Transcripts
1. Introduction: Photography is exciting. Documenting fleeting
moments and telling compelling visual stories is what we photographers live for. But what happens when
you put down the camera and can't find photos
from a year ago, or when you are
scrambling to find a high resolution version
of an image for a print, a competition or
exhibition or even worse when a hard drive crashes and takes
your work with it. If you've been shooting
for over a day, you know exactly what
I'm talking about. This is the not so fun part of photography that often
gets overlooked, but it's absolutely critical. I'm talking about archiving. Archiving is more than just
backing up your files. It is a structured
system for organizing, storing, and preserving
your images. It is about making your
photos easy to find, safely backed up
and protected from data loss or
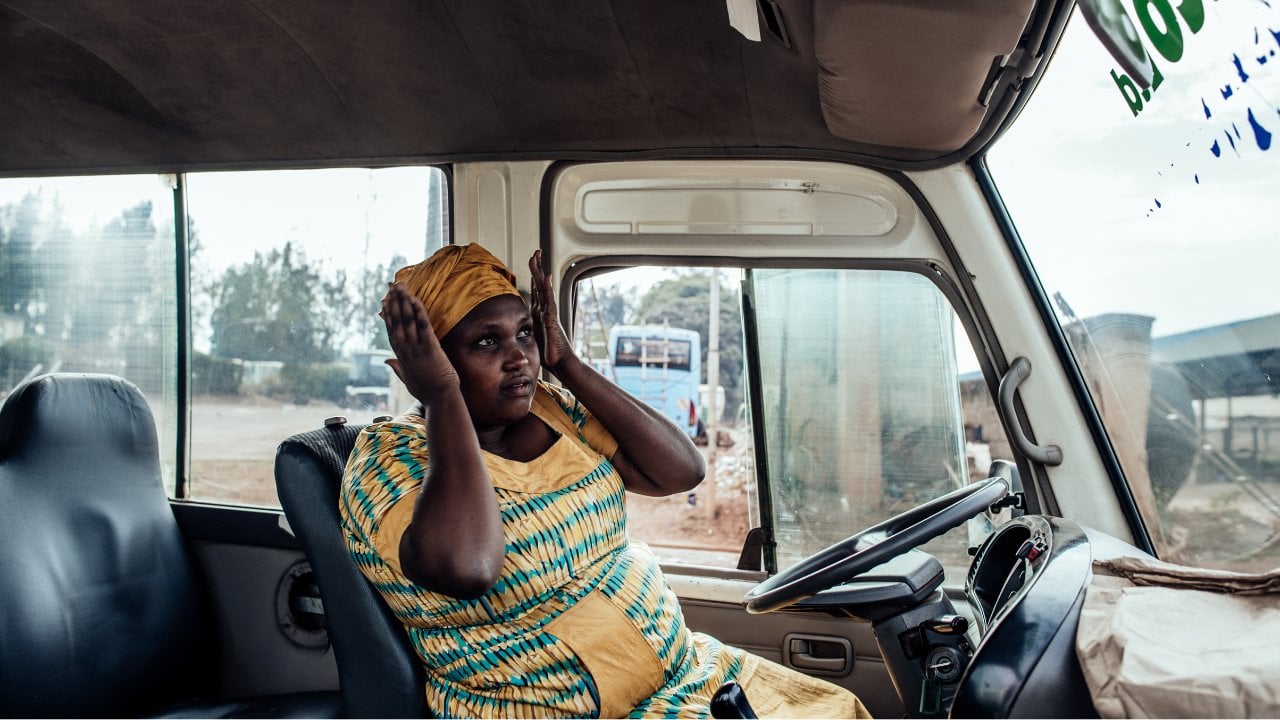
deterioration over time. I'm Kasey Wakalo, a UK based Nigerian
documentary photographer and producer with a
photography career spanning almost a decade. I've shot thousands
of images from commissions to personal
projects as my work grew, keeping track of my photographs
became a real challenge. I eventually
developed and adopted a functional archiving workflow that transformed how
I manage my work, making it much easier to
access and safeguard. In this class, I'm excited
to share practical, effective archiving
strategies to help you protect and
organize your work. We'll cover everything
from setting up a foolproof backup
system to using metadata to make your
images easily searchable. I'll also work you through
building a workflow that keeps your photos safe and
accessible for years to come. Think of this as future
proofing your creative legacy. Whether you're a professional
photographer or enthusiast, I'm here to help you create a system that not only
secures your work, but also simplifies
your creative life. By the end of this class, you'll feel confident knowing your images are securely stored, easy to find, and ready for any opportunity that
comes your way. So if you're ready
to take control of your life's work and ensure it's protected, I'll
see you in class.
2. Project: Your project is simple. Organize your
photography archive using the tips shared
in this class, or you've set up your
folder structure, take a screenshot of your arrangement and
upload it as a project. Feel free to adapt the
archiving techniques to suit your style and the
specific needs of your photography genre. There is no right or
wrong way of doing it. As long as your system
is consistent and makes it easy for you
to locate your files, when you need them, you're on the right track.
You've got this.
3. Importance of Archiving: Before we delve deep into how to archive
your photographs, I would like us to first
discuss why it is important. Here are some of
the reasons why you should take archiving
your work seriously, protecting your creative legacy. Your work has value, and that value
increases over time. Your photos are more
than just images. They are visual artifacts of
your journey as a creator. Each shot represents a moment, an idea or a story that you've captured and
brought to life. Over time, these images become
more than just pictures. They become part of
your creative legacy. Legacy isn't something
intangible. It's an asset. It has meaning, monetary value and historical significance. The earlier you realize this, the more intentional you
can be about protecting it. Archiving is the
most effective way to safeguard that legacy. It's more than just
backing up files. It's a way of organizing, curating and preserving
your life's work so that future generations can
experience and consume it. Without an archive, your work could be scattered
across hard drives, cloud accounts, or
even lost completely. With a proper archive, however, you create a living
breeding collection of your best work that
can be passed down, referenced, exhibited,
or even licensed, reducing the risk of loss. Photographs are fragile,
not just the prints, but also the digital files. Without a proper
archiving system, your entire body of work is vulnerable to hard
drive failures, accidental deletion,
software corruption, or even other
unforeseen disasters. One moment, everything
seems fine. The next years of creative
effort could vanish. For photographers, this
is a nightmare scenario. Like redoing a painting
or writing an article, you can't retake a photograph of a specific moment in time. When it's gone, it's gone. Archiving reduces the
risk significantly. By creating a structured, multi layered backup system, you ensure that your
images remain safe, accessible and usable
no matter what happens. Instead of relying on a
single storage device, archiving allows
you to duplicate and store your files
in multiple locations, digitally, physically, or both. It is the closest to insurance
for your creative work. So you have to take
it really seriously. Building efficiency
and easy access. As a photographer, your work doesn't just live
in your camera, lives in folders, hard
drives, and cloud storage. Without a proper
archiving system, finding one specific
image from thousands of files can feel like searching
for a needle in a haysack. This disorganization
waste valuable time and mental energy that could
be better spent creating, shooting or building
your career. Archiving offers a structured
approach to file storage, ensuring that every
photograph is cataloged, labeled, and accessible
when you need it. A well organized
archive is like having a personal library for your
creative work instead of rummaging through
random folders named untitled on the score one
or final final version two. You know exactly
where everything is. This clarity not
only saves time, but it also reduces stress. As a professional photographer, being able to locate and deliver images to
clients, editors, and curators, often
on short notice reinforces your reputation for being dependable
and professional.
4. Post-Shoot Workflow: I like to shoot with two
memory cards in my camera. One stores raw files, and the other saves
high resolution JPEGs. This system gives me
an extra layer of protection to avoid losing
files from a shoot. After each shoot, I transfer the images from
the primary memory card which holds the raw files
onto my portable SSD storage. This SSD storage serves as my travel storage solution for work created while
I'm in the field. So it pretty much goes
with me everywhere. Make it a point not
to format or reuse memory cards immediately
after transferring the files. Instead, I let the
memory card act as an additional
layer of backup. So I have multiple
memory cards and I rotate through them using
a fresh card each time. Only when I have used
all my available cards, do I return to earlier ones
and format them for reuse. This approach ensures
I always have a second copy of my files
for as long as possible. On the SSD, I
create a folder for each shot using a naming format that
starts with the year, the first two digits, followed by the month, the next two digits, the client name and
the shot title. I may be flexible
with this one but this format keeps my
files arranged in a chronological order with older shots appearing at the top or newer
ones at the bottom, or in any order that I
choose to view them in. This system makes it easy to track down specific
shots quickly. I recommend naming
your folders in a way that makes the
most sense to you. But be sure to keep it clear,
consistent and descriptive. The more context your
file name provides, the easier it will be to
locate your work later. So try and use words that describes
what the shoot is about. Once the files have
finished copying, I move on to sorting them. I prefer to do this
using Adobe bridge, but you could use photo mechanic or any other similar software. I assess the folder
directly from my SSD through Adobe bridge. While shooting, I
make it a point to be intentional with every
single frame that I capture, ensuring proper
composition and exposure. This approach significantly
reduces the number of usable images that I have
to sort through later. So in Adobe Bridge, I review the images and color tag the ones
I want to keep. I keep my selection
loose, but intentional, avoiding images that
are technically flawed or outright unusable. I don't want to clog my system with a lot of files
that I would not use. Once I've made my selections, I create a new folder called Select and copy all the
color tagged images into it. I then transfer the select
folder to my laptop, placing it within a new
project folder that follows the original
project name I assigned at the start. After that, I rename the
select folder to Raw, as it now contains all
my chosen raw files. From this point, I import
the images directly from my laptop storage into the light room for further
editing and processing. In Light room, I start by adding essential
metadata to the images. This includes details
like my name, contact information, project title,
captions and keywords. While this can also be
done on Adobe bridge, I prefer to handle
it directly in light bedding metadata into the image ensures that anyone
who accesses the photo, whether it's me or someone else can understand its context. Adding metadata is also a crucial part of the
archiving process. It makes your images
easier to find later because you can search by
captions, titles or keywords. Can even filter
images by location, camera type, or the lens used. The more information you
include in the metadata, the easier it will be to locate your specific photos
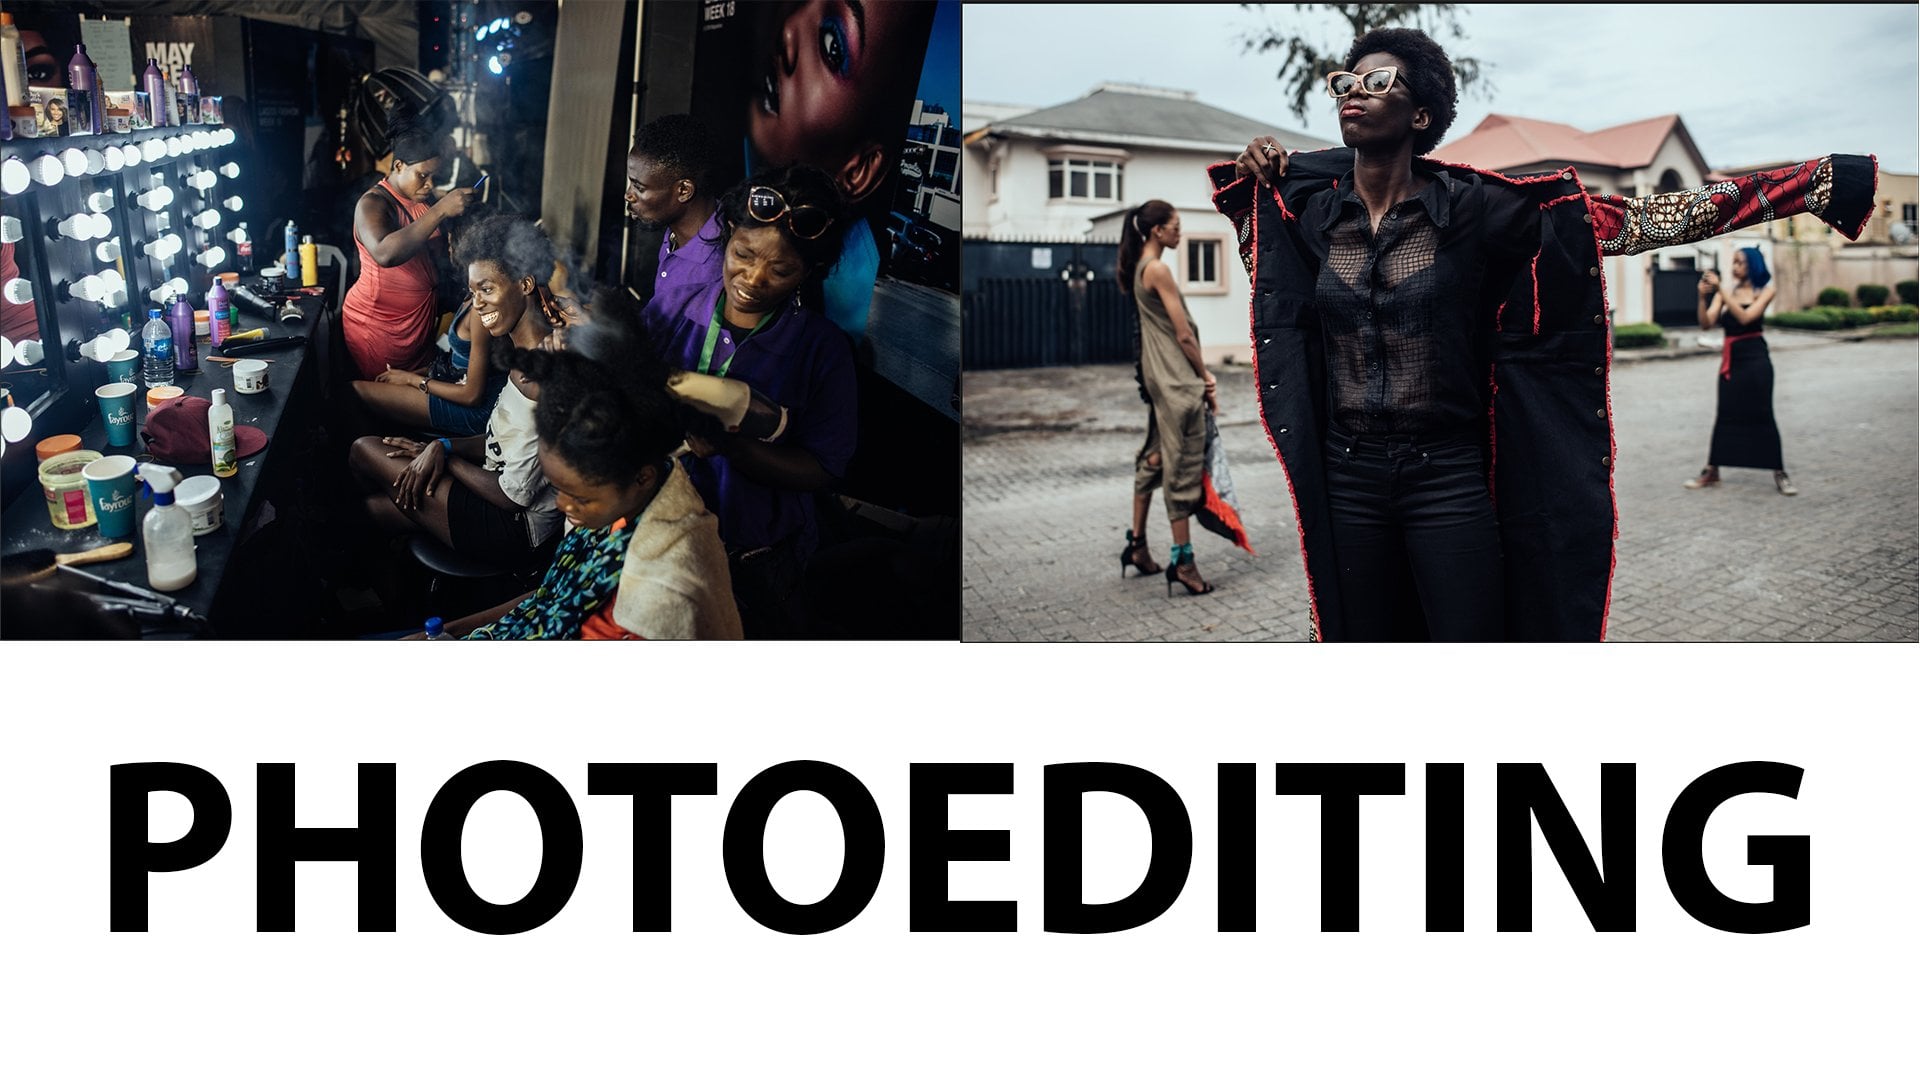
in the future. Once the metadata is in place, I move on to editing. I make minimal adjustments
to highlights, shadows, exposure, saturation
and vibrance to match my preferred style. After tweaking and fine
tuning these settings, I apply them to all the
images and then review each photo individually to make any adjustments
around like exposure, you know, to ensure
consistency across the batch. When editing is complete, I move to exporting. I export images as
high resolution JPEGs, ensuring the expos settings
aret maximum quality. The files are saved to the
project folder where I create a subfolder called Edited to store all the
edited JPEG files. This Clare folder
structure keeps my files organized and easy
to locate for the future. The task for this lesson is to review your archive and
organize your files. Make sure that each
project folder is named on the format year month
client project, and it includes subfolders
edited and raw.
5. Folder Structure: When it comes to folder
structure and file naming, I keep things simple
but effective. You may have noticed
that I don't rename the files as
part of my workflow. This is intentional. Instead, I configure my camera to use
continuous file numbering. This means that no
matter how many times I format my memory card or
switch to a new card, the file names continue
sequentially without restarting. Example, if my camera generates a file named KC one
under score 1368, the next file will be KC
one on the score 1369. I need to keep counting
up to 1370, 1371, and so on, no matter which card I'm using or how many
times I've formatted it. This method ensures
that every photo I shoot has a unique
number or identifier. To set this up, you will need to check your
camera's manual to see how to activate
continuous file numbering on your specific model. However, if you do decide
to rename your files, I recommend doing so
at the early stage with your raw files before
you even start processing it. It's important because if raw and jpek file
names don't match, it will be extremely
difficult to locate and re edit
specific images later. A mismatch between file names
is a recipe for confusion, especially if you're working across multiple
formats or folders. There are many ways to
organize your folders. You can sort by date, shoot type, client
name or location. For me, organizing
by year works best. Here is the structure I use. So pretty much start
off with the folder, that is the year 2017, 2018. Then I have the shoot
type, which is, you know, it can be commission project,
photo shoots, events. Then I have the project folder named after the year
and month of the shoot, the project and the client. And then I have the file type, which is raw or edited. For folder, this is
the top level folder, and it represents the year
the photos were taken. Simple structure allows
me to immediately identify a year or project
or shoot happened. Within the year folder, I categorize projects
by shoot type. For me, this typically
includes commission, you know, pretty much work that I've shot for clients
on assignments, where I was hired to
shoot for publications, organizations or
commercial client. You know, I also have the
photo shoots and events. Which includes shoots for
individuals like portraits, weddings and events, then
you have the project. These are personal or
self initiated projects. This might include
ongoing documentary work, creative series, or
passion projects that I do outside
of client work. You can adjust these categories to fit your style of work. If you mostly shoot
weddings, for example, your categories
might be weddings, engagements, and
portraits instead. In the project folder, each project gets
its own folder named according to the year
and month it was shot. Project title and
the client's name. This is where all files related to that specific
shoot are stored. The name of the folder should be clear and descriptive enough for you to know exactly what's
inside without opening it. The goal is to ensure
that each folder is easily searchable and
instantly recognizable. Inside the project folder, I create subfolders to
separate file types. Typically, this includes
raw and edited folder. The raw folder contains the process raw files
straight from the camera, whereas the edited folder holds edited JPEGs that have been finalized for delivery,
export or publication. This approach keeps
on process files separate from the
polished final images. It also avoids confusion
when looking for the most ready to use
version of a file. Task for this lesson is to review your archive and
organize your files. Make sure that each
project folder is named on the format year month
client project, and it includes subfolders
edited and raw.
6. Metadata: Let's talk a bit about metadata. It is basically a piece of readable data file that is embedded in your digital images. There are basically
three types of metadatas to be aware of
descriptive metadata. This includes information like keywords, captions and titles. Keywords are especially powerful because they make your
images easily searchable. For instance, if you're photographing a series
of portraits and Legos, you can use keywords
like portrait, Legos Nigeria and
straight photography to categorize your photos. You need to find
those images later, a simple keyword
search will bring them up immediately
technical metadata. This includes details
automatically captured by your camera, such as exposure settings, lens and camera type. While this isn't always
used in searches, it is helpful when you need to review the technical aspects of your shots or replicate
settings for future projects. Administrative metadata. This is where you include information like
copyright details, creator information
and usage rights. This is crucial for
photographers who license their work
or collaborate with clients in a descriptive caption to each image or at
least to key images, provides context for viewers
and also helps you remember the names of key subjects and location and the story
behind each image. This is especially useful for photojournalism and
documentary photography. You can't always remember the names of the people
in your pictures. That's why you should
write it down. Photo management softwares
like AWM and Capture One play a crucial role in organizing and cataloging your images
using metadata. These tools streamline the
process of adding, editing, and searching your metadata, making your archive more
manageable and efficient. The powerful search functions
in these programs let you filter images by almost
any piece of metadata, including keywords,
dates, lens type, and even camera model. Metadata and cataloging
matter, effortless searching. With a well tied and
catalog archive, you can easily find
the images you need. This is especially valuable when you're working
on a new project, fulfilling clients
request or putting together a portfolio,
enhance workflow efficiency. Proper metadata and
cataloging keep your archive structured
and workflow efficient. You'll be able to organize edit and deliver
your work faster. Freeing up more time
for creative pursuits, future proofing your archive. As your body of work grows, having an organized metadata reach archive will make
it easier to manage. It ensures that even
years down the line, you will be able to
access and understand the context of older
images without confusion. The task for this lesson is to utilize the
filter function in your photo management
software to find files based on the metadata information
associated with them. This could be the camera type, the lens, the year,
or even capture.
7. File Format: While there are many formats to store your photographs in, there are three
most common formats used by professional
photographers, and that is JPEG, Raw, and TIF. A Raw file is an unprocessed
digital image file that preserves all information
captured by your camera sensor. The format of a raw file varies depending on the camera
brand you're using. These formats are proprietary, meaning that they are controlled by the camera manufacturers and not universally accessible without
compatible software. Because of this,
some photographers choose to convert
their raw files to a more open and
accessible format like TIF for long term storage. However, I prefer
to archive my files as raw and keep high resolution
Jipek files as needed. Raw filees retain all
information from the sensor, making them ideal
for re editing. TIF, which stands for
tagged image file format, it's a useless format, meaning it preserves
all image details without any compression. Unlike raw files, which requires specific
software for access, TIF files are more widely supported across
editing platforms. Every edit you make, whether it's adjustment
or brightness, contrast or color
can be saved in your TIF file without any degradation in
the image quality. This makes TIF a preferred
choice for photographers who need long term archival
storage or print ready files. Example, if a photographer
knows they will be printing an image multiple
times in the future, they may save it as TIF
to avoid quality loss. However, the downside to TIF files is their
massive file size. TIFs are usually larger than raw files and significantly
larger than JPEGs. This is because they
store every pixel, color adjustment, and metadata without any form of compression. For example, a raw
file of 24 MB, its JPEG file would
be around eight MB, and the TIF version would
be a whooping 150 MB. Over time, these large files can take up enormous amount
of storage space. Wild TIF is a great option
for long term storage, personally, I prefer to stick to raw files for
following reasons. Raw files are smaller than TIFs, which makes them
easier to store. Editable flexibility. Since raw files retain
all sensor data, I can always re edit them and expose fresh
versions as needed. No redundant files. By sticking to raw files, I avoid the need to create large TIF files that
take up more storage. If I need a file for
printing or submission, I can always look
at the raw file, re edit it, if necessary, or just export it in the required format like a
high resolution TIF or JPED. This method keeps
my workflow clean, efficient, and storage friendly. Choice between raw or tif would depend on how you intend
to use your images. JPEGs are widely used because they are smaller
and more accessible, but here is the catch. JPEGs use lossy compression, meaning they reduce
the file size by discarding some image data. Every single time you open, edit and save a JPEG file, it loses little more quality. Over time, this can lead
to noticeable degradation, especially if you frequently edit and receive the same file. This is why I avoid using
Jpeg for archiving. If I need to edit or
reprocess a file, I work from the
original raw file. That way, I always
have access to the full quality source image. While I don't archive JPEGs
as my main source file, I do export them for
specific purposes. Here is how I manage
my JPEG exports. Low resolution version 72
DPI, less than one MB. I would use this
for web uploads, social media, and
email attachments. It's quicker to load. I will have a high resolution
version which is at 300 DPI usually above ten and
B used for client delivery, prints and submission
to editors. I may also have
additional versions. Sometimes I create a
special version like black and white edit or cropped versions if the
context requires it. The key idea is to avoid
re editing a JPEG file. Instead, I always return to the raw file if I
need to make edits. By doing so, I maintain the
integrity of the final image and avoid the quality loss that comes from repeatedly
editing JPEG. Here is a summary
of my approach. Store raw files as
the main archive, keep the original on process
files for re editing, future printing
and preservation. Export JPEGs for
specific use cases. I export low rests and high risk JPEGs for delivery,
submissions, and sharing. Then I avoid reediting JPEGs. All edits are made
from raw files, ensuring that the quality
is never compromised. Pretty much keep the
TIFs to save space. Since raw files are smaller
and retain sensor data, I find it unnecessary to
store large TIF files. This system allows me
to save storage space, protect the integrity
of my images, and maintain access to my highest quality files for re editing, printing,
or publishing. Thanks for this lesson
is to export a file in TIF format and compare it
size to JPD and RawFile.
8. Backup: Backing up your work is crucial to ensure your photos
are safe and secure, no matter what happens. The 321 backup strategy is a widely recommended method that provides maximum protection
against data loss. You should always have
three copies of your files, one primary copy
and two backups. For photographers, this
typically means having the original files on your computer or your
main working drive. Plus two additional backups, two different types of media. Store your backups on at least two different types of media to reduce the
risk of data loss. This could mean using both an external
hard drive and NAS, which is network
attached storage system, or combining a local
backup with cloud storage. One offsite copy. Keep one backup copy offsite away from
your home or studio. This protects your work from local disasters such as
fire, theft or flooding. Offsite backup could be stored in a secure cloud service or an external hard drive
that you leave at a trusted friend's house
or a safe deposit box. Choosing the right combination
of storage solutions is essential for implementing
the 321 strategy. Here are some common options along with their pros and cons. External hard drives
are affordable. Easy to use and portable. They offer large
storage capacities, making them a good option for photographers who need to backup high resolution images or
entire photography libraries. The downside, however, is that they are prone to
physical damage, wear and tear or
failure over time. If you're only using external hard drives
to backup you're at risk if both your
main and backup drives fail simultaneously. Best practice would be
to use high quality, reliable external hard drives, and if you can replace
them every few years. NAS system provides
a centralized way to store and backup files
across multiple devices. They are connected to
your local network allowing for automatic
and scheduled backups. However, they are
more expensive than basic external hard
drives and require some technical knowledge
to set up and manage. Best practice would
be to use a NAS for local backup and to
streamline your workflow, but also pay it with an
offsite backup solution. I personally do not
use a NAS system, but if you can afford
it, it's worth it, then. Cloud storage services
like Google Drive, Dropbox, Amazon S
three, I Cloud, Black Blaze, or flicker
offer offsite protection, ensuring that your files are
safe from local disaster. Cloud storage can be automated, making it easy to keep
your backups up to date. You have to know
that Cloud storage can become expensive over time because a lot of them
run on subscription basis, especially if you have a
large photography library. Uploading and downloading
large files may be slow depending on your
Internet connection, and there is also the potential
risk of data breaches. So choosing a secure
service is essential. Best practice would be to use encrypted Cloud services for sensitive files and
consider a service with automatic backup features
to simplify your workflow. 321 backup strategy
encourages using a mix of these storage solutions for best coverage. Primary storage. This is where you store
your working files such as your computer's
internal drive or a high speed external
SSD. Local backup. Use an external hard drive or a NAS system for
your first backup. You can automate this backup to ensure your
files are regularly copied without manual
intervention. Offsite backup. Use Cloud storage as
your offsite solution or keep an additional
external hard drive in a different
physical location. If you opt for a Cloud service, make sure it has good
encryption and reliability. Automate your backups. Use backup software
or features built into your operating system
to automate the process. Automation reduces the
risk of forgetting to backup your files and
keeps everything current. Regularly test your backups. Periodically check
that your backups are complete and can be
restored successfully. A backup is only useful if
it works when you need it. Update your backup plan
as your needs grow as your photography work evolves and your file
sizes increases, reaccess your storage
and backup needs. My backup process
involves storing all my files on a central
ten terabyte hard drive. As the main archive, I then create yearly backups
by copying each files onto a separate clearly
labeled two teraby hard drive. Addition, I store high
resolution JPEGs and key raw files on Cloud
storage for extra protection. This multi layered system
ensures that my work is secure, accessible, and backtup
across multiple locations. The task for this lesson
is to make a backup of all your important
photographs by saving copies on a backup hard
drive and in cloud storage.
9. Conclusion: We have come to the
end of this class, and I hope you've
learned how to create a functional archiving system for all the amazing
work that you produce. Archiving can be tedious, but if done right, can save you a lot of stress
in the future. Here is a recap of the
key things we've learned. I explained that archiving, your photographs is essential for protecting your
creative legacy, reducing the risk of loss, and ensuring efficient access, allowing you to
safeguard your work, maintain its value, and easily retrieve images
when you need them. Also shared how I use a multi
step workflow to protect, organize and process my images, shooting with dull memory cards, backing up the raw files
on a portable SSD, selecting images
using Adobe bridge, adding metadata,
editing in light room, and exportting high
resolution JPEGs into a well structured folder for easier access and
long term storage. Also shared how I use simple but effective
folder structure and file naming system
that relies on continuous file numbering
system, you know, to ensure that the
files are unique and an organized folder hierarchy
based on year shoot type, project name and file type, making it easy to locate, edit, and archive my
images efficiently. Also touched on metadata,
which includes descriptive, technical and
administrative details and, you know, how it is
essential for organizing, searching and future
proofing your photo archive, making it easier
to locate, manage, and understand the context
of your images efficiently. I also shared how I prioritize
raw files when it comes to archiving due to
their smaller size and the full editability. You know, I use JPEX for specific outputs like
sharing and delivery, and I avoid tips to
safe storage space, maintaining a workflow
that preserves image quality and keeps
my archive efficient. Then we close it off with a
three to one backup strategy, which ensures that
your photos are secure by creating and
keeping three copies of your files on two different
storage media with one stored off site using a
combination of local drives, NAS systems and cloud storage to protect against data loss
from hardware failure, theft or natural disasters. Thank you for taking
this class with me. I'd love to hear your thoughts. Leaving a review would help other students
discover this class. If you'd like to stay connected, you can follow me here on
Skillshare or on Instagram. I also send out a
monthly newsletter where I share insights
on photography. You can sign up using
the link on the screen, and I'll be in touch. Thank you again, and
I'll see you next time.
 KC Nwakalor, Documentary Photographer & Producer