Transcripts
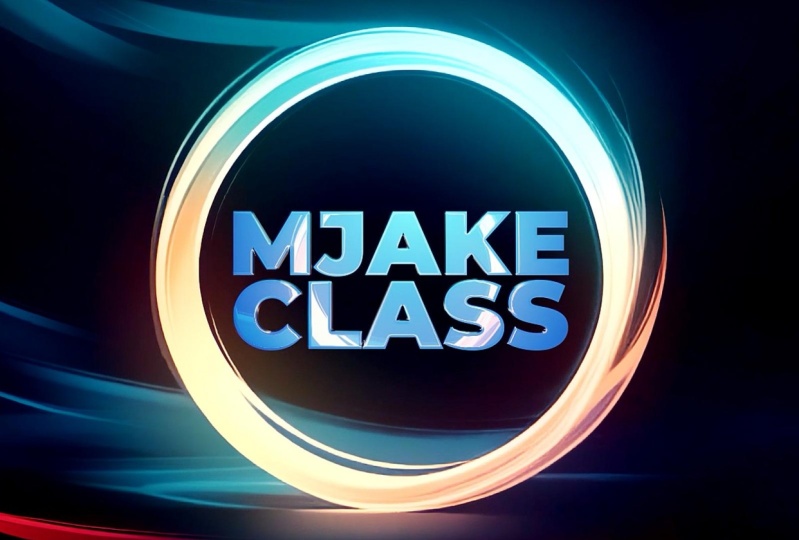
1. Introduction: Hi, I'm Jake. This
class will teach you how to create a circle
light logo re heel, which is great for beginners
and experience Vac artists. You don't need any
experience working with Adobe After Effects
to learn this effect. You can even download the pre trial version and
it will work fine. I'll explain each step we will take to create this Logo reheel. You can use your logo, text, or any shape to get
your personal look. I'll provide this awesome
circle background footage for free for you to use
to complete this class. Also, I'll show you where
you can get more of these motion design
backgrounds and how easy it is to swap them to
create a completely new look. By the end of this class, you'll know how to create logo
views that you can sell on your website or make for your clients and
personal projects. You can always write
your questions in discussion section under
any of my classes. To get help for me, while
creating cool effects. I think it's the
best way to learn the software while creating
interesting effects for fun. And to complete this class, our goal is to create this
circle Light logo review. Be happy to see in
my class as also your result after
following all the steps. So let's get started.
2. Creating Background: So I'm using Adobe
After Effects 2024. But you can pretty
much use any version of Adobe After Effects.
It will work fine. But if for some
reason, you cannot see some of the panels which
you can see on my screen, you can basically go to Window
and enable it from here. For example,
character, character, and you pretty much can enable any panel which you
can see on my screen. So first thing which we want to do is to create new composition. You can just click here,
Let Most lick on it, and let's type here
BG for background. Because this effect of logo
reveal and text reveal, we will start from
creating a background. Here we will set 1920 by 1080, which is basically
ful HD, frame rate, we can set it to 30,
which is basic and duration we can set
to maybe 15 seconds. So basically, here is frames, seconds, minutes and hours. And then click Okay. So we've created our new composition, and now we need to import
our video for background. So for this, we want to go to File Import File
and select these both videos which I've
provided in resource step to this class for you to
download. Lick input. So let's leftmost lick on this video and drag
on timeline here in our background conversion
which we've just created and let go
of leftmost link. So basically, we've
dropped our video and we can press
As on keyboard and make this 50% because this
original video is at four K, which is really good quality. And at the end of this class, I'm going to show
you where you can download a lot more of these backgrounds to use for
your custom logo reveals. So first thing which you
can see is this video takes about 12 seconds and our logo reveal should be around
four or 5 seconds, so it would be not so long. So what we can do, we can just change the duration
of this clip. Basically we can select this layer and
write most click on it and go to time
enable time remapping. So basically, these
two keyframes represents the duration
of this video. If I'm going to select
this keyframe and just let most click and
hold and drag to the left, I'm basically spading
up this video. So now it takes only about
one seconds and a half. So this is not
quite what we want. We want to make a bit more interesting
speeding up animation. So we can just press
Control Z to undo the step, so we will see this keyframe
at the moment where it was. And basically, we want to
speed up this first part of the video just before the
circle fully appears. So just about here, we need to click here to
create a new keyframe. Just left mostly here and
you'll create a new keyframe. Let's create another
one just before this Zoom in animation. Maybe it's just about here, we can create another keyframe. Now, basically, we want
to spit up this part, and if we will spit up this part only just by
selecting this keyframe, this part will be extended, and this is not
quite what we want. We want to keep this part of the video at the same speed
and speed up only this part. So basically, you need to select all of these
three keyframes, left mostly, hold, and
select all of them. And just move it just about
to have a second, like here. You can change the size of your timeline just by
clicking here to resize it, so you'll see the whole video. So basically, now
this part is sped up, then this goes as it was, and also this part
goes as it was. Let's select these two keyframes
and also sped up here. So maybe let's make it
like 3 seconds so it will and then here
about at 4 seconds, we can speed up this final part. So now if I'm going
to press zero NPD, you can see that this
first part sped up. Then we have this
really nice animation and Zoomin also a bit sped up. By the way, what's cool about this background is that
it's completely loopable Basically what it means that you can hold old
key on keyboard and left most click on
the Stopwatch to be able to type
here an expression. Let's type here loop and select
this loop out expression, and just click anywhere,
just like this. And now this animation
completely seamless. And once again, at the
end of this video, I'm going to show you
where you can get a lot more of these
kind of videos. So if I'm going to
press zero numpad, you can see that we have
this real nice animation which completely loops. And with these keyframes, you can always adjust the
speed of the animation. So in my case, I'm
pretty happy with this. One thing which I want
to add to make this look a bit more interesting
is to add a bit of glow. So we can go to
effects and presets. You can find the panel here. If you cannot see the panel, you can go to Window and enable it from here,
effects and presets. Just click on it and wait it to load up and then just type glow. We need this stylized glow, select it and drop
it on this video. So basically here, we can
just set a threshold. We can change the radius. As I'm changing this radius, we're getting this glow
a bit more blurrier, which is exactly what
we want because I've used in my example,
something like 512. So we get a lot of this glow. With this threshold, we can introduce which colors we
want to use as a glow. As you can see if
I'm going to 100%, we basically losing this glow. Let's change it to a
bit smaller value. In my case, I've used
something like 91. Basically, before and after, you can see that we've
added this little glow, which makes this animation
a bit more shinier. You can play around
with these values to see what you like best. Another thing which we can do, we can select this glow and
press Control D on keyboard. As you can see, I've
pressed Consul D, and basically it
duplicated this effect. So with this second glow,
I want to go to 100%, so basically to eliminate
all unwanted colors. And basically, I want to make
this radius even bigger. So let's go to value of 1,000. So we have this really
nice and big glow. At this point, it's
a bit too much, so let's go to glow intensity, and let's set it to 0.2. So we will keep it pretty
subtle, just like this. And one last thing
which I want to add is go to effects and presets
and type here curves. And here under color
correction curves, leftmost lick, hold and
drag here below this glow. So with this curve effect, we can add some contrast just by leftmost lick
on this curve and dragging up just a tiny bit to make it a bit
brighter as you can see. And here, just leftmost lick and drag it along
this bottom part. So basically, we would add in
this nice little contrast, which basically makes
this a bit little tidier. You can play around
with these curves to make the adjustments
which you like. So at this point, we can
save all of our progress. We can go to file, save. It's a good idea
because sometimes after effects can crash, so it's a good idea to save
your project from time to time and save wherever you want on your computer
and click Save. So in the next video, I'm
going to show you how you can create this logo
animation reveal. And we can also use our
text instead of logo. So it will look just like this. See you in the next video?
3. Creating Logo Reveal: So we've created our
background animation with this really nice glow. And now let's go to Project and create another composition. We can just left
mostly here or go to composition, new composition. And let's call it
your logo here, because in this composition, you'll be able to drag and drop your logo to use
as a footage for this logo reveal and leave
all of this as it was Okay. So here we can just jack and drop this example logo or you can already drop your own logo to use it for this animation. And also, we want to create
another composition. So let's let most click in it, and let's call it
logo reveal main. This will be our main
composition which we will render at the end.
So let's click Okay. So in this main composition, we can just jack and drop our BG and also we
want to drop our logo. So basically, we can see our
background and our logo. As you can see, at this moment, our logo is too big. So let's go to your logo here. Composition, select
this layer and press S, and let's make it smaller. So in my case,
I've set it to 57. So to get a right
timing of logo reveal, so it would look like it
stays behind of this circle, we want to go to your
logo here composition and and drop our
BG inside of it. Can even select it and press Enter and
call it MT or mask. So basically, we will
use this composition as a MT or mask to show our logo with the same timing as our animation
of the background. So what we want to do
is to find this moment where we have the circle completely appeared
on our screen, and let's go to this
rectangle tool, leftmost click and hold. Choose this ellipse stool. If we will click
here in the middle, just let most click and drag, and if we will hold
Control and Shift, it will create a perfect
circle just from the point where we clicked in our case is from the center. So we can create this
nice little circle. Just make it about at the edges of our
background animation. Then we want to
blur these edges. So let's click here to
open the mask properties, and let's set it
maybe like to 70. So as you can see our
edges are blurred, and we can also
create a keyframe to our mask path basically
for this circle line. So let's create a
keyframe about here, just about here where
this circle got bigger. So in my case, it's
about 1 second. And let's move to this point where it just appears
on the screen. So here, we can just simply select it this selection tool. With this selection
tool, we need to double click on one of the
points of this circle. So let's leftmost double
click on this point. And let's resize it. You can hold Control, so it will resize from the
center and just resize to same kind of shape as
our background animation. Then what we want to do is
to go to preview panel. If you cannot see
this preview panel, you can go to Window and
enable it from here, preview, and just
return one frame back. Let's click on this button. So it will go just one frame. And here, what we want
to do is double click on this mask and just simply remove from the screen,
just like this. Basically, what we've done,
move it out of the way and it will appear just
here at this moment. So as you can see, we've
created these keyframes. So let me quickly tell
you what keyframe does. Basically, key frames
are points in time, which remembers the value
of sardine properties. In our case, these
keyframes remembers the shape of our
property mask path. So basically, it remembered to stay at this shape in
this moment in time. In this one frame earlier, we moved this shape
out of the frame, so it will even remember
the position of this shape. So basically, it
will appear here, and then it will
go to this shape. And if we will scroll through, you can see how after effects goes from this
shape to this one. Just like this. So this
is exactly what we want. We want to use this
layer as a mask. So let's change this mode. If you cannot see this mode, you need to click here
on Toggle Switches and modes to click
until you see it. And under this mode, you need to click here and
change it to stencil Alpha. And basically, what it does, it reveals everything
which is behind. Basically everything
which is below of this layer will be revealed with this animation
which we just created. So if I'm going to
press zero amped, you can see this
nice little reveal. And we can even change
this work area just by clicking on this edge to
see only this 3 seconds. So let's press zero numpD
to see how it looks. So it looks pretty fine, but one thing which I want to add is a little scale
animation on this logo. So it would look a
bit more interesting. So let's press as
on keyboard to see the scale property and create a keyframe by clicking
on this stopwatch. Once again, with this keyframe, we want to save this size
of our logo, our scale. And here at the beginning, we want to make it a lot smaller. So something like this, as
you can see, it got smaller. So it will go from 14% to 57% to make this kind of animation. But we can create this
animation a bit smoother. I'm going to select
this keyframe and go to Graph Editor
by clicking here. Just make sure that
here under this icon, you've clicked on
this Edit speed graph to see the same graph as
I'm seeing on my screen. Then you need leftmost
click and hold on this little handle on this dot and jrag it
down and to the left. Basically, with this graph, it means that it will go fast
and slower towards the end. Let's go out from this graph
editor by clicking here, and now let's press zero
NMPD to see how it looks. Now as you can see, we have
this really smooth animation, and we can even spread
these keyframes a bit more to have this
animation a bit slower. Can even go to our logo
reveal main composition to see this altogether
just about 3 seconds. Let's also change this work area to pre render only
these 3 seconds. And to preview this, we need
to press zero on numpad. So now as you can see, we
have this nice logo reveal. So now it looks like
it's behind this circle, and to time it a bit better, we can just simply
select your logo here and just move it
to the right a bit. So basically, it will
start few seconds later. So now we kind of having
this little shadow, which looks pretty to make
it even more interesting, we can add a bit of reflections of this animation
on top of our logo. For this, we want to select this background layer and press Control D to duplicate it, select it and place it above. We can set it to screen, so it will overlay
on top of our logo, and you can see
everything got brighter. What we want to do
with this layer, we want to add a
transform effect. Let's type here transform
and here under distort select this transform and place it on this background
composition. Even select it and press Enter, and let's call it reflection. So with this scale,
we can just resize it and maybe let's set it to 45, so it will be just on the edges of our
logo, just like this. Then we can go to
your logo here. Position, and we need to select this mat layer which you've
created for this animation. Select it and press Control
C to copy and go to Logo reveal main and
press control V to paste. So basically, with this mat, we want to cut out our reflection because if I'm
going to solw this layer, you can see that it's
like a rectangle, and it's not quite what we want. So basically what
we want, we want to change the mode
of this mat layer, change it to normal then
we will use it as a mask. To see this track MT, you need to click here
to be able to see it. Then with this PC web, we need to select
it and drag it up to this met composition. Just like this, it will follow the mask which
we created here. Let's unsold this layer to
see how it looks altogether. It looks pretty cool, but one thing which I want
to add is a little bit of distortion and also I
want to see on on our logo. As you can see, I'm still seeing these bits of background
which I don't want to see. So for this, I want
to go to effects and presets and type CC blabbi. So here under distort, select this effect blobs
and drop it on reflection. So now we can open this blobbiness setting and change this layer to our logo, which basically
makes this effect work only inside of our logo, which now really looks like we have some reflection
on top of our logo. Softness, we can change how tight to the edges this
reflection should be. In my case, on the logo, it worked pretty well at nine. But if we will use a text, I would consider you to
try something like five. So let's set it to nine,
as we have a logo now, and a bit later, I'm going to
show you how to use a text. And let's just press zero
numpd to see how it looks. So now as you can see, we have really nice
reflections on our logo.
4. Text and Glass Fade Effect: Quickly show you how you can
use text instead of logo. Basically, let's go
to your logo here composition and just use
this horizontal type tool, leftmost click on it, and
just simply leftmost click hold and drag like this to create a box in
which we can type. So in my case, I'm going
to type just MJ class and change the selection tool I'm going to go to
character panel. If you cannot see
this character panel, you can go to Window and
enable from here, character. Here you basically can
change the size and change any font and basically make any changes to
the font itself. In my case, I like
to make this class a bit bigger and a bit lower. I will look visually like a box. Then I can go to a line panel. Once again, you can enable
it here, a line panel. And with these two clicks of aligning horizontally
and aligning vertically, I can set exactly at the
center of my screen. And this time, I don't want to animate this scale animation. So basically what I can do, I need to set this
time cursor here at the end where all
animation is completed, and then use this parent link, not track Md link
but parent link. And leftmost link on this Speakw and dragging rap to
this logo image. So basically, now it will repeat the same kind of animation,
which is really cool. Now we can just simply disable this logo and set it
below of this mat, so we will still have this nice logo reveal in
our case text reveal, and we can go back to
our logo reveal main. As you can see, we have this really nice
animation of our text. Really cool thing which
you can do is basically to change the color
of your text. Basically, you need to
select this logo here and go to FX and presets
and let's just type Ramp. Basically, I want to
use this gradient ramp, select it and just dragon
drop on your logo here. And with these two points, we can set our gradient. You can use any gradient
which you like. In my case, I'm going to
use this radial gradient, which basically makes this
little circle and then ambient light and just set to some bright color and this a bit darker,
from background. And once again, here and
reflection with the softness, we can change it to five if you want to get this reflection
tighter on the edges. As I told you before,
it looks better with smaller value here and bigger
like nine on the logos. But you can pretty
much change to any kind of value,
which you prefer. Just keep in mind that
if you will go back to your logo and disable
this text layer, don't forget to go to your logo here and disable
this colorization. And basically with
this gradient, you can change to any
color which you like, which is pretty awesome. As I promised, I want to show you where you can
get these kind of gradients is that you can just
simply go to import file. So what is cool about these videos that you can
basically import all of them. But in my case, I just
going to show you this example and let's say
this example and click Import. But you can pretty much use
any video from that package. And once you get the
access to these videos, you can just basically duplicate this animation which
you've created. And just simply select one of these videos and hold Old key, but make sure to select
here and here this layer, and we can just simply swap. Just hold old key on keyboard. Left mostly on this
video which you want to swap and hold and jeck
here and release. Basically, as you can see, it already applied our effects, which we've created earlier, and now we have this
really nice animation with new background. And this is how you
can easily see what you want to use for your effect. We can just duplicate it once again and let's
swap it with this. Go back to this main
composition, and as you can see, all of these
reflections works with any other background which
you can use. I almost forgot. I also wanted to
show you how you can create a little nice
animation at the end. So for example, if you're
going to press T on your logo here and create a keyframe for opacity and here, just by the end of
this animation, we can set it to zero, and you'll get this really nice animation just of reflection. Like these both keyframes
and press F nine, you can go to BGlayer and add gradient wipe effect
here under transition, select it and drop it here, and let's create a transition. Let mostly here to
create a keyframe, press U on keyboard to see this keyframe which
we just created, and here by the end, we can just start
into cut it out. And with this softness, we want to make it a lot smoother. So let's set it to
about 40 and gradient, let's make it a bit tighter. And also, let's select all of these keyframes
and press F nine, so this animation
will be smoother. So basically what we've
got here by the end is really cool transition
where we can see only reflections
and not our logo. So let's revert to our original video which I
provided with this class. And let's click here on Logo Reveal Min to see how it looks. So we have this really
nice animation, and then it goes only
to this glassy effect, which looks pretty awesome, and this is exactly what I've shown you in the
preview to this class. So as I promised, let me show you where
you can find all of these cool backgrounds which you can use for your logo reveals. Basically in resource
step to this class, you can find not
only this free video of background as
well as this logo. You can also find
this text document, which has links to
more backgrounds. Basically, you can just left
nose double click and see two links if you're
going to follow this going to get
access to this page. So what is cool about
these backgrounds? The most cool thing about this background
that you can buy, edit, and resell this product an unlimited number of times. You probably heard about
the stock markets, such as vado elements, motion array, eye Stock, Adobe stock, Shutter
stock, countless others. They don't have this
kind of licensing. Basically, if you will
purchase something on these kind of sites like
Video Hive or vado elements, you get a license
on one use only, and you cannot
resell these items. Like these products which I
provide here on Skillshare, that you can buy one
time and you can edit and resell them
to your clients or sell wherever you want
on your website where you want to use unlimited
number of times. Same goes to this second link, which is to my Gummo page. Here I have this section by Edit resell which basically provides you with this license. You can also buy from here, this exact product,
and by the way, you can always click
here to see the preview, which will show you all of these cool backgrounds which you have access to, as well as here. I also have just clean
backgrounds and same style, but without circle in the
middle in case if you would want to use a clean motion
graphics backgrounds. Also on my Gamo page, I have Premiere Pro
templates, logo reveals, and karaoke tiles template
for Premiere Pro, as well as Adobe After effects. You can also check it out. But keep in mind
that by edit resell only for these products,
as well as this one.
5. Conclusion: So what we've learned
in this class. So first thing we've
created is time remapping. Now we can adjust the timing of any videos and backgrounds
which we have. Also, we've created
some glow effects a little contrast with
these bunch of effects, and this is how we've introduced ourselves to effects
and precess panel. Then we've created
our logo animation just by using simple
scale animation, and also we've used our
background as a reference to create a right timing of
logo reveal with this mask. And finally, we've added all of these parts together in our
logo reveal main composition. Which basically would allow us to time it well
just by moving here on timeline and add this really nice and
clean reflection, which added this
really nice touch like this logo exists
in this three D space. Now we know how to use a text instead of
logo and even color it in any color which
you want to match it better with any
background which we can use. Also, I quickly
showed you how you can swap it with any
other background. Now we can also
quickly change to any other color to match it
with our new background, which looks also really nice to match our colors to new
background, even better. So this is how you
can quickly create an awesome logo wheel using this free background
which I provided, as well as now you
know where you can find even more cool backgrounds to use for your
projects and even resell to your clients and
for your personal projects. So feel free to check this link, which is also available in Resource step to the slash
and this text document. Also, feel free to follow
me here on Skillshare. I have a lot of classes on VFX. You can even click here
on SemorT see more. As you can see, I have a
lot of classes on VFX. Also, here is a section where I post new classes this month. I have classes on free AI tools, as well as fundamentals
of Adobe after effects. I have even classes
on complex Vc, log animation, DaVinci result
classes, and even more. Also recommend you to watch this really short
class which takes only 12 minutes and you'll get really powerful
effect at the end, which is also very
beginner friendly. Consider to leave
review to my classes. It really helps allow me to improve and share your
projects with me. I check all of them and give my feedback and tips how to make it even
better if you want. Follow me here on skill share, and I'll be happy to see you in my next class. Thank
you for watching.
 M Jake, Lets Create VFX & Cool Stuff Together