Transcripts
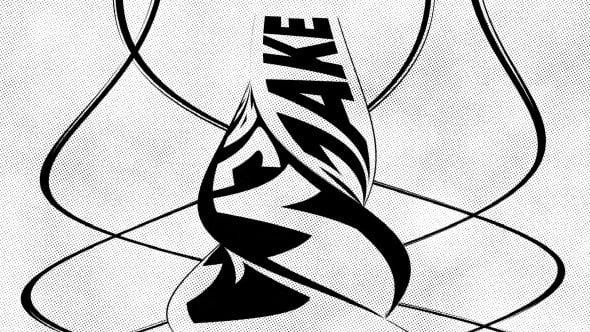
1. Introduction: Hi, I'm Jake. And I motion Zion from a
grading in this class, I want to show you a bunch of different ways of
reading text animations. These are real
life examples from an approved project
which I created this year in April
of this spring. I created this new
project for the biggest After Effects
templates market in the world, which is Envato Elements. And also this project is
available on Video Hive as well. So this is how you can tell
that these techniques are up-to-date and
approved for sale in the professional world of
motion design templates. Best part of this class is that it's aimed
towards beginners. It's okay if you
have never opened Adobe After Effects
in your entire life, I'm starting with the basics. So you would be
comfortable in using tools and gradually move towards advanced and
professional staff from my actual project
with each new video. Also, I've decided to end each video with a
challenge for you to make sure that you understood the technique which I
provided in each video. You'll be able to press pause
and complete the challenge, and then press play to see the correct way of
completing and the challenge. In this way, you'll have actual practice which will improve the understanding
of each technique. And to complete this class, our goal is to create these two types of
complex text animations, which could look simple for
advanced motion designers. But don't forget that whole complex projects are
made from these simple parts. I'll be happy to see
you in my class as also your result after
following all the steps. So let's get started.
2. 1 Creating Basic Animation: So I'm using Adobe
After Effects 2021. If you don't have this software, you can go to adobe.com
products After Effects and start the free trial because free version of the
software will work fine. Also, if you are
into text animation, you can start with
this tutorial as well. It's also starts from
beginner's level. And I show in this class other techniques
which you can use to animate your text and create
text animation templates. We've opened our Adobe
After Effects software, and now we can choose
the standard layout. So in this case, if
you let mostly here, you'll be having
the same panels, which you can see on my screen. But if for some
reason you cannot see some of the panels which
you can see on my screen. You can always refers
to them by their name. So for example, this
character panel, you can enable it from here,
from window character. And basically you can enable any of the panels which you
can see on my screen. Okay, so let's go to
the Project panel and now we can create our
first composition. To create composition,
you need to click here. Let's click here and here we
can adjust our dimension. So think of composition as a size of your screen on
which we are going to work. So first of all, we want
to choose our resolution. So in our case, we will use 1920s by tomato,
which is full HD. Also, we can set a frame rate. I'll use standard 30
frames per second. And here in duration, you can set how much time
will take this composition. So for example, here
is frames here, seconds, minutes, and hours. Now case we can leave
that ten seconds. And everything looks good. Here. We can just name it. We can name it as main
composition. And click. Okay. I've also opened this
project which we are going to refer to
them by creating these kinds of cool animations. So in this first
video of this class, we are going to create
this cool animation of what dynamic. So to create this
text animation, we just need to create
our text layer. And to create our text layer, we need to select this
horizontal type tool. So leftmost leaf here, we can zoom in or zoom out in our brain just by using wheel on the mouse and just leftmost
leg, hold and drag. And in this case you
are going to create this text box in which
you can write your text. You can see I've
created this text box, then I can let mostly here
and start typing my text. Let's also type
the word dynamic. Now we can just select this text and change to any
font which you like. In my case, I've used
Montserrat font, extra bold. And here we can just change
the size of our text. This Montserrat font is free. You can just download
from the web just by the name
Montserrat font, or use any other font,
it will work fine. By the way, if you type
too much of the text, you can see that it's tries
to stay in this border. And you can always just
leftmost, unexpanded. If you need more text. I'm going to delete this. Just select it and press
Backspace or Delete. And now we can just select it and choose here in
paragraph panel. And as always, if you can
see this panel paragraph, you can go to Window and enable
it from here, paragraph. Here in paragraph panel, we can just set it to center. So let's click here. And now
we can see our text center. And we can also use
this align panel, which is really handy because with just two clicks
here and here, we can just align
horizontally like this, and then align vertically. This is pretty much how you can just send her your text or snap to any parts
of your screen. Which just by using
these buttons, which is really cool as well. Okay, so the next
step will be to animate this text by
beer on the screen. So you can see we have here pretty cool animation
of operation. So let's try to do exactly that. What we can do is to
select this dynamic text. And then let's scroll down here. And we can see
this word animate, which is exactly what we want. We want to click on this
arrow and choose Opacity. You can guess, we can
choose to animate pretty much to any property
which we have here. For example, if we
select the position, it means that we can animate
our texts by position. So for example, let's see. Let's click Position. We can just move it up. And with this range selector, we can just animate each
character one by one. And what is cool about
position that we have also advanced
kind of animation. And we can go to ramp up. Now as you can see. We're animating our letters
not just one-by-one, but all at once. And it's much smoother. Once again, more on this
position property animation, you can check in this
text animation class. And this class, I
mainly focus on the position and also on tracking property
of the animation. But in this class, we want
to focus on the opacity. So let me select this
animator and click delete, which will remove this animator. And let's click on
this arrow key. And now choose Opacity
and 20 meet opacity. What do we want to do is
to set this opacity to 0, which tells to the sampler
that at a starting point, we don't want to see our text. Once again, to animate it, we need to go to
this range selector. Here with this Start option, we can scroll through. And now you can see
we are animating our letters one by one. You can go to Advanced and
said this shape to ramp up. And now we can animate
you letters at once, which is much smoother. Now basically, you know, a few types of animation
of the opacity property. But in our case, let's
set it offset to 0 and shape two square, which basically means
that each character will appear one by one. So now as you can see, when I'm changing this value
is animating. But when I stop changing
this value, nothing happens. Basically because we need to
create our first key frames. So let's create our
first keyframe. Let's set this play
head to the beginning. And by the way,
what you can see on the screen is basically
our timeline. And it goes from 0
seconds to ten seconds, which we've said in
composition settings. So if I'm going to
press 0 or numpad, it will start playing through
all of these seconds. To animate this text, we need to create
our first keyframe. Let's click on this stopwatch
leftmost leaf here. And let's set this to 0. Now let me explain
what is key-frame. Key-frame is basically
point in time, we should remember is the
value of sodium property. In our case, this keyframe
remembers this point in time, which is 0 seconds, the value which is 0 per
cent of the property start. So for example, if I am
going to move this playhead two seconds or 1 second and change the
start value to 100, which is by left mouse
clicking here and type 100. Click anywhere. You can see that it created
another keyframe. And now basically
after Effects will try to connect these two keyframes. In this keyframe, we have
saved the value of 100, and in this first keyframe, we've said value of 0. So now if I'm going
to scroll through, it will go from 0. Pay attention here. It will go from 0 to 100. And as you can see, it
gives us our animation from 0 per cent of this word
to 100% of this world. So this is basically how you can animate letters one by one. And to create more
interesting look. As you can see here in
my original example, these letters kinda appear
on the screen randomly. And this is pretty easy to do. You just need to go to the randomized order here in
Advanced tab and click on. Now, if I'm going
to scroll through, you can see that it appears on the screen and randomized order. So now my challenge
to you is to delete this text layer and
type any other texts. For example, stylish
are amazing and do the same just by using your own memory of what
you already learned. So try not to cheat and just pause this video and try
to do it by yourself. And once you do it, just on pause this
video and watch how it's needs to be
done incorrect way. Okay, So if you'll
remember it all correctly, you just selected this
text composition. A textbox, then
typed word, amazing. And we can also select
the selection tool. In this way, we can just
move our text for you. Just use this align tool and
align exactly in the middle of your screen is always set
the burger to the center. Here you've changed your
test if you would want. And then we will
do want to go to the text here and
choose Opacity. And here we need to
set this opacity to 0 and Range Selector, you would need to create a
keyframe at the beginning. And then at 1 second to 100. And finally, we
would need to go to advanced and change
randomized order to on. This is basically
what you need to learn from first
video of this class. Well done. The next video, I'm going to show
you how you can make this animation even
more interesting. We are going to try
to add these kinds of outlines on our characters
as well as add some colors. See you next video.
3. 2 Creating Colored Animation: So we've created our
first text animation, which looks pretty cool. We can do even better. In this video, I want
to show you how you can create more complex animation, which basically allows us not only read this kind of animation
operation of the taste, but also add in
more complex types. For example, this
outline animation, as well as these
colors which changes from red and then this orange, yellow, and finally white, which is more
advanced animation. Let me show you
how you can do it. So the easiest way
which you could think of is to just
duplicate this layer. Just select it and
press Control D to duplicate or go to
Edit, Duplicate, which is also Control D
or Command D if you're on a Mac and just simply move
one of the layers in time. And if we're going to
select this layer, this forest one, and go to
effects and presets panel. And by the way,
if you cannot see this effects and presets panel, you can go to Window and
enable it from here, Effects and Presets
and type here, fill effect and drop
it on this first text. And now as you can see,
we've created this kind of animation of operation
from one color, then goes to this
kind of white color. Now we can basically change
to any colors we should like. It's really cool animation
which you get in here. And basically you can even
duplicate one more time. So let's select this
bottom layer with this fill color and
press Control D and move it even a bit further, as well as this one. So these layers will
come one after another. And what this is
actually allows us to do is to change this
first color too, for example, to read one. Just like this,
we're changing here. Then this one we
can just select it and change it to yellow color, which will be in-between. This last one will be the same, which is the character
color, which is white. Now as you can
see, we've created this red color of the yellow color and
finally white color. And this is basically
how you can even choose other kinds of colors. And it will switch
between these colors, swirl any medium, which is pretty fun and
interesting looking. You can always move
these texts a bit further and get this
really cool kind of police light effect. Finally, what you
can do is to select this bottom layer
and press Control D. And more polar, these top ones, you just
pay the selection, this one, then hold shift
and select the top one. And now we can just move it even further and select
this bottom one. What we can do, we can just select this fill
effect and delete it, which basically will mean that this bottom layer
is still white. But if we can just
swap these colors, and basically this big square
means that it's fill color. And this little square
means that its true color. And to explain this better, I want to select this layer and click here on Solo button. So basically with
this solo button, we can see only this layer
which we've selected. And we can see this
color for layers on top, which is really handy
because I want to show you what is different
between these two boxes. So now we can see only
this bottom text layer. And now we can just click
here on these arrows, which basically will
swap and what it does, it just removes
this field color, but you can always select the fill color and change to
any color we should like. Or basically click here, which we'll remove
this fill color. What we will left
is this stroke. And we can even change
the thickness of the stroke and get
this kind of effect. So basically we've removed our fill of each
of the characters. And if I'm going
to click here on this toggled transparency grid, you can see that it's completely transparent and all the strokes of these characters are visible, which is exactly what we want. Because if we're going to
switch off the solo mode, we will see all of
these colorful layers, but this shock
will appear first. So let's click here. Starts with this text
layer with the stroke. Then these colors appear. And only then we can see this animation with
our white color, which gives even more
complexity to our animation. And as a final challenge, in this video, I want to show you one problem
with this technique. So let's say you created
this cool animation and you want to change the text. And as you can guess, you need
to double-click on each of these texts layers and
change this to new word. So for example, to text. And as you can see,
it needs to be done on each of these texts layers. Really take some time. And this is why I
want to show you a really cool
technique which will allow us to change
the texts just once. All of this animation
will appear on top of it. Which basically means that
we are going to create our first text
animation template. But before creating this
text animation template, I want you to remember this kind of animation
which we already created. So let's go through it. We've created this stroke layer. Then we've created
this layer with the fill color red one, then with this blue one, and finally, the original
with white color. And why I've decided
to remind you that because after
the technique, how to create the
template, I want you. So redo all of this animation. But don't be scared, it
will be really easy. So first of all,
we want to create our text animation template. So it's really easy to do. We can just select all of these
texts and just delete it. And here, select this text and make sure that it
has filled color. Just by clicking on the square. And choose the fill and
select this stroke color. And click here to
disable the stroke. Okay, So now we have our simple text animation which we created
in previous video. In the way to create
the texts templates you need to do is to precompose
this text animation. So let's select this text
and go to layer pre-compose, and let's call it text
animation one and click. Okay, so what is
cool about this? Now, we can just duplicate this text
animation, for example, like this and apply an
effect called find edges. Now let's also solo this layer. So we will see how this
find edges back to works. Basically we can just
change to invert, which leaves us with
this stroke effect. And what is cool about
this effect that we've created, this text stroke. But if I'm going to click
here and transparency grid, you can see that it's not
completely transparent. And let's go out from this transparency grid and
un-solo this text layer. We can change this mode
to add or to screen, which basically will
make visible only this text stroke and not
the black color inside. So let's click on screen, and let's move this white
layer a bit further. And now as you can see, we've created basically
the same kind of animation which we
created previously. Once again, what we did, we precompose our animation, which basically means
that we've taken our text and put it in a
box and pre-compose box. So if I'm going to
double-click on this, any of these compositions, we can open this
box and see inside this text animation here
in main composition, we can see these texts
animation, these boxes. And on one of the boxes, I've applied this
find edges effect, which basically
allows me to create this stroke effect on one
of these compositions. And why we are exactly did this. It's only because now when we're applying our
effects on top of this, these metaphorical boxes, which is basically compositions. Every of these compositions
are sourcing this text layer. And to show you how it works, we can just open this text composition leftmost
double-click here, and change it to any other word. For example, animate. And then let's go to
the main composition. And as you can see, it already
changed to this new world. But at the same time, we still have this
kind of animation and even these effects
which we've applied on top. So basically now my
challenge for you to create the same kind of
animation which we've created before with the colors. But by using these
texts animations. So feel free to pause this video and try to do this challenge. If you are not sure that
you can do this channel, you can re-watch this video and then pause this video and
try to do this challenge. I've assumed that you've tried and the right
version to do this, it will be to select
this text animation with our text and without any effects and just duplicate
it. Press Control D. Then just move it a bit behind and go to effects and presets
and type this fill effect, which we already used before. And just leave at
any colors we want. Once again, you need to
duplicate it, move it further. And this one too,
and change this to any other color,
for example, blue. And now we can leave
this solo mode. And now as you can see, we've created this kind of animation which appears with this stroke, then with the color, and then with our original text. And this is a good chance to explain you why
in After Effects, the order of these
compositions matter. So basically, as you can guess, if I'm going to place this
text animation on top, it will appear on
top of our strokes. So my case, I want to leave
these strokes on top, then I want to use this text animation
with the red color, so it will appear
below the strokes. Then I want to appear this blue color on
top of the red one. So I'm going to just select
it and drop it on top of this and make sure
that you don't drop on top of all of them because it will cover our stroke effect. So let's drop it here. And at this point it's
really handy to know how to rename these layers so it
will be easier to navigate. So let's select this layer and press Return or
Enter on keyboard. And just add the word which
represents the color. So my case, it's blue one. This one is fine edges effect, which basically is stroke. And this is one, is red one. So let's call it red. And this one, I'm pressing
Enter to rename it. And this is white,
which is original. And now it's really easy to see that we have
the stroke on top, then this blue color, which will appear just
after this red one. And finally, we want
to see this white one, which is now below. And we want to place on
top of the blue one, but below of this stroke effect. So this is a good chance to understand that you can mix
this order of these effects. You can always get
the new kind of look. So basically you can always
play around with the order of these layers and get
different results. And if this video is too
overwhelming for you, I recommend you to re-watch it. And after you watch this
video one more time, you're going to understand that this technique is not too hard. And only if you are
new to this kind of texts animation
template method, it may be kind of hard
for you to understand. But if you re-watch this
video one more time, you are going to get it that this animation is
basically the same, which we've created before. But now you can always go to text animation and change this one word to
any kind of text. For example, the
name of my channel. And it will automatically
change it here as well. And also apply all of these
kinds of animations on top. The next video, I want to
show you how you can create this kind of when it
rotates this text. And we can get 3D
field of our text, which is also uses the same
colors which we've created. So basically it's another level of complexity to this animation. And it's really cool
because it really looks like it's in 3D. See you next video.
4. 3 3D Animation Look: So now we've created
this kind of animation by going to show you how you can create this kind
of 3D field to our text. And what is cool about
this text animation templates that you can always go to this text animation and
just simply resize our texts. So for example, I
wanted to be bigger. So our 3D effect, would it be more noticeable? We can even decrease
the leading, which basically the space
between these letters. And once again, Let's center this text using
this Align panel. Now let's go to
main composition. And what we already
have is our animation. Let's use the same colors
which I've used in my project, which is basically this
yellow color in-between. And now I want to add
this kind of 3D rotation. Basically what we can do
is to just simply select these three layers below and attached to
this layer on top. Just by using this pick whip, basically you can
just left most leg, which just makes sure
to select these layers and let more slick and
attach to this top one. We can even use Layer
New Null Object, which is basically
the empty object to which we can just
attach anything. For example, we can use all of these layers selected and
attach it with this big web. Basically we're parenting
to this null object. And now if I'm going to
move this null object, we can press P to Z
position and move it. You can see that we have, are moving all of these
animations as well. Which is really handy
because if I'm going to move all the white layer, you can see that it falls
off of our animation. And in this case, if
we are going to parent all of these layers
to one null object, it will move exactly the
same as this null object. And now what do we want to do is click on this
toggle switches and modes to see
this 3D layer icon, which is basically means that we can left mouse click here. And all of these
layers and make it 3D. Now by changing this
X and Y rotation, we can rotate it this text. And as you can see it already, it rotates and 3D, which is exactly what we want. But this text doesn't really
have this kind of thickness, which we would want to see. At this case, we need to use some creativity to make it look like it's have some
dimension to this text. And once again, it's
really easy to do. You can just create a
keyframe for y rotation, just like mostly here. And I want to create
this keyframe here at two seconds where this
first animation ends. So basically you can just
move this keyframe around. And just after this
animation happened, then in just 1
second about here. Let's rotate it a
bit just like this, as you could see in
my original example. But in this example you
can see that it has this kind of thickness
with same colors. How I've managed to do this, we can just choose this color, which is now not
blue but yellow. So let's rename it. Now let's press P to see the position and
move this playhead. So it will be on top
of this keyframe. And to see if it's on top of, right on top of this keyframe. You can check on this icon here. You can see if I'm going
to set my playhead here. It's not on top
of this keyframe. And now when I place
it on top of it, it lights up blue. And why this is important, because if I'm going to
create an animation for this yellow text by clicking
on this position stopwatch. It will be synchronized with this animation only in
case if we are going to create our animation at exactly the same places
as these keyframes. So in my case, I just want
to move it to the left, which basically means
that I need to change this first value to minus 25. For example, it
moves to the left. And by the way, this
first value is x value. This is why a value
and this z value. So as you can see, it moves horizontally,
this vertically, and this is z space further
away or closer to the camera. In our case, we just
want to move it in x value exactly the same. I want to move this red color. So let's press P to
see what the position. Let's create a keyframe. And let's move it back to
this first keyframe here. And by the way, you can snap to these keyframes just
by holding Shift. As you can see, I'm
holding Shift and it will snap to these keyframes. And now we can just move
this keyframe here, which is basically the original
values of zeros, zeros 0. And here we can also move
this layer to the left. In our case, we want
to move to minus 25, but twice the distance, because we've moved our
first layer to the left, two minus 25 pixels. To move it even further, we want to set it to minus 50 to get this even more
exaggerated 3D field. With this animation,
we are getting this really cool 3D
field to our effect. Just make sure to
not over rotate because it will still
ruin this illusion. But for these kind of projects
which I created here, it really works fine. Because in the next frame, we continue this motion
with this text here. And at this point in this kind
of animation really works. The next video, I'm going to
show you how you can create this kind of next step
of this animation.
5. 4 Slide Text Animation: So in this point, we've created
this kind of animation, which looks pretty cool. But now we want to continue this motion and new
kind of animation. We can just duplicate this text animation
here in project panel. Select it and press
Control D to duplicate it. As you can see now it's
called text animation tool, and we can just
double-click on it and change this text to any other. So for example, let's
call it just text. What is different between duplicate and compositions here? And duplicate and compositions. This kind of window and
not in project window. That here we are
creating the copies which uses the same
kind of source. Basically, if we
change the source, for example, two amazing. In this main composition, it also changes in all
of these compositions. But if we duplicate them
here in project panel, this text animation, it will
not use the same source. It will have another
source of the text, which is really
handy because now we still have this
kind of animation, but it's not connected to
any of these compositions. So basically we have
created another copier, but it doesn't attach to
any of these compositions. Now we can just use
this text animation to new kinds of animations. Let's open it here and text, Let's do it this animator one and create new kinds of
animation here and animate. Now we can use this striking,
which is pretty cool. Basically, we can
animate characters go from sadder sides, which is pretty cool
animation on its own. So if I'm going to set this time cursor to
the beginning and set it to 0 or even
below 0, just like this. And create a keyframe and go
to 1 second and set it to 0. It will nicely spread out. Now let's press 0 numpad. And as you can see, we
have this animation. To make this animation
in a more interesting, you can always select this keyframe and go
to graph editor here. And graph editor,
make sure that you're using this Edit Speed
Graph by clicking here. And not Edit Value Graph. Use this Edit Speed Graph to see the exactly the same graph as I'm seeing here on my screen. And what this graph allows us to do is to click on this handle, leftmost click and hold, and drag it to the left
and to the baseline. And then once you will
touch this baseline, it will light up orange, as you can see, which is
exactly what we want. We don't want to go below. We just want to set
it to this baseline and drag it to the
left and release it. In this way, we've created
this kind of curve, which means that at the beginning of this
animation will start really fast and then it
will slow down by the end. So now if I'm going
to press 0, a numpad, you can see that
it starts really fast and slowing down
towards the end. Let's exit this graph. And we can even spread
these keyframes, which basically will slow
down this animation. And we can see this
animation a little better. Maybe let's shrink
it this distance. So it would go a bit faster. This basically how we can create this really smart and
interesting kind of animation. You can even go
further if you like, this kind of look, which
just makes sure that your play head exactly
on this keyframe. And then just change this value. Because if it's not
on this keyframe, you'll create another keyframe. And basically you'll add
another kind of automation, which is not what we want. Just delete unwanted
keyframes and change only on this keyframe
which we already read it and play around
with this value. We should like, I'm
going to set to 0. Now let's go back to
this main composition. We already have this kind of animation of preparation
on the screen. And then this rotation. Now let's cut it. All of these layers to this
moment when it's rotated, we can always check this null. Press U on the keyboard
to see the animation. And on this last keyframe, we can just cut all of these layers by
selecting all of them. And then just cut
it just like this. Let's make sure to cut
each of these layers, which basically allows us to cut this and it will disappear. Now as you know, we can
manipulate these keyframes. So it will have much more
interested in animation. Now if I'm going to de-select
any of these layers by clicking about here and
press U on the keyboard. And one more time, I can see all of my keyframes. And let's select all of these three keyframes and go to graph editor as we did before. In our case, I want
this animation to slowly start just like this. Let's deselected, select this and also drag it to
baseline and to the left. And let's select
this keyframe and also to the baseline
and to the right. I'm going to write
a note to the left. As you can see. Now, our curves means that
it will start really slow. Then fast towards the end, which is exactly what we want. And by the way, if
you're wondering why this curve went below age, just because this value went
from 0 to negative value. This is why it went
below and not on top. So let's exit this graph editor. Let's see how it looks. Let's press 0 number. Now as you can see, we
have this first dimension and then you can see that this slowly starts
and then disappears, which is exactly what we want. Because now we can use
this text animation to drag it here and move
it to the right. It continue exactly this motion. But this animation,
as you can see, starts from the center. And we can tweak this. We can go to text animation
to just select your text, select your paragraph, and then click on left aligned text. Now as you can see, if I'm
going to scroll through, we can get this
kind of animation. And we can amplify this
animation by selecting this text and press P on keyboard to
animate only the position. So let's select this
selection tool. Move it to the right where
we want it to appear. Here at the start, we can
just move it to the center. Let's also go to graph
editor and make it go really fast at the start
and go slow to the end. We can even get this
curve just like this. So it will definitely start
really fast and slow. At the end, we can press U on the keyboard to see
these keyframes as well, and also move it like this. So it also will start
fast and slow at the end. Now let's go to
main composition. Now, as you can see,
this continuation of this motion looks
much smoother. We can even move it to
the left if we want. And this is basically
how you can create these cool jump cuts, which kind of start this
motion and ends here. And now my challenge
to you is to create this kind of a curation
of these colors. Because we've created
this first part and the second part, but we don't have these colors. So press pause on
this video and try to create the colors
for this second kind of animation to see if you understood properly how
to do this technique. And then un-pause this video and see the right way
how you can do this. Okay, So the right
way to do this, just to duplicate
this composition, move it a bit like this. We can even copy the
yellow color from here. Select it and press Control C to copy control V to paste it. Once again, this order matters. So let's move it below. Let's make sure that it's yellow and not kind
of greenish color. Now let's duplicate
it one more time. Move it a bit like this. And let's copy this red color, Control C and Control
V to paste this. In our case, we even want
to overlap in this way. We will start seeing the
colors and then the text. And let's call it.
Just like this. We will see the colors and then the text appearing
on the screen. This is basically how you can create this kind of animation. As you can guess, you can create a bunch of different
kinds of ways. So in our case, we've used
two types of this animation. We've used this text animation with the animator of opacity. And also we've used the
animation using this striking. And as you can guess,
you can always use the other ways
to animate it. For example, this position. And animate it from top. So it would look
something like this. Once again, on this kind of
animation of the position, I recommend you to watch this
text animation class which goes in depth in a
position based animation, as well as, as really cool other ways to
animate the text. And finally, in the next video, I'm going to show you how
you can create this kind of animation of the background
with your image. Because here it's
pretty easy to do. You can see that I've just
scaled this animation up. Then I just duplicate
this image a bunch of times and made it
appear on opacity. But this kind of animation
is a bit more complex. So let me show you
in the next video.
6. 5 Background Image Animation: So let's create our background. First of all, we need
to import some video. We can just let
double mouse-click here in project panel in empty space and just import
any video we should have. Let's create a
composition for it. So for example, I'm
going to call it placeholder and click Okay. And I'm using the placeholder so we could use any other video. And I'll just drop this original video into
our main composition. Basically if the same
technique of using templates. Because now if I'm going
to use this placeholder, we can always change inside of this placeholder
to any other image, and it will still work fine. So once again, it's a
really good idea to re-watch all of this glass
and try to use this technique in which you are creating
the templates and not just animation of
your text or background. Let's create some cool
animation for our background. We can just simply press S on
keyboard to see our scale. And let's create a
keyframe here at the beginning and about
here where it appears. Let's make it even a bit bigger. Just like this. Basically the easiest
way to create more interesting animation just by simply selecting these
keyframes and press F9. If I'm going to go
to graph editor, you're going to see that it
starts slow and then fast, then slow, which already gives more interested
in kind of animation. But we can always amplify this motion just by
dragging like this. So now we can see this
kind of zooming effect. And to make this effect
even more interesting, we can use the technique
which called Alpha Matte. So to create this technique, we need to go to
layer new solid. Now let's call it met and
click Okay with this met, with this toggle switches, we need to change this toggle switch to
see this track matte, which basically means
that everywhere where you can see this layer which we just created with the same resolution
of our composition. We would see this place holder. So I'm gonna change this to alpha matte is
just like this. You can see that it
masking using this mat. And if I'm going to enable it. And for example, also
press S on keyboard, create a keyframe,
place it on start. So it would be 100
per cent. And later. Just about here. I can change this scale
to smaller value. For example, a 3D pie. Let's also select this
placeholder and press U to see where these
keyframes fence. So it will be the same
kind of animation. Also select it and press F9. And also let's go to graph editor and create
this kind of curve. So it will resemble
the same movement. Now, if I'm going to
switch up this layer, this place holder will still use this mat as a mask for
this place holder. So let's disable it. And now as you can see, where we can see this matte layer. There, we can see
our place holder. So let me show you. You can see that we still
have this zooming effect. But with this matte layer, which is changing the
scale to the smaller, we can focus only on
this part of the image. And if we were going
to press 0 numpad, we can see this kind of really cool and
interesting effect with this null object
which we created before. We can always amplify
this effect even more. Press S to create
a scale keyframe. Here at the beginning where
we cannot see this animation. We can always scale
it down to 55. Also select it, press F9, go to graph editor and change to exactly the
same kind of animation. And now we even amplifying
this effect of zooming in. We can even change this
to lower value like 20. And now this effect
even more pronounced. And what is cool about
this matte layer that we can always
use this placeholder, click on this toggle
switches and turn this placeholder
in the 3D layer, press R to see
rotation properties. And we can also rotate
this layer just like this. And it will still use this mat as the guidance
where to show this layer. By the way, in the
cases where you can see this kind of
weird artifacts, you can always go to layer,
new adjustment layer, this quick little tip, how to get rid of this
kind of artifacts. And as you can see, without
this adjustment layer, it's cut off our image. And if you are going to
place this adjustment layer between the background
and your texts animation, it will not have this
kind of problem. By the way, we can always
occurred this background. So we would have this
kind of animation. Let's also create
another solid and we can size it down and
move it to the right. Just like this, we can
use this line to snap to this kind of H leftmost double-click on this
rectangle tool. It will create a mask which
we can set to subtract. And if we'll open this mask, we can decrease the size and
create this kind of border. We can also press S and
click on this Unlock button. So we would, could change
the dimension of the square. And also let's click it here. It will snap to
this kind of edge. And finally, we can just simply press P on the keyboard
to create a position. Here, the start, you can
just move it to the left. And let's cut this frame. So it will start with this
second shot and select this keyframe and move
it as we did before, moving to the left. So it will start fast
and slower at the end. So in this way, you can
create these kind of cool animation just by
knowing these few techniques. So once again, to learn
more about text animations, I recommend you to watch
this class as well. Learn about even more techniques which we open use in
your future projects. And I really recommend you
to watch as many classes as you can on the
text animation. For example, this one. Or you can even
go to Video Hive, that net user and Jake portfolio and check
all of my projects. I request more
classes on my prices. I'll be happy to share
you my knowledge and experience creating
these kind of projects. Feel free to follow me
here on Skillshare. I post Adobe After Effects
classes every week. And by the way, if you
are interested to create more kind of fun VFS stuff, you can always check
my other classes. I have only 12 minutes. We have x plus. And you'll get really
powerful result at the end. Thank you for watching and I hope to see you in
my next lesson.
 M Jake, Lets Create VFX & Cool Stuff Together