Transcripts
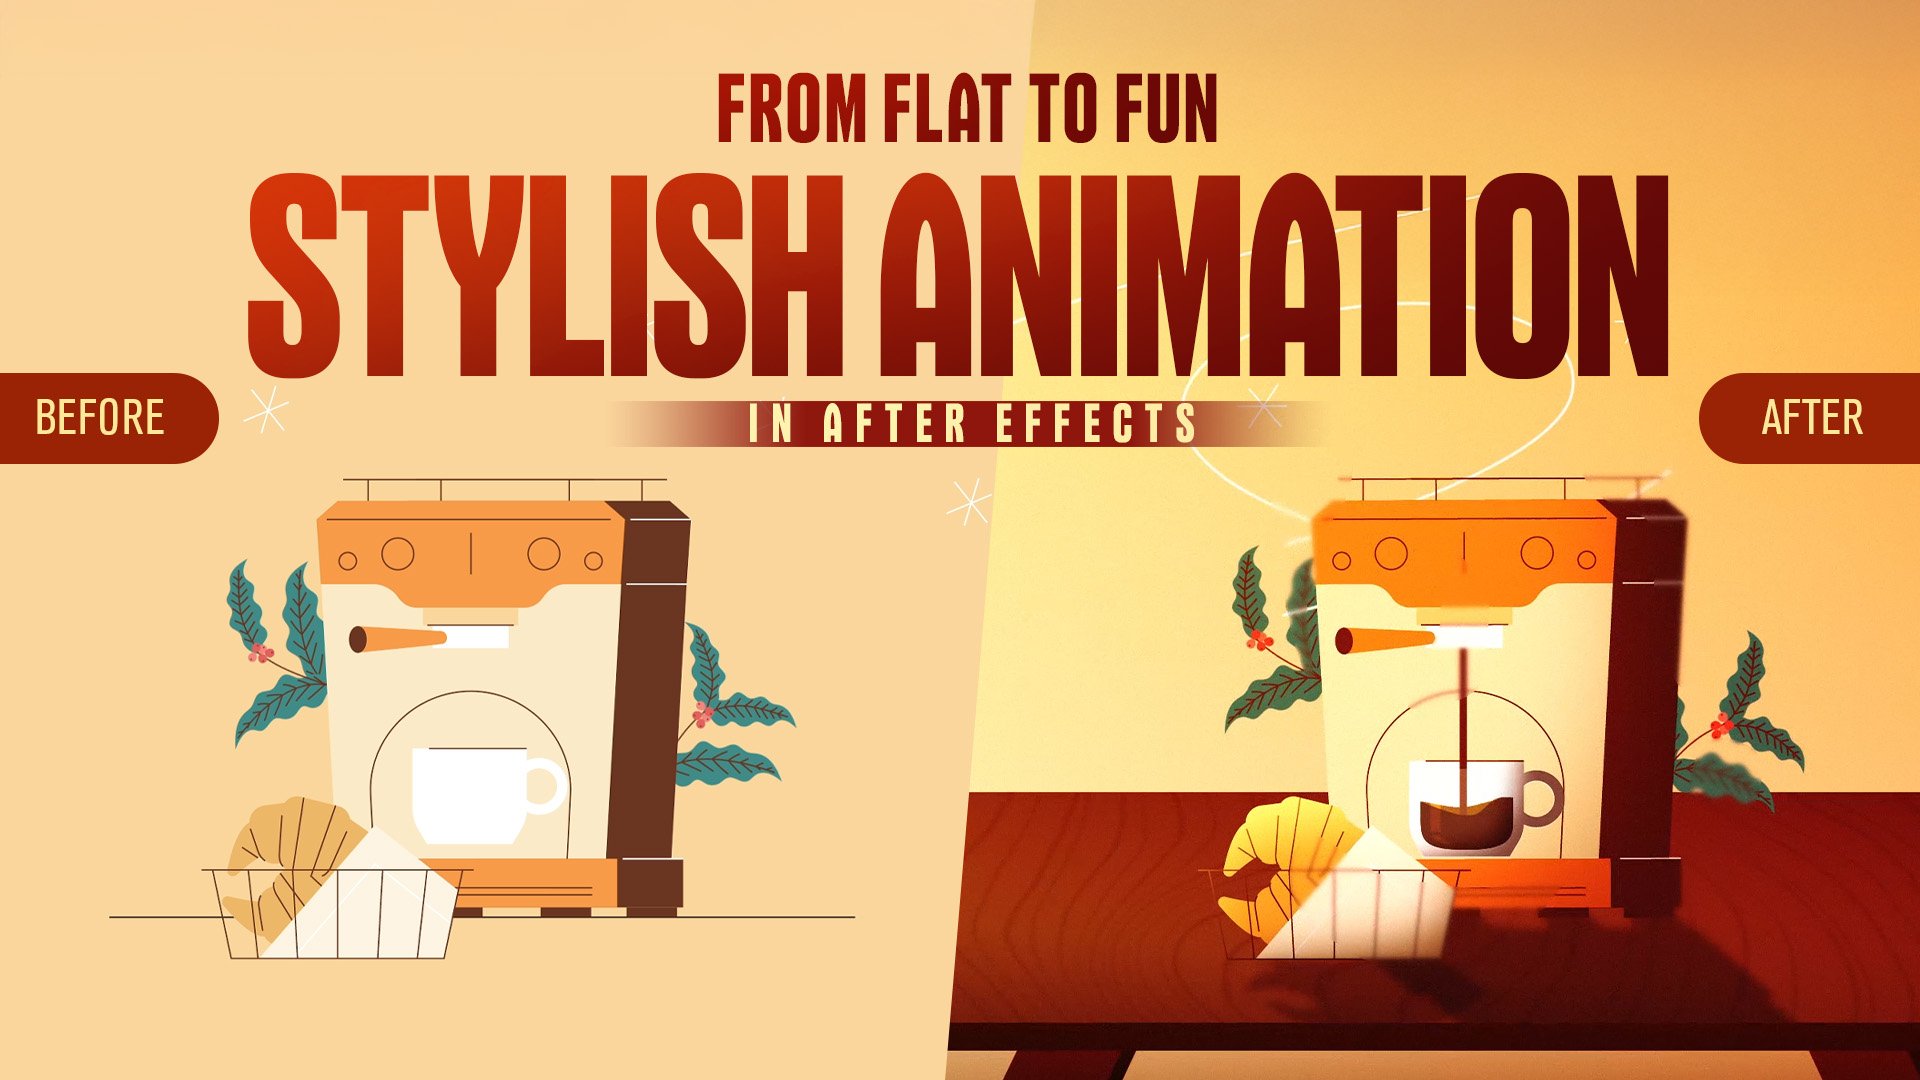
1. Introduction: If I told you that
you can easily create standing animations even
without prior experience. Hi. Anger Marta, co
founder of perdi, an animation studio where I work as the creative director. Over the past ten years, we have produced beautiful
animated splend videos for hundreds of
companies worldwide, such as Intel, elit, ger, Pose and many more. In this course, I will
teach you how to make thousand animations quickly
and easily with aftereffects. My favorite animation software. We will start by
organizing designs in Adobe Illustrator to work
efficiently in after effects. Then we'll dive into the aftereffect interface and explore its most
important tools. I will show you how to prepare all the elements to
animate them easily. Once Taste the most
exciting part begins, bringing our
illustrations to life. You will learn how to create key frames at
expressions, effects, and everything you need to start creating fun and
professional animations. You'll be able to download
all the files we use during the course so you can follow the instructions
in real time, making it much easier to
apply what you're learning. This course is ideal for illustrators and graphic
designers who want to learn how to make amazing
animations easily and in the shortest time possible and lock your potential. Join now.
2. Class Project: Okay Hi there for
the final project, you will create an
animation from scratch, applying everything you have learned throughout the course. This is an easy
to follow course. To complete this course, you will only need to
have AV aftereffects and AB Illustrator
installed on your PC. At the end of each lesson, I will provide some guidelines. I recommend following them to achieve the best results
from this course. I look forward to
seeing your progress. Don't hesitate to upload your work to the course
project gallery. If you have any questions, I'm here to help. I
hope you enjoy it.
3. Preparing the Files: In this lesson, we will
prepare our designs to animate them efficiently
in after effects. I use Tdbllustrator
to create the design. Please download the illustrator
file from projects and resources to apply everything learned during the
course in real time. The organization is
fundamental in animation. This will make our work
in after effects more efficient and help
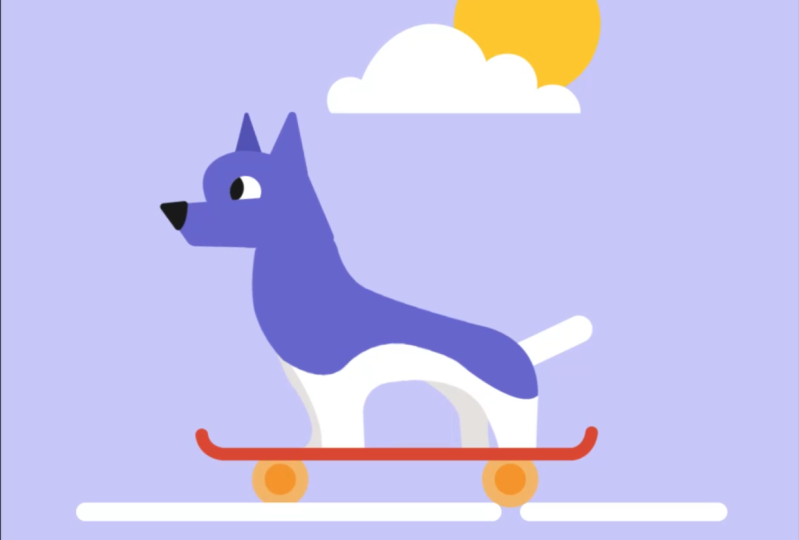
us work faster. Based on this approach, let's see how to organize the layers in a DBA Illustrator. The idea is to separate all the elements we're going
to animate into layers. If we open the layers panel, we can see how we have
separated our design. First, we created a layer for the snout and another
for the head. Additionally, we generated
a layer for each of the ears so we could
animate them independently. Next, we have
created a layer for the skateboard and
another for the body. We could also put the body
above the skateboard, but it looks better
if we put it below. To finish, we have created a
layer to animate the tail, the lines, and the background. In this case, we are not going
to animate the background, so we leave the cloud, the sun, and the sky on the same layer. When we start animating, you'll better understand why we need to organize the
layers this way.
4. Adobe After Effects: Hello, again. Before we start
animating the projects, let's get in touch with the
after effects interface. The first step is to
create a new composition, so we go to composition,
new composition. Open a new ten 80 by ten 80
composition at 24 frames. Give it 10 seconds and name it. As a second step, we will import our Adobe Illustrator
design to import a file, double click on
the project panel, and then select
the desired file. When we import a layered file
in the import as option, we must select composition
retain layer sizes. As you can see a composition and a folder with layers
have been created. We are going to work
on the composition. First, drag the
imported composition into the main composition. Let's take a quick look at
the after effects interface. The panel where you see the
design is the viewport. This panel shows the results of our designs and animations. At the bottom, we can
see the timeline panel. This panel is where
we will spend more time creating
our animations. From here, we can easily modify the transformation
properties of the layer. With the new after effects updates when selecting a layer, a new panel called properties
automatically appears. I'm going to enlarge it a bit
so you can see it better. This panel allows us to
work faster and more intuitively by accessing the
different configurations of the layer from
a single panel. If you have the latest updates installed and you
can't see this panel, you can open it from
windows, properties. But don't worry. You don't need to have this panel
to follow the course. It is just a plug
in that allows you to save a little time,
but nothing more. If we look to the left, we can see the
project panel where all the compositions we create and all the fires we
import will appear. And at the top, we can
find the essential tools.
5. Essential Tools: Hello. In this lesson, we'll look at the
most important tools we'll use during the course. Let's double click to enter
the skor dog composition, and I'll show you how the
different tools work. The selection tool allows us to select and move elements
and resize them. If we hold down the shift key
while adjusting the size, it will maintain the
proportions intact. The hand tool allows us to navigate within the
composition panel. With the Zoom tool, we can
zoom in or out of the image. Clicking will zoom
in and holding down the old key while
clicking will zoom out. The rotation tool allows us to rotate the selected objects
around that anchor point. We can change the
anchor points location using the pan behind
or anchor point tool. Notice that the
rotation will behave differently depending on where the anchor point is located. Now, let's see how to access the main tools with
the touch of a key. Press v for the selection tool, hold space for the hand
to C for the Zoom too. W for the rotation tool, and y for the pan behind too. Before we continue,
let's save our project. Go to file, save and simply save your project
in the decided location.
6. Before Animating: Hello again. Before
we start animating, I'll teach you a
technique you'll use very frequently in after
effects, parenting layers. Right now, if we move any of the layers using
the selection tool, we see that they
move independently. But we need, for example, when the body of the dog moves, its other parts
follow its movement. To fix this, we need
to link the layers, simply select the spiral icon of the head layer and drag
it to the body layer, and do the same with
the tail layer. Select the spiral icon
and drag it to the body. Now, if we move the body, the head and tail
follow its movement. Following the same logic, we want the ears and snout to follow the
movement of the head. We link them to the head. From the Parent and link menu, we can see the name of the layer to which
we have parented. From this menu, we can also perform the
parenting process. We just need to select
the desired layer. It's a very basic technique
that you'll use on many occasions when
creating your animations.
7. Adding Motion to Graphics: Let's begin with the
most exciting part, bringing our
illustration to life. First, let's create a new
composition to combine the layers that make up the
dog to work more comfortably. To do this, we select the
layers while holding down the control key and windows
or the command key and Mac. Right click, Precomose. Name it and press okey. If we double click, we can
access the dogs layers. Okay. Now we will start
placing the anchor points. On the layers, we are going
to animate their rotation. The anchor points will be
the reference points around which the layers will rotate
when we animate them. It is very simple. We
select the pan behind tool, then select the head and place the anchor point at the reference point around which we want the
layer to rotate. If you are not sure
if you have placed the anchor point
in the right place with the rotation tool, you can rotate the layer and
check if the rotation works. We will do the same
process with the snout, the ears, and the tail. If you realize we have not
placed the anchor points on the body because we will
not animate its rotation. Let's go back to the
skated dog composition, and following the same method that we saw in the
previous lesson, we link the dog with
the skateboard layer. If we move the skateboard, the dog follows its movement, Now, let's animate the
movement of the skateboard. Go to the point on the timeline where you want the
animation to start. You can see the time
indicator here. We want the animation to
start from the beginning. So make sure you're at the
start of the timeline. Select the skateboard layer. We want to animate its position, so we need to open
the position property and create a keyframe. To do this, click on the stopwatch symbol
next to position. If you notice a blue
diamond has been created at the time
indicator on the timeline. Keyframes are time markers
that indicate after effects where we want to change
the value of a property. Now, move the skateboard to the point where you want
the animation to start. Next, move forward
in the timeline. Select the skateboard
and move it to the point where you want
the animation to go. If you notice by
moving the skateboard, a new keyframe has
been automatically created where the time
indicator is located. The problem is that to create an organic animation like the
one you see on the screen, we would need to create
a lot of key frames, and we would waste
a lot of time. The solution create a
very simple expression. I will revert the
action by using Control Z or man Z on Mac. First, we need to separate the position
dimensions to do this, right click on the position and choose separate dimensions. Now, we can apply an
expression on a single axis. In this case, we want to create a random animation on
the horizontal axis. That is on the x axis. To create an expression, we click on the stopwatch while
holding down the Alt key, and write the expression, you see on the screen,
and we preview. Great, we created a
fantastic animation in just a few seconds without needing to create a
ton of keyframes. The wiggle expression
is a powerful tool that allows you to create random
movement or animation. The first number
represents the frequency. It is how many times per second you want the
property to wiggle. The second number
represents the amplitude. It is how much you want the
property to move or change.
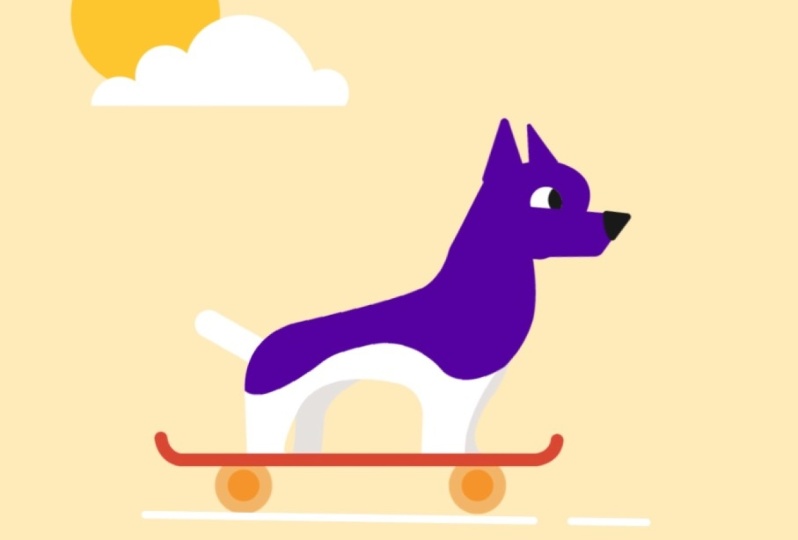
8. Dog Animation: Let's continue
animating the lines. First of all, we are going to
deactivate the lines layer. Let's make sure no layers are
selected by going to edit, deselect all, and we create
a line with the pen tool. We apply a ten P x
stroke and white color. We can modify it from up here or from the
properties panel. Also, in the line cap option, we choose round cap. We can find the same option in stroke within the
layer properties. In the dashes option, click twice on the plus symbol. We apply a value
of 5005050 in gap. And we apply an
expression and offset. As we've already seen to
create an expression, we have to click
on the stopwatch while holding down the old key, and we write the expression
that you see on the screen. Thanks to the time expression, we tell after effects
that the offset value advances 1,000 pixels in
a negative direction. That is, from left to right. Now we're going to continue animating the different
parts of the puppy. With a double click, we
enter the dog composition. If it is more
comfortable for you, you can activate the toggle
transparency grade option. And we're going to start
animating the dog snout. We open the rotation and apply the expression
you see on the screen. As we saw in the
previous lesson, when applying this expression, we created a random movement with a very natural appearance. Now to work even faster
with the right click, we copy the expression, and we paste it into the head. Let's take a look.
Great. And again, we paste the expression
on one of the ears. I'm going to modify the values of the expression a little. In this case, we want to simulate the movement
created by the wind, so we are going to increase both the frequency and the
amplitude of the movement. Again, we copy the expression
and paste it into ear two. We can also paste
it on the tail, which will also move
similarly due to the wind. And we preview. Fantastic.
In the next lesson, we will be adding the final
touches to our animation.
9. Final Touches: Hello again. In this lesson, we will add the final
touches to our animation. We select the dog and apply
the wave warp effect. In the direction option, we look for a horizontal angle, following the
direction of the air. We set the height to
five and width to 650. And we take a look. Okay,
let's exaggerate the effect. To do this, we are going
to increase the speed at. We preview and Bo
10. Rendering: Now that we have our projects
ready, we can export them. For this, we go to
composition and select Add to Adobe
Media Encoder. Media Encoder helps us export
projects more efficiently. First, we choose the Codec. In this case, we
will use H 2604. It exports the video in MP four, the most used
format for the web. Regarding the output resolution, we can choose the match source high or medium bit rate option to avoid mistakes and export it in the same size we have
worked on the project. Finally, we choose the
location where we will export the video and
give the file a name. To finish, click on
the play button here, and with this, everything
would be ready. Once the process is finished, you can open your
video and start sharing it on your
social networks.
11. Final Thoughts: I want to congratulate you
for completing this course. Throughout these lessons, you have learned
a lot of things. Prepare your designs
in a Roby illustrator, how the aftereffect
interface works. The most important
tools. Parent layers. Create animations, apply
expressions and effects, and some tips to speed
up your work process. And all these in just 20
minutes of the course. Now is the perfect time to
apply everything you have learned during the course by creating an animation
from scratch. You can use the course files or animate your designs.
It's up to you. Go ahead and upload
your projects to the course project gallery and take me in your Instagram post. I'll be happy to review
them and give you feedback. I value your opinion very much. If you like the course,
please leave me a review. I'll be very grateful.
Have a nice day.
 Guillermo Ortega, Creative Director