Transcripts
1. 1 Class Introduction: Ready to bring
characters to life with movement, personality,
and expression, welcome to meet
characters in After effect from static art
to expressive motion, another exciting class in my Skillshare After
effect mastery series. Hi, I'm Elli and I'll be
guiding you through this class. In this part of the series, we're going to step into one of the most exciting areas of motion design,
character animation. Character animation is
where your static design stop feeling flat
and begin to move, react, walk, run, speak,
and express emotion. And in this class, I will show you how
to make that happen inside Adobe After
effect using practical, beginner friendly and
professional techniques. We'll begin by looking
at the basics of character design and rigging
inside After Effects, so you understand how a
character needs to be prepared before
animation begins. Then we will install
and set up Duik Angela, one of the most powerful free character rigging tools
for After Effects. From there, we'll
create bone structures, explore auto rigging,
clean up our rig, and use those tools to build real character nision projects. You'll learn how to
create a work cycle. Set up a facial rig,
art facial expressions, work with lip syncing using SF Caddy and even create
a cycling mission scene. This class connects beautifully with the bigger After Effects journey because
character and mission brings together so many skills, designing, rigging, timing, movement, storytelling
and expression. So instead of only
animating shapes or text, you now learn how to animate
characters that feel alive. By the end of this
class, you'll have a stronger understanding of how character mission works
in After Effects, and you'll complete
multiple practical projects that help you apply
everything step by step. So get your project files
ready, open After Effects, and let's start
turning static artwork into expressive motion.
2. 2 Class Project: In this class, you'll be working on three main class projects, each designed to
help you practice a different part of the
character and mission workflow. These projects are not
just random exercises. They are built to
help you understand how aging, movement, facial animation,
and sin bulling come together inside
after effects. The first project
is a work circular mission in Duik Angela. This project is
covered in two parts. In Video seven, we'll begin
by creating the first part of the work run circular
mission using Duik Angela. You'll practice working
with the character rig, pushing the body, and creating movement that feel more natural
and controlled. Then in Video ten, we'll contut the same project
by finishing the work cycle and mission scene. This where we polish
the movement, improve the overall scene, and make their mission feel more
3. 3 Character Design & Rigging Basics in After Effects: Hey, welcome once again to the very exciting module on Character Admission
in After Effects. In this video,
we're going to get started with Character
and Mission. We're going to look at how
to design our characters, and I'm going to be using
Adbillusito for this course. So how to design our characters and how
to kind of structure them in order to make them animitable here
in after effects. Okay? So without further ado, let's go ahead and bring in
our Adobe Illustrit of file. So I'll click it going into my folder and bring in
the girl character one, AI file, which is Adobe
Illustrt of file. So select the girl character
one and come to import us and select composition
routinely sizes and hidimport. Yeah, and I'll
just click here on the composition to go
into our composition, and this is our character. As you can see, we have
lots of layers here, and these layers are basically
our body parts, right? We can see the names, arm one, hand one, fingers one,
whatever, whatever. So first of all, I will just go into AdobosFito now so that you
see our character. This is our character
structured. We can see that it has, of course, designed in AudubosFto
and these are all ears. So it was created here, and then we imported
it into after effects, and we now have our
layers. You get the point. So let's just go ahead and see what these layers look like. So if I just click here, I'll be able to select
everything in arm one. Okay? And if I just move it, we're going to see that
now we've moved arm one, and this is the arm
of our character. Okay? Now, if I
click on hand one, you're going to see that this is the hand attached to the arm, and then if I click
on fingers one, you're going to see that this
is the fingers attached to the arm and to the hand. You get the point. So now I
just want you to take note of the way the structure,
the way the design, you can see that the end of each of these parts is rounded, okay and fits perfectly
to the next one. Okay? So this forms kind of a hinge structure between the both parts.
You get the point. Now, that's in order to make rotation easy and
realistic, okay? So if I just select
everything here, for example, and come to opacity and reduce my opacity to have
reduced my opacity. Okay? So now, if we look at our parts now and
look at the joints, okay, the point where there
will be movement, rotations. We're going to see that it's darker and it's kind
of rounded, okay? So this is basically
showing us an intersection between the both
layers, the boot layer. So in this case, we have the thigh one
and also the leg one. So we can see that they are intersecting to
form this circle. So it means that
our ankle points will be positioned
at the center of the circles in order
to enable us to rotate our parts realistically. And this works everywhere, okay? This is basically how I
have structured the layer. Even though I didn't design
the model from scratch, so I got the model
from freepik.com, but it didn't come structured
for admission like this. So I was the one that
structured it like this, making sure the intersections
are rounded like this so that we can
rotate realistically. So this works everywhere, even on the arm,
even on the head. Okay? Probably not on
the head because there won't be much
movement on the head, but it works everywhere where
movement is going to occur, or rotation movement
is going to occur. So I'm just do this.
Yeah, basically, that's how to design
your character. Now let's go ahead
and see how we can animate this character
in after effects. Yeah, so here we are
in after effect. And what we want to
do is first of all, position our ankle
points properly. Okay? Now there are
very easier ways or more advanced ways using plugins to animate our character
or to rig our character. But now I'm going
to take you through the most crude and natural way to do it without any plugins. Then in subsequent videos, we're going to
learn how to do it with more advanced plugins. You get the point. So
now I want to show you how to actually do it
without using plugin. And yeah, so we first of all, have to position our ankle
points properly, okay? In the center of our joints.
That's what we want to do. Now in order to see the
position in properly, we have to select
everything and just reduce the opacity just like how we
did in Adobe Illustrator. I'm just going to hit T on my keyboard and
reduce my opacity, in order to see through allies. Let's make this 44, for example, or maybe less. 38. Good. So 38 works fine. And now we have our first
layer, which is the foot one. I I move this,
we're going to see that we actually have foot two. Okay? Now, this is the foot.
So we have the foot one. We actually have
the foot which is behind our foot one, okay? So that's how I have
structured the layer. Now, we can see that as
I select my foot one, it actually has a
big bounding box. It's very big, so it's very
hard for me to select my leg one because of the bounding
box of my foot one. So the very easy fix to this
is I'll just mask it out. So I'll select my
foot one and come here and pick my rectangle
tool and just create a quick mask around our
foot one in order to just cut the bound of our layer
to the side of our mask. Here is our foot one now. I no longer has that big bound. Now, let's do that for
foot too because they are basically the same layers. Yeah, so I've
selected my foot too, and I just want
to pick my recant and create a quick mask
around my foot, too. Good. Now we've done
the very first steps. Now, I just want to take
my foot one and start positioning my ankle point. Take my foot one
and I'll just pick my punt behind tool or ankle point tool here and
I'll position it right here, in between the foot one
and also my leg one. Yeah, so here so that we have a very sweet round rotation. You get the point. Now since
I've done this for foot one, I'll just go ahead and do
the same thing for foot two. I'll select foot two and bring
my ankle point right here. Perfect. So we've done that
for foot one and foot two. I'm just going to
select my leg one. And I want to bring my ankle
point right here, okay? Because the rotation of our leg one is going to be happening here.
We get the point. So I'll bring my ankle point right at the knee
level here, here. And I also want to do
this to my leg two. To select my leg two and bring my ankle point right
here. Just here. Perfect. So we've done that for leg one and leg two or
foot one and foot two. I want to just select next
my finger, my fingers. Yeah, so this is fingers one. As you click and bring
the anchle point here. Then I'll do the same
thing to fingers two. So fingers two, click and bring the ankle
point right here. I'll do the same thing to
hand one and hand two. So hand one, click and bring the anchle
point here to the middle. And same thing I'll do to
hand to soh my hand too. So I've basically
positioned these layers so that we have an easier
mission. You get the point. So everything has
been positioned in the way it
should be for us to have no weird movements or no weird distractions,
you get the point. So just take note of that. So when you are creating
your characters, you have to take
note of that, okay? Yeah, you have to
take note of that. It's very easy to create
characters in Illustrito. If you can't use Illustrto, you can take my course on Illustrto and learn
how to use Illustrito. It's a very good course.
And I promise you, it's going to be amazing. Yeah. So we have
hand one selected, and we have our ankle point
brought to the middle. We need to do that for our arm one and arm two.
This is our arm one. Okay. So we want our ankle points for
one to be around here. So click and bring
it around here. And also arm two. So I look for arm to arm
should be down behind. Okay? Yeah, it should be here. So this is arm two
and I'll bring my ankle point also let me do for my head, I'll just bring my
ankle point right here because it's the
same layer with my neck. So I'll just bring
my ankle point here even though there
really won't be any rotations for head. Okay. But let's just keep
our ankle point here. Next, we have the
chest for our chest, we want our ankle points to be here around here around here. Even though we won't really be moving our chest that much. Let's just go ahead
and cross check to see if every part has
been positioned properly. For arm one, it's properly, or hand one been done properly, fingers one, correct, head,
correct, chest correct. Here, we have a separate
layer for hair too. Because the way the
hair has been designed, it has another part which needs to be on
a different layer. You get the point. So let me
just check for the others. We can see that Taiwan is
not positioned properly. Thaiwan is showing us
the anchor point here. I just disable my my
transparency to see properly. We can see that She is here. We need to bring
the ankle point for hew to this point because
rotation for Thai one, it's going to be happening
here, right here. Same also for Thi two
needs to be here. Okay. So Thai one is
the Th two is here. Okay? Thai one Thi two, arm one has been
positioned properly, foot one positioned properly, foot two has
positioned properly. Leg one is perfect. Leg two is perfect. Finger one. Perfect. Hand one or
hand two is perfect. Let's look at finger. Okay, this is finger two and hand two. Let's look at finger
one and hand one. Yeah, they all plays perfectly. Good. Now the next thing we have to do is parent our parts. Okay? So we have to parent the smaller part
to the bigger part. Now, what do I mean
by a smaller part? And what do I mean
by a bigger part? Now, in this case, for the feet or for the
foot and the leg, the smaller part would be the foot and the bigger
part would be the leg. Now why is that? That's because the leg controls the foot. When the leg rotates, the foot rotates. With it. Okay, realistically, naturally, the food doesn't rotate
and rotates the leg. You get the point. The leg rotates and also
the food follows. Same also with the thigh. The thigh rotates
and also the foot and the leg follows the thigh. You have to basically
do this just like how a natural character or
natural human is structured. So the natural structure
of the human skeleton is what we are following
here. You get the point. Same also with our
head, with our arm, with our hand and
so on and so forth. The arm is the bigger boy and the hand and the fingers
are the smaller boys. The chest is a master. Even though it's not really
the master in the real sense, because the wist will be the master in the
most realistic sense. But in this case, we
don't have a wist. So everything is happening here. The way our character has been structured, it
doesn't have a wist. It just has long thighs.
You get the point. So basically, the chest
is the biggest guy now. Now, the chest will
control all the rotations. So it won't be parented
to any other thing. Now let's go ahead and
do that right away. So we select our foot one and parent it to our leg
one. You get the point. So foot one will take
the pick whip or parent whip two and
parent it to the leg two. So foot 22 leg two incredible. And foot one, two leg one. So leg one to thigh one, and two to Thai two. Okay? So that's how
it's going to be now. If I pick Taiwan, for example, and move it, we're going to see
that both leg one and foot one are following it.
You get the point now. So for Taiwan, it's going to
be parented to the chest. So Taiwan to the chest and also Thai two to
the chest as well. Perfect. Now, the head is also going to be
parented to the chest. Okay? Like I told you before, the chest is the biggest boy. Everything is parented to the
chest. Nothing is parented. No, we don't parent
the chest to anything. So if I sack the chest now, we're going to see
that we're moving all these parts, okay? Yeah. Incredible. So if we want to move the character
forward or backward, we're going to be
moving the chest, okay? And everything will follow suit. Yeah, now let's do our parenting to our fingers and our hands. Now, just come down,
select my finger. Okay, it's a bit
hard to select here. Now, let's just look
for it right here. So we're looking
for fingers one. Yeah, this fingers
one, and we want fingers one to be
parented to hand one. Perfect. Then we want fingers to be parented.
Two hands two. Now, fingers two fingers two should be
preented to hand two. Incredible. Now, hand two
should be presented to arm two. Hand two should be
presented to arm two and hand one should be
parented to arm one. Incredible. Now, arm one
should be parented to, of course, the
chest. You get it. And also arm two should
be parented to the chest. Yeah. So if you
select the chest now, every other thing
should follow along. Everything should follow along. Let me just enable
transparency and see. So we can see that the head
is not following, right? So the head too has to be preented to the head that
the extra hair we created. Where is it? Yeah,
this is a head tool, and it should be parented
to the head. Perfect. If I select my
chest now and move, we are going to see
that everything is moving along with our chest. Yeah. Incredible. Now it's
time to animate, okay? And I'm just going to quickly
do a work cycle animation. So that you should understand
how this thing works, okay, how rigging and animation works manually without using
any external plug in. So in to start, I'm going to first of all, select my leg one, my foot one, and my thigh one. So I want to keep this very
simple because things can get very complex sometimes because
of the number of layers, plenty number of layers
we're working with. So I'm going to start
with my foot one, my leg and my thigh one, and also my chest. You select my chest and I
will just isolate them. So what I want to do now
is just right click on them and invert selection. Invert selection
and I'll just hide the selected ones now and just, first of all, I'll just
select everything and hit T and make my
opacity back to 100. Incredible. Then next I'll just select everything,
enable them Okay. And now I'll do my selection
one more time for my Ti one, my leg one, and my foot one. So foot one, Thai
one, and leg one. Okay? And also my chest. I'll just click on them and select Inverse or
invert selection. And I'll just hide
the selected ones, and I'll also shide
the selected ones so that we now have less
layers to work with. Incredible. Now, this is
what we've got to work with. Yeah, so the next
thing I would do is select my thigh one, my foot one, and my leg one, hit R, and create a Q
frame for rotation. Create a keyframe for
rotation, and for my chest, I will hit P and create
a keyframe for position. I just do this and
zoom in a bit. Yeah. And what I
want to do is I want to work with 30 frames per
second for this animation. So I will just do
Control K to go into my composition settings and make sure I have 30
frames per second. As my composition frame read. So you want to make
sure your film at here is 30 frams per second. Hit okay. If you have 30 frams per second,
I'll just zoom in. And now I'll just select
my Thai one and go ahead. And create my first puse. So select your thigh, and I'll pick your
rotation tool. So click your rotation
tool and just click and rotate and create
your first pose. So create your first pose
something like this. And I'll just do Control R to bring up my ruler
tool and click and drag Aula here, okay? So I'll just leave
it here, and I intend to make this my
ground level. Incredible. Now the next thing I will
do is just go to 15 fims. Good 15 frames in time. Now that's about here. Yeah, this is 15 frames. So I'll go to 15
frames and create my next pus so I create my next puse while still
having my Tai one selected. So I'll create my next
pus, which is this. And I'll just key make sure
this is happening properly. Yeah. So this is my next puse, and I will just
click here to add keyframes or to repeat these
keyframes for these layers. Yeah, so just zoom in just skim through my key
films to see what I've got. Yeah, so this is what
I've got incredible. Okay? So just come
here, see two films. Okay, two films after
my first key frame. And I'll just go ahead
and try to position my foot properly,
okay, realistically. So at this point, I want
my foot to just look like this for now, and at this point, on my foot to just look
like this for now. Okay, I'll just come here right here to the middle and select my Ti one and just create a keyframe for my Ti one to just have a keyframe here. And yeah, so we
have this and this. Now, I'll just come to the middle one more time
and select my chest. And for my chest now, I want to actually
make this go up. So I want to take my
position for my chest up. Okay? Just up a bit. Say from 362.6 to, let's say, 32, five. Okay? So we have this. Yeah, this is the realistic
way of movement, okay? So there is this up and down movement of our chest or
waist, okay, as we move. So the next thing I'll do is
just go to 1 second. Okay? That's now 30 frames. So 30 frames, and I'll
just copy these keyframes, all of these keyframes
and piece them here. All of these
keyframes, Control C, Control V, contro C, contro V, Control C, Control V. And the next
thing I'll do is just zoom in and come to the middle between these keyframes
between these keyframes, I'll just come to the middle and in the middle or
around the middle, I'll just copy this guy, Control C and ConroV. Okay And after I do that, I'll select my thigh layer, and I'll do this and
select my leg and do this. I want to create this pose. So my thigh and my leg, let's see, this
might be too much, but let's just see how it goes. Okay. Yeah. This is perfect. This is good. So let's create
this pose at this point. Okay? Yeah. So this
and this and this. Yeah. Okay, so at this point, we just want to play with
the rotation of our foot. So let's see, let's see, we can make our foot look
just like this. And then, Yeah, you get the point. So just try to achieve
something that looks just like this, okay? Zoom in and clean up the
rotation of my foot, just make everything
look realistic. So come here, you know, just maybe do this
at this point. Okay? Perfect. Come here. We do this at this point, Yeah, you get the point. So this is what we want
to achieve, basically. So I'll just select
everything here and just easy ease them
with the F nine button. Yeah, so this is
what we want to get. We want to achieve for starters. Yeah. The next
thing I will do is just go ahead and enable
some more layers. I'll click on the
Shy button here to enable the other
layers and I'll hold on Control or command on the mac and click
on my ec two button. Sorry, my ec two layer. I'll then enable it here and
also my thigh two layer, and also enbtia and finally, my foot two layer, my foot two and enable here, just enable shy or shim. Get the point on she them, and then just do this
to hi the other ones. Yeah. Now the next thing
I'll do is just copy these keyframes and paste for
the corresponding layers. For my Taiwan, I'll copy all
the keyframes on Taiwan. Control C, and go to the first frame and select
the Ty two and Control V. Yeah, the foot one, select my foot one, copy
my key frames, Control C, and go to foot two
and Control V. Okay, I'll hit you to
expose my Q frames, and I'll do that for
leg one as well. Select my Q frames, Control C, select Let two and Control V. I'll hit you
expose my Q frames, and I'll just expose my Q
frames for all these layers to make sure everything
is working well. Perfect. Now we have all these animating just the
same way. You get the point. Now the next thing what I'm
going to do is just add expressions in order to enable our layers loop
out continuously, so that we don't need to keep
repeating these keyframes. So of course, you know
how to add keyframes, how to add expressions rather. So I'll hold down
all or option on the mark and click here
to add an expression and click here and go to proper T and add the
loop out animation. So loop out, just click
and add and click away and do same to
all other layers. So add the loop out admission
to all other layers, the loop out expression to all other layers that
have been animated. Yes, guys. I've added the loop out animation
to all our layers. If we play them, we're
going to see everything. It seems there's
a little problem. There's a little arrow in the way I apply the
keyframes here. For my leg and leg just select
all of them and hit you to expose my key frames and
I'll just make this longer, two layer longer to
sort the problem. Now, close this now
what we want to do is offset our layers
by 15 frames. Yeah, so we have
to pick the let, the foot two and the thigh two and offset them by 15 trims. So we'll select them and
then just go ahead and bring them 15 trims before the other
before the other layers. Now, if you play this, we're
going to see that we are having our admission, okay? Yeah, so you see we're having
our work cycle and mission. Our incredible work
cycle and mission. Yeah. So most of the work
has been done now I'll just shy the remaining layers
and just hide them. Yeah, and now I will just do Control K to change my
background color to white head okay so that we see our body
parts animating properly. Yeah, so now we need to
admit the hands, right? But before we do that,
I just want to adjust my rotation for my
chest just a bit. I feel my chest should
be a bit rotated. Let's see, by one point four
degrees, 1.4 degrees, okay? Just a bit. And I'll
just do Control Q one more time and just
increase the width of my composition so
that we are making sure no parts are being
cropped out, okay? Let me just increase my rotation a bit more and see if
it makes more sense. 2.8. Yeah, I think 2.8 degrees for rotation
of R looks good. Now I just want to
now select my arm. I want to select my
chest first of all, and then my head and I
want to select my arm one my arm two and my hand
one and hand two as well. Hand two, yeah, my fingers
two and my fingers one. And I will just
unshide them first and then right click on them and select Invas innate
selection and make sure I hide the selected
ones and also hide them. Can maybe not hide them
because I actually want to see my legs, right? So you know what? I'll
just unshy them, okay? Or untry them. Yeah, so
that I think we can still perfectly work even without
layers being visible here. Okay? So let's just
take the arm one. And now for our first pose, we need to just hit
R m one or take the rotation tool and make
sure m one is here, okay? Yeah, you know, the leg
one is in front, right? So the arm one needs
to be at the back. Okay? The arm one needs
to be at the back. Okay, I'm finding,
this is my arm one. So my arm one needs
to be at the back. Okay? And then arm two
needs to be at the front. I'll just hit R and
do this manually. So arm two needs to be here. And we actually
need to make sure Thi one is above Thi two. Yeah. So Ti one needs to be above tit. Yeah, Thai one is
above title currently. Yeah, it's above Ti two. So everything is working well. So our arm one needs to be
rotated just like this. So we just create a keyframe for rotation and same
also for arm two. And let's just zoom in and come to 15 frames and
see what we've got. So 15 frames, and
we want to bring our m one to this position, and our arm two to the
position it was before. You get the point. So this
is what we want to create. And then we just keep
repeating the cycle. So we just need to really
make sure we are having the correct rotation
for our arms. Okay? Now, just hold on and
click here and then give this loop out animation or expression and do
same with this guy. Come to properties and op out. Okay? Now, let's
play this and see. You can see that it's
not really doing well. We actually need to come back to 1 second and
copy this keyframe, Control C, Control V.
Control C Control V. Now, let's play this and see
if it doesn't work well, we will have to undo
the expression. Yeah, so we can see
it's playing well now. It's playing well. So our work cycle
is just going well. Incredible. Incredible.
Super incredible. Yeah, so maybe just select the keyframes and
just easy ease them. Yeah, just easy ease
them and incredible. You can see the easy is
really going in there and making this look very sweet. Okay? Yeah, and if we
wanted to add more detail, we could further
animate our hand, our hand one and hand too. So maybe at this point, we want it to be this. At this point,
maybe just come in. Now this is not necessary. Okay? This is not necessary. So if it's going to
cause any complications, we might just forget
about it anyways. But let's just try seeing if we can make things a bit more interesting by animating
our hands. Okay? So I'll just first of all, create a keyframe
for rotation on hand one and hand
two. And let's see. So at this point, maybe
maybe for hand one, I'll just do the rotation
just a big backwards. And then for hand two, I'll
bring it just a big forward. Okay. And then come here
and copy this keyframe, Control C, Control
V, and do same here, Control C Control V.
So you can see this is a really subtle animation, nothing serious, but it just adds a little layer of realism. Okay. And, of course, we can just add loop out expression. Same also here. At loopOut expression. If we want, we could even admit the fingers. Admit the fingers if we want. Let's see. Let's try
admitting the fingers. Select the finger one
and finger two hit R, at this point, we want
our finger one to be justice this to be justice. Create a key frame for rotation for fingers one and fingers two. Fingers one and fingers.
And I'll just close this other layers
that are opened, which we do not need right now. Yeah, so now we only have fingers one and
fingers two opened. So come to 15 trims. For fingers one, I'll
make this just this. And for fingers two, I think I will rotate
it just this way. Then come to 1 second, and for fingers
one, I'll do this. For fingers two, I will do this. I'll do this here, I'll do this. You just select them
EZ keyframes and easy. And of course, hold on. Optional mark, click here, to add our expression and add the loop out expression and do the same thing
to our fingers too. Look out expression. Incredible. Okay, we can see that even our
fingers are animating. Yeah, just make this bigger. Make this fit my screen. And just like that,
we have created our first character admission here in after effects
from scratch, how incredible that is. So that's it for this video on character admission,
here after effect. So this is just an introduction. In the next videos, we're going to be using
a more advanced tool to achieve this fit. Okay? Yeah, so that's
it for this one. See you in the
next one. Bye bye.
4. 4 Installing Duik Angela & Setting Up our Workspace: Hey, there, welcome
back. In this video, we're going to be installing the Duik Angela script in After Effects and
we're going to be setting up our workspace
to enable us start animating using the
Duik Angela script here in After Effect. So all you need to
do now is just go to the website for Duik Angela, which is rxlabortor.org
slash download Duik Angela, okay then forward Slash. Or you can just do
simple Google search. On your browser, and you should
be brought to this page. This should be the
first link you see. So go into the page and
just come down here and you are able to donate
using this button. So I encourage you to donate to the founders or to the
developers of Duke. This enables them continuously provide Duik for free. Okay? So when you're done donating, you just click Take my Download. And it should bring
you to the page where we are able
to download Duik. Okay? Yeah. So just
go down and now you can download Duik by simply clicking on
the Download button. Just click here and it's going
to download Duik for you. You can see that this
is marks Windows, it works for both
operating systems. And this is Duik API. Okay? This enables us to create scripts which include
features of Duik. But this is advanced
suf. You just need to download it and then
come to your downloads. And this is our downloads, go ahead and extract your file. And right here inside our folder, this is
what we get to see. You have a read me text file, which gives you
instructions on how to install Duik, Okay? So basically, you
want to come to scripts and then come to script UI panels and just select everything
here Control C, select everything, and
then go to your folder. That your C dot dot or the folder in which you have your after
effects installed. Mine is C dot dot and
program files and Ado B. And then just come to
Adobe After Effects, 2024, because that's
the one we're using and going
to support files, and you want to go
into script and then you want to go
into script UI panels, and just go ahead and piste your files here
Control V as you can see, I have all the panels
pisted already, but I'm just going to do
that one more time. Okay. And after you do that,
all you need to do is to restart after effect, okay? So we're going to
restart after effect and get back to setting
up our workspace. Yeah, so back in after effect, all you need to do
now to enable Duke is come to Windows
and just scroll down. And you're going to see all
the panels you pasted, okay? So all these are different
features of Duik, okay? Different components
of the script. So in order to have
everything in one place, you can just enable the
Duke angular script that this particular
one, my mouse is on. So just click on it and
going to open it up, and that contains all
the features, okay? All the features. So let's
just wait for it to load, and this is our Duke panel. Yeah. So right now, I'm just going to
go ahead and set up my work panel so we
can start using Duke. I'm just going to close
this temporarily. And now we want a workspace
which gives us enough room. We want the workspace
which gives us enough room for our layers. So what I'm going to
do is just click here and drag this panel here. I'm going to drag
this panel here, so we have our layers here. And first of all, I'm just going to
just temporarily create a new composition, but that's a very useless
composition just so I can see what I'm doing properly. So here, I'm just going
to close my audio panel, close my effects and
presets panel. Okay. And I'm going to bring my
composition panel here. Okay, so that I have my
projects and effects control panel in the middle
and my layers here. So I also close the preview
panel. I don't need this. And for my properties panel, I think I'll just position it here and also my aligned panel. So I'll just dock them
in the simplist so I can switch between each
panel like this. And I'll just make this
smaller so you can see our composition bigger here. Yeah. So go back to
my my project panel. Now let's try
creating a new layer. So let's see solid and hit okay. Good. So now you see that we're able to see
our timeline here and we are just going
to use this button here to expand or collapse
our timeline. So this is basically
enabling or disabling several features
or our timeline. So these buttons will
basically enable or disable features we have here. Thereby increasing or
decreasing the space for our timeline, for
our timeline, yeah. So this is basically
what you want to have. This is similar to
what you want to have. And now you can go
ahead and enable Duke. So Dungla enabled. Yeah, so it takes some
time to load because it's really complex and
ruboed plugin. Yeah, I'll just do Control key and change my
composition colloquy, not my composition cool
actually my solid. Yeah. So I want to just
change my solid color. I don't like that green color. I just want something bright, even though it's temporarily. Okay, so what you want
to do now you just click here where my mouse
is click and hold, and then drag your Duke panel right under your projects and
effects and control panel. Yeah. So this is what
you want to have. You want to have your
duke panel docked here. And you want to have
your layers panel here, you want to have your
composition panel here. Okay, you want to have
your projects effects and controls panel up here. So this is how we're going to be working while using Duke. Now, come here where it default, come here and then click
Save us new workspace, so we can see Duke
Angela and hit Okay. Now, we just saved our
panel, and the next video, we're going to use this panel to continue learning how to
use Duke in after effect. So that's it for this one, see you in the next one. Bye bye.
5. 5 Advanced Rigging with Duik Angela – Creating bone structure: So we now have Duik Install
here After Effects. And the next thing I'm
going to do is go ahead and bring in my artwork. So I'll click here to
go into the folder and select the girl
to character EI file, and then import composition retain layer sizes,
and hit Import. Yeah, and this is our character. I'll just click to go in, and I'll just control K to go into my composition
settings and change the color to white so as to see every part
of my character Clee. Yeah, so this is our character. We can see our character Clee. And these are, of
course, our layers. We can see that I have
named our layers properly with R and L for
right and left, okay? And on top of our layer, we have a joint layer. And if I just hide
this and enible it, you're going to see that this is actually the joint layer. This is our joint layer here. That's this layer with
the circles, right? And what this does
is it basically shows us positions
of our joints, okay? So the way we design
our character, it basically shows us the
position of our joints, okay? Because the way we
design our character, we design our character
so that part of our character overlap so
they overlap and create a circle so that those parts can rotate
around that circle. So if I just hit T for transparency or opacity and reduce my opacity a
bit for all my layers, apart from my joints, and I disable my joints temporarily, we're going to see that
these parts overlap, right? For example, the left
forearm and the left arm, they overlap and
create this circle, okay the circle that's darker. So these joint markers are just there to show
you the position of those circles because we need to place our ankle points for
these layers right here, right in the middle, okay? Remember, from the first
video in this module, we learned that we actually need to reposition our
ankle points properly at points like
this so as to help us achieve realistic movements. That's also true for using Duik. Okay, I'm just going to take
my past it back to 100. Now the next thing I'm
going to do is just select my joint layer and
right click on it and create shapes
from vector layer. Now, I've done this so that
it can be easy for me to kind of snap our anchor points to
the middle of these layers, since they are now joints, okay? So I'll select the
vector layer and shy it. And I'll select the joint
layer and just lock it so that we don't
select it accidentally. Yeah. And now we are going to reposition our joint for
every part of our character. Okay? Now, before I do that, I'll just do Control
K one more time and go to the
composition settings. And now let's look at some
features of our composition. We have the width and height, and I have them as 2000 pixels, and I've created them as 2000 pixels so that we get
the best resolution. Okay? We need to get the best resolution or high
resolution for a character. You can go as high as your
system can handle, okay? So 2000 is just okay for me. Now, that's because sometimes
you might need to zoom into our character in certain
parts of our character, and that will cause pixilation
or reduction in quality. Therefore, you have to make your initial
character design. In a high resolution, okay? And then for frame rt, I'm
using 24 frames per second. And for duration,
I'm using 2 minutes. Okay, you have to make
your duration a bit lengthy so that after we
are done again later on, you might not run out of time, and need to start
increasing your duration, which would then cause
things to be complicated. Okay? So just make your duration as long as possible initially. So you can even
make it 3 minutes. Yeah, 3 minutes, 30 seconds, okay? And it, okay. I will now collapse
this and just make sure every layer now is up
to 3 minutes, 30 seconds. Including my joint layer, but not really including my
joint layer because I don't need that joint layer
to be that long. If only I can, if only I can have my have my ankle points placed
on the first second, okay? So it's just a temporary layer. We don't need it
to be that long. So Controqa motion and make
sure everything is perfect. And yeah, everything is
perfect. We just hit okay. And now let's start
positioning our ankle point. So let's start with this guy, make sure my joint
layer is enabled. So for this guy, our
ankle point is supposed to be here because the rotation
is happening here, right? So just take your ankle
point and bring it here. Now if you hold down control, you are now able to
snap to the middle of your joint layer. I'll just zoom in one more time and select this and
hold down Control. And yeah, now I've
snap in the middle. Sometimes it gets a bit
difficult to do that. So if it gets too difficult, just try to do it manually, since we have very little circle in the midst of in the
middle of this big circle, which will make it really easy
to please our ankle point. Yeah, so I'm just
going to do that for every other parts
of my character. This is the torso
and for the torso, let me just isolate
this and also this. So for the torso,
we actually need the ankle point to be here. Okay? We need to be here.
Build the hip also. So we need it to
be here. So select the torso and bring
your ankle point here. Zoom in and make sure your
ankle point is right here. Put on control and
snap it properly. And then for our hip, I want my ankle
point for the hip to be in between the two
joints for my two thighs. Okay, so I'll bring it here
in between here like this. Perfect. And I'll unsolu all layers so I can go ahead
and walk on other parts. So we are done with the arms. Sorry with the left arm and the left hand and
the left forearm. So now let's go ahead and
do same for the right arm, right hand and right forearm. So I'll just isolate
these layers. So also with my joints. And for my forearm, the ankle point should be here. So select and drag
my ankle point here, for my forearm, it
should be here. Then for my right hand, it should be here. Perfect. On isolate them. And now let's move
to the next guy. Let's work on the
head and the neck. So the neck, the ankle
point needs to be here. Okay? Yeah, it's perfect. And for the head, it
needs to be here. Perfect. Now, let's
work on the leg. So for the thigh,
for the left thigh, ankle point needs to be here. Yeah, for the left leg,
it needs to be here. So my control is
not working here. I'll just do this manually. Please this manually. Perfect.
Now for my left foot, my ankle point needs
to be right here. For my right foot,
needs to be right here. Good. For my right leg, it needs to be right here. For my right thigh, it needs to be right here. Yeah. So we have our ankle points perfectly
set for everything. Let me just set also the
ankle point for my hair. This hair. All we need to do is select
it and bring it here. We need it to rotate
from this point. So that, it rotates just like, Okay, it's not
really doing well. Okay, we are actually
not going to be animating it anyways, except if we're going
to be animating it. Let see. Let me try
different location. Let's see here. Okay, yeah, let's just reposition
it here. Perfect. Yeah, and now we've
perfectly repositioned all our anchor points to
their appropriate locations. Now the next thing we're
going to do is actually go in and learn how to use Duik. Yeah, so this is the
interviews of Duik. This is what you get when you open Duik for
the first time, and I'll just click and reposition and dock my Duik
right here one more time. Okay? Yeah, so this
is what we get. This is the first thing you see. And these are the
list of the sections. We have the OCO meta ik section, which is the open
cutout meta ik section. We have the boon
section, the links and contraints section, the controller section,
the automation section, the admission section,
the camera section, the tool section, the get help, and so on and so forth section. Yeah. And all these
sections can make Duik seem a bit
cumbersome, okay? Because there are
lots and lots of features right in
all these sections. Okay, but you don't
need to learn how to use every feature
here because you don't need the knowledge
of every feature in Duik to be able to
create custom rig. So we're going to
just learn what we need to learn to create custom what we need to
learn to create good rigs. So here am I in
the first section, which is the open
cutout section. And this is just a
library, four rigs. You can come in here, select a rig that has been created for us and apply it to our
character with just one click. Okay? So if I just
go into Ant for example or anthropods,
for example, I can click on Ant and create a rig t for an Aunt character. Similar for Scorpion, and
this list keeps increasing. Okay? The list keep increasing. We can also create
our rig and save to the open cut out
metal rig library. Okay? So there are different
types of characters, the birds, which
include the chicken, the penguin, the rooster, and we even have
the plantigrade, which include animals
like the bear, the emo, the monkey,
the rabbit, okay? Go back and select the hominoid, which includes
gorillas and humans. So for our human character, this is what we are
going to be using. Yeah, so I'll just go ahead, create a new composition named
this composition Angela. And hit okay and name
our character Angela. Now, this is just a test. We are not really going
to be using this. I'm just trying to create a simple rig and show
you how it works. So it's telling us to
hide layer controls, we just hit Ignore because
we don't have layers anyways for new composition. So we see that Duke is creating our rig
automatically for us. And screting it and parenting the different parts that
need to be parented, okay? So it's parenting
the tip to the root. Okay, it's parenting
the tip to the root. Yeah, so this is an
arm, as you can see. You can take your rotation
tool and rotate this, and you're going to see
that the entire arm will rotate with it. Okay? And we just created this
with the click of a button. Yeah. So you can
select your bones. You can even go into
the effects and control panel and have
lots and lots of settings, even the color of your bones,
the size of your bones, and you don't need to
change them from here. You can just come to the bones panel this panel right here and click on select Bones
click on Select Boons, it's going to select
all your boons. And you might not
see your options, just like how I am seeing them. Now, in order to fix that, you can click here. Right here that edit settings. And now, under this please, you're going to see
standard in yours, okay? You're going to see that
it's set to standard. Now this is just
different levels of experience with the
software or with the script. So for you as a beginner, you need to come
and select Rookie. Now, what rookie
does is it creates text labels for all the
parts in Duik and gives you text explanations
for all the features so that you can
understand properly, understand what feature
that is and what it does. So just do that and click Apply and it's
going to apply that setting to your
Duke Angela script. Yeah. So here we
are one more time. We can go into the
open cutout section. And we've looked at the
open cutout section, just go to boons and select your boons by clicking this button and now
go to boon settings. And in boo settings, we can actually edits buns. So for example, we can edit the side that our boon appears. Is it the left side
of our character or the right side, the location? Is it the front or
back, the color? Click color and just skim
between colors, right? So we can see that as we click
here, the colors change. When you have your color,
you just click Apply. That's the color you want,
you just click Apply. It's going to change the
color for our character. Yeah, so we see that
the color has changed. And same also with
the size can reduce the size of our bones if
our bones are too big. We could make this 50%, okay? And it apply. And yet, you can see
that the sizes of our bones have decreased. Yeah, not just only our bones. We also have a feature
named envelope. And this envelope basically
creates an envelope for our rig and gives us what our character would look
like or should look like. So this can be a first step
for design our character. We could even start
design our character from After effect, because we can reposition this. We can move things around, okay, move our rig around
to the push we want, but this is just, by the way. This are the main thing
we should be looking at, so we're just going to
delete everything here. Or select boons and
delete everything here. There and delete. Good. Now, let's go back to our composition to
our girl composition. And for this girl composition, I'm just going to first of all, delete the extra composion I created and rename this Angela. So our girl composition
should be Angela. Perfect. Yeah. So just close out of the boon settings, and now let's go ahead and create boon structures
for our character. Let's go ahead and actually create bone structure
for our character. So there's a very
easy way to create boon structures in Duik. We just need to select the parts from the roots to the tip. So, for example, for arm now, we have to select
from the arm, okay? And then the forearm
and then the hand. So you have to select
them in the order which they occur, okay? So, of course, the arm has the ultimate control over the forearm and the hand, right? That's how you need to
select your characters, or your parts, and then
come here under bones. Come and click on
this huminoid option. And you're going to see
that we can create an arm. We can create a leg, we can
create a spine and a hair. And of course, this is an
arm we want to create. So just click on this
arm Options button. That's the gear box. Or the gear icon, and you're
going to see this interface. And for this interface,
you can pin it, you can close it, and you
can select your options. So for our hand, we need a hand, a forearm and an arm, right? But we don't need a shoulder, and we can then
select the position, which is left, of course, because we've named it properly, and then the location, which is the front, right? So this is all you
need to do in hold on control. And click here. So if you on control
and click here, it's going to
automatically perent our bone structure to
our okay to our hand. Yeah. So if, for example, I take my rotation tool now and select this and
just rotat this, we're going to see that
everything will follow along. Okay? It's meant
to follow along. I don't know why it's
not following along. Everything is foling
along. I love this. You can see how easy it was creating this very
first step, okay? Yeah, so we just need
to take the tip of our rig here and bring it to the tip of our fingers. Perfect. And I don't like the
colors because the colors are not tanding out
from our character. So I'll select all my bons here and then go to color settings and
just change the color. Just change the color I
don't need the envelope, so just sect the envelope
and just change the color, hit to this color, and just okay position this a bit more so I can see my
apply button and apply. Good. So we now have
our boons tending out. Perfect. Now the next thing I'm going to do is, of course, close out of my boon settings and do the same thing
for the left arm, right? Or for the right arm. So we have our torso in
the way we can just hide our torso and now
select our arm, our right arm, and then the forearm down shift
and select it. And then the hand in that. Okay and then click here, then click on the
arm Options button. And now Dukes intelligent
enough to know that this is now the right arm because the last one we created
was the left arm right. Only that we need to change this to the back, not the front, pull down control again and
click here to reposition everything or to reparent or to parent our bones
to our hands, our left hand, okay? Everything is
positioned properly, can take our rotation
tool and try it out. Okay, we can see that we're
getting that same error we got initially, but
this one is working. Now let's try working with
this. Yeah, so it's working. Apparently, I think
we're selecting I was selecting the arm instead of
the bone structure, right? So you need to actually select the bone structure, not the arm. Okay, not the arm, but
the bone structure. Okay, that's this bone
structure right here. And again, I don't
like the color, so I can just select them and change the color,
and change the color. So I'll go to my bone settings, change the color to
something that turns out. So this should work. Yeah, this turns out better. Close out on my bone settings
and go ahead and do that to my thigh to my left thigh, my left leg, and my left foot. Click here. And this time, we are creating a leg. So click on the leg options, and we need to have the tool
selected, the foot selected. Okay, let's just do
that one more time. Yeah, so we need to
have our tool selected, our foot selected, our calf selected, and our
thigh selected. And this is actually
the left foot, and it's actually in the front. So do this, click this a couple of times to
bring this to the front, okay? And then hold on
control and click here. So it's going to take its
time to create our foot. Perfect. And now that we have our foot bone structure created or our leg bone
structure created. The next thing we're
going to do is just go ahead and fix this. Okay? So what you want to do is click this and bring it here. Like this. Okay? And
then just click on this joint and
bring this joint to the tip of our foot, okay? Just like this. Then the
next guy will be this guy. So click this and bring
him to the back like this. I find it difficult to click
and select so you have to bring the joints
to the back of foots. Just here. And this one actually
needs to go a bit below. But if I move it, it's
going to affect this. So there is what we
call the edit mode. You can select a bone, which has been parented and
click on the edit mode, and it's going to temporarily
unparent everything so you can manually take it
to your location. I'm just going to
hide my joints layer. So you can manually take
it to your location, to the desired
location, it should be at the tip like this. Okay? So you can
manually take it to your desired location
without affecting the child. You get the point. So do that. And for this one, I actually think bringing it here
will be better. Yeah. So let's select this
guy and bring him here. For this guy should be here and then click out of the Edit mode or
click the Edit mode back. It's going to that of course, while having the boon selected, the boon which we
enable Edit mode for, you just click back
and it's going to present everything
back properly. So this is what we want to
have for our character. I'll click this one more
time and enable Edit mode. And let's just bring this here. Okay? Just bring this
here. Click back. So we want to have our foot looking like this
for our character. Yeah. So the next thing we're
going to do is test this, select this and just select your rotation to and
try to rotate your leg, and it's working perfectly. Good. So let's go ahead and
do that to the other leg. So select the right thigh, the right leg and the right foot and go
into your humanoid, click care, and click here. This time, it's the right one. Yeah, sometimes moving this little box gets
frustrating time. So it has to be the right this time and
it should be at the back, not at the front on
control, and click. Everything is being created
automatically. Perfect. Now the next thing we need
to do is just go ahead and, of course, reposition
our joints properly. So we're going to start
with this joint right here. Just select him bring him here. I select this guy and bring
him here just to the tip. Because we want to create our rig in such a way
that our character can stand on the tip
of his toe, right? Yeah. So that's why we
are taking much time to create the rig for
the foot like this. Yeah. But if you don't
want that feature, you can just create a normal
food or simpler food. Yeah, so you want
everything set out just like this for
the right leg. Yeah, let's rotate this to see if everything
is playing well. Perfect. And the next
feature is the spine, okay? So we need to create the bone
structure for our spine. So we're going to start with
the foot. So with the hip. So select the hip and
then control and select the torso and then
control and select the neck and then the
head in that order. So click here and click
on spine this time. Click on spine options, and we need the hip. We need just one layer of spine. So I'm just going to hit one, put in one here,
and then the head. Okay. Perfect, and then
hold on control and click here to perent everything and
create the bone structure. Perfect. Now, let's go ahead and reposition the tip of
our head just here. Bring the tip of our
head here, okay? And just like that, we
have our spine created. We can test this by
rotating our boon. Yeah, and everything
is working perfectly, except that the features of our fist are not
fully in the head. So we need to perient the
features of our fist. That's the eyebrow,
the eyes, the mouth, parented to our head, and also the extra
hair we created here. It also needs to be
parented to the head. Yeah. So everything moves
along with the head. Now, let's try rotating
our head or neck. Now we're going to see that
everything follows the head. Yeah, so that's what
we want to have. And right now we have
everything perented properly. Everything has been
perented properly, okay? And all bron structures
have been created. So we can go ahead and
start regain our character. Now we'll do that
in the next video, so see you in the
next one. Bye bye.
6. 6 Auto rigging & Cleaning up: So our bones have been created and have been parented
to our artwork, and this is probably a good
time to save your work. As you can see here, I've gone
ahead and sieved my work. Do it regain. So just go
ahead and save your work, and now let's continue. So the next thing we're going to do is just try to clean up our scene a bit to enable
us to rig our character. And the first thing I'm going
to do is select my bones, and I will just rename my bons. Yeah, I will renew my bones. This is something I
should have done earlier, but I failed to do that, and I will renee my bones now. So I will just go to bone
settings and go to group name. Click on group name
and our name is Angela and look for
the apply button. It's way down. So this is the apply button,
I just apply it, and now we should see that
all our bones get renamed. And this is a very
good way to work, even though I didn't
do this initially. So let's collapse
our angela back. And the next thing I'll
do is just duplicate my angular composition
so that I can always go back if I get into trouble. So just select it and come
to edit and duplicate. Okay? So I'm just having
it as Angela too. So back into Angelo one. I'm also going to
delete this composition one because it's useless. Yeah, so now back in our Angelo one or back in our
Angelo composition, the next thing I'm
going to do is just go ahead and delete some unwanted layers
like our joint layers. Our joint layer, we
really don't need it, so we're just going to
delete it and yeah, basically, that's the layer
we're going to delete. I think we have one
hidden as well. So this joint layer as well, we're going to delete
this so that we only have the parts which we
are going to be rigging. Now the next thing we have
to do is select our bones. Okay? You can do that by just
clicking on this button, but I just did that
manually here. Now, after you
select your bones, the only thing you have to do
next is just click At Rig. Click A to Rig, and it's
going to tell you to hide your layer
controls because they, of course, will slow
down your process. So I'm just going to click
Hide Layer Controls here and do its magic
in the background, do all the calculations
and the expressions, and do our gain for us. So our auto regain is
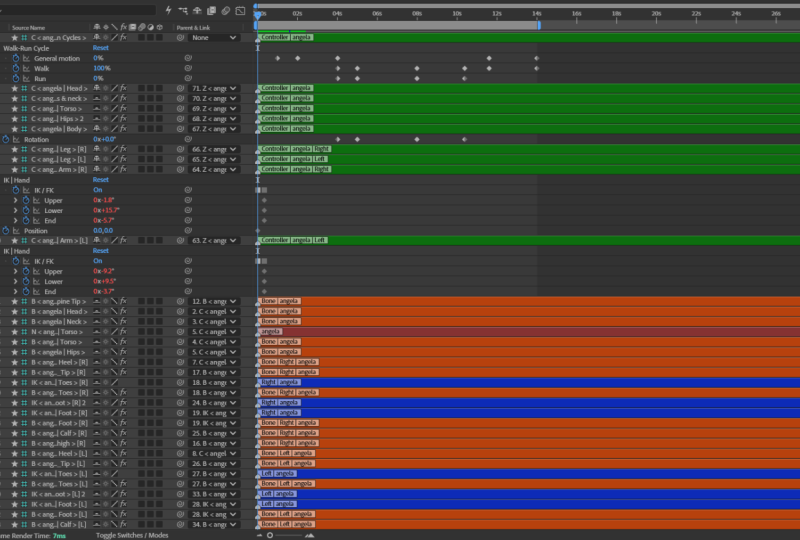
completed, and as you can see, we have new layers that have been added to our layer stack. And the way Duke creates and organizes these
layers is just incredible in the sense that it creates them
with layer tags, with layer colooring
and so on and so forth. So it's very easy to
actually work with them. Like we can select
each layer group. Let's say we want
select the controllers, which are these ones, we can just click on
the layer colors, and then select each layer
with that particular color. Okay, so that's a really
incredible way to work. And yeah, so the next thing
we're going to do now is just go ahead and
clean up our scene. We have too many layers
which we don't want to actually be seen
in the layer stack. Now, the first thing
I'm going to do is just hide my bones. Okay? So we can hide our
bones by coming to the bone section
and just hide bones. So hide bones, and all our
bones will get hidden. You can see it cleans up
the scene a bit more. Yeah, now the next thing
I'm going to do is just go ahead and lock all
my artwork layers, Lock also all these layers. Apart from my controller layers. Our controllers are
these little icons, let me just zoom in here you see these little icons
that Duke has created, which enable us
control our character. We just go ahead and
clue all these layers. Sorry. Go ahead and
log all these layers. I'll just click and drag
and then also hi them. I'll select not really select. I'll just enable my
shy option here and then click and drag
and hi all our layers. Yeah. And of course, enable the shy switch here.
Just click here to go back. And yeah, so we have
only our controllers. And now let's go ahead and
clean up our controllers. You can see that we have
the first controller here. It's a head controller, and we have effects
under it, right? So this is the head controller. It controls the head.
Controls the head. And before we kind of go in and mess up with
the controllers, there is one more
thing we need to do. We need to select
all our controllers here and hit P for position, and I'm just going to enable
the position property here. Now, we're going to see that we have different
values for position. And this is our neutral pose. This is our initial post, and we should be able to always go back to
this initial post. And that means that if we
mess with our controllers, it's going to be hard
for us to go back to our initial push because
we are then going to need to memorize these values and apply them correctly to
go back to our initial pos. And that's nearly impossible
or even impossible, okay? So how do we fix this? We can fix this by selecting all our controllers minus these ones that have
zero, zero, okay? Or you can select all of
them and just click here. Go to links and cotrans
and just click on t zero. Now, if you click on At Zero, what after effects
does or what it does is it creates null objects for our controllers and
gives us the ability to go back to our initial
post by just typing in 00. As you can see now, every
value here is 00, right? Every value here is 00, so it means we can just
mess with our controllers, and all we need to do is
just type zero, zero. And we are back to
our initial pos. So this is a very
important thing to do. So always make sure you do that before messing with
your controllers. Yeah. Now, let's go ahead and
see our controllers. Let's select the first guy.
This is the head controller. Or we can go into the effects and controls panel here and open the icon menu. And now we can actually increase the
size of our controller. Okay, we can flip it
so that it's facing the actual position of our head and then or the
actual direction of our head, and we can even move it. So we can move it just behind our head so that it
doesn't obstruct our view. If we want, we can
change the color by of course clicking here. Yeah, so that's the head for us. Maybe I will just
reduce the size a bit. And the head does this, it controls the head, right? Yeah. And we can see
that after doing this, the bounding box for our
controller now increases. That's because the
anchle point for our controller is here. We can bring the
anchle point back to the position of our
controller by going into the anchor option here
and just make the size. Hid enter. Now, we see
that the bounding box is brought has now been brought to the position
of our controller, and this makes it easier
and cleaner to work with. Yeah. Now the next controller is our neck controller or
shoulder controller. Yeah, it controls our
shoulder just like this. Okay? Without
controlling our hips. Okay? It controls our shoulder without controlling our hips. Yeah. So we just undo that or
bring the value back to 00. And now, I'm just going
to make this bigger, open the icon menu, make this bigger and position it also to
the left hand side. Go into the ankle
and make this zero, so we can control
it right from here. Yeah. I'll do that to
all the other ones. This is the torso controller, control to torso and it rotates from the torso
anchor point, right? So we can just go into the
icon, make this bigger. Okay, and position
reposition it. Okay, sorry, not orientation, but position reposition it here. And for anchor, we
can make a size zero. Yeah, and positioniyF
this shoulder, we could make it bigger. So increase the size
maybe to just this. And yeah, we can see
this is the ankle. So this torso, we can
use this to control the torso just as
you seen. Okay? Control the torso. And sometimes these controllers can
do some wet stuff. But there is this
really important one, which is the body controller, which I have
selected right here. I would just go into my icon, make my icon bigger and
position it just outside here. I'm going to flip it so that it's in the
direction of a carta, take it a bit lower, take it
a bit further from the body, or maybe just reposition
it here and then move the torso controller, a bit up Yeah. Now, this is the most
important controller, the body controller, okay? It controls the entire body. And if you want to
control the entire body, I would suggest you use it, not these other ones. These other ones should be
used when you want to create little movements around the specific part
they control. Okay? But if you want to
control the entire body, you should be using
the body controller for the anchor point,
just make the size. And yeah, this is
the body controller. It's the most important
controller here. So it controls
everything in the body, but the hands, the torso, the hips, the legs,
you get the point. Yeah, so the body controller
next is the hip controller. Open the icon and
make this bigger. For this, we use this
to control the hips. So you can just actually use
the rotation only for this, and you see we are controlling the hips by just rotating
the hips controller. Yeah, so just
position it properly. And sometimes we
might don't need all these controllers, really. Sometimes the body controller
and the limb controllers, that's for the
hands and the legs are just enough to do
all the job for us. But this is how we clean
up our controllers. We clean up the ankle, make the ankle just in the middle and the position
and the size as well. Yeah. So that's it for these controllers which
control the spine. The next ones are the
ones that control the hands and the feet. So for the hand, this is
the left hand controller. You can see us it to control
our hands or left hand. So I'll just open up my icon and make my icon
bigger. It's too big. I will rotate it to 180 degrees and just
position it right here. Below my hand and I'll just flip it so that it aligns with the direction of my
hand and then go into my uncle and make
my uncle size zero. Yeah, so that we have
this incredible, we can rotate it
rotate our hand. Hello and move it to
move our entire hand. Yeah. Next is this guy to select the controller,
go into icons, reposition it here,
rotate it to 180 degrees, flip it, resize it to the appropriate size and move it and then the uncle,
we just need to bring the uncle size to zero. Yeah, and then we'll go ahead and work on the
fifth controllers. So for the fifth controllers, go into the icon or make this bigger teeth
our teeth eats. And position it properly. Maybe make it even bigger
position it properly. And for uncle, we're
going to make this zero. And do the same thing for
the right foot controller. Yeah, so just like this,
we have gone ahead and worked on our controllers. Now, I'm going to hide some of these controllers because
I didn't need all of them. I will hide the
hip controller to select the controller,
hide it here. Okay? Yeah, just hide it here and lock it so that we
don't select it accidentally. Now we only have the head. And also, I think I'm
going to hide the torso, so hide the torso
and also lock it. So now we only have our head, our neck and shoulders, and also our body controllers. Yeah, the next thing we
do from here is just go ahead and see what some of the things we can do
with our controllers or some of the effects
we have right here. Just close this up and I'll
select everything one more time and hit P and make
our positions zero, zero, so that we go back
to our original pose. Now, I just will select
my right hand controller, and now under my
effects and control, we have IK effect added. Now on the here, you're
going to see that we have an option for K FK, and IK and FK are basically two systems by which we
can control our RIG. In animation, in
character animision, we can either control
our rigs by IK and FK. And the difference
is that for IK, the computer goes in and does a bit of
calculation for us, so it gives us limited
options to edit. So it gives us limited options
to manipulate manually. So in this case, we
are actually using the IK because we have
the handles here, and we just need to
manipulate these handles, and the computer automatically controls how every
other thing reacts, okay, how every
other patch reacts. Okay? But for the FK, it gives us the
ability to control everything manually,
everything manually. So the FK is kind of
giving us more controls, but things can get a bit too
complicated using the FK. So sometimes we're going
to switch in between the FK and IK systems while
animating our character. Okay, so while having
my hand selected, I can go into my IQ settings, and I have some controls
here. I have some options. Let's say I kind of move
my hand this, okay? We can use the side
option here to actually change the
side of our movement. So right now, it's set to 100%. If we make this mis 100%, we're going to see that our hand moves in the opposite
direction, right? Moves in the opposite
direction, just like this. Yeah, so this is just
a way to kind of control the direction
of our movement. Yeah, so we could
take this back to 100 to have the initial. Same also with our foot
and all other parts. So our food also
has the direction. Food controller also
has the direction. Let just zooming
biting with our foot. So with our foot non, you can
see that can make this site 100 and we are turning the direction of our character towards the left hand side. Yeah. These are some of the very few options or some of the options we can get with
this or we get with this. Now, if I just disable the Ike, we will now be able to use the F key to manplt
our character. Let's just take this back to 00. Oh, no, even take this back
to 00 so that we can see the effect of disabling our IK. So if I select my IK handle now my controller and disable my IK, we're going to see that
our character then goes to the FQ wood, and now we can use the FQ wood to manually control
our character. And since we have our characters
hand features locked, we won't be able to
actually select this, but we can select our controller and just open some
of these settings. And now with these settings,
we can go ahead and say, go to FK. So we can open FK
and now manually manipulate our body parts. So we have our body part and we can manually
manipulate this using the FK option because we have gone ahead and disabled
the IK option right here. So if we enable the IK, we'll go back to what
we had using the IK. I'll just reset
this so that we go back to what we had initially. Make the 00. Yeah, we can see that we've actually
messed up our character. Yeah, so I'll just do Cont Z, Country Z a couple
of times to go back to what I had initially. Yeah. Now we have everything
looking normal now, 000. All we needed to do
was just make this 000 and everything will
go back to the initial. So I suggest you just
work with the IK. So just work with the IK.
It makes things easier. So whenever we want
to use the FK, we just go ahead
and disable the IK and basically use the FK. Yeah. So that for
the hand handles, and then for the leg handles, for the leg controller, we
have a lot of options as well. Of the controller option, we have the foot IK option, which works just like the one we looked at for the hands, right? We have the FK, which we
can control the upper, lower end manually when
we disable the IK, okay? And right under the foot rule, we have some options here. We can actually edit our toes. Okay. And right
under the foot rule, we have the tip toe, which enables us do
this to our toes, okay? So we can use the tip
toe option to make our character tip toe,
okay, just like this. And we have the heel as well. Okay, so our character can do this and we have the foot rule. And these are some really
advanced rigging features. And we achieved these
controls due to those limbs or those
bounds we added to our character's foot when
we were placing the bones, if you remember correctly, yeah. So that's what gives us
the ability to manipulate the foot in this manner,
in this manner, yeah. Yeah, so these adoptions, we get with our foot, and we've basically
seen how all this work. So in the next video,
we're actually going to go ahead and start animiting our character to make our character move
and perform actions. So that's it for this one. See you in the
next one. Bye bye.
7. 7 Walk run cycle animation in Duik Angela: So in this video, we're
actually going to go ahead and create our walk and run cycles using Duik automatically here
in After Effects. So the first thing I
will do here is go ahead and read enable these
controllers and unlock them. And in order to create
our run and walk cycles, we just need to select
all our controllers, select all your
controllers and go to the automation and
expressions section of your Duik Angela in. Or script, and then all
you need to do now is just click on walk run cycle. Click on it, and Duik is
going to run its magic in the background and create
our run and walk cycle. And our post will change here, and my character is
looking really weird. Yours should also
be looking weird. If you followed all
my instructions. But don't worry, we're going
to fix this just in a bit. If we try playing, now we're going to see our
character actually working, but our character is working
in a very weird way, and that's because of the way we designed our character or the way we positioned
our character. So our character is positioned
on the left hand side, and that's why our legs
are looking like this. Our left leg is looking
like this, okay? And also for hands, let's go ahead and
fix our hands. Why are our hands not
moving correctly? That's because of
the weight option. So if you go into
your effects and control panel while
selecting your hand, you're going to
see weight at 100. So you just need to
relax this, okay? So as you relax this, you're
going to see that your hand is now moving freely, right? So you just have
to relax this to see 0% or close to zero, okay? And do same with this
other hand here. So I'll relax my
weight to see zero. And now if I play this, you're going to see that
now we fixed our hand. Okay, we fixed our hands. So our hands are swinging
how they should, okay? The only thing left is
just our legs, right? So for our legs, we're
going to go ahead and start by selecting the
most affected leg, which is our left leg, which is this leg to select him and go into your
effect and control panel. And right here, we want to
actually change the side. We see that the side is -100. We want to make this plus 100. So just remove the minus
and just make this plus. And now we see that our leg is now in the right
location, okay? So when we play this now, it's looking way better
than how it was looking. Before. Okay? So in order to
enable us play this better, I'm first of all, going to
reduce my resolution to half. And then I'll just come here, and now you're going
to see this new icon. And this icon was
created because we created an automatic
walk and run cycle. So it's basically the controller for our run and walk cycles. Okay? So just select it and
just come to icons here, and I just want to
actually make this bigger. I'm going to make this bigger, and I'm going to position
this or reposition it here. Just outside there so that
it's easy to select, okay? So when we select our guy now, we are going to be able to edit features of our animation. As you can see, there
are lots and lots of options to customize here, okay? Well the first thing
I'm going to do is come to computation to
open computation. And on the computation, we see that these values are used to compute the admission, okay? So they can be helpful
for your own expressions. So we have the cycle
frequency, which is one. We have the cycle duration,
which is 1 second, and we have the cycle
duration in frames, which is 24 frames
per second. Okay? So this tells us
that if we reduce the length or the duration of our work cycle to 1 second
or to 24 frame trader, we are going to be
able to complete the entire work cycle and if we make that the
length of our play time, it means we can
keep looping around our work cycle without having
to render all through, which will make play
now animation easier. What I want you to do now is just come here and click here. If you click here,
you are now going to be able to type in
the frames you want, okay, the fim you want to
position your time at. So now, since it's 24
frames per second, we are going to
position our time at 23 frames and hit enter. So it's going to take
this to 23 frames, and we want to trim our
composition, or our time rather. So in order to do this,
the easiest way to do this is just to
hit on your keyboard, and it's going to just trim
our time to to 24 frames. It means we can now play
this and we're going to have a smooth animation because it's playing around
our animation cycle. We don't have to
render all through, and that makes it easy. So we just close this computation and now
let's go ahead and see what else we can do to make our character look normal because it's not looking normal. The next thing I want
to do is just select my body controller and just
reposition this a bit, maybe to the front. Yeah, reposition my body
controller just like this. Now let's play this
and see what we get. Yeah, this is better.
This is better. Yeah, this is incredibly better. Now, the only thing we have
to fix now is our foot. You can see how our foot is
being rotated very awkwardly. So the next thing I'm
going to do is just re select my animation controller, and I want to just go
into my settings now. Okay? So for my settings, I'll just go into
my leg settings. So just come to
your leg settings, and for my feet height,
it should be 25%. For my feet rotation, I'll
just reduce this to say 45%. So let's make this 45%. And now let's try playing
our admission and see. Yeah, and you can see
that our admission is now playing very beautifully. Now the next thing
I'm going to do is just go ahead and hide some of these controllers
that we don't need. And actually, we don't
need any other controller. So I'm just going to
hide all of them. Anyone shi them. Even lock them and
probably shi them. So for my shy, I want to just
enable this and shi them. Okay. Yeah, try
them. Click here. In order to make my timeline
longer, I'll just click, go into columns and just disable my parents and link so that
we have more time here. Good. More space rather. Now the next thing
we're going to do is just go ahead and see
some of the options we get with our animation cycle. Controller. So right now
we are basically working. Our character is
basically working. And this is incredible because if we were to
admit this manually, we won't get it this easy. It takes a lot of
work to actually achieve an admission
that looks this good. Okay? Admission is really stressful and
complicated endeavor. Even the simplest animations are usually difficult to create. So Duik makes things
incredibly easy for us, and that's just amazing. That's not all we can do with our automatic
run and walk cycle. There are so many
options right here, and we're just going to
look at them right now. Now, if you open
your general motion, which is the first option here, if you open this, it's actually
a slider which controls the motion of our character. So let's make this zero. If we make this zero,
we're going to see that our character is now static. Character is no
longer moving because our general motion is zero now. Our general motion controls our work cycle and
our own cycle. As we can see now, with
our general motion at 100, our character is now working because our work
cycle is also at 100. We can reduce this to actually reduce the rate of work or how much our
character is working. Yeah, so we can see that our
character is now working slower because I've
reduced my general motion. You get. That's basically what the general
motion does for you. It controls the walk cycle
and also the run cycle. Now let's just make our
general motion 100 and make our walk cycle zero and our
run cycle, let's see 85. And now we're going
to see that our character is now running. Yeah, our character
is now running. Incredible. Good. But we can notice some weirdness
with the running, and that's because our
cycle duration has changed. So we can now see that
because we increased the speed of our character or because we made
our character run, our cycle duration is
now 17 frames, okay? No longer 21 frames, what is it 21 or 23? It's no longer 24 frames. So we have to change
this to 16, okay? We have to change
our play duration to 16 and hit N. Okay, to trim this to 16 frames, okay? Because we have 17 frames
as our cycle duration. Yeah. So now when we play this, our loop will now be perfect. So we are not having that
weirdness any longer. Incredible. Now, let's just go up and now we've looked
at our general motion. We've looked at our own
cycle and our work cycle. Now, let's open the
character and see the options we can manipulate
under our character. We have the first one, which is the character height, okay? And the best way to see how
this thing works is just by actually boosting up the values to basically see what
effect they give us, okay? So the character height, I
normally don't mess with this. Most of the time. So it's just the height of
our character, right? Like, because I
increase the height, we can see the wetness we get so I normally don't mess
with character height. Yeah, but for the energy, it basically increases the
energy of our character, how active our character can be. Okay? So let's make this 60 so you see the
boost in energy. Now, we can see that our
character is now running, and the movement is
very exaggerated. I think 60 was too much. Let's see 30. T 30 will give us a
good exaggeration, not too much, but
a very noticeable. Yeah, so you see there is an increased energy
in our character. And the softness is basically
how soft the movement is. Yeah, so that's it for the
character on the walk cycle, we have the work speed. We have it at -100, because it's going in
the left direction. If we make this plus 100, we're going to see that we will now go in the
opposite direction. So in this case, it's going to kind of
reverse our character. It's going to reverse
our character. But of course, our
character is not working, so we are not going
to see that work. Our character is running. So if we want our character
to reverse while running, we will have to change
this actually to 100. Yeah, that's the run cycle. So now we're going to see
that our character reverses. Okay? Running the opposite
direction. You get the point. Yeah. So I will just
give this a bit of work and a bit
of run so that we get to see options for
boot workalk and run. You get the point.
So for my run, I'll just make this
-101 more time. And for my work, I'll just keep this as -100. Yeah, so that we have a
mix of boot work and run. Yeah. So next thing
I'm going to do is go ahead and look at
the walk cycle type. So we have it set to realistic. We can select dancing, and it's going to give
us a kind of funny walk, kind of funny walk. We're not seeing the
effect very well. You know what I'm going to do? I'm just going to
make our run cycle to zero and just make
our walk cycle C 85 hdenta so that we get to
see the options properly. Let's go back to my computation and we are just going to turn this to 23 so that everything
happens in a loop. So make this 23 and hit in on your keyboard
to trim the time. Yeah, now we can see the effect we get by changing
the type to dancing. So let me just change
it back to realistic. So you see that we actually
have a realistic work cycle. So this is what we know as
a realistic work cycle. We can actually now
turn it to dancing, and now you're going
to see that our character is actually dancing. Yeah, our character
is actually dancing. We to turn this to 100. And Yeah, so our character is
actually dancing. This is a very
cartoony and funny way of admitting our character. So let's look at
the neck and head. Open the neck and head, now we can swing our neck and head. So you can see it has a
minus two degrees swing and plus two degrees
swing for our neck. So we could increase this maybe 12.8 degrees. And we don't want to
go wild with this because it can give us
some really weird results. Now, let's play this
and see what we get. Yeah, so we can see our
character's head is swinging. But the head and the
neck are swinging. Incredible. And that's what we get with the neck
and head swings. And let's close this
let's look at the body. So for the body, we can
actually admit the torso swing, the spine swing,
and the hip swing. Let's just make these values a bit higher and see what we get. So 12%, 10.7%, 9.3%, and let's see what we get this So you see what we get by
increasing our torso swing, our spine swing,
and our hip swing. I'm just going to
make my torso swing even higher. Say, 60%. And let's see how crazy
our character looks now. So we can see how crazy
our character looks. So we can go really
crazy with this. We can make our characters do really incredibly
crazy stuff, okay? Our imagination is basically
our limit here with what we can achieve. Yeah. So I'll give you the
6% for everything. Let's move to the next one. So close the body, and
let's see the arms. So this is the shoulder swing, the arm swing, the arm softness. And now we can also
open and control the left arm parameters and
the right arm parameters. Yeah, so there are lots
and lots of things we can control here. There are lots and lots of
things we can control here. So I advise and
see for yourself. But in order not to waste
so much of our time, I'm just going to go ahead and create a quick admission cycle. So I'll just make this longer. S 45 seconds. And now we're going to come here and create a
keyframe for general motion, create a keyframe
for walk and run. And also create a keyframe
for our work type. Let's select realistic
and just create a keyframe and go into the neck and head and create a keyframe
for head swing, neck swing, and also the body and create a keyframe
for the torso swing, the spine swing
and the hip swing. I'll just hit you on my
keyboard to bring up all our keyframes and
let's start animating. I'll zoom in and now
we'll go to 1 second. And just select all
of these keyframes and bring them forward. I'll bring them
forward to 2 seconds. And basically come
here to 1 second, and I just want to make
our general motion zero, so that our pus is maintained so that we start
from our initial pus, okay? Actually, I want to replace this keyframe with this one with the one where our motion
or general motion is zero, so that for 2 seconds, we start with our initial puse, and then we just start
increasing our motion 2-4, we going to make our
general motion 100. And then we're going to
make our work cycle, say 50 so that we don't start so far
so that we start just slow slowly and then come to the next second like the fifth second and
make our walk cycle 100. Okay. Then come to
the sixth second. Or even the seven
second just repeat this keyframe right here so
that in the eighth second, we are going to make our work cycle C zero, make our work cycle zero. But by this time, I want our run cycle
to have started. So we'll just come
back and right here, I'm going to just increase
our run cycle maybe to 10%. Okay. Well, I think what I'll do is actually
bring this q frame here. And for here, I'll just click here to repeat
the initial Q frame. So I run cycle will
start from here. And then as it's reaching
here, at this point, I want it to be
say 40% so that in the next 2 seconds our run
cycle will now be 100%. While our work cycle is
zero, you get a point. So let's try playing
this and see. Playing this might be a bit cumbersome, taking
a lot of time. So I'll just go ahead and create more key frames before playing
everything at the end. Now the next thing I
want to do is just make sure our guy runs for a bit to maybe runs
for for some seconds. So from the ninth second
to maybe the 14th second, or the 15 second. So go to 15 seconds, and I want to actually
repeat my Q frame for my run before finally slowing down my run to see ten. Yeah, and then from here on, we just want our work
cycle to continue. So I'll just go ahead and create a keyframe
for my work cycle here and then just continue
working down here. So I'm going to start by increasing our work
cycle to, let's say 50. And then we'll just
come here and increase our work cycle to 100. Okay? And at this point, I'll just make my run
cycle back to zero. Yeah, so that we
get this. Perfect. Now we have gone ahead and created keyframes for both
our work and run cycles. Now the next thing we're going
to do is just go ahead and create keyframes for other
aspects of our character. So now we are using
the realistic work. Okay? Using the realistic,
it's realistic. So before it starts running, I actually want to switch
it to the dancing mood. So let's see here, okay? So you just click here to create a
keyframe for realistic, and then you just come here
and make this dancing. Now, let's see. Yeah, so he's dancing, and then he starts to run. So for running, I
actually want as he starts to run or
as she starts to run, actually want her to run in the realistic mood, not
in the dancing mood. So let's just come here
and take this back to actually create one
more keyframe for dancing, then come right here
and take this back to realistic. Get the point. Yeah, so we can see that
our neck and head spins are actually looking funny
as our character runs. So, of course, we don't want
them to be we don't want them to be on while our
character is running, right? So we just come down and and we want them to actually stop as our character
starts to run. So we're just going to select all these keyframes
first of all, and just bring them
here and come to the next guy here and
just make them zero. So this is our head
swing, our next swing. So not really make them zero, but just reduce
the swing, right? So let's make this less
than three or 2.8, this should be C minus three. This should be plus one, this should be plus two, maybe this should be plus one. You get the point. Or just hit controls to see if my work, so she's running and
then she stops running. So right here, I'll
just click here to copy and paste my key frames, and I will now start creating
my exaggerated looks. I'll come here and just make
the head swing a bit more conspicuous and
now go some frames forward and make the next
swing a bit more conspicuous. Okay? So So when she starts working, the head and neck
will start swinging, and the exaggeration
will be much for the neck and head
swing this time. Yeah, next, we want to actually just bring
this keyframe forward because we want it to reach 100% work cycles before
the end of our animation, right before the
end of our time. I'm actually going to
bring this forward. Okay, forward like this. And for my head swing,
I'll make this. I'll take this
keyframe backward, and for my next swing, I'm actually going to
bring this forward, so that it starts after our head swing and then
for these keyframes, I'm going to take them forward and have them activated
at different times. You get the point so
that when we come here, we are not going to
create the next keyframe for our torso swing, which will be a bit exaggerated
or a bit too exaggerated. So let's see, 27%, and that will be
very exaggerated and I want that because I
want our character to look really cartoonish
and really dramatic. And then for the spine swing, I actually want this to be exaggerated as well.
Maybe that's too much. So let's say 15 and
seem also for our hips. Maybe 13. Yeah. And we actually
want to change the type, the admission type,
the work type, right? So right now, it's realistic,
as you can see here. So I want to just come in time, maybe come here
and create or come here around 17 seconds
and create a Q film, change to dancing so that we
can start dancing from here. You can start the dancing
work type from here. It's going to be really dramatic because it's going to be
dancing and it's going to have and she's going to have all these other fims that
make really funny movements. You get. She's going to have a range of funny movements here and then as you can
see, right here, I'll just come
right here, create a keyframe for my
general motion, come to the last fim and just make my general motion zero, so that we end our admission just on the last film,
you get the point. Yeah, before the end here, I'll just create a keyframe for my head swing
and my neck swing, and I will copy this keyframe. Yeah, I'll copy these keyframes. There's a way to copy
these keyframes actually using our Duik Angela plugin. You have to come to
the Admission tab or the admission
section and just select the keyframes and click on Copy Admission and then go to where you
want to pise them, which should be here and then piece Admission and
pieced animision. It's going to piece
our keyframes. Basically, we're going to have this and I think before the end, I should kind of change
my admission type, my work type too realistic. Yeah, I don't want it to dance
weirdly down to the end. Okay? So I just come here and create a new Q
frame maybe here. Now, you don't need to follow everything I've done
precisely because it's going to be really
difficult for you, okay? It's going to be really
difficult for you because I've just been
going with the flow. So just go with the flow
and create something cool. You get the point.
So I'll come to my type and create a
new keyframe here, and then come a bit forward and change this
park to realistic. Incredible. Then
we're going to end as realistic. Okay,
at realistic. Now that's basically what we want to create for this example. Before I ran preview this, I will select my keyframes, how easy is my keyframes to
seem with these ones under. So I'm not selecting
the square Q frames, just these ones, just
the linear q frames. So how easy is them. And now let's play and see
what our animation looks like. Yes, so our round
preview has completed. Now let's see what our
admission looks like. And this is what our
admission looks like. Incredible. And creating
an animation like this manually is really a
pin in the ***, okay? It's really difficult to create all these things by
manual keyframing. So we can see how much help
Duik does for us, okay? Duik is incredibly helpful. It simplifies all these
process for us and in fact, it's just incredible.
It's just incredible. If you had experience with admission or if you have past
experience with admission, you definitely testify to
the fact that it's not easy to pull this off within
this very short time. So Duik makes it possible, and we thank Duik for that. Yeah, we just keep
enjoying our admission. Just keep enjoying
watching our admission and enjoying what we have
been able to pull off. Incredible. Now the next
thing I will do is, I'll just go ahead and
render out my file, with a transparent background. So I'll enable
transparency here, and I will just hide
my controller so that it doesn't render
out with my video, because I want to actually
composite this on a new background in
a subsequent video. Yeah, so I'll just go
ahead and control. Or command them on
the MAC to enable our render queue and go
into the best settings. Make sure your settings
are just best quality, full, and yeah, hit okay. And then the uproot module, you have to select
your RGB plus Alpha. We first of all, have
to select our format, which is the QuickTime
in this case, and then now format
our QuickTime format enables us to export
RGB plus Alpha, which will in turn give us
a transparent background. So select this and hit Okay. And now we want this
render in full. And we can see that I
rent that one before, so we are just going to replace this heat render. And yeah. So that's it for
this video, guys. We will come to the
end of our video on creating our run and
walk cycle animations. Here in After Effects, we can see how incredibly
amazing the Duik script is. Yeah. So go ahead and
explore this script, go ahead and go crazy
and do stuff, right? I love to see the things
you create with it. And this will come to the
end of our video, guys. See you in the
next one. Bye bye.
8. 8 Facial Rigging with Duik Angela – Setting up facial rig: Here we come back in this video, we're going to learn how
to do facial rigging here in After Effects
using Duik Angela. So go into your folder and
bring in your character, and we are going to be using this facial rigging EI file to select the facial rigging at the below root of
file and click here and select composition retain layer sizes and hiding port. And I'll just going to
my rigging composition, and now you see this is the character we're
going to be using. I'll do Control K to go into
my composition settings. And you can see that this
is a three K character. So I've designed this character
in three K resolution, and I'll just change
the color here to a white color so we can
see all our parts clearly. Yeah, so this is our
character, very young boy, and we're going to
be animating or rigging this character
in this video. Now, here are my Adobe layers. As you can see, we have
layers for every part, just like how we did
for the body rigging. So for the nose, for the eyes, for the mouth, okay, left eyebrow, right, eyebrow, left eye, right eye, even the eyeballs, okay? The facial highlight
this little detail here. Okay? And we have basically
layers for everything. Now the body has just
one layer because we are not going to be
animating the body. So the body will be stagnant while the other
parts are animittd. Yeah, so all we
need to do next is select all the layers which are going to be involved
in our animiion, select all of them, right, click on them and create
shapes from vector layers. Create ships from vector layers. And yeah, now we have
ships from vectores. I'm just going to select
all my new ship layers and bring them on top
of our layer stack. So that we have our ship outlines and then
our vector layers. That's our Adobe files. So I'll select all of
these now and just delete them because we do
not need them any longer. And I have only my body layer as a vector file because
we're not going to be animating our body because we're not going
to be rigging our body, it's going to be stagnant,
basically, okay? So let's go ahead and
start working on this. Now, the first thing I need
you to observe is when you have your if you
select your layer, like the nose outline,
we're going to see that the bounding box for this
nose outline is big. Okay, the bounding box is the entire size
of our composition, and we actually need
the bounding box to be just the size of our sheep. That's our news in this case. And sometimes when we import our characters from Adobe ito, we usually get instances
like this, errors like this. And the easiest way to just
fix this is just to take your pen to and just have one of the ankle
points selected. For that layer,
that's for the nose outlines in this case,
and just delete. Hit delete a couple of times to delete that particular outline. Now you're going to see that we have another one, second one, that's because we have
multiple shapes in the nose. So all of these are
shapes that make up the highlight and
shadows of the nose. Okay? So all you need to do is just keep selecting and
deleting those anchor points till you get your
bounding box just in the shape or in the
size of your part. So I'm just going
to take my pen tool while having my news
outline selected, click and delete two times, hit delete two times and just
keep doing that till I see that my bounding box is now
in the size of my ship layer. Now, as you can see
now, my bonding box is just the size of our noose, and now we can work with
our nos layer because our bounding box is now
the size of our noose. Okay? Now, we just
hide our nose and do the same thing
with the mouth and all of the parts that
have the bonding box, the size of our composition. So I'll select the
mouth, take my pen to click on one of the anchor points here
and just keep deleting, click and keep deleting. Okay. So I'll just hit a skip
and select back my layer, take my pencil, select
the ankle points, move it, delete, delete. Just keep doing that till
I have my bonding box, the size of my mouth. Yeah, so we can see that the bonding box is now
the size of my mouth, and this process needs to just be repeated
for all the layers. The number of times you
need to delete will actually depend on the number of shapes in the object that's
in the mouth for this case. Okay, now you can see the
mouth has a lot of drawings, a lot of shapes, a
lot of complexity. So that's why we had to
delete a lot of times. Okay? But parts
like the eyebrow, which is just
basically one ship, won't require so
much of deleting. If I just select and move
this guy and delete, now we're going to see that
just with one deleting, we have our bounding box
the size of our eyebrow. That's our right eyebrow here. All we need to do
is just keep doing this for all remaining layers. I'm just going to
speed up the video so that we don't spend all the deleting and cleaning up our shapes and when I'm done, I will return and
we will continue. So we are done fixing our parts, and all our parts now
have the bounding boxes, just the sizes of the parts. Now the next thing I'm
going to do is just click here a new null object, and I'll renew my null
object to facial parts. Okay? And then bring my null object on top
of my layer stack. And I'll just go ahead and change the color
of my null object so that it's visible
on the face. So let's select yellow. Yeah, yellow would do, and then I'll do control old home key or Command
Option home key on the mac to bring my ankle point to
the middle of my null object. And I'll just position my null object in the middle of the face and then go ahead and
select all my facial parts, that's my nose, my mouth, my eyebrows, my
eyeballs, and my eyes. Okay? And then parent them to the facial parts so that my official part down
controls all of these. And I forgot to
parent this as well that the facial
highlights details. So parens to the facial parts, and now we can see that it controls all
our official parts. Perfect. Now the next
thing I'll do is just hit P for my official
parts layer, right click on it, and
separate dimensions. So now we want to create three extreme poses
for our character, and these poses will
be used to generate a rig for our face, okay? So for official parts, I actually want to zoom in
here and just go down yeah, to where I see my frames, right? My first frame, my second
frame, and so on and so forth. Now, I just want to
create a keyframe on the position for X and for Y, and I'll go five frames
to the right hand side. So I'll just do Control
and my right are key. One, two, three, four, five, and create keyframes
then do the same thing, one, two, three, four,
five, and create keyframes. Yeah, so the middle key frames
will be my neutral pose. And the first key frames will be my extreme pose to the right
hand side and to the top. And these last two keyframes
will be my extreme post to the left hand side and sorry to the right hand side and to the
bottom. You get the point. Yeah, so this is the
first thing I want to do. So I'll just come here while having my facial
parts no selected, and I'll just move my
facial parts to the top. So I'll just hold
the shift and hit my keyboard arukey
so my top u keys. So I'll just do that
a couple of times. So this is three times and I'll hit that to the left hand side and I'll move them to the left hand side. Okay? Okay, just like this, maybe I'll go up a little bit
more, something like this. So that's the first
thing I want to do. So this is my first
extreme pose. Maybe I should take
it up a bit more. Yeah, so let's go back
to our neutral pose, then our extreme pose. And now we want to go to the last two ki frames and take our facial
parts to the bottom, to the bottom, and then
to the right hand side. Yeah, so something like this. So we have our neutral pose, our first extreme pose and
our second extreme pose. Yeah. Now the next thing
I want to do is select my eye balls and hit P on them, select and separate dimensions. So right click and
separate dimensions. And I want to just the
same thing I did here, so I'll create keyframes
for our neutral pose, keyframes for extreme poses. Okay? And now for
our neutral pose, I want my eyes positions
to be just this. And then I'll select
the second eye, and then for our
extreme poses, Okay, we actually have to create
keyframes for this one, as well. Okay? I didn't do that. Yeah, so this is
our neutral pose and of our extreme pose, we want to bring the position of our eyes just to the
top left corner. Okay, we want our eyes
to look to the top left. And for the neutral
pose to the down side, we want the position
of our eyes to be to the left or to the right, lower end, just like this. Okay. Zoom to see. And there, everything
looks good. Yeah, everything looks good. Perfect. So we have
our extreme pose, sorry, our neutral pose
and then our extreme pose. Now, I just want to
do the same thing to all other parts of our body. So for our ears, we just
have to select them. Hit P, right click. And separate dimensions and separate dimensions and create our keyframes and create our key frames.
Now, just do that. Create new keyframes. Come
here, create new keyframes. Perfect. So for
our neutral pose, our key frames, our
position will be this, and then for our extreme
post to the right hand side, we're just going to select
our ears and move them up. Move them up, and now
we just move them to the right hand side
like this. Okay. Just like this. Yeah. And
then we just come down, and here we are actually going to move them
to the left hand side, and we are going to move them
kind of up a bit as well, because this will
be the position of our ears if we
look down, right? So something like this.
Good. To, perfect. Now the next thing
we're going to do is fix our face our head. So for our head, we have
to hit P for position or right click and separate
dimensions, create keyframes. On the left hand side, create keyframes on the right hand
side, create key frames. And we actually need to
also create keyframes for the path options of
our phase outline. So go into the path and
create a keyframe here, create a keyframe here. And create a keyframe here, just close this and hit you
to expose all our keyframes, and now let's start kind
of repositioning our face. So now we want to
reposition our face. So for our left hand side, we want our face
to kind of go up a bit and then to the
left hand side. Okay. And then we
want to actually select these uncle points
for ps these ones, and just move them to
the right hand side. Sorry, we have to move them
to the right hand side, okay? In the X axis. We have to be careful with
this. We need to make them, or we need to adjust them in
the X axis, not the Y axis. Okay? So in the X axis, that's your left and your right. And we want to create
this perspective that we get when we look
to the left hand side. Okay? So it means we have to also modify this
ankle point here. So again, we are moving to the left hand side
or to the right hand side, because for our parts, we have to edit
only in the X axis. So let's move to the left hand side to create
a better perspective. Okay? Again, only to
the left hand side. If you move it up or bottom, just to that and move it only to the left hand side so that we
have him looking like this. Perfect. Now, just go back and let's do the modifications
for our second extreme pose. So for the position, we're
just going to select a selection tool and
select the pace and move the pace a bit downward and reposition it
to the right hand side. Okay? Something like this. Yeah. And then take our
pen to select ankle point, set the ankle point
and just move our ankle point to
the left hand side. And remember, we only need to move our ankle points
either left or right because we only want to move our ankle points on
the X axis, right? So this is what we get. And we can select this guy as well and move it to the
left hand side so that we create a
better perspective. Yeah. So this is
our face when he looks down to the
right hand side, okay? So this is our neutral pulls. H. Okay, I think I've made a
mistake for our fs, because the neutral
pus is supposed to be neutral and it's not
neutral like this. The fist has changed, so I'm just going to
undo the changes I've made to do Control Z
a couple of times. And that's why we need to be really careful
while doing this. Okay? Be a little mistake
can mess things up a lot. Now, let's go back and see. Yeah, now we have maybe I need to undo a
couple more times. Yeah, so this is our neutral. This is to the top left corner. And now we need to now
create our admissions for our position to the
lower right corner. So again, I'll move my position. Okay? Move my position
to the lower right. Okay, just like this. So
let's see what we have now. Yeah, so this is
the neutral gain. This is to the top right corner. Yeah. So the next
thing I want to do is take my parts of K.
That's for my face. So click here, click here. And now let's move
our uncle points to the left hand side. Yeah, and then for this one, let's move it also to
the left hand side. Now, let's see if everything
is working well this time. So everything's working
well this time, as you can see, our
neutral pose is intact. It didn't get
distorted like before. So we have our neutral pose. We have this guy, and
we have this guy. Perfect. Now the next
thing I'm going to do is work on my hair, select the hair, hit P,
separate dimensions. Create your new keyframes, create your extra keyframes, create your extra keyframes. And I also want to create
keyframes for our parts. Okay? So open your parts
and create a keyframe here. Come here, create a keyframe and come here,
create a keyframe. So it hit you to expose
only the keyframes. And now let's start
repositioning our hair. So for the neutral
pose, we have this. For the extreme to
the left hand side, we need to bring our hair up. So just move your hair up like this and thick your hair to the left
hand side like this. Okay. And I also want
to work on my parts. So I'll just zoom in and remember we're only
doing left or right. I'll just move this to the
right hand side, the bit. Yeah, remember we're only moving to the left
or to the right. Select your point, your ankle point and
move to the right. Okay. Yeah, just this. I also want to select these points and move them
just slightly to the right. Perfect. Now I will
select these keyframes or these anchor points and
move them to the right. Yeah, for this ear, I will just move this
ear to cover rob this piece or move it to the top
to cover rob this piece, so that we have this
yeah, so this looks good. Okay? This our neutral pose,
this is our extreme pose. Perfect. Everything
looking good. So now let's modify our hair for the extreme pose to the left or to the right lower corner. Yeah, so select your hair. And for this, we
actually want to bring our hair bid up, I think. No, actually bit down. Actually need to
bring our hair down. Yeah, I think we need
to modify our ears. Okay, I think we need
to modify the potion of our ears for this
extreme push for ears, I'll just select the two of them and just move them
down a bit more. Yeah, so just down
a bit slightly. Okay. Yeah. And then for hair, I think this position
is probably okay. Zoom in and then take our pinto and just position
this to the left hand side. The shift to make
my movements faster or cover more space and do
same with these points. So we are moving them
to the left hand side. Yeah, perfect. And
for these ones, we are moving them to the
left hand side as well. Yeah, so the concept
we're using for this kind of facial rigging is something we actually will cover in a subsequent module. Yeah. So when we get there, I will notify you of
that particular concept. Now, that is T D. In the module on T D, we're actually going to learn
that what we just did here is something we
are going to cover. Yeah. So this is our
extreme pose yeah, so these are our extreme pos. This is our neutral pose,
and these our extreme poses. Nice. Now the next
thing we have to edit or we have to animate is our neck or our head shadow. So our head shadow. So the
first thing I'm going to do is just select my pento and kind of make this
bigger like this. Okay, make this bigger. Perfect. I'll hit P for position
in separate dimensions. And then I'll create my
keyframes for all my poses, just like I have done for other parts to my
neutral and my extremes. Then for my neutral, this will be the position. And then for this extreme, I'm just going to move this to the top to the left hand side. Okay? Yeah, this. And then now for
this extreme pose, I'll move it down onto
the right hand side. Okay? Just this. And what we need to
do now is to use our neck outline as an alpha
mat for our head shadow. So what I'll do is
just click to expose, not this I just
right click and make sure moods are enabled, right? And I will just click here
to give me more room. I will just try to
make more room here, and now we are working on
our head shadow outline. And what we need to do is use our neck outline as an alphamat. So I'll just take the alphamat sorry the track mat pique button or to here and drag it to
the neck outline to justice. And I'll just enable my neck outline so that
it's visible, right? So can now see that everything is happening within the
confines of our neck outline. Yeah. So we can just disable
our moods one more time. Yeah, and now we have all our extreme poses
perfectly done. Yeah, so now it's
time for the magic. Now, all you need to do
is come here under Duik, come to links and
Constraints, open it up. And now the first
thing we want to do, or the next thing we want to
do is come to connectors. So just click on the
Connector option button. And now what we want to create is actually
a two D slider. A two D slider will enable us to create values for
both X and YXs. So click on it right here
and just kale it up, make it a bit bigger, and I will just bring it to the to the side
of my face, okay? Just like this.
Perfect. The next thing I'll do is just go ahead and
select all my key frames for my X axis and my ship parts. I'll select all my key frames
for X axis, this guy here, and Hulan Control or
Command on MAC and select this guy here
and this guy here, and this guy here
and this guy here, all of them basically
for my parts and my X axis or my position. Yeah. So the next thing
we are going to do is just click here on properties. Click here on properties. And now we're going to see
that we are able to edit the positioning of our face
along the X axis llue. Yeah. So this is incredible. Now the next thing
we're going to do is just click here, click out. And while having my
C slider selected, just come back to Connectors, click on the gear icon button, and then this time, select Pick Control.
Select Pick Control. And now instead of X axis, we're going to choose Y axis and then select all our
keyframes for Y axis. So click and drag to make
you select these keyframes, then Hulan Control I come under the mark and select the rest. Okay, only the Y axis keyframes, only the Y position keyframes. Yeah, and then the
next thing we do is click on properties. Yeah. And the magic is done. So when we zoom in now and just maybe move this
a bit closer to the fish and try to
position this or move this, we're going to see
that we are moving to the we are basically
moving our fish. Our fish is moving perfectly. So we can rig our
face with this. Yeah. So we can just go ahead
and create a text and name the face or let's see the head rig
or head movement. Yeah, we can name
this head movement and just scale this up, hit us and scale this up. We actually need to enable this to be able
to scale this up. Scale it just slightly. And reposition it under
the controller here. Perfect. Now the next
controller I want to create is one to control my
eyes, only my eyes. So I'll select my eyes. So select my eyes, and these are my eyes, and I will just close
this and come back to the gear icon button and
click on to the slider. And then just bring it here. Okay, actually bring
the entire box here, not the dot and then
just scale this up. Yeah. And for this, I'll just control D to duplicate my text
and bring this here, and I'll name this I movement. Is movement. And
place it properly. Perfect. Now the next thing
we're going to do is link our eyes or our eye movements to our controller right here. So just go ahead and select all your keyframes for the eye layer that
are on the X axis. Okay, all your X axis keyframes. So this is our e ball Lyer, on your eyeball layers
only select this and Clear control or command and select this, and
then properties. Okay? Now, let's try
moving this t. Now, we see this is controlling
our X position. Perfect. And while
having this selected, we just close this and
do the same thing. And this time, we're
going to pick control. So pick control, and this time, we're going to change
this to the X. And now let's pick
our Y axis keyframes. Select this, n control, and select this and
select properties. So we see our eyes can
now move independently, okay, regardless of the
position of our face. So it means our face can move here and our eyes can
actually be leaking down. So you see we have more control
over our facial features. Incredible. Let's
go ahead and create one more or two
more controllers. Now, one for our eyebrows. I'm just going to create
one for eyebrows now. For eyebrows, we
actually need to set our eyebrows and
hit R for rotation. And now let's do the same thing. Let's create keyframes
for rotation. Let's create three key
frames just like we did with all the others. Okay. And then now for this guy, we want to come here, and this is our neutral pose, right? And then for extreme pose, we want our rotation to be this. So just go ahead and pick your rotation tool. This
is our rotation tool. And for our first extreme pose, we want our rotation to be this. Okay? So we want to
create this look, and we have our neutral pose, and then for second
extreme pose, we want our rotation to be this That's for
our right eyebrow, we're just going to
do the same thing to our left eyebrow. So for this extreme pose, we want the rotation to be this. Then we want this
for our neutral pose and for our second extreme pose, we want the rotian to be this. Yeah, so these are the
******* we want to create. I want to now create these controls for our
individual eyebrows. So every eyebrow will
have its control. Okay? So how do we do that? We just close out of this. And let's start with this
left or right eyebrow. Okay? So how do we do that? We just come to connectors one more time and click on
the connector option button. And this time we create
an angle slider. So click on Angle, and we
have our angle slider. This angle slider, I'm
just going to hold down shift and scale this up evenly and move
it to the left hand side. Maybe we will scale it even
more, and just have it here. And while we have
our slider selected, we are going to come
here and select value, and now we are told to choose
our minimum value, right? So we will just go
to the first Keffem. And now let's look
for our eyebrow. Now, we can see that we have
lots and lots of layers. So it's a bit difficult to look for our eyebrows or
to see our eyebrow, but this is it. Okay? So the minimum is -16.3. Now, just copy this
and paste this here. -16.3. Let me just
round this up to -16.3, and then the maximum so just come here to
select the maximum, and the maximum
rotation for the right is plus 26.3, okay? So plus 26 point let's see 0.4. Okay. Perfect. So these are
what we want to have yeah, and now it's time to select our keyframes. Now
where is it? Where is it? Eyebrow Outline. Let me see. Show I'm selecting the right
thing. Yeah, so this is it. So all I need to
do now is select my keyframes and click position. Yeah. And now we can go ahead and rotate our eyebrow and we can see that our
eyebrow is rotating. Our slider is now controlling the rotation of our eyebrow. I'll go ahead and do the same
thing to this other guy. So this is our left eyebrow. So we just need to click out
of this and then click here and angle rotation
or angle controller right there and
then just make this bigger and position it properly. Yep. And then now for this one, we have our minimum as -29.1, -29.1, then our maximum as 15.3, soften 0.3. Okay. And now we need to select our frames to select our Q
frames and click on property. Perfect. And now let's
just try rotating and see. Perfect. Now we see our eyes are rotating or our eyebrows
are rotating. Perfect. Incredible. Now, all we
need to do is, of course, rename or label our controllers. So this should be the
right eyebrow, right? Eyebrow eyebrow. C D, and this should be
the left eyebrow. Now, just move this move this bit to the right hand
side. Yeah, perfect. Now we have our controls
our right eyebrow and our left eyebrow, our eye movements, and
also our head movements. Now, the last control I want to create is one for
blinking our eyes. For this eye will just zoom in and select my eye outlines, my left and right eye outlines. These are my two layers, and I will just hit S for scale, and I will create a keyframe
on the first time and just come to ten frames and
create the second pose. Now for this one, we don't
want to have three poses. We just want to have two poses. That's the eye open pose and
then I close pose, right? So now I'll select my right eye outline and then
click here on link them. To link the dimensions
for both X and Y, and I would just have this as my first
pose, the eye open, and then I'll come to the
second keyframe and just scale this like this and make
sure it's let's see one. We don't want to completely
close it, so let's see one. Yeah, and see also
with this one. Okay, where is it? We're
talking about this guy. Yeah, same also with this one. So we want this to be one. Perfect. Yeah. So the first step has been done. So we have
it looking like this. Perfect. Now the next
thing I'm going to do is actually duplicate these guys. Sorry, duplicate these guys and just kind of work on
them a bit so Control D, duplicate them, and
I'll just move them up. Sorry, I will just move them up, and I actually want to
change their colors. So let's give them pink. Let's give the
ones pink as well. Yeah, so this one
half outline, too. Now, what I want to do is
just come in, take my pent, and just start deleting some of these outlines because there are too many shapes
inside, okay? So I'll select this
one and delete it. I just want the major ship
that covers the entire eye. So one major ship, okay? So I'll just go ahead and delete all of these other details. I can just solute them, so the layers, okay? Yeah, do the two
of them and then just start deleting the
ones that are not major. So we see this guy is not major. Yeah, and we have one more
that is not major this one. So click here and delete him. So that we only have this guy here, which is the mijo, right? So I can even change the color. Perfect. And we're
just going to do the same thing
with the next guy. Yeah, so we can just come here, click here, bring
him out and delete. Zoom in here, select
this guy and delete. Perfect, and do
same with this one. Perfect. Now we have the
major, which is this guy. Incredible. And now
they are, of course, animited just like these ones which we copied
them from, right? Incredible. So the next thing
would be to first of all, just bring our eyeball layers. So we have our eyeball right and we have our
eye outline right. I just want to bring
them next to each other, just like this and just
close the eyeball layer, and also do the same thing for our eyeball left and
our eye outline left. Yeah, so we have
eyeballs right outline, and then I write
outlines too, right? And then eyeball L outlines, and then I left
outlines, too, right? So we just want to have them
just position like this. I'll hit you to bring up my skill keyframe so that I'm
seeing them very clearly. And now the next thing is, I
want to use my eye outlines, the one I duplicated and simplified as a track mat
for my eyeball layers, okay, so that our eyeballs
are visible, okay? So first of all, I'll
just on Solu D so that we can see everything
happen in life. And I'll bring this, and I'll close the eyes so that we see the effect as soon
as I apply them. So now I want to take my eyeball layers and enable
my moods, first of all. Now we have too
many things here. That's the problem
working with this. We have too many things. So I just want to disable
some features, maybe the parent
feature as well. So we can just come here and disable parent and Link perfect so that we
have our eyeballs. Now for my eyeball, I want
to select this guy and click the Track Mat button or
two and drop it here. We get so that it's now hiding
our eyeball as it covers, as our eye covers gets covered or as our
eye gets blinked. So we want to also do the
same thing with this guy, click this guy and drag
him and drop here, and that should affect our right or our
left eyes, this guy. So see now our eyes are
blinking perfectly. Our eyes are blinking
perfectly incredible. So now we want to have
our keyframe selected. Or our keyframes exposed. That's for this guy and for this guy because they
are the ones we're going to be using to
create our blink. Now the next thing we do
is just click out of here, go into our connector options. And now we want to
actually create a slider, that's a one D slider. So click here to create it. And now zoom in, select your one D slider. Where is it? This
is a one slider. So select the entire thing, o and bring him here. Just go down shift and
scale this manually. Yeah, scale this manually
and position it here. Good. The next thing we do is make sure we have
value selected here, minimum -100, maximum -100. Now let's go ahead and select our our skill values, right now, this IR outline to select
the scale values and who down control or who down shift and select the
skill value for this one. Okay? Select also the skill
values for the IR outlines. That's the one we copied
this one from and this one. So all of them are four
layers all in all, select all your skill values and come and click on property. And perfect. Now, it has
linked the property. So now when we do this,
we are going to close. When we do this, we're going
to open. We get the point. So now we have our
blink controller. So next thing we do
is select this guy Control D and position him properly and just type
blink or eye Blink. Yeah. Incredible. And with this, we are basically done
rigging our fish. We have all our controllers. We have the eyebrows,
we have the eye blink. Okay? And we have
our eye movements. And we have our head movements. Yeah, incredible. Now we have lots and lots
of layers here. The whole thing looks messy. I would just select
everything and close them so that
they look less messy. And yeah, we can she
some of these layers. So select the body, for example, select all these layers
actually and just shy them. So enable your
switches and she them. And click on the Shy switch
so that we have the only. Perfect. Now we can just furthermore, reposition
our controllers. Yeah, so just reposition
your controllers. Okay, we're not doing
a good job here. So just select the outlines and reposition your controllers. Perfect. Same also with this. Okay, I think I undid that. Yeah, so we have
all our controllers looking clean and perfect. So the next thing we're
going to be doing now is animating our character
just by animating, of course, our controllers and
doing all sorts of things. Yeah. So that's the next
thing we have to do, okay? But we're not going to
do that in this video. We are going to do that
in a subsequent video, and we're actually going
to learn how to lip sync, how to make our character talk. I think that's what we're
going to learn next. After that, we would then
animate our character. So that's it for how to completely rig your character's
face realistically. And I knew this was long video, but this was necessary. I'm very sure you learned
some really cool stuff here. Yeah, and that's
it for this one. See you in the
next one. Bye bye.
9. 9 Lip syncing with SF Caddy in After effects: So in the last video, we learned how to do
facial rigging, and we created this amazing facial rig for our
character here. Now in this video, we're
going to learn how to syncing in After
Effects using another After Effects plugin or script called the SF Caddy. So I have gone ahead and added this plugin or this script
in your projects folder. This is the SF Caddy. You can as well search for it if you don't want
to use this one, so you can just search your browser and get
it downloaded, okay? Oh, I think you need
to pay a fee for it, but there are free versions
all around the Internet, which you can also access. This is actually a free version. So just go ahead
and download it, extract it, go into your folder, and copy the script file. This is the script file, okay? So copy it and go to your
cdt dot or your drive and just go ahead and paste
it in your scripts folder, just like we did
with Duik Angela. So going into script, going into script UI panels and just
pieced it here, okay? So I have gone ahead and
pieted mine so just do that and restart After Effects and come back here,
so we continue. Perfect. So when
you're done with that, you just need to come here and bring in the mouth
shapes Adobe sido file. So select the file composition retain layer sizes
and had in port. And this is how lip
syncing actually works. So this is an Adobe
Illustrator file, and this contains
mouth ships with different alphabets or
different sounds, okay? So this is something
you can just look up online to see references of. So you can see references of how different mouth shapes
are positioned, okay? Or when pronouncing
these letters. So for F, we have this, F and V, for B, we
have this and that. Yeah. So this is what
we're going to be using to create our lip sync. So we can see that each of
them has its own layer. We even have layers
for this shock stated, disgusted, this fart,
this thoughtful state, and all of these, right? So that's what you
want to import, okay? So I've done all
the work for you. I've provided this file. So just go in and
bring in the file. And I have this layer, which is title Libel, you can see that it contains the libeling for each
of these mouth ships. And each of these
mouth ship is actually named according to the labeling. So I'm just going to
delete this label layer. And the next thing I'll
do is just go one frame. So I'll do Control
and my right ARU key. So you can do command
and your right Ruki and select all of them and Control
Shift D and delete. So that we only have one
frame for each mouth ship. Okay? So this is it. We only have one ship
for each mouth ship. So the next thing I'll do
is select all of them, right click, go to keyframe assistant
and sequence layers. Now what this will do
is, and just hit, okay? Now what this will do is, it's going to arrange our
layers just like this, okay? From first to bottom, okay? And it actually did
it in the wrong way. Okay? So I just want to undo this and select
from here to here, right click. Sequences, okay? Yeah, so we have them
from A to shock now, from the letters from the sounds to these
other looks, right? So yeah, that's what
you want to do now, go to the last frame. The end of the last stream, and I'll just hit on my keyboard to trim the work
area to this point. And I'll just right click
and trim come to work area. I'll select everything
and go into my align tab and align
everything just like this. Okay? Align them just like this. Perfect, so that they
are all aligned to the middle of my composition and to the middle of each other. Yeah, so they are all
on top of each other. So as I play through, you see that we have our mouth and meeting
just like this. Perfect. And the
next thing I'll do is just take my
region of interest and just crop this out so that we have this only as
our region of interest. Incredible and then I'll
just go to composition and then crop composition
to region of interest so that we have
it looking just like this. Perfect. I'll just hit sieve Control S. And
now we can go back to our official reading
composition and now bring in our mouth
shapes composition. Select it and bring it here. You just rescale it, hit S, and rescale it just to
the shape of our mouth, can position it here. Perfect. Reposition it properly, move it up a bit. Yeah, and I think this is good. Now the next thing I'll do
is just go ahead and unshy all my layers and
just parent this. Okay? Not not track
math, actually. We need to enable our parents
two to parent and link, and we want to parent the
mouth composition to parent it that's using this parent
and link to the phase, right? Or to the null object
of the facial part. Yeah, this null object,
facial part to parent this so that it follows the null object. Now I can just hide my appearance and my
track mouths and my mood, so that now as we move our
fish after you do that, just go ahead and hide the
outlines for the mouth. Where is the outline,
this is the mouth and just hide it so that now the new mouth is our mouth
shapes. You get the point. Now, if I move my head, you're going to see that our mouth shape is
fully in it, right? Perfect. So this is
what we want to create. Incredible. All the next thing I'll do is just go ahead
and bring up my script. So go to Windows
and just go down here and enable SF
Caddy. Just go down. This SF Caddy, bring it in. And this is our SF Caddy. The next thing we're
going to do is just shy back our ears and select our mouth shapes
and click Load items. Now, it's going to load
all our mouth shapes. Okay? Now, just make
this bit bigger. Right here, if you click
here, you're going to go to settings and you can actually adjust the
size of the buttons. Now these are actually buttons. And what it does is it creates these togo h keyframes on
a mouth shape composition. So if you just come
here, for example, and just click one of these, it's going to write away create a togo frame which this
mouth shape you get. So it's just more like a switch. So you see how easy now it is to switch between
different mouth shapes. Yeah, I just delete the
three extra ones I created. Now the next thing we're
going to do is just go ahead and bring in our voice over and go into your
folder and you see this voice over, hidden part. And I will just bring
it to my composition. And now I can open the audio
wave and see my voice over. Yeah, so I'm just going
to play this so you see what so you hear
what we're seeing. Hey, guys, it's really
to you on this crap. Okay, let's start it
from the beginning. Just use your spice
bar to plead. Hey, guys, it's really
amazing to work with you on this incredible
After Effects project. Quality character rigging can be really frustrating
to pull over times, but this course makes
things incredibly easy. Keep learning. Keep creating and the stars will be
your starting point. Yeah, so this is just a very
simple voice over I did, and that's what we're going
to be using in this video. Yeah. So I'll just come here
and try to cool up some of this more so that
we have more room, right, so that we
have more room. Perfect. Now, I just want to have a neutral pose
for everything, okay? So for my eyes, it should be neutral for my head position,
it should be neutral. We can just hit P for this
tough You can remove that HTP. Yeah. So now, all we need to do is just come and start playing. Just come and start
playing through our audio. Okay? So if you hold on
Control or command and use the time line, okay, you are going
to be able to hear the voice as you
scroll through, okay? But we can just
do a simple play. So now we are saying, Hey, guys. So first of all, we want to have it in a neutral pause, okay? So we want to have a
neutral pause closed mouth. So just scroll down in the
closed mouth button here. So we have the first key
frame as a closed mouth. So he's saying, Hey, guys. He guy. So from here, we're going to start
with hey guys. So for hey guys, for hey, I want to use I want
to use one of these, let check which one
is most appropriate. So we want something, Hey, okay? So it's gonna be this guy, even though we
don't have H here. So let's go with this. So, hey guys, So it's like, Hey. So for the ending
part of the hey, we should use
something that says I. You get the point. So, hey, so let's try this.
Sorry. Let's try this. Yeah, so it's like, Hey. Okay. So let's take this guy a bit backwards. And let's do guys. So for guys, we're
going to start with G, whereas G, guys. Okay, there's one
thing you can do here. You can just hold
down Alt and click. And what it's going to do
is it's going to create a key frame and then
move two frames in time, so that you can
create the next one. So let's try play and see. Hey, guys. Hey, guys. Okay, so you want S S to
complete the guys, okay? So this is basically
how you want to do it gradually step by step
till you complete, okay? So you just scroll down
and look for S. Okay. Hey, guys. So we are
talking about this shape. Yeah. So let's see. Hey, guys. Hey, guys. Yeah, so maybe we'll
just move this a bit backwards and see. Hey, guys. Okay? Hey guys. Hey guys. Yeah. So it's really amazing, too. It's really amazing. So let's go ahead and
use it's really amazing. So let's use It's let's
go two frames in time. It's it's really amazing. It's really amazing.
Yeah. Now, we don't need to be too
precise with this. And yeah, if we wanted to
be very precise with this, we could spend all day trying
to get the best, right? So I'll just speed this up and show you my
result at the end. You basically know
the process now. So just go ahead and
do yours as well. So then let's compare
our results at the end, and if yours is not as good, then maybe you can go in
and try to fix things. Okay? Yeah, so I'm just
going to speed this up. Yes, guys, so I'm done
with my lip syncing, and let me just play this
so that I see what I have. And I'll just bring my
time to here and just hit in to trim my timeline and
trim come to work area. And let me just
play this. So you see what I have created. Hey, guys, it's really
really amazing to walk with you on this incredible
After Effects project. Quality character rig can be really frustrating
to pull over times. But this course makes things. Okay, so it seems we need to play it from
the beginning again. So let me just play
it from the beginning again. Should play better. It's really amazing
to walk with you on this incredible After
Effects project. Quality character rig can be really frustrating
to pull over times, but this course makes
things incredibly easy. Keep learning. Keep creating and the stars will be
your starting point. Yes, guys. So that's it for
this particular exercise. We can see that this
takes a lot of time, and you don't need to be
very precise, very perfect. And these mouth
ship I have added. Sometimes it's hard to find the particular or the right mouth
ship for some sounds, okay? So nothing is quick, clean, quicky,
perfect here. Okay? Just try your best to
achieve the best looks, and if you can create
better mouth shapes or find better ones online,
that's also welcomed. You can go ahead
and use them so far as you get the best
results, okay. But ultimately,
your results should be nothing less than
what I have created. I know mine is not perfect. There are lots and
lots of arrows, but this can serve. Okay? This is to
the lip syncing, so it's not supposed
to be perfect anyways. Okay? Yeah. So basically, go ahead and try to achieve something
that's quite decent. Yeah, so that's what I'm seeing. And yeah, so that's
it for this one. See you in the
next one. Bye bye.
10. 10 Exercise Finishing our walk cycle animation scene: Hey, welcome back.
In this exercise, we are going to be finishing up our work cycle animations, which we created in the
course of this mod, okay? So I'll go ahead and bring
in my work cycle animions. I have exported them as MV. Okay, so they have
transparent backgrounds. So this is the first
one we worked on. If I play this, we're going
to see our character working. Yeah, and then this is the
second one we worked on. Yeah, this is the one we use
Duik to create. Perfect. Now we're going to go
ahead and finish them up, and we're going to be
adding a background. We are going to add realistic, of course, to the
Los del background, and we're going to add
realistic movement, Okay, so that it appears
that our character is actually moving
in our background. So I'll go ahead and bring
in my background right now. So I click go into my folder, and in my folder,
I'm going to look for the subway background. Okay, so subway
background, where are you? This is the subway background. It's an Illustrator file, select it and select composition retain
layer sizes and hidden ports. Yeah. So when I go in, we're going to see that this is just a subway illustration, which I downloaded from
freepik.com and modify a bit. Yeah, so we want our characters
to work in the subway. Okay so we're going
to do that for every one of our character. So the first thing I
want to do now here is just Control K Okay. And I'm going to modify the sizes or the size
of my background, the width in particular. So I want to make
the width very long. Okay, we can see that
the height is 26 pixels, and the width is 6,000. We can see that the
height is 2006 pixels, and the width is 6,126 pixels. So we want our width
to be 20,000 pixels. Yeah, 20,000 pixels
and hit okay. So what we want to now
do is actually modify or duplicate our illustration to cover for the
remaining space. Okay? So I'll zoom in here,
position this properly, even do Control K one more time, and change the background
color to white so that I see what I'm doing clearly. Good. Then next thing I'll do is just Control D and bring
this to the left hand side, and zoom in and
reposition this well. Okay. Just like this. Of course, I'm pulling
down shift so that I move this whole thing
in a straight line. Yeah. Now, do control
D one more time, bring it to the left hand side,
position things properly. And control the one last time, zoom in and position
things properly. I just want to select
all my layers, my front column layers, and
make sure they're in front. And as you can see
here, they're in front. Yeah. So they have to be
in front of our layers, even though I think we don't
really need them to be exposed in this
particular composition, and you'll see why. So instead of having them on, I would just maybe delete them. That's the duplicated
one and just leave the first one and even off it. Okay. Yeah, we're going to
see why I did this later on. Now the next thing
we're going to do is create new compositions, which we put our character in. So we're going to start
with this character. So click here to create
a new composition, and I will just choose by normal 1920 by ten ATP and head ok. Yeah. So next thing I will
do is bring in my character. This is my character, and you
can see when I play this, our character is
actually moving. Yeah, next thing I'll do is just trim my composition
to my work area. So I'll come to the
end of my animation. Okay. I'll come here. And just bring my timeline down and right click and trim come to work area so
that we have this. Perfect. Now the next
thing I'll do is, of course, you guessed it right, bring in my subway illustration. Bring my subway
illustration, drop it here. You see that it's too big. I'll just hit this and re scale this down to the size
of my composition, this and move my subway
illustration just like this. Perfect. Yeah, the next
thing I will do is just preposition and rescale my character in relation
to my subway composition. Yeah, and we want to
reposition high in the middle. Yeah, in the middle. And I'll just do this
to see how my character compares to other parts
of my subway composition. And I think the size is perfect. So I'll just do
Control Z to bring my subway compositions
my subway illustrations position back to the
beginning like this. Okay? And just take
note of the sizes. The girl character is 85%, and the subway
composition is 54.2. Just have them
positioned properly, and now it's time for the magic. Now it's time for the
magic. Now, you can see that it's just an
admission of our g working. She's working fast, she's
walking really fast, right? So what we need to do
now is just come here, select our subway background, hit P for position, create a key frame for position, and just bring sorry, and just come to the end of
our admission of our time, which is around 20 seconds and four frames and just reposition
our subway background. Accordingly. So let's take
it to the end first and see. Okay? So if the movement of
our subway wagon is too fast, we're just going to
reduce the speed. So let's play this now and see. Yeah, so we can
see now it appears as if she is working
in the subway. You get the point. So let's
zoom in and see this closely. So she's working in the subway. Let's just reduce the speed of our subway background and see. So when we come to
our last frame, we just need to bring
this back like this. Let's just here
and try playing it back and see if we have
something more realistic. Yeah. And I think I preferred
the previous version, so I'll just undo to take back our subway background to
the previous position. Yeah. And this kind
of animation is basically us mimicking a camera, which is positioned on the character and moving
along with the character. You get. So that's why she
is always in the middle of the composition and the background is
moving as she moves. So we're basically seeing
that we have a camera and the camera follows
her as she works, okay, making sure that she is framed in the middle
of our composition. Yeah, so that's the first step and the most important step. The next step will
be to go back into our background
composition and copy our column layer. Okay? So our columns are
actually in front of our character in between our
character and the camera. So we have to select
and Control C, o on our front columns and go back to composition
one and Control V. Now we just have to
come back here and disable the visibility
and go back to our composition and just rescale our columns to the size
of our composition. So our column to be columns
have to be this big. They're actually less big Let me just rescale our
column accordingly. Yeah, so this size looks
good, looks perfect. Yeah, this size looks perfect. So what we need to do now is just duplicate our column
a couple of times. So having my column
positioned properly, what I will do now is
Control D and reposition the next guy here since I'm seeing the outline
of the previous guy, you get the point. I'll do this a couple of times. Control D again, and move it and move the next
version and Control D, and move the next version
just to the right hand side. Perfect. Now, after I'm done, all I would then do is select all my front column
my front columns. All of these ones I
dubgated and just parent them to my background image, or my subway background. So I would just come
here and make sure my appearance and
links is enabled, and then I will
just parent them to our subway background and bring our character behind them. Now when we play this, we're going to see
that our character appears in front of them, and we are basically having them fully in
our subway background. But I feel that this second
column has a bit of problems, this one. So you know what? I'll just come back here. And at this point, I'll just disable the
visibility for these ones. And just see how this one is. I think the problem I
have is with the sizing, so we can see that this is
bigger and this is smaller. So the only thing I'm
going to do now is just make sure I don't have this one side by
side with this one, so that we don't see the sizes
in contrast to each other. So I'll do this. I'll just come here and then position
this one here. Okay, so that it
appears after that one gets disappeared
and I'll delete the next one after it and
then for this last one, we are going to just move it
to the right hand side while down shift so that we
have this, basically. Let's just zoom in and
play our admission, maybe make this bigger and play our admission and
see what we've got. Yeah, incredible. And then
the final thing I would do is actually select my
girl M movie layer, maybe not even
select it, but just come here and create an ellipse. I will not select it
because if I select it, we are going to be if
I make a selection, we are going to be
creating a mask instead. So I want to create a ship
for shadow and reduce the opacity for this ship and then bring the ship
behind our character. Yeah. And finally, just parent the shape
to our character. Okay, we don't need to parent because our character
is not moving. So it's going to stay stagnant and still follow our
character anyway. So what I would do now is
just maybe rescale our shape. Okay, to this, hit We need
to pass it one more time. Now let's see how
everything plays out. Yeah. So we can see our shadow
is fully in our character. But, in essence, our character
is not moving, actually. It's just the background
that's moving. So that's the first way
to finish our animation, our work cycle animation. Incredible. And that
was incredible. So the next now
will do is, maybe just we name our composition. Girl animation one. And we just create a new
composition for the next one, mit girl animation
two, and hit okay. For this next one, we
bring in Angela animation. And this will be a bit more complex compared to
the previous one. So we just go ahead and bring in our subway background
composition, hits and rescale our subway
background composition to the side of our composition. And for this one, we're
going to start here. Okay, we're going to start here. And first thing we're going
to do for this one is select our Angela and
reposition her properly, and we're going to
reposition her here. Okay? So if we play
our admission, we are going to see that
let me just zoom this in. In fact, let me just trim my composition to work
area. We can hit for this. Just right click Trim
Comp to Work area. Okay, I deleted my
layer mistakenly. So cream come to work area. Now let's play this
and see what she does. So she starts by working. So from a stagnant
position, she works, and I want her to walk down to the middle
of our composition. Here. Okay? Then she starts running. Yeah, what we're going to
do is select our Angela, hit P for position,
create a keyframe here. Just come in time to
where she starts working. I'll bring my keyframe here and come to where
she starts running. Okay. And just before
she starts running, I want her to work
till this place. Okay? So I've moved her way hooli down shift to the
middle of my composition. Now let me play this and see. Okay, you get the point. So I'll just select
everything here and easy ease them so that she
doesn't start abruptly. She just starts slowly
and you get the point. Yeah, you get the point. Now, it's looking
more realistic. Yeah. And then probably
before she gets here, so maybe I'll just take
her back a bit back a bit. And then after she gets here, she will now start running. So from this point forward down till this point
where she stops running. So she stops running right here. So down to this point, I want my subway background to move. So hit P for position,
create a que frame here. So she stops running
here, right? So I want to bring
my Q frame down here to the point where she
starts running, okay? And then reposition
my background to this place when
she stops running. So I'll play this now to
see what I have created. So she walks and
then starts running. And then continues walking. So we just write in and
try to fix things because, of course, it's not
looking realistic, right? So she starts running from here. We want our movement
to start from here, we want our subway background to start moving from
here. Let's see. So we actually want to
select the key frames for our subway background
and easy them. Okay. And I think we
actually need to extend these keyframes a
bit more in time. This one's on her
position, okay? Bit more in time.
You get the point. So that the keyframes intersect with the movement of
our subway background. Okay. And then just extend our swi background
to move or to stop here. Yeah, so let's play
everything from beginning and see
what we've got. So she starts by being
stagnant and then moves walks to the middle and starts
to run starts to run. Um, and then stops. Okay? Yeah, then she stops. And what we want to do is
just till she stops walking, we're just going to admit
our subway background to just follow her. So the camera is
now following her. You get the point. So she's
going to be at the center of the camera till the end here. So we just want to now move our subway station
background a bit. You know, she's not going
to cover a lot of distance since she's not running.
She's not walking fast. So now let's play and see. Yeah. Okay, so let's just
even reposition this further to increase the
speed of our background. O. She starts her funny dance here. Yeah, I think everything
looks just perfect. Everything looks just
perfect. So this is what we want to go with. The final thing
I'll do is just add her shadow to her shadow has to be admitted
unlike the previous one. So her shadow is
going to be admitted. So from here, we're
going to have a shadow brought behind her, hit T for opacity and reduce
the opacity of her shadow. And move her shadow
just behind her. Okay, now we position my ankle point from my
shadow by holding down Control old home to
reposition the ankle point, squash my shadow more like this. And now let's see. I think our
shadow needs to be bigger. Yeah, just this big. Okay? So select our shadow, sell our shadow hit P, and create the
keyframe for position. And as she moves, you come here, move
our keyframe here, and as she moves, Down here, we want our shadow
to follow her. You get the point. And also, we want our shadow
to be easy east, just like her position
keyframes. Zoom in. Yeah, now let's play and see. We actually want to
move this keyframe here and let's play now and see. A Yeah, everything looking
sweet and perfect. Yeah, this is good. The next thing I
will do, of course, is just bring in my columns, my front columns to go back
to this first animation, select my column,
select all of them, and I'll just Control C and
Control V to paste them. And for these ones, I
will actually bring them here so that they start here. Perfect. Then parent them
to my sobe background. Now let's play and
see what we've got. She starts walking and walks down to the middle
and then starts running. Then finally comes to a
stop and continues walking. And then those have funny dance and complete till the end. So I'll just make this
full size and play this in full resolution so we see how
everything plays out. Let's wait for it to
finish around previewing. Yeah, now everything's plain. Well, you can see. Incredible. Incredible.
This is so incredible. Yeah, so that's
it, guys for this. This will come to the end of
our video of our exercise. See you in the
next one. Bye bye.
11. 11 Exercise – Adding facial expressions & finishing our facial rigging: Hey, welcome back.
So in this exercise, we're going to be finishing our official rigging in project. So go ahead and
open the project, go to file, open project,
and facial rigging. So this is a project it open. Yeah, so this is our
official rigging in project. Let me just go ahead
and play this so you see what we've done
from the past video. Hey, guys, it's really, really amazing to walk to you on this incredible After
Effects project. Quality character rigging can be really frustrating to
pull over at times, but this case makes
things Incredible Okay, let's play from the
beginning again. Hey, guys, it's really
amazing to work with you on this incredible
After Effects project. Quality character rigging can be really frustrating to
pull over at times, but this course makes
things incredibly easy. Chip learning. Chip grating and the stars will be
your starting point. Yeah, that was our lip syncing, and we handled this the
last time we opened. Oh, we worked on
this file, yeah. So now we're going
to be adding facial expressions to our admission. So first thing I'll do is
just select my slider. So we see that I'm
selecting this as well, that the outline. So what I'll do is
I'll first of all, close this, and then
shy all my layers. And now I want to actually
log these outlines. These outlines, I'll lock them so that I'm not
able to select them. So I'll just lock
them for each of these controls. So log them. Yeah, so that we're not
able to select them, we should only be able to select these controls,
the main controls. Yeah. So first thing we're
going to do is just hit R on this and make sure
my switches are on, and I'll just take my rotation
to zero for all of these, for the boots eyebrows
and close them. So this one, I will lock him. So just lock it so
that you only able to select this, for the eye blinks. And then for this one as well, we should lock this
Okay. Lock this. And for this one, we can see that this layer
is actually shed, so we need to unshide this
layer and bring the layer above and then go
ahead and lock this. And we also need to
just shide the ones we locked so that they
are also hidden. Since we are not going to
be selecting them, Yeah, so just click the Shy switch, and now we have only the ones that we need to animate, right? Perfect. So we're going to
start with our head movement. And I also want to just shy this mouth composition so that we are not
able to select it. I'll also kind of just lock it so that we are not able to select it and we
are not able to see it. And same also with all of these, actually, or maybe not. Let me just allow
them so that we don't spend all the time trying
to clean up the scene. So let's go ahead and
start an meeting. Now we're going to start
with the head layer, o or the head control. So let's play this and see. So we have him saying Hey, guys, it's really really amazing to talk to you on this
incredible after effect. Yeah, so I want to
just come here, zoom in a bit and then create
a keyframe for position. Okay? So we have Hey
guys. Hey, guys. So I want him to
look away a bit. So I'll just go three
frames in time. One, two, three, that's
control and the right okey. Make him look this way, okay? Yeah I make him look this way
and then go three frames in time and copy this and paste. So let's play and
see what we've done. Hey, guys, it's Hey guys. Okay, so what I'll do now
is just copy this keyframe and paste so that we spend three frames while
in this position, okay? And I want to select
everything that's all these keyframes and
just move them bit forward, and let's play and
see what we've got. Hey, guys, it's really
Hey, guys, it's really. Hey guys, it's really. Hi guys, it's wet. Okay, so this looks
better now, sweet. Hey, guys, it's really amazing. Good. Amazing, W
with you on this. And then at this point, I just want to create a new key frame or repeat
the previous keyframe. So just click here and then
go three frames in time. So one, two, three, that's okay. I'll just do that.
I'll just redo that. So create my keyframe and Control and write
Ruki three times. Then I want him to
kind of look down. Okay. So you should look
down so that we have this. Then to whoop it to you
on this incredible After Effects Wop it to you on this incredible
after effect Good. And then I want him to spend some frames while
in this position, so I'll click here
to repeat this. Then go three frames
in time and copy this guy and piece so that he heads back
to the same position. So we have, guys. It's really amazing
to wop it to you on this incredible After
Effects project. Yeah. Quality character. So we're just going
to click it to repeat this keyframe, good
three frames in time. And I will just make him look here or take his head
position to this side, okay? And I will just turn his head to the top right corner, like this. So let's see what we've got. Quality character
rig can be read. So as you say, really, I just want to kind of bring
his face down like this, and then go some frames in time and repeat the
same frame and then go three frames and make him look to the neutral
position, okay? So contro C, contro V. So
let's see what we've got. O you on this incredible
After Effects project. Quality character region. Then, can be Quality
character region. Can be real Okay, okay, okay. So we actually need to
repeat this keyframe. Here, so contro C, contro V, so that we spend all this time here. So let's play and see. Quality character rig can be really frustrating
to pull up. Perfect. So this is the
look I want to go for. So let's play from begin
and see. What we've got. Hey, guys, it's
Really amazing to watch to you on this incredible
After Effects project. Quality character region can be really frustrating
to pull over at times. But this case mixing he falls straight into
pull over times. But this course makes things. Yeah, so we just create
a new key frame, then go three frames in time. But this course makes
things incredibly easy. I want to shake my head or
his head while saying that. This course makes
things incredibly. So I want to do this
incredibly easy. Then we go three frames. Then go through frames.
And then go three frames, and then copy our
first frame here, which is our neutral
puse Condo C, Contra V. Let's see
what this gives us. This course makes
things incredibly easy. Okay. You see?
It's looking good. But this course makes
things incredibly easy. Things incredibly easy. Perfect. Keep learning.
Keep learning. So keep learning
for keep learning. Cos mixs incredibly easy. Yeah, I think I will
just unshy this and unshy my mouth shapes so that I hit you to expose my key frames so that I see where these keyframes
are positioned, right? That will help me in animting the movement of my head even
better. You get the point. Cost mix things
incredibly easy easy. Keep learning. So keep learning, we're just going to repeat
our key frame and then go three frames in
time, one, two, three. And for keep learning, I will make this guy go
down, keep learning. So one, two, three, and repeat our key
frame and then one, two, three, and copy
this guy and paste. So keep learning. Yeah. Keep learning. Hit, great. Then keep creating.
I think we just copy all of these and paste them here. So keep learning. Keep learning. Hit, creating. Okay, okay, keep
creating has to come actually at this point.
So let's play and see. Keep learning. Chi Actually, it
has to come here. Not here. So Keeparningreting. In the stars. Chip
grating and the stars. So we're just going to do one last movement
before the end. And the stars will be one, two, three, repeat our
que frame, go one, two, three, and maybe come
here or come here, go down. Then one, two, three,
and repeat this. Then one, two, three, it
is piece. So let's see. And the stars B, your start starting point. Yeah, this looks good. So Hey guys. It's really amazing
to wp it to you on this incredible After
Effects project. Quality character rig
can be really for. Yeah, so we can see that
we actually did good here. So let's close this guy and let's go ahead and
maybe not close him, hit P so that we see the keyframes and all our
other admissions will be in relation to all the
work we've done already. So the next one will
be the eyebrows. So let's select
the eyebrows Okay, and hit R for rotation,
create a frame here. And now let's start animating now for first librar, we
can see that this guy, one of them needs to actually
get a little bit rotated. So let's see. Take
your rotation to, and let's move this
guy just like this. So this is more like
the neutral, okay? So Hey, guys, it's really T when he's
saying it's really amazing. I actually want to create one keyframe and
just go three fims in time and make our
eyebrows do this. Okay? Yeah, and then go
three films in time. We can repeat our films. So copy and paste,
copy and paste. Hey, guys. So we just need to select all of these and bring them
forward. Let's play and see. Hey, guys, it's really
amazing. Whoop. Okay, I think one
of them should, wait. Okay. This guy. No, this guy. Need to
chill a bit, okay? So I think we need to
bring this iframe. Yeah, we need to bring this
first iframe we created so that it's positioned just at this point,
right? So let's see. Hey, guys, it's really
really amazing. Walk with you on this
incredible After. Yeah, so the effect. So at this point, we just
want to repeat these iframes. Then go three frames
in time and copy these first que frames and piece them so that we go back to
our neutral polls. Perfect. Hey, guys, it's really amaze whopping to you on this
incredible After Effects project. Perfect. Quality character rig can be really So when he's
seem really frustrating, I actually want to
create another pose. So select your two
sliders your key frames. Good three frames in
time, one, two, three, and we just want to
zoom in here and actually make the guy look I make our eyebrows
look like this, okay? So like he's kind of disgusted, because it's really
frustrating to pull of character animation at times. Character rig can be really
for straight into pivot. Yeah, you get the point. Can be really for straight
into pull off at times. Yeah, and then we just repeat our key frames, go
three frames in time. Copy this and pieced.
Copy this and piece. Riding can be really
frustrating to pull over times. But this course incredibly. So for incredibly easy, we are just going to kind of
repeat our key frames times. But this course makes
things incredibly. Okay, we're just going to
repeat our key frames. So click here, click here,
good three frames in time. And we want him to and we want our eyebrows to go this way. Okay. And stayed out
for three frames. And after three frames. Okay. After three frames, we just copy the neutral polls and paste. Good. So let's see. Things incredibly easy. But this course makes
things incredibly easy. Keep learning. Hit Graton. And then for this last part, I will just copy this Contra C Contrave, Contra C Controv. Hip Graton in the stars. As. Okay, and maybe I want to just stay a bit
longer in this post. And maybe move them bit forward. And the stars Ub. And the stars ob? Yeah, just move this bit forward so that we spend
more time in this pos. And the stars Ub Your
starting point for you. Incredible. So I like this, and we just go ahead and
work on the other ones. So let's work on
the eye movement. So Hey, guys. So when he's saying, Hey, guys, when he's looking this way, I want our eyes to
actually look that way. Okay, so I, select him, hit P, create the keyframe,
go three frames in time. And let's move him here. Select the keyframe,
take this backward, and I will just repeat this keyframe and go
three frames in time. Copy this guy and paste so that we have
him look this way. Hey, guys, it's really. Okay. Hey, guys, it's maybe he
should spend more time there. Hey, guys, it's Really amazing to quit you
on this incredible. Yeah, so at this point,
we want to create another pose for our
eyes go three frames in time and yeah, and do this. Then just come here and repeat the keyframe and
go three frames in time. Just come here and repeat the keyframes and
go three frames in time and copy the
initial and paste. Incredible After
Effects project. Yeah, this looks good. Hey, guys, it's really amazing. Copy to you on this
incredible After Effects project.
Quality character rig. Yeah, so at this point, we just want to
repeat this keyframe and then go three frames in time and move our guy here, then go three frames in
time, repeat our key frame. And then stay here for a bit. Repeat our keyframe,
good three frames in time and bring back our eye. Okay? Quality character rig can be real really forcing
to pull over times. Okay, we can see that the eye is actually not in the middle. So we just repeat this frame and then go and pick
this first Q frame, which we show is
the neutral push and contro V. You get the point. Okay, we actually need to
repeat this guy first. So Control C, contro V. Perfect. To pull over times.
But this case makes the mired mix things incredibly full of at times. But this cure makes things incredibly easy. Keep learning. Keep, so for keep learning, maybe we should make him
look a bit downward. Okay, and then repeat key frame and copy
this guy and pies. Keep learning. Keep learning. Keep learning. Keep
keep creating. I'll just copy this
and paste here. Okay? And the stars B. For the stars, I actually
don't want him to look down. I want him to look up. Okay?
So he should be looking up. So bring your time here to that key frame and make him look up B we're talking
about the stars. You get to control C and
come here and contro V. Let's play everything
and see what we've got. Hey, guys, it's really amazing to put you on this incredible
After Effects project. Yeah, it's looking good.
So I'll just go ahead and do the blinks to
select the blink, Controller, hit P,
create a keyframe. Now we just want to just
bring our frame to our time, go to three frames
forward and do this. Go to three frames forward,
Control C, Country V, go to three frames
forward, and copy this guy and piece.
So that's our blink. Hey, guys, it's really amazing. Yeah, it's really amazing, too. So we just need to
reposition this well Hey, guys, it's really Good. So we just copy this and
piece in different places. Retrovi Controv Controve. Okay? And controve. Yeah, now let's play and see
what we've got. Hey, guys, it's really
really amazing to work with you on this incredible
After Effects project. Quality character rig Quality character rigging can be really frustrating
to pull over at times, but this cure makes
things incredibly easy. Keep learning. Keep grating and the stars grating
and the stars B. B, your starting point. Yes, guy, so you can see that we have basically admitted
all our controllers. Now the next thing we do
is just finish this up. So we're going to
add the background, and we're going to hide
all our controllers. So just hide all your
controllers right now. I just on Chides and basically hide all the
things I need to hide, including our texts
and these as well. And you can see that I
actually hit my mouth. You can see that I hid
my mouth composition, which I should not have. So I'll just ible it here. So we have our mouth
composition back. Maybe I lock the layer so
that we can select it. I will also lock my null object
layer or hide the layer. This is my null object that official parts, I just hide it. And yeah, now we have only
our character animated. So I'll just go into
my composition, sorry my folder
now in my folder, I have this room Illustrator
JPEG image, so import it. And we're just going
to bring this into our composition and at a for scale and we
scale this down. You just want to scale this and position it so that it appears as if our character here
is in a room, right? Yeah, you just want to
position this realistically. Okay. So something like this
looks good. Yeah, good. And I just want to
select the image, hit T for transparency or
opacity and make our opacity 85% so that it's not taking
too much attention or 80%, it's a bit faint and we
have our character or our subject as the main
subject of our admission. Now, I'm just going
to play this. Hey, guys. Hey, guys, it's really amazing
to walk with you on this incredible
After Effects. Object. Quality character
rig can be Really for sure. Can be really frustrating
to pull off a shru. This cause makes
things incredibly fit this to the screen and make this full screen
incredibly easy. Keep learning. Keep
creating and the stars B B. Chip Greton and the stars Rs B, you're starting point. Okay, let's play this now
since the Run preview is done. Hey, guys, it's really
amazing to walk with you on this incredible
After Effects project. Quality character rigging can be really frustrating
to pull over at times. But this course makes
things incredibly easy. Keep learning. Keep creating, and the stars will be
your starting point. Yeah, and that's it
for this exercise. Everything has been admitted. We have our background.
Everything looks perfect, okay? So the next thing
we do is just, of course, just render this out. So best settings, hit okay. This, we're going to use the P four formats,
just hit, okay. And then Fisher begin P four. Perfect, and just hit render. And yeah, so this will come to the end of our
video or exercise. See you in the
next one. Bye bye.
12. 186 Cycling Character Animation: Hey, welcome back.
And this exercise, we're going to be recreating
the cycling animation here in After Effects. And I promise it's going to be packed with so much goodies. Okay? So let's go ahead
and start a new project. So I'm just going to come
to file new project. Yeah, so let's do this in
a new project entirely. Yeah. And then go into your
folder for this module, which is final
project module and bring in this illustrator file, this cycling admission
Illustrator file, select it. Go and select composition retain layer sizes
and hiding pot. And this is the file
in Illustrator. Okay? You can see the file. You can see all the layers
looking clean and divided. You can see that we have
a lot of layers here. We have the background
layer with our buildings in the back and we have
our character layers, bicycle layers,
our joint layers. Yeah, so this is a character
animation exercise. Yeah, so let's go ahead and
start working on it too. All we need to do now is
just click Auto clicker and go into character
and select this guy. And just hide him for now and then select our joints
guide and right click, convert or create shapes from vectoria so that we have our
guides as vector layers, as ship layers, so
that we can snap our anclepoint to the
middle of our ships. We can just delete this one.
Next thing I'm going to do is just come to my
windows and enable my Duik Angular rigging
interface, workspace. I'll go to workspace
and then go to my **** Ange Rigging
workpiece and it's just going to load everything up so that we have our
workspace and we can start creating our rig
here's our workspace. And now, I'm just going
to select this part. First of all, I'll just lock this guy because it's going
to be getting in our way. Lock this guy, which is our guides and then we
can select this guy, which is this flying dress
a and we want to hide it. But before then, I
think we should just move the ankle point to
where it's meant to be. I'll just hit T for transparency
and reduce this and we see that we need to bring
our ankle point around here. Around here and then just take a opacity back to 100
and just hide all here. Yeah, so that we can
see how main layers. Now, let's go ahead and start repositioning our ankle points. Okay? So just go in and start
with the right foot here. So I can isolate this if I want. I can isolate it and I can also isolate my right leg so
that I see both of them, and maybe enable
this guy so that we know that our right foot has
its ankle point right here. Now control to
snap to the middle of our ship here and just hide this or maybe not
and take the next guy, which is our right leg. This our right leg and we
just bring down a point here, the middle here. Yeah. Perfect. Now we can just hide them if we want or not. Okay? Yeah, but hiding them will actually make things cleaner. So we can hide them, and then we know we are done
with them for now. And then we have
the pedal front, but this is the bicycle parts, and we are not dealing
with them for now. So let's just go up
and start from up. We have our eyebrow and
our eyes and our mouth. What we want to do here is just kind of parent this to our head. So we have them linked to our
head and we just off them. We don't need them. Then now we can enable our head for head, we need to bring the
ankle point here. But we can also enable
our neck so that we see the head in
alignment with the neck. The head has to be here and the neck has to be around here. Okay, so we're done with
the head and the neck. Let's look at got the right arm. So isolate the right arm,
and for the right arm, we need to bring our
ankle point here, you guessed it. Bring it here. Perfect. Next, the
right forearm. For the right forearm, we need to bring our
ankle point here. So click and drag
whole down Control to snap to the middle of our
point right here, perfect. And then the right hand. Enable the right hand
and for the right hand, it has to be here to click
and reposition it here. Perfect. Then next, we
have the bicycle handle, and we don't need that for now. I'm just going to hide back right forearm
and our right hand. Now let's go to the right thigh. So enable the right thigh
and for right thigh, we need to bring
our angle point, I think, here, bullets. I getting a bit
confusing because of the overlapping joints. So for our right thigh, it has to be here around here. Now we can enable
our layer now and then know that it's supposed
to be here, perfect. Yeah. Okay. And then
for hips, for our hips, we just need to bring it around here in between these two, because this is for
the right thigh and this for the left thigh. Okay? So that's for hips
and then for torso needs to just be brought to about here. Just about here. Okay?
Yeah, just about here. Yeah, and then we have
our food. Our right foot. Yeah, our right
foot has been done. We are done with our torso, our right foot, our
hips, our right thigh. Let's go. We also done
with our right leg. Let's go down the list. For now, we're not
handling the tires. We're not handling
the pedal ring, the pedal road, the pedal med, the bicycle body, the pedal rod, B, and the pedal bag. Then now let's go ahead
and handle the left thigh. For the left thigh, it
starts to be brought here. Okay, perfect. Then the left foot. For the left foot, it has to be brought you guessed it here. And then the left leg,
for the left leg, it has to be brought
here, perfect. Then for the left arm, left arm has to be brought here and the left forearm has to be brought
you guessed it here. Then the left hand enable the left hand and
it has to be brought here. With that we've
come to the end of our repositioning
our anchor points. Now we can select all and
basically enable them. Okay. And now let's go ahead and hide our joint layer.
Just hide this layer. Now we can go ahead and start rigging our character and start creating
our bones, right? Yeah, so you know how we do it. We have to select from the
root to the tip, okay? So we can start with
our right hand, okay? So we can start with
the right arm and then select the right arm and we
see we have to open this up. And close this panel. We have to open
this up to enable our Duke Angela
plugin or script. Select the right arm and then select the
right forearm and then select the right hand in that
order and then go to bones. This is bones. So go to
bones and go to hominoid and click here and then click
here and just bring this. And now we have to select, we have to enable the hand, the forearm, the
disabled shoulder, we have to make it right. So click here to make it right, and then it's in the front, you hold on Control
or command on the mac and click here to create our bone structure
and automatically parent our bone
structure to our parts. Okay? So I'll just
bring this tip here. Now we can select our bone here, take our rotation tool and basically rotate our
arm very easily. Perfect. So that's
the first thing. Now let's go ahead and do same
thing to the other parts, select the left arm, hold down shift and select
the left forearm and then select the left hand. Just in that order and then come here and click here,
bring it here. This will be at the back, and
then this will be the left. So we hold down Control or
command and click here. And just reposition
our tip like this. Perfect. Now, let's go ahead
and do that for the leg, click on the right thigh, and then next click on the
right leg and the right foot. In that other click here, this time we're
selecting the leg. So click here, and
this is the right leg. So click here to
make this right and it's going to be in
the front, okay? Perfect. And then we want to
enable the tools as well. So click here for the toes, and we can see that
we have to redo that. So just click A. Let's
basically redo that. It's in the front. It's okay. Finding it hard moving
this sometimes. So it's in the front,
it's the right. Okay, and we want all this
so hold on Control and click and it's creating
our bone structures. Perfect. Now we just need
to reposition things, we just come in and
select this guy, select this guy and
bring him here, and then select this guy
and bring him here to the tip to the tip. And then for this
little joint here, we just need to bring
it to the heel. Okay. Yeah, just to
the heel like this. Perfect. This is
what we want to have for right leg. Let me try this. Yeah, we can see
that everything's working perfectly and do that. Go back to my move tool or my
selection tool and let's go ahead and work on
the other parts. Okay. So I'm trying
to select this one, but it seems it's far behind, so I was just going
to do that here. So let's start with
the left thigh, select the left thigh
and then the left leg, then the left foot. You come here and click
here, bring this here. This is the left and
it's at the back. Okay? We on control
or command and click here to parent everything. Perfect. Okay. Let's try this. Let's see. Yeah, so we're
moving our leg perfect. Now let's do that to the hip to our spine,
let's create our spine. So we're going to
start with the hip. There's the hip and
then the torso. There's a torso
and then our neck. Maybe we need to
select from here, so our neck and then our head. Then click here, go to spine. For spine, we want
just one layer. We want to enable the
head and we want to hold on control or
command and click here. Yeah, so we have our spine, and all we need to do now
is just bring our head, the tip out like this. Perfect. And let's just go through everything to make sure everything
is looking perfect. Now, we see that this
guy is not perfect. The one behind,
we didn't fix it. We didn't reposition
things properly. I'll just do that quickly. Select this guy, bring him
here, select this guy, bring him to the tip, and select this joint
and bring him here. Perfect. Yeah, now we're done with creating the bone
structures for our character. We're going to go ahead and
rig our character right now. So just select all the
bones so you can click here and select Libel Group
to select all the bones, and then come to bones. We're already in
bones, so click on bones and then just
click on Auto Rig. It's going to tell you
to hide layer controls. Just click on Hide
layer Controls and Illustrator or Duke is going to do its magic and
rig our character, and we'll be back when it's
done reagin our character. A Yeah, so our gin has been completed, and I'll just go ahead
and clean up my scene. First of all, I will
select my bones. So I'll just use this
to select my bones. Okay? And I will
just hide my bones. I'll hide my bones, and
then I will lock my bones, and then I will
just shy my bones. Okay? So all the lock layers, I am going to shy them. I'll just shy my bones
one after the other. This kets the bone. Okay. Yeah, let's hry that. Okay, we don't need to
shi the controllers. We don't want to shide
the controllers. So be careful and make sure you're shining
only the bones. Yeah. Now let's just go ahead and clean up
our controllers a bit. I'll select the head
controller and then go to icons and then just move
it to the left hand side, position into the left
hand side, just like this. I'll take it up a bit. I'll do that to
this one as well. Go to icons or icon and then
move it and move it up. And then you take the
rib or the torso, the torso controller,
and then also do that. I'm just going to
go ahead and do this for all these controllers. Here I'll just go ahead
and move them out of our character.
I'll do that quickly. I Yeah, so I've moved my
controllers out of the way. The next thing I'm
going to do now is just select all of them, all my controllers,
and I will just come here and type size. And I want to go into my ankle size for my controllers
and make sure I just turn them to zero so that
the ankle points are brought to the middle,
for all of them. I'll just close them back. Now let's go ahead and try them and see if they are
actually working well. I'll select this guy now
and just take this and see if my rig is working well. Okay. I'm actually selecting,
I actually select that. I'm actually selecting the hand. We actually need to log
all of these parts. We don't need to select them. We just need to select
our controllers. So let's try the
hand controller, and we can see that our
hand controller is working perfectly for right hand,
also for left hand. And for leg controllers,
it's working perfectly. For both legs, and also
for all these other ones. I really don't need all
of these controllers, so I'll just hide some of them. Okay? I'll hide this
guy. I'll lock him. Okay, and also shy the layer. I'll do that for
the hip as well. We don't really need this. Let me try rotating
it and see if it's going to be of any use to us. Not really. We can use the body for our rotation as you can see. We don't need the hip. Select the heap and then we just hide it and lock it and sh it. Same also with the
neck and the head. Or the shoulder rather, select the shoulder and just
lock it and hide it and sht. Also with the head, let me see. For the head, I think we want to just create a bit of rotation. Maybe we leave the
head and leave the body and the hands
and the legs. Perfect. We're done with this
and now we just want to clean up our sin further by hiding or shining all the layers we don't need here. I'm
just going to select this. Just hide them or first of all, lock them, and then sh them. So I'll first of all lock
the ones I need to lock. Key lock this, Lock all of these except
for the bike handle. Okay. And then lock the thigh, the torso, except for the bike
paths, which is the pedal. So sorry lock this and
then then go on to from here from the left thigh
down to this please, okay, down to this please. So just lock them and just shy all the lock layers. Yeah. So now the next thing
I'm going to do is just go ahead and rig my bike. So rigging my bike will
actually be very easy. All I need to do is pint
the tire the front tire and the back tire to the
body of my bike, okay? Now, that's the bike body. This is the bicycle body. So I'll just parent them
to the bicycle body so that it controls them, and then I will parent my pedal. So I want to select this
pedal and actually parent it to to this part, we
have them separate. We have this guy,
which is the pedal back and then we have this guy, which is the pedal back road. The pedal back will be parented
to the pedal back road. Then the pedal back road will be parented to the pedal med. This is the pedal med.
Yeah, so the pedal. The pedal back rod will be
parented to the pedal med. Okay. The pedal med will be
parented to the bicycle body. So bicycle, yeah. And then the pedal ring is this little
cycle we have here. So the pedal ring will be
parented to the pedal med, then the pedal bike handle, we parented to the bike
body bicycle body. Pedal front, let's see, the pedal front to
the pedal front, we parented to the pedal
road front. That's this one. So pedal front parented
to pedal road front. And then pedal road front, we parent it to pedal
ring ring, right? Yeah, the pedal ring.
And we actually need to reposition our ankle
points for some of this. So for this one, our ankle
point is just perfect here. But for this guy, we
need to reposition our ankle point here down here. So it has to be in the middle
of this pedal ring, okay? Yeah. So that's for this one. And then for this one
as well, where is it? Some of these names
are confusing. So for this one, it also has to be here. Yeah, and then for this
one, it has to be here, okay, because it's
going to be rotating from this point.
What else is left? I don't think anything
else is left on our bike. Okay, our bicycle body is
controlling everything. So it means we can
now rig our bike. Okay, we can now rig our bike. So for our bike, we want to actually have
this guy nibold. Okay? So we want to have him exposed, and then we want to have
these guys as well. So this and this. So we're actually creating
keyframes for them. We just hit R for them right
away and create a Q frame, because we are going
to be rotating them. Yeah. So every other thing
can be hidden for now. So we can just lock
them and shi them. Okay? Yeah, lock them and she
them. Don't lock this one. So just lock them and try them. The ones we don't need. Yeah, and also the Be handle. Do you have to
first and then shy. Yeah. So now we can go ahead and start animiting
our character. We want to animit
our character riding the bicycle just go ahead
and make more room here. I'll just squash this bit to make more room here
and I'll just zoom in zoom in to my fimes, okay? Yeah, now we have our
first key frames for our pedal meat and then our pedal front
and our pedal back. We want to now select our leg. Now I'm going to start
with this guy, okay? So I'm going to start
here and I'm also going to hit P for position, create frame for position
so that I move my leg, apart from P, I also
hit R to create a rotation qframe
then hit to expose all my qframes I'll do
that to this guy as well. So hit R, create a Q frame, hit P, create a Q frame, and then hit to show
all your q frames. Perfect. Now we're going
to start immediately. So for this one, you
want him to be here, and then you want
to go let's see let's go five frames for now. One, two, three, four, five, I'm doing control
right key, right Okey. You can do Command write k on the MAC to move five
frames forward. I want to bring this guy here. And then maybe just bring him down and then go
five frames forward, one, two, three, four, five, and then bring him here. Then go five frames for
one, two, three, four, five, then bring him here. We want to create this
look, as you can see, even though we are
going to further adjust every other thing
or further adjust the way it looks as
we rotate our pedal. We're just doing
this for basic look. One, two, three, four,
five, and we want to bring him back here. Now we have our key frames, and I think I
should just disable some of these features here. Maybe I'll disable the link and perent perfect so
that we have more room. Yeah. Now I'll just select my
pedal front, my pedal mead, my pedal back, or
maybe let's start with the pedal front,
and the pedal med. We'll go to the next film and I just want to
teat my pedal mead, take my rotation to the rotat
my pedal med gradually. And make sure my pedal meat is aligning on a straight line with our led like this, okay? And then I want to rotate
my pedal my pedal front. I want to rotate it
to look like this. Okay? So let's see
what we've done. So we're going from here. Okay, it's actually wrong. So you see some of these things can be
confusing at times. So the rotation here is wrong. The rotation on my pedal front, I'm just going to undo that. And the rotation actually
something like this. So just go over it and make sure you are
doing the right thing. This is what we've got. Now, it has to be
like this. You see? Perfect. And I'll just take this opportunity to reposition my leg or reposition
this Perfect. Then let's go ahead and
work on the next guy. On the next guy, we
have our leg here and our pedal needs to be rotated. So our pedal needs to
go round like this. Okay, I'm doing this gradually
so that I don't overdo it. I'm using control while clicking and dragging to adjust
the rotation value, okay? Yeah. So we can see that
our leg is going too far. Yeah, so we just take
our leg and take our leg up up to around
this point for now, and then we just
take the opportunity to rotate our pedal. So let's see what
we did previously. So previously we were here. Now we want to actually do this. Okay? So let's see if
it's working well. Come here and then
yeah, perfect. So we obviously need
to move our leg, move our leg on
top of our pedal. I'll go to the next guy. And for the next guy, we
need to rotate our pedal. Rotate our pedal make line here straight with the leg with the bis of the
leg just like this. Perfect, and then
take our pedal front, and this time, let's
see, we were like this. We need to Okay, I think we need to do
this. Well, let's see. Okay, so we like this. Yeah, this makes sense.
So we came here. Yeah, it makes sense. So now we're going to go
ahead and come back here. And for this, we need to take our pedal med and
route our pedal med to be straight at this and
then take our pedal front. And let's see. I think this would
make sense or not. I actually did make sense. Yeah, but of course, we
need to reposition our leg. So we just go over all
the key frames for leg or for foot and
reposition it, okay? In fact, we can of course rotate our foot because we actually did create keyframes
for rotation. You can further rotate your
foot to make things look more real of course our
pedal as well. Now let's go through everything. Right here, we see that
we actually need to move our foot up on top of our pedal. We just rotate it slightly to actually balance
on our pedal. Okay. Yeah, so we have this. Then we have this Then we have this. Then we have this. Then we have this perfect. Now what we want to do
now is we actually want to edit our admission path,
this line, you've seen. So we actually want
this to be cove. Okay? So you have to come here, take the convert vertex tool, and we have to just click and drag and basically convert our admission path to a
curve. We want a cove. So now we need to just go over
our Q frames one after the other so that we make sure everything aligns with
our curved path now. Okay? So you see it's
aligning better now. Yeah, so this is good. This is good. I think I will
just move our leg bit up. Yeah, so you've seen
the process for this. I'm just going to go ahead
and do this same thing I did for the right leg
to the left leg, okay? So I'll just speed up the video so that
it doesn't get too long and I'll be back when
everything looks perfect. So go ahead and follow
the same process you followed here to achieve the same animation
for the left leg. So see you when I'm done. I have successfully
created my key frames for my pedals and my
legs and my feet. I just hit the right leg right here to enable
me to see the left or the back leg.
That's the left leg. I will just go ahead and
enable it shy and look for my right leg where is it? This is it. Yeah, my
right leg is back. So now let's play
our mission and see. So I'll just bring my time
here to the last key frame, and we'll just hit and
to trim my work area. Okay, so that we can play in a loop as we can see now, our admission is playing
very well, perfectly. That's for our legs
and our pedals. Perfect. So the next
thing we're going to work on is actually making our character
touching our bike, okay? So I will just select my body handle here and take my rotation to
just rotate my body. Tell my body a bit. Okay, and then take this hand
and extend it here, and we can see that
the hand is behind our biehdle which is not
supposed to be Okay, so we want to bring the
hand above our bike handle, just like how we have
this one looking, okay? So for this one, we
position it properly. Okay? Just like this. And for this one, I
will reposition it like this and just go
ahead and fix this. Now our bike handle,
this is our bike handle. We just unlock it and bring it really behind
behind our layers. It has to be behind our layers, but our right leg has to be
behind it as well, okay? So it has to be in
front of our right leg. Okay? I'll just undo this
to see what I had before. Yeah, so we can
see that it has to be in front of our right leg. So I'll just go ahead and select our right leg, whereas
our right leg. Th should be our
right leg, right? Yeah, so I just undid that, and I think I have a better
way of handling this, instead of taking a bike
handle behind our layers, what I'll do is I'll
select my left hand, okay, which is actually here. Okay, now, this is
the right hand. Let's go down a bit. I can't find my left arm, okay? Left arm left forearm, left hand. This is my left hand. For some weird reasons, I get confused with latrine. What I want to do now is I just want to actually duplicate my left hand because I
just want this part of the left hand to be
on top of my pedal. I'll just do Control D on
my left hand and I will select my pen and just come and create a
mask on my left hand. Just like this. Yeah, just like this on my left hand, I want to bring this
layer on top of most of my layers on top
of my bike handle layer, most importantly,
yeah, just like this. Yeah. This is just what I
want to do to make it seem as my bike hand is in front
of my bike handle. So just this. Yeah,
this looks perfect. So we want to have
it looking like this and we want to just
admit our body a bit. Let's admit our body
and also our head. We're actually going to be
creating a loop admission. Let's see. For our body, we just want our body to
first of all, first of all, we want to hit R for body, and then create a Q frame. Then come some frames in
time and maybe go down bit. I think we also need
to create a keyframe for position or
just don't do this. To create a keyframe
for rotation, hit P, and also for position,
hit two times. Then go biding time and
maybe for your rotation, just tick this and just do this. Okay. And for my position, maybe I'll just take her
a bit forward slightly. Let's see how
everything, please. Okay, so what we want to
do now is we actually want to copy these
key frames back. Control C contro V, Control C, Control C contro V. Now
let's see what we've got. Okay. It's just spread these keyframes and
see what we get. By doing that, I'll just reduce
my resolution to half and then So this might work. We might change things later on, but let's work
with this for now. And then for our head,
let's see for our head, you might just come here and
maybe hit R for rotation, create a bit of rotation. Where is our head,
controller, this is it. And then just come in
time and maybe do this. We just want to have some
movement basically, okay? Maybe copy this guy in Piest. Okay, so for now,
let's work with this. For now, let's work with this. Yeah. So the next thing
I'm going to do is just rotate my tires. So I'll go down,
look for my tires. I think I locked them. So my front and back
tires to select them, select both of them, hit R, and side them, and we want to create a keyframe for
rotation, and then come here. Okay. And then let's
make this say seven. And let's play and see. I actually meant
seven revolutions, not seven rotations, okay? So let's make this
zero, and let's make this seven actually
seven revolutions. Yeah. And now we see that
she's riding her bicycle. Let's zoom in and
see. Maybe we want to just make our bicycle go faster. So let's see 11. Let's try something bigger
and see if it's going to work better.
Let's see t three. Yeah, I think tile
three works better. I like how the
rotation is right now. Tie three works better. I feel her movement that the movement of her body
is a bit too exaggerated. So let's see. Maybe we could do
something about it. So this is the initial and she goes
this way and goes back. To maybe this one
could be less rotated. Okay, so I'm just trying to
do things very slightly so that the changes
are not too much. And also for the head,
it's too obvious, select the head and to your rotation and just maybe
slightly bring this down. Let's see. At least she's moving her body. It mustn't look like this. You can make yours a
bit more exaggerated or a bit more reactive. This is just for you
to see the process, yours can definitely be better. I'm just going to hide my controllers and
let's finish this up quickly because the
video has taken so long. Hide all these controllers and now we can go on
to the next thing. Now for the next thing, all
I need to do now is just go back to my default workspace. Here in my default workspace, I'm just going to
go ahead and enable my background layer this guy I shy him and then I'll shy all other ones so that we
have layers to work with. I'll also shy my
controllers or my controls. I'll sh them so that we only have this layer to
work with and I'll just unlock it and I'll do Control K to go into my
composition settings, and I will make my
composition white. Idaho. Next, I will select him, right click and
precompose and move all attributes into
the new composition ik and now going into
the new composition. What I want to do
is do Control K for my composition settings, and I want to make
my width 12,000. I want to make sure
they are not linked. 12,000 seems good. I'll bring this guy here and
I will just do Control D to duplicate this and bring
the next guy here, and then another Control D to bring one more version
here and finally, another Control D
to complete it. Yeah. What we want to
do is come back here and we just want to
select our background, bring our background here. And then just do, first of all, we want to make
our admission just as long as S 12 seconds. Hit N. Then we want to
select our background, hit P for position, click here to create a new qframe actually
here on zero second. Then come here to 12
seconds and just bring your guy here. Just do this. I'm holy down shift to move
it in a straight line. One thing we actually need to do is we actually need to add a loop expression to
all our keyframes, apart from this guy. I'll just close this and shy all my layers and basically all my layers that
have keyframes. I'll select everything can
be selected and hit you to expose my keyframes and I hope I have all my fs all my layers
with key films selected, so that we don't leave some out. Yeah, I want to
create key frames or I want to add expressions
to all these layers. So I'll I'll just Hullt or option on the MAC
and click here to add on expression and I'll just come here and
go to properties and go to LoopOut this
particular loopOut click on it, and we're just going to do
that for all other properties. Hold Alt click and come
here and loop out. Now just peed up the
video so that we don't spend all the Yeah, so I've added my loop
out expression to all my animitd layers or all
my layers with keyframes, and I'll just play this
down to see what we have. Yeah, and as you can see, everything is playing perfectly. Everything is looping
out perfectly. And our background is also animating perfectly
so that she seems to be walking or she seemed to be moving in relation
to the background. So that's what we
want to have here. Looking incredible,
looking perfect. So the next thing I'm
just going to do is just select everything
in close them, maybe sh them, and
create a new ship layer. And for this new ship layer, I just want to
take my pen to and I want to draw a little heel. Okay, I want to draw out
a little hell Okay, this. Yeah. For my little heel, I want to admit my
little heel from here, so I'm just going to select
hit P on my keyboard and bring my little
heel here and create a key frame and come maybe 1.5 seconds and bring my little heel while holding down
shift out of my fime, so that we have this admission so that it seems as if she's
passing in front of a heel. You get the point. Let's play this and see if
the speed is okay. Yeah, of course, the speed
for the heel will be faster because the camera
is closer to the heel. You get the point. So I'll
just do that one more time. I'll create another
one, new ship leer. For this one, the
heel is going to be a bit steeper, kind of,
something like this. And as you can see, I'm
using a green heel. So it's just more of a lawn, but a hilly lawn, kind of. Yeah, so that's the concept
we want to be using here. So for here, we are
just going to hit P for position with the keyframe,
bring our position here, then come some frames
or some seconds in time and bring our
position here while holding down shift and just
pred our keyframes out a bit and play our mission and
marvel at our awesomeness. Incredible. Yeah, so I
love this. I love this. The final touch to this
would be actually to enable our flying dress to
our flying dress, unshy things and go and
look for a flan dress. This is our flying dress. Yeah. This is it. Our flying dress. This is our flying
dress and we just unlock it and unshy it and
shy every other thing else. And for flan dress, I
just want to select the flanre and I want to add
the wave wrap animation. So you just type w on
your effects and preset and just select the
wave wrap animation. And we want our
rotation to be this, I think minus about
-100 towards this side, just towards this direction. And we want to make
sure we are using the type, the sine with type. And for our height, I will just give this
minus nine minus nine. And then for our wavewidth I just increase this to see 59. Okay. Yeah, 59 looks good. I will just
reposition this to be on our shirt or on our
character. Yeah, just like this. Perfect. And we just want
to come here where it says spinning and we
want to select top edge. So it pins it to this point, to the anchor point
to this edge. Yeah. And basically, that's
it. Let's play and see. Yeah. So that's
it for animation, as you can see,
everything looks perfect. We could boost up
the resolution. Let's boost up the resolution
so that we preview everything in
perfect resolution. Okay? So you can go in and
maybe animate the eyes, animate the mouth, okay, create more character, okay, add more expression to her character to make her
more expressive, okay? And that will make the
animision even better. But you know the basics now. You know the process
of doing this, this is the process of
doing this process. But yours can of course be better and yours should
definitely be better. I love to see what you achieve, I love to see what
you come up with. Kindly share your
results with me, and that's it for this one. See you in the
next one. Bye bye.
13. 13 Conclusion: Congratulations on
completing the class. You just explore one
of the most exciting and creative areas
of after effects, character and
mission, and that is a big step forward in your
motion design journey. In this class, you
learn how to prepare characters for admission,
set up your workspace, install a used dic angel,
create wound structures, work with auto regain,
clean up your rig, and build practical character
admission projects. You also explore facial
regain, facial expression, leap syncing with SF Cardi, work around cycle and mission, and cycling and mission. These are powerful skills
that can help you create more expressive admissions
for explaner videos, social media content,
storytelling projects, motion graphics, and even more
advanced character scenes. Before you move on,
make sure you complete your class projects and upload them to the project section. I'll love to see what you
create and sharing your work will also help you build
confidence as an animator. Remember, this class is part of a larger Skillshare
series based on my complete Adobe
After facts class. So if you haven't taken
the previous classes yet, I encourage you to go back and explore them because each class is designed to help you build
your skills step by step. And if you're ready, continue. I'd love to see you
in the next class in the series where we keep building on everything
you've learned and take your after effect
skills even further. Keep practicing,
keep experimenting, and keep bringing your ideas
to life through motion.
 Ukpoewole Enupe, Become a Pro Designer Today!