Transcripts
1. Introduction Animals: Illustrating animals is probably
my favorite thing to do. They come in all
shapes and sizes. And that are just
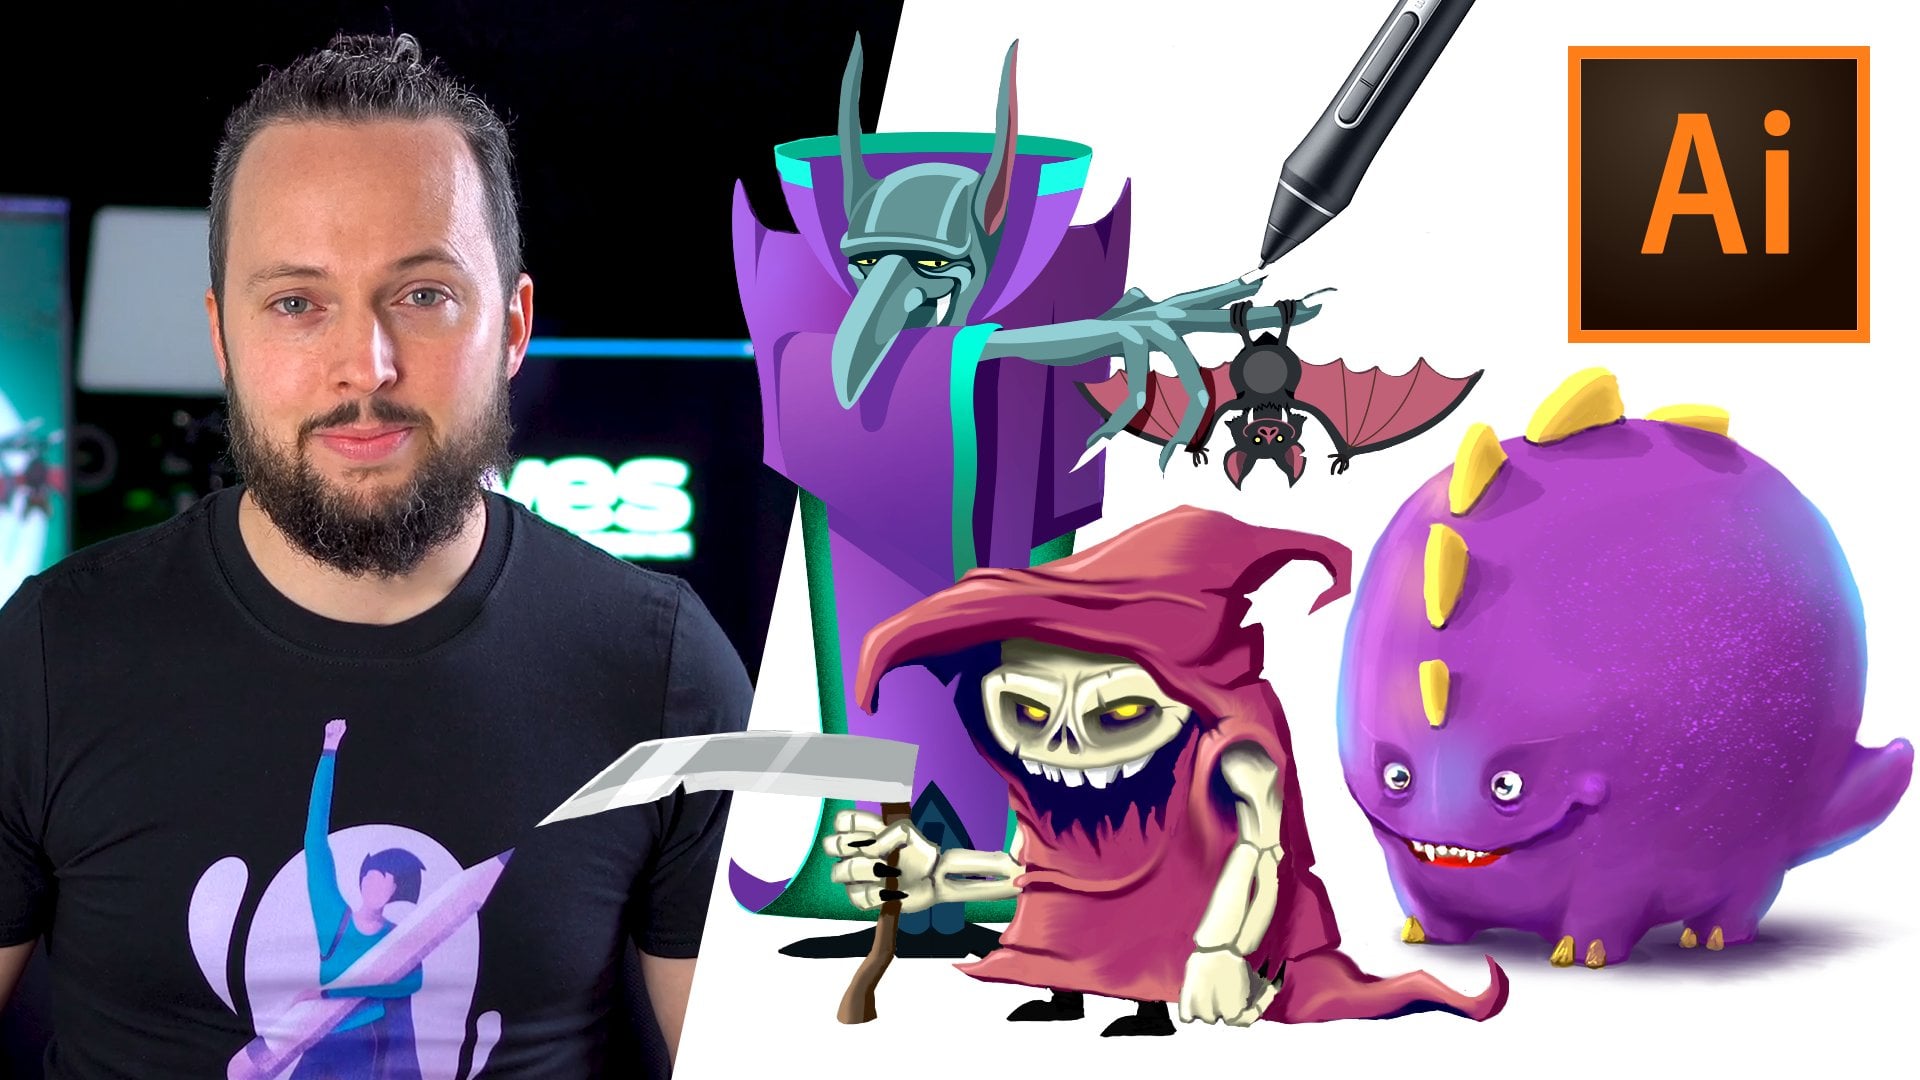
so many things you can exaggerate and make fun of. I'm Martin, I have over 20 years of experience
as a graphic designer, illustrator and Adobe
certified instructor. I have worked with
companies like BBC, these knee, Google, ikea, and I cannot wait to share my best
practices with you. This is a streamlined
hands-on course focusing on a real
life design project. I will be walking you through everything step-by-step
and you will get all the exercise files
so you can follow along in case you
prefer not to copy me. You can also follow my workflow using alternative
assets provided and create something
completely unique that you can showcase in
your creative portfolio. I am pretty sure
this course will inspire you to create
something amazing. First, we will cover some
tips that can help you find your own unique
illustration style. And then we will
jump straight into Adobe Illustrator to work on too cute animal illustrations, Ulama and the swap. We will be using
various techniques and features like the Pen Tool, Curvature tool, shade bill
they're keeping mosques. Also learn how to apply complex textures and effects
to our illustrations. Besides all the technical stuff, we will also cover some important graphic
design theory that you will be able to apply in any of your future
creative projects. You can join this course without any prior knowledge
in graphic design, illustration or
Adobe applications. But to complete the project, you will need access to Adobe Creative Cloud and a
desktop or laptop computer, but now it's time
to start creating. So I will see you
in the next lesson.
2. Workflow explained: I have two examples that I'm
going to walk you through. One will concentrate on the actual tracing and
coloring in Illustrator. The other one will be a little
bit more advanced showing how to do shading by also
using some textures. And you can decide
to follow along and re-create both of these
illustrations if you want. However, what would
be even better is once you've understood
the techniques, you choose an animal that you
would like to illustrate, you find some references
for it, do your sketch, and then turn it into a vector
artwork using Illustrator. You can use Illustrator on the iPad or the desktop version, or maybe a combination
of the two. And in case you are
completely new to drawing, you can also find a sketch
online that you like and turn that into a vector artwork for the vector part of the work, which is the tracing, coloring and the rest, you don't actually need
to have drawing skills. It is more art working. The creative part
is really coming up with a good sketch
and composition. So before we get started
and jump into Illustrator, I would like to talk about
something very important, and that is how to find your
style as an illustrator.
3. Illustration style: Most established artists
have a unique style that fans admire that can
be easily recognized. If you are planning to become an illustrator or
digital artist, you will most likely
one the same to define your own art style and to ensure that your ART stands out. In this video, I will
demonstrate how to achieve this by analyzing the
work of George tongs, a young and talented
illustrator, I instantly became a big fan of George's work the
first time I saw his portfolio at a b hence
review event that we hosted. And since then he became one of the top talent of 2019,
selected by Adobe. And his Instagram
account is also getting a lot of
love and deservedly. So now we already set
down once with him and we have that video
here on the channel if you want, just check it out. It's in the show,
your work playlist, and the link is also in
the description below. But this time I'm going to take a closer look at his work, examples of all the different
animal illustrations that he's popular
and famous for. But the main thing I'm
looking for really is the answer to how
he found his style. And that is probably the
most difficult thing and most complex thing as an artist or as a creative you
are challenged with. So here's some of the images that we will be looking at in this review and starting
with this process. But we can see the
original sketch. So the final work is this one. I'm just going to show you
the veil and the squid, this fight between
these two animals. And then we can see that
the original sketch already is very well
establishing the composition. And that's one of the
things that I wanted to get to in this video that if you are good at
planning your work, most likely you will
be able to get to a very well-defined
composition in the beginning, even video rough sketch. So if you have a good plan or
idea and you commit to it, normally, you will
be able to produce more work and also your work
will be more recognizable. So having a good plan, having something
that you commit to, and usually a solid sketches, something that I
normally mentioned that you should always strive for. So let's see what was
Georges next step? So from this rough sketch on paper was then taken
into a digital format. And in Procreate, he's drawing over it and constructing
all these lines. Now you can see that he's very meticulously
constructing everything. So it's very geometric
and we have lots of sharp angles, straight lines, and these very nicely
constructed round corners or a radius around the edges. But from this we get
the cleaner result. Here we can see
better the outlines, and then we get the base
colors and then some textures. And then finally we have all the additional
details added here. Now in this case,
George not only had the rough sketch really
close to the final result, but he even knew the colors
that he's going to use. So notice this sketch here saying the veil is
going to be green, black background
here is he's saying, and then the screen is red. So even the color
theme or palate was established in the
original concept. Now of course,
this is not always the case with this
other example. Here I'm going to again show you the sketch and the final
result next to each other. We have a lot of different
variations of colors. So he was not a 100% sure what color theme you
should work with. And we can see his
research for the project. So he found so many
different color variations that he was thinking of using. And then we can also see him
experimenting with these. So I'm just going to show
you these three variations. So once you have the outlines, he did very quick sketches, just adding some paint and experimenting with
different variations. That exploration is sometimes part of the process for George. But even though he was
experimenting with colors, the original sketch
was once again really close to
the final result. So it shows a very solid
plan that he started with.
4. How to find your style: I believe that the
two biggest goals and challenges of all creatives, and including illustrators, are to find their unique style, something that is recognizable. So a certain look that is
established as their own and to create appealing art
design or any kind of work. And this can be very difficult. So first of all, to
stand out and be unique in today's world
is really difficult. We are constantly bombarded
with all kinds of visuals and it is really hard
to get people's attention, let alone to have them
recognize your work. And also it is very
difficult to define what is going to be appealing
to your audience. Whether you are trying to reach a broader audience or
just a smaller group, is still important to understand what makes your work at peeling. To get answers for these
difficult questions, it's best to look at emerging talented
artists because they are still exploring
different styles. And they are trying to find their voice and their
way in the Korea. But also thanks to social media, we can follow really
rich of their work, gets more likes and more
attention from their followers. We're living in a
very connected world and it helps artists
to get more exposure, but also to guide them in understanding what works and what their audience
is interested in. Of course, it can also be discouraging if you
are not getting that many followers and
you're not getting likes or comments on the
work that you share. But persistence is key, of course, like in everything. In case of George, he has been sharing his work for many years before
it got recognized. And now finally he's
getting all the followers. But make sure you check out his Instagram account where
he's also doing regularly. Draw these in your
style challenges. He posts an image of one of
his recent work and then select the best art sent
to him by his followers. So just as an example, the leper that I've already
showed you earlier was recreated by all of
these other artists. Just going to show
you a few of them. And these are screenshots
from his Instagram account. And they are all really similar in terms of
colors and composition. But still we can
see that the style of each artist is different. That's the cool thing about art, is that everyone is going to create something unique
because their style is a combination of all
the influences that they had and all the
experiences that they had. So one of the answers to the
question that how to find your style is that
you don't need to look for it because
it's already vdu. So everyone has already a style. The challenge is more
about refining your style. So just to prove this to you, let's take a look at some
of Georgia's earlier work where he's unique signature
style is already noticeable, but it's not a 100 per
cent crystallized yet. So here he's already doing recognizable and
familiar animals in strange poses and
exaggerated proportions, vivid, vibrant colors. And of course, he's
achieving this By extensively studying
animals and their behavior. So just as another example, his understanding of bears
in particular comes from all of the studies and the illustrations that
he did in the past. So I'm just going to flick
through some of these quickly. And you can see there's loads of different styles and
explorations here. But essentially, this
shows his understanding of the anatomy and behavior
of this particular animal. He even gets up close and personal sometimes
with these animals. And don't ask me
about this photo. This is on his
Instagram account. Maybe message him to find
out more about this counter. But let me show you a
more recent example of a bear illustration
by George. And when you look at this, you will notice that the original traits from the previous illustrations
are still there, but he's much more confident in using these bold
shapes and colors. So we can clearly see an evolution here from
the left to the right, from doing simple animal studies to ending up creating
these highly stylized, exaggerated, and as simplified
illustrations of animals. And to get back to the
other question that we asked on how to make
your work appealing. I think in his case, the appeal lies in
seeing organic, natural curvy shapes, Animals in this stylized constructed
geometric forms. So why is this appealing? But first of all, because
geometric shapes are just perfect and it's
great to look at them. But also somehow George
finds to combine these shapes and still make these characters
recognizable. Especially in today's world, you need to be able to get people's attention and you want them to look at your work, at least for a
couple of seconds. That's already and achievement. And if they are interested, they will probably keep
scrolling and keep liking and keep following
eventually your work. So hopefully this explanation is going to help you to
find your own style. And more importantly,
it will inspire you to sit down and
do some drawings. If you'd like Georgia
and you love drawing animals and you want to
get really good at it. Then I have a couple of
book recommendations for which the links are
in the description below. But we also have
a blog post about this topic which goes
into much more detail. But I'm going to show you these couple of books
that I think are just great and really
inspired me to draw animals. So one of them is Chris
errors, daily zoo series. This is definitely something to check out, very inspiring. Then there is the
brilliant book of Ken halt grants the art of
animal drawing. One of the books from
terrible with ledge, one of the best artists drawing
animals, in my opinion. This one in particular is a brilliant one that's
worth checking out. And most recently,
the masters of anatomy came out with
drawing animals book, which is also great. And Raul Moreno shows brilliant characterizations
of animals in it, studying from these
artists and others, and also doing as
much drawings as possible is what's going
to get your results. And that eventually is going
to lead to that refined, an established
style that you can see with emerging
artists like George
5. Illustration start - Sloth: Alright, so this is how I
normally start an illustration. I have a sketch that I
placed into Illustrator. Now, you can create
these sketches in Procreate or you can draw
on paper and scan it then. But the reason why you
should always start from a sketch is because
it helps you to capture the essence of a character and add the
expression like here, we have very simple shapes, but it already has some flow and some shape
language in place. Having all these
curvy round shapes are always good for
these cute characters. And the sketch can really
help to achieve this, but you might need to
do a couple of rounds. So a few sketches, quick ones from which you
can choose the best one. So I try not to stop
and just do one sketch. I usually do a few of them and each of these usually
take around five-minutes. So it's not that much of a
commitment, but believe me, having a good expressive sketch is the key for a
successful illustration. Or the rest is more like art working in a way because you
can learn the techniques. But having a good sketch in the beginning
is what's going to be the heart and soul
of the whole artwork. So without any further
delay, let's get started. You can see I have the colors already prepared
here, so I again, I don't want to waste
time on collecting them and I also save
them into the swatches. Plus one I'm going to do
is to show you just very briefly how the end result
is going to look like. So here's a bit of a sneak peek of what we
are going to achieve. And now that we've seen
it, Let's crack on. You can see there will be some differences from
the original sketch. And that's fine again, because
this is just a guideline. You can always change things
around as you go ahead, but we'll go through all
of that in more detail. So I'm going to double-click
on the sketch layer and turn it into a
template which will limit automatically
by 50 per cent. And then I'm going to select this additional layer on top
on which I'm going to work. Now, the main tool I will be
using is the curvature tool. And this is one of the tools in Illustrator that doesn't really get as much love as it deserves. Most people would recommend
everyone to use the pen tool. And we know that the
pen tool works in a way that you click to create straight lines or click and drag to create curved lines. And that's great for most cases. But if you know that
your character or illustration has a lot
of round shapes in it, then it's probably worth trying. The curvature tool, which
by default draws curves. So let me show you how it works. It's here in the toolbar. And by the way, if
you don't see it, you have to go into the
Edit toolbar option and you have to make
sure you choose from here, the Advanced Toolbar. Because by default it's set to basic and it might
not show this tool. So once you see it, you can just select it and you can even assign a custom
keyboard shortcut to it if you use it often. Now that I have it selected, I'm going to also make sure
I don't have a fill color. So I'll press the question
mark or forward slash on the keyboard that removes the
currently selected color. Now I can start drawing with it. So when I click, I'm just going to
start drawing here. Maybe when I click, it creates the
first anchor point. But already it looks
slightly different. It's not a square,
it's a circle, which already indicates
that you're using the curvature tool
instead of the pen tool. But as soon as I click next time and start
moving my mouse, you can see how
immediately it tries to bend the shape and
create a curve. So what started off as a straight line now
turns into a curve. When I click again, you can see how nicely it will try to follow the
shape I'm creating. So this is not a perfect circle. It's a specific curve that
I want it to create here. With these few points, I couldn't really
closely follow it, but once again, I'm not trying
to be exactly the same. We're not trying to be
exactly recreate my lines. I just use that as a guideline. So let's continue. I'm going to add
another point here and then another point around
there, around there. And the belly needs
to curve like that. And then come up here. Now at 1, I might need to move these points
around a bit more. Put one more point
up there and there. So you can see that this point here is
a little bit sharp. What you can always do is
to double-click on it and that makes sure that both
sides are curved up. If you double-click on a point, it turns it back
into a sharp corner. Let me show you here
on the top as well. So when I do that, you see we can very quickly turn these points
into sharp corners. Or when I double-click
again on them, we can turn them back
into round shapes. Now, this is also very useful, but what's even more useful
is that with the same tool. So without changing
through any other tools, I'm still using the
curvature tool. I can already start moving
these points around a bit. And that's what I really
love about this tool that I can mold the shape
almost like a sculpture. I can move things
around and find the best point for each
of these anchor points. That with the Pen
tool would normally be switching back
and forth between the direct selection
tool or using shortcuts to move
anchor points around, adjust them and
just the handles. There's a lot to worry about when you work
with the pen tool. By the way, if you switch to the pen tool and
notice how immediately all of these points
change to anchor points, the usual square anchor points. And if I click on one of them with the direct selection tool, it will show me all the handles. So that's when it gets
more complicated. If you are new to Illustrator, I would suggest to stick with the curvature tool
because it just makes it much easier
to work with.
6. Creating the main shapes - Sloth: Now a cool thing that
you can do is if you feel like there's
too many anchor points, you can also delete
them by just clicking on one and then press
Backspace on the keyboard. You can delete it. And here I feel like that
might actually help to create a better round belly for our
sloth, something like that. And maybe even this
other one we can delete and then just move that
point a bit further down. So that is quite a nice shape
there, here on the top. We can also check if we need two of these points are
one will be enough, but I think two points
when necessary. There. Of course, the less
points you use usually the easier to work
with your path. But you don't have to be too stingy like when you're
working with the Pen tool, you want to reduce the
anchor points and use the least amount you can
with the curvature tool. I think it's a
little bit easier. You don't have to really force yourself to use a
minimum amount, but you can see
sometimes less points helps to define
the shape better. So that's our main
shape already in place. And I'm not going to add colors just yet because I would
like to see what I'm doing. Instead I'm going to draw
all the rest of the shapes. So let's do the arm. And again, I'm going to start
with the curvature tool. Just simply click,
come down like so here I'm going to double-click to make sure that this is a coordinate point. And then I click, click and see how it
becomes already curves. Yeah, so that's going
to work quite nicely. We can always move this
further to the left later on to make sure that we have a nice curve that at the end. But for now I'm just
going to keep it here. And if you want, you can always close the shape, even when the pen tool, you can just use the pen tool
and close up this shape. It's good habit not to leave your parts
open in Illustrator, especially if you
are planning to sell them on stock sites. So it's a good practice
to close them in, even if it's not really necessary from the
visibility point of view. But now that we
have that in place, we can again switch back to
the curvature tool and draw in the arm here in
the back or lag. So we are going to
draw this like so. Again, we'll create the 1.2nd and then come down
probably around here, further down, somewhere
around there. Now I'm going to move
these points around. The bit, can go
up a bit as well. Yeah, That's cute. And then we use the pen tool and
just close it off. Of course, you can use
the curvature tool for closing it off as well. But I just find it easier
to do it this way. And this is actually a
shape we can reuse already by using the selection
tool alt, click and drag. I'm going to duplicate
it and just rotate it slightly and maybe make
it slightly smaller. Something like that. And you can see already I am changing slightly the
original drawing. I don't actually want
these two legs to overlap. I'm going to create a bit more visibility for
the lag in the background. But we can always
tweak this later. That's why I keep all of
these shapes separate. Now moving on, I'm going to
use again the curvature tool, and I'm going to zoom
a little bit closer just so we can see
the face better. Here I'm going to
start by holding down the Option or Alt
key on the keyboard, because I know that needs
to be a corner point. And then I click and click
to create the first shape. Again, if I hold down
the Alt key here, I can make sure that's
also a coordinate point. And then click, hold
down the Alt key again. Click on key again, click, again, click
and then click. So you can see again, holding down the Alt key or Option key can save you time
when you're working with the curvature tool
because it helps you to alternate between corner
points and round points. And I love the fact that I can always adjust these
points later. So you can see, instead of having that
point there in the middle, if I move it up here, it actually creates or recreates
that shape much better. Also, don't forget
that you can use the corner widgets if you switch to the Direct
Selection Tool, any corner points will have
a coordinate widget on them. And then if you have all of them selected at the same time, you can drag this corner widgets in to create a round corners. And then these are
completely non-destructive. So you can make them
big or make them small again and go back
into sharp corners. The cool thing is
that if you add corner radius on
these sharp corners and you switch back to
the curvature tool. It will still work. It will just have a bit
more points on the curve. So I'm just going to undo
that because I think having those sharp corners
that are actually good. And even though this drawing, I wanted to make it
very round and fluffy, I still like to have
some sharp corners. And also in this
case on the arm, I feel like it would
be good to have a sharp corner on the elbow, again, just to have a bit
of variety in the shape. So if I zoom in a
little bit closer here and use the direct
selection tool, I can select this shape. And if I double-click
on this point, that already creates
that perfect shape I was looking for before. And after. You can
see that having that sharp corner dad creates
a bit more interests. And these are the things
that you will learn and you develop as a style. Whether you prefer to have that variation in
shapes and lines, or you prefer to have
them more round. It's completely up to you. It's your artistic
style that can be defined by even simple
things like that.
7. Creating the claws - Sloth: Alright, so let's move on. I'm going to draw
the clause now. Again for that, I'm going to use the curvature tool and I
will actually draw one, a v form the drawing,
something like this. And then at the end that, okay, That's looks quite good. Maybe drag this one
up a bit or down. Yeah, that's not too bad. If you drag two points
too close to each other. It also automatically
merges them, which is quite a neat
feature I actually prefer, in this case, I
think the pen tool. So at this point I will
switch to the pen tool. And with that one, I can select these anchor points
and also the handles, and just adjust
them a little bit further until I'm
happy with the curves. Yeah, something like that. Looks good. Okay. It's always good
to have references of the actual animal
that you're drawing before you create
details like this. So it's good to
know that they have actually really long clause. But of course you can
exaggerate these things. And for these, because it's a little bit difficult
to select them. I'm going to press Shift X, which will turn them
into a filled shape. And I will already start using the colors are collected here. So I have the colors for the
clause here on the right. And I am going to
reduce the same size, assuming a bit closer, Let's see where it was,
something around that. It gets a bit smaller. And then Alt click and
drag to duplicate. And hold click and drag again. This middle one can be a
bit bigger than the rest. And to make sure that we
can see them separately, I have another color edit here, so I use a slightly brighter
one for the middle ones. And I'm going to select all
three, group them together, Command or Control G and
then Alt or Option click and drag them here to the back. Something like that. Okay? Now you can always reversed this or reflect it and
I think that helps. I'm using the reflect tool
always the shortcut for it. And all you have to do
is to click and drag to reflect the selected object. So that was a quick and easy
We use of the same element. And in general, in Illustrator, you want to work fast
and efficiently. So any little time-saver
like that can help. Now we can draw the clothes
for the other leg here. So I'm going to
double-click inside here, select one of them, copy, double-click
outside, and then paste. I'm going to use the reflect
tool and reflect it around. Let's just zoom a bit closer. Here. We can place it down. Something like that nicely
following the shape. Yeah, something like that. And then old click and drag. Using the other color for this. Put it behind command
square brackets. You can push details behind. And then the other one, we can make slightly
smaller and longer. And then the third one, we again twist around. It gets slightly smaller,
Something like that. Okay. So if you feel
like it's a bit too far, we can always bring it
a bit closer. Like so. Alright, these clothes we
won't see because it's hidden. And then we'll have more details for the brunch and also details for the firm. We can actually order the create the details for the firm now. So I'm going to
zoom a little bit closer and I want
to have a bit of detail here on the head
and also on the back. So what I'm going to use for this is again the
curvature tool. And what I'll do is I'm going to double-click on this point. Then click and click, Double-click on the top, come down and click twice,
double-click again. And then we can
click and hold down the Alt key to make sure
that is a corner point. Click again. And two of them, I think will be enough, but
maybe we can do a third one. So again, click, click,
click and click. And then here at
the end we can just double-click and click at the end so that we have a little detail which
we can always refine. So if I select this and
use the curvature tool, if I feel like I
need to refine it, I can move these points around. Slightly smaller at the end. I think that looks quite nice. Then we will be able to use
that at the bottom as well. We just have to old
click and drag, maybe flip it around and maybe
make it a bit bigger here. So it's not like a tail, but you can consider
the tail as well. It's more like a detail
on the back just to make it a bit more
fluffy and furry, instead of adding a
lot of fair detail, sometimes less is
more and you just indicate subtle details like
these will already help. So now it's time to end the facial expression and
the details on the face. I changed my mind. I'm
actually going to create an open eye version
for the slot. So if you remember
seeing the example, will create more like
that, something like that. So let's just start
with the mouth. I'm going to keep
the layers away. I had them. So I'm going to use again
the curvature tool. Click, click and click, as simple as that, and then Shift X to swap the fill color
to a stroke color. And I'm going to use a
darker color for the stroke. By the way, when you have
the field color on top, even though it's empty, in case you want to change
the color of your stroke, just press X on the keyboard. You can swap which color
is highlighted and then what whatever color
you select will be applied to that attribute. So now that we have
that in place, I can increase the stroke size
maybe to one millimeters, and then I would use
a width profile, probably this one for the mouth. Now we can always increase this further if we want
to make it thicker. But I think the one millimeter
for now we'll work. And then let's draw the nose. Now for the nodes, I'm going to use again the curvature tool just
to stick with the theme. I'm going to start
drawing here on the left. Here at the bottom
I double-click. I want to keep that one sharp. And then just another
line here on the top. Again, you can see
I'm trying to mix these round shapes with
some sharp angles. Again, just to go with that variety that we started
there at the bottom. And I'm going to for
now just keep it as is. And probably colored
this with the dark, same dark color what
I used on the mouth. So now that we have
these in place, I'm going to draw
one of the eyes.
8. Drawing the eyes - Sloth: For the eyes, I'm going
to start with a circle. So just use the Ellipse
tool and click and drag. I can even hold down
the Shift key if I want to make it
perfect circle. And then I am going to use a
bright color for it for now. And then I am going to add the eyelid for which
I'm going to use again, the curvature tool,
double-click, double-click, and then click, click and click, Shift X, swap the colors around,
remove the stroke. And then with the curvature
tool we can refine the shape. Something like that. That looks all right, another circle for the iris. And then we just need a little reflection
and other circle which is going to be
white fill and no stroke. It's getting there. The only thing I would like to change is to make sure that the colors are
slightly different. So this one can be
a darker brown, or maybe the eyelid
can be less dark than that and just put it
all the way on the top. Yes, that's a bit better. But to have a look at the
original drawing that I did, you can see if you add a bit of variety in the shapes instead of keeping them completely
perfect like this circle, it already gets a bit
more interesting. So what I would do in
this case is to select this shape and then use
the curvature tool, select that point
and just push it up or push it
slightly to the side. Maybe this point can come
down a little bit as well, and you already start to have
a bit more irregular shape. The same thing goes
here to the top. If we want to push things out of bed or bring things down, we can start molding
the shape again. That's the best way. Putting what this
actually means, what we are doing here. Eyes are very important part of an illustration on
a character because they are the ones that define the look and the expression. So it's very
expressive in novae. Look at this. If I start moving things around, like these two details, if I move further to
the right or left, it already makes it look
like the character is looking in a direction
and not staring at us. But again, the eyelids, if I remove the eyelid, it will look very excited and
happy with the eyelids on. It looks more sleepy. And that I think works well
with the slot character. So for now I'm
going to just keep things like as they are, maybe just this
reflection point, I will move slightly
to the right. I think that looks a bit better. So I'm going to select
all of them together, all of these details, Command or Control G and
then o for Reflect tool. And actually, let's click
in here in the middle, click and drag with
the reflect tool, Shift and Alt or
option key held down. Maybe in this case
just the Option key is enough to make sure while we are creating the reflection where
also duplicating. So we want to keep
the original there. Adding the order
option key while using the reflect tool
creates a duplicate. Cool. And that first that I added was the
center of symmetry. Okay, let me zoom back
and I think we are pretty much ready with all the details
necessary for the slot. Now it might not
look great so far, but once I add all the colors, you will see how it looks. So let me just start
with the slot, the main detail, actually, I'm going to start
with the smaller ones. This one will be bright. Then this one here will
be the medium brown. And I'm going to keep
removing the strokes as well. So you will see me removing
the strokes as I go ahead. So the main shape now we can do, and that can be again, this medium brown on the
fill color like that. And then these will be darker. So I'm just going to turn
them into this darker color, darker brown, and use
command Shift or Control Shift square bracket to move
them in the background. And then I think these need
to be changed in color. I can even use the
Eyedropper now. I is the shortcut for that, and that is pretty much it. Now, if I turn off this and
I see the sketch there, I don't have a detail
for the belly, but normally slots have a brighter detail on their
belly similarly to their face. So that would be good to
use and also especially to separate the legs in the
back from the front. So the body and the
legs in the back can be separated much
better that way. So what I'm going
to do is to use the curvature tool again. And I'm going to start drawing outside and then come down. Draw this shape,
something like that. Okay, something like that. I'm going to set it to
the brighter color. And here comes a very useful tip if you select these two shapes. So the main shape that we have in the background
and the shape we just created by using the Shift key and select both of them and then use the shape builder tool and holding down the
Alt or Option key, you can remove the access part. So that way you end up
having something like that. Now I'm going to
move some details around slightly like this. Hand can come a little
bit closer this way. And I can also probably use
the curvature tool just to adjust the shape slightly
around like that. I think that works. Let's have a look at
my original drawing. Yeah, it was quite similar. It's never going
to be exactly the same each time I
would draw this, it will be slightly different.
9. Shadows, Shape Builder Tool - Sloth: Another useful technique
with the same tool, the shape builder tool, I can create shadows. And at this point I'm going
to turn off the sketch because it's not really
important anymore. And I'm going to use this shape that we created for
the hand and duplicate it. Use the darker color, send it behind the other shape, and rotate it around slightly until it gets close to the corner points,
something like that. And then select the
detail behind it. So Shift-click on the
detail behind it. And then using the
shape builder tool, we can again get rid of the excess detail,
something like that. And then even here on this side, we can select the shape and
use the eraser tool and just delete what's not
necessary from it. Now, if I want to move
the hand or the leg, I'm just going to adjust
this a little bit. Just have a better
shape like that. I'm going to select these, group them together
and I can start move them around by looking
at the whole shape. I can include also the
shadow in the selection. But if I start
moving them around after it was cut into place, it might not work as well, but I think it's actually
fine the way it is. I liked the fact that there
is a sharp corner here. So just showing it to you. If I move this all
the way up there, it creates a continuous shape, but I actually like that slight break in
there on the left. Okay, so we have a
little shadow there, but I would like to have the same shadow
here for the firm. So I'm going to set this up
in the place I want it, then. Well, to be honest,
in this case, it will be easier if
we just draw this in. So in these cases
sometimes I would switch to the Outline View
Command or Control Y. And then I can just draw with
the pen tool in this case, draw from this point here, maybe around from
there to there. As simple triangle like this, Command or Control Y to go back, set this up to the shadow
color, send it behind. So use the command square
bracket to send it behind. And once it finds its place, we can shift, click, select these two shapes. So select that and
the shape behind it. I think it is already
selected, yes. And then use the
shape builder tool and holding down the
Alt key or Option key, you can delete the
excess detail there. Okay, so that's just a
subtle little shading there which helps us to see is not part of
the silhouette. It's actually coming
out from that plane. Now, the same we could
repeat here at the bottom, but I think it
looks fine for now. Next thing would be the branch, but that's not as
exciting to draw. So I'm going to just cheat a bit and bring it in from
the original drawing. And notice that I have created an out-of-bounds
effect as well. So we have the
little bounding box, the circle, bounding circle. In this case, we have the branch and the
hand coming out of it. So that tiny little
detail ads also depth, even though we don't have
any texture or shading, it still creates
a sense of depth. So I think that is
working quite well. And one last little detail here for the branch
since we brought it in, would be to add a little
bit of shading there. This one, I can even use the
blob brush tool for this, I'm going to use a
darker color probably. I don't know, maybe
this color here. I'm just going to paint
over these parts here. And actually I will have to use the darker color than that. Or maybe this color will work. Because otherwise if
clashes with the lag, the good thing about the
blob brush tool is that it extends the
details very quickly. So if I just draw
or here as well, it just keeps creating one single shape instead
of multiple shapes. These clothes can come on top. Just move them up a bit. That shape can come up
as well slightly. Okay. We just want to make
sure that it feels like it's holding
onto that branch. And then this one, again can come on top. And all we have to do at the
end is to make sure that this is now only visible
on top of the branch. So we can use the shape
builder tool and then just chop these bits off like so. So when we zoom back, we can see how that would work. And I think that
just adds, again, just a little bit more
depth to the illustration. So we could go and
refine this further. But if we look at the sketch
and the illustration, it looks very similar. And with the background, I think it works really well. Once again, we can compare it to my other drawing
which I created. I spent a bit more time on refining the expression and had, but I think it works
quite well already. We can always go back and
that's the good thing again about the
tool that we use, the curvature tool
that if we feel like we need to adjust
any of these shapes, we can easily do that. We can make the head slightly
bigger and we could go on and refine this very quickly and easily if we feel
like we need it.
10. Grain Effect - Llama: Here we are in Illustrator and this is the sketch
I started with. Now I'm going to show you how
I've done it in Procreate. It's a quick time-lapse. Normally what I start
through these an idea and then I
just mess around. It takes only ten to 15 minutes to create this type of sketches. But it's very important to start with something solid before you come into Illustrator
and do all the tracing, which is much more
time-consuming. And just so you can see a
glimpse of this workflow, here is another time-lapse. This was recorded
in Illustrator. I was using predominantly
the pen tool. Now this tutorial is focus is the last stage when we
are applying the effects. So that's like the
detailing part. But once again, let
me emphasize without a solid sketch that has a good composition
in the beginning, there is no point in struggling in Illustrator
because it can waste a lot of time and then you might not enjoy
the final result. So practice a lot
the sketching phase. But now that you've seen
these time-lapse is, Let's jump into Illustrator and let me show you what happens. So I bring that
sketch that I created into Illustrator and place
it on a separate layer. So I placed in a layer, I said that as a template by double-clicking
on it and choosing template from this option that locks the layer and I
can work on top of it. And this is how the
tracing looks like. And then the other time consuming part is
adding textures. But once you know the technique, it actually can be much faster. For this illustration,
it took me around half an hour extra to add all of this texture that you can see here in
the final result. So now let me zoom a little
bit closer so you can see it better what
I'm talking about. So this is the doubt, the shading, and
this is the shading. And this is a particular
type of shading that a lot of illustrators use
in Adobe Illustrator, It's called the
greenhouse effect, and it can be used in a
very subtle way like here. So first let's start using a simple linear or radial
gradient with the effect. I'm going to show
this on the heels so you can see when I
turn off the shading, the heels all have
something like a highlight. So as if the sun is shining and then it lights the
top of these heels. So I'm going to start with this, maybe pick this heel here. So I'm going to turn
off the shading. First thing is that you
need to duplicate it. Command or Control C and then Command or Control F
to paste in place. I'll paste in front. It's called in Illustrator
that will place it, the duplicate directly on
top of the previous object. So now that we have that ready, we will also have to
add a mask on this. So I'm going to go to the transparency panel
and click on Make mask. If any of the panels you
don't see that I'm using, just go to the Window menu
and you will find it there. So now that I have
the mask ready, I'm going to click
on Invert Mask. This is also important, and more importantly, I'm going to click on the mask itself. That way you know that you
are in the mask is that it's going to say here
in the layers panel that you are inside the
opacity mask and none of the other objects from the artwork
will be visible, only whatever you create
inside this particular mask. So now that we are here, we will use the same
shortcut again, paste in front command or
control F. And we will see that object is certainly
there in this mask. Now, what color this is? It doesn't really matter because we are going to
change it anyway. But what's more important
is that you need to switch back to the original
object or the duplicate. And you do that by clicking
on this other thumbnails. So it's almost like
two different realms. You can work in the objects around and you can work
in the mask round. So you remember switching
back and forth between them? I wish there was a shortcut
to switch between it. That might be one. I just
haven't found it yet, but if you know of it, please let me know in the
comments section below. So we are back in
the object realm. And what I'm going to do is to change the color of this object. Now, for this,
normally I would use the color panel and
leading the color panel. If you set your
color mode to CMYK is normally quite easy to
work with these colors. But you can also work with HSB where you have hue
saturation and brightness. And sometimes I prefer
to use this because I can very easily control
it, just a brightness. So we want to make it brighter than the
original color because this will be like a highlight
instead of a shadow. So it should be brighter, but it can also be a bit more
saturated and maybe also attend more warmer because we are simulating the sunshine. So something like that. Now the easiest way
to check how it looks before we apply
the effect is to simply turn the layer or the
object on and off and we can see the difference between it and the original base color. So I'm quite happy with this, but we can always come
back and make changes. So I'm just going to keep
my color panel handy. And let's go back to the object. So I select it and go
back to the mosque. So once again, we switch sides and we are now
inside the mask. Now this is where it
gets interesting and this is where the
actual effect starts. Because we need to add, first of all, a
gradient on the field. You can do this with the
gradient panel quiet easily. You just simply have to click
on the gradient slider. So this is going to
add the gradient, but you won't notice much difference at the
beginning because we are applying this gradient on the mask and not on the object. Notice here in the opacity
mask, it's already visible. Now, the next thing
we're going to do is to apply the effect
from the Effect menu. We go to texture and
then choose grain. It will open up a
separate window and then make sure
from the grain type, you choose this one. I think it's pronounced
stippled or stifle, not sure. But what's more important
is you have to also find the right intensity and contrast for the effect that
you would like to create. I'm going to increase
the intensity a bit just so we
can see it better. But luckily, this
is a live effect so we can always come back
and make changes to it. So let's click on Okay, and we will already
start seeing the effect, but at the moment, it's in the wrong direction
to change this, simply just press
G on the keyboard. That's the gradient annotator or gradient tool with
which you can click and drag and define
the direction. Now, we want to
go from down, up. And you can see
already how we're starting to introduce
the texture. I'm going to zoom
a little bit even closer just so you
can see it better. And you don't have
to always click and drag to start again, creating the effect like this. Because once you have it roughly in the position
that you need, you can also just simply
drag these points around. The bottom circle is
normally the one that you move the whole
gradient around by. The top square is the one
with which you can control the distance or the transition
between the two points. You can also move the
white point up and down. And notice how
that's also changing the spread or the
transition of the effect. And the little star icon
here is also again, the balance between
the two sides. So the black and divide. So essentially you
are playing around with that gradient on the mask. But since we added the
grain effect on it, it creates this cool transition. And don't forget
if you feel like these little dots in the
grain or too intense, you can always go to the appearance panel and
change the values there. But if you're seeing
color stop written there, we have to do is to
just press Escape. So it goes back
one step and then you will see the grain
effect inside the field. Click on that, which will
bring you back to this menu. Here, we can reduce
the intensity, maybe increase the
contrast a bit, or reduce it, and
then click Okay. And as you can see,
this is the change. So this was before,
and this is after. So very easy to adjust
and customize it. Now of course,
there's another thing that you can do if you feel like the color that you
chose is not bright enough. All you have to do
is to switch rounds, go back to the objects from
the transparency panel, and then from there you can
adjust those values as well. So we can reduce the saturation
or increase it again, play around with the hue
and so on and so forth. So that's how quick and
easy it was to set it up. And before I forget,
there's also one thing that you can
change and that is the direction or the type of
gradient that you are using. So once again, if we go
back to the mask and have that fill color selected where we can see
it's a gradient. You can very easily switch
it to radio gradient. Now with this one, you will
have a different annotators. So when you're using
the gradient tool, remember pressing G
will get you there. It's going to work
slightly differently. You have to click and
drag out like this. Now sometimes it might be the wrong way around
in these cases, where you have to
do is to click on this icon, the reverse gradient. So now you can see it's
much easier to control it. We can just grab
the center point of the gradient and move
it wherever we wanted. Or what I find it easier to do with the radio
gradient is to simply click and drag out from
the point where I need it. Now, notice that sometimes the grain effect is not visible. I've found it the
easiest to show it again is to simply
move the white or the black point
around a bit or any of these properties on the
gradient annotator. So if I again draw
it here on the top, you see the grain
effect is gone. But once I move this around, it will show once more.
11. Freeform Gradient - Llama: The great thing about
this technique is that it's completely
non-destructive. And although it feels like it was a long time to set it up, once you start doing it, it gets much faster and easier. So just to prove this to you, I'm going to do it once again
on one of the other hills. So first of all, I'm
going to switch back to the normal object mode and then try to
select that object. So here it is. I'm going to find it. It's actually inside
the clipping mask. So that's the
object I'm going to copy and paste Command C, command F, change the color, make it darker this time because I'm going to
use it for shading. So probably saturation
doesn't need to change, just simply the brightness. Something like that. And I am going to add the
mask, invert the mask, click on the mask and paste
in again the same shape, then click on whichever
gradient type I want. Let's say this time I'm going to use the linear gradient again. And then I go to Effect menu. And I don't even have to
go through the menus, just simply choose Apply green. That is also a shortcut
for the previously used, the fact it's Command Shift
E or Control Shift G on PC. And you will see
that's already there. So that's how quick
and easy it was to recreate this effect
on another object. And I can press G on
the keyboard and then click and drag to
control the spread. Maybe something like this. Be a little bit
longer than that. Once again, if I don't
see the effect at all, I have to do is to just move
these points around a bit. Maybe set it down
somewhere around there. So it didn't take long at all to recreate it
on another object. And you can see that it
would be very quick and easy to apply this to all
of these other hills. But instead of showing the same thing over
and over again, I'm going to move on and show
you how to use the same in grain effect but using it
with a free form gradient. So that's a new feature that was introduced recently
in Illustrator. And I was really excited to
try it out with this effect. So the reason I would
switch to this is when I have objects
that are more complex. So it's not just a simple
ellipse like these hills, but more complex object like
the body of the Larmor. So I'm going to switch
back to the normal mode, select the llama, and
I'm going to copy paste. So just you can see better. I'm going to drag this
out here on the side. So that's the shape
is definitely more complex than the previous
objects that we work with. In these cases, a free
form gradient will give us much more control on
setting up the effect. Once we have the
object duplicated, I am going to click
on Make mask, Invert Mask, and then
clicking the mask. But this is where the
difference comes in. Instead of pasting in, again, the same lama silhouette. I'm going to use
the rectangle tool M is the shortcut for that and draw a big rectangle around the area where
the llamas body is. So I intentionally go way
beyond that and I'm going to change this to a
free form gradient. So this rectangle will be set up with a free form
gradient on it. Now, you might not notice much difference
in the beginning, but we will make changes here. First of all, I'm
going to get rid of these Gradients, stops, or pins. So I only have one
here and I'm going to set that up to be black for now. Or maybe let's just set it up
for white in the beginning. Now, we don't see much
difference at the moment because the original
objects color is the same. So we have to switch
back to the object itself and reduce the color, maybe make it darker. And also, we can make it slightly more saturated,
Something like this. Okay, now we can switch back
to our gradient and let's see what happens if we change
the color stop to black. See already there
is a difference when we set it to black
because of invert mask, it's going to show
all the details of these duplicate object. So the object that is darker
is now completely visible, but we don't see the effect yet. So let's see what happens
if we add another stop, maybe somewhere around here, and that's set to white. Now we already have a
gradient going on here, but it's not yet using the
effect that we had before. So all we have to do is
simply add the grain effect, go up to Effect menu, apply the grain with
the same settings. And wallah, there it is. But the coolest
thing now is that I can drag these points around. And instead of using
the gradient annotator, I can be very specific where
I want the effect to show. So for example, if
we want to create a little shading under
the head of the Ulama. So if I zoom a little
bit closer here, all we have to do is to set the black point up
there and then move the white point down until we
want, again clear details. And notice how here
the gradient is already spreading onto
the back of the llama. If I don't want that, I can just add another
white point there. But then if I want to have a bit more shading at
the bottom on the legs, I can add another
gradient point there, switch it to black, and there you go. It's already much better
and more interesting. Now you can also increase
the spread by dragging these perimeter lines
when you're using a free form gradient or reduce
them, something like that. But because we created the big rectangle on
the illustration, we can also drag this point
further out so we can go beyond the silhouette
and keep our points there. So that's why I said
in the beginning, it's better to do that bigger shape and not use the llamas body
because this way, I can be very specific
where I want these points. And that can be
much more subtle. The fact itself. Now if I still feel
like there's too much green seeping
into the body, all I have to do is
to just block it V that another stop,
something like that. And you can put as many pins in the free form
gradient as you want. And you can even use gray pins, which will have an
effect in-between showing and hiding
the green effect.
12. Apply gradient on stroke - Llama : Alright, so here we are in
Illustrator and we will crack on continuing with the
green effect this time. First of all, I'm going to apply it on this cactus
here on the left. The difference will be that
instead of using a linear, radial or Freeform Gradient, I'm going to use it on a stroke. And this is particularly useful if you have an
object where you would like to emphasize the outline or the silhouette
video, our shading. So what we will do
is first of all, double-click on the cactus
because this is a group. That way I can isolate it
and I can work a little bit easily without messing up anything else in the background. Notice here in the layers
panel we have three objects, the one in the middle
and the two on the side. Now I'm going to start with
the one in the middle. So just like before, the first step is
to duplicate it. Command C, command F or
Control C, Control F. That's the shortcut
for paste in front. So just so you can
see once again, there's two objects now, and the one on top will set to whatever color we want
the shading to be. For this, I'm using
the color panel, reducing brightness,
increasing saturation a bit, and maybe making the color slightly warmer or
cooler in this case, I think that might look better. Let's do something like this. Once again, I can test
how it's going to look. Yeah, I think that will work
quite nicely for shading. Make sure you keep
the objects selected. And then we go to the
transparency panel and click on Make mask, Invert Mask. And also select the
mask itself from this thumbnail and paste the
object again inside here, Control or Command F. Now instead of working
with the Fill, this time we will
work with the stroke. And the quickest way
to swap the stroke and the fill colors is to use
the shortcut Shift X. Notice what happens here. I'm switching the existing
color onto the stroke. So Shift X once again
goes back and forth. And I'm doing this
inside the mosque. It's important, so it's
not on the object. We're working inside the mask. And you can always tell that by looking at the layers panel. And if it says opacity mask, and it only shows that particular object
that you're working with. That means you are not
affecting the object. You are working inside its mask. So now that we have
the stroke setup, we need to find
our gradient panel and click on linear gradient. And once that's added, because we are on a stroke, we can choose these
additional options. And what we need is the apply
gradient across stroke. That's probably the best
way to work with it now because the stroke at the moment is very tiny, it's only 1. We don't really see
much difference, but as soon as I start increasing
the value, by the way, if you hold down the Shift key
and click on these arrows, you can increase this
value much faster, so it jumps up ten
points at a time. I'm going to set it
around 20 points is good. This already makes the
effect more visible, but currently we don't have
the grain effect on it. So what we need to do is to
go up to the Effect menu. And from the texture category, we need to choose Grain, which will bring
us to this menu. And from last time, I mentioned this already, but I'll just go into repeat. Make sure you choose this
grain type, stapled, then intensity and contrast set to whatever
values you prefer. Click Okay, and it
will be saved as a live effect so we can always come back and
make changes to it. So this is how it looks
without the green, and this is how it
looks with the grain. Let me zoom a little bit
closer so you can see better once again, before and after. Now here are the things that
you can make changes to. First of all, you can
continue to increase the size of this and you can
go to as high as you want. But what you can also do is
to control the gradient. So if you want more
of the shading, just simply drag the black
point further in like so. And as you can see, it's already going to
increase the intensity. You can also control the balance between the white and
the black points, which will also
make a difference. And if it's still
not strong enough and it's not to your
liking, don't forget, you can also change the color
of your shading by going back to the object from the
transparency panel and there, make sure you select
the fill color. So just simply press X
this time not shift X, press X to swap between
which attribute is selected. And then here we can
reduce the brightness. There may be increased
the saturation, maybe also go towards
more warmer tones or cooler tones,
something like that. I think this looks
quite good already. I feel like if we go
back to the mask itself, may be the point size can
be reduced a bit to 2025. Yeah, I quite like this, but to make it simpler
and be able to reuse the same settings on the other two branches
of the cactus. All we have to do is to save this stroke setup
as a graphic style, which we can do from
this panel here. So while the object is
selected, and more importantly, the opacity mask is selected, we click on New Graphic Style. There you go. It's
already added for us. So now what we need to do is to switch back to
the normal mode. So get out of the mask, select the other
branch of the cactus, and then repeat the
same steps as before. I'm going to show you again just so we practiced together. So command C, command F, That's a quick copy
and paste in front, change the color to
something slightly darker. We could have used
a swatch for this, but I'm just going to amend
it here in the color panel. Then make mask, Invert
Mask, click on the mask, paste in front
again Command F or Control F. And then once
we have that ready, we just have to swap the colors from field to stroke, shift X, select the stroke and
then choose or so linear gradient and the gradient
across stroke option. And now we can just
apply our graphic style. So the last part of the
technique is faster now because we don't have
to set up that and that's probably the most
time-consuming one. So that's why it's good to
save it as a graphic style. You can see how quick that was. Let's just do this once
more on the other branch. So I switch back, select that left branch, and then I'm going
to copy paste. Go to the field color,
make it darker. Once again slightly different. Make Mask, select mask,
Invert Mask, paste, and then swap the colors,
select the stroke, linear across and graphic style. Boom, done. So. Of course, it takes some
practice to get to the speed, but you can see once you
know what you're doing, you can be very quick and effective applying
these effects.
13. Using Gradient Mesh - Llama: And I kept the most
interesting way of using the grain
effect for last, because now we will
learn how to use it with a gradient mesh, which gives you the
most intricate control that you can get in Illustrator. So for this, I'm going to
leave the opacity mask of the cactus and also leave the isolation mode by
double-clicking outside. I'm going to scroll up and focus on the cute as part
of the illustration, the head of this Lama. So I'm going to click
on this object. First of all, I'm just going
to drag it to the side so you can see that's the object
we are going to work with. And it's important because depending on the
outline of an object, the gradient mesh will
behave differently. If you have a very
complex shape, it might not work best. But for the type of complexity that you can see here is
going to still work fine. Normally, the more anchor
points you have on an outline, the more difficult it
is for Illustrator to create a nice mesh with
the gradient mesh feature. But you will see exactly what
I mean once we get started. So now that we have
our objects selected, it actually starts very similarly to the
previous techniques, and you guessed it, we have to duplicate it. Command C, command F or
Control C, Control F. Then you guys did again, we have to change the
color to something, whatever we want to use
this grain effect for. In this case, we want to
use it again for shading. So I'm just going to go back to the HSB values and I will
reduce the brightness, increase the saturation a bit, and maybe also the
Hue adjust slightly. Something like that I think is going to work
for the shading. Then we will create the
mask, invert the mask, select the mask and paste in
the same object in there. Now here's an
important step that's different from the
previous methods. Here we have to make sure that the mask is set to black field. So make sure you click on black here in the color options. So without this, you won't
really see much happening. But once you have this setup, you can apply the gradient mesh. So we can go to the Object menu and choose create gradient mesh. Once that's selected, we will
see it coming up already. And it's a really nice mesh
that's created here on this fairly simple outline. But notice that I
have options here. And the most important
one is to change the appearance from
flat to center. Now, flat is just simply going to use the same
color on all the mesh points that you had as your basic or base field color. While the two center means that it's going
to create a ready, almost like a
three-dimensional shape by using brighter
colors in the center and darker colors
on the outline. So that's really cool, but we can also increase and decrease the rows and columns. And notice how adding more rows is going to create a
more complex mesh. And the same thing
happens with columns. You can use the up
and down arrows here, by the way, to quickly
see the difference. So you can control
this very easily. But the good thing is
that you can also add mesh lines later on which I'm going to
show you how to do. So for now, all we have to do
is to set it up like this. I'm going to click on, Okay, now comes our good old
friend, the grain effect. So we go to the Effect menu
and since we already used it, I'm just simply going
to use apply green. So it's going to use the same
exact settings as before. And although it seems like a bit more complex
way to set it up, it's actually not that complex at all because you
can see we are already at the
point where we can adjust the green effect. So we can now select these mesh points using
the direct selection tool. Shortcut is a way that you
can move these points around. And notice that as I'm
moving the points around, am effecting the spread of
the gradient or the grain. In this case, what
you can do is to change the color for each
of these mesh points. And notice that the color on the edges are going to be black, while this transitional
mesh points will be gray, and the one in the middle
is going to be white. So that's how it's creates
the defect in the middle. It's completely
empty, while wherever there's black or gray is going to start
showing the grain. If I select this
other point up here, and instead of using gray, I said this to white. See immediately it's
creates a different effect. I can again select this point
and either just drag it around or I can also
set this to white. Then we have a similar effect to using the previous technique, where we have the shading around the outline
of the cactus. But what's different
here is that we have much more intricate
control and I can have a different effect moving under the
eyes, for example. Then further up here, if I want these points
to come further out, I can do that very easily. And I can move these points
exactly on the eyes, maybe something like that. And also instead of
using gray here, I can set them to black, which increases the intensity of the effect only on
those specific areas. Now, if you run out of mesh points and you
need more control, you have to do is to
press U on the keyboard, which gets you to the mesh tool. And with that, you can click
anywhere on the outline. Now, if you click on an existing
line, like in this case, I click in the middle
where there was already a vertical line. This is only going to give me additional points
here on the side. But I'm going to undo this. So you can see
what's difference. If I click in a
completely empty area, it's also going to create an
additional vertical line, not just a horizontal line. This way I'm adding a lot
more points to control. So I'm going to do the same
thing here on the left side. Now, I can select this
point maybe here, and set that to white or so, select this point,
set that to white. And then I can move these
points around and be even more specific where I
want these points to be. So let's take a look without
this effect on the head. So if I come back to the object from the
transparency panel, we can find our object
here in the layers panel. By the way, whenever you
have something selected and you have loads of
things in the layers panel, you can just click on this
little locate objects which will jump to
the selected object. Really useful technique. So now I can see without
the effect and the effect. So there you go. This was the most complex setup with the grain effect technique, but still, once you
know how to use it, it's not that difficult at all. So if you learn all of these four different ways
of using the grain effect, you will have all
the methods you need depending on the shape
of the object and also depending on whether
you would like to have a highlight or shading
applied to it. So once again, just to see
what we achieved here is the illustration without
any of these grain effect. And here it is with the full shading applied
on all the objects.
14. Conclusion: Well done for
finishing this course. I hope you had just as much fun going through it as
I had recording it. And of course, don't forget
about the class project. Because remember,
practice makes perfect. I can't wait to see your work, so make sure to submit it. And in case you
like this course, and you would like to
learn more from me, then there's plenty of other courses that
you can find here. Go ahead check them out now. I can't wait to meet
you in the next one.
 Martin Perhiniak, Graphic Designer, Illustrator & Educator