Transcripts
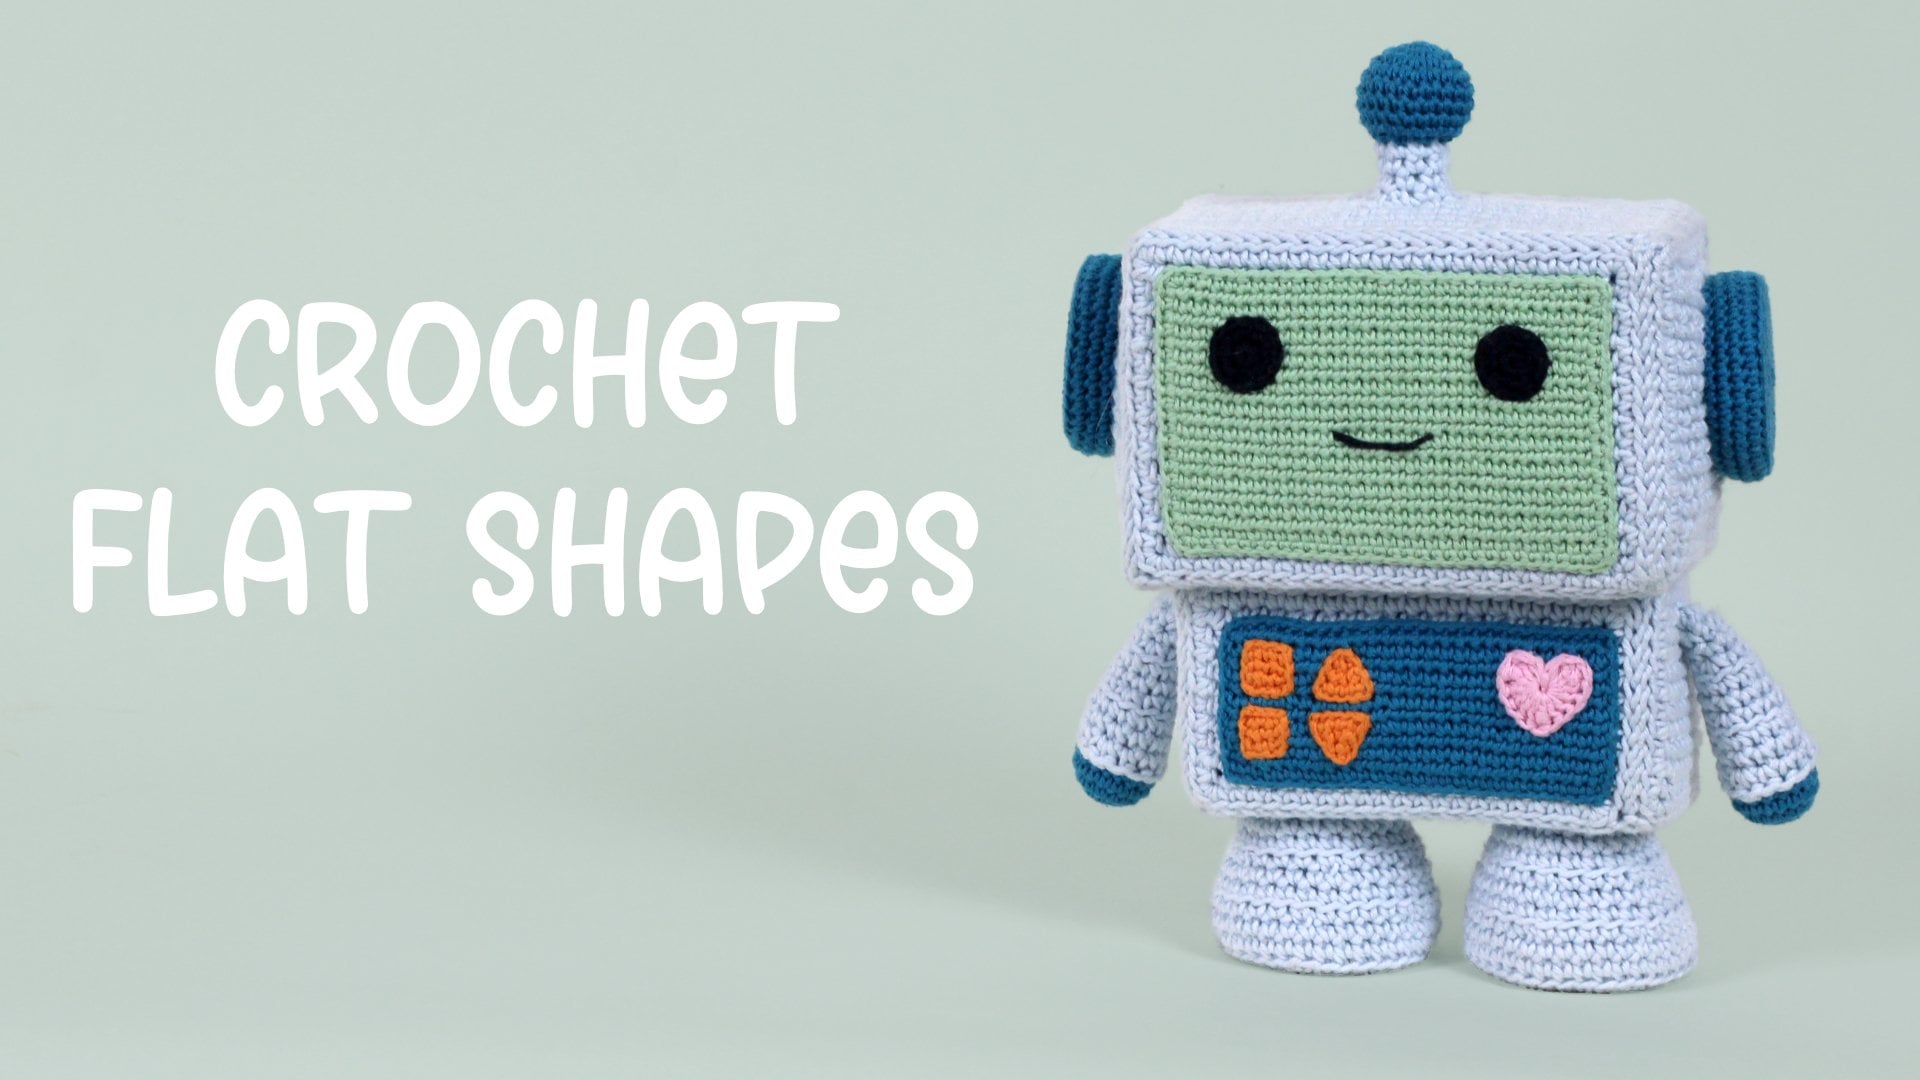
1. Introduction: Do you like making handmade
gifts for friends and family? Do you want to learn how
to make cute Megumi? Don't know how to crochet. Don't worry. Come with me. Hi, I'm Anna. I'm the
designer and on Badum, I started making Amigo in 2010. When I discovered by accident that you could
crochet the animals, I grabbed my grandma's
old hooks and yarns and taught myself how
to crochet right there. And then at first, I followed other
designers instructions and studied all the stasis work to make the shapes of the Amigo. Soon I started to create my own designs and to
write my own patterns. Today I of patterns that I sell on my own
website and on Etsy. These are some of my designs. I like to make a Megumi
inspired by nature, like animals, cacti,
and succulents. I also like to make fun crochet
cut beds like this one. Amigo and crochet are
really fun crafts to learn. You can make almost anything
with a hook and yard. I really like to push the
limits of what you can make with crochet and I want to
share my secrets with you. This classes for
beginner crochets or for crochets that want
to refresh their skills. In this class, you'll learn
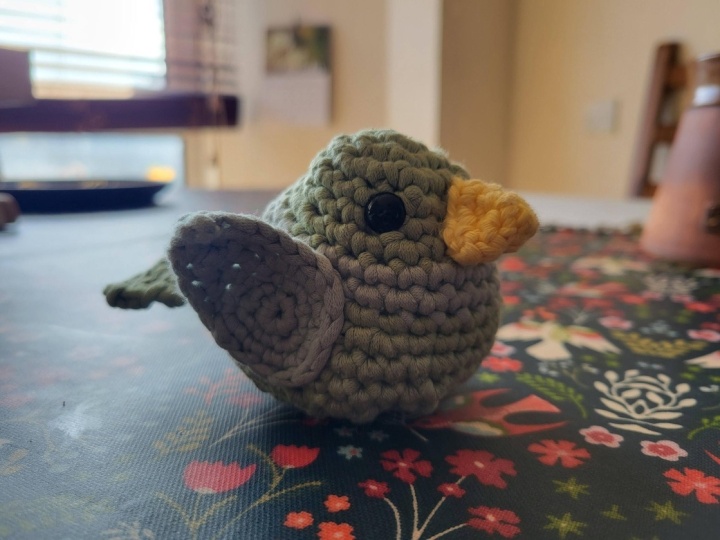
the basics of crochet and amigo while making
this little bird. You will learn what tools
and materials you need. How to hold the hook and
yarn, the basic stitches. How to work in rounds and rows. How to color change and
make horizontal stripes. And how to assemble all
the pieces together. As a final step, you will
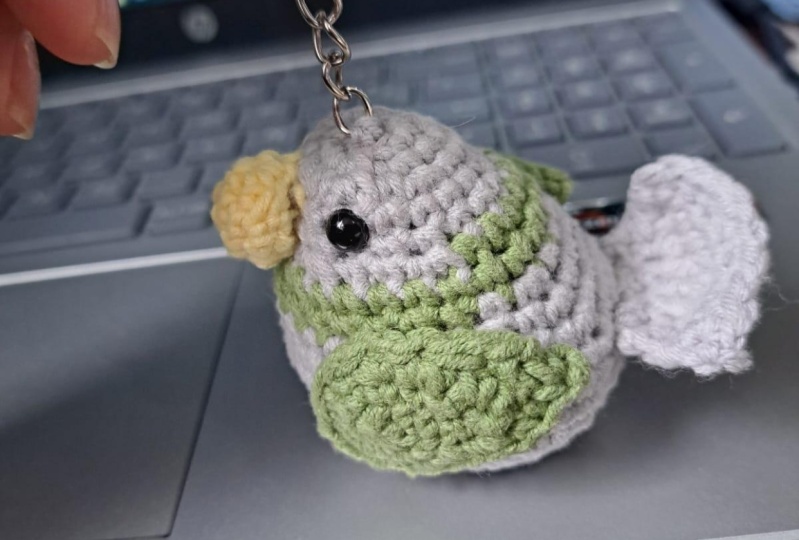
learn how you can turn your Megumi into a key chain that you can use on your purse, on your backpack,
or with your kids. By the end of this class, you'll be comfortable
crocheting and reading written crochet patterns and
ready for bigger projects. Thanks for joining
me. Let's crochet.
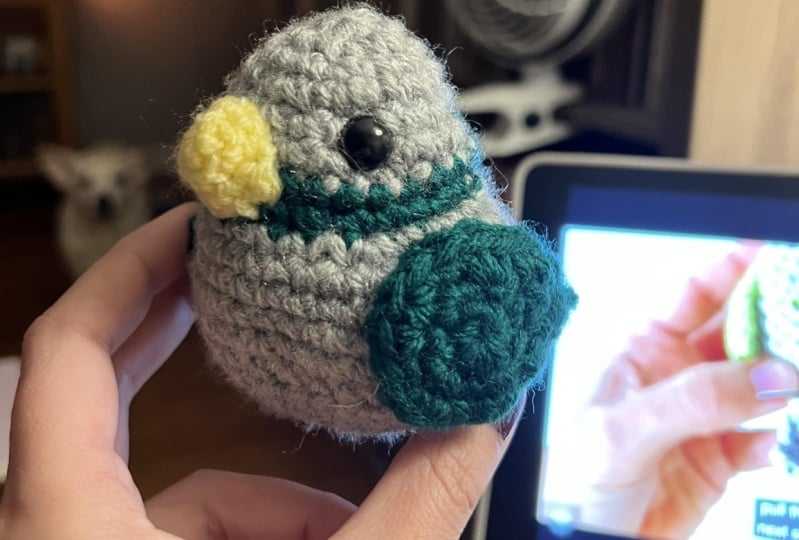
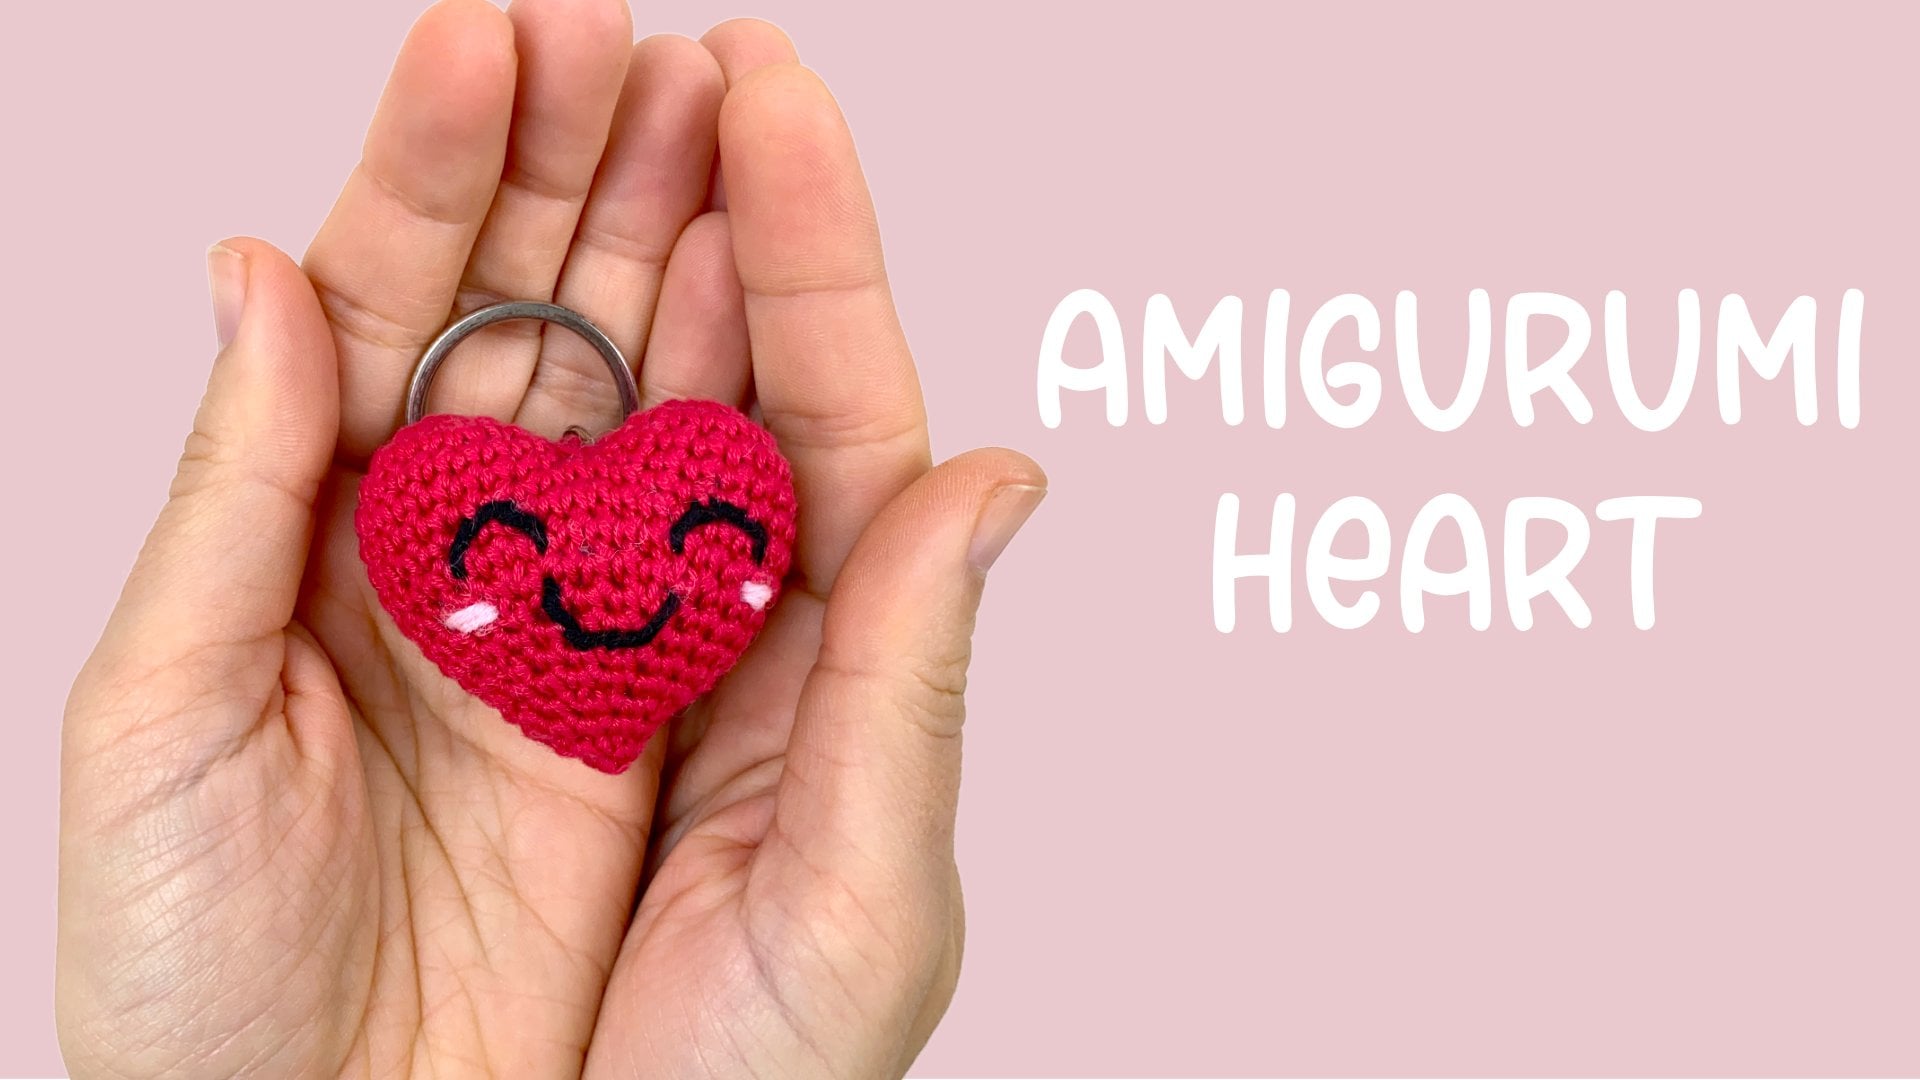
2. Class Project: Welcome, I'm so excited
that you're here. Your class project is to
crochet your first a Megumi, this little bird, and to
turn them into a kitchen. I chose to teach how to make this little bird,
because while making it, you will learn the
fundamental skills to start crocheting and
making a Megumi. Also, I wanted you to have something cute and that
you can use at the end. Be sure to download
the written pattern in the project and resources. We will learn how
to read written crochet patterns as we
create our little bird. First, we will talk
about the tools and materials that will be needed
to complete this project, where you can get them and alternatives. Some
of the materials. Next, I'll show you how to
hold your hook and yard. Then we will start working on the body of the bird
starting from its head. We will start with
the magic ring and working in
continuous rounds. We will make the stripe
continue to make the body stuff it and cause
it without leaving a trace. Next we will make the
tail working in rows. We will combine working in rounds and rows to
make the wings. Finally, back to working in
rounds to make the beak. After we make all the pieces, we'll assemble them into
this cute little word. As a bonus, you
will learn how to attach a key chain to your room. Be sure to share the
progress on your project as we go along right through
to the finished bird. By sharing pictures or thoughts in the project
and resources section, Be sure to use the
discussion page to ask questions or share any insights with the rest of the class. If you get stuck
or need any help, I'm here to answer
your questions. Grab your hook and see
you in the next lesson.
3. Materials: First things first,
let's go through the materials we
need in more detail. First, you'll need a
3.5 millimeter hook, which in US terms is four and in UK terms
is a size nine hook. You'll also need a 2.2
millimeter hook or a C hook for the US or a
size 12 hook in the UK. I prefer to use these gray ones because they have a coating
that makes them slide. They are easier, but there are many different types of hooks with different types of vandals. The ones that you're
more comfortable with. Next, you'll need two colors of medium weight yarn
for the bird's body. I chose the light gray
and the light green. And you'll need one color of fine weight yarn for
the bird's beak. I chose the light yellow. I prefer to work
with cotton yarn, but acrylic yarn is also a good yarn to use
in a mingming. What does the weight
of the iron mean? The weight of the yarn tells
us how thick the yarn is. The bigger the weight,
the thicker the yarn. Medium weight yarn
is a yarn that has 132-210 meters in 100 grams in some brands is marked
with a number four. If we look at the label of
the yarn, we can see that, for example, the thicker yarn that I'm using for this project, 105 meters in 50 grams, which means that in 100
grams it has 210 meters, which makes it a
medium weight yarn. The fine weight yarn is
a finer yarn that as 260-400 meters in 100 grams or sometimes is marked
with the number two. The finer yarn I'm
using for this project S 180 meters in 50 grams, which means it has 360 meters in 100 grams and that makes
it a fine weight yarn. Some yarns are sold
in 50 grams skins. So you might find it
helpful to divide the quantities in the
weight table into, before buying the yarn. In the Project and
Resources tab, you can find the table with the different
weights of yarn. You might also see that
in a label of the yarn, there is a recommended
size hook for Amigo. Always use a hook
that is one to two sizes smaller than what's
recommended on a label, so you end up with a doll
with no holes in its fabric. I recommend that for
medium weight yarns, you use a 3.2 millimeter hook. For fine weight yarns, you use a 2.2 millimeter hook. Of course, you can always experiment with
the yarn you have, making a swatch and seeing if it has any big holes.
Oh, quick tip. Keep the labels of your
yarn with a sample attached so you can buy
the exact same one. If you need more,
you'll need stuffing. The stuffing is this fluffy
material called polypill. If you don't have
poly Phil on hand, you can use yarn or fabric
scraps or even cotton. You'll need a pair of
nine millimeter Safety. Yes. If you don't
have safety eyes, you'll need fine weight yarn
in black and white as well. Need a stitch marker. If you don't have a
fancy one like this, you can use a paper or even a scrap of yarn to mark
the beginning of your runs. You'll also need an
embroidery needle, scissors, and sewing pins. All these materials
you can find at craft stores or aberdasheries, either physical or online. Now that we gathered all
the materials we need, let's go over how we should
hold our hook and yard.
4. Hold the Hook and Yarn: In this lesson, we'll go over the methods used to hold
your hook and yarn. Hold the hook with
your dominant hand and the yarn with your
non dominant hand. There are two methods to
hold the crochet hook. The knife fold where you hold your hook like you would a
knife if you were about to cut a piece of food with your index finger and thumb holding the hook in
the narrower part. The end of the hook is
under the palm of your hand and held close to it by
the other three fingers. The second method
is the pencil hold, where you hold the hook as
you would a pencil with your thumb and index finger on either side of the
narrow part of the hook, with the middle finger a little
bit forward on the hook. In this hold, the end of
the hook is above the hand. I prefer the pencil hold, but you use what feels
more comfortable to. You hold the hook firmly,
but not too tight. There are many different
ways you can hold the yarn. I'll show you how I hold it, which is how I learn and what feels more
comfortable to me. Place the working yarn. That's the yarn that it's
going to the skin over your index finger of your non dominant hand and
under the other three fingers, all the working yarn with
a ring and little fingers, maintaining an even
tension on the yarn, all the yarn firmly, but not too tight to avoid unnecessary strain
while working. I like to keep my index
finger right behind my work because it helps me to hold it along
with the thumb. Now that you know how to hold your Ok yarn, let's dive in.
5. Magic ring and single crochet: In this lesson, we'll start
to make the body of the bird. We will learn how to make the magic ring and not
the single crochet. We will also start to learn how to read written
crochet patterns. In the project and
resources section, you'll find the
written pattern for the little bird we are about
to make as we go along. I'll explain line by line what each abbreviation means so
that by the end of this class, you will know how to read
Britain Crochet patterns. Keep in mind that I use US
names and abbreviations. This is important
to know because patterns written in the
English language can be written using either the US or the UK nomenclature
in the project. In research step, you can
find a conversion chart tip. You can write the abbreviations
and their meaning on a sticky note and attach it to the page of the pattern
you are working on. Or keep it on your table where it can be
easily accessible. Let's start in the first
line of the pattern. We can see R and
D one column six, into the magic ring. Open parenthesis,
close parenthesis. If we look at our
abbreviation table, we can see that R
and D means round S, C means single crochet, and ST means stitches. The number between parentheses
at the end of each line indicates how many stitches you should have after you
complete that round. For the first round,
we need to work six single crochets
into the magic ring. At the end of that round, we'll have six stitches. The single crochet is a
smaller crochet stitch that makes a tight fabric
but not too stiff. It's ideal for a Megumi because it doesn't let the
stuffing to show through. To start the body of the bird, we need to make a
magic ring first. This is the most used technique to start an Amigumi
worked in runs. An alternative method
is to chain four plus slip stitch to the
first chain to make a ring. I think it's harder to
work your stitches in two and you end up with a hole
in the center of your Amigo. The magic ring is easier
to work into and it closes completely to make a magic ring. All the three end of
your light gray yard, the color you chose for
the body of your bird. And place it from the
back to the front, between your index
and middle fingers. Wrap the free end of the yard two times around
the index finger, holding it between the
index and middle fingers. Grab the working yard and
bring it to the front. Over your fingers, hold the
working yard with your thumb. Grab your 2.2 millimeter hook and make it go
under all the loops. Grab the last loop with your hook and pull it
to make it go under the other two loops, yarn over. This means to place
the working yarn over the hook and pull the yarn
through the loop on the hook. Completing the magic ring, gently take the magic ring
off your finger to work. Single crochet into
the magic ring. Make the hook go
into the magic ring, yarn over, pull up a loop. This means bring a loop to the front through
the magic ring or stitch yarn over and pull through the two
loops on the hook. You've made your
first single crochet. Repeat five more times. Insert the hook into
the ring yarn over, pull up a loop yarn over, pull through the two loops on the hook into the
ring yarn over, pull up a loop yarn over, pull through 23 single crochet, We need the Insert your hook into the
magic ring yarn over, pull up a loop yarn over. Pull the yarn through the
two loops on the hook. Insert your hook into the
magic ring yarn over, Pull up a loop yarn over, pull to the two loops on
the hook into the ring. Yarn over, pull up
a loop, yarn over, pull through to six single
crochet into the magic ring. Now we need to close it, Loosen the loop on your hook. By pulling the hook up and
letting the yarn move. Take the hook from the loop. Turn the ring upside down with the loop
pointing downwards. And the loops of the
magic ring turn to you, pull gently on the tail and see which loop from the
magic ring moves. Grab the loop that
moved close to the tail of the magic ring
and pull it towards you. Beginning to close
the magic ring. Pull it as tight as you can. Next, grab the tail of the
magic ring and pull it. Closing the magic
ring completely. As you can see, the magic
ring closes completely. Window holds at its center. Grab your hook and place it
once more into the loop. Pull the working yard gently to close the
loop around the hook. The first round is completed. In the next lesson,
we are moving on to the second round
of the bird's body, where we'll learn how to
increase. See you there.
6. How to Increase: In this lesson, we are
going to learn how to increase and how to
make our work bigger. Let's start on the second round, we find a new
abbreviation, Inc two. Let's take a look at
our abbreviation chart. And we can see that it means to increase the number of
stitches by working two single crochet into
the same stitch of the previous round
or row times by six. Just means that
we need to repeat what's between
parentheses six times. At the end of the
second round we'll have 12 stitches because we started with six
single crochet and want to grow the head of the bird straight
out to the sides. We need to increase six times evenly around the first round. For the second round
we need to work, we increase in all stitches
of the previous round. Because we're working
in continuous rounds, also known as spirals, we start working the
second round directly on top of the first without
joining or chaining. This is also the reason why
we need a stitch marker, because without using one, it's hard to tell where
our rounds start. Sometimes it's hard to find the first stitch
on the first run, which is where we need to start the second round to find and count the stitches
on the first round. In our case, six, beginning
next to our hook, there are two ways
you can identify and count your stitches. First is from the front. From the front.
One single crochet on the last work round or row looks like the letter V with the horizontal bar on top. The other way is from the
top of the round or row. Each individual
stitch looks like the letter V stacked
on top of each other. Almost all crochet stitches
look like this from the top. In this case, I'm going to count the stitches
from the front, but because the
single crochet are so tightly pressed
against each other, I'm going to count
horizontal bars on top. Okay, Count with me 123456. This is where we need to work our first stitch of
the second round. Sometimes the first stitch of the first round is
a little bit tight. You need to be
patient working into it to make one increase. Insert your hook
under both loops of the first stitch of the first
round yarn over and pull up a loop yarn over and pull the yarn through
the loops on the hook. Place your stitch marker on the first stitch because
we're increasing. Instead of inserting our
hook into the next stitch, we're going to insert our hook into the same
stitch as before. Insert your hook into
the same stitch, yarn over and pull up a loop yarn over and pull through the
two loops on the hook. You made your first increase, where before you had one stitch, now you have to now repeat five more times in
the remaining stitches. Insert your hook into
the next stitch and work a single crochet yarn over. Pull up a loop yarn over, pull through the two
loops on the hook. To increase work
another single crochet into the same stitch, yarn over, pull up a loop yarn over, pull through two, continue to increase on all stitches
to the end of the round. I'll see you there at
the end of round two. We'll have worth one increase in each of the stitches
from the first round. Now we have 12 stitches
for the next few rounds. We already know all
the abbreviations. We need to keep
increasing evenly so that the head grows at
the same pace all around. We need to work the same
amount of increases as before. Six and space them evenly
on the next round. On the third round, work one single crochet increase in the next stitch,
repeat six times. At the end, you'll
have 18 stitches. Insert your hook into
the next stitch. Yarn over and pull up
the loop yarn over. Pull through the two
loops, one single crochet. Place your stitch marker
on the first stitch, increase in the next stitch. Insert your hook into
the next stitch. Yarn over and pull up, loop yarn over and pull the yarn through the
two loops on the hook. Into the same stitch. Yarn over, pull, polo
yarn over, pull two. You have your first group of one single crochet
plus one increase. Repeat five more times
to the end of the round. At the end of the round, we
should have 18 stitches. We don't need to increase the
width of the head anymore, but we need to make it taller. And for that we need to work single crochet is on all
stitches all the way around. So for Rounds 4.5 we need
to work 18 single crochet, one on each available stitch
of the previous round. Insert a hook into the
next stitch, yarn over, pull up a look yarn over
and pull through two. Repeat to the end of the run. When you get to the
end of round four, repeat the same
thing for round 51, single crochet into each
stitch of the previous run. I'll see you at the
end of round five. Make sure to keep placing your stitch marker on the
first stitch of each round. Now that we work two rounds without increasing
or decreasing, the head of the
bird grew taller, but now we need to make it
a little bit wider again, we are increasing again
on the next round, we want to take a guess what we need to work on the sixth round. That's right, the single
crushes plus one increase repeat six times and at the
end we left 24 stitches. I'll make the first
repetition with you. Insert your hook into the
next stitch. Yarn over. Pull up a loop yarn over, Pull through the Tu
loops on the hook. One more, single crochet. Insert your hook into
the next stitch. Yarn over, pull up a loop, yarn over, pull through two. Now the increase. Insert your
hook into the next stitch, yarn over, pull up
a loop, yarn over, pull through two into the same stitch, yarn over, pull up a loop, yarn over, pull through
the two loops on the hook. Repeat five more times to the end of the round.
See you there. At the end of the sixth round, we have 24 stitches and now it's time to make the
stripe on the bird's neck. But that's on the next
lesson. See you there.
7. Making the Stripe: In this lesson, we
are going to make the horizontal stripe
in the bird's neck. We are going to learn
how to change colors in a way that blends in
with the rest of the work. Here we are back at the
end of the sixth round. Now we need to make the stripe, but if we were to make our next stitch in
the second color, we would get a
stitch green, gray. And that would give away
where we changed colors. There's a little trick I'm going to show you to avoid this. But first, we need to
learn a little bit more about the anatomy
of crush stitches. If we look at the
top of the stitches, we can see that there are
two loops that form a V. The arm of the V that
is closest to you when your work is turned to you
is called the front loop. And the one that is farther
away is called the back loop. To start the stripe,
we first need to undo the last stitch
of the sixth round. To undo the last stitch, take your hook from
the loop and place it between the front and back
loops of the last stitch. Make the hook go to the
front of your work. Pull the working yarn until
the last stitch is undone. The hook stops us from
unraveling more than what we need to change colors
and make strive first. We need to work our
last stitch again, but not all the way to the end. You'll see what I mean in a second because we need
to increase here. Insert your hook into the same
stitch as the last stitch, yarn over and pull up a look. Now the front part. Grab the
yarn in the second color. I'm using light green. Fold it over your index finger
of your non dominant hand. Make the hook go under the green yarn and pull it
through the loops on the hook, completing the single crochet. As you can see, the last
stitch is now all gray. Now we can continue working with the green yarn and
make our stripe, leave the gray yarn For now, don't do anything to it. We will be needing it later to complete the
body of the bird. Grab the tail of
the green yarn with your non dominant hand and keep it on top of
the previous round. While we work the next few
stitches on run seven, we find a new abbreviation. Let's bring up our
abbreviation chart and we see that it
means slip stitch. So for the seventh round
with the second color one slip stitch and 23
single crochet at the end, we should have 24 stitches
to work a slip stitch, insert your hook into the
next stitch, yarn over. Make sure the tail of the yarn is on top of the
previous thrown. Pull up, look and pull it
through the loop on the hook. If the gray single crochet
becomes a little loose, don't worry, just pull the gray yard a little
bit until it's perfect. Again, place your stitch marker in the first stitch
and continue to work. Single crochet one on
each stitch to the end of the run work the first
five to four stitches over the end of the green yarn. Working over the end of the green yarn secures
it while we're working and we no need to come back to it later to secure it. At the end of round seven, you should have 24 stitches. At this point you can
hide the tail from the magic ring inside
the bird's head. 48th round work 24 single
crochets all the way around. Make sure to mark the
first stitch and complete the last single crochet of
the round with the gray yarn. I'll wait for you there
to make the last stitch. Insert your hook into the next stitch yarn over and pull up a loop
with the green yard. Grab the gray yarn yarn over with the gray yarn and pull it through the
tulp on the hook. You should have 24
stitches in this room. If the last green single
crochet becomes a little loose, just pull the green yarn a little to tighten
it a little bit. Continue to work with the
gray yarn, just like before. We need to start
a new color with a slip stitch on
round nine work. One slip stitch, one increase. Five single crochet
and one increase. Then one single crochet
plus one increase. Repeat two times
after that work, eight single crochet to
finish the round work, one increase plus
one single crochet. Repeat two times at the end, you should have 30
stitches to slip stitch. Insert your hook into the
next stitch, the yarn over. Pull up a loop and pull
through the loop on the hook. I'll make the rest of
the round with you. We already have our slip stitch, now we need one increase. Insert your hook into
the next stitch. Yarn over, Pull up
a Look yarn over, Pull through the two
loops on the hook to insert into the same stitch. Yarn over, pull up
a look yarn over, pull through the two
loops on the hook. Next we need to make five single crochet
into the next stitch, yarn over, pull up, yarn over, pull two, and that's the single crochet. One more makes four, we need one more into the
next stitch, yarn over, pull over 21, increase 12345, single crochet. Now we need to increase
again into the next stitch, yarn over and pull upon, pull through two into the same stitch over
and pull pull two. Next we need to work a group of one single C plus one increase. Repeat two times, one single Ce, increase into the same
stitch to increase. Next one single crochet
and one increase. Now we need eight single
crochet into the next stitch. Over and pull now
one single crochet, seven to go, 23 single crochet, we need five more, 45671 more to go, and eight. Let's check 12345678,
single crochet. Next we need to work a group of one increase plus one
single crochet repeat two times into the next stitch to increase yarn over and
pull up a loop over, pull through two into the same stitch to increase
over and pull up a loop over. Pull through two n one single
crochet into the next over, pull up a loop over to increase and to end the round. One single crew shape. We don't need the green
yard anymore for the body. We need to secure
it on the inside. Make the loop on
the hook looser by pulling it up and
letting the yard run, take the hook from the loop. To avoid our work from
unraveling wildly, secure the green yard, Place the stitch
marker on the loop. And I also like to go under both loops of the first stitch so that our work is extra protected no matter how
much you pull on it. It's just want to unravel to secure the green yard, turn your work around and get the gray yarn
out of the way. Grab the green yarn and cut it, leaving a tail of more or less
10 centimeters, about 4 ". Tread the tail on an
embroidering needle. Here's a neat trick to
a thread your needle. Grab the end of the yarn between your thumb
and the next finger. Pull it until you can see it. Place the eye of
the needle between your fingers on top of
where the tail should be. Wiggle the embroidering
needle between your fingers while at the
same time pushing it down. Just like that, the yarn goes through the
eye of the needle. I'll show it again.
Place the yarn between your thumb
and index finger. Pull it until you can see it. Place the eye of
the needle between your fingers where
the tail should be. Wiggle the embroidery
needle between your fingers and at the
same time push it down. Never fails. I like to secure my tails on the horizontal loops at the
back of the single cro, make the needle go under one of the horizontal loops and pull, make it go under the
same loop again. And pull it gently
until you have a loop. Make the needle go
inside the loop from the back and pull
it, creating a knot. The tail is secured. The reason we start around
with the slip stitch when changing colors is because
if we use single crushes, it creates a step where
you clearly see where one color ends and the other
starts with the slip stitch. That change is smoother. In this lesson,
we'll learn how to make the horizontal
stripe and now we can continue to work on the birds seeing
the next lesson.
8. Rounds 10 and 11: In this lesson, we
are going to work on round 10.11 of the bird's body. And I'll share some
insights you can give shape to your amigo By the
end of round nine, we can already start
to see the body taking shape for round ten. Work two single
crochet one increase. Five single crochet
one increase. Next work a group of two single crochets
plus one increase. Repeat two times. After that work nine single
crochet and then a group of one increase plus two single crochet repeat
two times At the end, you should have 36 stitches. Now that the green
yarn is secured, we can take the stitch marker from the first
stitch and the loop. Place the hook back in the
loop to start the tenth round. First work to single crochet
into the next stitch. Yarn over, pull up a loop, yarn over, pull through
the two loops on the hook. Don't forget to place
your stitch marker on the first stitch
into the next stage. Yarn over, pull up, no increase into the next stage. Yarn over, pull, pull yarn
over pro to increase, go into the same stay over two. Next we need five
single crochet, 123r and 51, increase into the next stage. Over and pull yarn over, pull two to increase, go into the same stage, yarn over and pull
yarn over, pull two. Next we need a group
of two single crochet. Increase. Repeat two times, one single crochet,
two single crochet. Now the increase into the same stitch to
increase one more time. One single crochet,
two single crochet, and one increase into
the same stitch to increase 12 single crochet
increase, 12 increase. Next we need nine single
crochet into the next stitch. Over poop, no pull, 21, single crochet, 23456. We need three more, 78, the last 19. Now we need to work a group of one increase plus two single
crochet repeat two times. Next we need one increase into
the next stitch over two, into the same stitch over 22 single C one. 21 increase into the same stitch to increase and to
finish the round two single 1.2 At the end, you should have 36 stitches. I want to continue to grow the back a bit more to the outside. For round 11 work three
single crochet one increase. Five single crochet
one increase. And to finish the round
26 single crochet. At the end of this round, you'll have 38 stitches. To start round 11, we need three single crochet
into the next stitch, yarn over and pull
Opo yarn over. Pull through two, place the stitch marker on
the first stitch, one single crochet,
two single crochet, and the last 13 single crochet. Now we need one increase
into the next stitch. Yarn over, pull, pour, increase. Go into the same stitch, yarn over and pull pour two. Now we need five single
crochet, 123-51-2345 Next we need one increase
into the next stage over put two increase going
to the same stage. Now next we need
two single crochet. To the end we need 26 single crochet 123 45e 678-910-1112 1314, 1516, 1718. 1920 we need six more. 21, 222-032-4205 and the last 126. Because we only increase
two times at the end, you should have 38 stitches. Meet me on the next lesson to continue to work on
the body of the word.
9. Rounds 12 and 13: In this lesson, we
are going to work on rounds 12.13 of the bird's body. I want to keep extending the
back of the bird so we are going to keep increasing at
the back To count the rounds, just count the rings
around your work. Be careful not to turn
your work too much while you count or it might
give you a false result. Trying to count the rounds
going up as straight as you can count with me. 123 456-789-1011 for around 12 work four single crochet
one increase. Seven single crochet
one increase To finish this round work, 25 single crochet to the end. At the end, you should
have 40 stitches to start, we need four single. Into the next stitch over, pull through the two
loops on the hook. One single crochet. Place the stitch marker in your first stitch into the next stitch over pullover. Pull two over pull
23 single crochet. One more single C. Now we need one increase into
the next stitch over pullover two to increase
go into the same stitch, pull two, next we need seven single
crochet into the next stitch. Over pull, pull 21,
single crochet, 234561. More seven. Now one increase into
the next stitch, you put two into
the same stitch. Two Next we need 25 single
crochet to the end. 12345678. 910-11-1213 I don't like this stitch. It's too loose. Let me show
you how we can fix it. Take the hook from the loop, place it between the front
and back loops of the stitch. Pull the working yarn, and it comes undone.
I'll show it again. Take the hook from
the loop inserted between the front and back
loops of the stitch just made. Pull the working yarn and
the stitch is unraveled. Repeat your stitch and
continue to work as usual. If you need to count the stitches from
your last increase, 123 456-789-1011
we need 14 more. Keep working one single crochet on each single crochet
of the previous round. I'll come back just before the end of this round
to finish it with you only two single
crochet is left, 24. Into the next stitch, Yarn over, pull up a loop, yarn
over, pull through two. 25 single crochet. At the end of this round, you should have 40 stitches. For round 13 work, five single crochet
one increase. Seven single crochet
one increase to finish the round work 26, single crochet to the end. At the end, you should
have 42 stitches. Start round 13 with
five single crochet. Take the stitch marker from the first stitch of
the previous round. Insert your hook into
the next stitch. Yarn over pull, loop yarn over pull through
the two loops on the hook. One single crochet, the stitch marker In the
first stitch of this round, we need for more single crushes. This one makes 234, the last 15. Now increase into the next stop to go into the same stitch two. Next we need seven
single crochet into the next stitch over pullout one single
crochet, 23,456.7 Here you can see clearly
how the increases are extending the back of
the bird to the outside. Now we need one increase into the next stitch to into
the same stitch over, pull, pull over, pull two. Now we need to single
crochet to the end with 26 single crochet 1234. Continue to single crochet on each single crochet of
the previous round. I'll come back just before the end of this round
to finish the round with you three more single
crochet to finish the round. This one x 24 25 single crochet, last one into the next stitch, yarn over pull polo yarn over
pull T 226 single crochet. At the end of this round,
you should have 42 stitches. Next we are going to learn
how to decrease you there.
10. How to Decrease: In this lesson, we are going
to learn how to decrease and continue to learn how to read written crochet patterns. The goal now is to
make the front of the bird curve to the inside
to start shaping its tummy. On round 14, we find a new
abbreviation, deck two. If we take a look at our
abbreviation charts, we can see that it means decreasing using the
invisible decrease method. Catching two stitches for round 14 work six
single crochet, one increase seven
single crochet, one increase six single crochet. Next work a group of one invisible decrease
plus one single crochet. Repeat seven times. At the end, you should
have 37 stitches. Start round 14 with
six single crochet. Go into the next stitch. Over, pull, pull over,
pull through two. Place the stitch marker in
the first stitch of the round one single crochet
into the next stitch. No, pull, pull you
22 single crochet, three single crochet F 5.6 Now the increase
in the next stitch over two into the same stitch
to increase over pullover. Put two. Next we need seven single crochet 123, we need three more. 56, last 17. Now we need one increase
into the next stage. No pull, pull two into the
same stitch to increase Novo. No two. Next work six single crochets, 12,345.6 Next we need to
work one group of one invisible decrease
plus one single crochet. Repeat seven times to make
an invisible decrease. Insert your hook into
the next stitch. But this time, catch
the front loop. Only the hook is between
the front and back loop. Repeat for the next stitch, insert your hook into
the next stitch. Catching only the
front loop yarn over, pull the yarn through the front loops of both
stitches to pull up a loop yarn over, pull through the two
loops on the hook. We took two stitches
and turn them into one. This is our first
invisible decrease. Now we need one
single crochet next. Invisible decrease. Insert your hook behind the front loop of
the next stitch, and again behind the front
loop of the next stitch. Yarn over, pull the yarn through the two loops
to pull up a loop. Yarn over, pull through
21, invisible decrease, one single crochet, and one invisible decrease again behind the front
loop of the next stitch. Again behind the front
loop of the next stitch y the two loops to pull
up a loop, yarn over, pull 21 single crochet, one invisible decrease behind the front loop of
the next stitch, and again behind the front
loop of the next stitch. Yarn over, pull through the
loops to pull up a loop. Yarn over, pull through 21 single crochet on E. Invisible decrease behind the front loop
of the next stitch. Behind the front loop of
the next stitch over, pull the two loops
to pull up a loop. Pull through 21, single one invisible decrease behind the front loop of
the next stitch, behind the front loop
of the next stitch. Yarn over, pull
through the two loops. Yarn over, pull through 21, single crochet, one invisible decrease behind the front
loop of the next stitch, Again, behind the front
loop of the next stitch. Yarn over, pull through the
two loops to pull up a loop, yarn over, pull through
the Tu loops on the hook to finish the round
one single crew shape. The decreases curved the shape
of the Mugu to the inside. That's why for now I'm only decreasing on this side
to make the tummy of the bird join me in the next lesson to continue our work
on the bird's body.
11. Rounds 15 and 16: Let's dive right in and
complete rounds 15.16. Of the body of the word
on round 15 were two, single crochet is plus
one invisible decrease, Repeat two times
seven single crochet, one invisible decrease,
plus two single crochet. Repeat four times to end the round work one
invisible decrease, and at the end, four
single crochet. At the end of round 15, you should have 30 stitches
to start round 15, work two single crochet. Insert your hook into
the next stitch over. Pull over 21 single crochet. Place your stitch marker
in the first stitch of the first strong two single crochet. Now the invisible decrease. Insert your hook behind the front loop of
the next stitch. Insert your hook behind the front loop of
the next stitch. Will they yarn through
the two loops? Yarn yarn through the
two loops on the hook. Two more single crochet 12, and now one invisible
decrease behind the front loop of the
next stitch and behind the front loop of the next
stitch over the two loops, through the two
loops on the hook. Next we need seven single on E23 456.7 Next we need one invisible decrease behind the front loop of
the next stitch, behind the front loop
of the next stitch. Over pull through the two loops over pull through both
loops on the hook. Two single 121 invisible decrease behind the front loop of the next stitch and behind the front loop
of the next stitch. Yarn over, pull
through both loops, Yarn over, pull through
the two loops on the hook. Two, single crochet 1.21 invisible decrease
12 single crochet, one invisible decrease,
two single crochet. We need to work
two more groups of one invisible decrease plus two single crochet
behind the front loop. Behind the front loop again, y through both loops. Pull the two loops on the
hook. Two, single cro. And two, invisible decrease
behind the front loop, again behind the front
loop, yarn over, pull through both loops, yarn over, pull through
both loops on the hook. Two single crochet 1.2 Now we need to work one
more invisible decrease behind the front loop
of the next stitch. Behind the front loop
of the next yarn over, pull through both loops. Yarn over, pull through
both loops on the hook. To finish the round work
for single crashes, 123. And at the end, you should have 30 stitches. Concentrating the
decreases on the front of the bird makes the tummy curve
even more to the inside. On round 16, you are starting to close the
body of the bird. Round 163, single crochet
plus one invisible decrease, repeat six times to
the end of the run. At the end, you should
have 24 stitches to start round 163, single crochet plus one
invisible decrease. Insert your hook into
the next stitch. Yarn over, pull up y. Pull through the two
loops on the hook. One single crochet. Don't forget to place
your stitch marker into the next stitch. Yarn over, pull polo yarn over. Pull through both
loops on the hook to single crochet, three
single crochet. Now the invisible decrease behind the front loop
of the next stitch. Again, behind the front
loop of the next stitch. Yarn over, pull
through both loops. Yarn over, pull through
the two loops on the hook. Repeat this group of
three single crochet plus one decrease six times
to the end of the round. I'll see you back at the
end of the round to work. The last group with you
to finish the round, work for the six times three single crochet plus
one invisible decrease, single crochet, two
single crochet. We need one more.
Three single crochet, and now the invisible
decrease in search your hook behind the front
loop of the next stitch. Again, behind the front loop of the next stitch over the yarn. Through both loops, you are
the two loops on the hook. At the end, you should
have 24 stitches. As you can see, the
body of the bird is starting to close
evenly on all sides. Now it's a good time to
place the safety eyes, and that's what we'll
do in the next lesson. If you're using crochet eyes, you can skip the next lesson. The crochet eyes will be
attached to the body later. Oh, and if you have
any questions, you can leave them in
the discussions below.
12. Placing the Eyes: At this time, I like to place the safety eyes on the bird. It is important to note that safety eyes should not be used for a Megumi meant for babies or small children
that mouth their toys. The safety eyes are
hard and can hurt the child's mouth and
can be a choking hazard. When making a Megumi
for young children, I like to use baby safe yarn. And I use crocheted eyes. I embroider the ice
directly into the toy to ensure it remains completely
soft and safe for the child. I like to attach
the crochet eyes when I have all the
other pieces ready. So if you're using crochet eyes, you can skip ahead
to the next lesson. Just like before, let's secure the yarn so that our
work doesn't unravel. While we place the safety ice, loosen the loop, take
the hook from the loop, place the loop on
the stitch marker and close the stitch
marker to secure it before placing the safety is I like to experiment with their placement
with sewing pins. That way you won't be left with a big gap between your
stitches if you decide to move the ice for the bird. I like to place the
ice between rounds 4.5 and with six
stitches between them. Place the sewing pins
where you would like the ice to be and see if
you like their placement. Move them around until
you're satisfied the safety eyes of two pieces. The eye itself with
the rounded front, which is what's going to
be visible on the outside, and the peg that will go
through the fabric of Amigo. Then we have the washer
which is going to be on the inside of
a Megumi and it's what keeps the safety
eye secured in place to secure the ice. Place the washer on the
safety ice pack on the inside of the bird with the flat side turn to the fabric of the bird, all the safety eye
with the index and middle finger on the washer
on either side of its hole. And your thumb on
the round part of the safety eye to
secure the safety ice. Push the thumb and
fingers together. Now it's time to
place the safety ice. Carefully Take one
of the sawing pins out and replace it
with the safety eye. Push the peg of the eye to the inside between two
stitches on the birds body. Repeat for the other side. Take the sewing pin out and place the safety
eye in its place. Make sure you're happy
with the placement of the eyes because once
secured they won't come out. Grab a washer and
place it on the peg of the safety eye with a
flat part of the washer. Turn to the wall
of the Amiga Rumi. Place the index and
middle fingers on the washer on either
side of the peg, and your thumb on the
outside on the eye. Push them together until you hear several
clicking sounds. Make sure that the washer is right up against the
fabric of the bird. Repeat for the other
eye. Grab a washer. Place it on the peg of the safety with the flat part
turned to the wall of the. Place your index
and middle finger on either side of the peg
on top of the washer. And your thumb on the
round part of the eye. Push your fingers together until you hear the
clicking sounds. Make sure that the washer went
through all the ridges on the peg and that it's right up against the fabric
of your Megumi. The eyes are secured and it will be nearly impossible
to take them out. Now I can continue to work
on the body of the bird, working on the last
remaining rounds and stuffing the
body of the bird.
13. Stuffing and Last Rounds: After placing the safety eyes, I like to begin to stuff
the body of the bird. After that, we'll be working on the last throngs of
the body of the bird. Grab a handful of polyphyl
and place it inside the bird. Use your fingers to reach every crevice of the
body of the bird. Reinforce the stuffing
around the eyes. And make sure that the pegs
of the ice inside the bird pushed up or down by the stuffing for that might
distort the face of the bird. I like to fluff up the poly Phil before placing it
inside my Emmy. I feel it makes them
softer and not so compact. Make sure to force the poly Phil into the edge of the bird. Sometimes the stuffing
resists going into smaller places so I use
my fingers to make sure they are well stuff as
we go into the body, start to push the stuffing to the edges of the bird to
accentuate its shapes. Stuff up to the last worked run, I like my amigo me to be a bit firmer but not
too much stuff. The body of the bird until
you're wrapper with it, grab your 3.2 millimeter hook to finish the
body of the bird. For on 17, work a group of two single crochets plus
one invisible decrease. Repeat six times at the end, you should have 18 stitches. I'll make the first
repetition with you. First, we need to
single crochet. Insert your hook into
the next stitch. Yarn over polo. Polo yarn over. Pull through the two
loops on the hook. One single crochet. Place your stitch marker in the first stitch into
the next stitch. Yarn over, pull up,
look yarn over. Pull through the two
loops on the hook. Two single crochet. Now the invisible decrease. Insert your hook behind the front loop of
the next stitch. Again, behind the front
loop of the next stitch. Yarn over, pull
through two loops. Yarn over, pull through
the two loops on the hook to avoid grabbing
the stuffing with your hook. Place the index finger of your non dominant hand behind the stitches
you are working into. Repeat from the beginning
five more times at the end, should have 18 stitches On round 18 work a group of one single crop plus
one invisible decrease. Repeat six times at the end, you should have 12 stitches. First we need a single
crochet into the next stitch, yarn over, pull a
loop yarn over. Pull through the two
loops on the hook. Don't forget to place
your stitch marker into the first stitch. Next, we need one
invisible decrease. Insert your hook behind the front loop of
the next stitch. Again, behind the front
loop of the next stitch. Yarn over, pull
through the two loops. Yarn over, pull, threw the
two loops on the hook. Repeat from the beginning
five more times. At the end, you should
have 12 stitches. At this point, you can reinforce
the stuffing a bit more. Push the stuffing to the
edges of the body of the bird and to any areas
you feel are a bit empty. Once you satisfied
with the stuffing, continue to work on
the body of the bird. For the last round, round 19, work six invisible decreases
all the way to the end. At the end, you should
have six stitches. Insert your hook behind the front loop of
the next stitch. Again, behind the front
loop of the next stitch. Yarn over, pull
through two loops, Yarn over, Pull through
the two loops on the hook. Place the stitch marker
on the first stitch. Repeat from the beginning
five more times at the end. So six stitches. If you feel like you need to stuff the body a
little bit more, you can use the end of a thicker hook to make it go through the
hole at the bottom. Keep in mind that
the more stuffing you put inside your mega room, the more chances it has to
shoot through the stitches. Now it's time to
close our Amigo, we'll do that in the next
lesson. See you there.
14. Closing: Let's close the bird.
Before closing the bird, we need to leave a tail long enough to attach the key chain. If you don't want to turn
your bird into a key chain, you can leave a tail
of more or less 10 centimeters or 4 ". To determine the
length of the tail, you need to leave for the
key chain first loop where the hook was with your thumb so that your work
doesn't unravel. Keep your thumb at the bottom of the bird and your index
finger at its top. Grab the working yarn
and wrap it around your index finger and thumb,
alternating between them. The idea here is to
have a length of yarn that is six times
the height of the bird. Repeat until you have
that cut the yarn. Pull the loop until the end of the yarn becomes loose
and the loop is undone. Take the sage maker out, we don't need it anymore. Thread the long tail into
an embroidery needle. Close Amigo, you
were in the round. Catch the front loops of all the stitches of
the last strung. Place your needle behind the front loop of
the next stitch. Pull the yarn gently repeat for the remaining
five stitches, 2,345.6 Pull the yarn tightly until the hole at the bottom
is completely closed. To finish off the body, we are going to use one of the loops that go
into the center. Like the ones, ideally use the one closest
to where you ended. Insert the needle under
the loop, pull the yarn, go under the same loop again and pull gently until
you have a loop. Insert the needle into the
loop and pull, creating a not. Insert your needle
into the center of the last throne and make it come out at the center of
the first throne. You can use a long
needle if you have it. Pull the yarn tightly until the knot slides into
the body of the bird. Leave the long tail.
We'll be needing it later to attach
the key chain. If you don't want to make a
key chain out of the bird, make the needle come out anywhere in the body
between two stitches. Depress the body of
the bird right next to the yarn and cut it
flush with the body. The yarn will disappear
into the bird. The body is finished and now we're going
to make the tail, say in the next lesson.
15. Making the Tail - Part 1: In this lesson, we are going to start working on the tail. To make the tail,
you'll need a 3.2 millimeter hook and the
medium weight yarn in gray. In the beginning of the tail, we find new information
and abbreviations. We can see that it says that
the tail is worked in rows. This means that we'll
be working back and forth over the previous row, just like a printer at
the end of the other. For the tail we have
the information leave a long tail
at the beginning. That just means we need to start working further
down the yarn. Instead of starting right
at the end of the arm. In the first line for
the instructions, we can see CH seven. Let's bring up the
abbreviation table and we can see that CH means chain. Before we work the first row, we need to chain seven. In other words, work a
chain with seven stitches. To start the chain, we
first need a slip knot. To make a slip knot,
grab the yarn, place it your index and middle finger from the
front to the back, and bring it to the
over the index finger. We'll need a long tail of
yarn at the base of the tail. Pull the end of the
yarn until it's more or less 30 centimeters
or 12 " long. Secure the yarn with
your thumb and fingers. Place your hook under the
yarn that's on top of your index finger coming
from the left to the right. Turn your hook until it's
in its natural position. Yarn over, grab the yarn that's on the hook,
and pull up a loop. You just made one slip. Not now, we need a chain of seven stitches to
chain yarn over. Pull one chain yarn over, Pull, pull two chains, three chains, 4561 more, seven to come, the
stitches on the chain. Ignore the slip knot and
the loop on the hook, we have 123,456.7 for the first row of the tail work. One single crochet into the
second chain from the hook, plus five more single crochet
to the end of the chain. At the end, you
left six stitches. Because the row starts
with a single crochet, we need to leave a chain free to make up for the height
of the single crochet. If we were to work
into the first chain, the first single crochet
would be all scrunched up. If we were to start
with the taller stitch, we will need to begin working
further down the chain. Even though we start
with a chain of seven, we'll end up with six
single crochets at the end. At the end of each row, we need to prepare
for the next one. For that, we need to
chain one and turn. When working in rows, I like to make the first row in the back bumps of the chain. The back bumps are these vertical dashes on the
back of the chain. Insert your hook under the
second bump of the chain. Yarn over, pull, pull yarn over. Pull through the Tu
loops on the hook. One single crochet
under the next bump, yarn over, pull, pull yarn over, and pull through the
tulp on the hook. Two, single crochet. Repeat for the remaining chains. At the end, you should
have six stitches. Three, single crochet or single crochet.
We need two more. Be careful not to
catch any extra. Yard five, single crochet. Last 16 single crochet. This knot at the end is the
slip knot don't work into it. This is the reason why I like to work into the back
bumps of the chain. The bottom is as pretty as the top showing the
viz of the chain. In this case, they are going
to be iden when assembled. But I just wanted to show you that you can
have both sides. Betty, at the end of each row, we need to chain one and turn northward to prepare
for the next row. This chain on E at
the end is known as the turning chain and is not included in the final
number of stitches. The turning chain moves us up to the next row while maintaining the height
of the stitches. To turn your work, simply
drop it to the back, turning it from right to left. For the second row work, one increase, four single
crochet, and one increase. Finally, chain one and turn. Because we are
increasing two times, we have two more
stitches than before, making it eight stitches. At the end of row two, insert your hook into
the first stitch over one yarn over pull loop. Pull through the two loops on the hook to make
one single crochet. To increase, insert
your hook into the same stitch and work
another single crochet. Next work for single crochet 12, The and F on the last stitch increase. Again, insert your hook into
the last stitch of row one. You pull through
the two loops on the hook into the same stitch over yarn over and
pull through two. The increases at the edges
of the tail make it wider, giving it that
classic birds tail look chain one at the end. In turn to prepare
for the next row, join me in the next lesson
to finish up the tail.
16. Making the Tail - Part 2: Okay, let's finish the tie. In the third row of the tail, we find new
abbreviations, DC, DC. If we check our
abbreviations chart, we can see that HDC
means double crochet, DC means double crochet. For row three, we need two
single C12, double crochet, two double crochet,
12 double crochet, and two single
crochet chain one. And turn to prepare
for the next row. At the end, we'll
have eight stitches. Start the third row with two single crochet,
one single crochet, two single crochets. Now to work a half
double crochet, the first thing we need
to do is yarn over. After that, insert your
hook into the next stitch, yarn over, and pull up a loop. Now we have three
loops on the hook, Yarn over and pull the yarn through all
the loops on the hook. As you can see, that
extra yarn over at the beginning gives the half double crochet a
little bit of height. Next we need to double crochets to work a double
crochet yarn over. Insert your hook into
the next stitch, yarn over and pull, pull look yarn over. And here is where it differs from the
half double crochet. Pull through only two
loops on the hook, yarn over and pull through the last two
loops on the hook. This difference makes
the double crochet even taller than the
half double crochet, double crochet yarn over. Insert your hook into the
next stitch, Yarn over. Pull up a loop, yarn over, Pull through two
loops on the hook, yarn over, and pull through the last two
loops on the hook. Next we need one half
double crochet yarn over. Insert your hook into the next stitch yarn
over and pull up a loop yarn over and pull through all
the loops on the hook. To finish this row work, two more single crochet, 12 single crochet starting and ending with
shorter stitches. And using taller
stitches in the middle creates a curve to the top
edge of the tail that I think looks more natural and pretty chain one in turn to
prepare for the next row, four for one increase, six half double crochet, one increase chain one in turn, because we increase two times, we have two more stitches, which means we'll
have ten stitches at the end of four to start work one single
crochet into the first. To increase, insert your hook into the same stitch, yarn over. Pull op yarn over and
pull through two. Now we need six double
crochets, yarn over. Insert your hook into
the next stitch, all the loops on the hook. One half double crochet over. Insert your hook into the
next stitch, yarn over. Pull over through all
the loops on the hook. Two, half double
crochet yarn over. Insert your hook into
the next stitch, yarn over and pull
polo yarn over. Pull through all the
loops on the hook. Three, half double
crochet yarn over, search your hook into
the next stitch, yarn over and pull poo yarn. Pull through all the loops
on the hook, yarn over, Insert your hook into
the next stitch, yarn over and pull polo yarn over and pull through all the
loops on the hook. We need one half double
crochet yarn over. Insert your hook into the
next stitch, yarn over. Pull up yarn over and pull through all
the loops on the hook. Six, half double crochet. Now we need to increase
with single crochet on the last stitch,
one single crochet. And to increase,
insert your hook into the same stitch yarn over, pull, pull through the two loops
on the hook chain on E, and turn to prepare for
the next row on row five. Work two single crochet,
two double crochets, two double crochets,
two double crochets, and finally two single crochet at the end web and stitches. First we need two
single crochet, 12 single crochet. Next we need to have
double crochets over. Insert your hook into the
next stitch, yarn over. Pull yarn over. Pull through all the
loops on the hook. One mark yarn over. Insert your hook into the
next stitch, yarn over. Pull up yarn over. Pull through all the
loops on the hook. Next we need to double
crochets, yarn over. Insert your hook into the
next stitch, yarn over. Pull up yarn over. Pull through two
loops on the hook, Yarn over, and pull through the last two
loops on the hook. One double crochet, We
need one more yarn over. Insert your hook into
the next stitch, yarn over, Pull up yarn over. Pull through two
loops on the hook, yarn over, and pull through the last two
loops on the hook. Now we need to have double
crochets, yarn over. Insert your hook into
the next stitch, yarn over and pull
polo yarn over. Pull through all the loops
on the hook, yarn over, Insert your hook into
the next stitch, yarn over, pull polo yarn over. Pull through all the
loops on the hook. To finish this row, we need two single crochet, one to take the hook from the loop. And cut a tail of about
20 centimeters or 8 ". Pull the loop until
it becomes undone and thread the tail on
your embroidery needle. Insert the needle under the loops that go
around the side of the tail of the bird and threw the knot from
the initial chain. We'll secure this tail later
while assembling the bird. Don't talk too much on the yarn. You don't misshapen the tail. The tail is finished, and on the next lesson
we'll make the wings.
17. Making the Wings - Part 1: For the wings,
we'll be combining working in rounds and rows. We'll start working in rounds
and then switch to rows. For the wings, we will
need a 3.5 millimeter hook and the green medium weight
yarn to make the wing. We'll need to leave a long
tail at the beginning, just like we did for the tail. We'll need to start
working further down the yarn instead of
right at the beginning. Leave a tail of more or less
party centimeters are 16 ". To start the wings work six single cross into the
magic ring for round one. At the end will have 6 ". Remember to start working
a bit further down the yarn to make the magic ring, place the yarn between your
index and middle finger, with the working yarn
going to the back. Wrap the free end of the yarn to times around
your index finger. Hold the yarn between your
index and middle fingers. Bring your working yarn to
the front over your fingers, all the working yarn
with your thumb. Place your hook under all the loops that we
formed around the fingers. Catch the last one with
your hook and pull it under the other two yarn over
and pull up a look. Take the magic ring
from your finger. Work six, single crochet
into the magic ring. Insert your hook
into the magic ring. Yarn over, pull up
a loop yarn over, and pull through the
two loops on the hook. One single crochet, 23 or five, last 16, take the hook from the loop. If you want, you can
place a stitch marker on the loop so that your
work doesn't unravel. Turn your work upside down with the loops from the
magic ring facing you. Pull gently on the tail
from the beginning. Notice which of the loops is
moving and becoming smaller. Grab it close to the tail of the magic ring and
pull it towards you. Beginning to close
the magic ring. Pull it as tight as you can, grab the tail and
pull it firmly. Closing the magic
ring completely, place your hook back
into the loop and pull the working yarn gently to
close the loop around it. The end, we have six stitches. For the second round, I want to increase the size of my circle, but not too much. Instead of increasing on all the available stitches
like you normally would, I'm going to increase
on every other stitch. For round two, work one single
crochet plus one increase. Repeat three times to the end of the round because we increase
three times at the end, we'll have nine stitches. Insert your hook into
the next stitch. You are no burn, pull, pull yarn over and pull the yarn through
the tulips on the hook. One single crochet. Remember to place
your stitch marker on the first stitch
of the round. Now the increase one single
crochet into the next stitch. And to increase one
more single crochet into the same stitch. Repeat from the beginning of
this round, two more times. At the end we'll have nine
stitches, one single crochet, one increase, and for the last time, one
single crochet. One increase. From now on, we'll switch to work in rows, which just means that
we'll start working back and forth with a
chain one at the end. Instead of working all
around the previous rounds. Four rows, three and forward. Three single crochet and
chain one in turn at the end. At the end of each
of these rows, you'll have three stitches. Take off your stitch marker
in the single crochet. In the next three stitches, one single crochet, place your stitch marker
back into this stitch. Two single crochet and three single crochet chain one. In turn four work three single crochet 123 chain. One turn on five
Avenue abbreviation two G. Let's bring up our abbreviation chart
and we can see that it means single
crochet two together, which is just another way of decreasing four row five work. One single crochet two together and one
single crochet chain. One enter at the end. At the end we'll
let two stitches. We are decreasing the number of stitches to make the
point of the wing. To make a single
crochet together, insert your hook into
the next stitch, yarn over, and pull up a loop. Insert your hook into the
next stitch, yarn over. Pull yarn over and
pull the yarn. Roll the loops on the hook. One single crochet,
two together. We took two single
crochet and turned them into one single crochet, into the last stitch chain one. In turn, to prepare
for the next row, far row six, work one single
crochet two together. At the end you left one stitch. Insert your hook into
the next stitch, yarn over, pull poop. Insert your hook into
the next stitch, yarn over and pull
a loop yarn over. And pull the yarn through
all the loops on the hook, one single crochet together. I prefer to use this
method of decreasing on flat pieces because the stitch looks good from the
back and the front. Unlike the invisible
decrease that only looks good from the
front, Don't finish off. In the next lesson, we
are going to finish the edges of the wings and
make them look pretty.
18. Making the Wings - Part 2: In this lesson, we are going to continue from my left off. In the last lesson, we
are going to work around the edge of the wing and give
it a nice finished look. To finish the wings work one
single crochet on top of row six on the edge work
three single crochet, one increase, two single
crochet plus one increase, repeat two times from the
two single crochet work. Three single crochet on the
other side of the wing and one single crochet in the same space as the
first single crochet to make the little tip of
the wing chain and work one slip stitch on
the third chain From the hook slip stitch
to the first stitch. Join Vince to start in one in turn and work on single
crochet on top of row six. Insert your hook under the top loops of
the single crochet two together of row six yarn over and pull up a loop yarn over and pull through the
two loops on the hook. If you want, place
a stitch marker on the single crochet so it's
easier to find later. Now we are going to single
crochet all around the wing. Turn your work on inside so it's easier to
work on the edge. For our first single
crochet on the edge, we are going to insert
our hook between the V in the front of the
single crochet from row five. Make sure to catch the
loop on the back as well, Yarn over, pull up a loop. Be careful not to
pull extra strands of yarn yarn over and pull through
the tulops on the hook. The next single crochet we
are going to work between row 5.4 Insert your hook
between the two rows, yarn over and pull a pollo yarn over and pull through
the tulp on the hook. And the third one
between the V in the front of the last single
crochet on row three. Then on top of the available
stitches from round two, work one increase to increase work one single crochet into the first available
stitch of round two, another single crochet
into the same stitch. Next two single crochet
plus one increase repeat two times, one single crochet, two single crochet increase one single crochet
into the next stitch, one single crochet into
the same stitch as the previous 11 single crochet, two single crochet, and now one increase one single
crochet into the next stitch. And to increase
one single crochet into the same stitch as before. Next work one single crochet, 3-4 Next, between rows 4.5 right at the base of the single
crochet two together. And then between rows 5.6 Finally, work one
single crochet into the same space as the first single crochet we
made at the start. To finish chain three over polo Poll one chain over
and pull polo two chains. Polo pouch. Slip stitch into the back pump of the third chain
from the hook. Insert your hook into
the back pump of the chain yarn over
and pull up a loop. Pull the yarn
through the loop on the hook slip stitch to
the first single crochet. Insert your hook
under both loops of the first single
crochet yarn over. Pull up a loop and pull the yarn through
the loop on the hook. Take the hook from the
loop and cut the yarn, leaving a tail of more or
less 10 centimeters or 4 " thread in on your embroidery
needle and needle join. Insert your needle
under the top loops of the second stitch
to the left pull Gently insert your needle between the loops of the stitch from where the yarn came from. Insert the needle between
the top loops of the stitch. Test directly under this one. Pull gently until it's the size of the top loops
of the other stitches. Turn the wing
around, finish off, and weaving ends in the
back to secure the yarn. Make the needle go
under a loop in the back and pull the yarn. Make the needle go
under the same loop again and pull gently
until you have a loop. Make the needle go into the
center of the loop and pull, creating a knot and
securing the arn. Make the needle go under a few loops in the back
to weave in the ends, pull the yarn. If you want to go under
a few more loops, cut the remaining tail and be careful not
to cut your work. Go back to the tail from the beginning and weave
it in in the back, making it come out at
the top of the wings. Make two wings. In the next
lesson, we'll make the big.
19. Making the Beak: To make the beak,
you'll need your 2.2 millimeter hook and the
lightweight yard in yellow. For the first round
of the beak work, six single crochets
into the magic ring. At the end, you'll
have six stitches. First we need a magic ring. Place the yarn between
your index and middle fingers with the working
yarn going to the back. Wrap it around the
index finger two times, and bring the working
yarn to the front. Over the finger, the
yarn with your thumb, grab the 2.2 millimeter hook and make it go under all
the loops on your fingers. Grab the last one with your
hook and pull it under the other two yarn over and pull through the
loop on the hook. Take the magic ring from your finger works single
crochet into the magic ring. Insert your hook into the
magic ring, yarn over, pull a loop yarn over and pull through the
two loops on the hook. One single crochet to single crochet, 345.6 To close the magic ring, pull the tail of the magic ring gently to see which of the
loops starts to close. Grab the one that was
closing next to the tail. Pull it towards you to
close the other loop. Grab the tail and close
it as tight as you can. On round two, work one signal
crochet plus one increase. Repeat three times
from the beginning. At the end of this round,
you nine stitches. Insert your hook into
the next stitch. Yarn over. Pull up a loop yarn over and pull through
the tuloops on the hook. Place your stitch marker
on the first stitch. Work a single crochet
into the next stitch. And to increase work a single crochet into the
same stitch as before. Repeat from the beginning
two more times. At the end, you'll
have nine stitches. For round three work two single crochet
plus one increase. Repeat three times
from the beginning. At the end, you'll
let two stitches. Take the stitch marker
from the first stitch. Insert your hook into
the first stitch of the previous round yarn. Pull yarn over and pull through the tulp on the
hook, One single crochet. Place the stitch marker on the stitch in search your
hook into the next stitch. Yarn over, pull loop yarn over, and pull through the
two loops on the hook. Two single crochet. Now they increase
one single crochet into the next stitch. To increase work, one single crusade
into the same stitch. Repeat from the beginning
two more times. At the end you left 12 stitches. Take off the stitch marker and slip stitch to the first
stitch of one tree. Insert your hook into
the next stitch. Yarn over. Pull a loop. And pull through the
loop on the hook. At the end of the
beak, we need to leave a tel long enough to
sew it to the body. Here is a neat trick to make sure you always leave
a tail long enough. Hook from the loop and
grab the working yard. Wrap the working
yarn loosely around the edge of the opening
and double that length. Cut the tail a bit further down the yarn, it always works. Thread the tail on your
embroidering needle. Place the yarn between your
thumb and index fingers. Pull it until you can see it. Place the eye of
the needle between your fingers and wiggle the
needle between your fingers. It now needle join. And leave the tail
to needle join. Insert your needle under both loops of the second
stitch to the left. Pull the yarn. Insert your needle back into the stitch from where
the yarn came from. Between the top loops of the stitch as directly
under this one, pull the yarn until
the stitch is the same size of the top
loops of the other stitches. The slip stitch and needle joint bring the height of
the stitches down, making the edge of
the big more uniform and neat to shape. The big find increases on
the last run and pinch them, making a triangle at the base. Push the edges to the inside, flattening them to create
a three sided pyramid, either tail from the magic
ring inside the beak. Next I'm going to show
you how you can make the eyes using yard seeing
in the next lesson.
20. Making Crochet Eyes: For the eyes. You'll
need a 2.2 millimeter hook and lightweight
yarn in black and white. I'm using light blue yarn in the tutorial so it's
easier for you to see for round one work for single crochet
into the magic ring. At the end, you'll
have four stitches to make a magic ring. Place the yarn between
your index and middle fingers with the working
yarn going to the back. Grab the yarn around the
index finger two times, and bring the working yarn to
the front over the finger. Grab the working yarn
with your thumb. Grab the 2.2 millimeter hook and make it go under all the
loops on your fingers. Grab the last one with your
hook and pull it under the other two yarn over. And pull through the
loop on the hook. Take the magic ring from your finger work for a single crochet
into the magic ring. Insert your hook
into the magic ring. Yarn over, Pull, pull yarn over, and pull through the
two loops on the hook. One single crochet,
two single crochet, three single crochet,
and four single crochet. Close the magic ring. Pull the tail of the magic ring gently and see which of
the loops starts to close. Grab the one that was
closing next to the tail. Pull it towards you to
close the other loop. Grab the tail and close
it as tight as you can. Place the hook back
into the loop and slip stitch the first
single crochet. Insert your hook into
the first stitch of round one yarn over and pull up the loop. Pull the yarn through
the loop on the hook. Cut the yarn,
leaving a long tail. Undo the loop and thread the yarn on an
embroidery needle. Insert the needle under the top. Loops this time of the next
stitch to the left and then back into the middle of the stitch from where
the yarn comes from. Insert your needle
into the middle of the stitch test directly
below this one. Pull the yard gently
until the stitch is the same size as the top
loops of the other stitches. Make two ice with
the black yarn to make the shine in the
ice current length of 22 centimeters, more or less 9 " of white yarn. Thread it on your embroidery. Neo. Insert your needle
from the back, under the top loops of one of the stitches of the eye pull, leaving a bit of
tail in the back. Insert your needle under the top loops of
the next stitch. Pull the iron, gently secure the tail and
get it out of the way. Go back into the first stitch and then back into
the second one. And leave the tails, we'll
take care of them later. Make two eyes in black
with a shining white. In the next lesson, we are going to prepare the
bird for assembly. This is also where
I'll show you how to attach the Crocs to
the body. Let's go.
21. Assembly: Preparations and Crochet Eyes: By now you should have one body, two wings, one tail, one beak. And if you're using
crush eyes, two eyes. Before starting to sew
all the pieces together, secure them with sewing pins. So you can choose carefully
where to attach them. Start with the beak, which
is the easiest to place. Place the beak right on
top of the stripe and between the eyes and secure
it with sewing pins. Then it's the wings.
Place them with the top edge right on top of the lowest round of the stripe. And the front of the wing
below the center of the eye. Use multiple pins to secure
it so it can move around. Repeat for the other ing. Place the tail above
the sixth round from the end and on the
opposite side of the beak, count the runs from the end, 123456, secure the tail
above the sixth run. Look at the bird from
above and center the tail in relation to the
beak as much as possible. The tail seems a little off to the side in relation
to the beak. I'm going to move it a
little to the right. Move the pieces around
until you're satisfied with their placement and make sure everything is
where you want. Before starting to
sew, for example, I ended up moving the tail up one round because I thought
it'd looked better. If I'm using crush eyes, I like to secure all
the other pieces. First, start with a, place it at the center
of the face and on top of the stripe from there, place all the remaining pieces. Remember, you can
always move them around before sewing
them to the body. I'm using the light blue, it's easier for you to see, to find where to place the eyes. Insert a sewing pin right
at the center of the eye. Count four runs from the top. And place the pin between the fourth and fifth
front of the head. Repeat for the
other eye and leave five to six stitches
between the eyes. I'm using the blue eye again, it's easier for you to see. First, we need to
get the tails from the shine and the beginning
of the magic ring. Out of the way thread one of the tails on
an embroidery needle. Insert your needle
right where you place the sewing pin and make it come out a little
bit further between two stitches at the back
or side of the head. Keep in mind that we'll need
to secure these tails later, so don't make them come
out too far from the eye. Repeat for the other two tails. Don't pull on the white tails or the shine of the eye
will become smaller. Orient the eye in
its final position to place it with a shine
on the upper part. And secure it with at
least two swing pins so it can move while sewing. Leave the tails for
now and let's sew the eye thread the tail left at the end of
the magic cream on the embroidery needle. To sow flat pieces like the eye, I like to use the
following method. Go under a loop from the body that's right
under the edge of the eye. Pull the yarn, go under both loops of the closest stitch on
the edge of the eye. Pull the Ar to the
outside of the eye, forcing the top loops of the stitch to turn
to the outside. Next, go under the top loops of the next stitch to the
left and pull the ar. Grab a loop on the body
of the bird that's close to the edge of the
eye, and pull the yarn. Go back into the same stitch on the eye and pull the
yarn to the outside. Go around the rest of the eye, repeating the same steps
into the next stitch. Grab a loop from the body
into the same stitch. Pull the yarn to the outside. Be careful to not cover
the shine of the eye. I like to repeat some
stitches at the beginning, especially if the yarn from
the eyes is showing a little at the end. Go into one last
stitch and make the needle come out between two stitches on the back of the
head of the bird. To finish off, go under
the loop that's on the left from where the yarn
came out and pull the yarn. Go under the same loop. Pull the yarn gently
until you have a loop. Insert your needle into
the loop and pull, creating a not go into the same space from
where the yarn came out of. Make the needle come out on
the opposite side and pull, making the knot
disappear into the bird. To make sure that the knot
is not going to surface, place your needle under
the loops of the stitch to the right and of the stitch
where the knot was formed. Pull the yarn tightly to slide the knot
deeper into the omi, all the yarn and press
the body a little. With your fingers
are the scissors, Cut the yarn flush with
the body of the bird. Be careful not to cut
the body of the bird. The tail will be hidden
inside the body of the bird. Repeat for all the other
tails and the other eye. The rest of the
assembly is the same, whether you're using
safety or crush the eyes. Next we'll attach the
big. See you there.
22. Assembling the Beak: In this lesson, we are
going to attach the beak to the bird's face
before starting to sew. Place the sewing pin on each corner of the
beak to its aerate, its triangular shape at the
base, and keep it still. I'd like to start to sew
the beak at the bottom, so I make sure the tail is
on the bottom of the beak. Thread the tail from the beak on an embroidery needle to start to sow in search of a needle between the
last gray round and the first green round between two stitches
closest to the tail. Make the needle
come out right at the other side of the
stitch to the left. Pull the yarn go under the top loops of the stitches on the bag
closest to the tail. Insert the needle
from the outside to the inside of the
beak. Pull the yarn, Insert the needle where the yarn came out
from on the body, and make it come out on the other side of
the next stitch. Pull the yarn go under the top loops of the next
stitch on the Pull the yarn go into the same
space where the yarn came out from on the
body and make the needle come out on the other side of the stitch under the top loops on the next stitch
of the big they are do go up the side of the beak. Pull loops from the body
that follow its edge with your needle gravel loop that's right under
the edge of the beak. They are go under the top loops of the
next stitch of the beak. Pull they are, keep checking
the shape of the beak and if the stitches aren't too noticeable and keep following
its shape to the top. Grab one loop from the body
and again into the top. Loops of the next stitch to
the beak repeat to the top. If you need to turn
the bird upside down and find it easier to
sow the side this way, keep falling the edge on the other side of the
Ak, down to the base. Grab a loop from the body that's right under
the edge of the beak. Pull the yarn, go
under the top loops. On the next stitch of the beak, pull the yarn, Repeat until you get to the last corner
of the back at the base. To complete sewing the base, go under the top loops of the
corner and pull the yarn. Insert your needle
into the space between two stitches and
between the gray and the green stripe and make it
come out the other side of the stitch under the top loops of the next stitch of the beak. Pull the yard, Repeat
until we reach where we began to sew to finish. Officer the needle into the space between the
stitches it came out of, and make it come out on the
opposite side of the head. Go under the loop at the left from where
the yarn came out. Pull the yarn under
the same loop again. Pull gently until you form
a loop with the yarn. Insert the needle into the
loop and pull, forming a not. Insert the needle into the same space where
the yarn came out from in the body and make it come out on the opposite
side of the head. Pull the yarn ending the nut. This is where we made our knot. You can see that the loop is a little bit pulled to the inside. Insert your needle
under the loop to the right and into the loop
where we made the knot. Hold the needle and pull
the yarn tight so that the knot slips deeper into
the body of the bird. The loop where we made the knot, it's back to its normal size. Pull the yarn tightly
and cut the yarn with the scissors flush against
the body of the bird. The beak is attached
next the wings.
23. Assembling the Wings: Now that the beak is attached, it's time to assemble the wings. Thread the tail from the wing
on an embroidery needle. Make sure you like the
placement of both wings. Before starting to
sew for the wings, I like to use the same method
of sewing as for the Crocs, but this time we are not going
to go all the way around. We are going to sew only
the rounded part of the wing to start, catch a loop on the
body of the bird, close to the tail from the wing, pull the yard, go under the top loops of the closest stitch from the back to the
front of the wing. Pull the yard, go under the top loops of the next stitch to
the left on the wing. This time from the
front to the back. Pull the yarn, creating an horizontal bar at
the top of the stitch. Grab a loop on the
body of the bird, under the edge of the wing. Pull the yard, go into the
same stitch on the wing, the one where the
horizontal bar ends, but now in the
opposite direction. Pull the yarn into
the next stitch. Pull the yarn, grab a loop or stitch from the body that's directly under
the edge of the wing. Pull the yarn into the
same stitch on the wing. Pull the yarn, keep repeating this pattern into
the next stitch on the wing. Grab a loop or stitch on
the body of the bird, back into the same
stitch on the wing, this time in the
opposite direction. Into the next
stitch on the wing, into the body of the bird, into the same
stitch on the wing. Keep taking the sewing pins out as you go along and
don't need them anymore. I like this method of sewing
flat crochet pieces to a guy because it's the sewing stitches blend
well with the crochet. I like the little dashes on
the edge of the flat piece. Repeat until you are at the bottom of the
wing under the point, more or less from
where you started, grab a loop on the
body of the bird. Go into the same
stitch on the wing, then into the next
stitch on the wing. Here is a good place to
stop, to finish off, lift a part of the
wing that wasn't attached and make the needle go into the body of the bird. Close to the last stitch
we used to sew the wing, make it come out a little bit further on the side of the body. Between two stitches. Go under the loop
that's right at the left from where
the yarn came out. Pull the yarn, go under
the same loop again. Pull gently until you form
a loop with the yarn. Insert the needle into the
loop and pull, forming a not. Insert the needle
into the same space. The yarn came out
from the body and make it come out on the
opposite side of the body. Pull the yarn, ending the
knot with the needle, grab the stitch where
we made the knot. And the one to its right, pull the needle and
pull the yarn tight, so the knot slips deeper
into the body of the bird. And the loop where
we made the knot, it's back to its original size. Pull the yarn tightly
and cut the yarn with the scissors flush against
the body of the word. One down, one to go repeat
for the other wing. In the next lesson,
we'll attach the te.
24. Assembling the Tail: The only piece left to
assemble is the tail. First we are going
to take care of the yarn we left at
the end of the tail. Throw the yarn on an
embroidery needle. Insert the needle into the body of the bird at the
base of the tail, right under the first
stitch of the tail. And make it come out a
couple of rounds below, pull the yarn gently, be careful not to pull too much or the side of
the tail will be scrunched up to secure the yarn. Insert the needle
under the loop to the right from where the
yarn came out of the body. Insert a needle under
the same loop again. Pull gently until
you form a loop. Insert the needle into
the loop and pull, creating a knot and
securing the yarn. If you cut your tail too short, use the end of the needle to go into the loop or stitches. Insert your needle
into the body of the bird and make it come
out on the opposite side. Pull the yarn, ding the knot. Pull the stitch where
we made the knot. And the one to its
right with your needle, Pull the yarn, sliding the
knot further into the body. Pull the yarn firmly and cut it with scissors
flush against the body to sew the
tail to the body. Thread the long tail
left at the beginning of the tail into an
embroidery needle. Insert your needle into the same space where
you hit the yarn from the end of the tail
and make it come out to the left of the next
stitch on the body. Pull the yard, go under the loops of the
first stitch of the tail. Pull the yarn go into the same space, the yarn came out
from in the body and make the needle come out to
the left of the next stitch. Pull the yarn go under the loops of the
same stitch on the tail. Pull the yarn go around the same stitch on
the body one more time. Pull the are going one more time into the
same stitch on the tail, creates a little V that mimics the Croc stitches going into
the next stitch on the tail. Pull the A. Be careful to catch the correct
stitch on the tail as the next stitch can sometimes be hidden by the sawing
stitches with it previously. Go around the next stitch
on the body, pull the yarn, go into the same stitch on
the tail. Pull the yarn, go around the same
stitch on the body, pull the yarn into the
next stitch on the tail. Repeat this pattern. Next stitch on the tail. Next stitch on the body. Same stitch on the tail. Same stitch on the body, across the base of the tail. If your yarn gets twisted while completing a
stitch, lay it down. Twisted on top of the
object you are sewing. Place your thumb on top of the yarn where the
stitch is going to form and pull the yarn
gently to complete the stitch. The stitch comes out straight. After that, you can take the
needle from the yarn and untwist it by running your
fingers gently down it, thread the needle
again to continue to sew around the same stitch on the body into the next stitch on the tail, a round the next
stitch on the body into the same stitch of the tail at the end go into a space
between two stitches, One stitch to the side of the tail and make
the needle come out right at the other end of the tail where we
started to sew, pull, firmly, catch the first stitch from the base of the tail. Again, make the
needle go back into the body at the same
spot it came out of. Make the needle come out at
the other side of the tail. Pull the yarn firmly. If the tail is firmly attached, it's time to finish off. To finish off, go into the
same space where the tail came out of the body and make it
come out of your runs below. Go under the loop to the left, pull the yarn, go under
the same loop again. Pull gently until you form
a loop with the yarn. Insert the needle into the loop and pull
forming the knot. Insert the needle
into the same space. The yarn came out
from the body and make it come out on the
opposite side of the body. Pull the yarn ending the knot with the needle, grab the stitch where
we made the knot. And the one to its right, pull the needle and
pull the yarn tight so that the knot slips deeper
into the body of the bird. And the loop where we made the knot is back to
its normal size, pull the yarn tightly, and cut the yarn
with the scissors flush against the
body of the bird. This method of sewing
makes the tail seem like a continuation of
the body of the bird. The bird is finished if you want to turn it
into a key chain, see you in the next son.
25. Attaching the Keychain: Now that all the
pieces are assembled, start to attach the key chain. To attach the key
chain to the bird, you can use a long needle that's longer than the
height of the bird. But if you don't have one, you can use a regular
embroidery needle. I'm going to use my
embroidery needle to show you it can be used. Thread the tail
left at the end of the body of the bird On
your embroidery needle, grab your key chain and pass the needle through the
last link on the chain. Insert the needle into the
center of the first round of the body and make it come out in the center
of the last round. Here is where the long
needle comes in handy. But if you have a
regular sized needle, just push down the body
of the bird until the visible grab the needle before letting go of
the body of the bird. Or it may be lost in sighting, pull the yarn until the key
chain is on top of the head. Don't pull too much, or the head will become
flattened like this at the bottom. Go under a loop
from the last rum, go into the center of
the last strong and make it come out at the
center of the first strong, pull the yarn until
it disappears. I don't like the
dim pull, it lives, so I use my needle to make the bottom of the
word flat again. Go through the last lip of
the chain and pull the yarn, go into the center of
the first row and make the needle come out at the
center of the last row. Push down on the body of the bird to make the
needle go through, grab the needle, let go
of the body of the bird, allowing it to go to
its original size and pull the yarn carefully, pull on the key chain, or use the needle to pull the head up. If it becomes flattened under a loop from the last
strong at the bottom pull, they go into the center of the last Ron and
make the needle come out at the center of the first strong at the top of the head. Repeat a couple more times, going up and down through
the body and catching in the loop on the last Ron or the last chain
of the key chain. Make sure you end at
the bottom of the bird and that you have enough
yarn left to finish off. To finish off, make
the needle come out a few runs
above the last run. Go under the loop to the left, pull the yard, go under
the same loop again, pull gently until you form
a loop with the yarn. Insert the needle into the
loop and pull, forming a knot. Insert the needle into the same space where
the yarn came out from the body and make it come out on the opposite
side of the body. Pull the yarn ending the
knot with the needle. Grab the stitch where
we make the knot. And the one to its right hold the needle and
pull the yarn tight so the knot slips deeper into
the body of the bird. And the loop where
we made the knot, it's back to its normal size. Sometimes if I still have a big tail left
after finish off, I like to go through the Migrmi with the needle a few times. This makes the yarn to get
tangled in the stuffing. It's just an extra
step to make sure the yarn is secure
inside the Amigo. Just make sure to insert
the needle into the space it just came out of so that
the yarn isn't visible. Pull the yarn tightly
and cut the yarn with the scissors flush against
the body of the bird. You created all the pieces, attached them together,
secured the key chain, and got yourself a cute
and Megumi bird congrats. You made it to the
end of the class and together we made
Amigo key chain.
26. Wrap Up and Thank You: We did it. Thank you so much
for watching my class today. I hope it was helpful and that you enjoyed
learning a new craft. Once you make one bird, continue your practice
by making a few more S, gifts for your
friends and family. When you feel comfortable
making the little bird, you can try your new skills. With this mini
version, both patterns are exactly the same. The only difference is that in the mini version we work with finer weight yarns and smaller hooks and the eyes
are six millimeter safety. Both patterns are available for download in the Project
and Resources tab. If you have any questions
or need any help, please ask them in the
discussion section. I want this to be a place
where you can help each other. So please reach out. If you need anything, be
sure to post pictures of your finished birds in the
project and resources section. I'm super excited to see your Amiga room and now
you're going to use them. Feel free to post pictures of while you were working
on a project as well. And if you love this
class on Amigo, have many more coming where I explore more complex projects. So click the follow button above to be notified
when that happens. My hope is that once
you master this class, you go on to my other skillshare classes that will take you on a learning path from total beginner to a
confident casare. I'm really glad you
decided to take this class and I'm really
excited to see what you create. Al right, that's another
class in the back. I'll see you on the next one. And again, thank you so much
for spending time with me.
 Ana Rosa, Amigurumi and crochet designer