Transcripts
1. Welcome: Hello and welcome
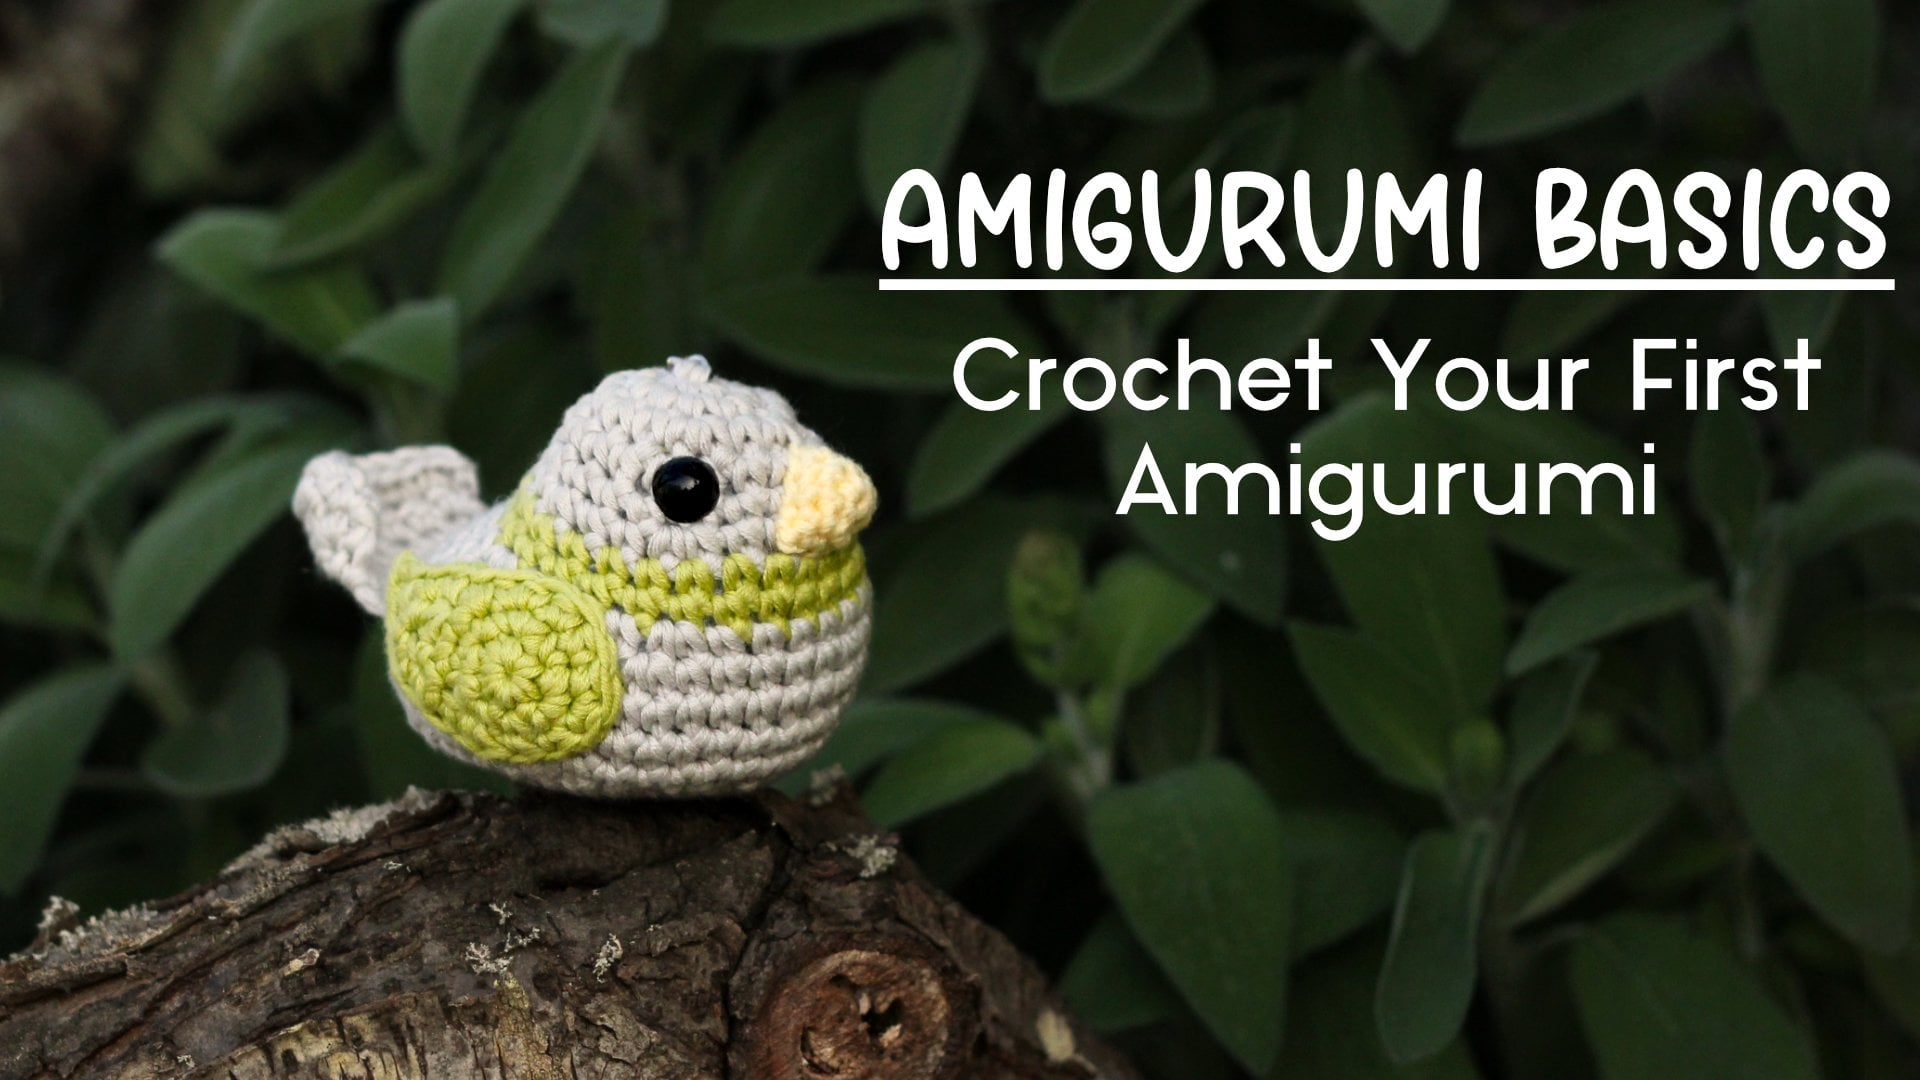
to my latest class Amigurumi Basics, Tre D Shapes. Have you ever looked at an
amigurumi and wondered, how would I even
crochet that shape? The secret is that
many amigurumi are made by combining
simple tree D shapes. Once you understand
how those shapes work, you can start looking
at an amigurumi and breaking it down into pieces
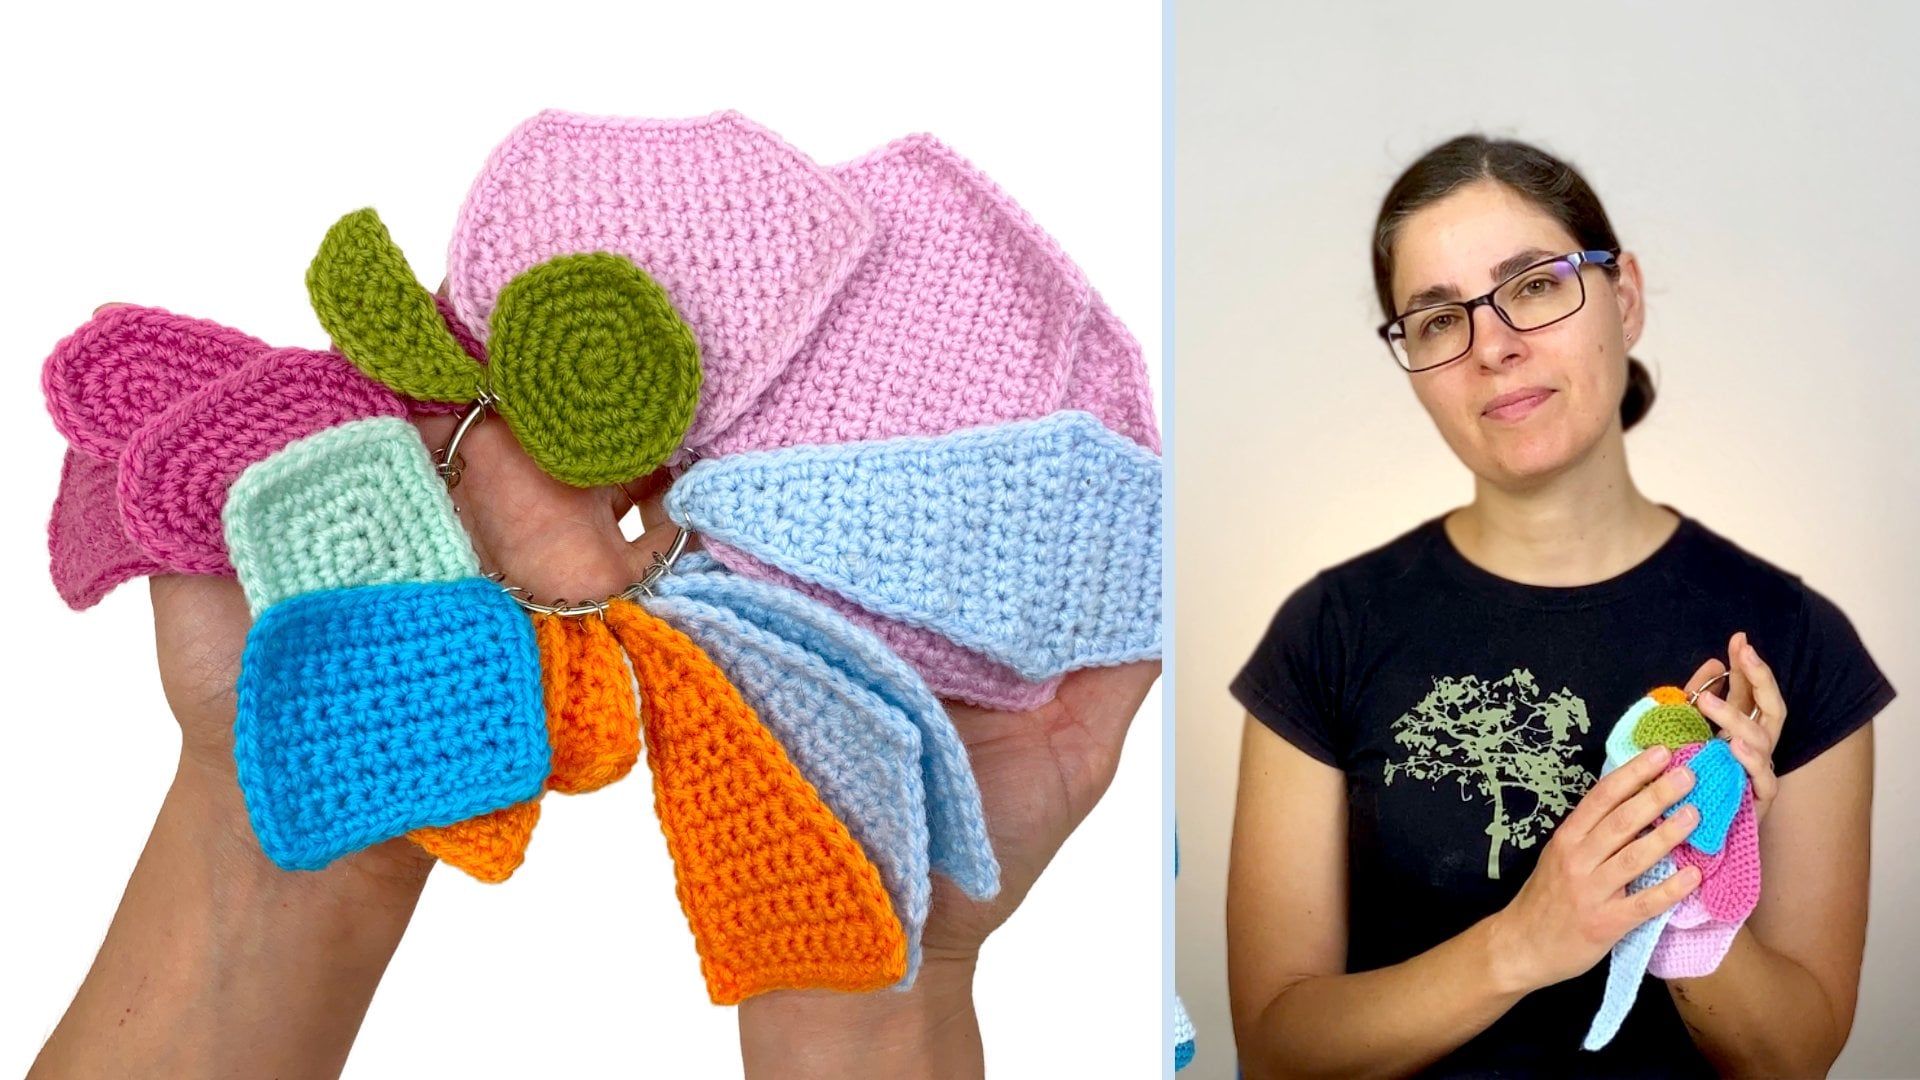
you already all to make. Hi, I'm Ana I'm a crochet amigurumi designer
and a founder of Buddy Romy. I design fun crochet
animeromi patterns like the ones you see here. I love pushing the bombis of crochet while
at the same time, making it accessible
to everyone. In this class, we're continuing our ever growing
crochet sampler, and this time, we're moving from flat shapes into the
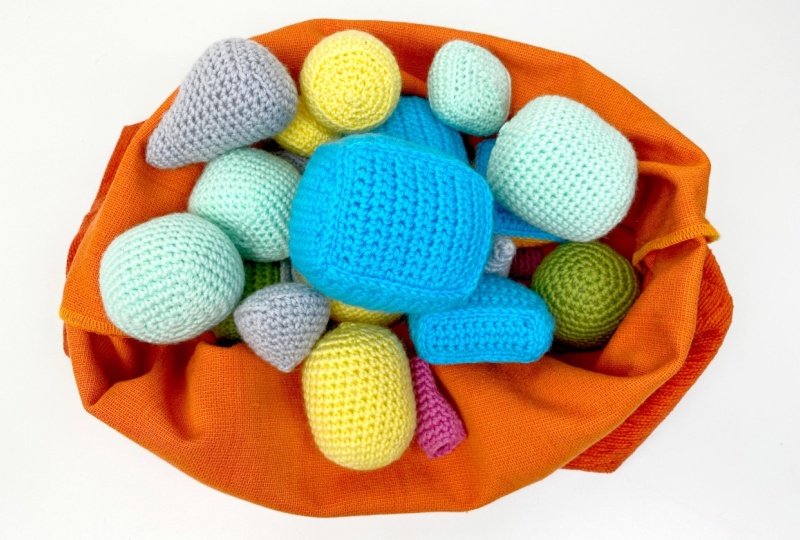
third dimension. Learn how to crochet balls
and capsules, cylinders, tubes, two types of cones, two types of cubes,
and pyramids. And these aren't just shapes
to add to your sampler. They're building blocks that you can use to create
your own amigurumi. A cone can become a heat, n or a spike. A cylinder can become a
harm, a leg, or body. A pyramid can become a roof
or even a little crystal. By the end of this
class, you'll have a better understanding of how three D shapes
are constructed, and now you can
combine them to bring your own amgromy ideas to life. This class is designed
for beginner to intermediate crochets and you don't need any
special materials. All you need is a crochet hook and some yarn you
already have on end. If you've taken my
flat Shapes class, this is the next
step in our journey. If you haven't, you can
still jump right in. So grab your hook and
yarn and let's start turning flat stitches
into three D shapes.
2. Project: Welcome to the class project. For this project,
you're going to create your untried shape sampler using the techniques we'll learn
throughout the class. The goal isn't just to make a collection of cute
crochet shapes. I want you to start looking
at these shapes as building blocks for amigurumi and see what you can
create with them. Throughout the class,
we'll learn how to make balls and capsules, cylinders, tubes, cones,
cubes, and pyramids. You can make all of them or choose the shapes that
interest you the most. Once you've made your shapes, I'd like for you to take it one step further and experiment with them by combining
different shapes, changing their proportions, or imagining what each one could be maybe your ball
becomes a head, your cone a head or a horn or your cylinder becomes
a harm or a leg. The written patterns
are available in the project and
resources section, so make sure to download
them before you begin. And most importantly, share your project in the
project gallery. You can simply take a photo of your finished
shapes and upload it if you experiment with your shapes or create
something new with them. I'd love to see that, too. And don't forget that you can update your project as you go. You don't have to wait until
everything is finished. I'll be checking the
project gallery, and I'd love to see
what you come up with. So your first step is simple. Download the pattern from the project and
resources section, grab your hook and some yard and start with the first shape. I can tweet to see through these shaped samplers and all the creative ideas
you come up with. Next, we'll discuss
the materials we need in more detail. And
3. Materials: In this class, I'm
teaching you step by step how to create nine different
crochet three D shapes. It's easier than it seems, and you'll soon start
to see the tricks, to create them on the find them. But first, we'll need to
gather our materials. We'll need any yarn
you have on end and a crochet hook
suitable to your yarn. Check the label of your yarn to see the recommended
hook size. For amigurumi, I
recommend using a hook, one, two, two size smaller
of what the yarn label says. This helps the stuffing not to show through
your stitches. I'm using a medium weight yarn
and a 3.5 millimeter hook. That's an E four for the US
and size nine for the UK. You'll also need
scissors, stitch markers, at least two, an embroidery
needle and stuffing. Make sure to download
the pattern for all the shapes in the
project and we sarts page. Now that we have all
of our supplies, we are ready to begin making
our first shape the ball.
4. Ball & Capsule: To crochet amigurumi ball, first, we need to
crochet Flat circle. The width of the flat circle will determine the
width of your ball, so make it as wide as you
want your ball to be. To see in detail up to
crochet, flat circle, refer back to the
previous class in this series Amigurumi
Basics Flat Shapes. I increased my circle
up to round five, where I work three single
crochets plus one increase, repeating it to the
end of the round. At the end of this round,
I have 30 stitches. To turn your flat
circle into a ball, you need to build your work up. This is accomplished by working the same number of stitches
on the following runs. In this case, 30. To ensure that your
ball stays round, work the same number of
runs you worked until now. But this time without
increases or decreases, I increase for five runs, so this means that I
have to work without increases or decreases
for five rounds. Work 30 single crochets for each round from
round six to ten. Don't forget to always
mark the first stage. By the end of round ten, you'll have a kind of a
cup with an open end. All that's left to do is cause the opening by decreasing
on every round. You'll need to keep
the same principles of proportion in mind while
decreasing as well. That means that you need
to evenly decrease six times on each round just like
we did for the increases. A helpful trick for the first
round with decreases is to copy the stitch pattern from the last round
with increases. For example, if your last
round wind increases was three single crochet
plus one increase, then your first round
with decreases will be three single crochet
plus one decrease. On round 11 we three single
crochet plus one decrease. Repeat six times to
the end of the round. At the end of this round, you left 24 stitches. To decrease, go under the
front loop of the next stitch. And again, under the front
loop of the following stitch. Yarn over, pull up a loop, yarn over, pull through
the tulips on the hook. You'll notice that your work
is starting to grow towards the center and the opening
is starting to get smaller. For round 12 w two single
crochets plus one decrease. Repeat from the
beginning six times until the end of the round. At the end of this round, you left 18 stitches, and the opening
is a bit smaller. But At this time, I like to begin to
stuff amigurumi before the opening
gets too small. For round 13, work one single crochet
plus one decrease, repeat six times to
the end of the round. At the end, you
left 12 stitches. Be careful not to pull the
stuffing with your hook. To avoid pulling the
stuffing up with your hook, you can place your index finger
behind the stitch you are working into to keep that
space clear from stuffing. I forgot to replace my stitch
marker at the beginning. I know that I need to
work one more group of one single crochet plus one decrease because
on the previous round, I still see two single crochets
before the next decrease. Now I only have one single
crochet plus one decrease, so I know I reached
the end of the round. I like to stuff the ball
a bit more at this point. To prevent your work
from unraveling, while stuffing places stitch
marker in the working loop. For extra security,
fasten the marker to the next stitch so it stays
in place and out of the way. On round 14, decrease six
times to the end of the run. At the end, you
left six stitches. Don't forget to use
your stitch marker. To If you need to reinforce the stuffing, at this point, my fingers don't fit into the opening anymore, so I use the flat end of the
hook to push the stuffing. All that's left to do is cut the yarn and
close the opening. To close the last round, cut the yarn leaving
a long tail, undo the loop on the hook and thread the tail on an
embroidery needle. To close, catch the front loops of all the stitches
of the last round. Place your needle under the front loop of
the next stitch. Pull the yarn gently. Repeat for the remaining
five stitches. The yarn tightly until the
opening is completely closed. To finish off the ball, we are going to use one of the loops that go
into the center. Ideally, use the one closest
to where you're ended. Insert a needle under the loop. Pull the yarn. Go under the same loop again and pull gently until
you have a loop. Insert a needle into the loop
and pull creating a knot. Insert your needle into the
center of the last round and make it come out anywhere between two stitches
on the ball. Pull the arm tightly until the
knot slides into the ball. All the yarn thought, push
the ball of the ball down right next to the yarn and cut the yarn flush
with the ball. The yarn will disappear
into the ball. The ball is completed and you can use it on your
amigurumi projects. Balls are great to make
heads, bodies, eyes, and many more parts or
details in your amigurumi. I use balls on a robot front to make the top of the
antenna and it ends. If you work more rounds
without increases or decreases than the
ones where you increase, you end up with a capsule, a cylinder with rounded ends. Next up, we are going
to make a cylinder.
5. Cylinder: To crochet cylinders start
by crocheting a flat circle. The width of the flat circle will determine the
width of the cylinder, so make it as wide as you
want your cylinder to be. Increased my circle
up to round five, where I worked three single
crochets plus one increase, repeating it six times
to the end of the round. At the end of this round, I have 30 stitches. If you'd like to Nova to
crochet a circle in detail, check the first
class in this series Amigurumi basic flat shapes. To turn your flat
circle into a cylinder, you need to build your
workup by working the next runs without
increasing or decreasing. And to achieve the abrupt
change in direction, we are going to
work the next round into the back loops only. For round six, work
30 single crochets into the back loops only. Twerk into the back loop
insert your hook between the top loops of the next stitch and make it come
out to the back. Yarn over and pull
up yarn over and pull through the two loops on the hook to complete
the single crochet. Continue to single crochet into the back loop only to
the end of the round. Let's try that again.
As you can see, working in the back
loops allows for the stitch to move more
freely and stand up straight. To increase the height
of your cylinder, keep working 30 stitches
on every round. Now working on both loops. In this case, I work 30
stitches for eight rounds. Work 30 stitches on both
loops from round seven to 13. By the end of round 13, you'll have a tall cup with a flat bottom and one open end. Once you reach the desired
height of your cylinder, it's time to close the top. To close the opening, we need to decrease evenly on every round. And to replicate
the abrupt change of direction on the bottom, we are going to work
the first round of decreases into the back loop. For round 14, work three single crochets
plus one decrease. Repeat it six times to
the end of the round, always working into
the back loop only. At the end, we left 24 stitches. We're the invisible
decrease as usual, but this time using
the back loops only. Working into the back loops gives us these clean
and sharp edges. Very useful when we want
to mimic objects with sharp edges or when we want our amigurumi to
stand on its own. Go back to working
in both loops. On round 15 work two single
crushes plus one decrease. Repeat it six times to
the end of the round. At the end of the round,
you left 18 stitches. The opening is getting smaller, and I'm going to take
this opportunity to start to stuff the cylinder. Stuff just enough
to fill the shape, but not too much to keep the
bottom as flat as possible. On round 16, work one single
crochet plus one decrease, repeat six times to
the end of the wrong, at the end of your
left, 12 stitches. If you need to
reinforce the stuffing, do it now as the opening will be too small after the next run. For run 17, decrease
until the end of the run, leaving you with six
stitches at the end. Cut the urn, close the
opening, and finish off. The cylinder is
complete and ready to be used on your
migra projects. You can control the height
of the cylinder by working more or less rounds without
increases or decreases. For example, in this
little short one, I only work three rounds
without increases or decreases. And for this sole one, I work 12 rounds without
increases or decreases. The cylinder is a
variation of the capsule. The only difference being that the first round
without increases or decreases and the
first round where it decreased are both worked
in the bilops only. This makes the cylinder
able to stand on its own. Cylinders are great
shapes for legs, arms, tails, dull accessories, life water bottles,
and flashlights. You can make pencils, candles, magic wands, tree
trunks, or rockets. These are just a few
examples of what you can make with a simple
Amegy roomy cylinder. For our little robot friend, I use these very short
cylinders to make these ears. Join me in the next
lesson where we are going to learn how to
crochet closed comb.
6. Cone I: To crochet closed cone, once again, we need to
crochet flat circle first. This will be the
base of the cone and its width will determine the width of the
cone at the base. Make it as wide as you want by adding more rounds
with increases. If you need out, but to
crochet flat circle, check the previous
class in this series and maybe run your
basis flat shapes. I increased my circle
up to round five, where I work three single
crochets plus one increase, repeating it six times
to the end of the round. At the end of this round, I have 30 stitches. To turn our flat
circle into a cone, we need to go up by working the next round without
increasing or decreasing. And to achieve the abrupt
change in direction, we are going to
work the next round into the back clubs only, just like we did
for the cylinder. For round six, work
30 single crochets into the B loops only. Insert your hook between the two top loops
of the next stitch. Yarn over and pull up a loop, yarn over and pull the yarn through the
two loops on the hook. One single crochet
in the B loop only. Don't forget to mark the
first stitch of the round. Continue to single crochet in the B loop only for
the rest of the round. At the end, we left 30 stitches. Work one more round without
increases or decreases. This time into both loops. At the end, we left 30 stitches. To make a cone, we need to start decreasing the
opening of our work. Otherwise, we'll end
up with a cylinder. For round they were
three single crochet plus one decrease six times
to the end of the round. At the end of this round,
we left 24 stitches. Oh, that's one more
than what we need. Let me undo this last one. There you go. The
single crochets. And now we need a decrease. Because I don't want
this particular con too close too abruptly, I'm going to work two rounds without increases
or decreases next. Work 24 single crochets
for rounds nine and ten. For round 11 work two single
crochet plus one decrease, six times to the
end of the round. At the end, we have 18 stitches. We can already start to see that the walls of the cone are
leaning to its center. For rounds 12 and 13
work 18 single crochets. It's time to start
to stuff the cone. Stuff just enough
to fill the shape, but not too much to keep the
bottom as flat as possible. If you'd like, you can secure the loop from your hook
on your stitch marker. That way you don't accidentally unravel your work
while you stuff. Replace the hook back into
the loop, and for round 14, work one single crochet plus one decrease six times
to the end of the round. At the end, we left 12 stitches. Work 12 single crochet
for rounds 15 and 16. On round 17, decrease until
the end of the round, leaving us with six
stitches at the end. Oh. Continue to stuff as you work the pointy
end of your cone. When the opening gets too
small for your fingers, use the flat end of the hook
to push the stuffing inside. Cut the yarn, close the
opening, and finish off. We can control the angle at which the cone closes by working more or less rounds
without increases or decreases between the
ones with decreases. For example, for
this little one, I only work one round
without increases or decreases between the
rounds with decreases. And for this soll one, I
work three rounds without increases or decreases between
the ones with decreases. The cone is a useful shape
to know how to crochet. With it, we can create spikes, tusks, arms, ears,
and even legs. If you truncate the
top of the cone and don't work it all
the way to the point, you can make cool robot legs like I did for a robot friend. Another variation of the cone is the open ended cone where
we don't have a base. We are going to
learn how to crochet one just like that
in the next lesson.
7. Cone II: For the open ended cone, we are going to start at
the pointy end of the cone. To work an open ended cone, work six single crochets into the magic
ring and cause it. Work six single crochets
into the magic ring. Close the magic ring. For round two work
six single crochets to force the first
round into a point. At the end, we left six stitches
and a little baby cone. Don't forget your stitch marker. On Round three, increase on every stitch of the
previous round. At the end of this round, we left 12 stitches. W 12 single crouches on
rounds four and five. For round six, work one single crochet plus one increase to the
end of the round. At the end, we'll
have 18 stitches. At this point, you can idea tail from the magic ring
inside the cone. Work 18 single crochets
on round seven and eight. On Round nine, work two single crochets
plus one increase. Repeat six times to
the end of the round. At the end of this round, we'll left 24 stitches. Work 24 stitches for
rounds ten and 11. For round 12 work, three single crochets
plus one increase, repeat six times to
the end of the round. At the end well 30 stitches. Work a single crochet. Insert your hook into
the next stitch, yarn over and pull up a loop and pull it through the loop on the hook to slip stitch and bring the height of
the stitches down. Needle join and finish
off on the inside. To needle join, tread the tail on your embroidery
or yarn needle. Go under the top loops of the second stitch to the
left, pull the yarn. Go between the top loops
of the slip stitch and between the top loops of the
stitch directly below it. Pull the yarn until
the needle join is the same size as the top
of the other stitches. To finish off, go under a loop
on the inside of the cone. Pull the yarn, go under
the same loop again, and pull the yarn gently
until you have a loop. Go into the loop and
pull forming a knot. Eye the tail inside the cone. If you intend to attach the open end of the
cone to another part, leave a long tail and don't secure the yarn on the
inside of the cone. With open ended cones, you can make fun projects like an ice cream or a party hat. On a robot friend, I use the open ended cones
to make his arms. Just like the closed ones, we can control the angle of the walls by adding
or subtracting bronze without increases or decreases between the
ones with increases. For example, for the tall one, I worked three rounds
without increases or decreases between the
ones with increases. For the smaller one,
I worked only one run without increases or decreases between the ones with increases. Next up, we are going to
learn how to crochet tube.
8. Tube: To crochet tubes start
by crocheting a chain. The length of the chain will determine the width of the tube. Make the chain
shorter if you want a thinner tube or longer
if you want a wider tube. To start the chain
first, we need to create a slip note on a hook. Place the yarn on top of your index finger with
it still to the front. Slide your hook under the
yarn from left to right. Then rotate it clockwise
back to its usual position. Yarn over and pull the yarn
through the loop on the hook. One slip not. Remember that this doesn't count as a chain. To chain, yarn over, pull through the
loop on the hook. One chain. Yarn over, pull through two chains. Yarn over, pull
through three chains. Four, five. Continue to chain until
you have 24 stitches. To turn the chain into a circle, insert the hook into the first stitch of the
chain and slip stitch. I like to work into the
back bumps of the chain, so I'm going to slip stitch into the first back
bump of the chain. Make sure the chain
isn't twisted. Yarn over, pull up a loop and pull it through
the loop on the hook. For the first round, work 24 stitches into the
back bumps of the chain. Work the first stitch into the same stitch where you slip
stitch to make the circle. Don't forget to mark
the first stitch. Continue to single
crochet all the way around on the back
loops of the chain. Keep working rounds
of 24 stitches until you reach the
desired height. In this case, I work 24
stitches for six rounds. Once you're satisfied with the
height of your tube, the only thing left to
do is to finish off. I like to slip stitch first to bring the height
of the stitches down. Cut a yarn needle join, and finish off within the ends. The tube is complete
and ready to be used on your
amigurumi projects. The reason I like to work
into the back bumps of the chain is that both edges
of your work look the same, showing the top loops
of the stitches. It gives a more finished
look to your project. The tube, just
like the cylinder, it's able to stand on its own. Here's a quick tip.
Instead of removing and replacing your stitch
marker on every round, you can use a piece
of scrap thread to mark the first
stitch of the round. All the stitches that
fall on top of that one are always the first
stitch of their own round. This is especially useful when marking with longer pieces. Place the thread on your hook. Going to the next stitch. Pull the yarn through the
stitch and the thread. Complete the stitch as usual. The thread now hugs the
first stitch of this frown, and every stitch that
is worked on top of this one is the first
stitch of its own round. Continue to work as usual. If the piece you're
crocheting is long, you might want to place
several threads along the way. With the tube, you can
make sleeves, pens, and other fun accessories
for amigurumi. On the robot, I use it to
make the base of the antenna. Control the thickness
of the tube by working more or less
chains in the beginning, and it's side by working more or less runs without
increasing or decreasing. For example, this
one right here is taller and thinner than the
one we've been working on. I created by working
only 15 chains in the beginning and
crocheting without increasing and
decreasing for ten runs. Meet me the next lesson, my real crochet a
cube worked in rows.
9. Cubes in Rows: To make a cube,
first, we need to crochet six squares that
will become its walls. Refer back to the first
class of this series. If you need a refresher all
to crochet square in rows. Nile join and leave long
tails in all squares but one. To assemble the cube, attach four squares with a long tail to the one
where we weave in the ends. Place the square with
the short tail on your table with the
wrong side facing up. Surrounded with the squares
with the long tails. Place them on top of your table or with the wrong side
facing up as well. Make sure to place
the edges with the long tails next to the edge of the
square in the center. We are going to use the
long tails to attach the squares from the outside
to the one in the center. The squares on the outside will make the walls of the cube. The one in the
center is the base. Grab the square from the
center and the one under it. We don't need the
other three for now. We are going to attach these
two edges together first. Flip the bottom square
on top of the other. Before starting to
sew them together, we are going to secure the
corners of the squares with the stitch marker to help pass line and attach
the edges evenly. Look for the single
crochet in the center of the increased
tree of each corner. Place the stitch marker. Repeat for the corresponding corners of the
square in the back. Close the stitch marker and
repeat for the other side. Make sure you're still on
the edge with a long tail. Thread the long tail on an
embroidery or yarn needle. To attach the squares, we are going to use the
loops in the middle. This means we'll use the
front loop of the square in the back and the back loop
of the square in the front. Make sure you have the square with the long tail in the front. Insert your needle
from the front to the back under
the front loop of the marked stitch on the
back square. Pull the yarn. Remove the stitch marker
from the square in the back. Go under the front loop of the next stitch
to the left this time from the back to the
front, pull the yarn. You can see we created a little dash here
between the two stitches. Now we are going into
the front square. Go under the back
loop from the back to the front of the stitch as
still as the stitch marker. Pull the yarn. Now we can remove the stitch
marker completely. Next to the left, we
have the needle join. We are going to ignore
it and go under the back loop of the single
crochet to its left. Pull the yarn. Go under the front loop of
the last stitch we used at the back.
Pull the yard. Go under the next front loop
of the stitch to the left, from the back to the
front, pull the yarn. And under the last used loop
in the front, pull the yarn. To make sure you go into
the less used loop, look for the small
horizontal dash between the two
previous stitches. The end of the dash goes
into the less used loop. Go under the next back loop
to the left in the front, and under the last stitch
we used in the back. Pull the yarn. Under
the next in the back, under the lest used in
the front, pull the yarn. Under the next in the front, under the lest used in the back, look for the dash,
pull the yarn. Keep repeating these two steps. Go under the next
loop to the left, then go under the last loop you used on the opposite side. Continue until you reach the two loops held by
the stitch marker. Don't cut the tail,
leave it for now, we'll need it later
to attach the sides. Repeat the same process from the beginning for the
remaining sides of the base. Grab a new square, place it on the table next to a
free edge of the base with the wrong
side facing up and the long tail next to the edge we are going to attach it to. Flip it over and place it on top of the base.
Pick up everything. Place the stitch marker in the middle single crochet of
each corner on both squares. Thread the long tail
onto your needle. Starting on the back, go under the front loop of the stitch
on the stitch marker. Remove the stitch
marker from the back. Go into the next loop
to the left and into the back loop of the stitch
still on the stitch marker. Skip the needle join and repeat all along the edge
into the next to the left, into the same as before
on the opposite side. Next to the left. Same
on the opposite side. Next to the left and so on. Notice how after attaching
the sides of the cube, we are left with a long tail
at each corner of the base. We are going to use those to attach the sides to each other. To close the corner,
we are going to go under the front loop of the
next stitch in the bottom. Go under the less used back
loop on the side facing you, under the back loop of the next stitch to the
left on the same square, under the less used loop
at the side at the top. Remember to look for the dashes to know which is
the last used loop. Continue to attach
the sides as before. Under the next, under the
same on the opposite side. Under the next, under
the same, and so on. Oh, remember to all
the top corners with the stitch marker so you're sure that your
stitches will align. Repeat the pattern under
the next slope to the left, under the last used loop
on the opposite side, under the next loop to the left until you reach
the stitch marker. Once we go through the loops on the stitch marker,
we can finish off. To finish off, you need to bring the tail to the
inside of the cube. Go through one stitch down on the same side
where the tail ended. This will replicate the
same stitch pattern we created when
joining the squares, making it almost invisible. Finish off on the inside. Go under a loop on the inside. Go under the same loop again, pull the yarn carefully
until you form a loop. Go into the loop and pull creating a knot and
securing the yarn. Cut the yarn leaving a bit of tail that will live
inside the cube. Repeat for the remaining sides. At the end, we'll have
a box with an open top. For the top, you'll
need to leave a tail, more or less 15 centimeters around 6 " longer
than the others. Before touching the top, I like to make sure that the
bottom and top pieces of the same orientation
is just my preference. As we first secure
the corners of the top to the corners of
the side you're starting on, just like before, go under the front loop of the stitch on the stitch
marker at the back, under the front loop of the
next stitch to the left, into the back loop
of the stitch, still on the stitch marker, skip the needle
join and go under the back loop of the
next stitch to the left. F here, keep repeating the pattern all the way
around the top of the cube. Less used on the opposite side, next loop to the left. Remember to secure
the following corner to ensure that the
edges are aligned. Before closing the last
edge, stuff the cube. Make sure to push the stuffing into the corners of the cube. Close the cube completely
and finish off. To finish off,
going to the cube, replicating one of the
dashes next to the tail. Make the needle come
out between one of the stitches on the sides of
the cube and pull the yarn. Go under the closest
loop of the stitch on the left of where you
came out. Pull the yarn. Go under the same loop again, forming a loop with a yarn. Go through the loop and
pull creating a knot. Insert your needle into
the bottom of the loop, your knot is on and make it come out on
the opposite side. Pull the arm firmly, pulling the knot
inside the cube. Place your needle under
the loops of the stitch on the right and the stitch
where you created the knot. Pull the arm firmly
and at the same time, pull the needle in the
opposite direction. Hold the yarn firmly and cut it flush against the
wall of the cube. Be careful not to cut the
stitches of the cube. Crocheting cubes in rows
results in sharper edges, and using the loops
in the middle creates a neat texture
that I really love. Also, you can customize the sides of your
cube anyway you like. Make them all one color,
different colors, solid colors with stripes,
wherever you like. With an aminoam cube,
you can make heads, bodies, noses, tails,
boxes, purses. The possibilities are endless. On our little friend, I use cuboid shapes to make
the head and the body. If we use shorter rectangles
for the sides of our cube, we get a squashed cubit shape. The sides on this one
are only four rows tall. For this taller cubit shape, I use sides that
are 14 rows tall. Next up, we are going to
crochet cube worked in rounds. Can it be done? Turn me the
next lesson to find out.
10. Cubes in Rounds: Yes, it's possible. And to make a cube in
continuous rounds, first, we need to
crochet squaring rounds. Check out to crochet
squaring runs in the previous class
from this series. Don't finish off the square. After making the square, which will be the bottom or top of the cube,
start working up. To go up in amigurumi no matter what shape
you're working on, work without increases,
or decreases all around. In my case, because I
increased for five rounds, I'm going to work 36 single
crochets all around. Continue working
without increases or decreases until you reach
your desired height. To make a perfect cube, I find that the number of
rounds without increases or decreases should be twice the
number of increased rounds. For this cube, I increased
for five rounds, so I'm going to work without increases or decreases
for ten rounds. Once you have a shape where the height is the
same as its width, it's time to start to close. For round 16 begin with the
same number of single crochet as the round where you
increase. For me, it was three. Decrease work in an invisible
crochet for three stitches, which means you need to catch three stitches before
completing the single crochet. Work an invisible decrease
for three stitches, insert your hook under the front loops of the
next three stitches. Yarn over, pull up a loop through three
loops on the hook, yarn over and pull the yarn through the
two loops on the hook, completing the invisible
single crochet. Work the same amount of
stitches you work between the first and second corners of the last round where you
increase for me to six. Work an invisible decrease
for three stitches. Work six single crochets plus
a decrease two more times. To finish the round,
work the same amount of stitches as in the
beginning for Mistry. At the end, we left 28 stitches. For round 17, work two single
crochets plus one decrease. Work for single crochets and one invisible decrease
for three stitches. Repeat three times. A. To finish the round, work two single crochets. At the end, we left 20 stitches. A few rules to keep in mind to turn your square into a cube. Work without increases
or decreases to achieve the desired
height for your queue. Always decrease starting on the last stitch before the decrease on the
previous round. And the stitches between the decreases always
decrease by two. At this point, I like
to begin to stuff. Secure the live loop on the stitch marker so you don't unravel your work accidentally. On the 18th round, work one single crochet,
plus one decrease. W two single crochets,
plus a decrease, repeat three times,
and to finish, work one single crochet. At the end, we left 12 stitches. Reinforce the
stuffing if needed. For the 19th and last run, work four decreases at the
end left for stitches. To make a cube, I
prefer to decrease with invisible decrease
with three stitches, but you can use a single
crochet tree together as well. Close finish off and
within the ends. And there you have
a monomromy cube. If you look closely at
the cube we just made, you can see that
its corners from the top and the bottom
don't quite line up. They shift a little to
the right due to the fact that we are working in
spirals or continuous runs. This is especially noticeable when we crochet taller cuboid. If I was going to close this shape the same way
I did the previous one, working three single crochets
and then decreasing, you can see that its
corners sits way before the respective
corner on the bottom. To correct this, we need to manually find the first corner, find the middle stitch of the corresponding
corner on the bottom, and come up as perpendicular to the top of the
cube as you can. Make sure you're happy
with the placement of the corner and mark it
with the stitch marker. Work the remaining
single crochets leaving the stitch before
the stitch marker free. This is going to be where
we start our decrease. Work an invisible decrease
for three stitches. The first corner is finished and right on top of
its counterpart. To make the remaining
corners is very simple. Work the same number of single crochets as in the
last run where you increase. For me, it was six. Work six single crochets and one invisible decrease for three stitches three more times. Continue to close the cube, starting your decreases on the stitch before
the decrease on the previous run and work the necessary single
crochets between them. When the opening starts to get a bit small, start to stuff. Continue to decrease
until you can only work for
invisible decreases. Close finish off and
within the ends. The end result is a cubic object that is the corners aligned. Both these cubes
are the same size, but the one on the right was made just by following
the pattern and the one on the left was made by finding the corners
of the base manually. We can clearly see that the one where we
follow the pattern, the corners are not aligned, and the one where we
found the corners manually as the corners aligned. You can create taller cubit
shapes simply by working more rounds without
increasing or decreasing before
starting to close. The cubit shape on the
right, it's much taller, but its corners are
still aligned because I use the manual method
for finding the corners. If you want to create
a sharer cuboid, simply work less rounds without increasing or decreasing
before closing it. And if you like sharper edges, work the first round
without increases or decreases in the
back loops only, and then work on the back loops only on the first
round with decreases. This gives you a sharper bottom and top edges and
straighter sides. Just like for the
cubes, where tin rows, you can create hands, bodies, noses, tails, boxes, purses, among other shapes and objects. I even made this
cute little tail for a robot friend using an
unfinished cube in rounds. Using cubes or thin rows or rounds is just a
matter of preference for the way you like
to make your cube or the final look you
want for your project. Cubes or thin rounds
gives us a softer look. While cubes with thin
rows have a sharper look. Meet me in the next
lesson to crochet. Final shape, the pyramid.
11. Pyramid: Okay. To make a pyramid, you'll need four
triangles and one square, the square should
be the same width as the base of the triangles. If our triangle is ten
stitches white at the base, our square needs to be tens, stitches white on all sides. To know how to crochet a
triangle and a square in rows, check out the previous
class in this series, Amigurumi Basics Flat Shapes. I'm using four triangles
and one square word in rows just like the ones
we created on that class, all with long tails
left at the end. Use the tails left at the end of each triangle to attach
them to each other, using the same technique we used to assemble the
cube word in rows. Use the last tail to join the last two edges and finish
off the top of the pyramid. Finish off and we
in all the tails. Attach a square at the bottom to complete and
close the pyramid. Finish off and we in the tails. A pyramid might not seem like
an obvious amigurumi shape. But once you start looking
at this as a building block, you can use it for spikes, ears, heads, horns, roofs, crystals, and so much
more. And that's it. We added nine more shapes to our great crochet
shaped sampler, and in addition to
the flat shapes, we are now prepared
to jump right into the next class
of the series where we'll use all
these shapes to create an original amigurumi.
12. Thank You: And that's a rep. We learned
a lot in this class. We learn how to crochet a ball, a capsule, a cylinder, two types of cons, a tube, two types of
cubes, and a pyramid. And most importantly,
we learn how to modify each of these shapes
to fit our own projects. That's a lot of new
shapes and techniques. But if there's one thing
I hope you take away from this class is that once you understand how these
basic shapes work, you can change their size and proportions, combine
them together. And start using them as building blocks for your own
amigurumi ideas. And remember, you can
always come back and revisit these lessons whenever
you need a refresher. If you have any
questions or ideas, share them in the discussions. We can learn from each other
and help each other out. And don't forget to
share your project in the project massage section. I'd love to see the shapes you make and now you
experiment with them. If you enjoy the class, I'd really appreciate if
you could leave a review. It helps other students
find a class and discover the fun of creating amigurumi with simple shapes. And now we're ready for the
final class in this series. We're finally going to
put everything we've learned together and make
our cute robot friend. I'll also show you
how you can use these same principles to
create your no amigurumi, so you can take what we've
learned and make it your own. Make sure you follow me
here on Skillshare so you'll be notified when the
next class is available. In the meantime,
you can check out my other classes and keep
making lots of cute amigurumi. Thank you so much for
joining me in this class, and congratulations
on completing your tree D shaped sampler. I can wait to see
what you create. See in the next class. H
 Ana Rosa, Amigurumi and crochet designer