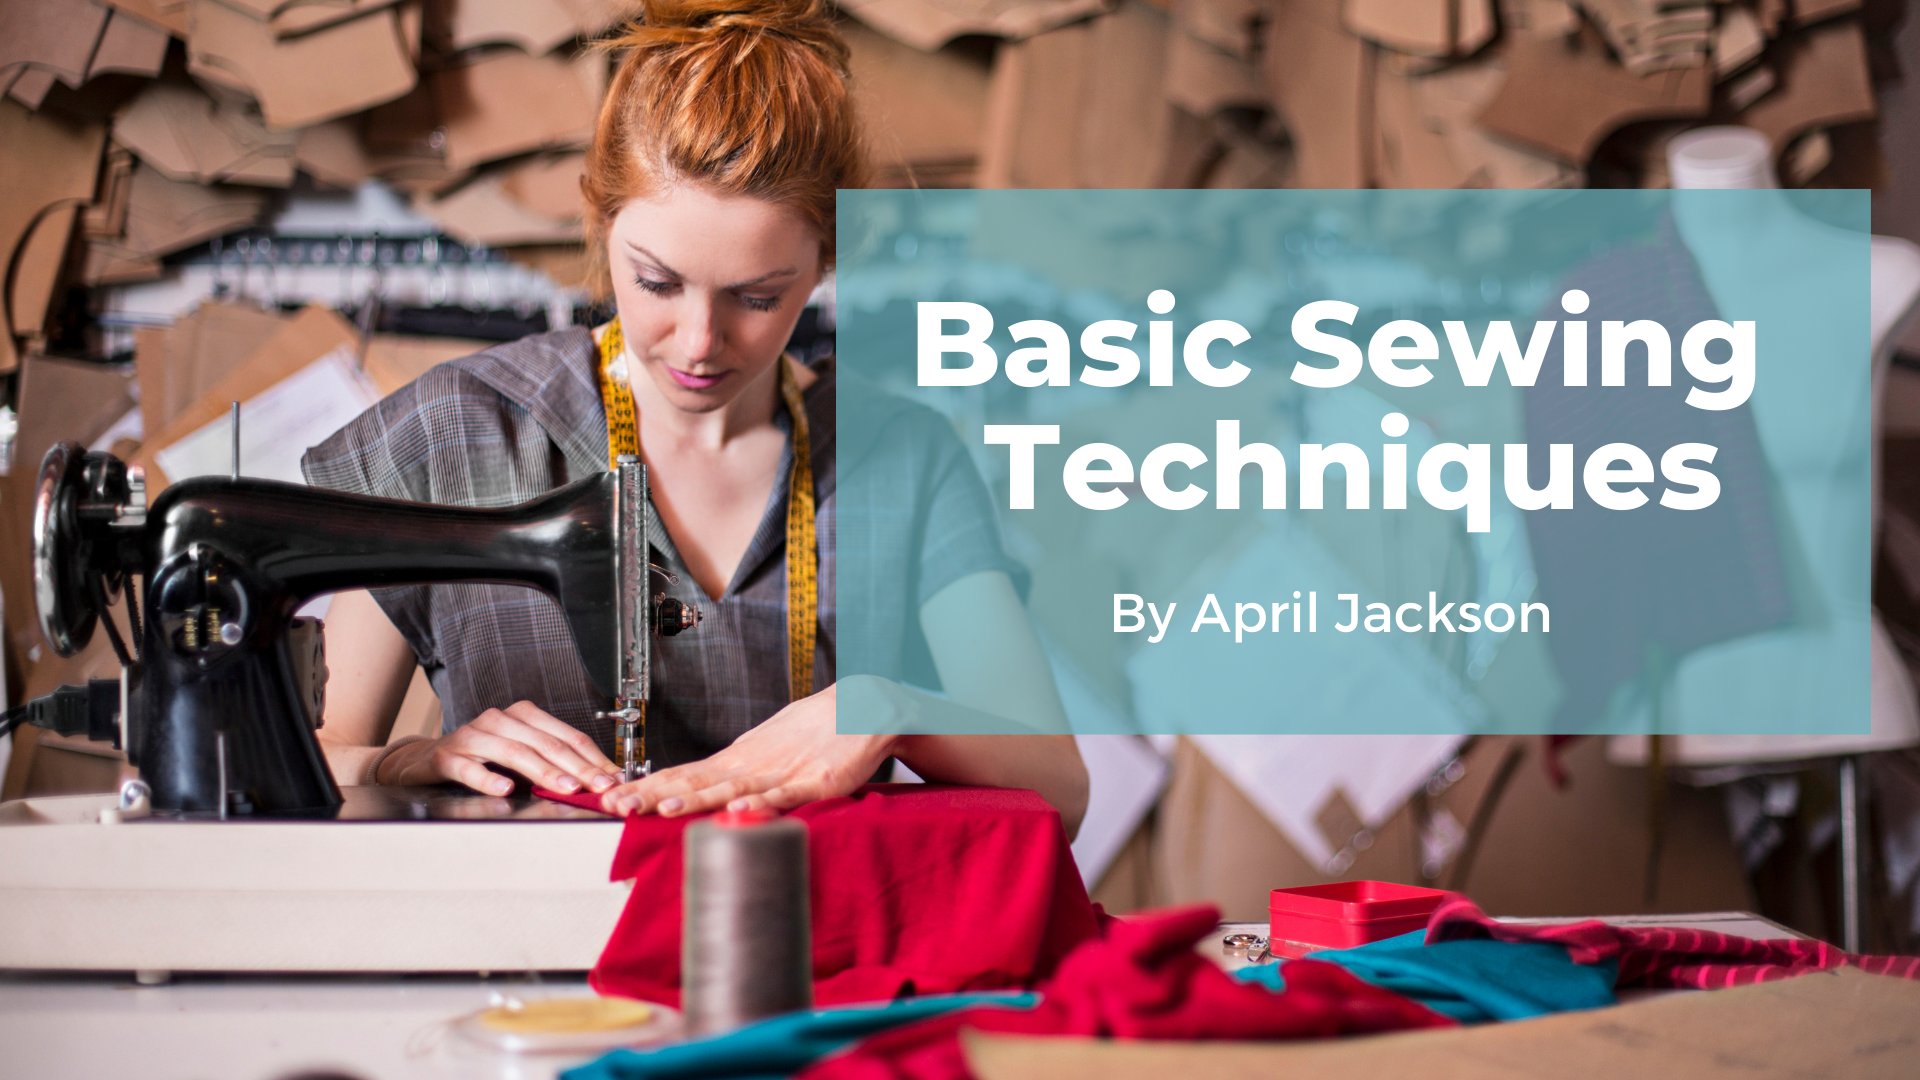
Transcripts
1. April Skirt Hem Intro Pant Hems : Hello, April Jackson
here as your teacher. In this module, we will be
performing sleep alterations. Sleep ham and meropenem are
not that much different, except one is on your leg and
the other is on your arm. Because you will be using this thing sewing methods to finish off a variety
of sleep patterns. Please refer to the
pen found videos. Half-inch top stitch,
1 " top stitch, line stitch and cover stitch towns when these finishes
are required on slaves. So let's begin.
2. Sleeves Shorten Less than 3 inches: This client has aligned jacket that we are going to
be shortening our sleeves. You can see where we have
pinned for the finished ham. What we wanna do at this point, I want to determine how much
we're shortening this slave. So I'm just going
to turn it in Zeno. Measure what we have flipped up That's inch and three-quarters that we have pinned
up that we're hemming this sleeve for our client. So if you need to write
that down, write it down, but just make sure you remember that inch and three-quarters. Because I want to show you how this garment is constructed. I call this a plain line sleeve. Plain meaning that
there's no details, there's no buttons,
but it is lined. And let me flip this
out for you to see. The lining is joined. At the bottom of the sleeve. You have a bit of a
facing on the inside. That's why it's
called plane lined. And for this sleeve, we're hemming it less than 3 ". The routine we will use for this leaf is different than
one for more than 3 ". And that's what we're
going to show you first. Now that we know we named him this inch and three-quarters, we need to get inside
to do our work. We turn the jacket inside out. And a lot of times
this jacket will have, if it's not in the one sleeve, Let's look in the other slave. There it is. You can see that that's
been top stitched close. We're going to open
that up to get inside. That's where they closed off their government when
they were constructing. So we just have to
undo a couple of stitches, pull the strings. And that opens up for
us to do our work. So we're going to take
the sleeve that we want. Pull that through. Now at this point we can
see that there's tacking. I want to show you
on the other sleeve, the corresponding area when
the sleeve is together. So inside out, talking there
is actually right here. You can see how that's
keeping the sleeve in place so it doesn't roll down
and keeps the size that talking is that tacking there? We need to undo that. And if the others there
was another same. If it was tapped, we do
the same but there isn't. Now, I want to show you take her sleeve and put
it onto your press board. It's a little hard to
see here because they're interfacing is
really, really light. But there is interfacing
along here and we're actually going to replace that with an, a
better interfacing. Sometimes you might have a
really wide interfacing. If it's a good quality, we don't have to
replace it as long as our finished ham
falls within it. But this one does not. They're interfacing ends here. It's a little hard to see, but I will show you can see once we get the good interfacing on, we're having an inch
and three-quarters. You can see that they're
interfacing is below that. So we are going to put
some new interfacing. I like to start on a seam. And at my seam inch
and three-quarters, I'm actually going
to put a snip. There. Were always
going to snip it. That way. We can see where we're going. And I'm going to put
another little marks. I can see that. Don't worry
if you can't right now, you'll see where
I'm gluing though. When I put my
interfacing right here, this edge is falling
along our new seam line, our Newham, which would be on the corresponding
sleep right here. So I'm going to lay
our interfacing down and I always tuck it
underneath the seam allowance. Your iron, give it a little
bit of a press into place. Just be careful when you're
sleeve is inside out. You don't press any creases
in it that you don't need. Sometimes if you
press a crease in, you might not get it out. So I've got that
area press down. I'm going to rotate it a
little bit onto my board. Same thing. I'm going to measure
up from the old ham. Inch and three-quarters. Lay my interfacing down so
that this is my new seem. This is actually going
to be my new facing. This area here. This is the new facing here. Press that down. Now we're back to
our original seam. I'm going I can see
where my first snip was pilot program right along there. Tuck that underneath
the seam allowance. I'm trimming a little
bit more so it lies flat and fuse that down. Now you'll notice that
I didn't separate the lining from the
outer material. When you're having
your slaves under 3 " you do not have
to separate that. We're gonna do this
technique at the machine. I'll give you a little preview. When we take this to
the sewing machine. We line up our lining
with our outer material. And you can see how we can
easily get into there. We're going to put our
new stitching here. And the stitching that
we're putting along here, you'll see when we get to
the machine is actually this stitching that
will be repositioning. And with this
particular technique, you don't have to do all that separating
it just gives you a more work if you can get
away without doing that. So at this point we're actually going to go to the machine. And so the new lining
to the new facing. We're at the sewing machine
with the long line sleeve, which we're shortening
less than 3 ". So this point we're
going to go in through our opening from the lining, pull the sleeve inside out so we can see the area
where we're working at. This is the old stitching. We are going to be
replacing that stitching down into our new interfacing. The first thing we wanna do is with the old stitching line up our scenes and I'm
lining up the lining, same with the outer material. I always have my outer material upper I was going to
so from that side. And we're going to
take this material and put it underneath the foot half inch from the
top of our new interfacing. I've got the needle in and it's holding my material into place. Because now we're going to want to make sure
the lining stay smooth. And so the two layers together half inch from the new interfacing, that'll be our new cut line. Smooth that out nice and smooth. Nice and smooth here
and continue sewing till we get to where we started. Reinforce our stitching,
take out her work. And you can see that
our new stitch line. And if we were to measure it, this sleeve we were humming
inch and three-quarters. This stitch line should
be about inch and three-quarters
from the original. It's a little shy. The main reason being that my interfacing is a little
bit wider than what they had, but everything will
fall into place. My main concern is that the
finished him is that it's exactly inch and three-quarters
from their original hand. Tremor threads. And now at this point, we can actually trim off
this extra material. I'm going to keep my hand
inside because I want to make sure I'm not cutting
any of the lining. And we're going to
trim right along the edge of my new interfacing. Throw that away. Now we're going to
replace the tracking, which will hold our him
into the new position. So with the scenes facing open, flatten them onto each other, pull it out so we can stitch
on the seam allowance. That under the
machine of attack, at this point we are going to
keep this same facing open. We can only talk so far here. We're going to
make sure it stays onto the seam allowance. And now we want to
actually tack the lining a little bit
up into the sleep. This makes sure that when the client is putting their
arm back into their sleeves, they're not pushing
their linings through. So at this point, leave
the same flat open. Take your coordinating seen
from the lining laid on top. Make sure it's flat, but
always push it forward, just a hair giving it
a little bit of ease. This will guarantee that
the lining isn't pulling. When the alteration is finished. That just keeps that
in place there. I'll go in and turn
this right side out. You can see this is
our new stitch line. New facing finished him. The lining that we tacked
as well as our new him. At this point, once both
sleeves are finished, we are going to
close up the lining where we went inside
the do all our work. You can see that the siem has
just been taught stitched. So we're going to
replace that top stitching close to the folded edge just like they had there. And now the jacket
has been closed up from the work we had
done. So I'll sealed. And now we'll go to up to the pressing table to
give us our final press. Makes sure that it
looks nice and neat. Yes. And now we'll give
it our final press. Were at the table ready there
press are finished ham. We can see how the linings
kinda puffy There. We want to get that
nice and flat. Whenever I'm doing asleep ham, I usually like to insert. This actually used to be a shoulder pad that I just
flattened out. It works fine. I usually like to insert
that in this way. When I'm pressing this area, I'm not ready to press this yet because it's not into place. So I always put us just
something inside it. Whether you purchase something
or you make something. What I want to do is I
want to make sure also that my lining is all pulled up. So I'm putting pressure
on the facing. But I'm actually going
to reach my hand inside this leaf and I'm pulling the lining up just to make sure that it's all flat. And then I'll even take
my ruler and give them just a little bit
of a push just to make sure everything
is nice and flat. Before I start pressing. Give that a press on that side. Flip it over this side. And now we're going to
press this area flat. So same thing in search,
you're pressing gadget. If our lining has moved, we can always reach in and
flatten that out again, but this one hasn't. Now I just want to
make sure I press out any creases that might've
gotten put in there. The first two presses. We Can I just sometimes I
just move that up my hand, but you can use your
clapper to smooth that out. The first leaf has been pressed. And we can see how
nice that looks inside, nice and clean. And now your plane
line sleeves are complete and ready to
present to your customer.
3. Sleeves Shorten More than 3 inches: We're still working
on the jacket. This is actually
the other sleeve of the jacket that we did, the original plane lined ham. When you're going to be
hemming asleep more than 3 ". We cannot do that
simple technique of doing inside sowing. To keep without undoing
this particular area, we do need to separate the lining from
the outer material. So let's say we're gonna be having this particular
sleeve 4 ". The first thing we're
going to need to do is separate the lining then from the outer
material at the wrist. So let's get this undone. The need to use the blade
and areas. Go ahead. And now that that's
separated, we're going to, if there's any tacking on your
scenes under your tacking. Alright, so we're going to
be having this leave 4 ". So the first thing we wanna do is move our
outer material out of the way, pull out our lining. And one way we can do this is by just from their cut
edge measuring 4 ". And we could easily
cut this off. And the lining technically
is 4 " shorter. That's ready to go. I do want to show you afterwards if you let's say you weren't
able to do that, there is a way to determine
the length of your lining. I will show you that
in just a second. So now for our outer material, we're going to go turn
our work inside out, move the lining out of the way. And we're going to just like we did with
the other sleeve. The first one we did mark our line where we want
our interfacing to go. We want it to be placed. So this is now 4 ". That's our new finished line. I measured 4 " from
their original ham, put a snip into our
seam allowance. Let's press on our interfacing just like
we did with the other, but now we don't have the other material
in our way at all. I'm a little bit
more area to me. Line that up with our snip. And now we can actually cut this excess off at the bottom
of the interfacing. This is our new finished him. This is the facing and this
will be our new cut edge, which is actually this was
the original cut edge. We can cut this straight across now and throw that piece away. So when our work is all done, this will actually be
turned inside like that. I wish wanted to show you. Will actually reinforce
that same too because we cut and there's no tacking that came out. We'll
reinforce that. I just want to put
a pin in there to hold our new him into place. Because I wanted to show you another way you can
cut your lining. I generally would
just measure the 4 " and cut that off of my lining. But if you're ever wondering
another way to do it, I'm going to churn your grandma. Good side out. That's our new finished him. Pull your lining down,
flatten that out. And you could actually cut
your lining right there where the new then a TAM is and
that should work out. It actually works
out to 4 " anyways. That will work out perfectly
by the time it's joined. That's another way you can
figure out the lining if you wondered wary to cut that. But it's easier just to
measure 4 " and cut it off. We're going to turn this
right side out or inside out. I'm I mean, now we need to rejoin the lining to
the outer material. Our main concern at this
point is we just want to make sure the lining and the material doesn't
get twisted. It's nice that this
has just one seam. Pull this back a little. We will close that up when
we get to the machine. Right now I'm just going
to flip this under, make sure my seams are lined up. Pin that into place
to hold it for me. And now we'll pull that sleeve through the opening that
we have in the jacket. We're going to reach all the
way in, pull that through. And then when we
get to the machine, we're kind of at the same place that we would be from
our original ham, were just sewing these
two layers together. I just leave this pinned
in the place where we get to the machine that it
gets doesn't get mixed up. And now we'll go to the
machine and we will. So these two layers together. We're at the sewing machine with the line sleeve that we
were having more than 3 ". For the rest of this alteration, I have put in a dark
contrasting thread. This way you can better see where I'm placing my stitching. The first thing I want to
do is I've placed in a pan over to keep my lining and
the facing still together. I want to close up the seam that was starting to come
undone because we cut it. So at this point I'm just
going to do that repair first. And this portion I always saw with the good material of
the jacket facing you, the lining will
be away from you. I'm going to really line up that seam that
I had lined up. This scene was pressed open, so we are going to keep
that pressed open. I have the raw
edges of my lining and my good material even. And now I'm going to put
that under the machine to, so the good material
and the lining together put that underneath. This is similar to
what we had done with the sleeve that the
linings remained attached. So now we're just
opening this out and keeping the raw edges even. And we're going to
solo the lining and the sleeve together
at the raw edges. As the very, you can see, these are lined up. Makes sure that
seem remains open. Now I'm Danielle, be able
to see where I had sown. Now I have the
lining attached to the outer material and that's about half inch
from the raw edge. Now, that tacking we had
shown you earlier that kept this facing in place. We do that by opening
out the scene, keep it flat and fold it face-to-face with
the seams open. And we're going to tack this
within the seam allowance. I want to keep my seam open. The moles of an attack my
lining a little bit further up. First of all, I'm just doing
a little bit attacking as close as I can with the two, the seam allowance open. And then we're gonna
kinda skip up to here. Because we want to tap down
our lining a little bit up. What's very important
is when we do this, I don't want to pull on my
lining too much because if we have the lining pulling too much when the
sleeve is finished, the outer material will buckle. So wherever this lies nicely, I'm going to just push it down a little to give
it a little bit of ease. And I'm just gonna do a
couple of stitches here. Just the tack that you can
see how that's tax there. We remove that too when we
were opening up our sleeve. And now the seam allowances tacked so that it will
keep our finished him in. I'm going to turn
this right side out now so we can see
what that looks like. Region to the coat, find the sleeve you're
working on, pull it through. There we go. And we can see that's where the
stitching we just did. You can see with the
contrasting thread. We have are facing
and we have at tax now so that the Newham
will stay in place. We'll take that, go up to the pressing table and we'll
give that a final press. Insert the pressing pad. Pressure on the bottom so
I can pull my lining up, my ruler to smooth out
any other bumps inside. Flip that over. Press out the crease that
we might have pressed in. And on the other side. And now you're playing
line sleeves are complete and ready to
present to your customer.
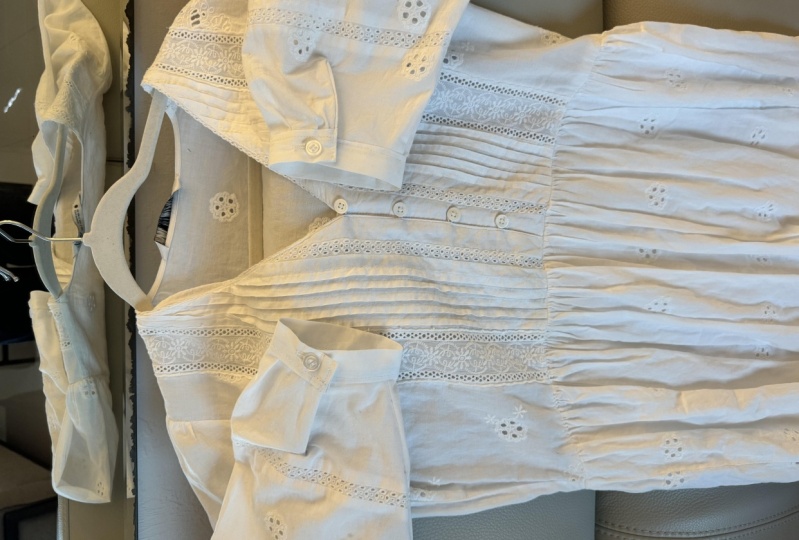
4. Ladies' Blouse Sleeve Cuff Placket: Today we're gonna be working
on ladies blow sleeves. Generally it will be
a sleeve with a cuff and a plaque it that we will be moving up when we're
doing our shortening. Let's take a look at
what that looks like. Here we have the sleeve. It's bound by a separate
cuff at the bottom. And the plaque, it is
considered this opening. This plaque, it actually has a separate piece
that has bounded. Once in a while you
will see a plaque that is just turned
under in top stitched. This one has a separate
piece that is bound. We will be moving that up also. The first thing we
wanna do is just assess our length that we're
going to be doing. We're going to pretend
this particular calf is going to be
shortened to inches. That's how we're going
to move everything up. So let's just jump right in. It's another one of those
projects that's much easier to see than
it is to explain. The first thing we
need to do is remove all the pieces that are joined
onto the cuff right now. So we're going to take the
cuff off and the plaque it in that order with
this particular sleeve, we don't have to take
off our buttons. First. Let's just run our rays are underneath the back of the cuff. Get that started. I always
like to check first. Will it tear open? Because if it does,
it'll be much quicker. And this one does. It may be top stitch
that each of the ends. So just released that. Once you take the cuff off, it is a good practice
to pin it to the sleeve which it came from this way you don't
get them mixed up. Even if you get them
mixed up there, you can figure out which
goes to which sleeve. And it does, One is
made customer for each of this leaves
another item to take note of before
you take everything apart is if there's any pleading to there
may be either gathers, but this one has pleading. So I'm not going to
necessarily measure those. You can if you'd like. Each of these plates is
about three-quarters of an inch tucked in underneath. And their approximate
placement there were always on the side that accompanies
the button hole. That's generally where your
plates are going to be. We don't need to know
the exact measurement because when we
take our sleeve up, we may be going
into a fuller area, are pleats may be just a quarter
of an inch or so larger. We're going to make that adjustment as we put
everything back together. We do need to take
out those pleats. So let's just tap those threads there,
just to release them. Now we're going to take
out the plaque it. First thing they have
done here is they have done a little bit of
stitching right across here, which holds that the
plaque it into that shape. We're going to undo
that little tacking that makes that little v First. The side that also has the
pleats and the buttons will generally be flipped
to the inside. And as you can see,
it's actually tact and secured into that position. We are going to undo that also. And you can see that the
plaque at peace is actually just the rectangular piece of fabric that's in like
a double biased fold. Now we're ready to remove that. Same like we always do to
slide it underneath the back. You might not want to
pull this one just because it is on a
section that is just cut. And if you were
to pull too hard, you wouldn't want it to cut or a tear all the way up
the arm of the sleeve, that would not be good. And of course, we
want to clean up all our threads off at each of the pieces
that has come out. This way when we put
everything back in place that we won't have those threads to
put the fight with. Once again, pin
that plaque it to the other side. Alright. Now what we're going to do is we're going to mark
and cut this sleeve. If this area is really
not lying flat, you can always use your iron
to give it a bit of a press. It is important at this time to measure the length of the
slit that they have cut in. This one measures at
two-and-a-half inches. We have decided that this
leaf is going to be ham 2 ". The first thing
we're gonna do now is Mark 2 " from their cut edge. I'm going to continue
their cut line down. And we know that it goes two-and-a-half inches
from the cut edge. So I'm going to put
a little crosshairs right there at
two-and-a-half inches. Cut the 2 " off that. We need to make this leave
the appropriate length. Make sure you lift this up. You don't want to cut
through both layers. And we're going to cut straight down to where your
crosshairs are at that two-and-a-half and now we have replaced that slit there. That's where the plaque
it's going to lie. Do that to the next leaf. And our next step is we will be going to the sewing machine. We're at the sewing machine. We're going to start with
whichever side you'd like. I am using a contrasting
thread gray for this demonstration
for you so you can see more accurately
where I'm sewing. Our first step is where it's
actually reverse of what you have done a few of the order of which you took everything
off in the beginning. You are just going to go
backwards and reverse that. So since we took this
plaque it off last time, we're going to
replace that first. I'm just making sure
that the placard, remember we had
that little sewing that put it into that v0. So that tells me that this is the good
side that I want up. With the V facing in like that. Just fits in about a
quarter of an inch. Even at, at the tops. If you've measured in cut, right, this should all work out. We're going to put our stitch
length through about a two. We do want a little bit
smaller of a stitch. Just trying to get out
from my old threads. First thing we
wanna do is get it into the machine so the
needle is holding it. It's one of those steps
that is just much easier to show you then to
actually explain to you. At this point, you should
see that the halfway mark, which is the point of
your area you cut, should line up nicely
with the halfway mark on the your plaque at
facing with your needle in. It's helping to
anchor your work. Or just going to get
this in in lined up with see how they have their quarter-inch
facing flipped in. We're just gonna get your
cut plaque at lined up. Just with that,
just to that point, we're not going to go
any further than that. Flip your packet back over and we're putting our top
stitching rate in their mark. You can see where
it's just at a level less than an eighth of an inch. Just give it a go. You can see now as we're
getting closer to the cut point that it's
a little less to put in. Leave your needle in,
lift up your foot. Let's get that tucked
in a little bit more. We need to just make sure
that catches at that point. I'm going to show
a little bit more. Now with the needle in. I'm going to spin it around. And now I'm going to
come up the other side. Move manipulate your
material so it's out of your way up the other side. Let's take a look at that. When the main things
we want to check is that it has caught in the back. It is a little bit out further
than their stitching was. But keep in mind that if this is the same
color using this, you notice this more because
I have used contrasting. If this is the same color, that wouldn't be as noticeable, but we do want to try and
get that a little closer. I'm going to do the
other side right now, that other same piece so that we can see we can get that a little closer for you. Locate your other sleeve. And my pieces that
are pinned on it. We're going to put the
other pocket piece on just so we can
review that again. We've determined this
is the side we want up because we can see
that's how it's folded. So this is our top side. Slip that into their
into their stitching. Let's get her needle into the machine so it's
holding our work for us. We want to make sure also we're not pulling anything either of these because it will stretch them out and they won't
line up properly, just let them fall into place. That's lined up with
the quarter-inch here. Lie that right there. See how well that worked
falls into place. I'm going to flip over my
front so it's lined up. And now let's see if I can so on a straight
line with this one, once you get to your
to your halfway mark, put the needle in so it's
anchoring your work. Spin it around. Bring this up. Move this extra material
out of your way. If you have to do a couple
more stitches, go ahead. So you're sewing backup
on a straight line. And we'll go to the top. There we go. Not too bad, better
than the other one. At this point, we're going
to put in that tacking that they had that holds it
into that nice V-shape. So we want to fold this
your pocket rate in half. We already have the small
stitch now we're just going to replace that stitching. They had their, their
tactics into the V. Take a look at that. That looks good there. We'll do the same with the other slave. When you're working on
your sleeves on your own, you can finish one
complete sleeve. I'm just going
back and forth for your sake so that we can see, reinforce each step here. For this completely in half. We want to make sure
that we don't catch the actual blouse material into our tacking and
replace the attacking. Now let's put the cuff back on, start working with
the cuff area. I wanted to position my
sleeves so that you can see this cough goes
on to this sleeve. So what's important is getting the depletes
on the correct side. Another way that you can tell where the buttonhole will go. Therefore, your pleats is. Let's flip this a little
bit this way for us to see. This area of the sleeve has a very short distance
from the underarm. Seem that will always be your button, therefore,
your backside. This area has this
wider spacing. That will always be where
your buttonhole goes. Therefore, that is your
considered your goods side. Do you remember the
plaque at peace was tapped like this on the
inside and as you can see, that allows that to fall
over nicely like that. So we're going to put that
little piece attacking in. But before we do that, let's just put a pin
in there to hold that. This is where we're going to get this piece of
material at the cuff. Now to fit the cuff itself, as we can see, there's
a lot of excess. One way you can do that is
line your cuff up here. Let's see how much
excess material we have. I can get this for you. We're going to run this along. And we can see that we have this much material that we
have to tuck into your plates. You can measure
that if you'd like. It's about
three-and-a-half inches, then you can divide that
among to plead sizes. Do the mathematics. I don't do that. I just fold my pleats and then I'm going to line it up again and see if that's
going to be enough. It's in the same positions. I don't pull out
a ruler for this. It's more of a visual for me. My main concern is that this distance from
here to here and from each pleat when I put the other slave together
is fairly equal. So I'm just going
to make two plates that resembled the ones that were in the mouth originally. But a couple of pins in there. Now let's measure that again
and see how that's gone. I'd like to avoid
as much mathematics as possible if I can. Now we can see how that's
a little too short. This plate is a
little bit bigger than what I like
than the other ones, so I'm going to
remove it from there. Do a quick measure once again, and that should be
good. And there we go. Now we've got that
just where we want. Let's run a stitch
across this to base it. Within the half inch
from the cut line. We just want to do
a row of basting to hold these together so
we can remove our pins. And now we're ready to
put our cuff back on. We always like to start
with the buttonhole side. It is most important that this looks the best
because this is the side that's going to show another tip to make sure
everything's lining up properly. We wanna make sure
that when the plaque, the cough is on, that when it will be completely even at the same spot here. So what I'm going to do is put a little mark of
chalk just like that. And you'll see when
I put that on and where those two trucks
come into play. All right. I'm going to talk this raw edge into the kF rate to where
that chalk mark was. Get that pushed up as far
as I can close to the edge. Once again, put my needle in
so it's anchoring my work. I'm going to open my cuff, lay the raw edge of the
sleeve inside the cuff. And I'm making it so
that it's kind of even with what they
have flipped inside, which is about half an inch. I do have a small stitch again, I'm gonna do a little front
and back just to secure that. Now we're going to put an eighth of an
inch from the fold. Always leave your needle in
when you're repositioning. Do the next few
inches of your work. Lay down your cuff
In, continue to sell down the next few inches. At this point, you'll see we're
getting close to the end. We're going to talk the
raw edge under and I'm going to make sure
that the bottom of my cuff is lined up with that chalk mark that we did just before
we started this row. Tuck that in, just wind up. There's no creases. And let's finish that row. Trimmer threads. And this side is ready. We always want to
check, make sure it's caught on the back
that didn't skip. That. It's all sealed. And it's not as
imperative if this isn't perfectly lined up
because that is inside. And remember, we will be doing this in its matching color. What is most important is that this side looks neat and
clean when it's finished. And you can see if we
did up our button. That lines up nicely
like that too. Let's do finish off
the other side. This is the area of our sleeve that has
the shortest Ariel. So we know that is
actually the back. This is the front where
our good details will be, where the button hole is. So once again, turn your
facing to the inside. Let's put a pin in
there to hold that. If you'd like at this point, you can always kinda make, take a visual this. The first pleat on
the other sleeve is approximately 1 " and
three-eighths from our fault. If you wanted to keep that just so that it's looking even. You're welcome to do that. I generally just
take do it visually, but if you want it too, you could always
just put a pin in there so it gives you
a bit of a guide. After you do enough of these, you just need to you don't even think about
it after awhile, but you're welcome
to put that pin in there for measuring. You can see that please
here is a little bit further away than what
I've done with this one. So I'm just gonna make sure
I adjust that a little. Nobody's pulling out rulers to measure your clothing
as long as it looks symmetrical or even just
by visually looking at it. That is, you're gonna
be more important. Let's do a quick trial run to see if this is
taken up enough. Yes, I'm happy with that. Let's base those into place. Remove our pins. We want to apply that little
small piece of chalk, makes sure our cuff
is going to be even when it's all done. So about half an inch down. Put a little piece
of small chalk mark. The only difference with this as when we did our
last cuff because we always want to have
the buttonhole side on the top it just because
it is the most important. And we always want to be
sewing from the button towards the actually
the button hole to the buttons because that
is your most important. You can see that in order
for us to do that now, we actually have to switch
all our work-around. Yes, it would feel more
comfortable to start here and go down
to the other side. We want to switch
that around like this so that we are starting
with the buttonhole side. It just ensures that every
time this area is going to get up as far as in as close as
it can and be the neatest. If we happen to
have a little space down in where the
button area is, it's not going to be as imperative because it's going to be covered up
with the buttonhole. Whatever areas showing the most is the area you
want to look the best. It's good practice to learn
to so on lefts and rights, not just in one direction too. So we're going to
tuck in the raw edge. Make sure I can see my little chalk mark that we
put there and it's up close lined up with the
edge of the cuff that underneath the machine get the needle in there
to hold it for me. Line up my raw edge with the raw edges on
the inside of the cost. It's about a half
an inch inside. We're going to do a
little bit front and back to lock that there. And now let so our first
few inches needle in. Reposition. The next
few inches ready to go. Needle in. I have seen some sores. Pin this all across. But as you can see how this
keeps curling anyways, you can never get
this laid right flat, so it's going to stay that
way and you can only still so in increments of
maybe three to 4 ". So for me, pinning is just
a step That's not really necessary because I can only still do these few inches
in the first place. So I just do my holding and repositioning all-in-one
without a pinning step. If you feel more confidence
to do the painting, it's just going to add
more time to your work. But feel free to do
that in the beginning and gradually stop the pinning. Looking for are aware of my other chalk mark is so that it's lined up with my cuff there. And let's finish off this row. Little bit front and back to lock clipper threads. And let's check the
backside to make sure everything looks
good on this side. And then on the
backside everything oh, see here, this hasn't caught. We miss the little area. All we wanna do for
that because it's a nice smooth piece
of top stitch and we don't have to take it all out. But I am going to lift up a little bit and just
reposition that. Keep in mind too that if when
we are using the same color of thread as our material, when we do this top
stitching back in again, we don t have to
take out as much. It will blend nicely still. But because we can
see this here, I want to make sure it's
going to be nice and smooth. This doesn't happen
that often anyways, a lot of when the
shirt is manufactured, a lot of times the underside
is cut a fair amount larger than the front side
so that it doesn't miss. When you put this
bath underneath. You're a lineup my stitching
so it blends in nice, doesn't look like
we've made a mistake. And I'm just going
to consciously make sure that at the back here, it's going to catch this time. That's why it's
always good to check. Doesn't happen often, but
once in a while it does. And there we can
see how we did it. We did do that. Now, we've caught
that along here. J just didn't line that up. There we go. That's better. Clean up my threads. And our sleeves are now ready. We have our pleats repositioned, we have our Planet
back-end and our cough and everything is 2 " shorter than it was when
our customer brought it in. This is definitely
one of those projects that you need to practice
a couple of times, it's just learning to
manipulate the material. But with the, each
time you practice, you'll get better
and better and it'll become easier and easier.
 April Jackson, Everything is easy when you know how!