Transcripts
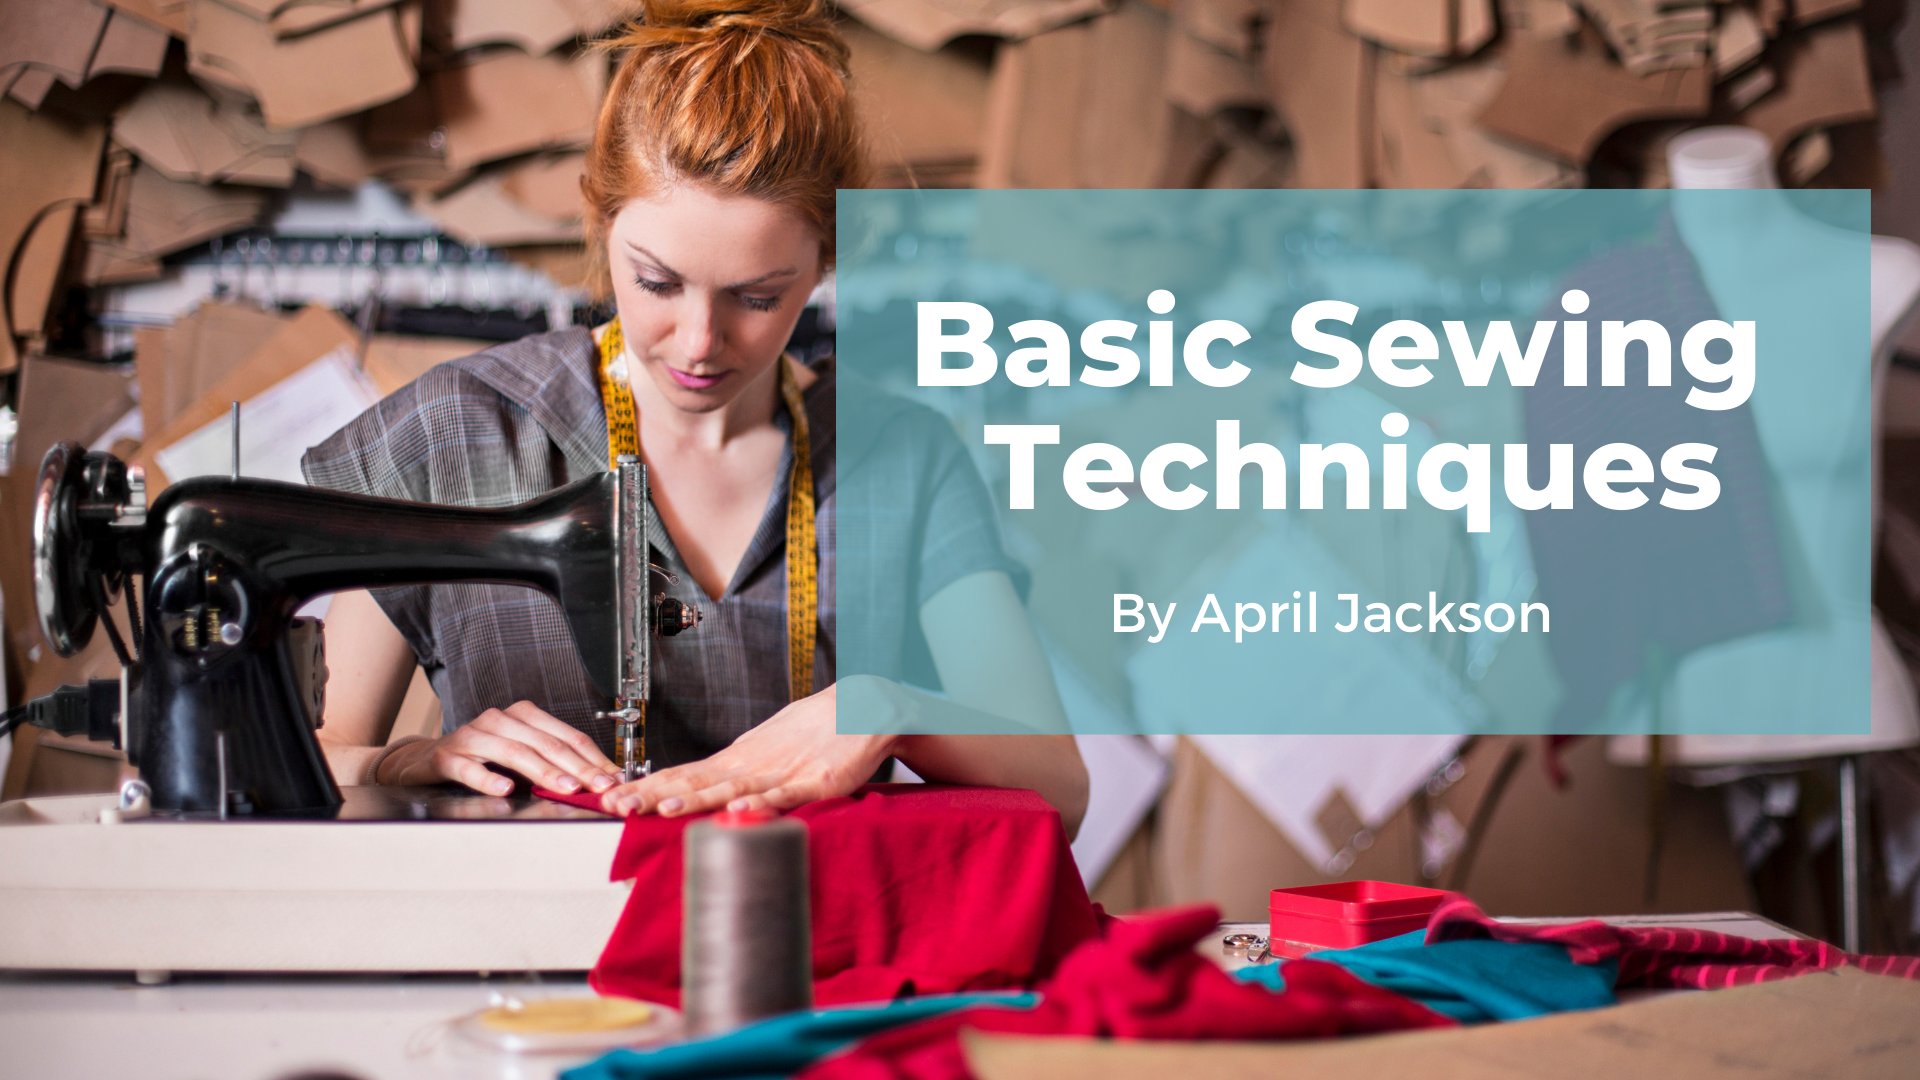
1. April Skirt Hem Intro V2: April Jackson here
as your teacher. In this next module, we're going to
attack skirt hams. Anyone who has worn a skirt
or works with good hands will know that they come in a variety of finishes
for everyone. You can have simple hams that where we cut and
we turn under New, do a basic gene ham. Some we surge and we top stitch. There are others with
knit fabrics where we're going to use
our cover stitch. Then we move into the element of line skirts where we have lining attached,
end-user blind hammer, and even into formal wear, where we are going to tackle a formal dresses
which tend to have a fuller skirt with
multiple layers. And a lot of times, we have to just make sure that the finished skirt is totally parallel when the
client is wearing them. So here we go.
2. Lesson 1: Lined Straight Skirt: There are many variations
to skirt hams. This dress we have today, I would consider its straight. There's no vent,
but it is lined. And when we do a
blind hem on it. So I want to walk you through
the steps that we're going to use to perform
this alteration. So let's look at
what we have pinned. Our client came in and
we pin this on her. You can see these are the
pins holding up the ham. Let's see how much we
have flipped inside 3.5 at this 0.3 inches. I never worry when there's a little bit of
a variation with that, it looks nice on the client. My main concern is that
when we do this ham, it's the same all
the way around. If I had to choose, I will always choose
the little bit longer, which would be the three inches. So I'm going to go with a three inches overall
hamming of this skirt. Let's take those out. This lining, you can see is loose and not attached
to our dress at all. What I'm going to do just
with this because it's like that is I'm going to
get it prepped first. If we need to have the
dress three inches overall, we are going to hand the
lining three inches overall. I'm just laying that out
nice and straight there. Perfect. And I'm going to put a, this is our finished line. But this has a rate now this is almost like a
quarter-inch top stitch. I like doing a
half-inch top stitch. So if that's our finished line, we're actually going
to cut one inch below. Go to the other side three
inches. That's your finished. That's where we're
actually going to cut a longer ruler to
connect those dots. Here we go. Nice straight. The ham seems to be
flopping down anyways here. So I, my main concern and
it's lying flat on the grain. And when I connect my lines that my ham is nice and straight. So I am going to just
connect, I choose sides. And that is the line
I'm going to cut on to make sure it
doesn't move on me. I'll put a couple
of pins in here. I'm just going to
cut straight across. The lining is prepped. And we'll take that to the straight stitch
machine after we do our outer material. So now I'm going to lay
down the rest of the dress. I want the front side up. Enrico. Sure. I'm going to check before
you do a lot of fussing. This is my finished line. They have inch and a
half on the inside. If I'm going to cut
inch and a half, It's kinda running
right along my old ham. So I'm going to want to
get rid of that old ham. So it's not in my way, It's hard to see, but that is a blind him. We don't see it. So I'm just
going to cut my thread. And, um, blindly
looking for that. Let's see. I get
that pulled out. There it is. If for some
reason you can't find it, you can see that because this is a really textured material. You've got all these fibers. I'm just kind of
cutting underneath and hoping I catch
the right thread. If for some reason you
absolutely can't find it, instead of playing
with it all day. You can use a razor
blade to take that out. Sometimes that is
a little easier, but sometimes I just don't
know when to give up. Today's that day. Let's grab a razor blade. And at that point we'll just
run the blade underneath. That seems to be working better. In this tray time is money, so don't let your pride
get caught in there. Like I do. Doesn't take much the blade it because it's
only a blind him anyways, so we're only cutting
a few threads. Once I get this out, I want to show you something on this hand that I'm noticing that I wanted to make sure
ours is not like this. Okay. We're all the way around. I'm noticing, remember
when I initially measured how much is flipped inside and so
that was inch and a half. Over here. There's almost
a quarter inch difference. That's well, that's almost
even a little bit more. It's almost one
inch and 1 eighth. Then over here it might
be inch and a half. Again. Our primary goal, whenever
we do a ham like this, whatever is flipped inside, we want it to be
perfectly parallel. We don't want to have that
much of a variance in our ham. It just makes it look like
something is crooked. So when we cut ours and
we put our hands up, if it's going to be
inch and a half, it's going to be inch and
a half all the way around. We don't want to
mimic another app, a poor job because then
our job will just be poor. So back to putting this
dress with the front up. Nice and straight. Three inches is
our finished line. And we're going to cut
it an inch and a half. I'm going to mark
it in the middle. Three inches since our finished and cut at inch and a half. And the same over here. I'm going to select
both of those. This material is a
little harder to see, but not impossible as long
as you have a sharp chalk. Me for I move this, I'm going to put a pin
through my finished ham. This is where the
new hams going to be right through
to the other side. So it holds the two layers. And here and here. Doing
that for two reasons. The first reason is when I
pull out their old ham now, to cut that, I don't want
these lines to slip rate now, so that's going to hold
that in place for me. Now. I can cut, I don't have to draw. There's no sense in drawing this cut line all
the way around. It's just a waste of time. We're just going to cut
through the two layers. There we go. Now, those pins are also
holding my two layers together. So my finished line on the back, I already have where
it's going to go, so I'm just going to
connect the pins. I can take those out. Now. Our first stop is going to be the
straight stitch machine, where we're going to put
the ham into our lighting. At the straight stitch
machine where we're going to put the hammer
into our lining. Let's pull that out
so we can see it. And we do want to start our stitching on the
backseat of the lining. Once again, it's all inside. It's one of those things that won't make or break your job. But it's just a good practice to start and have all your
overlapping on the vaccine. So with the lining
it's inside out. I can see this is the zipper. So I know this is my vaccine. Of course, because I
can see the lining. This is the inside seam. I know that I'm going to
be rolling it towards the wrong side so that
when all is said and done, we have a nice clean finish on the good side of our lining. Just a half-inch, half-inch. So we're going to
fold it half inch. Half inch. That I don't
usually mark that. Take the extra time. We're just going to do the work. Half-inch, half-inch,
fold it in. Make sure you're happy
with the way this looks. Needle in. And we can see that's a nice clean
finish there. Continue that around. I have because it's
aligning two things. I am definitely making
sure I am putting my tension on the front and
the back while I'm sewing. Otherwise, it may tend to pucker because the lining
is a bit more delicate. Even though the
machine is pulling. I'm at least keeping this flat so that we have a nice clean
finish on the good side. Needle in reposition. Half-inch, half-inch. We want to make sure too, that when we're doing this,
we're not pulling the top. Because then that's when
we get that pucker. And we may get off centered
and we get a role. Just flip it in
perpendicular to the siem. Hold that in place. The machine do the work and
you just hold the material. You can see here we're
actually didn't pull. When I did this. See this area. Can you see how it kinda
went a little wavy. It's one thing we'd
like to try and avoid. So I'm going to be a good girl and make sure I'm pulling the front and the back, but it just kinda shows you one of the reasons why we do that. Normally do that. It gives a nice flat finish. Make sure my side
seams are lined up. Turned under. This is where we began. You can see my scenes
lifting up there. So I'm going to correct that if the lining wasn't
cut perfectly on the straight grain up and down, then when we cut it across, it can cause it to not fold
as neatly as we'd like. So we may have to
coax that down. Let's go over that again and
make that a little neater. Overlap. In a secure your stitches down. You're lining is done. We'll give it a final press. Once we've been to
the the blind hammer. At this point, we are going
back to the iron though. Whenever we do, actually
we've got a surge this first. Then we're gonna go
back to the iron. Whenever we have a skirt hem, we always want to
make sure that it is actually pressed up into
place before we blind him. So let's go to the surgery
to finish off this edge. The surgery we're
going to finish off the bottom of our
outer material. Of course, we just
want to make sure our lining is out of the way. We want the good
side of the material up facing us that
will always make sure that the goods side of
the surging will be visible when we put our Hamon. And of course, when
we're approaching seams, seams are already
pressed to the back. We want to make
sure we keep them going in the direction that
they're supposed to be. We approach that makes
sure that lying flat. And we only need to
shave off the egg. We're just given
a clean finished to the raw edge
because you can see, of course it's fraying
and we don't want that. Not going to give me a nod. Yeah, it's a nice clean finish. Approaching my next scene. The vaccine was pressed to open, so I want to keep
it that way too. We're at where we began
overlap and then not. Now what we need to do
is we need to go to the iron and press
this into place. Skirt hem, especially
for blind hemming, we will generally
press up into place. If we look at our
work here, remember, we had left inch and
a half on the inside. My main objective is
I want this to be a nice parallel line from my search dead
to my finished edge. Though I'm going by my line
that I have on with chalk. I am more concerned to have a nice parallel clean
finish on the inside. If this wavers like 1 eighth
or 1 16th of an inch, it's not going to make a difference in the
finished product, which is gonna look neater when this is nice and straight, as opposed to the way it was
when I had gotten the dress. This much was up in
this much was down. Even if it was even
on the outside. It just looks like there's
a problem on the inside. That little bit there. Do another a little bit using
my line as a guideline. But visually, I'm
just looking to make sure it looks nice
and parallel to me. That's in place. Here we go. You can see using the
clapper helps to set that. If I was to move that
before using the clapper, the we wouldn't have
as crisp of a line, the steam would
still be too hot in the crease we prestin
will lift up. We are giving it a good final
press ones. We blind him. But this just helps us with accuracy when we're putting
it into the blind hammer. And we can at this
point if you want, let's pull our lining out and give it a good
Press while we're here. You can do it now or
you can do it later, but I'm here now and I
feel like doing it now, so we'll do that
on the good side. I'm just giving it
a press and you see how that looks much
nicer once we press it, if we were as opposed to
leaving it like that, even from the good side, it's giving a nice
press to finish it. That way when we come
back to the iron, we don't have to do this step. See how clean that looks. And this is what
it looks like on the good side of the lining. Now, let's go to
the blind hammer and finish off this job. At the blind hammer
to finish off the outer part of the dress. Take your lining and just
push it up out of the way. We do want to try and start
our blind him on the back. So I have the back of
the dress facing up. I know that in my flip this up, this is my center back seam. Once again, it doesn't make a big difference if you
started here or over here, but it's just a good practice. I'm using a gray so you can see, but with this material, gray would be a suitable color because it wouldn't show
on the other side either. Got that underneath. I've got my little piece of metal here running
along my surgeon. Let's do a couple of
stitches and see what we've got going on here. I'm
sure that's going to. Now, one thing I want
you to take notice of, this material has a
real kind of a looser. We've, if you take a
look at the grain, you can see how it's
kinda pulling this way. To me, the lines
are going this way. This is going straight. When we do this, we're going to
want to kinda coax this bottom part with our hand to make sure
the grain stay straight. Otherwise, this is one of those jobs where it's
going to shift for sure. And then you're gonna get a pucker and one
edge or it's going to get those little twisty
lines that we don't want. We find when we do a skirt because it's
a longer distance, you have the friction of the bottoms
pushing this one way, but this is getting pushed down. Friction coming this way. It can get unaligned. So with skirts especially
we want to kind of give it a bit of a
coax with her hand, make sure the seams
stay lined up. When we do that. Let's
take a look and see. You can see how nice
that is turning out. Can't even see the stitches and it's invisible on that side. We want to make sure we're coaxing our material
just a little. I love materials like this
that have such a texture to it because you're finished seam will be totally invisible. We're now approaching
where we began. So we're just going to make
sure we overlap that a little bit about a
couple of inches. Remove our needle
out of the material, find our little
loop there she is. Let's cut that loop. So let everything is locked. Now all we need to do is
go to the press table, give that a final press. And at this point, our
project is complete. We want to give our outer
material a final press. You can see even right
here it looks okay. But see how it's
just a little wavy That's from going
through the machine. I'm going to actually
just do a single layer, put it on my board like this, helps us smooth out the fibers. And one more just to
connect all that. And at this point, you're alteration is complete. You can see what a nice
finish we have on the bottom. Nothing shows the nice
clean finish on our lining. And of course the
lining doesn't show. There. We have our
dress alteration. This has been hemmed.
3. Lesson 2: Skirt Hem Quarter Inch Topstitch: We're going to work on
another skirt hem today, our client is brought
in this dress. And what's the benefit
of this type of ham? We're actually just
going to search it, then just do a
quarter-inch top stitch is because sometimes
your material is too flimsy cutoff grain that in order to
do a double role, you're just not going to get
a nice enough looking ham. So sometimes it's
just simpler to search it and do a top stitch. Sometimes this works
also with knits. It's a good technique to use. Just use it once in a while. If you're fighting with
a double-barreled home, maybe you just might
want to surge it, do the top stitch and you'll still get a good clean finished. So let's look at what
we're working on. Of course, our client came in
and I used my skirt marker. This way I want
to make sure that while she's wearing this gown, we've got a perfectly
parallel ham on her. So this is exactly where I want my finished him to be
when all is said and done. You can see even here, the Lavie is a bit of
a contrasting stitch. And they did the same technique where they searched and
then just flipped it up. On this particular dress. They actually did
their top stitching very close to the edge. So that's almost like
a 1 eighth or 1 16th. You could do the same. Or you can even
just like I said, bring your stitching
a little bit higher to the quarter-inch and it will still
look very nice. But one of our objectives, of course, with a
dress like this, is making sure that we match
our thread to the garment. I can see here where they did
not still in, it's not bad. But they still probably could
have chosen a better color. Of course, I'm going to use
contrasting for you to see, but just keep in mind in order to have a
nice clean finish. Try and match up your color as best as possible with
for your top stitching. The first stopper going with this address is rate
to the surgery. Generally when we're
at the searcher, one of our guidelines
is we will have the edge of the foot running along our stitching or
sometimes our chalk line. But we don't necessarily
want that with this alteration because that's going to leave seam
allowance inside of about five-eighths of an inch and that's gonna
be too much for us. You can see here, even on their work, that they just have like
a little quarter-inch flipped under so we don't want to leave
much more than that. So what I'm gonna do is I'm of course I'm
starting at the back. This is my back. I'm going to
work my way up to my line. So as you can see, if I let the line where I want to do my fold run along here,
I'm gonna do it for that. So you can see that's too, too much for on the inside. Let's see if we can see that. That's about five-eighths of an inch and it's a
little too wide. We wanted to turn that
down a little bit more. So what I'm going to do, you'll notice on your foot there are some other lines here. There's a little red line. And of course our other two, this little notch here runs
exactly what your needle. I'm going to run my finished him along with that
little red line. Now once again, keep in mind, it's not going to make
or break anything. If it happens the veer
by an eighth of an inch, but it's just a good
guideline there. Now we can see how we have a nice quarter-inch that
will flip under beautifully. Okay, let's just continue
around. Like we always do. Make sure if your
seam allowances on the inside are folded open, Let's make sure
they stay that way. Thea with your hand. So I'm visually taking
my chalk marks and making sure they line up
with that little red line. The seam is flat. Now we're going to
finish off where we started and pull that out. We have a nice clean
search all the way round. And at this point
we're going to go to the straight stitch and do
our final step of sewing, which is just putting
in that nice little a top stitch, straight stitch. Of course, whenever we do
any type of top stitching, if we want our overlap
to be on the vaccine. So I have the back of my
dress on my table and I'm following that same all
the way down to the ham. So this is my vaccine. With the dress inside out. We're just going to flip that
little searching we just did in length that
like I mentioned, we could easily do a
quarter-inch top stitch. I'm gonna do one quickly
just so you can see. We're folding in
our surged area. Probably a little bit more
than one-quarter of an inch. And how I know
that is right now, my fold of the bottom
of the dress is radon. My quarter-inch line
on my machine guide, and my needle is over is
actually insides that searching. So that's how I have this
flipped up that I would say that's almost one centimeter
or half an inch there. But no more than a half an inch. Just I think a centimeter is
a little bit less than that, So I would even go with that. And I'm running my folder, my material right along
the quarter inch. I just wanted to show you what I want to show you what
that looks like on this side because
I might go with the 1 eighth top stitch myself. But I just wanted
to show you that you could do either one. That's what it looks
like on the good side. That still is
totally preventable. But I think for this dress, because they had the
narrower AI top stitching, I want to replace that too. So I'm just going to
take out this bit that I showed you and then we're just
going to put the skinnier. Either one will work
with what we've searched and cut off already. We go Let's take
oh, that's gone. Flip our dress backup, the ham. I can see my little white line anyways that I had originally. And I'm going to put a skinnier. So I have that flipped up just a little bit more
than quarter of an inch. The main concern is not
exactly the number. It's the main concern is that when even from the inside
your work looks neat. So as long as this
looks parallel, it wouldn't even matter
if you decided to flip it up this much. As long as you did that
all the way around. Okay. That they're going to
start my stitching. And for me to do the
narrower top stitching, I am running the folds of my fabric along the edge
of the feed dog here. Just pick a spot and then
keep it lined up with that. Your goal is always that from the inside and the outside
your work looks parallel. Let's see what this
is looking like. There we go. See that's looking really nice. Back to my regular stitch. Fold this, unfolding it now
I can see on my white line. But once again, what's more concerning to me if this varies off by like an eighth of an
inch or 16th of an inch, it's not going to make a
difference in the finished him. I want this to look
parallel through needle in, readjust your
material unfolding at all my line and I think that looks parallel, so
let's keep going. The same at the scene. Let the machine do the work. You're just holding
the material. Almost all around. There you go. Overlap our original
stitching where we started. Just a little. Reinforce it a bit. And do keep in mind that I
am using contrasting thread, everything will look
much better when you use the matching thread. We go clean up any loose
threads and let's take a look. See how nice that looks. Which is that little
bit flipped underneath. Let's go to the press
table and we'll see how nice this looks
after our final press. We can see that even
though this ditching, it looks very nice. Everything seems to be curling. That's where our final press will lay everything into place. Use our clapper to
flatten it out. Just keep going
around your skirt. I'm pulling on this
just a little bit, putting a little tension just
to smooth everything out. Let's take a look at
our finished product. There you go. That's how I want the where's the
front of this dress? There we go. That is our finished skirt hem. I'm sure you also noticed how this can be a little bit
quicker of a technique. It's another benefit of doing your skirt hem in this manner, but it still gives a nice
clean finished to any garment.
4. Lesson 3: Shorten Pleated Skirt from Waist: We have another skirt that our client would
like to have hemmed. It is pleaded and it
actually is double-layered. It's another skirt where
we're going to choose to do the hamming
from the waist band. It is a little
trickier because we have two layers to work with. But I'm going to walk you
through the steps once we've got the two layers
based it together, it's just like the
other skirt we did. So let's start at the beginning. We're going to look
at our skirt here. You can see it's fairly full. We have our two layers are pleaded layer
over top and we have a knit lining underneath. I want to show you inside out. Our net lining. When the waist band
is stretched out, our lining is actually smooth. There's no extra pleats and that we're that's
important is when we're basing our pleaded
material to the lining, this is going to remain flat, but we just want
to make sure that our pleaded material is
straight up and down. You'll see how that will
work in when we do that. We do have another
label at the back. We'll want to make
sure that that goes back to our client to Canada. Find the back easily. Plus this particular skirt
does have skirt hangers. And if it comes
through skirt hangers, this makes it easy to hang
on a hanger in your closet. I am also going to
replace though. So at this point, the first things to go
will be the skirt hangers. Take those off. And I'm going to remove
the label for us this way. We'll just set them
aside and we'll put them back on the skirt when this project is done. Yeah. There we go. We'll set those aside. At this point. I want to put this
back right side out. And I'm going to use my chalk to mark certain points I want. That's the back and there
should be a sightseeing. Let me get my bearings here. That was the vaccine. So with our back
seam, I want to, I'm putting a chalk mark on the waist band so I
could easily determined. And we're having this actually total of two inches
just so you know, I'm going to continue
that chalk mark down into the skirt just so
I know they line up there. My side seam I'm
using the side seam of the skirt to determine
that goes here. Let's draw that down also. And if there's one site seeing,
there's usually another. There's the other side, same mark, the waist band. And I'm going to continue
that straight down. And when it's lying
on the side seems the only other see my
need is the center. And I can determine that
if this is the back, this must be the center of
the front. And there you go. I have some marks. Now, what I need to do, I need to draw a line
two inches below, or this seam is, this is where the waist
band joins the skirt. I need to draw a line like this because I
need a guideline. I need to go to the
straight stitch machine in based this netting
in its pleats. You can see even here, when it's joint,
it's in its pleats, but it's kind of half gathered. I need to do the same and
based it onto the lining, but I need a line to go buy. This is my two inch mark. That over. There we go. I'm continuing to mark two
inches from the old way spans. Seem there we go. Now I have something
to work with. At this point, we're going to go to the straight
stitch machine. I will use a light color to
base this for two reasons. One, so you can see I'll use a bigger stitch
that it'll come out. But also this way, I can take out my basting if any of it's gonna show after. I can always pull it out. So let's go to the
straight stitch machine and base these two
layers together. I've turned my dress inside-out. When doing this basting stitch, it doesn't really
matter where you start. Whether you start in the middle
of a panel or add a CME. My main concern is when I'm basing the
two layers together, my lining, I will want to
be fairly flat, no puckers. The first thing I
wanna do then is get this under the machine. And I'm going to base
rate on the line I drew, I have a bigger stitch this
way it's easy to get out. I want my pleats to be
straight up and down. If they start shifting. You'll notice that in the end, it will look very sloppy. Underneath. I see
how that's smooth. I'm able to smooth that out
without having to even really pull my waist band because
I'm down far enough. I want my lining to be smooth. And then just make sure your pleats are
straight up and down, 90 degree angle from
the waist band. And let's just run some
stitching and see how this goes. Needle in. Adjust my material. My lining is smooth. Okay. Just my pleats
material up and down. I'm holding it here so
it's not getting pulled. Putting a little tautness
intention into it. Of course it doesn't have to
be perfect because remember it's also gathered
at the top there. Needle in. Flip that around. Just your material. Keep in mind this is a
more advanced technique. It's not that it's impossible, it's just a bit more tricky. Because like I'm brushing
hair almost just making sure everything's
nice and smooth. If for some reason your foot, when you get caught
underneath one of the bleach, just stop, kinda reposition, get it out and
continue because you might have a fold and it might just catch once in a while. You just want to keep it flat. Flat style. You can see this is part of
what we've already stitched. It's coming along nice. See, there's a
little pucker there. That's not a problem at all. I'll show you how we're going to eliminate that
little bit there. You might get the odd one, but it's, it's nominal. It won't even you won't
even notice it afterwards. I'll show you how we're
going to deal with that. Keep it flat. All right. We've already made it
around to the other side. Take a quick look. There we go. Remember I said
there was a couple of teeny little puckers. I could totally leave
those in there and put this waist band back
on and it wouldn't make a difference
at all in the end. But I do want to show you
how we would fix that. You just put that
there and there. And your pleats are going
to open up a little bit. Undo that, just smooth that back out and we'll
go back over that. It's always easier just
to fix little ones as in one area than
do the whole thing. So you can see where
my stitching came out. I'm just going to resell
that. Just the rebased it. There we go. In aereo. We fix that one little pucker. Now we're ready to
go to our next step. We're gonna go walk to the
press table if you want it, you call was could do this
while you're sitting. We're going to remove the waist band from
the main material now. And then we're going to trim and get it ready to
sew back together. But let's go up to the press
table so it's easier to see. We're at our prep table. We're going to use our
nice sharp blade to remove the waist band
from this skirt. This one has been
straight stitched. As well as search. So there's a fair amount
to get through this. So just be patient. With some projects. There's no easy way to
get through some things. There's no tearing
this one out or no magic sheets patients
and the steady hand. Let's continue on this way. This is where I wish we had
that interlocking stitch. We're almost there. All right. At this point we just
want to pull out some of our threads that are
stuck to her waist band. Remember the other piece
we're actually cutting off so we don't have to
beat as fussy with that. The waist band you'll notice
also has an elastic inside, but there's stitching
that is holding the two layers
together and that is a good thing we want to make
sure that stays together. If for any reason they
didn't have that, we would want to go to
the straight stitch and close that up on our own, but they will always have
the majority of the time. That's so, so the elastic
will stay in place. All right? At this point, now it's time to cut the piece
off that we need. So I have it on my table like this because I want to make sure I don't cut anything. I'm not supposed to cut. And I'm going to trim just about a quarter of
inch from my basting. I don't want to cut
my basting because then it'll all come out. The, what I worked so hard to put together that around. You might notice that here
I've brought this up a little. I'm my cut. My main concern is that I
want to cut off two inches. I know my stitching was
from the seam allowance. But if it's kinda wavered, I don't want to be cutting
on a crooked line. I'm cutting two inches total
off of the skirt itself. Because of it says a
difficult I'm area to do. I just don't want
to follow my line. If it's crooked, It's
just there to base that that material in. There we go. It's like anything. If
you draw a line and you can tell it's
Crockett, don't so on it. So it's straight. And this is the piece we cut off two inches all
the way around. Let me get rid of that. And now we're ready to get
the waist band back on. I'm looking for my marks
that we put on here earlier. So where's my side seams? That's my back. Alright. This is my side seam,
That's my vaccine. And there's a piece of
chalk in the front. Also. Grabbed her waist band. This particular one, it
doesn't really matter. I still see the marks where
my the back of my labor was. So since I have the skirt, the back good side facing me. This is the back
of the waist band. It will go like this and
it's right sides together. So I'm gonna put that there
like that and put a pin in. I'm going to go round
to one more quarter. I know that's my side seam. Find the coordinating
site's theme, and that's my chalk mark. We put and pin that there. This one's gonna be a little
fussier to put together. But where it's easier, It's fussier and that we have to stretch our waist band
to accommodate all that. But you can see how
when I pull that, it lines up nicely. What's also a bonus? We're actually going to
solo this first using the straight stitch machine
before we go to the surgery. That makes it a little easier
to That's my mark from the center front line that up with the center
front on my waist band. Put a pin through
straight up and down. And our last mark, there's my mark and
there's my mark. At this point, Let's go to
the straight stitch machine and we're going to give this a so to secure the waist band to the outer material
all the way around. Right along the base of the
elastic that's inside here. Let's go. At the
straight stitch machine. I do have a lighter
color in the top. I just want you to be as clearly
see where I'm stitching. If you look here, this is the waist band I have it on top are always going
to have the waist band on top and the skirt material on the bottom whenever we
put a waist band back. And you can see there's
elastic inside. There's a row of stitching
to hold elastic into place. And then there's a half
inch seam allowance. We are going to stitch right here at the half
inch seam allowance. When we put our
waist band back on. Of course, we have to
do some pulling and stretching of our material
because it is elastic. And we have to stretch
so that the elastic accommodate this extra material. So I'm starting at
a pin which is 10, either the side seam
or front or back. Leave your needle in. Let's give this a little poll because we only
have to stretch it. Just so that this is smooth. At this point, I find where
my pen is back here too far. What I might do is I'm going
to pull this, it's flat. I'm going to pinch it
halfway and hold it there. That way. It's not I'm not going as far as the distance line
up my raw edges, flatten out my band. C and stitch on your
half inch needle in. Stop and say I've got a half inch seam
allowance. Needles in. I'm going to give this
a little bit of a pull now to the rest of it. So it gets to the
other quarter pin and other quarter part, line the raw edges up. Leave the needle in. And let's adjust that to the next one. Like I said, this
is a big distance. I'm going to pinch it halfway. You can put a pin in
there if you want it. But I'm just going to pinch it, holding it in, place. The needle in. And let's reposition and finish
that little quarter off. At this point I'm
pulling so it's flat. Getting my raw edges
even flattening out the elastic if I don't see how their last it's
pulling like that. We want to stretch out
the elastic switch right flat needle in and reposition almost
around. Straighten that up. Needle in and let's do our
last quarter it up halfway. There we go. The raw edges or even
straighten out or last exon, definitely pulling
front and back. Let's get rid of that. Almost there. Overlap where we began. And to trimmer threads. Now at this point, we want to check and make
sure everything got caught. If for any reason it didn't
weaken, adjust that now. So let's take a look. This is our waist band
where we had sown. Looks good so far. Good, good, good. Don't worry about that.
That's why we put that in so we could
take that out. That's just our basting
still caught good. That looks good there. And there we caught that all the way around, so that's good. While we're here, we're going
to put our label back on. So let's find the back. I have our label. We go. Actually I switched my thread
out to black for that. There you go. To the wording is
going the correct way. It's always a good thing. Little bit attacking
on this side. And they're talking they're went right through
their waist band. So I'm not concerned that ours is going right through either. This is where they had it originally, so that's
where we're putting it. It'll make it
easier when they're getting dressed to define it, which is the vaccine,
are in there. And we're going to tack our skirt hangers also
to the side seams. This way when we
search this edge, it's going to get caught into the surging and be
nice and clean. Let's folder will skirt hangers and half
binder sightseeing. There's one there. Just put that there
to get across. Here we go. I'm using a smaller stage two because it is a
really small ribbon. We use too big of a stitch, it won't even catch it. And we'll put the other side. The other ribbon will go. Sometimes if I have
a skirt and they don't have these end, but it's a really nice skirt. I'll add them myself. It's just a nice little
gesture for your client. Helps keep their clothes looking good when they can
hang them up properly. At this point, we're
going to go to the surgery and we're going
to clean up this edge. Where at their
surgery to clean up this thread where we joined
our waist band to the skirt. Remember it's always easier
to sew inside a circle, so I've left the
skirt inside-out. We have to stretch
this, of course. And we want to make sure
nothing's gonna get cut. Let's lift up our foot just to get this
wedged underneath. Put the foot down and let
it get caught a little bit. Make sure our lining is flat. And we want to put some
tension front and back. Lining is flat. Tension front and back. So that's nice and straight. And see how that's cleaning
that up beautifully. Make sure we don't cut the
loops we just sold on. The needle is in always helps when the
needles and if we're doing any pulling tension
front and back. But we're still letting
the machine do the work. We're just holding the
front and the back tight. Needle in position. Our fabric linings
flat. Let's pull. It looks flat. And this is flat. Titan or fabric. We're almost to the end. Nice and flat. Tighten and go. This point we're going to
overlap and then pull it out. Let's flip this right side out. There we go. And at this point, your job is pretty much done. If there's any thread
that is showing, Be sure to go and pick it out. But otherwise, you're complete. This is quite a difficult
job that you got through. Make sure you do practice
anything like this. Find more skirts because
it is more complicated, but once you learn the steps,
there's nothing to it.
5. Lesson 4: Extra Full Hem 1 8th Topstitch: We're going to be Hamming
a very full dress today. This is actually a skirt, but it would be taken care of
just the same we're doing. This could be a quarter-inch
or a 1 eighth inch. It's it's sort of in-between. I want to express to you how important it is
that your client does have their shoes on when they're doing
that type of fitting, especially if it's going
right to the floor. This client originally came in and this is where
the chalk mark lay, that was the very bottom
of the ham with her shoes. This is the difference.
It makes him the ham. So that's why it's very
important for your client to have the appropriate shoe on when you are
marking their ham. You've seen the how we mark
this in a previous video. So now I want to just show
you how we're going to translate this chalk mark
into our finished him. Like when we did the
chalk on the client, I was able to show you
that the chalk mark actually will go right
through to your lining. That's going to help us
when we go to the lining. And this will guarantee
if we connect all these chalk marks
are ham is gonna be perfectly parallel and
correct for our client. That's why it's
important also to make sure that when we do
mark for our client, that the chalk marks are just maybe about four no more than six inches
away from each other. That will help us to translate into a very even ham for them. There is no work that we
do at the table right now we're gonna go directly to the machine and
begin the sewing. We're at the machine now. What we need to do with our
garment is we always want our stitching to be on the
backside of your work. So this is the
back of the skirt. I'm going to follow
that seam all the way down to the mark
I'm working with, which is our longest mark. And we're going to flip our material rate
on our chalk mark. And we're going to start
on the very back scene. Let's get that out
of the machine. Also, we want to match up
the same stitch length, typically with any type of work like this,
It's more delicate. They do use a smaller stitch, so I'm using about a 2.5. We want to get this
under the machine and we are folding rate on our chalk mark the
material right in half. We want to do our
row of stitching. First row of
stitching is going to be, let me get that here, but we're going to stitch about an eighth of an inch
away no more if you can get less perfect from that fold. And we're going to do
that all the way around. Let's get started so you can see what this is looking like. Get our needle and always have your needle in when
you're adjusting your work. Like I always say,
this is very crucial. Because when you're going from this mark to this
mark to this mark, if you were to just pull your materials
straight like this, you can sort of see how the
chalk marks are falling here. Because your skirt is cut in, some of them are, pieces are falling on the bias. It's
going to Drake more. You need to make
sure you're going rate on each of
those chalk marks. So we're only going to go
from that mark to that mark. Let's roll our material. So eighth of an inch from
that him from the fault. Now let's go to the next mark. Tuck your material away and
let's go to the next month. Can see, let's take a look at where my stitching is going. See how it's just the little tiny it's almost a
16th of an inch. An eighth of an inch is okay. But no more than an
eighth of an inch. But if you can get smaller, It's even better
away from that fold. Let's tuck this around again. Get to the next mark. We're going to keep
doing that until we get all the way around. The skirt. Next mark, I can see it there
fold right on top of that. Sometimes you May 2 guess
yourself and think, well, this looks kind of wavy, but because we marked
this honor client using the skirt marker, you so on. Each of these lines
and connect the dots. Almost, I'd say ninety-five
percent of the time. The other 5% could just be
an extra fussy customer. You will always
have a perfect tab. I'm still folding from one to the other. This process, depending on how much material you
have in your skirt, could take about another
five minutes or so. So I'm well, I'm going
to continue doing this. We're going to skip to the
next session section for you. So we finally made
it to the very end. You can see how
lags very tedious, so don't rush through it in another tip when you're trying to so really close to the edge. Don't do what I call over steer. When your material
is under there, just hold the material and
let the feed dogs move it. Try to get really close in. The more you overstep
your material, the more you're going
to get a wavering line. It's not going to be
a nice clean line. Just let the machine
do all the work. You hold it into
place and let it pull your work nice and
straight and you'll get a nice, clean straight line. Next, we have to actually
trim this excess off. Now, this is another
tedious us part. Just take your time. I want to give you
a little bit of a visual of how
that's going to go. It's not a quick process because we do not want to be cutting into the good
material are actually cutting our actual
stitching we just put in. You can do this at your machine, you can do this at
the pressing table, whichever is easiest for you. I'd just like to do
it at my machine. And we're going to cut
up to our stitching, use a really good sharp
pair of scissors. And I always flip my materials so that I have
the excess ham to my left. And I want to make sure that even that little bit of a
lip that I've created with that stitching is facing away from mice
where I'm cutting. And I'm just going
to trim really close to my row of stitching. You almost want it to be
about an eighth of an inch. So that when it's done, you just have you've
trimmed off most of that the excess and you just
have a little bit of a lip. Do little bits at a time
wherever it's most comfortable. So I've actually moved
the work to my legs. I do have pants on today. I find the material
doesn't shift around as much because the
materials resting against the material
on my pants. Just like when it was
on top of the table. I'm still laying
it the same way. It just makes my work
lay a little flatter. This is just a technique I do. Not everyone does.
There's like this, but I find it works for me. Just do another little bit, reposition your
material and trim. If while you're
doing this trimming, you happen to accidentally
cut this fold. It's not the end of the world as long as you don't
make a big cut because eventually
this is going to get folded in one more time. So if there is a
little snip in there, it's not going to show
on the good side. It does happen. That's why we
just want to take our time. This is another
very tedious job. It can take about five,
sometimes ten minutes. So I'm going to
continue this end. We'll skip back to taping rate when we're ready
to go back into the machine. But do take note that
it is a slower process. You're not going to get this
done in just two minutes. Now we're finally done cutting all the excess material off
the bottom of the skirt. So I'm going to set
that aside for now. And you can see we have this nice just one row
of stitching so far, one little fold with
a nice clean cut. At this point. Now we're going
to start at the same spot we did originally the vaccine. And now that row of
stitching in that fold makes it easier for us
to do our good fold. The second and see
how that will turn in nicely and makes a
nice rolled him. Now we're going to
do our second row of stitching that will roll in to about anywhere from a this is going looking more
like a quarter of an inch. Our main goal is
that whenever we start rolling in
at the beginning, that it looks the same all
the way around the skirt. So with this folding in
at about a quarter-inch, That's what we want it to
look like all the way around. If you're able to get this, fold it to a really tiny, tiny eighth of an inch. Some materials are finding
that you can do that then as long as it looks the
same all the way around. We're folding the sin. See how that's falling
into place nicely. And we're going to go right
in the middle of that, which because it's only
a quarter of an inch, it's about an eighth of an inch from the top fooled
and the bottom. Let me get a little bit more going so you can
see what this is. Looking away. Don't worry about trying to
fold way up here. You only have enough
control still. Right here at where
you're working. So right in the middle. A little bit more so we can see, once again, do not over steer. So now let's look
on the good side and see what that's
looking like. See if you can see that. Now we have another
quarter-inch are actually an eighth of an inch
just from the finished him. And our main objective is to make sure that that
row of stitching, because it's our top stitching, it's the final stitching. Looks nice and
neat and straight. Let's keep going. Do
a little bit more. Roll it in. And
so a little role. And so we see it looks nice
and parallel, it looks good. So in a straight line and
do another little bit. And we can see how
that's looking nice and neat on our goods side. So we're going to continue this technique all the
way around the skirt. Skirts gotten a
little twisted here. We're approaching
a C and C here. Sometimes when we get to
wear the same hits a ham, we may have to sort of manipulate the material
a little bit more. We'll see when we get there. The reason that is, is because sometimes the
seam is on a straight grain. This one's not, it's
actually on the bias. So that's why it tends
to stretch a bit more. So when we're doing
our flipping, it sometimes can be just a little bit more fuzzy
to get into place. Just manipulated little bit. Even if it's not
overly glamorous. On this side, there
might be a little bump. I'm going over the excess. There's like a little nub here. So I just wanted
to make sure that it went through smoothly. They get caught in the hole. But you can see how
even if it's not overly glamorous on this side, it's still going to look nice
and clean on the good side. Sometimes you just
need to manipulate the material a little bit more to get over a scene. Because you also have
the thickness of the seam allowance
going under your ham. Another technique I use
sometimes when I'm doing this type of him is
you can see how if I, because the materialist cut on a bias grain so it's
curving a bit more. If I were to just pull
the top material, eventually, it could get sink. So I'm kind of with
my hand just pulling the bottom the flat part and it's causing this the curl
in just the right amount. Just helping keep it so we're not pulling
the top too much, read it, making sure
everything's falling into place. You don't have to do
that all the way around, but you may find in
some areas it helps to aid in a nice flat him. Now I want to talk about a little bit of
something that I'm noticing here that you might be questioning that
it's not an issue. Our original chalk marks, we can see where
they are falling. As I'm sewing this. Sometimes. We'll see the chalk mark. Let me see if I can
find one for you here. On the very edge. Sometimes the chalk
mark may tend to be a little bit
more inside my ham. I've sought, I've seen that a little bit further down here, see how the chalk mark is a
little bit more rolled in. Sometimes you might actually
see the chalk mark. It might even be
just a little bit on the outside of the material. That variance is not going
to make or break your hem. It actually is probably
the difference of maybe a 16th of an
inch. Either way. It's not worth stressing over. When we do the marking. This is just at the floor. So the fact that this little
piece is here, yet, this, these bonds are a perfect, is not going to mean that this ham is going to be hanging. That's almost like
a two sixteenths or three-sixteenths of
an inch off the floor. Nothing like that is ever
going to be noticed. It's going to look nice and
straight all the way around. So don't worry or
stress over if you see your chalk mark in
different spots. Now fat chalk mark was anywhere
like half-inch or more. Either way, you
might have an issue. But because you can see it's
all within this little area, that's not going to
make a difference. Once again, we're
getting to a siem, so I'm just making
sure that's getting flipped in nice
and neat and tidy. Going to give it a
little bit of a full. Because what happens is because this material
is fairly delicate. The material would almost make like a little bit of a ball and can get stuck
in the needle hole. We just helped get that
area smoothly past that. Even though the industrial
machine you might not Brings at some
things like that, can stop the machine. But even one little
piece of thread in the wrong place can jam up the whole machine so you
just want to be careful. I'm applying a little
bit of tension with this hand and making sure the materials lying
smooth with this one. Just letting my hands
slide along with the speed of the feed dogs. When you are doing
a job like this, always make sure you have lots
of thread on your bobbin. The last thing you want is to be sewing around and around
and find out that you ran out of thread after your
first couple of inches of stitching are actually
getting to where we began. So I'm going to trim that up. Sure. That's in place. And just blend in
that stitching. Our outer material is
now fully fully done. We have that nice rolled
him all the way round. We will be going to the pressing table and I will always give
that a nice press. Even if I was to steam
a project like this eventually I would always give
my finished hammer, press. It just evens out and flattens everything
out a lot neater. At this point before we go up to the machine and do any pressing, we might as well
start on our lining. This particular dress
just has one lining. And what I like with the chalk line is
that a lot of times we can see the chalk
line rate through. It'll go through the first
material and hit our lining. So this is actually where our outside of our good
material will be finished. Lining is generally
anywhere from half an inch to one inch shorter
than the outer material. So what I like to do with
my lining at this point, I'm going to cut
directly on this line. This particular skirt
just had a surge Tam. I'm not a big fan of just
leaving a surge, Tim, I like to do like a
little top stitch, a quarter-inch top stitch. So we're going to cut
this right on this line. When we are ham is finished. You'll actually be a half inch shorter than the outer material. So let's get this cut first. Just connect all your dots. We're approaching the
end of my process of trimming and the lining and I want to show something to you. You might notice that
with our lining, this piece I cut off is about an inch and
a quarter thick. When I'm connecting
the dots where my chalk mark originally made, when I mark the skirt, that there are some areas
that it's just very slim. The reason for that
is that we cannot assume that any
garment that comes from the manufacturer
is perfectly parallel to the floor
in the first place, let alone on your client. If I were to show you the piece that I cut
off the outer material, you would notice the same thing. There are areas that are wider and then there's areas that are visibly much smaller. Lattice because when a
garment is initially made, especially something like this, that the material
is cut on the bias. You would normally make the
garment lot the material sit. And then when you're
marketed on your client, you always use the skirt markers so it's parallel to the floor. Because you can
see in some areas, see how the material here, this is actually on
a straight grain so it's not stretching. Yeah, we can go over to here. And you see how that stretches. That's because just
over a matter of maybe 14 inches of the skirt, this is going to hang
straighter because it's on a straight
grain over here. The weight of the
skirts going to pull it and it's going
to drape longer. And that's why you get
that uneven looking ham. The skirt marker will
make it perfectly parallel to the floor
and parallel when your client has it on the
same markings on our lining. Obviously, when she
had this skirt on. At this point, there was only a little bit that was
needing shortening over here. There was a little bit more. It's just because it was not cut perfectly parallel
from the factory. So it's always, it's more
important that you cut on your chocolate because
that's guaranteed to be I'm parallel to the floor. So always trust
your chalk lines. Now that we've got this
cut all the way round, we're going to find the back
are vaccine. Let me see. There we are. I can see
where my zipper was. Even though it's aligning. I still like to
start on my boxing. And at this point
we're just going to do a quarter-inch rolled hem, which if you remember from our pants and other items
that we have worked on, we just fold the material
under one-quarter inch. Folded under another
quarter-inch. Put your needle into Hold it. This is a little bit
stretch here of a material. So you want to take your time. Bullet under about a
quarter-inch, quarter-inch. And the actual
quarter-inch issue. Our objective is to make sure this just looks nice and
parallel all the way around. We can see that the material is running along the
quarter-inch line. But our main goal
is just to make sure that you have a nice neat rolled him with
this quarter-inch, quarter-inch all the way round. Our finished him on here will be up about a half an inch
from the outside material. The main goal is that
our lining will not be showing our client
has the dress on. We want the outer material to
be the only thing they say. We don't want to be able
to see any of the lining. Roll it under quarter-inch,
quarter-inch. And I'm just going
ahead about six inches from the needle itself. Don't worry about trying. Some people try and
fold it back here. You're not gonna get the
control that you need. Just fold it in directly at a 90 degree
angle, quarter-inch, quarter-inch hole
that they're kind of just smooth and fold the material and it falls
into place and we just keep on going just
like our gene hams, but this one's just
a quarter-inch. Of course this is called a top stitch because
I own a finished. On the outside of the material. We have a top stitch
and we can see that I do this all the
way around the lining. Same thing once we
approach a scene that has rendered into the ham, tuck it under same quarter-inch, quarter-inch, hold
it into place. Manipulate the material so you liked the way it looks
nice and smooth. Let's get up to that area. It's a little thick,
leaves the needle end. And let's do some
more manipulation. We're now approaching
where we began. Trimmer threads, overlap our stitching. Just a little bit of
a security stitch and we can take that out. At this point, we're
going to go to the pressing table
and we're going to get our finished
pressing our hem. We're at the pressing table. We want to make sure we give the entire have a good Press. You can see even the lining. It still has that puffiness. Take our iron, give
it a bit of steam. And you can use your
clapper if you'd like to keep it flat. You can see how that flattens
that out nicely, compares. It's not much difference,
but it's just the cleaner. You can see how this
is still puffy, that gives it a nice flat edge. So let's continue around. You don't need to spend a lot
of time on pressing that. You need to spend
some time on it. You can see also
when we do our work, how it's a little wavy. Pressing will give us
a nice flat finish. And even if your client
has asked for you to steam the entire
garment at some point, you cannot get the flat finish from pressing with steaming, you always need to
suppress your work first. The Taylor who train me always said whenever
you saw something, always pressing, we're
almost to the end. That's lining is pressed now. And now we'll put up
our outer material. Another tip you'll find is even if your client has
asked you to steam, which will get rid of all 0s. Um, it's very hard to steam the very edge of this material for
that so delicate and the steam just
kinda pushes it. So getting a nice flat area
is only done with the iron. Okay. So I'm straightening it out. Remember how some of the parts of the hem are kind of curled because they were
on what's the biased. You can see this curve. What's going to be amazing is that when it's on the client, it is actually going to be
parallel to the floor still. This obviously is an area that has a lot of stretch in it. That's why it's on the bias. See how it's curling in. That's another
reason why we need to give it a press
to flatten that out. Remember the clapper just
kinda helps to cool down your material so that when
you go to move it around, it keeps the flat press, but it also helps
to cool it down. So when you move your
material around, you're not it's not
critically because it's, it's hot still, the
material is still hot. So that's why
sometimes I'll even give it a little bit of
a fluff because if this is hot and I put
it over here and it's getting all bunched up. I'm going to just be putting in another bunch of wrinkles. Never-ending process. See how I gave this
just that little bit of a poll to flatten
that out nicely. I think we're almost
around to the other side. This is probably the
front of the skirt. The reason I know that. Can you see how it's
making that point? That point generally, we
had seen on other skirts, the parts of the skirt
that had the scene. This is probably the very front, which is cut on the very bias. So let me see if I'm right. Yeah, see that's the front
and that's why it looks like that has that pointy look, but just because it's
cut on the bias. But we don't have a seam in the front of our
garments generally. And I think we are almost
all the way around. All right, go there. All the way around. Let's take a little
bit of a look at this. Because I want to show you
how even at this point, it doesn't look as wavy as it
did when it's on the board, but see how nice
that ham turned out. If you have any chalk showing, I obviously have
some chalk showing from the first time she fit. Just take a damp cloth. I usually just take a damp
washcloth and that will generally allow us to brush
away though was extra chocks. We don't want too many of those, but this is just because
she tried to dress on originally without her shoes. And then I will just
dry that up eventually. But we just use a damp cloth to get rid of any
extra chalk marks. But at this point, our
skirt is ready for our customer to try on.
6. Lesson 5: Lined Straight Skirt with Slit: Our client has brought
this dress into us. She's requested that
we have in the dress. She came in, we did the pinning. So now I'm going to
walk you through the steps to do the ham. This dress is lined and it also has a slit that we are
going to be finishing off. So let's begin. This is where we have the dress
pin from our client. We flipped up the material. You can put a chalk mark if you want at the base of the fold. Or you can just take
your ruler if you want and measure how much is folded in here
we have 2.5 inches, either one as long as
we have a final number. This is going to be hemorrhage 2.5 inches all the way round. Let's take a look at the
inside construction at the ham are lining has a half-inch top stitch will be replacing
that, of course. And the inside of our
dress is blind hemmed. Um, it has some ham tape on it. We're not going to
replace the ham tape. We're going to do a finish
on ours with surging, we're going to search the
bottom and then do a blind hem, but we're not going to
replace the ham tape. Sometimes somebody may
do that if they don't have a surgery to do the ham. So that's maybe why that's there because we have a surgery. We're going to surge
and then blind him. So the first thing we need to do is we're going to actually mark the
outside of her dress. I'm going to flip it this way. And at this point, I want my lining
actually the same with the slit facing me. Because the first thing
I want to do is make sure that when I'm
drawing my line, let's get that out of
the way. Lying flat. Because a straight skirt. There we go. I can see
here at the original ham, one side is like
quarter of an inch longer than the
other side already. We want to make sure that's
not going to be happening. That's why we wouldn't want
a ham the whole dress, 2.5 inches exactly as is because then our hand will
be exactly the same, but just 2.5 inches shorter
with a quarter-inch. This slide not fitting. So I'm going to 2.5
and right there. So I know when I have my dress and I folded
exactly on that line, it's going to be perfectly
even and that's one of my main goals whenever
you have a slit or event. Alright. I'm going to measure over to
the side seam, 2.5 inches. And this dress has inch
and a half tucked inside. So we're gonna do the same. So at this point That's
our finished him. But we're going to cut a seam allowance the flip
inside of inch and a half. So I'm putting a line inch
and a half below that. Let's connect our dots. That's our finished
line at 2.5 inches. And this is our cut line where we're going to be
surging at inch and a half. You can also see here
laying nice and straight. There seems to be some sort of a little bend in the fabric. We want to make sure ours
doesn't have that either. That's why I'm going
to mark 2.5 over here inch and a half and
draw a straight line. I'm not concerned that that's
a little bit different. I want my hem to lay straight, not have this bend in it. There we go. Flip the dress over and we're
going to mark the front. Just the same. Just laying flat. 2.5 inches inch and a
half in the middle, 2.5 inches inch and a half. That is why I also like using
my skirt marker as opposed to hemming some dresses
this a set amount. Because when we use
the skirt marker, we are guaranteed that it's going to be parallel
when on our customer. But this client. Just wanted to have it
flipped up that much. So that's why we're just doing our best to
make sure it's going to be even when she's got it on is even
all the way around. So now at this point, we need to separate the lining from the outer material as well as the hammer cutting is going
to run into their old ham, so we need to take that out. So first thing I'm going to do, I know this is a blind hem
with our blind stem stitch. So I'm going to start over here. Click the stitches
underneath that, Hamilton them. All out. There we go. We have the blind HAM removed. We can see that the
backward or the slit is, it's been sown in
tact down here, so we're going to remove that. Let's use a blade. Looks like they just
hand so that there. And we want to remove the lining along this scene where it's joined to
the outer material, as well as they've have a seam here where
that's finished off, we're going to get
rid of that two. And that will actually release
our lining. There we go. There we go. So rereleased that
and then we can undo or lining a little
bit. There we go. We ended that little
faster than I want it. And the same here. And do this side where
it's been hand sewn, little bit stitching
from the still there and do the same where
they finished off. Now when we put our scene back, we're going to do it a
little bit different. It's just because
I always put it back the same way all the time. And that's the way we're
going to put it back. It's using the same method. If this was a skirt
on its own or even if this is a jacket of some sort that has
the similar finish, we put it back
just the same way. Makes life easy. Alright? And I give that a little
press, flatten that out, make it easier for us to work
with. Okay, there we go. And do the same to
the other side. Just make it easier for us
to work with when we cut. Because there's folds in there. Now typically, I get
this around so you can see when this was
all finished off. Your lining is in generally
is it's finished. How will always be about one inch above the finished
him of your skirt? I'm going to this is
the finished him up my skirt into the facing of the
line we're going to cut on. And I want that because I want to lay my
lining onto here. That's my finished ham. The finish time of the
lining is one inch above that that line. There's what I'm going to want. And I'm going to
transfer that to the other side of the slit. The same thing. Role that that's
the finished him. And then that's
where we're cutting. So this is the lining and our bottom of her lining
is one inch above that. Now we are going to
mark the lining itself. Lay this out for you. And now the reason I mark
it that way on the side, you may notice that the distance from my Newham to the bottom of the lining
is two and a quarter. Reasoning would tell you that that line should be 2.5 inches because we're shortening
everything 2.5 inches. But as you can see, because the lining
is pulling here, That's why I'd rather draw that line in accordance
with our new him. Because never assume that the original work is perfectly
straight at this point. Now, I will do 2.5. Because if we were to
have done this at 2.5, it would have been an inch in almost two inches
above our new line. And the only line I'm really
going to mark on here, since this is a
half-inch gene ham. We're going to be turning
it in half-inch, half-inch. So we need one inch for that. I'm actually just going
to mark now my cut line, which this is inch and
a half from there. So I'm just going to
draw my cut line now. I could draw both, but I don't
necessarily need to draw both lines to do a
skinny jean ham. This new line is inch and
three-quarters from here. I know the math doesn't add up. It's just now I'm
just measuring inch, inch and a half inch and three. It should actually
be inch and a half because it's actually above
my finished outer material. The extra eighth of
an inch is not going to make a maker or break this job one inch below there. So that's inch, inch and a half. I'm going to cut that there. That's my cut. There we go. Now I'm going to cut it, cut my lining first, the garbage. And now I'm going to
cut my outer material. Just make sure when you're
cutting that you don't cut anything underneath that's
not supposed to be cut. At this point, we're
going to go to the searcher and we're
going to search this edge. And then we'll meet you at the straight stitch
machine after that. Well, we're at the surgery. We are going to surge at the
very bottom of the skirt. I'm also going to search the raw edge of
the material here. This is part of the pleat. Were they had done a finish where it was
finished off here, but hand sewn at the bottom. We're going to reverse that. So once I searched this
and we do our finished, you'll see what I'm going to meet and what this
is going to look like. So I want to finish off
this raw edge here. Like that. I'm not
worried about getting the lining and yet it's
not going to show it all. Now I'm going to continue the
surging along the bottom. Make sure you are. If there's any themes that
are pressed flat open, make sure they stay flat. And I'm going to
search that edge to, this is the other
side of the slit. There we go. Now we're going to be back at the pressing station where we're just going to press
your hands up. We're going to press the
hammock onto that line and then we'll be at the
straight stitch machine. I stopped back at the ironing
board before I came to the machine just to press up the hammer on the
bottom of the skirt. The majority of the
time when we do any type of ham on that is more and blind hem
that all like this. We will always press
up into place. And our main
objective is just to make sure we have a nice straight facing on the inside if anyone were to
ever look at that. So I do have that
pressed up and into place for us at the machine. The first thing we're going
to do is we're going to put in the half-inch top stitch him That's going to finish off
the bottom of our lining. Using a medium stitch, any like we normally do for
basic sewing 2.5 to three, I'm going to churn in half-inch. Half-inch. Get this started. Okay. He's just the half
inch top stitch him. Half-inch, half-inch. Well that into place. And there we go. Half-inch, half-inch. Looks nice, parallel. And so making sure our seams are lining up. Once again, I had to have
the contrasting thread and here and here. Don't know why it's
lining up this way, but it's not a problem
for summaries. You can see how it's aligning
perfectly straight here. But they're cut, they
have flared out. So I'm just going
to trim that up. Before I close that up. There we go. Now what I'm going to
do is I'm going to so my lining continued this seam down where the lining
is joined onto here. Put that under where
they finish that off with an actual seam and
did a reversed stacking. We're going to finish
her as off differently. This is the way we're
always going to finish off. Continue up our sewing
with the lining. See what that looks
like on this side. There we go. So we do have that
finished off nicely. There. We want to finish off. Along this edge. We're taking our opening up
the facing, flipping our ham. Are facing backwards
in lining up or ham. We're going to sew right on the Hamline for the fold
is we've pressed that in. You can see that's
exactly where I want to. So there I want to show you what that
looks like from this side. Turn that right side out and see how we
finish that off there. Let's get rid of this. Now remember, this will all
be with the matching thread. Eventually, I'm just
got the contrasting. So now what I wanna
do is I want to make sure this is all
going to stay in place, in lined up nicely. So I am going to tack open out. I don't want to touch
my good material, but I'm going to
baste along here this facing piece to what I
have turned in on my ham. Open that out to get
that out of the machine. Just close to the edge. And I want to make sure
everything is lined up nicely. Nothing peaks out. Just gives it a nice finish. One of those jobs
you could hand. So But why? When you can just stitch it. And there we go. And then that's
finished off nicely there does any other
strings get rid of in that side is
done and finished. So now I'm going to go
to the other side of the pleat or the this is
actually a slit, a pleat. We'll be finished off
in a similar fashion. First of all, we're going to
continue sewing the lining down to the main
material at the slit. We go, this is our finished tamper with
the pleat backwards. So rate on our fold, the finished hem goes. During the material right side. Sure. We're on the line, right? Good. And now we've watched you
based all these together, so this doesn't happen. That's my main goal there. So let's line those up. Lay them on there. That tucked in, open out or ham facing. Get that out of the
machine if you want, you can always pin that. So that's straight down. Just enough attack
that into place, give it a nice clean finish. Trim that up there. We have that side
finished there. So at this point,
we're going to go to the blind hammer where we're going to
finish off this ham. We're at the blind hem machine. Once again, I do have a beige thread in here
as opposed to the pink. I want you to see. I'm going to begin right here and begin
our blind HAM stitching. Okay, for the outer material. Once again, I have
the little slowly space or this little
slit right here running on top of my searching. And generally this bar I have my surgeon
pressing up against. Let's see, make sure
that's catching. Stitching the little
loose I'm going to tighten up here just a little. We do that for each project
just to make sure it's getting each individual project getting the right tension
and the right catching. We don't want it too
tight or too loose. That's catching nicely there. And we can see on this side, how much does catching
every other one, which is what I
want to have it on the two-to-one where it skips every other stitch so
it's not so prominent. And we'll finish this off. I love this machine. I don't like hands-on. So this saves me lots
of time and does a much better job than I
would get as close as we can. Turn the wheel of rotation
takes so the needles out. And our main concern
is we want to make sure we catch that loop. That. And when we take our workout and we see how
nice of a job that's done. And it's nice and clean
on this side also. We're done at this machine. Now we're going to go
up to the press table. We're going to press it as well as I'm going to show you
how we're going to hand. So one of the other
times we do hands, so I'm the tacking generally the lining and the outer
material will be tagged with this thin thread, a material so that it
doesn't pull all over. And I'll show you how
we're going to do that. I get depressed table. We want to give
everything a good Press. The first step we're going to do is we want to
make sure that our lining gets suppressed since
we put a new him in that. There we go. This way. I'm also making sure my corners are pressed nicely. Do the same with this corner. We go. And then the remainder
of aligning itself, do it on its own. We don't have to press it
with the outer material. Now I want you to press
the outer material itself. There we go. This will cause any other stitches or anything to blend in nicely to make that blind
him even more invisible. There we go. Let's move this out of
the way that this point. I always want to double-check
that all the hard work we did to make
sure this is lined up is in place and it should be. There we go. Make sure that's
nice and smooth. It's the pump there. There we go. We can see how that lines
up nicely there. Okay. This point, we want to tack are lining to the outer material
at the side seams. This just prevents it from
pulling up or down too much. You'll notice when
you get a dress from a manufacturer that
that's usually done. So I'm going to put our
lining here like this. I've already gotten a thread, needle and thread ready to go. And this has a six plie. So we started out with three strands and
folded it in half. So now we have six. And I've tied it in an art. And first thing I'm going to do is slip my needle underneath my seam allowance because I don't like
my knots showing. That's my knots underneath. I'm going to do one little
backstitch in place. And then the next one I'm
going to do in the same spot. But at this point, I'm
going to grab my loop. Makes sure my, At this
point I wanna make sure my threads are all
smooth, all my strands. And we're going to
do a little trick. It's like a crochet type stitch. Basically, I'm going to put
my fingers through the loop. I'm going to pull this thread through
and tighten that up. Now I have another loop, pull that thread through and
pull it down to the base. I'm gonna do that for
about ten times or so, or till this string. You'll see it's making me stop for a second and show you it's making
a little string. So I want to make that string about
three-quarters of an inch long. Not much more than that. This is the same type of loop we would do
if we were making a bustle or bra straps
brought keepers, we would do the same technique. Once your string is as
long as you want it, pull it through,
completely tied off. And then at that point, we're going to attach
it to the lining. And you'll see that
that's joined now by my little thread. And we just need to
secure it to our lining. A couple of back stitches
just to make sure it's in place. Doesn't go anywhere. And take my pin out. And now my lining is joined to
the other material. I think I should have enough
to do the other side. And two time may not. And do the same on this side. Underneath seam allowance
so I can hide my knot. Little backstitch in place. Another one just to
get that started. A little smaller because I
don't have as much room, but it's we can do it too. Just so it's about
three-quarters of an inch. No one's going to be pulling
out a ruler for this part. Just one more time. Then I'm going to
just catch my lining. So that's joined. And let's not that off now
with a few back stitches. Just want to make sure that's
not going to pull out. And there you go. At this point, the entire
dress is complete. We have our finished him. See how nice that looks on the side. Like
nothing has been done.
7. Lesson 6: Take in Sides with Skirt Hem Combination: Our client has brought
us as lovely dress. We have, I have shown you
how to do what ham before. But with this
particular project, we're going to combine it with taking in the dress
fits your beautifully, but it's just the
little big for her over her hips and down
through to the hem. So I'm going to walk
you through the steps for how we're going to do the marketing and
the work for tapering, and then how that works in conjunction when we're
also doing the hump. So let's take a look
at how it's pinned. Me. Move this out of the
way so I can lay this down. There we go. This is our skirt. And we have the ham flipped up. So at this point, I want to
see how much we're hemming. So let's just look inside. We have 2.5 flipped inside. Let's check it here too, just to see if it's 2.5. And we have pinned on our
client over the hips, at the waist at this same, you can see how I've pinned
at close to nothing. That means we really don't
need to do anything there. We're just going
to blend that in. And you can see my pen marks as we go down through the ham. So once again, what I'm
going to do is take a couple of points
at my finished him. We want to take in each side two inches and let's say
halfway up, inch and a half. And then we know we're going to blend that up if you want. I could even this one,
you can always take a quick measurement of that's one inch and that is approximately six inches
from the top waste. If you want, you can
always take that too. But I know it's two inches, halfway up, inch and a half, and then one inch as six
inches from the sea. So let's take those out. We're going to
remove our old ham. Because since we're only
doing the ham 2.5 inches, I know that that's going to run into my new ham, the
work that I need. So we're going to
first of all start by removing the old HAM. Okay, Here we go. There's still a pin in there. So thing with a print
sometimes it's hard to see everything out. I'm clipping underneath the blind hem
stitches so I can get that one that's going to
pop up and pull out for us. There we go. At this point we're going
to mark our ham first. I want the front of the
dress up facing me. This dress has no
slits and no lining. I would consider this
just a straight skirt. And when I say straight, it just means that it's not overly wide. And there's really no flair to the skirt itself
from the hip down. Alright. Now, anytime we have a
garment like this that has clearly visible
details in the print, especially because they do have it that's
actually on grain. The original Hamlet cut nice. They're surging, It's cut
straight along the lines. We want to make sure we're combining what
we need for our hand, but also so that
visually it doesn't get off kilter because it
would look kind of silly. If we put our Hamon. And let's say, let's get that out away so you
can see what I'm doing. If our ham looked
anything like this, even in the slightest, that would be very visible. I know that's a bit
more exaggerated, but you get my point. You'd be surprised at how easy it is to get it off kilter. So first thing I want to do, then I'm going to mark
my new Hamline, 2.5. So this is my old
ham 2.5 inches up. I'm gonna do the
same over here, 2.5. Let's get that. But you can
see with my marking 2.5, with my 2.5 falls right here, I actually am more concerned to get my new Hamline
rate like that. So it's the same distance
from this white line. Otherwise it'll be too
noticeable if it's cricket. Let me draw that. Even though I've drawn the line, when I do my
pressing, once again, I'm going to make
sure that it looks visually pleasing
from that line. I'm going to mark my cut line, which there'll be inch
and a half below. So I can do the same with that. I'm just going to mark along here and you'll notice
that this point, I'm not going to cut
through the two layers because I want to
make sure I'm still continuing this line
through to the other side. Let's take a look
at the side seems obviously their
side seams aren't lined up perfectly,
which is fine. But when I continue my new
Hamline over at the back, that's where my new
hams going to be. Because once again, when somebody is looking
straight on from the back, I want to make sure that looks like it's all
even with that line. I flip this over. A lot of times you'll just grab a job and you'll think it's just an easy mark and cut. And sometimes it's
just not that simple. Alright? I'm thinking here because I have a little
bit of a dilemma. You may notice that when
that comes over here, it doesn't fall in
the same place. I distanced from this line
as it does on this side. So I need to decide how
I'm going to handle that. I'm going to connect these. And then I'll see. Okay, I think if we
do it right about, there will still be good. That will still have
a pleasing line. I think it's better to
have close to here. Then have this rate at the
white and this one above. So I'm going to mark my cut
line inch and a half down, which works out about
on this white line. So at this point I'm going
to cut before I forget, I'm only cutting single layer. Just when I thought
the job was gonna be easy and chop, chopping. Little bit more, thinking
to get a good quality job. Okay, spin this around. And I'm going to continue
cutting single layer. Okay? Just a little side note about this particular project. If this wasn't so off-kilter, both on both sides. When we did this taper, we could almost try and
get this all lined up. But because it is so off kilter, our chances of getting these actually lined up would
be almost slim to none. So at that point it's not worth fighting with the material to get it lined up
and then do our ham. We're just going to proceed with the ham and the
taper as normal, but I just wanted to
point that out to you. At this point, we're
going to turn her garment inside-out so we can
see our side seams. Want to make sure my
chalk is nice and sharp. There's still a pin in there. It's not lying flat, so let's get that out. There's still one up here. There we go. Now with the dress lying, the skirt lying flat, going to press the
one side same. So let's look back
at our measurements. We had two inches at
the bottom of the ham, halfway up with inch and a half. And about six inches down from the way switches,
right about there. We had another one-inch pinned. So our main concern at this
point is nice smooth lines. The bottom here to here. And at this point I'm
not going to draw a straight line because
we're at the hip. So our hips aren't
that straight. And then this is the just
below where this waste joins. We want to blend
that to nothing. There we go. Going to move this over so
we can mark the other side. Get rid of my label. Press flat. Whenever you press
and then you're going to draw with your wax chalk. You always have to let
this cool down a bit. Otherwise your wax chalk is
just going to disappear. It's going to melt. Two inches, an inch and a 1.5 inch straight
line at the bottom. We're going to blend that up. Nice smooth curve and blend
to nothing at the waist. There we go. At this point we're
going to go to the streets to machine and do our sewing and then to the surgery and clean up
those seams with the search. We're at the straight
stitch machine. Since this machine,
this material is what I would call shifting,
it's very slippery. I've decided to put
some pins anchoring my two layers together
down through the scene, which I am going to. So I found that out doing a test run and the two
layers were getting shifted. So I took that out, I'm pinning it to
help secure it. And this is where it's gonna be very important for
you to make sure you're putting your attention
on the front and the back of your material
on the front and the back of the
petal or the foot. Otherwise, it's going
to get all off sync. So once again, I'm gonna
put this under the machine. Blend into their
original stitching, get a little bit going. There we go. You can see I have my first
pin anchoring my two layers. So this way I can solo
right over top of it. I'm putting tension on the front and the
back of my material. I'm going to sew to
just over my pin. Stop. Make sure everything's
lined nice and flat. I can see my line
which I want to so on. My other pin is here. And when I'm doing my polling, I want to make sure I'm holding on the opposite
side of this pin. If I pull here, I could shift the two layers. So since that's
already anchored, I'm holding and on
this side of it so that it doesn't move
any of the material. Nice and smooth and
continuous sewing. The next little bit. And you can see I have a
pin down at my ham. And you can see even
with my pinning, it's still shifting
a little bit. I'm not that concerned
rate at this point. As I get down, I
want to remove that. Reinforce. Some
materials, look easy, but there are more difficult
than what they are. They're more challenging. And you can see how that slipped down just
that little bit. But of course when
we do our surging, we're just going to
surge and blend that in. It's not like all these lines are lining up in
the first place. Let's flip over to
the other side. This, this one I'm actually
sewing from the bottom-up. Before I do anything, I want to put in some
pins to anchors. I'm making sure this
is nice and smooth. Let's put in one pin here. You'll up a little further, maybe about six or eight inches. Another pin. Sure. He's lying flat. Another pin here. And we'll see how that does. Start at the bottom. Reinforce. And now I want to blend this. Why? Others see? There we go. Remove our pins. I always want to check, make
sure nothing got pinched. That's a nice
smooth blend there. And on the other side, this is where it joined at the waist and the same
here, nice smooth. So at this point
we're going to go to the surgery and we're
going to trim off. Down the scene we just
made and we're going to put our good surge into
the bottom of the ham. Were at the surgery.
We're going to trim down these seams we just put in. Of course, just like when
we were stitching here, we wanted to be careful that we didn't pinch anything with our stitching with because we're cutting with the surgery, we want to make
double sure that with this time get that underneath, but make sure there's
nothing underneath that's going to get pinched
and cut where we don't want. Once again, we're just
running this surgery along the stitching line. Now we're going to do the
other side and go up. We blend that into
their surgeon. And at this point we're going to search the bottom
of the material. Doesn't matter really
where we start. We just want to make
sure all our seams are going in the
right direction. So for me, I like
starting on my back, seen the reason being because then I know
the next theme is my side seam and then
I know which way I'm going to press that
when I do my surging. They're vaccine has
been pressed open. So I'm going to lay that
down like that with it. Let pressed open,
slip that underneath, and continue cleaning
off the bottom. Now that I'm approaching
my side seam, obviously if I just
came from the back, I know I'm going to
press my side seam to the back, continue around. This is my back. So this seem gets
pressed this way. And this was that seem that God off kilter that little bit. We just shave that
off with the knife. At this point we're going
to the press table to press the side seams in the proper direction to
give them a smooth finish. And we're going to press up the Newham and getting
it ready to go to the blind hammer out
they earning board, we're going to slip our
skirt on to the small board. Even though the same as just
going in one direction. It is a dress, your outfit. I like to end because it's not as flexible or it
doesn't stay in place like some of the genes might that I'm going to press
from the inside first of getting this seem to go in the right direction
and then we're going to press it from the outside. And some casual clothes. We can just do it in one step
and just do the outside. But on dress your clothes, I find we have two. It gives a better
result if we do the inside than the outside. Go around to do the other seam, which are the scenes is getting
pressed towards the back. Now we're going to
flip it right side out and press the same seems. Here we go. Spin it around to
do the other side. Now we're going to use the
iron to press up our new ham. We're just gonna do
that in little batches. That's our line there. But remember, the main thing is what
we want at this point is just making sure
that it looks parallel. But also that our design
lines in the print. Our straight. Because then on this side, it'll look good that way to still looking good. Okay. And our last little bit. So I wanted to just double-check how this is going to look from
the good side. When I put that ham in, I'm pleased this is the front. That's looking good there. And then on the back also because the side seams aren't lined up in
the first place. I'm not concerned with those. My main goal is that from
the front and the back, our hands look even. So let's go to the
blind stitch machine and get this put in. At the blind stitch machine. I do have gradient
so you can better see where how this is working. Got this underneath,
made sure I'm starting at my vaccine.
It's pressed open. Let's see how the
stitches going to work. Take a look before we go
too far looking good. You can see it's a nice
neat stitch, not too tight, not too loopy, and
it is catching. So let's continue on. Because I already know
this material is what I call shifting and can move. I'm just making sure
I'm not pulling anything while I'ma
this is running around. But I also am guiding the material to keep
these lined up. Because like I mentioned before, one starts going that way. The bottom starts going
faster than the top. It's going to get
all off kilter. And then it's just not
going to lay nicely. So I'm making sure these
are staying lined up. And coaxing the bottom alone. Overlap a bit. Bring your needle out. There's my loop. Let's cut
that and that is done. See what that stitch
looks like there. I haven't read on top. And it looks good from
that side, even generally, I would have done
this anti-black, which would have caused
it not to show even more. But like I said,
for this purpose, I wanted to use the
gray so you could see, let's go to the iron, press it and we are complete
at that point. We just want to give our
dress a final press. We have our ham in here. You can see how it's still just a little bubbly and wavy
from us doing work on it. Going to flatten this out. Of course, use the
clapper to hold that in the front side. And I just wanted to
make sure my side seems also get a bit of a press the other side. Let's move this out of
the way and take a look. At this point. Our dress is complete. We have it taken in nicely. See how we have this
nice gradual taper and hanged for the
clients and it's nice and straight better
than the original was. Now at this point
we're complete. The client is ready to take
the dress home and and enjoy.
 April Jackson, Everything is easy when you know how!