Transcripts
1. Introduction: [MUSIC] I love using
things that are a bit more unpredictable in my art. Things that serendipitously give you something amazing without you being able to control every element that
you use to create. I'm Denise Love and I'm an
artist and photographer. Today we're going to play with the ultimate
uncontrollable art supply, and that's alcohol ink. So I want to show
you how I work with a product that really
is hard to control, doesn't go where
you want it to go, and let's see what beautiful
abstracts that we can create with this very flowy ink. I like working with lots
of different inks because the acrylic ink stays within the water and the watercolor
stays within the water. The alcohol just spreads
and spreads and spreads. So in today's class, I'm going to show
you my favorite ways to temper where that
alcohol's going. We're not going to have
full control over it, but I'm going to
show you how I have a little more control and the way that I like to
manipulate that ink. We'll do several projects. We'll start off small and create some fun small
little abstracts. We'll swatch out all our colors, which I find is really the best way to play
with the different air blowing items that you choose
to try to experiment with. Because if you sample
all your colors, now you have however many
colors that you have, I probably have at least 50. That gave me 50
chances to play with my air blowing devices before
I moved to a piece of art. So really loves watching
things out first then making some small color samplers based on the colors that I
loved from my swatches. Because I guarantee
you cannot tell what color that ink is going
to be just in the bottle. Then we're going to move on to some larger pieces and get
some movement and see how all the stuff that we tried in our smaller pieces translates
into going larger. The secret there is to
just not get in a hurry. Take your time. Go with the flow and
just see what you get. I can't wait to see what projects you
create today in class. Be sure to come back and
share some of those with me. So let's get started. [MUSIC]
2. Class Project: [MUSIC] Your class project today is to come back and share any of the abstracts that
you created in class. I'd love to see any of the smaller sampler
ones that you did as you were experimenting, and playing with color, and air blowing, and possibly any mark-making that you decided to
add to your piece. Then I'd love to see how you translated that into
a larger piece. I can't wait to see the projects
that you make in class. Come back and share those. Let's get started. [MUSIC]
3. Supplies: Let's take a look at our
supplies in class today. You're going to need to
have first and foremost, some type of alcohol ink, and I have a couple
of different choices. I have the Tim
Holtz Ranger brand, which are the Adirondacks
alcohol ink colors, and those are fun. There's lots of those colors, I've got a little too tubs of just lots of different colors
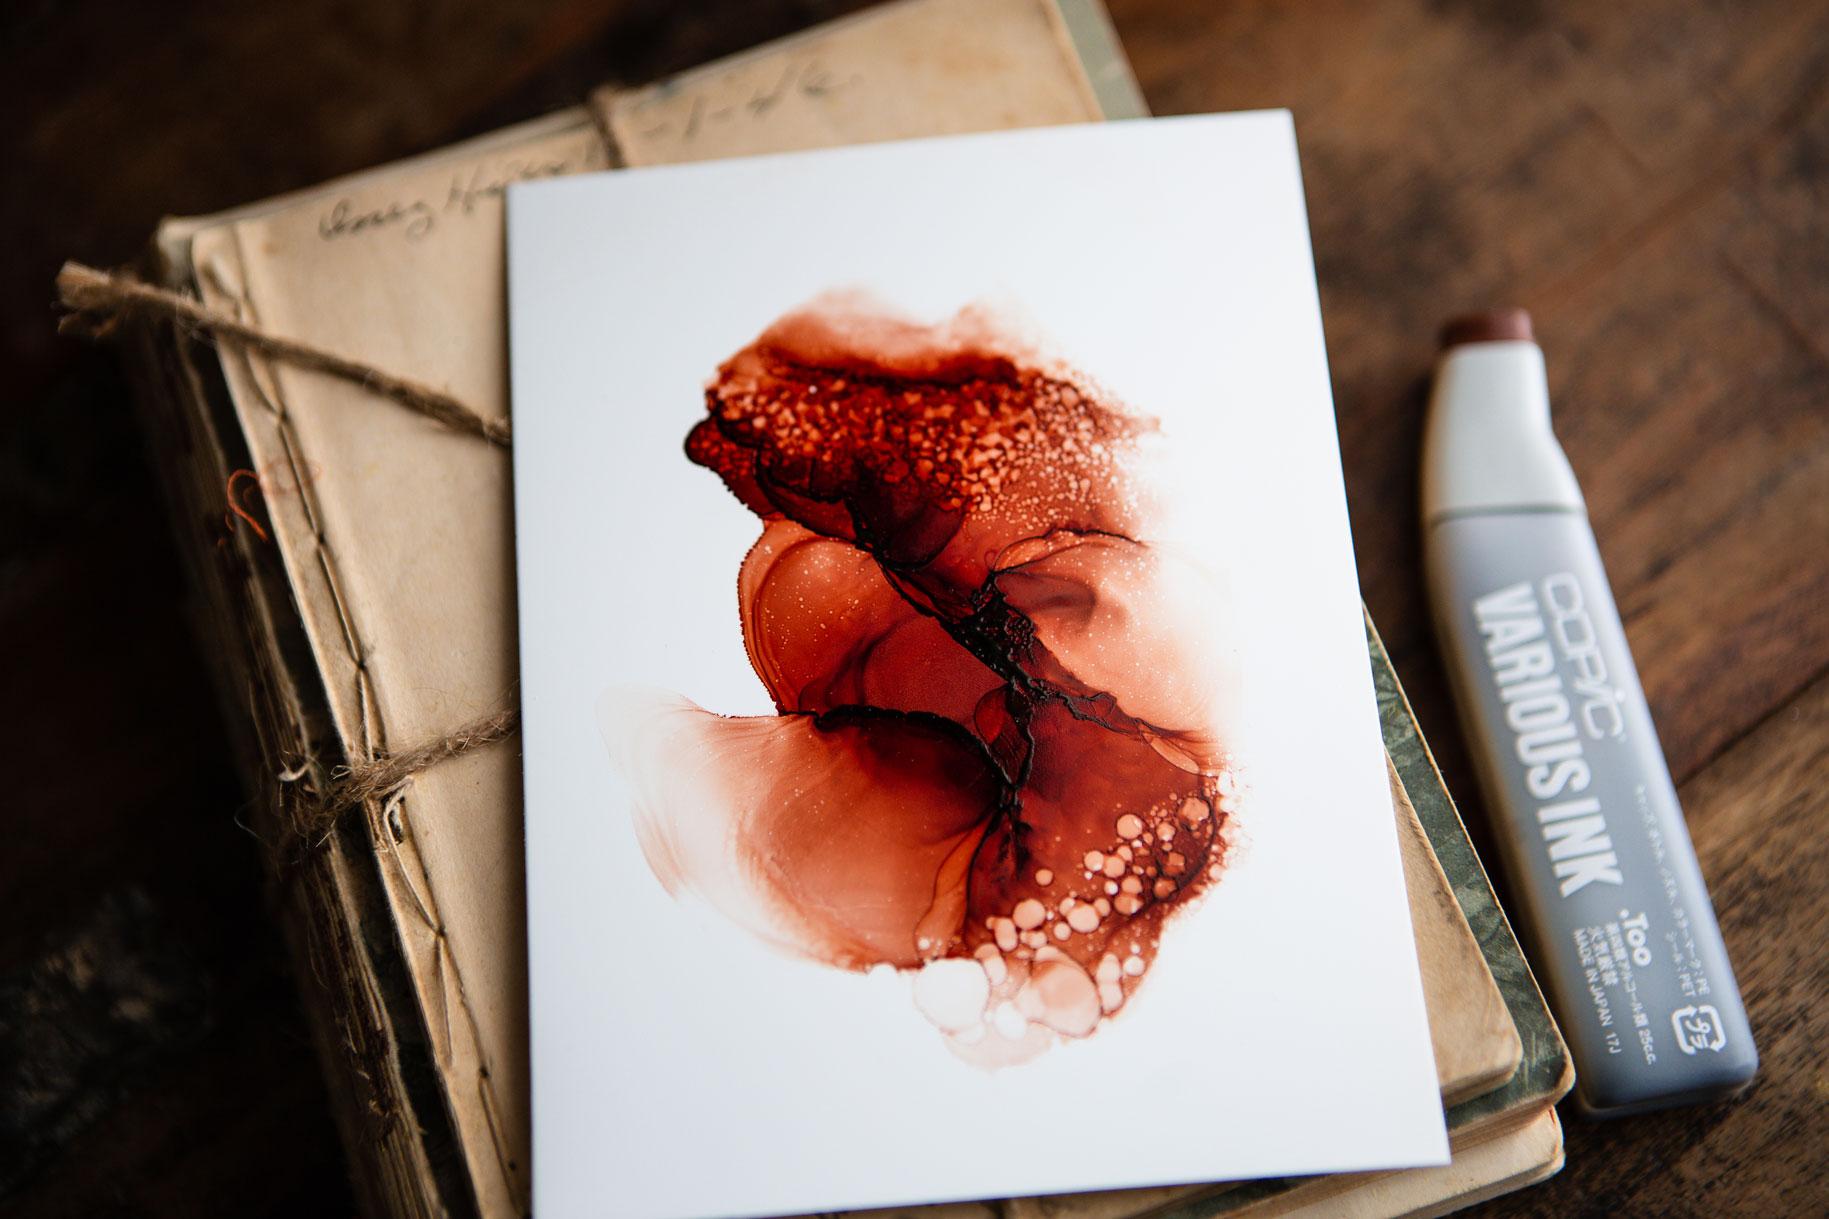
I collected over the years. I also have some Copic
Various Ink colors. I actually loved the Copic ones because they come in
like over 300 colors in lots of different variations, and there's a whole
lot of ink in here that just goes on forever. What these are, you get
these at the art store and they are refill inks
for the Copic markers, so if you've got these
alcohol ink markers, this is the refills
for these markers. But you don't have time
with any of the markers just get the inks. But the colors are beautiful, there's a big variety, and these are the ones that I really love
the color range of so any alcohol ink, that's fine. If you've got these arrangers,
they work great too. There's several colors in
here that I really love also. In addition to the regular inks, we also are going to have
some fun with some metallics and there's a
couple of different ones of those that
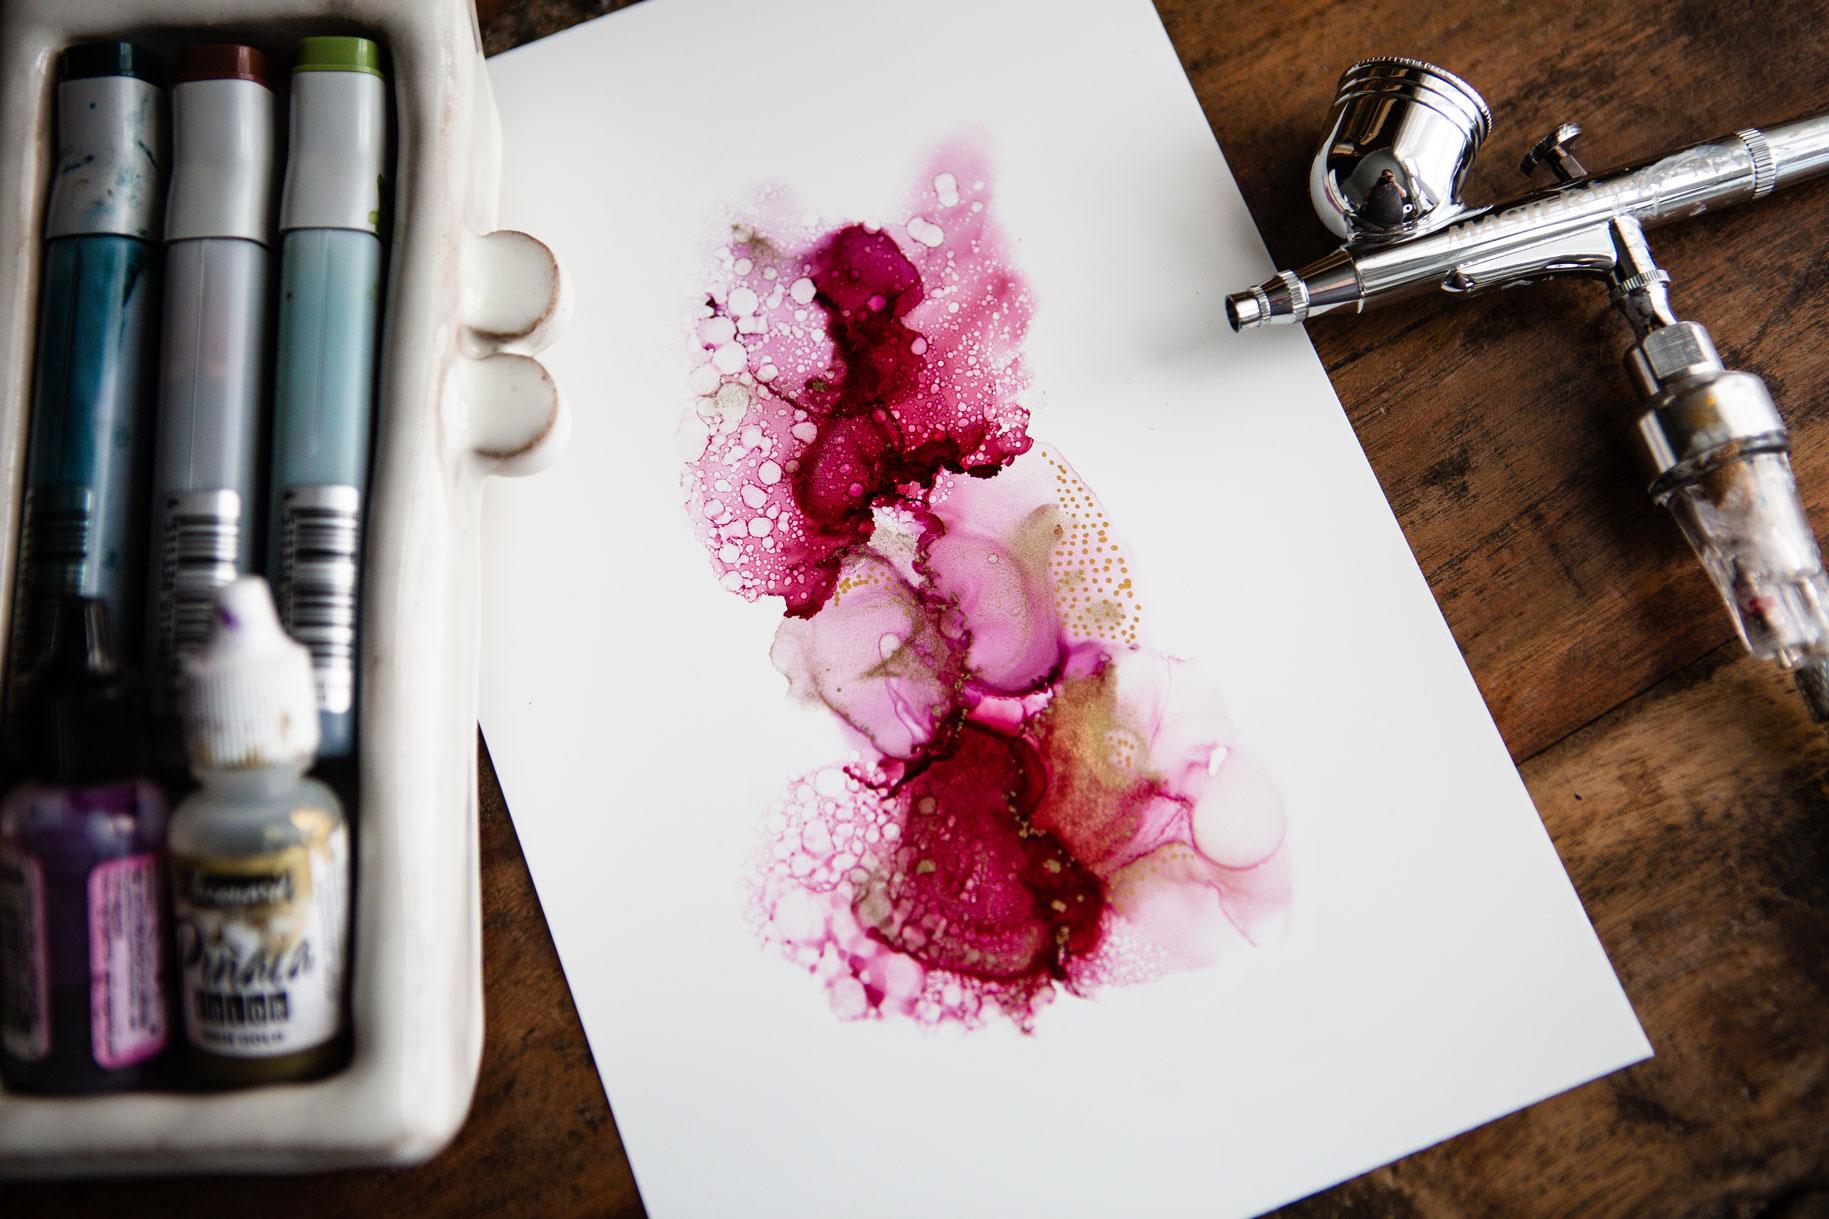
I really love. I love this Jacquard Pinata, the gold and then I love some
of this Tim Holtz Mixatives and the gold on the
Pinata is my favorite, the silver I didn't really
like the way it works as well. It doesn't quite do the same, so if you only get one, get
this gold by the Pinata and these ranger
ones come in gold, and silver, and there's a pearl. The pearl is not my
favorite either. There are a couple
of choices there, I do like the silver by Tim
Holtz better personally. If you want a silver, that's the one I like. I like having both of the golds because they're different. They're completely different in the way they look and react and so they're just fun
to experiment with. I do like having some of those. You also want a bottle of some isopropyl alcohol and this is what we're
going to use to spread the ink around with. I get the 91 percent, you can get 91-99, you don't want anything
any lower than the 91 because it's just got
more additives of water. I believe it's got
more additives in it. You want it to be almost
pure alcohol if you can, so 91 percent isopropyl
is what I will be using and I just got that
at the grocery store. Then, I also put some of that alcohol into some
little containers. I have this little container that still got some
alcohol at the bottom, it's got a nice tip on it. I also like these
fine-line applicators. They're my favorite. They do give you more
control over your alcohol and we take this lid off here and you can see I've got
this nice pointer tip on it. You get a lot more control, the finer that tip is, so that's my favorite. I've got a couple of these and I just take a
little funnel and funnel some alcohol out of
my bigger alcohol bottle onto that and then use
this all through class, so you'll be seeing me
use this the whole time. These are fine-line applicators, I just got a pack of
these off Amazon. I love those. You'll also need some paper. Normally, you see everybody
do alcohol inks on YUPO and I've done
alcohol inks on YUPO and you close a
little bit pricey. You feel like you
can't practice as much because you're just using all the expensive
paper basically. I've got on a really cool
solution to this problem now. This is what's most common if you have YUPO,
feel free to use it, but it stains so you
put the ink on it and you get color staining and you can't get rid
of that staining. I'm going to do
an example for us so that we can see
some differences. I also recently started
using mineral paper, which is a lot cheaper
than the YUPO. I could get this for YUPO, just to give you an example, these 9 by 12, 10 sheets,
that's about $15 a pad. I think if I'm
remembering that correct. I had this multimedia
paper, it's 20 sheets, so double the amount
that's in the YUPO, and it was only
$7 and $11 apart. It's already more than half
the price of the YUPO. It's a lot thinner
than the YUPO. That's depends on how
thick you want that paper, could be a plus or minus, but it also stains, YUPO is basically plastic. Mineral paper is made
from crushed rocks, so that was a fun little thing to experiment with
was something that wasn't made of plastic or trees. I do love mineral paper for
alcohol inks, but again, it stains and it just is
another option for us to use. But my new favorite
for alcohol inks is the NARA paper in N-A-R-A. This paper is basically
plastic also, it's white. It's probably polypropylene,
so it's a plastic. But what's so amazing about
it is it does not stain and when we do our
paper demonstration, you're going to see what
big of a deal that makes. Now you can buy
one pack of paper, which these run about
$14 for 10 sheets. But Amazon has a random deal, like it's a buy one get one free so you might look
at the fine print under the pricing and see, I just placed several orders
for buy one get one free. But these are 9 by
12 pieces of paper and what's really nice about
it is they don't stain. If you get like
this 9 by 12 pack and you cut it into quarters, you can start practicing on the smaller paper
and get really good, and for every one
that you don't like, you can just wipe it off and try again so
there is no waste. That is the magic
of the NARA paper. It has no waste. I can wipe it off and try
again 100 times if I need to. Now, instead of wasting
a piece of paper for everything that I create and think, oh, I don't like
that and throw it away or put it to the side, now, I can just wipe it back off this paper and try again. It's magic, and so
it does not stain, that no staining
allows us to get really pretty wispy
looks in an alcohol. It allows us to wipe off
things we don't like. We can wipe off any dots that
appear that were a mistake. It's the most forgiving paper. For the price, since
I can reuse it over and over and over, then I can end up with
everything that I love. I can just keep the ones I love and wipe off what I don't love, there's virtually no waste. NARA paper, that's my favorite. We also maybe going to draw
on top of some of our pieces. These are just play
pieces I've done before, but I like riding on
top of them and doing some more mark-making or
some dots or some fun stuff. You can only do that with water-based products
on top of alcohol. If you put anything
alcohol-based on top alcohol, like if I came back
with my Copic marker and decided to draw on this, the alcohol reactivates
the alcohol and it would ruin your piece. Anything water-based,
like acrylic paint, anything like that, you can
draw right on top of that and you have no problems. I love using the Posca Pens. They're really beautiful
on top of this. Also like using my very favorite Kuretake Mica, ink and paste. So those are beautiful
on top of these. Anything water-based,
if you like to stamp beautiful designs
on top of your artwork, you could do that with water-based
stamp pads and stamps. The pigment based ones
are also water-based. Usually, this color
box collection seems to be my favorite, but you can experiment
with different brands and see what you
like and just play. This might be something
you're interested in if you like stamping
things in your artwork, I just thought I
would mention that. I also like to make
my own color cards. I've made a color samples
on that mineral paper because it was the
least expensive of the three types of
paper that I use. But still looks like what the alcohol ink is going to look like on one of my papers, and I cut it into
two-inch by three-inch or so PSI squares. I tried lots of different
ink pens that I have, but I really liked the Pigma
Micron ink pens to write on. I just wrote my colors
and what I did in this pen because it doesn't
smear with the alcohol ink, so that's my favorite black pen. It comes in a couple of colors. You also want like a
couple of little brushes that you can maybe move
the ink around in, so I've just pulled a couple
out of my brush stash. Not really specific, I just pulled out a
few that I thought, just in case I want a brush, I got a couple to play with. You also want to have something
to push the ink around. So I have a couple of
different options. You can get a straw and you can blow the ink
around through the straw. If you're doing that, practice a little bit to see how that's going to work for you and see how fast you
run out of breath. I get lightheaded using a straw, so I don't use a straw myself, but this is just a
regular drinking straw, something you can blow
the ink around with. I use a little airbrush
and many compressor set. These run me about $7 or so for this little
master airbrush kit. It comes with little airbrush, and it comes with a little
mini air compressor. This is really nice because then you can just move
the air around. You're not wanting any
tips on it or anything, you just want to be able
to move air around. This is what I've
used for a long time. Then I saw people using a blow dryer that
looks like this, and I thought, "What is
that thing they're using?" They say don't use
heat on the inks. But if you use something like
this on the cool setting, the cool is not
really cooling air. It's very low heat and that
makes your ink dry faster. It's a lot easier to use this and get that ink to
dry and keep going. This is what that is. It's a curl wand, and I didn't realize that these little tips don't
come on the base. So that's what this is. I'm using a Revlon curl wand. This is the one-inch size, it's about a 500 watt. I'll show you how
we'll use that. But I love it because
I've got more control than using like a
little hairdryer. You can use a hairdryer
on your cool setting, but this is the one that
you'll see in lots of really good alcohol ink
artist using a lot of times. So super cool. I love that little gadget. Now we have gone through
most of the supplies. You'll also maybe
be thinking about the blending solution
from the Tim Holtz. Let me tell you, this works
for me on the YUPO in the mineral paper to make the alcohol land on the
paper really nicely without leaving
like a drop stain. But when we're using
this NARA paper, because there's no
staining anyway, you could choose not to use this and just use the isopropyl
alcohol as your thing to move the ink around
and it works great. This is optional if you're
using that NARA paper. If you're using the YUPO
or the mineral paper, then I did actually like
using this quite a bit. So optional item that alcohol blending solution by Tim Holtz. I think that's most of what
we'll be using in class, so let's get started.
4. Safety: [MUSIC] Let's talk about
safety when you're doing the alcohol
inks for a moment. Alcohol is got a very
strong fume to it. You may think that the alcohol bothers
you or doesn't bother you and you'll just have
to see as you're using it, how much it bothers you, but no matter what
you think it's doing, it's probably doing more
than you think it's doing, so I recommend you just
always follow like a basic safety protocol
when using the inks. You want to have some airflow
in the room or you want to work outside or in an open area, like maybe go in
the garage and open the door so you have
lots of fresh air. Because if you're working
in a room like my studio, the air just builds
up and get stale. The alcohol, the fumes are just right here and they
are just lingering. That's what you don't want, you want to keep some
good air movements. In my studio, I have a fan in the window
that pulls the air out. I have a fan attached to my desk that pushes the
air towards that window, so I have a constant air
flow as I'm using ink. That's number 1. Number 2, when you're doing stuff to blow this around if you're
using a straw, this is like just a
regular drinking straw. You could just take this out
of the soul paper wrapper. When you're blowing your piece, you want to blow air down, but you don't want
to suck air back up because the air
coming back up, is that alcohol fume. You want to blow air down, move your straw away
from your piece, suck air back in, come back and blow
air back down. Don't ever just be hovering
around it and just be blowing in and out and
in and out and in and out. You're sucking that alcohol
fume into your lungs, and you don't want do that. Be mindful of that if
you're using a straw. Another thing I want to mention, and it's the biggest red
flag indicator for me, so that I know what it's doing, is if I'm breathing
the alcohol in and I don't have enough
air ventilation, after working with it for
30 minutes to an hour, you'll start to get a headache. If you're ever working with the inks and you're
getting a headache, it's affecting you and
you didn't even know it. You don't have
enough ventilation, and you'll need to make some adjustments
to your workflow. If you work with it and
you're getting a headache. I want you to be
mindful of that, if you start getting the twinges of a
headache and you think, I think I'm getting a headache. It's the fumes from the
alcohol creating that, and I want you to up your
airflow or take a break and walk away and then move your space to somewhere
with more ventilation. A headache is a number
1 red flag to me. Another thing is gloves. I don't wear gloves
often enough, but I want you to wear gloves
because we're going to use the gloves to maybe
move around alcohol. We don't want a bunch of
alcohol sitting on our skin, soaking into our skin. A pair of gloves, especially the
hand that is maybe the dominant hand working
with the alcohol. Whatever hand that is, at least wear the
one glove but I'd prefer if you wore both gloves. You're not supposed
to put heat on alcohol because
alcohol is flammable, but if you use a
hairdryer or one of these straight dryers
that came with the curl piece on the end, looks like this here, that's what this is, then use it on the
cool setting only. The cool setting
is not cold air, it's slightly warm air, but you'll like
that slight warmth because it'll dry
your inks faster. On a low setting only, do not use a high setting
on a blower like this. Keep these things in mind, just a little bit of
safety will go a long way and I'll see you
back in class. [MUSIC]
5. Color Swatches: In this video, let's talk about making swatches of
all your colors, and I'll apologize at the
very beginning of this, you will hear my fans going. I also have my gloves on. I want you to remember
safety first. If you hear the fans going and you're thinking
it's annoying, it's a reminder to you that you need to think
of safety first when you're using anything that has a fume to it
like the alcohol inks. So I apologize, the
fans will be going. I want you to create
some smaller pieces, get your paper that you want
to create your samples on, and cut it up into
little samples. About two-inch by three-inch
is what I'm using today, and I want you to make a color
swatch of all your colors. The reason I want
you to do this is because then you can see
what the color looks like, how it spreads on the paper. If it separates out into
more than one color. I also did a set of these
with the gold and the silver and got to see how that looked. So I want you to do
a set of metallics. So a set of all
your solid colors and a set of metallics, and then this is how we
can pick colors to do. Then I can say, oh, I want
to do something in Meadow, what color can go with all, will look at this
purple eggplant. Here's the colors I want to use and oh, let's look at this. I love this Jacquard gold, so maybe we can go
with that gold. So you can see how easy that's going to make
looking for your colors. This is really important too because say like this is bronze, and if I'm looking at
bronze and ice-ocean, and I didn't have listed
what color I used. I might pick that ice-ocean and then start working
with it and think, wait a minute, that does
not look like my sample. I want you to make a
sample of every color and label at the
bottom of that sample what color that was and the
other benefit to doing that, now you get a chance to work with your air-blowing
tools here. I had some blanks right here. Let's get these blanks. Now, you get a
chance to experiment with the air blowing
tools like your dryer. These are stuck together. So we can experiment
with our dryer, we can experiment
with our blower. Let's just go for it. I think that's two
pieces of paper but I got my gloves
on, so I can't feel. Let's just pick a color. Let's say I want
to do pea green, and I can even say
maybe with some gold and pick which gold
that would be. So now I want to go ahead, shake your ink up
before you open it. Pick your gold, shake your gold up
before you open it. You want to shake the
gold really, really well, and maybe I want some
alcohol available, so have the alcohol
open and ready. Now, it's the time that we
want to just experiment here. So maybe I'll do say a drop
or two of the pea green, maybe a tiny bit of that gold. Now let's just do a little
bit of alcohol on here, and see what it does. So I like to have a
piece of cardboards and now I can pick these
up and look at it. I can move this around. Now, I can test out my
different supplies, so I can test out little drier That was on the cool. I can also test out
my little air gun and see how that works. With the drier,
what I like about it's going to dry the
ink faster for me. There we go, and that's basically dry. Now what I like about
doing the drier, is it dried a whole lot faster than anything else
I've ever tried. Now I can see the different
layers of this color from the darkest to lightest. I can get a feel for how my
air blower is going to work. I can do all these samples
that I've already done. Now, I get a feel for
how to work that drier on 50 different pieces rather than starting right
in on my piece of artwork. These pieces I made
with my air gun, this piece I made
with the dryer, look at how amazing that
looks on with the dryer. It's super cool. I like the control and the
way it's a little wispier than I was getting
with my blower. Super cool. I love the difference there. This is actually like a
color that's similar. Look how different
that looks on there. So this is a perfect example of test out each
of your blowers. This is the air gun
and this is the dryer and say, oh which look
do we like better? This is really appealing to me. I love that. So I want you to make samples of every
color that you have, and a color with some
gold and I picked it the same color to do
the gold and the silver and all the different things
with so that I could see how that affected the
color that I chose. Here's another one. That's a pea green
with the gold, and so I just marked, what color did I use
and wrote it down. So I want you to do a
sample of all your pieces. Perfect time to experiment
with your blowing apparatuses, even if it's just a straw. Then, that's where we're
going to get started. So make your samples and I'll see you back in class.
6. Paper Test: Nara vs Mineral & Yupo: Let's do a paper comparison. I'll apologize again, you'll hear my fans going because I'm going to
be using the inks. I'll put some gloves back
on, always safety first. I want to look at the different ways that
these three papers work. I have cut down a piece of Yupo, a piece of mineral paper, and a piece of the Nara, and then we're going
to take a look at how they work with the ink and then how easily can
I mop up a mistake, can I change something. I've got some shop towels. I like using a
lint-free towel with my alcohol and that's
what I've got. I'm going to start
off by putting a little bit of ink
on each one of these, and spreading it around, and letting it dry, and just seeing what does
this look like on here. Then let's see if
we can clean up any mistakes or wipe off
the ink when we're done. I'm just going to put
a couple of drops. I'm going to move this
with some alcohol. This is another fun
feature of using the heat. Look how cool that is. This is only Yupo,
it's my first sample. Look at what that does. It makes beautiful rings and
some separation of color and some staining like you
can see right up here. There is some blue staining like an undertone of that
color. Very interesting. Now I can see how that
copic various ink pea green looks on Yupo. Let's do the same thing
on the mineral paper and the Nara and then
we'll talk about it. So just a couple
of drops of ink, a little bit of alcohol. You'll notice I'm not using anything else with it right now. I just want to see
what this does. Now we've got some ink on the Nara. Now on the Nara, it's very interesting, I don't see any outlays of staining like I
saw with the Yupo. Very interesting there
in how the ink actually stayed quite a bit
cleaner and a little crisper looking than
it does on the Yupo. On the mineral paper also, don't see as much staining like outlying outside of the piece
like I did with the Yupo. The Yupo is definitely
staining the most. The mineral paper stained
a little bit less. The Nara paper is
a no-stain paper, so all of that pigment is
staying within the ink itself, it's not staining the
paper underneath. That's very interesting. Now, look at this cool little thing. Now, I'm just going to take
a little bit of alcohol on a shop towel or I could just put the alcohol
really right across here. This reactivates our ink if
I put the alcohol across it. Let's say I just want
to wipe that off. On the Yupo, if I wipe that off, you can still see all that
ink that stained the paper., so there's really no way to 100 percent correct a mistake. With the mineral paper, I'm just going to put
some alcohol on there, and again, wipe that off. Again, you'll see we
have paper stain, so there's really no way
to 100 percent correct a mistake or get a dot off that randomly landed somewhere
you didn't want it. This is the magic of this
paper right here, people. Nara paper, a little
bit of alcohol. Look at that. I wiped
that write-off. No staining at all. It's magic. Let's just say that I wanted to reuse this piece of paper
now for something else. I could just wipe it
with some alcohol and a clean towel and I could just completely erase everything
that I did and do it again. Now you have no waste. With the mineral paper
and the Yupo paper, I felt like with every
design that I did, if I didn't like it
or it didn't work out or there was a
mistake on there, I just had to throw that
piece of paper away. But with the Nara paper, I can have one piece
of paper and I could practice 10,000 times. Just wiping it clear
like an eraser board. Just clean it right
off, no staining. Let that alcohol
dry for a minute and you're ready to
do another piece. This paper, even though it's priced wise in the middle
of the two other papers, this paper really is the cheapest paper
because there's no waste. You just wipe it
off and keep going. How cool is that? I thought that would be a
really fun demo to show you what you could do
on the Yupo mineral and Nara paper and if you
could fix mistakes and what paper is
obviously my favorite. I hope you enjoyed seeing that comparison and I'll
see you back in class.
7. Cleaning Off Nara Paper: Let's do a quick demo on cleaning off the NARA paper. We just did a demo. If you already saw it, then we're just going to
be duplicating that demo. But just in case
you skipped that, I want you to still
know how to do this. I'm going to show you
how we clean up stuff. Let's say you make a
piece and you're like, oh, there's some dots up here. I don't want the dots up there. That looks like a mistake. I need to wipe that mistake off. You can either put a
little bit of alcohol onto your paper and just wipe
it off, super cool. Or you can put a little
bit of alcohol onto your rag or towel or whatever it is you're using
and wipe that way. I do find it a little
bit easier if you put it on the paper and wipe the paper, it's a little more controllable. But look how easy that
is to just say clean up a mistake or an edge or take
off some on your drawing. Let's say you just
hate it completely, then you want to clean
the whole paper off. You don't have to throw it away. This paper is super cool. Just spread some alcohol, just the regular
alcohol on your piece. Wipe it if you see
any residual ink, just do it again. New clean sides so you're not
just wiping in back on it. Just wipe everything off just
like it was a clean slate. Now, just let that
alcohol dry for a moment because it does have wet
alcohol on the paper, or set it to the side and use a different piece and have a
couple of pieces that you're working and erasing and practicing on and then you're
ready to use it again. How amazing is that? I love this NARA
paper because it does not stain and it lets
you fix mistakes. I'll see you back in class.
8. Air Blowing Options: [MUSIC] I'm working on the NARA paper and I want to look at the three different ways to push around ink that I'm
looking at here. You can also get one of those things that looks
like a balloon with a little spout and it has a little hand air blower,
you could get one of those. I don't have one of those. I'm going to be blowing
air with a straw, with a hairdryer,
and with an air gun. I've got three options to use and we might just
put a little bit of ink on here just to see
what those differences look like and maybe a
little bit of alcohol. When you're blowing
air on it, blow air, lean back or lean away to suck air in and then come
back and blow air. Don't blow air and suck air as it's remaining
over your piece. [NOISE] Again, move it to suck some area in because if
you suck the air in, you're sucking all
those fumes in. There we go, so that's
blowing with a straw. That was pretty easy. There wasn't anything
hard about that. But let me tell you,
you'll get lightheaded really quick blowing
it with a straw. Let's do a little thing of
ink and try the air gun. Now, what I like
about the air gun, this has got this little
bit of air compressor which I'm going to set in the floor so we don't
have to hear it turn on on top of
the fans going, but I want you to
remember safety, so fans, fans, fans [LAUGHTER]. Like about this is you
can push down to get the air to blow and you can control how
much you push down, so you have a
little control over how much airflow comes out and I'm working it to the side
or right on top round. Just being real careful
to start the air off my piece rather than right on my piece because if I start
it right on my piece, I'm going to make a mess. Let's just take a look at that. Let's just do that. Let's do one where we just make a mess. Now I'm right on it.
Look what I did, all over the place, no control. Now, let's do that
right over here. A little bit of ink and now
if I started off to the side, I can very gently
come around and start to control
it a lot easier. I can direct the air flow
with the direction that I go. But I don't want to start right directly on top of the piece. I want to come around a little bit softer
with what I'm doing. Because it's just blowing cold air it's going
to take longer to dry than using our
little hairdryer. But it's interesting to see how can I move things around, what does it look like
with this particular tool? Is that the look I'm
wanting, I'm going for? Then we can let it do its thing. This was air gun. That actually looks pretty cool, now that's done that
so if you want that, that's how to do
that [LAUGHTER]. Let's use the dryer, so with the dryer, whether you use a
regular hairdryer that's L-shaped or
you get one of these and leave the top
hair apparatus piece off of it so that you have
this thing to work with, you don't want to go
directly on the ink, just like with the air gun going directly on it gives
you no control. Let's just try that. Let's just do it right
here [LAUGHTER]. If you try it once,
then you know, I feel like it [NOISE], see there, no control. It just went everywhere
no matter what I did when I was
straight on top of it. In general, that's
not what we want. We want full control. Maybe I want a drop here, maybe a little bit of alcohol, we'll let that
spread a tiny bit, so maybe I'll just
spread it a tiny bit and I want to
come in straight up and work my way around straight up but
never straight on it, so coming towards it [NOISE]. You saw how I was doing that. I was coming up to it but not right on top of it
for most of that and I was going around and
directing that ink flow that gave me the most
control of that piece. There we go, different samples. Out of that, the straw is easy, but it's going to
make you run out of breath and go lightheaded
very quickly. Air gun, it's got its place, it's a favorite tool of mine. There's a lot of control there. It takes a little longer
for the ink to dry, but there's lots of great
applications for that. Then the air dryer,
the ink dries the fastest and we have
control over it if we come in from the side and not
directly on top of it. Now that dried, it's actually
cool too [LAUGHTER]. Even though I'm
like don't do this, there is a place for this. Look at each of the
options and see what is going to work
for your piece of abstract as you're going. I thought that was
a pretty cool demo and looking at how different blow things work
and if you've got more than one option
to blow air around, I want you to test them and then keep your little test
sheets so you can be like, "Oh, that was the dryer, cool. Oh, that was the air blower. Let's go with that." I'll
see you back in class. [MUSIC]
9. Single Color Abstracts: In this video, let's do a
one-color little abstract. I'm looking through my samples because I've made a sample of everything and look
at this copper. This is Copic Copper E18. Look at how gorgeous
that color is. It'd be really beautiful
mixed with this borons, look how pretty that is. I'm going to use copper. I'm going to do a one color
little abstract to just play and manipulate the ink and get used to how
I work with the ink. That's the color
we're going to be playing with first on mine. What I want to do is I'm
going to put some ink down, I'm going to put
some alcohol down I'm going to let that dry a bit. Then to make some wispy
pretty variances, I'm going to put
some more ink down and some more alcohol
and start reactivating and moving stuff around until
I get something I love. If I don't love it, remember, we can just put alcohol on it and just wipe it all back off. You don't want to
use too much ink. It doesn't have to be like
a giant puddle of ink. We just want like a
little bit of ink. I want you to try
some different shapes to see as we're creating, does the shape
make a difference? Is it going to give us some
variations on our abstract? I'm just going to start off
moving that ink around. Then we're going to let that
do a little bit of drying. Then we'll just see, what we can get, so
we'll start with this. I'm going to go ahead and
play with my hairdryer. You saw it was coming in at it, but not directly on top of it. Just to get started and look at how much color variation that we have just in
that right there. If I want to get
some wispy areas and maybe bring it in
a little differently. I'm like what I got here. I can put some more ink
and some more alcohol and then start blowing those
and making them wispy. Just putting the alcohol on it isn't going to give
you what you want. Because what that
does on any area where we have a really
thick amount of alcohol, if I just add alcohol to that, it leaves a seam there
that's not so pretty. Let me just show you that
and we'll see what we get. Even though alcohol
reactivates alcohol, and actually it did a
pretty good job there, but I can still see
the underlying line of what I had there. Sometimes it works and
sometimes it doesn't. The longer you work it, the more it has a time to work the rest of
that ink into this ink. But for the most part, it works better if you just
activate it with some ink. You can even take your finger, move that around
where you want it. Have a cloth ready to
wipe your finger off so it's a little
more controlled. Then wipe the alcohol one side. Now we can come back. You see how we got that
to just push and pull. We got some interesting
lines in it. The more you push
it and pull it, the more lines you can
make in the piece. If you don't like all the lines, maybe push and don't
push, pull, push, pull, push, pull that's
how you get that. Whereas here we have less lines, it's a little smoother so
very interesting there, seeing the differences in the
way that you blow that ink. Now we can do the same
with the air guns, so we might just do another
little corner here, a little bit of ink,
a little bit alcohol. We can tap that with our finger to really put that
where we want it. Again, don't start the
air right there on the piece start beside it and work your way over to it. We can work it down and
then we can start seeing that wisp Venus appear
as we're doing that. We can stop and just
let the ink sit and do its thing once it's
everywhere that it wants to be. That one I did get more lines as I was going
back-and-forth also. That's interesting. Looking there, every ink is going to react a
tiny bit different too, you might do the
exact same thing, say with that bronze, which is this pretty blue. You may not get those
lines in the same way. Each ink acts
completely different, I might say, what is
this going on here? Let's do something on this side. I might put some ink over here. Come with some alcohol. We can move that around
if we want a little bit and maybe do our hair dryer. We can just let it sit and
do its thing if we want. If I have a defined edge here, then I'm like, oh, I like that. But what about this edge here that I don't want to be there? Now is the perfect time to
have a little bit of alcohol and a cloth that we can
just wipe that edge with. I could either do it
right on the paper and then come right up and clean it where
I want to stop it. Look at that, how easy that is. If I have any spots on the
paper that I don't like, I can just dab that
with my finger. Then you'll get rid of
any super sharp edge. Now another way that
we could do that if we wanted to really come back and control a little bit. This is the time that I would grab one of my little
paint brushes. I would have a little
tub of alcohol, maybe. This one's got a little
bit of color in it because I was using it
with the other one. But alcohol reactivates alcohol so put a little bit
of alcohol in that if you've got any color in there because you don't want to put your thing in
there with color. Then look at wipes right
out and it's clean. Then I can put a little
bit alcohol in here and I can use a brush to
very gently manipulate. Now remember that
alcohol spreads and so you want to work on the tipiest part of
something that you can if you're trying to clean it up. Don't get right on their
heavy on the edge and think, "Oh, I'm going to be
able to clean this up." It's going to spread,
change your piece. Work very carefully
when you're doing that. Tiny brush, tiny
amount of alcohol, and just seeing, can
we spread that around? Or is it going to change it? I hate it. Now that we did this right here, we can see I made an edge there, I didn't mean to put that
on there into my paintbrush but I've made it an edge there, and so now I have to be like, do I like that edge or do I
need to just reactivate that and use my dryer on it. If I did that and
I'm like, oh, darn, I could just come back on here
with a little more alcohol, then we could work
it a little more. Which I might tell you I
didn't add any ink in there, so I might come
back with some ink and alcohol now that
I've done that. Then let's say you
do what I just did, so now we've got
that way out there and it's like, "oh, what the
heck did I do that for?". Now, look, and come back,
do a little bit of cleanup, get it right back in
where I want it to be, put the alcohol beside it, not right on top of the piece and work your way towards what
you're trying to clean up. This cleanup practice really
is valuable information to be practicing with on your pieces. Because now, the
piece is not ruined, it's just, maybe we need
to clean a little up. Like maybe I need to just get that little bit of
an edge off of there, look at that I like the
way that turned out. The only thing that's iffy is this little
corner right here. Again, I can put a
little tiny bit of ink, little alcohol on the outside the way I want the ink to go, and then I can spread
that that way. I can use a little
air gun if I wanted. That stayed very heavy, I'm actually just not happy
with that right there. Let's say you hate
the whole piece and you want to start over. Well, let's just maybe we
do hate the whole piece, and let's just start all over. Watch this. It may take you 15 tries before
you get one that you like. Oh my goodness, I love this. If you've got any
ink on your towel you'll just spreading that
back onto your piece. So let me just get
a clean towel, and check it out. Check that out, and then, you can let that alcohol
dry for a second. We could do again. After you play, wipe it off as many times
as you need to wipe it off, until you get a one-color
piece that you think, okay, I love this. You can go through
and just like I did, scrap up any little
areas that you like. Something's weird about that, let me just clean
that little spot up, or you can have any little
dabs of ink anywhere, you can just take
your little towel with a tiny bit of alcohol on it and I do say tiny amount
because alcohol spreads, so if you've got a whole
lot alcohol on this paper and you touch anything
that you didn't mean to, it'll spread right onto that. Be really careful with that. I want you to think. Look how cool this is? Then I want you to try something really fun that we
haven't talked about yet, and get a little mini mister, and we can put alcohol in this, and then very lightly missed
something to add some drama, some spots, some interests. What you might do is take just a little scrap
piece of paper and you can miss
the whole thing, or you can miss
one certain part, maybe I just want this edge and maybe this edge and
I don't want all of it. I can manipulate exactly, some of it, is a tiny bit wet, exactly where I put that. Maybe I just want it down here, and you spritz, look at this?. Look what that does. Depending on how what
that alcohol still is, it may blend and
merge a little bit and make an interesting texture, or it may be nice
tight little dots. I really love that. I want to go up here. Oh, look at that. Make sure your ministers pointed the right way as
pointing the other way. Look how cool that
just made that. It just added some interest
to a single-color abstract, so that's your first project. I want you to try
the NARA paper, I want you to use one color, I want you to put alcohol and ink on that paper
and moosh it around. If you're not happy with it, wipe it off with alcohol, and do it again, and do it 10 times
if you need to, until you've got
one that you like. That's pretty cool. This is the best paper
to do that with. You can practice over
and over and over again and you don't have to
throw that paper away. That's my favorite,
I love that one. I'll see you in
the next project.
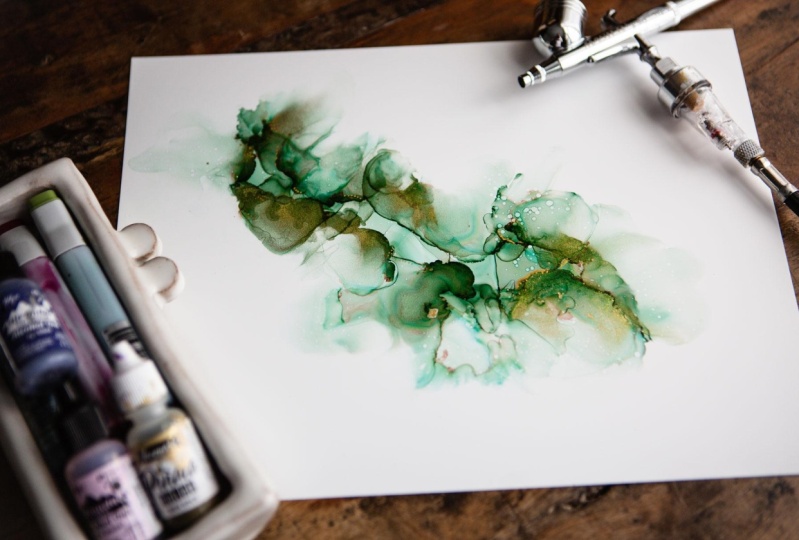
10. Two Colors With Gold Abstract: In this project, let's do two colors
and some gold. I apologize again,
the fans are on. But I want you to
remember safety first. I want you to have your fans on. Let's go ahead. I've got the bronze. My two colors are going to
be bronze and pea green. I think those are beautiful. My metallic is going to be
this Pinata gold because this gold tends to sit
on the top and move around and follow
the edges and leave you a really pretty
edge and everything. I've got all of
that and I've got some alcohol right here. I'm trying to put these where I don't
spill them everywhere. I have a tendency to
knock things over. I got some shop towels
ready over here. I also have my air gun and
my blow dryer both handy. What I want to do is two colors, a little abstract with the gold. I'm going to start off
putting the colors on there and letting them dry. I'm going to reactivate
them with some color and some alcohol and some gold
and just see what we can get. If you don't like the first try, wipe it all off and try again. That is what I love
about this paper. A lot of times I
don't get what I want the very first time, even though I've done alcohol
ink now for a few years. I wouldn't say that it's
my best supply that I use. It's not the thing that I think, this is my one thing
because I think everything is my thing and that's why I experiment with so many
different art supplies. But I would say that most
of the time I get something that I like after sitting
at my table creating. I want to say even then, I still wipe a few off and try again because abstract art, you just work at it. I work at it. Got my little dish here if I want to
do some brushwork. Don't forget, you can put
your finger in there to move it around too while
it's all good and wet. Let's just go for it. I'm going to start
with one color. Let's just move that
around. There we go. Let's just add a
second color in here. If we don't like it,
I'll start again. I'm having an issue with
my paper liking to blow, so I'm going to attach
the very tippy, try to attach one little corner so that I'm not trying to
hold the whole paper down. That's an interesting start. Let's just start
adding a little bit of alcohol, a
little bit of gold, a little bit of a color, and just run this around
and see what we get. I just shook the gold up, so we should be
good on the gold. Another thing I'll mention
with this little guy, the tighter to the
paper that you are, the more control you
actually tend to have, so don't try to be
super far away from it. I know I'm going in and out, but the tighter you
are on the paper, the easier that ink
seems to control. Let's see if I can, very gently just at the edges, give me a little
more control look. That's already pretty
like it is, though. Now I'm getting
excited about it. Let's go ahead and just tap
it a little bit of green, a little bit gold. Not too much. It's so easy to overdo
it with the alcohol, that trying the less is more strategy is going to make that work a
little better for us. Another thing too, the tighter we are to that paper, the wispier these
edges are being. That's very fun. I'm going to go ahead
the green again, a little tap of gold. Go ahead and get that alcohol. Then what I could've done is tape the paper down, that would have
been a good idea, now that I'm running
it all over the place and using the dryer. Let's put that, maybe a
little bit of alcohol, just throwing that out
there in case you want to tape your paper
down a little bit. I am leaving some
of it to dry itself a little bit just to
see what we can get. I want to go just do a long
one and see what we get, as I'm not going to
inks over everywhere. Don't forget to use
your glove if you feel like you need to
blend in a little bit. Again, I'm keeping my air source tight to the paper
and look at all these wispy, crazy yummy edges. I actually loved how the green
mixing in with the blue. I think I'm going to keep up
with the green and just have those little tiny spouts
of blue shinning in there. A little bit of alcohol. I want to push that
back in a little bit, maybe some gold. Look how cool that looks. There is one area here, then I'm like, am I loving
it or do I not love it? Do I just want to
wet that one area right there like this one area here to make it a little wispier and a little blend
that in a little bit? Other than that I'm going gaga over everything else
we've got going on here, and I think that's
a little heart that got created right
there in the middle. How cool is that? You can see it shining. I like seeing the gold shining
the light. I love that. Maybe I'm thinking
just this one little side that the alcohol is
not as soft as it could be, so I'm just laying some
alcohol down beside it. Alcohol runs, so what it did was
run right in here. I don t think I like
what it did there. I'm going to do one last
little pass, green gold, little bit of alcohol and
see if we can just merge that one little section in
with the rest of our piece. I probably should
have just did that. A little bit of gold, little bit of alcohol out
here on the one side, and we'll let that run around a little bit and work that in. I could even take my
thumb, my finger, and just put it where I want it. Can't get the only
other thing now. Do you have any spots that
you want to clear up? I do have this one
spot right here, this spot right here. I want to clear that up. It's like a little extra
ink sitting out there. Then I want to just
clean this little area outside and I think I'll
be happy with this. I love the little
bits of gold that we can see sparkling that
it's not 100 percent dry, but it's getting awful close. I'm just going to
put a little bit of alcohol on the edge of my piece and very gently pull that from where I
did not want that one spot. Alcohol spreads, so don't
get it all over your piece. It'll spread that way, and then pick another clean
edge because alcohol also re-spreads if you've got
it on this towel thing. See, look at that. Much better. That is the way, people. That is the way. I
know I'm being silly. But look how pretty that is now. Some of the things I'm
looking for in an abstract that I like is movement, so do we have some nice
movement and flow? With this paper, I'm especially also looking for some
of these wispy edges because it's such a
great paper for not staining that you can get the wispy edge without
weird staining underneath. You can turn it different
directions to be like, which is my favorite way. I'm almost liking this way. In addition to the way that
I laid it down, I like this. Then so I like movement. I like light and dark, so you need some
contrast in there, and then I also like
interesting details. Like in this one, I like the little rungs that I
got in the ink over here. It almost looks like
a beautiful petal. I like the dark river we can see in the
middle of the piece, and I like the
gold bits that are shining on some of the edges, so metallics, that's
another thing that I think adds a little bit of
interest to your piece. Now we can always mark make
on this after the fact. If we want to add some dots or some little extra
details in gold, I could come back,
especially with my Micah ink and
paint on top of it. I'd be careful trying
to paint on top of the alcohol ink with the
alcohol gold, because remember, gold spreads and it reactivates
the ink that's there, so you're more likely to put that on and it spread out weird, and you think, no, I ruined it. Whereas if I'm using an acrylic or water-based gold or paste that anchor that paste, I can paint right on top and
continue adding details. The only thing is
that this gold is probably going to be a
different color than this gold, so you just might
decide right up front, what are the things you're
going to be adding. I do think that the Posca pen gold is very
similar to the Pinata gold, so you might consider extra
marks with the Posca pen. Like we could just come
back on here right now. Let's just get that activated. Really, if I did a
little bit of gold, I could do perfect thing
would be to do some samples of all my metallics on
a piece of my paper. That is so pretty. If I do
a little thing of gold, let it spread out
and do its thing, and I do a little thing
of the Posca pen, I can see how far
off is that color? Or if I'm just doing a dot, is it close enough
to even matter? I think as a dot, it's close enough to not matter. As a line, that's questionable. But I do have the
option. That's my point. But this one is so beautiful with the shimmer and
the pieces that I've got in it that I think we're going to call that
one good to go. First try, which sometimes, trust me, doesn't happen for me. I hope you have fun with
two color and a metallic. Can't wait to see what
those pieces look like, and I'll see you back in class.
11. Wispy Flower Accident: Let's do one more small one and then we'll do
a bigger abstract. But I want to show you something
cool that we could do. We could do an abstract with
one color and some gold. I'm going to be using
the Pinata Gold because I'm using this current and I want this gold
to sit on the top. I'm going to be using my air gun and we're going to look at how we can push the ink
in a specific direction. It's almost like I want
to create a flower who is throwing its
petals out there for the world to see and
it's very proud. So I'm thinking
like flower center, add some ink, a little
gold, add some alcohol. We're going to shoot
this off of the page and I've off centered it, hoping that I would like
what the direction does. Drop of gold or drop
of the current. Be careful because the
gold drops were at once. Now I'm actually going to
run these off the page, almost like we've got
some petal definition. By the way, I run that
air in that petal. So look at that. We're going to run all
the petals that way. Then we could clean up
some edges if we wanted. I could clean that edge off
a little bit right there before we get any further where I dropped that
gold accidentally. So maybe since I know I'm
dropping that gold everywhere, I could put these to
the other side of us. Before we get too far, I could go ahead if I wanted and clean off that spot
if I needed to. Then I'm sure I'm going to have some more alcohol
come back down that way so we can continue
to just fix and go. But we could get to
the end and just see, now what did we end up with and did we cover areas
that we needed to cover? Let's just keep going. I'm going to run that air off, drag the alcohol content
in the direction that I want it to go. I can control the edges a little bit just
by blowing it back. Look at that. Do I sound like a nut? But man, it gets so excited with some of the way
these things move. We're just going to pull
this one on down this way. Yes, look at that. Let's just pull that, run the ink right there. Maybe a little extra
ink right here. Extra alcohol can run
that a little bit. I could have this on a paper
towel to really soak off what it is that
I'm knocking off. I could if I wanted to put
a shop towel under that to really catch that
as it's going off. Check that out right there. That looks like a
cone flower kind of. I could put a petal on it
and just call that done and make a greeting
card out of it. That's really pretty
just like it is. As a matter of fact,
I could come back in with the gold ink or Posca pen, do some gold around
this little petal here. I could actually come back with this gold,
check this out. We might just have to
call this flower done. Got my ink open, got one of my dip
pens that I like, my little Kakimori dip pen. I could have a little
sample piece of paper over here to start my
dip just to see, am I going to get those
dots the way I want it. Sometimes you just get
the most perfect peace at the moment you
did not expect it. We're going to say that it's
about this piece right here. Look at that. See it shines pretty. Oh my goodness. Look how beautiful that is. First project, half a flower. What I think we can
do now is go ahead and do what I was
really going to do with the flowers splayed
out all directions. But check that out, that is a gorgeous flower
that I wasn't even expecting. So yummy. Now, we could come back and right on the edge
if we wanted to, and just get some
different things go in. I do have a little bit of gold that I have just noticed
that got right here. Again, anything on here that
you didn't want on here, just take a moment
to clean that up, and then set that to the
side before you ruin it. Oh my goodness. Look at that. We're
going to save that one, and then we'll do another
one with the whole flower. Let me grab a piece of paper and I'll be right back.
12. Running Ink To Edges: Let's do a flower again, but this time radiating
out from the center. I think I'm going to try
the garnet from the Copic and just see what we can get. I'm going to go ahead and just lay a center
out here and let it dry. Then we'll come back and
then splay out some petals. What I want to do is
use my air gun for this and you can do it with a straw, but I want to run
some ink, some gold, and some alcohol
out in a direction. I like using the gun to do that because I can get real tight on it and create some layers
and depth in that petal, so that's what I'm going to do. We're just going to help
this along a little bit. Then we're going to lift it a little bit
in the direction that I plan on going
so it doesn't sink back too far in the other way. A little bit of ink, a little bit of the gold, some alcohol around and out in the
direction I want to go. We'll let that just move that way a little bit
as I grab my gun. Then you can see how I've
made some lines in the petal. It adds some movement
and some depth by coming in really tight
with the air gun. That's pretty cool right there. Let's work out
towards the corners and come back and fill in. Because it seems like every
time I start going around and just do like one
direction like I did on that pretty piece
that we just kept. Most of the time I messed up before I get all the way out. Let's just go ahead and
just start running that way and get the four corners and
then maybe fill back in. Again, I'm just tilting
in the direction I planned on mostly going. We'll pull the gun. Then mostly run in the alcohol
off onto my towel there. Oh, yeah, I see pretty. Then that gives these
other corners a chance to dry some more as
we're working around. That alcohol moves fast. Check that out. I'm going to come back and we'll let that corner dry. Let's work in the center and start going around
the four centers now and then we can come
back and decide. Do we like what's happening
in the middle here? Let's just do this. A little bit of gold. Got some alcohol, just run that, fill up our spaces. That's cool. If we have a spot
that we're like, I don't know if I
like that or not, we can always come back
with another thing of ink and run it that way in a moment. Every time we put some ink here, we're reactivating
the ink beside it, so we're going to have that. Let's run it out this way. It might work for you
better to go around it clockwise instead
of this little game. Hope I made a funny
little edge there. Now we actually have basically a really close to a
circular center there. We could at this point
add a little bit of ink, maybe a little bit of gold, maybe a little bit of alcohol, and just let that
spread and do its thing because the other alcohol that we've layer is going to do a pretty good job of
stopping that fuss. Sorry, I had to stop that where I wanted it
before it kept going. But already have
in some of that. This ink that was dry acts
a little bit as a barrier and makes it easier for us to then do other stuff like that where we can come back and
have it in the center. Got my little scrap paper here. There we go. A little started. Maybe I'll come back for this. Then get the center going
here with some gold. Look how pretty that is. Wipe that out. Another thing that we could do to add a little more
interest on this is our spritz. Remember this piece. I want you to try out all the different
little techniques just to see what you can get. On top of that, we could do a little spritz. I could do it in certain areas. I could let it do a direction. Let's see, I'm going to
grab a clean piece of, we'll use this. I could let it just do some and block off the center there. Then I could come back and
do a little here possibly or maybe we just like it looking like ribbons of yummy stuff. A little tiny mist
here of alcohol. Well, I thought I had
to go in the right way. I did not. Look what that just did. Oh, my goodness. I definitely want
you all to try. Look at that. Well, that was way too much alcohol on that spot, but I just want you to
give that a try and see. What can you get? See now, if you get too close and you
missed it too hard, you don't get dots. You get it to run. Let me dry this a little bit. You got to be very
careful there. What if we come back? I just ruined it. Let's start again. I can always do that. What if we just took
this as a circle? I just wanted to protect
that center part. Look at that. There we go. That felt like that fixed it. Super fun. This was more of a test
of just try all of the different techniques
on a little piece and show you the splay
out which out of the two flowers are other flower is definitely the most gorgeous
thing I've ever created. But it's all about
experimenting with the different techniques as we move into a
larger project. I will see you back in class.
13. Medium Abstract: In this video, let's do something a
little bit larger. I've just got a piece of the 9 by 12 Nor Paper cut in half. Maybe we can do something
a little bit longer. I've gone through my
little color swatches, and I really like
this pink Schubert. It's a really light, fun, color of smoky pink. I like this garnet
maybe as a contrast. I could do one color
with just the gold. Then I could tap in a
little bit of a garnet and just see if that doesn't
give us some excitement. I may hate it, but we're
going to give it a try. That's my colors. I've already got these
open out here on my table. The garnet is a Copic. The pink Schubert is the
Tim Holtz Adirondacks. Then I've got the
pinata gold out here, and we've got shaken up. We're ready to lay some ink. I also have a little
hairdryer and my air gun, both over here and ready. You will hear the fans going. I apologize, I've
got the ink going, so we want to think
about safety. I know I keep mentioning
safety all through class, but I want you to not forget it. I want it to be ingrained
into your mind. Safety. I'm just going to lay some ink
and then we're going to move it around a little bit and let it
dry and do its thing. Then we'll come back and
add some more ink and some gold and make
it wispy and yummy. Let's just see what we can get. Have you tried different sizes, then we'll get different shapes and different things
coming out of here. I think it's fun just to
see what can we get if we just have some
different shapes and sizes going on here. I'm just going to lay
some alcohol around. I will just move
this around a bit. Again, when I'm using
this air dryer, I'm drying it a lot faster
than it would normally dry. I'm only using it on the
very lowest cool setting. While that's not cool, cold air, it is slightly warm. It's not hot, so it's
not going to add to the flammability and the fumes
of my ink and I love that. Look how cool this is looking. Just like that. Now we'll come back around and make some of this real wispy. Just so we can get, so
I've got my inks ready. Might do a little here, maybe a little here, maybe a little gold. Definitely some
alcohol. Wrap that. Move around a bit. Real soft with my air. Might come back along the edges with a
little bit of alcohol and just below that in
row wispy and soft. Again, as I'm using
this heat gun, I'm not going directly
down onto my piece. I'm coming from the side and the closer you are to the paper, the wispier these
edges turn out, and look how beautiful
that turned out. I'm liking this. Let's just go around
and make it all wispy, and then that'll run some of
this ink into the center. That will give us a yummy movement there as
we're going in the center. Then some alcohol will
start just moving around. You can use too much ink
and too much alcohol. If you feel like you got
way too much going on, try a lighter hand just to see, does that get you what you like? Definitely, you can do
too much very easily. That felt like a lot
alcohol on that piece. That's why I'm saying that. Don't forget, we can
move this around with our fingers and really manipulate that even
a little bit more. I'm just working my way around the page, getting rid of any tight
lines, sharp lines, and making it real wispy by just running that ink
back as I'm going. I've just got this
little edge here. I need to run back in, so let's do this right here. Maybe a little tiny bit of
gold, definitely some ink. Look how pretty this is. Now, if we've got any spots
that are got any ink on it, let's just clean that
up and then we can take a little look here and
see what we think. What I love about this paper, you can just wipe away areas that aren't quite doing
what you needed it to do. See, look at that. Oh, my gosh. Give
you the right edge, right where you need it. Look how beautiful that is. Super pretty and wispy. I like the movement, I like the color, I like the little bit
of gold in there. What we could also do
is come back right now and add any mark-making
that we'd like to add. We could also take our alcohol spritzer and spritz
part of this. Get a little piece
of paper here. Make sure that you go
in the right direction. Maybe I need this
spritz a little bit. Real soft, but it is
a lot going on there. But look at that. I like that. That right there. I like that. That gave me a lot
of extra movement. Check that out. How
pretty that is? It's going to blend and
do some funky stuff. Trying to let it dry
here for a second. Just putting it in front of
the fan there for a second. We could decide now, do we want to add any Posca
pen, any mark-making, anything like that,
that's going to add some interests or change it. Or maybe we want to use the ink and do some larger
mark-making because there is some spots where the gold is doing
something not quite as beautiful as a
might've liked it like it didn't quiet move quite
the same like right there. In that spot, do I
want to camouflage that with some gold ink? Let's just do this. You could decide to just re-alcohol that and move
it around some more or take this as a moment to work with what you have
going on there and mark make. Your choice on how much
you want to mark make. But I just want to incorporate maybe some
of that a little bit. It might not be even a lot, but it can be a little tiny bit like add it to our little piece. Look how pretty that is. That's a pretty piece. I want to you do two
color, as in this case, I did two colors that work
in the same color range, but one was darker
than the other, and a gold a little bit bigger, and just see what are the
challenges when you go larger, it's definitely
going to be working the piece longer because you've gone larger so it's
more space to work around. I want you to not get
into a super big hurry, and this is an instance
where I found having the little handheld blow dryer makes everything so much easier, and you get that right down near the paper beside the piece and really manipulate that ink
and it dries it a lot faster. Think you're going to have
fun with some of the stuff, and I want to see a
little bit larger piece and see what you come up with. I'll see you back in class.
14. Large Abstract: So I've got this juniper and I thought we would
do a larger piece. I really love the
way this juniper has so many colors within that one color, so you can tell there's some green and
there's some blue. It separates out on
this other paper, so cool, that I thought we would
try it on this Nor Paper. I just like the color range that might possibly be in here. I've got some pinata
gold because I liked the way it hugs the edges and it's very vibrant and beautiful. I've got my alcohol over here. I got our hoop. I've got ink on my
finger. That's okay. We'll work that in or
I'll wipe it off later. But I'm going to do
maybe something larger, maybe coming down the page. Let's start thinking
about our composition. If it's not the
perfect composition when you're done,
it doesn't matter. We can cut pieces out
that we really love. I love to cut up art so
we can certainly pick a section if the whole
thing is not perfect. I don't want you to see how much longer does it take to
make a big piece than a little piece and
just see what are those challenges when
we're doing this. I'm just going to start
dropping some ink, coming down the way
the angle here. Let's just see what
can we get here? Then put some alcohol
around some of these to get this
to start moving. I want to use my
little gun to start manipulating some of this color. This was definitely a good color to do this
with because I can definitely see the separation of that color really beautifully
so it looks like I've used 15 colors instead of one. But it's pretty cool. Let's just work our way
around as best we can. A little bit of golden here, a little bit of alcohol. Try not to judge the
piece as you're going. Just go ahead and
go with the flow. Then when you get to a point, they're like, oh, this
is looking pretty cool. Come back and get off any weird mistakes like any dots that you weren't
where you want it on. Anything that's standing out
as looking out of place. Then if you're just not
sure if you love it or not, I would recommend you walk away and don't do anything else
to it that day and come back tomorrow and
look at it again because I can't
tell you how many times I have done
something and thought, "Oh no, I don't know if
I like this or not," and then wipe it away. I got discouraged
and didn't come back or did something
else with it. Look at that. See? Now,
that looks better that way. Then if I had just set
it to the side because I'll take pictures of these
and I'll come back later, I'm like, what was I thinking? That's amazing. What I really love
about this piece. Love it this way, right here. Looking all the color
in there that we got out of that one
bottle of color. This was the juniper. There's so much color
separating in that one color, it's not staining though. It's not staining the paper, but it's separating
out of there. Look how amazing that is. Like I said, if you decide, I don't know if I
love it or not, you can always come back
with a piece of mat and start comparing different
areas and thinking, oh, look at that, or, oh, check that out, so we could put a
big mat around this. I do find that looking at it with a mat around it and this
one's a little bit small, but looking at it with a
mat around it completely changes the look and
makes it look finished. Look how pretty that is. Even cutting off the
top and the bottom. Because now it's got
movement and it's got color and it's got
a little bit of shine. I will say the one
thing that's grabbing my eye is this little square
that has resisted any ink. I just got something on this paper so let's
just get that off. Might've been something
on the back of that mat because I put it
on every piece of art. Look how pretty that is. There is one piece right here
is driving me a tiny bit insane because there's
no color on it. I could try a brush with a
little bit of the gold ink, or I could go ahead
and do the mica. I hid the brush from myself. Here we go. You can try
a little bit of ink. You got to be very gently doing this because alcohol spreads. Don't forget that. Then did I do enough? Do I like that color? I could come back with a
little bit of juniper on my brush and I could see if that'll let
me fill that in a little. It's not really
doing what I want. I could go with Posca pen. I could fill it in
with some Mica ink. The mica ink I know will
definitely stay there. Got to be really
careful with this ink. It just does its
own little thing. I don't know. I just get some ink or I
didn't mean to or might have. Make some little dots in there. We could do that. We can fill in with
some shiny stuff a little bit further
if we wanted. Really, I could just
make some fun lines. I could follow some of these lines and just give me some extra
shine in there. It's not as organic
looking as what I already had on there. So if
you're going to do that. I would definitely
do it sparingly. Maybe I'll just do it as
dots because I like dots. I don't like lines. The dots are a lot
more whimsical. I do like just a
little bit of whimsy, I think in something
like this, less is more, but if you like doodlings
and tangling and stuff, you could always
doodlings and tangling around a pretty piece like this. But I do love how that turned out and I love the
pretty little dots here on this end, so super fun. Checkout the finished piece. I'm loving that. I'm
actually going to stop because I do love this quite a bit
going this direction. I could even come back with
a tiny bit of a speckle with my mister if I wanted to throw a
little bit of that in there and the
further I get away, the more subtle those might be. See, that's fine. I have
the fan on over here. It's blowing it in
different ways. See, that right there,
just a little bit. Oh, yeah, look at that. I want you to go bigger. I want you to do a
9 by 12 or 10 by 15 or 11 by 16 or whatever size, large piece of paper you have. Go at a diagonal, run some ink down it, and then create a wispy abstract coming in with some
more ink and some air, whether that air be from
your air gun, your straw. I highly recommend the
little dryer that is by far my favorite tool now when I'm working
with alcohol inks, it dries it faster and it really gives me that pretty
wispiness that I like. If you've never played with your little hairdryer on here, definitely do that on
the coolest setting. I can't wait to see
what these look like when you're done. So I will
see you back in class.
15. Finishing Your Piece: In this video, let's talk about finishing your alcohol inks. Look how pretty all of
these pieces turned out. I am telling you some
of my favorite pieces. Now I've done in this
class, look at these. I mean, they're just gorgeous. They're so gorgeous that you're going to want to find ways to extend their life and lengthen how long they're
going be beautiful for. The reason I say that is because alcohol ink is not light fast. If you display this in an area where it's getting
some good sunlight, these colors are going
to just fade away. It's going be just
a shell of what it was or you just might be gone. What you need to do, what I'm going to recommend
that you do, especially if it's a piece
that you love more than any other piece you've ever done is take steps to preserve these. The first step that
you're going do is photograph it or scan it into your computer so that you can do a little color
correcting if you need to. Then you can use
this for prints. You can print a copy out that
can be displayed anywhere. You don't have to worry about it being
light fast anymore. Then you can store your original somewhere where it's not
getting lots of light. That's the first
thing that I would do before I did anything else. I would photograph
or scan it into my computer so I have a
permanent digital copy. The other thing that
you'll want to consider doing is putting a
varnish on top of these. That'll give it a nice
protective finish coat. There's a couple of kinds of varnish that people talk about. They talk about doing
a regular varnish, non yellowing acid
free on the top first, and then coming back
with a coat or two of a UV archival varnish on top of that to give
it that UV protection. You're no longer concerned about the light
damaging your piece. Now, I've tried both of these
and I've heard that you should do the varnish
first because it does a better job than
doing the UV first. Depending on what UV you use, this is UV archival
varnish also, so it's just more varnish. I've tried both of these
on this piece of paper. I've put the common regular
varnish here on this side. I've put the krylon or
archival varnish on this side. Just from a visual standpoint, the regular varnish
is a nicer finish. This UV varnish has a little
heavier finish on it. I can see why you
might want to varnish with the regular
varnish and then maybe on top at the end, just a little bit of
varnish because I can see this varnish building up
and being really heavy. Whereas this varnish is very
light and I don't know, It just looks better. Now that I'm looking
at it in the light, it looks a little better. Normally, what you
do with the varnish is if you could
hang it up outside, maybe on like a little bowl clip somewhere just so that
you can hang it up. That's a really good
way to get your best finished because then you're not spraying down on something, you're spraying
towards something. You want to start this spray I'm not going
to spray in the office, but you want to start
spraying off your piece. Don't just put it here and start the spray because
let's say this was a clogged nozzle and all of
a sudden you unclogged it and a bunch of goop
landed on your piece. That would be very upsetting. Then I really do hope that you made a copy of that by photographing
it or scanning it. You want to start spraying
off of your piece. Then you want to come onto your piece and then
go off to your piece. You don't want to stop and start right on your piece
because you'll build up a lot of extra varnish on the edges that then
might run and drip. You want to go all
the way off and all the way off on both sides. You want to be good
say foot and a half, like 12 to 15 inches away. You want to do several
passes, let that dry. Do another layer, let that dry. You want very thin layers, three or four very thin layers. Then once those are all dry, you could come back with your UV protector
as a top finish. Then your piece would be
a lot more protected for a lot longer and hopefully give you a little bit
of sun protection. Finishing your pieces,
That's what I would recommend just from
my own experience. Definitely make a copy of your pieces before
you do anything else. Photograph it or scan it, so you have it for later. All right, I'll see
you back in class.
16. Final Thoughts: [MUSIC] I know now
that you have watched the ink and probably
played with the ink, that you'll
definitely agree with me that the alcohol ink is the most uncontrollable
art supply that I've ever played with. The alcohol just keeps on spreading and go in and you
got to work a little bit fast to start corraling it
into the space that you want it to stay in or it just goes in places
that you're like, "I didn't want it to go there." [LAUGHTER] In today's class, what did you think
has the Nora paper? Oh, my goodness. This paper was not
available years ago. It was only introduced just
a couple of years ago, and I use the YUPO, and then more recently than that I'd played on mineral paper. The most frustrating thing
about that is they stain. You can't just wipe the
ink off and try again. That's basically a
wasted piece of paper. You don't feel like you
can practice nearly as much as if you had a
cheaper paper to play on. This Nora paper is basically the gift
that keeps on giving. You can do a piece on it and
you can wipe it away with some alcohol and you
could do another piece on it and you can wipe it
away with some alcohol. Instead of having 100
packs of paper to get to the point that you're
creating really good art, now you need one pack of paper and some alcohol to
wipe it back off. I just think that is amazing. For me, it's a game
changer because now I'm not hampered by the cost of the paper and the
cost of the ink and the practice that I need
to do to get really good. Now, I'm not hampered in by that because the ink goes a long way. It last forever. I'll probably have
the bottle of ink I have for as long as I
do art but the paper, now that's a cost, that's a barrier for how much
you can practice and do. The Nora paper
removed that barrier. Now, I can just practice
as many times as I want and I don't feel like I'm
spending any extra money. It really has removed
a big barrier for a lot of people for creating
alcohol and pieces, because alcohol ink is
not as easy as you think. It takes a little bit
of practice and go in before you end up with
the pieces that you like. I love this Nora
paper to help you do that without spending
all your money on paper. [LAUGHTER] I hope you
love that new discovery. Also, the blow dryer
oh, my goodness. I have taken lots of alcohol ink classes
years and years ago, and not one person used a dryer. Now I see on Instagram
everybody has that little upright drier and I'm
like, "What is that?" [LAUGHTER] I showed you
in class what that is. It's just basically
a hair curl or without the curling
apparatus on the top. How cool is that? I hope you enjoy exploring all the different things I'm bringing to you in class today. It's not something
that I see a lot of people share what they're using. I hope that this
discovery helps you make incredible pieces that
you are going to love. I'll see you next time. [MUSIC]
 DENISE LOVE, Artist & Creative Educator