Transcripts
1. Welcome: [MUSIC] Hey, I'm Denise Love and I want to welcome
you to class. Let me show you what
we'll be doing. In this class, we're
going to learn how to make our own acrylic paint. I'm going to show you how super easy it is to make the paint. We're going to mix several
colors up and then I create a little test painting
to test out the paint. Then I put a few other
art supplies on top of my painting to see
how easy or hard it is to then draw and
create on top of our acrylic paint with other materials that we might want to incorporate in our art. We're going to be making
our own paint with paint pigment and a binder
and I'll show you how easy that is to do in our paint mixing video and I'm pretty
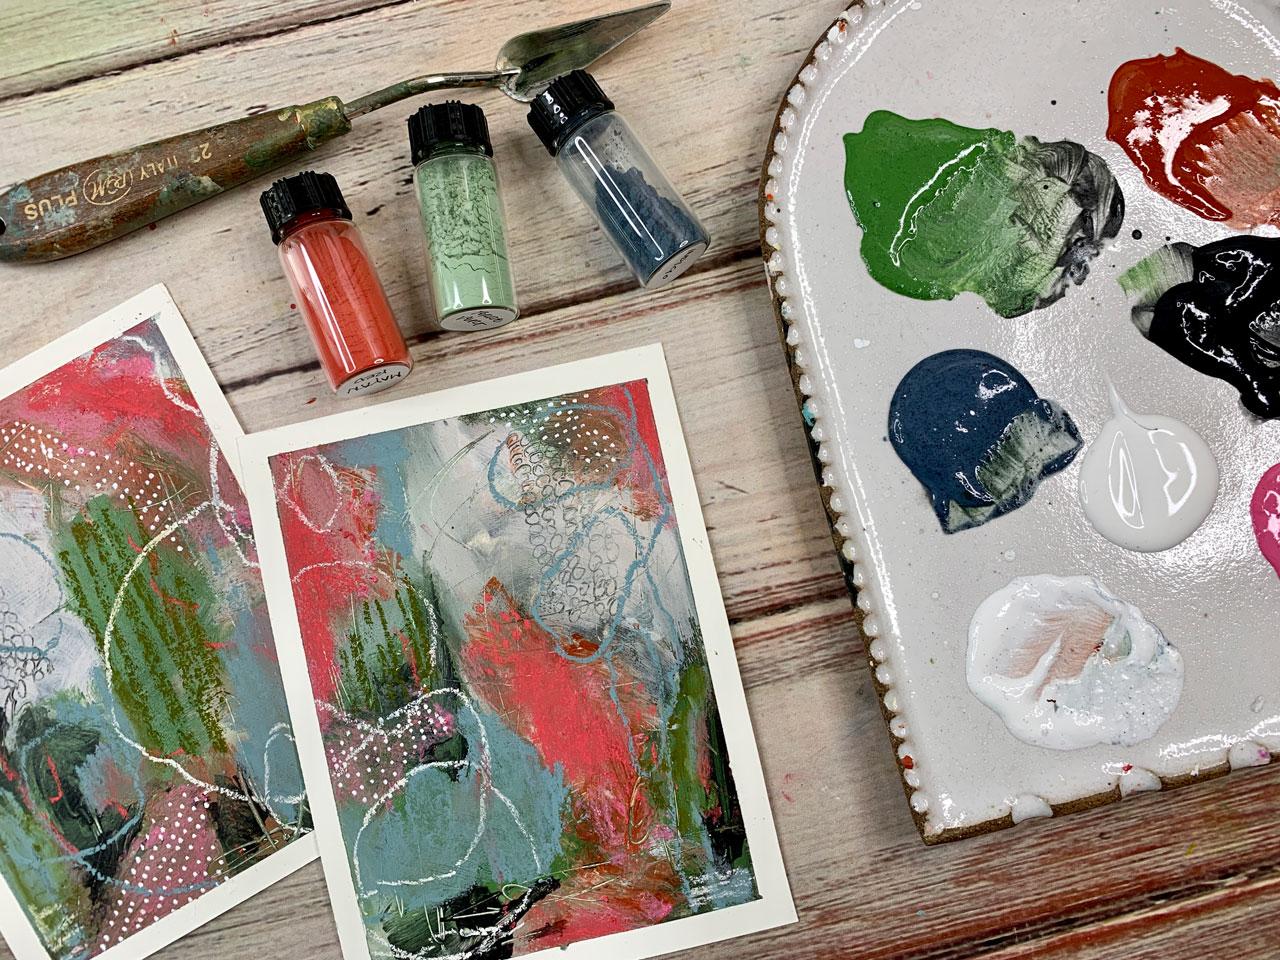
excited to get started. These turned out so beautiful. I used some random
colors just to try out a variety of
different paint pigments from art pigment to
natural art pigments, some charcoal powder. I used some specialty
colors that I got at an art store of different
pigments just to try a variety and a couple of different mixing binders to show you what you might consider using to mix that paint
up with and then just see what can we create with
that paint that we made. I'm pretty excited to share with you how easy it
is to make paint. I'm really loving
some of these colors that are mixed up and how they're incorporated
into our binder. I can't wait to get started. I'll see you in class. [MUSIC]
2. Supplies: [MUSIC] Let's talk about
supplies that we need to make our own paint. Making acrylic paint really
is like super-duper easy. Once you see how easy this is, I know you're going to want
to try to mix a little bit of paint every time you
come to your paint room. Our binder that I use and I
like a lot is matte medium, and you can use
Liquitex matte medium, you can use Golden matte medium, you can use any brand of
matte medium that you'd like. Matte medium comes in matte
finish and gloss finish. I particularly like the
matte finish personally, so that's what I use. It also makes it much easier to then use other materials
on top of it because it's got a little bit of grip
to it with the powder and the matte medium without
adding a layer of gesso. So, I do like matte medium
and the matte finish. The other option
that I really like, and it's really nice if you have a sensitivity to any kind of chemicals that may be in paint and you really want to
control what you're using, and it be natural and non-toxic, plant-based, no petroleum, I get this natural
acrylic medium, which is basically a
matte medium that they have created out of
plant-based stuff. I get this from
naturalearthpaint.com, which is also where
I get earth pigments and they have just a
plethora of yummy colors and you can get just an
amazing array of supplies on that site for things that you want to
use for natural paint. We're going to use a binder, you need matte medium and if you want the natural non-toxic, that's a great choice. Then you also need pigments, so you need a binder
and you need pigment. The pigment can be basically any kind of pigment you
can get your hands on whether you were out
there foraging and you broke up the rocks and you ground the rocks down to powder, or you got some natural
earth pigment from the Natural Earth Paint company. I have a lot of
those, I love those. They are much easier than going out and
foraging your own, but some of the fun in mixing paints could be the go
out and the forage and get your own colors
from around your area and then you can make paintings based on the area
that you live in. Here in Georgia, that
would be red clay. Red would be the colors that I could mix up, basically this. I also have specialty
pigments that I got from an online retailer and depending on when you
watch this workshop, they may or may not
still be available. So, I'm not going to try to tell you what art vendor it was, but these are specialty
Japanese pigments, they don't have a name, they just have a number. I really love these
because they're so pretty, but you can use paint colors
from the paint companies. This is Gamblin, and out of all of the colors, the green and that natural earth pigment
red were my favorites. The green just mixes up and
it's so creamy and yummy. The easiest way to get pigment is to get some from Gamblin or whichever paint brand that you
happen to like that offers pink pigment and get a
few colors that you like. I loved the green and I want
a few more Gamblin colors, and I also have
the yellow ocher. I love the paint pigment
colors mixed in with the matte medium
the best because they really did mix in, were super creamy and beautiful. I also mixed in charcoal powder, and you could try
graphite powder, you could also try mica powders, you could try
pearlescent powders, anything that's a powder. You can mix into a binder like the matte medium and
you can paint with it. When you go to the art
store or the craft store, look around for
anything that looks like a pigment
because you can mix that pigment into
your matte medium and make a paint out of it. I'm also using a couple
of palette knives. I like this shape for
mixing personally, but you can use any
palette knives, any size, any shape. This one just happens to be
the one that I like to use. I was mixing those paints up on my disposable paint palette, and then when I got it mixed up, I was moving it onto the palette I was going
to actually paint from. I do have those and
that's basically it. Pigment, matte medium,
that makes your paint, something to mix the paint, somewhere to put
the paint to use. Now with the acrylic paint, just like with regular
acrylic paint, it does not stay wet that long. It's not like oil paint and you could work with it
for a week or more, it's going to dry
out pretty fast. I have these in a nice big clump of liquid but if I let this
sit here too long, it's going to get a dry coating on it and then eventually
dry all the way through. You want to mix all your
colors fairly quickly, get them all ready and be
ready to paint with it. This is not something
that you want to set to the side and be like, I'm going to go eat lunch
now and come back later. These will dry on you. They're not like
watercolor paints where you can reactivate it. It's not like oil
paint where there's a long working time. These you're going to want to
mix and use fairly quickly. I hope you enjoy
mixing some paints. I'm going to show you
how we mix those up in the next video.
Let's get started [MUSIC].
3. Mixing your paint: I'm going to start
mixing our paints and we have a couple
of options here. For paint, basically,
what we need is we need a pigment
and we need a binder. The binder that you use for acrylic painter that I
use is a matte medium. You can get matte medium from liquid texts or golden
or different brands, and matte medium has a lot
of purposes that it serves. It can be a glue, it
can be a top coat. It can be a binder
for acrylic paint. We just mix the binder
with the pigment to make the paint very easy to
make acrylic paint. We also have some
natural acrylic medium, which is basically
a matte medium. From the Natural
Earth paint company, and that's natural
earth paint.com. I like using the Natural
Earth paint company because that's where I
get these pigments from. Made from rocks and things. These are natural
earth pigments. You can mix the pigment with the natural acrylic
medium and have a nice non-toxic plant-based
petroleum-free paint. If you're sensitive to chemicals or anything that
might be in a normal paint, this is definitely a really
nice way to go and you can have full control over what elements
are in your paint, which is where I really like
using something like this. I've got natural earth pigments. I've got mommy read indigo, titanium white. I
thought I might try. I have a pink from my specialty pigments
that I've gotten, so they don't have a color
name but it is a pink. Also, have chromium green
oxide from Gamblin. Then just to show
that you can use basically any pigment
in making your paint, I also got some charcoal
powder I thought we'd use for black. I'm just going to start
mixing these colors on my disposable palette and then I'll put them on
my paint palette. Acrylic paint dries a lot faster than oil paint. We don't care. Watercolor dries because
you can re-wet that, but acrylic paint one
it's dry, we're set. You want to get these
out and ready to go and then be ready to paint fairly quickly once you've
got these going. I'm going to mix my paint up here on my
disposable palette, put them on my paint palette
and then be ready to paint. Let's get started. I'm getting my pigments out. I've got enough room to mix
several colors on here, but I want to definitely
leave myself enough space. Let's put this one down here. I'm just using a little
bit of each pigment. There is no exact here's
the right right recipe. It's just trial and error on your part as to how
much pigment you like, to how much paint. Just to show you, I'm going to mix these up a couple of ways. I've got the matte medium
here in the jar from the Natural Earth paint
company and I like to go ahead and get all my mediums
set out so that I'm not mixing a bunch of paint and then having a dirty palette knife
that I have to contend with. I go ahead and get
everything out. This is probably a
50-50 or so mixture, just play with that and figure what ends up
being the best for you. Then maybe I'll do one more
with this one and I'll do the other ones with
my matte medium from liquid texts just because I
like to use things like this as my experiments and my tests and my figuring
things out stuff. I'm going to get
my matte medium. This is a little more liquidy, I can feel it already. I didn't even have
this one open. Let me open it. This
is basically a glue. Once this stuff dries, you're set completely
different consistency than our other one, and then I can always
add more if I need it. But I'm going to
go ahead and just start mixing these
with my palette knife, just getting all the
paint incorporated. I really do love the
Gamblin pigments. They mix in and become
a really yummy, delicious texture to work with. I like those a lot. I'm working pretty fast. It's not going to
dry in a minute, but it's going to dry
in a few minutes. You want to get going when
you get your mixture. Then once I get what I want, I'm going to move
this over here. Ready to paint with and
move right to the next one. This is that indigo. This one is very
grainy and I already know from mixing it
in the watercolors that it's a little harder
to incorporate in a binder. I have discovered, and I may have used
too much medium here, but this is why we do
stuff like this to experiment and figure out
what's the right consistency. Do we like the amount
of color that we got? See even in this binder, this pigment is
staying suspended. I think indigo is just
a really hard pigment. We're always, no matter which medium that
we're going with, we're going to have that pigment suspended
and it's going to stay not as mixed up as a finer powder because that's basically
what you're doing. You're suspending that pigment
in some type of binder. Let's go ahead to the next one. This is a titanium white powder. I think mixing paint is fun. You can mix these
up just like you can combine colors out of a
tube to make other colors. You can experiment with
different pigments. You can experiment with
different binders. It's just fun to see what all the different
elements gets you. No matter what you do,
it's probably not going to be the exact consistency. I got a little bit of blue
and white. That's all right. It's probably not going to be the exact consistency
of paint that you get from the art store already
made up, but that's okay. I already understand that. It's not going to be exactly like a paint that comes out of a tube but it sure
is a nice quality. Very little filler, vivid color. Look at this color,
this mummy red. Super easy to mix and wow that color is super
yummy. I like that a lot. Next, this charcoal in
with our matte medium, get us a nice black, hopefully. I Hope by seeing
how easy this is to make some of your own
acrylic paints that will inspire you to get
creative and want to try this because I had
all of the paints. This one's probably
the easiest to make. You just mix that
pigment in with matte medium and
you're good to go. This is that specialty
pigment that I got at an art store online. I'm just mixing it up
because I wanted a pink. After playing with
these for quite a while now I have discovered
that I think I would like to have
a Gamblin pink because it really does
make the most creamy, yummy paint to work with. We're just going to
go with what we got. I also like to personally have gesso available on my
paint palette because I like mixing my
paints with gesso so that it makes it
translucent a little bit, but it makes it where I can
put other things on top. I like to layer my materials. This is just a watercolor paper that I am now going to paint. Now that we've got all
of our paints mixed, you saw how easy that was. I'm going to take these
down and then I will be right back to test these out and try painting
with them. [MUSIC]
4. Saving wet paint in containers: I wanted to give you an
idea because in this class, I mixed up our acrylic
paints and I used them. Whenever I mixed up, I was going ahead and using. But let's say that you want
to make some acrylic paints and be able to use
them for awhile. These are a little paint pots
that I got off of Amazon, but you could get some of
these from the art store. If you want to be able
to create some paint, keep it for a while and
use it for a little bit, you can get these little
clear plastic paint pots and these are fantastic. Then the lid just
closes and it seals. Then you can keep
those acrylic paints for several weeks rather than just the day that you're
working with them. You would just want to
put the paint in there with the palette knife
and then close that up. Then you can keep using that
paint for a little while. That's really good for mixing your custom paints
with the pigments. It's also really good if
you've got a custom color that you're mixing up that you want to be able
to use over and over without mixing it every time. These little paint
pots are fantastic and they were pretty cheap
for a big bag of them. If you need to keep
the paint wet, then these little paint pots
are fantastic for that. I will see you back in class.
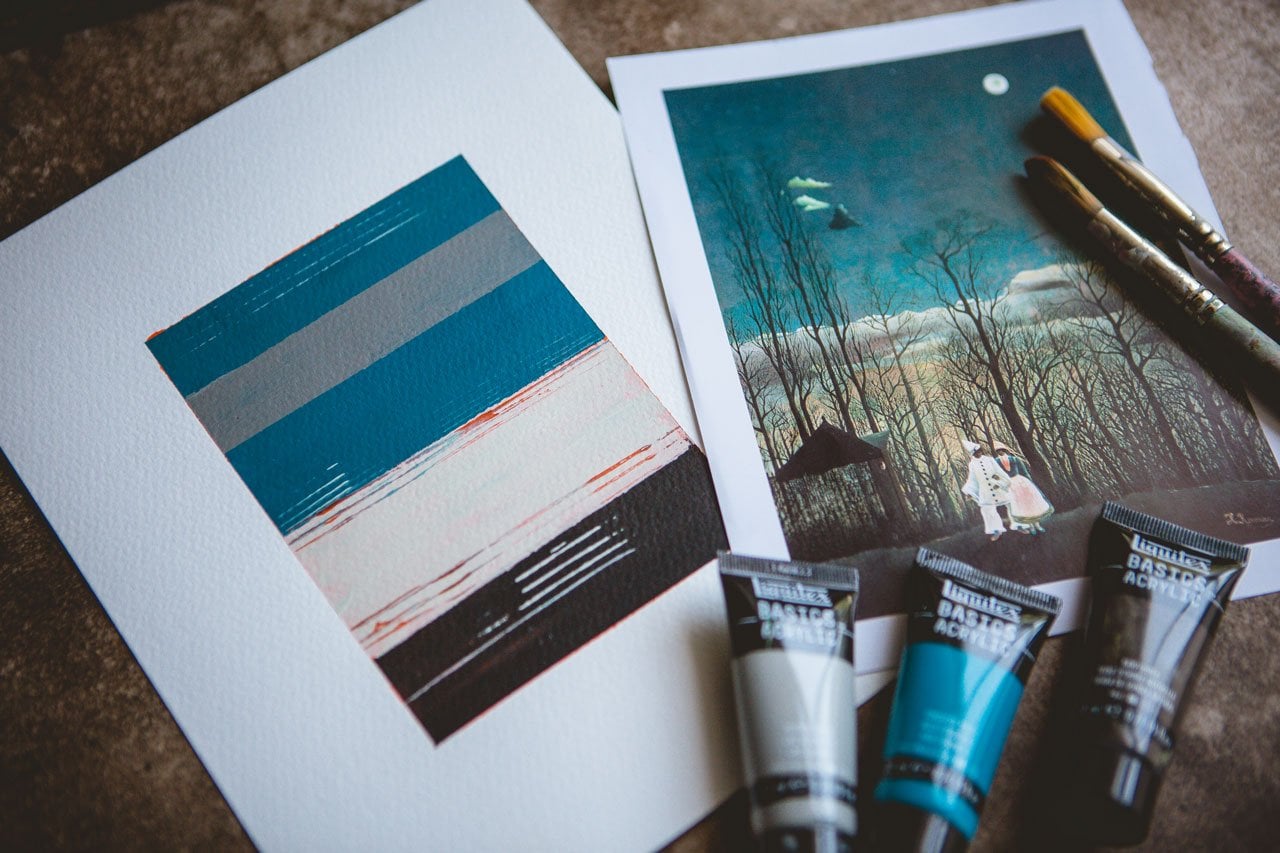
5. Let's test out our new paint: [MUSIC] Now I'm ready
to start painting. I've got a little bit
of water over here, I've got a couple of just random paintbrushes
I got from Michaels, and I am going to start. I like to just mix things up on my palette, and then
just get going. This is how I like
to test paints. I could have done test swatches with the different colors, but I like to see, what am I going to get
mixing these on my palette with different colors and different supplies,
different materials. What am I going to get? I like to just go ahead, and maybe paint something
and test these out. It's definitely a different
feel working with this acrylic paint
in the map medium or in the natural one. Especially this one,
the indigo just really is a harder pigment. It doesn't blend in like
I would think it would. I'm not getting the
blue that I was thinking I was going
to get out of here. I do like moving stuff
around with my fingers. Maybe off. Get a second paintbrush. We're going to add some
white in here and just see. It's a little more
translucent than the titanium that I would normally get out of a tube, so that's interesting. I like doing fun color studies, so that's why I end up doing this with the paint pigments. Let's see with this orange, this yummy, mummy red. [MUSIC] I'm going to add some mark-making in here, add some interest, and then
I'll keep adding some paint. [NOISE] I like to layer things and let them dry and
layer in some more, and maybe I'll get in there with my fingers and
smooth some paint around if I don't want a
bunch of paintbrush marks. I'm just experimenting here, I'm not trying to
make a piece of art, so that does make it a little easier when you're
doing final abstracts. If you're not going for
anything in particular, then you're a little
bit freer to just paint and move things around and
see, do you like this color, do you like the way that it is reacting with the other colors, do you like the way it feels? Because I will tell you, painting with a handmade paint, it's a little different
than painting with a manufacturer paint with different fillers and stuff
because it feels different. It's a little thicker. It's a little more like
painting with a glue, which is appropriate because that's basically what
matte medium is. It's a glue, it's not a regular binder like we might think of them manufacturing with some
other fillers in it. Just a little different feel. [MUSIC] I will say too, with the amount of pigment
that I put in them, these are a little
more translucent too. Every color is going to
have that translucency, where with acrylic paint
that's manufactured some are acrylic and some are opaque
and some are translucent. It really just depends
on what they've used to create it and what
fillers were in that paint. All the man-made ones here
that I mixed up and created, they all seem to be
slightly translucent. Just keep that in mind, when you're deciding on
painting colors that they're not as opaque as maybe like the orange you might get that
are already made. Definitely interesting
to experiment with. These would be fun
making a landscape. I'm going to go ahead, maybe do some more mark-making, just some interesting things in this paint while it's wet. Then we can come back
and top this paint. I've got a little bit of, just so that I was working a
little bit into the paint, but I also noticed on some other ones that I was
playing with that it was really easy to top these
paints that I made with pastels and stuff. I think they do have
a little more grit, and that could be the
grit in the pigment itself than some of the acrylic ones that are manufactured because those are normally really plasticky, and you can't put
anything on top of it. But I didn't seem to run into
that same issue with these. I think it's just because
the pigment is a little bit heavier and more coarse. I might have to let
this dry and then I might do some more mark-making. These are dry, mostly dry, they're drier, and I thought I
would go ahead and just mark on top of
these with some of my favorite mark-making
tools to get an idea of how these are going to work with
different things on top. One of my favorite
tools to use on top of my paintings
is the Posca Pen. It's a white paint pen
and makes great marks. Even though in the end, I'm not sure I'll love the colors that
I've put together, I wanted to test a variety from paint pigment
to natural pigment, to a specialty
pigment to charcoal, or different powder
to give a range of different things that
you could look for. You could look for Mica powders, you could do Pearl powders, any type of powder can
be made into a paint. You just got to mix that powder with something that's going to hold the powder
together and glue it to your paper like a matte medium. Let me put a few
more dots over here. Definitely loving the paint pen, works great on top of our paint. Yummy, love the paint pen. Then I have some soft pastels. These are mostly Sennelier soft pastels and I
like using these because they can accent the color, and you
can rub them in. They are water-soluble,
you could get them wet and smear
it around some more. But I like it because
they give you some pops of color on top of paint,
and a different texture, and I liked that the
texture is different. You can see that these
are going right on top of my handmade paints
really nicely. Usually, the acrylic
is so shiny and so hard that these
won't stick to it. But I'm having some
real good experiences with the handmade
paints of things stick into it really nicely. I'm just adding
some other color, maybe some other mark-making. In any end, I may not love my little paintings,
but that's okay. The whole purpose here is
to experiment and see, what can I do with this? What can I do? Got a green here, so I
might use this green. You can draw different marks. [MUSIC] I almost see what looks like, sure it's that white, but it's almost a gray-blue
color that's really pretty. So I might look in
my pastels and see, is there a gray-blue
color that I would like? Yeah, that's it I
think, right there. Let's see. That I would like to
accent in here a little more because I'm seeing that
color and I'm thinking, I love that, it's really pretty. Maybe I'll change some
of the color in here to reflect that,
because I like it. See it's almost that
exact color that I can see right in here. Let me just zoom
this in for you. See this color right in here, it's just barely
looks like a blue. I think I want to turn
some of that more blue to pull that out. [MUSIC] See that sticking right to that paint really
nicely, I love that. That's pretty. Let's see. Anything else I want to do this? Maybe I want us to
mark out of that. Then I do have some whites
in here I could come back and do some little
white details. That's pretty. I'm not sure if
there's anything else I want to add to this right now, but I can think about it. I do like the colors
that it went. Very fun. I think I'm going to
go and wipe my hand, maybe I'll just
wipe them off here and I'll try to be careful. I'm going to peel
the tape off so we can look and see what
these look like. Peeling the tape is magic, because then whatever
you are working on from a little mess, suddenly turns into a
little piece of art. I'm in love with it. Look how pretty that is now
that we pulled the paint. I thought I wasn't
going to love it, but I love it. Oh my goodness. Peeling the tape gives
me joy [LAUGHTER]. When I start off, I think, I'm not sure I'm excited
about these colors, but then I add some other mark making on top of it,
and then I'm like, wow, I'm in love with
the little pieces. Then it's almost like with
this little frame on it, it's like we've made it
ready for a piece of art. Look how beautiful
these turned out. I know we started off making
paint and then this is my little paint
experiment to use the paint and then
mark-make on top of it and see how
everything sticks. Then to finish this, I would probably use a finishing spray to
coat on top of that. Because I've used pastels, and my favorite fixative
for the pastels is the Sennelier soft
pastel fixative. Then I spray this on quite a few times, and
then this would be ready to then be
framed and hung up, because now that we're
done, I love it. I hope you have
fun making some of your own paint and then
testing it out on say, a little abstract
piece like this or whatever type of art
that you like to do. I would love for you
to come back and share what you made paint-wise, what you used, what you
created with that paint. I would be ecstatic if you'd come back and share
some of that with me. I will see you next time. [MUSIC].
 DENISE LOVE, Artist & Creative Educator