Transcripts
1. Introduction: Hi. My name is Sheri, and I teach art and
craft classes in a small country town
in Western Australia. Today, I'm going to teach you a really easy and beautiful
technique using alcohol inc. In my demonstration, I'm
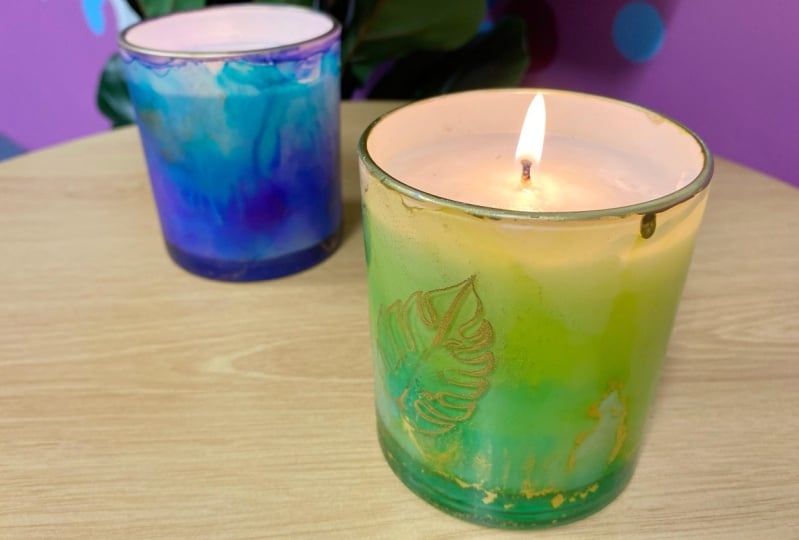
going to show you how to make these lovely candles
using the technique. But it's such a good technique because you can
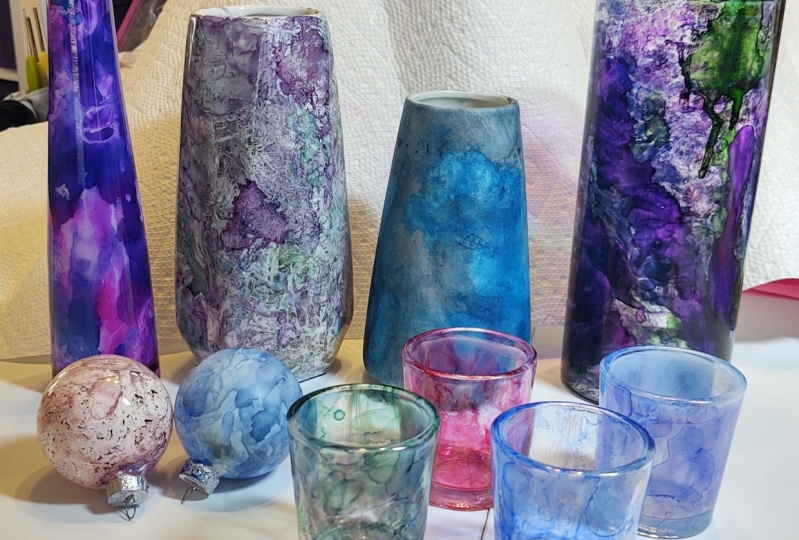
use it to decorate almost anything like
these little plant pots. And here's another one in
some different colors. Aren't they amazing? Anytime you need a gift, it'll be great. One of the best
things about it is that apart from
the alcohol links, you don't need anything
special for it. Everything you need, you
probably already have around the house. Let's get started.
2. Tools and materials: So this is actually a
really lovely technique. It's not too difficult. You don't need a lot of stuff, and what you do need. You can probably find around the house anyway, most of it. And even if you're a
complete beginner, you can produce a really
lovely array of patterns. To start with, you need
something to paint. Because this is just a practice, I've got a really
cheap ceramic mug. To get a feel for this
technique properly, you need a rounded
surface to practice on. We are, of course, going to need alcoholis If you're new to arts and craft or you're
new to working with color, and you don't have a lot of
background on color theory. For beginners, I
always recommend two colors and a silver or gold. Now, my two colors
that I've chosen are a light green and a turquoise. Now I know these colors are
going to work well together because turquoise is
essentially a blue green. So it's got some green in it, which means it's
going to go really, really well with
that light green. So you'll need some alcohol. Now I'm using 100%
isopropal alcohol. You should be able
to get this from your local hardware shop, and I've decanted it into a needle tip bottle to help
me control where it goes. We need some disposable
gloves as always, and we need some plastic wrap
or cling wrap or glad wrap, or cling film, or sera wrap, or whatever you call it in
your part of the world.
3. Learning the technique: So let's get started. Throw some gloves on and tear yourself a piece
of plastic wrap. So this is just a practice, so it really doesn't matter. But when you're
doing it for reels, before you start doing anything, just make sure that the piece of plastic you've cut
is big enough to wrap all the way around the piece that you're
planning to paint. It can be absolutely heartbreaking if you
forget this step, and you realize
that your pattern is not going to go all the way around, and you'll
have a white strip. We're good though. This one's big enough, so
let's make a start. Grab your first ink and just randomly drip it all
over the plastic. Often, when we pick our colors, one of the colors will be
more dominant than the other. In my case, the turquoise is
going to be a lot darker, it's going to take
over from the green. Now, I don't actually want the turquoise to dominate this one. I want it to be mostly green with spots of turquoise
here and there. So now as I'm adding drops of my green of my second
color to the plastic, I'm going to add about twice
as much of the green as I did the turquoise because I want there to be more green. So on your practice piece, before you go into
your real piece, make sure you experiment with
different proportions of your colors and see how it alters the final look
of your finished piece. So now I'm adding my silver, and the silver will definitely You metallic will
definitely overtake. So you can see I'm only adding about four or five drops
of the silver compared to, say 30 or 40 or 50
of the other drops. Finally, I'm going
to add some alcohol. I'm just giving it a
big square all over. Now, there's no set rules about how much alcohol you
should add at this stage. The alcohol just helps
the inks move and blend. So if you add less alcohol, then the inks won't
blend as much. And if you add more alcohol,
the inks will blend more. It all depends on the
final look that you want. So now I'm going to
take my practice mug. I'm going to lay it
down on the plastic. And I'm going to wrap that
plastic all the way around it. If you've got any white gaps, you may choose to leave them there if you want
some white gaps. If you don't, you can just massage the plastic
a little bit. If your colors aren't running
together very well, again, you can just massage the
plastic and just work, generally work those
colors together. Now, while the ink ist wet, you're going to unwrap the mug. And then I'm just
going to sit that on a ceramic tile so it
doesn't stain anything. And I'm just going
to let it air dry naturally and just
let the ink and the alcohol just naturally keep dripping and blending
while it dries. Now, if at the
beginning, you forgot to check the size
of the plastic and you've ended up with
plastic that's too small for what you're wrapping
and you've got white gaps. You can actually take this plastic wrap while
the ink is still wet. You can bunch it
up a little bit, and you can actually
stamp with it. If you've got any small white gaps that
you need to cover, this is a really good hack
to solve that problem. So that's pretty well dry. You don't need to put
a heat gun on this, you just let it dry naturally. That there looks like it's
where I accidentally touched the mug with the plastic wrap while it was drying.
So I'll ignore that. But, like, look at the rest of it. There was almost no time. There was almost
no skill in that. And look how beautiful it is.
4. Painting your candle: I'm now going to use
this technique on this really nice candle
that I found at the shop. It's inside a glass jar, so I'm not painting
the candle directly. The thing I really
love about this candle specifically is the
jar is actually white, the glass is white,
it's not C through. So this is just
going to make those alcohol ink colors
absolutely pop. Now, because I'm going to
color in the whole candle, I'm actually going to use a
gold metallic acrylic pen. So I'm just going
to use that pen to line around the rim here, and it's just going to give it a really nice
finished crisp look. I also have a
ceramic tile nearby, and it's just going
to be a nice clean, hard flat surface
where I can rest my candle while the ink dries. So it's a really good
idea to do this. I'm going to grab
a white, but I'm going to squirt some alcohol. And then I'm really going to clean down the surface
before I ink it up. So this will not only get rid of any dirt or anything
that's clinging to it, it will get rid of fingerprints, and it will also clean
up any residue from any labels that were on
that candle to begin with. So for my ink colors, I'm sticking with the light
green and the turquoise. The candle is
called prosco pear. So this light green just seems perfect to go
with a scent like that. But I have swapped my
silver out for gold. I just think I like gold
a little bit better, particularly with that
gold pen in the rim. So, I'm just going
to check that I've cut myself a big enough piece. And it looks like I
have, that plastic goes all the way
around. Beautiful. Okay. So lots of green. Just a few drops of turquoise. I want this candle
to be mostly green. I don't want the turquoise
to dominate the light green, so I'm just putting a few drops on there compared
with the green. Then I'm going to put
even less of the gold. And a big old square
of alcohol all over. No, I'm going to
wrap that candle. I'm going to give it
a good old massage to get those colors
flowing a little bit, fill in some white spots. That candle looks
pretty well dry, but I'm just going to
give it another minute or two before I actually touch it. But I don't need to
touch it to do the rim. Now, this is a
different gold pen to what I showed you
in the last shot. I tried to use that other
one and it had run dry, but luckily I had this spa. It was a very, very
well used pen, that other one, and I wholeheartedly thank
it for its service. So anyway, we're going to
give the pen a good shake. I'm just going to depress the on my tile just to get
the ink flowing. And then I'm just
going to carefully and patiently paint with that
pen around the edge. This is a completely
optional step. You don't have to go
out and buy a gold pen. As I say, I think it gives
it a nice polished finish. And it also helps that you
don't have to worry about getting a neat edge on your alcohol link because you're
going to paint over it. It's not the easiest
thing to do because it's a round neb on a round rim, so you do need to
be very patient. But it'll look
amazing at the end. Now, finally, once your piece is dry, you'll need to seal it. Now, this is tricky. In the US, alcohol ink workers
swear by crylon. It's not too easy to find in Australia and where
I am in Australia, I don't have a lot
of choice anyway. So I just go to my local
hardware store and I get the best sort of
glossal I can find. It does reactivate the
alcohol a little bit. But if you just work in thin coats, it's
better than nothing.
5. Your project: As I said earlier, this is such a great technique. You
don't need a lot of time. You don't need a
lot of equipment, and you can make something
really, really beautiful. You can use this
technique to paint any non porous object
that you find in a shop, it can be a cheap object. It can be an expensive object, and you're just going
to make it look absolutely stunning every time. You can make a lovely
gift for somebody. You can chooseir favorite colors or choose colors to suit, their bedroom or their laundry. So please go ahead right now, grab some plastic wrap out of the kitchen drawer and ink
up something beautiful. And when you've done that, take a photo of your amazing artwork and upload it to the
gallery. See you next time.
 Sheree Lowe, Artist and instructor