Transcripts
1. Things You Will Learn! : Hello everyone. I'm Mark mine. I am a portrait and boudoir photographer and a
professional photo editor. Today I will be teaching you
everything you need to know about AIR generation
using stable diffusion. I am confident in saying that
this is the most in depth course on all things AI art available on the Internet today. Just as I do in
my other courses. I'll start with the
assumption that you have no prior experience
with AIR generation. Breaking down the
basics first and slowly increasing the complexity level
as the course progresses. Throughout the course,
I'll treat you to a no stone unturned
comprehensive guidance, ensuring that by the end
you'll have grown from an absolute beginner to
an experienced user. By the end of this course, you will know how to set up your completely free
AI art software from installation to
various extensions available on the Internet. You will become familiar
with all the tools and techniques required for both basic and
advanced use cases. You will learn how
to communicate effectively with your computer, a process known as prompting. And how to generate images using both text to image and
image to image methods. I will also show you various
in painting techniques used to fix and recreate parts of
previously generated images. And finally, how to upscale your results
using a variety of. What sets this course apart from most AI related courses
on the Internet is the in depth breakdown
and overview of each and every setting and slider
of Automatic 11, 11. The most advanced AI
generator available to date, including various examples, comparisons between
different settings and more. All with the goal
of helping you find your own style and
preferred method. This will provide you with a comprehensive understanding of the parameters that
you can use to guide the AI generation
according to your vision. Additionally, we will
cover both the photo realistic and animated
stable diffusion models. Where to find and install them alongside
textual inversions, luras and files we use to teach our favorite
models new concepts. Made a great effort to
simplify and help you navigate the
sometimes confusing, stable diffusion interface. Including various terms and techniques used
by the community. With the goal of presenting
them in a way that is understandable even if you have had no prior contact with AI. This course is your one
stop destination for mastering AI art generation
with stable diffusion. I'd be delighted to have
you on board as my student embarking on this
creative journey into the world of
AI art generation. Let's unlock your creative
potential together. I am Mark and I will be
happy to be your teacher.
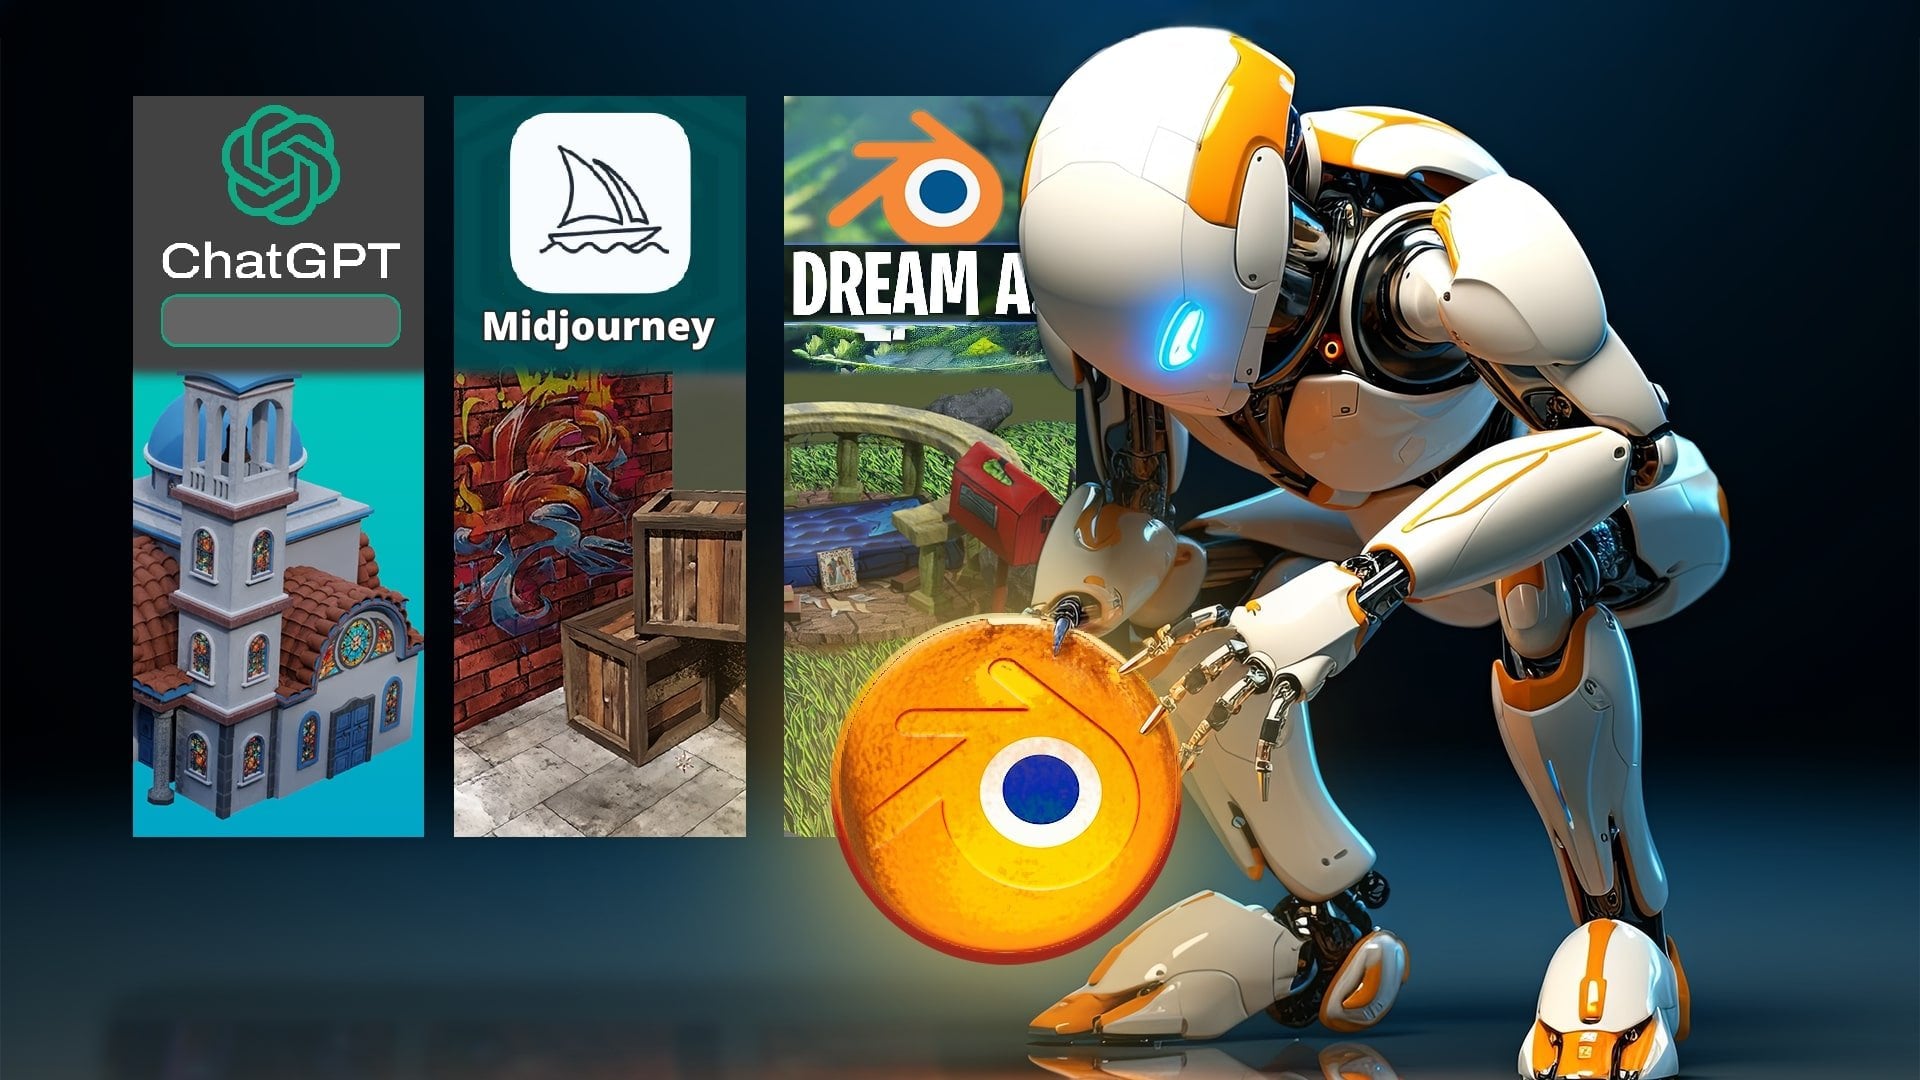
2. Why Stable Diffusion?: Welcome to the first
chapter of this tutorial. Before we move on,
I want to answer a question that is probably
in the minds of many of you. Why not Mid journey, an already popular
AI art generator. Why don't we use
the Adobes firefly? I can provide you with
two kinds of answers. A short one, I would assume you're like me and
you don't like being restricted when it
comes to trying out different ideas and having
to pay for it on top, all while being severely limited when it comes to taking
control over your image. A longer one mid journey is a
subscription based service, giving you a number of
generations to use it. You need an internet connection and all your results are public. Costs of using mid journey are vastly increasing in
case you want to keep your results private or get additional generations
outside of the basic plan. It's a similar story
with Adobe's Firefly and their generative fill requiring both the Internet connection
and a paid subscription. Adobe is likely going to charge extra for the generative
fill feature within Photoshop two that
is in development at the moment of
creation of this course. Contrary to Mid Journeys
and Adobe's solutions, stable diffusion is both free and running
locally on your PC. With a simple tweak, you can run it completely
offline for when you want to go off the grid or when on a trip with no
Internet connection. The second important reason why stable diffusion is a better
choice is the fact that results generated
by Mid Journey or Adobe are based on their
own large trained models. While these large
models are flexible and capable of generating a
wide range of outputs, they are limited in terms of the quality of those outputs. Now let's delve into the
most crucial reason. Both Adobe and Mid Journey
operate as businesses. Which means they
need to adhere to strict standards and tend
to be very restrictive. In terms of the
prompts you can use, mid journey in particular, continuously adds to
its list of band words. As a boudoir photographer, you can imagine how much
of my typical prompts are already blacklisted or will likely be added in the future. Another significant advantage of stable diffusion is that you have the freedom to
train your models on the content you desire, or download pre trained models shared by various
Internet users. The possibilities are limitless in terms of what you can create, and there are no restrictions
on your creativity. Speaking about the advantages of stable diffusion interfaces over other generative AI solutions, here are some of them you can experience using software such as Automatic 11 11 that we
will base this lesson on. A generous number of words
allowed in the prompt window. The ability to use
negative prompts. Reading prompts from
existing content or having the AI
search for prompts, generating original content
guided by other images. Extensive control over
the AI creation process with various parameters, precise control over
AI generation seeds. We will cover these in detail. Batch processing and creating
AI work efficiently. A wide selection of samplers, a variety of upscaling methods and upscalers to choose from. The ability to install
models from the Internet, filling in models using files. We will become familiar with Laura's textual
inversions and others. The potential for modding
your software to gain even more control,
training, stable diffusion. To reconstruct your own face or any other desired content. Merging various models to
achieve your desired results. Exploring different
types of in painting, which we will also cover. Uploading precise masks created in Photoshop and much more. The only drawback of
stable diffusion is that its generation speed depends on the graphics card in your PC, with newer graphics
cards offering higher speeds for a more
enjoyable experience. If you lack the
hardware requirements for stable diffusion, you can also use it
inexpensively by renting graphic processing time from
Google using Google Colab. In conclusion, while
stable diffusion may initially appear more
complex to get into, it is ultimately
worth the effort, as it does not inhibit
your creativity and allows you to create according to your preferences and vision.
3. Setting Up Your Free Software: In this chapter, we will
cover the following topics. Pc specifications
required to run AI Art programs or as they are often referred to
as user interfaces. User interfaces for creating AI art including
NMKD and others. Automatic 11, 11, my
preferred user interface, and how to set it up for local and offline use on your PC. The installation process, PC specifications needed
16 gigabytes of Ram, Nvidia, GPU, GTX,
700 series or newer. With at least 2
gigabytes of V, Ram, Linux or Windows 7810, or 11 at least 10
gigabytes of disc space. As mentioned earlier,
I will be showing you how to run stable
diffusion for free. However, if your PC doesn't meet the required
specifications, you can still run
stable diffusion models using a Google Colab
notebook for $10 a month. As of July 2023. I will add a link explaining
setting up stable diffusion through Google Colab in the text file in the
course materials. User interfaces, the programs used to run stable diffusion
models and generate AI art can be either
standalone applications or user interfaces accessed through your computer's
internet browser. Here are some of the
most popular options. Kd graphical user interface and offline standalone
application. Somewhat slow with updates,
but beginner friendly, playground, user friendly, and offering 1,000 free
image generations per day. It is intuitive and fun
for dipping your toes in AI Art Dream Studio, similar to playground but
with some missing features. Also, it is not free
invoke AI stable, though not as feature rich. It provides a powerful
user interface, made space offers a
simple interface and allows limited free usage
with full functionality available through a paid plan Comf Ui newer arrival featuring a node
based user interface. Quite powerful but
also quite complex to diffusers packed
with advanced features. It has a clean user interface and is known for its
speed and stability. For a list of more
free websites, you can check the course
materials text file. If you haven't experimented
with AI generated art before, you can start with
simpler options like playground AI to
get a feel for it. In that case, you can also
skip to the second chapter of this tutorial where I will teach you how to
communicate with your PC. However, since this
lesson covers everything from a beginner to
a pro level uses, I strongly recommend
diving into Automatic 11, 11 with me A few words
on Automatic 11, 11. Automatic 11 11 is open
source and it's the most powerful and feature rich
user interface out there, offering frequent updates, a continuous stream
of new features, and numerous extensions
for advanced users. You can generate
using text prompts or use other images to guide
the creation process. You can also generate a part of the image only instead
of a whole one. And upload masks created in
Photoshop and so much more. All of the new stuff in
the AI art world you can get to try first using
Automatic 11 11. This is the reason we
will be covering and creating our AI art within
this user interface. In the course
materials text file, you will find a link that
goes to this web page. This is Automatic 11
11 page on Github. You can also Google Automatic 11 11 and find the
first link on Github. Don't let the somewhat technical installation process deter you. It's a straightforward
step by step procedure. Even if it involves entering
some command prompts. You're just going to
scroll down until you find the installation
and running section. Here you can see automatic
installation on windows. There are literally three
steps only to install. Stable diffusion,
or Automatic 11 11, which is a user interface
for stable diffusion. First you need to
download Python three pint 10.6
You need to press this link and scroll down here
where you're going to find the Windows installer 64
bit download that one, then we'll head back to the
installation instructions. On step two, we
will download Git. Now, we haven't
installed Python yet, but we'll do that in a second. We're going to download Git, which will use the
standalone installer 64 bit Git for Windows. Set up, Download that file. Once you've downloaded
those files, you will see them in
your downloads folder. Start with double
clicking the Python, Make sure that you
check this box. Add Python to path, this is very important. Then press install. Now, Python is now installing. This shouldn't take more
than a couple of minutes. You could now close this. Now we need to install Git. Double click here,
we're going to press, you can leave everything here, Default and just
press next again. Press Next, as we will
not be using Git for anything more than one or
maybe two simple commands. You don't need to care about the editor, just
leave this again. Default and press
next. Let git decide. Press next again, leave everything default
and just press next. After you press next with
all the default settings, Git is now installing
on your computer. Git is the application
that we will use to download
files from Github, and that is where Automatic 11 11 is stored,
developed and updated. Click view, release notes
and just press Finish. We have now installed
the prerequisites for Automatic 11 11 and
stable diffusion. We can now go back to the install instructions and we will copy paste
this line here. Now, open Explorer window, create a folder where you want your stable
diffusion to be. I'm creating a folder
here named a 11 11. I'm entering that folder
now I'm going to press up here and I'm going to type in CMD to open a command prompt. You can also open a command
prompt from your start menu. But then you won't be
in this directory here. You're going to copy
paste the git Clone text. Git is the program
that we installed. Clone will copy the
files to your computer. Press Enter. Now your files are being copied
to your computer. This should be fairly fast depending on your
Internet connection. For me, it took about 5
seconds. Automatic 11. 11 is now installed
on your computer. Now you can start
your stable diffusion by using the web UI user file. However, I recommend
that we do some changes. First, we're going
to open Notepad and we're going to drag
this file into Notepad. This will greatly improve your
AI generation experience. We're going to add
a space two dashes, and write x formers. This will speed up
your stable diffusion. Generations will also
type auto launch. This will automatically launch a browser window when you
start Automatic 11, 11. Now, if you are on a GPU of
let's say maybe four to six, maybe 8 gigabytes of Am, you could add med Am. This will lower
your Am usage and will make stable diffusion easier to use on your computer. I will use the X former
and auto launch commands. All we need to do now
is save the file. With the software
installed and ready, it's time to move on to the first creative part
of this course.
4. The Art of Prompting: Welcome to the first creative
chapter of this course. Now that you have
successfully installed the user interface we'll be
using for creating AI art, it's time to dive into the fundamentals of
AI art creation. Whether you intend
to use Automatic 11 11 to enhance
parts of your images, create assets, or craft
entirely original AI art. It all begins with a prompt. You may have come
across the concept of prompts or have heard about
the art of prompting. In this chapter, I will provide a comprehensive
understanding of what prompts are and guide you on how to craft effective
prompts the right way. What exactly are
prompts if this is your first encounter with
the term? Let me explain. Prompts are the
words you give to the AI to tell it
what to generate. This is how we communicate our creative intentions in a way that the computer
can comprehend. As the process relies on words instead of complex
programming languages. It's also intuitive for us
humans and in practice, much simpler than it may sound. This window here is where
we type in our prompts, that are our textual commands. And this area here is a
negative Prompts window. This is where you
tell stable diffusion what we want to see in
our generated image. Here is where we
write the elements we want to exclude
from the result. Think of prompts as the recipe for the image we want to create. This is the most crucial
aspect of AI image generation. When you're preparing
to craft a prompt, begin by asking yourself questions about the image
you wish to create. What's the subject
of your image? What are the characteristics
and details of your subject? What additional details do you want to add to the
subject of your art? What medium should your result? Try to recreate an oil painting
illustration or a photo. Should it be a
close up portrait, full body portrait, or
a big landscape photo? What art style should your
image be inspired by? Which artist and aesthetic? Describe the surrounding
environment. How should the light and ambient
of your image look like? Describe the color
scheme of your shot, such as teal and orange. A lot of models respond
well to quality tags. Those are the words
and phrases in your prompt, such
as masterpiece, best quality, intricate details, high resolution, et cetera. Make sure that the model
window is showing V 1.5 pruned EMA only if not, consult with the word file
I've provided with the lesson. Before we give our first
AI generation a go, it's important not to get
disappointed on your first run. We are using a base
model that's coming alongside Automatic 11 11. Simply so you can get a feeling
or how prompting works. I promise you'll
see your results getting way better as we
progress through the course. One thing to mention is
that you will probably get different results than me even if using the same exact prompts. And that depends on a lot of factors such as
the graphic card, you have version of your
software, and so on. With that out of the way, let's try out prompting together. Like mentioned before, let's answer to those questions
laid out earlier. Subject, subject
description and details. Let's say golden retriever dog with big black
eyes and big ears, medium of our generated image. I will go with the
illustration in the style of cartoon shot type or angle. Let it be the close up shot
style children cartoon. Maybe surrounding
elements in a park color. Vivid colors, colorful
lighting on a sunny day, morning, light shining through the trees surrounding
environment, birds flying in the background. Let's hit the Generate button. This is my result. Of course, you can try your own prompts instead of the ones I've chosen. Keep generating a
few times until you get to something resembling
a result you like. You might get it on the
first run or you might not. It's a bit like lottery. The first time you do this, when you get to
something you like, lock the seed by typing one in the seed window in order to loosely lock the compositional
elements in the image. Don't worry, I will tell you everything about
seeds later on. This will serve us
well in order to compare the upcoming
results with our first one. Returning to the result
of my first generation, it was a good start, but
neither great nor terrible. Let's see how we can
further improve it. A good idea would
be to add a few of the quality prompts,
such as masterpiece, best quality, intricate details, high resolution that I
have mentioned earlier. Let's click Generate again. That is definitely better. Now, I'm not so sure about those pink or red trees
in the background. How are we going to take
care of those and make so that they don't appear
in our future generations. It's time to learn about
the negative prompts. We use negative prompts to describe what we don't want
to appear in the image. We can also use them
to alter the style. For example, minimizing
animated results in case we're going for
realism in our work. Or to exclude certain features, such as facial hair
on people, et cetera. Using the positive prompts
from our earlier generation, let's test out a few
negative prompts. Purple trees, red trees color. Let's hit the Generate button
again and much better. As you can see, negative prompts can heavily impact the result. Remember the universal
quality prompts. There are also some
negative prompts that can affect the quality
of your results. Such as you can use them with most of
your generations too. You can find all the prompts
in the word file provided in the course materials where I've typed all the prompts out
for your convenience. Now let's return to the image of our dog and try to further
improve our results. We will do this by
adding a bunch of these quality
negative prompts to those few negative prompts
we typed in earlier. Let's press Generate
button again, assuming we've just
started not bad at all. Some additional prompting tips. We, there's a clever
trick that can help us emphasize a particular
word within our prompt. Placing a word in round brackets increases the emphasis on
that specific keyword. The community calls this
putting weight on a keyword. You can see an example using
the image with our dog. I would emphasize
the birds flying in the background
part of our prompt by writing the sentence
in brackets like this. Let's generate. Again, it's
not the best looking bird, but there's one
more in our image. Let's keep increasing weights by adding a second set of
brackets like this. There are significantly
more bird like animals in
our current photo. Each bracket represents 1.1
times increase in weight. In other words, science. For now, don't obsess over the imperfections
in our result. As the painting chapter
deals with this, this is simply a
demonstration of how prompting
impacts the result. You should be cautious when adding weight to your keywords, as adding too many could
lead to various artifacts. This usually happens when the generation process becomes confused about
what to emphasize. In such cases, it's better
to restructure the prompt. We can also restructure
our prompt and use a flock of birds instead of birds flying in
the background. You can see it works as well. Remember, you can do
the weight optimization in the negative prompt window. Or you can use a
different type of bracket to suppress the strength of objects in your prompt by
using these square brackets. Here's a time saving tip. Typing brackets by
hand can be tedious. There's a neat trick
you can employ here. If you want to increase
or decrease the weight of a keyword or a couple
of keywords at once, select the word or words with your mouse and press the control plus arrow up key combination
to increase the Or, Control plus arrow down key
combination to decrease it Re ordering keywords. Even if we decide not to change the keywords
in our prompt, their order in a prompt
plays a major role too. I will demonstrate this by
only moving the keyword, close up shot to the
beginning of the prompt. The close up shot that
I've used as part of the prompt also carries strong associations
with photography. Moving the keyword to the
beginning of my prompt, It seems to communicate
to the AI that my desire is to place a
stronger emphasis on it, even if my intention
wasn't to achieve photo realism that I've
ended up achieving. This demonstrates
how sensitive and susceptible to changes
the final result can be. This case, if I wanted a
really tight close up frame, I could have achieved it by
placing more emphasis on the phrase close up or
omitting the keyword shot. Or restructuring
my prompt to say, macro perspective
of a dog's nose while leaving other parts
of the prompt unchanged. A lot about AI art
generation is about getting a feeling by simply playing with it
and experimenting. In our examples covered earlier, we have used a default
stable diffusion model that isn't used for much besides
demonstration purposes yet. It has helped us get a better understanding of the process. You'll be amazed with
how much more you can achieve with a custom model
in the upcoming chapters. You can now unlock
the seed by typing minus one into the
seed prompt window. This will randomize
each generation again, in case you want to generate different looking images using the same prompt instead of sticking with the
composition we had before. Remember, we'll
cover the seeds in details further
on in the course. Also, there's another important aspect you should know about when building prompts two
different types of prompting You can experiment
with the main one that is used by the
majority of users and another one that's bit
less rigid and more reminiscent of natural
language and how we speak. Taking our earlier
prompt example, you can try writing
a grammatically correct sentence in
the prompt window, such as an illustration of
a golden retriever dog with big black eyes and big ears
in a park on a sunny day, with morning light
shining through the trees and birds
flying in the background, drawn in a masterpiece
colorful style of a vivid children's cartoon, in best quality, with intricate details
and high resolution. As you can see, the method
works quite well too. So what is the
correct way to do it? Unfortunately, the answer is, it depends on the
model you're using. I would advise following the
fragmented style explained earlier because this is the prompting style
that more models are trained to understand. Blending two keywords,
Are you interested in combining two keywords or combining faces in
your AI generation? To do this, use this
syntax in your prompt. The number allows
you to control how much of the blending is
supposed to be done. 0.1 reduces the strength
of the first word. 0.5 mixes the two words
in equal measures. 0.75 puts more emphasis on
the first word in the syntax. For example, you can
use Emma Watson and Harry Potter followed
by the number keyword. Swapping is a technique
tailored for this purpose. Essentially, it serves as a
valuable method to create fresh and unique looks by
merging two existing ones. Mentioning a celebrity's name in your prompt can have a
significant impact on your result as the
training data used for the model likely includes many
images of that celebrity. However, if you wish to have a consistent face across
a variety of generations, yet not easily recognizable, incorporating the names of well known actors and actresses, and blending them together
enables you to merge two distinct recognizable
faces to create a brand new one strain. This tip is not directly
related to prompting, but it can help
prevent eye strain. Especially when using
a large monitor where the prompt
text becomes tiny. You can hold the
control key while using the scroll wheel of your mouse to zoom in on the interface. This allows you to see the text and type more comfortably. Saving prompts as styles by utilizing the pencil
icon located here. You can save a collection of positive and negative prompts to use alongside the ones you've entered in
the prompt window. For instance, if you've
crafted a set of photoralistic prompts that you'd like to apply to
various subjects, you can simply type the subject, importing the remaining prompt
from your saved template. One thing to keep in
mind is that we are all early adopters of
this technology and you should take
pride in that fact. The technology is still
in its infancy and can be somewhat complex for beginners with a lot of ground to cover. As fun as it is, the
whole process is prone to artifacts,
mistakes, and imperfections. However, this
shouldn't discourage you from delving deeper into it, as the community is working hard to find a variety
of ways to reduce those mistakes and train the models better,
finding inspiration. When it comes to prompting, there are several places on the Internet
where you can find inspiration and see how other
people craft their prompts. You can visit Civet I.com Explore Page or Mid
Journeys Showcase Page, where you can view images created by the community members using different
models and prompts used to generate those images. Clicking on an image will often display the prompt
and the model used. Speaking of inspiration, I personally enjoy
having fun with AI art generation because
it allows me to be creative in various fields in which
I have no expertise in, such as drawing or painting. It also lets me
envision my photoshoots in advance as
photography is what I do as my main profession or use AI generated elements that I can incorporate in
my own photography. Photo manipulation used to be
something I had never been as good at and it has never
been as enjoyable as it is. Now I have a deep passion
for technology and find it intriguing to witness how a computer thinks
and creates art. It's rewarding to utilize a machine primarily
composed of processors, wires, and calculations to produce something as
beautiful as art. As a boudoir photographer, I not only teach skin
retouching and color grading, but also offer courses on integrating AI imagery
with photography. With AI art generation, I have the capability to create concepts that have
never been seen before. Explore fictional historical
scenarios and art styles and craft imagery inspired by the paintings of my favorite
artists from the past. Among other things, It's a pleasure to be alongside
you, my students, at the forefront
of something new where creativity
knows no bounds, allowing us to expand
our creative potential. I'm fully committed
to this journey and hope you enjoy the
upcoming chapters.
5. Stable Diffusion Models: In this chapter, we're
going to cover one of the most important elements
of AI image creation. We've mentioned stable diffusion models a few times before. What are they and what
do we use them for? User interfaces
like automatic 11, 11 are nothing more than
powerful tools that allow us to run different
stable diffusion models. To put it simply, or to
find a real life analogy, our graphic interface, Automatic 11 11 provides us only
with the blank canvas. The model we use is our palette and prompts represent what we're
going to paint. Models, The most crucial part of image generation contain
all the information needed to generate images. And the subjects
style and quality of the images we generate depend completely on
the model we use. Due to the data used
to train that model, We won't be able to generate an image of a cat if there have never been images of cats in
the models training data. Likewise, if we only train or use a model with
images of cats, we won't be able to
generate images of cars. Soon after the release of
the first public model, the community started
to build on top of it, creating specialized models that perform way better
than the base one. These models are
usually focused on a specific style subject,
mood, et cetera, such as children's
animation, poster art, not safe for work imagery, photorealism, cars,
anime and more. Many of these models retain
a lot of flexibility on top. There is now a huge number of various models available on
the Internet all for free, so you can never exhaust all the possibilities when it comes to your creative ideas. So far we were using
the model called Stable Diffusion
version 1.5 It is a default base model
that can be used to determine if our software
works well with our hardware. It's flexible. Not as good when it comes
to specific styles. You know that saying a jack of all trades is
a master of none. Now it's time to cover
the exciting part, custom stable diffusion
models created by the community that are far superior to what the
base model can do. Where do we find
all these models? I hear you ask. As
mentioned before, a website called Civet is a large repository of all
things AI art related, where you can find models, photo examples, alongside
prompts for each model. Lots of new models are appearing daily with image examples, parameter descriptions,
prompts, and more. We will be focusing
on this platform for all our AI art
generation needs. Before using Civet AI, you should create your
account and if you wish, enable not safe
for work results. Because even if
you're not planning on using those capabilities, many good models might be
filtered out from your search. Also, you can activate
dark mode right here. As browsing through
a white page, looking at prompts and
imagery can become tiring for your eyes when
generating images. You can easily mitigate any
not safe for work results in your prompts by
staying away from such keywords in your positive prompt and adding keywords, nude, nudity, nipples, naked, et cetera, in your
negative prompt. As an additional safety measure, there are a few other
places you can find models at hugging face. It is another large repository of various AI models used for everything from science
applications to generative art which
we are concerned with. The interface is rather dry, often with no photos for chan, risky place to find
models that can have viruses and ransomware
packed within. I would advise against
looking for models here. The biggest benefit of
using stable diffusion is that unlike Mid Journey
and Adobes Firefly, which are both very
restrictive in terms of what ideas you
can toy around with, there is no limit
to what anyone in the community can train a
stable diffusion model to do. Stable diffusion models come
in two different formats, KPT and Safe tensors. Download the safe tensor version of the model whenever
it is available. If not, make sure you download the CKPT files from a
trustworthy source. As safe tensor files can't be
packed with malicious code, you should be worry free
using models found on AI. As you will see, the majority
of models were trained on animated art with varying
levels of photorealism. However, some were trained or merged to be as photorealistic
as currently possible. Speaking of photorealism, a new model type currently in active development
is called SDxl. Aiming to achieve even higher
generation resolution, legible text and
photorealistic results. And these are the
models trained on larger images than 512 by 512 pixels and 768
by 768 pixels, which most other models
are trained with. Stable diffusion,
Cel models take significantly longer
to produce an image, but the results
aren't necessarily twice as good as the
resolution makes it seem. Generating images this way requires a secondary
refiner model that also takes
additional time to get loaded during the
generation process. For now, for practicality and
generation speed purposes, let's stick with the
regular checkpoint models. I will show you the SDXl
models later on when dealing with image size and the settings and parameters
chapter of this course. Sometimes a model
made by the creator whose work you like can
have multiple variants, be on the lookout for those. Usually, different variants of the models will be shown here. The same creator can
sometimes publish the same model in two
stylistic versions. Or it could be a model
used primarily for image generation or a model
with additional data, non pruned, suitable
for further training. As our plan here is to create art rather than
train our models. All you should be looking
for are the pruned models. They contain only the data
needed for image generation, saving you a lot of disc space. And trust me, with models
being 5 gigabytes on average, they can swallow a lot
of your disc space. Fast speaking of disc space, the same goes for FP 16
versus FP 32 models. When given the choice,
choose the FP 16 as the FP 32 models contain a lot of data you won't be needing
for image generation. A creator can
update their models with a newer, additionally
trained version. In the meantime, if you like a specific model check from time to time the
models page on Civet. Often it will be
in the description section you will find what makes a newer version unique and different
than the previous one. Of course, not all models come
in a variety of versions. But some popular
models creators are updating and retraining their
models to perform better. And are often publishing the results within
the same page. Now let's take a
much needed break from all the tech
talk and test how a different custom
model performs in comparison to the default
model we were using before. I've developed a
photorealistic model that I've extensively
tested during the creation of this and my other AI photography
compositing course. I have found it to be
very capable of providing a wide variety of
photorealistic results. Still being perfectly
capable of delivering illustrations and other
non realistic results too. You will find this model in the course materials
where I will provide you with
a download link. All the downloaded models
are installed the same way It is done by placing them in the
Stable diffusion folder. Found within Stable Diffusion
web is models folder. After placing the model, be sure to refresh the model
drop down menu found here. By clicking on the refresh
icon for this generation, I will use my own model
provided with the lesson. Now let's return once
again to the prompts used earlier and our good old
friend, the golden retriever. If you have been using
different prompts than me, that's perfectly fine. You should re use those
again with this example. I just want to show
you how much a model, even when used with same
settings and prompts changes. The final look, pay attention to this as it can
save you a lot of time. Instead of typing the
whole prompt again or copy pasting your
prompt from a text file, you can re use a prompt from
an already created image. This is how you
can quickly get to your generated images by
pressing the folder icon. Navigate to the PNG
Info tab shown here, Browse Four or Drop in
Image into the window. And then simply transfer the prompt and
generation parameters by clicking Send to TXT two EMG. This tool provides you with
data including prompts, negative prompts, seeds, models, used, extensions, used and more. It is here for our convenience, allowing us to see
the creative recipe that has led to the
image we are examining. Sometimes the creator will be using their own mixed model, or a model expanding file, such as a Loro file that
you might not have yourself or he could be using another AI image generating software. In these cases, you
won't be able to replicate the same exact result, but at times you can
get quite close to it. The PNG info can also help gain deeper insight into the
process of image generation. Or how a model is responding to various prompts
and parameters. If an image created
by someone else possesses data you're
still not familiar with, don't fret as we're
going to go over various extensions
and additional files in the upcoming chapter. With that out of the way,
let's load our custom model. Loading a model takes some time. Now that it is done, let's
re use the prompt as discussed earlier and hit
Generate button again. Pretty damn nice.
Now let's compare the result with the images we created using the default model. We're going somewhere
with all this. Let's try to bring our dog to
life by trying to generate a photo realistic result instead of the ones
inspired by cartoons. I've changed my prompt
to say close up raw photograph of
golden retriever dog with big black
eyes and big ears. Camera photography in a style of Annie Lebowitz Getty images. Cannon 60 is 135
F 3.5 in a park. Vivid colors, colorful
on a sunny day, morning, light shining
through the trees, birds flying in the background. Masterpiece. Best quality, intricate details,
high resolution force. Let's press Generate
button again. Let's unlock the seat, as
it probably got locked. When we transferred
the image data from the PNG info window and try
a few more generations, four of my non cherry
picked results are compared to what I was
getting with a default model. It is far superior with
way fewer artifacts and still capable of delivering both animated and
realistic results. After covering some
additional tips on finding and
experimenting with models, I'll show you more
ways to further improve and enlarge
your results. Searching for models,
the models you can find on Civet AI will
either be trained by a creator of the
model or they will be a so called merged model containing multiple
other models. Using the method
I will teach you about at the end
of this chapter. Sometimes you will find them under the name
checkpoint merged. You will find models on CivitAI under the classification
checkpoint. The size of the model
files on average is going to be 2-7 gigabytes. To look for models only without other AI content we'll
be covering later. Activate the search
filter that is located here by clicking
on checkpoint option. Keep in mind that
the filter location and look might change in the upcoming months as the website keeps
evolving monthly. When it comes to the overall
style or feel of the model, as you will see while
browsing through CivtAI, all the models can be roughly divided into two
main categories, photorealistic and
illustration oriented, also known as anime models. Most models, regardless of
their stylistic leanings, are still trained on a
wide variety of styles. And to some extent,
capable of delivering both photorealistic
and animated styles. As you've seen with the
model I've provided with the lesson However, you will be able to easily spot the model's main style by
browsing through the images. A model can gravitate towards
a specific ethnicity too. However, you can use both
positive and negative prompts, such as Caucasian, Asian, white skin, black
skin, et cetera, to better navigate the AI
towards the desired result. Some models could have
their own special keywords that the model has been
trained to understand. Keywords are there to trigger the style a model
is specialized in. Most of them will be
listed in the description. Once you click on the model, it would be good to pay
attention to the words a models creator is
using in the prompt. In the example provided
alongside the model, sometimes the trigger words are going to be
shown on the side. The choice of model
depends on nothing more than your
aesthetical preferences, alongside prompts
given in the examples. A lot of models are
going to have notes on how the creator
uses their model, including parameters,
trigger words, and other tips that seem to
make the model work best. My best advice is to check both the preview images
and their prompts, alongside the author's
notes, if available, as they are going to give
you the best chances of obtaining great results
with a model you've chosen, or at least a similar look to the preview images the
author has provided. Sometimes you will
notice a sign, these are the Laura
additions which are there to teach the
model a new concept. They provide additional
flexibility to the model and we'll be covering
them in the next chapter. Remember that no matter
the model we go for, we can use the negative
prompt window to suppress certain aspects using prompts
such as illustration, anime cartoon, photorealistic, et cetera,
photorealistic models. The model I've mixed
and provided you is capable of creating great
illustrated results. But where it excels
is at photorealism. However, it's by far
not the only one. In order to further enhance the photorealism in our results, we should be using photography
oriented trigger words. In our prompt, I will provide you with all these prompts in
the course materials so you can copy them or save
them as styles using the pen icon that I've shown
in the prompting chapter. Remember that some
models could have their unique special
keywords that the model has been trained
to understand too, anime models, as there
is a huge amount of artists drawing or
painting different styles and all of them significantly
differing from one another. It would be hard coming up
with some universal prompts. Animated models, what
usually works would be the subject in the style
of the artist's name. I will give you an example using a very popular anime style, that is the style
of Hayao Miyazaki, who runs a famous anime
studio called Studio Gibe. I will run an anime style prompt using the model I've
provided you with. Once again an image of our dog. I will build off the prompt we used at the beginning
of our lesson, but adding some new and specific
anime oriented prompts, This will be my first time
running this prompt using a model I mixed specifically
for photorealistic results. I am not sure how
good it will perform. Let's hit Generate,
not bad at all. This also goes to show how
flexible some models are. Instead of overloading
your hard drive with gigabytes of
various models, you should definitely
try out what your favorite model
is capable of. If you end up liking
a certain model that seems incapable of delivering a result you're looking for. Wait until you hear about
Laura's textual inversions and more that will allow you to quickly teach your
model new things. Some anime related prompts that you can draw
inspiration from. Let's try something
completely different. A futuristic version
of a dog in a style of a currently popular
game, Cyberpunk 2077. You may want to increase the resolution a bit so you can see the more complicated elements of our prompt shine through. I will show you the
implication of resolution and other parameters in one of the upcoming chapters
of this tutorial. For now, let's set the
resolution to 840 by 840 pixels. I've used the
original dog prompt and changed some
of the keywords to better reflect the
futuristic neon style of Cyberpunk 2077. Let's hit Generate button again. These are some good results. If you're tired of
our good old friend, you can experiment more
using your own prompts, trying out everything that
you have learned so far. If in your experiments you have created an
image of a human, sometimes you might notice the further the face is
within the frame, the more it might get warped. In the next chapter, I
will be teaching you how to teach your
model new concepts. How to create people's faces, add elements the model is struggling with,
and so much more. The models are fun,
no doubt about it. But what comes next is what makes stable
diffusion amazing.
6. Expanding Your Models: Welcome to another exciting
chapter of this course. Hope you're having fun so far learning about stable diffusion. This one is going to
be an exciting one as I will be showing you
many ways you can teach your preferred model some
new tricks or helping it generate better the
idea you've had in mind. Before. We move on to new kinds of files we
haven't been dealing with. It's time to show you
another cool trick you can do with checkpoint
models model merging. Another fantastic thing
about automatic 11, 11 user interface
is that using it, you can merge two or
even three models yourself into a new model. By merging multiple models, you're giving your merged
model the abilities of all the models you've
included in the process. Each stable diffusion model has its own strengths
and weaknesses. And merging them
can help mitigate their limitations and
enhance their strengths. Let's say you like
a model that can create cats in a very
interesting art style, but it has been trained to
create nothing but cats, and you would really
like to see a dog generated in a
similar art style. This is where model
merging is useful. By merging these two models, you'd create a new one
capable of generating both. Additionally, it's good to see what prompts are triggering the art style you enjoy so you can put more
emphasis on it. The new model isn't going to be delivering only the art
style of the first model, but the art style of
the second one as well, that you may want
to suppress using negative prompts to
merge the models. Navigate to the Checkpoint
Merger tab, where you're fine. Drop down menus that will allow you to choose
up to three models. And the multiplier slider. The more to the
left the slider is, the more the final model
is weighted towards model A to the right model. If you set the
weighting to zero, then the final result will
be identical to model A. If to one, then
identical to model B. Once you've decided
to mix the models, my advice is to pick
the weighted sum and set the multiplier value
according to your wishes. Hitting Merge will
take some time and a new model will be
added to the directory. To use it, you should refresh the models in the upper
left corner first. Now that we have
covered everything that is to be known about
checkpoint models, it's time to tell
you a bit more about the other kinds of files
used for AI generation. You can find on Civet, AI, and other platforms besides stable diffusion models or the checkpoint models that
require no additional files. In order to generate AI art, you can find a number
of files that can expand and teach your
model new concepts. They all must be used
alongside a model. Some of the new concepts a
model could be expanded would include subjects and
characters, art styles, clothing items, facial
expressions, props, poses objects,
photography styles, various interiors and
exteriors and many more. These additions to your
checkpoint files can also be trained to affect not only the generated subject or style, but also sharpness,
level of detail, contrast, how dark
the black tones are or any other such
balance of color and light. Overall quality of your
image generations. Skin detail or level of skin
imperfections help you keep a generation detail the same across multiple
image generations. It's hard explaining
these model additions in detail without
getting too technical. But to keep things simple, you can understand them as a sub model or a model infusion. There are a couple of file types of this kind and they are, on average, way smaller
than the model files, ranging from 14 kilobytes to
250 megabytes on average, and flexible enough to
be used with any model. They can be helpful when
trying to achieve a result. The model itself isn't trained to understand
and generate. And they are a quicker
and often better solution than let's say model merging
we've covered earlier. Placed inside their
corresponding folder, inside Automatic 11 11
installation directory. The file gets
automatically installed. All you need for your
Automatic 11 11 to recognize them and include them in
Generations is to hit Refresh. Then you need to refer
to them by typing a trigger keyword related to the file itself in
the prompt window that will activate the effects
of the model edition we just installed
textual inversions, also called embeddings are
the smallest of the bunch, typically ten to 100 kilobytes, and are very practical
due to their size. People often use them to introduce a new
character to the model, although they also can be used to teach a model
different concepts. A great thing about
a textual inversion is that you can create them yourself by using a training
process in Automatic 11 11. This process allows
you to create a textual inversion trained
on images of yourself, your friend, a family
member, et cetera. Most creators on Civit
AI are uploading textual inversions trained on faces of various public figures, actresses, Instagram
models, et cetera. This is the installation method. Remember, you must use them
with a checkpoint model. All textual
inversions and any of the future model infusions
we're going to be learning about are either trained on a base stable diffusion model
or using a specific model. The will, of course provide somewhat different results
based on the models. They are used alongside with all your
installed embeddings. The other name for
textual inversions are going to be shown here. All you need to do is click on the one you
wish from the list, and it will be automatically
added to your prompt. Then you can use it like
any other keyword in your prompt and move its
position within the prompt. On CivitAI, I have found
a great textual inversion that can introduce
the concept of hazy light to my
image generation. Here is a generation result without the textual
inversion used. Here is a generation result with a textual inversion haze light used at the beginning
of my prompt while the rest of the
prompt remained unchanged. An interesting development
are the negative embeddings. And these files are trained
on bad quality images by placing their
corresponding activation keyword in your negative prompt. With some models, you'll get
better image generations. Certain negative
embeddings can help reduce low quality image artifacts or reduce the chance of poorly
rendered limbs or hands, which are generally
common issues with AI image generation. At this point in time, let's try generating an
image of a person, which is the primary use
of textual inversions. We will retire our golden retriever and try something new. I want to create an image of a person in a photo
realistic style. I will bump my resolution
to 512 by 768 pixels, which allows a bit more of the photorealistic
elements to come through. Keep in mind that we will
deal with resolution and all the other automatic
11, 11 parameters. In the upcoming chapters, I will start with a prompt
focused on photorealism, but without a textual
inversion first. Now I will include
a textual inversion trained on a specific face. Note that some of the minor
elements have changed too, but the most significant
difference is apparent in the face of
the lady we generated. I will now utilize an
automatic 11 11 extension called after detailer, which enables me to
modify the face only. I will explain this in the extensions chapter
of this tutorial. I will use a new
textual inversion, This time trained on
a different face. Even though it's
so small, 14 KB. Only the impact of a textual inversion on our image generation
can be significant. That you've tried
and experimented a bit with textual inversions, it's time to show
you an even more powerful model
infusion called Laura. Laura's abbreviated from
low rank adaptation. These are my favorite
model infusion files. Everything that I've told
you a model infusion can do. Laura files are capable of, they are larger and
more powerful than textual inversions are
typically between ten, 200 megabytes in size. They can introduce virtually
anything to your model, Some quality
improvement Lauras are already popular in
the AI community, such as detail tweaker, noise, offset film, grain,
age, slider, et cetera. As they work with almost all
the models, don't forget. Same as with textual inversions. You must use them with
a checkpoint model. To install them, they
need to be put in their corresponding folder
in the Web Ui Laura folder. Once placed there,
all you got to do is hit Refresh Laura's. Use a similar method of
activation as textual inversion. All you need to do is
navigate to the Laura tab and click on the one from
the list you wish to use, and it will be automatically
added to your prompt. Some Las can be stand
alone in the prompt, requiring nothing more than selecting them from
the Laura list, while others perform better. If you include a necessary
activation keyword, you can inspect your luras
for the activation keywords and what specific words are used to trigger effects
within a Laura. Let's take an example. A Laura inspired by the art style
of a Polish painter, Zuzizlobixinski, once selected from the list and added to the prompt, it
will look like this. These brackets are used
to differentiate from other words in your prompt
and activate a Laura. The word within is Laura's
name given by the creator. While the numerical value
represents strength, normally it goes
from 0.1 to one, and exceeding these
values isn't recommended. Let's bring back our good
old friend, the dog. I will use the model I've provided you along
with the lesson, the one I've been using for all our previous image generations. And I will re use
the prompt from the beginning of our
lesson without the Laura. First, let's read the
data from the PNG info, transfer it to the
text image tab. Hitting the Generate button, we are greeted with
a familiar result. Now I will use these
prompts again by adding a few of the Bksinski related prompts you can
see on the screen. I will do it without
a Bsinski Laura. I can check if my model has been trained on any of Besinski's
paintings at all. As you can see, this
model hasn't been trained using any
imagery by this artist. This is where Laurs
could be of great help. Now let's increase the
image size by a bit, 840 by 840 pixels. So we can allow the
details characteristic of Besinski's work to shine through and include a
Laura file in our prompt. While leaving the rest
of the prompt the same. I am 99% sure that the results we're
going to get this time are going to be a
drastic shift from the cute animated
style we started with. Even if there are no
changes to the prompt, this is way closer to those apocalyptic scenes
presented in Besinski's work. Let's try to clean
up our prompt and remove the children
illustration related keywords, replacing them with new keywords better suited to imagery, color, palette, and motives
found in Besinski's art. I will not change the
strength of the laura and only focus on the
keywords in the prompt. Much closer to the scenes
in Beksinski's work. Now what if we want to use
multiple Lauras in our prompt? A general rule of thumb when it comes to using two
or more Las in your prompt is that the
combined strength amount should not exceed
a value of one. You may still go over that value and a model will
generate just fine. But in most cases, it
would get confused, producing results with
various artifacts in case it gets lost over what Laura should give
the priority on Civit AI. You can usually see
the recommended settings by the Laura's author. Some Lauras will produce a desired effect at a
lower value than others, as there are so many methods of training and so many Las out there considering a variety of models and prompts to
be used alongside. The best way is to test yourself using an
SD model you enjoy. Let's use our usual
prompt and try increasing a value of Laura way beyond
one and see what happens. I will start with no Laura. A Laura value of one and
a Laura value of three. As you can see, more
isn't always better. With the value of three starting to increase artifacts
in our generation result and making the result stay further away from
the original prompt, Let's try adding two Lauras and exceeding the
recommended values. This is how our
usual illustration of a dog in a park prompt with broken mirror Laura added looks like this is the same prompt, a broken mirror Laura set to a strength of one alongside
a detailed tweaker. Laura from an earlier example
set to the same strength. You can already see some
strange things here. Loss of composition,
flying fairy dogs, duplication, artifacts and more. Now that you've
gained some insight into how Laura's work, it's time to cover chorus. These files belong to the
same family as Laura's. They are a newer development
but not necessarily better. Let's say Lechorus is somewhat more
expressive than Laura, but this doesn't
matter too much to an end user as that too
depends on a lot of factors. They are used in a
very similar way to Laura's and sometimes
require a trigger word for the generation
process to extract from a licorus everything
that it's capable of. I've tried testing them
without trigger words, and it's a hit or miss to look for them on to activate
the Licorice filter. Once you've found a Licorus, you'd want to try download
it as usual and put it in the Laura folder to even if they are called
Licorus and not Laura. For simplicity, you
can install them in the same folder as they
belong in the same family. To use them, just
select them from the Laurea list and once
added to the prompt, they will to look like a Laura. For any reason you want to separate your Licorus
files from Laura's, you can install an extension using the method I
will show you in the automatic 11 11
extensions chapter of this tutorial and place all
your Licorice files there. In that case, you'll
be selecting them from a Liqorus tab with no
difference in their actual use. As always, after installing one, hit refresh so that it
will show in the list. Before using a Licorus, you can inspect
the trigger words here by clicking
on the info icon. You can also look for
the trigger words here. Just as with Laura's,
you can pick from the list and
adjust the strength. Placing the trigger word closer or further from the beginning of the prompt can also affect
the result to a degree, which is a general
rule about prompting. Just for fun, I will use our
dog to show you both the use of licorus and the importance
of a keyword order at once. We'll use a Liicorus trained
to produce images of trucks. I've only added the Lichorus
set to the strength of one to the usual prompt
we've been using before. Let's do the same prompt again with the only
difference being the word order for a change. Here is a proper use
of Alchorus trained on fashion inspired by the
golden winged birds from Buddhist texts. Besides textual inversions,
Lauras and lycurus, you can find a couple
of additional files on Civet Doi used for similar
purposes. Hyper networks. Hyper networks represent
additional network modules added to checkpoint models. They are on average
around 80 megabytes to explain them on a
deeper technical level. After an image has been partially rendered
through the model, the hyper network will
skew all results from the model towards the hyper
network training data, effectively changing the model, in simpler words,
to an end user. The results are going to be
similar to what we could get using Laura's
hyper networks. Do not need trigger words. Just adding the hyper network
in your prompt is enough. With previously mentioned files, you must use hyper networks with a checkpoint model to browse through hyper
networks on Civet AI. Let's activate the filter first. The installation method
is similar to installing all the previously
mentioned files with hyper networks being installed
in their own folder. I will use a Hyper Network Louisa vintage train to produce colorful vintage style headshots with an image that
we've used before. In order to use them
in your prompt, pick from a list and set the strength just as
you do with a Laura. Interesting results but
definitely not something alike the examples
provided on Civet, This hyper network is trained
to produce headshots. Let's try something
that's probably closer to the way it
was imagined to work. Quite nice. One more file
type you can find on Civet are the aesthetic
gradients since they are more of an extension
than a file such as Laura. We're going to cover them in the extensions chapter
of this tutorial. Tell me how are you doing
if you're in the mood for a break or experimenting with different
prompts and models. Go ahead. In the next chapter, we'll delve into optimizing
our generations, upscaling them to larger sizes, maintaining the essence
of our generations while introducing variations
and much more. Following chapters
are going to take your generations from
nice to amazing. Now that you know the basics, I will show you how to merge your AI creations
with your photos. How to generate using images. How to blend images. And how to fix various
generation issues. How to bump
resolution in detail. And how to properly
upscale your images. Next chapter is going to give you the ultimate
understanding of image generation processes and give you the keys to creation. We still have a lot
of fun ahead of us, so get ready for the next
chapter of our adventure.
7. Settings and Sliders: Now that we have
covered prompts and various files needed
to create AI art, let's tackle the parameters that guide the process
of AI art creation. The things I'm
going to teach you in this chapter are just as important and capable of heavily affecting
our final results. Don't get intimidated
by the variety of sliders in Automatic 11, 11. With most of these you won't need to play
around too often, as either you won't be changing them much or you'd
be loading them automatically from
another image using the PNG Info method
I've shown you before. The lower portion of my
Automatic 11 11 interface might differ slightly
from the one you have. As I have added plenty
of extensions to mine, I will tell you all about them in the chapter dealing with extensions which also come in the shape of various
tabs and sliders. Two, let's begin with the
most important options and parameters that are
going to be common for any automatic 11 11 user. We will start with the most
intuitive one that has the biggest effect on
our result, image size. The image size parameter determines the size of
the generated image. The standard image size that
stable diffusion version 1.5 is trained on is
512 by 512 pixels, which is the models
native resolution. Some newer models are
trained on images with a 768 by 768 pixel resolution. And the newest SDX L
models are trained on 1024 by 1024 pixels. However, these larger models
take significantly longer to generate and require a refiner model in addition
to the general one. When using the higher
solution fixed method or various up scalers, the image size will represent only the initial step in
the generation process, not the final pixel dimension
of the generated result. In this case, one part of the process generates an
image at, for example, 512 by 512 pixels, while the rest of the process increases that
resolution further. However, let's not delve
too deeply into that. For now, we stick with the
basic use of image size. Even a slight change can
significantly alter the result. If you lock the seed to retain the compositional
elements of the image, changing the image size might completely disrupt the
intended composition. Generating results closer
to the native model. Resolution increases
the likelihood of successful image
generation and avoids issues such as two bodies or multiple heads
in the results. While 512 by 512 pixels
is a small resolution, it is often used as the
starting point before upscaling the results to the
desired larger resolution. Keep in mind that some
models are trained on higher resolutions or different aspect ratios than
a square image, and you can usually find that information in the notes left by the models author regarding
the aspect ratio. The little up and down
pointing arrows allow you to quickly swap height
and width dimensions, facilitating a quick
change between portrait and landscape
orientations. Naturally, if you're seeking human portrait oriented results an aspect ratio closer to the usual aspect
ratio of a portrait. Larger vertical dimensions than horizontal ones might provide
you with a better result. The same principle applies to landscape imagery where a longer horizontal
dimension might generate a much better scenery or landscape image without the
use of higher solution. Fix explained further control net and various upscale methods. Your image size
shouldn't deviate too far from the native
resolution of the model. You can determine
the resolutions at which the model
performs best. Different GPU's will generate
at different speeds. So instead of generating
everything at a larger result and risking plenty of poorly
looking generations, it's advisable to generate
them at a lower resolution. Will also be faster and
then upscale or repeat the generation using
his fix and up scalers. The model I've provided you with generates the best
looking results at a satisfactory speed at sizes
of around 85850 pixels. This is the image generated at normal aspect ratio and recommended native
resolution of the model. Now let me show you
what happens when we deviate too far from
the native resolution. This is an example
with a vertical side far exceeding the dimensions
the model was trained on. This generation
artifact is known as duplication or twinning
is happening due to our model suddenly
having to fill in a much larger space than the one it's
been trained to fill. Duplication and
twinning refer to unwanted duplication
or multiplication of features in your creations. For instance, this
might result in characters with two
faces or two heads, extra limbs, et cetera. This is what happens
when both sides are largely exceeding the dimension
the model was trained on. In summary, stick close
to the native resolution. Now that you have a grasp of
models and image dimensions, I will tell you a bit more
about the SDXl models. As mentioned earlier, SDXl is a newer development aiming to achieve a better
level of detail, much improved photo realism, and higher native
resolution SDXl models are trained on 1024
by 1024 pixels. And can be used with or
without a refiner model. The refiner model is another, often smaller model added to
the original SDXl model that refines the details When
downloading an SDXl model, make sure to download
a refiner if it's added or hinted
at alongside it. Refiner models are installed in the same folder as general
checkpoint models. You can pick them from
this drop down menu. The recommended value for the
switch at slider is between 0.7 to 0.8 and serves as the point at which the generation
process using a general DXL model stops and switches
to the refiner model. At the moment of
writing automatic 11 11 isn't very
efficient at running SDX L models quickly and switching between the model and refiner model can be slow. Plus SDXl models use a lot of computer memory to create
images right now using SDXL models and automatic 11 11 might not be
the best use of your time as the results may not always be worth the much
longer generation time. Probably the currently best
and time efficient way is to generate images
using the base model first without the refiner. After that is done, you
can collect a batch of images that you like
to use the refiner on, then do the refiner step through the image to image panel
that we're going to cover. Minimizing the time spent on model switching on
the bright side, most of the SDXcel models currently being
uploaded to Civet, I are trained to produce a great level of detail without
the use of a refiner that makes them somewhat faster
to use SD Xcel models at another layer of complexity and an additional loss of time
on image generations. Therefore, let's stick with
the regular SD models. Here are some of
the custom models compared to the base SD, Cel. Sdxcel models are
expected to become fantastic in the upcoming
future with further retraining, just as it was
done with regular, stable diffusion
models that were optimized into thousands of
models by the community. It's important to note that
in any case, the general use, prompting and other settings
are all the same between regular and SDXl models
sampling methods. Before intimidating you
with an explanation, it's important to
know that any of your sampling method choices
is going to work well. There are no bad or good sampling methods,
only different ones. The easiest way of understanding
sampling methods and samplers is to think of them as different artists creating
your commissioned art. They can all do it, they just have a different way
of going about it. Some methods guide
the AI towards meticulously crafting
every detail, while others prompt it to
quickly sketch out a concept. What's cool about
this is there's no one size fits
all best setting. Now for a more
technical description, sampling methods represent
the algorithmic strategy AI uses to translate a text
prompt into a unique image. If you really wish to go in depth and scientific on samples, I will provide you with a link inside the course
materials file. Here is where you can choose between different
sampling methods. They are all different methods of solving diffusion equations. There's no right choice here. At most times, what matters
is if the image looks good, Euler, which is a
default option, is a fast sampler, but you're
given other options too. You can download additional
samplers off the web. At the moment,
there are probably way too many samplers
available within Automatic 11, 11 that you'll
never have time to check and understand
exactly how they work. Some people prefer one
sampler over the other. For their models, you should try them out for yourself and change them from
time to time to see the effect they have
on your images. Here's a comparison using a prompt for an orange
tabby cat outdoors. Now if you look for this
variation in your images, intentionally look no further
than seeds and variation. Seeds explained further on samplers can also affect the
speed of your generation. Here's a chart showing
the generation speed using different samplers when
generating eight images. You will see in the next
part of the course that when it comes to samplers
and sampling steps, more time invested in generating an image doesn't directly
translate to quality. In fact, you can
already see this in the comparison
image that uses a cat to show how
different sampling choices affect the final result. My general advice is to
test out a few samplers. And if a few of them you like
produce the same result, then simply pick the one that
produces the result faster. Now let's see what
are sampling steps. Sampling steps are a slider on the interface that controls how many iterations or steps stable diffusion model takes
to craft your artwork. It's like the number of brush strokes artist decides
to put into their painting, contrary to what
one might think. Bigger isn't always better.
With sampling steps. Cranking up the
sampling steps number doesn't necessarily
result in a better image. It's all about finding
that balance between a high quality computation time. As the higher the number
of sampling steps, the longer time it takes
to generate a result. Typically 20 steps with the oiler sampler are enough to reach a high quality
sharp image. Although the image
will still change subtly when stepping
through to higher values, the result will be
somewhat different, but not necessarily
of higher quality. The fewer the number
of sampling steps, the faster the image
will be generated. Finding some middle
ground between speed and quality is advised. I usually stay 20-40 sampling
steps and adjust to higher. If you suspect quality is low, it takes three times
the time reaching 25-75 steps with no benefit
in terms of quality. Cfg scale, or the Classifier
Free Guidance Scale, CFG scale is a
parameter to control how much the generation process should stick with your prompt. You can imagine CFG as a
sliding scale that controls your guide's attentiveness to your instructions or as creativity versus
prompt literalness. Here is how the CFG
values are usually seen as one to three. Mostly ignore your prompt. Giving free rein to SD. Three to six, still
relatively free, but sticking a bit
more to the prompt. Six, playful and
creative setting, best suited for shorter
prompts. Seven to ten. A good balance between following the prompt and freedom 15. Adhere more to prompt optimal. When you're confident
your prompt is detailed, 20 values of 20 and more are rarely useful and tend to result in less satisfactory outcomes. The typical and default
value is seven. Here is an example comparing CFG scale values
ranging 5-30 and sampling steps 10-50 seed value. All AI generations begin with noise built from
a noise pattern. The value of the seed
determines the noise pattern. The generation process starts with greatly affecting
the final result. You can also think
of the seed as a unique identifier for
that particular image. This is how all AI
generation looks like, starting from noise and
resulting in your image. You don't need to come up with
the seed number yourself, because it is
generated randomly. However, controlling the
seed can help you generate reproducible images or images similar to
the one you like. Don't get too spooked out. With this vague description, the seed controls the
elements of your image determining where and how they are positioned in
relation to each other. The default value is
minus one and stands for the randomized value,
meaning Automatic 11. 11 will generate a
different image every time Generate button is pressed
using the specified prompt. You normally want this value to be minus one unless
you're trying to lock the composition and vary the prompt a little to see
what else you can get. Same prompt, random seed typing, one is going to lock the seed. So you can experiment a bit
with varying your prompts. Same prompt with one
keyword difference. However, pay attention to this same prompt
and the same seed. This can often
happen by mistake, results in the same
exact image every time clicking on the dice
icon randomizes the seed, unlocking them so you can get
entirely different images. Again, each generated
result will have information on the seed number saved in its data
that you can inspect. Using the PNG Info tab, you can reuse the seed number
of the image you like in case you want to change something little
within your prompt, but still keep the
general image similar. Note that if your
prompt changes a lot, the re used seed number isn't
going to be as effective. To sum it up, if you wish to explore and get a variety
of different images, use a value of minus one. If you want to fine
tune your generation, fix the seed to a
specific number and vary the prompt a little
until you're satisfied. Another option that allows you to fine tune your
generations and vary your result a little
while keeping the general seed locked is
this little extra checkbox. This reveals the
extra seed menu with even more options.
Variation Seed. This is an additional
seed you can play with. Think of it as a seed
within your seed. You'll use this when you're
fairly happy with your image, but still want to
change it slightly. Variation strength, you
can control how much of your original seed and variation seed you want in the mix. A setting of zero uses
your original seed only, while a setting of one
uses the variation seed. If you wish to vary
your results slightly, which is the idea
behind this option, lock the main seed, randomize
the variation seed, and set the variation
strength to 0.1 This produces similar results
to your main seed with minor variations between
different generations. Seed resize. We have covered earlier how
changing resolution, even when using the
same exact seed, produces entirely
different results. Seed resize function is here
to let us generate images at different resolutions
while preserving the general look of the image
we're trying to recreate. This function allows you
to generate images from known or fixed seeds at
different resolutions. Even on a fixed seed, the image changes entirely
once we change the resolution. As the resolution is a part
of the generation algorithm. If you really like the image obtained using a certain seed, but wanted a larger resolution, this is where seed
size becomes useful. You can see the general feel of a starting image
remain the same. The resolution is increased
from left to right, you will put the new image size in width and height sliders. And the width and height of the original image
you are trying to recreate here, batch count. Now this is the long
awaited moment where we can stop pressing the
Generate button repeatedly. If you set the batch count
to three and press Generate, the system will
generate three images, all using a prompt you set
and a different random seed. Unless you've
locked this option, advice is to always generate at least four to five images
with the prompt before changing it so you
can get an idea how close the prompt is to what you wished in
the first place. Or should you change
either your prompt, a certain parameter or simply
generate more batch size. Refers to the number of images to generate in one go within a single batch while increasing the batch size can significantly boost the generation
performance. Be mindful that it comes at the cost of higher
video Ram usage. I am keeping batch
size at one while using the batch count to
tell to Automatic 11, 11 how many images I want. You can increase this number
if you have a powerful GPU, the total number of
images generated equals the batch count times the
batch size face restoration. It's a fact that stable
diffusion is not fantastic at generating faces as the models are getting trained better and
with various automatic 11, 11 extensions coming out frequently aiming to
solve this problem. This isn't so much of a
problem as it used to be, however, there are
still situations where we can see those issues. One such example is when generating images where the
subject is far in the frame. Restore faces aims to solve this and many
similar problems by applying an additional
post processing model near the end of generation, trained for restoring
defects on faces. Turning on restore will try to render a natural looking face. Not every model will benefit from this process and frequently the face restoration style isn't coherent with the general style
of a model you are using. Moreover, with the emergence of some extensions such
as after detailer, the use of face
restoration has declined. And therefore, it has moved from the main panel into
the settings panel, one slider that deals with face restoration and is
still on a main page, though that might change in the future versions
of automatic 11. 11 is the GFP Gan
visibility slider. When set to zero GFP
gan face restoration is off, But in my tests, when higher than zero or one, it will activate
the GFP gan effects even if restore faces
is switched off. In the menu, there are two
face restoration models you can use in Automatic 11 11
found in the settings menu. By clicking on face
restoration on the side panel code former produces a
more realistic result at all strength levels. This can be either good
or bad depending on the context and frequently results in a totally
different phase. Gfp Gan retains much more of the original
structure of the face. It's soft in general and
sometimes almost painterly, which could be either
desired or undesired. If photo realism is
our only goal however, it retains the facial
features better. I've seen many commenters
recommend using code former specifically
to obtain the eyes, then blending the result with
the original in Photoshop. This is a workable solution, but it's time intensive too. As my second AI
course deals exactly with merging AI generated
art with photography. This is where the Photoshop
technique might come useful. You might like the way the
face restoration results look, and you should definitely
try both of the models out. You can even blend
them by selecting code former in the menu and
adjusting its weight. And doing the same
with the GFP Gan slider on the main page. I usually keep both of these settings off
as it additionally slows down generation
time to get better faces, I frequently use the after detailer extensions I will
soon tell you more about. Here are some examples,
original code, former GFP gan up scalers. As we've previously established, the default size used to train most models is 512
by 512 pixels. Some stable diffusion version two models have bumped
the resolution higher, while SDXl models
are going as high as 1024 by 1024 pixels as their
native pixel resolution. Of course, not everyone has the latest and greatest
graphics cards, and many people are stuck with models trained on
lower resolutions. This is, however,
no problem at all, because upscalers are here to help with the current
state of things. Upscalers are the go to tool for achieving high
resolution generations. Now let me tell you a thing
or two about upscaling. Ai upscaling works
differently than the upscaling methods
used in the past. Traditional upscaling
methods use just the pixels of
the original image, mixing these existing
pixels using mathematical operations
to enlarge the image. Here you can see
the two traditional upscaling methods at work. Traditional upscaling
always results in blurry outcomes
and is not much of an improvement over the
image we started with. In the case of an image that
is distorted or corrupted, in some ways, these
algorithms can't fill in the missing
information accurately. In contrast, AI upscaling works in an entirely
different way. Here's a little comparison
between a couple of AI upscaling methods and their
traditional counterparts. Ai upscalers are trained
on a massive amount of data to be able to
recreate information. These upscalers try to recognize patterns in
images and videos, and upscale by
guessing new details that would contextually
fit into the new pixels. The way the model
is trained is by degrading good quality images, and training a neural network to recover the original image. Using automatic 11 11, you can upscale your results in two ways as a part of
the generation process and later on by
sending images you like to the extra tab
where upscaling is done. You can also run
upscaling processes on a large batch of images, which I will show you
too in Automatic 11 11. You are also given a choice of working with two up
scalers at once. Up scales 1.2 Using the up scalar two
visibility slider allows you to blend
two upscale results. The default upscale
factor is four, but you can set it to a lower
value if you don't need the image to be four times as big as the
original resolution. You can set the upscale factor by dragging the scale by slider. A good general purpose AI up scalar is RS organ Four X Plus. When it comes to the
produced results that are most alike photography, my favorite one is Maker, A custom up scaler
not installed by default with automatic
11 11 installation, anime images require up scalers specifically
trained on such art. I will provide you with a link. As always in the course
materials text file. Don't let this confuse you. Even when the scale by
slider is set to a value, it won't have any effect unless
one or two upscalers are chosen in the drop down
menus below the number four, where the slider
is going to be at most times when you
run Automatic 11, 11, just the default value. Some of the popular up scalers used for different purposes are the first two up scalars in the list are the
traditional up scalars that are not able to generate
new details like the rest. Here you can choose from a
variety of automatic 11, 11 upscalers or download them from the Internet
and install them if you want to delve
deeper into it. I will provide you
with my test examples, alongside course materials in case the results aren't
clear from the video. Together with links
to the websites offering custom up scalars
that you can try out, Remember to refresh the
user interface after installing a custom up scalar
into your automatic 11, 11 time saving tip. The extra tab shown here is
your general upscaling hub. As mentioned before,
upscaling can be done as part of the generation process or separately on
images you like. If you prefer to save time on image generations and only upscale images,
you're happy with. The extras tab is the
place for you here you can input an image
set the upscale factor, choose the up scalar, and even add a
second one on top. You can adjust the visibility of the second up scalar using the visibility slider alongside face restoration module
settings shown below. Once you've generated an
image from other tabs, you can also swiftly send it to the extras tab for a
touch of upscaling magic. If you want to batch process a large number of files during your computer
break or lunch, you can use the batch
from directory tab. Set the input directory where
the original files are and the output directory where your results should
be generated. To copy the directory
destinations, open a folder, navigate to the directory, right click and copy, then passed it into
the input directory. Do the same for the
output directory. The rest of the up
scalar settings within the extra tab
should already be familiar to you.
Here's a little bonus. In addition to using
the up scalers found within Automatic 11 11. For my photography and
photography oriented results, I often use another
piece of software called Topaz Giga Pixel I. It has a very user friendly
and intuitive interface, allowing you to choose
the upscale factor. Just like Automatic 11, 11 alongside an image type. The standard option
is quite good, but you can try various
other image types depending on the images
you're upscaling. You can also leave it on auto, letting the app analyze your
image and suggest settings. I've tested it extensively for both my photographs
and AI generations, and it works really well. It is particularly
useful when trying to restore old family or
childhood photographs. You can batch process a variety of images that you can collect in one folder and
let it run while you're having your
morning coffee or lunch. Now that you grasp the
workings of upscalers, let's delve into the high
resolution fix option designed to use upscalers
in conjunction with additional post processing step to generate detailed images at resolutions higher than
the default 512 by 512. This process incorporates
an additional layer of detailing to enhance
the final result. The high resolution
fix procedure involves initially generating
an image at the smaller, closer to native resolution. Upscaling this initial image to the image resolution
you specified. And subsequently applying
extra post processing steps to increase details and
achieve the desired outcome. This supplementary step
significantly increases the level of detail compared to a straightforward upscale. And it also has the
potential to alter the visual appearance of the
generated image effectively. Utilizing the high
resolution fix function proves beneficial in mitigating issues
such as twinning or duplication previously
mentioned in relation to image size. And helps maintain the
composition integrity of your upscaled images. Let's consider
setting a resolution higher than the models
training resolution, both without and with
the high resolution fix as illustrated in this example. Working with NonSDXcel models can yield impressive results, producing images
that surpass the 512 by 512 pixels default size. This is achieved without an additional up skelling step that can be applied
in the extra tab. It's essential to note that working with the high resolution fixed does come with a trade off in terms of generation time. His fixed steps represents a
number of his fixed steps. Hagen, in addition to
the sampling steps used during the first pass
of the generation process, if set to zero, it employs the same number
of sampling steps as used for the original image. If set to a specific number, that designated number
will be utilized. I recommend 15 high
resolution steps as it strikes a good balance
between speed and quality. Similar to other aspects
in the AI realm, it involves a delicate
dance between achieving optimal quality and
minimizing processing time. Noising strength. You
can think of this slider as the strength of the up scaler during the upscaling steps, or how much freedom you're
giving to stable diffusion during this process
on the lower values. This slider lets us preserve the essence of our image during
the enhancement process, while with higher values, the process will
likely introduce additional changes
into your image. I will show examples using the same prompt and
the same settings, with the only difference
being the denoising strength. I will start with the
original image generated at 568 by 832 pixels
with no his fix. Now I will be regenerating
this image with two up scales at
denoising strength set at 0.250 point 5.0 0.8 For
the first set of examples, I will use the latent up scalar. With an upscale by
slider set to 1.5 x. That will produce an image
size of 880 by 12 88 pixels. The latent up scalers work slightly
different than others, upscaling at a different point
in the generating process. They usually need more steps at a higher denoise strength
such as 0.5 and higher. Observe the difference
between latent versus RSR. Gan up scalar at 0.25 strength, especially at level zero, your image will not change
at the value of one. The results are hardly
like how the image looked before the upscaling
process has started. The optimal denoising
strength will depend on the upscaler
you're using. You'll need values of around 0.5 for the latent upscalers, while other upscalers will
do just fine from 0.3 to 0.5 If you wish to give high resolution fix more freedom to reinterpret your idea, you can aim for higher values. Hope you're doing well there. We have now covered the basics
of AI image generations. Our following chapters
are going to bring it all together and are going to be way less intense than this one.
8. Image-To-Image Generation: Welcome to another exciting
chapter of this tutorial. I am pretty sure this is going to be the
one you'll enjoy. The image to image panel is the second most important
panel of Automatic 11 11. Now that you understand
how Hires Fix works, you'll have a better
understanding of image to image. As we have established
throughout the course, text to image is a default
way of AI image generation. However, besides creating
images from a text prompt, only another popular and
interesting way is generating, using another image
as a reference. We call this method
image to image. This allows us to transform
an existing image, your earlier AI
generation, your photo, or a sketch, or anything from the Internet into a new image. The process of
using another image as a reference is simple. All we need to do is
type in our prompt. As usual, place an image
into this window here, determine the dimensions
of the generated image. And finally, how much freedom we want to give automatic 11, 11 in reinterpreting
the source image. To do that, we use the
denoising strength slider, just as we did with his fix. The denoising strength
slider allows us to fine tune the extent of the transformation
applied to our images. Lower values retain more of the original images
characteristics, whereas higher values allow for more dramatic and
creative transformations. Keep in mind that the lower
denoising strength values will also make a generated image stay closer to the
reference image and often result in somewhat
blurry generations. While higher denoising
slider values allow the model to
express itself freely. Here are a few examples with the same prompts
and settings, with different denoising values. Think of the input image as
nothing more than a guide. The image also does
not need to be pretty or be high res
or have any details. The important part is the
color and the composition. So you can use a child's
drawing, for example, and see how stable
diffusion alongside your prompt and a model
interprets the input. One thing I've
noticed too is that the stronger the contrast and lines in your
original reference, the stronger these will imprint themselves
on your result. There is no good value when it comes to denoising strength. If all you want is a result
loosely based on a reference, you can increase
the values beyond 0.6 If you want to give some painterly quality
to a photographic image, you can get satisfactory results even with values as low as 0.15 How much the image will change in comparison
to the reference depends on the model used, various lores,
textual inversions, your prompt sampling
steps, et cetera. The image to image
panel provides us with many familiar options
we had in the text to image panel that we
were covering earlier. However, there are a
couple of additions. The first one being resize mode, that allows us to determine various image size
related parameters. Just resize, This will resize your image to meet the
width and the height set. If your height and width are different than those
of the original image, your image will be
stretched, crop, and resize. This will crop the
original image to the resolution values here first and then run
the image generation. This is similar to you
cropping the original image yourself before putting
it into automatic 11, 11. Resize and fill. Resizes the image to your specified resolution and
fills the empty space with colors present in the
image, just latent upscale. This option is very
similar to the first one, the only difference
being that it uses a different latent
upscaling method. The scale by and scale to options you can use to
either resize by a factor or resize to specific
dimensions by typing them in in case you
have chosen the up scalar. The image to image Prompt panel also understands instructions, so you can say things like
make the person wear a hat. And if your denoising
strength is high enough, the person in your generated image will be rendered wearing a hat alongside previously mentioned
settings and parameters. The image to image panel
provides us with a couple of new tabs such as sketch
in paint in Paint, sketch in paint,
upload and batch. I will show you the
sketch and batch tabs now and leave the in
paint related tabs for the next chapter that deals with in painting,
specifically sketch. Now that you're familiar
with image to image, it's time to cover
the sketch option. That introduces an
interesting addition to image to image generation. You can think of sketch as a creative and quite
useful coloring tool, merged with an image
to image module. At first glance, sketch and image to image look
completely the same. But if you look closer, once you drop an image
into this area here, you will notice a couple
of options you haven't seen on the basic
image to image panel. These tools are the
rudimentary paint tools. Brush and brush size undo
clear and color palette. On the left side,
hovering the mouse over the little info icon shows you some things that
can help you when drawing. The way sketch works
is that it will render the new image in a similar way to how image to image will do, but also paying close attention to colors that you've
painted over the image. Your final result
will be a new image that might be very close
to what you had initially. How close the result will
be to the reference image. Again, depends mostly
on a denoising slider. Let's try an example using the image of a girl
we used earlier. This is how my sketch
masks looked like. Here you can see the result. I've changed my prompt to contain less of red
related keywords and reduced some of the
weights on the word red that my initial prompt had. Let's hit Generate and
see what result I got. Now general rule is that
when you use Sketch, you want to use the same
prompt as you had initially. You can help the image
generation a bit by using words related
to your new color. Two, like I did here. If your prompt says red
studio background and you're trying to paint the background
yellow using sketch, there will be a
bit of a conflict between your intentions. One more thing I wanted to
show you is the batch tab. If you remember
the batch tab I've shown you when we were
discussing up scalers, this is pretty much the
same thing this time. The only difference is
that instead of batch upscaling the batch
tab within image to image allows you to process a large number of photos
automatically using, of course, the image
to image panel. Copying the directory
destination from your Explorer into the input
and output directories tells Automatic 11
11 where to take photos from and what folder
to generate the results in. Now that you've
understood the process of image generation, various
upscalers, parameters, additional functions and
image to image generation, it's time to show you in
painting a great way to fix your image generations and introduce new
elements to them. Let's move on to in painting.
9. Adding Elements Using Inpainting: Welcome to yet another fun
chapter of this course, How are you doing so far? I hope you're taking breaks and letting all the new
stuff settle in. We have covered quite
a lot together, but I still have some
cool tricks to show you. Actually many more new tricks. There are further techniques and total game changers awaiting us in the extensions
chapter of this course. But before we dive in, let's get familiar with in painting. Instead of generating
the whole image, which is what we were doing
until this point in painting, is a technique used when we want to generate just a
part of an image, fix a part of previously
generated image, or generate everything
around a certain area. You can use in painting
to regenerate part of an AI generated image or
a part of a real image. This is similar to Photoshop's new generative fill function, but unrestricted when
it comes to content. The content that
will be generated within the masked area depends on the model and
additional files that can expand our model, such as Laura, textual
inversions and more. Remember the way
we use sketching. Now imagine this, but
instead of colors, we're going to be adding
actual content into our image, regenerating parts of images, or removing undesired elements. The method works like this. We supply an image, then draw an area of the image we would
like to generate using stable diffusion type in the prompt for the redraw
and click Generate. After we click Generate, the area will be
generated based on our prompt in painting is a part of the image
to image panel and the area that we
draw is called a mask. Just as with the sketch
tab we were using before, you will find all the
familiar drawing tools and the info panel
on the left side. Some differences
between the sketch and in painting panels are the absence of the color
palette and some new options. I will explain mask blur. This slider affects the
softness of the painting brush. If set too low, the painted content might
look pasted into the picture. While increasing this
slider will result in better blending between the original and generated content. Padding affects how much of
the area surrounding the mask should be used as a
reference when it comes to generating the
content inside the mask. This slider depends on
what you're trying to do. I usually go with higher
values for this one as I'd want the generated result
to blend as best it could. Mask mode presents you with two options in paint mask that generates content
inside the mask and in paint mask does
exactly the opposite, changes everything about the
image except the drawn area. Masked content presents
us with various modes for how the content within the mask is going to be created. Again, your choice should depend on what you're
trying to achieve. And some modes are better or
worse for specific tasks. Phil uses the
neighboring colors as a base for painting original. Used when you don't want
huge changes and mostly when fixing stuff other
than adding new elements. Latent noise or
latent nothing are good when you're trying to
add something into an image. Unlike what the image
contains already, latent noise fills the
area with noise from which all AI image
generation starts basically generating
from your prompt without too much of the image used
as a reference latent, Nothing is comparable
with erasing the mask area with an eraser. Think of it as the
choice between filling with static or black. I would advise picking
latent noise in paint area. In paints only the masked area, whole picture might be good. Only when working on
already small results. It will still in
paint the mask area, but it might take into account
the rest of the picture. Better drawback of
this method is that it resizes an image based
on size parameters. So I'd stay away from
it when I want to retain the size of the image
I put into in painting. Just as with general
image generation, it could be challenging to get the result we want
on the first try. Therefore, we should set the
batch size to around five. According to the results,
we could switch up a few parameters,
such as denoising, strength resolution, et cetera, until we start getting
closer to what we want. Here are a few of my
results when fixing minor hand mutations or
similar elements using the original prompt for in painting works 90% of the time. However, if you're trying
to add something new, you can retain the stylistic
keywords of your prompt while describing
what it is that you want to add with in painting. Now it's time to cover
the two other in painting modes in paint upload. The painting tool is
powerful but lacks many of the fine tuning options
that some users might be accustomed to from
programs like Photoshop. Drawing masks over
subjects can be tedious, especially when dealing with
intricate details like hair. If you aren't satisfied
with the level of control over masking and
have more ambitious goals. Automatic 11 11 allows you
to create your mask in another software and import it using the paint
upload feature. The upper portion is where
you need to put your image, while the lower one is
intended for the mask. You can go with a
black and white mask. I will show you a couple
generations and the masks I've created in Photoshop to
aid in my AI generations. My second course
deals specifically with the topic of
AI and photography. So if this is something
that interests you, I will happily have you as
my student again in paint. Sketch. In paint sketch combines the functionality of in painting and color control
of the sketch panel. Unlike the original sketch, it will render only
the masked zone, not touching the
rest of the image. Contrary to the normal sketch. You can write a
unrelated prompt and the paint will try to
render your prompt in the masked area by using
the color of the mask as an additional element
in the generative process. Now that we have
covered image to image generation and in painting as one of
its integral parts, what awaits us is
an exciting chapter that will bring everything
we have learned so far together and unlock
some new options and ideas that you were maybe unaware you can do with Automatic 11, 11.
10. Amazing Extensions! : I have some amazing things
to show you in this chapter. Not much more left
before I leave you to use everything
you've learned so far. Extensions are my favorite
part of stable diffusion, as they allow us to take
further control over our image generations
and enhance everything we've learned earlier with some additional abilities. Some of these extensions
can be used to add an extra element of control
to your image generations, such as the super popular
Control Net extension. While others, like deforum, enable you to create
videos from your image. Generations developed
continuously by the global Internet community
and users worldwide. Automatic 11 11 is enriched daily by community
developed extensions setting it apart from
other AI generators and enhancing its
functionality and ease of use. Some of the popular
ones are Control net, xyz plot after detailer, Civet, AI helper canvas, zoom,
aesthetic gradient, interrogate clip, ultimate SD, upscale, open pose
editor and deforum. The installation method for all these extensions
is quite simple. All you need to do
is copy a link. Navigate to the extensions
tab found here, then click Install from URL. Paste the link right
here, and click Install. All you need to do next is click on the installed
extensions right here, and press the Apply
and restart UI button. Let's talk about the
first extension, the fantastic control net. This extension has changed
stable diffusion forever. You will see very soon why it is my favorite stable
diffusion extension. Among other things,
it lets you copy or specify human poses
from a reference image, copy composition from
another image by analyzing either edges
or depth, and so on. It can replicate the
color palette from a reference image or turn a scribble into a
great looking result. And more. It could be used in any of the image generation
panels alongside them. But when used in
tandem with image to image feature
becomes incredibly powerful as it gives you a granular level of control
over your creations, paving the way for
boundless creativity. You remember the way
image to image generation works using a reference image
to guide our generation. Now imagine that tool becoming ten times as powerful
and feature rich. This is what control net is. When activated by checking
this checkbox right here. Control net becomes
an additional step of control that your image
generation will adhere to. What you see here
are a plethora of various elements that could be extracted from the
reference image and used to guide your image
generation Control net can analyze the hard
contrast lines of the image and use those
to guide the generation. Analyze the depth of
the reference image and use that to guide
the generation process. Extract the pose from
the reference image, having it be the
only thing locked in while freely interpreting
everything else. Based on your prompt, convert a reference image into a
drawing by analyzing lines. Extract, for example,
only hard lines ignoring other elements present
in the reference image. Analyze the orientation of surfaces and use that
as a method of control. Use the shuffle option to transfer the color scheme
of the reference image. Allow even better control
of in painting and more. Make sure that you have
the various models installed needed for
control net to work. Here you can see some of the
ways I've used control net. Control net can also work with an open pose extension allowing a direct
transfer of the pose you've created using
a stick man figure to be transferred as a method
of control and control net. A couple of things
that would be good to know love Ram option is experimental and is for GPUs with less than 8
gigabytes of V Ram. Allow preview check this to enable a preview window next
to the reference image. I recommend you
select this option. Use the explosion icon
next to the preprocessor drop down menu to preview the effect of the pre processor. The explode icon allows you to see the preview of
the analyzed image. The upwards pointing
arrow transfers the dimensions of the
image you placed into control net to the
image size dimensions for the image that is
about to be generated. Here you can see how I have used image to image
alongside control net to completely lock in content and compositional
elements of the image. I extensively use
Control Net for all my photo manipulations
that I am teaching more about. In my second course on AI
plus Photoshop editing, make sure to click on
the enable checkbox before starting the AI
generation process. You incorporate
control net into it. It's something that I am
often forgetting about as the installation method
might change a bit over time. Pay attention to the
installation instructions on control nets web page. I will provide you with the link alongside some additional instructions in
course materials. Text file after detail after detailer is another
community favorite. It serves to help
generate better faces, body parts and hands. It's among my
favorite extensions, not only because it acts as an automatic paint feature that detects and fixes potentially
problematic areas, but also because it provides
high quality results. Often better than what
the AI generation does by default When
installed and activated. Once you press the
generated button, the image will
generate as usual. Then after detailer takes over, looking for faces and hands in the image and attempting to automatically paint those
areas using its custom model, specially trained to fix
such possible errors. It can also further enhance the quality of generated areas. After detailer contains both positive and
negative prompts, allowing you an additional step of control over the
in painting it is doing when using
textual inversions trained on people's faces. After detailer can
be used to increase the likelihood of a generated face looking like the person. As both your general prompt
and after detailer prompt can contain the textual inversion working on replicating
someone's likeness. Another amazing thing about
after detailer is that it allows custom prompts
for both hands faces, et cetera, all while letting you use both in painting
models in unison. I will show you a couple of generations with and
without after detailer. The results speak
for themselves. Below the after detailers
model and prompt selections, you can find three
drop down menus. Detection, mask, pre
processing, and in painting, allowing you so
much more control over how after detailer
should be applied. You can leave the first
two on default settings, however you should
pay attention to the last one that
allows you to run after detailer using
different denoising and mask blur settings. Or using another model than what the image has
been created with. You can also specify the sampler number of
steps and CFG scale. How crazy is that?
Civet AI helper. This is a very useful one. It's an extension helping you handle your models
much more easily. Here are some of the
things it can do. It can scan all
models and download model information and
preview images from Civet I. It can check all your local
models new version and automatically update them
with an info and a preview. It adds some new icons to the round globe icon
opens this models URL. In a new tab, you can use the bulb icon to add this model's trigger
words to prompt. While this one here the tag icon uses this models
preview images prompt. One thing to note
is that every time you install or update
this extension, you need to shut down
web Ui and re launch it. Just reload UI option from the. Settings won't work for this
extension, Canvas zoom. This extension allows
you to zoom into the sketch in paint and
in paint, sketch panels. It doesn't change anything
about image generation itself. But it makes it more
comfortable to do all the drawing
related things within the UI. Aesthetic gradient. Aesthetic gradient
is an extension somewhat similar in
functionality to Laura's. Basically, instead of using
the prompt weight only, it allows you some further control over the implementation of downloaded aesthetic
gradient file from Civet AI. Some say they are about to get phased out. Some
say they are good. I haven't used them
much personally, with Laura's being
powerful as they are, I don't see aesthetic gradient
as a part of my workflow. But it might be a great for, you should definitely
check them out. You can find them using the
filter options right here. Interrogate clip and
interrogate deep buru. It's a built in extension
to automatic 11, 11. Both clip and deep
buru are used to extract prompts from
images placed into the image to image tab
using a couple of gigabytes large model that will get automatically downloaded
once you run these options. Interrogate clip is used for general imagery and deep boru
should be used for anime. They use a lot of video Ram. They cannot be used
with a low spec GPU. Using these tools
is quite a hit and miss scenario and often funny. So my advice is that
you better explore the capabilities of your models by exercising your
own creativity. Instead, ultimate SD upscale, a great upscale module that allows you to upscale
your images without introducing classic
AI upscale artifacts such as over
sharpening polishing of skin tones, et cetera. The way ultimate
upscale works is by breaking an image
into smaller tiles, then working and
upscaling tile by tile, and finally merging
all these tiles into one upscaled image with
superior results to the usual upscaling
methods done in automatic 11 11
open pose editor. This is a small extension
that allows you to add a person or more people into the image and
craft their poses using a simplified representation
of a human body. You can then send your
creations to control net extension to use as a guide. During image generation, I will show you a
simple example, really an interesting little
extension, X, Y, Z plot. Not so much an extension, as much it is a script, but I have decided to
cover it here as it is almost invisible when
using the UI, X, Y Z. Plot is a script that creates grids of images with
varying parameters, which can be found in the script drop down menu as shown below. I've used them earlier to show how different CFG scale and sampling steps
affect the result, but I will show you
a few more examples. Deforum. You must have seen
those tripy videos where one frame blends into another with a camera
panning inside the video, and fractal like animations, changing shapes and
merging into one another. All this is done in deforum. Deforum is probably
the extension with the largest number of options allowing you to control numerous
generation parameters, camera movements, and more. It has so many
features that it would take a whole lesson
to cover them all. For the purpose of this chapter, I will try to simplify it a bit. The Run tab offers the classic choices of
sampler sampling steps, dimensions, and seeds, things you should
be familiar with. Below you can see an
option to restore faces, which will increase
generating time, but might result in
nicer looking faces. The key frames tab
provides a multitude of parameters that deal with how the image changes over time, including camera movements and generation parameters
like seeds. Key frames allow you to
select the duration of the animation using
the max frames value. In the prompt tab
enter the prompts you wish to use the
difference compared to the usual prompting is that
here you can set at which point a set of prompts changes into another set of prompts. The control net tab allows you to incorporate control net, which we covered
earlier, a guide during frame generation. Hybrid video, among
other things, allows you to use another
video as a guide to the camera movements of
your deforum generation. In the output tab,
you can select the export parameters
and whether to combine generated images into a video or just leave them as images for
your further manipulation. This way you can import
them into Premier Pro, add a soundtrack, various
effects, and more. With all that we
have explored today, what remains is for you to
set your creativity free. Congratulations on
finishing the course. It's been a privilege.
Being a part of your learning experience. Feel free to reach out any time, whether you have questions
or want to showcase your unique creations here to support you in all your AI
and Photoshop endeavors. And speaking of Photoshop, if you sense that it's time
to elevate your skills, consider joining my next course, delving into the fusion of
AI art and photography. Or if you're passionate about photography and interested
in skin retouching, I will be happy to teach you my tips and secrets throughout a 3 hours long in depth portrait and boudoir
retouching course. I'm looking forward
to seeing you again. I am wishing you
endless inspiration and boundless success. My name is Mark
and see you again.
 Marko Smiljanic, Boudoir Photographer and Retoucher