Transcripts
1. Introduction: Hello, everyone. My
name is Sant Kumar, and welcome to this class
on Advanced transitions and professional video effects
in Adobe Premiere Pro. In this course, we are going
to learn how to create cinematic video effects,
custom smooth transitions, motion graphics,
creative animations, and professional
editing styles using powerful tools available
inside Premiere Pro. We will explore
different types of effects such as blur effects, stylize effects,
transform effects, masking techniques,
blending modes, Track Mat key,
adjustment layers, and many advanced
visual effects. Also learn how to create modern cinematic
transitions like glitch transitions,
Zoom transitions, split transitions,
mosaic transitions, wave transitions, flash effects, and many more creative
transition styles. So if you want to
make your videos look more creative, dynamic,
and professional, then let's get started
and explore the world of advanced transitions and visual
effects in Premiere Pro.
2. How to Apply Video Transitions in Premiere Pro: Now, let's learn how
to apply transitions in Adobe Premiere Pro
in a practical way. In the timeline, we already have multiple clips placed
one after another, and our goal is to create a smooth connection between
them using transitions. To do that, we first let's zoom the timeline And then go to the project panel and
open the Effects panel. Inside the effects panel, you will find a folder
called video transitions, and here you can see
many different types of transitions available. Let's choose one
simple transition to understand the concept. Open the wipe folder,
select linear wipe, and then drag it directly onto the cut between two
clips in the timeline. As soon as we apply
the transition, you may notice a warning message saying insufficient media. This message means that
the clips do not have enough extra frames or handle
and press Okay for now. You will see that the
transition is applied, but it does not look smooth. Instead, it creates a
slight freeze frame effect which makes the video
look unprofessional. This happens because
Premiere Pro is forced to repeat frames due to the
lack of extra footage. Now the question is, how do
we identify this problem? First, let's undo the action. And if you look closely
at the timeline, you will notice small
white indicators at the beginning or
end of the clips. These indicators show that there are no extra
frames available. Another way to confirm this is by trying to extend the clip. If the clip does
not extend further, it means there are no handles. Fix this issue,
we need to create some extra space by trimming
the clips slightly. Once you trim both
clips a little bit, you will notice that those
white indicators disappear. This means now both clips have extra frames available
and now select the Track select forward
tool by pressing A on your keyboard and then
adjust the clips forward. Now, when we apply the
same transition again, you will see that no
error appears and the transition works smoothly
without any freeze frame. Let's understand one
more important situation that often confuses beginners. If we undo the action, and this time trim only the first clip while leaving the second
clip unchanged. And then apply the
transition again, you will notice
something different. The transition is
no longer centered. Instead, it shifts automatically to the beginning of
the second clip. This happens because only
one clip has extra frames, so Premiere Pro adjusts the transition based on
the available footage. That is why the
transition placement changes automatically. So always remember, if you want a perfectly centered
and smooth transition, both clips must
have extra frames. Otherwise, you may get errors
or unexpected results. So now you clearly understand
how transitions work in Adobe Premiere Pro and why sometimes they don't
behave the way we expect. So the key takeaway is simple. Always keep a little extra
footage while editing, use transitions carefully
and focus on smooth, natural flow rather than
over using effects. Now you're ready to use transitions confidently
in your project.
3. Working with Transition Properties & Controls: This lesson, we are going to
understand how transitions actually behave
inside the timeline in Adobe Premiere Pro, and this is something
every editor must understand to achieve clean
and professional results. And we have multiple clips placed side by side
in the timeline, and these clips contain extra
frames known as handles. These extra frames are very
important because they allow transitions to blend
properly between two clips. Now, when we apply any
transition between two clips, by default, Premiere Pro places it at the
center of the cut. However, depending on
your editing style or the requirement
of your project, you are not limited to
this default behavior. You can move the transition so that it starts
completely from the beginning of
the second clip or ends exactly at the
end of the first clip. This flexibility allows you to control the visual
flow more precisely, especially in storytelling
or fast paced edits. But center transition is equally divided
between both clips half of the
transition appears on the first clip and the other
half on the second clip. This center placement generally gives the most natural
and smooth result, which is why it is used
by default in most cases. Now, let me show
you a preview of the end of the first clip and the beginning
of the second clip. If you apply another
transition on the same cut, Premiere Pro will automatically
replace the previous one. This makes it very quick
to experiment with different transition
styles without needing to delete the
old one manually. But if you want to remove
a transition completely, you can simply select
it and press delete, and the timeline will
return to a normal cut. Now, let's talk about an important situation
that beginners often face. Let's create a gap
between two clips, and when we apply a transition, it will not behave like
a normal transition. Instead of blending two clips, it will apply only to a single clip which
looks incorrect. Happens because a transition always needs two
clips to connect. If you want it to work properly, you need to either
remove the gap or place another clip so that both sides of the transition are filled. Now, I'll place this clip
on top and preview it. You can see it works like
a normal transition. And let's undo the action. Let's move ahead
and understand how to control transitions
more precisely. When you select a transition and open the effect
controls panel, you will find alignment options. From here, you can
choose whether the transition
starts at the cut, ends at the cut or
stays centered. This gives you full control
over how the transition behaves without needing to
drag it manually every time. Or in the Effect Controls panel, we can change the transition
position as well. Simply drag it left or right, and the transition position will automatically update
in the timeline. If you double click
on a transition, you will see its duration. In Premiere Pro, the value
of one represents 1 second. You can change this
duration either by typing a new value and it will automatically update
in the timeline. Or by dragging the edges of the transition directly
in the timeline. When you increase the duration, the transition becomes
slower and smoother. When you decrease
it, the transition becomes faster and sharper. Controlling this timing is
very important because it directly affects the mood
and pacing of your video. Now, here is a very
important concept that many beginners
misunderstand. When you move your cursor
over the cut point, you will notice a red trim icon. If you drag from this point, you are not changing
the transition. You are actually trimming
the clip itself. This means you are either adding or removing
frames from the clip, not adjusting the transition. Understanding this difference is crucial for precise editing. Finally, when we try to increase the duration
of a transition, it stops at a certain point. This happens because there are no more extra frames
available in the clip. In other words, the
handles are finished. If you force the
transition beyond this limit in effect
controls panel, Premiere Pro will create a freeze frame to fill
the missing frames, which usually looks unprofessional
and should be avoided. So the key idea to remember is to always keep extra
frames while editing, use center alignment for
balanced results and control duration carefully to match the style of your video. Once you understand
these small details, your transitions
will immediately start looking more
polished and professional.
4. Customizing Video Effects for Creative Editing: This tutorial, I
will show you how to customize transitions using
the Effect Controls panel. First, let's zoom into
the timeline so we can clearly see the cut
point between the two clips. This helps us work
more precisely while applying and
adjusting the transition. Now, let's apply the
linear wipe transition between these two clips. Once the transition is applied, select it from the timeline and then move to the
effect controls panel. This is where all the customization
options are available. Will notice that there
are many settings available for this transition. Each of these controls
allows you to modify how the transition
looks and behaves. Now, if you want to
preview the transition, make sure the playhead is positioned over the
transition area. Then click on the show
actual sources and simply press the play button
in the preview monitor, and you will be able to
see how the transition is working between the
two clips in real time. And timing section controls how much of the transition
is visible over time. The start value defines
where the transition begins. When it is set to 0%, the transition starts from the very beginning of the clip. The end value defines how
far the transition goes. So basically, start
and end together, control the range and
progress of the transition. If we look at the
visual curve editor, this graph controls the
speed of the transition. By adjusting the curve, we can make the transition start slowly and end fast
or the opposite. This helps create a more
smooth and natural motion. And in type option, by default, it is set to Bezier. Asia creates a smooth
and natural transition. It means the motion
starts slowly, then speeds up in the middle and again slows down at the end. This gives a very polished and cinematic feel to
the transition. Now, when you switch to split, the curve becomes
independent on both sides. This means you can
control the beginning and the ending of the
transition separately. For example, you can make
the transition start very slowly and then suddenly
speed up at the end, or you can do the opposite and start fast but finish smoothly. This gives you much
more creative freedom, especially when you want
stylized or dynamic effects. When we select E's, the transition moves in a
very smooth and natural way. It starts slowly, then
gradually speeds up, and again, slows
down at the end. This is the most commonly
used option because it creates a soft and
professional looking motion. And when we switch to stop, the motion becomes more abrupt. The transition
comes to a pause or slows down sharply
at a certain point. This can create a slightly
stiff or dramatic effect, which is sometimes useful
for stylized edits, but not ideal for smooth
cinematic transitions. And when we choose drive, the motion becomes more
forceful and continuous. The transition accelerates
more strongly, making it feel faster
and more energetic. This is often used in
dynamic edits like reels or action sequences where you want a sense of
speed and impact. And the angle defines the
direction of the wipe. You can rotate it to any angle to create different
directional effects. And the reverse direction option simply flips the
direction of the wipe. So instead of going
left to right, it will go right to left. The center controls the position from where the wipe happens. You can move this point to shift the transition's origin
anywhere in the frame, and the mirror option creates a mirrored wipe effect
from both sides, which can give a more
stylized or symmetrical look. Repeats controls how many times the wipe pattern repeats
across the frame. If you increase this value, the transition will create multiple repeating lines
instead of a single wipe. Wipe feather controls
the softness of the edge of the transition. If the value is low, the edge will look
sharp and hard. If you increase it, the edge becomes softer and more blended, giving a smoother and
more cinematic feel. Repeat feather. This works
with the repeat setting. It softens the edges of the repeated wipes when
multiple patterns are used. If you enable stroke, you can add a visible
line along the wipe edge. The width controls how
thick the line is. And the grow setting controls how the stroke
expands or animates. This is useful when you want a stylized or
graphic transition, and the color option
allows you to change the color of
the transition edge. By default, it is usually
set to a neutral tone, but you can pick any color
depending on your design. This is especially
useful when you want to create a stylized or
branded transition. Next, we have the glow range. This controls how much glow appears around the edge
of the transition. If you increase this value, the edge will start to look brighter and more highlighted, almost like a light is passing
through the transition. This works well for creative
or cinematic effects. Then we have the shadow range. This adds a darker area
around the transition edge. Increasing this value gives
more depth and contrast, making the transition look more three dimensional
instead of flat. Finally, there is the
uniform shadow option. When this is enabled, the shadow remains evenly distributed
across the transition. If it is turned off,
the shadow may vary depending on the direction
or angle of the wipe, giving a more dynamic but
less consistent look. Now, in the Effect
Controls panel, you will notice a
small reset icon next to the effect name
or individual properties. This reset icon is used to bring the settings back to their
original default values. So if you have made
multiple changes to the transition and you want
to quickly start fresh, you can simply
click on this icon. If you click the reset
icon at the top, it will reset the entire effect. But if you click the reset icon next to a specific property, it will only reset
that particular set. Now in the control section, you will see a button
called surprise me. This option is used
to automatically generate random settings
for the transition. When you click on
it, Premiere Pro instantly changes multiple
parameters like angle, feather, curve, and other
properties to create a completely new variation
of the transition. This is especially
useful when you are experimenting and looking
for creative ideas. Instead of manually adjusting
each setting one by one, you can simply click this button and quickly explore
different style. Every time you
press, surprise me, you will get a different result. Some variations may
look subtle while others can be more
dramatic or stylized. So this feature is not
meant for precise control, but it is very helpful
for inspiration and discovering new
transition looks quickly. We explored how
different settings like timing, direction, curve, and feather can completely
change the look and feel of a trans once you
understand these controls, you are not limited
to default effects. You can create your
own unique styles. The important thing
to remember is that most transitions in Premiere Pro share very
similar properties. So whatever you have
learned here can be applied to other
transitions as well.
5. Understanding Default Transitions : This lesson, we are going
to understand one of the most important and
time saving features in Adobe Premiere Pro, which is the default transition. A default transition is
a preset transition that Premiere Pro applies instantly between two clips
using a shortcut. Instead of going to
the effects panel every time and dragging
a transition manually, you can apply it
in just one step, which makes your editing much
faster and more efficient. Now let's see how to apply it. First, make sure you have two clips placed next to
each other in the timeline. Then select the
cut point between them or simply select the clips. Next, go to the sequence menu, click on Apply Video
transition or use the shortcut Control
or Command D to quickly apply the
default transition. By default, Premiere Pro uses Cross Dissolve as the
video transition. This creates a smooth fade
between two clips where the first clip gradually disappears while the
second clip appears. And if you want to apply
an audio transition, go to the sequence menu and
click Apply Audio Transition. Simply press Control or Command
Shift D. And for audio, the default transition
is constant power, which creates a
smooth audio fade and prevents sudden
jumps in sound. And let's delete
both transitions. And if you want to apply the default transition to both audio and video
at the same time, you can either choose apply default transitions to
selection or simply press Shift plus D. This will
automatically apply the default transitions to both audio and video
tracks together, making your workflow
faster and more efficient. When the transition is applied, it is placed at the center
of the cut by default. This means half of the
transition is applied to the first clip and the other
half to the second clip. This balanced placement usually gives the most natural result. Especially in cinematic
or storytelling edits. Now you might be wondering
how to recognize which transition is
set as the default. To check this, go to the Effects panel and open
the dissolve category. Here, you will see the
cross dissolve transition and you will notice a
blue border around it. This blue highlight
indicates that it is currently set as the
default transition. This means whenever we
press the shortcut, Control or Command D, Premiere Pro will apply this
transition automatically. Now, if you want to change the default transition,
it's very simple. Just right click on
any other transition. For example, dip to black and select set selected
as default transition. As soon as you do
that, the blue border will move from cross
dissolve to dip to black. This visually confirms that the default transition
has been changed. When you apply the
default transition using Control or Command D, dip to black will be used
instead of cross dissolve. Always remember the blue
border is the key indicator that tells you which transition is currently set as default. This small detail
helps you quickly identify and control your
workflow while editing. We can also adjust the duration of the
default transition. After applying it, simply drag the edges in the timeline to
make it shorter or longer. A shorter duration
makes the transition faster and sharper while
a longer duration makes it smoother and more gradual
and go the preference and timeline Here we can set the default duration of
audio and video transition. So the default transition is a powerful tool that saves time and keeps your
workflow fast. Once you get used to
using shortcuts like Control or Command plus D and Control or Command
plus Shift plus D, your editing speed will
improve significantly and your transitions will
look smooth and professional.
6. Creating Smooth Video Transitions: In this video, we are
going to learn how to use video effects as transitions
in Adobe Premiere Pro, and we have a logo file on top of the video
in the timeline. Now, if we apply a simple
transition like Cross Dissolve, you can see that the
result looks very basic. It just fades the
logo in and out and it doesn't feel very
impressive or engaging. This kind of transition works, but it looks too
simple and doesn't add much visual
interest to the video. So to make our transition more attractive
and professional, we can use video effects
instead of standard transition. Combining effects and keyframes, we can create custom transitions that look much more
dynamic and creative. This approach gives us full
control over motion, timing, and style, allowing us to design unique transitions
that stand out. Now, go to the Effects panel, then open video effects
and inside that, open the distort folder. From here, select the
turbulent displace effect and drag it onto the logo clip. As soon as you apply it, you will notice
that the shape of the logo starts to
change slightly. This happens because the
turbulent displace effect creates distortion in the image. This effect used to create
wave like motion, distortion, or even glitch style
animations in your footage, which makes it very useful
for creative transitions. Now, let's adjust one of the
most important settings, which is the amount value. The amount controls how strong
the distortion effect is. If you keep the value low, the distortion will be
very subtle and smooth and the logo will only
slightly move or bend. But as you increase the value, the distortion
becomes stronger and the logo starts to look
more dynamic and heavily. And then let's increase
the size which controls the scale of
the distortion pattern. A smaller size creates
tight detailed waves while a larger size produces big soft distortions
across the frame, and we can change the
offset turbulence, and this is used to move the distortion pattern
across the screen. By animating this property, you can create flowing
or moving wave effects. The complexity setting controls how detailed the distortion is. Lower values keep the
effect simple while higher values add more layers and make the motion
more complex and rich. Next is evolution, which is one of the most
important controls. It animates the internal
movement of the distortion. When you increase
this value over time, the waves continuously change, creating a dynamic
and organic motion. Now you can see a distortion, almost like a liquid effect
applied to the logo. At the moment, this effect is affecting the entire
clip continuously, which is not what we
want for a transition. We only want this effect to
appear during the transition, not throughout the
whole logo duration. So first, move to the very
beginning of the clip. Now, click on the stopwatch
to enable keyframes. And move plus 20 frames
on the timeline. Reset all values and set
the amount value to zero. Now play the timeline. You can see the logo
animation is working. Next, press the end key on the logo layer to move the playhead to the
end of the clip, then go back -20 frames
on the timeline. And now let's add the keyframes. Then go to the first
frame of the clip, select all the starting
keyframes and copy them. Then press the page down
key to move to the end of the clip and paste
those keyframes here. This helps maintain consistency between the start and
end of the animation. Now, if we play the timeline, you can see that
the logo animation looks smooth and
properly controlled. To make it even more
visually appealing, let's add a cross
Zoom transition for a smoother and
more dynamic look. After applying it, we don't need the transition at the end, so simply select
it and delete it. Then adjust the transition
at the beginning by reducing its duration so it blends nicely with
the animation. Now, if we preview the result, the logo transition looks much more polished, smooth,
and professional. So in this way, we can create transitions
using video effects rather than relying
solely on built in transitions in
Adobe Premiere Pro. Now, let me show you
one more example. First, let's drag this logo
onto the timeline above the clip and increase its size so it fills
more of the frame. Next, go to the Effects panel and apply the wave warp
effect to the logo. As soon as we apply it, you can preview
the effect and see how it creates a
wave like motion. Now, let's reduce the
wave height value to make the effect more
controlled and less intense. So it looks smoother
and more professional. Now, let's also increase
the wave width value, which controls how wide the wave pattern appears
across the logo. To enhance the overall look, let's also add a
wipe transition. Now, go to the video
transitions panel, open the wipe category, and select the linear
wipe transition. Drag it to the
beginning of the clip. Then look at the preview in the program monitor to see
how the transition appears. Now let's adjust the duration
of the wipe as well. You can do this by dragging the edges of the transition
in the timeline, making it shorter
for a faster effect or longer for a smoother,
slower transition. Now, place the same
wipe transition at the end of the clip as
well in reverse direction. So the animation feels balanced at both the
beginning and the end. And now let me show
you one more example. First, hold the Alt key or
option key and drag the logo. This will create a
duplicate copy of the clip. Now, on this new copy, let's remove the
previous effects and transitions so we
can start fresh. A next, go to the effects
panel, open video effects. Then go to the legacy folder and choose the block
dissolve effect, drag and apply it to the clip. Once the effect is applied, go to the Effect Controls
panel and enable the stopwatch for the
transition completion property. This will create the
first keyframe and allow us to animate
the effect over time. Now we can control how
the blocks appear and create a unique transition
animation using this effect. And let's adjust the
transition completion. This controls the progress
of the transition over time. I block width. This controls the horizontal
size of each block. If you keep the value small, the transition will
use many tiny blocks, creating a detailed and
smooth pixel like effect. If you increase the value, the blocks become wider, making the transition look more bold and noticeable
and block height, which controls the vertical
size of the blocks. Just like width, smaller
values create finer blocks while larger values create
bigger squares or rectangles. Now move forward
in the timeline by about 20 frames and
here reset the values. And let's check the animation and go back to the very
first frame and adjust the value according to your requirement to get
a better visual look. Next, move to the end of
the clip and then come back around 20 frames
using -20 frames. At this point, add
another keyframe. Now return to the first frame, copy the starting keyframe, then press the down arrow key to move to the end
and paste it there. If we now play the timeline, you can see that the logo is smoothly animated
using the effect. To refine the look further, let's adjust the block height and transition
completion properties. By changing this value, we can control how large or
small the blocks appear, which directly affects the
style of the transition. With this, we have completed
another example of creating a custom transition
using video effects. And the biggest
advantage of using transitions is that
they help create a smooth flow between
clips instead of abrupt cut transitions make your video feel more connected
and visually pleasing. They also improve storytelling. A well placed transition
can show a change in time, mood, or scene, making your edit more
meaningful and engaging. So whether you use
default transitions or create your own
using effects, understanding how transitions
work gives you full control over your editing and helps you produce more
professional videos.
7. Morph Cut Transition for Smooth Face Edits: In this lesson, we are
going to learn about one of the most powerful and
intelligent transitions in Adobe Premiere Pro, which is the morph cut. The morph cut transition is specially designed to
smooth out jump cuts. A jump cut usually
happens when you remove a portion from
the middle of a clip, especially in interviews
or talking head videos. When you cut out unwanted parts, the subject suddenly jumps
from one position to another, which looks unnatural
and distracting. Now, when we play the clip, you can clearly notice a
jump cut in the scene. To smooth this out and
make it look natural, we will use the morph
cut transition. Now go to the Effects panel, open video transitions,
then go to the Dissolve category
and select MorphCut. Drag it onto the cut
between the two clips. As soon as we apply it, Premiere Pro will start analyzing the clip
in the background. You may see a message like
analyzing in background. Once the analysis is complete, the transition will be ready. Now play the timeline. And you will notice that
instead of a hard jump, the subject appears to smoothly move from one
position to another. This makes the edit
look much more natural. However, morph cut works best
under certain conditions. The background should
be consistent, the lighting should not change, and the subject should not
move too much between cuts. If there is too much movement or a big change in position, the transition may create
visible distortion or ghosting. You can also adjust the
duration of the morph cut. You can make it
shorter or longer. It really depends on the
scene and what feels natural. Slightly longer duration gives premier more frames to blend, which often results in
a smoother transition. But if you make it too long, it may look unnatural, so you need to find
the right balance. If the effect
doesn't look right, you can try trimming the
clips slightly or choosing a different cut point where the subject's position
is more similar. Morph cut is a very useful tool, especially for
interviews, tutorials, and talking head videos. It helps you remove
mistakes pauses or unwanted sections while keeping the final video smooth
and professional. Once you understand how
to use morpCut properly, you can significantly
improve the quality of your edits without needing
complex animations or effects.
8. Exploring More Creative Transitions: This lesson, we will learn about some available transitions
in Adobe Premiere Pro. You can explore many more
transitions by opening the video transitions folder
inside the Effects panel. Simply choose any
transition such as pull motion and drag it between
two clips in the timeline. As soon as you apply
it, you will instantly see the transition preview
between the clips. Now, if you want to
customize the transition, simply select it in the timeline and go to the Effect
Controls panel. Here you can edit settings
like duration, direction, alignment, motion, and other available properties depending on the
transition type. And now let's apply another transition and see how it looks. Travel motion
transitions are used to create smooth and dynamic
movement between clips, making travel videos look
more cinematic and engaging. And dip to color is a smooth transition
effect used to fade one clip into
a solid color, such as black or white before
revealing the next clip. It is commonly used for scene
changes, emotional moments, cinematic edits, and storytelling transitions to create a soft and
professional visual flow. And mosaic transition creates a pixelated block style
animation between clips, giving the video a digital or glitch like
transition effect. Now, click on the
surprise Me button, and Premiere Pro will
automatically create different creative mosaic
transition variations, and it is commonly
used in modern edits, text style videos,
gaming content, and creative cinematic
transitions. And glass transition
creates a smooth, distorted or glass like
visual effect between clips, making the transition look
cinematic and stylish. And glitch transition creates a digital distortion
effect between clips using RGB shifts, noise, flickers, and
screen distortion. And TV Power transition creates an old television shutdown
style effect where the screen quickly
collapses into a bright line or point before
switching to the next clip. VHS damage transition creates an old tape style
distortion effect with static noise, glitches,
color shifts, and tracking lines
between clips, and flare transition uses
bright light streaks or lens flare effects to
smoothly connect two clips, creating a cinematic and
energetic visual flow. And flash transition creates a quick burst of bright
light between clips, making the cut feel fast,
energetic, and impactful. And Zoom blur transition creates a fast zooming motion
with blur between clips, making the transition feel smooth, dynamic, and cinematic. And ray transition
creates glowing light rays or burst style
effects between clips, adding a dramatic and
cinematic visual flow. And three D roll transition
rotates the clips in three dimensional space while switching between scenes, creating a dynamic and
cinematic movement effect. And split transition divides the screen into sections while
switching between clips, creating a smooth and
stylish transition effect. And motion tween
transition creates smooth animated movement
between clips or keyframes, making the motion feel
fluid and natural. And three D spin
transition rotates the clips in three
dimensional space while switching scenes, creating a fast and
dynamic cinematic effect. And slice transition cuts
the screen into sections and quickly reveals
the next clip with smooth slicing motion. And wave transition creates a smooth flowing or liquid style distortion
between clips, making the transition
look soft and cinematic. And clock wipe
transition reveals the next clip using a circular clock like
motion around the screen. And star wipe transition reveals the next clip using a
star shaped animation, creating a fun and stylized
transition effect. And center split transition
divides the screen from the center and reveals the next clip with
smooth split motion. And there are many more
transitions available in Adobe Premiere Pro that you can explore for
creative editing. Each transition creates a different visual style
and motion effect, so experimenting with
them can help make your videos more cinematic,
dynamic, and engaging. You can try transitions like wipes, zooms, spins, glitches, blurs, light leaks, splits, three D motion, and many
other creative effects. Most transitions also include
customizable settings, which means you can adjust their direction speed, softness, angle, motion, colors, and animation style according
to your project needs. Another great advantage is that transitions can be combined
with sound effects, motion blur, color grading, and keyframes to create even more professional
looking edits. So don't hesitate to explore different transitions,
preview the results, and experiment with
various combinations to develop your own
unique editing style.
9. Applying and Managing Video Effects: Adobe Premiere Pro, applying
effects is very easy. Here in the timeline,
we have multiple clips. To apply an effect, first go to the effects panel. Inside the effects panel, you will find the
video effects category and inside video effects, we have many different effect
folders and categories. Now open any folder
and choose an effect. For example, let's
select the Tint effect. Simply drag the
effect onto the clip. As soon as you apply it, the tint effect is instantly
added to the footage. Now, if you want to
customize the effect, go to the Effect Controls panel. Here you will find all the available settings
for the tint effect. For example, if you want
to change the colors, simply click on
the color options and choose any color you like. You can also adjust
settings like opacity or blending to control how
strongly the effect appears. And if you want to temporarily
disable the effect, simply click on the FX
icon to turn it off. Click it again to enable
the effect back on. This makes it very
easy to preview before and after
results while editing. We can also apply multiple
effects to the same clip. For example, let's apply
the lumetri color. Effect is primarily used for color correction
and color grading, allowing us to completely change the look and
mood of the clip. Now simply adjust different color settings
like temperature, tint, exposure, contrast,
highlights, shadows, and other values to
customize the color style. Next, let's apply one more
effect, such as vintage. This creates an old cinematic
or retrostyle look. And now let's apply the
black and white effect. As soon as we apply it, the clip instantly changes into a
black and white style. Now, one very important
thing to understand in Adobe Premiere Pro is that the position or order of
effects matters a lot. If we change the
order of the effects, the final visual result also changes in the
program monitor. For example, if we move the tint effect above or
below another effect, you can see that the colors change differently
in the preview. So always remember, effect order is very
important because each effect processes the clip differently depending on its position in
the effect controls panel. And now let me show
you one more example. By default, when we
apply an effect, it affects the entire clip, and we cannot control
the specific area where the effect appears. But if we want to
control the effect area, then we use masks. Simply select a clip and choose a mask shape from the
effect controls panel. Then drag and adjust
the mask over the area where you want
the effect to appear. Now, let's apply an effect. For example, let's
use Gaussian blur. As soon as we apply it, you can see that the
Gaussian blur effect appears only inside
the masked area. Now let's decrease
the blur amount to make the effect more visible. And if we want the
opposite result, simply enable the inverted
option in the mask settings. Now the mask works in reverse, and the blur is applied outside the selected
area instead. At the moment, the mask
edges look very sharp, so to create a more natural
and professional result, let's increase the
mask feather value. This softens the edges and blends the blur smoothly
with the footage, and now we have a nice
Gaussian blur effect with proper focus on the subject You can use this same technique with
many different effects. Simply select the clip, search for any effect. Apply. And then customize the settings in the
Effect Controls panel for a better and more
creative result. Applying effects in
Adobe Premiere Pro helps improve the
visual quality, style, and overall
impact of a video. Effects allow us
to enhance colors, create cinematic
looks, add motion, generate creative transitions,
blur backgrounds, highlight subjects, and
produce artistic visuals. So effects are one of the
most powerful tools in Premiere Pro for transforming simple footage into cinematic, creative and professional
looking video.
10. Motion, Scale & Position Animation Effects: This video, we are
going to learn some powerful and creative
editing techniques in Adobe Premiere Pro. Now we have three
clips in the timeline. First, let me show
you the preview. In this first clip, we want the speed to remain
normal at the beginning, then increase as people walk and finally slow
slightly at the end. To achieve this, I'll show you a quick and very useful trick. First, make sure these
two options are enabled. Show FX badges and
show video key frames. If they are not enabled,
simply turn them on. Now, increase the height of the video track so we can
clearly see the keyframe line. Once FX badges are enabled, you will notice a small
FX icon on the clip. Right click on it, then go to time remapping and select speed. Now you will see a horizontal
line across the clip, which represents the speed. Next, hold the
Control or command key and click on the line
to create keyframes. Add one keyframe where you
want the speed to start increasing and another where you want it to return to normal. Now, drag the line upward
between these keyframes. As you upward the line,
the speed increases. You will also notice
that Premiere Pro automatically adjusts the clip length when
you change the speed. Now, click on the handle between the keyframes and drag it slightly to create
some distance. This will make the speed change smoother instead of abrupt. Do the same on the
other side as well. So both the speed ramp in
and ramp out feel natural. Now let's play the timeline
and see the result. And now you can see the
speed starts at normal, then increases as the action happens and then returns
back to normal again. At the end, if we pull
the line downward, you can slow down the
clip at that point. As you do this, you will
notice that Adobe Premiere Pro automatically increases
the clip length to accommodate the slower speed. Now, let's play the timeline, and you can see we have
a smooth transition between normal speed, fast motion, and slow motion. And now let me show
you one more example. Again, select time
remapping and choose speed. Then hold the control or command key and click on the line
to create keyframes. Add your points where you
want the speed to change and then adjust the line up or
down to control the speed. Once you position the
points correctly, your speed ramp is
ready, just like that, we've created another
smooth speed transition. And to make it faster, let's increase the speed
by adjusting the line upward and see the result. And let me show you
one more quick trick. In this example,
we want to create a smooth Zoom effect toward
the top of the mountain, along with gentle motion. First, right click on the
FX badge of the clip, go to motion and choose scale. This will display the scale
property on the clip. Now hold the control
or command key and click on the line to create
multiple key frames. Add a few points where you want the Zoom to start and progress. We can also add stop points to control the timing
of the animation. Now slightly raise the line
to increase the scale, which creates a Zoom in effect. With this, we have
created the Zoom effect. And to focus on the
top of the mountain, let's adjust the
position of the clip. Next, go to the effect
controls panel. Here, you can see all
the keyframes clearly, which is created using
the scale property. Now enable the stopwatch
for the position property. Move to the second keyframe
and adjust the position of the clip so the focus shifts
upward toward the mountain. Then move to the
next key frame and adjust the position again
to continue the motion. This creates a smooth
movement along with the Zoom. Finally, go to the
last frame and reset the position so the
motion settles naturally. And in this way, we've created a smooth Zoom effect
quickly and efficiently. And now, let's adjust the top
view position a bit more. Add another keyframe,
adjust the position slightly and then preview the result to see
the improvement. You can also fine tune these points directly
from the FX badge. Just right click,
choose position, and you will see options
like anchor point, which you can adjust to control
how the movement behaves. And that's it. By using
these techniques, you can create smooth
and professional effects quickly and efficiently.
11. Track Matte Key with Text Animation: This lesson, we are
going to learn one of the most powerful
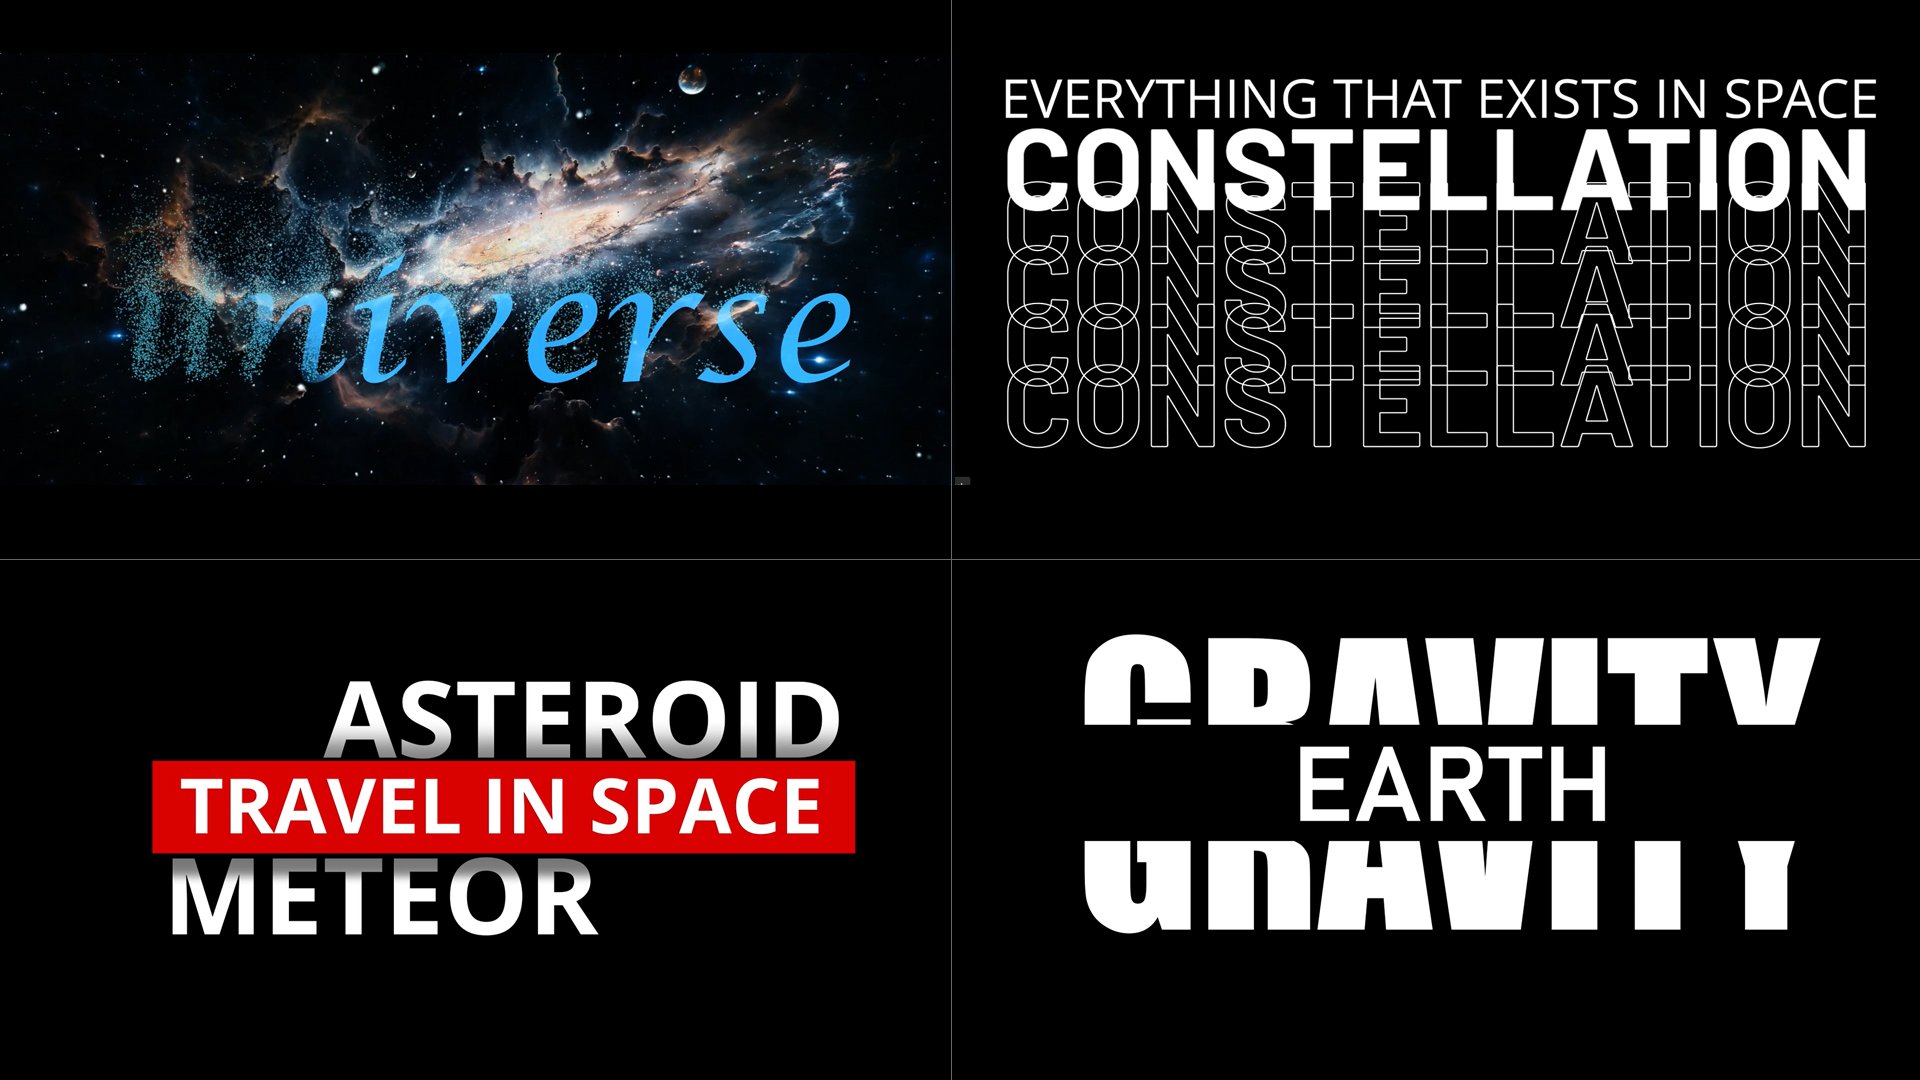
compositing tools in Adobe Premiere Pro, which is the track Mat key. Track Mat key is
used to reveal or hide one clip using
another clip as a mask. In simple terms, one layer controls the visibility
of another layer. Now let's understand
how it works. Let's start with
our first example. In this example, we have
three clips in the timeline, two video clips and
one audio track. The bottom clip
shows space footage. And the clip above it
contains background effects. Now, let's create
a new text layer and type something
like universe. Now move to the
properties panel, select a suitable font family, switch to a bold style for better visibility and adjust the font size to fit
the composition. Now, let's animate this text. Go to the Effect Controls
panel and enable the stopwatch for the scale
property to create keyframes. At the starting point, increase the scale so the
text appears large. Then move forward in the timeline and reduce the scale to make
the text smaller. And let's see the preview. Move forward again, add another keyframe and finally reduce the scale to zero so
the text disappears smoothly. And let's make the
font more bold. Now, if we play the timeline, you can see that we have created a simple and smooth
text animation. Now, select the V
two track and then go to the effects panel, open video effects and
inside the key category. Select Track Matt key. Drag this effect onto the clip. Next, go to the Effect
Controls panel, and in the MT option,
choose Video three, which is the track where
our text layer is placed. As soon as you select it, you will see a nice
reveal effect where the video is now visible
through the text. And now let's fine tune the
text effect a bit more. To make the text
reveal more visible, we can increase the brightness and contrast of the V two track. So go to the Effects panel, search for brightness and contrast and drag this
effect onto the video clip. Now go to the Effect
Controls panel and increase the brightness and contrast value slightly until the text stands
out more clearly. Now let's play the
timeline again. And you can see we have created a nice creative text effect
in Adobe Premiere Pro. Now let's create
another variation. Add a new text layer and keep the font size
smaller this time. Then enable the stopwatch for the scale property
to animate it. Now set the font size to
zero at the starting frame. Then move forward
in the timeline and increase the font size so
the text becomes large. Move forward again and
make it slightly smaller. And then move forward once more and increase
it a little again. This creates a dynamic
scaling animation. Now let's animate the
position property as well. Enable the stopwatch
to create keyframes, then move the text
to a new position. A And we have created the text animation. Now again, apply the track
Mt key effect to the clip. And this time choose Video
four as the Mt layer. Next, let's enhance
the design a bit more. Go to the properties panel, change the fill type to gradient and adjust the opacity of the first color
point to zero. And we can also
enable the stroke to give the text a more
defined outline. Reducing the opacity creates a transparent gradient
effect on the text layer. Now let's preview the result. Next, let's fine tune the text layer a bit more to
improve the overall look. At this point, open the lumetri color panel and adjust settings
like temperature, exposure, contrast, and highlights to enhance
the visual quality. You can also adjust the
opacity slightly to control the transparency and blend the text more naturally
with the background. Now, to make the
text more visible, let's adjust the color
of the V one track, and now we want to
change the color of the track where the
second text appears. So first, place the playhead at the point where the second
text starts and cut the clip. This way, we isolate only
that portion of the clip. Now apply the color effect
to this specific section, so it only affects the area where the
second text appears. This helps us control
the look more precisely and keeps the
rest of the clip unchanged. Now, when we preview the result, you can see we have created a clean and visually
appealing text effect. And finally, let's play the full clip to see
the complete result. And now let's move
to example two. In this example, we have
two layers in the timeline. The bottom layer is
a solid background, and the upper layer
is a JPG image. First, go to the effects panel, then open video effects. Go to the distort category and choose the wave warp effect. Drag it onto the upper layer. Now adjust some of the settings to create a smooth
wave animation. As you tweak the values, you can see the image start to move with a fluid
wave like motion. Next, let's create
a text layer again. Type your text, then adjust
the font properties. Such as size, style,
fill and stroke. Now, apply the Track
mat key effect. Select the video layer, go to the effects panel
and apply Track Mat key. Then in the Effect
Controls panel, choose Video three
as the mat layer. As soon as you do
this, you can see that the animation is now
visible through the text, creating a very creative text reveal effect to
refine the result, adjust the position of the video layer as well
as the text layer. So this is a simple idea of how you can use
Track Mat key in a creative way to design unique and professional
looking text animations.
12. Creative Shape Animations with Track Matte Key: This lesson, we are going
to learn how to use Track Mat key with shapes
in Adobe Premiere Pro. Using shapes with
Track Mat key is a very creative way
to reveal videos, create stylish transitions, and design modern
motion graphics. Now we have two clips
in the timeline, and first let me
show you both clips. In this example, we
are going to create a transition using a
shape and track mat key. First, select the
rectangle shape tool and create a rectangle
shape on the screen. Then position the shape
so it starts slightly before the cut point around
halfway over the clip. Now, let's make the
shape look more dynamic. Go to the effects panel, open the distort category, and apply the turbulent displace effect to
the shape layer. Next, adjust settings
like amount, size, offset, complexity,
and evolution. As you change these values, you can see the shape starts getting a fluid and
distorted motion, which gives the transition a more organic and
creative look. Once the effect looks good, move the shape back
to the point where you want the transition
preview to begin. Now go to the effect
controls panel and enable the stopwatch for
the position property, move forward in the timeline and increase the position value so the shape moves
across the screen. If we preview the animation now, you can see that we have created a moving
shape animation. Now, let's convert
this animation into an actual transition. Select the V two clip, go to the Effects panel, search for Track Matt key. And apply it to the clip. Then open the effect
controls panel, and in the MT option, choose Video three, which is the track where the
animated shape is placed. Now, when we play the timeline, you can see that
the second clip is revealed through the
moving distorted shape, creating a very unique
and creative transition. So with the help of track mat key shapes and a
few video effects, we can create custom
transitions that look much more dynamic and professional
than standard transitions. And now let me show
you one more example. First, let's delete the
previous shape layer and create a new
ellipse shape instead. And when we create the shape, it works like a mask. This happens because
we applied the track mat key effect on
the V two track, and in the mat option, we selected the V three track. So the ellipse layer is
being used as a mat to reveal the video instead of appearing normally
on the screen. Now, if you want to see the
actual ellipse shape again, simply go to the Matt option in the effect controls panel
and change it to none. As soon as you do that,
the shape becomes visible again because it is no
longer being used as a mask. Now go to the effects panel, open the distort category, and this time choose
the Twirl effect. Drag it onto the ellipse shape. Next, let's adjust some
important properties like angle, Twirl radius, and Twirl center. As you change these values, you can see the shape starts getting a twisted
and dynamic look. I Now, move to the first frame
of the timeline and enable the stopwatches for the properties we
want to animate. Also, enable the stopwatch for the scale or size property. At the beginning,
reduce the size to zero so the
shape is invisible. Then move forward
in the timeline and increase the size value so
the ellipse grows smoothly. At the same time,
adjust the twirl values as well to create a more
dynamic motion effect. Now, if we play the timeline, you can see that we have created a moving and animated
shape effect. Now, let's fine tune a
few more settings to make the animation look smoother
and more visually appealing. Next, let's convert
this into a transition. Select the V two clip, and in the Matt option, choose Video three, which contains the animated
ellipse shape. Now, when we play the timeline, you can see that
the second clip is revealed through the
animated twirl shape, creating a very unique
and stylish transition. Now, let's fine tune a
few more settings to make the animation look smoother
and more visually appealing. So Track Matt key with shapes is a very powerful technique
for creating reveals, transitions, intro animations, and motion graphics
in a creative.
13. Blending Modes for Cinematic Effects: This lesson, we are going to learn about blending options, also known as blend modes
in Adobe Premiere Pro. Blend modes are used
to control how one layer mixes or blends with
another layer underneath it. Instead of simply placing
one clip over another, blend modes combine the
colors, brightness, and details of both layers to create different
visual effects. In the timeline, we
have a clip and first, let me show you the preview. Now let's apply a
gradient effect. Gradient effects
are used to create smooth color transitions
between two or more colors. They are very useful for
backgrounds, text effects, cinematic overlays, transitions,
and motion graphics. Now, go to the Effects panel, open the generate category and choose the four
color gradient effect. Drag it onto the clip.
As soon as you apply it, you can see that four
different colors are now blended over the clip. Next, go to the Effect
Controls panel. Here you can adjust the color
of each point individually, and you can also change the
location of the colors. In the blend options, you can customize each
color individually and also control its location
and to reposition the color, simply select the point in the program monitor and
drag it wherever you want. Opacity setting
controls how visible or transparent the gradient
appears over the clip, and blending mode controls how the selected layer mixes with
the layers underneath it. Instead of displaying
the clip normally, Premiere Pro combines the
colors and brightness of both layers to create
different visual effects. By default, the blending
mode is set to normal, which means the layer appears
without any blending. If we change the mode, we can create many different
styles and effects. For example, multiply keeps dark areas and
removes bright parts, which is useful for shadows
and texture overlays, and the screen mode removes dark areas and keeps only
the brighter parts visible. This is very useful for
light leaks, glow effects, fire, sparks and overlays
with black backgrounds. Overlay increases
contrast and creates a stronger cinematic look while soft light gives a smoother
and more natural blend. You can already see the
before and after difference. The video now looks more
cinematic and visually rich. Now let's play the timeline. As you can see, the video gets
a completely new blend of colors which adds more mood
and atmosphere to the scene. And the best part is we can
animate these colors as well. To do that, simply enable
the stopwatches for all the gradient properties
in the Effect Controls panel. Now move forward in
the timeline and adjust the color points
and their positions. A then move forward again and once more adjust the points and colors to
create a different look. Now, if we preview the timeline, you can see we have created a smooth animated color effect. So with the help of gradients
and blending modes, we can create very creative
and cinematic visual effects in Adobe Premiere Pro. I now hold the Alt or the option key and
drag the video clip. This will create a
duplicate copy of the clip. Next, remove the gradient effect from this duplicated layer. Now, again, hold Alt or option and drag the clip upward
onto a new video track. This creates another copy
on a separate layer. Now let's experiment
with blending modes. If we choose multiply, you can see the video
becomes darker because this mode enhances
shadows and dark tones. But if we switch to soft light, the result becomes much
smoother and more attractive. The colors look richer, the contrast improves and the video gets a more
cinematic appearance. Can also adjust the opacity to fine tune the effect and make the blend
look more natural. So by combining
duplicate layers, blend modes and opacity, we can quickly create creative cinematic color
effects in Adobe Premiere Pro. And now let's create
another example. First, let's duplicate
the clip again. Now, if we want to apply only the gradient effect
for blending purposes, the best method is to
use an adjustment layer. So first, create a
new adjustment layer. Simply click on
the new item icon and choose adjustment layer. Now place the adjustment layer above the video clips
in the timeline. Next, drag the
gradient effect onto the adjustment layer instead of applying it directly
to the video clip. Now, go to the Effect
Controls panel. Here, you can customize
the gradient colors, adjust their positions, and create different
color combinations. Inside the gradient effect, you will also see a
button called randomize. This option is used
to automatically generate random gradient
colors and positions. When you click on randomize, Premiere Pro instantly changes the color combination and
rearranges the gradient points, giving you a completely
new look every time. This is very useful when you
want quick creative ideas or different cinematic
color styles without manually adjusting every
color. And surprise me. This feature
automatically generates random gradient styles for you. When you click on
it, Premiere Pro instantly changes the colors, gradient positions, and overall color combination to create a completely
new visual look. Every time you press the button, you get a different result. Some combinations
may look cinematic and soft while others
may appear colorful, dramatic, or more creative. And in the blend mode option, choose a blending mode that
matches your video style. You can try different
blending modes until you get a good result. For example, soft light creates
a smooth cinematic look. The best part is
that you can change the blending mode and other
settings at any time, feel free to experiment with different combinations until the video looks
the way you want. So gradient effects are simple but extremely powerful
tools for adding depth, color, and cinematic style to
your videos and animations. Once you understand
how to control colors, direction and animation, you can create professional looking
visuals very easily.
14. Stabilizing Shaky Footage with Warp Stabilizer: In this lesson, we are
going to learn about warp stabilizer in
Adobe Premiere Pro. Warp stabilizer is one of the most useful effects
for fixing shaky footage. If your camera movement
is unstable or your handheld shot
contains unwanted shaking, this effect helps smooth out the motion and make the video
look more professional. Now let's see how it works. Let's play the timeline, and you can see
that the camera is shaking while the footage
was being recorded. Because of this, the video looks unstable and we need
to stabilize it. To fix this, go to
the effects panel, then open the distort category and choose warp stabilizer. Now drag the effect onto the clip and as soon as
the effect is applied, Premiere Pro
automatically starts analysing the footage
in the background. During this process, it studies the camera movement and calculates how to
stabilize the shot. Once the analysis is complete, the stabilization effect
is applied automatically. Let's play the video And the footage looks much smoother. Let's compare the before
and after preview. You can clearly see
that the footage now looks much smoother
and more stabilized. And now let's move to the
Effects Control panel. I result, we have two modes, smooth motion and no motion. By default, warp stabilizer is usually set to smooth motion. It keeps the original
camera movement, but makes it smoother
and more stable. So if the camera is
panning, walking, or moving naturally, this option preserves that motion
while reducing shakiness. This is very useful for
cinematic shots, travel videos, vlogs, and handheld
footage where you still want natural
movement in the scene. Now let's look at no motion, and no motion applies
stronger stabilization. It may crop the footage
more or sometimes create distortions if the
original clip is too shaky. And the smoothness controls how much stabilization
is applied. Lower values keep more of
the original camera motion while higher values create a stronger stabilization effect. If you increase it too much, the footage may start
looking unnatural, and in stabilization, the
first option is position. This is the simplest
stabilization method. It only adjusts the position of the frame to reduce
camera shake. It works best for clips with
very small movement and usually gives fast performance because it applies
minimal process. Next is position,
scale rotation. This method not only adjusts position but also
scale and rotation. It can handle more complex
camera movement and usually produces smoother
results than position alone. Then we have perspective. Perspective stabilization
works by adjusting the image corners and
perspective of the frame. It is useful for shots where the camera movement changes
direction or angle. However, sometimes
it can slightly distort the footage if the
movement is too strong. Finally, we have subspace warp, which is the default and
most advanced method. Subspace Warp analyzes
different parts of the image separately and
stabilizes them independently. This creates the smoothest and most professional
looking result, especially for handheld footage. However, because it
is very powerful, it can sometimes
create warping or stretching artifacts if the
footage is extremely shaky. Preserve scale option helps
maintain the original size of the footage as much as possible while applying
stabilization. When this option is enabled, Premiere Pro tries to reduce unnecessary scaling so the clip keeps more of its
original framing, and framing options
control how Premiere Pro handles the edges of the
frame after stabilization. The first option
is stabilize only. This mode only stabilizes the footage and does not
crop or zoom the image. Because of this, you may
see black edges around the frame during move
next is stabilized crop. This option stabilizes
the footage and crops the edges to hide
the empty spaces created during stabilization. However, it does not
automatically scale the image, so the cropped borders
may still remain visible. Then we have stabilized
crop autoscale. This is one of the most
commonly used options. Premiere Pro stabilizes
the footage, crops the unwanted edges, and automatically
scales the clip, so the black borders are hidden. This gives a clean and
professional result. Finally, we have stabilized,
synthesized edges. This is the most
advanced framing option. Instead of simply
cropping or scaling, Premiere Pro tries to generate new pixels around the edges
to fill missing areas. This helps preserve more of the original frame and
reduces excessive zooming. However, because it creates
artificial edge information, it may sometimes produce visual artifacts or
strange distortions, especially on highly
detailed footage. Additional scale option allows
you to manually increase the scaling even more after
stabilization is applied. If you increase this value, the clip zooms in further, which can help hide
unwanted edges or make the stabilization
look cleaner. This is especially useful
when small black borders or edge artifacts are still visible after stabilization
and in advance. Detailed analysis is enabled, Premiere Pro performs a deeper and more accurate
analysis of the footage. This can improve
stabilization quality, especially for difficult
or very shaky clips. However, because the
analysis is more detailed, it also takes more
processing time. Next is fast analysis. This option speeds up the stabilization process by using a quicker analysis method. It is useful when you want faster results or when working
on less powerful systems. The stabilization may not be as accurate as
detailed analysis, but it works well for
many normal clips. The warp stabilizer works
best for handheld shots, walking shots, travel videos, vlogs, drone footage,
and cinematic B roll. So with the help of
warp stabilizer, you can quickly transform shaky footage into smooth and
professional looking video.
15. Mosaic Effect & Face Blur Techniques: This lesson, we are
going to learn about the mosaic effect in
Adobe Premiere Pro. The mosaic effect
is used to create a pixelated or block
style look on a video. It is commonly used
for censoring faces, hiding sensitive information, creating retro style visuals, or adding creative
pixel effects. Now let's see how to use it. We have two clips in
the timeline and first, let me show you both clips. In the first clip, we
need to blur the face of this lady and we can do that
using the mosaic effect. First, go to the effects panel, then open the stylized category. Select Mosaic and drag
it onto the clip. As soon as we apply the effect, you can see that the entire
clip becomes pixelated, but we only want the
effect on the face area. To achieve this, we
will use a mask. First, let's
temporarily turn off the effect so we can
clearly see the subject. Now, go to the mask section in the Effect Controls panel and choose the
ellipse mask tool. Create the mask
around the face and adjust its size and
position properly. Now, because the
subject is moving, we need to animate the mask
so it follows the pace. Go to the transform
controls and enable the stopwatch for the position property to create keyframes, then move forward in
the timeline and adjust the mask position according
to the phase movement. Continue adding keyframes
wherever needed, so the mask keeps following
the subject smoothly. Now, let's preview the result. You can see that
the tracking looks smooth and the effect
follows the face correctly. And let's enable
the mosaic effect. Next, drag the mask
onto the mosaic effect. So the effect is applied
only inside the mask area. I now when we play the timeline, you can see that
the subject's face is hidden using
the mosaic effect. And we can increase
the mask feather value slightly to soften the edges, which helps the blur blend
more naturally with the video. And finally, we can also adjust the mosaic values to control how strong or soft the
pixelation appears. Shape controls the style
of the mosaic tiles. Different shapes create
different visual looks depending on the
design of the effect, and numb tiles
controls the number of tiles or blocks
visible in the frame. Increasing the value creates smaller and more detailed tiles. Decreasing, it creates larger
and more noticeable blocks. And angle rotates the direction
of the mosaic pattern. By changing the angle, you can create different
artistic styles and orientations for the tiles, and distortion controls how much the mosaic tiles are
warped or distorted. Lower values keep the
tiles clean and uniform, while higher values create a more abstract and
stylized appearance. Softness controls the
sharpness of the tile edges. Lower softness creates
hard and defined edges, while higher softness makes the effect smoother and softer, and light amount controls how much lighting or shading is applied to the mosaic tiles. Increasing the value gives the tiles more depth
and dimension, and light angle changes
the direction from which the light appears to
hit the mosaic pattern. Adjusting this setting changes the highlights and
shadows on the tiles, and tile height controls the depth or height
of the mosaic tiles, making them appear more
raised or embossed. Higher values create a stronger
three dimensional look. So depending on
your project needs, you can customize
the effect settings to achieve the desired result. Now let's move to
the second example. In this example, we need to blur this middle
person completely. And in Adobe Premiere Pro 2026, this process has become
much easier with the new AI powered
subject mask feature. First, select the clip, then click on the
subject mask option. Now, click on the middle
subject in the program monitor. As soon as you do
that, Premiere Pro automatically creates a
mask around the person, so there is no need to manually
draw or animate the mask. Next, click on the track selected mask forward
and backward buttons. Premiere Pro will automatically
analyze the subject and generate a moving mask that follows the person
throughout the clip. Now you can see that the
mask perfectly covers the entire person while following the movement
automatically. Next, drag the mosaic
effect onto the clip. As soon as the
effect is applied, the entire person becomes
pixelated because the mosaic effect is now working inside the
AI generated mask. And if we enable
the invert option, the result becomes the opposite. Instead of blurring the person, the mosaic effect is applied to the background while the
subject remains clear. So by using masks, we can precisely control
the mosaic effect and apply it only to specific
areas of the video. And whether you are
creating cinematic edits, social media content,
documentaries, tutorials, or privacy based edits, the mosaic effect is a powerful
and creative tool that can improve both
the visual style and professionalism
of your video.
16. Transform Effects and Creative Motion Controls: This lesson, we are
going to learn about the transform effect
in Adobe Premiere Pro. The transform effect is a very powerful effect used for creating
professional animations, smooth motion, Zoom effects, camera movement, and
cinematic transitions. We have two clips
in the timeline. First, let me show
you both clips. Now, to access the
transform effects, go to the Effects panel. Here you will find the
transform folder and inside it, the first effect
is three D rotate. The three D rotate effect allows us to rotate clips in
three dimensional space, creating more dynamic and
cinematic motion effects compared to normal rotation. This effect is very useful
for creative transitions, motion graphics,
perspective animations and stylized video movement. We can customize these values
depending on the type of effect or animation we want to create and let's
see the preview. Inside many effects in
Adobe Premiere Pro, you may also notice a
button called surprise M. This feature is used to automatically generate
random effect settings. When you click on
it, Premiere Pro instantly changes different
values such as position, rotation, scale,
distortion, angle or animation settings depending
on the effect you are using. Every click creates
a new variation which helps you quickly explore creative looks and motion styles without manually
adjusting every set. Some results may look
subtle and cinematic while others may appear more
dramatic or experimental. This option is especially useful when you want
quick inspiration or when you are
experimenting with creative transitions
and motion effects. Now let's move to the
auto reframe effect. First, let's turn off
the previous effect. Next, reduce the clip size. Now let's reduce
the clip size so we can clearly understand
how the effect works and then switch the sequence settings
to a vertical format. Now, after changing
the sequence settings, you can see blank space
appearing at the top and bottom, and parts of the background clip are also becoming visible. This usually happens when horizontal footage is placed
inside a vertical sequence. To solve this type of problem, we use the auto reframe effect. Auto reframe
automatically adjusts the framing of the
video and tries to keep the main
subject properly visible inside the
new aspect ratio. This is especially
useful for creating vertical videos for social
media platforms like reels, shorts and stories without manually repositioning
every shot. And now let's change the sequence settings back to
the original format we had before and turn off the effect. Next, let's resize the clip
back to its normal size. And now let's move to
the camera shake effect, which creates realistic handheld or shake style motion effects. This is commonly used in action scenes and
cinematic edits. And when we preview the clip, it creates the effect of a handheld camera shaking
during the shoot. And when we click on
the surprise me button, Premiere Pro
automatically creates random camera shake variations for creative motion effects. Now, let's disable this effect too before moving to
the next example. And the grow effect is used to expand the edges
of an object, text, shape, or clip. It creates the illusion that the object is growing outward, which is very useful
for glow effects, transitions, stylized
animations and motion graphics. Another advantage
of the grow effect is that it can create motion without changing
the overall position of the object too much. Helps maintain a cleaner and
more controlled animation. You can also animate the
grow amount using keyframes. By starting from a low value
and gradually increasing it, the object appears
to grow over time. And if you animate
it repeatedly, you can create pulse or
breathing style effects. When combined with opacity, color effects, glow
or track mat key, the grow effect becomes
even more powerful for creating professional
cinematic visuals and creative transitions. Now, let's disable this effect too before moving to
the next example. And horizontal flip simply
flips the clip horizontally, creating a mirror effect. I and the move effect is used to animate
the movement of a clip in a smoother and
more professional way. It allows you to move a clip horizontally or
vertically across the screen while giving you more advanced controls compared
to basic motion settings. One of the biggest advantages of the move effect is that it
includes motion blur support. This means when the
object moves quickly, the motion appears
smoother and more natural, just like real camera movement. Without motion blur, fast movement can look
sharp and unnatural. But with the move effect, the animation feels more
cinematic and realistic. The effect mainly works using X and Y position and
the offset effect is used to shift the position of an image or video frame without leaving empty
space around the edges. Instead of creating black
borders when the image moves, the effect wraps the
pixels around the frame, making the movement appear
continuous and seamless. This creates a looping or wrap around motion effect
where one side of the image exits the frame and instantly reappears
from the opposite side. Because of this behavior, the offset effect is very useful for creating
seamless animations, moving backgrounds,
looping textures, abstract motion graphics,
and stylized transition. Can also animate the offset
values using keyframes. For example, by continuously changing the
horizontal position, you can create endless
scrolling backgrounds or flowing motion effects. Another creative use is
combining offset with blur blending modes or distortion effects to create futuristic and abstract visuals. The shrink effect is used to reduce the visible
size of a clip, text, shape, or graphic
from different directions. Instead of scaling
the entire object uniformly like the
normal scale property, the shrink effect compresses
the edges inward, creating a unique collapsing
or squeezing animation. This makes the movement
feel more dynamic and stylized compared to a
regular Zoom out effect. The effect can shrink
the clip horizontally, vertically or from all sides depending on the
settings you choose. Because of this, it is very
useful for transitions, reveals, motion graphics,
and stylized animations. For example, you can make a clip appear as if it is
folding inward, collapsing into the center or being compressed
from the edges. When applied to text or shapes, the shrink effect creates smooth disappearing
animations and works very well for title
graphics and logo reveals. The spin effect is
used to rotate a clip, text, shape, or graphic continuously around
its center point. Unlike normal rotation, which usually rotates
to a fixed angle, the spin effect is
designed to create smooth and ongoing
rotational motion. This makes it very useful
for dynamic transitions, motion graphics,
logo animations, and creative visual effects. When applied to a clip, the object can spin slowly
for a subtle motion effect or rotate quickly for energetic
and stylized animation. Effect usually includes
controls for rotation speed, direction, and motion blur. Rotation speed controls
how fast the object spins. Lower values create smooth
and gentle rotation while higher values create
fast and energetic movement. And the transform effect, one of the most powerful
effects in this category, it provides advanced
control over position, scale, rotation, anchor
point, and motion blur, making it extremely useful for cinematic animations
and transitions. The vertical flip effect
flips the video vertically. This means the top
part of the clip moves to the bottom and the
bottom moves to the top, creating an upside
down mirror effect. And the wiggle effect creates random
movement in the clip, making it appear
shaky or vibrating. This is very useful for
handheld camera simulations, energetic motion graphics, glitch effects, or
dynamic transitions. You can adjust the intensity and movement settings to create either subtle motion or strong shake effects depending
on your project style. So the transform
category contains many powerful effects that can help you create motion graphics, transitions, cinematic movement, and creative visual
effects very easily.
17. Creating Movie End Scene Text Animation: Now let's move to another
important effect, which is the basic
three D effect. The basic three D effect
is used to create simple three
dimensional rotation and perspective
effects on a clip, image, text, or graphic. It gives a flat object the illusion of depth and
movement in three D space. Now, let's understand
the main controls. The first option is Swiv vl rotates the clip horizontally, which means the object moves left or right in three D space, almost like turning a card or
rotating a screen sideways. Next is tilt. Tilt rotates
the clip vertically, creating an up and down
three D rotation effect. Then we have distance to image. This controls the perspective
depth of the clip. Lower values make
the perspective more dramatic and exaggerated while higher values create a flatter and more subtle
three D appearance. And let's apply the
transform effect now and reposition
the clip a bit. Now, let's create
a new text layer, and I have pasted
some dummy text here. Next, let's adjust the font size so the text is clearly
visible on the screen. Now we want to animate the text from bottom to top
in the Y direction, just like movie end credits. So go to the Effect
Controls panel and enable the stopwatch for the
position property to create keyframes. At the starting frame,
adjust the Y value so the text starts below the frame or outside
the visible area. Then move forward in the timeline and add
another keyframe. Now move the text upward so it reaches the
top of the screen. Now, if we preview
the animation, you can see that the text
smoothly scrolls upward, but we want the text to appear softly from the
bottom and disappear smoothly at the top instead of suddenly entering and
leaving the frame. To create this effect, let's make a shape layer. Create a new shape
layer and draw a rectangle shape where we want the text to remain visible. Now apply the track mat key
effect to the text layer. Then go to the Effect
Controls panel and in the mat option choose
the shape layer track, for example, Video three. Now, when we play the timeline, the text becomes visible
only inside the shape area. This creates a smooth
fade style reveal, similar to professional
movie ending credits. And just like that,
we have created a cinematic movie end
scene text animation in Adobe Premiere Pro.
18. Exploring More Stylize & Creative Effects: This lesson, we are
going to explore the stylize and other effects
in Adobe Premiere Pro. Stylize effects are mainly used to give videos a creative, artistic, cinematic or
graphic style appearance. Now, let's open
the Effects panel and go to the Stylize category. Inside this folder, we have
several creative effects. The brush strokes effect is used to give footage a painted, artistic or handcrafted
appearance. Instead of showing the video
with normal smooth details, this effect transforms the
image into a style that looks similar to a painting created
with real brush strokes. The effect works by
simplifying details and adding textured brush like
patterns across the footage. Because of this, the
video starts to look more artistic and stylized
rather than realistic. And the color emboss effect is used to create an
embossed or raised surface appearance
on the video while still preserving the original
colors of the footage. Instead of displaying
the image normally, this effect highlights
edges, textures, and contrast areas
to make the video appear as if it has depth
carved into the surface. Because of this, the footage
gets a stylized metallic or sculpted the find edges effect is used to detect the edges, outlines, and contrast areas
inside the footage and convert them into
a stylized line or sketch style appearance. Instead of showing full
colors and details normally, this effect analyzes the image and highlights the
borders between objects, shapes, textures, and
lighting differences. Because of this, the footage starts to look like a drawing, sketch or digital
outline artwork. The posterize effect
is used to reduce the number of colors and tonal
variations in the footage, creating a simplified graphic
or poster style appearance. Normally, videos contain
smooth gradients and thousands of color shades. But when we apply the
posterize effect, those smooth transitions are reduced into a limited number of color levels and the
roughen edges effect is used to create irregular, distorted and uneven
edges around objects, text, shapes or footage. Instead of clean
and smooth borders, the edges become rough, organic, and handcrafted
in appearance. This gives the video a more
artistic and natural look almost like the object
was drawn by hand, painted on paper or
affected by smoke, ink, fire, or grunge textures. Let's move to another effect, the corner pin effect, and it is used to distort and reposition the four corners
of a clip independently. This allows us to fit a video, image or graphic into a custom
perspective or surface. In simple words, corner pin helps us place
footage onto screens, billboards, phones,
monitors, walls, or any angled surface
inside a scene. And the mirror effect
is used to create a reflected copy of the footage
across a selected axis. It works just like a real
mirror where one side of the image is duplicated and reflected onto
the other side. This effect is very useful for creating symmetrical
visuals, reflections, kaleidoscope style effects,
abstract animations, and creative cinematic
compositions. You can also animate the reflection center
and reflection angle using keyframes to create moving mirror animations and
dynamic transitions. And And the magnify effect is used to zoom into
a specific area of a clip while keeping the
surrounding area unchanged. It works like a magnifying
glass or zoom lens placed over the video. This effect is very useful
for highlighting details, creating focus effects,
stylized transitions, and creative motion graphics. You can also explore other available effects
in Premiere Pro. Just drag any effect
onto the clip, then go to the Effect
Controls panel to customize the settings and create different visual styles. Most effects include controls
for things like intensity, position, color,
angle, distortion, softness, animation,
and blending. By adjusting these values, you can completely change the visual style
of your footage. You can also enable stopwatches to animate the settings
using keyframes. This allows you to create smooth motion,
transitions, reveals, Zoom effects,
cinematic animations, and many other creative visuals. Another great advantage is that different effects can
be combined together. For example, you can mix blur glow, gradients,
blending modes, masks, motion
effects, and stylized filters to create
unique cinematic looks. So don't hesitate to try different effects,
adjust their properties, preview the results,
and discover new creative possibilities
for your project.
19. Using Adjustment Layers for Professional Editing: Adjustment layer is a
very useful feature that allows us to
apply effects to multiple clips at the
same time without adding the effect directly onto
each clip individually. This makes the workflow cleaner, faster and more flexible. Now let's see how it works. Here we have several
clips in the timeline. To create an adjustment layer, click on the new item icon in the project panel and
choose adjustment layer. You can also rename
the adjustment layer for better project organization. Now simply drag the
adjustment layer above the clips in the timeline. At the moment, the
adjustment layer does not affect anything because no
effects have been applied yet. But once we apply any
effect onto this layer, it will automatically affect
all the clips below it. Another advantage is that
we can easily increase or decrease the length of the adjustment layer
by dragging its edges, or if you want to quickly extend it to the
playhead position, simply select the
adjustment layer, place the playhead where
you want the layer to end, and press the E
key to extend it. And now let's apply some effects onto the
adjustment layer. For example, we can use effects like vintage lumetri color. And black and white. Now, to make the lumetri color
effect active properly, let's change the order of the effects in the
effect controls panel. The order of effects can change
the final visual result, so arranging them correctly
is very important. We can also apply a
rounded corners effect to give the video a softer
cinematic frame appearance. Now, we want these effects to appear on all the
clips in the timeline. To do that, simply
increase the length of the adjustment layer so
it covers all the clips. And as soon as the
adjustment layer extends across the timeline, all the clips underneath automatically receive
the same effects. This is one of the
biggest advantages of using adjustment
layers because we can quickly apply and control effects across multiple
clips at the same time. And the best part is that we can adjust the effect
settings at any time. We can modify the
intensity, colors, blending, opacity, or any other
settings whenever needed. We can also add
more effects onto the same adjustment
layer to create different cinematic
or creative looks. Another big advantage of using adjustment
layers is flexibility. If we want the effects
to appear only on a particular section or remove the effects
from a specific clip, we can simply cut the
adjustment layer and resize it according
to the required area. This way, the effects will only affect the clips underneath that portion of the
adjustment layer while the other areas
remain unaffected. So adjustment layers make the editing workflow
much faster, cleaner and more professional, especially when working with multiple clips and global
effects in Adobe Premiere Pro. We can quickly create a copy
of the adjustment layer by holding Alt or option
and dragging the layer. This allows us to reuse
the same effects on other clips or specific
sections of the timeline. So adjustment layers are one of the most
important tools for professional editing
because they help keep projects organized,
flexible, and efficient.
20. Copy, Save & Reuse Effects in Adobe Premiere Pro: This lesson, we are going
to learn how to copy, apply and save effects
in Adobe Premiere Pro. These techniques are very useful because they help speed up the editing workflow
and maintain a consistent look
across multiple clips. Now let's start with
copying effects. In this clip, I have already applied effects like vintage, black and white,
tint, and noise. Now we want to apply the same effects to
other clips as well. To do that, first select the clip that
contains the effects, then go to the Effect
Controls panel and select the effects
you want to copy. We can select a single effect or multiple effects together by holding the control
or the command key. Now copy the effects. Next, select the clip
where you want to apply the same effects and press Control or Command
V to paste them. As soon as you
paste the effects, the new clip will instantly receive the same visual
style and settings. This is a very fast
and useful workflow because it helps maintain a consistent look across multiple clips without manually recreating every effect again. Now, let's copy some effect and paste them onto this clip. As you can see, only
the two effects that we selected have
been copied and applied. Let me show you one more
very useful method. First, select the clip that
already contains the effects. Then go to the edit
menu and choose copy. Next, select the target clip
and choose paste attributes. Now a new window will appear. Here you can choose exactly which effects
you want to paste. By default, all copied
effects are already selected. If you want to apply all the
effects, simply press Okay. But if you only want
specific effects, then just uncheck the ones
you do not want to apply. Once you press Okay,
the selected effects will be applied to the clip. Now let's do one more example. Again, copy the effect. This time, select multiple clips together and then
paste the effects. As soon as you paste them, all the selected clips receive the same
effects instantly. This is a very fast and professional workflow
for applying consistent effects
and color grading across multiple clips
in Adobe Premiere Pro. But these methods are mainly useful when working
inside the same project. What if we want to use the same effects in
another project as well? For that type of situation, we can save the effects as
a preset for future use. Do this, first select the effect or effects
you want to save. Then right click on
the selected effects and choose Save Preset. Now give the preset any name
you want and click Okay. Once saved, the preset
will automatically appear inside the presets
folder in the effects panel. Now, whenever you want to
use the same effect again, simply select a clip and
drag the preset onto it. As soon as you apply it, all the saved effects and settings will be
applied instantly. And if you no longer
need the preset, you can also delete it
from the presets folder. Saving effects as
presets is one of the best and fastest ways to
reuse your favorite effects, animations, and cinematic looks across different projects
in Adobe Premiere Pro.
21. Conclusion & Final Tips: Congratulations. We
have successfully completed this class on professional video effects and advanced transitions
in Adobe Premiere Pro. Throughout this
course, we explored many powerful effects,
cinematic transitions, masking techniques,
blending modes, motion graphics,
adjustment layers, and creative
animation workflows. You learned how to create professional visual
styles using tools like Track Mat key
warp stabilizer, transform effects,
stylize effects, mosaic effects, AI masking, keyframes and many
advanced transitions. The most important thing now is practice and experimentation. Try different effects,
combine transitions, adjust settings, and create your own unique editing style. And if you want to learn Adobe Premiere Pro in full detail, you can join my complete
course by visiting my profile. The more you experiment with creative ideas and workflows, the more professional and cinematic your
videos will become. I hope this class
helped you better understand advanced
editing techniques and gave you
confidence to create more engaging and visually
impressive videos. Thank you so much for
joining this class. I'm Sant Kumar, and I'll
see you in the next course.
 Sant Kumar, Video Editing, Motion Creative Design Instructor