Transcripts
1. Introduction: Before now, if you wanted
to edit a video properly, you had to sit at a desk, open up your laptop, fire up
a heavy editing software, and spend hours cutting clips. But things have changed. Today, you can edit professional looking video right
from your phone. Yes, Adobe Premiere is
available on mobile, completely free, and that's game changer for
creators like us. This class, we are going to
explore this brand new app and learn how to edit social ready videos
wherever you are. My name is Nihilwag. I'm a filmmaker
and video editor, and I've been making online
videos for nearly a decade. This class will give you step by step workflow from
importing footage, cutting and trimming
to adding roll, captions, music, and finally exporting
your finished video. By the end of this class,
you will exactly know how to create polished videos
using only your phone, whether you are at
home, traveling or just editing on the go. So if you're ready
to start editing faster and smarter,
let's jump in.
2. Class Project: Welcome to the class. I'm really excited to have you here. For the class project,
you will be creating a 30 to 62nd video edited entirely on
Adobe Premiure Mobile. Make sure that your project includes clean cuts
between clips, background music,
and proper export. Don't worry, if this
sounds like a lot, I will guide you
through each step in an easy and hands on way. You can pause, rewind, and move at your own pace. Once you have finished
your project, share it in the class gallery. I would love to
see what you make. So grab your phone,
open a premium mobile, and let's get started
on your first edit.
3. Getting Started: All right, so for this class, I have added link to the assets I have used in the
project section. You can click it. It will
open in the Google Drive. If you don't have the
Google Drive app, you can download it
from the app store. Once you open the
link, you will see a folder that has
two kinds of files. Broll clips and
talking head clips. The talking head clips are
the ones where I'm speaking, so we will need
voice from those. The roll are extra
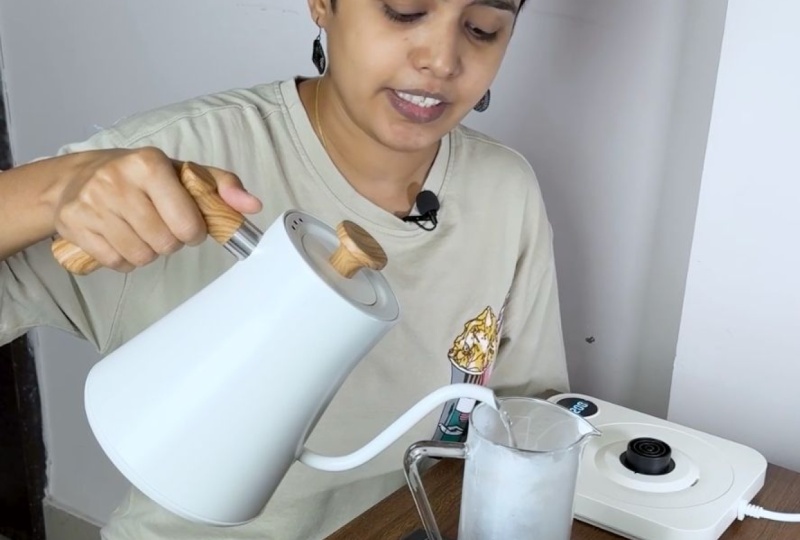
short and only one of those roll number six has sound where I'm pouring
coffee into the glass. Now, what I want
you to do is go to the Drive folder and long
press one file to select it. Then on top right, you will see a little square icon
with dots around it. Tap it and it will select
all of your files at once. Next, tap on the three dots at the top and select Download. Once downloaded, these
files will automatically save to your Photos folder,
and that's important. Because when you're filming your own videos on your phone, everything you shoot will
also save in the photos. Keeping your clips in the
Photos folder will make editing on Premiere
Mobile much easier. Now that your clips
are downloaded, open your Photos app, select all those files. And then tap on the three
dots that you see on top. Choose add to album and create a new album
called French Press. This will keep your clips
organized and easy to find. Now, let's open the
Adobe Premiere Mobile. When you first open the app, you will see a simple
welcome screen. There are a few options here
New from photo library, which we will use the
most, New from files, create a new blank project, which lets you make
a structure and add clips later
and extract audio, which we will explore later
when we work on voiceovers. You might also see some
advanced generative options that are pro features. These need a paid Adobe plan, but don't worry, we are not
going to be using those. Everything that we do in this
class is completely free. Let's start our first project. Tap New from photo library and then tap on
filter at the bottom. Select videos. Now, you will see all of your
downloaded clips. From here, I'm going to select my talking
head videos first. Those are the clips where I am speaking directly to
the camera like this. I'm just going to select them in order until all 13 of
them are selected. Rest of the clips you
see are my B roll, which we will add later once
the main edit is ready. Now tap next and you will see your videos
appear in the timeline. They are all arranged in the same order that
you selected them. That's super handy because it saves time rearranging later. I personally like to
film my videos using the back camera because it
gives you a better quality. But if you film using
your front camera, you might notice that
your image looks mirred. To fix that, tap on
your clip to select it, scroll through the
tools at the bottom, and find flip Etch. Tap it and just like that, your video will be
the right way around. I'm going to undo this because I filmed this video
using the back camera. And it doesn't need flipping. I recommend doing this to
all of your clips before you start cutting in case
you are using front camera. This way, you don't
have to fix it again for every clip
after we trim them. Let's look at the timeline now. You can pinch to zoom
in for a closer look or zoom out to see
your full sequence. This is the most powerful
gestures in mobile editing. It helps you work faster
and be more precise. Now we have imported our clips, fix any mirror shots, and organize everything neatly. That means we are ready
for the fun part. Actually, cutting and
trimming are footing. Let's jump into the
editing basics next.
4. Cutting & Trimming: Uh huh. Now that we have all of our
clips on the timeline, let's talk about basics of
editing, cutting and trimming. Editing is really just about deciding what goes
and what stays. On mobile, Premiere
makes this super simple. First, pinch out on the
timeline to Zoom closer. This way, you can clearly
see your audio wave forms. Those little spikes that show
you where you're speaking. If you've got sections
where you paused, cuffed, or messed up, you will see those
gaps right away. Now, let's select
one of our clips. You will notice that
there's a little handle at the start of your video
and another at the end. That's where the video
starts and ends. What you can do is
drag the handle from the beginning of the clip and trim out the part
that you don't need. Let me show you. I'll
play my clip once. The first specialty coffee I
have. The first specialty? Okay, I can see right here on the waveform where I actually
want to start my video. I'm just going to see where
my face is moving nicely. And then I will
drag that handle to trim it right here. Now,
let's play that back. First specialty coffee I
have ever had in my life. Perfect. Now my video starts cleanly right where
I begin speaking. We have just trimmed
our first clip using the handle method, but there is another way
of trimming the clip, and that is to use
the split tool. I want to end my clip right
after I say French press. I'll move the playhead
to that point, make sure my video is selected, and then you see there are a
few options on the bottom. I'm going to tap the split icon. Now the clip is cut
into two parts. I'll check the next section
if I need it, and I don't. So I will delete it using the delete option that
is in the bottom panel. Here is something really
nice about Premiere mobile. Unlike the desktop
version of Premiere, when you delete a section, the gap automatically closes. It's called ripple edit, which means there
is no empty space left in between your clips. Everything just snaps together. Let's do that again
with the next clip. I'll play. And all I remember. Okay, that's the
moment I want to keep. I'll move the playhead
right before that line. Tap split and trim off the
extra part that I don't need. So to recap, there are two
main ways to trim the video. The first method is to drag
the handles at the beginning or end of your clip to cut
out the unwanted parts. And the second method is to move the playhead where you
want to make a cut, tap split, and delete
the extra piece. You can also move
frame by frame. Or clip by clip by using the arrow buttons at the bottom
of your program monitor, which is super helpful for tight edits or
tutorial style videos. I'm going to go ahead and use the same method to trim
the remaining clips. Here's a pro tip. Always
start by doing the rough cut. Go through your
entire timeline and remove all of the bad takes
or long pauses first. Don't worry about the
perfect timing yet. Build the basic structure. By the end of this
step, you should have a rough cut of your video, only the good parts
in the right order. That's the foundation
of a very good edit. Once that's ready,
we will start adding more creativity like roll and visual to bring
your story to life.
5. Adding B-roll: I have finished
trimming the parts that I actually want in my a role. That's the talking head section. There's one small part
in my video where I just want the voiceover and not
my face on the screen. I have trimmed that bit also, and now we are going to
add a B roll on top of it. Let's learn how to add
that in premium mobile. First, you can see this
small horizontal bar between your preview
and the timeline. You can hold and drag it up and down to resize your workspace. Since we are adding B roll, let's drag it up a little
so we can see more of the timeline while still
watching the preview. Now tap on ad videos and
images in the bottom and go to your photo library and start selecting your Broll
clips one by one. For me, I'm picking
them in order. After you are done
selecting tap next. Now here's a problem
that you will notice. Premiere puts all of these clips right after your Aroll
on the same track. We don't want that. I'm going to undo all of this by clicking the icon that's between the
timeline and program monitor. Let me show you the right way. Instead of adding
everything at once, let's add the clips one by one where we actually
want them in the video. Let's find the moment in my main clip where I talk
about finer grounds. That's where I want the gritty
Coffee B roll to appear. I'm going to tap add
videos and images. Choose the clip that
shows the coffee grounds. By default, premiere drops
them in the main track, so let's drag it up and create a new layer
above the A role. Now it sits on top, so my talking head
audio keeps playing underneath while the B
roll plays visually over. I can hold and drag the clip to line it up perfectly with
the words I'm saying. Then I will trim
the handle so it ends exactly where
the line ends. Let's preview that. All of those finer ground
seep into your cup. Perfect. The timing
feels natural. Here's something to remember
when you're adding B roll, make sure your playhead
is on the clip before the voice over section
that you are covering. Premier mobile adds the new clip ahead of the clip that
is on the playhead. So this will keep
things lined up. Next, I'll move
to the part where I mentioned the
clever rubber seal. I know which clips shows that, so I'm going to go and select and place sit right
above that section. Now, let's trim this B roll so it only shows the
rubber seal moment. If needed, you can split it
and delete the extra parts. I'm also going to do the
same for the plunging shot. Split, delete and move it where
it matches the narration. Alright, let's step back and talk about what we
are doing right here. Be role is simply extra footage that
supports your stories, close up, cutaways,
or even photos. In social videos, it keeps things dynamic and
visually interesting. Now that you know
how to bring in Broll and make your
video visually rich, let's move on to the next
part and learn how to make your edits flow smoothly
from one scene to the next.
6. Visual Flow & Transitions: I'm just going to
fix our visuals a little bit because
if you see here, the first specialty
coffee I have ever had in my life was
from a French press. And all I remember thinking was, why does this taste so muddy? It was messy. This cut
is a little jarring. When we go from one
clip to another, it just feels abrupt. So what I'm going to do
is smoothen that moment. I'll select this next clip. I only need to see
this little space. So I'm going to pinch out on the program monitor and center the part that
I actually want. Let's preview that again. In my life was from
a French press. And all I remember
thinking, much better. Now the flow between the
clips feel more natural, and that's what this
lesson is about. Making your edits
flow smoothly so they look clean and
feel pleasant to watch. I'm going to do
the same thing to the entire video where I feel that it is
not flowing well. Now we can start using
transitions to connect the shots. Transitions are
small visual effects that help one clip move to
the next more smoothly. Okay, let's add one. What do you have to do is tap on the space between two
clips in your timeline. On this little
translucent rectangle. Now you'll see the
transition options pop up. You will find things
like cross fade, wipe, slide, and a few more. Let's try a cross fade first. You can adjust the
duration as well, longer for smoother blends
and shorter for quick cuts. Let's see how that looks. It fades in naturally
instead of cutting harshly. For this video, I don't feel
the need for transition, so I'm just going to
set this to none. I know I've told you
about transition, but you don't need to
go overboard with these because too many transitions
can be distracting. Try to keep them subtle, especially in the tutorial
videos like this. So now our edit feels smoother, less jumpy, less
jarring, more cinematic. In the next lesson,
we will dive into one of my favorite
parts of editing, and that is audio. We will learn how to
clean up the voice, add music, and balance
everything perfectly.
7. Audio Mastery on Mobile: Alright, now that our
visuals look great, let's make the audio
sound just as good. Audio is half of your
video experience. If your sound is
messy or uneven, your viewers going to
notice it right away. So the first thing
that I do when I start working with
audio is clean it up. If there is a
background noise, echo, or that slight hum from a fan, we will take care of it right
here in Premiere Mobile. First, let's listen
to the audio. The first specialty coffee I have ever had in my life work. I can see that there is a little bit of the
background noise. So tap on the clip to select it, and you will see this bar appear at the bottom with
a lot of options. Scroll through it until you find enhanced speech and tap on it. Now, toggle it on
using this switch. You will notice a
small processing bar pop up on your preview screen. That means the premier
is working on that clip. Once it's done, play
it back and listen. The first specialty
coffee I have ever had in my life was
from a French press. Right now, it's sounding
a little bit robotic, but we can find unit. Let's adjust the sliders. I'm going to lower the
speech enhancement slightly and just increase the background noise reduction. Just enough to
clean up the sound, and let's play that back again. The first specialty
coffee I have ever had in my life
was from a friend. And yes, that sounds much
smoother and more natural. Keep these numbers in
mind because we need to apply it to all of
the similar clips. In my case, the entire timeline. Premium Mobile currently
does not have apply all option in the
enhanced speech settings, but I hope that they will
do it in the next update. Now, there's another
really helpful feature. We are not going to
use it in this video, but I'm just going to show you. Let's say you have
a clip where you only want the sound
and not the video. All you need to do
is select that clip, scroll through the bottom
toolbar and tap Extract Audio. Once that is done, you can delete the original video clip, and you will still
have the clean audio sitting perfectly
in your timeline. They have this clever rubber
seal around the filter. So all those This is really
useful if you're working with voice over or
sound from other clips. We don't need this, so I'm
just going to undo it. Okay, now that our dialog
and voice sounds good, let's add background music to
bring everything together. Tap on the timeline anywhere
to deselect everything. Tap on the music and
audio that you see. And you will see a few options. You can record a voiceover, add a sound track, or even
include sound effects. There are also pro options
like AI generated Effects, but we will stick
to the free ones. Let's tap soundtracks. Here Premiere Mobile gives you a nice little library of
free songs to choose from. I usually filter them by mood because music really sets
the tone of your video. Right now, my video
feels calm and mellow, so I'm just going to
select the mellow mood. Let's preview a few options. This one sounds perfect. I'll tap this plus
button to add and Premiere will download
it on my phone. Once it's ready, the
song automatically appears right in my timeline
where the playhead is. Now, let's place it
properly by holding the music clip and
dragging it to the start. I will trim the
start of the song to match where I begin talking. And let's move it forward a bit. Let's listen to how it sounds. The first specialty
coffee I have ever had in my life was
from a French press. And all I remember
thinking, nice, but I think the
music is too loud. So I'm going to select
this music lip, tap volume, and
reduce it to 20%. It was originally around 30%, which wasn't bad, but this softer volume lets my
voice stand out better. Next, I will scroll
to the end of the video and trim the music. So it finishes neatly
with my final line. Just keep your playhead at the spot where you
want it to stop, tap, split, and delete
the extra section. Let's review the end part. I think I actually
like French best now. I think that I want
to add fade out. So tap on the audio and select the audio
fade from the bottom. I think I will make
it 4 seconds long. With your sound polished and balanced now your video
feels professional. In the next lesson, we will move on to something
equally important, and that is color correction.
8. Color Correction: H In the esson we are going
to color correct our video. But before we start, let's make sure that
phone brightness is high enough so we can actually see what's
happening on the screen. Sometimes when your
screen is too dim, you won't notice the
subtle colored changes, so it's better to work with good visibility.
Alright, let's begin. First, select the clip that
you want to color correct. Now scroll left from the bottom, and you will see a
section called Los. Here you can try out
different preset looks, basically filters
for your video, and you can also adjust
their intensity. You'll notice how each look changes the mod of your video. Personally, I don't like
using the preset looks because they often
make your footage look too flat or unnatural. So if you also don't
want to use these, just select none, tap on the Cross icon to exit and
then go to adjust instead. Now this is where
the real control is. Under Adjust, you
will see full list of options almost like desktop
version of Premiure. You can tweak exposure, contrast, highlights,
shadows, whites and blacks. Let's start with exposure. It's very strong, so be gentle. Even small change
can look dramatic. If you want to go back
to the default value, just double tap on
the slider and it will reset to zero.
Let me show you again. I will turn the
contrast way up and then double tap
Boom, back to zero. This works for all the sliders. Now I'll increase the
contrast a little because it adds nice
depth to this video. Next, I'm going to slightly
reduce the highlight, so the bright areas
don't blow out, and I'm going to
lift the shadows a bit to bring back some detail. You can also tweak whites and blacks to balance
the overall tone. Now let's go into color. Here you can adjust temperature, tint, vibrance and saturation. Temperature changes how warm
or cool your clip looks. This one feels a
little too warm to me, so I am going to
move it slightly toward the cool side
around minus seven. Then I'm going to add a
hint of pink in tint, maybe plus three, just
to balance it out. Now, vibrance this
one brings life to your colors without
oversaturating the skin tones. Let's add a little bit of
vibrance, maybe plus four. And small boost in saturation around
plus one or plus two. Already, this looks much
cleaner and more natural. If you want to go more advanced, there is HSL in the mix, which stands for hue,
saturation and luminance. This is where you can adjust
the individual color ranges, like the reds or just the blues. For this video, we will keep it simple and skip this part. Then we have color grading. Here you can control shadows, mid tones, and
highlights separately. If you want more cinematic tone, you can add a tiny
bit of blue in the shadows or little
warmth in the highlights. You can also select global, which affects all of
the tones at once. There's even vignette option. This darkens the corners
of your frame to suddenly draw attention
to the center. Let me show you how it works. You can adjust midpoint
and roundness. And also feather to control
the shape and softness. Personally, I like using high feather because
it looks smoother. But for this project, I'm not
going to keep the vignette. I just wanted to show
you how it works. I really love how many options Premier Mobile is giving
you in the Adjust panel. It's almost as
powerful as desktop, but it's so much simpler to use. Once you're happy
with your settings, you can apply them to
all of your clips. There is an option that is
apply color settings to all. Just tab that and it will copy your adjustments to every
clip in your timeline. If you ever want to undo them, there's also remove
all adjustments, which resets everything,
and there we go. Our video now has a
beautiful bananc look. It's brighter, cleaner,
and ready to export. In the next lesson, we will
finish everything off by learning how to export your
video in the right setting.
9. Exporting & Sharing: Alright, now we have
reached the final step, exporting and
sharing your video. This is where we take all of the hard work that we
have done throughout this class and turn it into one finished video that
you can post online. So once you edit looks good
and everything is in place, tap on the Export icon in the top right
corner of your screen. You will see a few settings
here. Don't worry. It's simple. Let's first
choose the resolution. You can export 720 P, ten ATP or higher in four K. For most social media platforms
like Instagram Reels, YouTube shots, and Tik Tok, ten ATP is perfect. It gives you high quality without creating a massive file. Next, let's pick the frame rate. Most videos are either
24 frames per second for cinematic feel or 30 frames per second for smooth
everyday videos. Then we have quality settings, low, medium or high. If you're short on storage
space, medium works fine. But I usually keep it
on high because that gives you sharper
and cleaner video. Now tap Export video, and premiere will start
rendering your project. It will take a few minutes depending on the
length of your video. Once it's done,
your video will be saved directly to
your photos folder. From there, you can
easily share it to Instagram or YouTube or wherever
you share your content. You can also send your project
to Premiere Desktop if you want to do Advanced color
grading or add graphics later. Just tap on send to
Premiere Desktop, and it will transfer through
your Creative Cloud account. That's a great
option if you like doing finishing touches
on your computer. You have now created a complete professional
looking video from rock lips to polished
edits, all from your phone.
10. Lesson 10: Congratulations on finishing
the class and the project. I hope you're feeling proud of what you've created
in this class. Learning to edit videos on the premium mobile is
such a powerful skill, and now you have learned
how to do it all in the palm of your
hand. Pun intended. Whether you are editing
for social media, YouTube, or personal projects, you now know how to
organize your clips, trim and cut with
precision, add Broll, balance your audio, color
correct your footage, and export your final video. All without needing
a desktop setup. I would love to see
a finished project, so make sure to upload it to the student gallery
here on Skillshare. Sharing your work not only
celebrates your effort, but also helps inspire
everybody in the class. And if you found
this class helpful, I would really appreciate
if you left review. Your feedback helps me
improve my future classes and helps other students know what to expect
from this class. And, of course, I
love hearing what you enjoyed in this class and what you would like
to learn next. To keep learning, make sure you follow here on Skillshare, so you will be notified
when the next class drops. You would like to see
more behind the scenes tutorials and
creative inspiration, follow me on YouTube
and Instagram. Thank you so much for
joining me in this class. I really enjoyed sharing these techniques
with you and I hope this class has shown how powerful mobile
editing could be. I can't wait to see
what you make next.
 Snehal Wagh, Filmmaker