Transcripts
1. Welcome!: Before mobile phones,
videos were always in 16 by nine format for
PCs, TVs, and laptops. But now with our focus
on mobile devices, vertical videos are taking over. That's why it is
important to master vertical video formats that fit perfectly on our mobile devices. My name is Niko Wag. I am a professional video itor and motion graphics designer. I have been making online
videos for about nine years, and in the past few years, I have helped my clients create
amazing vertical videos. In this class, we will dive
into the art of editing specifically for short
term vertical videos. We will use Adobe Premier Pro to learn about aspect ratios, creative editing, and how to blend audio and
music seamlessly. I will also share tips on
finding trending music and making your videos stand out
on Instagram and YouTube. This class is hands on. You will work on the
project that lets you apply what you learn in
real world scenarios. Whether you're a
complete beginner or have some experience, this class will help
you edit engaging short term videos that will
build your online presence. So if you're to get started, let's jump into the
first lesson and learn the basics of short
term vertical video.
2. Class Project: Welcome to the class. I'm
thrilled to have you here. For the class project,
we will create an informative short
form video edited specifically for Instagram
and YouTube shots. We will dive into key
techniques like subtitles, super smooth transitions and color grading to bring
your idea to light. Don't worry if this
sounds like a lot. I will guide you
through each step, breaking things down into
easy to follow sections. Move at your own
pace, take notes, and feel free to revind or adjust the playback
if you need to. If you run into any
questions or need help, just reach out in
the community tab. I'm here to support you and help you through any challenges. At the end of this
class, you will have a standout vertical
video ready to impress. Once you're finished
editing your video, shar it in a class
project section, so we can all see
your amazing work.
3. Optimizing Workspace: The first thing you see when you open Premier Pro is the screen where you can create
a new project or open an existing one. We are going to
create a new project. This is an important step. We need to select
the location where your project will be saved
and name the project. There are two ways to
set up your workflow. I'll show you both and you can choose whichever
fits your needs. The first way is to go to the project templates and
select social media template. Everything else
remains the same, so we will click on Create. If you can't see the social
media template options, then you have to update your AOP Premier Pro to
the latest software. We have a lot of options here. We can see the Instagram reel vertical and the
TikTok vertical, and also YouTube
shorts vertical. These are the templates you
will need for social media. I'm going to choose the
Instagram reel vertical. You can see some elements here. I'm going to delete
the layer below, and once I do, this is the overlay that we
can see clearly. This overlay helps ensure that all the important
text or video stays visible on
the app and isn't hidden behind the
interactive features. Let me show you the
TikTok vertical as well, and you'll see a similar theme just like for YouTube shots. Since I only need to create
one video for Instagram, I'll select all the
other templates, hold command and click
on the Instagram reel. Then I will delete the others. I'll double click on the
template and it's ready to edit. The second way is to open your project without
selecting a template. Right click on the project
window, click sequence, select the social media nine by 16 template and
rename your sequence. Now our timeline is ready. The only thing missing
is the template overlay, but this method is quick and
handy when you are already inside a project and don't want to create a
reel from scratch. If your workspace
doesn't look like mine, it might be because
you haven't used Premier Pro in a
vertical format before. You could be in the
default workspace, which uses the full work area for editing horizontal videos. Let me show you how to
create this workspace. Premier Pro has built
in vertical workspace, but I customize the one you see on the screen to my liking. Let's go to the workspace
panel, click on it, and you will see
different workspaces for various stages of editing. This volume control panel
was originally here. But since I needed more
space for my timeline, I dragged it up and
made it smaller. I did the same with tools moving them from left to below
my project panel. Customize your premier
pro work space before we dive into editing
our vertical videos.
4. Automating Subtitles for Accessibility: In this lesson, we are
going to add subtitles to our video so that people can watch it even
without an audio. What you see on
the timeline right now is my talking head video. Let's add subtitles. Go to the text and make sure you have the
transcript selected. This window will allow us to transcribe the audio
with a dialogue. I'm going to click
on transcribe. This process will take
some time depending on the length of your
voice over or audio. Now that our audio
is transcribed, we can see some pauses and gaps. You can go to the transcript
options here and adjust the minimum pause length based on how tight you want
your edit to be. I will keep it at 0.15 seconds. Let's remove the pauses
and gaps altogether. Click on the funnel icon
inside transcription. Then click on Pauses. This will select all of
the pauses in the video. You can then click
Delete and Delete all. This will significantly reduce your editing time for Talking
Head or blog style videos. After this, I will clean up any double takes
and edit the text that is misinterpreted by the transcribe AI
in Premier Pro. Let's review this
talking head video to ensure there are no errors. I have also stacked
the audio segments, so the audio starts
before the video, creating a fast motion
effect in my video. Now that this is done, We will go to the caption tab. I will click on Create
captions from the transcript. When you do this, a
settings window opens. There are some
presets you can use. I'm going to select
the subtitle default and then open the
captioning preferences. I want to make my
video fast paced. Let's tweak these settings a bit to achieve the
desired output. We will keep the format
as subtitle style. We don't have any style yet, but we will edit some text
later and save it as a style. If you already have a text style, you can use that. There is an option to choose the maximum length
of characters. This is an important
one because we want the words to appear one
by one in this video, I will set it around
nine and ten characters. We will also have a
minimum duration. I will set it to the lowest
possible and I don't want any gaps between captions because we are aiming
for a tight edit. There is no point in
keeping double lines, so I will select single line. We are going to click
on, transcribe, and create captions. Once it's completed,
you will see the basic text at the
bottom of your footage. This looks a bit dull, so we are going to
select everything and go to essential graphics. When you click on edit, you can adjust all of these text files in
subtitles at the same time, including position,
scale, fonts, and colors. This is helpful when you
want to edit quickly. Let's start by
changing the font. I have one font that I love. It's called Gazpacho, and since I'm going for a vintage
style in this video, I'm going to make the
font a bit larger. That looks okay for now. I'm going to position my
caption in the middle so that I can see it while
editing it more easily. Then let's go to the stroke. I will set it to four. Let's say I want
to make it paste. I'm choosing the color blue. This color looks all right. I'm also going to make the
shadow the same color, and for the shadow blur, I will set it to zero. As I mentioned, I want
the text to look retro. I'm experimenting a bit with
the direction of the text, and I will also
increase the stroke. Let's change the position
of this text so that it appears just above where
a user name shows up, preventing it from being hidden by the interactive
features in the app. Now, let's play back
and see how it looks. This text look great as
is, but it's static. Let's use key frame options
to add some movement. Since this text is part
of a subtitle file, you won't have direct
access to effect controls to add keyframe to
all of the text. However, there is another way. Select all the subtitles, go to graphics and titles and find the option called
Upgrade caption to graphic. Click on this and your
subtitles will move to your timeline instead of a
separate subtitle track. Since we no longer need this subtitle track,
we can delete it. You need to note one thing that you cannot
change the properties of all the text once upgrading
the subtitles to graphics. So it's important to edit all the design properties
before upgrading them. Now, when I click on
any of the files, I get the effect
controls right here. Next, click on the first graphic and move the Anchor point to the middle of the text by
clicking on the Anchor point. You'll see a blue circle with
a plus sign in the center. Move it to where the text is. Now let's add a key frame
to the scale property. Press shift, and then
the left arrow key to move five frames ahead, and then click on the stopwatch
icon next to the scale. This will create a key frame. Next, go back to the first frame and
set the scale to zero. Creating another keyframe. As we play the animation,
the text pops up. However, the animation
isn't smooth yet. Right click on the second
keyframe and select ease in. Troll down the arrow beside the scale property
to reveal the graph. Drag the handle below towards the first keyframe to
create a smooth curve. The text animation will
now look smoother. To apply the same animation
to all of your subtitles, click on vector motion, right click and choose copy. Then select all the other
subtitles except the first one and press Control
V on your keyboard. Now that the animation has been applied to all the subtitles, let's play back and
see how it looks. Go ahead and complete adding subtitles to your
video and in the next lesson, we will add text to
hook our audience.
5. Utilizing Supers for Impactful Messaging: Creating an eye catching text
to hook your audience is a crucial step in creating
short form content. In this lesson, we will create engaging supers to
keep them watching. In this reel, my hook
is four things to know about getting around
in hand introverion. I want the text to
appear as I say it. First, I am doing
some rough work by taking this title
into my note pad. I'm going to highlight
the important words that should be easier to read. Since four is a number, I'll keep it standalone. Things to know will be on the first line A
could be smaller. Next comes getting around, and the word in doesn't
need much space, so we can keep it small. T hiland is the
main keyword here, so it should be the largest. The words introvert addition
could also be in brackets or smaller since it signifies series of
content coming up. Let's move into Prime Pro
and design this idea. I will delete the whole part of that subtitle and
create a new graphic. Go to graphics and titles. Click new layer and then text. We will add all of our
text to this layer. Since we want to animate each
one of these one by one, we will create a separate
text layer for every line. To do this, let's go
to essential graphics. Click on new text layer and scroll until you see
text properties. Here you can align the text. I'm going to center
align our text. I'll also go to align
and transform to center align it horizontally
and vertically. This gives us a starting point. I'm going to write things to know since that was
our first line. We will also need to add the
number four before this, but I'll probably use
a e to convey that. Go to essential
graphics properties, click on things to
know and hit command C and command V to copy and
paste the same text again. Then we will use the position
properties to move the text below our main text and
change the text to about. We will repeat these steps for all of our
remaining three lines. This is how it looks after
adding all of our text. But it's in the same
style as our subtitles. Let's make it a bit different. First, I will select these three texts and
make them capital letters to bring
some differentiation between important words. Next, I will remove all
the text properties, except for the stroke. I'll make the stroke black
with a width of five. I will also adjust
the text size, making it bigger or smaller
according to the preference. I want to choose a
handwritten font for in and about This one looks nice. I'll also make these two
texts the same size. There is a significant
distance between all of these because we have
adjusted the sizes. Let's tweak the position to make all of these words
look like one unit. Now that this looks cohesive, let's take one step further. I'm going to click on a
text layer in timeline, then drag while
holding Option or Alt. Next, I'll go to the essential graphics and
without selecting any text, I will move the position
slightly so that the second text look like
shadow of the first text. Then select all of these, click on fill and
add pastal blue. I want it to be a little
brighter than our subtitles. I also want the outline of our second text to be
smaller than the first. That's looking better. In our reel, Tylan is the
most important keyword. Let's create a background
layer around it. In the second text layer, we will delete the Tylan text. I will delete in and about now, I'm going to the
graphics and titles, clicking on the new layer. Then selecting rectangle. Now that the shape layer
is in our program, let's position it
behind the thylan text. I will also take this time to position thylan slightly below the other words so that we have enough space for our
background rectangle. I'll also position our last
introvert addition text below yn so that it's readable. Let's color our
background rectangle with the same pastal blue that we used for our
secondary text layer. I'll copy it from the text and paste it into the fill
of the rectangle. I also want my
background to be curved. I'll use the option
here for that and set it to e. I'll also go
to our primary layer. Align the ty text in the middle and make it
smaller than before. I fits perfectly
in our background. This is still looking a bit off, so I'm going to add a stroke around our
background layer as well.
6. Animating Supers to Hook the Audience: Now we can get started
with the animation, but before that, we need
to prepare our text. First, I'm going to click
on the secondary layer, then select all of the text inside it Control X to cut it. Next, I will switch
to the primary layer and paste it by pressing
Control V. I will position these words
below the primary text and adjust them according
to how we want it. Now, the secondary
text is directly behind the primary text.
We didn't want that. Let's go to the
secondary text and move the position
parameters about ten points away from the
original graphic. Let's do this to all
the secondary text. Now I'm going to delete the secondary graphic we made
since we no longer need it. To animate our text together, we need to group it. I'm going to select the
first text that is Ts to know and click on this
icon to create group. I will rename this
group Ts to know, and we will do the same thing for each text
element separately. However, these two texts don't need to be grouped
since they stand alone, and we can animate them as is. Next, go to the effect panel, search for transform, and add the transform
property to each group. Now if we go to the
effect controls, we can animate the
text as we want them. In my plan, I want
these two words to come in from right and left. Then have thylan pop up from
the middle and finally, introvert addition will slide down from beneath
the word thylan. Before animating,
I will listen to my audio and mark each
word as I say it, so it's easier to animate
each word individually. Let's start with the
transform property of the first text group. I'll create a key frame at
the position of first marker, then go to the first frame and move the position
to the left. Until it's completely
out of the frame. Right click on the
last keyframe, hover over temporal
interpolation, and select Ease in. Open the graph editor for
position by tolling down the arrow and dragging the handle toward
the first key frame. This will smooth the animation. I will also adjust the
shedter angle to 180 degree, so our text has motion blower. Next, I'll move
on to the getting around text group and
repeat the process. I'll go to its maker point, add a key frame here, and then hold shift and press the left arrow key twice
to move ten frames back. I will set the shutter angle to 180 degree and position
the text out of the frame. I'll smooth the animation
by adding sin to the end keyframe and
then creating a curve. For the thigh end text group, I'll follow the same steps
for the scale properties, excluding the shutter
angle adjustment. Now we have two remaining words. To make them fade in, I will use the opacity effect. I will go to the
marker where about should start and
create a key frame. Then I'll move ten frames back and change the opacity to zero, creating our start key frame. I'll do the same
for the in text. Go to the marker,
create a key frame, move ten frames back, and then set the
opacity to zero. Let's play this part back. The text appears on the screen, as I say it, which is
exactly what I wanted. For the last text, I will add crop effect about the
transform effect. By clicking on the crop, I can see the area
being cropped. I'll adjust the top parameters until the blue line crops out the introvert
addition text right below the thylan word.
That looks perfect. Now let's go to the
transform effect of introvert addition and
add the text marker, create a key frame
for the position. Then move back ten frames and position the text
behind thylan text. I'll also set the ster
angle to 180 degrees. And smooth the
animation by adding ease in just as we did
with the other text. Once we finish with the text, we can adjust the
vector motion position and move it around as we need. Let's log the three tracks
that we don't need for now. First, I'll go to the
text layer then effect controls and reposition the text because it's currently
overlapping my face. I will move it a bit lower. Additionally, the
interactive icons are overlapping our title due
to the template overlay. To fix this, I will move
the text to a bit left. That works well, but
there is one issue. The introvert addition text
is appearing prematurely. This is because we just
moved our entire text, and we need to change the crop. To fix this, I will go to
the crop effect, select it, and let's move it below
the thyln background, and now that is fixed. Design your own
hook for the reel before jumping on to the
next lesson in which we will add B roll on top of our talking head video
and learn how to collate
7. Elevating the Reel with B-Roll: In this lesson, we
will incorporate B roll footage and learn
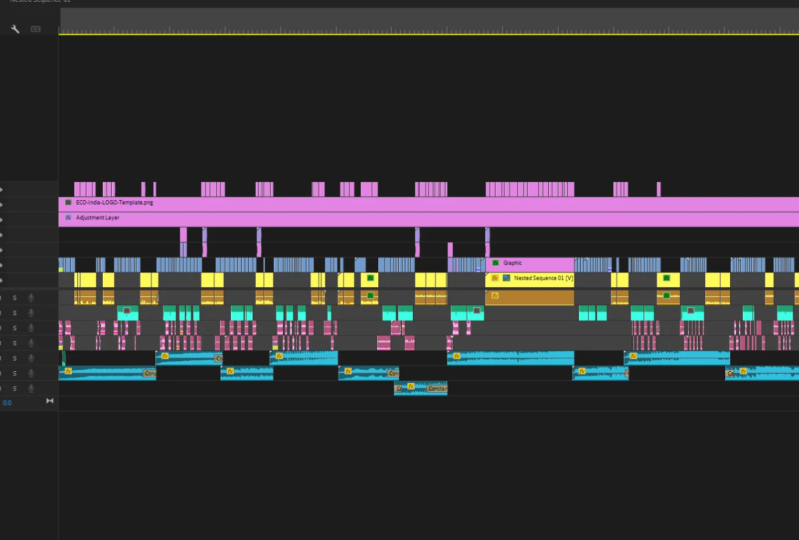
how to calibrate it. Let's prepare our timeline
to insert the B roll. As you can see, the
template overlay and subtitles are right
above the A roll. After the A role, I will
keep one track open for the B roll and another one for color grading
adjustment layer. I will select all the
subtitles and move them to the fifth track
while holding shift, so their positions don't change. I will do the same with the template overlay by
placing it on the sixth track. I will also lock and hide the subtitle sex track to
make it easier to place the B roll and also that they don't move while we are
editing the B roll. Now that our space is clear, let's import the B roll footage and place it above
the a roll footage. Just as we do for
horizontal videos. I have added all of
my beats footage, so it's time to color correct. First, I'll color
correct only the A role, so I'm going to hide
the Batole track. Then I'll go to lumeary color where we can use
various parameters. The first thing I'll
do is click on auto, then use the wide
balance dropper. I'll pick any white
or gray shade in the video to achieve the
correct color balance. After that, I'll adjust the exposure slightly
to brighten it. My video still looks yellowish, so I'll go to the SSL secondary, set the color and
apply to my face. You can adjust this parameters until the orange
areas are selected. Now I will adjust the temperature
for the selected area. Then I'll return to
basic correction. I'll keep adjusting
the parameters until I'm satisfied
with the result. Now that's done, I'll go
to the effect controls, select luminary color, right
click on it, and copy. Then I'll switch to the
full view of my timeline. Select all the A roll footage. Use command V to page the color correction
across the entire a roll. I will color correct
the B roll similarly, but I'm going to have
to do it one by one. Let's move on to the next step. I want the first clip of our
video to be a close shot. I'll go to the effect control. Click on scale, set it to 125. I'll also reposition it. After that, I'll add some
Zoom effects to give the video some movement
where there is no moment. Let's select the clip. Go to effect controls. Click on scale. I'll
create a key frame, then move ahead a bit and set to 120 and place this keyframe
at the end of the clip. I'll play this back, and you
can see a settle moment, exactly what I was aiming for. I'll use this technique on other footage where I
think it's necessary, and after that, I'll
show you the results. While adding key
frames to my role, I noticed that some
clips were jittery. To fix this, we can
use op stabilizer. This is how you can do it. Go to the effects panel, search for Op stabilizer. And when this comes
up in the results, go to the clip you
want to stabilize, drag the Op stabilizer
into the clip, and it will start analyzing
and stabilizing your footage. You can apply this to
all the footage that you think needs stabilization. The final step is
to add a lot to ensure our video feels
cohesive rather than random. To do this, we need
an adjustment layer. Right click on the project, select new item, and then
click on Adjustment layer. Ok and drag this adjustment
layer onto our third track. I'll extend it to the
end of our video. Then go to the lumitry color while the adjustment
layer is selected, go to creative, click
on L, and then browse. I want to give this
video a classic Teal and orange look that's in
the travel videos. I'll go to my Lutz folder and select the Teal
and orange Lut. It looks overpowering at first, but we can reduce
the intensity to 50, which looks much better. I'll also set the exposure
of adjustment layer 2.3. Clean up yours by adding complimentary Broll
footage and color grading. In the next essence, we will place visual elements
to make our real
8. Infusing Creativity with Visual Elements: In this son, we are
going to add some fun to our vertical videos by
using IPs and images. Even though we
have added B roll, there are still a few places
in the video where it isn't as attention grabbing as in
other areas with visuals. For example, when I talk about the apps for
calling a cab, I didn't have a B roll to add, so I could include the
app logos instead. Similarly, when discussing
the use of cache, there is no accompanying visual. I've downloaded a few
elements to use in my video, so I'm going to import
them and add them I will move these elements
around and resize them ensuring that they
don't overpower the text. I also have a few IPs that I have downloaded from a website, which I'll incorporate
where they fit best. The IFs are already animated, so I don't need to add
key frames to them. However, since the
app logos are static, I'm going to add a scale
animation to them, similar to how we
animated the subtitles. Now that I think about it, I can replace the subtitles with these app logos since the logos already
display the app names. Let's delete these
three subtitles and animate the logos as
we did for subtitles. We need to advance
five frames on the scale and then
create a key frame. After that, I'll go back to the first frame and
set the scale to zero. This will make the logos pop up. To smoothen the animation, I will apply an ease
in effect and rack the handle to create a
smooth Bazzie curve. I will repeat this process for the other two app logos as well. When I play back, the app logos still blend into the background. To fix this, I'm going to add a drop shadow behind each logo. First, go to the effects, search for drop shadow, and then drag it
into the first logo. We can tweak it a
bit. I will set the opacity to 200 and
increase that distance. Slightly, that looks better. I'll also increase the softness. Now I'm going to right
click on the drop shadow, it, and then paste it
into the other two logos. The effect applies to both
9. Perfecting the Audio: Up next, we'll
work on perfecting our audio and adding
some sound effects, so it sounds as
good as it looks. Now that we are on our timeline, the first step is to select
the entire audio track, since it's the same
voiceover from my A role. Next, I'll go to the
essential sound panel. Click on preset,
choose dialogue, and select balanced
low Tone voice. If you're working in
a soundproof room or doing a complete voiceover, you can also choose the
podcast voice preset. Or, for example, if you recorded
in a noisy environment, you can use the clean up
noisy dialogue option. You can notice that once
I applied this preset, the sound level increased. I want the level between
minus six and -12 dB, so I'll add the clip volume
level to minus three. When I played back, it
falls under minus six dB, which should sound perfect
on mobile devices. Since this is a
talking head video, we will need to add
instrumental background music. To find trending music, we will open up our
social media app. I have opened the
real section of the Instagram app where we
can find trending music. Click on the music icon to
see which music is trending. The tilted arrow
below the soundtrack indicates that the music
is currently trending. You might also discover
new trending music while scrolling through
your Instagram feed. To save it, go to the audio page and
tap on the save icon. Now, where is this audio saved? To find it, go to your profile. Tap the three lines on the upper right corner
and select saved. Here you will find
Audio saved audio. As several audio saved, many of which are also trending. I'll find an instrumental
track that's both trending and
suitable for a video. After a little bit of searching, I found the one that
I'll save for now, and we can use it during
our upload process. You can absolutely use
the audio that is not trending or you can use an
original audio as well. But using trending sounds in your reels can boost
your engagement, improve your branding, and even increase the chances of
your video going viral.
10. Mastering Export Settings: In this lesson, we will go over correct settings to
use for exporting. You videos look best
on any platform. Once I'm done editing, we
need to export a video. But before that,
I will make sure to hide the template
overlay track. Then I'll go to the Export page. There are many settings
to customize here, but the most important one
to focus on is the preset. You can create custom
export setting presets and save them in for
any kind of video. I usually start with
the default preset loaded in the software when
creating a custom preset. Here, I'm going to choose Match Source adaptive
High bit rate. Let's toll down the video window and tick these two boxes. Render at maximum depth and
use maximum render quality. Next, we will need to go
to the BIRD settings. For Instagram reels
and YouTube shots, I'll keep this at seven since vertical videos are oriented
towards smartphone users. This step is optional, but if you often use closed
captions in your videos, turn on this totgle. Just make sure that you
are in a project that has closed caption enable before
creating this preset. Or this option will be locked. In our case, we upgraded
our captions to graphics, so we don't need
to toggle this on. Finally, click Save Preset and rename it in a way that's
easily identifiable for you. Great job. Now, you
know how to export your videos in the highest
quodalty possible.
11. Wrap Up!: Congratulations on
finishing the class. I hope you are excited
to use what you learned and start editing
amazing vertical videos. If you have followed along with the lessons and worked
on the project, you should have some great
content ready to share. I would love to see your videos, so don't forget to post them
in the project gallery. Your work will not only
showcase your skills, but also inspire students
who are taking this class. If you enjoy this class, I have four more classes
available on Skillshare, check out my profile on more
Tp centric on video editing. Also follow me on
Instagram and YouTube for more behind the scenes
and content updates. Thanks for joining
me in this class. I look forward to seeing
you in future classes.
 Snehal Wagh, Filmmaker