Transcripts
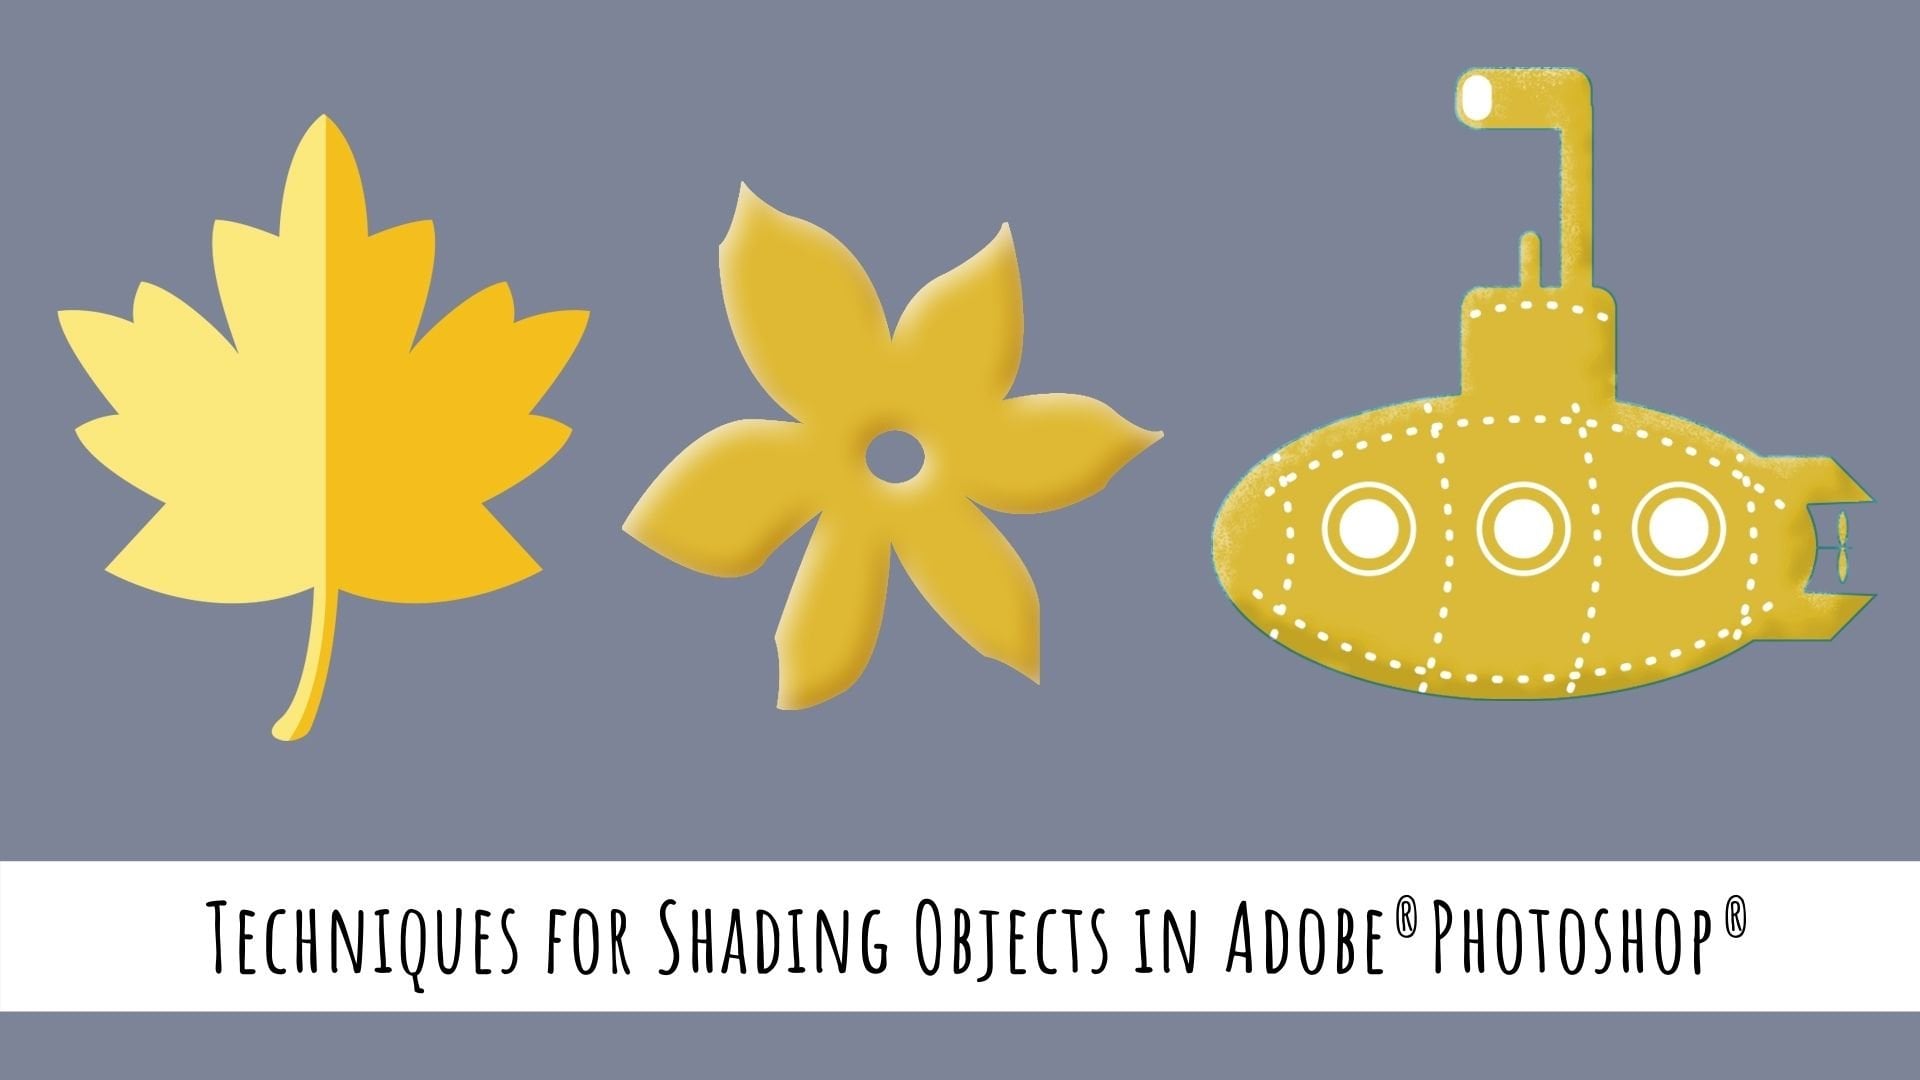
1. Welcome to Flyer & Poster design in Photoshop: Guys, in this course, I am going to teach you step by step, also design professional, modern and unique
flyers and posters for different brands and
clients all over the world. In this course, I
will put you through the design processes from
beginning to advanced level. I will start by putting you through navigating the
Photoshop interface, understanding the principles
of flyer and poster designs, which include layouts,
focal points, hierarchy alignments,
contrast, balance, and so on. Also, I will teach
you typography. Typefaces serve
ser fonts, colors, meaning of colors, and
why different brands use different fonts and colors
to portray your brands. Next, I will teach you several techniques
on how to design flyers and posters for
different brands and clients. Brands which include
food brands, tech brands,
agricultural brands, logistic transportation brands, travel and tourism brands, beauty brands, and
real estate brands. This will help you
take your flyer and poster design skills
to the next level. Also, I will teach you how to export images for
prints and webs. Teach you how to
create PSD markups to present your works to your
clients in the best way. Also, I will show you where
to download PSD markups, HD images and icons in order
to elevate your skills. I have also made the resource
files available for you to download and follow along as I design on flyer and
poster designs. Take your Photoshop
flyer and poster design skills to the next level. I will see you in the
next lecture video.
2. Getting Started: Guys, thank you for
taking this course. Before you begin, you should
download the resource files for this course in order to
follow along as I design. These are the resource files. You will find the link
to the resource file in the class description and
project description go downward to the last
sentence where you are the HTTP copy from the HTTP
down to the last word. Then you copy it and paste
it on your Internet. And it takes you to the
Google driver where you find the resource file in the Google Drive.
You press the link. Then from the link
it takes you to the Google Drive where
the resource files are. Then from there, you download the resource files
into your computer. Then firstly, when
you download it, it will look exactly like this. This first one over here
is what it is, a zip file. What do you do? Let
me delete this. Okay, so that I can show
you the processes. Okay? Then when you have a Z file, just right click on
it, what do you do? Then you extract files. It tells you, just just select, okay. Then what happens? Extract the file completely for you from five
to normal file. Just come over here,
you double click. Then you have this as you see, the Photoshop Master
Class Professional, Fire and Poster design. You double click. Yeah, we
have what we arrive here. Yeah, this is where we
have the resource file. So we have the project files. These are all the
file so that you can follow along as I am designed, these are where you get all
the files for the projects. In this course, going back, we have we have the
exercise files. I'm going to give you an assignment exercise
for you to do, for you to do for the assignment is in the
last lecture in this course. When you get to
the last lecture, you would know what
the assignment, the exercise is all about. The p, the practical
exercise is all about. Here we have the fonts, All the ponts are
used in this course. Here for you to download, you can just control select
all the what's installed. It installed my system already. So there is no need for me
just install and follow along. Apart from that, we have we
have photo shop shortcut PDF for you to use and
be able to follow along. Just double for Windows users. Actually, this is
then the control plus everything actually
for the Mac users. We have this for them also. The shops cuts are here, they are available for them. The last S, the markups, which is what Photoshop
documents double click here, we have all the S markup we are going to
use in this holes, you have all the mark
ups available for you. It is very, very important to download the resource files, move to the lecture
underneath this lecture. Select it and click the link you would
see in the lecture. And download it. I will see you in the
next lecture video.
3. Photoshop Interface: Guys, if you already know how to navigate your
Photoshop interface, then move to the next lecture, whereby we start with layouts. Understanding the
principles of flyer and poster design in
Photoshop layouts, focal points alignments, and the like, balance
and the like. This lecture is for people
who are new to Photoshop. They need to understand the
interface of Photoshop. But if you understand the
Photoshop interface already, how to navigate it, then
move to the next lecture, which is underneath
this lecture. Now for people who are new to Photoshop and need to
understand the interface, firstly, what we're looking
at right now is what? This is what we call the
Photoshop home screen. This is where you have
the recent files. You just open or like
18 hours yesterday, hours ago, things like that. So this is where we have what
we call the recent files. You can actually change it
to be something like this. Also, it can change to be something like this or you
just leave it the way it is. The most important
thing to know is that we are in the
home screen, okay? If it is to open a file that has been existing before
you come over to open, but we are not opening
a file that has been existing before we need
to open a new file. Okay. Just select new file. When you select
new file, you have recent files which
has just been used. You have se five with the sizes. Okay. We have 42. We have prints. We have an
illustration web elect. But we don't actually need
all these in this course. What we need is just
come over to prints. Okay. Then select what? A four, because that is
what we're going to use. All through 4567,
sz 123456, okay? The size are the same thing. The way it is, the length of the breadth are almost
the same thing. Okay? But it's just like the
size reduces and increases. The thing is that we are going
to use a four all through. Okay? Four all through
when you see this. Okay. Just leave them
the way they are. Call want to use inches. Okay. To find anyone you prefer. But just make sure
you selected four. Okay? Make sure you selected four sizes.
Everything like this. You can see this
is what landscapes portraits, but we
don't need this. Just leave it as
portraits parent, it's mistakenly chooses
landscape itself. Then you can come over, choose portraits, then
leave this as it is. The resolution should
be 300 algebra, color. Leave this as it is in the
default. What do you do then? You select what creates. Then it creates, this is size
we're going to be using. All true in this Tua because we're dealing with both
flyers and posters. And that thing is that
all through this tutorial I'm going to be talking
about short cards that control zero contra Z
using using contras and ships. And you're going to be able to follow along when you open this. This is the real exact words,
exact Photoshop interface. Everything is what we
call Photoshop interface. We have the work spaces. Look
at this place over here, over here, and over here. Okay. It includes the work spaces. Okay, and also the canvas. Canvas is where the design is being done, which is
this white space. This white plain paper or area. Okay? All actually, we have to understand
that this is what we call coming over here. We have this as we have
this as the two bar. Call it two panel, two bar. That's not a problem. Okay,
this is what collapsed. You can try to come over here. And what expand? It's expanded. My screen is very small. I actually want to collapsed. Want to collapse?
What's expanded? Your might probably
be like this. Just select this, then
it's what? It's expands. Okay. This is where we have the different tools were
used in the portal shop. Okay. Now, what do we do? You can just over here. Just bring the mouse over there. Just just select. You don't select,
Don't click anything. Just move your mouse
somewhere you would see the different things the
tools have been used for. These are not all the tools. There are some tools that are
underneath the other tools. For example, we would see
some very small arrows here around small like
triangular arrows. Okay? When you have
them like that, when you right
click on one tool. Okay, it shows you, okay, let me click on this. Okay, When you click and drag, you can see
something like this. Okay? It is only the
one which is showing it is only the icon showing that would respond,
that will be selected. But what about the
other icons underneath? What about the other
tools underneath? How do you get them?
You don't click. You don't click. You want your right click? You can see rectangular make to. You can see rectangular make electrical make,
single single column. You can see coming over. So
you can just write click. You see the other
tools we have here. You can write click,
You can write click except the one that doesn't
have any small arrow. When I write click on, you
can see nothing is selected, only that tool is selected. Okay. That is very, very
when you come over any too, you want to use just the
brush tool for example. You want to use them,
just paints, Okay? Something like that. So these are where all the
tools are being. Okay, let me contrast
that as one goes away. Select the move to, That's another thing we have
to understand again. This is what we call the menu
bar. You can see them here. Just select on one, You can see all other functions and
options are embedded here. The file, okay, you talk
about opening a new file. Closing all files. Opening openers, save file, export file, generate
a file, okay? We have edits. We have some
other functions like undo, redo, cut, copy, paste, clap. Okay? Fill stroke
content a well field, and the p. We have image also talks about functions
that deals with images, layers, layers, types help
windows plug in views. Three D filter, we're going
to use filter very much. Well in this course we can't
use or the menu options, it's not possible Windows also. Apart from that, we
also are what we call the options or properties. It is immediately after it
is underneath the menu bar. The reason why we
have an option or properties is the what is that? When you select a
tool from here, it's options and properties need to show. Where
does it show? It shows right here. Just select this. You can see exchanges, slits, you can see exchanges, seles, you can see that's not changing. Select this, you can
see it changing. You can see this also changes whenever you select
a particular two. It's options and properties. What shows? That's
why it's called what? Property Properties or options. Now, after that,
just come over here. This is where we have what? We have several panels, several bars were
coming over here. We have the color
color section of the color color panel Swatches, which deals with colors. Also gradients, gradient just
like an adjustment layer. Also we have patterns, there are different ones, but all these ones are
not really necessary. To that extent you can
actually get them, you can actually get some from
here, some from here also. Okay. So apart from that, when you come down we are
what we call layers now. Yes, that is its layers
coming over here to layer. This is where we have this is what we call the layer panel. The layer or the layer section, actually Now we have one layer actually is locked when a layer is locked,
okay, you select this. When a layer is locked,
you can't click and this is selected. Just come over by, Make sure after every action you make
or something like that, make sure you come
back to come back to the move to it's very important. You'll find it
okay. You find it. Had select this, come over, click your left mouse click old. What happens? This correct selected layer
is a background layer. You cannot move a background
layer or change its taking other blending
mode or pay. However, you can convert
it to a normal layer, then you change any
of these attributes. When we have a layer like this, it is always locked.
Okay, what do you do? You unlock it. If you want to lock it back,
come over. What do you do? You unlock? What do? You cannot click drag. You can see I'm
dragging that layer. This thing you're
saying is transparency. Okay, but yeah, it can click Oden Drag with
the left mouse button, then click Odin Drug. It's different places. Understand that.
It's very simple. Let me try to bring it when you're trying to
put something on. Result vertically, you see Photoshop actually
makes it easy for you to have some grid lines to make you see it's
vertical enough, it's result enough, and it's
what in the cardinal drop. It's very, very simple. Photoshop actually helps us
that now in the layers panel, this is what we call
the blend modes. O to blend things to blend, no interacting one image
with another image. It happens with majorly, starting from two
images, two elements. We have the opacity
whereby you can click wooden drug like this to
make the layer invisible. Come over a click
wooden drug like this. Make it visible, make it
invisible, something like that. You can click here
also to work to reduce or increase
it, this field. Actually we're going
to use feel here. In this feel is just
almost like opacity, but works majorly with
the layer styles. Okay. Its effects, it shows in a layer of
styles perfectly. But we're not going
to do that here. Now we have this thing. We can do work, we can
make this invisible. We can make it visible. You can see when you
select it, it's invisible. When you select shows
it's, it's visible. Okay. Another thing we can
do is just right click and come over here and you can
see no color, red, orange. You can give it a color when
you make another layer, you can change the color of that layer also to
another column. Let's come over here.
This is what we call the layer layer stop. Okay, apart from the
layer, we also have what? We also have the layer mask. We're going to lend that
very much in this tutorial. Apart from that, we have
the adjustment layer. We're going to lend
that in the video, in the subsequent videos. This is what we call the group creating a new group
we're going to create. Very much well, and you
can do it from here also. But you can just do
the only one layer. You can come over here, this creates a new layer
and see the plus in the middle tends select
you selected that. Then you can write,
click on Wards, change it towards a green colic, green red, something like that. Okay, from that, now we've
created a new layer. Let me create new layer. If want to create a new layer, what you did is very important. Photoshop is very sensitive, wherever you select
a new layer would be what would be created on
top that selected layer. You can see now you want
to create a new layer, for example, which
would layer five. When I select this list, the new layers come behind, come below would go
above layer one. You can see it
become layer five. You can see layer
five very important. Another thing you
can do is just what. You can delete things. You can select this right
click and go to what deletes layers can just like let's
select this layer one, it's very important to lane, to select, select, and select. Okay. Whatever you select is
whatever layer you select, that is where the function
actually will work out. Just select this click with
your left mouth bolting on, drag it down towards
the trash can end. It's deleted very, very fast. Like you selecting
this right clicking and coming here, delete layer. And yes, taking time, just select on this
click and drag it down. And that's all, it makes
your work very efficient. Okay. Now, apart from
that, is it for this? Apart from that, now
let me contrast. Click, delete, or you
just click and drag down. Click, click and drag down. Very, very perfect.
Another thing you have to understand is
that when you come over here, you can be able to toggle
back to the home screen. Click, see you back
to the screen. Very perfect. The what happens? You can use this arrow or select this PS icon,
the first icon. Then it takes you back to
the interface. Very simple. Another thing we have
to understand here is that there's something here. You can see it. Untitled
X. I can decide to close. When I select this, it closes. Okay. Let's select it
and see what happens. It closes. You see safe
changes before it closes. I can say no, but I don't want to close it. Let me a little bit like that. Okay. Now, when you open a
new document, it opens where? It opens around
here, you can see. Now, let's try to open
another document. Let's go to file, then open then, okay. Okay, What? Select the desktop, okay. Yes, just as an example. Okay? Just as an example. Now, we just come over here
to Boger, sell this Boger. Let's see what happens.
You can see it opens here. It opens here as a new document. It's very simple.
Whatever. Open again. It lines up here. The line up here, and you're able
to access anyone. Just come over here, you can see the design you're
actually designing. Come over here, you have time
to be able to move here. Double click another one here, click another one,
click another one here. Then it's not composed close or shut down photo
shop to that extent. No, just come o select this,
do whatever I want to do. Select I want to do now. I've been able to explain
what the interface is, how to navigate the interface, how to move on and on. Other thing is just that you can actually zoom in, zoom out, okay, for you to zoom in, you can actually
use control plus, you can see I'm zooming. You can see the zoom out control plus minus on your keyboard. Okay. Then to fix to
screen immediately. Very fast, you do control zero. Even if you've zoomed in, you can press on
control plus zero. Very perfect. But for the
Mac users, that is what? Command plus zero. Command plus minus, and command plus plus. Another thing I wanted to
understand is the one I use most times is when zooming out, I press on my, the Okey. Wherever I put my corsor, that is where it's
going to zoom. You can see I'll press on my out. As
I'm pressing on my O. This is the Cos. Then zoom in using your middle mouse
button, which is scroll. You can see it. Then
when I want to go back, press control zero, and
it shows me the way. Now if I want to zooming into the circle I press
out, then zoom in. Use the Middlemosino,
scroll in screening, then you can scroll
out again, then okay. Then use control zero
and it's fit to screen. That is how to navigate
the Photoshop interface. Everything you need to know
to start the fundamentals. Now as a beginner, you
now understand how to navigate the Photoshop
interface to B properties. By the properties are
options by the layer panel, the member, actually you can
move to the nest lecture. And from there there we
start the principles of flyer and poster
designs from here. After you've
actually watch this, then definitely you would know perfectly how to navigate
and it will help you to. Furthermore, it will
help you towards, to improve your
Photoshop skills. I'll see you in the nest.
4. Layout: This lecture I'm going to teach
you understanding layout. What is layout? Simply, layout is what we call the arrangement of elements
in a particular design, no matter the type of
design you are into. Even it is graphic design, web design, whatever
it is, I, UI, UX design layout is
very important and it's important when you're
talking about layout. Layout is simply the arrangement
of elements in a design. What are these elements? Elements include
text in a design, shapes in a design, images in a design, and any other thing. Okay, I'm going to show
you the practical aspect, but first I need to sketch something for you to
understand perfectly these elements which we
said the arrangements of elements in a well
organized way. Okay? That's what we call lays. These elements are
text, shapes, images, and whatever we have in
that particular design. Okay, We use the designs,
the arrangements. It has been arranged. Well,
layout is good enough. Okay. It will tell a visual story about the
product you're trying to know. You're trying to
make the audience by the targeted audience
of a particular brand. Okay. It will actually tell a visual story of what
you're trying to portray, the type of product
you're trying to sell to people.
Okay, that is it. So that is what you
simply, as I said, layout is the arrangement
of elements in a design. Now I'm going to sketch
something to you for you to be able to understand what layers actually
really mean. Let me just say I have
a line like this. Okay? Just a line. Okay, let me come th that,
Let me just say, okay, I have something like this.
The line is straight. Now we call main image
in a particular, we're actually focusing on
flyer design and post design. Okay. In a particular
flyer we call main image. Sometimes it's not composite. You see all the main
image, text them. Main text is also called
themes composite. See the mine filter. Sometimes you can
just just one image then just probably
one sentence or two sentence of a
particular one sentence or two sentences now. But normally we do
see the main image, the main text,
which is the theme, the minor text, and
what's the D filter? Now I'm going to illustrate
something to you. Just just like
scalting of something. Now let's say for example
we have an image, okay? It depends on how creative
view you learn to be creative. Practice mix, perfection, okay? It depends on how creative view I'm going to show
you the difference. Or you can see the
different practical designs which we're going to design
in this particular tutorial. Okay, I'm going to
show you everything, okay, concerning layouts
and some other ones, like the white space, the focal point balance, repetition and the likes, which is based on design. Everything is actually other, everything is actually
related to what layouts. Okay? But don't
worry, everything is going to be understandable. Now, what do we do? For example,
let's strike structure. Some things we have main image, we can decide what to put
the main image around here. But before that,
the D is important. Also the der can actually be, in most cases the D is the logo of the brand.
The brand logo. Okay. Let's say for example we have the logo
around somewhere. Okay, We have the
logo somewhere around somewhere. The logo is there. We're trying to make
sure. Okay, okay, there is a very big image
that needs to be shown. Okay. Then what do you do?
You try to make sure the main image is
somewhere around there. Okay, Somewhere around there. Okay. You're arranging
it, it's going on. Well, then apart from that, we have what we
call the main text, which is what the thing. Okay, now we have the well arranged and it
should be like what? It should be
proportional to the. You see, it's actually
no, I'm sketching. It might not be perfect
to that extent, but when we get to
practical aspects, you're going to see how it is. Now we have what we
call the main text. As I've said, probably
the main text can actually be
somewhere around there. Okay, not too big, but just something like this. Just as an illustration, you can see the main text. Then we can have what
we call the minor text, somewhere around the, you know, some wordings,
something like that. Apart from that, we
can have, this is the main image around
there is the main text. Minor have some minor images, let me say like one. Let me try to contrate. I want to make sure it is like in proportion
together. Okay? Just something like this
also making it so like, let's say minor images then
on something like this. Okay? So you're going
to make sure that this is a proportion left aligned. This is a proportion
right aligned. Okay? Then try as much
as possible to make sure the amount of space here
within the sentences, okay? Should also be in proportion. Okay? The last which
is what the filter, most times the filter
can be a call to action CTA for people to
buy lots, like in a book. Now, call now, subscribe
now, or something like that. Okay? We can just have the
filter somewhere around. Okay. Let me contrast that, it's not strict enough, you can just have the filter
somewhere around here. You see that? That's just a sketch of how things looks like
in a layout, Okay? It can come in different forms. Even sometimes you might
decide not to put the image, okay, put the image very big up here or
something like that. This is just an illustration. Then let's go into the
practical as we further. We have the main image, the main text, which is what? The theme, the minor text, the header, and what's
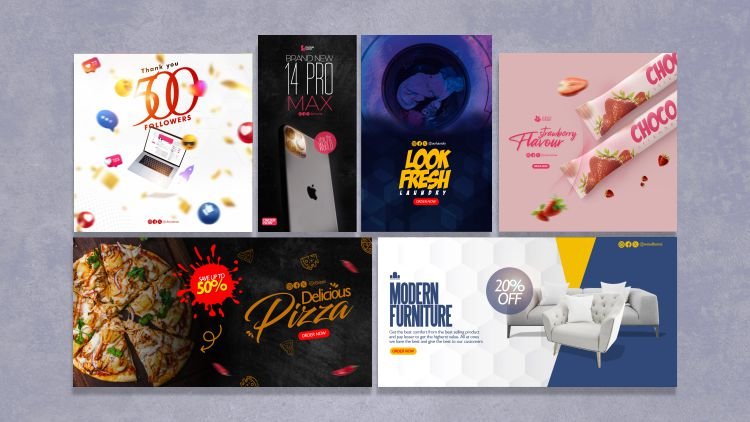
And the footer. Okay, so let's go over here. So, for example, we have
something like this. You can see this is a flyer
and poster design for like a restaurant or a
food brand which actually deals selling
burgers to people. So you can see something like this vying, this
is the main image. It's big and very attractive. It's just that is
the focal point. When we get to the
focal points lecture, you're going to understand that is just like the focal point. This is what we call is what
we call the main image. And there are some other
images there and we have the main text also well
arranged and well structured. This is actually what Med
center aligned, okay? It is well structured. Everything is going on well. We have the call to action,
which is the footer. We have the D, which
is what you can see. We have the D, which
is what the logo. We have the F, which is
what the call to action. Okay. We have the main image, which is this, the main image. Everything here, this
is the main image. We have what's the main text? Also slanted to bring about, just like in a diagonal form
to bring about nice effects. Okay, you can see there
is no minor text there, but that's not a problem,
it's a composite. You see everything here. We have the main
image and we have the minor images that have been blocked to make it
nowhere cool and nice. We have the head phone also, like we made a
particular head phone for a particular
compiner is in tech. Okay, so now we
have the main image which is what's the head phone. Then we have the error which is what's the logo of the
compin of the branch. Then we have the filter. No filter present. Fine, but we have the main text and the minor text.
This is the main text. Yeah. And the minor techno Enjoy the sound, enjoy the word. You can see very
perfect control Z. Apart from that, we have a, this is a particular type of flare we made for
an Agric brand. At make all these you're
going to design all, Don't worry, just be patient. You're going to
design all these in this tutorial in this course. Apart from that,
we have this also, we have the Dan, See it's somewhere here.
It's not compulsory. You put the Da all this
every time at the Med, at the Medius, at the
right hand side, a line. Okay. So apart from that,
we have the main image, which is what is the
structructin image? Okay? We have minor images. Okay? Minor images. Minor images, Okay. We have the main text,
is the main text, okay, Which is the theme and
then the minor text. Okay? Somewhere around. And we have the call to action is contact us
today on the website. Apart from that, we
have some other things like from this brand. Also we have, we have
locates and write. Actually, this is the main
text, okay, the theme. Locate and write.
Okay, the D. Okay? This is the, the footer, okay, The main image which is this, This is the main,
this is the ones are the ones, are the words. The other types of
image that just look, make the design more beautiful. We're going to learn
all this, that's not a problem at all, the patient. Apart from that, this is for a tourism and a travel brand. We have the main image itself
is the background image. You're going to see how
it is being designed. Very simple. That is the background image. Then the main text is this,
that attracts people. Perfect. Apart from that, we have the minor images, something like this play the ones we have the
other, some other texts. Okay. Around here we have
the word the fol ful and what a very perfect come
to the beauty side. Nice. One, golden, golden background we're
going to lend out. We did all this. We have a lot of text here, but the
main text is what? This is the main text.
That is why it's very big. That's when we talk
about hierarchy. We have the D, okay? The era is right here. There is no call to
action at all, okay? It's just the way
the client wants. It's okay. We have
the main image, okay? Then we have the minor images like that have been
blood, things like this. The ones okay. Then apart from that, we have the last one which
is what this design. Okay? So we have this
middle center align, left align, right align. Okay? This is the main image. As we can see, this
is the main image. Okay, the main text. This is the main text. Okay. Which is the theme.
Okay. We have the area. Okay. No footer, fine. But these are some other text. These are some other
texts also then. This is the Colt Action Layouts. That is actually how layout is. You make sure it is being
arranged in a perfect order. You can see from the
sketch you can see, then to the boger, can see
this is the main image, okay, Into the headphone. Into the Greek, into the rider for the
tall campaign beauty. Then that is how
it's meant to be. Just to tell visual story, make it lively to people. Not boring because it's very
important to the clients. It's very important
to targeted audience are targeted with this beautiful design
because you need to tell them a story with their design. A visual design, visual story telling people
layout is very simple. It is. What's the arrangement
of elements in your design? Elements which include
texts, images, symbols, okay, objects, and the wherever there must
be well aligned, must be well arranged. Left aligned, right
aligned, middle align. Whatever alignment you're using, just make it very perfect. That's the end for
this tutorial lecture. Exactly. I'll see you
in the next lecture, which we'll be talking about focal points in
subsequent lectures, talking about white space
alignment, hierarchy, balance, repetition, contrast,
and contrast movement. And you're going to understand better why
we do these things. I'll see you in the next.
5. Focal Point: Tutorial, I'm going to
teach you focal points. What is focal points? Focal points means the
area of dominance. Focal point means
center of interest. It also means points of emphas. What is the focal point here? Here, right now, we have
the focal points as this. Which is which is this? You can also include
this with it. But the real focal
point is what is this? Because that is the area of center of interest
points of emphasyt. A focal point, the design
would be meaningless. It's, as a creative designer, you need to know what image, exactly what text exactly should be the focal points.
Where should it be? It's not composites
in the center, it can be by the left and
sight come over here. This is what the focal points around here. It's very perfect. As I said, without
the focal points, it is going to be meaning less. What is the focal point of this green leaves?
It can be this. Okay? It can be Why? Because the tractor works
on what's on the arid land. This is the arid land.
Those are the focal point. Not just one car, two or three, but mainly it should be one. Okay? You can say, you
can say it's this. Okay, for this course
is the focal point. This is the focal point because we write people
and transport people. This two has actually
captured the minds of people. Come over to what
is the focal point? The focal point is it's all
the background over here. And that is the program
because it's traveling on top. The plain year also. And what's the
pictures year also? Okay. The beauty. What is the focal point, this creme itself? Okay? What is the focal point of home? This is the home,
we're talking about, homes like this,
places like this. Focal point is the area of
dominance, center of interest. You want people to see
first and attract them, for them to stay and continue reading whatever you're saying. Whatever you design point
of Phs where you emphasize, oh, this is what
I'm talking about. It must be one, Must be one. Should be one. This
is okay as it is. You say it's retractor and
a few year, Yes, it's one. Or you can take this as you can take a three year and say, oh, for the horizontal
lines, it should be one. Sometimes can be two form
but fine, it's okay. It should be one. Okay.
It should be one. Yeah. Also it's only one
also in the background. Okay. Without the focal
points, it will be what? The desire will be meaningless. That is it above
four call points. I'll see you in the nest.
6. White space (Negative space): Lecture, I'm going to
teach you white space. White space is also known
as words, negative space. You use white space
as designers. We use white space as
professional designers. We use white space to
make our elements, To make the elements
in a design breathe, you give them space to breathe. For example, you
can see the logo is up here with spaces before, before the out and fresh.
A little space here. Then we have this, Even with all the images
I'm putting here, there are spaces
there for you to, you can see outside. You can see there's
a space. Okay. I'm not bringing the col
to action down here, Okay? I'm making sure that
there is a space and there's a space here also. Apart from that,
come to the head, you can see there's a space
here. There's a space. Space. Space also.
There's a space here. There is a space
here. You're giving the design room
to breathe. Okay? You making it perfect? Even
modern designs are like that. You can see there
is a space here. It's not that you put the green Aggrecan
logo somewhere around there without any space and
making the space very small. See, you can see also this one, that the space is
aligned together. Okay? But we're
going to get there, we get to alignments, okay? Also you can see the space. You can see space, it's
proportioned to get a, can see the space.
See the spacing. It's very important
to the designs. You can see the spacing also. You can see the spacing here. Even if this is not much
you know, but it's okay. See the spacing here
also very perfect. So you need to watch the white space or
the negative space. Okay? As to make it makes
your design perfect. You can see the space here also. You can see very, very perfect. You can see the spaces
here, very perfect. Come over to build one. Okay? You can see also, you can see the spaces here. Okay. You can see, and you can see the spaces not
jump part together. That English is correct.
Sorry for that. Okay. Then also you
can see this also. You can see, you can see that is what white
space talks about. It makes your design
looks nice and very neat and modern for your
elements to breathe. I'll see you in
the next lecture.
7. Alignment: This lecture, I will
be teaching you alignments just from
the word aligns, to make something in
position to position things. It's just related to layout. Okay, fine. But this is
a little bit different. Make sure you
position something. When you say align,
you align to the left, to the center, or to the right. And make sure the
text, the words, the images, the symbols, the elements in general
are what are well aligned. You can see for example,
this is well aligned. It is center aligned. The logo, the maine, the main image, and what
the court action perfect. Center aligned. Come over to. You can see this is also
what's perfectly aligned. You can see perfectly aligned, Perfectly aligned to the words. This is right allied. The
first one is center aligned. This is right aligned for this, this is like we have
the left aligned. We also have the
left aligned bots being aligned on the flyer
in the right alignment area. Okay. But it is left aligned but aligned to the right of what? Of the flyer. It's perfect. And also here you can see this is this is aligned
together with what? This very perfect
also over here, they are aligned together. Okay. You can see making
sure things like this, they are being aligned
together, okay? I purposely made them
different, okay? Bring about more
effects, contrast, okay. Beauty. You can see here as what you see, it's
aligned together. You can see the
logo and this also are aligned together,
very perfect. Also, these awards
are aligned together. Controls aligned together. That's what alignment
actually talks about. It talks about position. As I've said, we have
the left aligned middle. All right align. That's three. But actually recently we
got to know that pop, call it that is the center
aligned and H aligned. So when you say H aligned, it contains the right
alignments and left alignments. Okay, that's it about alignments actually
that I'll see in the
8. Hierarchy: In this lecture,
I'm going to teach you what we call hierarchy. From the word hierarchy, you would have said hierarchy. Position. Like grades,
levels, ranks. When you use hierarchy, you make sure the most
important work is the biggest, more bigger than the
less important words. Text, the most important image is bigger than the
less important ones. That is the simple
meaning of hierarchy. You can see from here that we have art and fresh that
is the most important. I know the call to action
is also important. If they do not understand
the meaning of this, they can come over here to
the call to action, okay? So this is more important. This image is more
important than the other images. That's Ray. Okay? This is what the main image bigger than
all these other ones. Agriculture, Okay? Talking about green
life, Okay, Ray. Because we need
this to make sure. We talk about
mechanized farming. We produce in multiples
and things like that. And also another part
of Iraqis worth having this work showing better
than all these other ones. Okay. And also
going to the right also we have Ich locates, right? Okay. You can see Ich. Okay? Then we have
the smaller ones. Okay? This is the
most important. Here we have the top about
Archy travel and tourism. A people must see
this very fast, faster hierarchy also is used here when we
talk about this, this hotel area, this
particular background image, also beauty, talking about hierarchy, talking
about this image. Then hierarchy go
beyond perfection. Everyone wants to go
beyond perfection. But not everybody
will be perfect. Okay? Nobody can be perfect. Actually, another Archy was by your dream house
with us today. Dreamhuse. Which you've ever
dreamed about. That's it. That's Arch's works.
The most important. Down to what? To
the less important. I'll see you in the next to.
9. Balance: Lecture I'm going to teach
you what balance is. You can see balance
to balance things. It talks about weights. You shouldn't allow
the left align to be like 99% and make the right align just 1%
It can work like that. Actually, Berk
rules of dissemble, just try as much as possible to balance everything
you can see. This is well center
aligned balance. And some images to make it up, we have also balance
to the left. Some images are to
balance everything. We have a Greek,
also very perfect. Everywhere is balanced. The middle, the left,
the right balance, okay? Very balanced. We
have the rider also balanced year balance
coming from year down. Okay? Then balanced
year also, okay? We have this also balanced year everywhere is actually
balanced over balanced. The image balances this up. If it's like that
balance is actually, I need a, it's balance. Actually, don't mind my English. Yeah, it also
balance the middle, the left and the right. That is about balance. Very simple Es.
10. Repetition: This lecture, I will be
teaching you reputation. What is reputation
from that word? You would have understood that
what continuous existence of something for you
to repeat something. And repeating and repeating that is what making
it consistent, it's deals majorly
with color and forts majorly with color and fonts can give
it image also, but actually it's
majorly based on color. And f you can see
this color over here, we use a spicy type of color. All three, we never use
green, blue, black, red. Just make sure it's spicy and reddish in color because
we're talking about food. Okay thing the repetitions about repetition here also the font is called what
is called Monserrat, the chef, which is the fonts for the brand
itself is also at the front. That's repetition. We
are not just changing for any how coming over here, over here we use
still fish fine, but we also use repetition of
humanist and humanist also. Okay? One apart from
the color here, actually the general
color used was green. Okay? We have green. Very light green. A
little lighter green. Okay? Okay, we have
green all true, making sure the repetition to portray that thing
called agriculture. Okay, That's another
thing. That's color. Okay? Now, based on
the space also color, there is repetition of the color which is just like the
color of the brands car. Okay? Repetition of the
brands, fonts also. Which is what Mona Okay, coming over here to Also, there's repetition of
travel and tourism and all the same fonts will
never change anything. That's repetition.
Also also repetition of these colors over here. Also coming to beauty. Also white is just like the
repetition of the color. And also the old font is a
repetition of just one font. Which is what slender, actually coming over here. There's also repetition
of fonts are exactly what human humanist
and also humanist, also the brand low points. It's also human. This is
all of the different ones. This one bearanting is also
the points we used here. Repetition deals with color and also the color green
is a repetition. Also here with
black green mostly, which actually
signifies something very important to the brand. To learn more about color,
the meaning of colors, when we get to color section, that is for repetition
actually as lecture.
11. Contrast: This lecture, I'll be teaching
you what we call contrast. You can see from the
name, actually also contrast the difference
between two things, of three or 456 and
above the thing. Is there a way is a contrast? It works majorly with
colors and also fonts. Okay, when you say
contrast actually it brings about the beauty
of something it shows. It gives very clear
understanding about something. It's try to make us notice
something very fast. You can see there's a
contrast of color here. As you can see the logo
there is something like an orange and a
wine is wine and wine. You don't really notice it to that extent, or
orange and orange. So there's a contrast of color. Country zero. They just
come over here also. There's actually, you
can use a focal point. White, everything. You can use everything
in a particular design. But in most designs, it is well used completely. Okay, so we're talking
about contrast. Okay? Okay, let me check. Okay, let me look around here. Okay. This is also
like a contrast. Also making sure that the green agriculture is white
and logo itself is what? Light green, different
from the color of green are bringing
about contrast. Okay, Then we go to rider. You see over here you can see, you can see this is a contrast
towards, to this color. Very perfect. It makes it
look attractive and real. Okay, zero. Okay, Just come over
here. Also comes to top. Okay? Also, another
contrast which you actually notice is
somewhere here. Come over here. Okay. This is human,
the two is human. But this is a light
for, this is what? Deeper, more bold than, than trip itself than
the forms used for trip. It's also humanized, okay? But the weight is different. That is also contrast
makes your work look nice and beautiful. This is different from, from the very important country. Zero. Then beauty. Also, there's contrast. There's no contrast at all. Actually, just the contrast I can say there is here is what? The size of the funds. One is bigger than the other. Bringing a contrast.
Also also the funds for the logo, brand name. Actually for the brand logo, we have wine color. Then this white, that's
also part of contrast. Also contrast between
two color contrast between two funds,
I'll say in the next.
12. Movement: Let out, teach you
about movements. When you see movement is
the way your design move. The way it flows in
the way your elements, the way it flows in your
design. You can see this. This is just
vertical and this is what diagonal movement actually
is not important, Okay? But just something we
should learn about. This is what diagonal in nature, and this is what vertical in nature depends on how
effective you are. This is what diagonal in nature, This is what vertical
and vertical can say. It's also horizontal. And horizontal, it
happens like that. Come to right also. This is
what's a little bit diagonal. Okay? Then come to top.
Okay. This is what? Diagonal. Diagonal. Okay, And this is what's
horizontal in nature. Then we have beauty
control zero. This is what's left
aligned and it's vertical. Vertical. And there
also is what? Vertical. Okay, let
me say vertical. Horizontal and vertical.
Something like that. So that's what movement
actually talks about. Then we jump to the next nature.
13. Typography, Typefaces and Fonts: This lecture you're going
to understand typography, type face, and what are the exactly different
types of funds we are. Typography in a simple
way means what? The arrangements of text, the way you arrange
text in your design. That's just one thing
where you arrange it, left, align, right, align things like
this where it's been arranged and it's left to you as a creative designer to know how, how you want to arrange it. Also that's typographic,
the arrangements of text. When you talk about type, face and fonts, we'll be
like, what's typography? What type typography? Graphy at the end is
what is the arrangements of forms of text, of types. You can texts types
is the same thing, but when you're talking
about typeface, typeface has been
mistaken for Fts. Typeface means Ft family, so font family means type is
an example of a font family. Let me come over to
wear to this, okay? I want to use the cost, okay? An example of, let me
use the first one, okay? Let's come over then, you'll see the properties. Okay? If in case the
property by isn't showing, just come over to window, then come over what properties? Then you click on this, make sure it is showing,
it's showing perfectly. So this is the first
one over here. This is, this is
humans. Five to be. Let me us on isms and do okay. Okay, Let me change
this to Montserrat. I think Montserrat will go
better ON M Montserrat. Okay. Now, coming over
here, let me say, I choose the first one
saying, okay, now, when you say montserrat, Montserrat is a type
phase that is a family. Fonts, Montserrat. But when you say a font itself, a font itself are
members of a type phase. They are members of
that font family. As I've said, Monsant
is a funds fund. But when you come over here, you click on the options. We have, the different
types of options we have. These are what we call
funds themselves. These are what we
call the real funds. But Mons Font family and the members of the funds
family are we call funds. That is it a fund
family is Mons. Monserraz is also like a family. Font family. And the children, the members of the
family, are called fonts. But the type face itself
is what is called fonts. The type face itself
is called what? Font family, which is on. We
also have humanist, humanik, humanity, but humanist
itself is what is a type. The humanities MD and Lies
are what F font family, being able to get
that perfectly. Actually, it's not composer. Just to understand what
types and font part that we also are what we call
normal or regular fonts. And also Css, for
example, suites. These are normal funds that
you can see perfectly, even looking at this, the costs, it is a normal fund. You can see it's
normal real clearly. But these type of fonts
are called words, costs, different type of fonts that can look different
in different ways. That can co for letter,
second third letter. It's coughing, it's not
straight like this one. These are regular normal for, these are words fund. An example of that is let
say come over normal funds. I use normal funds here. Also normal here. Then the use words make it
look low to bring about, you know, some beauty
in the design. Also, you look at this
pace I use by Cosquens. The other ones I use
was I use normal pons. Ok? Normal type faces, normal font family then using
their normal funds also. So that is it for the
normal and consequences. In the next class,
we're going to be talking in the next tutorial. The next we're going
to be talking about surfer and san ser fronts, okay?
14. Serif and Sans Serif Fonts: In this lecture, I'm going to put you
through the differences between a serif and
sans serif fronts. When you say serifs, serifs are fronts that have
strokes or lines At the edge, at the edges of the letters. Okay? For particular
fronts, for example, O, you can see this
is Lorem Epson. Okay? You can see
a type of stroke. It's not normal like this. Just look, look at the U over. Look at the I, look at the
P. Look at the, look at U. Look at, look at the,
look at the L, L, okay? But this one over here as, as a stroke. As a stroke. Let me just brush
to, sorry, brush. It has some stroke. You can see sharp
strokes, lines. You can see all those lines. Okay? Fonts like this
are called what? They are called
serif fonts. Okay? They are font with
what? With strokes. You can see, you
can see over here. No matter how big
or small it is, it will surely show
strokes. Okay? So apart from that, we also
what we call serif science. It means without. Okay? It's a French word. Okay. Serifs are form that
are strokes that strokes and the strokes at their edges and the lesser science means
without. Definitely. These are for when
they are forms without a stroke at their edges or
without strokes at the edges. You can see very, very perfect. You can just look at this. No stroke, This is not a stroke. This is not a
stroke. You can see the difference stroke, okay? Serif are just like
normal forms, okay? Without any stroke idea edges. Why serifonsre forms with
strokes idea edges. Okay. Another thing we have
to understand between Erfan series that
when using Serifs, it looks classic,
old old fashioned. Actually. Medical magazine
companies, magazine brands, newspapers, the Seri Fun because it came before the
Seri funds, okay? When you want to
design something of the classic age or something
of the old age vintage, retro or something like that, you tend to use serifs nowadays. In a modern time, people use a lot of brands
like Facebook, Okay, Like editors like Twitter, like Ebay, Intel, Mastercard. They use the sensory phones
without those strokes. Sensory strokes doesn't
exist in sensory phones. But we're talking about iphones. Brands like messages,
Ben, they use it. Okay? Brands like Rolex. The thing is that you might
actually be confused. What is now the difference? The difference is that
erophons strokes, why sensory fonts have
stroke at their edges. Okay? The thing is
just that even if it is a classic design design or even if it is
a modern design, there is no funds you can use. There is no problem
using any funds, okay? You can use the spun, you can use the funds, Ell, the two, okay? But the thing is just, it's
been categorized as saying that when you're using a
Serif, it's modernized. If it's old fashion, it's used for fashion
and the like. When using a serif, it's modern because
modern brands use serifs. According to research,
some brands, they changed their brand funds from the to the San Serifs. Okay, Because it looks more than talks about
luxury and the like. So there is no problem
in you mixing the two. That is not a problem.
That's differences between sani fonts and font. I'll see you in
the next lecture.
15. Understanding Colours - Part 1: In this lecture, I'm going
to teach you about color. What I want us to understand
about color, firstly, is that color
affects our emotion. It triggers us to do things, it makes us fall in
love with things. Color is very powerful. It affects emotions. And it speaks a lot about a particular brand
you're designing for. Learning to know what color
fits a particular brand. What is the meaning
of that color? What does the color portray? Everything attached to
it would help you to be a created designer and
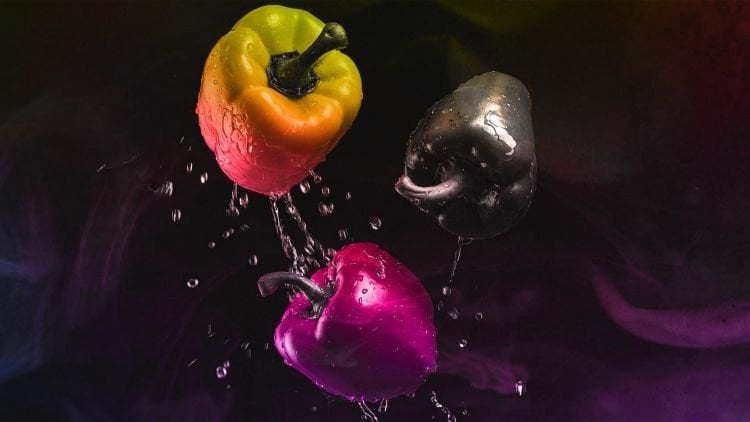
know what is best for you. So now I want to talk about the primary colors
and the secondary colors, and some other colors attached to it for the primary color. Firstly, we have red, Red. You need to understand when you're designing for your brand. Red, Red indicates passion, love, power, energy, appetites. Unger. It also signifies
and indicates danger. Okay? It talks about
appetites and anger. When you're designing
for your brand, just like this, for example, designed for a food brand, you should try to make
sure they are spices. The color should be
red wine color, okay. Not that you can't
add any other color, but make sure orange, yellow, red is part
of the colors. You can see the
way I design this, very perfect to actually
the background color color actually over as some
spicy red color. Let me say reddish color when
we're talking about red. Red talks about appetitks about under talks about it indicates
partial love energy. Okay. That's just one
thing you need to know. Brands that brands, real life brands that uses
red for their own brand. Color is for example,
we have Cocacula. Okay? Talks about
tasty to taste. Okay. That's just one of its, another thing is just add, okay. They have a lot of software
they made for people, like people who have passion for one particular
software or the other things like another brandies talking about Netflix, the color red. Okay. Let's actually,
it's based on, it's a movie brand, let me say movie brand
actually based on movie. Just like STV, we have this type of brand actually shows
different movies for people. People have passion towards, people are energetic towards the type of color
particular brand uses matters a lot and it's
in targeting one's audience. Okay, about another example I can give you
apart from this is another one is the
blue color bloom. Let me just move to
a particular flyer I designed using blue color. Okay. Let me come over here to right. Yeah, somewhere like this. When you use blue color, blue color indicates
and signifies trust, calmness,
security, friendliness. Okay. That's when you
go to an hospital. Okay? People who
perform surgery, what type of surgery
clothes do they wear? The word blue color just to make you feel calm, friendly, Okay? Now, when you design
it for your brand, another thing you
have to understand is brands that deals in, brands that deal in IT, okay? That is in finance that different things that has
to do with security, okay? Their brand logo is
always in blue color, most of them, okay? It companies like
Intel for example. Their brand color is what? Blue. Paypal for
example, Cory Wise. Then brands like Cory Wise which actually is found
in West in Africa. Their brand color is also blue. Blue signifies security,
calmness, friendliness. Okay. Website that
blue includes Twitter. Twitter is an example.
Facebook is an example. As I've said, Paypal also, and Cory Wise, some
other brands like that. They want to trust them, wants to be calm
and want to feel secure about their
brand. That's one thing. Color in a brand, logo color for a
brand says a lot. It's very important.
Apart from that, I think there is another blue. Okay, something like
this. That touch of blue around here. Okay, phone also, there
is a touch of blue in the background whereby I use the color look that
is it for blue. Then the last primary
color which is what? Yellow. You have to understand
that yellow signifies, indicates power,
indicates youthfulness, like to being youthful age. Okay, signifies to be
energetic, vibrant. Okay. It signifies warmness, the color of the sound,
something like that. Brands that uses yellow includes brands like Shell
company, MC, Donut. But actually everything about this yellow is just
talking about power. Being energetic and
vibrant enough. Okay, so that is why yellow is being added to the,
the burger brand. Actually, the restaurant
brands in food. Yellow is being
added to it to bring about vibrant ener, energy. Talking about being energetic. Okay? Power, and
some other things. I think I use yellow here again. Okay. Yes. For this
beauty is power. Okay? We actually tried as much as possible to use
a golden color. Okay? Using a golden color, there is a touch, but there's always a touch of yellow there. Okay? This talk
about being vibrant, being energetic, go
beyond perfection. It's something like being
energetic and being vibrant. Being warm, cool, and nice. In the next lecture,
we're going to be talking about the
secondary colors and some other colors being attached
to the secondary color.
16. Understanding Colours - Part 2: One of the colors we have in the secondary color is green. Green indicates and signifies life, eco, friendliness
environments. Okay. Agriculture,
Uniqueness, power. Also brands that
use green include, number one, we have brands
like Animal Planet. We all know what Animal
Planet actually does, okay? There into animals and the like British Petroleum and real estate companies also. That is why, for example, you see over here, okay,
just come over here. Green, agriculture,
Green all through, just a touch of red, making it look nice. Okay. Apart from that, I have
another one which is, which is talking about what? Real estate? Because it talks
about Echoing Echo Friend. It talks about environment. This is one thing we should
actually understand. Apart from that, we have purple. Purple is used for
luxury royalty wisdom. It indicates innovation. Okay. It's actually,
it's clothes like purple was won by worthy
people in the ordinary. You see brands using pop for the brand
logo, for the brand. Actually we have orange,
energetical, being playful. Okay, Black. Also black is
used by luxury companies. Companies like for example, we have modern
companies using black, like Gucci, for example, in their logo and Calvin Klein as black, their brand logo. Apart we have white. White actually talks
about being careful, holistic and economic and
the like, things like that. It's white and black and
gold is mostly used and also gray in some ways is
mostly used by companies, world brands that try to
seclude themselves and stand out from their competitors using the normal colors we know. Okay. So that is actually
it's for the secondary color. Actually, it's, it's not
much to that extent. Okay. That is it. I'll see you in
the next lecture, but with a few explanation on the primary and
secondary color. And what brand uses this,
what brand uses that. Okay? You can see actually
using red and yellow, using blue right here. This is a reflection
of the lights that brings about
the green color. Okay, great green all
through the touch of blue. Then blue talking about transport logistic
company talking about security and being trustworthy. This talks about Blue also
being trustworthy, okay, trusting the troop brand
to take people to and fro, whereby they would lose their
money or something like that in a way whereby they
are going to fraud them. Okay? The beauty, talking about yellow, vibrant gold, Okay? Talking about red, also pink color, something
like that, okay? Bringing about love,
okay. Passion, okay? Are also talking about green environments and eco,
friendliness and the like. That is it for colors. When we get to the
practical aspect, we're going to use the
colors perfectly and very, very well, efficiently
and effectively. I'll see you in
the next tutorial.
17. Food Brand Flyer & Poster design - Part 1: In this lecture I'm going
to put you through, this is the beginning
of the design, the practical
aspect of designing a flyer and a poster
for different clients. Now just come over, click on New File, Okay. When you click on New file, what happens when you click
on New file? What happens? This pops up. You can try to use any custom
paper you want. Like recent saved for photos. Okay. We have different sizes, okay, for prints, for illustration,
web, mobile film, and so it depends, but majorly, when you're designing a
poster or a flyer flyer, naturally we use a four. Sorry, we use five. But some flyers, you can use a four if it is recommended
by the client. Okay. So you can use 45.
You can use any of the. 0123456. Okay. So fights a flyer and
depending on the client. So all through the tutorial
I'm going to be using a four is well known
by people four, it is different from the ten
by ten social media flyer. Okay. But this can also be, can be used for a social flyer. Okay. But I'm going
to be using a four, so you can see a four or recent. Actually recently this four. When you click on four, then just come over here
as an custom paper. Any paper you click on, it will give you the
size immediately. This is the size in millimeters, but even changing 2 ", which is mostly mostly
known as inches by 11 okay? Or by 12 approximately. Okay. Let's say nine by 12
then approximately. Okay, so you can make it like landscape or portray,
just leave it as portray. That is it RGB color,
Leave it like that. Eight bits, leave it like that. Leave this alone. Resolution
300, leave it like that. This is white, Leave it. So you can change the paper to black but just leave it.
That's for the canvas. Just livid weight is
and every other thing here share just livid
weight is okay. So you can use inches,
centimeter, millimeter. But I just prefer using inches because I'm more used
to using inches. So it's not a problem you
using any measurement. Just getting everything
right now, what do you do? You click on Create. Now we already. So the first thing you
do, this is the canvas. The first thing you do is
what? You click onwards. You click on the lock icon
to make it words lock. Otherwise you wouldn't be
able to move your paper. Just click old and
drag you convert to normal layer if you read the current selected
layer in the background. So you cannot move
a background layer, just what do you do? The first background is
always logged in Photoshop. What do you do? You unlock
the one click old and old, and you can see, you can see that is
it Just contrast it, I'm going to be using
short cuts very much, well shortcuts on my keyboard. Very much, very much
in my tutorial. And also I wanted to
notice something. Look at the side,
look over here, look at the side over here. You can see I have a
particular over here, you would see anything I
click on my mouth left, right, Do or anything I press on my keyboard
Shows you now. Okay, I'm present control now on my keyboard.
You can see it. Okay, I'm present
escape right now. Right now. Okay, escape
is not really showing. Okay. But control shifts, you can see out, that's out. I pressed out, that was
where this pop up out. You can see out, you
can see it's showing okay for my mouse left, you can see left click
right showing the left. This is left click, left click. And you can see right
click then scroll. I'm using the wheel,
the scroll up down. Whatever I do actually using the mouse and the
keyboard it shows here, it will help you to
be able to follow along Whatever I'm
doing in this to toll video in this cose just even if I forgot to see a particular key or
something like that, you would see it's pop up here. So let's move on now. This unlock the layer already, so it's very easy
for me to know. Click, hold and drag. Okay. Just press contra, you
can see countryside, you can see good. Now we're designing for a
restaurant or let me say a brand that produces that
sell burger to people. Let's begin. First, actually take
away the lock icon, make the background
unlock the layer. Fine. Go come over
to file To open, we need the source files
now. Come here to download. Okay, which you downloaded
the resource file from the link produced in the lecture titled Download
the resource file. This is it. You double click. Come over to project files, then we have this. Where do we start? What I'm
going to do here is that The burger design. For
the burger design, all the images that
has the alphabet. As for the, it's for
the burger design. The net design we're
designing is this, okay? For a brand company.
Okay. It's for the B. Okay. Then all and on that the alphabet talks about
a particular design of, a particular flyer poster design for a particular
brand like this, for example, is for
a particular brand also like this. Okay? D is for a particular brand. For this all through one towards a nine is
for the burger design. For the brand I'm going to
pick in the pictures one by one or I can try pick
it together at once, but I want to be well
structured and well organized. I'm going to pick the pictures one by one. I click on this. Then there is nothing bad
in you coming outside, the coming to file and
importing the images from the O file somewhere. But you can just come over here to do then. Why
is it going back? Downloads, Photoshop,
like the source file. Downloaded project files,
then click on this. Down, Open. When you
open it doesn't. You can see it's open. Here it is, a new
document entirely. This is the document
we are working on. This is documents I
just opened just now. Okay. So I need to take import
this into this document. Whenever you open a
new image or an image, you want to use a new image or an image you
want to use. Okay. What happens? It opens a
new document for it, okay? But if you are
importing from here, it's not going to
open a new document. But I want it like this. Don't worry, that's
not a problem. This is the blank page. This is the four. This is for the poster and
for the flyer. Okay. Just come over here. What do you do? You can
click old and drag, but you don't respond. Why? Because this is
the layer is locked. You unlock. What do you do? You click, click old. You can see here it's click, click and it's show you click. Then you can see it's
showing right here. You can see all this right here. You click old. And what? Drag this image, Drag
it to this place, okay? To this new document
you can see. Then bring it down
into this place. Then you drop, I've
not dropped it. Okay. You can see the plus. You can see under the cursor, we have a plus in square. Okay, then you drop it. You can see it's here. And also it remains here. It's like copied
and pasted there. It didn't cut. What do you do? You can close this one.
We don't need it again. Just press just select. Okay, now we have this. This was the background before. And now what is this? We
have another image here. What do we do? As I've said, I'll be using shortcut. Very, very much open, press out, then use the middlemuse
button to, to scroll out. We can zoom in and zoom
out in different ways. We can press control
and control plus zero, control plus zero
on your keyboard. Pressing on control.
Right now you can see, you can see there, I'm pressing control right now. The press on zero,
press on control. The press in order to zoom
in When you press control, then you press on plus, You press on control
and on control, then you press plus 123,
any amount to words. Then to zoom out, you press press minus. That is, you're still
control pressing minus, but I don't use that often. There is another thing I
use, press on control. The press, it's fit to screen immediately no
matter how far it is. Okay? You're pressing
contra controls minus. Press control plus
zero. Okay. Very fast. Instead of pressing contro plus, plus, plus, plus, plus, No, you can contra plus
zero from its goes. Okay? Instead of using control plus plus or minus,
what do I use? I press on Out.
Okay. I old the out. Then use my middle mouse button, the scroll the wheel
and I scroll out. Then scroll in whatever
I want to scroll out. It depends, les course depends on where you
put the corsorf. The cursor is present. Al scroll in. It's
going to scroll, it's going to zoom where? Where the corsory. Perfect. Even if it's down here, you put a corsor
present, old scroll in. It zooms wherever
you want it to be. It's more better, faster and efficient than the control
plus, minus control. Plus, plus control. Okay. It's very perfect. Control plus fine. Okay. Now, what do we do? I want to adjust this
particular design. This particular design. To adjust it, what do I do? You present what control you can see when
I present contra. Happens. It shows
these guidelines. Okay, for me to be able to edit and change and
do some things. Even I can write. Click on it as it is now and you see more properties showing
why don't need them. Now what do you do? You can see this corsor. When I move it to this edge, it changes to what's like a diagonal slant arrow
that moves up and down. That, that moves up and
down, but it's slant. For it to be able to click odd, you can actually bring
your cos outside. When you bring your cors
outside, what happens? It changes to something like a turn around arrow. Then what? You click Old. Okay. The left mouse button. You click old and what? And drag. Okay. Sorry. Click old and w and drag something like
this in the background, looks something like
something creamy. And we're talking about burger, something delicious
and yummy, spicy. Okay, so I don't want
to be just like this. I want to know the
diagona to curve, to be slant, okay? Something like this is perfect. So when you're
through with that, you don't do anything else. You need to follow the rules. What do you do? You check. If you do not check, there are some things
you will do that once. Um, the program will respond to. What do you do now? You
check, check, very perfect. When you check, just make sure you most times try as much as possible to whenever you
select anything yet, try as much as possible to
always go back towards, go back to the move tool because that is the
beginning of all tools. Now we have this just
present contra zero. Just make sure you select this. It's selected. Any layer you are
dealing with should be selected whenever
you're having mistakes, making mistakes, you're
trying to select, trying to do some things
and it's not working. Definitely come over here. Check, look at the
layer you've selected. Check, check the layers. Check if you've selected the layer you want to
what you want to move. Otherwise it doesn't
move. This is an example. I've selected this
layer, then I try to click old and what's
old and drag. Okay. Press and contras to undo. Okay. But I click on this
layer and what's and drag? I click here because
the layer is wind, but it's not working. It's only taking this
layer. This layer, why? Because it's selected. If you want to drag this
layer, you need to select it. Then click Old. And
what's and drag? You can see click old and drag. It's not affecting
this upper layer. Not affecting this,
because what? I didn't select it. Let me press contras.
Another thing you should, apart from contras, if you've done it too
much or like you, okay, there's a mistake. Contra, just come back to edit. Okay, come back to edit. And what redo
transformation that was contra un shifts plus
contra is what Red. Then we have this.
Okay. Now when it is very important
to understand this, there's something we
call auto select. Okay? I didn't check
it for reasons, I make sure it's not checked, it's not check, Now
I'm checking it. Why? Because I make sure anything I select is
the only thing moving. You can see it's
moving even when I come outside here,
not in the canvas. When I come outside and
click old and drag, it selects it because the
auto select is not there. That is, I select manually, not auto okay, but okay. Another example is when
I click on this layer, this layer click old
and drag, right? But when I come over here, this is another layer. I didn't select it. It is the layer I selected that will
respond to the movement. Now this layer digs this layer. Then I click on this layer
old and drug what apples. It's not working, only the
layer I selected is working. It's very, very important to know usefulness of
unchecking the auto select. But when you check the
auto select, what happens? No matter the layer you select, it is not going to respond. It depends on the canvas. Now, I'm selecting this layer. Look at this.
Selecting this layer. Okay, I set this layer. Don't forget, we're
not checking. We checked the auto select. Okay, I've checked this layer, now this layer is checked, fine. It is checked. This layer is selected, sorry. It is selected and this
is checked over here. Okay, so what do we do now? I click on this. What about if I click on this?
What happens? Would it be selected? Would it work out? Yeah, sure it would. Click drag, which is
not supposed to be. Click and drag this. Click and drag this. But I don't like it because
sometimes you want to move something and you
mistakenly move something else. Let's check it and
see what happens. Now I've selected the
background, the white one. Then when I click on this
to select what happens, it isn't selecting only what
I selected here is working. I would advise check this. Whatever you select here
can only be selected, even if you try to click year old and drag on
the selected what? Only the selected layer
will be selected. Control it. Let's go back. Class. So now I have this. I've selected this. This is it. Okay, fine. Okay, nice one. There is something I
want to do whereby all these edges would be
what would fade away. And I'm going to blend this background with the
background white background. I'm going to blend
this image with a white background that I'm going to blend this
background with. What's with this background? I'm going to blend
this image with this background. Sorry for that. I'm going to blend this
image with this background. How do I go about it? Good. There is something
we call layer mask. Okay, there is something we
call layer mask in Photoshop. Very perfect layer
mask helps you to make a whole layer invisible
or make it invisible, or make an area of a layer visible and make
the other parts invisible. Okay, layer Matt does that. It is what we call non
destructive design. Without you
destroying the design whenever I want to go back. For example, this space
has been asphe away's. It's now interacting with
the other layer on under, with the up of layer mask. And you don't want
it again? Oh no. I want to go back to
what I did before using contra to an
extent the layer mask. Just switch the layer mask, then you get whatever
you want back. So I want to teach you that
now. Click on this layer. Click on this layer because I want to apply the layer
mask on this layer. It's very important
to understand something or whatever
you want to do. Try select a layer. It is only on that layer that the layer mask
will be effective. Photoshop is very sensitive. Whatever command you
give to the selection, it is only that selected layer. The effects will affect.
Let me say it like that. Let's go click on
the Select That. Then what? Select
the layer mask. Now layer mask is
being selected. Layer mask is much designers
use layer mask a lot. Thereby things you imagine. It comes from the layer mask hiding some parts and
making some parts visible. I actually use it, I used
it a lot in this course. Also need to understand
what it is exactly. The rule is that
whenever you want to do anything on the layer
mask, it must be selected. Look at the, the four
white outline here. When you select this and
you're trying to use the layer mask, it
doesn't respond. It's very important to know that because this
is the image itself. Layer mask is an
additional effect when you're using
the layer mask. Don't forget you
select the layer mask. That's number one. Number two. Number two, talking about
the layer mask again. Okay, whenever you see a white, when there is a white
color in the layer mask, it means that part is visible. But when you see the layer
mask as being black, it means that mask, that part, that area
of the image is what? Invisible can't be
seen by people. But you know what you did
to it to make it unseen. You know why you did that. But you can see it here. But you can see it
actually somewhere here. You can see here, Okay, sorry, sorry for that. You can see what
you did over here. But on the canvas,
it's not gone. It's it can't be seen. It can be seen on the
canvas. So, what happens? How does it work? We use
the up of the brush tool. You select the brush
tool, this is it. And the shortcut for
the brush tool is what? You can see, the shortcut
here, the shock. You can see the shortcut for the brush is what brush
is very much like. Wall used to paint, to select areas to
use on layer mask. Like when you are using layer
mask, use the brush tool. Probably the icon for your brush tool is something
like this. See how it is? The reason why is that
your caps lock is on, press your caps
lock to make it up, then you have it back like this. If you press it like this, if the capslock is on, it's the icon shows like this. And it's actually works
the way you want to work. Okay, but let's be
on the same pace and make sure your caps lock
is on. It's like this. It depends. Now, you can increase the brush
size the way you want. You can increase or decrease, increase or decrease
the brush size. Like you can come over
here, we can actually, you can see size 29, you can see that. You can see what is happening.
It's very, very tiny. That is why it's like
that. You can see 95, you can see 168. You can see it's increasing
then to the highest, the atness of the brush, it's 2% Most times
when you're design, you don't want the brush to
be very hard. What do you do? You try to make it even to
the lowest 00 that's perfect. But short cut you can use, which I use shortcuts
most of very often is that you press on out because I can just come
over here and start changing. The shortcut is very
fast and help me, you just press on out. Okay? Press an old out. Okay. The costal would
actually change somehow. Okay? But make sure you're
not selecting this layer. You're selecting this rectangle. You're selecting this rectangle. Press on Out when
you press on out. It is not your
left mouse button. You're going to use, it is
not your middle mouse button, you're going to use it is your
word, right mouse button. Okay. The first command
is word, press on out, you hold it, then you press
on your right mouse button. You press hold it, you can see diameter
4,400.58 p x an zero opacity nine 5% The diameter is the
size you can see. I'm holding my out and I'm
holding my right mouse button. That is the way we are
going to actue we want. Now hold it, the word drag
to the right or to the left. When you drag to the
right, it increases it. You can see when you drag
to the left, what happens? It decreases it.
You can see very perfect when you want to make
it like the addness, okay? When you drag it up, the ads, when you drag it up,
the Agnes reduces. When you drag it
down, the addness increases. Just make it zero. The main I'm trying to teach
here is that the release, the keyboard and mouse
have released them, okay? Okay, zing odds and the
middle mouse button matriz, it's out in the size,
very, very easy. Just press on odds.
Then what's left? Your right mouse button, click, hold, and what drag To
the right, to the left. To the right, to the left. I'm going to be
using very much of, in this case, that is it. Now after that, we need to understand that when
you're using the layer mask. When using the layer mask, now we have the brush.
Okay, Control zero. Now we have the
brush. Okay? In order to achieve whatever
I want to achieve. You can remember I said, when the layer is white, when this rectangle is white, that is, it is visible. When it is black, it's, it's invisible when
the layer is mask. You can expect us to paint when the layer here
is mask rectangle. The layer mask here,
it's white can mean the ector
click, it is white. You can't pet paint white on it. We need to paint
what under color. This is what? Black.
When it's black, you can't pet black on it. We need to paint white on it. You understand that is
when this space is white, you paint black on it. When the dian is black,
paint white on it. Now this is the brush,
this layer mask. Where do we select colors? Come over here, We call
this the ground color. We call this word, this
is foreground color. You can see it shows
the color picker. Okay. And this is what
the foreground color. The background color
around color is white. You can see background
color over here is white. Then what's the
foreground color? You can see foreground
color is black. Even if the color is
something like red now or something like
blue or something. Let me select this image. The color is like this color. You can see I'm changing
the color here. Even if it's like that, whenever you press on this layer mask, it changes it towards gray. It tells you can use that gray. Okay, the best thing
you should do, go back towards the default. And using the default, when you want to
use a layer mask, make sure you press
on this fault, which is what the default
when you press on this fot, it goes back towards
black and white shortcut, that is D, You press on D, then this is white. Whenever you're painting,
it is whatever is on the foreground
color that shows, okay, That is responding
to this rectangle. Whatever is on the
background color doesn't respond at all except
what you switch it. This is the switching.
You press switching, the shortcut is X. You can see I'm pressing on X. You can see here you
can see it's changing X. I'm switching,
switching. What happens? This is white, foreground, color is white, it won't work
out, nothing would happen. See, let me click, drag. You can see painting here. Nothing, nothing is happening. What do we do? We
switch present the X, or you come over, present
the X. Then what? The foreground
color is now black. Then we have white. It must
be opposite white and black. Okay? And if this
place is black, you change foreground
color to place is black. You change foreground
color toward, to white. But this is white. Okay. We
have to paint black on it. What do I do? Let's begin. We have everything set now. Click, You can click on, you can see you can click once. You can click on, but
it's going to take time. You click most times, you click old and drag. You can see, you can see that you click the
edges must go. Because what I want to blend, you can see very perfect. We have it already. We have it now. What is the next thing I want to come over to come
over to the move, press on, on the O out, then control, then
come over here, not using the rotating, just come over here, click, drag the left mouse button. The reason I did this
is that I want it to be what's in proportion together if I was not holding the out. Let me release it if I was
not already Will happen, only one side would be increasing
and I don't want that. I want everything to increase
at the same time and decrease at the same time.
Press on this present. Then what increases? You can come over,
I've released it. Come over a click
here, old drag. You can see it looks creamy. So I decided to make it all. Let it be like that, let it maintain the way it is. Then you press, you check
it, then control zero. You can see very perfect
when as we're moving on, you see how things are changing. Now we move to the Boger. Press on file, then open. Okay, now the Boger, We're through it one then now
two. So now we have this. As usual, it's opening
a new document. This document we're working on this document for the bugger. Click and drag and drop it here. As usual, we can delete this.
We don't need it anymore. What we do, we press on the use the Minimize
button, then scroll out. Then after scrolling out, scroll out very far, the words. Press on Control. Make
sure this is selected. Make sure this
layer is selected. Not this, not this, but this. Okay? Control C. Then we go to Go, so we can out. Then zoom in. Okay. Then click here, nothing is showing, right?
Then just click in this. Just click anywhere
around you, just click. Okay. Now click Old and Drug, present the odd sky. Click Old drug,
present the odd sky. Okay, we have that.
Okay. Then control zero. Just see what you're
doing perfectly. Just try to make sure what
you're doing is correct. It shouldn't come down too much, it should be somewhere
around here. Okay. Then click O and
drug. Try to reduce. Then you check
this very perfect. So you can see the
tridangle like you know the edges
we need to do what? We need to make it interact. We need to make it
interact and relates blend with the other backgrounds. Okay, so what do we do? You already know we do what? We make a layer
mask very perfect. But before that, let's see
how, let's see how it is. I think it's more
okay, like this. It's fine. Okay, because there will be a call to
action underneath here. We need to make sure
it's code. It's okay. Then don't forget, you're
selecting on this, selecting a layer masking, a third layer mask, no
contrast. What do you do? You select this layer. On what? Select the layer mask. And we're good to go now.
What's the next thing? The next step is what brush to, you can press on the,
on the keyboard. So we have that this place is white and this is,
this is black. For example, let's switch,
this is white and white. Let's start painting.
What happens? Nothing happens. What do you do? You're
making a mistake. Then what do you do? You
make sure it's black. Then click, then drag. You can see it's working out. Then nice, it's all gone. It's blending. It might look somewhere right
now, but don't worry. When I apply effects to it, you will see what happens. You can clean it more. You can click, when you click old drag mistakenly cleaning
something, what happened? You can correct it. There is no need for you to
start pressing count. It's a long process.
What do you do? We use the black on the white, we now have some black. Okay, The white
areas are visible. You can see like an X over here. Okay, It was what I did here. You can see, what do you do? Switch this back
toward to white. Press the X on your keyboard, to white, now white. So the white is going to be applied to the black areas here, it's coming back to live. You can see very simple, easy. Okay, let's try that again. You present up X. You try mistakenly
what happened, then you switch to X,
back again. What happens? You clean this
away. Very simple. Just make sure
it's clear to see. Let's make sure
everywhere. You make it everywhere,
very clear to see. This is very easy, just that you practice
to be very perfect. You can see there is
black around here. The white areas only showing
which is the burger. Okay, The black areas
are which are the edges. So let me change this to black. Let me call some places more. I should make any mistake
of erasing some parts. If I erase it, then
change it to white, then make it visible back. That is the second process. What is the next thing to do? The next thing to do what? Let's add some spiky
color to the design. We have that. How do we
do that? Don't worry. My layers, I'm going
to group them in a way it would look
well structured, well organized, and very neat. Because I love to make
my designs very neat. I'm going to teach you that.
That is not a problem. Okay? You click on this, because whenever you click
on this or click on this, an adjustment layer
is somewhere. This icon keeps the
adjustment layers okay. When you click on an
adjustment layer example, when you select
on this, whenever you want to select
an adjustment layer, for example, vibrance, it appears above
where you selected. You have to be very
careful control, I want the adjustment
layer I'm about to select to be on
top of layer two. Okay. On top of what? On top of layer two. Actually, you can try
as much as possible to the words to change the
name of this layer. This is Amber, the layer for
the amberger. You can see. You can make it invisible. You can make it visible. Make it invisible, visible. Then you can try
double click on this. You see the select the double click on
this and what burger? Then enter. Okay. You can say this is the
background. Okay. Double click on it,
The background. Okay. You can double kicks and just say something
like creamy creamy. And you could go, it will
help you know which layer is, which image is in this layer, is on this layer,
Something like that. Now, just select this because I want the new adjustment layer. I want to use to be on top
of what of this layer. Then come over here, something
we call color lookup. I'm going to be using it
many times in this course, the other adjustment
layers we can use. But this is very,
very much perfect because it is installed, a lot of things are
installed in it. Press on what color lookup. Then you can see
it's pops up here. Another thing you
have to understand is that just click this. Another thing you have to understand is that
this is what we call the property window. Okay? Bus is not here. For example, let me
right click, okay. For example, let me click and drag it out, then cancel it. Vous is not appearing
here, okay? For example, like I need
something and it's not appearing until you double
click or something here. Let me close this. Just come over to windows, okay, window. Then what? Come
over to properties? You can see the ones
checked layer checked. That's why you have
the layers here. Color is checked, that
you have the colors here. Okay? But properties is not checked because
it's not here. Present what properties then. This is it right here, right? Then what do you do if your
own appears like this? Try to come over.
Just click hold and drag it till you
see a blue outline. When you drop it
here, it's going to be big, but I don't
want it here. I want to very small, you can see the
small blue outline. Then you drop. Okay, you drop. Then whenever you need a
property for a particular layer, just click on this layer. Then click here,
show its property. Click on this layer,
it's Property shoes. Click on this layer,
it's Property Issues. For the color lookup, click here, It's Property shoes. Okay, then don't forget, this is the layer must every. And it's important to know that every adjustment layer
comes with a layer mask. You can see the layer mask. Every adjustment layer
comes with a layer mask. Okay. So you need to make
sure you select this itself. This is the color lo,
color lookup itself. Then select, you can see it's changing when selected
layer mask, what happens? Look at what's brought, When this happens, look at it. You can change it also. This is normal color lookup.
This is the layer mask. This is the normal color lookup. Select this. What do we select? We select the crips warm. Okay, I want to make this
background very warm. I want to give warm look
the press nice one. That is one reason
why you should be able to know how to use
the adjustment layers. Let me make this invisible and
you can see what happened. You can see very rough
when I did this. You can see shining and perfect. Apart from that, I want to
use another color look up. This is a color
lookup on the car. Then you select this, it
should be above this. Then come over here. Then what color? Look up again. Then under Color, Look
up, it's already. Click on this, then
come over here. What I love most, the late
sun sets, very perfect. You can see the
changes just collapse. You can see from this, from this to what to this. You can see that perfect. I want to add something. This creamy background,
I want to make it increase more to be able
to cover the background. Able to cover the
back background. Let me say like that
to S. Press on, then use the minimal
button to like zoe out, then press on this
creamier control C. Then try to click old. Bring something like this. Very, very perfect, good. Yes. Then then control zero. Very, very perfect,
the creamy stop. So click move to, then try to adjust
a little bit of, Let me use navigation
here, Okay. Control C. Then a little
bit, little bit nice. One D, I'm just getting
old and dragging. I'm not using old at all. Okay. You can just click
around the control zero. Okay? So click, you can click
at least just strike to. Okay. Okay. Not
satisfied with that. Okay. Click Old and drug Use the out you can
without using out, just okay, good control zero. You can click and
move a little bit. Yeah, that's perfect enough so for the second color look up, I can try to just reduce
it a little bits. Okay. I think it's 100% like this. I can reduce it a little bits. Two bits, okay? It's still
going to show the warmness. Okay. Going to show the
warmness or I should just make it very
little color. Look up. Okay. Can help a lot
with the design. That's very perfect
for the Boger. Let me reduce it a little bit. Come over a little bit down. That's nice. Now, what
is the next thing? Floors to write the text on it. What type of text? Just come click this is the text to When
you click the text to what happens, the
property is here. It will show it's the text to. You've selected
this play, that is the text to will come over here. I don't want it to be elected. Click here, select here, so that the text will come
over the color look up. But before I go
there, press move to Group everything here
as background, okay? Just listen for, make this
invisible and invisible. Okay. Click, you can see. You see when we added a
little bit of effect, you can see how it's
changed. Then what? The color. Lookup.
Perfect. See, perfect. Group this. I'm going
to select this. Press control, select this, select this, select this, and select this. Then what? Then I can press Control.
Press and control. Okay. Very fast shortcuts
or you can write. Click, then come over it. Words group from layers. But before I do that, instead
of me pressing and present, holding on controls,
phrases, phrases. There's another way I can do it. So I want to group
everything here together. What do I do? I press only one. I select only one, press Shift, then come to the last place, still present, and
Shift, then select this. Then it takes everything. It selects everything from the first points to the
set to the last point. What do I do? I can click then from layers,
what do I call it? I call everything background,
Mistake background. Then we have this aspect ground. So you can write, click here, the change the color
to something like red. To make it dictates
different change to blue. Change to green if you like, but I don't want to any color. Okay. The name is okay for
me when you select this. The next thing coming
up should be what? Select text to come over here is why we want to write
the text. Then click. When you click this
appears it is N L, if that is what's even in web
design and graphic design anywhere actually it's very
well known being selected, then you can type whatever
you want to type. But before that, you
can actually come over then select this
18. Food Brand Flyer & Poster design - Part 2: The next thing is what's
the logo for the brand? Very nice. Comp
over here to open. Now this is the logo. Then open, very per click. I think this one. Stay
there to just delete. Click, click words and
drag here, perfect. You can see, you can
see it's going up. You click and drag it up. You can see the particle
and ten straight and very perps a little bit
up, not so much. Fine out. Then scroll in in with
the middle mouse, but in. Okay, so now what happens then The text to then click okay. So what's the name of the
restaurant or the brand? The name is what? The chef. Chef. Okay, good. So click check, move to, then come over here, then go to Properties. Properties. Then what do you do? The color should maintain it. So then I think I should change. This is too tiny
for me, too bold. I'm going to reduce the
size to let me size to eight, that's too small. Let me just bring
Tan in the middle. Middle, like this. Okay. This
is not even in the middle. What's happening?
This is the middle. Exactly the Save this also. Nice one. Let me change it
to something like around 16. I think that is
perfectly around 14. We bring this here down
to bit, let me zoom in. Click and that's control zero. That's very perfect. I think it's two beach. Yes, think so. Let me click here. Then click the control,
or your right click. Then you can double click and
change it to words brand, brand, then control
C then click. Try to reduce it into. Let me download to go to
Control. Very perfect. I'm going to add a flare lights. Okay. So the design most
especially the circle, the zero, the letter
to make it shine. Right? I'll come over
here to open five, open, then go down. That is where the lights is. Anytime I need the
lights just go down. That's, that's the last image. Then open. Okay, we have this, then
click O D, then drop. What is this? Just
come over here to what we call the blend
mode, which is normal. You can see the click
when you start dragging. You can see dragging down. Wow, this happens. Effect, very nice. Perfect. Going. Very nice. Perfect, nice. But then all need what? Screams, then click, oder, drag it to the middle.
What do you do? You use press on, Zoom out. What do you do you control? I think it's what do you do? You try to reduce,
it's malfunctioning. Try reduced, make sure
it is in the sale. Click and drag it. Okay. Then contra are perfect. I love it like
this. It's a thing that you can actually control. Again, try to increase
it to be able to capture a very high range. All you try to do this, this capture a very large area. So click Old Day, I think that's okay.
Oh, it's too much. I think it's okay. Like this and it's
perfect enough. It's perfect enough
now contra just look at it from the before
and what's the after? Perfect. What is the next thing? This should be on
top every time. Let's group it. It
should be group, Just write them from layers. There is what light
see it is collapse. That's why it is expanded. That's why just what collapses only the lights in the group. I just wanted to be
structures so well organized. It's going to be
very neat like this. I noticed something that I need to change the Prem aspects. It's Yeah, should be showing
down right here. So, what do I do Control? Okay, increase this. Try to try to bring
this up a little bit. The creamy stuff
should be down there. So good, very perfect. So, yes, should be down there. I noticed that I have to pay good attention to
this fast controls. You can see the creamy
stuff is down here. It's, that is actually what we want the
efforts to look like. Clip and drag a little bit. He very, very perfect, nice and creamy.
Nice and creamy. We need to add
much more effects. Let me call up this back. Okay, nice. And much more effects
need to be added. What is the next thing?
The first, just come over. The first thing to do
is add the leaves. What do we do? What do
you mean by leaves open? You have the first 1 second. Add them one by
one, first second. Actually, make them
well arranged. Okay. This will be last. You arrange this open, then you click, drag the nice. Make sure you close this.
No, we don't need you. The shape closes. No,
we don't need you. Shape closes. No, we
don't need you anymore. It remains one. What do you do?
You click on this. Then control C on zoom out
the Medium House button. Then what is happening in
Sunshine? Just click here. Sh, click Old Drive O, nice one. Okay. Just, let's move
it up a little bit. Up a little bit.
Little little bits. Okay. It's actually fun. Okay? Okay. Can. Okay, so what do we do? We need to add some
blow, some motion, blow some Gaussian blow, that will make it look
very much realistic. Okay, Another thing you can
do is just come here, sorry. Come here to text, okay. Click on the Fresh
out and fresh, just go to the text to
then click Click here. Then you can use the space ban, make sure it's space okay
in order to make the sorry, this layer believe
layer to show come over to move to then
something like this. Okay, that's exactly
how I did that. That's exactly how I'm doing it. Okay, so that's it. That's very perfect. Okay, So to look good because the space
need to be there for, for the leaves to breathe.
Something like that. So click, hold and
drag a little bit. Okay, a little bit up. Okay, that's perfect. Then you can use the arrow, the dump just to bring a little bit down
arrow on the keyboard. You can see moving a little bit, downing the to bit up. Okay. Depends on you. Then to the right, that's nice. Let me collapse to.
What do we do now? We need to use the filter. When you want to use the filter, what happens, don't just go straight to the
futert the future. You change that layer to a layer to a smart convert
to smart object. Reason is that if there is any mistake you've made
the f what happens? You can go back easily, come back and
change it and edit. But for Adventure, you
made a mistake and you didn't use the smart
object. What happens? You need to use contra, sometimes it might not
get to that particular, that particular
source or origin. What happens is you
need to delete and start again with that layer. You do not want that to happen. Okay, what do you do? You
convert to smart object. So you come out to
smart. You can see there is a small
box come to that. You can see this
was empty before. This is still empty,
What do you do? Right click, then works, convert to smart
objects. What happens? Then go to filter. Come over here to blow. I would advise you when it is blow and you want to make
nice effects. What do you do? First, try using
the motion block, because the motion
actually a motion picture. Before you use words,
digsion block. Okay. First, use
the motion block. What happens? You can actually, you can increase, you
can decrease, increase. You see it is running, running, running away, okay? Something like that.
This is too much. You can start from
the bigger one to the smaller one and start
seeing what is happening. You start from minor, start from the worst, coming
down to the real, okay. You can see how
things are changing. You can see, you can see, because I don't want it
to look scattered where people know their leaves out, the leaves to show, okay. And it's very important
what happens. You can drop it as 40
something. I think it's okay. It's perfect enough there. Okay. Leave the color picker, I need the color
look up. The effect. We used to affect
everything except, except from some other things like the text and the branding. But I want it also
to affect this. Leave the tomato. We're going to use the comb and what the lectos or something
like that, What do I do? I open, make sure I
come over a click, drag, that is the leave. And bring it down below color
lookup 1.2 then you drop. You can see that. You
can see the changes. Okay, let me cares
it and do it again. This is, you can collapse, you can collapse the background. Also, you see, this is
what I did just now. These are the leaves. Okay?
These are the effects. You can actually make
changes, make effects here. You can make it invisible. G, what's it called? The motion blow, And you
can make it visible back. It depends on you. Okay. But I want this color lookup
to affect this. Also, I do. I click hold and drag down below
the color lookup. That is, it would be
the background group. I can create a group in a group. Now I'm going to create
a group of fruits, foods in the background group. Just drop it here. What happens? You can
see the effects there. It's affecting right now, what do I do? I
can click on this. Then control. Okay,
you can see the group. Then double click
the right words, fruits then okay, you can
actually collapse this back, that is in the background. We have normal. Okay, let me select
this. Press control. The puts effects,
the words effects. Okay, we have this, just say background one
sometimes because I still want to maintain sorry, background. You can see in background here we have three groups
also in the background. The background for the
normal backgrounds for the leaves and the
things I'm using right now. And also effects for the effects, the color
of cop and the like. Right now you can notice that these leaves are
behind the text. What do we do? Is that a
problem? Not a problem. What do we do? We
use the layer mask. Let us press the
key, then zoom in. What happens? How do we do it? How do we make it work? This is one way we can make it work. Just compare to text, Collapse, expand the, select the X
and fresh this and fresh. Any of the word that is above the leave
would be maxed out. That you can see. Now just press on
the layer mask. This is white, this is
black, everything is good. And we have the brush select
what happens, how we do it. That is the out and fresh
is what is visible, white. Wherever we have the
leave behind it. Let's start with this, where we have the leave behind
it. What happens? We're going to
paint on the place, we're going to paint black on this white layer mass that
is this visible here. The stroke visible when
we paint black on it, it becomes what's invisible. And the leaves comes up, pops up and becomes visible. Very, very simple. Let me reduce brush icon at present O use your rights
and mouse protein. Okay. Click, hold and
drag today, what happens? Then You see you click
here and it goes the way. Perfect. That's it. Then this also, I think you to be, there is something
here. Yes, there is. Even if I make a mistake of it's more than
supposed to be, though I do present X, switch towards two whites and erase the black area,
You can see that all the words.
Then you zoom out. Okay. I think it's You can
somehow and just Okay. Yeah. Also Oh, sorry. Is a Change it to words
to black. You can try to. Everything is what happens. You can X then back, okay, that's contra, see what is happening.
Very, very perfect. Any other one, we have, make sure it's
black, then paints on this so we can see
everything about it. Then X, then paint white contra, see it's perfect. Then out, this is the last one, pen you click on
this, what happens? Nothing shows
immediately. Is what? Black. So what happens? Switch white, then contra. It's very perfect. This is exactly what we want. We moved now, just press on. Now we've gotten this perfectly.
What is the next thing? The next thing we're
bringing in should also be in the foot, so that these effects will affect it should be
in the foot layer. What happens? We go
over to what's open, what should be the next thing?
The next thing is what? The core open? We have this. Then press on the move to click, hold and drag, then drop. So now we have it here. Just selected. Just click and drag. Okay, fine, no problem. Just press on outs, press on out, then use the minimize butt,
and then zoom out. Then press on control. Then try to try to adjust. Then check this. So
what do we do now? The outsk zooming, okay? You can use the navigation.
You click Drop down, okay. Then use the Ok. Then zooming, which exactly do I
need? I need this. I want to cut this out exactly. To cut this out from this
image, what do I do? Very simple, Just use
the selection tools. Let's click on one
anyone you prefer, but the one I will use
is a quick selection to quick and perfect. Even if there are mistakes, you can actually
edit them very fast. Click on this, then you
forget to try to select this, because you select on the layer and click on this like this, it's not going to work. Click on this layer, select this as usual, then this is what you want. Click and drag on it. You can see very fast, just release the couple. And very fast, it's very
much okay, like this. And that's what
I'm going to use. What do you do? You
copy and paste that. You're going to cut
this particular image out from this image. What do you do was the
short cut control J. That is it automatically copies it and paste
it in a new layer. Just look over here, just see what happens.
Just control. You can see before
we add layer five, now layer six, the layer
five is a normal layer. Can see, make it invisible,
make it visible. Just delete. Click and
drag it to the trash can. Wait, you can right click on it. Then what do you do? This layer. Okay, first, that's
a long process, but what can you do? You
can do it like this. Click on this layer and click on this layer and drag its way to
the trash can end. It still is very beautiful
now. Very beautiful. Now click on this layer,
which is the comber. Just try, come over, just move to, then you can
see we can now very perfect. Let's rename this. Okay? You
double click on then bad. Okay. Then for this layer, okay, is the leaves just double
click Then what's leaves? Correct? Leaves,
Okay. Don't forget, I'm trying to collapse
this expand back. We're talking about
the fruits right now. Fruit in the fruits
section, control zero. Okay, now we have just
select the cucumber. This is the cucumber
very perfect. Just bring over here. Press on control C, Okay. Then click old and drag. Press out, then bring it around
somewhere, very perfect. Control zero. Then check this. Very perfect, I think. Let me increase it a little bit. Yeah, let me use a down
arrow on my keyboard to make it come down a little
bit then Right a little bit. Okay, good. Now check
this, what do we do? We turn it into a smart object because we're going
to use a filter. Going to use the blow. Right click on the Cocumbern's
Combat to smart Objects. Now combat smart objects
come come to filter blow. We have motion blow, very nice. You can even increase it.
You see you can see perfect said towards something like something is okay
for five is okay. Then press okay. Then
apart from that, I want to give this one a
blow blow, Gaussian blow. You can see very, very blurry. But we need people to see
what is the ingredients, the recipes or what
should I say that we used to make the hamburger. Okay, let's put it around. No, I think it's okay. Like this. It's fine. Perfect.
Okay. Yes, that's nice. What do you do?
Bring this one up. Sorry, you don't have
that? I have that. Just try to collapse this back. Collapse this back. Also for the comber, there is
something I want to do. Okay. I want another want
to be around the space. So what do I do? I press,
that's the first thing you do. Because if you move this first, it doesn't recognize
the command back. But when you press on out first, then click and move this
on, it's very perfect. Drop it here, then
you drop it here. I'm going to drop it like this. No, I can't. But
I don't want to. I want it to be what? To
be flipped horizontally. So what do I do control? Yes, it tell me smart update. Apply to the ton. Primary.
Yeah, sure. Okay. Then what's your
right click on it. Then what's flip horizontally? Perfect. Then check
then the future. The blows comes back to it. So that is it. Then bring it around here.
Somewhere around here. Okay, I think that's packet enough. That's good. That is for the leaves
and the cucumber. What is the next thing to do? Let me put cucumber
two, nice design. What is the next thing to do? We need to get some tomatoes. Let's go to market. Open. Come over to We Tomatoes. Click then nice. Now we have the tomatoes. We can actually cut
it out from here. Instead of taking the
district, what do we do? Which one do we need? We need
this tomato. What do we do? The quick selection, which is, if this is not like this,
just right click on it. Then this is it at the middle. The Quick Selection, two, then we have it,
then click on this. Then the brush to it
is a quick selection, but just circulate the brush to it's very smooth,
so press on out. Then your right hand Mos button. Then click old and drag
to the right hand side. Then that's nice, very perfect. Then contra copy it. Just click on this, click
old D, then delete. Then what you do to pick the move to to be
able to move it, otherwise it's
thelion select again, we don't need to select again. That's just come to select
and what's the select? Okay, Then come to the
move to click here. Hold and drag the perfect double click and write what's tomato
One tomato one. Okay. Put 1 second tomatoes because the is another
tomato coming up. The on three tomato
is coming up. Don't worry, this is one. Just control, what do
you do you reduce. Okay, you bring it
somewhere over here. Okay, perfect. I love that we should be
reduced a little bits. What do we do? We
change to what? Convert to smart objects, then move to filter. Then you blow, okay? Motion, blow. First you can see, I think the 45 is okay. No, no, no. Because I want people
to see what I'm doing, to see exactly. It's blow fine, but we
need to make people see exactly what is
the filter again. What is the next thing blow? We have Gian block,
then we can make it. Actually I think it's
okay. Like this or we just Failing so much. 1.6 is okay. 1.8 fine. That's nice. What do we do next? We come over here, try to make sure
you collapse this. Okay, then press on out. You've selected this,
you select this, press out, then click, okay. Nice one click somewhere you can release your hand from the out. That's not a problem. What you want is done. You can zoom in here, the out key, then use the space. Just come come over here. Nice control there. You can see we are
achieving nice result. We are making sure it is
in diagonal like this. One is like cutting across legs. This is cutting across legs. Next tomato. Let's call this tomato soup because there
is tomato three coming up. Nice. Next tomato which
is open the tomato. Threat tomato as usual,
the quick selection. So perfect control. That's it. Just take on this,
bring it down. Delete. And we have
this is the shut for the motor is V. Then
click, drag the drop. Just like saying, you
drag in what you drop it. Very simple. Who shining,
she's shining bright. Control, then what?
You reduce it. Then bring it over
here, somewhere here. Okay. Then try to rotate, okay? Making it nice and look good. Rotate then bring
it somewhere here. Control, Try to make
it look se bigger. Okay, nice One check. They're bring it somewhere
here. Let me zoom in. Okay, tick on this. Okay? Okay, it's perfect that
way. So what do we do? Change to convert to what? Smart objects. Then go to filter. Nice blow, what do you do? Motion blow is 48. Let me increase two bits. Nice, Nice one. I think that's okay. Let's use Gi blow. It's added straight
motion blow, blow. I think the 1.8 is okay. That's, that's nice. So you want to edit something
probably in the motion. Just double click it tells you the preview and it
gives it a preview. Gi blub click. We're good to go.
Just collapse back. What else? Now is the leto, is it called contra zero. And see you see we're achieving, our results are
gradually, gradually. Now, what is the next thing? The next thing is to find the last fruit,
fruit and vegetable. Fine. That's not a problem. What is the last one? This one is very, very tricky. In some ways we have
very careful now, we chose come over here, then click Old and drug. Try to reduce it. Press out
then right and mass button. Then click Old and drag
to the Wt to the left. It has selected everything. But the problem is that
before I press on Contre, everything but look at the
white spaces here inside. What happens? It's a big
problem for us. What do we do? We make sure that it's
cut even after I cut the lectures from this image. The other places which is
a white must not show. We need to select places to. How do we do it in the
selection to any other? To add that selection, just keep on something like
just on something like this. You can see it's adding
to the selection. See, adding to the selection. You can see you press on sheets, adding to the selection. But when you want to
subtract from a selection, you press on out. Now my hand is out. Then I'm trying to subtract from that selection to take away
the selection from outside. You click and drag on it. You can see, You can see. You can see, let me add
here, I have to add. My hand is on the outs key. You can see the
subtraction in the circle. But when I release this,
we can see the plus. The plus is saying
it's need to plus it. There's no subtraction here. Again, use the minus for this, then good, use the
space, the space bake. Click on the mouse, click,
drag, and come over. That's what we're going
to use here. Press on Ad. Subpractdes's not composed with perfect reason because it's just something very
small want to show? It's going to be in a
very, very long place. No one is going to
notice any mistake or something present out. Oh, sorry, this one
is adding contrast. Contrast. Okay, Present
outs just a little bit because it's present out using your right
hand most button reduce. Okay, nice, nice, nice. Okay, let me out the zone out, Okay, This is a space bar, okay? I'm still on my out on this. I just want the
whites to go away because I don't want
the whites to be seen. Okay? Yeah, come here, drag this drug, this somewhere
here also click here. That's a plus,
sorry. On the outs. On the outs, that's okay. It's going to take more
than the required part, but that's okay because no
one is actually no one is going to see exactly what
is what is in there. To that extent, what
do I do control? That's one aspect. We need the second one over here also. Okay. Then what do we do? The reason why this is because the circle is very
sm your right hand, your right mouse button. Then click oder
drug to the right. Then you see click
on drug, sorry. You can see there is a mistake there because I'm
clicking on this layer, not this layer, it should
be this background layer. Then click Oden words
and dug very perfect. You can see that. Zooming.
Try zooming. Sorry. Sorry, sorry, sorry
for that, to zooming. So present minus. Okay. Then try to make sure this one's present minus,
sorry, the out key. Sorry, I said minus. The out key. Okay. Try
to make this come in. Okay, that you're trying to subtract from here. Very tiny. Very, very tiny. Oh, see that's not a problem even if
it's cut more than expected. Okay? Okay. Okay, control
zero then control. Good. So we can take
this and we delete. Then we have the two press
on the sheet, spread sheets. Then click on this one. Then click the move to then
drag the two into this place. Very perfect. So the
first thing you're going to do is click on
this one, then delete this. We don't need this anymore. Click on this one,
then delete this, we don't need this anymore.
Then click on this one. With the delete, we
don't need this. Perfect, so we have them in
the fruit. What do we do? You can click on this, then
make it invisible for now. Then we select this, this
is what we need for now. Then control, then
reduce this down, okay? Okay. And click and
bring it up here then. Okay, put some way around there. Okay, let me zoom in z in. If you'll find it
difficult, just zoom in. It's going to be solved, okay? Control zero. Okay? Isn't that too big? Not too big at all. Not too big. The thing is that
I want this to be above the H. You can
see as to be above the. What do we do? Come over to the text like we
did the last time. The layer layer mask come
over to out and fresh. When you select and fresh, make sure it's not select. Select the layer
mask. What do you do? You press the B, that is the brush to,
then this is white. And this is white, it's not
going to work. We need black. What do we do your paint
on this very nice. Then zoom in, then
change, change to black. The place is in a to paint
shouldn't be painted on. We can zoom in. Then
try to, you know, contract that's perfect. So what do you do? You blow very perfect. So what type of blow? Okay, first that's
a big mistake, not just try to
collapse this back. Okay, you're talking about this. Okay. So okay, yeah, right click then covered
to smart object. Then what? Move to the filter. Then blow. Motion, blow the motion blow. Well, that's very bad, but
something is very bad for it. I think 20 something
should go. Nice one. Okay, that should go the blow, The motion blow is okay. We don't need to
use a cushion blow. So try to collapse this down. Now, consigning this,
bring this down. Okay, so contra. Okay, so it should be contra C, bring it somewhere here. What do we do? We use
the gory Gati block. We use the word motion. Blow converts to smart
object first to filter blow. Now just leave it to
23, it's perfect. Okay, that is the
end of the tutorial. Everything is set and you
would see your clients will be very happy to
have stretch Opispsis. Collab. Sorry, your
clients will be very, very happy to have this.
Let me do one more thing. Come over to background, Come over to effect. Okay, not effector background
itself to the creamy place. I want to make it show
more in the background. What do I do? I'll
come over here to come to the adjustment layer. Okay. Then I come over to
brightness and what contrast. I can try to decide what brighten it or
what make it dark. You can see, you get a
picture. Let me take it back. This is the undo normal. I can press an
auto and also does the work actually it's
been programmed to do. Okay. That's not a problem but, but it might not suit my taste, so do so let me just a little bit just Okay,
you can see that. You can see, say,
the choco chocolate. Choco chocolate. Okay. The chocolate stuff. So that's too much.
Way too much. Way too much, very light. Okay. Yes, that's perfect. That's just ways to
make your designs look perfect and nice. Your client will be very happy. He or she, the brand will
be very happy they gave you this work and
it's really good. We move to the next lecture
where we're going to be designing flyer or a poster
for another brand entirely. I'll see you in the next video.
19. Tech Brand Flyer & Poster design: Lecture, I'm going to teach
you how to design a flyer and poster for a company that deals in technology,
that is in tech. It's very easy as the
tradition goes come here. Okay, I've unlocked this, we come here, come
to file, okay, then moving to file normally, as we all come to open, then from here, okay,
we've done this already. The one to a nine is
meant for the burger. Okay, Which we've
designed earlier also. Now this is for this, I don't want to pick
everything at once as usual, I go to pick this first. So good. As usual, just as we are here, come
over here, then click Old. And what old? And
drag here, then what? You drop it here, because this is exactly
where we want to use it. Try to zoom out. Okay. Actually,
can use as usual, the control plus, minus,
minus, minus, okay. Control plus, plus,
plus, plus, okay. Just to fix to screen
is what control I use. Normally I use a shortcut. I just press on what's out, then use the middle
mouse button, which is the wen,
you scroll outside. Then you click on this,
which is the first the, the control, which is
what to transform. If you transform, click do what? You click the side, you
click drag like this. As usual, you press
on what's out, just something like mixes
in the proposal together. Press scroll out, then what? And try to click on
this navigation. Bring it down. Click, bring
it down like this, okay? Just try to click Hold. And you can see the
pink line in between. Just drop it there, okay? Then move this one
in a little bit and that you check it
and that is it. Okay. What do you do now? Control zero. Perfect. So we have
this like this. I do, I want to make it a little bit different from what are being given by the
clients, okay? If, for example you have this, you designed this for
a technology company, so what do you do? I want to flip it out. Then out a little
bit to flip it. Control Control. What do you do? Your right click on your right click on this, the flip horizontal,
then you got a picture. It's flips, that's good. Perfect. Now we have this. The next thing I'm
going to do now is that just contra zero. The next thing I'm
going to do now is the. I want to make this a
little bit different, a little bit unique. Okay? Just to make
it look different and to attract the
audience, what do I do? I come over Color
Lookup, as you all know. Okay, just click here
and what color lookup? Click what happens? Come over to where, as usual, come over to late sunset. Click, you can see perfect. Not that it changes the design. It's the reflection
coming from here. Okay, I want to
change a little bit. Just a little bit. Just
click this one in. Just collapse it back. Now I have this come
over to opacity as well. Like opacity reduces
the transparency, transparency increase or
reduces the transparency. Just click hold and
drag like this, okay? We can see zero. There's nothing
starts increasing the little by little, okay? Some changes and so affect
some changes so that the woves I'm going to put on it can be seen some percent, a little more, 90% Okay. I think this is okay. It's fine. It's good. That's nice. Okay. That's very, very perfect. So now what's next? So we have this very smooth
number, just, you know, you can see, you can see this is what's the before and
what's in the after? You can see it's not
changing the color. Just a reflection of
what is happening. That's all. Okay, so now country zero, not
changing the color. Just a reflection. We have that. Apart from, apart from that,
I want to add something. Things look rough, not really, so not really smooth to
that extent. What do we do? We add some noise. Okay, we add some
noise to the word, to the design. Where
do we add noise? Is it adjustment, layer color, lookup, or W, or
the layer itself. Which is the layer,
the head foam itself. We're going to add the noise
on the head for itself. Okay, Click on this. There's something very Ian, you have to know that
when you want to add filters. Filter. I want to add. The noise in the fielder. When you want to add anything, filer, try as much as
possible to do words. You right click first, the word converts
to smart objects. It really help you to do words
whenever you make mistake, you can be able to go back after you've used
this smart object, the converted to smart objects. You'll be able to
adjust it without, but if you use the filter
without changing or converting that layer to a
smart object, what happens? You won't be able to
make adjustments at all. You need to dig that layer
and start all over again. To prevent that you do what converts to smart
objects loading. You can see there is now
a very small box here. Let me contrast it
for you to see. This was, this was
before the right click. Then what converts
to smart object, You can see very perfect
coming over to filter. Then what to noise? I want to blow, I'm too used
to blow noise. Then what? Add noise? We're adding.
What we're adding? Noise. Just look at it. Just look at this cat. Look at how rough it
is making us to see. Things are not smooth in
life, they are rough. If it looks smooth,
it look fake. A little bit of roughness
must be there to make it look realistic. Okay, What do you do? Let me cancel, and you can see, you can see how smooth it is. Then let me go back
to filter noise. You can actually try as usual, you can just come over too much of noise. Then
you start reducing. By start reducing, as you see, all this is what
I actually like. This is the perfect
noise I want. Okay, Roughness. Can you see what you press? Okay. Immediately I press okay. You can see smart
filter add noise. That is if I want to adjust. If, for example, I don't want the noise to be
digging, what do I do? I can press the icon, then the noise remains smooth. Let me try to zooming. Can see, look at the noise. You can see if it's too much, you can double click on
what's on the add noise, then try to reduce, you see you reduce it
now let me increase a little bit too much. Come over here just a little. Come over here, you
can see it's form. I think, let me put it, 27 is too much. Leave it at 21 then. Okay, definitely.
This is opened. You look at this area.
You can put it in bag. You can close it and
you can open it. Let's close it to make
it neat as usual. I love my layers to
be very, very neat. Control Z can see,
let me click on this. I want to make the
noise invisible. You can see, can
see it's invisible. Visible in a little bit. Press invisible now you
can see how fake it is. Then press, you see
it's now visible. You can see how
realistic it looks, how photo realistic it looks. That is what we call using noise to make
things that look fake. To be what perfect and real you. Click that now, that is all
for the background for now. Okay, click on
this, then control. And then what control or
what? Your right click. And you have group from
layers. What do I say it to? What background? Sorry, for that background. So that's the first see. It makes the work
very neat as usual, you can actually
change the color, reflect in the
colors like green. I leave it that no color.
I just refer it like this. Okay, fine. So now
just click on that. Now that is being click on, Then the next thing
is that we had some nice little
effects like sound, like sound icons, like
some nice effects, then some sounds to
make it look worse, to make it look realistic. Okay, You can see when you actually give
this to your client, your client would love it more. What do you do? Just control. Okay, we have that. Then what? Come over to five. All the resource files
are there for you to use. So far, you have this
scores with you. Just click on this open. As you click drag to the first. Then all, don't forget, just try to delete. Delete this. Perfect. So we have this. Now what do I do? I press out, then zoom
out the clicking on this, not on this but on this
control. What do you do? You try to decrease. Okay, then just this, like this, zoom in. Okay, perfect. So
what do you do? You check it nice. What is the next thing to do? Now? We blend. We need
to blend using words, using the blend mode. From there we get
what want perfectly. Come over to what's to normal. There's a particular blend
on I'm going to use. But you can just see, those are the practical aspect. You can see the
background is icon. Okay. The sound icon stays. You can see, you can see, you can see when he
brings out under color, I'm not going to use
that saturation color. And words and luminosity. What happens now? We're
going to do what? We're going to use saturation. Actually, you have to
understand that satural actually blends this perfectly. The blend modes
helps to do what? To make two layers
interact together. That is the layer which
I named background. Okay, The layer which
in background is now interacting with this layer two which I'm going
to group them also. Okay? It's interacting with
the layer on any, okay. The best one that could
actually interact with, which is saturation. It looks good and perfect
on that particular layer. Click on the saturation, and you can see what happens. I wanted to
understand something. Just make that invisible. What happens? Make it
visible. Look at the side. It looks rough. Doesn't
look, approach. It doesn't look nice.
What do you do? There is something
we can do to it. Something we can do
to it. What do we do? There is something we call
layer mask in Photoshop. Layer mask actually
it can help you hide a particular area in an image and make under
particular area visible. Okay, this side looks rough. You can see making invisible,
making this visible. You can see it looks
somehow, it's not detailed. The details there are what? It's fading away.
What do you do? You just come over here.
We call what layer mask. You click it, you can see this is the main image. This
is the layer mask. Whenever you want to
adjust the layer mask, like make something app, something visible,
something invisible, you have to click on this. But if you want to
adjust or want to change something on the image itself,
you have to click this. Now, how does it work? Somehow? It's no detailed. The details there are
what it's fitting away. What do you do? You
just come over here. Call what layer mask. You click it, you can see this is the main image. This
is the layer mask. Whenever you want to
adjust the layer mask, like make something app, something visible,
something invisible, you have to click on this. But if you want to
adjust or want to change some things on the image
itself, you have to click this. Now, how does it work when you click on
the layer mask itself? You can see when I click
on this normal image, you can see the color
here, yellow and white. But when I click on
this, what happens? It changes to ash and white. What is the reason for that? The reason for that is that whenever you are using the
layer mask, this changes. It's supposed to be
in black and white. Now click on black and white. You can actually click
on black and white. Or you can use the S. You
can use the short cut. You can use the short
cut on your keyboard, which is what D it takes
you back to the default, you want to switch between
the two, black and white. You can press X on your
keyboard or you can press this. I'm pressing X now. You can see you can going
to switch in between. It's going to come in
handy. Don't worry, you're going to use it very much on or you can press this. Okay, good. Now what happens is that make
something visible, that is when the layer
mask over here is white, that particular area, the
whole area is visible. I want to take note of this. When a particular
layer is white, that particular
layer is visible. The area in that
layer is visible. But when it is black, that particular area
is what's in visible. Please take note of that. Now, when you want
to brush normally, when we want to make something
visible or invisible, that is, you press on what? B, which is the
shortcut for brush. Or you come over
the click brush, you can see this is the
icon for the brush. That's how the Pussal for
the brush looks like. So let's begin.
Now we have this. Okay, fine. So what do I
do if I'm going to paint? This is we, this is white. Actually, I tried to paint
on this one. What happens? Nothing. Nothing shows. Because this is white
and this is white. The foreground color is white. The background color is black. Okay. Whatever you're
painting on something, it shows whatever the
foreground color is, not the background color. Now to be able to change
this, what do I do? I switch which is X or I press
this. Okay? You can say. So when I click Old
and drug but hold on, my opacity is in 58, my flow is in 54. I don't want to be
like that there in some aspects where we
use it like that, okay. But just click Old and Drug 200. If you can't just press on this, click Old and drug, press
on this, click on the drug. Or you can click on a drug on the flow FLOW itself,
reduce and increase. Nothing happens until we walk onto the paints.
Now what do we do? This is black, Don't
forget opposites. Black end white, white end black happens.
That's how it is. The old area is visible
when I click old and drug. And what happens, you can see the way I strike is the way I moved the
movements of the brush. You see click, old words, and drag is the way you see the movement that is that place. You can see a black, like a black marker
or a black paint. It's now becoming what? Invisible. It's only
affects this layer, not the layer underneath. Take note of that. Okay,
where am I trying to paint? And all the layer is gone. Let's by one that just
contras on the second time, then the third time
until it goes. Another thing you can
do is contras example. I mistakenly claim this using
conclusor. What do you do? You press X. You switch or you just come over here
and click, or you press X. What do you switch to?
Is it white or black? No, we have white here
and we painted on black. But now we have black. I want this black to go back
towards white, or do I do? Then I click on this white. It's white already fine. Then I paint over here, what it's back to
life very easy. This is what we call non. Destructive. Non
destructive design. Just say design is
non destructive. You don't destroy
the design itself. What happens? It
comes back to life. You just have
towards press on X, then try to adjust. Okay, you can see some
great stuff here. Definitely, there's
something that is not good. Where am I trying to erase
from this layer, this side X? Make sure it's black.
Then I clean this away and you can see
the details is back. You see, you can see perfect. I can actually try to make sure. Okay, let me just
clean up this space. I don't want it to be too
much clean some places here. Okay. Now, this perfect,
it depends on, it depends on how
you want to do it. It's very perfect
when, for example, you just come over a present
ships and present ships, then you click the layer
mask. Now what happens? You see a cancel, I've tried to cancel the
layer mask, which I did. You can see it is
not well detailed. But when I try to me reopen or what I call the
shift, then click again. You can see well detailed. Just just look at
it. Just look at it. I closed it. You can
see how rough it is. But when I try to make sure I
open it back, what happens? You can see how detailed it is. It's not a really much effect, but a little effect. What do I do? I try from
there I can try to reduce. Just lick on this.
Don't click on Layer. Must just click on
this, click and drug. Try to reduce it.
That's like 67. You can use it more,
okay? It shouldn't be. 47 is 70 something, okay? You can see. So now we have those
sounds are actually there to show that this is like, the design is good, the design is nice and gorgeous. Apart from that, we'll
be done with that. Apart from that,
we come to file. Okay, You choose this also. We do it just like we
did the other one. Okay, Just come
over to move too, because I can be using
the brush to move. Okay. Click on the move
to click old and drag, and just drop as usual. Control zero, press and
out, then scroll out, then control, click, click
older and drag, then out. Then, no, just trying to make
this show in the middle. Then you check, now you
have this as usual, go to the saturation. Good. I'm sure you can remember. I use saturation
for the first one. Like you're going to the blend, you're clicking on
this saturation on, you're trying to press
on out and you scrolling and working just first
click on this layer. Then the minimize button, scroll in. What do you do? What do we do? Again,
we use the layer mask. What do you do? This is
it click on layer mask. This is white. This is black. Then for the short cut
forward for the brush to, then you click hold and
drag your painting on it. It's only going to
affect this layer. This layer you can see
as I'm cleaning on this, on the sound icons are
what are not erasing. Perfect control zero. Now I can try to decrease
this to 70 something. Okay, Just like say, you can see the reason I'm
putting these days, the string talking
about music actually. But the electric flow of
what they are listening to. What the listener is listening. Listening to, he or she is
listening to rather the sound, the warves coming out. It would actually portray
something very nice. You can try to reduce it
more, but I think it's okay. Like that contra you
can see perfect. The last that is it for that. Okay, the last one come
to five, come to open, then we have the, then just try to delete this. Come over, click old, old, and drug, then drop. So we have this perfect. I think this is okay. This is nice enough.
Is good enough. Just what do you do? You go back again? You go to saturation. Okay, same saturation. Saturation is already
looking good. Let me find something
else to use. Something that would actually take away the background for me. Okay, I think lighter
color Goethe. Try to understand
whatever you want to do. Actually, so far you can be
able to get what you want. It would actually
help you out control. Then what's come over here, then try to rotate.
Okay, not yet. Just bring it out the
B. Then what happens? You can see the rotation
like icon or color. Click, old drag. It's just like a sound
coming from year to year. I try to rotate it. Click on this. Then what? You try to reduce it, reduce it perfectly to
a very large extent. What do we do? We
come over, click, come over to pay Opacity. Come over to come over
to opacity a little bit. A little bit of that is okay. It doesn't look
rough. Not at all. You can try to let me do
it doesn't look rough. It looks perfect. Because we're trying to,
we're talking about what? Sound talking about words, okay? Things people are listening to. This would actually
bring about more effect. It will look pleasing, appealing
to the audience, okay? Now I'm done with the effect. Just click here, control, click, control and click. You don't take out
from the control. Just click, hold control. Click and click, then
control, or you just write. Click then come over to, we convert to group from layers. Then what do you write?
Let's put on effects. Perfect. That's
the second window. I love to have my layers very, very neat and perfect. Apart from that, now let's move to the nest
one on the list. What is the next
thing? Just come over to five, then open. When we have the logo for
the brand, just click, then we have this, then click and bring
over here, then perfect. You can actually put the
songwhere around here. Okay. Accord with
length alignments, layer on X. I don't want
to put it here. Okay. I don't want to put it,
I want to put it here because I see some
words coming here. I want them to align together in the words in the
right alignments. The music is the Xt, the left alignment area. Click on this navigation, click gold and drag up, then out, then scroll in. Okay. So me having this now, I want to use a particular color that would look like golden. Okay? Because I can use
black and a dark background, it's not possible, okay? I click on this or double click. Click on this, okay? Click on this Blending Options. The reason why I can't go
straight to using no colors. Like for example, I'm clicking
this, I'm using colors. It's not showing
what is happening. I'm using different
colors. What is happening? Not showing, It's
not showing what? When you have a
particular image. If for example,
if it is a vector or something you created
in Photoshop itself, a text or something,
you created a shape. In Photoshop itself,
you would be able to, as I've explained before, okay, you would be able to use
the color immediately. But yeah, you have to rightly
go to blending options. Then use that color in
the blending options. That is how Photoshop has
programmed everything. Click on what color
overly you do. You click on Color Over first, Just look at color
over, then what's? Click on Display. Okay,
as you click on Display, what happens? Then You
can see different. You can change to any color
you feel like changing to. It can be, bring it here, bring the sacan, any color you just
prefer to change it to. But what's something
like coding yellow. This is yellow then very good. Something like this.
Okay, then perfect. Now zoom. What is the name of the brand? Come to the text to click
here. Okay, Too big. So what do I do? I come over
here, then what do I do? I try to reduce the
fonts of the brand. I can use like 18.
Okay, very good. So I'm going to reuse it later. So what is the
name of the brand? In capital letter words, Your stock should
be on the wave. That's the name of the brand. Okay, Then you do. Click, come over here, select move to click Hold. And what you can see, you can see the
pink line vertical, it's in the middle. Then try to zoom in the press on this pre, on the sound wave. Then control, then
click what's And drag. Try to reduce this. Okay, perfect. And don't forget mind you. Then you check, I need to change the color of this
sound wave to the color of, of the brand. The brand here. What do I do? It would double click on this.
What's on this icon? This particular double click. So when you double
click, what do you do? You come over here to color. Click on Color, then
you can see, come out. When you come out,
you can see something like the pain,
something like an ink. When you click on
this, what do you do? What happens? It gives you
that particular design. For example, I can
just come over here, I just come over
here, click on this, you can see click on
this, click on this, blue color, click on this, and this gives me the reason why sometimes probably you're
not seeing this icon. Is that your caps on? Let me press Myppslok is on. It won't give you
that particular type of ink like icon.
Do you understand? So to give you
something like this, it works the same way.
That's not a problem. Just press Cpslock. Okay. Now press
this golden color, and it gives you
the golden color. Then you click on
what you click on. Okay. Now I need to
change the front. I think the point, okay? I'm not using Manterat,
I'm using humanist. The front is part of
the resource fouls. Just come over. H, U, M, give you actually what it is. This is humanist. I want human, bold. Yes. Human is Bd Italy. Click on it. Just
come over here. You can see the control. Click on this,
Hold on, your out. Then try to increase
this a little bit and you check this
and that's perfect. Present control
zero, you can see, I think missing this from, it's showing me the brand, the brand name and
brand logo is too big. So what do I do? Although I'm through with the logo,
just click on this. You can see this is out. Just press it in to make it
invisible, open, close it. Click on this present
control and click on this. Then Azure, right click. Then what group from layers.
Then what do you do? You come over here and
write a brand logo. That's pathetic. Brand logo. Okay then, okay, see I
love my work to be neat. So now we have that
clicking on present, then control, then try
to reduce present o, then try to reduce the end. Let's check it, and that's fine. I think it looks good right now. That's conclusory, that is very, very perfect and
looks realistic. So now we have that you
can try to come over to the effect if you think all these things are
too clear to be seen. Okay, like the music. Just try to reduce your
party a little bit. That's 60 something. Then for this also, if you think it's too clear
to be seen, let's reduce it. That's 68. Then for this
also, let's reduce it. Mothers nine, but I
just want to make it at least visible for people
to see. That's seven. Okay, in that poky
right now. Okay. Hey, sorry. Now what is the next
thing? The next thing is. Next thing is that there
is a text to write. Now we have the products. Okay. We are actually
showcasing to people. We have the branding
is the text. Want to give people
the call to action, like things that will make, the things that will trigger them to buy. We
have this already. We can write it. We can write it. But not
appropriate enough to write. To be appropriate, to write it, to make everything forward
in the right alignment. What do you do then come over. N is the next thing we do. Then click on two. Click here. What do you write? What we're meant to write is
just press your cups log, make it on feel. Oh, sorry, it's not clear there. Okay, let me just before I click actually
before you click, you can actually
change it to white. Can change the color to white. It was there. Just
click old drag. You can just click, click, drag in old, just click, click. Or you can click somewhere without taking your hand from
your left and mouse boton. That is, you click old
end drag to this piece. This is white, old end drag. You can see it change
to black. Old end drag. You can see it changed
to widen price. Okay. Then what you
can be able to watch, you can see what
is happening now. So that's good. But I don't
want to see contras it. See, I want something. I think, yeah, we do. I want something like
this some. Thank you. Good. So feel oh, sorry, a mistake sounds wrong. Sound good on this.
Now what happens? Come to property. The property, but don't forget, if you don't have the property, the property windows here, come over to windows. And what do you do? You
press on where is it? You press on Properties. It shows you the property. Okay, let's try to
reduce the text. Actually, we can fly
pre the space bar key. Click, that is your presence. You've pressed it and it's
there, you're holding on it. Then click your
left mouse button. Click, hold, drag, so that we can be able
to see what we're doing. What happens there. You come over here,
you can see this. There's an going up and down, the going left and right, selling the words,
going up and down, going left and right, reducing the line space
between the words, okay, or between the letters, depending on what you're
doing at that time. Now, having this, let's
try to reduce this. Apart from that, I think, okay, let's try to reduce forces
before we change the forms. Okay, come over six a half. So you can see, let's
say 18 too much. Okay, let's change it
to something like four. Okay? Perfect enough. Perfect enough.
And this is what? Center aligned, Okay. This is left aligned, okay? And this is right aligned, and this is the
right align we need. Apart from that, we're not
using this humanists, okay? We're using other funds which is part of the resource file. Still fish oh sorry. That is it, okay. Still EL fish. Steel fish regular
or steel fish bold. But I want to use steel fish regular and just click on it. Just try to make it bigger
by what you press on. On the move to, then you
can actually move it here. Then click on Press Control. Then we increase. Click. Apart from that,
we need to increase. It's rough. Let me
check this first. It's rough 25. That's too much.
That way too much. Let me say 75. Sorry, I'm increasing
the less five. Let's say 25 a little bit. 50. No, let's say 40. Okay. 40. That's that's
part O -40 Sorry. -40 I think that should be Okay. So now this also, let's try to It's now together. Let's say 48. Let's say 45. 45. Let's say 43. 43, good. I think that's okay. This is E L. I didn't even know it's a
typographic error, please. Very sorry for that. Just
come over here first. The text to the very
good. Feel good. So now we have this.
Then what happens? We try to increase, we try to make it
just click on it, the drag it a little bit, You can see the line showing, the red pink line showing
it's telling me it's aligned to that logo
update control zero. You can see, you can see, you can see it is aligned
to the logo update, the sound wave logo up there. That is how it's used actually it's perfect
and well aligned. Present O scroll in then we have this actually you can increase it a
little bit control, you can try to increase
it a little bit more o depending on you, but just make sure it's
still well aligned. You can see see where
Aligned with what, with the logo up there. Just check it and that's it. So there's a mistake somewhere. I made the field, the sound and the layer. Okay, I made the
feel, the sound. So there is a little mistake whereby feel the sound,
which I use there. I made it, I coated, created it in this particular group which
is not supposed to be. What can I do? Just click, you, click hold, and drag out. You see, you see this box. This large rectangle, okay? You shouldn't drop it there. You shouldn't drop it here. You can drop it here. A very tiny retangle box. In dropping it in this
very large retangle box, it is going to the group
for the brand logo. Bringing it over here, it's
going to separate itself from any other
group, that is it. But this layer actually, actually this layer
should be a mistake. So let me just click
old and drag it way so the deletes can
drop it, it's gone. Try try to close
the effect group. Now this is Fill the sound. What next? Just come over here. Out then zooming. Click Old and drag
using the space. I press on the space and then I click Old and drug using
the left mouth, sporting. What do you do, you? There is a line actually
somewhere there, rectangle two. Then click old And
no drug like this. It gives, it shows the
properties for a shape. It's a feel and stroke that is, let me commit space,
Click old and drug. You can see, you can
see what is happening. Stroke is like an outer, okay. An outer design, as
I've said earlier, actually is like an outer
line for a particular shape. But I don't need to stroke. But firstly the fill,
it is the color. Click on the color
white, white color. Then click here. Then come over to the stroke. Click on the stroke,
then it's white. I don't want any stroke at yet. You see no stroke. You can see the red line canceling that
there is no stroke. That is when you click
on its no color. For the stroke you click on it, then that is it. Click on the two shock for
the move two is what's always V. V, press V rather. Then bring it
somewhere like this. Make sure it aligns
with the E and the D on the right for the
right alignment to be correct. Then drop, press on out, zoom in, then try
increases a little bit. Now try to bring this
up a little bit. Okay, that's good. It's looking at this line, not really the D, but it's making sure that everything
is in proportion. It's in line control zero. Let me see how this feel. Okay, I think this line is too big to be at least
a little bit thinner. Click on this control C. Click, hold and drag. No, if it's not
working like that, just just click press. Then on, on, on the bottom line
will be decreased. You can see decreased
and increase. This is okay. So just click
old and drag control zero, you can see very perfect old
then see you can increase. I don't like what is wrong. Control zero, it's too thin. Let me control z and let
me leave it the way it is. Zoom, Click And what control Z? It's fine. It's okay. It's fine. So what is the next thing to do then
Another phone, another text. I click, okay. I click, Click. What happens? Writes, enjoy, sorry, enjoy the words. Okay. That is like
trying to press people, persuade people to buy
something like that. But I'm not going
to use this one. I'm going to use the human on
which I used for the brand. I'm only using two points here, The steel fish and the humans. And two colors like the
golden color for the text. And also white color Charlie, it's good pants I used
recently will be here. Just come over with
a click on it. I don't use Roman, I want to use the bold one. Bold italic. You can
see that's perfect. Press and control. And
try to reduce its, make sure it can
be seen outstand. Zooming. Okay. Press Space bar, then click Old and Drug. Then you see, okay, check. Then come over here, there's
something wrong with this. Come over to the tan,
click old and drug. Good, it's aligning
together for this. Also select the enjoy the words. Then click old and words, old and drug contra. Let's see what happens
in the coming down. That's perfect. Perfect. I
click on the Feel, the sound. Click with present and control. Click direct tangle, then click, click, Enjoy the words. Then control. Also the Syme has right clicking,
right clicking on this. Then go from layers. I can double click here. What do I write text
then what can I do? I can actually click and drag it a little bit up on the space to nice spacing the element
which is a text to breathe, giving them the room and
the space to breathe. Control zero. You can see perfect. So you can see everything
is well aligned together, Right alignment with what,
with the sound wave. Click old and drug.
Then coming down, coming down increases
a little bit. Come over here, enjoy the words. Okay, then the press on space. Click old and drag. Okay, Then make this
point like around 14. Make it bigger, at least, okay? Okay, that's too big. Let's make it way, That's good. Quant zero, and that's perfect. Out. Things crawl in, coming like this,
then feel the sound. Enjoy the words. We move to the next design. I'll see you in the next Ti. Actually, the color look up. If you think the color look up, it's too, the color
look up is too much. You can try to reduce
it to your taste. You can see, try to
reduce it to your test. If you actually like
something like this, 5,000 problem or even zero, but that's very bad, just try
to increase a little bit. 8055 is actually nice.
That's good and okay. If you feel like the
85 would actually work for you perfectly so
that is not a problem, but I think 90
would work for me. You can see everything
is very neat, the layers are very, very neat. I'll see you in
the nests lecture.
20. Agric Brand Flyer & Poster design : In this lecture, we
are designing a flyer and a poster for an Agric brand, a brand that deals in grain, plants, in grain life,
things like that. Come first, what we unlock
then come over to file. Then to open you move down, way down to the last, which is what one? Start 1-5 Actually,
that is our main sign. Those are the images.
But before we do that, actually just cancel. Come over to the rectangle. Rectangle to click, it
can click from here. Just make sure you
click it outside. Okay. Then try to
click to the day, just you still clicking
and holding and drag. Just try to drag it
somewhere. Then you drop. Perfect. Now we have this. What do you do? Don't prese,
don't select the move to. Okay. Just right click on it. Okay. What do you do? You press what? You select the move to, then what control? Also on direct. Then
right click on it. Then what do you do? You
come over to two skew, what I call it, skew,
the present skew. Then click here, click the drag, just a nice effect. Okay, then you drop. Okay? Just click the D and
move it up a little bit. Okay, I think that should. Okay, that's nice. St is check, then click, you can see yes contrast. What is the next thing to do? Now we can go to the file open, then move downward towards
one, Then open perfect. Now we have this as we
have click old and drag. Yeah, then drop very perfect, but it's covering everything. What do we do? We want this
tractor to be in a container. What container? The
container we made. Diectangle. Let me try
to what is invisible? This container, we
made this rectangle. You can see contra select
the rectangle. You can see. You see this container we made? What do we do? You can't
raise it. You can see. We want this layer,
which is this, which have made visible,
make visible back. What's this layer
to do to be inside this rectangle container?
What do we do? It's very simple. Firstly, you can
try to press on O, then zoom out to
the middle maze, Bolton, then make
this visible. Okay. Then what do you
do? You just okay, just control, it's very big. Just press on the zoom out, then come over pre
click old drug, click old and drag
and present the Okey. You can see, you can
see then control. I want to see what is happening, then what check you can see. Now we have this. You
can see it's up here. Even for example,
when I just drag it, make it below the tangle, you can see it's
below the rectangle. It's not inside the
rectangle. So what do we do? Bring it back up.
Okay, What do we do? There is something we call
what you click, Clip Mask. You click inside something
just like a clip, a peg holding a clothes.
Your right click. When your right
click on that layer, you want to click, you want to click on another layer
should be selected. Okay, I want to click this
por inside the rectangle. Right click on it then create clipping mask, then it's inside. When you want to
adjust, you can adjust every just inside the rectangle, not outside the rectangle. It is clipped, it
is attached to it. Press on the zoom out, then control then
Make in the middle. Then click oder drug, then press on, click drag. That's perfect. Then
what's control? Then check, then control. You can see there is something
you're not covered all. Do we do to it? It's very
simple. You know what to do. Just press on what's
Just press on, select this, press on O.
You can see this here. Look at this small arrow
that moves from the Tang, then shows the pointed mouth of the arrow down
to the rectangle. That is, it is showing
the clipping mask. For example, when I right
the real mask, what happens? It can come outside by
the one that controls. You can see that arrow
is gone, right click. And keeping mask
the arrow is back. Very simple. Now you selected
this, what do you do? You press on out. You press on the click hold and drag it. Copies as we all know, normal. What is the essence
of doing this? This is what to do.
This is the copy layer. Okay, this is the
really is a copy layer. Layer is when we are selected. Then click hold and drag. You can see perfect,
what do we do? I need to flip it because as you see in this, this
is something like this. Just as the same thing. Another thing is now
click on this one. Then what do you do control? When you control, then just bring your coser on
it, right click. Then what's flip horizontally? I forgot that because actually flip horizontally makes it looks perfect than this controls the other term,
right click on it. Then what's flip horizontally? That is it. Apart from that, just come over to the layer one. The copy, the copied one. Okay. You can delete, okay, and try to create
another one out. Then click old and drag down. You can see still selected. Just make sure it is
merging together. But it took somehow and doesn't like the way
it's meant to be. That's simple. Just
what do you do? Control, Okay. Then right click.
What do you do? Flip vertically. Very perfect. The check. You can just try to use up and down arrow
on your keyboard. It's selected, select
the layer one slayer, one copy, then move it up. Are moving, you can say are
moving as I'm moving down. So I just want to see, just
close it and that's it. Don't worry, no one will see
what is happening there. We're going to cover it up. That's very perfect. Now I want to add some type of its tractor image is too
to shine too bright. I want to try to try to
it and make it worth, let me say make it reduced. Okay, fine. So what do we do? We come over here, this
layer over here, layer one. Let's layer because
layer one copy is just one used as a cab
flag down there. But the layer one,
actually I want to use what we call ingredients
for me to make gradients. I want to just come over
the ingredients here. Because it's ingredients
come over the grad. Start, click on drag
and do like this. No, it doesn't work like that. You need to create a
layer for its entire. Otherwise it would take over, the layer on the tractor
won't be there anymore. Now, what do you do?
Contra what do you do? You come over here, you
create a new layer. Create a new layer. That is the plus over here. Make sure you're not
selecting this, I repeat. Do not select this.
Select the layer one. Okay. Then what do you do? You press on this plus, which is what creates a new. Then this is created. Whatever you're doing.
Now, make sure you're not selecting any layer
except from what, the layer two which is empty. Whatever we do, just
click over here, then come over here, you
click the gradients, okay? Don't forget this is
the option B, okay? This is the option
or properties bar. Okay? Just click on this. You have different, can
try to increase this. You can see we have different, okay, Bring it down. We have different
types of things. You can choose from.
Gradients, Gradients, you can even create yourself, but let's maintain
the fundamental one. Just click over here, you
can see different gradients. Color, you can see the
color is changing. You can see black and white. You can see blues, You
can see different ones. But I don't want any
other one that was just a black and white. Okay, I've selected
that. Then what do I do? I come over, click old
and what old and drag. You can see, you can
see what's happened. What do we do? It's very perfect. Just come over
here to, normally, we need to blend the upper layer with what with this down layer. The upper layer with what
with the down layer. Another thing we can do,
instead of doing this process, click hold and drag
it up like this. Okay? Just click
hold and drag it up, and it covers everywhere.
Let's do it like that. We can click hold
and drag it up. Then it covers everywhere. It would actually
make it perfect. Come over it to what's
the blend mode? You can see normal, dissolve, darken, multiply different ones. But when I want to use what is not really darken,
multiply, okay? But I want to use what? Color? Yeah, color, okay? But the theme is just that. Let's try to look at
different ones we have here, can see different ones
that suit the design. It's yours, it
depends on you. Okay. My color divide in the
likes that should be okay. That's fine. Why? I want to use color as I've said,
what do I do? I try to reduce the. You can see, you can
see what is happening. You can see, instead of me having something like
very bright and shine, I don't want it to
be very bright. And you can see this before
and what the before. Perfect. Not too much. Not too much. I can
try to increase it. You can increase, but
can see very perfect. Now that is it for that. Okay. I can just come over
here, let me try to. I can just say that
is the background, but I won't say that
is the background. I would just click over here, press shift the click over the right click then
was group players. I'll call T because there is still another
background down the tractor. Okay. Very nice. Out
the zoom in space bar. Click and drag the
left left mouse. Okay. Then I'm going
to give it a name. Actually, it's as a name. The brand as a name. Okay. Over here, what do you do? What is the name?
Green Greek Perfect. So you can control, then try to increase
the move to, or you check the
check over here, B. Change the font to a nice font. This font is nice, but I want to change the
font to another font. Okay, let me use
oh, sorry for that. He something like that. So okay, we have -25 Just trying to trying to make
sure things are okay or we can just decide
to change the funds. Okay. But let's see.
Let's see how it goes. Okay. No, no, no. Let me see. Zero. No, no. Then at Steel Fish, Okay. I think steel fish would
do the work better for us. Steel fish TEE L the coal away from it is
going to be affecting TEE. Yeah. Steel fish,
steel fish, regular. Nice. This looks bold and, you know, big enough
for us to use. So what do we do? We need
a logo for the brand. You can see everything I design. I would always have a logo for it because it's very important. Click, click, old
and drag the drop. Very perfect control. Click around the
end. Just try to. Okay, we have this
then, then check. Okay, come over here
to the green Greek. Click, hold and drag somewhere. It's in the middle. Then
then what do we do? Okay. Before that, let me change the color of this
layer, this logo. Right click and
what blend options then color overlay as usual. Okay. Then come over
here, then green. I want light screen. I repeat. Very light screen. I think that's okay.
That's fine then. Okay then. Okay, green. Agree. Because the color
we have to use most tally, Whatever we're talking about, we're talking about Agris, have to tally with Agri. Zoom in then click,
Then drag up. Yes. Then control zero. I think it's too big. Somehow. Kind of Okay, So let me try to group the
two together at first. And other words, brand
logo, then control. Okay, Then the check
the control zero, you can see perfect. Let me try to zoom in again. See think it's
perfect like this. Yeah. As a designer
should know what is good. It's perfect like this.
Or let me increase it a little bits but
make it a little bit. No, no work contra
think little bit. Yeah, yeah, Contrary
zero is that okay. But as a designer, you
must not make mistakes. You can, but just try to
make your work perfect. You shouldn't make mistakes
every time contra zero. Again, a little bit.
Click and drag. Yeah. Yeah, I think that's
perfect enough. So what is the next thing
to do, contra zero? What is the next thing to do?
The next thing to do right now is coming over here. Present no, coming over here, then come over to circle. Okay, come over to
circle, then we have as usually, come over here. Okay, don't forget your right click in order to find
the remaining options. Then it leaves to, okay,
then what do you do? Come over a click. Then what drag, okay,
you can see it somehow. What present shift and out then it brings it out
from the middle. Very perfect, control zero
and see what happens. You can see very perfect. You can leave the color
like that because we're going to Still
going to put what? Still going to put an
image inside control. Just come over to the stroke, okay, To the stroke, we must have a particular
color that is no very, Let's say, let's say we use this hydro pattern capture
to get this color stroke. Press. Okay, let me try to
increase the stroke. I'm coming to use a
particular color, but let's try to
increase the stroke. Not too much stroke. Okay, let me say,
let me come back here and see what happens.
Is this perfect enough? I think it's too big. It's quite big. Okay, control C. Let me click
and drag out Skip. Okay. It's somehow, I don't
really like the color. I mean, the color
itself, I don't like color. What do we do? We try to reduce the try to do
something like this. Yeah, I think this
is perfect enough. Yeah, that's perfect enough. That's nice. Apart from that, we should come over
it just right click. And what lending options because we want to
give it to what? We want to give it a drop
shadow. A drop shadow. So now you can see drop
shadow and make sure your opacity is
not too much okay. Just try to increase
something like this is okay. Your angle should be something
around as this is okay. Just to increase,
come up a little bit around 54, you can see. Okay. Then your distance should be the way
it is, like 42. 43. Okay. Shouldn't be too much. Okay. You can see should be too much for the draft shuttle. Okay. Okay. That's perfect. So what else do we need here? We don't need anything
again, then present. Okay. So what do we do? Just come over and come to file. Okay. First, let me
delete this one. Let me delete this one, the tract top. Okay. Nice. Come over to file, open, go down, down, down,
downwards, select this. Downwards, open, very perfect. So click old, and drag,
and drag it here. Okay? And just right click on this because it is this ellipse you want to create. Clipping mask and just
clipping mask and it's inside. Just out and zoom out control. Then what's? Click, hold and
drag using your out key. Zoom in. Okay, then bring, make sure it's in
the middle, okay. You can see the vertical line. Then the result line
actually is nosing, but that's not a problem.
Just zoom in and what? Just come over here
without using your out. Just then try to what
is wrong with you. Okay. I'm not I don't need
this porting over here. What I need exactly
what the tomato. And check something like this you're doing. That's perfect. Just check it on what's control. Perfect. I think I
need to increase. You're not going to click
on this because this is the inner image
with the ellipse. I think I want to make to
increase it a little bit. Okay. Let me say this.
59. Let me say 62. Okay. That's, that's nice. What else do I need that? What do I do? It's very important just click on press on controls
and click on this. Then right click. Firstly,
let collapse this. Then right click. Then
group from layers. I say circle one because we need circle two words and
three important. What do I do know, Cale one
is selected and press on O. When you present
the more do you do you click this old world drug? Make sure you just do
it something like this. Okay. Then what is the nesting? Press out again. Click on this word drug. You can press on sheets
to make it words, to make it proportional, then then you drop. But before you do that,
you can contras it, select the circle
one copy contract, then try to reduce. Press on this old, then press on, then try
to reduce a little bit. Not too much, but a little bit. Okay? Yeah, I want to
make it the variation to be different from the
original circle itself. What do you do this circle
one click and drag it up. It should be above
every other thing. You can see very perfect come over a double
click on this. Press your right arrow on
your keyboard, then words. Oh, sorry for that. Press the
right round the keyboard. Then Spark Saples, very perfect. Just click on the sapple as it's been click,
it's been selected. Move it out a little
bit from there. Okay, so what do you do you
Okay, I can change the color. I can change the color just now. Okay. Let me select. Okay. Selects not
showing anything. So just press on the
arrow, Then select, select this ellipse, not this. Okay. Then what do you do? You select this, try to change the color.
Something like this. Probably you come over here and change the
color around here. Okay. I think I need more
Something like that. Think I may be more clear. Yeah. Something
like that is Okay. And that's that's
perfect enough. That's perfect enough.
What do we do? We change the image. The image you're changing.
Just click on this. The image is coming over this. Or you did this immediately, but you can just click on this. Then what's comes
to file comes to open what we need, like
something like this. Perfect. What do we do? You click and drag it
up here. Then what? You drop it down, it comes automatically here. Because we selected this. Because whatever you select,
whatever you now choose, whatever image you
are bringing or importing is going to be a book. That image you selected
before. What do we do now? You click older
and drag this one. Then what's delete you do? You click Select, right click. Then create clipping mask. Very, very perfect. Then
out, then zoom out. Then contro, zooming. Just try to drag a O. Then click and ran. Check control zero.
Very, very perfect. What do you do now? We
have this done already. All right, so what do you click? Select the Caple
two, present click. You can see how it is,
but present shapes what? Make it straight. I think that's perfect enough. Okay, then the first thing I do is I changed the
name towards saple three. Okay, Then we have
sapple three. Selected. And come over here.
And don't forget, it's very important, the sapple three should be below
the sapple two. It should be chronological.
Should be perfect. Present this rod, Select the
ellipse to show everything, don't you won't select the layer, you won't
just select this. You have to select that exact
elements in the design. Just come over here, try to change the stuck, make it thicker than
the normal ones. Very perfect. Just
a little bit thick, little bit lighter, or
something like that. Okay, I think
something like that. It's okay enough. Good enough. What do we do now? We
try to change this one. Select this so that the fight coming up should be above that. And within that one
point, what's open? Click, Everything
should be worth green, because talking about
green life, okay. Click and drag it y the dust base to the trash
can. Then what's delete? Click and right click. Then what convert converse, create clicking mask.
What do you do? Press one out, then
zoom out control. Then you can navigate this. Click, Click old and drag this. Okay. Bring it to the middle. Okay, Something like you
can see the sorry out. Then zoom in, then
click and drag it out. You can see very perfect. Then we can try to keep
it, put it like this. Okay. But I think
we should. You. Okay, that's perfect enough. Then check control zero. You can see very perfect. You can see even, let me try
to de this, try to d this. You can see just tractor. You can see this line. We've
never seen it like before. Only you designed it. Would
understand the details there. What people won't understand. You can see it's gone
very perfect. Okay. Now what do we do? I think
it's coming down too much. I think the circles are
coming down too much. So let me just say circle 2.3
Present control and select. Click and drag it up a
little bit too much. Little bit down. Select circle one, circle one. Then take it up a little bit. Does what does Perfect. Perfect. Very, very perfect. I can
actually control all of them. Then click Old Present. Then try to reduce them
to be not too big, to make them too big. And click, drag them
up a little bit, also a little bit. Okay. And what you select,
and that's perfect. You can use your left arrow on the keyboard to move it
to the left a little bit, Then up a little bit
also, that's perfect. So what do we do? I want to add like a little small effects, like something
we've done before. In the first flyer
we did, we designed. Now this is the
bag as I've said. I'm going to add
another thing there. Okay. I can try to just
right group for now. When I have this
background, what I'm going to put
it in background, it is expanded in collapse. We want to add some
nice good effect to this design. What do we do? You select the
circle layer because design design to be up. Okay, on the upper parts, the effect rather to be
up. What is the effect? Just the leaves. Okay, going down, sorry, going down like this. Okay, What do we do? We come over here. Here
we want to borrow this. B, five leaves. Press open, click old, and drag here. It appears fine. Click old and drag around here. What do you just try to come
over those control, okay? It's very small. We know
that it's normal. Okay? Just bring it here,
try to expand, find, that's not a problem. Try to move like this
we want to do is just, we want to try, try to control, right, the flip horizontal. Very perfect flipping
arizontally. What happens? We'll
bring it around here. Brings just something
like around there, we're going to blow them. Don't look good and
nice. Look fresh. Okay, always keep it fresh. Just drop it
somewhere like this. Okay, Yeah, I think that's okay enough. Then what do you do with blow? Okay, perfect. So just come over here. This, then right click. And as usual, combat to
smart objects. Come to what? Come to filter, then what blow, what can easily, Gcianldine? Just try to reduce it to
the end. You got a picture. Okay. I think not so much. The leave should show, so I can just look like a
butterfly or something. Yeah, a little bit. Okay. That's it.
And what's price? Okay, So you can actually just bring something
down like this. Just concrete.
Okay. Price, Okay. Concrete. Try to like something like enough increase or
something like that. But something around there pre, like little bits, then check
and that's perfect enough. That's just very,
very perfect enough. So contrite like, you
know, I think that's okay. That's okay. And
nice. Very perfect. You can click and drag Eli bits. Click, drag Eli bits. That's okay. That's enough. That is it. For the effects. I can just right
click and just try to group from layers. Okay. Just put effects even case
there is something else. We're going to use a
effects the perfect. Then just try to collapse. And what collapses effect. What is the next thing to do? The next thing to
do is now was to apply a background
to the white areas. What do we do? Just
come over here. Now we've selected the layer, Let's come over here
to file, then open. Okay, then go, do we have what? Six. Then open. Very perfect. Just
try to do just this. We don't need any
more. Just click old and click old and drag here. Then it's here, perfect. You can see it's under, can see it's not showing that. Then come over here. Control, what do you do? Just try to put around there.
I think. Let me flip it. Just right click And
what flip horizon tally? I think I'm going to
love it like that. It's going to look
cold and nice. Okay. Okay. Yes? Yeah, I think
that's perfect enough. What is the next thing then? Control zero. They'll
just Right what? Blown don't forget, converts
to smart objects. Then what? Come over to filter, block motion, blow,
Gil Gaussian blow. That should be perfect
enough for us, 0.9 Okay, it's cooler. Okay. Select this, select
the present control. Then select layer zero.
Then right click. Then what do you do? You
group from layers then. It's group already.
Sorry for that. It's grouped already.
Just collapse. Yeah, we have that. What
is the next thing to do? We need some text.
All these texts. I'm going to make
sure I'm not going to select anything around here. I'm going to select
the background. Anything, I'll just be
above the background, but below everything here, including a tractor press
on this click over here. Okay, let me increase that
a little bit. Around. 72 is one that is to fish, but I'm going to use
two fish for this. I don't think it's going
to work out like this. Let me change the color.
Let me, let me check, check, then select the K
to come over to white. Then change words black
for the meantime, uses green over here. Okay, let's just, let's give it its color straight.
Let's come over here. Then I used the ice to
select the green over here, then came over here. That is perfect, the text to select this green leaves. Okay, that's pathetic. It's kind of let me say, okay. Okay, fine, that's
not a problem. Let me just say,
put it around 72. Okay, good leaves. Yeah, that's good. So just come over here. Select, select this. Okay. Which we use earlier. Select this for. We
can use fish here. We're going to use this fish and what squall, if it's
correct, like that. Apart from that, we're going to use what's called humanist. I just like to use
humanist and photo. I don't think I've
used photo throughout, but that's not bad. That's okay. Let's make it 30, that's not okay. 48. That's 60. 50. Let's say 50. Let's say 55. Let's say 53. 53. Nice one. He just come over here. Country, okay. Zoom in the check, then come over here, try to. This is 62. Let me make it 60. 60. Not too much. 61.5 Let me just 61. That's perfect. Out, out the space
burden. Let's see. Yeah. Perfect like that. Very perfect. So what is
the next thing to do? Services. Services we're
not using as we're using. Just come over here, M O N T s for that. The cosh, trying to type, make sure the corsor
is not around, it's going to be changing it. Just bring it down like this. Okay. What's month month? Sera Monera medium
probably should go. No, lets you bold. Shouldn't be too
bold. Yeah, perfect. Just let red, I want
something red, reddish color. Bring down the red, like this very part then. Very nice. Okay, Sorry for that. Just to. Okay, Yeah. What do you do? Come over the -25 or let's just say -100 very,
very perfect. Let's -95 -95 okay. Nice control. Try to reduce, reduce, and put it in the center, like being center aligned. Something like that, okay? It doesn't really
look center aligned. No machines are not correct. Every time you
just, let's try to put it the way you think
it would actually go. Perfect. Okay, let's try to
reduce this a little bit. Okay, good. So try to increase this also. Okay, Check it first. Can you try to
increase this also? Hm. Okay. Ten -25 Okay. -50 Good. Perfect control zero. Okay. Zoom, sorry. Zooming space back. The control tally
gives it a little bit. Then you press control the
select the green leaves. Let's group them and say just contra G, not
showing contrG. Let's group them and
say what's happening. Okay, double click. Let's group them and say words, text one or bigger text. Okay, text, text one. Let's click, click and
drag control zero. Then you see perfect. Let's try to, like, we can try to make sure it's aligned
with that circle, but I don't want it
to align with this. Okay, let's just come over here. That's perfect. What is
the next thing to do? Now we have text over here. We need under text which is like can be above
or can be under. I want it to be above is okay. That's fine. That's
not a problem. So what do we do? Just
come over the text again. Come over the text. Okay. Select text that
has been selected, then just click there
for it to show up. Okay, what we are going to do, just check first check the
space for the controls. What do you do? Just make
sure it text, what do you do? Click old, old. Then just like this, then release to tell you
whatever you want to do, you're going to
type in that box. You can reduce the point size. Just come over to
something like pot, can see pin, just come
by something like 18. Okay, that's nice. You can leave it like
that and type the fresh, fresh capsulatorkay,
capula. Fresh food. Just try to collapse
this fresh food then. And healthy healthy life, you see a good. What happens? Just
come over here. Come here to like 36, let's say it's not working fine. All you do is just check it, then come over here,
you do it again. 11, Okay. Do it around 14. I think that is perfect enough. Let's say around 18. That's good. Now what do we do? We go back before that, Let's change the
color towards black. Click and drag down to black. I want it to be black.
Apart from that, I don't want it to be
Mona bold or something like that. Mons fine. Just come over here, just
look at the front size. The type of front,
not the type face for the front itself. Like medium size. Okay. Medium size is
still bold enough. I don't like that. I
want like regular. No, I want light. Yes. Let's continue now. Text to then just click
around over here. The make this, make this collapse to
inseparable entities. Live your life to the
fullest green plants with our fresh green Gigi and other cultural products. Full stop. I say
what? Full, stop. So now let's just, if
you size this like this, it's going to like you
go down, sorry. Go down. Go down like this. Okay.
See, it's going down, but we're not going to
do something like that. Okay, We have it as
something like this. Then we try to close down. It goes in. Okay, so just
try to click odd like this. Okay, so sorry. Then try to check it. After checking, what do you do? You can't control C.
Then when you control, you can try to increase
like this, okay? Okay, Something like
this is perfect enough. So control. Okay, check. Okay. Okay, that's perfect. What else do we want? We
need a call to action now. They've actually
tried to advertise themselves where this
were. What else? Just over towards rectangle. Then click Old and Wards. Click old and drug like this. Okay, I think enough. Fine. Then out click Old D. It should be in proper.
You can see perfect. We have that. What is next? Then come over the what's contacts us. Okay, now we have that. I actually want to
make it more bigger at least than the
normal regular one. I want to be regular. Yeah, regular. Just contrary to reduce. Then bring contra bring
it around somewhere. It's not showing why it's black. Just try
to change color. Come over here then what is wrong with you or it's not working because
I've not checked this. Then select this white then. Okay, perfect. And the tumble should be color should be red. Just come via. Then what? Select
red, then go back. Then what the scroll should be. What? No scroll,
no feel coloring. Nice one, just out. Zoom in. Select the contact us today, then make sure it is what
it is in the center. Click So we have that. We have that, okay. Then apart from that,
we can do like this. Let's select the
contact us today. Then press on Out, then
you bring it down. Press on ships. Okay. Something like that.
Then that's perfect. Okay, it's in line.
That's very good. Now what do you do? Just
change the color to black. Because we need now,
just very good. Press on the text text to click around the Cd
and drug like this. What do you write?
Plus, plus what? Sorry. Shift +2 340-235-9389 193891. That's one that's 3
456-789-1011 Very perfect. Check. So that's control. Okay, then what do we do? We increase. Check out the then zoom in, then click, click drug. Very perfect. Control.
Control zero, then zoom. Click and drug like
this, very perfect. What is the next thing to do? We are going to, we want to
put their website there. But before we put the website, okay, I don't want
to use the corner. Let's select the press. Then click and drag down. Then pres on sheets to make it, to make it proportional.
What do we do? We pre text to click old. That's bad over here. Click Old. And what's click Old, Drag. So what happens? Okay. Grain Greek, which
is now of the complaint. So and that's name the website, Gregretwtc. Then select this. That's nice. What do we do? Just come over to what
the move to try to select the contact us to the
the size it is that 12? I'll select this and make it also around 12 or
smaller than that. Okay. Yeah, that's perfect.
Just put it around. I want to select an icon, like a website icon, for us to have a very good
design. What do we do? Come over to file,
then then open, go down, then we have the seven. Then what? Open? Very perfect. Click old and drag,
then perfect. Then what control
C. Then reduce. Okay, then come over here, you can see perfect. Just check, what do you do? Just try to zoom in
and see what happens. The layer which is just
make sure it is in line, You can see that is
the real line itself. Okay, That is a real line. Just come over to the number. The number is not in proportion, so we need to make sure it is in proportion. Yeah, very good. Now come to Green.com
then click like this. That's perfect. Control
zero. What do we do? I think it's to be
things like that, so I need to make sure. This layer control plus control, plus troll, plus Okay. Plus fresh food. Okay. I think, yeah,
that's everything. What do you do? Could
you just let control? Okay. Then double click. That is what text to. What is wrong with your text
to then enter, then control. Try to do, try to reduce it. Click and drag up. Okay, that's perfect. You can click old
and drug like this. Okay, that's perfect. Let's take text
one, click olden, drag to the left, litle bits, just something like
this. That's perfect. So now we have
everything in order. I think the background
is too blurry, it's not showing the go blood. Then just try to reduce it a little bits. Reduce the blows. That's too much. Just okay, I think that's okay. That's perfect.
Before we finish, I need to add one more thing. Last one is just that I want to add nice effect like this. Leave effects I added here. I also want to add it
down in the background. So let's click old. Sorry, that's pathetic. But you just select the effect. Then press on All.
Then click Old. Drag it. Let's drag it down. Nice. Try to change this
todf effect to the enter. You can try to click
older and drag and put at the middle of tractor and text to that is not problem. So what do you do? Just
press out, then zoom out. Then control control. Then press press Okay. So just try to use this
drastically, okay? Click old and drag
somewhere, okay, then out, then zoom in. Okay? Now what do you do? You right click, then flip horizontally. Very, very perfect. So just check it is checked. The control, sorry. Just control C control. Then click old and drag, okay? Okay, zoom out. Also
click old drug, okay? Click older.
21. Logistic Transport Brand Flyer & Poster design : In this lecture, we are
designing a flyer and poster for a transportation logistic
brand, writing brand. Let me use it like that as
a logistic brand, okay? It is a company that is into writing people from
one place to another. And not only that, they use app to contact them
and things like that. It's a design that
has to do with logic. Now let's begin, unlock, then come over to file, then open as usual, Okay? Normally this is, it's D12 3456. Okay, we begin like
this, Select this, open, okay, click and drag here, then drop fine as usual. Then control on zoom
on price, then on. Okay, come over here on zoom in in order to cut
this out from the background. Actually, as we all
know, we're going to use a selection to very, very easy. Just come over here,
click click Old Days. Just selecting the
screen, one, every part. Just just conde and press. You're going to
select the place. Click Older and drag down. Okay. Then navigate
this place down. You can see it's not
selecting everything. Click Older and drag down. Okay. Then you can use your old. Then zoom out using the
multiples into Zoom out, then you can navigate, Displace. Click to the left
right hand side. Use this navigation. Also
here, click drag down. Okay, the solution to
continue the quick solution. Okay? You can see some
places are actually coming out out of the selection. Click, click here, okay. So zoom in, Press on the out, You can see this is a plus. Okay. Then press on
the out for the minus. Okay, then also for the minus. Okay, good. I think that should be okay.
That should be okay. We don't need to get something very perfect to that extent. Okay, because we're
still going to make some control zero then. What control? Nice one. This one just click hold and
drag this to the trash can. Then this should be deleted. The move to select the move
to click hold and drag this. Click and drag this. Oh, we're already in the
layer we need, okay, just come over here
and what's good, we in the layer we need actually just come over here, come down. Okay, before you
rotate, contract, let's control, right click then then
you flip horizontally. That's perfect. Then
what do you do? You try to change things. Okay, that's perfect enough. Then just have that
selected there. Okay, nice one. Just click, Navigate down. Pre Oldsky. Okay.
Then after that, what do we do? The next thing to
do is to bring, this is where the action
begins upon. Then what? Bring the car in the
nice logistic car. Okay. That is, say that is being used for their brand,
to transport people. Click Ad, drugs, drugs, and then drop. Okay, that's good. Then control C. Use the Ods key. Then out, click here, click and drag the
Praise Old Sky. Praise the space. Sorry.
Praise escape prep. Oh, sorry. Let me check first. Then the space bad,
then no, perfect. So click here. Move it
near a little bit here. Move it to the edge here. Okay. Because that's what
exactly I want to do. Then click on this, then move it a little bit to the edge. Nice. We can see what we
want to do perfectly, but the thing is just that. Just select on what's
on this layer. Okay, You can see the
Select this layer. Click down, Come over here. Okay, select on this layer. Okay, then what do we do? We select the layer
mask as usual. Okay, select the layer mask. Select here, make
sure this is black. Make sure this is
white downwards the B, which is a short cut
forward for the brush to. Then firstly, you erase the edges before
we know what's next to do. Can click, click on slip now.
Yeah, something like that. So we have that perfectly, then zoom in then
reduce the brush to. Can increase it around. So just to make it
very fast for you. Okay, So now try to zoom in, okay, Zoom in very well. Try to reduce it. Then you want to
show that the car is coming from what's coming
from inside the phone. You can see very perfect. So control zero, okay. Very perfect. You can
see very, very perfect. So we can try, so you can press on X, even case, for example. You just, so you know, I know I've said that before. Okay, sorry, can see that's
very, very perfect. So just try to me, I was actually thinking I
should just click here. Then, you know, we move
to then try to make this. Oh, sorry, I take layer. The layer. Okay,
just select this, Try to move this a
little bit inside. Okay, a little bit inside. Then press control.
Then select this. Then you know what
to do. You click, you click hold, and drag
to the right and side. What do I do with
this? I make sure I come back to this layer,
select the layer max. Then the brush to I'll
try to plt on this. When I paint is what happens. Nothing but it cleans it. But I want it to be to make it appear and
make it invisible. Just switch and the Xds try in. Okay. I'm sorry. X. Oh, sorry. Never tried to. Okay. Something like that. Just go. Okay. Very perfect. Yeah, just come over here and try to just
press the X. Okay. Make sure it's gone.
Then look at this place, the phone is showing
down. Just press the X. Make sure you're
cleaning the place away. For the phones to show
here, right here. Okay, Try to zoom in. Press X. Those places
show right here, those dust, press X again. Make them like, you know, somewhat invisible or
something like that. Okay? So just come over
here a little bit. It's going to, it's quite
tricky somehow, okay? But don't be scared about that. Try to reduce it. A
little bid and phrase. Let, try to, you know, control zero very, very. You can see very, very nice, very, very perfect. So what do we do next? What is the next thing to
do? Just try to increase it. Okay? Just try to know
something like this. I think that's too much. Just come overhead
and press X on this to make this visible for us to see what we are doing. Okay? Then after that, what do we do? Press X again. Then we try to know something like this. And that's perfect, so we
can just present control. Then we move to the
downward it to bits. Okay? We have
something like this. Perfect. Present control zero. Okay? Apatrom that we can
actually come over here, okay? To put some navigation
maps into the words, into the phone.
Okay? What do I do? I come over here to the
selection to come over here. Then click, strike,
increase, click, drag down. Okay, you can see selected
selecting the screen and down. Just press on out. Then subtract the places you don't
want it to be. Then subtract contra press on
outiden subtracts present. Outiden subtracts going to
subtract. Yeah, that's nice. That's nice, Yes. Then stret reduce, then also out around
there, try to reduce. It's tricky some you're going to achieve what you
want to achieve, okay? So just take, everything
is going to be all right. Okay, so try zooming then. Try to just reduce
it in a little bit. Because reducing it
would actually help you to select better than just increasing and minus display from it. Because we can't
allow the card to be chosen like that Cho part of it. Okay. Yeah, try
to subtract also. Okay. That should be okay. Yeah, something
like that is okay. Just control zero, you can
see very, very perfect. What do we do? It's very simple. Just come over here, try
to delete this, okay. Then come over to
file, then open. Okay. Then come down,
then select this. Then what do we do?
We have this now. Just make sure you
unlock this and try to select this
image as a whole. You can press control zero. You can press control,
that's one thing you can do. Press control, then
come over here, you can see, you can see the cost changes. Come
over here and click here. You can see, you can see they
aren't like matching lines. Okay. You can see selected. Then what's control? Or you come over
to edit and copy. Still the same thing.
Now, come over here, come over here, What do you do? You do, you should be here. Okay, make sure you select this. Then what it, then what's
pastas, special paste into. Then what? It enters
into the selection. It understands what
you're saying. Control zero, then control C. Then try to reduce
the fix it very well. Inside, I just try to increase. I'm using my left
arrow on my keyboard to move it can see, then I can press Shift, then try to make this
longer a little bit longer. You can see that a little bit longer but it's going
to distort the image. Just you can click old
somehow like this. Try to adjust this a little bit. Okay, click old and drug down. Okay, just move a
little bit like this. Move up. Yeah, I think
that's perfect enough. Then what? Then you check. Now click old and
drug out. Then what? Zoom in this, please. Look. So just come over. Click on the layer max, then B, try to
reduce, reduce it. It paints black on it. You can see very,
very good. Perfect. Okay, that's enough to control. See, we're achieving
our results. What's next? The next thing is supposed to apply
effect, which is what? The solid color,
the color field, whatever color we're
trying to apply. Let's try to apply
something like yellowish, yellowish color then. Okay, what happens? Come over here to, to change to any
color you prefer. Something like this.
Very nice luminosity. Color saturation. Okay, divide,
subtract difference. And it's okay. It's, it's to use
bomb, divide, perfect. Just reduce the opacity. That is the best
thing you can do. Your past to zero, then
start increasing two by two. I think this perfect enough. Perfect. Okay, thing going to do is what you
can just press out, Click, press, click, drag. Okay, I got to try
to do something. Come over to brush, because
you need to make it perfect. You can never be
perfect, but just try to make this perfect country. Another thing I
would like to do, just make sure this
is, this is white. Okay. And depends on
the black layers, so I don't make this turn back. Okay. Then X. I selected my X. Then click then, just like li, two by two by two, just something like this. Okay? No contrast. Let me not conflate control, Let me just switch X.
Okay, you can see that. Now I want to try this, okay? Make sure this works out, okay? Click old and drag. Sorry, the switch from the X.
Click old and drag. Okay? Click old and drug. Then you know,
something like this. Very, very perfect. So I think it's, it's, it's, it's
fine. It's okay. It's fine. It's okay.
It's okay the way it is. So what do we do now? We come over here. This is the car. This is the selection
for the phone. The phone itself, let's
say 123 is control. And presently three downwards, you group everything group from, from call it car and phone
is in the background. You just have to
have it like that. Now what do we do? We want to apply a light to it. Are light, just come here. Try to delete this first. Delete on the flare lights. I just love the light
so much. Love it. Then present, remove to, then click on this
move right here. Then select this and make
it worth screen as usual. Control zero, control C. Then click old and drag
down bring right here. Okay, Zoom in. Then
use this navigation. Click old and drag, pressing the old key. Then check control
zero. Very perfect. I said very per what do you do? You click on this, click on
this, click on this and this. Then what control? Right click. Then what's group? This is what we
call back ground. Then you're good to go. Very nice. Control.
Let's come over, let's click, click,
hold and drag. You can see what is
happening to the phone. The map is not following
it. What do we do? Just check this control then
come come over the click. This press control still. Hold on the control. Click and click this. What do we do then? You right click, merge layers. You match all the
layers together. You match all the
layers together. Before you march all
the layers together, make sure everything is perfect, you're not making any
more adjustments. Because any more
adjustments would work out. Okay, now what do we do? So let me try to adjust
this car better, present X, then press on the
mass layer max, then present X to switch. Then try to something like this. And that's perfect. You can zoom in and actually use the X also X again to make some nice nice
effects around there. Can then just zooming
in to bit, press on X. Try to take away those lines that looks somewhat contrast, that looks somewhat visible. Name was control zero. That is very perfect. So I can actually come over
here and know, try X, okay? Try to, you know,
something like this. Then the control zero, very perfect. I
think that's okay. X again. And just going to
try to make this perfect. We aren't perfect, but let's try to make something look good. Yeah, I think that's okay. And actually, that's
what we want. Now, what is the next thing? This is a flare light already, making design look good. Sorry. You click the flight just to
try to reduce these lights. Flare control and click and
drag it down e little bits. Okay. Eli then just put it somewhere that is nice and beat. You can see without
the flare lights just look dull. Just normal. Flay light looks nice. Okay, let me just put it
up before and the after. Perfect. What is the
next thing to do? Next thing to do is now click
on this, press control. Click on this and
click on the right. Click downwards, merge layers. Control zero, then control. Then click Old. Click old and perfect. I love this. What is
the next thing to do? I want to give it a drop shadow, something like
that, just to make it look realistic. Nice. Something like that.
Now, how do we do that? Just as usual. Right click,
downwards, blended Options. Then select, select your watch. Select your drop shadow. Then from the drop shadow, you can actually select
different things. You can see. You can see
drop shadow actually down. Words can see how it's moving. You can see, but I want mine to be
somewhere around there. Okay. The distance also. Okay. Just try to make it. I think we shouldn't be there, we should be somewhere
around there. You can see it actually.
Here from you can see, you can see also the distance. Right. I think that's
okay. That's fine. So try to try to
collapse system. We have we have the
car and phone a layer. We have all these also. We can just see we can
see background one. Let's leave it like that because we have background already so that's not a problem.
We are prove that. All right. Yeah, we are that. What is the next thing we
move now? What do we do? We move over to well, come over to fly then
we approve this. There's nothing we have
to do to this again, and it's already perfect and
looks real. What do we do? We come over to Fly. Come over to open, Okay, then come over to this
place, then open perfect. Click old, and drag and drop. We have control zero out. Zoom out, then try
to make sure that this background click
old and drag is up here. Another thing is we're trying to make this road like
a background also. Okay, just open the
background here, click Old Drag, and drop
this below the car and fall. You can see perfect. We can drop it below layer zero because the layer is white totally. Let's
leave it like that. We don't need to delete
it. What do we do? Select the layer six here. Actually click old
drug like this. I want to make things very
simple and different. Something like that. We have lime is to control
and reduce things. Reduce things move.
It's around there. Okay, something around
there then that is perfect. Then that's a, that's perfect. So what do we do? The layer
mask as usual looks somehow, it looks awkward, but before that we can
actually is a layer mask, this normally come over
to come over to pay, then try to reduce it because it's a background so it
needs to be reduced, that the details
won't be too much. Around 55, 56. That's nice. Then set the layer mask, then watch the brush
to then increase it. Then try to paint on it. But this white, white,
it don't work out. If it's x, then paint on it. But we're painting here, actually, we're painting here. We want to make
those edges go away, just fly away, not showing anything strikes to make sure that piece is
also cleaned up. Okay, you can
actually come over, just click once, just
to be like click, that's like a dust or something, something to work like that. Just click, click,
click, click, click. Something like that. It's okay. Fine. No, it isn't. I don't like it.
I think something like this is somewhat okay. Somewhat okay. Okay. Control zero. Okay. No, I don't like it. It's awful not good enough. Okay. So I can try to reduce it or pass it
to something like, you know, 50 the flow,
something like it. When I try to, you
know, click around here to put something like some weather stops
or something like that. It looks nice and great, okay. Opt in the road is, don't forget, it's a D company. They drive people from
one place to another to fulfill their wants. Okay.
Something like that. That's perfect enough for them. Apart from that,
apart from that, apart from the O was
saying just come over seven after this image. The next image we're
going to be using is we're going to
come come over F, come over to open, then
one open as usual. You can delete this.
We delete this, We don't need them for now. Okay, you delete this,
then come over here, click old and drag
this up, then drop. Okay, you've dropped that. Press out, then
the minimize both. And then scroll out, select it, then control, then click old and drag using
the old ski reduce. Then another thing you
going to do is on zoom in, then try to rotate. This very important if
you want to make it 45% like just press on ships. Then click Old and drag to the middle the words click
Oden drug present out. Then that's perfect. Then check what is the next
thing to do after that? Make sure this is underneath everything
except from layer zero, you can see very perfect. What do we do? We
make sure we reduce this to something very small, drastically press
on country zero. Something very
small, drastically. That's around 18 or
something like that. Now what do we do? Just
select the layer mask because it's actually
showing. What do we do? Press brush and this is white. The layer mask is white. What point the brush is what? Black. So it's going
to go perfectly, Make sure it's not
showing around here also. Okay, let's just leave it
as showing around there. That's not a problem. But on the road show, on the road here, it's more than affects the road, it's not erasing very perfectly. Reason is that the
opacity is being reduced, the flow is being reduced. What's increase it
then? You do what? You erase things
very, very fast. Try to re use then control zero, you
can see very, very okay? And it seems, even because the background
wasn't show a lot, mustn't be too much,
just like reduced. Okay. So it has to make
sure it's blend perfectly. Okay. So that is for that. Apart from that, we
also make sure that the flare lights actually, it shows. Okay. It shows around. Let me just come over here
and select the flare light. Click, hold and drag. Just want it around somewhere, but that's a mistake. Just present out it's copies
and pastes, Adjust some way. That's nice. Just like a light. Okay. Like a light, that's good. Because that place is red, the location icon is red. That is very perfect. Another thing is just that. I think, I don't like this
place. We, it looks like. Just select this P the layer. Stay the brush and
try to increase. And try to increase, okay? Then click and drag, which is not supposed to
be the X. Click X, okay? Then what do we do? I try to reduce your pacity. Try to reduce the flow. So that same 60, 60 something. Then what do I do? I press on X switch, then try to take this
away to by need to. Okay. Can see see
something like this. Okay. Something like this. Then I think that's,
That's perfect enough. Yes, that's okay. That is nice and clean. Very perfect. So we're through this downward, this nice downward, please. And what is the next
thing to do now? The next thing to do is to the brand name and the
brand icon, press on. Okay. Then then make
sure you collapse. It's collapsed already. And
make sure you collapse. Just select this and we
start with the brand logo. Just try to delay this. Okay? What is the
next thing to do? Just come over to file open and what's the brand
logo? Which is what? Six. Then click old. Then drop. Very perfect. Click bring around here
contra reduce a large extent. Then drop what.
Trying to do now. Just press control zero. Okay. Click the
blending options, Okay, then me having
a blending option. I want to change the color
of that particular thing. You understand that if it is coming outside
from Photoshop, not created in Photoshop, we need to use the blending
mode, the blending options, by T clicking on the layer and selecting the
blending option, also called the layer style. Okay, to change the color. Now, color overlay. Then select this.
Then what do we do? We don't have a specific color on us, We have a specific color. We have the brown color, which is the color of the car. Just come over here and
use this to do what? I think it's too light to dark. I think I think
that color is okay. But I need to make
it so deeper in, you know, What I'm going
to do now is okay. Okay. No problem.
Let's continue. I don't want problem. I want something, no
logistic looking people see that they are safe and, you know, security is
tight and, you know, their life is not at risk, okay? That's perfect. Okay.
That's perfect enough. Then then, you know, then let me come
over here again. Color, double click,
Color over, double click, click over here, then
try to make it darker. Yes, that is perfect enough. Very perfect. Now I want to give them a
brand name actually. And their brand name is
words you select on this, then click is Words Capsule. My perfect. What is
the color for that? I'll just come over here then. Just on the reason why it's bringing this
is that your capslog. Your capslock. Then
make sure it is off. Then select this, then
you're good to go. That is the move to
then click and put around there, control C. Then try to reduce a little bit. I think I should give it
Italy coming coming in, then just give it regular. Italy. Regular. No, no, medium is then. Okay. Fine. Nice. That's nice. You can zoom in then control. Very, very perfect. So this and this is what brand logo very, very perfect. Just out in unless
see what happens, I think I need to make the rider a little
bit smaller. Okay. My rider is a contract then
click O and watch drug. Okay. Then come over here. Yeah, that's Satya, that's true. Come over to something
like semi board. What's wrong? Semi board
Italy. I think that's okay. That should be
okay. Yeah, that's fine. That should be fine. Okay. Out then then zoom in. Now we move towards to the text we need to
write on the design. What is the next thing to write? The next thing to
write now is what. Locate and write and
some other things. But for now the
capsule should be on locates and right, nice one. We select this cont rather
make sure it's big. At least make sure
it is in line with. Check this present. Then in the mouse putting, I want to try to change
the color spacer. I'll try to change the color. I want to make a contrast
with color over here. So this car should be
in this color, but the, my rider should change
more blue like color. Okay, So just click on this, my rider, try to
make it visible. Correct. So just select this. Okay, select this also, then just know there's some kind of blue color that actually looks nice. Come down over here. Okay, I want to make it look like that exact car be used for transporting people. Hey, that's perfect enough. So now locate and ride. Actually, I want such a color
or so just select that. Downwards, come over here,
then that's perfect. Then select. Okay.
Now what else? Just come over again.
Sorry, just come over, try to change this aunt board. Okay, but not italic at all. Board is perfect enough. Then change one to
something around 48. Okay. Nice. One quick old and
it's in line, that's good. So just try signal.
Probably six. Okay. Probably like 483-63-3303, then let's say 35, 35, then that's it. Then we have this also -75 Okay. Very, very control zero. You can see I think I should reduce and try and
ride a little bit. That has to be reduced. I'm not going to reduce
it, I just have to reduce the forms to something
like semi bold. Okay. Then. Yeah, I think
that's perfect enough. That's perfect enough.
Apart from that, then try to increase
the -50 Let me see. Say -55 55. Okay, good, That's perfect. There is something I
would try also try to do. Okay, just press on Out
Zooming, that's very simple. Just come over here to
file and open the load. Then select, which
is resource file. Then comp over to the last one, which is what's 77. Then what's open? Then click old it here. Perfect. Contra, try to reduce. Okay, just put it somewhere. Okay, then what do
we do? What do I do? I select the layer
nine actually, which is the location on contra. You can see above, can see the line above it. So that you can
see very perfect. So you can just click
Den Drug like this, don't give you what you
want, just contrast it. Press on sheet, then
click Den Drug, and try to make it no
bits like fact, big. Something like that. Then then, okay, very perfect, select this. Only select the downwards text. Try to de, then space. Okay, then check, then
select the layer I. Again, select the
move to click hold, and drag this to
the left hand side. To the left hand side, okay? Okay. So you can actually
try as much as possible. Just use text to the
electrons to expand this, but not too much. Okay? Just to be just
tres to re, use it, okay? But make sure this is
working perfectly. Just click hold and drag
like this. See what happens. Control zero is really perfect. First, let me change the
color to this color itself. Okay. Color overlay. Then select color. I give it as that color
which is perfect. Just like, you know, just like. Oh, sorry. Right. And
it's then color overlay. Color overlay then. Okay. So controvert
control zero. I think that's perfect. Select it's click old drug. Okay, so click old
drug like this. Yeah, I think it's perfect
enough. Control zero. Yeah, it's perfect enough. Yeah, it's perfect enough. So that's perfect. So the mistake I've done
is that present control. And try to bring them outside
the group for brand logo. Put them here. Don't
drop them here. Still coming inside
the group but put them around
some very tiny tim, we just drop it down.
What do you do? You write click downwards
group from layers. Then you can just write
text one, text one. Okay. Then just make
sure you text one. Want to write another text? What do we do you see? Okay, we locate and drive you. And drive you over your Contr perfect. So what do I do? I change the font to something
lighter than locates. And what's right? Very important to bring about. What's contrast I can
use medium, fine. Then try to reduce
control drastically. The P shouldn't be too
big. Things like that. Then select, then change
it to what to black. If I feel like I can, I
can leave it like that. Okay, that is not a problem. So the move to click
old and drag up control zero, put Ski to dominate tubs
and see what is happening. Okay, that's very, very perfect. So click old and drag down, Convert the navigation here, click Coding, drag down. Then we creates the call
to action over here. Just click click Cod, Drug. Okay, let's come over
here and select this. It should be okay. Okay,
this is perfect enough. We select this, but it's
the same thing. Same thing. This is perfectly the same
thing. What do we do? We try to click over here. Those pockets, you have
to still select that. You have to select on ditangle
shape. On the rectangle. Still on ditangle, okay? You come in to the, otherwise
these things won't show. You have to still be ontangle, Click over and drug like
this, then that's perfect. Then try to take away the stroke from there.
Very, very perfect. So we have the Symt
come over here, we look at your contr.
That is the second test. Just conte, that's,
that's text two. Sorry, and is not
really doing text two. Then what's? Try to collapse. We have another text right now. That's what book now. Perfect. Then what's
the exclamation want? Something like that. It's okay. Perfect. Then try
to reduce, bring, per, then select the move to. Okay. Can come over
here, Pick this clip. Ode and drug, Okay? Click and drag is,
then you drop. Very perfect. So out, then zoom in. Then try to adjust the line, the space, I mean, the line spacing,
that six to 216. Okay. 910. Very, very perfect. So okay, check this. The country's, see how it's, let's see how it looks like. Okay, book now. The book now is very tiny, so I need a nice form, modern medium,
that'll be semi bold. Yeah, that looks perfect
and good. I like that. Okay. You can just press
control. Group them together. Okay. The court action,
Let's book now. You can click hold and
drag them up a little bit. What I'm trying to do
is that control zero, I want to make sure it is left aligned very well with this. Is it? Yes, it is. Yeah, it is left aligned. It's very perfect. I want to make sure there is
no problem in this piece. Just come over here to text one. Text one must align with
what's with the logo up there. It's a good. The texts aligned with text one you can
see perfect, good. You can see the end comes out. Let me just say it's put Ops
comes out more than the L, which is normal in
letter. What do we do? Come over contra,
then select the book now and sure it is in line
with what? In line with the. All you can see, perfect. It is left aligned. Just put it like
that, That's perfect. What is the next thing to do? The next thing to do
is just come over, select select on book. Now select out the
click, drag it out. Then press sheets,
Make make it in line. Then the text to click. Actually, you can
make the changes to black because that
is the exact color I want to use for
the phone number. Change black then okay. Then press on the text. Click, click and drag it
like this. What do we do? We change the number. We use a number that's
plus 0234. Okay. Then that's nice effect. Okay. Does 90 okay. 62 Okay. 73333. Okay. Does
1-034-567-8910, Yes, that's nice. That's nice. What do you do? You check it very, very perfect. So try to close this down. Then o zoom in, then control click
the old on Os. Click Old Drug. Perfect. What's control? Zero. Controls control zero, very perfect. Out then zoom in. You can see then action is down. Very perfect design for a logistic
transportation company. You can click to be down, we can see now it's
proportional, okay? Very, very perfect
contra zero singing. These would actually
trigger people to buy a car coming out from phone app that actually can look at people
from different places. We have, we have
the map down there. Things looks nice
and that's perfect. I'll see you in the next, in the next lecture.
22. Travel & Tour Brand Flyer & Poster design : In this lecture, we are
going to design a flyer and poster for a brand. A traveling brand. A type of brand that actually
helps people want to travel and go on a toll to different
countries of the world. Okay, now we begin. Normally you unlock this first, which is a normal process. First come up to five
downwards as usual. Ops, downloads the download
actually process files then. Okay, come up to one. Just select Open. Perfect. So what do we do? Actually, we would actually have a picture. Okay, this is now what we need. Click hold, and drag it here. This is the right canvas one. What do you do out the
zoom out the control, then try to refuse out
cl drug like this. Okay, fine. The other thing
is water is too much. Let me just raise it
somehow around here. Okay, bring it. That is perfect. Then click the other thing. Out to this background is white background
to make it black, I don't want a light
background. Select this. Come over to adjustment layer, then what's solid color? Then click hold,
drag down black. Click, drag down to black. Very. So we have that. So what is the next thing to
do now contra this is it, but this is the image. Select the image. Okay, now you select the image.
Then press on what? Then select what's layer mask as usual. Come over to brush. We have to brush, it looks like it's because the cap is on. Then release your
caple. What do you do? You just try as
much as possible to make sure your P is not in, it is not 100, 100, 100. Make sure your ops something. Let's say 46 flow
also 40 something. Okay, just contra zero, so we have that now. We're going to select
this, yeah, this layer. And make sure you Sel can
click once nothing is showing, it will be very, very slow. Click. Just click very well. You can see this.
Select this, select. After selecting this
to make sure that the brushes was black, not white, try to switch. Switch or what, Your
shortcut, what do you do? You click here, you
can see it's fading. Click again, click
again, click again, click again, click
again, then click Old. And drug like this will only
go once. Click old drug. Second time reason
why this is like this is we reduce the
opacity and the flow. And these are the things that
helps in erasing things. In blending things together, it was 100% you can
see the take it to 100% you see very fast. You can see very fast. But I don't want it to be very, very fast out it slow
and go on low price. Okay. Very perfect. So just, you know, just
return back to 41. Returns back to 402-40-4406 Not six, but that
has not a problem. So just you click a lot, you see just click contract and make sure
the line is not shown. I just test saying the edges. I don't want them to know like I just want people to see it as blending the image
and the image is very, yeah, we got rid of the
light of the line then. Little by little, just just move little by out
this manually. Just move little by little. Okay. I'm bringing it here. Okay. Landscaping, like this
way suits you. Okay. Actually, that's too
bright. Not too shop. That's perfect enough.
That's good enough. So what is the next thing to do? We have that
already. Okay, fine. So what is the next
characters and control generate
Downwards from layers, call back ground, sorry. That's perfect. So now we have, we need, we need the logo of the brand and the
name of the branch. Come over to open and this is the Love branch Three,
open. Very perfect. Just. Back to move to click
code and click code and draw. That's perfect. Just come over control
C. Try to use clever. Very perfect. What do you do? You right click blending
options, change the color, that color over, and come over a clicked towards
white, The perfect. Okay, that is very
perfect. What do we do? Give it a particular, we give it a
particular brand name. Select this then. Sure. Okay. It is actually, these are the ponts
we're going to use. Okay. We're going to just come over here,
change the points. So what's to humans? I so much love humans. Hm. Okay, humans. Sorry, HUM. H, okay, you have this very, very like for points,
things like that. So make the forms words, make it white,
also very perfect. What we can do is
just select text to the click around here
an the point of the. So you can humanist. Just press H. What's
wrong with you? Press H over. You can use this. This was the italic
that's perfect. Select this, That's
select too much. So click around
here, changes words. You can see this is the middle. What I don't like the way it, you can just click and draw. You've seen it specific
speed. The middle. More and more that
way it's looking. Just select layups. Control. Very perfect. That's perfect. Then present control.
Group them together, it's no shame or control. Click, that is what
that is. Good. So what do you do? Contra tract, try
to reduce this. Click hold and drag around here. Then check what do you do. Contra zeros. To select this,
select here itself, click hold and drag like this. Okay, that's the. Let's select the
brand as a contra, then try to increase that. Should do what? Control.
Yeah, that should do, that's a little
bit, that's good. That's, let's do it to me. Okay, so another thing I could actually do
is just come over, select the trip here. Okay, select this. Click. Click Colden drug. No click drug. Then try to increase, you know, this -25 Yeah,
something like that. Let me say -20 -20 No. Okay, let me see what. Not too much. Too much. Rather let me make it
-50 Yeah, that's okay. Perfect. So control zero. Nice. So what is the next
thing to do right now? The next thing to
do right now is that we're trying to put
some images somewhere there. So how do we go about it? Just rectangle, okay. Click and what's click
old and drug like this. Yeah, that's perfect. 91. So what do we do? Limit the field is black here. Just leave
it the way it is. Just come over to the stroke, then make the stroke white. And increase the stroke. That is the best thing we
can do. Increase the stroke. Okay, that's too much. Way too much. That's even way too, so why? Okay, that's select the move to select the move to try to make it. Let me say right. Let me say 35. Sorry. 35. That's too much. Way too much. Let me say 32. Okay. That's, that's enough. That's perfect enough.
So we have that. Apart from that, what do we do before we try to, you know, slant it and make
it a dynamic to lose controls of things
like that, okay? We try as much as
possible to do two. We try as much as
possible to click, press on old and drag it down. Press click, drag it down. Okay, so what do
we do with this? Okay, just contrast, sorry. So what do we do?
We try to make sure that the outline is changed. Okay? Just to make it white, try to use a nice color that
is not so clear, like white. Something like something like this nice one can make it fade more because we're
talking about enjoyment. Shouldn't be just white. Okay. Okay. Yeah, something
like that is okay. Then we should have
another type of rectangle. This rectangle should be in
a group of the brand logo. Click Oden, drag its outside. Perfect, Close to this. Yeah, this will be actually
a new group of Rex. You can click, press, press, press out the, drag it down, press
to make it straight. Then come over, try to
change what's outlined. Something like a blue. But the blue just come over. The blue should be very light. Yeah, Should be
lighter than that. Yeah, this to the red outline stroke to be lighter than
the way it is just now. That is good enough. One
other one should do more. Click cold. And sorry for that. Select this old and drag it down the sheets to make sure it is
in proportion. Select this. Whatever color should we
use? Let's use yellow. Okay. The yellow color make it will seem like
it's red but not red. Try as much as possible to make the colors look
different and look good. Apart from that,
what do we do now? We can be able to do anything. Let's fix the pictures. Photos in the even
direct select. Just come over and
make it invisible. You can see it. Invisible. Invisible.
This is one to three. Try to arrange one,
but that's fine. I know this is. Just
come over here. Five then open, then look
for taking the four. Okay. Then click then as usual just come over here to the
come over, click on this. Let slip and what create
clipping mask. What do we do? You click on the navigation because the image will be very, very Then what control without out just Fx. Click, click, code and drug. If it's not selecting
the first C on the image, selected images, then you can see coded
very, very perfect. Then that's selected very, very perfect. A correct tangle. Invisible, visible, that is
it control plus zero movi. Then what's then
open, Come down. Yet we, which should we take
possible chooses on like the restaurants in the hotels and Theory center and the like. Click then perfect. Just what's right. Click then create clipping mask. Very perfect Out. Then navigate up control. Very, very. Let's take from here
without the O can see. Then click, click,
hold and drag. That's perfect. So for the next
rectangle, which is this, then come over to file open again and come
over to were to. While the nice bad also nice
looks nice perfect. It's. Nice and cool. Click
hold and drag. Sorry for that. Then drop
here, right click on it. Then creates cling mast,
very, very perfect. Just what outs. Then
zoom out, click hold, and drag this up.
Control C, okay. Click, then zoom in, Come over here, click drag out, then come over here. That's very perfect. Now what do we do? We
can try to come up with just click here
and press sheet. Then click this right click. Then group from layers. Then you call it was small, recall Reck is rectangle. Okay. Then because
there's going to be another rectangle like long
rectangle control zero, okay. Space, Brad Drug. Then what is the next
thing to do now? We need to slant everything. I slant every control, then click a slant.
Very perfect. Then what do we do? You just try to come over. Open, open everything. Okay, sorry. We have, this is
the post rectangle. We have this, we click drag. So what do we do? The best thing we can do
now is when we click, you should select to
them with the drag them. Otherwise, when we
select only one of its, just move that one and
leave the inside image, leave it. What do we do? We need this rectangle
to the second one, then it's layer and click
and drag it up like this. But the most important
thing we need to angle one and it's
layout should be up. All we can do, just risk, group it as one. The next one which is
just phrase on this, select this, press
control, select this. Then click then from layers,
what do you call it? Then we click Can see
now we need to make re one above two below.
Directly down. You can see now very, very perfect. Let's strike. No contra select one. Try to click hold and drag it. Spring it somewhere around
here. Very perfect. Direct to bring Reco
somewhere selected. C two. Reco brings
Rec somewhere around. Just staying around
there somewhere. There should be, we should
be somewhere around here. Just bring it in a little bit. That's perfect. One should come
out a little bit. He should be here. Direct two should
be somewhere here. You can see somewhere
around there. Okay, Direct 33 should be somewhere around in. Zoom in to make it perfectly, then you drop control z. Now I can actually
come over here, select the small
rectangle and control, then it selects
everything perfectly just to increase
it to your taste. Okay, I think it's
speaking up like this. What is the next thing to do? The next thing to do
is that we're going to give it a sing, give it a shadow
simple, right on this. Then blending options, okay. Then shadow. You can see it gives
everything. It's drop shadow. Let's try to make,
You can see there. Try to change the angle. Somewhere. Good. Somewhere, yeah, perfect. The distance should
be something like this, something like this. But now the problem is on the shadow to show
on the second one, the shadow second to
show on the third one. What do we do? We try as much as possible to make sure
we do it like this. Okay, let's cancel it. We don't click ever. Don't
select everything together. We select it one by one, then that is the best we can do. Right Click then
blending options. Okay. Then drop shadow. You see it to reflect
on the other one here. And that is what exactly I want. Try to make your positive varia. Okay, and the distance
coming like this. Okay, bring this like this. Very perfect. That's going up. That's too much coming
down a little bit, some around 53.
Yeah, that's nice. That is, the exact
things can make the distance much more
or something like this. Yes. Perfect enough
but it's too dark. Yes, this type of
transparency is okay. Yeah, I like the transparency the way it is. What do we do? As usual, we copy and paste that effect that drop
shadow on the other ones. Press on, then click and
drag this drop shadow. Thenwardsdrop it
shows there also. Perfect. What do you do also here you click this
struct shadow. Okay. Press clickpad And
what's and drop here. Perfect. Now, what do we do? I think
drop is too much contra zero. I think it's too dark or something like that.
Okay, what do we do? Just come over to the first one. Come over to the first one. Double click. What do you do? Try to make it less. You
try to make it zero. Just contra try to
reduce it a little bit. That's cool. That's 44. Just come over, control
this two and make it 44. Highlight it. 44 then enter. Okay, that's perfect. Then come to the
one double click, then it's been Led
44 then perfect. It's not really changing
anything to that extent. Okay, Before I
change it for one, I think I need to reduce
this a little bit, okay. It's not really, lateness is just too much or
something like that. So let me try to reduce it more. I think that's perfect. 31 should be good.
Then double click. This is 31. Nice one, then come away and give 31. 31 then perfect. I think that that's nice. That's okay. Collapse then that's very perfect. I
need the floor light. I just want it to
look good and nice. More better. Come to file. Comes to open, then
down, then open. Then just try to close the ones. We don't need them
anymore. Close them. This is click, drag
it down as usual. Then come over to
the blend mode. Then what you scream, scream, what do you do? Use them out the control
then click And the odds keys inside the just put around somewhere. Yeah, shine bright, something like this is pictures of what we
want to come and do. This is a destination
of what we're going to take it to different places you're going to enjoy. Just try to reduce it
to so from these two. Looks vibrant. You can press click and
bring somewhere else. Touch up light
somewhere, looks good. Contra click down. Let me see. I reduce your pasty. Just come over your pacity. So far it's dull. Before then see what happens. It's shine contra, Let's
make shiner somewhere. Let's print it. Put up here,
let's put it somewhere. That's not down here. Whenever you feel like putting
it, that is not a problem. Just make sure it looks
corrective and looks good. Perfect. I think
it's not really, it's not really
looking good there. Then click and
drag it somewhere. Then that's perfect enough. I want it to be part, actually I want to be
part of the rectangle just against the
large blue eyes. Just drop it inside. You see it's on top of
everything. That's fine. You can try to collapse
these ones collapse on, it's collapsed, Perfect. That's control, zero
control, perfect. What is the next
thing to do now? The next thing to do is to
write the text on the design. Now, what do we write now? We move towards
the text to here. What travel enter and sorry. Sorry, sum holiday. Yeah. To spell day. Sure. Sure. What you pick? You said the pick to sorry. I said the pick two.
So just select. Then come over. What points are we
using on parenting? Yeah, it is what? On being That's fine. Tense, it's even, you
know, structured. It part is nice and looks
good and very, very perfect. So what do we do? Control
what you rotate it. Okay. Okay. It's not going to work
like that reason because I need to select this
post control. Okay, good. So try to expand you side. The move to pause
contra that is to, you have to follow
the guidelines. Okay? It's very, very important. Otherwise actually it
might not work the extent, to the extent we
want it to work, you can contrato unless
see what is happening. If it's not working, just
use just click once. Contra can see very perfect. You can just contract and
try to increase the little bit more just to make it big. Then select this, then use
the Okey. Then zoom in. Okay. Then you can just right click and go
to blending options. Try so some drop shadows
for this also drop shadow, you can see very nice. Perfect the distance
is too much. Just reduce the distance
and try to increase. Like you can see, it looks nice and beautiful. Nice. I love this
design, the part. It's great. You can see
very, very perfect, but it's too dark.
That's my problem. I just like to make
things very perfect. I think it's pacy, it's not much enough. Reduce it a little bit.
Yeah, no, yeah, that's okay. Then what licks? Okay, perfect. I love this design.
What else to do? Can drag it around
just some way. What is the next
thing for us to do? I make sure we put
something. It's fun. It's not composed to
put an aeroplane, although an airplane is coming, but let's put a rocket. Like a rocket, so that's fun. Okay, What is the next thing to do? Just come over to five. Then what to open? Okay, As usual. Then come
to the word rocket launch. This is 777. Click hold and drag it. Nice contra, then bring somewhere around the end of just no
launching rocket. Nice one. Just
leave it like this. Fine, fine. Okay. Okay, just
something like this then. Okay, let me say contra and
see I think it's too big. So out then try to reduce it. Okay? Okay, zooming. Okay. Then what?
Check very perfect. So what you're going
to do is just change the color of this blue or
we just leave it like that? No, we need to change the color to make it coding. It's fun fed. So just okay, you can click D
somewhere's wise. Rocket time. So what do you do? You right click then move
towards blending options. As usual, it's actually
nice and co what do you do? Select what is it,
color overlay. But what color using
using gold color. Just come over to yellow side, come over some way
that's golding enough back because we're going to reduce the
words, the transparency. Then come over to the
transparency collapse. Just come over to
transparency in the word, reduce
the transparency. But before we do
that, just go back contra just come over. I think I need to
make it lighter, more light mended down
a more lighter color. Okay. A night on,
something like that. So press. Okay. Then what? Select. Okay. What
is the next thing? I think we need
those flare lights. Okay. When you launch a rocket in the light
that comes from it, Poka, understand?
Just contrazero. Okay, just come over to
the lights can collapse. That's good. We
need those lights. Okay, fine. But
when we use them, it would seem like we are
using it from the small rec. Let's create a new light. Come over to the file,
then open, Move downwards, desired 191, click,
click drag, and drop. Then what do you do? You
come over to what screen? Then you go by control. Then click drag. Using what? Using out. Then you put somewhere here. Then you check, okay
onwards. You zoom in. What is the next thing
to do with this light? What do you do? The control, then
select contr bit. Then you try to
reduce your pay much. Try to reduce it. Not too
much. You don't reduce. Only we need to select
the two together, they reduce your opacity. Okay, Just try to right click, then group from layers. Now what do you call it
you call rocket time. Rocket Then enter perfect.
What do you do then? We can minimize, we can reduce it together
on the same pace. It's not composite
showing to that extent, but there should be
something there that makes people the form part, okay? So something like this you can control then try to rotate it. Launching, nice. One control again,
try to increase. Okay, nice. Bring somewhere. Yeah. Okay, select
what do you do? You try to increase a
little bit, not too much. Okay, reduce. Okay, that's nice.
Control. Very perfect. We have that. That
is nice and perfect. So what is the next thing to do before we do that control? And select this right click. Then just contra then it's not showing country G. Then what
do you say? Travel and to. You try to change
them to travel and to as a whole, the text there, what travel? Enter? Perfect. What is the next thing to do? Just come down here. We're moving gradually. If this place is like too
clear for you to see, like don't see what
is there perfectly, just come back to background,
that's not a problem. Come back to background, select
this, this is the image. But make sure you
select the layer exac, the layers expacancy. Then just come over to
brush, make sure it is. Then just try to click
like you click old. Especially if it's too
light for you to light, it's not showing what
you want it to show. Just just click, but
it will look rough. And somehow just leave
it the way it is. Just contra, contra, way
too much. So it depends. Or you just click old and drag
ones like this, like this, something like this
around this area also, but you look dark. Just contras, we
don't need that right now is just perfect
as it's meant to be. Scans do one part
of it something like something like Ntrkay. I prefer the way it is
just right now. It's okay. The cloud, the black cloud. And it's nice just
leave it like that. It's nice. Just put this back. The brand logo should be up. That's a mistake. Should be up. Then try to bring it
downwards a little bit. Yeah, that's nice. I think that's not okay. Just click, That's perfect. Control Then then bring
around somewhere, then that's very perfect. So what is the next thing?
To just come over here. Then select this. Select what are we typing today? Our Okay. Holiday Okay. Packages. But I'm
using this points for either holiday packages,
some me sincerely. Okay. I just don't want
to use cost punts heading for things I write as
headings for things I write. Just put it here. The
change the change the, the words humanist just to go along with the brand
color. With the brand. Brand. With the font. Yeah, with the brand. A very italic, very light, one humanist that is very, very light human, human. Just italic, light it. Yeah, I want this very
perfect. What do you do? Can zoom in and see what is
happening, that come over. Just expand or
something like that. So what that's come to a minus five can increase
more than that. So let's say 25, okay? Not really perfect
enough separated. You can actually try
to increase it, okay? So what do we do? Compute that. 300, for example,
that's perfect enough. Just try to reduce the font very much around
something like 12. Yeah, something like that. I prefer something
like that, can control increase a little bit. Then bring to the middle, then try to expand even more. Okay, check this first. Try to expand that, Let's make it around something like 500. Yeah, that's perfect enough. Then just put that center, then drop. I want to
change the color. Anything that comes down
right now should be around something like golden color out, Some yellow, round yellow. That's okay. Perfect. So that is the center of the
real center, zooming. Okay. Let me make it lighter. It's not really light
to that extent. Let me make it lighter. Okay. That's good and perfect. That's nice. So outstanding
zooms then. Perfect. So what are the older packages? Okay. The packages, there
are three actually. So we're going to
just like saying, we've been given by the client that the packages are three, so we need to know how to make sure that we arrange
them perfectly. Which should go first? Which should go second. So there are three. I'll try to make sure that what it is at the center
very much well. Okay, so that's. Then select this, then click wood and drug emissions is what sits at the center of what? Of the flyer. Yeah, that's the center. Then drug, very, very perfect. Just try to give it just
normal, be normal black color. That's not a problem.
Okay. But just try to reduce it opacity down. Okay? And put that,
find other problem. But try to reduce your
opacity, That's 11 increase. It's showing some signs of, you know, reduction or
something like that, opacity. What do you do? Just come over, come to fill, then you can use this
golden color, you can see. Then we come to stroke can make it no stroke fine as usual. Then what do you do?
Come over the rectangle, you can write Click, then
try to reduce it more. You can see that
you can make it 11. I think that's perfect enough. Okay, let's write some text on it and we copy and
paste everything. Then we know what to do. You can try to select this, write click contra, contra, then double click, like adding, let me say in, then rights, try to make this collapse. Okay, so what do you
write right now? So just select
this, Then select, Okay, select
somewhere, not good, that's nice. And what's write? Dubai. Okay, nice one. So in writing Dubai
talks, what do we do? Select, make sure you
adjust things. Okay. Let's say 25. Okay.
Very, very perfect. And we should change the fonts. Actually, I want humanist also, but you know, both humanist,
something like that. Not too bold. Yeah, Roman Italy can do it. Okay. I think, yeah,
it should be able to. What do I do? Then
move back to the, move to click and drug. Then try to reduce
this drastic control. Then press on out.
Okay. You can zoom in. Click, click Ddr contra. Yeah, try to reduce more. Before you check
this, what do you do? Just click, click, click. And drag it up a little bit. Can sit at the middle, then drop. Then what do you do? You check this, then
try to underline the word by nice one. What is the next thing
to do right now? Just sorry for that. Very perfect. What is
the next thing to do? You can just decide to press on out, then
break this down. Press on sheets to
make it straight. Okay, then pre the good. So what do we do? You
just come over here, come to the text, to click, drag at this. Then what do you do? You write five days to
five days to four nights. Okay, nice one, come to later. G, H, T, S, N, G, H C. Okay. Perfect. But I want to use a type of fund that would stand, this type of funds
that stand and stand perfectly and
they are tall funds. Okay. Let me use it
like that to help you understand what steel fish. Okay, I've used steel fish
before. It's too here. Then select stil
part of the funds I actually gave you which is
in the course resources. So try to make this, I say that pan white showing
again, so doesn't a problem. So just select
this, then control, then click and drag. Press on wards. Old
ships, it's very potent. Old ships then shapes
at the middle, very, very perfect, but it's not long enough. What do we do? Actually, I don't allow
someone doing this. I don't allow any of
my student doing this. But actually it's very
necessary over just control. Then what do we do? We
click here and try towards, try to drag it down. We press on ships, then click here,
then drag it down. Which I don't like my student doing this as I've said earlier, but it's very necessary
to do that right now. Okay. Because the front is not long enough
to the single one, so we have to do
something like this. Do you understand the check? Fatally click and drag it up
a little bit to find that. That's nice and that.
Perfect, that's okay. Go to Dubai to again, present sheets present
out rather click, present shifts, make it to
make it straight downwards. How many persons we use? Three persons. What do you do? You come over to
the text to click, click and drag there. What's three persons? Three smaller to persons. Perfect. What do we just
try to know? Make it bold. Italic should be much more
different on the text. To click old and
drag this. Okay. To increase. Okay, that's perfect,
that's nice. What is the last thing to do? The last thing to do
now is just check that the last thing to do
now is come over here. Click under a tang
is not changes. Right click is to
show every other tool underneath it as usual. Do you do come over here then that's very perfect. What color should I give this? I should give this color,
this particular color. Then come over to the
stroke and what's no stroke? Very perfect. Then come over the
battery number, you can see how it is now. Very, very perfect.
So what do we do? You can actually just
bring this over. Type a new later. Okay, You can just
come over here, come to three persons, Just press on out, then write it down. Press shift to make
it somewhat straight. Okay, but make sure that this three person copy this
one we're about to write. Something should be
what should be above every other thing when it's app. Just as much as just come over here and click
and drag down, then changed black.
What do we do? Come over to the text to
select this and what's right, 30030030123 $300,000 It's really,
really serious. Just select the text to move to. Then after selecting this there, do you, do you select
the $300,000 there? Do you do you come over
here to change the point? You can change the steel fish
and let's see what happens to steel fish, Concrete. Or a click and drag
something like this, that is perfect enough. Press zoom in, make
sure you check this. Make sure this is at the center. This particular Yes,
it's at the center. Yeah, not at the center, Sorry. This is the center itself. Okay. Perfect, this
is the perfect. Good. What's control zero? You can see n is one. But what I want to
do right now is that just select the tangle. Yeah, that's the rectangle. Nice one. What do you do? You try to decrease cost, fine, live like this. Select this, then come
over here, press Shift, then select by and right click. Then words showing. Come back. Then control short
cut, then double click. You have words long re, have small records long, going to have three long regs. This is long. Rec
one, then enter. When you try to make
this invisible, it takes everything away. The K, try to make this visible. It shows everything. What is the next thing to do? Let's start from the left
and let's right hand side. Okay, let's click Old press on Old click and drag this down. Are you making sure it straight? That pressing ships? Yes, it's going to
be straight, fine. You can drop it. But what
is the next thing to do? Sing What is the next thing to do? We have the fine right
click and drag down, just to make it a
little bit different. Just a little bit different. Something like that. Very fine. What's the next thing? This
is we come over double click, Then the right arrow. Right arrow on the keyboard. And just press it like this, you delete everything
on the right again. Okay, fine. Then then Enter. What do we do just to make
sure you expand this? 300,000 should be changed. Let's start from 300,000 Come over to the
text to enter into. Just select into 500,000 What is the next
thing to change? Five days, four nights
should be changed. Select text to select
issue seven to six. Right now, use the right arrow to move to navigate the
seven to six nights. Okay. Mature is what
you come over here, you can select this, check this P or you just move
straight to three persons. Three persons. It
takes away that. Then just select
your course here. The five persons, you see,
I'm changing everything. And it's going, it's going fine. After that, then come
over to the bit, change it to Fide land, then space perfect. You can click and
dt to the medium, and this is the medium. Just drop perfect, Just meli bit, try to change the color. I think this is a rectangle. This is the rectangle I
need to change the color. This is it. Okay,
Good changing color. Make it different
from that particular golden type of color. Then let's come over this color then try to make it
into a gray like color. That's thats pathetic. Select this rectangle. This rectangle, yeah, sure. Come over here and make it just come over here and
colors just come over. I think that's okay. You can see it's different, quite different from the
normal one at the middle. It's just showing some
variations, something like that. Just collapse this back. What is the next thing to do? Just come over here.
Now we've selected on this present click. The present ships just want
us to be straight, straight. Just look at the just
then, very, very perfect. So you can double click
here, right arrow, then three, then very
perfect. What do you do? Let's start as start
from the price, okay? We love money too much.
Just make it work. $250,000 money, so, so big. Apart from that, come to
seven days, six nights, okay? Change the seven
to what? To three. Then use the right arrow to come over to three days, two nights. What is the next thing
to change five process, change them towards 22 person. Then what is the next
thing Fired four, then click, hold and drag around the what do you do?
You change it to what? Wow, nice. Sorry. Just check it over. Just click, drag,
zoom, click, drag. That is perfect. Control zero. Okay, that is nice. You can zoom in and
see what is happening, the details of everything, okay? Okay, that's nice. Looks good. What is the next thing to do? Just strike you, collapses back. What is the next thing
to do? Just come over, select the edding,
copy and paste. So presents, click
and drag down. Present what's on
sheets, then what? Then drop down. I want to do changes, edding copy, go straight up. Then what do I do? I call this Fay call pula. That is the last thing
we're going to be having. Yeah. But just know
what do I do to this? I make sure that I change
this to something else. So I said I select text two. Okay. That has been
selected. What do you do? Book now? Okay. Plus, plus what? Plus 234. It's zero. All right. Then 95, very, very perfect.
Just check this. When you check it then, minus five, very, very perfect.
23. Real Estate Flyer & Poster design: Lecture, I'm going to teach
you how to design for a real estate component
in a very simple way. Let's begin. Come over to file, open, then what's
come down here? This is a section, the all through is for the
real estate. Okay. We start from here. Open, open, click and drag. Very good control. Zero, present out, then zoom out using the minimus, but the minimus control C. Then try to reduce
this present out. Then click Oden Drug. You can see, you can see the vertical line and you
can see the horizontal line. Also check that the control see, you can see click Oden Drug. You can see vertical
and horizontal line. You see very, very perfect. You can, it's okay like that. This rectangle needs to be
what needs to be eliminated. So how do we do it
now? What do we do? Normally? As we all know, we use the layer mask
press on the layer mask, the brush tool, we have this, this is white and this is black. Opposite to click old
and what's old drug? Click old, click, old drug. As usual, you can just click, Click on, click, click,
click, click, click. That is perfect enough. Good. That's the first step. Now we have that, just
comey to the move to now. Secondly, what are
we going to do? We're going to put a
background underneath file, come to open, then what
background are we using? This background exactly. Click on this, then what? Then
open this, I've forgotten. Okay, then we have
the click old. And click old and
drag into the space. Then on zoom out. Perfect. Now we have control as usual. Then try to rotate. Okay, You want to make it
like the rotation look like in five degrees and we just present shift
and present shift. You can see, you can see it's stand still.
Then move here. Then try to enlarge
even case you can enlarge. Just put it there. Then you check control zero. Okay, very good. So now what do we
do? I try to watch. I try to blow is. Click here, Hold
and drag it down. And make sure that
the, the real estate, the house is above
the words background. Okay. I can try as I can just
Okay, I wanted to group it. Let me just leave it like that. Let me leave it like that. Now this is, this is
the background now, right click and turn towards
convert to smart objects. Now come to filter blow, okay? Gaussian blow. Okay, So we can decide to
blow to the extent we want. Okay? I think something
like that is okay. But if it's not okay, we can actually increase
it more and more. Okay, That's bad. I think it is. Okay. The press press. Okay. So we have this. So try to close this and make sure the
bagroundes like that, so that after that
let's try to put, you know, now we have the house, let's try to put a little
bit of light just to make, just bring about effect. Okay? Just open,
come over to light, then open as usual, you click a and drag
into this place. Then what happens?
It should be on top. Okay, Then give it what screen? Good. And click old
drag somewhere here. Just try to reduce it. Reduce your pacity, It shows, but measure your pacity
being reduced. Okay. Too much. That's too small. 67. Yeah, I think
that's perfect enough. It shows, That's good. Before, before, after. If you notice, you
can see a line here. And I think a line is here also. What happens is for the house. See. Making this invisible. Invisible. Definitely. We need layer masks to click
on layer mask. Then try to take away this line. You see perfect. I think that is under one year. Okay, it's gone now. Very good. We have the background. This background you can see
has added more effects to it. And we have the
light also adding more effect to our design. After that, what's next? We need a house on top actually, to bring about a more
realistic stuff. Come to open this
house, then open. I did this one. We did this also. Okay. So you click
hold and drag. Bring it down. Okay. So out, then zoom the contra. Okay. I reduce that without
using the outs key. Purple. Purposefully rather? That Purposefully. Okay. Okay. You said that. Okay. So what do I do? Make sure it is with
the background. Just bring it down.
Make sure it's not covering the house.
Okay. It's okay. Like this and perfect. So we having that. So what do we do? We try to, what we try to block, We try, we try to make it, we try to reduce it. Opacity, not so much, okay? I think something
like that is okay. Let me say swap because
there is still going to be the logo of the couplet
and some texts up there. So everything has to show, everything has to
interact with each other. So fine, we got that right.
Any other one again? So we have another
background underneath here. Actually, what do we do? We come over here, we
come over here, open. What is the nest? This is
the nest. Click on this. Downwards, open.
You can do this. We don't need this anymore.
Click oldword and drag. Drop it down. Okay. Nice one. Out then Zoo Control C. Okay? Then bring it here. Okay. Out then zone in. Try to check this space bar, then drag it here like this. Okay. So we have this. So this should be underneath. Okay. Okay, I want this to
be underneath this also. Oh, no, it shouldn't be, Should be very, very good. Perfect. So now also
controls to be increased. And right click on it. When you right click,
flip horizontal. Now you try to move
it somewhere here. Because I don't want this white space to be
empty, just like that. I want something to be there. Something should be there. So make it bigger. The notes. That is okay. I think that's okay. Okay, that's good.
What's control? I'll do it is very simple. First of all, you can actually, let's reduce the opacity. We try to use the brush to
then use the layer mask. And then firstly, let's
reduce the opacity. And let's see what
happens to reduce. Let's see how many opacity
for 12. Try reduce this. Also something like, you
know, it's okay, that's fine. So what do we do? We give
it a layer mask as usual. Then the B, the brush to what? You try to make sure
you see the country. Can you see There was
a line here before me now trying to paint over it. Painting black on
this white here. It makes this place,
what's in visible. The same thing for
these other areas. Try as much as possible to do that and for this area also. Okay, so I think it's too big. So I think that's it. So
I think it's too big. So control again
then try to reduce, click hold and drug
and press on O. Okay? Okay, that's perfect. Let me reduce your Psi. Let me say nine. Yes, that's good. Control. That's perfect.
Very, very simple. Perfect. But with a lot of stress just to make
the design very good. So we have another
one, let's put it in the background, okay. Yeah, click, hold and
drag here, then drop it. Okay. Okay, it's there
already, so Okay, it's just like
underneath this one. So let me just put it, I can't put it over here,
that's not possible. So I should just put it, put it here, it's good. Contra, try to try to increase. Try to increase. So what I'm trying to do to
these now is to blow it. I don't want to reduce
the past or something. I'm going to use the
brush to delay a mask. But first I want to blow it. First, let's see how it goes. Before I blow, what do I do? Right click. Then what
converts to smart objects. Then what? Using the field. Then the blow come
over to the blow. We have the motion blow. But I'm not going
to use the motion, I'm going to use the normal
blow, which is words. The Gaussian blow, there's
Gaussian blown 72. That's too much. Way too much. Just something that would very perfect. So now what do I do again? Layer mask the B. What do I do? Let me try to increase it. I can increase it by coming
over here, clicking on this. Then what's increase then? That's one way of doing it. So don't forget this
must be cleaned, must be wiped up. Okay, so then move to, I can try to click old and drag. Move this a little bit. Move
this somewhere a little bit. So if the line is
showing around here, just just click on this again. Then shortcuts, then
click hold and drag it. It's blend that's fixed away. Then you're, you're
able to adjust it, whatever you want to adjust. Okay. But click old and drag
this and bring this up. It should be above, okay. Contrary, can see it
was below before. Then click hold and word, and drag up, it should be above. So let me take this away. You can see this Tscl,
Triclosa, Perfect. Now I think everything we're
doing about the background, I think that's all. Now, now I know the house and the lights
is not a background, but to make everything
easy for us, let's call every layer, what background, so that everything very easy for us and we'll be able
to understand more. Click, instead of pressing
control and clicking, and clicking, and
clicking and clicking, I would rather click on this, then press Shift, then
go to the last one. Then it sticks everything. It selects everything that's different between the
shift and a control. When you click on this press and control, when
you click on this, it doesn't take this,
you need to go back and take this click click,
It's one by one. For the shifts when you
click on this and you want to take every one of
select every layer here. Just come to the last
one. You press on Shift, then then click, and
that is it. Right. Click the group from layers as I've said,
group from layers. Then what do you do as usual? Back nice one. You see everything is now
what everything is now. Very smooth, very good. Now, what is the next thing? The next thing is for us to get the logo done now
let me get the logo, go to file open, then the logo, nice. Click old and what?
And drag over here. Click you can see the
blue, the pink line, telling me that this is the
med, the central alignment. Click on this, on the
delete, we don't need more. Click on this, delete,
we don't need this. Then click on this. Then what do you do? What is the next thing to do? Now we need to change
the color of this. And as I've said
earlier, real estates, mostly green, to bring about, talking about the environment, eco, friendliness, and the like. This is an object, this is an image which we
imported into Photoshop. It was not created
in Photoshop itself. It's not easy for us to just give it the color
like this very easily. Something like this
is not possible. What do we do that
double click like this, twice the layer style pops up. Or you right click and select the blending option,
it's the same thing. What do you do? Color
overlay as usual. Now I want a green color. Click on this. What do you do? Come around, you
can come over here, you can come somewhere here, try to look for a very
good green color, a nice green color. I think that would do okay then. Okay, so control honestly
how big it is I think. Okay, nice. That's nice. Okay, I'm looking for a
very perfect place to, so to make sure it is
being stalled there. Okay, so that's nice. So what is the
name of the brand? The name of the brand is Luxury. Click brand is what? Luxury written, bold letters. You can see very, very falling. That's a cos front, but I'm going to
change the worry the brand uses the
front humanist. Sorry, a few minutes. Good. Good now. Hm, very good. I think this is more preferable. Or should I use the board one? No, I think this is,
this should be okay. Use the board one. It's a brand, so it's very important
to make it show better. So now what do I do? I need to get the color double click here.
It's N composite. You double click, Just come
over here to Properties, then just click on this place. Then select this
green over here. Then you selected
this then okay. Then the okay is
pressed, it shows up. Now what you do, click
and move it around. I think the font is too bold. Let me change it, so I have
to change back to what? To the normal front, not using the bold front, man. Yeah, the Roman is okay. And that's perfect enough. Perfect. Country
zero, and let's see. Very perfect. It's okay. It's very much okay, like that. The then click, then cut, right click, then
pull from layers, then brand logo as usual. Nice. I just love to do my
work in a very neat way Now, contract, then click on and
try and shouldn't be too big, Moderate, not too big. Now we start with
writing the text on it. What does the company,
what do they need to pursue their clients with? Heck is wrong with
my photo shop? What is wrong? Okay, good. It's number for programs
to malfunction. Very funny. So now
what do we do? We come over here then by by Dream House with Sorry. With us today. Today. Okay, good, Sorry, I need to zoom in in the first place.
Then you check. You do what? You check. Good. Press on the move to then click Old And Drug is fine. I need to break them down
because I'm going to use different fronts for the
buyer and Dream House, and with us today is going
to be the same front. There is a mistake here. Good check, what do
I do? I click over. Click. That is after I've selected the text
to set the text to, then click here is the
cause of click Old Drug. Then what's control
X? That is to cuts. Cuts. Okay, fine. Then what? Then check, because you
need to follow the command. Then after checking
it's still on the text, to then click somewhere. When you click
somewhere, this appears. Then what's control? It's Paste. Then what? Select. Apart from that,
I'm going to make the dream with us
today, separate sizes. So I have to make sure I cut dream hours away from
with us today. What do I do? Again, select the
text to click over. Click and drag the control
X. What do you do? You can see this look
some just city space. Look some more. Just back
space once, back space twice. Because there were some
things there before. But now our back space, that is, it's taking those
empty spaces away. Then come over, click here, then control V, and the
Dream House is back. What do we do? Price on the move to click
Old and drag down. Click old, sorry, with us today. Click and drag it down. Okay. Then by the
buyer should be here. The buyer is here. Then
come over to properties, then change its fonts
towards bearing. Then change the fonts
towards bearing. Okay. Yeah, bearing. Just click and that
is the front. Be ten. So does it just come
over here and try to try like a font size which is
around like, let's say 30. Let me say like 35. Okay, let's say like 35 then. Okay, bring it down
here and I can try to, you know, try to increase this a little
bit minus, let me say. Okay, 50. Okay, nice one. So definitely this
is the middle. This is not in the middle.
This is not in the middle. Rather, let me try to. Yeah, this is the
middle. What about this? Sorry, let me click
on by Perfect. Now with the Dream House. Dream House. Okay,
Dream House over here. Then I'll change the
fund towards humanist. The funds will be changed
towards humanist. Yes, humanist. Let me give
it an italic, not bold. Italic is okay.
Okay, very perfect. Control T. Okay, I think, let me use
another human ist italic. This should go or
light one italic. It should go better. You
should go faster and better. Okay, let me try to zoom
because when you zoom, you know perfectly what is
happening to the design. So that's good.
That's good enough. Okay, so let me see contra zero. Okay, so we have
contra zero again. Let me see from my farway looks. Okay, Let me go to
the background. Try to reduce the
house and the light. Bring them down, sorry. Click on them then press sheet. It's like shift isn't
really working. Okay. That's nice.
Not a problem. Okay. Because I don't
want the words and the house to be on like to, to touch each other,
something like that. So the brand logo. Okay. Not a problem with
us today. Bring over here. Okay. So you can actually
scatter the forts or actually at them being
grouped together, but to have to bring
about more effect, you can scatter them. And you know that's good enough. So click here, you can
double click. Okay. Then come over the black then. Okay. So what do you do? You control C. Oh wait, there is
something here. Definitely we need to. Words back space. Good. So contra
click older words, click old and drag. Give its italics. I think it is. Italic. Should go perfectly. Yeah, here's what I want. So click old and, you know, drag contra zero. So try to. Yes, put it at 60, 60. Oh, sorry. Oh, -60 -60 -65 No, -70 Oh, sorry, definitely. -55 Good. So it should be okay like that. So click on Dream House, then click on with us today. Then contra try to like
large press on Os. Believe this, control
zero, then check. Okay, Control zero. Okay, we have that very perfect. Now you can click on this, click on, click on this, then contra G. That's what, let's say D. Oh, what's wrong? What happened? Contrasts, say text. There are other texts.
There are some other texts we need to look into. Also, apart from this one, click and drag down out. Then what? Zooming. So I
want to make a circle. Okay? You click, you
click the circle. Now you can see this. Click the left mouse button. Click hold, don't drag. Then press on Shift and out. Then it comes from the middle. It's the circle is drawn from
the middle in proportion. There you drop. What happens? You click on the field. Then the green,
which we've used, Photoshop recognizes its
name for the stroke, which is the outer line. Okay, we press on what? No stroke, no color. The press them, no stroke
is being added to that. So the move to come, come, just drop it there. Now let's bring about, let's reduce your pacity
to something very small. Okay? Okay, very good. Very perfect. Now we need texts,
which is what? Let's say 25% is 25 person
that shouldn't go like that. Contras, Yeah, let's
write it outside 25% because writing it inside Photoshop recognizes that I'm writing it inside the circle. I put the 25% inside the circle, but not writing it
inside the circle. It's different things entirely. They are different things
entirely. What do I do? I check it, then come over, try to use also a humanist. That is, I'm using
only two fonts for this design. What do I do? I give it a Apol
italic, humanist, bold. Okay, so control, you know, I'm going to give it white
click, click over, okay? I need to check this first click over here, then you know, white then, sorry, they move to, then click over here. Okay. Then try to zoom in here. What do I do? Come
over here also. Then try to reduce, let me say 12110. Oh sorry, Minus, minus 110. Minus 115? Let me say minus 120. Minus 120, okay. Okay. Okay. That's good enough. So control can try to reduce. Nothing I can do is just press on Out, then click on this, drag it down, press on
shifts to bring about, you know, to make it
straight. Then what do I do? I press on the texts
to click on this, click, then click Old
and drug like this. Then what do I do?
Caps, lock on. Then this counts. Then does it. What's
wrong with you? Who, what's wrong? Then this counts. Then does it. First on the move to then control click old and
words. Click old D. Then move around the click, old words and drug. So we can control
zero and see what is happening isn't perfect enough. Very, very perfect.
What do we do? We come over here,
click on this, it just comes downwards. Then the 20, then then the ellipse is a
composable click on the lips I us click
on the ellipse when it has been clicked.
What happens then? Control the rotate.
Just a little bit. Not too much. Just a
little bit. Not too much. Just to add some effect to it. Now we can just
group them together. Control your right click then if it's not showing
that's not a problem, just control, then double click, then we can put discounts. The count is one. Control zero, you can see that. Perfect. Perfect. That's one, that's one thing I think I need to reduce the opacity of the
ellipse a little bit. A little bit. That's okay. That's good enough.
That's, that's nice. So, what is
the next thing? The last thing
we're going to do. Which is what? The
text over here. So, what do we do?
You click on this, then Start. Okay. Enter. Then
what? Dollar sign? Dollars. Okay. I want you
to see what I'm doing, so I don't want. Okay. Just click on this. Then we have the color, which is black then. Okay. Okay. So now you can
actually come over here. Click. Click over here. Click on this, try to reduce
it. It's getting too much. Just around 20. Okay. Click. So you can see the line there. I think it's call this
math variable like that. That's not a problem. Okay.
So try to expand the letters. It's it's packed together, which is not supposed to be 175. I want to reduce. It is bold. I want a Roman one. Yes, Roman italic. Perfect. That's okay.
Insufficient for me. So what is nest? I can press on. On bring this down, press sheets to make
it straight now. How do I do? Then click
onwards and then dollar sign. Oh, sorry, that's $1 sign. What? $1.55 million has
been sold for that. This is money we're
talking about. We need to increase it,
make it a bold, italic. And try to try to increase
the money itself, because money is important. I love money myself. You can see showing
the line for me that you're the right
place. Now what do you do? I want a specific color. Just okay, let me move a little bit when
I choose the color. So I can be able to use
what the hydro two to do. What's to click here then, just like the incarnate
and it has chosen it, then we have the money here. The price is there.
So apart from that, the last text is
what contacts us. Now let me try to increase
this more control. C increases a little bit more. Okay, that's perfect. Okay, for the contactors. Now I can just
click on the price. Starts from the press, then click on its click, Drag, then press Shift. Okay. Then what do I do the text to Click
Click you first click, then click Old Drug. Then contacts. No, no, no, no, no. Very funny. We have that. I want
to do something. I want to make sure
we do something. I want to reduce this a little bit because I want to put it in a solid shape or create a solid shape
which is a rectangle. Rectangle and click click drug. So what color would I give that? I should give that green. Yes, green. Then
what's no stroke? No stroke. No stroke. Not interested. So what do I do?
I contact us now. I was bring it over. I put it over the pages up. The layer should be
up so that this can show the color is not okay. So I need to change the colors. What's white then? Okay then. Okay, so what do I do? Just come over out Spacebar. Click Odd, drop. Okay. Now, so click on this, then you know you got a picture. But I want this rectangle
itself must align itself. Yes, it's aligned. Then this should align in any
way we want it to be. So fight in the box. Oh, sorry. The present contacts me now. Okay. So something like that. Okay, Country zero, you
can see nice one out. Then let me pull this down, 1,500 present out, then click old and click
old and drag down. Okay. I think there
is an issue here. This 1005 is not strict with the other ones.
Are you sorry for that? 1.5 1005. Okay, that's strict. Let me look at the
Rector. Strict with the from but not straight with. Okay. Let me click on this sometimes when you
zooming, it helps you a lot. Okay. I think it's now, yeah, it's now together in proportion. So click on the contactors now, click on that,
then control zero. So I think that's okay. That's nice. That's palatable. Okay, so now click on this, press was present out. Click on Older and Watch and Drug Present sheet
to make it straight. Okay, now I write the,
the phone number. So press click here,
click Older and Drug. That's text two plus 234. That's not a plus, that's an easy qual to or a easy equals two plus three to
409-53-0621 Okay. 123. Okay. So 91 then they move to clip order
watch and drug like this. The number is not complete. Let me just put 54. Yeah, that's okay. That's nice. So, yeah, so I want to make it black. It shouldn't be
green, green, green, green, B, a mixture of black, you know, because black
is just like, you know, Let me well, use
a natural color. Let me just say
something like that. So contra then what's click
old and what's end G. Let's say the finishing
contra zero, then check then. I think we are good to go. Yeah. Yeah, I think we're good to go because normally I can just reduce
this a little bit. Control. Let's reduce this
a little bit if I want. Okay. But I think the price is much more important
than the number. But the number is
a cultural action. It's okay. It's fine. That's the end. Actually,
we've actually done that's more than
30 minutes then. A very simple one, not
to even talk of a very, very difficult one
like the burger, the cream and minimal, minimal. It's very simple. Starting from year down, going downward end,
It's really nice. It's really nice.
Control, really nice. Another thing we have to do
is, okay, firstly, let me, let me just say, let
me just say control. Okay? No, no, no,
no conte contra. Okay? Then let me
just say price good. Now we can see, just come over here to the
background, okay. Look at the lights, okay. You can see how it's okay. Then I'm to create a rounder, one put around here. I click on this layer, the light layer, click on this light layer,
then present out. Then after present out, then click on the old Dra. That is your what it is
copying and pasting. It is copying and
pasting over here, making it look more
good and more nice. Just look at this. You can see I can actually just
reduce this a little bit. I'll just try to increase
it and bring it more like up a little bit
more. Not too much. I don't want to burn
out the design for me. Don't burn out the
design for me. I want it to be burn out. Just try to reduce just
some effects before then. What a very perfect. It shouldn't be too much,
should just be reduced. We have this one very
nice perfect, that's two. That's the tutorial
that is the end of this particular real
estate flyer design. I'll see you in the next video, but before then,
let me close this. I'll see you in the video.
24. Travel & Tour Brand Flyer & Poster design: This course, I am going
to teach you how to make a flyer and poster design
for a beauty brand. Okay, as a designer, they want us to design for them a poster for a particular
cream which they manufacture. Begin. Come over, just select
this background layer. What unlock the layer? Come over to file, go to open. Okay. Then we come over to what? Come over to one because we
are actually selecting 1234. But one then open. Very simple. Now this open. So click
Ode and, and drag here. Then d y, perfect.
What do you do? Press out, then use
the Minimals button. Zoom out, then control
click code and drug. Then around there.
Okay. Control zero. Control zero, click code and drug can see, okay, a little bit up and just drag because it has to be
by the left hand side. By the right hand side,
sorry, two bits up here. Then what's? Then check. So what is going to happen here? Very simple. What do
you do? Come over there to layer zero,
What do you do? Come over to what? No
layer, max time around. Come over here to
adjustment layer. Then solid color. Now we have solid color. That's what I'm
trying to do here is when I make this invisible, you see the background there. Now, I can't cover for paper all canvass with
this, it's not possible. What do I do? I make sure this layer is the same color
as this. How do I do it? The only way, the best
way I can do is what. Come over to adjustment layer and make sure you're
not this layer. Make sure you're
ceting this layer. This is going to
affect all the layers, but I only want this
layer to be affected. You come over. Just
make clear than what, the solid color, what do you do? You can see you can
choose any color. Choose the pink or something where you can get it perfectly. What do you do? Just bring
out the cost of the word. Choose the color perfect then. Okay. You can choose
from any angle you want, but just choose like
somewhere very close to that. C, C. I think this is okay there. Okay, What do you do now? You come to the real layer for this itself, what do you do? Control that? You come over. What layer mask? Very perfect layer mask. Then select this, please
make sure this is black, this is white forward, it should be opposite
white and black. Press on B, which is short, key forward for brush, press on out using right and must put in click
drag to the right, to the left to
increase and decrease. Try to, you got a picture
perfect. We're done with that. Very, very perfect
after doing that. So now what do I want to do? I want to apply black
and white on the layer. You don't press,
you come over here to the layer one, okay? Then come over to the
adjustment layer. Press the adjustment layer. Then what? Black and white? It affects the layer, the immediate layer after
the black and white layer. Then do all through the
select black and white, you can see perfect. What I'm trying to do is to have a golden background color. Okay, Golden background color. Okay, so now we have black. I want to try to reduce black. Okay? You can see
if I reached zero, you can see I'm
increasing it lit by too because I don't
want the thing to show to that extent. Okay. This is 345,057.3 let's say 80. Yeah, I think that's okay. It is okay and nice. What is the next thing to do? You can see this is
black and white, and these are the features
under black and white. We can try to changes, you can see changes. Just come over here, come down here, this is the dot. Just so we can try
to adjust things. Make sure you can see
this is pink, okay. That is it includes red
mata and also some yellow. You can see something
like that, okay? Und. So try to adjust the red
little bit, Okay, nice one. Not being too much. Think
about it like this. Perfect. So the yellow
little bits, okay? The green might not have
effect at all, okay? The sin might not have
effect at all also. Okay? You can just leave the
emerges se what happens? You can see no effect. So the monitor should
surely have an effect. You can see very perfect. I want something something
like this is okay. It's perfect. Now adding this, you can see this is the original image from the
start. Then we have this. We are adding more Ire
editing Very much. Well, another thing we can do is when you try
to than you see, he can see the
golden color, okay? When you try to tint, you
can leave it like this. That's not a problem. But when
you're trying to tint it, okay, you can see
a different color. Let's continue with
the tinting then. We know what nest to do apart
from the add another thing, which is another
adjustment layer. Which is what as
usual color look up. But right now I'm not using
the less sunset for now. Okay. The first thing
I'm going to use here is what is the fog? It the fog units, you can see things have changed. That is why things are
changing like this. And it's looking perfectly
that I've been applying things from from below,
black and white. 108, I just in the red and majetedn applying
the color look up, then applying the foggy it under the color lookup so I can
try to reduce it also. Okay. Because I want a golden
color, but a mixture of, of the foggyits and black and white and tint to bring
about a golden color. Not just straight to the point. Okay, This is okay. Also I can reduce it a bit. Normal, zero. Okay? Just a two. Okay? Okay, nice. Yes, that is perfect. That's 44 nights. Thing I can do is I
can add some noise. Okay? I can add some
noise. To what? To the background itself,
that golden color. What do we do? Don't click on
this. Don't click on this. What you select
this because this is directly going
to the background. You're trying to affect the color lookup or
the black and white. Only the background
should be affected. What do we do when you want to use the noise just
like a green, the noise, we're going to the filter for you to use the filters
up said earlier, you do what your right
click and what converts to smart objects
for easy editing. Okay? So, but there
is a problem. I have made this a
smart object, okay? So when I come over
to the filter and try to use what the noise, okay? You can say add
noise. What happens? It adds noise. On what
about this plays? It is telling me
what? That it is. Only this layer it is applying
it to, not this layer. I don't forget we did
a color fill whereby we actually copied the
color from here to where? To the background over here. Let me make sure I
make this invisible. If you could remember
very clearly, we had something
like this before. We did layer mask here,
then made a color. Then what made a
background of pink? We copied the pink
from this background. Okay, now this visible back. Okay, so what do we do? There is something we
call merging of layers. Okay, Click here, press control, and click here. Then what? Right click. Now, when you
right click, what do you do? You don't link the layers. Not here. We don't use,
don't use link layers. Here we do what?
We merge layers, you can see it's
become one already. You can see. Do you right click the convert to smart object, then come over to filter, then apply the noise
and see what happens. The nurse applies
to every place, every area in the design. Okay? Now, for the
noise, this is too much. The noise is quite too much. Okay, What do we do? We like this then it comes
slowly, slowly, nice one. Okay. That is too small. Yeah. This is nicer, is nice. This is good enough. Nice then. Okay, you can see, let me try to make
this invisible. Before words, after
the, Before inwards. After very perfect. It is also affecting
the cream which okay, it's affecting the cream also,
but that's not a problem. It's okay. We love it like that. Try to collapse this back then. We add that right now. We add, we add are light. Okay. Light. Okay. But
before we add that, make sure that you select this first before
the flare light. Just come over to
find, then open. Okay. Come over, awards the
flare light, then open. So click okay,
sorry. Still brush. Come over to move to
click hold and what? And drag over here, then words. Then you drop very perfect. Firstly, just come
over to the number, then what's lightening? Sorry. Screen. Just come to screen, we
use this very, very often. Just come over to
the screen, then we just drop it around here. Just drop it around here. So you can just try to reduce to around 20 something
or 30 something, depending on what
you want to do. You can see this is the
before and what the after. It actually brings about
nice effects. Okay. Present again here. Okay? I think I need to include more, okay? You can see, you can
see very, very nice. Let me use concrete
again and look, it's okay contra zero, okay? You can see that.
Perfect. You can see the before and
the after the before. You can see how cool it is, but adding the flay light
makes it more beautiful. Perfect. Now we have all these. I'll try to group. I'll make sure I
group everything. Just click here, press Shift, then click here, the right. Group, round layers,
very. What do you do? The background. Nice one, good. I love to make my work very neat and well arranged in order. What is the next
we should create? We have a logo for this brand at that should go
next. Where is it? Normally we say the wet, This click old and
drag, then drop. Very nice. Okay. The reason why you can
see the line showing right, But the reason why the
line is not showing yet, so as can be able to be in proportion in the
right alignment, is that this is an image, it is an image file, but this thing is not an
object in and of itself. But I can able to carry these
objects easily like that. Click, carry the objects
easily like that. No, I can carry the
objects easily like okay, I control, I carry
the old e mail. So it's not possible for you to align it properly like that. Just come over zooming
out space bar, press space bar or left smart, and click hold and drag. Okay to suit your need. Then control, then try
to reduce n one, okay? Okay, So that's good. Then we have this. Then
come over to Yeah, the text to pre, then click on that.
Then what do we do? The name of the brand is
Word Beauty, Cat beauty. What is wrong with me? Beauty. Beauty. Beauty, Spa. Very nice. So what do we do?
Just come over here. So we have to change
the font because we're talking about a beauty spa. Okay? We need a beautiful, nice, cool looking font that null bolt black. Okay? But the regular
is more preferable. Just then what you
select the regular, you can just come over here. This is the left alignment. I want to make it
right aligned because the logo is right
aligned and it's like really aligned with the
with this cream over here. Just come over here and press
this, then that's good. You can come over
here to move to. Sorry for the background noise because it's really,
really annoying. I'm very sorry for
that. Just press and click over here,
come over here, you can see the
present control, okay? Click. Click. Drag very perfect, then old. Okay. Click. Click. You can actually move it down.
Bring it over here. You can see the line,
it's telling me it's aligning proportionally,
very perfect. Then another thing I want to do is I want to make this actually it
shouldn't be black. Okay. Country zero
shouldn't be black. Okay. Beauty sph be white. Color? I want to be black. I want to be white.
Click, drag white then. Okay. It has changed
Then apart from that, you can actually zoom in. Zoom, sorry for the
background that. I said, it's really,
really annoying. Apart from that, we
have the layers. This layer actually over here. This layer. Then what do we do? It is not a vital image
made from imported shop. It's an image imported.
What do we do? The right click in
blending options The color because it remembers the color I use
last, which is white. So what I'm not using
white this time around, just come over
here, click on the. Then words come over
here, come outside. I want to use this color because
it's color of the cream. It should go with
the brand color. Yeah, that's what then. Okay, very perfect. What next? Let's go to the text. But before that we
need to arrange this. Click here, press and
control. Then click here. Firstly, try to collapse
the right click. Then group from layers. What do we say the brand logo? Nice one. Control zero. You can see we are going on a slow pace and everything is, everything is going
well. Very nice. What nest? Come over here. Then we try as much as possible to
make sure the G is capsule letter O
is small letter. Okay. Go beyond. Let me make this the
present. Go beyond. Perfection can actually
checking here. You can actually come over here, move to it would
actually apply to it very just pre on the text to click and
drive, then Control X. Okay, after control X like
you're trying to cut it away from the ones
not to separate them, press and check,
then go back again. It's actually pressed already the text to click
somewhere here. Then press control V and
it's past the goal itself. Apart from that,
set this, press. Okay, the text to click older and drag the two
go beyond control X. Then check, then steal
the coal with the text to select it here.
Just click once. Okay. It brings it
out and select it Shows Lorem Epsem
ifs automatically. Then what? Price
control V. That's it. Nice one. Come over here. Perfect. Then select what? Go. Click on, then bring it somewhere.
Then control. Then click old, drag. Click. Click old, drag it. I want to make the size
somewhat like, let me say one. Okay, I need to check it.
Sorry, let me say 125. Something like that.
That's perfect. I'll try to reduce
the little bit. -75 Yeah. Perfect. So I need something. Yeah, you can see
very, very perfect. Okay. Like that, like
downward. So now, beyond. Beyond. Okay. Put beyond around, make sure it is in line with. You can zoom, it's yours. Okay. Make sure it's in
line with a very perfect. Now let me try to increase it to around something like 48. You can see the G. It's
aligning with the B. That is exactly what I want. Then come to
perfection. Hand up. So select perfection. And so you can
bring it over here. The B should align with the P. Something that is
very, very important. You can see perfect. I can make this much bigger. 30. Oh, sorry, that's a mistake. I think one is. Okay.
That's perfect. That's perfect. Control what? Control? Z. You can see we are achieving the results
we are after. That's very perfect. I think I really need to adjust the background a little bit
and just come over to color. Look up. Sorry, why come
back and double click. Okay. Then try to increase the two
bits to make golden show. Yeah, nice. On the
golden machine. Perfectly. Yeah. Okay,
that's perfect. That's okay. So apart from that,
now that's good. We move to the next text. Okay, collapses. So this is the first text. Text. One click, press on control. Click and click.
Okay. Right click. Yeah, sorry, that's a mistake. Right click. Then
it's nothing group, that's not a problem.
So just control. Then come over a double click. Then what do you do? You
press on text, then what one? Because there are several
text coming next. What is the next thing to do? The next thing to do now is
just press on text as usual. Then, sorry for that. Let's present
something like this. So the first one is a capsule, then apples, it's more than us. Much more cream, full stop the check. The thing we're going for now is that this is right align, which is supposed to be so left align because this
place is align. Why this space should
be left align? Just click, click old drag, make sure it is perfect. Just look at it. Make
sure it is perfect. With what? With the B. And okay, very important. Let's try to reduce this to
around something like 24. Let's maybe 2020 should go well. Very perfect. Now what do we do, the line spacing actually, Which is this should
be what should be. Let's try to make sure
it is in line very well. Yeah, that's perfect. I think that's perfect enough. What is the next thing
to do? Close this. We're moving gradually and
that is making much sense. Click on this, click
on the text here, which is, let's say
there's text two. Click then it's not, so that's not bad. Just come the double click
here and say text two. Try to collapse because
it has expanded spinal. Just collapse text
to the next text. Firstly, select Text. Select Text, which is the
press on when you press on. Then click old and dry. Then you can press on
sheets to make it words, to make it straight,
that's perfect. Press on the two texts. Then click old and
click old and dry. Because we're trying to
use, we need some bullets. Also press calculator,
the smaller L L A. Sorry, why am I doing coverage? Nice. Okay, then enter cup
sweat H, humidity resistance. Okay. Nest, semi mature. Finish. Next cover, all visible flows. Enter then sweat free. Sorry. Sweat free, perfect. So what do we do? Just try to come over here
and try to make sure the line spacing is a little bit more than the last one.
Yeah, that's perfect. So we're going to draw a
rectangle before that, let me try to move this
bit present on shapes. Okay, Then try to draw
atangtangular box which will. The features. Yeah, features. Okay, the features,
what do I do? I try to, the color
is just wait and see. I try to mature. The
stroke is no stroke. Okay, nice one. What
do I do after that? That's all we're
text text to copy, we're supposed to be
what? Text three. Text text three. Then enter very, very perfect present rectangle
and would try to reduce its opacity something like ten. That's perfect. That's perfect. But another thing you
should know is just that. To zoom in and make sure this
rectangle is in line with. You can see a, you can
see the line perfect. Click on all the No. Okay? Then come over here. So how I made the circle is that you let
circles, then click on circle. Click hold and drag, then press shift out before
releasing the circle. Okay, very perfect.
The words come to the, come to the move to the perfect. Then press firstly,
give it its color, color as usual color. Then come over a stroke, the word make it color. What do I do with the ellipse? Just come by, click,
hold, and drag it up. I want to be above
direct tangle. Okay. Then what do I do? I make sure the
opacity is very low. Just something like 50. Let me see. Press control zero, and let's
see what happens. Yeah, yeah, Yeah, it's
perfect. It's perfect. Perfect, that's
nice. Click, click, hold, and drag to the left
little bits with shen. Press on out ships,
then click down. Release out shift, then click
down, and then click down. You will need left
mouse button first, then shift, then click down. Click and drag down
out shift, then click, hold and drag down
very Ppc contra zero. You can see the try
to try to very, very perfect. Very,
very perfect. Another thing I want us to
notice from here is that actually this text all
shouldn't be bigger than this. Shouldn't be like 20, should be at least
reduced like 18. No, let's make it 16 perfect. Very perfect. So that is
where the mistake is. We need to rectify this mistake. Firstly, let me very
sorry for that. Let me try to delete
this one cord. Click Addr where the trash can. Okay, the press
on the rectangle. Click, drag. I think
it's straight, Perfect. Press on this, try to,
okay, that's perfect. Present tangle, then control. If you try to click, click on D, like you can see
what does happening. Contro. Press on sheet first, then try to try to reduce shift. Reduces it in a perfect way. Contro, zero check. Okay, nice one in the collapse. Click the compress
to make straight. Okay, that's nice. Just come over, Zoom in
the words, the circle, the hold and drag is in the
shift in words in Olds. Ki. Okay? Perfect. As, as I did before, you can see the stroke. No stroke, perfect. You can see, so I don't know if some can see from afar the way it is now. There's not perfect enough. I'm as they need to. Beats perfect. I want to try to reduce your
priacityI think 60 is nice. 66 as it is. Pay, that's nice. Out click sheets,
you see perfect. Out. Click All in sheets. Out. Click All in sheets. Click called in sheets,
Very, very perfect. So control zero,
and that's nice, that's what I do. Okay, let's jump over. Let's just say click
here, press and control. Click, click, click, then
click. What do you do? Right click. And what's
group from layers, but the lives
should be the text. Three very important.
Click on leaves, then don't support it here. When you see a very
large rectangle, very tiny rectangle
that it is coming into what it is coming into text. Okay? Even if you drop it like this, it's
coming into text. But I want to arrange it myself. Should it be above the old or should it be below
the eye or should it be above the above the
rectangle and also in text, it's there already. You got to go. Okay. What
is the next thing to do? She selects the
text three itself. Present out. Click Olden, sorry. Present out first, then click
old and drag. Then what? Then she very perfect. Now what happens?
That's text four. Text four alive. I need to do all the lives. So click old and drag way. Click old and drag to
way the trash car. Okay, very perfect. So what is the next thing? Yeah, we have the rectangle, we have everything set, so just click on this, on the D. Yeah, LDI, then the text to
click and drag down. So what do you write cat to use? Colon. Then enter. Okay, Clans, face, neck end. Apply. Apply. Apply and feel relax for 2 minutes. Rains with warm
water and feel dry. How to use it. The instructions
on how to use them, That is it you check, then come over here, make this, that make it 14. 14 is okay. Let's make it 15, then 15 should go better. Perfect. Apart from
apart from that, we should try to just come
to the move to just try to. Okay, select the Tangle control. The present shift, The click, click and drag here. Present shift, click here, Perfect control the
Select the move to. This is nice and
we're good to go. What is the next thing?
Let me try to collapse. What is the next thing?
We create a circle. Come over here. Click. And shift. Then what?
Then it creates in the middle, perfect. What do you do? What
color do we give it? We give it this color as
usual stroke. What do you do? No stroke, no feel perfect. Then press. And what do we do? We reduce its
opacity down to zero and start increasing lit
by lio. Get to what? I think 18 should be okay. Let's say, I don't want
it to be too much. You want something
very light glassy? Okay. What is the
next thing we do? Now? We have this already. Then what do we do
when we text then? That's 100% natural. When we have 100%
yeah, natural capital. You can see you're
using small letter, but what is happening is actually looking like
a capital letter. That is how it is when
you're using the same. Okay? And that
thing is just that. Come over here, press
K. This is a mistake. This should be a
capital letter, B. You can see how it is now, it will become very big
compared to the normal, compared to the
normal, small letters. So check. Then come over again. Then check the P. Okay, Shift on the capsures. Caps, make it under. Then you can see that was
a mistake from my control. Zero. What do we do? Used to zoom in, then come over a collapse. Okay, strikes, collapses. The beyond perfection
is where it is in text. One natural, 100% natural.
Just come over here. Just strikes, put in the middle. Okay, then what do you do? We'll make sure that
come over to text. Okay, I need to make
sure I cut this text. Then control, that's
a mistake for me. I need to choose from
click drag the control, then enter the text to
again. Then click here. Control. Very perfect. So what do we do next? Select the move to Nature Gold, and drag down 100% 100%
over here in the middle. Yes, Control C, Then
click hold and drag. Try to make it big. Not too big. Okay, but I think that
should be okay then. Okay, check this. Click on this, then what's hundred
percent nice? Then press on Natural. The Natural should come over
here, come to the middle, then control press
try to increase O. Then zoom in. I think I okay, sorry for that. Shake that, then 100%
also very perfect. Then control, try to increase,
then that's perfect. We have this natural
selected control. Then select this, also
right click downwards, it's not showing nice. Control. Then click
then what we have. Oh, sorry, not get
time for that. Let me drop this control. We're going to group everything here together at the same time. Control plus word Aleve. What do you do? You right click then group from layers.
Then what happens? Let's just put scale. That's nice. It speaks together. Then control. Then
what do you do? You rotate very perfect. Click and drag up. Okay. Because I don't want the hundred percent
nature to be covered. So I just wanted to
have a bridging space. Also, according to what I've told you before,
control plus, plus perfect al zoom in, zoom in. What do you do? Do I don't want this 100% and
nature to be selected. Okay, contra, try to
use it like this. Yes. Okay, that's perfect for me. Nice. Then control
zero, see very perfect. So you can just
frequently ellipses, try to make it like, you
know, 15% transparency. But let me say ten,
10% transparency. Okay, let me say,
shouldn't be too much. Let me say, yeah,
fine, that's okay. Perfect. So see
everything is neat. Neat, Okay, so what is
the next thing to do? Now we move to the image
section whereby we're able to cut the image from
their backgrounds. So, where are the images?
Come over to file. Okay, open. They come down here. So we are tricking, if I'm not mistaken. Yes. Then come towards
three, then open. You can just come over, try to delete this ones,
we don't need them. Again, deli, we don't need
the deli, we only need this. Click old and no
before you click old. And drug, fine, not a problem. You can try to select
everything here, okay? Where you can click
old and drag it here. Then select whatever you
want to select here. What do you do? Use
on zoom out control. Then try to reduce. Okay. Then click old and drag, drag and drop. What do you do? You check this out. Then what's zoom in? We're going to use as usual, the quick, sorry for that. We're going to use as usual, the quick selection to where is the Quick
Selects. This is selected. The quick selection
to then what click the drug you can zoom in and to be able to add
more edges. More edges. That's perfect enough
then just what control? That's not the only thing we need to do what we need this one to very. You see
it's not working. What is happening?
You're selecting this layer instead of
the original layer. Let me try to make
this invisible and you will see
what is happening. This is a copy layer J. We have this back originally. So you have to click
here, not here. Click Old by, just much more. Okay, wow, that's very pathetic. I have to be very careful. If it isn't working,
that is not a problem. Just come over here, Come
to the polygonal lasso two, or come to the
magnetic lasso two. I just want to use
magnetic lasso because it recognizes edges. And as you click on it's, it's attached to edges, Click, drag, or just
leave it as it goes. But I'm not dragging
anything right now because the image itself is not
perfect to that extent. Chooses it chooses,
I am okay. I click. And what's perfect
then, what control? This is the original I took it from then can make it invisible. Click and drag. And what did it That's perfect. Control zero. Now we have this come over here. I try to make this invisible
for the main time. Then we have this space bar. Click on control, Then try to increase something like this. Then check. So then press the word. Press the move to click old
and drag down control C. That's perfect. Another thing I want you guys to notice is that whatever
I'm doing now, they are not affected by the
backgrounds we had before. What do we do? We need to make sure that all the
images we're using, we're cutting from the
background all the knots, the dates, and some
other foods we're using. Actually, we're going
to do what we are going to make sure it is in the background layer so that the color look up the black
and white can affect is. We're going to drop, drop
it above this layer. We're going to drop it
away above this layer. So what do we do?
We come over here. This is layer. Click, click
control. Press control. Click, click, press control. You click, then click
Older. And drag down. Just leave it like that.
Then what you drop, you can see it's been affected
already, very perfect. Because this color lookup and black white must
affect them also. Nice. What can we do? We can say this is big 11 because our color of the black on the
back of the B one. Anyone that happens,
that occurs again, we're going to give it a name like two or something like that. We need to blow this
as what do we do? The big not, what do we
do? Well, right click. Then convert to smart objects, then come come to
filter. Nice one. As usual, we use the
motion blow first. That is what we do most times. Motion blow, let's
bring the soundwdk. Yeah, no, no. Yeah. That's okay.
Then what's price? Okay. Very perfect. So what is the
next thing we use? A Gacian blow also
it will feel like. So you can just sell
a the Gaocian blot, some little effect.
Okay. Gian blow. That should be
very, very minimal. Okay. It's not actually
showing a lot of changes. Okay, that's fine.
Okay, so we have that. So what do we do
now? Copy and paste. That will be what big
to, how do we do that? Make sure this is invisible. Just control what do we do? Click it's selected
already. Just present. Click, Click Old drug somewhere. When you do control, okay, telling us to be turned off. Temporary Y, the
transformation is being. Preview, press, okay. Then try to rotate
like this, okay? Something like this.
What is wrong with you? Try to rotate. Control zero to
rotate the words, then check what do you do? Control again, try to re, try to red press. Perfect. That's perfect. I can try to reduce
its own opacity. Big not copy, just double click. Just use the right mouse board, the right arrow, the right arrow on the
keyboard suppression. So I can try to reduce
its opacity I feel like. Okay, I think that's
okay. It's okay. That's perfect. What is next? The next thing is
the black seed. Okay. We can try
to just come over, try to polyps to make its
net try Polyps also nice. The black nuts, which I have actually made
invisible before. What do we do? Let me just
drop this here. What do we do? Just control C, the
big black nuts. Control C, then increase, okay? So we have something like, so I want to put it
somewhere around here. Somewhere around here, okay. Then try to change, okay? Then, okay. So what do we do? What you convert to smart
objects, then filter. Okay? Then what
blow we have what? Motion blow. Something like that
is okay. Very nice. Okay, Then what? You
can reduce the opacity, you can see very perfect. Keep on reducing the
past to something like. Okay, that's 40. Okay, nice one. Okay, so just make this, just collapse this back
very, very, very important. Okay, so we have that, they just reduce it to a little bit, like
bringing it down. Oh, sorry. Black. Yeah, just
little bit down. Okay, that's perfect. So now, so now we move to the other
images, come to five. Okay, five, Sorry. Sorry. Sorry. Come
to five to open. Come to five. Okay, to
open. Then what's next? The press the open. What do we do? Click Old. And click olden. Drag. And what You
drop it. Okay. So now it's actually automatically comes
into the background. Under, under the color, look up in black and white. So what happens is now we
can click old and drag. It's like around somewhere here. Okay, very perfect.
So what do you do? You press out the control, then what you reduce
drastically the okay. A little bit of hard. So bring around here then
what's like this? Then drop. We check, what do we do? We try a, sorry, press out then, you know, as usual in
press the space bar. Okay. So what do we do? We select the images, we can try to make
sure it looks dull. Try to reduce this. Okay? Actually, the image isn't supposed to look dull
as it is like this. We can just come
over here. Okay. If it's giving us problem, like we don't really like
the way it looks like, okay, we can just make
sure this is back. Click here, click Oden
drug, then delete, okay. Then come over here
and delete this. Then come over here and use
this before you import it. Okay, The first one
I need actually is this particular one that looks like a date or
something like that. Selection two, it's very small. Try to increase
the selection two, that is why that
icon is like that. Unlock the layer, then
click, hold and drag. We can add. That's
control control. Very perfect. What else? Which one do we need again? We need one more. Okay, I think we need something
like something like this. Should be okay for us. That click, sorry, I'm
not selecting the layer, this is the real layer, Cd Drug. Click, click, press, try to
subtract this place away. I'm present, I'm
still holding on out. Yes, hold on outs. And click the outside. The Remove your
hand from the outs, you can take your hand
away from the out. Then have this. Oh, that's too much.
Just control it. Zoom in, then a little
bit, a very good. Then controls Y,
then present out, then try to click old drag. That's okay. Then
what control J? Then click old drag. These then wards
deletes, very perfect. Then control zero.
You can see the two. Then two, click, click, press control, include
this, that is selected. Click on drag, then
what? Then drop. It's the same thing, but sorry for that. But what do we do now? Just control zero. What
is the next thing? Just come over select. You can see the not one, Not one. We have the big nuts. Okay, this is the big nuts. I'm just giving
them those names. Okay. Then the second one which is the select, make it visible. Then what? Not to. Not two. Very perfect. Select
one. Then what? You click Old and
drug somewhere, contra try to reduce. Perfect, Right click. Then convert to smart objects. Then filter. Come over to blow. We have, we have the
motion blow. Perfect. I don't want to use
the motion blow to bit too much. It's okay. That's nice. Then
the Guss blows. Usual. It's not compatible. Use the Gussian blow
to the motion blow. It's just used to it. So think that's okay. Bring it down a
little bit, okay. Then I can try to
make it transparent. Just bring this one down, try to close this collapses, trying to make it transparency
something like this. Very perfect to blend
with the grain,
25. How to export images for prints and webs: This lecture, I'm going to
teach you how to save and exports images for
prints and webs. It's very simple. This is a PSD file actually, which we've worked on
already in Tutoria. Then just come over
here, come to file, come to file if you want
to save, It's very easy. This is already saved, okay? It's, if yours is
not saved already, just click on this. For example, let me
say to save us, okay? Okay. For example, let's
say I want to save sports. Yours would be saved. Okay? Then just probably a new
burger or something like that. Okay, We have
something like this. Just a name if you want
to just come over here, make sure it's what's
P Photo share. You can see that is the best you can save with what do you do You save your words
to any destination, Like let me just select Save. You can see PS already exist. Do you want to replace it? No, actually, you can
just come to Desktop, then you try to save here
in Deckstop or anywhere. You prefer to save it, to
save art rather. Okay. That's a way to save for you. That is, when you save it, you save all the layers with it. You save as a PS file, all the layers with it, okay? But for example,
you want to save, you want to send
to someone through your social media and okay, send to someone for the
post to print for you. Or you just want to send it to the web upload
to somewhere. What do you do? What do you do? You save a copy or
what? Or you export. When you save a copy, you save a copy as
J and the like. Okay, preferable just as
pay something like this, peg, you save a copy as a Jpeg. But mostly I don't save as, I don't save a
copy, save a copy. I use what I use, exports. I just prefer using exports. Exports. Because for
you to use a markup, which we're going to use also
for you to create a markup, which we're also going to
create in this lecture, next video, next video. Okay, so you can see it brings
it here, okay, exports. You want to change something
from like Jpeg to NGPN. Don't have background, okay? But this peg actually, because you're going to use
it for our PSD mark up, there are some markups
that actually accept all the PNG, not Jpeg, okay, But this is for
prints and also for Web, and also for the mark
up you want to use, but the mark up you want to
use actually accept Jpeg. This is what you can see here. You can actually zoom in, okay? What? You can zoom out and
see what is happening in. Zoom like this, like this, okay? Very good. Like this. Or you just come back
to the normal size. You can decrease, okay, increase again.
Now what do we do? Just what? It's very
simple, just exports. Ask you what's called
the destination. Let me say Dektop. Okay,
then what do you do? Let me say, okay, let me come over to downloads. Just say downloads, then
what do you do Then come over here to documents. Okay, Decstop is okay.
Then what do I do? Then say with that name,
New Boger, Recovered. Now it's saved. What do you do? Just come to your over, you can see New Bern,
then double click. Then you see what happens. It comes as words New Boger, Recovered pews you're
having this you can send to print upload
to any social media, Facebook, Whatsapp or different
things you want to do. You can send to print
and send to webs. Okay. This is how to make a peg exporting the file saving
us and save a copy. I'll see you in
the next lecture.
26. Mockup 1: This particular lecture,
particularly in this section, we're talking about mark ups. We're creating mark ups
in different forms. Just come over here to file, come over to open, then open. Then just come over
here to download. Come over to download where we have the okay, the double click. Then we have was
five SD mark ups. You have it also
in your resources. Just click here, we
have the first one. We're going to read the
second, third, and fourth one. As the fourth one
is the tumbling I actually made in my Cs. Now we have pen
double click on it. Or you can just click and
open here, then it opens. It's very important to
understand mockups very well. It would help us to, you're presenting your work
to your clients. It makes it look real, it makes it look realistic, and it makes your clients enjoy whatever
you've given them, even if they don't like it. Making this look
real and perfect, make them to accept, to reject. We have different layers
here, as we all know. We have layers in potential. We have left clips color, right clips, color, whatever
has been written, named it. The exact thing you
want to change, the exact thing you want
to use has been named. There's one way
you can know what exactly is this layer about. You can just make this
invisible click on this icon. You can see what changes this particular thing here changes. You can see, you
can see it green. And it comes up and it's gone. You can see make this invisible. As you can see the
two things over here, Visible, invisible,
visible and invisible. Perfect. The left poster. Actually, we don't really
know what this is actually, but we just know
something actually here. We're not using this two.
Let's come over as a design. The design is the
real design itself. You can see left poster
and it goes off. You can see right
poster, it goes up. So there are some
things embedded here. We have an arrow, you see? We're coming back to
that actually we have the background texture when
you make this just collapse. When you make this invisible, background texture is gone. But when you bring
it back, you see it's back here, very perfect. This is the background
you can double click on. This is a color, you can change color,
something like red. You can see perfect
reddish color. Like make it lightly dark, very dark zone. You can make it. So any color actually you prefer all green color, perfect. It's your choice. But let
me leave it the way it is. Sometimes it's very good to just leave mockups the way
they have been made. What is the next thing to do? This is expanded,
just collapses. Good, We're not changing. Anything you're
mentioning for now, actually probably
is going to change. But let's deal with
the left poster. Click here. What do you
do? This is the shadow. For the left poster.
You can see O, it's not this one. This
one is not working. This is working. You
can see it's gone. That's the shadow. But
don't tamper with anything. The only thing you
want to tamper with is what is the left poster Exactly. How do you stay the markup?
How do you use the Mack up? We're going to start with this. What do we do? What do you do? You can actually come over here. You can click, you
can select this box. This box or just click
the old box here. Actually just
double click twice. That is, you click 1.2 It takes exactly where the designs
on that exact mark up. It takes it to where it is. Actually just just on shows
like this also what do we do? We have our files already. That was why we had a particular section
before the section which was Jpeg
exposing our images. We've been able to
export all our images. If you've not done
that, do that now. Okay, I've taught you how
to export your images. Okay, Now you export
them in Jpeg. Okay, I have all my designs, the fly and poster designs, which we've done in this course. I have everything
pegged already. So you just come over, you
can see me everything. The seven, they
are all J already because I'm going to
use them very much. In this particular section, we're dealing with
markups. What do we do? It's actually when
you come over here, just see like a light one and like a dark
one, for example. Let me just use
something like that. Okay, I think I should
put light or dark. Dark or light,
either of the two. I would like to use. Let's see. Okay. Even if the
make a mistake, there are changes that can make. Just click on this, click old, and drag this down into here. You can see Photoshop
shows, okay. For example, let me
just drop somewhere. You click old and you can see Photoshop is actually
open down in an icon. It is at the tax bar, Just bring it on top of it, then it shows what? You drop it inside. Very. Then it's fills the screen
and you check this. Peradventure, you
can control it. Peradventure, you don't
have it like that. Just come to file open and
move towards DestophI. Move to Deckstop.
What happens then? Towards I add apps peg. And you can see this is, you can just select
this and what's open? Just do everything
beginning before. Just click old and drag it here. Then you drop down. You can say, sure you
want to come back. Just drop drop. Don't mind present. Zoom out the control, then click drag. Like this. Zoom was a mistake, Zooming again, let's bring it around somewhere you can see
it is clipping to that side. Then click here and drag
down and it's clip. Then you check very, very perfect the control z. Then what do you do is very important if come over
and see what happens. Nothing changes. It
is very important when you're using mark
up, what do you do? You save that
particular mark up? Here we are now what do
we do? We save this. Sorry, here, actually, exactly. Oh, sorry. It's not the
one I'm going to say. I'm going to say this
because this is where, when I open the mock up
is when I double click, it was, it took me to a new word which is
this. What do you do? You can actually click this
one and make them invisible. I would that you will
click old and drag down. And if you want
them visible back, click old and do it's not she, because
this one is on top. You can make this invisible. You can see click
old and drag down. It goes invisible, click
old and drag it visible. But so far this is on
top, nothing shows. I don't want the document
to be too heavy. So just make this, just make this invisible.
So what do you do? Control, it's saving over here. Then when it says what do you, what happens, It shows here. Now, what is the next
thing we are done? What? With the left poster? What do we do? We collapses. Okay, Actually, the
right pos also expanded. We just collapse. Okay, now let's expand the right poster. Making this invisible.
Invisible. Just to know we are sure about
what we're doing. Just double click. Okay,
we have this double click. What do we do? Come over here. You can actually
go to open open, but I want to use
that technique. I text techniques,
come to a click, old drug down, then
drop very perfect. Then check what's showing. What do we do? We
click Olden drug. Make them invisible, or
leave them as invisible. Click this old and drag it
up, bringing it to the eyes. Then you can click Old and drag these ones and make
them invisible fine. Then you can watch Control
Save, very perfect. Then come over here, very nice. Another thing we can do,
just try to change this one. Also feel the sound. Try to change is collapse this back and expand
the left tone. Double click then changes by giving it what?
Something like this. Actually, let's see
what happens. Nice one. What do you do contrave
then come over. Perfect, Probably you can see a particular line that is how
the mock up is being made. There is no adjustment
that can be made to this. Okay. That contra zero over
here as you can see there, probably yes, it's
a white line. Okay. That's how it's been made. Nothing we can just do. I think I want to make this left one. Okay. I want to make this
one the normal boger. We just click down then Perfect. Just check. When you
check, what do you do? So check as usual,
what do we do? We save, control the save. Then you move, you
move to the space. Then you select, and
this is perfect. I can just know you can
change it to your taste. It depends, it's yours. Okay? You can just come
over to the right poster. Okay, this is the right poster. The double click, you're trying
to change your grid form. You double click, double. When you double
click, what happens? You just come over, then choose, this is back, actually is back. Then what you drop after
dropping, what happens? Then you select this. Then what do you do?
Control S, then save. And you come over here
to the main image and we have this perfect perfect. We move to the next
lecture where we continue with mockup spot in
different forms. I'll see in the next.
27. Mockup 2: Now Azizure go to open or you just come over
to file and go to open. Then what download as normal Photoshop file which has been changed to
a normal folder. Then we have, we have the markup poster one,
which we've done already. The poster two can double
click and just open straight. Very easy. We've been
able to see how we change things in the first one. For us to do this,
actually it's very simple. Also, the main flyer change is what is right
here in the letter. You can see the first the second one and this
is the first one to them. This is the first one to them. That is the main thing
we are changing. We can make some
other adjustments as actually we've done
in the first to what? This color balance. You can
click double click here. Then you can do what?
Adjustments, like the 60. You can see the
tone, it's changing. That's the, it's actually changing the shadows and lights. It's making it balanced. Okay. The shadows, is the black, the darkest part in the image. Dark parts in the image. Why the highlights are the
light parts in the image? This actually, the mid
tone is actually in between using shadows on to actually affect
the shadows on, using highlights on to
actually affect the Yl. Let's change the shadows on and try to make them red. It's
affecting the shadow. You can see the shadows
are very dark right now. You can this where
you do your do, okay? You come into the highlights actually affect the highlights. You can see perfect
when it's actually, let me say, balances
actually balance everything but the shadows
and the highlights. Okay? You can see it's going to balance everything the way
it's meant to balance. We're not changing anything.
Just make it that exposure. Also trying to expose. But we're not going
to change everything. Just leave the weights perfect. I love the way it is, I think. Yeah. Okay. No more adjustment here. Everything is perfect. I didn't change anything. Yeah, Just leave
the way it is then. That's perfect.
This is collapse. This expand, Trace collapse. You can trace collapse also. It's expanded for the texture. Actually, just leave
texture the way it is because it's created in an animated software,
something like that. Before it actually became a PS. No. Place your wall,
place your floor. Actually, you can change
the color of the wall. That's why you're trying to
say something like that. Like just like an example, you can change the
wall, can come over it, come to the rectangle
to click Oden drug and the previous color was
right or something like that. So let me just tell you
something like this and see what happens as usually do what you control
in order to save it. When you save it, it's going to reflect on what on display. Just come over and see perfect. Actually that's the floor also. That's double click here. When you double clust, it's still direct angle to
just something like this. That's right. I'm going to
give you that same yellow, but I'm going to
reduce its quality. Very, very light.
Something like this. Then you can see. What do you do you control to save the effect to the markup? You can see perfect. But I'm nosing this,
I don't need it. I just like the way it is. Perfect. Just contra
1.2 twice what. You can close this and what close this, you can
come over here. Also, double click
for the background. That is everything together
as a whole actually. Okay. You can try to change
it and make it very light. Should be something very
light. Not so much. You can say something like
this and it's perfect. But don't want it just contrast. I love the way it is naturally, the way it came about. Now let's expand
the letter then. This is the second one, and this is what the
first one make this si. It depends on the one
you want to start with. I want to start with
the second one first. Actually, they have
a dark background here and a light background. So I want to follow the
procedure, the process, that is what I'm going to follow for this dark background. Let me come over here,
then you double click. Don't forget what I said. Let me close this
and come over here. Do you double click on, on the small box? Because it's, it's, it's actually a layer,
actually a markup. Let me just say it like
that. Double click on this small recto double click. I've said it's a
dark background, I want to use a dark
background also. What do I do? As I've said earlier before
that I have the pee pet double click of
everything we did in this cross a dark
background problems. Say this, click and
drag Photoshop, then drop it contains
what's done, what do we do? Actually, it looks somehow. The only thing we need here
is what is the store layer? You can click, drag it and bring it up here. We're good to go. Or we leave it like that
and make sure we make all in visible and
we're good to go. What is the next thing to do? We save control. You see saving nine, 9% 100 in order for
you to reflect it. Then we see what is there? Very perfect, okay zone love. It looks good. Now what
is the next thing? We need the lights present. Then minimize lights
on rectangle. Just come over here,
select the move to we need light type of light, flyer and poster with me. Just double click over here. The more, come over here, choose a light something, click, click old and drag. What is the nesting?
You can try to work. Make all this invisible. How did I do it?
Click, drag down. It makes everything invisible. You want to make
everything visible back. You click, make
visible old and drag, everything becomes visible back. Just click and drag. You can't see it because
this is on top of every other layer we
have just control. And you see seven and it's
seven 100% We move here and you click very,
very perfect thing. The problem we have here is now this background flyer is blending in this
background, what do we do? We can actually come over here
were selected layer mask. We can actually come over, I want to select the
background self. Come over here,
then the white is. Try to bring it down a little
bit and make it something like in a gray color. You can see, you can
see it's more better than the way it is before
we can leave it like this. This is very, very perfect. You can decide to Jed, you can actually try
it on your own and try the other peg flyers
and post away, Go pee and try it on them. And see what really happens, how you can actually
go along with things, how you can actually
change things using this particular macop I
will see in next lecture.
28. Mockup 3: Lecture. We have another mark
up we're going to try on. Okay, open. Come over here towards flyer, push three. Okay, then select. Then what's open?
So we have this. You can try to make
this invisible. You can see invisible nally changing much
to effects. Okay. The objects. Okay. Okay. Don't need to touch
anything here. You can see the shadow,
it's going away. Then we have the
background, like the sand. Okay. It's going just
leave it like that. We have the main
thing we have to is what is this? This, but this. What do you do?
You double click. Just double click here.
Then I want to use, I don't want to use a light one. I want to use a dark one
because what's it called? A light flyer would be like, actually would blend
with the sand. I want to use
something like this. Use the headphone again. Use the headphone
then come over again, just that's perfect. This out present on zoom out, then click Select, click out, and drag out a little bit. And that's okay. After checking what control you need to say,
very, very important. Okay? You can control zero just to make it fix
screen, then move here, then we have this very perfect, So it's not really
actually difficult. Okay, let's try a lighter one. Come come over here, let's use the rider
click olden drug, then very, very perfect. Then check, then
control. That's saving. Saving, then come over
here then Perfect. I think that is a problem. Okay, it's not
actually closing up. Oh yeah, that's true. Control. Click Old click on Austin Olden drug is just
try to adjust the No, select is in control
then move over here. We have this perfect. I think even the
white background actually works perfectly well. And the dark backgrounds, okay, that is not a problem, That's not a problem, okay. That is for this mock up lecture I'll see in the next lecture.
29. Mockup 4: In this lecture. This is the thumbnail which
the thumbnail mark up. I used actually just
double click here. Actually, it's open. This
is the exact thumbnail. What did I do? You can
try to pick this visible, invisible, See which one? Actually, if you accelerate
this actually will show you everything one by
this is the background, like one by one. Okay? 11. What do we do? The main
thing we are actually after, this is side, all the sides are linked to side B are
linked together. You can actually make
side one particular, you can see click and
drag down like this. So these are the side as
including the middle one. Okay? In the middle one you can see this is the side
which you can see. The one here is the side
including this and this, whatever you put
inside here will actually reflect in the
other sides of this. As we put in side B would actually reflect
in the other side of the B. Okay, let's see what happens. Double click here on A, okay? Then come over here,
come to the themindp, you're going to notice
that this thing is, you can just click and
drag and make it here. Can click and drag
down like this. Actually, it's going to
keep, some of the images is not me going to make them
show. But what do you do? You just try to adjust it in
your best way, country zero, because this is
narrowly given us like 4.5 When you click old and drag, come over here, you
see what happens. It's not working. What
do you do pre shift, then click drag a bit. You can see it's
actually shrinking. It's not going to
shrink your work. Okay. But we don't have any choice
then, just not too much. Come over a present shift also, then try to shrink inside. When you shrink, then
just drop that click, drag this down without using any keyboard shortcuts.
Then what do you do? Click and drag this
to the left and just try to make them
well in the center. And what do you do control
then after saving it, then just come over here
and see what happens. You can see the is
connected to what the. As you can see A, this is A then A. Now for the B, you
double click the B also come over here and give it the same. We
can try to change. It's probably going to come over here to use the headphone. Just drop it like this, okay? Click, drag it up.
Then click old. And drag down like this, okay? Press on the ships,
Click Den Drug inside, two bits, okay? Press on ships, click
on Oden Drugs also. Then click Oden Drug like
this, something like this. Then click Den Drug to the site. Okay, You're trying to click
Golden Drug like this. So I'm present ships, sorry. Okay, you can see and
it's forms like this. Okay, let's make things
balance variable. Okay, select then
control S, okay. Then what do you do? You come
over here after it's said, then let's see what happens. You can see, you can
see how things are now. But I don't want to use this. I want to use this
space, this one exactly. Select this, Press control
C, which will copy it. Then come over here, try to delete this code and
drag to the trash can. What do you do? Control
its past exactly, then control, then save. When you save, when you save, just come over the
select this, then whatd? Everything actually has
the same mockup design. All the S are connected, all the B's are also connected. It's very, very
simple and perfect. I will see you in
the next lecture.
30. Where to download PSD Mockups & Images: In this lecture, I will
be teaching you where to download images, S, the markups and icons from
website to download them from, you can just come over here
to free and just press Enter. It takes you to free
pick, just select here. It's very simple. First,
you need to sign, sign up for this
website over here. Then after signing up, then you can be able
to have access to it. But without signing up, you can just have access
to downloading only three, let me say resources
from here for example. You can just search
agriculture Acho. It brings out the images
for you from different, you can see, you can see the
one I use in my tutorial. You can search for images. Okay, You can come over here also just talk about mark ups. Mark ups, okay. Mark ups, the springs out, different markups for you to. You can see different
types of mark ups. It's free. Okay? But there are some that are
paid like this. You can see the crown
over here, yellow crown. It shows us that this
is what this for premium subscribers
who subscribed to this particular websites. Lot images, lot of mark ups
for you to use over here. Apart from that.
Apart from that we can go to, there's a website. Okay. You can come to
Blast Blast. Yeah. Now, in blast,
actually there well, actually I know them
for the markups. Okay. The PS, the mark ups, you can see different types
of markups for you to use, different types of markups, for you to use the
markups icons, let's see the icons they have. Over here you can see different icons. You
can actually download. So you can download almost
everything here for free. Sophia, noising is for
commercial purpose but using it for commercial purposes you have to subscribe. Okay. And they have different
price subscriptions. You can see Forts
also can download forms from here as
it goes a long way. Apart from that, we can come
over where we can come to unsplash.com slash for you to download images to
use in your designs. In your flyer designs
and poster designs. Okay. You can see
different types of images for you to
use in your design. Different images,
different images. You can also search here, There are different
images you can use. You can also search here
images to use apart from another website called Pi. You can see the Pi Pi actually also they have
images for you to do. We have nature, wallpaper
grounds, and the like. So you can from any angle, anywhere you prefer,
just download from. Apart from that, we have
a particular website that people download from
that's what Flaticon. Flaticon. Just over Flaticon. Then it takes were any icon you would want to
download and use. The icon I used, website icon, I used the location icon
I used in the tutoria. Actually, I downloaded them from where it was downloaded
from, Flaticon. Actually, it goes a long way. Okay. For your icon download to download icons, I
recommend Flaticon. Okay. For mark Ups
free and Blast. Okay. And some other
websites for images free, Pick, Blast, we have Splash
also pier and the like. That is it for where
to download images, icons, and mark Ups from.
31. Conclusion: Guys, we have come to the end
of this course as a whole. By now, you're a professional in designing flyers and posters
for different brands. Do not forget your assignments. The exercise files which you'll find in the resource
file from the select, there is A and B for the images for you will be
designing for a vegetarian. Someone who doesn't eat, who is not into eat inmates
and fish, fish or fishes. Let me say it like
that actually. Who doesn't eat meat and fish? Okay, Fish you design Like it's a brand that is advertising on a post and flyer
for people to know. Okay, we deal with people
who are vegetarians design that for me either using a light
or dark background. Apart from that,
Apart from that, in the part of the assignment,
the exercise files, you may see the 12 you're
going to design for a flyer and a poster for a particular brand that deals in automobiles selling cars. You can use the light
or dark background. The assignment, that's
the exercise for you. Firstly, the you're
going to design for a vegetarian
brand and secondly, for an automobile
brand that is it also, don't forget to take my course. Blend and change colors
of anything anywhere in Photoshop which would help
you to improve your color. Skies. In any way
whereby changing colors of different things,
places in Photoshop, anyhow you want it, any angle, I look forward to seeing
you in my future courses. As usual, keep creating.
 Quadri Ilebiyi