Transcripts
1. Welcome: Welcome to Adobe
Illustrator Essentials. Illustrator is a robust
program with tons of features. So this class covers just the essentials for
complete beginners. While there's a focus on
Illustration for animation, the tools and techniques
that I'll cover are applicable to graphic design
and static illustrations. I'm Meghan Frias, and
I'm an explanimator. I write, illustrate, and
animate educational animations, mostly focused on health
and environmental topics. A huge part of animation is having high quality
illustrations to animate. If you can illustrate
and animate, you don't have to rely on others to bring your ideas to life. You don't need to
be able to draw, to be able to illustrate
an Adobe Illustrator. Throughout this
class, I'll show you the tools and techniques
to illustrate even the most complex visuals by building with basic shapes. For the class project, I've
created a workbook for you to follow along as you watch.
Now, let's get started.
2. Set Up Workspace: In this video,
you'll get a tour of Adobe Illustrator and set up your workspace with
everything that you'll need. First, let's create a new file. From the home screen, you
can just click this button, or the keyboard shortcut is
always Command or Control N. I'm going to go with a width of 1920 and a height
of 1080 pixels. This is the size for HD video, so anytime I'm
animating a scene, I'm usually using this size. Make sure that your
dimensions are pixels because that's
what After Effects uses. For artboards, I'm just
going to leave this at one because when you import a
file into after effects, it's only going to
recognize one artboard. So if you're doing
something like storyboards, you might want to have
multiple different artboards so that each scene can
have its own artboard. But you're going to want
to break up the file into single artboards to import
into after effects. For bleed settings, we
don't need to worry about any of these because
this is just for print. The color mode is important, and it's important
that you choose RGB color, which is for digital. CMYK color is for print. So make sure that you
choose RGB color, because if you
accidentally chose CMYK, and then you import this file
into after effects later, you'll notice that
the colors look different than what you
were seeing in Illustrator. And that's because
after effects uses RGB. Then scrolling
down, you can leave the raster effects
at screen or 72 PPI, and this is good
for video because this setting doesn't really
matter except for print. Then I'm going to hit
Create. Let's start with a tour of the workspace. Yours probably looks something
like this by default. But if it doesn't, that's okay because I'm going to
help you customize your workspace so that it has all of the tools that
you're going to use the most. If you go up to
Window Workspace, you can find different
default workspaces. I'm going to switch this to Essentials Classic
because I like this top toolbar and I like the expanded view
of this left toolbar. Let's go through some of the panels that I
frequently use. If you don't see a panel, you can always find
it underneath Window. First up is the
properties panel. And this panel can
be really helpful because it changes based on
whatever you're working with. Say you're working with shapes, and I'll show you more about
all of these tools later. It's going to change the
settings that it has here based on the fact that
you're working with a shape. Behind that is libraries
and this can be helpful to save different colors or graphics that you
use frequently. These libraries
work across all of the different Adobe apps and I'll talk more
about how this can be useful or not so useful between After Effects
and Illustrator later on. Then in this bar here, you can click any of these to
bring up different panels. If you have a smaller screen, it might be helpful to have
these condensed like this, and then you just need to
click on them to bring up the things that you
need when you need them. But I have a bigger screen, and I like to see all these
panels expanded all at once, so it's easier to
get to what I need without having to click
into a specific panel. I'm going to click this
Expand panels button here. Let's go through these panels, and I'll make sure we have
all the ones we need. So color, color guide, and swatches are all useful
for recoloring artwork, and I'll go through color
in a separate video. But for now, I'll just keep
all these panels here. And then brushes I
don't use a lot. So I'm just going to right
click on it and hit close. I also don't use
symbols very much, so I'll just close that one. Next is the stroke panel, and there's actually
more to this panel. So I'm going to hit the menu
and choose show options. These settings can
be really useful, so I want to have them visible. Underneath that is gradient and underneath that
is transparency, and I'll keep all
of those there. Appearance can be useful, but graphic styles I
don't use very much, so I'm just going to right
click on that and close it. The Layers panel is helpful, but a lot of times I
have lots of layers, so this is not really
enough space for it. So I'm just going
to click and drag this panel over here and put it underneath
here so that I'll have a lot more space
for all my layers. The Artboards panel can
be helpful if you're working with multiple artboards,
like for storyboarding, but you may not need this
if you're just working on an Illustrator file
that you'll import into after effects that
only has one artboard. Well, I'll just leave
it here for now. Asset X word I use sometimes when I need
to export graphics, but it's not really something
I use much for animation. Down here is common, so if you have people
reviewing your work, they can leave comments,
but I don't use that, so I'm just going to hit close. Next, I'm going to
go up to Window and then down to Pathfinder. That's going to open
up this new Window, and I'm just going
to click and drag to dock this panel down here. I'll show you how this panel
works in a later video, but this is something
I use all the time, so I definitely want it
here in my workspace. The align tools can
be really helpful, but they're also
going to come up in the top tool bar when I have things that I
could actually align. But there's some extra
options on here, so I'll just dock
this one behind here. The Transform panel can
also be really useful, so I'm going to dock
that down here as well. So you can move the panels around in any way that you like, and you can always find
other ones that you may need or that you use a lot, and you can open
them up underneath window and then dock
them wherever you want. One thing that I would
recommend not doing is just having random
floating windows all around your workspace
because you'll have to move them around to get
to things that you need, and then you're just
going to end up working on your workspace more than you actually
work on your work. So if you use a panel, just make sure that
it has a spot where it's docked and you can
save it in that spot. And that brings me to
saving your workspace. So once you're happy with how
your workspace is laid out, you can go up to
Window workspace and then say new workspace, and then you can give it a name. And then just hit
Okay. One last thing that I want to customize
is this bar down here, which is kind of a new
feature to Illustrator. And since I learned Illustrator
before this bar came out, I just find this annoying. You can definitely keep
it if you find it useful, but I'm going to go
ahead and close it. That bar is called the
Conceptual Task Bar, so if you want it back, you can find it underneath window. This white area is the artboard, and when you input your
artwork into after effects, everything needs to
be on the artboard. Otherwise, it will be cut off. I talked more about importing Illustrator files into after
effects in this video, which is part of my after
effects fundamental series. If you realize you need to change the size
of your artboard, you can use this
artboard tool right here and then you can
adjust by dragging, or you can also adjust
the dimensions here, or you can use the
artboard panel and click here to
bring up the settings. Now let's talk about navigating
around the workspace. A couple of keyboard
shortcuts that I use all the time to get around the workspace quickly is Command or Control
plus to zoom in, Command or Control
minus to Zoom out, and then Command zero to fit the artboard to the
space that you have. I compiled all the
keyboard shortcuts that you need to know into
this one handy guide, so make sure to download
that using the link below. So let's say that I want to
line these two squares up. When I move the squares, I get these nice pink guidelines so that I know when
they're lined up. Those are called Smart
Guides, and to turn them on, go up to view and then make sure that smart
guides are checked.
3. Create, Edit & Stylize Text: In this video,
you'll learn how to work with text in
Adobe Illustrator, including how to create
point versus paragraph type, stylized text, type on a path, and customized text as shapes. Using the text tool,
if you click anywhere, you can start writing
what's called point text. When you're done
typing, you want to go back to the
selection tool. To change the size of the text, you can either scale it and
make sure that you hold down shift here so that
you're not distorting the text in a weird way, or you can also change
the font size in this top menu and you can
change the font up here too. If you don't have this
top tool bar visible, you can do these same things in the Properties panel
or underneath Window, you can go down to type and find different
character panels. This is also where you'd find special characters
underneath Glyphs. Also good to know is that text that's underlined like this, you can click on to
bring up the panel. So this will give
you more options to customize your text. There's two different
types of text. So what I just created
here by just clicking with the text tool is
called Point Type. To go back in and
edit your text, you can double click with
the direct selection tool, and then you can edit again. To add a new line to point type, hit Return or Enter
to get a new line. The other option
is paragraph type. So with the text tool,
you want to click and drag to create
a bounding box. And now you can type
in this bounding box. And wherever the
bounding box ends, it's going to start a new line. So if you go back to
the selection tool, you can adjust the
bounding box and it will adjust the line
breaks of your text. If you want to change
the size of the text, you can do that by changing
the size of the font. There's an easy way to switch between point type
and paragraph type. This textbox here
is paragraph type. You can tell because if
you try to resize it, the text will automatically
refit the bounding box. You can also tell because this
circle here is filled in. And if you double
click on this circle, it's going to convert
it to point type. So now if you resize it, it's going to actually
stretch the text. With point type, the line breaks are controlled by returns. When it's point type, you can tell because this
circle is open. If you want to switch
back to paragraph type, you can double click this to
switch to paragraph type, but all of those line
breaks are now baked in, you'd have to go in
and delete them. And then now if you resize the bounding box,
it'll work again. When you have paragraph type, if you want to size the bounding box to
the size of the text, then you can double click
on this little square here, and it will either shrink
that bounding box to fit, or if your bounding box was too small and text
was getting cut off, you can know buy this little
icon right here and you can quickly make the
bounding box fit the text again by double
clicking the square. Any of these tools that have
this little triangle in the bottom mean that there's
more tools underneath them. So if you click and hold,
you can get to those tools. Here are some other type tools. One that I use a lot is
the type on a path tool. When you're using
this tool, you'll see a slightly different
icon for your cursor. Then you can click on a shape, and you can start typing
around the shape. Once you're finished
typing, make sure to go back to
the selection tool. With that text selected, there's a few things
that you can adjust. So these lines here adjust where the text starts and ends. So you might not want
it to be trimmed, but in case it is trimmed, this line will untrim it. And then this line here that's perpendicular to your shape, you can drag to flip the text onto the other
side of the path. Then again, use these lines to adjust where the
text is on the path. If you want to copy
and paste text, but maintain the style
of the destination text, what you need to do is double click into the text to copy, hit Command C, and then double click into the text box
where you want to paste it. If you just hit
Command B to paste, it will paste exactly
as you copied it. But if instead you want to
keep the destination format, then hit Command Option B. Et's say you have some text
and you've changed the font, but you want to go
even further and change the shapes of
the actual letters. To do that, you can outline
the text or in other words, turn the letters into shapes. The keyboard shortcut
is Command Shift O. Then you can use the direct
selection tool to go in and actually manipulate
all of the paths. And I'll talk more
about this type of editing in a later video. There's tons more advanced
things you can do with text, but this covers the essentials that motion designers
need to know. A lot of times, if
you're trying to create texts that you
want to be animated, you'll need to
recreate it in after effects anyways, in
order to animate it. If you want to learn more
about animating texts, check out these
videos and classes. Or if you want to learn something that you
don't see there, comment below and let me know
what you'd like to learn.
4. Create & Edit Shapes: In this video, you'll
learn all about creating and editing shapes in
Adobe Illustrator. You'll learn how to
transform basic shapes into unique shapes that will serve as the foundation for
your illustrations. Okay. There are a few
different shape tools, and by default,
they're going to be underneath the rectangle tool. If you click and
hold that, you can see all of the
different shape tools. Let's start with a rectangle, which the shortcut
is M. With the tool, you can just click and drag
to draw out a rectangle. If you click and drag
while holding Shift, it'll make a perfect square. You can also see
that indicated by the pink horizontal line if you have Smart
Guides turned on, which is underneath
view Smart Guides. To switch back to the
selection tool after you've created a shape and you still have the shape tool
for your cursor, you can just hit V
on the keyboard. To create an ellipse,
you can grab the tool by clicking
and holding and then dragging to get to the ellipse tool or
the shortcut is L, and then click and drag
to draw out an ellipse. If you want a perfect circle, click and drag well
holding Shift. If you want to
create your shape, whether that's a
rectangle or ellipse from the center instead of from
a corner like normal, what you can do is
hold down Option or Alt to draw shape
from the center, and you can even do a combination
of keyboard shortcuts. If you hold down shift, it'll
make it a perfect circle. Next step is the polygon tool, and there's no keyboard
chart cut for this one, so you'll find it
underneath the shape tools. Then just click and
drag to create a shape. If you want your polygon
to not be rotated, you can hold down shift so it stays at zero degrees rotation. Also, while you're dragging, you can increase or
decrease the number of sides by hitting the up
and down arrow keys. Underneath that
is the star tool. Same with the polygon tool. If you hold down shift while
clicking and dragging, it'll snap it so that it's
at zero degrees rotation. Also, while you're
dragging with the Sr tool, you can hit the up
and down arrow keys to create more or less points. When you're clicking and
dragging to create a star, you can also hold
down Option or Alt to maintain a straight side
for all of your points. If you start dragging and
then hold command or control, you can just adjust the outer point and keep
the inner radius constant. Once you've created a star, make sure that it's selected, and then you should
see this little icon to increase or decrease
the number of points. The polygon has a similar thing, but it's a little less obvious. It's this little
diamond right here. Stars also have these
little circle icons, so you can drag these to adjust the inner radius or
the outer radius. Another way to create a shape is to first grab the shape
tool that you want. I'm going to do M on
the keyboard to get the rectangle tool and
then just click anywhere, and it'll bring up a
dialog box where you can type in the exact
dimensions of your shape. You can click this button
to maintain the proportion. If I change my mind and
want this to be 300, then both the width and
height will be 300. I'm going to do a
separate video on color, but just for the basics, over here is where
you control colors. There's a fill color which
is the inside color, and then there's a stroke
color which is the outline. Whichever is on top is the one that you're
going to be controlling. With the fill on top,
I can go over here and choose a swatch
to recolor this. Then with the stroke
on top, I can come over and choose
a different color. Again, more on color
in a later video. Let's take a look at
the stroke panel. I'm just going to create a rectangle and you
can see that this has a black stroke to increase the stroke weight or the
thickness of that line, you can increase it by
using this drop down or by using the up and down arrows or by just typing
in an exact number. We're going to skip over
the cap because this requires an open shape,
so we'll cover it later. Next is the corner, so you can have a pointy
corner like this, or you can have a
rounded corner, or there's a bevel corner. And then another
thing to note about the corner is that there's
this number called the limit. If you look at this triangle,
notice this corner here. If I go into this box, another way to effect
the number is to have the box open like this
and then use the arrow keys. When I arrow down 5-4, notice how this corner
goes from pointy to flattened. That's
what the limit does. It decides where point corners are going to be
made at what limit? A lot of times, you don't need to worry
about this setting, but in cases where you have something like text
maybe that's outlined, you might get some weird pointy jagged edges that
you don't want, so this can be a way
to get rid of them. The next option is where you
want the stroke aligned to. In this option, it's
align to the center, or you can have it so the
stroke is on the inside and the boundary box is on the
outside or vice versa, the stroke is align
to the outside. With the selection tool,
if you click a shape, you should see these little circle icons in all
of the corners. If you click and drag towards the center on one
of these icons, you'll round the
corners of the shape. You can also unround by
clicking and dragging outwards. If you just want to
round a single corner, then select that corner first and make sure
that it's more bold, and then you can click
and drag to round it. If you want to select
just some of the corners, then hold down shift between selecting them to
select multiple, and then drag from one of those to round both
of those corners. There are also different
types of corners. While you're clicking and
dragging a round corner icon, you can hit the up
or down arrow keys to switch between the
three corner types. Also, if you already
have rounded the corners and you want
to change the corner type, you can hit Option or
Alt while clicking the round corner icon to
cycle between the options. You can use and combine all of these techniques for
some unique looks. If you want to be
really precise about your rounded corners
with the shape selected, find the Transform panel, and then you can type
in the exact values for each individual corner. If you want all of the
corners to be the same, then you can lock
this by clicking this icon here and then
change the number. You'll also find the
round corner option sometimes in the top toolbar
if you have enough space. Otherwise, you can click shape to find those options here. The transform panel can be super helpful for
editing shapes, especially if you
want to be precise and type in exact values. And the properties
that show up in the transform panel depend on the type of shape that
you're working with. So if I select this rectangle, then you can see we
can adjust the width. And if we constrain
the proportions, it'll adjust the
height accordingly, or you can unconstrain and then type in a different value. There's also rotation. These options are
for the corners. You can lock them so
that all the corners are updated the same way. Or if you unlock them, you can adjust each
corner individually. These little drop downs allow you to change the
type of corner. If you're working with a circle, you can adjust the
width and height and this button will lock
the proportions. These options allow you to
create a Pi like shape. I'm going to put in 45 degrees, and then let's do 60. Once you've put in
some angles here, you can actually adjust this
right on the shape itself. The first number is for one handle and the second
number is for the other handle. If you want to switch these
numbers to invert the Pi, you can click this button. You can also rotate
the circle here. If you're working with stars, you have options for
the number of points, the rotation, and then
also the outer radius and the inner radius. Then these are for the corners. And you can change
the corner type too. At the bottom of the
transform panel, you have options
for scale corners and scale strokes and effects. If you have both of these
checked and you scale a shape, you can see how the corners are scaling proportional
to the shape. And also the stroke
weight is scaling too. If you uncheck these and
now scale the shape, you can see that the
corners are not changing, so adjust how the shape looks. And also the stroke weight
is staying the same, even if I scale it up really
big or down really small. It stays the same width. In other videos, we'll
talk about drawing custom shapes that aren't
built with the shape tools. For those types
of custom shapes, you won't have
properties down here, but for all types of layers, you'll have properties here. The X and Y coordinates are for where they're positioned
on your artboard, and then of course, there's
also width and height. One option that you have with this width and height
is that you can adjust where it happens from with this little
coordinate system here. By default, the reference point where things happen
from is in the center. But let's say you want
to change this to the upper right and then
you change the height, You can see that it's scaled out from this top right corner. Another thing you can do is skew the shape by putting
in an angle here. To scale objects, you can
use the selection tool. First, select the object
to scale and then hover over these little squares on the boundary box to
get the double arrows. From here, click and drag
to scale this shape. You can do just horizontally
or just vertically, or if you go from a
corner, you can do both. If you want to maintain
the proportions, you can hold down Shift
as you're dragging. If you want to scale this
shape from the center, then as you're dragging,
hold down the option key. One thing to note between
Illustrator and after effects is that for shape
layers and after effects, there's a size property
and then there's a scale property
that's a percentage. But in Illustrator, there's just one size property and scaling a shape
affects the size property. You can see the size here
in the Transform panel, and when I adjust by scaling, you can see that those
dimensions change. There's not two different
properties, size and scale. It's all the same thing. You can also scale objects
with the scale tool. First, select them with
the selection tool, and then the scale tool is here or the keyboard shortcut is S. Then click and drag
anywhere to scale the object. How the object scales depends on the direction
that you drag. If you drag in a
diagonal while holding the Shift key, it'll
maintain proportions. But if you drag horizontally, it's going to scale
just horizontally, and if you drag vertically, it'll just scale vertically. But if you drag at a diagonal, it'll maintain proportions. Another option that
you have when using the scale tool is to change
the reference point. This little icon here is the icon for the
reference point. It's basically the same thing as an anchor point
in after effects. With the scale tool,
you can click to move this reference point
anywhere you want it. Now when I scale the shape, it's going to scale from
that reference point. With the scale tool,
if you option, click on the reference point, it'll bring up this box
where you can adjust the exact percentage
scale for the shape. So you could type in
exact dimensions, and if you have preview checked, you'll be able to see
that happen live. You could also do
this non uniformly. And you have the options for scale corners and scale
strokes and effects, which aren't applicable
to this shape, but it's helpful to have
those options here. Also, keep in mind
that you can only see the reference point when
you're using the Scale tool. If you're using the
selection tool, you don't see that
reference point. You can rotate objects
with the selection tool. So first, select the
object and then hover outside of these little
boxes on the bounding box, you should see this
curved arrow icon. By clicking and dragging
with that icon, you can rotate the shape. If you click and drag to rotate
while holding down Shift, it'll snap to 45
degree increments. You can also rotate objects
with the rotation tool. First, select them with the
selection tool and then grab the rotation tool or
the keyboard shortcut is R, and then just click
and drag to rotate. Also with the rotation tool, you have the option to rotate
from the reference point. To move the reference point, just click with the
rotation tool and then click and drag to rotate
from that reference point. Also, if you option, click
on the reference point, then you'll have options
where you can type in the exact amount that you
want to rotate the shape. Keep in mind that the
reference point is only visible when you're
using the rotation tool. When you're using the selection
tool, it's not visible. You can reflect shapes
with the selection tool. If you click and drag, basically you're
scaling the shape, but you just drag so that
it flips the shape over. Another way to do this
where you can maintain the proportions is to
use the reflect tool. This tool is underneath
the rotation tool. If you click and
hold, you can find it here or the keyboard
shortcut, it's O. With this tool, you can flip
around the reference point. With the reflect tool, you
just need to click and drag in the direction that
you want to flip the shape. If you want to flip in
45 degree increments, so maybe perfectly horizontally, just hold down the Shift key. To move the reference point, you can just click
with the Reflect tool. Also with the reflect tool, if you option, click on
the reference point, then you have options to
flip perfectly horizontally, perfectly vertically, or
you can choose an angle. The shear tool allows
you to skew shapes. You can find it underneath
the scale tool. It's going to skew from
this reference point. Click and Drag to
shear the object. If you hold down Shift, it'll snap to 45 degree increments. If you want to move
this reference point, just click with the shear tool. With the shear tool,
if you option, click on this reference point, you can type in exact angles. You can also skew shapes with this option in
the Transform panel. Another way to
transform objects is to first select them
with the selection tool. Then right click go
down to transform, and then these are your options for transforming the shape. Let's do scale. This will bring up the same box
that you would get with the Scale tool
and you can type in exact dimensions for
how to effect the shape. This can be useful for
precisely moving objects. Make sure that the layer
is selected because if you right click without
the layer being selected, you won't see the
transform options. So select, then right
click Transform, and then move or
Command Shift M. Then you can type in
the exact dimensions to move the object. Also, if you hit Copy, it's going to
duplicate the shape in the position that
you told it to move to. Another handy shortcut to add onto this technique
is Command D. This will duplicate
the last action.
5. Work with Multiple Shapes: This video, you'll learn
about working with multiple shapes in
Adobe Illustrator. That includes
duplicating shapes, copying and pasting shapes. There's more options than you might think, aligning shapes, selecting certain
parts of your artwork, grouping shapes, editing multiple shapes at
once, and more. To duplicate a shape, use
the selection tool and then option or alt click and drag on the shape to pull
out a duplicate. If you want to maintain
the horizontal or vertical position
of the duplicate, then hold down shift
as you're dragging. Command D does not mean to duplicate a shape
in Illustrator. It means to repeat
the last action. Since the last action that I just did was to
duplicate a shape, I can do Command D to
duplicate the shape and move it the same amount that I moved when I created
that duplicate. Copying and pasting work
similar to other programs, but with a couple extra options, it can come in really handy. To copy, it's just Command C, paste is Command V, and then CUT is Command X. Then again, command V to paste. Notice that when I
copied this layer, it pasted it in the
center of the Rboard. But what if you want
to copy a layer and paste it exactly
where it was? It's going to be
command C to copy, and then to paste in place, it's Command Shift V. This can be useful if
you wanted to say, rotate the object and it needed to be in the
exact right place. If we go over to
the layer stack, notice that when
you paste in place, it paste as the topmost layer. If you copy a layer
and then do Command F, it'll paste just right in
front of that original layer. So if we scroll down
and find that layer, it's going to be the one with
this little box next to it. So this was the original
layer that I copied. And when I did Command F, it pasted just in
front of that layer. Another option is
to do Command B, and that's going to paste just behind the original
layer that you copied. To change the layer
order of objects, first select the object, then right click
and go to range, and then you have options
for bring to front, bring forward, send
backwards, or send to back. Let's do send backwards. You can also use
keyboard chart cuts. Bring forward is
command right bracket. And if you want to bring something all the
way to the front, you can do Command
Shift right bracket. To send a layer backwards, it's command and left bracket. Keep in mind that's only moving
the layer back one layer. So if you go into
the layer stack, there's a bunch of layers
in between this and this. If you want to bring something
all the way to the back, then it's going to be command
shift and left bracket. Of course, you can
always go into the layers panel to adjust
the ordering of your layers. But if you haven't
organized your layers yet for exporting them
for animation, then it might be easier just to use the
keyboard shortcuts. But you can just
click and drag to rearrange layers in layer panel. The keyboard shortcuts to bring things forward
and backward only work when those objects
are within the same layer. So they're nested underneath
a layer like this. If you want to bring an
object into its own layer, then you can use the plus
button to create a new layer. Then you can select something
from another layer and you can see that something
is selected in this layer by this
little indicator here. Then I can take this little
box and drag it up into this layer and it'll just bring that selected object
into this new layer. And to rename a layer, you
can double click and rename. To change the layer order,
you can just click and drag. You can also use the eyeball
to turn on and off layers. There's an option to lock layers so you don't
accidentally select them and you can always delete
layers with the trash can. There's a couple
ways that you can select multiple objects. The first way is
just to select one, then hold down Shift
and select others. Another way is to click in an empty area and then drag over all the things
that you want selected. If you have multiple layers
selected, you can group them. To do that, you can right
click and choose group or the keyboard shortcut is Command G. Once you have a group, the whole group
will move together. You can do any of the transformations
with the entire group. Scale, move, rotate,
anything like that. If you need to get
into the group to adjust individual objects, just double click on
one of the objects, and they will enter
isolation mode. You can tell you're
in isolation mode because of this gray
bar at the top. Then you can adjust
individual layers. To get out of isolation mode, just click on this gray bar, and this still is going
to act as a group. To ungroup, just
do Command Shift G. Now each one of these
is on their own again. These three objects
are not grouped. If I select all three of them, I can transform
them all at once. Also, if you select
them and group them, you can transform them together. These objects are not grouped. If I select all of them, right click and go
to transform and then choose one of these
options. I'll choose scale. I'm going to switch to uniform and let's just make them 50%. You can see that it transformed
all of this as one thing. These shapes are
also not grouped. I'm going to select all
of them, right click, go to transform, and
then transform each. For this, let's also do 50% horizontal and vertical scale. You can see how it's transforming
each shape on its own. So instead of treating the
whole thing like one unit, it treats each
shape individually. So it maintains the
spacing in between them. Another thing that's really
useful to do when you have multiple different
objects is to align them. Of course, you can also select and align individual shapes, but they'll just align
to the artboard. I've saved this
topic until we had multiple shapes because it's a little bit more
interesting to work with. I'm going to select
all of these shapes by cooking and
dragging over them. Then if you don't see the aligned tools in
your top toolbar, you can also find
the align panel, which if you don't have
this docked already, you can find it
underneath window. So let's say I wanted to
align these all horizontally, and then I want to
space them all evenly. I'm going to unalign them again and show you
one other thing. I'm going to select all
these objects again. Last time I did line to center, but if you do line to
the most left or right, or top or bottom,
it's going to choose the thing that's the
most that direction. For example, this
shape is the topmost. If I choose a line to top, all the shapes are going to
align to that topmost shape. I'm going to undo that and
show you that you have a couple different options if that's not what
you're going for. Say you wanted to
line all these shapes to the bottom of the artboard. If you click on
this button here, you can choose to
align to the artboard. Now if I click Align to bottom, they're all going to go to
the bottom of the artboard. And if I distribute them, they're all going to
distribute across the artboard with even
spacing between them. Another option is to align
to a specific object. If I select all
the objects again, then select the one that
I want to align to. This object will be more
bold and that means that it's the key object that you're going
to be aligning to. You can also see
that it switched to align to key object in
the selection here. Then you can choose whichever
way you want to align this. Now, let's say that
I want to vertically center these on the arboard. I can make sure that
I'm aligning to Rboard and then
click this button. But what if I want to now horizontally align all of
these to the artboard, but keep the spacing as is. If I click this button, because these are all
individual shapes, they're all going to go to
the same horizontal position. But that's not what
I want. I want them to be spaced out like this. One option is to group
all these shapes, Command G, and then
use the align tool. I'm going to undo that and
I also undid the group. Now these are all
individual shapes. Let's say that I didn't want
these shapes to be grouped. Of course, you could group
them and then just right away, ungroup them, but
that's a couple steps. Another way to do that would
be to select all the shapes. With these ungrouped shapes, what you can do is go
into the Transform panel and then just type in half
of the size of the artboard. In this case, it's
going to be 396. That's going to
center all the shapes without having to
have them grouped. I already showed you some
examples of how you can select multiple objects and
distribute them evenly. But what if you have
different size objects? This distributes all
of the objects evenly, but what if you
want the spacing in between the objects
to all be even? The way to do that is
in the align panel. So here underneath
distribute spacing, you can do this vertically
or horizontally. You can see how this
adjusts the spacing between the objects so the
spacing is all equal.
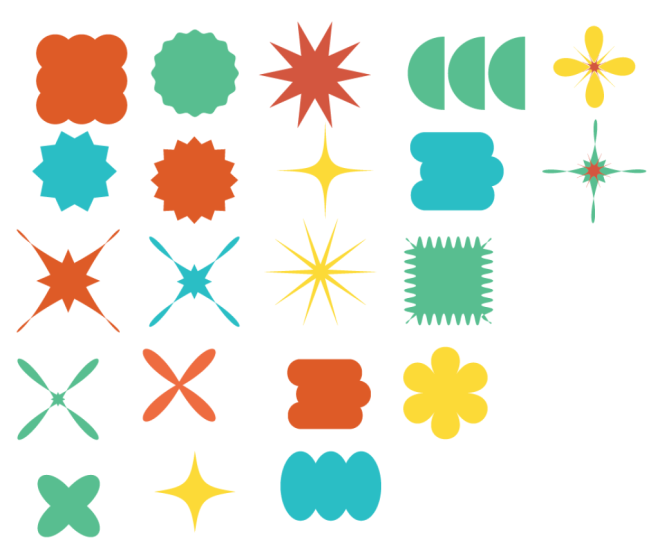
6. Illustrate with Shapes: This video, you'll
learn how to combine basic shapes to build more
complex illustrations. I'll cover the
Shape Builder tool and Pathfinder panel
in this video. First way to build with shapes is with the Shape Builder tool. So let's transform these circles and rectangle into a cloud. So first, I'm going to click and drag over them to
select them all, and then I'm going to grab
the Shape Builder tool, which the keyboard shortcut is Shift M. So what I want to do is click and drag over all of these top shapes in
order to merge them. And then I want to subtract
all these bottom shapes. So to do that, I'm going
to hold down Option and notice the little minus
icon next to the cursor, and then I'm going to
click and drag to subtract all of these shapes,
as well as these two. And there's one little
extra shape here which I can zoom in and
then hit Delete. Another way to build with shapes is with the Pathfinder panel. So the first option here
is to unite shapes. So if you click
and drag to select these first two shapes and
then click the Unite button, it merges them together. Let's select the second set. And for this one, it's going
to subtract the front shape. Next is intersect,
and this is going to leave only the parts of
the shapes that overlap. Next is exclude, so it's going to exclude the parts of
the shape that overlap. I'm going to undo all of that. I'm going to reapply the
Pathfinder shape modes, but this time
holding down option. I'm going to click Unite
holding down the option key. This is going to
do the same thing, but it's creating
a compound shape. You can see that both of
those shapes are there. I I double click to get
into isolation mode, this means that it's
still editable. I can move the shapes around
or maybe scale one of them and everything is
still going to be united, but it's a compound shape, so it's non destructive. You'll learn more about compound
shapes in another video. So let's do the same
thing with minus front. Hold down option minus front, and then you can
see that that minus shape is still actually there, so I could double
click to go into isolation mode and move it around or adjust it
in any other way. Same thing for intersect. And same thing for exclude. This is a great way to work with the Pathfinder tool but
in a non destructive way. What I mean by destructive
is if I undo this, so we're back to normal, let me show you what I
mean by destructive. If I were to select
these and then choose exclude but not
holding down option, if I double click into this, you can see that it's
made two new shapes. It hasn't retained the
original squares that I had. That's what I mean
by destructive. Moving on to the bottom row
of the Pathfinder panel, I'm going to click
and drag to select these shapes and
let's divide them. It doesn't look like
that's done anything, but if you double click to
enter into isolation mode, or if you ungroup, you can pull the shapes apart
and see that that's divided them up into different shapes everywhere where they
were overlapping. The next option is trim. Again, it doesn't look
like it's done anything, but if you ungroup them or enter isolation mode and
pull the shapes apart, you can see that it's trimmed the back layer with
the front layer. The next option is merge. What this does is
combine shapes that are the same color and then trim shapes that are
different colors. Next is crop, and this is going to crop the back
layer with the front layer. Next is outline. And this turns your shapes into outlines. So let's go into the stroke
and turn up the stroke. And if we ungroup this, you can see that each
different piece that was overlapping is its
own outline now. And last is minus back, which is pretty straightforward.
7. Create Custom Paths & Shapes: This video, you
learn how to create custom paths and shapes
in Adobe Illustrator. I'll cover the Pen tool,
the Anchor Point tool, which is surprisingly useful and the direct selection tool. Plus, we'll also look at
how to customize strokes. The Pen tool is
great for creating custom paths and shapes. You can find it here or the keyboard shortcut
is P. To use the Pen tool first
click to create a point and then just click
to create additional points. To finish using the Pen tool, you can either hit Enter or Return or you can hit V to go
back to the selection tool. While using the Pentool, if you hold down
shift between points, it'll make it a straight
line either horizontally or vertically or in 45 degree increments if you go
in a diagonal line. To create curves
with the pentol, first click to create a point, then hold and drag out to create handles that are going to
be tangential to the path. Then click to create
another point and keep holding to drag
out the handles. Again, to finish your path, either hit Return or V to
go to the selection tool. If you hold shift while cooking and dragging
out the handles, it'll snap the handles
to 45 degree increments. There can be a learning curve to drawing with the Pen tool. So here's an alternative method that you might find easier. So with the Pen tool,
click to create points, but just create straight lines. Then switch over to
the anchor point tool, which is underneath
the Pen tool. Click and hold and then grab this tool or the
keyboard shortcut is Shift C. Then grabbing somewhere around the
middle of a straight line, click and drag with this
tool to create a curve. If you click and drag
while holding Shift, it'll snap the handles to
perpendicular to the path. It can be hard to
create a shape that's exactly what you want right from the start with the Pen tool. So it's really useful to
be able to edit the path, and here are some
tools for doing so. First is the Direct Selection
tool, which is here. The keyboard shortcut is A. With this tool, you
can select a path, and you can select the
individual points on the path and move them by
clicking and dragging. You can also click and drag on the handles to
adjust the curve. If you select a path with
the direct selection tool, you can hit Delete to delete it. Next up is the Add
Anchor point tool. The keyboard shortcut is plus. With this tool, you can
add points to a path. And then with the
direct selection tool, you can adjust those points. The Delete Anchor point tool, which is minus on the keyboard, allows you to delete points. And if you hold down Shift
while deleting a point, it'll try to maintain
the shape of that path as much as possible
with just one less point. With the direct selection tool, if you select a
segment of the path, you can hit Delete
to just delete that segment of the path between two different
anchor points. Or you can actually click
on Anchor points and then hit Delete to just
delete that anchor point. If the icon next to the
Pen tool is a little star, that means that you're
starting a new path. And if the little
icon is a circle, that means you're
closing a path. Or if you have an open path and then you've clicked
out of the open path, and you want to go back
in and edit that path, if you go to the Pen tool and then hover over
one of the points, you'll see a little slash
next to the Pen tool. And this means that you're
going to add to that path. If you're drawing
with the pentol and you're creating curves, but then you want
the next segment of the line to not be curved, but you already have the handle
here from the last point, what you can do is hover
over that last point, and you'll see this
little upside down V icon next to your pentol. If you click that point, it'll make it so that the next segment of the line is straight. I put this a shape here for you to practice using the Pentl. So let me show you how I would go about tracing the shape. I'm going to start
here and click and drag to create a
point with handles. And then I'm roughly going to
go in the center of curves, and that's where I'm going to choose to put the next point. It's okay if it's not perfect on the first go because you
can go back in and edit. Here's an instance
where I don't want the next segment of
this path to be curved, so I'm going to click
on the last point. And then hovering
over the first point, you can see that
little circle icon and that means I'm
closing the shape. Then with the direct
selection tool, you can go back in and adjust
the points and the handles. It's not perfect, but
you get the point. We've talked about the
anchor point tool, but there's a few more
things that it can do. So again, it's
underneath the pentol or the shortcut is Shift C. So we talked about how
you can click and drag to create a curve
from a straight line. I'm going to switch
to the selection tool really quick and click
on this point up here and you can see that that has handles because
this is a curved line. If you wanted to convert this to a pointee corner instead
of a curved corner, you can use the anchor
point tool for that. So with the anchor point tool, just click on that anchor point. If you have a pointee corner and you want it to be curved, so you want to add
handles to it, just click and drag with the anchor point to
drag out handles. If you use the direct selection
tool to adjust handles, the handles are locked. So when I move this top one, the bottom one is locked to it. If you use the
anchor point tool, you can drag the
handle and it will be unlocked from
the other handle. I'm going to convert this
back by clicking to create Pointe corner and
then clicking and dragging to draw
out handles again. I'm going to switch back to
the direct selection tool. If you're dragging handles
and you hold down Shift, it'll lock the handles
to 45 degree anchormans. When you're editing
individual points on a path, you can use these tools to manipulate those
points or handles. As an example, let's turn this circle into a
water droplet shape. I'm going to select
the top point with the direct selection tool, and then holding down Shift, I'm going to drag it
up and holding down Shift maintains its
horizontal position. I want to bring
these handles in, but if I do it one at a time, it's going to be hard to
make this symmetrical. So instead, I can
use the scale tool. So I'm going to hit S to
switch over to the scale tool, and then grabbing this handle, I'm going to hold down Shift to maintain vertical positioning
and then drag this in. You could also do the same thing across handles that
are not connected. So I'm going to
switch over to the direct selection tool and select these top two
handles and then hit S to switch back over to
the scale tool and then drag down just a little bit
to bring those handles up. With the direct selection tool, you can also click and drag over multiple different points
to select those points, and then you can move those, or you could use these tools. So I'm going to hit
R to switch over to the rotation tool and
then just click and drag and you can see how that rotates just the points
that are selected. If you create a custom path
or shape with the Pen tool, you can switch
over to the direct selection tool and then select the shape with the
direct selection tool to see the round
corners options, and then you can click and drag just like normal to
round those corners. When you're working
with custom shapes, that is shapes that were not created by using one
of the shape tools, you have to use the
direct selection tool to see the round corners option. If you use the regular
selection tool, you won't see the
round corners option. With the direct selection tool, you can still adjust
individual corners or even change the
type of corner. But the corners are not
going to show up in the Transform panel because
this is a custom shape. This also works for open paths. If you're working
with custom shapes and you select the
shape and you go to the direct selection
tool and you see rounded corners in
some of the corners, but you're missing a
rounded corner icon, so I could round these corners, but the top one is not
working. Here's how to fix it. Sometimes you just
need a zoom in. But if you still don't see
that round corners icon, there could be multiple points overlapping or really
close together. So what you can do
is switch over to the minus anchor point tool
and then just click and see, yep, there was an extra point because there's still a
point after deleting one. Now if I switch back over to
the direct selection tool, you can see that icon and you
can round that corner now. The scissors tool allows
you to cut paths. You can find it here or
the keyboard shortcut is C. You can click anywhere on
the path to create a cut, and then if you switch back
to the direct selection tool, you can see that
these are cut here. You can also click on
an Anchor point with the scissors tool to cut
at the anchor point. And switching back to the
direct selection tool, you can see that
this is now cut. If you want to join points, then first select the points either by selecting by holding shift in between or clicking and dragging
over the two points. And then to join them, you can go up to object path, and then join, or a much quicker way is the keyboard shortcut,
which is Command J. So that's connected
these two points with a segment of line. But if instead you
wanted one point here, what you can do is
average these points. The keyboard shortcut for
that is Option Command J. You can choose if you want
to average horizontally, vertically or both, which is what I want to
do in this case. That's moved both of the anchor points to the same exact place. If you click off and
then click back on with the direct selection
tool and pull out, you can see that you had two anchor points stacked
on top of each other. I'm going to undo that
and then just click and drag to select both of
those anchor points, and I want to reduce this
to one anchor point, so I'm going to go to
the Path Binder panel and click the Unite option. You can see that
that also united the other part of my
path that was open, but doing this step was
helpful because now I have the Round Corners icon if I
wanted to round the corner. Let's look at some
of the options in the stroke panel when
you have an open path. First, you can change the cap. So you can have a flat cap,
which is called the butt cap, or you can have a rounded cap, or you can have a
projecting cap, which just means
that it's going to extend a little bit
past the anchor point. You can also create dashed
lines by checking this box, and then you can type
in custom values for the dashes and the gaps. You can also add
arrowheads to paths. So if you go in, you
can put an arrow on either end and there's
a few different styles. You can also adjust the
size of the arrowheads. And with this button,
you can align the arrowhead to the end of the line or have the end of the line be at
the tip of the arrowhead. The last option is to change
the profile of the line. There's a couple
options to choose from. If you want to
change the width of a path beyond the options
underneath profile, you can do that with
the Width tool, which is right here or
the keyword shortcut is Shift W. From here, you can hover over
the path and then you'll see a little
plus icon next to your mouse and you
can click and drag to expand the stroke
weight there. You can also drag inward to
reduce the stroke weight. If you want to reposition this
thickness along the path, you can just click it and
drag it along the path. You can also go back and
edit it if you'd like. If you hold down Option while clicking and
dragging on a Width, it will just affect
that side of the line. To delete a Width, you can
just select it and hit Delete. If you'd like to reset a line, you can just go to the
selection tool and then change the profile
back to uniform.
8. Color Graphics: In this video, you'll
learn all about working with color in
Adobe Illustrator, including how to color
your illustrations, work with the Eyedropper tool, save color palettes
to use across files, and recolor artwork. When you select an object, its colors will appear here. This is also where you
can change the colors. This color is the inner
color or the fill color, and this one is for the
stroke or the outline. This little button here switches the fill and stroke colors. You can choose colors from
the swatches panel or from the color picker up
here or the color guide. Whichever is on top, whether that's the stroke or the fill, is going to be the one affected if you
choose a new color. So with the stroke on top, I'm going to go over
and pick a new color. And then with the fill on top, make sure the shape is selected, and then I can choose
another color. Quick way to switch
whether the fill or the stroke is on top
is to press the X key, and then make sure
the shape is selected and we can recolor the stroke. If you want to switch the
fill and stroke colors, there's also a keyboard shortcut for that, which is Shift X. If you don't want the shape
to have a filler stroke, you can use this button
to have no stroke, or if the fill is on top, click this button for no fill. The keyboard shortcuts
are going to be the less than sine for a
color stroke fill, or the slash for a
no fill or stroke. There's also an option for
a gradient filler stroke, which is this button here, or the keyboard shortcut is
the greater than sine. I'm going to change this
back to a solid fill, and then another option is
that you can double click on the fill or stroke box here
to bring up the color picker. From here, you can choose a
color by using the slider, or you could type
in hue saturation and brightness numbers or red, green, and blue
numbers or hex codes. There's three different
types of gradients. Let's select this first box
and give it a gradient fill. You can make adjustments
in the gradient panel. So if you want to choose a
new color for the gradient, you can double click on one
of these circles on the ends to bring up the swatches and you can choose
from the swatches. Or with one of these
circles selected, you can grab the eyedropper tool here and then sample
another color. This slider at the top lets you adjust how the
gradient is laid out. You can also adjust the
positioning of the colors. If a color is selected, you can change its opacity and also whichever
circle is selected, you can change the location by putting in an
exact number here. If you hover your mouse
just below this color bar, you'll see a little plus
icon next to your cursor. And if you click, it'll
make a new color, and then you can either double
click to get the swatches, or you could grab
the eyedropper, which is also an
option from here, and you can sample a
new color that way. And you don't have to sample
just from this color picker. That's just where my
colors happen to be. You could also sample from
somewhere on the artboard. And then you can make
adjustments to this. There's also a slider
right on the shape, so you can adjust the
slider that way. All right. To delete a color,
make sure it's selected and then hit
the little trash can. Here you can adjust the
angle of the gradient. To reverse the gradient,
click this button. Let's move on to the
next type of gradient. I'm going to click
the gradient button. This time, let's change
the type to radial. All the slider and
location and opacity, all of that works
the same, but now the gradient is in
a radial shape. You can adjust the
percentage here, this makes it a little bit more oval and you can
adjust the angle. Let's apply a gradient
to this last box. And this one, let's change the
type to freeform gradient. This is going to add little
circles to your shape, and these represent each of
the colors in your gradient. You can change these
colors by selecting them and then going to
the color picker and choosing a new color you can
sample again from wherever. Then you can also
adjust by moving these or by dragging
their radius bigger. You can also adjust
their opacity so whichever one is selected, you can change the opacity here. You can also add
additional colors. You know you're going
to add a color if you see this icon
for your cursor. To delete a color, select it, and then hit the
little trash can. Another option if you want
really precise control of your gradient is
to switch to lines. Then if you create new points, you have a pen tool
almost where you can create a gradient
based off of a line. You can also have
gradients for strokes. I'm just going to increase
the stroke on this. Let's switch so the stroke
is on top and then I'll click the gradient button to
apply a gradient to that, then let's just change the
colors so we can tell. There's a couple options for how the gradient is
applied to the stroke. So right now we're on
within the stroke. There's also along the stroke and finally, across the stroke. The eyedropper
tool is useful for sampling colors and
recoloring artwork, and there's two ways
that you can use it. The first way is to select something that you
want to recolor. Then grab the
eyedropper tool either from here or the keyboard
shortcut is eye. And then click on the color
that you want to sample, and this can be anywhere
in Illustrator. And what that's
going to do is copy the fill and stroke
color of that object. So because this shape that
I copied had no stroke, it took away the stroke that was on this object with
its fill color. So it copies the attributes of the thing that
you're copying, as well as colors. I'm going to switch back to
the selection tool and then select this shape and then grab the
Eyedropper tool again, and let's copy
this stroke color. So you can see that it
copied the stroke color. It's also given
it pointy corners whereas it used to
have rounded corners, and it's made this
stroke aligned to the inside because these are all attributes of this shape. So for one more example, you can also copy gradients. If you're using the
eyedropper with text, so say I select this text and then eyedropper this top text, it's going to copy the
font, the font size, the color, so all different
attributes of the text. There'll probably be cases
where you just want to sample a color and not the other
attributes of that object. Here's how you can do that.
I'll select this shape, and then I just want
to copy this color, and I want it to
be the fill color, so I'm going to make
sure that that's on top. Then I'm going to click this
color but hold down Shift. Holding Shift makes
it so it only copies the color that you click and no other attributes
of the shape. I'm going to switch back
to the selection tool and then grab this shape. Let's say I just want to
color the stroke of this, I'm going to put the stroke
on top and then grab the eyedropper and then I'm going to sample this
color holding shift. You can also sample a color in the middle of a gradient
by holding shift. I'm going to make sure
the fill is on top here, grab the eyedropper and then select a middle color
of this holding shift. Also, if you're using
the eyedropper tool and you want to quickly
sample lots of colors, instead of switching back to the selection tool by hitting V on the keyboard and then going back to the
eyedropper tool, you can just stay on the eyedropper tool
and then hold down command to select a shape
and then lift up command, and then you have the
eyedropper tool still. So you can sample,
hold command, sample, hold command to select, sample, and then it makes the workflow a
little bit faster. You can also select
multiple things at once and then use the eyedropper to recolor them all the same color. Et's look at the second way
to use the eyedropper tool. The first step is to
set the colors here, there's a couple of
ways to do that. You can double click into
the color and then set the color with the color
picker or these values. Or you could also select a shape and it will
adopt the colors here. Next, you want to grab
the eyedropper tool and then hold down
option to get this icon. Then click the objects that you want to
apply the color to. This can be a fast way to color multiple things
with the same color. Then if you want
to switch colors, you can either use
the eyedropper to sample a different color, to set it here, or
click into here, set the color or
choose a swatch. Anyway, you want
to set this color and then go back to
the eyedropper tool, hold down option and
start recoloring. Another trick with the
Eyjarper tool is that you can sample colors from
outside of Illustrator. So I'm just going to
move Illustrator over. And this is adobe color. You could choose any site. It doesn't have to be a specific site for
color inspiration. Anywhere on your
screen will work. And what you need to do is
grab the eyedropper tool, and then if you just move your mouse outside of Illustrator, the eyedropper tool disappears. So the trick is to
click and drag, and then it will keep the eye dropper tool and
you can see that this color here is changing as I go over
different colors. To sample a color,
lift up the mouse. And now, with that color, you could do the option trick to select shapes to recolor. The appearance
panel allows you to adjust the fill stroke in the opacity and also add multiple fills or
strokes to objects. So let's select this shape, and then let's give it a
stroke right from here. So you have a few different
options, swatches, the color picker, where
you can put in hex codes. And there's also
gradient options, and you can even use
this AI prompt feature. So let's just go
back to swatches and grab one of our swatches. You can also adjust the
stroke weight from here. You can also adjust
the opacity here. So this opacity is going to
be just for this stroke. This opacity is
just for the fill, and this opacity at the bottom
affects the whole shape. Also, if you adjust
the opacity here, that affects the whole shape. Let's just change the opacity of the fill. So we
can do that here. Then you can see
if I bring this to the front and move
it over things, you can partly see through. Another thing you
may want to do is add multiple strokes
to an object. So to do that, go to the appearance panel and then click this new stroke button. And then let's give this
one a different color. And it's going to
be right on top, but you can use the
alignment tools to align it to the inside or the outside
so you can see both strokes, and then you can also
maybe adjust the width. And you can also turn on and off strokes and fills with
the eyeball here. You can also adjust the
opacity of shapes in the transparency panel and you can also set
blending modes here. We'll talk about masking
in a separate video. You've already seen me use
swatches to recolor artwork, but you can also use swatches
to save color palettes. It even makes it easy to reuse the same color palette
between Illustrator files. To create a new swatch, make
sure that the color that you want is set here and then
hit the new swatch button. From here, you could adjust
the color if you wanted to. This checkbox here for Global means that if
you use this color in your artwork and then you decide that you want
to change the swatch, all of the times that
you've used that color are linked to this swatch. So if you change
the swatch color, all of those instances of that color will also be updated. Let's create this swatch. You can see that this
little triangle in the corner indicates that
it's a global swatch. Now, if I select all of
these and recolor them with that global swatch to make sure that they're linked
to the global swatch, and then I go in
and double click on the swatch to actually
update the swatch color. You can see that it changes all the instances of that color. Because I didn't technically color this with
the global swatch, it didn't change this one.
I'm just going to undo that. Another way to create
swatches where you can create multiple
at a time is to select multiple things in
your artwork and then hit this new swatch folder
and you can name this and I'm doing
it from the artwork. If I had selected swatches in here that I'd
already created, then I could just
select the swatches and create this group
from the swatches. And then I'm going
to make all of them global colors and hit Okay. So now you can see this
new swatch group here. If you want to save this swatch group so that you
could open it up in different Illustrator files, let me show you how to do that. So you want to select the
folder and then go up to this menu and say Save
Swatch Library as ASE. By default, this will open
the Swatches folder on your computer and you can
name this and then hit Save. Now if I open a new
Illustrator file, the swatches aren't
automatically there, but you can go to the
menu or this button here and go to User Defined and then find the
colors that you saved. This is going to open up a
whole other Swatches panel, because when I save
these swatches, I had a bunch of other swatches
in the Swatches panel, I actually saved all of that. In order to not have saved
all of these swatches, I would have just
needed to select them and then hit
the delete button. But from here, you could just
drag this folder over into your swatches panel or you could just dock
this entire panel. And now you have
the swatches that you can use in this new project. You can also save
colors in libraries. Libraries are nice because
anything you save in them are available in
any Adobe program. I'm going to go out
of this library and create a new library. And then select artwork that's the color that
you want to add. Go to the plus button, and then I'm going to add this
as a fill color. And then just repeat this
for all of your colors. Now if you want to
recolor something, you can just select it and then click one of the
colors here to recolor it. The magic Wan tool is for selecting things that
have something in common, and it can be really useful when you're trying to
recolor artwork. I'll show you how it
works with this example. But first, I'm just
going to select all of these squares
and group them, and then I'm going
to double click into the group to go into
isolation mode. That way, it's not
going to affect the colors for this
whole big document. It's just going to
affect this group. Now I'm going to go
and grab the magic Wantol which is here or the
keyboard shortcut is why. You can see that if
I select a color, it selects all things with
that same fill color. If you want to add
to a selection, let's also select
these yellowish ones. Hold down Shift and you'll see the little plus icon next
to your magic wand icon. If you want to subtract
from a selection, you can hold down Option
or Alt and you'll get a little minus sign and then click the selection that
you want to subtract. This can be useful for
recoloring artwork because once you select something that's
all the same color, you could go in and change
all of the colors at once. If you need to customize how the Magic Wand tool
select something, you can double click on it. And it'll bring up
all of these options. For example, you could check
this box to make sure that the opacity is considered
within a certain tolerance. You can see that some of
these have a lower opacity. But if I make a selection
of this dark color, it's not going to select
the ones that have a partial opacity because I've checked this
opacity button. These settings are great if
you need custom selections. Also, if you double click on the eyedropper tool
in a similar way, you can adjust what
settings it's looking at. The color guide panel
can be useful for finding colors that work
well with a selected color. So this whole block
of colors is grouped, so I'm just going
to double click to get into this one color, and then I'm going
to click here to make sure that it sets
that as the base color. You can see that now it's
giving me shades and tints of that color and also some other colors that
might go well with it. If you go to the top
menu, you can change the harmony rule to find other
color palette variations. Another way to recolor artwork is to first select your artwork, then go up to Edit, Edit Colors, and then
recolor artwork. From here, there's
lots of options to explore to help you create
a new color palette. You can also click over to the generative recolor
tab and type in a prompt, and then AI will come up with a color palette that
matches that prompt.
9. Create & Edit Masks: This video, you'll learn
about clipping mask, the drawn side mode, compound paths,
and opacity masks. In Adobe Illustrator. Clipping masks are where one
object crops another object. For an example,
I'm going to make this square crop so you only
see half of this circle. So first, they need
to be overlapping and the square needs to
be on top of the circle. If you need to adjust
the layer order, you can do that in the
layers panel or there's keyboard shortcuts which are included in the
downloadable PDF. The next step is to
select both shapes, and the easiest way to
make a clipping mask is to use the keyboard shortcut,
which is Command seven. Now you can see that it's
made the square invisible and the circle is only visible where it overlaps
with the square. If you want to edit
a clipping mask, you can just double click into the clipping mask to
enter isolation mode, which you can tell by
this bar at the top, and then you can
adjust each shape. To exit isolation mode, just click the bar at the top. To select a clipping mask, you have to make
sure that you either select the border of the clipping shape or the part of the shape
that's visible. So if I just select here,
it doesn't select it. In the Layers panel, clipping masks are called clip groups. And if you toggle them open, you can see the contents inside. And this is also a way to access the shapes inside of
it so you can adjust. You can also add shapes to a clipping mask by dragging
them in in the Layers panel. Or you could release
the clipping mask and then reapply it. So to release a clipping mask, which I'll do down here, you can use the keyboard shortcut, which is Command Option seven. The square shape that was used for clipping this
circle is there. It just doesn't have
a fill or stroke. So if you wanted to, you could
give it a fill or stroke. Also, if you forget the
keyboard shortcuts, you can just right
click on the shapes and you have the options
for clipping mask. Or if this was a clipping mask, then you'd have the option
to release it here. Another way to crop shapes with other shapes is to
use draw inside mode. And there's actually
three drawing modes. The first one is the default,
which is draw normal. The second one is draw behind. So if you enable this and
then you draw new shapes, it'll just
automatically draw them behind the existing layers. So maybe this could be helpful for some kind of situation, but honestly, I don't
think I ever used this. The last mode is draw inside, and in order to enable it, we need to have
something selected that we can draw inside of. Now I can turn on draw inside mode or the keyboard
shortcut to switch modes is Shift D. You can tell that you're in drawn side
mode by these dash lines, and then I'm going to
grab a shape tool, and if you start
creating shapes, they'll be inside of
this original shape. You can add anything in
here, so it could be texts, more shapes or things
that you draw, custom with the pen tool. If you want to edit the shapes
inside, just double click. And this will enter
into Isolation mode where you can go and edit. You can also add new
things in isolation mode. To get out of Isolation mode,
click the bar at the top. If you go over to
the layers panel, you can see that when you
use draw and side mode, you're actually creating clip
groups or clipping masks. So if I toggle this open, you can see all the shapes that make up this
clipping group. And this ellipse here is the thing that's cropping
everything else. One of the differences
between using draw and side mode versus
just creating a clipping mask is that this shape
that crops everything else is visible when you're working with
draw and side mode. Whereas, if we look at
the clip group from the last example on
the previous arboard, you can see that that
rectangle is not visible. Also, if the thing that's clipping the other
shapes has a stroke, that stroke will be applied on top of everything else,
which can be kind of nice. To further explain
the differences between drawn side mode
and clipping mask, I'm going to recreate this
but using clipping masks. So first, I'm just
duplicating it, and then I'm going to
release the clipping mask. And now I need to make sure
that this circle is on top. And in order to
have this circle as the background as well
as the clipping group, I need to copy it,
paste it in place, so basically duplicating it, and then move a
copy to the bottom. Now I'm going to select
all of these layers and hit Command seven to
create a clipping mask. And you can see the
background color is visible, but it's not putting the stroke on top of everything else, like the drawn side mode did. Another difference between using drawn side mode and
creating clipping masks is that if you wanted to adjust the shape of the thing that's
clipping everything else, so I'm going to use the
direct selection tool and adjust the shape
of this circle, you can see that I can do that, and it will still make
all the clipping work. Now if I go over to this
clipping mask version, if I use the direct
selection tool to adjust the shape that's
clipping everything else, this is a separate shape from the background shape so
when I adjust the mask, it's only adjusting the mask, so you get a different look. If you wanted to adjust
the background shape, too, you'd have to
manually do that. So this may or may
not be what you want, and this can help you decide
whether you want to use drawn side mode or just
create clothing mass. Compound paths can be useful for cutting shapes
out of other shapes, and they work similar to the
Pathfinder exclude option. So on these two
shapes, I'm going to use the Pathfinder Exclude. So select both of them and
then click the exclude button. And then for this
one, I'm going to select them both and then create a compound path by using the keyboard shortcut,
which is Command eight. If you forget the
keyboard shortcut, you can always just right
click and find that option. Notice how in the final
result Pathfinder exclude chose the color
from the front shape, and compound paths chose the
color from the back shape. But either way, if you go
into the layers panel, you can see that both methods actually made a compound path. So from here, both
of these shapes are going to act
in the same way. A compound path is going to have multiple different paths,
and if you want to edit one, you could use the
direct selection tool and then edit the individual
points on the path. Or another way to do
it would be to use the selection tool
and then just double click on one of the paths, and then you can move
the whole path or you could rotate it or
anything like that. That enters you into
isolation mode. So to exit Isolation mode,
just click this bar. If you want to release
a compound path, then make sure it's selected, then right click it and go
to release Compound Path. I'm just going to undo
that and show you that another way to
find that is to go to object and then
compound path release, or there is a long
keyboard chart cut to do the same thing. The inner shape is there. It's just the same color
as the outer shape. Another type of mask
is an opacity mask, and this is done in the
Transparency panel. This uses black to hide
and white to show, similar to how masks
work in Photoshop. So I'm just going to move
this text underneath this gradient and
then select both and click Make mask in
the Transparency panel. And you can see that
the areas that were white are showing
the text underneath more than the areas that were black are showing the
text underneath east. And this is still editable text, so you could go in
and change the text. And of course, this works on other layers besides text, too. If you want to adjust
the other shape that's doing the masking, you can do that by
clicking on it here, and then you can
make adjustments. If you have clip checked here, then if you move the shape
that's doing the clipping off, the thing that's being
clipped will not be visible at all outside
of that shape. Otherwise, if you turn this off, it will be completely visible outside of that shape
that's doing the masking. Another option is
to invert the mask, which just makes white
hide and black show.
10. What's Next: Thanks for watching. If you
found this class helpful, it would help me out
if you left a review. To practice what
you've learned here, watch this class next to learn how to illustrate
a set of icons. Then you can watch this
class to learn how to animate them in
Adobe After Effects. And if you're still
looking for more, check out my complete
curriculum for learning motion design.
Thanks again for watching.