Transcripts
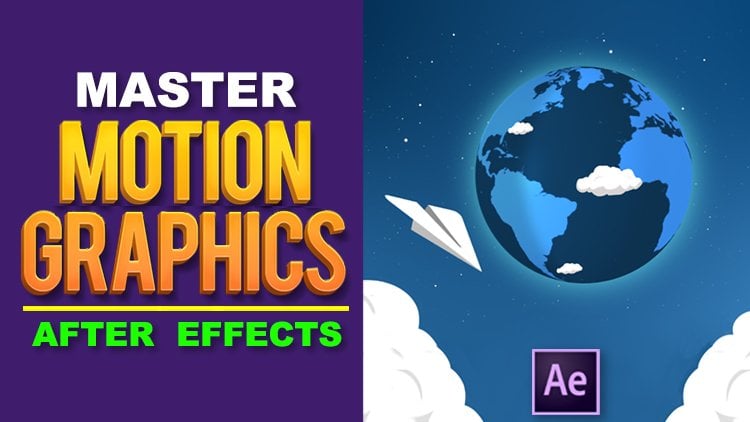
1. 1.1-Introduction: Hello and welcome to my brand new course on Adobe
After Effects CC. My name is Martin, and
I've been teaching about programs such
as After Effects, Photoshop, illustrator, and
others for over 12 years. In this nine hour course, I'm going to teach you all
you need to know to create dazzling animations with
Adobe After Effects. You will learn how to animate layers in many different ways, creating an animating
texts and shapes, working in 3D, compositing
animations into video, camera and motion tracking, and much, much more. Each chapter comes with many files with which you can follow along and use to create
your own animations. So let's dive right in and get started with Adobe
After Effects.
2. 1.2-The After Effects interface: In this lesson, I will give you a quick tour of the
After Effects interface. And this is the
screen that you will see when you launch the program. We have here the
possibility to create a new project or open
an existing project. We have a Home tab
where we can see the most recent opened files and a Learn tab where you can
watch some tutorials about working with After Effects
on the Adobe website. We also have the
possibility to create a new team project
allowing you to invite others who also have
access to After Effects to work on the
same project concurrently. So several people can work on
a project at the same time, or you can open a team
project from here as well. I'm just going to click
through this home screen actually by clicking the X
at the top right on Windows, which will be on the
top left on Mac, you can always get back
to that splash screen, the start screen by pressing this Home button here
at the top left. Now, quickly about
the interface, I have here a menu where we can access different
functions of the program, such as creating a new
project or opening, or saving, importing
and exporting media. We have below that a toolbar, which we will be looking
at in future chapters. But I have a selection tool, a hand tool, zoom tool, and some other tools
that we can use to create and manipulate things. I have here the
project panel where our files will be organized. In. Here will be our compositions
are Illustrator files, our Photoshop files, etc. All stuff that we
create, an import. Here we have the actual
composition panel where the video
will be displayed. On the right-hand side, we have these panels for
effects and presets, for example, which
you can expand by clicking them and
collapse by clicking them. Again, we have here
some character formatting for texts
on the Align panel, a library's panel, and
some other panels. At the bottom here, on the left, I have the layers and on the right is where the
timeline will be displayed, which I will show
you in a little bit. Now, at the top here we
have different workspaces that we can use for
different functions. I usually leave it
set to default, but you can also go into review. And that just changes how these panels are
organized and which panels are available
here on the right. So I can switch to a small
screen, for example. And that's going to give me
a larger composition panel. Or I can switch to standard
or the libraries workspace, where we just have
a library's panel here on the right-hand side. But usually I stick
to default and summon whichever other panel I would
need from the window menu. Speaking of the Window menu, you can always go in here. And for example, select, let's say the audio panel. That's just going to
add it to this bar, the sidebar here on
the right-hand side. So now it's in there. And if I want to remove
a panel because I'm not using it or because it's
taking up a lot of space, I can always click on
the hamburger menu at the top right of the panel
and then choose Close Panel. Now, if you're working
with two or more screens, it can be useful to put different panels on
a different screen. So let's say I want to undock this info panel and just put
it in its own little area. What I can do that and it's
just click and drag out of there and release it anywhere. Here, for example. And that's going to
put the info panel here in this part
of the workspace. I can also choose to
undock the panel by right, by clicking the hamburger menu. And that's gonna give
me this info panel floating in its own window. When I close out this panel, Let's say that I have removed
a panel from the interface, or I've moved different parts of the interface around and I just want to go back to the default. I wanted to go back to
the way it looked before. What you can do
then is just reset the workspace by going
into the window, window menu and then
choosing workspace, and then choose reset, the workspace that you've
chosen to saved layout. And that's going to
put it back here. Just for demonstration purposes. I'm going to create
a new composition. We will be going over
the settings for new compositions
in a future video. But I just want
something to show you the actual timeline. So I'm going to click
New Composition here in the composition panel and just use the default
settings and click. Okay. That's going to give me
a composition which is also visible here in
the Project panel. And now I actually
have a timeline here. We don't have any
actual layers yet. We will look at that
in a separate video. But here I have the timeline
through which I can scrub by grabbing this playhead
and clicking and dragging the mouse around. Now, there are some toggles and switches here at the bottom, a couple of which are
actually pretty useful. Here I have a button for
toggled transparency grid, and that's going to overrule the background color that
is set for the composition, which for me is
currently set to black. And that's going to show
actual transparencies. So these checkerboard patterns indicate transparency
in After Effects. That is a quick tour of the
After Effects interface. In the next video, I am going to teach you
all about compositions.
3. 1.3-Creating Compositions: In this lesson, I'm going
to teach you all about creating compositions
and compositions. You can see for now as new documents that you
create within After Effects. You can have compositions within compositions,
within compositions, but that's a concept
that we will explore later when we start talking
about pre compositions. Now, here in After Effects, I currently have a
blank project and I'm just going to click here
on New Composition. Alternatively, you
can press Control N on Windows or Command
N on the Mac. Or you can go into the
composition menu at the top and then choose
new composition. That's going to bring us
to this pop up where we can determine the options
for our composition. So for our initial video, first thing we can do is name
our composition and that's the name that's going to be displayed in the
project panel here. For now, I'm just going to
leave this set to comp one. And comp then obviously
stands for composition. Here we have a number of presets
that we can choose from. I usually don't use these, but if you're looking for a four K 25 frames
per second preset, then you can explore
those options here. Or if you just want
standard HDTV with a certain frame
rate of 2425 or 30. That's also something you can choose here and we'll get
to what those settings actually mean later in this
video and the next videos. You can also click on the
width and the height to enter your own sizes. So let's say you want
to create something for Instagram, for real. So for example, you will
want to switch these so you want a width of 1080
and a height of 1920s. So you can just click in here
and enter those manually. So I can make this 1080
wide by 1920 tall. Pixel aspect ratio
is always set to square pixels unless you're working with certain
video format. So you can always leave that on. And here we choose
the frame rate. The frame rate is important
and I'm going to spend some time talking about
that in a separate video. But basically, video is just a sequence of
images within a file. And the number of images per second is what is
called the frame rate. Now, most video is shot on
either 24 frames per second, Twenty-five frames,
frames per second, or 30 frames per second
depending on where you're from. Because in the US it's actually 30 frames per second by default. And in Europe it's either 2425. But you can also increase
this frame rate for more fluid motion and less motion blur when you are
working with motion blur, which we will also get
to in a separate video. The resolution that
we can choose here. It doesn't have
anything to do with our eventual file format. This is just a
preview resolution. And if I'm just making
some basic animations, then I usually leave
this set to full. You can change the start time
code of the composition, um, and that is not actually
useful in this case. But if you're working with important imported
video from a camera, by default, the timecode will be set to whatever the
timecode on the camera is. But for now we're just
going to leave this at 0. And even when I'm working with imported footage from my camera, I usually set this back to 0. But you will see that
later in this chapter. Here we can specify the
duration of our composition. So that is going to be the duration of the
video initially, we can always change this
later when we actually need the composition to be
either longer or shorter. But usually here, I ballpark what the video length
would be at the end. And this timecode actually
works in an interesting way. If I enter one and
then press Tab, then it goes to one frame. So now the composition will
be one frame in duration. Then next to that we
have the seconds, then we have minutes, and then we have hours. And this works with periods. So if I enter one
period and then Tab, it will change it to 1 second. And if I press one period, period and then press Tab, it's going to change
it to one minute. So if you have to navigate
to a specific time codes, a system that is
very easy to use. We can also set a background
color for our composition. So I can just click on the
color and set this to white, for example, and
then click Okay. There are some other settings
regarding compositions, mainly regarding the shutter
angle and the 3D renderer. But those are concepts that
we will talk about much later in the course once we get to
those advanced functions. So I'm going to create a
composition that is a 1080 by 1920 pixels with a frame rate
of 60 frames per second. The brief you preview resolution is going
to be set to full. The composition will
be one minute long and its background color
will be set to white. And then I can click OK to actually create
that composition. That brings us to the
composition here. And as you can see, this is a portrait oriented video for, let's say, Instagram Reels. And the composition is here
in the Project panel as well. Now the composition is
currently still empty, so we don't have
any actual layers, but we'll get to that
in a next video. If you want to change a
compositions settings, once it's been created, you can always right-click
the composition in the project panel and choose
Composition, Settings. Or when you are working
within the composition, you can always press Control K to get to the
composition settings, and that will be
Command K on the Mac. So I'm not creating a
new composition here. I'm changing the settings
of the current composition. And you get there by
pressing Control K on Windows or Command K on the Mac. Now, I want to show
you one more thing about navigating
between compositions. And for that we're
actually going to duplicate comp one here
in the Project panel. So I'm just going to click
on comp one and then I'm going to press Control D for duplicate to get a comp to which is just a straight up copy of the first composition. And I can open that
composition by double-clicking it here
in the Project panel. Now, compositions
once double-click here or once you create them, will be displayed here at
the top of the layers panel. So here I am working in Comp to, and I can always switch to
comp one whenever I desire. So you can switch between different open compositions
with this task bar here. You can also close
these compositions by just clicking on this icon. And that just gives me the
settings for comp one. Now, you want to make sure that you're actually working in Comp One by double-clicking
it here as well. So that is the best way of navigating between
compositions.
4. 1.4-About framerates: In this lesson, I want to go
a little bit more in-depth about frame rates when talking
about video animation. I have in the exercise files
here 1.4 about frame rates, which is an After Effects
project that you can just open. And in this project, I
have three compositions, 60 FPS, 30 FPS, and 15 FPS, in
which I've changed the frame rates to display
how these actually work. This is a very simple
animation of a square moving from left to right over
the span of five seconds. Now, here in these
60 FPS composition, I can just press the spacebar
to play the animation. As you can see, it moves through the screen very smoothly. And that is the result of this higher frame
rate for 60 FPS. So when I am actually
just creating an animation without any
actual video content, I prefer to work
in 60 frames per second because the animation
is a lot smoother. And I can demonstrate the
difference by going into the 30 FPS composition and
then playing this one. So the settings for this composition is
a frame rate of 30. So playing this animation, it's still smooth, but
it's not quite as smooth. You can see a bit more
stuttering in this animation. It's not as buttery as the
60 FPS composition was. And now I can go into the 5015 FPS animation and you will see that
it's very choppy, so there's only 15
frames per second, meaning that our eyes can actually distinguish
individual frames. So anything below 24
frames per second is going to give you this kind
of stop motion effect, which can be useful
in some cases if you want that look
for your animations, but it's not going to
play back very smoothly. So if you're working
with video content, you will generally speaking, want the composition
to match that video. Video contents frame rate. If you are creating animations
within After Effects, just purely animation based, then I would work with
60 frames per second. Or if you have a
slightly slower system, 60 frames per second might be a bit too much
for your computer. So you might want to work with 30 frames per second
then as well. So generally speaking, I myself work in 60 FPS
when I'm creating animations and whatever
the frame rate of my video is when I'm adding effects and
animations to video content.
5. 1.5-Navigating the timeline: In this lesson, I'm
going to teach you how to quickly navigate
the timeline, which is very important when you are working with After Effects. So the timeline is displayed
here at the bottom, right, to the left we have the
layers of this composition, and here we have the
actual timeline. You can move through the
timeline by grabbing the playhead and clicking
and dragging it around, or scrubbing through the
timeline as it's known. Or you can just
click on any part of the timeline to jump
to a specific section. You can play the timeline
by pressing the spacebar. So when you press the spacebar, the timeline actually starts playing and you can see
the actual animation. If this bar is not green, that means the sequence, the video is actually
not pre-rendered yet. So you might have to let it play once to have it fill
up all the way with green before you can accurately play the
video in real time. You can also jump to specific parts of
the timeline by just clicking here in the timecode at the top left of the layers. So let's say I want to
jump to two seconds. Exactly. I'm just going to enter two period and then press Enter. And that puts the timeline
at exactly two seconds. What's also often
useful is being able to move in time frame by frame. So if I want to move one frame forward or one frame backwards, I can hold down the Control key on my
keyboard and then use the arrow keys on my keyboard
to jump one frame forward. If you do this,
holding shift as well. So Control Shift
and the arrow keys, you will jump
forward ten frames. So that makes it a lot easier
to navigate the timeline. Now, the next chapter is going
to be all about animation. But before we get there, I just want to
quickly show you how to move between keyframes. You will learn a lot about
keyframes in the next chapter. But for now, I just
want to actually show you what they do and how you can navigate between them with this shape
layer here selected. So I'm just going to
make sure that it's highlighted in light gray. I'm going to press the P key to get the position
of this layer. Here. When the position is expanded, we see these three
keyframes and these determine the animation
of this rectangle. So if I go to the
beginning of the timeline, it will move between
these keyframes. And these are basically
the animation points. So you will learn a lot more about that in the next chapter. But I just want to show you
that you can navigate between these keyframes using
these little arrow icons. Or you can use the J and K
keys on your keyboard to jump between keyframes of a
layer that just jumps between any layer that
has an actual keyframe. So this also makes it a lot easier to navigate through time. And another quick and
easy navigation technique that you can use
in After Effects. It's pressing the I key to go to the end point of a layer. So in this case it
goes to the start of the timeline to 0 frames
and Sarah seconds. I can also press the O key to go to the outpoint of a layer. So that brings me
to five seconds. So the end point of the layer.
6. 1.6-Zoom and navigation: In this lesson, I'm
going to quickly show you in the document 1.6, zooming and navigating how to Zoom and navigate
within your documents. I'm looking at the
composition viewer here. And what I want to
show you is that when you have the mouse
in this panel, you can use the mouse
wheel to zoom in and out. So on Windows, if I scroll up, I will zoom in and if I
scroll down, I will zoom out. Depending on your
settings that might be reversed on Macs, but that is the
default on Windows. In any case. We can also look at the Zoom
percentage here. So I'm currently at 50%. And let's say I just want to fit the whole composition on screen. Then I can just go to fit
and that's going to place everything on screen that's
happening in the composition. For now, I'm actually
going to zoom in a little bit further to 100% using the mouse wheel. And I want to quickly show
you that it's pretty easy to navigate along this composition if you hold down the spacebar. So the spacebar switches
to the hand tool, allowing you to click
and drag around to change to a different
point of the composition. So if you are working
in a zoomed in view and you want to look at a different part of
the composition. Let's say while this
animation is almost complete, I can hold down the space bar
and click and drag around to get that part of the
composition in view. So I'm just going to go
back to fit for now. And I want to show you
that you can't just zoom in and out on the
composition viewer. You can also zoom in and
out on the timeline. Let's say I just want
to make sure that this keyframe is in
the right place. What I can do then is either put the timeline there by clicking and dragging
it to this point. Then using the zoom bar at the bottom left
of the timeline, or what I can do is hold Alt and then use the
mouse wheel to zoom in. Holding Alt and
scrolling up actually zooms in where the mouse
is currently placed. So if I hold the mouse
on this keyframe, it will zoom in over there. And if I hold the mouse here, it will zoom in on 1
second in the timeline. So Alt scroll is very useful
for zooming in and out of the timeline when
you want to look at a specific section and
Alt scrolling down, then again, zooms
out of the timeline.
7. 1.7-Importing video: In the next few videos, I'm going to show you how you can import different types of files to After Effects
and then create compositions based
on those files. And for that, I am going to import a video file initially. So the first thing
we're going to import is an actual video. There are several ways of importing files
to After Effects. You can go into
the File menu and then choose Import
and then file. You can press Control I on
Windows and Command I on Mac. Or what you can do is
just double-click on an empty space in the project
panel here on the left, which is going to put
you in a file browser. I'm just going to navigate to the exercise files for this
chapter in one course files. And I'm going to choose
1.7 importing video. Now I have the option
to create an a composition right out the gate here by enabling this checkbox. But we're going to do it inside
of After Effects itself. So I'm just going to click
Import and that is going to import the footage to
the project panel. Now, I like to stay organized
in the project panel. And if I have several different types of footage or several
files of footage, I prefer to put
them in a folder. So what I'm gonna do
is create a folder by clicking this little
folder icon at the bottom. And I'm just going to name
this footage and press Enter. And then I can
drag in this video to the folder and that's
going to place it here. Now let's say I want to base
a composition on this video. This video is
nineteen hundred and twenty one thousand
eighty pixels with a 30 frames per
second frame rate. So what I can do now
is either right-click it and choose comp
from selection, which is going to create a new composition
with those settings. Or what I can do is click
and drag the video to the new composition button at the bottom of
the project panel. So the third bottom from the
third button from the left. So releasing it
here we'll create a composition and also placed the video on the timeline here. So that is a useful
little trick. If I press Control K to get
in the composition settings, you will see that the
width and the height of the composition match
that of the video. And the same goes
for the frame rate, the frame rate to set that 30, because the video is also
30 frames per second. The duration also matches
the duration of the video, which is about 30 seconds. If you do this based on video that you've just
imported from a camera, the timecode will be set to whatever the timecode
of that video is. So you might want to go in here and change the
start time code to 0 so you don't get confused when you are working
with imported footage. And that's something I
just want to illustrate. If you import something
that has a timecode, the timecode will
be displayed here and not the actual
timeline time. It's always useful to set the timecode to 0 unless
you're working on something like a movie or
documentary production where you actually
want the timecode. But that's something for an advanced course and falls outside of the scope of
what we will be doing here. You will note that the
composition is actually inside of this footage
folder as well. I can just click and
drag it out of there to actually put it
in its own thing. So it's not part of
the same folder. I just clicked and dragged it
down to put it separately. So that is how we work
with importing video.
8. 1.8-Importing Photoshop documents: It's very common to
design a document in Adobe Photoshop or
Adobe Illustrator, and then bring it
into After Effects to actually animate it
and bring it to life. And in this video
and the next one, I'm going to show you how
to import those files. So I'm just going to
double-click on an empty part of the project panel here in this blank document
and a half here, 1.8, importing Photoshop files in
this chapter's course files, you can create a
Photoshop sequence. If the Photoshop document
actually contains layers, or you can create a composition. And what I can do now
is actually choose how I want to import
this Photoshop document. So you can choose
between footage, composition, retain layer
sizes, or a composition. Now, this is a layered Photoshop
document and if I import it as footage is just
going to be a flat image. So I will not have the layers of that photoshop documents
available to me separately. If I choose composition,
retain layer sizes, it's going to create
a composition with the Photoshop layers and the orientation
point of the layers, which I will talk about
more in the next chapter, is going to be centered
on the layer itself. If I choose Composition, I will also get the layers
in the composition. But the rotation point
or the anchor point, is going to be centered
inside of the composition, in the center of
the composition, I'm just gonna go
for this final one. So I'm going to
choose composition here and then choose Import. You get the same pop-up
box here where you can choose whether you want to
create a composition or not. So I'm just going to enable
this and then click, Okay, and that gives me a composition here in the Project panel. You will also note that this
came with a file structure. So a folder structure
which contains all the separate
layers I have here, these separate layers
that I can click and drag into any composition
that I choose. But I can also open this
composition by just double-clicking it
and cure I have these separate layers of the Photoshop document that
I can actually influence, separate from the
rest of the file. So I can individually manipulate these layers because it is a
layered Photoshop document. If you want to
manipulate something or animate something separate
from its background, you're going to have to
cut out those objects from the background in
Photoshop so you can animate them
in After Effects.
9. 1.9-Importing Illustrator files: This lesson is going
to be very similar to the previous
lesson, except we are, we'll be working with an Illustrator file instead
of a Photoshop file. So here in this empty project, I'm just going to
double-click in the project panel and
I'm going to choose 1.9 importing Illustrator
files and then click Import. And here again, I can
choose the import kind. I can choose a footage layer, which is just going to give me a flat result without access to the layers
of the document. Or I can choose a
composition and I can choose the footage dimensions to be
layer size or document size. And I'm going to
import this document twice to show you the
difference between the two. So first I'm going to choose
Layer Size and click. Okay. And that gives me this file here in the project
panel, this composition. So I'm just going
to double-click this composition to get into it. And here I have the
separate layers. And what I want to show
you is that these layers rotate around their
own centers because we chose the anchor
point to be at the center of the
layers themselves so that they retain layer sizes. So when I select this
wheel here in the layers, I can press R for rotation. When I start
changing this value, you will see that the wheel rotates around its own center. For Illustrator
artwork, I usually choose Retain Layer Sizes, so objects actually rotate
around their own centers. So that's something
important to note. But we just have these separate layers
here from illustrator. So you also want to make sure that everything
that you want to animate separately from an
Illustrator document is on its own layer so
that you can animate them separately
in After Effects. Now there's another
thing I want to show you in this video, because otherwise it would
actually be pretty brief. And that is when you place
a file into After Effects, you are not actually
placing that entire file into After Effects document into the after-effects project. You are actually
creating a link to the location of that
file on your hard drive. And that has a few reasons. For example, if I were to open this Illustrator document and change the colors on the bus, for example, and then save
the Illustrator document. Those changes will be
reflected in after effects immediately because there is
a link to the original file. So these are not After
Effects shapes these, this is an Illustrator document
and changing the document will change the appearance of that document in After Effects. Another benefit of working with links and not
embedding documents in their entirety is that the After Effects files are
actually quite small, usually no more than a few
megabytes when you could have a Photoshop document, for example, worth a
few 100 megabytes. But working with links also has the drawback that
if you incorrectly, if the link breaks, for example, by moving the document or renaming the
document or deleting it outright is going to break
the link and you will not be able to use the
file in After Effects. And just to show
you what I mean, I'm going to find this
Illustrator document on my hard drive, which is another useful trick
I'm going to show you and change its name to break
the link manually. So to find the file
on my hard drive, I mean, I know where it is
and I have it open here. But what you can do is
actually find one of the layers here and
then right-click on it. And then I can choose
Reveal in explorer. And that's going to
open the Explorer. And then I can just
change the file name here to let say importing
Illustrator files, dash one. Now that the file is renamed after effects is still looking for importing Illustrator
files without the dash one. So going back to After Effects, I get this error message. Files cannot be found and it's missing four files currently. So clicking on Okay, it's actually going
to completely break my animation and we will see
this test screen, let's say. So to fix this, I have to put the file
back the way it was. So I'm, what I'm going to do is go into the course files again and I'm just going
to change the name back. So I'm going to delete
the dash one and save it. But now in After Effects, it doesn't automatically update. I actually have to
reload the footage. So what I'm gonna do is select all the layers that concerns. And then right-click on it and then choose reload footage. And reloading the footage
will tell me that three additional missing
items have been found. And that actually gives
me back my illustration. I am still missing
one apparently, so I'm just going to
reload this one as well. That is actually not
updating properly. This is a bug that
happens sometimes. What I can actually do is
right-click on the layer it concerns and then replace
the footage with a file. Then I can choose this one here. And click import. And I can choose
a specific layer. And that's going to be, we'll V and click. Okay. Now I can actually
click and drag it back into the Illustrator or into the After Effects
composition from the project panel and delete
the layer that was there. So this is a bug that happens sometimes I'm
actually glad it happened because I showed I
was able to show you how to actually solve it. Sometimes footage will
not just not reload. I could have saved
it closed out of After Effects and open
the project again. And it would have actually
reflected the changes. But I'm just happy that
I got to show you this little work-around
for importing files.
10. 1.10-Importing an image sequence: I actually started working with After Effects about
seven years ago because I was creating a
lot of time-lapse video. And in this lesson I want
to show you how you can use an image sequence to create a composition within
After Effects that will play as video. So a series of images
will be placed after, one after the other
on the timeline. So you can actually
play the images as video in the exercise files. I'm just going to find the
folder image sequence. I'm going to select one
of these images and press Control a to select everything. And then I have
this checkbox here for import JPEG sequence. And with that checkbox enabled, I can click Import and
that is going to give me a JPEG sequence here
in the Project panel. Now, I'm going to
base a composition on that image sequence
by clicking and dragging it to the new
composition button at the bottom of
the project panel. And that's going to
give me this result. So I can now play
this image sequence, which is just a
folder of images as a video here in After Effects, which can be very useful. Now, I can also speed
up this footage a little bit by going here
where it says stretch. And if that stretch column is actually not
available to you, you can enable it here
at the bottom left of the program with this
third little switch. And then change the stretch
to 50%. And click Okay. And that's actually
going to speed up the footage by a 100%, making it slightly faster. This is actually
footage based on an After Effects project
that I created, which I will show you in Chapter six once we
start working with 3D. So we will actually work with
something very similar to this to create an
animation in this style. So that's how we can
import a J peg sequence. You just have to
make sure that they are numbered sequentially so that the filenames go
from whatever number two. However many images
you are importing. So that after effects actually knows that there's a sequence. If there's one image in a
sequence of hundreds of images that has the incorrect filename that will display
as a dropped frame. So when you go to that frame, you will actually get the, the missing link display that we saw in the
previous lesson.
11. 1.11-Working with Layers: In this lesson, I want to
quickly tell you about working with layers
in After Effects, which shouldn't really have
any secrets for you if you've worked with Photoshop
or Illustrator before. But here in the course file
1.11, working with layers, we will find the composition
1.11 working with layers in which I have
these five layers. Now whichever object is at
the top of the layer stack. So whichever is layer number one is above all of
the other layers. And just for
demonstration purposes, I placed these dice in
approximately the same location. And what you will
see is that die one, this one is on top of
all the other dice. Now I want to show
you what happens when I click and drag dye one down below die too. And you will see this
blue highlight to indicate that it's
actually being moved. Now this other dice is
in front of die one. Die two is the top layer. So it's also
displaying on top of everything else in the
composition panel. I can also drag dye one
down a bit further. And that's going
to place it beyond die three and die for. The stacking order of
layers is essential to understand for building
good creative compositions, whichever is on top
here in the layer stack is on top of everything else
in the composition panel. You can also place layers above or below the background in this particular composition. So if I click and drag down, die one below original, it's actually going to disappear beyond this background image, so it's not currently visible. Now to click and
drag layers around. We can just make sure that they are selected
in the layers. And then I can just click and drag using the selection tool here to place them somewhere
else in the composition. And I can do the same
for die number two. And you can just click
and drag these around. Now, besides this
stacking order, another thing that's very important is the layer duration. Currently, these
layers exist for the entirety of the composition. So if I go into the
composition settings, this composition is five
seconds long and all of these layers fill out this
composition entirely, meaning that they will exist for the duration of
this composition. Now I want to show you that
we can actually change that by going to a different
point in the timeline, for example, to 1
second exactly. Then I can grab the
start of this layer with this little double arrow icon and click and drag it there. And what you will see is now
the layer will not exist in the composition until
the timeline hits 1 second. And you can trim
layers like this by clicking and dragging
the start or the end. Because I can also do
this from the end, meaning that it will only
exist for the first, second of the composition. Or you can use some
keyboard shortcuts, which I very often use. If I hold down Alt and
use the left bracket key, I will trim the layer in front of wherever the timeline is. And undoing that with Control Z, I can use Alt and
the right bracket to trim the layer after
where the timeline is. So that's something
very useful to know that you can trim these layers
and when you trim them, they will stop existing at
some point in the timeline. So you can also click
and drag layers around without changing
their duration. So I can just click and drag it around to place it at 1 second. And the layer is still
actually five seconds long, but the rest of it is trimmed by the composition duration. So now I've moved
it by 1 second, going into the
composition settings with Control K and changing the
duration to six seconds. So I'm entering six
period and then pressing Tab, zooming out. Now, you will see that these layers still
end to five seconds, but this one ends at
six seconds because it was moved by 1 second
in the timeline. I'm just going to undo these
changes with Control Z. Speaking of control Z. Control Z is your best friend
in After Effects because it allows you to
quickly go back a step. But it can also happen
that you go back one step too far when
you're tweaking some settings on an effect
or an animation that you use Control Z to many times. Now, using Control Shift Z is actually going to go
forward a step again. You can redo changes, you've undone with Control Z, with Control Shift Z to
go forward another step. And that's basically all
you have to currently know about the stacking order of layers and the
duration of layers. I just wanted to show you some
quick additional controls that we have concerning layers here in the left
of the layers panel. The first thing we can do
here is locking a layer. So if I click and
drag over these dice, so you can click and
drag over these. You don't have to activate
them individually. I cannot actually select these layers to manipulate
them so they are locked and unavailable until I unlock them again by
clicking and dragging here. We also can influence
a layer's visibility. So I can toggle a layer on or off by clicking this
little eyeball icon. If a layer contains audio, we can also mute the audio by clicking this column
of buttons here. And here we have
the solo column, which actually does, does
the reverse of the eyeball. So if I enable a
solo for a layer, it's going to hide
everything except that layer or several layers if they
have their solos enabled. So if I solo a layer, I'm just clicking this
little button here, and that's going
to hide everything except that particular layer. One more thing I want
to show you about layers is that you can create shy layers which
you can hide at anytime. After Effects projects
tend to become relatively complex if you want to
create something fancy. So the layers quickly
start adding up. So what you can do
if you want to hide certain layers from
the layer stack as you are working on something, you can click this
shy guy icon here. And the shy guy icon is currently enabled for
these four layers. Then clicking the shy
guy here at the top of the layers panel is
actually going to hide all of those layers
from the layer stack. This is something you
will see very often if you work with templates
that you've downloaded, because the control
layers that you use to influence the animation and
contents will be visible. But all everything
that's going on behind the scenes to
actually make the animation will be shy so that you don't accidentally influence any
of the important settings. If you want to clean up your
Layers panel a little bit, you can use the shy guy to hide certain layers while you
are not working on them.
12. 2.1-Position: Now that we've looked
at the interface and some basic terminology, we are going to start animating
here in After Effects. For this, I have the project
chapter two main File Open. And in this project
you will find 15 compositions
that I've prepared. And we're going to start
with 2.1 position. So you can double-click that
composition to open it, which we'll put
it in a tab here. And in this composition we only have this one
rectangle or a square. Rather. We will be looking at this
rectangle quite a bit throughout this chapter. But for now I just want to move this rectangle from
the left side of the composition to
the right side of the composition in a
timespan of two seconds. So I wanted to start
here at 0 frames and at two seconds
or 120 frames, I want the rectangle to
be on the right side. So we're going to look at the transform properties
of this layer. So here I have the layers which lists is listing
rectangle at the moment. And I'm going to expand
this rectangle here. And then here we have
the transform controls. Now, these transform
controls to take up a lot of space in
this Layers panel, especially when you have
several layers open with different effects
and different masks and other properties, Lists can get quite expensive. So to approach individual
properties of layers, we have some more shortcut
keys that we can use. If I press the P
key on my keyboard, I only enabled the position. So only the position
property is now visible. I can press the S key to
approach the scale property. I can press R for rotation and
I can press T for opacity. So if you want to
enable the position, if you want to animate
the position of a layer, you can click on the
layer and press P to make the position visible. So then we can
control the position. The position is
displayed in coordinates based on the top-left
of the composition. So here I see that
the exposition, the first number is 228 pixels from the left
of the composition. And it is 520 pixels from
the top of the composition. And that is referring
to the anchor points. So the center of this
rectangle at the moment. So I want to animate
the position. So I'm going to click the stopwatch in front
of the word position. And that determines that I
want to animate this property. So I've now saved the
current position of the layer at 0
seconds, 0 frames. Now I want to create this
animation spanning two seconds. So I'm going to go to two
seconds in the timeline. And I can do that by either
clicking and dragging the playhead here
to two seconds. Or I can just click in the
timecode at the top left of the layers and press two
period and press Enter. And that's going to put me
at exactly two seconds. So now I can change the
position of the layer, the x position of the layer, in a couple of ways, I can either start clicking
and dragging the layer. And that means I can freehand
draw this animation path. So it's going to end up
wherever I put this rectangle, holding down the Shift key enables me to drag
it out straight. So now I cannot change
the vertical position, I can only change the
horizontal position. So that is one way
of doing that. Well, you can also do, and I just use
Control Z to go back a step is grabbed
the exposition here, and then click and
drag to change it. So I can click and drag
to change the position. And this goes for pretty
much all numerical values in after effects. These are called
scrubby sliders, and that means you can click and drag on the number to change it and dragging it to the left obviously
means a lower value. And dragging it to the right
gives us a higher value. Now that I've dragged
it out to the right, you will see this
animation path. And when I go back to the
start of the composition by clicking and dragging the
playhead back and forth, you will see that it moves. Now, I can preview
this animation by pressing the spacebar. So pressing space enables
playback for the timeline. What that's gonna
do initially is click play the entire timeline. Let's say I wanted to limit this playback to three seconds. What I can do then is look at this gray bar at the
top of the timeline, which is called the work area. And I can click and drag this right side to
about three seconds. Now when playback
hits three seconds, it's going to jump
back to the start. So that is something
useful that we can use to limit playback to a
certain part of our timeline. Now, how long this
animation takes is based on where this secondary
keyframe is placed. So if I click and
drag this keyframe out to the right
over the timeline, it's going to lengthen
the animation, so it's going to
take the rectangle longer to get to the other side. Conversely, if I move
it to about 1 second, it's going to shorten the animation so it
will move quicker. So the secondary
keyframe determines the end position
of the animation. So moving the playhead
back to two seconds, I can click and drag
this holding Shift and that's going to snap
it to the play head. Without shift, you can
release it anywhere. And holding shift, once you
get close to the playhead, that's actually going to snap the keyframe to the play head, which is also something
that we use very often. Now, note what happens when we disable the stopwatch
for this layer. Then all keyframes
will disappear. Also note what happens
when we re-enable it. That is not going to bring back the keyframes that
were just erased. So now we have to start
over with our animation. So if you disable a stopwatch
that is going to delete all keyframes currently
attached to this property. And you will have to recreate
the animation yourself. So in this case, I can
actually use Control Z to re-enable the keyframes
and bringing them back. Now what you will
note is that when I am at a different
position in the timeline, for example, exactly 1 second. If I change the layer position, then that is going to add a secondary keyframe in-between. So now I have three
keyframes between which this rectangle will move. Moving the playhead
to the beginning, It's now going to
dip to the bottom. As you can see. If I then click this keyframe
and delete it using Backspace or Delete. It's going to put the
animation back where it was. Also note that if I put the playhead on
the final keyframe here and then move the position that will also change
the end point. Now, what I'm gonna do is select both keyframes by clicking
the word position. So I'm going to click the
actual position property here, and that is going to
select all keyframes. Now, if I move the rectangle, it's going to move
the entire animation. So now the entire
animation is changed. When I'm at a different
position in the timeline. That doesn't work. So to move an animation, you want to be on a
keyframe and then select all keyframes to change the position that the
animation is taking place in.
13. 2.2-Interpolation: Before we continue animating different properties
and after effects, I want to explain something
about keyframe interpolation. For that, I have the
composition to point to interpolation open in the
project chapter two, main file. And here we are going to create another basic
position animation. So I'm going to click the
layer and I'm going to press P to enable the
position property. And I'm going to enable animation by clicking
the stopwatch, placing a keyframe at the
beginning of the timeline. Then I will go to two seconds and the
timeline by clicking in the timecode at the
top-left and then pressing to period
and then Enter. And now I'm going to grab the rectangle using
the selection tool. And I'm going to click
and drag the rectangle to the right side
of my composition. Now, we have here two keyframes and After
Effects calculates what the position of our rectangle is at each frame in
between those keyframes. And that is called
interpolation. After Effects is
interpolating what the position is at
any given frame, regardless of having
any keyframes. So we don't need to create keyframes for every
individual frame. After Effects calculates those, interpolates those to
give us this animation, which is incredibly
useful because you only determined the start point
and the end point of an animation and
after effects does all the work to calculate what happens between those frames. Now, we're gonna go
back to the start of the timeline by just clicking and dragging the
playhead to the left. And I am going to delete this animation by clicking
the stopwatch once again. And I'm going to enable
animation again by clicking the
stopwatch once more. Now we're going to create a slightly different
animation with different points here,
which you will see. So with this keyframe enabled, I'm going to go to 1
second in the timeline, so one Period Enter. And then I'm going to click and drag the rectangle downwards. Then I'm gonna go
to two seconds. So I'm going to enter
2 in the time code. And I'm going to click and
drag it to the right to end up in about the center at the
bottom of the composition. And what you will see
is that it is no longer moving in a straight
line that there is now what is called a
Bezier curve apply to this animation that has something to do with
the interpolation. And I will explain once we get to the end
of the animation, how to correct this, because this is the default
behavior of After Effects. And in my view, this is undesirable because in most cases you want something
to move in a straight line. So now I'm gonna go
to three seconds. So 3 Enter and I'm going to
click and drag it upwards. I'm gonna go to four seconds. So four period, enter and click
and drag it to the right. And I'm going to enter
five Period Enter, and then click and drag it down. So when I'm, when I
play this animation by going to the beginning of the timeline and pressing Enter, you will see that it
moves in a curve. Now, I don't want it
to move in a curve. I wanted to move
in straight lines. So to do that, I have to change the interpolation
of the keyframes. And that is due to a
default setting in After Effects that we are
going to change, which will then be
saved even when we update the application
to newer versions. So what I'm gonna do is first show you how to override it for this
single animation. Because sometimes you do
want this different kind of interpolation and then show you how to disable
property globally. So to disable it for any future
animations that you make. So I'm going to click
the word position to select all keyframes. And then I'm going to
right-click on one of these keyframes and then go
to Keyframe Interpolation, the fourth one from the bottom. Now here we have the
temporal interpolation, which we are going
to leave alone because time is usually linear, going from the present
into the future. But the spatial interpolation
is set to auto bezier. Now, this provides
this curve when we have more than two keyframes. So I'm going to change this to linear and then click, Okay, and that is going to change this individual animation
to a linear interpolation. So now when I play
the animation, they will move in
straight lines. There we go. Now, like I said, this is behavior that I
usually do not want. I usually want to animate and straight lines when position
is concerned at least. So what I'm gonna do is
go into the properties, the preferences
of after effects. On Windows. You would use the Edit menu. On Mac, you would use the After Effects menu
at the top left and then go into Edit Preferences
and then general. Now the fourth checkbox
from the top is going to allow us to switch the default spatial interpolation to linear. So once you enable
this and click Okay, Any future position animations will have the linear
interpolation, which should be the default. In my estimation, you might
have a different opinion. Other animators do have
different opinions on this, but I prefer to be linear. And now that is set for any future animations
that we make.
14. 2.3-Easing: Another important
aspect of animating in After Effects is the
easing of keyframes. For this, I have the
project chapter two, main file open and then the
composition 2.3 easing. So you can double-click that
to open the composition. And what you will see
here is when you play the timeline is
that the rectangle moves at a constant speed. So it never changes. Speed. Just hits the
next keyframe and immediately starts moving
in the other direction. There's no change in
momentum whatsoever. Now, this is due to the
easing of the keyframes. So what I'm gonna do is
click the layer here in the Layers panel and press P to make the position
property visible. And here we have
regular old keyframes. And what you will
also note is when you zoom in on the timeline, these individual dots in between the end points
of the keyframes are the individual frames. And these are all
equally spaced. So these are all exactly
the same distance apart, indicating that the rectangle will move at a constant speed. What you usually want to make
animation more fluid and dynamic is for it to accelerate from its
original position, then slow down to
its end position. In this particular case, I want the keyframe. I want the rectangle to
accelerate from its origin, then slowed down
towards this keyframe, and then accelerate once more. Once it leaves that keyframe, I want a fluid motion
from beginning to end. And to do that, we're going to apply some easing
to these keyframes. To apply easing, we can select
the keyframe it concerns. So in this case the first one. Then I'm going to
right-click and choose keyframe
assistant at the bottom. Now this gives us three options. Easy Ease, Easy Ease
in and easy ease out. Now for the start
of an animation, you would usually
use the Ease Out. For an end of an animation. You would choose Easy Ease in. And that's a little
counter-intuitive because out indicates an n and
n indicates beginning. But you are easing out of a position into
another position. So that's why those
seem reversed. But in actuality, this is
the way it's supposed to be. Easy. Ease applies both an ease in and ease
out to a key-frame. So for this animation, we would need all
three variants. The Ease Out for the
initial animation, for the first keyframe, easy ease for all the
keyframes in-between, and then an Ease In for the final keyframe to ease
it into its end position. I'm going to apply an easy ease out for the initial keyframe. And it will look like
an opening bracket. And that indicates
that from standstill, it is going to accelerate. And this is also something
we can see when we zoom in on the individual
frames here, you will see that
these are closer together than the keyframes further than the frames further
along in the animation. And this is how that looks. So when I play back, it accelerates from
the initial position. So it's no longer moving
at a constant speed. Now, the keyframes in-between, I'm going to select
here by clicking and dragging within
the timeline. And then you can also
actually Shift-click on keyframes to
select multiples, and Shift-click once
more to deselect them. So that's also something useful. So I'm going to apply
the easy, ease, easing to these keyframes by right-clicking
on one of them. Choosing keyframe assistant
and then easy, ease. This will look like an hourglass
indicating that there is first and ease in and then an ease out applied
to the keyframes. And this has how that
looks in motion. It slows down and
then accelerates again whenever it
hits a keyframe. This is also displayed in
the individual frames here. If I zoom in a little, you will see that
these frames are closer together
than it evens out. And then the distance between the frames
becomes smaller again, indicating an ease in. And now I'm going to apply an ease into the final keyframe by choosing right mouse
and then easy ease m. Note that there are also
shortcuts for this F9, easy ease Shift F9, easy ease in and Control
Shift F9 for ease out. For the start of an animation, you will always
choose the Ease Out. For keyframes in-between, you
will choose an easy ease. For the end of an animation, you would choose an
ease in a final tip, once you have applied easing, you can't just remove the
easing through the same menu. So when you right-click on a keyframe and choose
keyframe assistant, you can no longer switch it off. So what you wanna do, if you want to
remove the easing, you can select the
keyframes and concerns and then hold Control on Windows
and Command on the Mac, and then click on
the keyframes wants. So that will remove
the easing and now they are regular
keyframes again.
15. 2.4-The Graph editor: A tool that gives us a
little bit more control over the speed and easing of
keyframes is the graph editor, which we are going to look at in two-point for the graph editor. The graph editor
is found here at the top of the layers panel. So enabling the graph
that are currently editor currently it doesn't
actually show us anything. So when you click this, you will have an empty field. To actually visualize something
within the graph editor, we need an animation. So I'm just going to leave the graph editor
enabled for now. And I'm going to press P on the rectangle layer to
enable the position. Here we have the y value, the y position of the
rectangle in green, and the X position in red. So we will be animating
the x position. And for that I'm going to
place a keyframe by enabling the stopwatch at 0
seconds, 0 frames. And this keyframe will also be visible here in
the graph editor. Then I'm gonna go to two
seconds and the timeline. So in the timecode I'm
going to enter two period. And then using the
selection tool, I'm just going to click
and drag the rectangle to the right of the composition. In the graph editor, you will
see the straight line for the X position going
from here at 228 pixels, all the way here to 1772 pixels. So this animation is now
visualized in this graph. So I'm going to switch back to the regular timeline for just a minute to see to show
you what actually happened. Exactly the same thing happened as what we did previously. So here we have two
regular keyframes. Now I want to show you
what happens when we change the easing
of these keyframes. I'm going to choose
an ease out for the first keyframe and an ease in for the
second keyframe. So with this keyframe selected, I'm just going to right-click. Go to keyframe
assistant and choose Ease Out and in-between. Before we change the final
keyframe to ease in, I'm just going to show you
what happened in the graph. So I re-enable the graph editor. And what you will see is
that there is now a curve applied to the beginning
of the animation, and that indicates that it
accelerates to its full speed. So I can also change the easing of keyframes here on
the graph editor. So I'm just going to click
the secondary keyframe. And then we have here easy ease, ease in and ease out. So I'm just gonna
make this ease in. That is going to give us this graduated line that
starts off slowly and accelerates and
then falls off in speed towards the
end of the keyframe. Now, changing the position
of these keyframes here, again changes the speed
of the animation. So I can click and
drag this end here, holding shift for example. And that is going
to change how fast the animation takes place. So I just undid
that by Control Z. What I want to show you is that using an
additional keyframe, we can change the curve here. So we can change how quickly
the rectangle moves. And to do that, I'm
going to grab pen tool here at the top of the program, this little inkwell pen here. Using this tool, I can
hover over the line here for the exposition and then
click to add a keyframe. Now, switching back to
the selection tool, I can now click and
drag this keyframe to alter how steep this line is. So I can click and
drag it upwards. And that is going to make
the start of the animation, the first half of
the animation play faster than the second half. So now, because we have
this more steep line, it's going to slowly
animate towards the end while the
initial animation takes place a lot faster. So what I can do
now as well as move this one keyframe
to the left a bit. And this increases how
steep it is, obviously. So the first part of the
animation will take place very quickly and it will slowly graduate towards its end point. So now playing the animation,
it looks like this. We get an initial
burst of speed and then a rapid fall off to 0 towards the end
of the animation. Now, switching the
Graph Editor back off gives us this third
keyframe in the middle. So now we have three keyframes. This has an easy ease obviously. So we have the hourglass
shape here for the keyframe. So this is how we can change
the speed of this animation. I can change it here as
well by clicking and dragging it towards the
right in the timeline. Switching back to
the graph editor, that is going to give
me this graph here. So sometimes when
you want to change the initial or n
velocity of a keyframe, it's useful to go into
the graph editor at a point or a keyframe
as it would be, and then change its position to alter the speed
of the animation.
16. 2.5-Anchor point: Another very important
aspect of animating in After Effects is influencing
a layer's anchor point. And to demonstrate this, I have here composition 2.5 anchor point in this
chapter's main file. And in this composition, we will be drawing our
first shape layer. So here at the top
I have my toolbar, and here I have
the shape layers. The rectangle tool is
activated by default. If you hold down the mouse
button on these tools, you can expand them and choose the other tools in
the tool group. For now I'm just going to
stick to the rectangle tool. The rectangle tool,
by default has a red fill color and
a white stroke color. We're not going to be
looking at that for now. That will be for the
chapter about shape layers. But initially I just want to show you how
this tool works. I'm going to click and drag
and hold my mouse down. So if you're following along, just hold the mouse down until
I tell you to release it. And that allows me to
draw a rectangle by freehand so it can have any
size in any proportion. Holding down Shift constraints, the proportions to a square. All sides are equally as long in relation to each other
while I am drawing it. So while I still
have the mouse down, I can hold down the spacebar to still move the rectangle around. Now, using these shortcuts, I'm going to draw a small
square here at the top left. Now I have this square here. And what you will note is that wild the square is selected. We see this little target in the middle of
the composition. This is the layer's
anchor point, because adding a shape
layer automatically places the anchor point in the
center of the composition, not on the shape itself. So to demonstrate what
this actually does, I'm going to switch back
to the selection tool. And I'm going to enable
this layers rotation by pressing R with the layer
selected in the layers panel. Here in rotation we have a number of rotations and
then number of degrees. So number of rotations
and degrees respectively. Now I'm going to click and
drag on the number of degrees. And I want you to note what happens when I start
clicking and dragging the rectangle is not going to rotate around its own center. It's going to rotate around
the center of the composition because that is where the layer's anchor
point currently is. Now I'm just going
to undo that using Control Z or Command
Z on the Mac. And I'm going to
show you the tool to influence a
layer's anchor point, which is here in
the top toolbar, the pan behind or anchor
point tool shortcut. Why? So pressing Y
will enable this tool. This tool allows me
to click and drag around to change the position of the layer's anchor point. So if I place it below the layer and then start
influencing the rotation, it's going to
rotate around that. This also applies to scale. So pressing S for scale will
allow me to scale the layer. And the layer will not
scale from its own center. It will scale from the
layer's anchor point. So that is something
very important to note. Generally speaking,
you will want the anchor point on the
center of each layer. So I can use the
anchor point tool, the pen behind tool
as it's called, to drag the anchor point to
the center of the layer. But a shortcut for
this very handy one, which I use daily, is holding Control on
Windows or Command on the Mac and just
double-clicking the tool. So not the anchor point itself, but double-clicking the
tool holding Control will allow you to center the anchor
point on the layer itself. Now, shape layers can
contain multiple shapes and this varying effects depending on how many shapes are
contained within a layer. But for these, for the
purpose of this lesson, that is basically
all you need to know about a layer's
anchor point.
17. 2.6-Scale: In this lesson, I will
show you everything concerning an object scale. So I want to make an
object bigger or smaller. That's when you want to
animate an object scale. I have here composition 2.6 scale in our chapter
two main file project. And I have here a single ellipse with its anchor point
already at the center. Later in a later chapter, I'm going to show you
how to draw something like this quickly
and efficiently. But for now I've created
the ellipse for you. So here in the layers I'm
just going to press S to enable the object
scale to make it visible. And here I have the horizontal and vertical
scale respectively. So the left is always the horizontal and the right is
always the vertical scale. Currently, these are being
influenced at the same time. So if I change the scale of one, the other will scale concurrently because of
this chain link icon, meaning that they will both be influenced at the same time. And in many situations
this is what you want, but what you can also do is disable the chain link
icon by clicking it once. And then you can
affect the scale of the object over the x
and y-axis separately. So now I can animate those
separately if I so choose. Also note that the item, the layer is scaling
from its anchor point. So it's currently scaling from and to the center of the layer, which is often what you want. But you might want
the anchor point in different places for
different situations, which I will show
you in a little bit. So let's say I want to animate this circle from 0 to 100% scale within 2.5th or 30
frames because we are working with a 60 frame
per second timeline. I'm just going to enable the chain link
icon and make sure that I'm at 0 frames
the timeline. And then I'm going to
click the stopwatch icon for scale to start
animating its scale. And then I'm going to put
this percentage at 0%. So 0% scale means the
object is invisible. Then I'm going to
move to 30 frames in the timeline by just
entering 30 and pressing Enter. And then I'm going to enter
100 for the scale again. And as we've seen earlier, After Effects interpolates
everything in-between. So now within 2.5th, we see this circle grow from
0% scale to a 100% scale. As you will see in many
places in this course, 2.5th doesn't sound
like a lot of time, but it is a measurable
span of time. You can watch it animate
from beginning to end. So often you need
less animation over a smaller span of time than
you would think initially. Now, again, note
that the layer is currently scaling from
its anchor point. I just wanted to show
you what happens when we move the anchor point. And for that, I'm just going
to go back using Control Z. I'm going to enable the
stopwatch for scale again. But this time I am going to move the anchor point downwards. So I'm just going
to move it down here to the bottom
center of the layer. Again, go to 30 frames. And let's say this time we're
going to go from 100 to 0. So I'm just going to put 0
for the second keyframe. And now it's actually
going to scale down into that anchor point. The anchor points position is incredibly important
for scale animations. Now you can also animate
these properties separately. So let's say I'm just gonna go to the beginning
of the timeline, disable the animation
by clicking the stopwatch and
enable it once more. And let's say I am going to put the scale for the
vertical axis at 0. So I'm going to disable
the chain link icon, put the second
percentage value at 0. Then go back to 30 frames in the timeline and then
change it back to 100. Now it's not going to
scale over the x-axis. So the width, it's only going
to scale over the height, giving us this effect. If you are into animating
info-graphics, for example, this is very useful for
scaling bar graphs upwards. Or if you want to make
like a pop-up animation, this is also
something you can use what you will see
later in this course. I'm also going to add some
easing to these keyframes. So I'm going to
add an ease in for the last keyframe and an ease out for the initial
keyframe at, with this. As a result, the anchor point is
important and it's important to note that you can
animate the x-axis and the y-axis separately
concerning scale animations.
18. 2.7-Rotation: In this lesson, we
will be looking at animating rotation
for our layers. And for that I have
decomposition to 0.7 rotation with
this shape layer, just say simple 400
by 400 pixels square. And to get to the
rotation property, I'm just going to press
the R key on my keyboard. And rotation actually has two
values that we can change. We have the number of
rotations and we have the number of degrees
that it is rotating. And what you will note
is that when I enter 360 degrees in the second value, it's actually just going
to change to one rotation because one full
rotation is 360 degrees. I just undid that
change by using Control Z to go a
step backwards. And now we're going to animate the rotation of this layer. So to animate it, I am going to enable the
stopwatch for rotation. And that is going to tell After Effects that I want
this property to animate. And then I'm going to go to
30 frames in the timeline. And then I'm going
to rotate it twice. So I'm just going to enter two. Actually, the first
value will contain two. And that's going to rotate
it twice within 2.5th, which is quite fast. Let's say I want to spread out
this animation a bit more. What I can do then is just
put the timeline at 1 second. Then grab this keyframe
and just click and drag it off to the right. And if I hold down shift, it will actually snap to
the timeline indicator. So that is another
very useful trick. Now, it rotates twice
and I'm just going to apply the correct easing
for this animation. I'm going to give the first
keyframe an ease out. And the second
keyframe and ease in. Now the animation will speed up and slow down
towards the end. Now, let's say I
want this square to remain at this rotation for 1 second before animating
backwards again. What I'm gonna do
then is just go to two seconds in the timeline. And then I'm going to add
another keyframe with the same value as the
previous key-frame, because I don't want it to rotate between these two points. So I'm going to click this, this little keyframe icon on the left of the layer controls. And then skip ahead 1
second to three seconds. And then just put the number
of rotations back at 0. And that's going to
rotate it between two rotations and 0 rotations. So reversing the rotation, I'm just going to give this
first keyframe and ease out. And the second one an ease in. Now when I play the animation, it will look like this. It's going to spin
one way and then spin the other way within 1 second. So that is all you need to
know about animating rotation. You should note that
rotation's always take place around a
layer's anchor point. So if I were to move
this anchor point, it's not going to rotate
around its own center, but around where the
anchor point is now. So that's something
to keep track of. It will always rotate around
the layer's anchor point.
19. 2.8-Opacity: In this lesson, I'm
going to teach you how to animate a layer's opacity. So animate its visibility. Visibility. Essentially. For that, I have here the
composition to 0.8 opacity, which contains this
simple ellipse. And we're going to animate this ellipse from being
invisible to be invisible, to becoming invisible
again a second later. So to animate this
layer's opacity, I'm going to select it
in the layers panel and then press T for opacity. And I'm going to
put the opacity at 0 at the beginning
of the timeline. And by the way, these
scrubby sliders allow me to just click and drag
on the value to change it. Opacity cannot exceed
100 or go below 0. So it's very easy
to go from 0 to 100 by just clicking
and dragging. Then I'm going to add a keyframe by clicking the stopwatch. And then I'm going to go to
1 second in the timeline. And something I usually do is just kind of eyeball where
I need to click to get to 1 second and I either
hit it exactly or I can skip frame by frame
by holding down Control and using the
arrow keys on my keyboard. Now to animate the
opacity to 100%, all I have to do is
just click and drag the opacity value to 100. And that's going to
give me this animation. Very simple. Now, I want it to remain at
100% opacity for 1 second, so up to two seconds. And then I want it to animate to 0% opacity within
another second. So what I'm gonna do now
is go to two seconds in the timeline and then add
another keyframe for a 100% by clicking this
little keyframe icon at the left of the
layer property. Then I'm gonna go
to three seconds. Then I'm going to
animate it to 0 again by just changing the
numerical value to 0, giving us this animation,
it fades into view. It stays in view for
1 second and then fades out of you within
1 second yet again. Now, one thing I want
to show you about these keyframes is that I can change the duration of the animation by
selecting everything, holding down Alt on Windows
or Option on the Mac, and then just clicking and
dragging the last keyframe. So by doing that, I'm spacing the
keyframes out evenly. So you change the entirety
of the duration of the animation so
you can increase its speed by putting
them closer together. Or I can Alt, drag
them further apart. And that will actually
slow down the animation. Now let's add some easing. So I'm going to select these two keyframes, holding Shift. And these are going
to become ease out. And these two, when
I select them, they are going to become
0s in key-frames. And this is the final
result of our animation.
20. 2.9-Parenting: By parenting layers
to each other, we can make one layer followed the same animation
as another layer. And in this lesson,
I'm going to give you a quick introduction
to this concept. I have here these
three rectangles, so one larger one at the bottom, which is rectangle,
the regular rectangle. Then we have rectangle two in the middle and rectangle
three at the top. And obviously the top
one is the smallest. And what I would like to do is rotate these three rectangles around the same point around the center of the
largest rectangle. But these all have their
own rotation values. So if I rotate rectangle one, you will see that it
rotates in place. What I could do is grab this layer's anchor
point and just click and drag it
to the center of this other layer to get
the desired effect. But it's actually
quite difficult to set the anchor points of all three of these layers
to the same point. And it would be a lot more difficult if you had even
more layers than this. So to get the desired result, being able to rotate all three of these shapes around
the same point, I'm going to parent
rectangle two and rectangle 32, rectangle one. There are several
ways of doing that. I'm just going to look at
rectangle to initially, what we have here is a Parent and Link column
in the layer controls. If this is not visible for you, you can always click here at this second little
switch at the bottom left to enable the
Parent and Link column. And here you have
a drop-down list for all the layers
in this composition. So I can choose rectangle,
the third layer. And what you will see
is that once I click on rectangle one and grab its rotation value and
start rotating it. That rectangle two is
now following along with that rotation from the
same anchor point. Now rectangle to still has its own rotation which I
can animate independently. But now when rectangle
one rotates or changes position or scales is going
to follow along with that. Another way of parenting layers, looking at rectangle three
is using the pick whip. The pick whip is this little squiggle next to the Parent and
Link drop-down. And what I can do now
is click and drag this pick whip to rectangle
one and release it. Then it's just going to fill in rectum rectangle one over here. So let's give this rectangle an animation by
just rotating it once. So I'm gonna go to
the rotation of rectangle one and keyframe it, and then go to two
seconds in the timeline. I'm just going to
rotate it once, so I'm going to enter one. And that will give
me this animation. Let's put some easing on that. So right-click and
choose Ease In for the second keyframe and ease
out for the first keyframe. It's going to make it a little better looking this animation. What I can still
do now is actually parent or give these parented layers their
own animations. So what I can do here is grab the rotation of
rectangle two and keyframe that independently of the rotation of rectangle one. And then I'm gonna go to two
seconds and the timeline, and I'm just going
to rotate this twice because it's
smaller and it will rotate around
its own center because it still has
its own anchor point. Now I get this as a result. Let me add some easing to that. So an Ease In for the
second keyframe and an ease out for the first. And that's gonna look like this. Now let's say I want to copy this animation to
rectangle three. I can just click on rotation, which highlights all the, all the keyframes involved. And then press control
C to copy them. Then click on rectangle
tool and press Control V to paste those
keyframes in place. So now if I grab
the rotation value, you'll see that they're in
the wrong place because the timeline wasn't
at the beginning. I can just click and drag
these back forwards. And that's going to
give me this animation. So you can parent layers
to each other and the children will follow
whatever the parent is doing. But you can still give these parented layers their own
animations if you want.
21. 2.10-Parenting-2: In this lesson, we are
going to expand on the concept of parenting
a little bit by creating a chain of parenting to get some interesting animations with this robot arm in composition to 0.10 parenting to what I have here are separate
layers for each circle. So each pivot point of this robot arm and individual layers for
these segments here, and a separate layer
for the claw and the floor or the
base of the robot. Now, what I would like to
achieve is that when I rotate circle one here at the
top of the layers panel, everything rotates
along with it. So the entire robot
arm just rotates. When I rotate circle too, I want everything above
circle to rotate, but I want to circle
one to stay in place. When I rotate circle three, I want everything
above that to rotate, but everything below it to
say in the same location. So I want to be able to animate each segment
individually, but also be able to animate them together when I
rotate circle one. So that's something we are going to achieve through parenting. What I'm gonna do is
parent segment one and circle two to circle one. So I'm just going to
select these second, third layers and grab the pick whip and just
parented to circle one. So now when I grabbed circle one and press R for rotation, I can rotate it and the segment, and the circle will
rotate along with it. Now I'm going to grab segment
two and circle three, and I'm going to parent
dose to circle two. So I'm just going to
grab the pick whip and I'm going to release
it on circle two. And that gives me this result. So I can rotate circle one, and that's going to rotate everything that we've
parented so far. And I can rotate circle too, and that's going to rotate
everything above that. By the way, I am. Every time I rotate these, I just press Control Z to go
back to the standard value. Otherwise, the segments
in circles are not going to be aligned
in our end result. So now we have circle three, segment three and circle
for which of course I want to parent
to circle three. And again, let's just
look at the result by pressing R for circle three and rotating that rotates
this rotating circle tool now rotates everything above it. And circle one works as well. So now we grab segment for and circle five
and that's going to be parented to circle
for and let me just grab circle forced
rotation to test that out. Okay, and now we only have
the claw of the robot, which I want to pair
it to circle five. So now we have a complete
parenting chain. And I can show you that by just enabling the rotation on all of these rotating circle one is going to rotate
the entire robot. Rotating circle two
is going to rotate everything above
they're rotating. Circle three is gonna
give us this result. And S4 is gonna give us this. And circle five
is going to allow us to actually rotate the claw. So you can key-frame
these if you want by just adding keyframes
with the stopwatch value. In the next chapter
about expressions, I'm actually going to show you how to randomize animations within certain values to make this robot do a little dance, but that's something we will
look at in the next chapter.
22. 2.11-Copying keyframes: In this lesson, I'm going
to teach you how to copy keyframes to a different
point in the timeline, and also how to mirror keyframes across the
timeline so that you can rewind an animation here in
the composition to 0.11, copying keyframes, I have the following animation
which we already created in the lesson
about position. And basically what
I would like is if this animation rewound itself, starting at five seconds, so that it starts moving back to the exact same positions as it did in the
previous keyframes. Now, I could just eyeball
this and go to six seconds and then drag this rectangle up towards this previous point. But that is pretty tedious, labor-intensive and
not very exact. So what I'm actually
going to do is copy everything except this
last keyframe here. Because starting at that point, I actually want it to
animate in reverse. So I'm going to select these first five keyframes and then press control
C to copy them. I'm going to go to
exactly six seconds. And then I am going to paste these keyframes using control
V or command V on the Mac. I'm not going to click anywhere
else for now because I want these keyframes
to remain selected. Now, these keyframes are in the exact same order as
these first five keyframes. And that means that
starting at five seconds, it's not going to
reverse the animation. It's gonna go back to this original point from
the first keyframe, because this is a copy
of this first keyframe. What I actually want is to
flip these keyframes over. I want to reverse them in time. And for that, I can right-click while these keyframes
are selected and make sure that you right-click on the actual keyframe because otherwise he will get
a different menu. And then you can go into
the keyframe assistant. And the bottom most option
is time-reverse keyframes. And that's going to
flip them around. And that's gonna give me
the following animation. It's going to keep going
till five seconds, and then it's just
going to reverse to the same positions. And they will be the
exact same positions because these keyframes
along with their values, were copied and pasted on. So when you want to actually
rewind that animation, there is something
you can use called the ping-pong loop expression, but I will teach you more about
that in the next chapter. Or you can just copy
the keyframes and flip them using time-reverse
keyframes. In the keyframe, assistant.
23. 2.12-Hold keyframes: In a previous lesson, we have talked about interpolation where
after-effects basically calculates what the position of an object is
in-between key-frames. And it doesn't just
do that for position, it does it for every
property that you animate. So after effects just
calculates the state of an object in-between key-frames when you have animated them. But sometimes you
don't want After Effects to
interpellate anything. And you just want the state of the object to change from
one frame to the next. So I basically, with
this animation, it's moving through
the screen and each individual frame has its own position
for this rectangle. But what I actually
want is at 1 second, I just want the
rectangle to jump to this position immediately. And a two seconds, I wanted to just appear here
all of a sudden, like it's a stop motion
animation basically. And that's something we can
achieve with hold keyframes. So what I'm gonna do is
summon the position of this shape layer by
pressing the P key. And here I have all
of these keyframes selected already because I
clicked on the word position. And now I want to toggle
these into hold keyframes. And to do that I can
right-click on any of them. But do make sure that you actually right-click
on a key-frame. Otherwise you get
a different menu and this is not
going to make sense. So I'm just going to
right-click on one of the keyframes and then I can
choose toggle hold keyframe. So the position of these shape, of this shape is
actually not going to change in-between
the keyframes, but it is going to change
once it hits a keyframe. So when I play the animation, it is just going to jump across the screen at each second. Now, this is a toggle, meaning that I can
just go back into the right mouse menu and choose toggle hold
key frame again. And that's going to
normalize the animation to just a linear fashion. But you can always
switch to toggle hold keyframes to get
something like this. And if you want to go
for a stop motion look, then this is definitely
something that you can use.
24. 2.13-Project: It's time to put
everything we've learned in the previous videos to the test by making a
little project animation. So we're going to draw a
400 by 400 pixel rectangle. We're going to animate its
position, its rotation, its scale, and its opacity while looking at some tips and tricks
along the way. So the first thing I
want to do is create a 400 by 400 pixel rectangle. And the easiest way of doing
that is just double-clicking the rectangle tool here at
the top of the toolbar. I'm just going to double-click this tool and that's going to create a rectangle that spans
the entire composition. So this rectangle is now 1920 pixels wide by 1080 pixels high. Now, what I'm going
to do is expand the contents of rectangle one and then go to rectangle path and expand
those options as well. And you will learn more
about this by the way, in the chapter about
working with shape layers. I'm just going to disable this little chain link icon so I can influence the width
and the height separately. So I'm just going to
enter 400 by 400. And now I have a
rectangle that's exactly 400 by 400 pixels. And its anchor point is also automatically
centered when you create it within the composition by double-clicking the tool. So this, to my mind, is the easiest way of
drawing exact shapes. Now I'm going to grab
the selection tool and just put the rectangle
up here somewhere. The first thing we're
gonna do is get the same position animation
as we've seen previously. So I'm going to move it down in 1 second, right into seconds, up in three, right in four, and down in five. So the same animation
as we did previously. So I'm just going to
press P for position. And then at 0 seconds, 0 frames, I'm going to enable
the stopwatch to add the first keyframe. Then I'm gonna go to 1
second in the timeline. And with the selection tool, I'm just going to click
and drag it down. Then I'm going to
go to two seconds, and I'm going to click
and drag it to the right. It's below here in the center. Three seconds. And then drag it up. Going to go to four seconds
and drag it to the right. And clicking on
exact time codes is a skill that you acquire as you work more
with After Effects. A lot of the time I will
end up a few frames off and then I can
just use Control and the arrow keys
of the keyboard to navigate to the
correct time code, which is displayed here on
top of the layers panel. But that's something you acquire as a skill
as you go along. So now we have this
5 second animation. I'm just going to add the correct easing to
these keyframes. So I'm just going to right-click the last keyframe and turn
this into an ease in. I'm going to do the same for an ease out on the
first keyframe. And this intermediate keyframes, these four are going to get
an easy, ease keyframes. So instead of right-clicking and going to the
keyframe assistant, I'm just going to
pressing on my keyboard, turn them into, oh, actually F9 is occupied by a shortcut of my
recording software. So I'm just going to right-click
and choose easy, ease. So now they slowed down towards the keyframes and
accelerate out of them once more once it hits
the, hits the keyframe. Now we're going to animate
this rectangle's scale. I want it to start at 50%, then animate to
100% at 1 second, then remain at a 100%
until four seconds. Then animate back to
50% at five seconds. So I'm just going to grab
the scale by pressing S and enable animation by clicking the stopwatch and
changing the scale to 50%. Then I'm gonna go to 1
second in the timeline. And I'm going to change
the scale to 100. And that's gonna give
me this animation. Now. It's a little bit off with the easing of the
position animation. So I'm already going to
apply the correct easing. So an ease out over here
and then an ease in over here so that the position and scale actually
animate at the same time. Now I want it to stay at a 100% until it hits four seconds. So I'm going to go to four
seconds in the timeline. And I'm just going to click
this keyframe icon to insert a keyframe with the same value
as the previous keyframe. And I can already give
this an ease out. Then I'm gonna go to
exactly five seconds and then rewind the
scale back to 50. And that's going to
give me this animation. It scales to a 100, it stays at a 100, and then it scales
back down to 50. Now we're gonna do the
same for the opacity. And note that we already have the correct positions on these keyframes with
the scale animation. So what I'm actually
going to do is use these keyframes as a reference to navigate in the timeline. So we don't have to
enter time codes or click exactly on the right spot. So I'm going to press Shift T
to also enable the opacity. So now I have scale
and opacity in view. And at the beginning
of the timeline, I'm going to enable
the stopwatch for opacity and put it at 50%. Now I can use this
little arrow icon to navigate to the
next keyframe, which is where I want the
opacity to become 100. And then I can click
this arrow icon for scale again to jump to four seconds and insert another keyframe for 100
to keep the value at 100. For these three seconds. Then move to five seconds, and then change the
opacity back to 50. And now we have this animation. So the opacity and scale
animate at the same time. There we go. And the final animation
that we are going to add is two rotations from
one to five seconds. So between 05 seconds, I want it to rotate twice. So I'm just going to grab
the rotation with R. And at the beginning
of the timeline, I'm going to enable
the stopwatch go to five seconds in the timeline and just enter two rotations. And I'm going to give
these some easing again. So an ease out for the first one and an
ease in for the second. And that's gonna give
us this animation. It looks like it's
spinning more than twice, but that's because
this is a square. So those pointy bits
make it look like it's spinning faster than
it actually is. Now, we currently have
a 10-second timeline. And let's say I want to cut off this animation
at five seconds. I'm going to show you a
little trick for that. I'm going to go to five
seconds exactly on the timeline by just
entering it in the timecode. And then I'm going
to press N to limit the work area to where
the timeline is. Now the work area is
set to five seconds. And that means that
once the playback hits, the end of the work area is just going to skip
back to the beginning. Now to trim the
comp to work area, I can right-click
here in the top of this gray bar and then choose
trim comp to work area. And that's going
to trim the comp to exactly five seconds. So that's another little
handy trick that we very often use in After Effects. So this is the animation
that we've created. And in the next chapter
about expressions, I'm going to teach
you how to make animations like this a lot more interesting and dynamic
using expressions.
25. 2.14-Motion blur: Motion blur is
something that we are all intimately familiar with, and most people don't
even realize it. It's basically the effect
where an object appears of blurry in a video because
it is moving too fast. So when you watch videos of cars racing by or a fight scene, you will see that the action isn't frozen perfectly
from frame to frame, but there is actually
blurring going on. And that's because of the
shutter speed of the camera. And it also has to do with
the frame rate of the video. If you're filming in
slow motion from, let's say, 60 frames
per second and up. It's a lot more difficult to get motion blur because
objects need to be moving pretty fast for motion blur to occur at those
higher frame rates. So after Effects is very capable of simulating
Motion Blur. And I'm going to show
you how in this video, in this composition
to 0.14 motion blur, I have this animation
of a robot. And in the next chapter I'm going to teach you
how to actually create this animation
using a wiggle expression. But if we were filming
this on a regular camera, there would be some motion
blur happening to this robot. And I'm just going to show
you how to enable motion blur for the layers and then
for the composition, and then how to change the
settings for motion blur. So you have a little bit more
control over the amounts. So I'm going to select
all the layers here by pressing Control a
or Command a on Mac. And here in the layer switches we have a motion blur column. And because all of these
layers are selected, I can just click one
of them and that's going to activate
it for all of them. You also want to make
sure that motion blur is enabled in the composition
settings here at the top. So if I enable motion blur, you will already see some
blurriness occurring because this robot is actually
moving pretty fast. So now when I play the timeline, you will see this
motion blur inaction. Now, motion blur can be
pretty processor intensive, so it might be a bit
more difficult for your computer to render this kind of animation
as a preview. That's why you can
always toggle it on or off with this
switch at the top. And when you enable it again, it's going to have to
pre-render everything again. But you can always disabled
the preview so you can work within a
composition more quickly. Now, you also have control over the amount of motion blur in any given composition
by changing the shutter angle of the composition settings
in the Advanced tab. So here inside of
this composition, I'm just going to press
Control K or Command K on the Mac and then go into
the advanced settings. And here we have
a shutter angle. The shutter angle by default
is set to a 180 degrees. And what this actually means
and what this actually does when we are comparing it
to a physical camera, falls a bit outside of
the scope of this course. But I just want to show you that a higher value equals
more motion blur. So I have preview enabled
here at the bottom left so I can actually see what's
happening in the composition. And then I'm just going
to change it to 360. So that's double the amount of motion blur for the
same amount of motion. When I put it at 720, our robot arm is a
lot less visible, but I just wanted to show
you what this looks like in motion when I click on Okay. And then just pre-render the
scene by pressing space bar. So this is how that looks. This is how the motion
blur is configured. Now, this doesn't exactly
look natural because of the 720 degrees shutter
angle isn't exactly natural, especially not at 30 FPS, which is the setting
for this composition. But if you want some more
motion blur in your animations, you can change the
shutter angle off the composition to
achieve that effect.
26. 3.1-Wiggle: Expressions are an incredibly powerful
tool within After Effects because they allow
us to automate certain animations by
randomizing values, for example, or to make
animations more interesting and dynamic by adding
just a little bit of pizzazz to them, let's say. So here in the Chapter
three main file, you will find the composition
three-point one wiggled and the wiggle expression is the first expression that
we will be looking at. We will also be looking at several different ways of working with expressions
in this chapter. And this is the only
expression that we will fill in manually because it's
so easy to remember. So let's say I have this rectangle and I want
this rectangle to just kind of move around the
composition in a random way. What I can do then is
grab the position. And I could animate
this with keyframes. I could just add a keyframe, change its position, then move forward in time and
change its position again. And change its position again. And I could just make it
wiggle all around, let's say. And I could add some
easing to this to make it more interesting. But what I can also
do is just assign a number of wiggles per second, along with an amplitude value that tells After Effects how hard I want it to wiggle to randomize this
position value. So to do this, to add an
expression to the position, I'm not actually going
to use any keyframes. I'm just going to
Alt click or Option click on the Mac,
stopwatch for position. And that opens this code and dialogue in the timeline here. And what I'm gonna do now
is type in W I, G for wig. And that's going to
autocomplete to wiggle. Autocomplete was
introduced into After Effects in 2019, I believe. And for stuff like this,
it is a lifesaver. Now with the wiggle highlighted, I'm going to press the
Tab key to auto-complete. And that's going to
type wiggle with two brackets and opening
bracket and a closing bracket. Now, in this bracket,
there are two things. I have to specify. The frequency of the wiggles, so the number of wiggles
per second and the amplitude that the wiggle can
reach as a maximum value. So I'm going to enter two
for two wiggles per second. Then type a comma to separate
the operators and a space. And then I'm going to
type, let's say 25. Now to confirm the expression, I'm just going to click
anywhere outside of it. And now when I start
playing the timeline, you will see that
the rectangle is actually moving over the x and y axes because this wiggle is applied to one property,
the position here. Now to, let's say that the position was
actually collapsed. So I'm just going to
press P to collapse the position and
then press P again. The values for the x and the
y position have turned red, and that indicates that there is an expression active
on this property. And you can always access
the expression by just collapsing or expanding
this triangle here. And then you can click inside of the code to edit the values. So let's say I'm going to change the wiggle frequency two for the amplitude to 75 and then just click outside
of the expression to confirm. And that's going to turn it
into something like this. Let's say I also want to
randomize the scale value. So I'm just going to select the rectangle again
and press S for scale, and then Alt click the stopwatch
to enter an expression. Again, I'm going to type WIG, WIG and then press Tab to
autocomplete to wiggle. And I'm gonna go for
two times per second with an amplitude
of, let's say 25%. That is also going to
randomize the scale value, giving us this, as a result. Notice that I have all
this animation going on, but not a single keyframe added. Just this wiggle
expression already gives us this kind of dynamic result. So that is something that's exceedingly useful
for the wiggle. If you want to animate a layer's opacity randomly
to make it flash, for example, or to
make it Flickr. You can also do that. So I can just press
T for opacity. Alt, click the stopwatch for
opacity and type in wiggle. Wiggle this 15 times per second with a maximum
value of 100. Then what you will
see is that it also starts flickering as
if it were a light. Let's say. The wiggle expression
allows you to randomize an object's properties for a certain amount of times
per second across several, across a maximum value
that you can also specify.
27. 3.2-Separate dimensions: It happens quite often
that you want to animate the different
axes of an object. So the x and the y axis separately when it comes
to a layers position. But what we've seen in
previous lessons and in the previous chapter
is that when I enable position for this
layer by pressing P, we have these two values, one for the x position and one for the y position
of this layer. But it only has one stopwatch, meaning that any
expression that I add for the y-axis will also apply to
the x-axis and vice versa. Now, let's say that I want this rectangle to wiggle on the, on the Y position only, but stay in place
on the exposition. So just wanted to move
up and down randomly, but not left to right. Now, to achieve that, we
can actually separate the dimensions of the
position for this layer. And to do that, I'm
going to make sure that position is actually
highlighted here so that it's clicked and highlighted in the
Layer Properties. And then I can go up into
the Animation menu here at the top and hear about a
bit more than halfway down, you will see
Separate Dimensions. And once I click
Separate Dimensions, you will now see that
I have an x position and a y position that I
can animate separately. So let's add this
wiggle expression to the Y position only. So I'm just going to Alt click
the stopwatch or Option. Click on the Mac, type in wig for wiggle and press
Tab to autocomplete it. Then I'm going to
enter for wiggles per second comma space
50, let's say. Now you will see that
it's only animating on the y-axis and not
on the x-axis. So it's just moving
up and down and not left to right because I split the dimensions and any
expression that I add to the Y position not automatically
apply to the X position. Now one thing to
note is that if you forget to do this and you
add the expression first. So I just went back with control Z to before separating
the dimensions, I can, I'll click the
stopwatch and type in wig and then enter
four comma 50. So now it's actually active
on the x and the y axis. So it's moving from
left to right as well. Now, nope, what happens when
I separate the dimensions? Now, I don't have to go into the Animation
menu here at the top, I can just right-click
this position. And then I can choose
separate dimensions. And note that the
expression disappears. So any expression
that you have active, it will disappear and you
will have to add it again. So make sure that you keep an eye on whether
or not a property has an expression and then
reapply the expression to the relevant x or y position. You can also do this
for objects in 3D space when they also
have a z position. So enabling 3D on this layer about which you will learn
a lot more in chapter six, we'll also give you
a separate position coordinates for the z axis.
28. 3.3-Wiggle-2: As promised in the
previous chapter where we were looking
at this robot arm, I'm going to show
you how to animate this using the
wiggle expression. For brevity sake, I've already completed the
parenting chain here actually, so everything is
parented correctly. When you think back at the video about parenting
in Chapter two, I've already arranged that
when we rotate circle one, everything rotates except
the claw apparently. So I'm just going to parent
the claw back to circle five. This is why it's
always a good idea to test your rigs, let's say. And what I wanna do now, because the rest of them
appear to be in order. These are parented to
circle to circle three, circle for and then circle five. Okay, so the rig
appears to be in order. So what I'm gonna do is
add a wiggle expression to the rotation of circle one. So I'm just going to Alt
click on the stopwatch here. And then I'm going to type in wig and Tab to auto-complete. And let's say we're gonna
go for two comma 20. That's going to give
us this wiggle. Now I'm going to
enter this wiggle again for the rotation
of circle to, before I show you
how we can actually copy expressions
to other layers. So I'm just going to Alt click the rotation stopwatch
on circle tool, and I'm going to type in wig
and then tab to autocomplete two comma space 20 and
close the expression. And then we already have
something like this. Now to complete
the animation and animate the entire robot, I'm going to copy the expression from one
of these rotation values. So you can choose either
circle one or circle too. And I'm just going
to right-click on rotation for one
of those layers. And then I can choose for
copy expression only. And that only copies
the expressions. So no keyframes or whatever, just the expression itself. And then I can select the remaining three
circles, circle 345. And then I can just
paste using control V or command V on the Mac
to add this expression. When I press R for the rotation
values of these layers, you will see that
the expression is active because the
rotation is changed and it's a red value indicating that there is
an expression active. Without much effort,
we have now created this animation and we didn't use a single
keyframe for this, only the wiggle expression. So the wiggle expression is
very often used for just animating background elements
that need to do something, but it's not really important
what exactly they do. So that is one of the most practical applications
of the wiggle expression.
29. 3.4-Linking properties: In this lesson, we are
going to animate this bus driving from off-screen to the
center of our composition, remaining stationary
for a second and then driving off
screen to the right. And besides animating
the position of the bus, I obviously also want to animate the rotation
of the wheels because the wheel should be spinning while this
van is driving. But the actual calculation of
how much it should rotate, depending on how much it moves, can be quite complicated. So I would have to calculate
how many times it has to rotate to drive
from here to here, and that's not the
easiest thing to do. So what we're going to do
is use an expression by linking layer properties so that the position of this bus, it determines the rotation of these wheels so that when
we start moving the wheels, moving the bus, the wheels
actually rotate along with it. And for that, the first thing
we need to do is parent these four top layers to
the van outlines layer. So I have here two wheels. I have the mirror, I have the Windows, and here I have the fan itself. So main body of the bus, Let's say when I
animate the van, I want everything to
move along with it. So I'm just going to grab these four layers and I'm
going to parent them to the then outlines
by dragging one of the pickups to the
van help lines layer. Now they're parented. So when I grabbed the
position of Van outlines, you will see that I can now move everything at once because
they are parented. Now, I'm going to start with this bus off-screen actually. So I'm just going to
click and drag it with the selection tool to the left. Then at 0 frames, 0 seconds, I'm going to
animate its position. So here I click the
stopwatch to add a keyframe. And then I'm going to move to four seconds in the timeline. And I want it to end up in the exact center of
the composition. And I happen to know that this bus is symmetrically drawn, at least in its size
property on the x-axis. So I can actually just move it to the middle
of the composition by clicking in the
exposition and entering 960. Because this composition
is 1920 pixels wide, nine hundred, nine
hundred and sixty is half of that number. So 960 actually puts it
exactly in the center. And now I'm going to
go to five seconds. And I'm going to add a hold
keyframe so it actually stays in the center
between 45 seconds. So I'm just going to
click the keyframe icon here on the left of
the layer controls. And then click and drag
the timeline indicator to the end of the composition and then just click and
drag it off screen. I'm going to add
some easing to this. So on this keyframe, I'm going to give an ease in. This one will be an ease out. This one will be an ease in because it's supposed
to come to a stop. And this one will
get an ease out. Now these animations like
the beginning and the end of it won't actually be visible. But I'm just doing it
for completion sake. Let's say now we have
the following animation. The bus enters or flies. Interview comes to a stop, stay still for a second, and flies out of you. Now the bus should
actually be driving. So at this point, I want
to link the rotation of the wheels to the
position of the bus. For that, I have to get the rotation values for
the wheels interview. So I'm just going to select
both of them and press R. And then I want to link this rotation to the x
position of the bus, not the y position. I only want to link
it to the exposition. I don't want the wheels to rotate when the y
position changes. If the y position will change next to the
parenting pick whip. So slightly lower. Actually, you could
say that it's at the end of this
rotation column. Let's say what I can do here is grab this property pick whip. And the property pick whip allows me to link
the property of one layer to a different
property on another layer. So I'm just going
to click and drag this pick whip to the
first position value. So the X position van outlines
and release the mouse. And I'm gonna do
the same thing for the wheel, F, the front-wheel. So I'm just going to grab
this secondary property, pick whip, click and drag
it to the X position. Now when the bus
moves through frame, you will see that the
wheels are rotating. And not only are they rotating, they are rotating
exactly as much as they need to for this position
animation to take place. So they are linked
together so the wheels will rotate exactly
how much they have to. That is exceedingly useful because if I change the
position animation now, this rotation will
also change with it. So if I speed up the
animation by just grabbing these
three keyframes and moving them to the left. I don't have to change anything about the rotation value for these layers because they are linked to the
position animation. So this is a very
basic character rig, our vehicle Reagan, that we've made here actually, because when the bus moves, the wheels rotate along
with that movement. So if you ever want to
animate some kind of vehicle, this is an extremely
easy way of managing it.
30. 3.5-Loop out: In this lesson, I'm going
to teach you how to loop an animation using the
loop out expression. For that, I have the composition three-point five loop out, which contains the outlines of this ball illustration,
this football illustration. What we're going to
do is make this ball fly through the air. Going from off-screen at the bottom-left to the
top in the middle, and then to the bottom-right. So what I'm gonna do here at the beginning
of the timeline, it's just move the ball off screen using the selection tool. And then I'm going to start
keyframing its position. So I'm just going to click
the stopwatch for position. And then I'm going
to go to 15 frames. Let's say that's a
quarter of a second. And then I'm going
to click and drag it up to the middle of the composition and
skip another 15 frames. So I will now move
to 30 frames in the timeline and
then click and drag it down to the bottom right. Now, as you might note, actually this animation is a
little bit too quick for me. I'm just going to select
these key-frames. I'm going to hold down Alt and click and drag to
about 1 second. So now the animation
is a bit slower, but that works for our purposes. Now what you will note
is that this ball is flying in a perfect
triangle shape. Now, that's not usually
how balls behave. And it's behaving
this way because we changed the keyframe
interpolation from auto bezier a two linear to make sure that we can actually move layers
in straight lines. But in this case, I don't want it to move in a straight line. I want it to move in an arc. So what I'm gonna do is with
these keyframes selected, just right-click on one of them, and then go to Keyframe
Interpolation. And then I'm going to change the spatial interpolation
from linear to auto bezier. And when I click
Okay, you will see that it is now a curve. I can still change the angle of this curve by clicking and
dragging these handles around. You will learn about a bit more about these
handles when we start working with the pen tool in
one of the next chapters. But now the ball is flying
through the screen like so. Now let's say that I
want an infinite stream of balls flying
from left to right. What I could do is
just copy and paste these keyframes to wherever I want that animation
to take place. So I could copy these keyframes. And I could go to, let's say, one minute
and 31 second, 30 frames and then pasting
those keyframes again, that's not exactly
what I want because the ball is actually moving through the frame back
to the beginning. Now, that can be
something that you find desirable for any
random animation. But in this case, I would
just like this animation to start over as soon as it
hits this final keyframe. And that's where the loop
out expression comes in. Because the loop out
animation expression, we'll actually go
through the animation. So go from key-frame
to keyframe. And when it gets
to the final one is just going to jump back to the first one and then play the animation again
on an infinite loop. So to achieve this, I'm going to Alt
click the stopwatch for position where we just
created this animation. We've already looked at a
couple of different ways of adding expressions
to our layers. We've entered them manually
with a wiggle expression. We've linked properties
to each other, which also is basically
adding an expression. We can also use the
expression language menu, which you will find here at this Play button next
to the layer controls. So clicking this opens a
pretty intimidating menu with way too many options for
the normal user variety. But the only category
where you actually have to be in on a regular
basis is the property tab. So I'm just gonna
go to property. And here we have a few
loops to choose from. Now, the one we will be choosing is the loopOut type cycle. So loopOut type cycle. And I'm just going
to click this. And now when I click
out of the expression, the loop is already applied. So now when I play the timeline, you will see an
infinite stream of balls just flying
through the screen. So the animation is
playing as follows. It's going from keyframe one to keyframe to
keyframe three. And then it just jumps
back to keyframe one. And it will keep looping
this into infinity or as long as the composition
actually lasts. Now, there's actually
a different type of loop out that you can use. The default is cycle, which cycles through
the keyframes and then starts over again. But there's also
the ping pong type. And the ping pong
type actually hits the final keyframe and
then goes back to the first one through all
the other keyframes. So that is going to
give us the effect that the bowl is being
hit back and forth. So not an endless
stream of balls, but one ball going
back and forth. So clicking in the expression, I can change the word
cycle here to ping-pong, and that is one word. And now you will see that
the ball just keeps going back and forth between
the left and right side. Again, we've only
keyframes a second here, but we basically created an infinite animation by adding
this loop out expression. One thing I want to
note about expressions is that when I remove
the expression by Alt, clicking the stopwatch,
and then add it again. The expression is gone. So just like keyframes, when you remove an expression, you remove all of the settings and all of the
texts in this code panel. So if you, you really have to keep
in mind whether you need to Alt click on the
stopwatch or if you just need to click
on the stopwatch.
31. 3.6-Loop in: In the previous lesson, we looked at the
loop out expression to make an animation
loop infinitely. But it often happens
that you don't want an animation
to loop infinitely, but only up to a certain point, and that is where the loop
in expression comes in. So here in the
composition 3.6 loop in, I have this same animation, but without the expression. So over 1 second, the ball flies through the
screen to the other side. Now, what I'm gonna do is select these keyframes by just clicking and dragging
in the timeline. And I'm going to move
them to three seconds. So I'm just going to
move the timeline to three seconds and click and drag these keyframes to the right. And holding Shift
allows me to snap them to the timeline indicator. So now the animation is
not going to start until the timeline hits three seconds and then it will play once. But what I actually want
is for this animation to loop until it hits the
final keyframe over here. That is where the loop
and expression comes in. So I'm going to Alt click
or Option click on the Mac, on the position stopwatch. Then I'm going to go into the expression language
menu and go up to property. Then I'm going to choose
the loop in animation. And what you will see now is that the animation will loop on a cycle until it hits
this final keyframe. So once the animation
itself actually plays on these keyframes, then the, then the loop will break and the
animation will stop. So however far I move this, these keyframes will be the
end point of my animation. Note that this also has a type, so I can go from cycle
to ping pong. Let's say. That's going to loop this
animation for four seconds. From four seconds
to five seconds. The animation itself plays on the keyframes and then
the animation ends. So if you want a loop
that ends at some point, that's when you use the
loop in expression.
32. 3.7-Inertial bounce: The inertial balance
expression is my favorite expression to work with because
without much effort, it just makes our animations
a lot more visually interesting when it comes to specifically rotation
and scale animations, because it makes
the animations more bouncy and more dynamic. And to demonstrate
this, I have here the composition 3.7 inertial bounce. And we're going to create a scale animation
of a quarter of a second from 0% scale
to 100% scale. So here at the beginning
of the timeline, I'm just going to
keyframe the scale by clicking the stopwatch. And I'm going to put
the scale value to 0. Then I'm going to skip to 15 frames and then increase
the scale value to 100%. Now, this animation
is completely linear, but what I also want
to point out is that a quarter of a second doesn't sound
like a lot of time, but you can wait for this
animation to complete, like you consciously
experienced the animation. And sometimes a quarter
of a second is even too long for an
animation like this. So even though a
quarter of a second, it doesn't sound like a lot
of time for an animation. It might just be
plenty in many cases. Now, this animation is
completely linear and static, not very visually
interesting at all. I want to show you how
we can use the bounce, the bounce expression to improve this animation
a little bit. We could work with
easing and we could even add some keyframes on the graph editor to make the animation more
visually interesting. But because the
animation is so short, easing isn't really
going to help us there. So if you look in the course
files for this chapter, you will find a text file
labeled expressions. And this is a file in which
we will work in this video. And the two next ones about the inertial bounce again
and about the bounce back. But for this video
we're just looking at the inertial bounce to get this expression
into After Effects, I'm just going to select
it here in this text file. And please note that
you don't have to understand what this says. You don't have to be able
to write this in any way. You don't have to know
which component does what. You just have to be able
to copy and paste it to an After Effects expression to be able to benefit from it. So don't, unless you know, JavaScript, don't bother trying to understand what this says. You just have to be able to copy and paste it to be
able to use it. So I'm just going
to copy this with Control C and then head
back to After Effects. Now I'm going to add it to this scale animation by Alt
clicking on the stopwatch and just straight up pasting
in with Control V. Now when I click outside
the expression and I'm actually going
to zoom in a little bit. I'm going to play the animation. You will see that there is
a very pronounced bounce. So what actually happens
looking at this scale value? The scale actually
increases past 100%, then goes back below a 100%, then back over 100%, but slightly less so, and then back under a 100%
but slightly less so it keeps bouncing until it reaches the actual value
of the keyframe. And also note that
this animation actually continues
past the keyframes. So when I play the animation, you will see that
the animation is not completed until about a second. So that's what this
expression does. And it just makes this kind of animation a lot more visually
interesting and dynamic. This enters your brain in a
completely different way, then a linear animation. And only have to do is
just copy and paste it from this text file
that I've provided. Now, let's say I want to save this animation for later use. What I can do then is
go up into animation. And then I'm actually going to have to select
the scale value because that's where the
keyframes and the expression is going up into
the Animation menu. I can save this as an animation preset with the topmost option. Then you can choose a
location for this expression. So you can save it in
the default folder or any other folder
on your hard drive. Save it in another folder you will get a pop-up
that says, Hey, you are saving and outside
of the default folder, please keep track of
where you save things. So you can just
click through this. Now if I want to apply this animation preset,
including the expression, I can go up into animation and then recent
animation presets, and it will be right
here at the top. So if you are charmed by
one of these expressions, are the changes that you make to the expression which we
will do in the next video. You can save those as
an animation preset, so you don't have to actually work with this code anymore. You can just apply the
preset and be done with it.
33. 3.8-Inertial bounce 2: In this lesson, we
will be looking at the inertial bounce expression a little more comprehensively changed some of its
properties and also apply to the rotation of the shape that we animated in
the previous lesson. So here in the composition
3.8 inertial bounce too, I have this same
animation as before. So just a scale
bounce from 0 to 100 in about 15 frames or
a quarter of a second, because we are working with a 60 frames per second timeline, which I can show you
by pressing Control K. And here we have
a frame rate of 6015 frames is a
quarter of a second. Now, I'm going to get
the scale property out by pressing S with
the layer selected. And then I'm going to
expand the expression. And then we're going to look at some of the properties
of this expression. Like I said in the
previous lesson, you don't have to know
what all of this says. You just have to
know that when you scroll all the way
to the bottom, you have here three
properties that you can edit, AMP, freak, and decay. The amp stands for amplitude, or how far the
deviation is from 100%. Currently the maximum
is about a 170%, so it's going to bounce out to approximately that
value as a maximum. So increasing this property is going to make the bounce harder. So I'm just going to change this 0.052.09, almost doubling it. And what you will see is that
the scale variation is now increased so it is
allowed to become bigger. So now the deviation for the first bounce
is about a 123%, which I can see here
in the scale value. And clicking in the
expression again, I'm going to look at the
frequency or the frequency. So the frequency Freq
stands for frequency, and that is the
number of variations, the number of wiggles, let's say per second, the number of bounces
currently it's set to four. I'm just going to
change it to six. And that is going to make
a lot more pronounced. So it's going to make
the bounce harder because there's more
variations per second. So playing the animation now
will give me this result. Let me just play that back. Now we have a much
harder bounds. And please note that we have
not edited any keyframes. We are just changing some of these numbers and we are getting a completely different result while it's still looking
natural and organic. The decay determines how quickly the animation normalizes
to the end value. So how quickly it gets to 100% and stays there to
complete the animation. So a higher value means the
animation is over sooner, and a lower value means the
animation lasts for longer. So I'm just going
to take away this eight and then enter a six, so it's 6 O instead of 8. And please note that if you
delete a character too many, or if you exaggerate
these values too much, the expression, the
expression is going to break. If I forget one of
these semi-colons or an equal sign or change
these values in any way, the expression will
not work anymore, and After Effects will give
you an expression error. So now we have an
amplitude of 0.09, a frequency of
six, and the k F6. So let's look at the animation. And that is pretty cool. And again, you would be
able to keyframe this. You would be able
to add keyframes for this increase in scale and the longer bounce with the frequency changes
and the decay changes. But that is a lot harder to
do and time it correctly and make it look
organic than just changing these
values a little bit. The amplitude,
frequency, and the k determined how this expression
behaves towards the end. Now, as I said in
the previous video, the animation keeps playing
after it hits the keyframe. And at this point I want to figure out what the
first frame is, where the animation is complete. So when it is
completely done, now, I do this exercise in my
courses all the time, so I know where the
animation ends. It's at 1 second, 15 frames. But I'm going to show
you how you can actually discover when an
animation is complete. Because here we see the scale
value which is fluctuating. So first thing I'm
gonna do is visually look when the animation
appears to be complete. And it's about here, let's say. And then I can skip forward frame-by-frame holding control
and using the right arrow key to find the first
two frames where the percentage value of
the scale stays at 100%. So that tells me that
the animation is over. At this point. I also want to apply a similar animation to the
rotation of this shape. So I'm just going to
press R for the rotation. First. I'm going to make
the animation itself. So I am going to
keyframe here at 1 second 15 frames and
then go to 1 second, 30 frames or 1.5 seconds, and change the rotation
value to 45 degrees. So the second value
will be changed to 45. And that gives us this. It just rotates on
the center axis. And now I want to add
this expression to it. So I'm going to Alt click on the rotation stopwatch and
just paste in the expression. And this is the expression
without the changes, by the way, zoom in a little bit by using
the mouse wheel. And now when I play
the animation, you will see that the rotation has the same bounce that
we had for the scale. So it actually looks like
it's stuck on something. And now clicking
in the expression, I'm going to enter
the same changes. So 0.09 for the amplitude
than six for the frequency, and then another
six for the decay. That is going to give
me this result when I preview the entire animation. So I'm just going to play
the timeline with space, and that is how it looks, especially at 60
frames per second. These animations look so nice. So I cannot recommend you using
these expressions enough. And if this is a bit too
complicated for you, rest assured that this is as complicated as this course gets, like this is as
technical as we go. There's some 3D stuff
that can get pretty complicated with coordinates and z-space and things like that. But this is as technically complicated as the course gets. Leaving out the
bounce-back expression, which we will talk at, talk about in the next video. If you'd like these animations, you don't have to
actually remember the expressions are
copied, the expressions, you just have to
save these as a, as an animation preset through the animation menu
here at the top. So you can enter them
whenever you want.
34. 3.9-Bounce back: Another very common expression is the bounce back expression, and it works similarly to the inertial balance
expression that we looked at in the
previous two lessons. However, while the inertial
bounds fluctuates past the actual value of the
keyframe as in its scale. For example, in the previous
animation goes over 100%. The bounce back expression hits the keyframe value and then
bounces back off of it. And I'm going to
demonstrate this with an example of letting this rectangle fall
to the ground. Let's say I'm going to make it bounce on the floor
of the composition. So the first thing
I'm gonna do is find the final frame of the
rotation animation, which you will find in composition three-point
nine, bounce back. So the expression
is still active, like the animation is still
active past the keyframe. And I'm just going
to use control and the arrow keys to find the first frame where the
animation actually completes. And that is two
seconds and 28 frames. And from here, I'm going to
animate the layers position. So I'm going to press
the P key for position. I'm going to add a keyframe
by clicking the stopwatch. Now, I'm going to
skip 15 frames ahead. So that will be two seconds
and 43 frames to 0.43. And then I'm just going
to use the selection tool and drag it down to the
bottom of the composition. Now, when something falls, it usually doesn't fall
past where it ends up, but it can bounce back
from that position. And that's what we
are going to do with the bounce-back expression, which you will find
in the text file provided with the course
files of this chapter. So I'm just going
to select E through the final Else value and then
copy this using control C. And then I'm just
going to add it to this position animation by Alt clicking
the stopwatch and just pasting in with Control V. And now if I drag the timeline, I can zoom in a little bit here. You can play the timeline and it will bounce on the ground. Now, there are a
couple of values that govern the behavior
of this bounce. So I'm going to click
inside of the code, inside of the expression. And as opposed to
the inertial bounce, these values are
actually at the top. So here I have e, which is the energy. G is for gravity, and N max is the maximum
number of repetitions. So the maximum
number of bounces, regardless of the
energy and gravity. The energy governs
how much energy of the bounce is left
after each bounce. So 100% would be one, so 0.7 would be 70%, meaning it loses 30% of its
height with each bounce. So let's lower this amount, increase this amount
to 0.9 instead of 0.7 and make sure it's a
period and a comma by the way, then it will bounce higher
or it will bounce less low. With each repetition. The G stands for gravity, and that determines how high the object is able
to bounce back. So decreasing the gravity
to 2500 yields this result. So the balance is longer. And the N max determines how many bounces are required for the
animation to complete. So if I just increase
the work area here, and let's say I'm going to
decrease the intmax to four. Now, despite it not
being bounced out, let's say after four
repetitions it stops. So after the fifth repetition, it comes to a halt. Let's say. Now I'm just going
to put this back on nine, because in the end, we will not have enough repetitions for
the timeline to complete. And now I'm going to change
the energy value to a one. So I'm just going
to delete the nine and the period and enter one. Now this means that Let's
just going to bounce back to the same
position each time. So it's not going to lose
any energy on each bounce, and it's just going
to keep bouncing nine times or until the
timeline completes. There you go. Now, I can also give this
an even greater value. So a positive decimal,
let's say 1.1. And that's going to increase
the height of the Bounce by 10% with each repetition. So I'm just going to
press space bar here, and now it will bounce 10%
higher with each bounce. I can also increase this to 1.2, let's say, where the increase
will be more pronounced. And again, one of the
most useful things about this is you
could keyframe this. You could just add keyframes
to get this balance. And you can go into the
graph editor to edit the falloff of the increase
or decrease in height. But just changing
this expression realistically mimics
how this object would react in the real-world. It's not exact because gravity is not as simple as
this little equation here. But it gives us
realistic behavior by just altering these values here at the top of the
expression without having to animate
everything manually. If you want to change
the animation, you don't have to go in
and edit the keyframes. You can just edit
these values and the animation will
change with it, along with anything
parented to this layer, if that were the
case, let's say. Now, another thing I want to demonstrate is that
the behavior of this expression is also related to the speed
of the keyframes. So if I decrease the
speed of the animation by just moving this second keyframe to the right a little bit, it's going to fall slower, meaning that coming back up, it will have a lot less energy. So it takes longer
for the position to increase above
its original value. Now, if I increase the speed, let's say moving these keyframes
a lot closer together, you will see that it
hits the ground faster, so it has more energy
to begin with, and it keeps increasing by
20% with each repetition. So that is the power
of this expression. And it is exceedingly useful
for when you want things to fall to the ground or
collide with each other.
35. 3.10-Time: Another very useful expression
is the time expression. And the time expression
allows us to change a value of a property over time. Let's say I want
the rotation value of this rectangle to
increase over time. Now, that's something
I could keyframe, but let's say I just want
it to rotate infinitely. Then I'm just going
to press the R key with this layer selected, I'm going to Alt, click the stopwatch for rotation
to apply an expression. Then I'm just going to type in time and use Tab
to auto-complete. And then I'm going to click
outside of the expression. And now when I
play the timeline, the rotation of the
object will increase by one degree every second. Every second that the rotation
increases by one degree. Now, let's say I want
it to rotate faster. What I can do then is apply a modifier by adding an
asterix for multiply. And then I can enter,
let's say ten. Now it's going to rotate
ten degrees every second. So now playing the timeline, you will see that
it rotates faster. Let's say I change
this value to 50. It's going to rotate by
50 degrees every second. And this will loop infinitely. So if I change the length
of the composition, it will just keep
rotating and rotating. And I don't have to really think about what I'm doing
with the keyframes because there are no keyframes that are used for
this animation. Now, let's say I also want
to apply this to position. I want the position
to change over time. What I can do then
is press the P key and then Alt,
click the stopwatch. But you'll note when I type in time autocomplete with tab
and click outside of it. This is going to give
me an expression error, which is this orange bar here, which indicates the
expression error. I can click on the X to actually get rid
of this notification. Or I can click the
magnifying glass and that will select the
property it concerns. So if I have the scale visible, let's say I click
this magnifier icon. It's going to give me the rotation where the problem
is actually taking place. And that's because
position actually has two values that would need
to alter change over time. And this expression cannot
do that in this way. So I'm just going to grab
P for position again. I'm going to Alt
click the stopwatch to disable the expression. And now I'm going to
separate the dimensions, which we have also looked
at in a previous lesson. So I'm just going to go
into animation here. And then I'm going to
choose Separate Dimensions. Now, I'm going to just
choose the exposition. So I'm just going to Alt click
on the stopwatch and type in time tabbing
to auto-complete. And now when I push spacebar, you will see that, well, it's only changing
one pixel per second. So I'm actually
going to increase this value a bit by
adding an asterix. Lets say 50 pixels
per second is good. And now it will change
50 pixels each second. I can make this even
faster, let's say a 150. And not a keyframe insight to create this
type of animation. So that is why the time
expression can be very useful. You can just increase a value
by whichever number you want each second without
having to use any keyframes.
36. 3.11-Saving animation presets: Every animator has their go-to tricks and standard animations
that they use very often. In this lesson, I want to
show you that you can save animations along with
their expressions, it as presets so that you can summon them from the
program whenever you want without having to
keyframe everything manually and adding
expressions manually. So here I have composition
of 3.11 saving animations. And let's say I want to save
this scaling animation, this 0 to 100% over
15 frames with this inertial bounce
expression for later use in another project
or for another layer. What I'm gonna do then is get
the scale property using S, and then click on
Scale to select the actual animation along with the keyframes
and the expression. Then I can go into the
Animation menu here at the top and then choose
Save Animation Preset. Now, this is going to bring
me into a file browser, allowing me to choose
a location where this preset will be saved. And let's say I'm
just going to call this one scale bounce too. Because I think I already have a scale balance in
there somewhere. So I'm just going to click Save. And then it's gonna
give me a warning about the default location
to save expressions. Just going to click
through this with okay. And then the animation is saved. So now I can actually remove
the animation by Alt, clicking the stopwatch to get
rid of the expression and then clicking the stopwatch to actually remove the keyframes. And let's say I want to
apply this animation then. So with the layer selected, I'm just going to
go into animation. And then I can either choose Browse presets or I can look at the recent
animation presets. Here I will have
the scale bounce. So clicking this applies
the animation immediately. So now I already have this
animation on my layer. And it's also taking place at
the exact same time because the timeline was set to
0 frames and 0 seconds. So I'm just going to use Control Z to go
back for a moment. Let's say I want to apply
this animation at 1 second. I'm just going to
move the timeline to 1 second and then go
back into animation, recent animation presets and
then choose scale bounce. And then it applies the
preset at 1 second. So it actually
applies the preset wherever you have the
timeline positioned. So you don't have to
keep dragging around keyframes to get them
to a certain point. You just have to
put the timeline where you want to
apply the animation, apply the preset, and then the animation is automatically
generated for you.
37. 4.1-Shape tools overview: In this chapter, we will
be focusing on creating an animating shape layers and
their different properties. We've already seen that regular shape layers
have a position, a scale, or rotation,
and an opacity. But shape layers have
many other properties that we can also animate. And that is what this
chapter is about. The shape tools or the basic
shape tools are here in the top toolbar and by default it's set to
the rectangle tool. If you hold the mouse down
on the rectangle tool, you can choose the
different shape tools that are available. And here we have a
rounded rectangle tool which has rounded corners. We have an ellipse
tool which we can use to draw ellipses or circles. We have a polygon tool
and we have a star tool. Now, you can switch to these tools and
between these tools at anytime by pressing the
Q key on your keyboard. So pressing Q activates the
shape tool here at the top. And using Q, you can cycle
through the different tools. Now, with the regular
rectangle selected, I can click and drag
on my composition. And that allows me
to draw a rectangle of any size and any proportion. You don't actually see the size next to
your mouse cursor, as you may have seen in Illustrator, InDesign
or Photoshop. But that is something we won't be missing in this chapter. Now, we're holding down
the Shift key as I'm still dragging the mouse allows me
to draw a perfect square. And this also goes
for the ellipse tool, the polygon tool,
the Star Tool, etc. So all of these tools
are constrained to an equal proportion by
the Shift tool key. I can also hold
down the spacebar, which allows me to move the
tool as I'm still drawing it. So if you start clicking and dragging in just
the wrong place, you can always hold
down the Shift key as you are still dragging so you can relocate the shape to a different part of
your composition. You can also hold
down the Control key or the Command key on Mac, which allows you to
draw the shape from the center of your
original click. So that without the control key, you will draw from the corner. If you hold down control, you will draw from its center, which is useful if you
are drawing objects in front of each other and they have to line up perfectly. Now, using this, I can just quickly draw this
rectangle in the center. And my rectangle currently
has a red fill color. The fill color is
set here at the top. I can click the color to
set any color that I like. And I can actually
click the word Fill to choose different
kinds of fills. I can choose for no fill. I can choose a solid
fill which we just saw. I can choose a linear
gradient fill, which currently goes
from white to black, and a radial gradient fill which radiates outward
from its center. Now, we will be looking at these different fill
options in a later video. But this is basically where you set up the colors
applied to your shape. I'm just going to click OK. And note that now in
the layers here we have a Shape layer and the shape
layer has a contents. The contents is currently
one rectangle which consists of a path which defines the actual shape
of the rectangle. It also has a stroke and a fill. So we can actually access
these options here. And most of these can be
animated as you can see, because it has a stopwatch. So I could animate the
stroke color, for example, or the fill color or different
properties of the fill, which we will be looking
at later in this chapter. Now, with this shape
layer selected, I'm just going to hold down
the mouse on the shape tools, and I'm going to grab the ellipse tool now
with the shape selected. And this is important
for this example, I'm going to click and
drag and hold down Shift so I can draw a
proportional circle. And then I'm gonna
release the mouse. And as you can see, this shape is not on a separate layer because this
shape layer was selected. The ellipse was added to
the same shape layer. So I can animate
them individually in the sense that
I can go here to the transform controls for this individual shape and
change the properties here, such as the position,
the scale, etc. But the layer properties are separate from these
individual settings. I can still access the
individual contents of the Shape layer by just dropping down these, these triangles. Let's say that I can use to access these
different properties. But the layer transform options apply to all shapes
within a shape layer. Now, I'm just going to
use Control Z to go back to before
drawing the ellipse. It often happens that you want these properties on
separate layers, that you want to be able to
influence them individually. To achieve this, I'm
going to de-select the current shape
layer by just clicking on an empty spot in
the layers panel here, you can also use Control Shift a to deselect
everything, by the way. And now if I click and drag, you will see that it creates
a secondary shape layer, shape layer two, which has separate layer properties as
opposed to Shape Layer one. So this layer has
its own position and shape layer one also
has its own position, so these are no longer linked. I prefer to work with separate
shape layers in most cases because the shortcuts
are still available. And just to illustrate that, I am going to delete Shape layer to select
Shape Layer one, and again draw an ellipse. Let's say I want to animate the position of the
ellipse only while not animating the position of the rectangle if I press
the P key on the keyboard. Now, this position influences both shapes together because they are part of the same layer. If we want to influenced
them individually, I have to expand the content's going to ellipse one
and then transform ellipse one and then
animate this position separate from the position
of rectangle one. So that makes it slightly less convenient to access these
different layer properties because you have
to go all the way into these drop-downs to access these properties
that you want to animate. So for this kind of thing, I prefer to work on
separate layers, but you can add them
to the same layer while still having the option
to animate them separately.
38. 4.2-Other shapes: In this lesson, we
will be looking at some different properties of
the different shape tools. In the previous
lesson, we worked with the standard
rectangle tool which you can use to draw
rectangles obviously, now I'm just going to add, activate the rounded
rectangle tool. The rounded rectangle tool. You can again just
click and drag and get a rounded rectangle. Now I'm just holding
down the mouse currently so I can still alter the
shape as I'm drawing it. And I just wanted to
show you that you can increase or decrease the rounding of the corners by using the up and
down arrow keys. Holding it down actually decreases the radius
of the corners. And holding the up arrow key increases the
radius of the corners. So you can get a more or less rounded rectangle
if you want. Again, you can hold Shift
to draw a rectangle. You can use the space bar to move the shape as you
are still drawing it. And you can use Control
to draw from your original mouse-click
if you so choose. I'm just going to
delete this shape using the delete key twice. And I use the Delete key twice, because according to
the current selection, I have here Shape Layer one and its contents rectangle
one is selected. Now pressing Delete, once
deletes the contents, and then pressing Delete again, deletes the actual layer, which is not required, but I prefer to start fresh. Whenever I switch shapes. Then I'm going to switch
to the Ellipse tool. I can just click and
drag to draw an ellipse. I can hold Shift
to draw a circle. I can hold space to move this circle as I'm
still drawing it. And I can use control to
draw the circle from my original mouse-click
if I so choose. So again, this is exactly
similar to the rectangle tool. I'm just going to
delete the shape and the layer and then switch
to the polygon tool. The polygon tool initially
gives us a five sided polygon. Holding Shift straightens out the polygon because it is always proportional like I cannot draw different
proportions currently, so I can hold down Shift
to keep it straight. And also note that this always draws from the center of
your original mouse-click. So I'm not dragging
from a corner and dragging from the center
of the shape itself. And using control does
not change this behavior. Now, I can still, while I'm holding
the mouse down, change how this polygon looks. For example, I can use the up
key or the up arrow key on my keyboard to increase the number of sides
of this polygon. So let's say I want
to draw a triangle. I just decrease the
number of sides to three, and that gives me a triangle. I can press up three
times to get a hexagon. So I can also change how the
corners behave of the shape. So I can use the left arrow key to inset the corners
in this way. And I can use the right
arrow key to push them outwards to get
shapes like this. So as you are still drawing, you can change these shapes
to whatever you like. And these tools are a
lot more versatile, then they would
appear originally. I'm just going to release
the mouse and press Delete and then delete again. And note that when I start clicking and dragging once more, it actually remembers
the settings from the previous draw from the last time I
actually used the tool. So that's something to remember. I'm just going to
delete this shape here and then switch
to the Star Tool. And the Star Tool works in
a very similar fashion. So I can click and drag to
draw a five-point star. I can use Shift to
keep it straight because I'm already
drawing from the center. I can use the space bar to move the shape around as
I'm still drawing it. And I can use the up
arrow key to increase the number of points in the
star and the down arrow key to decrease the
number of points. I can also use the left arrow
key to inset the corners. And I can do the same
with the right arrow key towards the other side to
get these flowery shapes. Now, another thing I
want you to note about this tool is if I hold
down the control key, I can actually expand the
length of the star points. So I'm not actually
scaling the shape itself. I'm scaling the star points. In this case, I'm
just gonna go back to a bit of a more conventional
shape for a star. As you can see, holding down Control or Command on the Mac allows me to draw
a star like so. So as you are still drawing, you have a lot of control over how the actual shape
is going to look. And you can do those
things as long as you have the mouse button held down. So as we were still drawing it. Now, looking at the
layer contents, I now have here a poly star one. I can expand the options of Paulista R1 and then go
into poly star path. The polygon tool and the star tool allow me to set
the number of points here. So once you've actually
drawn the shape, you are not stuck with
those actual proportions. I can also change the inner
radius, as you can see. I can also change
the outer radius to change the length
of the points. So if you don't want to
use those shortcuts or you want to enter exact values. You can still change
all of these in the settings once the
layer is actually drawn. And please note that you
can also animate all of these because they
have stopwatches. So you can still animate
all of these properties. The number of points, the inset, the radius for the
inside and outside, and the roundness
of the inside and outside when you have actually
drawn the shape already.
39. 4.3-Adding fills and strokes: In previous lessons,
we've already looked at adding fills and strokes, two different shaped objects that we can draw it
in After Effects. In this lesson, I want
to show you that you can actually add
several fills and several strokes and animate different properties concerning
those fills and strokes. So here in the composition 4.3, adding fills and strokes, I'm just going to press Q
for the rectangle tool. And I'm just going to actually
double-click this tool to draw a rectangle at the full
size of the composition. And that's because I
want a rectangle of a specific size with the anchor point is centered
on the shape itself. So this is the easiest
way of doing that. With shape layer one selected. I'm just going to
expand the contents of rectangle one and go
into the rectangle path. I'm going to unlink the
width and the height. And I'm just going
to enter 500 for the width and 500
for the height. So now I have a red rectangle
with a two pixel stroke, which is currently white. Obviously we cannot see this white stroke currently because it's against
a white background. But we'll get to that in time. So I'm just going to click the fill color here at the top. And I'm going to go
into the blue spectrum and I'm just going to
pick something like this. The hexadecimal color
code for this is 217797 if you want to
follow along exactly, but I'm just pulling
these colors out of thin air at the moment. Then I'm going to
go into the stroke and I'm going to pick kind of like a muted orange over
here, something like this. C D 7934. And because this is currently
only two pixels wide, It's not very visible. So I'm just going to
click the pixel value here at the top and enter 50%, increase it to 50 pixels. Now note that strokes
actually scale towards the outside and
the inside of shapes. So if I click and drag here, you will see that it
scales inside and outside along with the
pixel value that you enter. Now that we have this shape
with these color settings, we're just going to look at the contents of the Shape Layer. Currently, we have rectangle,
one rectangle path. And this shape layer, or the contents of
the Shape Layer, currently has one
stroke and fill. Now let's say I want to add a secondary stroke
to rectangle one. To do that, I'm gonna
make sure that in contents rectangle
one is selected. And then I can go up
here into this Add menu, which is only visible once the shape layer is
actually selected. Or alternatively, you can
look at the contents of the Shape Layer
and then click Add over here this
little play button, which gives you
the same options. Now again, makes sure
that rectangle one is selected if you're following along because that's
important for later. Why it's so important. I will show you in
the next lesson. So I'm just going to click Add and I'm going to go into stroke. And that adds a two
pixel white stroke to this same object. So now in the rectangle
one contents, I can actually go into stroke to and I can make this kind of
a bluish color like a cyan. 1983 b, f. And I'm going
to increase its size to, let's say, 30 pixels. There we have a stroke
over our stroke. And please note that the
order of these strokes of these objects
actually is important because I can actually
drag stroke to down a spot and that's going to
hide it behind stroke one. So stroke to is
actually still there, but it's hidden
beneath stroke one. Stroke two is still
there, but it's hidden, but nice stroke one. So now I'm going to add a
third stroke by again making sure rectangle one is selected the actual shape that I
want to apply this to. And I'm going to add
yet another stroke. Stroke three, again is a
two pixel white stroke. So I'm just gonna go in
here and I'm going to make it a read color. And I'm going to
increase the width to half of the 30, so 15. And there we go. And note that stroke width is actually
something you can animate. So you can key-frame these
properties as you wish. I could animate the
stroke 1 first, then animates
stroke to interview by Keyframing the
width of the stroke. And then stroke three to animate these strokes into
interview individually. So let's do that as an example. I'm at the beginning
of the timeline. I'm just going to put the stroke width of
stroke one to 0. And for now I'm just
going to hide stroke 23 actually by clicking
the eyeball icon here. And then within ten frames, I want it to go to, let's say 15 frames. I want it to go to the 50
where it was originally. So I'm just going to
click the stopwatch to add a keyframe from
the stroke width. And then I'm gonna
go to 15 frames. And I'm going to change
the width back to 50. And that's going to animate
the stroke width for me. So I'm just going to
add some easing here, an Ease In for the final keyframe and an ease out for the
first keyframe. And then I'm gonna go to about halfway the full
length of this animation. So seven frames. I'm going to
re-enable stroke to, I'm going to expand its options. I'm going to keyframe the
stroke width and put it at 0. Then I'm going to
go plus 15 frames. So I'm gonna go to 22 frames. Then I'm going to
change it back to 30, which is also going to
animate this stroke. And I'm just going to add
the appropriate easing. So an Ease In for the final frame and an
ease out for the first. Then about halfway
through this one. So 15 frames. I'm going to go
into stroke three, making that visible again. Expand the options
for stroke three. Keyframe the stroke
width, put it at 0, go to plus 15 frames,
so 30 frames. And then change the
stroke width back to 15. Add some easing. Keyframe assistant ease
in and then ease out. Now playing the
animation is going to look something like this. You can animate all of these individual properties
of the shape layers. So you can add as many fills and as many strokes as you want. And you can animate all of their properties together
or individually. Now again, in the next chapter, I'm going to show you how
this works with applying strokes and fills to different
levels of a shape layer.
40. 4.4-Adding on levels: In this lesson, I want to elaborate a little bit
on why you need to be very specific about
what you select in the layer properties
when it comes to shape layers,
texts layers as well. But we will be looking at
that in a future chapter. So here in the composition 4.4, adding on different levels, we have here this
shape layer which currently only has one stroke, the 50 pixel, light brown
stroke, orange ish stroke. That's the only stroke
that is currently present. Now, I want to show you
what happens when I now add another shape
to this same layer. So with this layer selected, I'm going to grab
the ellipse tool, and I'm just going
to click and drag holding Shift to draw a circle, which is added to this
same shape layer. So I'm actually going to remove the animation
of this stroke here. So I'm just going to
click the stopwatch when it's already visible. So now they are the same. So these individual shapes within this layer actually
have their own stroke options. So if I expand the ellipse, you will see the stroke
which I can influence separately from the
stroke of the rectangle. But there is also a
way to add a stroke or anything to
this entire layer, and not just the individual
objects within the layer. So for this example, I'm going to make sure that
the layer itself is selected. So not ellipse one,
not rectangle one, but the layer
itself is selected, so nothing else is highlighted here in
the layer controls. Then I'm going to go into Add, and then I'm going to
add yet another stroke. Now, the stroke is currently not visible because it's a
white two pixel stroke, which is obviously
not, not visible here. But note that the stroke is also displayed outside of the ellipse one and rectangle one
like it was added to the shape layer and not
these individual shapes. So I'm going to
expand stroke one, and I'm just going to pick a reddish color here
just as an example. And I'm going to increase
the stroke width and as soon as it exceeds 50, because the stroke
that's currently applied to these two shapes is 50. You will see that it's
added to both shapes. So it's added to both shapes
within this one layer. So that's something
important to keep in mind. If you want to apply separate strokes to objects
within the same layer, you have to make sure those
individual objects are selected if you want
to add something, because you can't just
add fills and strokes, you can also add all
these different modifiers which we will look at later. If you want to add those to
all the objects on a layer, you want to make
sure that layer is selected and nothing from
the individual contents. So what you can also
do is click and drag this stroke into ellipse
one, for example, that removes it from
the rectangle because it's now contained within
this group of ellipse one. So that's one way of changing the strokes around
and to correct any mistakes that you
make along the way. I can grab the stroke here and just click and
drag it to the rectangle. And I can just collapse, ellipse one and expand
rectangle and just click and drag it
to the contents. And that's going to apply
it to everything within the shape layer all
at once, once again. And just as another
quick example, I'm going to show
you how that works with one of the modifiers. So I am going to go
into the Add menu, and I am going to grab
the twist modifier. Now the twist modifier twists
any object in this way. So it kinda just turns
it around on its center. And I currently applied it to both of these shapes
at the same time. Right now I'm just
changing the center because I want the circle
to be affected as well. And this is already a pretty cool little animation that you can create by
just keyframing this. But it's currently affecting
both shapes because it's at the top
level of contents. If I click and drag it
into rectangle one, it's only going to
affect rectangle one. And if I click and drag
it into ellipse one, it's only going to
affect ellipse one. So that's how these
different branches of applying effects
and modifiers works. You just click and drag
them to whichever group you want them to apply to
within these shape layers. Or you can apply
them to all of them. But just making sure
it's applied at the top level of contents.
41. 4.5-Gradients: In this lesson, we
will be looking at applying gradients
to our shapes. And a gradient, color gradient is basically one
color that fades into another color
that transitions into another color
as a gradient. And to apply that to a shape, I have here composition 4.5 gradients and I have the
shape layer one selected. And to apply a gradient, you actually have to select some of the contents
of a shape layer. So I'm just going to
click rectangle one here. Then I'm gonna go up into the Add menu and then I
can choose Gradient fill. Now, that's going to fill this
rectangle with a white to black rake gradient that just
runs along the x-axis here. We can alter this
gradient by expanding the layer controls here
for gradient fill. And then we have
some options here. So I can change the
type of gradient and you can choose between
linear and radial. Linear just goes from
one side to the other, and radial radiates from the
center of the shape itself. I'm just going to put
it back on linear. We have a start point
which determines where the gradient
starts to transition. You can influence that
over the x and y axes. As you can see, you can actually rotate where
the gradient starts. And you can also do
this for the endpoints, so the black side
of the gradient, and if you drag
it into the minus flips to the other side, which is something
to take note of as you are working with
different gradients. We can also change the opacity. And what you will see is
that the gradient fill is currently on top of the actual solid color
fill, which is blue. So now, by lowering the
opacity of the gradient, I can see through the
gradient to the color, color that lies below it. So this is something you can use to create some
interesting effects. I'm just going to put
it back at a 100% for now for demonstration purposes, you can also edit the colors of a gradient by clicking
edit gradient. And that brings you into
the gradient editor, which you will be familiar with if you've ever worked with Photoshop or Illustrator,
or even InDesign. What I can do then is click
here on the white color, stop at the bottom left
of the gradient ramp. And then I can just
enter a color. And then I can click
the black side, the black color stop and I
can pick a different color. Yeah, it's just gonna
be something like this. You can also add colors by just clicking at the bottom of
the bar to add stops what? You can also give different
colors, of course, and if you want to remove them, because often you will
add one accidentally. If you click around
a bit too much here, you can just click
and drag down to get rid of those gradient stops. You can also edit which color is dominant by clicking and dragging this little
diamond icon. So now the left side of the
gradient is more dominant. And if I drag it to the right, you will see that the other
color becomes more dominant. So the gradient becomes
less pronounced, let's say, becomes more gradual
and there's less of a hard stop if you increase the distance between these two. So then I'm going to click, Okay, and here we
have our gradient. And as I said, you can edit the opacity for some
interesting effects. You can rotate the gradient by playing around
with these settings. And let's say I'm going to add another shape to
this shape layer. I'm just going to
click on contents in the Layer Controls click and drag to add another gradient
and you add another shape. And you will note
that the gradient is not applied to this shape. And that's because it's only active in that
rectangle one group. Now, what I can do is select
the gradient fill here, press Control C,
select Rectangle tool, and then press Control V. Now initially, visually nothing happens and that's because of the stacking order
of these fills. So when I paid something, the pasted object becomes the bottom most
object in this group. So now if I click and drag
it up above the fill one, you will see that it
becomes visible again. So the order of these
items is important. And if you apply
something and you're not actually seeing it show up, it probably has to
do with how the, how the operators are stacked within these
individual shapes. So that's something
to keep in mind. Also important to
note is that you can always delete
the specific items. So I can just click
the gradient fill here and press Delete, and that just deletes
it out of the group. I can also delete this stroke that's on there and this fill. And then I just have the
single path which is left. So that's also
something you can do. I'm just going to Control Z, those operations for now. You can also apply
gradients to strokes. So let's say I select
rectangle two here. Then I'm gonna go up into the Add menu and choose
gradients stroke. And that adds a gradient stroke
above the existing stock. So that's also
something worth noting. If you already have a stroke, it just displays over the
stroke that is currently there. Now, I can change
the stroke width. I can rotate the
gradient like so. I can also displace
the gradient like so. And I can obviously
change the colors by clicking Add gradient here
or edit gradient care, and then fill in my own
colors as I see fit. So that's how we
work with gradients in After Effects when it
comes to shape layers, at least when we come to
the chapter about Effects, I'm going to show you
some different ways of adding interesting gradients
to your compositions.
42. 4.6-Merge paths: From this lesson on, we will be looking at some of the modifiers that we
can add to shape layers, starting with the
Merge Paths modifier. Merge Paths allows us to combine shapes into
different shapes. And to demonstrate this, I have composition
4.6, Merge Paths. And in this composition
I'm just going to select the rectangle tool and make sure that shape
layer one is selected because I want to add the
shape to the same layer. I'm just going to click
and drag and draw a shape. And as you can see, the shapes just overlap. They are just part
of the same layer. Meaning that with
the Selection tool, I can influence
them separately by making sure that I'm
within the actual layer. And when I click the layer, I just move everything
at the same time. So I can either individually select these shapes
or I can select the layer in its entirety and click and drag that
around or separately. Now, let's say I want to combine these shapes
in a certain way. What I'm gonna do then is make sure that the layer is selected. And I'm going to go into Add. And again, you can
do that down here in the layer controls or here at the top where it
says Add and I'm going to add a merge paths. The first thing
you'll notice is that where these shapes overlap, the strokes disappear
because it's a unifying these shapes
into a single shape. So what I can do here
is grab rectangle two. And as you can see, wherever I place it, the overlap is expanded
or contracted. Now, this Merge Paths operator has several different
parameters that we can change. You can find it down
here in the layer controls where it
says Merge Paths one. And the mode is
currently set to add, meaning that it is
adding these two shapes together to function
as a single shape. Now, I can also choose Merge, which gives us this
interesting area of overlap, Let's say. So what is actually happening? They are not above or
below each other anymore as they would be without
the Merge Paths operator, they are now simply intertwined. I can also choose Subtract, and that is going to subtract
the overlapping shape, giving me this L-shape or this
little Tetris shape here. I can also choose intersect, and that is only going
to leave the area of the shapes that
overlap each other. So now only the overlap remains. So now if I select rectangle
one and I drag that around, you will see that only
where rectangle one touches rectangle two
is still visible. I can also go into exclude. Exclude does the opposite, and it hides the area of
the shapes that overlap. So now if I move
rectangle tool around, you will see that
rectangle tool is cutting out of rectangle one. So using this, you can create
some interesting shapes. And especially considering
that you can animate all of these parameters
individually or together, allows for some interesting
possibilities that I heartedly encourage
you to experiment with.
43. 4.7-Offset paths: Another operator which
can sometimes be useful is the offset path. And for this example, I've created the composition
4.7 offset paths. And what I want to
demonstrate here is what happens when I want to
scale these shapes, which are part of
the same shape layer from their individual centers. Now, let's say that I start changing the
scale of this layer. What you will see is
that these layers are the shapes scale towards
the center of the layer. So not their own centers. They will always scale to the
center of the layer itself, which you can set, of course, with the anchor point tool. So if I put it here
on this rectangle, and then I start
changing the scale. Only the rectangle scales
source its center. And these other shapes also scale towards the center
of the rectangle, which is not useful
in this case. So let's say that
these objects have to be on the same layer
for different purposes. Let's say you could always
draw them on separate layers. I just wanted to show, show
you what happens when you want to scale these individual
shapes on the same layer. What you can then use
is the offset paths. So with the layer selected here, I'm going to go into the Add menu and then I'm
going to choose offset paths. And the first thing
you'll notice is that the layers that the shape's
scale a little bit. And that is because their path, the path is being off set. So here in the offset paths, which I can expand in
the layer controls, I have an amount control, so I can increase the
size of these paths. The paths actually don't
increase in size themselves. You can still see the
paths here just they are visually smaller or larger
depending on the values. So I can click and drag this to the left to scale
the paths down. And I can drag it to
the right to scale them up to wherever I
want them to be. And that is basically all
that this operator does. The most useful case for it
would be if you want to scale individual shapes within
an individual layer at the same time from
their own centers.
44. 4.8-Repeater: The repeater operator for me is one of the more
interesting ones because it allows you to create some pretty cool stuff with
some basic operations. So I have here
composition 4.8 repeater, in which I have this
simple polygon. And I want to apply the repeater operator
to this polygon. So I'm just going to go into Add and then go into repeater. And what you will see
is that we now have two copies of this shape
in the back of it. So these copies are in the
back of the original lets say, and how those operate and
how many of them there are, and what the distance is, and what kind of
transform options they get is determined in
the repeater settings, which you will find in
the layer controls. So currently it's
set to three copies and that actually
includes the original. So if I change it to one copy, it just gives me the one. So I can just click and
drag this out and make as many copies of this
shape as I want. And that's not all
because I can also expand these transform controls
for the repeater and cure. I have the position, scale, rotation, start opacity and end opacity for each
of these copies. So what I can do
here, for example, is increase the position
and you will see that the spacing of each
copy is then increased. What I can also do is
increase or decrease the scale of each copy by just clicking and
dragging the scale, which also gives me a
pretty interesting effect. I can also change the
rotation of each copy. And you will note that the farther away from
the original it is, the faster the rotation
will be displayed. Actually, here we have
the start opacity. And if I lower this, the start of the repeater is
going to become transparent. And as it goes to the right, let's say the opacity
increases to a 100%. Again. If I put this back at 100, you can see that I also have the same control for
the end opacity. So now the beginning is 100%
opaque or nontransparent, and the beginning or the end is actually
transparent here. So this allows us to create
some interesting things. Just as an exercise for stuff that we've done
in previous chapters, we're going to be making a little basic
animation with this. So first thing we're
gonna do is grab the selection tool and just click and drag this out
to the left a little. I'm going to put the
number of copies at six. And I am going to
change the position of these copies to 0 initially for the
start of the timeline. Then I'm going to
keyframe the position. And then I'm going to go into, and note that this is
not the layer position, so this is not the P key. This is not the setting that you want to change with the P key. Let's say this is the position of the repeater
that we've applied. So not the layer position, but the position
of the repeater. So then I'm gonna go to 1
second in the timeline, and then I'm going to
increase the X position. So the first position to
something like 250 pixels. Let's say 250 Exactly. Okay. Now we have this. I'm going to apply some
basic easing to this. So Ease In for the end. And he's out for the start, and that gives us this result. Then I am also going to keyframe the rotation of these shapes by going to the beginning
of the timeline, clicking the stopwatch
for rotation. I'm going to use the arrow
of the position here to jump forward to that same
frame at 1 second. Then I'm going to increase
the rotation value to one, giving them one rotation and then apply the standard easing, so ease in, ease out. And then we have
something like this. And actually one rotation may actually be a
little bit too much. So what I'm actually going to
do is go back to 1 second. Instead of one. I'm just going to
enter 90 degrees. And that's going to give
me something like this. Pretty cool, pretty cool. I like this. So you can experiment
by keyframing some of the other properties that
you can play with the start and the end opacity,
for example, um, but this was basically
the whole exercise, not only applying this repeater, but also demonstrating
that you can actually animate all of these
different properties however you want.
45. 4.9-Trim path: The trim paths operator is exceedingly useful
and it's used so often that you've probably
seen it hundreds of times in real life
without realizing it. It is used to make it seem
like a shape is being drawn. And here in the
composition 4.9 trim path, I have this shape layer
containing, containing a polygon. And note that this polygon
only has a stroke. It does not have a fill. Why it doesn't have a fill? I will explain in
a little while. So here on this shape layer, I'm going to apply the
trim paths operator. So I'm just going to
go into the Add menu and then go into trim paths. And initially nothing happens
because we need to go into the settings which you will find under the layer controls. So here I have trim path and here is something I
really want you to pay attention to because it has a start value and an end value. This is something that is
very common in After Effects. We're also when you're
working with texts layers. So the concept of working with a start and an end is important. So pay attention. The start value is
currently set to 0 and the n value is set to 100. Now, when I start
changing the start value, you will see that the line
starts to gradually disappear. The line completely
disappears when both values are at 100%. However, it also disappears when both values are set to 0%. It just means that
once the values are 0 and you start
animating one of them, the animation runs counter at, the animation runs clockwise, no matter which of
these two you change. If both values are
at 100 and you start animating them, it
animates counterclockwise. If you want to
animate something, animate the trim path
counter clockwise, you would both put
both values at 100. And if you want to
animate them clockwise, you start the animation at
0 and then work from there. I'm just going to go
to 100 for now and I'm just going to show you
how I can animate this, which is the same as
any other animation. I'm just going to
click the stopwatch for the start value. Then I'm gonna go to 1 second in the timeline and just click and
drag it down to 0. And you can comfortably
click and drag it from 0 to 100 without worrying that it goes
past that value because 100 is the maximum value
and 0 is the minimum value. So now I already have
this animation here. You can also apply some
easing to this animation. So the Ease Out for the start and the
Ease In for the end. And you can very easily create
animation such as this. Now, I want you to follow along with me and just deleting the
trim path for now. I'm just going to press
Delete to get it off there. And now I'm going to
duplicate this shape. So I'm going to click
on the poly star in the layer contents and press Control D or Command
D on the Mac. And that duplicates
the poly star. With this second
poly star selected, I'm just going to click
and drag off to the left. And I'm just going
to move this one over to the right a little bit. And let's say I'm just going
to duplicate this one again. So I'm just going to
click on the polystyrene to press Control D to duplicate, select the third poly star
and just click and drag here. So these are just about aligned. And now I'm going to add
a trim path to the layer, not one of these
individual poly stars. They're actually polygons. It's a bit of a weird story
why it's called a poly star. In here. The Star Tool and the polygon
tool used to be one tool. And you would have to specify
here in the layer controls whether it would be
a star or a polygon. Now, you can still
actually do that. You can go into the poly star path and then
choose polygon or star. But you didn't. You used to have a
separate Star tool. So that's why it's called
a poly star because it can either be a polygon
or it can be a star. In any case, we have here
these three polyesters, and I'm going to apply the trim paths operator
to the layer itself. So with the layer selected, not these individual poly stars, I'm going to go into the Add menu and then
choose Trim Paths. Now, when I go to Trim Paths and start changing the start value, you will see that they all
animate at the same time, which can be something you want. But it can also be
the case that you want these to
animate separately, one after the other. So what I can do then is go where it says trim
multiple shapes. And then I can switch
it to individually. Now once I start
changing the value, you will see that the third poly star
starts animating first. The second star, polystyrene
starts animating second. And the first polys are
actually starts animating last. And that is because
of the stacking order of these Paulista, ours. So let's say I'm going
to put polys start to at the top and poly star
three at the bottom. Now, you will see that
we get the left 1 first. Oh wait, I actually
switch these around. There we go. So now we have them animating one after
the other first number two, then number three,
and then number one. As I have clearly
just demonstrated, you want to keep an eye
on the stacking order of the shape objects
within each layer. But this allows you to create these little cool
hand-drawn animations. Let's say. You don't want to overdo the duration of
these animations, like when you have
like a drawing, you want to animate things
into frame pretty quickly. But it's something
I very often use. It's very flexible
in many situations. So the trim path is something I definitely recommend that
you experiment with. One final note on
why these objects only have a stroke
and not a fill. That's because the effect kind of breaks when the
objects have a fill. So I'm just going to click
on the shape layer here. And I'm gonna go
into the fill color, and I'm just going
to actually go into this poly star here. And I'm going to go into Add, and then I'm just
going to add a fill. It doesn't matter what
the fill is actually. And now I can copy this
fill Control C and then paste it over here in the poly star three
and a poly star one. Now, when you start
using trim paths on objects with a
fill, you get this. And that doesn't
look good at all. Like the effect of
the stroke being drawn is completely
overshadowed by this fill shape
filling in over time. So I would recommend that you don't use a fill when
you use this effect.
46. 4.10-Wiggle transform: Another interesting operator
is the wiggle transform. And for that I have here the composition four-point
ten wiggle transform. And with the layer selected, so not the contents, even though it only contains
a single poly star. I'm gonna go up into the Add menu and go
to wiggle transform. Now the wiggle transforming
initially does nothing. So I have to go into
these settings here. And the wiggle transform
actually allows us to create animations without using any expressions
or any keyframes. So if we can wiggle the
different properties that a layer has by just
changing these values. We have here wiggles per
second, wiggles per second. A correlation, a Temporal Phase, a spatial phase,
and a random seed. You don't actually have to understand what all
of these values mean. You just have to
know which ones you have to change to
change the animation. Now, initially, like I said, nothing actually happens until I expand the transform
controls here, which gives us anchor point, position, scale, and rotation. The only one we are missing, let's say between brackets is the opacity because that
does not have any thing, that does not have
any spatial data, let's say an anchor point, position, scale and rotation do. So. Let's say I change
the y position here. And I'm gonna put
that at about 50. Oh wait, this is
the anchor point that I'm changing currently. So I'm just going to change the Y position to
approximately 50. And now, once I start
playing the timeline, I already have a
wiggly animation. In the previous
chapter, we already looked at the wiggle expression. So this is a way to
make a shape behave that way without actually
having to use the expression. And yes, this is only
applicable to shape layers, but many animations only
consist of shape layers. So this is something
very useful to know. I'm also going to change the
scale value to, let say, about 40% and the rotation
value to about 45%. Let's say. Now when I play the timeline, I already have this animation, which isn't particularly fancy, but there is something
happening on the screen. And that is often something
you want for, let's say, background elements or icon sets that you are
trying to animate. So that is something
that you can use to put some random animation
without having to think too much about where the keyframes should be and how
they should behave. Now, once I start changing
the wiggles per second, it will start animating
a lot faster. So now it's at nine times
per second instead of two. And if I put it at one
wiggles per second, it will behave a lot slower. Now, the correlation relates to the values here at the top. It's going to jump to these values exactly
when it's set to 100%. And it can deviate
between any value, between 050 for the
position value. For example, if it's set to, if it's set to 0, the temporal phase kind of displaces where the
wiggle takes place. And the spatial phase does the same for the actual position, rotation, and scale
of the object. A random seed applies
a randomizer to all of these values to make
it a bit more random, let's say, but if you
want more exact control, leaf the random seed at 0. So that is the wiggle transform, which you can use to randomly transform any shape
within your shape layers. Now, you can apply these two individual
shapes within a shape layer or to the
shape layer in general. So if I would create a secondary shape within
this shape layer, I could have one conform to a wiggle transform
and the other one not by placing it
within the group, by just clicking and dragging. Or I can apply different wiggle transforms if I apply them
to the shapes separately.
47. 4.11-Other operators: In this lesson, we
will be looking at the remaining operators
that we can add to our shape layers
because they do not contain a lot of
options and settings. So we can talk about several
of them in one lesson. I have here the
composition 4.11 other operators which contains
this five sided polygon. And what I'm gonna
do is go up into the Add menu with the Shape
Layer selected, of course. And then I'm gonna go
to pucker and bloat. Now, the pucker and bloat is
added to the layer controls. And what you will note is that the corners of the object
are already rounded, like the sides are
slightly being inflated. And that's because they
are being bloated. Dragging this slider for
the amount to the right, It's going to bloat
the shape layer and dragging it to the left is going to pucker the shape layer. So clicking and
dragging to the right gives me initially
this flower shape. And dragging it past that, past the boundaries
of the stroke, It's going to give me some funky looking fractal thing like this. Now clicking and dragging it to the left, puckers the shape. And that kind of squeezes
the edges of the shape together until you go
past its boundaries. And then again, you get this fractal looking shape
once you start animating this. And of course you
can animate this by just using the stopwatch as we've done with many previous
settings in the past. I'm just going to delete the
pucker and bloat by clicking on it and pressing
Delete on my keyboard. And then I'm going
to go back up into the Add menu and then look
at the round corners. Now, the round corners
operator rounds the corners of objects so I can expand its options here in
the Layer Controls. And I have a radius slider here. And if I click and drag
this to the right, it's going to increase the
roundness of the corners. And clicking and dragging
it to the left decreases the roundness of
the corners until I get back to the original shape. So not a very
interesting operator, but if you want to round the corners of an object
with straight corners, this is something you can use. Just going to delete this
operator by pressing Delete again and then back
into the Add menu. And then we're going
to look at the twist. The twist kinda puts
the shape in a blender, trailing along its edges. So I'm going to expand its
options here and here we actually have two settings
that we can change. Here. I have the angle
which is going to increase the amount of
blending, let's say. And here I have the option to change where the
effect is centered. And that's gonna
give us something funky looking like this. So you don't have to actually
draw the shapes manually. You can just create
them and transition between them by using
these settings. And of course, you
can key-frame these because the setting
has a stopwatch. Now I'm going to delete this
twist by pressing Delete and going back up
into the Add menu, we're going to look
at the wiggle path, which works very similarly to the wiggle transform that we looked at in a
previous video. It's going to make the edges around this
shape more wiggly. And I can expand its options. And here we have quite a few more than in the previous ones. I can change the size to change where the points end
up from the effect. I can change the amount of
detail and that's going to increase the number of
edges that the object has. I can change the
corner to smooth to create a more smooth
shape along each edge. And here we have the
animation controls. So now it says here,
wiggles per second. So that means once I
played the timeline, we already have an animation. I can change this number to one. And that's going to slow
the animation down. So now we already have this bacteria germ kind of thing just floating
in media air here, which can give an
interesting effect or can be an interesting
background element, let's say. So I'm just going to delete this wiggle path because the rest of the
settings just work the exact same way as the
wiggle transform of which we've already looked at in
a previous video. And I'm gonna go back
into the Add menu and then we're going to look at the last one, the zig zag, which works in a similar way as the wiggle paths
and wiggle transform, but it doesn't animate
for you automatically. So expanding the options
for the zigzag we have here the size property which is going to make the
edges more pointy. And if I want them
to be rounded, I can change the points
from corner to smooth. And that's gonna
give me this effect. Note that things like
this don't always look as good with a thicker stroke. So let me just decrease the stroke size to
something like five. Let's say. That looks
a bit different. I wouldn't say necessarily better, but it looks different. You can change the ridges
per segment and that's going to increase the number of points that are expanding
from its center. Those are all the operators. Now, not all of these are useful or practical
in most cases, but I did want to show you all of them for
completeness sake.
48. 4.12-The Pen: In the previous lessons, we've looked at the default
shape tools that we have at our disposal
in After Effects. There is also
another tool that we can use to create shapes, and that is the pen tool. Most Adobe programs have a version of the pen
tool, and I must say, I am the least impressed by how the pen
tool works in After Effects. It's not very flexible. It lacks some of the finesse
that the pen tool has in programs like Photoshop
and especially Illustrator. But it's still part
of the program. We still use it for
certain things and that's why I want to highlight
it in this lesson. The pen tool here is this
fountain pen icon that you will find in the toolbar to the right of the
irregular shape tools. And when I click this, we have the same settings as we saw for the other shape tools. We have a fill and a
stroke that we can change. So you can click here to
change the color of the fill, and you can click on the word fill to change the type of fill, and the same goes
for the stroke. Now, the pen tool
can be used to draw either straight lines or curves. When it comes to straight lines, the tool works exactly the same as in other Adobe programs. The problems arise when
you start drawing curves, which we will get
to in a little bit. Now to draw straight lines, all you have to do is click in the composition and
that is going to create an anchor point. So one single point currently. Now clicking up here
is going to draw a line between these two points. And once I add a third line, so when we go from one
dimension to two dimensions, you will see that after effects starts filling in this shape, which is the fill color that
we set here at the top. Now I can keep clicking to
continue drawing my shape. You can also draw it over itself because it jumps
to the next point. And here the first vertex. So the first vertex
that we actually click, the first anchor point
is highlighted here. And once you hover
your mouse over this, you will see a different cursor. You will see small little
circle icon next to the cursor. So when you click,
you actually close the path and now the
shape is complete. Once this shape is drawn, you can select these points and just click and
drag them around. If you want to add points, you can actually hover over the stroke and
just add one here, which I can then
also click and drag. And if you want
to delete points, you can hover over
one of the points holding the Control
key on Windows, command on Mac, and then
click to delete the point, and then the connection
is made with the next point in the line. Now, before I show you how to
create curves from scratch, I'm going to show you
how we can convert these straight lines to curves. So I'm going to hold the Alt key or the
Option key on Mac. And that is going to give me the convert anchor point tool, like this empty little triangle. And clicking on one
of these corners turns it into a Bezier curve, or what is known
as a Bezier curve. Now, the left part of
this curve is governed by this handle that I
have here on the left. And the right part is
governed by the right handle. And once I start clicking
and dragging this around, you'll see that it's
very difficult to influence one side
but not the other. Let's say I want this part of
the curve to stay the same, and I just want to
change this curve. Now using the Shift key, it gives us a little bit
more control over this. So you have a little
bit more control over which one you influence, but it's exceedingly difficult to actually do this properly. So often when I need to use something that I have
to draw with a pen, then I choose to draw it in Illustrator and
then just copy and paste this shape
into After Effects, which I will show you in
one of the next lessons. Holding Alt, you can click on these anchor points to
convert them to curves. And conversely, you
can Alt click on them again to convert
them to straight lines. So that's something
that you can do. If you accidentally click
and drag one of these, you can always Alt
click to turn it into a straight line or a curve. Now, I'm just going to
delete the shape layer by clicking on it in the layer
controls and pressing Delete. And now I'm going to show
you how to draw curves. And this is very inexact compare to how it
works in Illustrator, as I've said before. So I'm just going to
click here once to draw a single point and then move slightly to the right to approximately the
middle of the composition. And then instead of clicking, I'm going to click and drag. The behavior of this tool
is a bit odd at first. It takes some getting used to. Because if you drag
to the bottom right, the curve is actually going
to go to the top left. And drawing to the
top-left is going to displace the curve
to the bottom right. So it takes a bit of
practice to really get a feel for this
holding shift, you can draw the line exactly diagonally to create
an even curve, such as I have here. Now, in the other
Adobe programs, you would now see a preview of what your
next click is going to do. So there would be what is
called a rubber band element, which would display
the next curve. As once you click and drag
an anchor point like this, it doesn't just get one
handle for this side. It also gets a handle
for the next curve. So I'm going to click
a bit further on here. And that's going to
make the curve go down like this because this handle is expanded to the bottom right. Now, I can try to click and
drag this back in here. But that's also going to affect the other line if
you're not careful. So this is not very easy to
work with in my opinion. So I can just keep clicking
and sometimes clicking and dragging to give the
objects some curves. Let's say something like this. And clicking and
dragging on the first also allows me to
change this curve, but it's also
changing this curve. And that is just very inconvenient
behavior for this stool. That's just how it works
here in After Effects. In a later chapter, I'm going
to show you how you can use the pen tool to create
masks over actual video. But this is basically
how the tool works. The after-effects version
of the pen tool is not the best or most
comprehensive version. But if you need to
freehand draw a shape, this is a tool that you
can experiment with.
49. 4.13-Copy from Illustrator: In this lesson, I'm going
to show you how we can copy a shape from Illustrator
into After Effects. So in the exercise
files of this chapter, you will find this file 4.13
copy from Illustrator.ai. And in this document, I've created this
relatively simple shape, which would be more
difficult to draw in After Effects because of
how the pen tool works, as I've explained in
the previous lesson. Now here in Illustrator, I'm just going to
copy this shape by pressing Control C or
Command Z on the Mac. And then I'm going to go right
back to After Effects in the composition 4.13
copy from Illustrator. Now, this initially
cannot just be pasted, so I can't just press control V and get it into
this composition. For this, I need a shape layer
to apply this shape too. So what I'm gonna do is grab the pen tool here at the top. And I'm just going to
create a single vertex by clicking approximately here, that just creates a single
point in a shape layer. And now I'm going to
paste in the shape using control V. So now
I've used Control V. And if you look at the
contents we have here, shape one and path one that I can just edit as I see fit
here in After Effects. So I can actually delete
anchor points if I so choose, I can convert anchor
points if I so choose by just Alt,
clicking on these. And that actually converts
all of them in this case. But you can get those shapes from Illustrator
into After Effects, provided that they
are not too complex. If it's a more complex shape, there is a different, more productive way or
a more efficient way of converting your
illustrator layers into after-effects shapes, which I will show you
in the next lesson.
50. 4.14-Shapes from vector layers: Drawing your artwork in
Illustrator before you import it into After Effects
and start animating. It is a very pleasant
way of working because the After Effects composition is actually linked to
the Illustrator file. So any edits that you do to the Illustrator file will also be reflected in After Effects. But sometimes you wish to have the shape editing tools of
After Effects available for things that you've drawn in Illustrator because
you want to animate certain properties or apply these different operators
that we've looked at in the previous
lessons of this chapter. So what I'm going
to show you now is importing an Illustrator
document and then converting that
Illustrator artwork into After Effects shapes. So what I'm gonna do is
just double-click on an empty space in the
project panel here. And that's going to open
the import dialog box. And in the exercise
files you will find 4.14 shapes from vector layers. And I'm just going to
click Import here. And then I'm going
to import it as a composition with Footage
Dimensions, layer size. And once I click Okay, that's going to give
me a new composition. And what you will also see
in the project panel is that this folder was created and this folder contains all
the individual layers of this Illustrator document. So I'm just going to
open this composition by double-clicking it
in the project panel. And here we have these
illustrator layers, which you didn't see the illustrator layers in a previous lesson
about parenting? I believe it was,
um, but though, that document was based on
an Illustrator document, which you can see here. So here I have all
these different layers. And having these items on
different layers allows me to animate them individually
in After Effects. Now, let's say I want to create actual shapes from these illustrator layers
within After Effects. So I can use all
the shape editing tools and operators
that After Effects has. What I can do then is select all of these layers by
either clicking and dragging or Control
a or Command J on the Mac to select everything. And then I can
right-click on either of them and then go into Create. And then I can choose Create
Shapes from Vector Layer. And once I click that after
effects actually traces the illustrator layers and turns them into After Effects shapes. Here. And I now have the
option to change this object, fill or stroke, or add different
operators if I so choose so I can
apply a pucker and bloat to it to get kind of a
different ring shape here. So you can use all of those
default tools for shapes on these illustrator
layers because they are now converted
to After Effects vector. What I'm doing now
is just selecting these illustrator
layers which are automatically hidden when
you use this function when you convert to
aftereffect shapes. Because I don't need them
in my composition anymore. So I'm just going to select all the illustrator layers and then press delete
to get rid of them. And then I just have my
aftereffects, shapes.
51. 4.15-Shapes from text: In this final lesson
of this chapter, I just quickly want to
show you that you can also convert editable text into actual shapes so
that you can apply operators to them or animate
their various properties. So here in the composition
for 0.15 shapes from texts, I have this text
layer which just says After Effects,
as you can read. Now, I want to show
you that you can just edit this text by double-clicking
in it if you so choose. Like I said, more about
that in the next chapter. But for now I'm just
going to switch back to the Selection tool so that the layer is selected
and not the text itself. Now, to convert this text
into shapes so that we can start applying our
operators and animations. We can right-click on the layer, in the layer controls, then go into Create, and then you can choose
Create Shapes from text. There's also create
masks from texts, but we will be
looking at that in the chapter about adding masks. So create shapes from texts. It actually hides the
texts layer itself. And now it's displaying this
after-effects outlines. And After Effects outlines is the name of this layer because that's what the
actual text says. Said, at least because now it
is no longer editable text. It is just a collection of
shapes which look like text. So if I expand the contents of this shape layer because it is a shape layer. Now you see the
individual letters here. Now these individual
letters are actually comprised of several
shapes due to how masking or building shapes
works in After Effects. So this a is not just
the shape of an a, it also contains a triangle
for this hole in the a, Let's say composite shapes like that actually contains
several different aspects. So expanding this a, you can see that I can
hide this top one. And that is going to just
show me the triangle. And I can hide this bottom one. And that's actually going
to hide the triangle. So this is a composite shape, which we already looked at the different modes of adding
shapes to other shapes. And that is how these shape
layers are comprised. So now that you have these Shape Outlines or
these texts outlines, you can change their fill color. You can go into the
Add menu and add different modifiers if you want to add some
funky effects to it. And it just gives you a bit more flexibility for
animating certain kinds of things that are
different from what you can actually animate
using the text animators, which we will be looking
at in the next chapter.
52. 5.1-Type tool overview: In this chapter, I'm going
to be teaching you all about working with text
in After Effects. And to get started, I
have here the composition 5.1 text layer overview
in the project file, Chapter five, main file. Now, before we get
started with texts, I just want to make sure
that our text is going to look the same when we
start entering it. So what I'm gonna do is just activate the Type
Tool here at the top. And if you are in the
default workspace, you will have a character
panel and a Paragraph panel. And what I want to do is reset the character
and paragraph panels that we have to
default formatting for text. So to do that, I can go into this little hamburger
menu at the top right of the character
panel and then go all the way to the bottom where
it says reset characters. If you do that, you
get the default Times New Roman
regular in 36 pixels. And the default text color
should also be set to black. If it's not set to black, you can always click
on the fill color of the text and just put the color picker at
the bottom-left. I'm going to click
OK out of there. And then I also wanted to
reset the paragraph options. So I'm going to go into
the paragraph panel, go into the menu, and then choose Reset paragraph to get the default options. Now, by the way, you can hold down the mouse on the type tool
here at the top, and also choose a
vertical type tool. So if you want to
type text vertically, that is something you can do using that tool instead
of having to put every character on its own line with the horizontal type tool. Now, there are two
ways of entering text in After Effects. What I can do is either click in the composition and
that's going to give me an infinite
line of text. So this line will keep going to infinity and it
doesn't break to a new line. Let's say I'm just
going to cancel my text input for now
by pressing Escape. And that just deletes
the text layer. So that just gets rid of the
texts that I was entering. What you can also do
instead of just clicking is clicking and dragging
for a text frame. So this is a paragraph text and the text is going to
break to a new line, to the next line. When it hits the edge
of this text frame, you can still change the size and orientation of this
extreme if you want, while you are still
entering the text. So that's something
useful if you want the text to only
cover a certain area. For now, I'm going
to press Escape again and then click once. And then I'm just going to
type After Effects, CC 2022. Now, let's say I want to
format this text a little. What I'm gonna do then is
click within the text three times to select all
the text on this line. And then we're going to look
at the character panel. The Character panel
contains many of the same options that you
might know from Illustrator, Photoshop, and InDesign
with a few exceptions. Now, the first dialogue
here is to choose a font. You can expand this list for
a gigantic list of fonts, all the fonts available on your system or through
Creative Cloud, Adobe fonts, which I will
get to in a later video. You can also do is
just click inside of the current font and
then search for fonts. So I'm going to look
for Myriad Pro, and that's m, y are a D. And I'm going to scroll down to Myriad Pro Regular for now. And then show you
that you can also change the text color over here. So I can click on
this black fill that's gonna give
me the color picker pop up and then I can pick
a lighter blue like so. What you can also do
in After Effects, and I'm just going to
zoom in a little bit using the mouse wheel is apply a stroke texts so that there is a stroke
along each character. So for that, I'm going to put the stroke at the front here by clicking it and then clicking it again to get the color picker. And I'm just going to pick a lighter red here
and then click Okay. And as you can see,
the text is now outlined with a red stroke. The thickness of this stroke is determined a bit further
down in the dialog box. It's currently set to one pixel. You can also change the
size of the stroke. For now, I don't really want
a stroke over my texts. I'm just gonna get
rid of it by dragging it all the way to the left. Now we have here the text size, which in After Effects
is pixel-based. So it's not based on points like in the other
Adobe programs, but it is based on pixels. And I can increase
the text size to something like 125 pixels. And that's going to give
a slightly bigger text. The dialog next to the text
size is the line-height, which currently we cannot see because we only have one line. So to demonstrate this, I'm just going to go
into the text frame by clicking once so
that the text cursor is right in front of
CC and then press Enter to put this
text on its own line. Now, selecting these. Lines. Again, I can now
increase or decrease the line-height by just
clicking and dragging this value or entering
something manually. And I'm just gonna go back
to steps using Control Z. Then we end up at the
kerning of the text. And kerning is a bit of a
strange concept for most. Basically with kerning, you can determine individual
character distances. So let's say, I think that these two letters are
too close together. What I can do then is just grabbed this value and
click and drag it. And then I can change the
individual character distances. So if the text doesn't
look quite right to you and you want to change the individual
character distance. That's something you can use
with the kerning dialog box. Now, you can also use
the Alt keys for this. So if you hold down
Alt and then use the left arrow key and
the right arrow key. You can also change the kerning as long as the texts
is not selected. Now, selecting the text again
by clicking three times, I am going to look at the
tracking of the text. By changing the tracking, you change the distances of
all selected characters. So now I can space them
out at the same time. When you have a
selection of texts, as I currently do, you can use Alt
and the arrow keys to change the
tracking of the text. So it's a contextual
shortcut that depends on whether or not you have
any text selected. We already looked at
the stroke options. So now we're going to look
at the scaling options, which is something
that I have never used in any of the
Adobe programs. They all offer the option
to scale characters. But if you don't scale the
width along with the height, then you will get
distorted text. That doesn't look right. So if you want larger texts, just increase the pixel size and don't use the scale values. So let's say I'm going to
put the vertical scale at 120%, or let's say 150. That's just going to stretch
the text vertically by 50%. The same goes for the
horizontal stretch. So I can enter a 150
and that's just going to scale the texts over
the horizontal axis. Here we have a baseline shift enabling me to put the text
higher on the baseline. And that's not particularly useful in this
particular situation. But if you want certain texts to stay higher on the baseline, That's something
you can do by just selecting the relevant text. Then we have a Zoom, a value which is unique
to After Effects. And it is basically like
tracking and kerning. It's this based on a percentage, percentage value instead
of a pixel value. So the Summa is
currently set to 0%. If I start increasing
this value, you will see that the individual
character spacings are decreased by 100 percent. So they are 100% closer together than they
are at a value of 0%. These are all
dropdowns by the way. So you can also
choose exact values if you don't want to
enter them manually. Now, we have some toggles
here at the bottom, which you might also know
from other Adobe programs, I can enable faux bold, which just makes the
text a bit thicker. We also have faux italic, which rotates the
text on the baseline. So if you don't have a bold
variant of a certain font, or the boldest, not bold enough. Or if you don't have an
italicized variant of a text, a font, then you can
use these options. I would advise against it. If you want to use italic text, just use the italic
version of the font. If you really don't have
one available and you insist on having italic text, you can use this toggle. We have here all caps, which turns all the letters
into capital letters. We also have small caps, which keeps the
capital letters as regular capital letters and small letters as smaller
capital letters, which is something I use quite often because I like
the way it looks. We also have
superscript which puts the text higher on the baseline and decreases the scale
by 70%, I believe it is. And then we also have
a subscript which puts the texts lower on the line
and also scales it by 70%. So you would use these
for like source listing sources or you would use the super script
for measurements, for example, square
meters or cubic kilometers or
whatever your fancy. Now, we also have some
paragraph options here to demonstrate these
is pretty straightforward. Currently the text
is left aligned, and that means that if I want, I'm going to do is
just control C. The texts, just copy it. Enter a new line
by pressing Enter. And I am just going to remove the cc from the bottom line and effects from
the middle line. Just so we have some
different formatting here so that you can see the
differences in formatting. Now, the paragraph rules are applied to the paragraph
that you are currently in. Here, I essentially have
three paragraphs because each heart enter is
a new paragraph. So what I can do here is center the text and that
makes it jumped to the left, which is a bit odd, but that's just how
texts alignment works in Photoshop and After Effects. I can also write align the text and that makes
it jumped a bit further, meaning you have
to actually move the text frame to get it
where you want to be. We also have the justify
options which are currently not available because I'm
working with point text. So the line texts spread
over several lines. If I had a text frame, those options would
be available. Now, we have here a few
options for indentations. So I can indent the
texts from the left. I can also indent the
text from the right, which currently doesn't
actually work because this is essentially an
infinite text frame all the way to off-screen. I can also indent the
space before a paragraph, which I can
demonstrate by putting the text cursor in
the second paragraph. So increasing this increases the spacing with the
previous paragraph. And then we also
have a space after, which increases the space
after the current paragraph. Now, I don't recommend
working with a lot of text or large texts, texts in After Effects because you want
to keep it legible and you don't want to make
people read too much. I mean, video is a visual
communication tool that you can use and
relying on a lot of texts tends to
tire people out. So I would recommend against
using large areas of texts. But if you do have
to use a lot of texts than these options
are available to you. Now, once you're satisfied
with your texts, you can switch to any other tool and that is
going to commit the text. You can also press Control
Enter to confirm a text. So if I'm inside a text frame, I can press Control Enter, and that confirms my text entry. If you want to edit the text, you can either double-click the text layer here in
the layer controls. You can also, when you have
the selection tool active, Double-click on a text
to get into the editing. Or you can just
grab the type tool and click in the text once. And that also puts you
in the text editing. Those are basically
the text options that we have in After Effects. In the next video, we're going to get into
actually animating our text.
53. 5.2-Animating text: In this lesson, we're going
to start animating our text. And animating texts can
be done in a few ways. Inside of After Effects. I have here the composition five-point to animating texts. And here I have this
text frame that we made in the previous lesson. And I'm going to look
at the layer controls where we have two drop-downs
for this text layer, we have a text drop-down, which we will be
looking at later, and a Transform drop-down. Now I can expand this
Transform drop-down. And here we see the same
layer controls that we've had for any other layer
in this course so far. We have anchor point, position, scale, rotation, and opacity. So these are the T
key for opacity. P for position, S for scale, R for rotation, and
a for anchor point. So these are no different
than any of the other layer controls that
we've looked at so far. So you will see once I
start changing the opacity, the opacity of the entire
texts layer changes, so everything is
influenced all at once. Now, what is often done in After Effects for a bit more
of a dynamic type of animation is animate based on characters or words or lines. And that's something
you can absolutely do without adding any
real effects to this layer by looking at adding animators to
our texts layers. Animators can be
added by clicking this button here in the layer controls where it says animate. And when you click Animate, you can choose different
types of animators. I have here, the spatial and rotation and opacity animator. So Opacity, position
and scale skew. Skew is actually tilting
it on the baseline. Or I can add an animator for
all of these properties. I can animate, fill color, stroke color, stroke width, and different texts
properties such as the tracking or
the line spacing, which you can also use to make animating
texts more dynamic. For now, we're going
to keep it simple and I'm just going to
choose Opacity. So I want to animate
these characters, interview one after the
other and not all at once, like I wouldn't be able to
do with the layer controls. So now I have here an animator, and the animator
contains two items, the Range Selector
and an opacity value. The currently the opacity of all the characters
is set to 100%. So when I start decreasing this, you will see all of the
characters disappear. And that's what we
want. And that's also actually not what
we are going to keyframe here because I want to animate them separately and not
all at the same time. So now we're going to look
at the range selector. And this hearkens back to
what I was telling you with the trim paths operator that we worked with in
the previous chapter, because we have a start
value and an end value. Now, when these
properties are disparate, so when they are not the same, the text just has the opacity value that
we've chosen here. But when I start bringing
these closer together, so when I start bringing
the start value up, you will see that it
increases which percent, what percentage of the
text is actually visible? So when I put it at 50, 50% percent of all the characters
are currently in view. And this is something we can keyframe because we
have a stopwatch here. So at the beginning
of the timeline, I'm just going to click
the Start stopwatch. I'm gonna go to 1 second in the timeline and then I'm going to change the value to 100. And now when I
play the timeline, you will see that
all the characters animate one after the other, instead of at the same time, these animations work
like any other animation. If you want to lengthen it, I can just move this
keyframe to the right. And if I want to
shorten the animation, I can move it to the left. Though. I'm just going to undo those last two steps
using Control Z. Now I'm going to add a
secondary animation for which I would like to have
a secondary animator. So I don't want this
animator to have the same range selector
because I might want to do something slightly
different with the timing of the animation. And the range selector
is what we keyframes. So I cannot have two different range selectors
for the same animator. So what I'm gonna do is
go up to where it says animate and make sure that the animator here
is not selected. So I want this animator
not to be selected. So I'm just going to click
on the text here at the top. Then I can go to animate
and I can choose position. Now, I get a secondary
animator here in the layer controls with
its own arranged selector. And what am I gonna
do is placed all of the texts slightly
higher than it is now. Just for clarity sake, I'm going to move the
timeline forward a little bit so the text
is actually visible. So after where the opacity
animation takes place, so I'm going to click
and drag the y value. So the secondary position value. To the left to about minus
140 to place it further upwards because a lower y-value for position means that it's
higher in the composition. And now I'm gonna move
back to the start of the timeline and grabbed
the Range Selector. And when I move the start value, wait, let me just go a bit forward so the character
is actually visible. You will see that
I can animate them downwards by using
this start value. So bringing the
start and end values to the same value basically undoes what you do
with these animators. So I'm going to keyframe
the start here. At 0 seconds. I'm gonna go to 1 second, and then I'm going to change
the start value to 100. And what you will now
see is that while the opacity animation
is taking place, the position animation
also takes place. So both of these animators
are working at the same time. Now, what I could do is start the position animation slightly later than the
opacity animation, which will give us this
kind of effect like the Texas really dropping
down out of nothing. So this is a cool little
trick that you can do and you can add animators
for any property, property that you want. It's still animate
their position. I could still animate
their scale if I wanted. You can add these animators
and just play around with the keyframes that you add to the range selector to
get varying results. And the variation that you can make with this
is basically infinite because you can add
several animators with the same
property, for example. So I could first animate
their position in this way, and then later on
in the timeline, I can animate their
position another way using a different animators. So this is very flexible, a bit in transparent
as a new user. But once you get the hang of what this range
selector actually does, so the start and the end value, it becomes so
useful that there's basically nothing
concerning texts that you can't animate. Another thing I want
to show you is that currently we are animating
based on characters. Each character is
animating individually. It's also possible
to animate based on words or based on lines. And to do that, you
have to go into the advanced options
of the range selector. So I'm just gonna go into the Advanced tab of
the range selector. And here I have based
on set two characters, which is the default. So I'm just going to expand this and then I can choose words. Because there is a
secondary animation. I also want that animator, that range selector
to be set to words. So I'm going to expand
animator to go into advanced and also set this
from characters to words. And now we get this effect. It's not very smooth. I could add some easing to
this position, for example. But this is the basics of how these animators
work in After Effects. Now, just for clarity sake, I'm going to remove animator, one animator to actually, so I'm going to click,
Animate or two, press Delete, and then we only have our opacity animation. Now, I want to show you what
happens when you go for different values with
these start and end. So let's say I'm
going to delete, delete the keyframes
for the start. So I'm just going to
click the stopwatch and watch what happens
when I click and drag the end towards 0 instead
of start towards 100. You will see that I'm
animating from right to left. So that is also absolutely
something you can do. Once these values are both at 0, you can then again animate the start to make it go
from left to right again. So as long as you put some
keyframes on these values, you can just play around
with them and get them into view and out of
you in different ways.
54. 5.3-Presets: After Effects contains
a large library of text animation presets that you can use from within the program. And you will find those in the
Effects and Presets panel, which should be part of
your default workspace. If this panel is not
present in your interface, you can always go into the
Window menu and then choose Effects and Presets
to get it part of the panels here on the right. So the texts presets, you will find in the animation presets the top folder here. And then you can
go into presets, and then you can go into text. Then you can go to any of
these different categories. But we're going to
focus on animate in. Now, these effects, unfortunately
cannot be previewed. You have to actually
apply them for you to see what they actually
do here in After Effects. So what I can do
here is grab center, center, spiral for example. And I'm just going
to click and drag it to this text frame here. And that is going to automatically
apply the animation. That animation looks like this. This is not something
I would ever use in a practical context, but this is just an example. You can't tell what they
actually do before you apply them unless you have
Adobe Bridge installed. By the way, I just use Control Z to undo applying the effect. Now, I want to show
you how you are, how you can be able to
preview those instead of going through the whole list looking for something
that you like. And by the way, there are not many in this list that I like. I find a lot of them too busy, a little bit PowerPoint, if you know what I mean. But they are available to you in the program for
different purposes. So I just want to show you this for the sake of
being comprehensive. So to access the preview, I'm going to go into the hamburger menu of the
effects and presets panel. And then I can choose
Browse presets. And that's going to open
Adobe Bridge and bring me to the Effects folder,
the presets folder. Here I can click on
Text and animate in. And now I have here these
different items and I can click these to get a preview
in the preview panel. Here, I can look for
something that I like. Let's say I am going to choose
the fade up characters, which is a simple
opacity animation. And when I want to use this, I can then go back into
After Effects and just look for fade up characters. Then I'm going to click and
drag it to the text layer. Now the animation
is already applied. So when I play the animation, we get this and it takes
place over two seconds. Now, what I would like to show you is that
these presets are based on the exact
same principles that we looked at in
the previous lesson. So these are animators and range selectors that are
automatically applied for you. So here when I expand
the text menu, I can go into the animator. And here I have a
Range Selector. And this is the value that
is actually keyframes. So it's basically exactly
the same animation as we made in the
previous lesson. Initially, at least with
the opacity animation, except that it takes place over two seconds instead of one. So if I want to increase
the speed of the animation, I just click and drag
the secondary keyframe out to 1 second. And let me be a little more
exact with those values. Okay, there we go. Now, even though this
preset is applied, I can still add extra animators
to get different results. So let's say I choose Animate
and then I choose scale. Now I have a separate
animator and I'm going to animate from 0%. So I'm just going to change
the scale values to 0. And if you change one,
you can change the other automatically because of
this chain link icon. And then I'm going
to go into the range selector and I'm going
to keyframe to start. Go to 1 second, and then just go to 100. You will see that
now the characters scale from 0 to
100% individually. However, it does scale from the actual center
of our composition. You can't really tell because the animation takes
place so quickly. But these characters, like from the left side
of the animation, they scale in from over here. And when we get to the 50% mark, they start scaling that way, which is not exactly
what I would like. So what I'm actually
going to do is go into the path options here. Excuse me. We're going to go
into more options. And I'm going to change
the anchor point grouping from line to character. And now they scale individually. That's something I was
actually planning to show you in a different video,
the point grouping. But this actually
works quite nicely. I can also choose a word. And what you'll see
then is that they scale from the
center of the word, which can also be a cool effect. As long as the words
aren't too long. But I think for now, I prefer
them on character level. This actually only
applies to animation and rotation because the anchor point grouping determines where each individual characters
anchor point is. So with it's set to character, it's at the bottom of each
individual character. And when its head toward it's
in the central of the word. And when it's at the line, it's set to the
center of the line. So a bit of an addendum
as, as you can see, but it's useful to know
where these animations are actually coming from and what these
presets actually do. I don't use these presets. I have other ways of animating texts also besides
what we've seen so far. But I will show you those in the chapter about plug-ins
for after effects, where we will look at
animation composer.
55. 6.1-About 3D in After Effects: In this chapter, we're
gonna be working with 3D. And in this first lesson, I'm just going to give you
a quick introduction on how 3D in After Effects
actually works. Essentially, what
we are getting is a third axis along which
we can transform objects. We've already looked
at the x-axis for the horizontal values and the y-axis for the
vertical values. So the third dimension, the dimension is
going to give us depth in our compositions
for layers that we make 3D. And that's something we
have to actively do, which we're going to
start with here in the composition 6.1 about
3D in, After Effects. To make a layer, 3D layer, we are going to look at this little switch here
in the layer controls, It's this little cube, the final column of these icons, let's say once I toggle this and the shape is
actually selected, you will see this widget pop-up. Now, this widget allows
me direct control over the object in
all three dimensions. I have here the green
arrow for the y-axis. I have the red arrow for the Z, for the x axis, we have here a blue arrow, which is currently not
very well visible. It's pointed towards our camera. So it's pointed
towards our view, which is why we cannot
accurately see it at the moment. Now, before we continue, I'm going to take a look at
some of the layer controls. So first I'm going to
press P for position. And you will note that in
addition to an X and a Y value, we now have a third
value for the zed axis. Now the Z position actually moves objects further
away from us if we increase it and
closer towards us or towards the camera
when we decrease it. So when I start increasing
this zed value, you will see the object shrink. And that's not because it's
scale is being changed. Its position in Z space, in 3D space is being changed, so it's being moved further
away from us at the moment. Once I start moving in closer, you will see that the size
appears to increase and that's because it's being brought
closer to the camera. So I'm just going to Control Z, those steps to get back to
the previous Z position of 0. And now we're going to
look at the rotation. And once, once we
press R for rotation, you will see some very
different values. The rotation value for
2D layers just has one rotation value for the
number of rotations and one value for the
number of degrees. Now, here we have
orientation and x rotation. Now, one of the examples
in this chapter, I will elaborate a
little bit about the difference between
orientation and extra rotation. Orientation is
basically a way to orient several objects
towards a certain angle. And it also caps
out at 360 degrees. So after 360, it goes back to 0. And the rotation value can
be any value that I want. Now, what you'll note
is that once I start rotating this object
along the y-axis, for example, you will
see that it has depth. So now it's rotated 68
degrees over the y-axis. And that gives me an angle
of view on the object, and that's something we
haven't seen before. And that also allows us to
see the z axis arrow here. So with the selection tool, I can click and drag
this arrow and I can move it along this axis. I can also rotate it
along any axis that I choose by grabbing this part
of the widget, the circle. I can also do that for the
y-axis and the x-axis. So I can rotate it in 3D space. I can also scale it in 3D space. So I can scale it up with
this little cube icon. I can also do that
over the zed axis, but that doesn't work with our current
composition settings, which we'll get to
in a later video. But I can scale it along the axes to get
different results. And that's basically what 3D is. We're adding a third dimension along which we can
transform objects. Now, you can always disabled
3D on a specific layer by just toggling this
and that turns it back into a 2D layer. Once you re-enable it, it doesn't remember its previous
transformation options. So that resets all
the transforms and possible animations that you have applied
with key-frames. Once you disabled 3D
and then re-enable it. So it's just like
adding key-frames. Once you click stopwatch
that has keyframes, you will delete those
keyframes and the same goes for 3D transforms. So that is the basics
of thinking in 3D, adding a third axis. And in the next video, I'm gonna talk to you about
navigating in 3D space.
56. 6.2-Navigating in 3D space: When you're working
in a 3D scene, not everything is
always as it seems. And to demonstrate this, I have created the
composition 6.2, navigating in 3D space, so we can actually start
moving around in 3D space. Now, I have here this rectangle that we also
saw in the previous lesson. And it's already a 3D object and its transform options are
all set to the default. Now, what I want to
show you is that there's actually
something here in the composition that
we are currently not seeing because of
our perspective, because we are looking
straight at this rectangle. And once we start changing
our angle of view, you will see that
there's actually something else in the scene. You wouldn't be able
to tell initially by looking at the layers
panel because I have put in some options to hide the layer
as best as I could. But what I'm gonna do here is
grab this tool at the top, the orbit around scene tool. You can also grab
the orbit around cursor or camera point
of interest tool. But we're just going to, I'm just gonna go with the orbit, orbit around siem tool for now. And using this tool, I
can click and drag and change my perspective
of the scene. So here we see that
there's actually a second rectangle in
front of this rectangle, which is slightly smaller, but it has a lower z position. So it's actually
closer to the camera. And depending on
your angle of view, it just appears to be
the same one rectangle, but it's actually two rectangles with one of them
moved in 3D space. Now, I've done this actually buy making the shy guy here active. So once I click this
little shy guy, the layer becomes visible again. And I had also locked the layer to make sure
that you didn't select it. Using the orbit
around scene tool. I can just orbit
around the scene and look at it from
different views. Now, there's no
real quick way to reset this default camera
to the default position. But I can go into the layer
menu here at the top, and then choose camera, and then reset default camera. And that's gonna give me
the normal default view. So if you're orbiting around
the scene with this tool, just to have a different look at where things are in 3D space, you can always get back to the
default camera by going to layer camera and then
reset default camera. Now, there are also
different views that we can approach here in the
composition view port. So currently the 3D view pop-up is set to the active camera. So that's just the default After Effects camera that we have
very little control over. One of the next videos I'm
going to teach you all about adding our own cameras and
changing their properties. But I can go here to a top view. And that gives me this view. And here in this view I can also see the
separate rectangles. So here is the larger rectangle and the ERC smaller rectangle, which is moved towards
the active camera. Here in these views, I can also manipulate them as I so choose, so I can move it closer or further away from
the active camera. I can rotate them. I can scale them,
whatever I like. You can also look at a scene
in two different views. So I can go where it says one view and I can
go to two views. And initially that gives me
a top view or a front view. But what I can then actually do is go here where
it says Default. And I can choose a top view for one and the front
view for another. And I can navigate
within these separately. So I can look at the scene from different perspectives
to see what my layers are actually doing. So here I have an
orthographic view, and here I have the top view. And if I start moving
it in the top view, you will also see it
move in the other view. So that is very useful if you're trying to build
a more complex scene. And you want to see
exactly what the distances of objects are in relation
to each other in 3D space.
57. 6.3-Setting up a camera: It's time to go
through how we set up our own cameras in
any given scene. I have here the composition 6.3, setting up a camera. And I have predefined
the parameters of this scene in a way that
we will recreate later. Basically what we're gonna do is take this Photoshop file, which consists of a background
along with a few dice, and make it look
like these dice are being thrown towards the
camera in slow motion. So that's something
we're gonna be doing in this chapter as a
final exercise. But what I want to show
you is how to set up a camera in a scene like this. And to just show you what's
going on in this scene, I'm going to go into a top view. So I'm gonna go
here where it says active camera and then
I'm gonna go to top. And I'm just going
to scroll down a little bit to zoom out. Here you will see the
actual background image and I can click on that and then confirm in the layers panel that this is actually
the correct layer. I have here, the dice
number four, 321. So the lower the number, the closer the object
is towards the camera, according to how I
built this scene. And how I built the scene
actually is through Photoshop. I had several images of my friend here
throwing these dice, and I isolated the dice in Photoshop and put them
on their own layers, allowing me to animate them
separately in After Effects. Now, to set up a camera that we can move through this scene, I'm going to go into the
layer menu here at the top, and then go to new and
then choose camera. Alternatively, on Windows you can press Control Alt Shift C or Command Option
Shift C on the Mac. And that brings us into this
new camera dialogue box. And this dialogue box can
be a little intimidating, especially if you don't know
anything about cameras. But it's really not as complicated as it
might seem initially. The first thing we want
to do is determine what type of camera
that we want. And we can choose between a one node camera and
a two-node camera. Now, a one-node camera
orients around itself. So if you rotate, the one-node camera
is just going to rotate in place like
it's on a tripod. Now, the two-node camera orients around a so-called
point of interest. And that is the camera that I prefer to use because
it's just easier to manipulate this point
of interests instead of manipulating
the camera itself. So I usually go for
the two-node camera. I encourage you to experiment with both types
and just play with their rotations to see how they actually work and
what you can do with them. The second important option is the preset that you choose. The preset allows you to
choose a focal length. The lower numbers are
very wide angle lenses. The higher numbers
are more zoomed in. So with a lower number
such as the 20 millimeter, for example, you will get a
much wider field of view. So you will get more in frame then with a 50
millimeter camera. Now, 3D in After Effects
is very often about hiding the seams of your
illusion, Let's say. So I tend to go for a 50
or 80 millimeter preset. So you don't really have to
spend a lot of effort of hiding the fact that
it's not actual 3D, because 3D in After
Effects by default is creating basically a
cardboard cutout version of a 3D object. It's not actually 3D. It's what we call 2.5 D because it doesn't actually have any dimensions over the z axis. These 3D objects, at least not in the
classic 3D renderer, which I will talk about
in a future video. So I tend to be a
little more zoomed in, not to break the illusion
of the 3D effect, but for demonstration purposes, I'm just gonna go with a 20 millimeter preset and
that determines the zoom, the film size, the
focal length, etc. It's all predetermined
for me in that way. So now when I click Okay, we will switch to
this other camera. And the view also
switches to this camera. The camera that we just added overrides the default camera. As you can see, we can see a lot more of our scene in this way. Once I grabbed the
orbit around siem tool, you will see that we have
a very wide field of view. And even despite the fact that we're super close to this dice, we can still see a lot of
the background going on. I'm just going to Control
Z, that camera movement. I also could have gone to layer camera and then
reset camera one. And now I want to show
you what happens once we switch to a 50
millimeter preset. We don't have to create
a new camera for that. I can just double-click
the camera that's here in the layers. And then I can go into the
presets and choose a 50. And then I'm going
to click Okay. And now we have this setup here. The camera is a little
bit to punched in. So what I can do is grab the camera's position and
just click and drag it to the left until everything appears to
fit in the scene again. So don't wanna go too far. I don't want to punch out too far because then you
start seeing the seams, as I said earlier. But you will note
that when I click and drag it to the right, again, it looks like we're moving
through this scene and that's something I'm going to
teach you how to do in the next video.
58. 6.4-Setting up a scene in 3D: In this lesson, we are going
to set up a scene in 3D. So I have here the composition 6 for setting up a scene in 3D, which is basically the
same document as before. It just has these
Photoshop layers, but these layers are not yet 3D. The scene does not
contain a camera. And because these objects
are not in 3D yet, they also don't have
different Z positions. So that, but we can
animate through the scene. That's what we're gonna
be doing in this lesson. The first thing I wanna do
is create the 3D layers. So I'm just going to
click and drag over the 3D column here to
make these layers 3D. By the way, this is a
Photoshop document that I have placed in after effects and that puts the
orientation points, so the anchor point of the object in the center
of the composition. And that actually helps us
for this particular scene. And you will notice
why in a moment. I'll also just gonna
go ahead and create the camera because
then I can see where I actually need
to place these objects. So I'm gonna go into
layer new camera. And I'm just going to
choose the 50 millimeter preset and name it Camera one in a
two-node camera setup. So then I'm just
going to click Okay, so now we have our camera. We also seeing through
this camera currently, which I can also see here
in the camera controls. And now I want to go to a top view of the scene in a
second window for a moment. So I'm just gonna go
here where it says one view and then I'm
gonna go to two views. And the other view is
automatically a top view. So that's useful in this case. All of these layers have the
same position at the moment, which is 0 pixels. And I can visualize that by
selecting all these layers, by clicking and dragging in the layer controls and
pressing P for position, they all have the
exact same position. So 960 over the x-axis, 640 over the y axis, and 0 on the z axis. And to create these, this parallax 3D effect, about which I will talk a
bit more in a future video. We need to move these
layers in 3D space. And what we're gonna do is
put the background layer, the actual image of my friend Michael throwing the
dice all the way to the back and then create
depth by placing this, these dice on several
different Z positions. After which we will move the
camera through the scene. So I'm gonna click on
the original layer, the background layer. And then I'm just going to
click on the Z position. And I'm going to move
this to initially, let's say a thousand, and that moves it further
away from the camera. And I'm noticing that I could
move it a bit further away. So let's go to 2
thousand actually. Now, obviously, this
image no longer fills the frame and that
is something that we have to take into
account and correct. And by the way, here, on the top view, you will now see that this layer is all
the way to the back. So to correct this, I am actually going to scale the layer until it
fills the frame again. So I'm going to press S for scale with this original
layer selected. And I'm just going
to scale it up to fill the frame
again, side-to-side. Okay, and that's our
first layer setup. Then I'm gonna go to
the first dice and I'm going to be working from top
to bottom for these layers. So I'm going to give die
one a very low, As I said, position die to a
slightly less slow, slightly higher here
is that position. And the same goes for
these other three. So I'm going to create
different layers of depth to emphasize
the effect. So I'm gonna go to die one, and I'm going to put this
as minus 1 thousand. And that's going to move
it closer to the camera, as we will see here in the
top view of our scene. Then I'm gonna go to die too, and I'm gonna give
this minus 750. So it's slightly
closer to the camera. And then I'm gonna
give die three minus 500 and die for minus 250. These values, values
are arbitrary. They are not exact, Let's say. But I also need to
correct their scales to fit this scene better because
with dye one selected, I can zoom out here
a little bit in this front view of camera one. And I will see that
the bounding box of the layer is much too large. So I'm just going to grab
the scale for this layer. And I'm just going to
scale it down until it fills the composition in
the width of it again. Then I'm gonna go
to die number two, and I'm going to
press S for scale. And I'm going to scale it down until it fills the width
of my scene again. Then I'm gonna go to die
three and do the same thing. Scale it down, and die for, requires the least scaling because it's furthest
away from the camera. And now we have our scene setup. And in the next video, I'm gonna show you how
to animate the camera.
59. 6.5-Animating the camera: In this lesson, we're
going to start animating our camera through
the scene and also give some animation
to the dice to make it look like they are
spinning a little bit. For that, I'm just going
to grab the camera here and I'm going to
grab its position. And because a camera is
a 3D object by default, we have an x position, y position, and a z position. Now, the zip position of this
camera is a lot lower than these position of our layers
here at 20 minus 2666.7. And that's because of the
cameras settings that we chose with the 50
millimeter preset. Now, what I'm gonna do is
just keyframe the position here and then move to five
seconds and the timeline, because let's say I want to
make a 5 second animation. I'm also going to then
grab the Z position. And I'm just going
to keep clicking and dragging it to the right until both dice at the front
or almost out of frame. So to about here at
minus 1900, let's say. So I'm just going to enter minus 1900 to keep things simple. And now what you will see
when I play the timeline is we look like we're
moving through the dice, or the dice are moving past us and we are moving
slightly towards them. And you will also
see this here at the top of the composition, at the top view. So we are moving through the dice layers to the
background, Let's say. Now to give the dice a
little bit of rotation, I'm just going to start with dye one and grab the rotation value. And what I want is not to rotate them around the
center of the composition. I want to rotate them
around their own center. So what I'm gonna do is
grab the anchor point tool. And I'm just going to move
the anchor point using the on-screen widget
to what would be approximately the center
of gravity for this die. Then I'm going to
keyframe the z rotation. Why the z rotation
and not the x and y. I will show you when I
start rotating the x value, it appears flat because
this is an actual 3D. It's like a cardboard cutout, like I said in the
previous lesson. So the same goes for the y-axis. And I can play with these
values a little bit, but as soon as you go too far, you break the illusion
of it actually being 3D. So you don't want
to overdo that. And speaking of
not overdoing it, I'm just going to keyframe
the Z position from the beginning and then
go to five seconds. And I'm just going to
rotate it ever so slightly. So let's say something
like 15 degrees. Approximately 15 degrees. Then I'm just going to preview, preview the animation
by going to the beginning and playing it. Okay, That is fair enough. Then we're going to
go to die number two. So I'm just going to
grab the rotation. And again, I want
the anchor point to be at the center of the die. So I'm just going to
click and drag this over. Now I can rotate it in place. So I'm going to
keyframe the zed, zed rotation and just go to five seconds and just
rotate it a bit. This one, I'm gonna go to about 60 degrees,
something like that. And then playing the
animation makes it look like the dye is rotating. I'm gonna do the same thing for die number three
and number four. So I'm just going to grab
the rotation keyframe, the z rotation. But first we have to
correct its anchor point. And I'm just going to
double-check which die, die it actually is by disabling the icon for di three so that I'm sure that I'm working
on the right layer. Then I'm just going
to click and drag the anchor point to the proper location
that you want to do this before you start animating the position or
rotation of an object. So I'm going to keyframe the
Z position at 0 seconds, move to five seconds, and I'm going to rotate it, let's say about 60
degrees as well. Let's say 45. Okay. Then we have this. And the final die,
die number four. I'm just going to grab
the rotation with R. Then I want to correct its anchor points
to the proper die. The singular of dice is dy, which a lot of people
apparently do not know. Then I'm going to keyframe the z rotation of
die number four. Then I'm just going to
rotate it the other way, I guess, by about 45 degrees. Now we have this animation.
60. 6.6-Depth of field: In this lesson, I want
to tell you something about depth of field
in After Effects. Depth of field is a
relatively complex topic that has to do with how actual
cameras and camera lenses work. Basically debt the
field allows you to blur a background
or a foreground, depending on the camera
settings and in After Effects, you can simulate those
settings and change how objects appear to
be in or out of focus. Now what you should
know about this image is that it already
has a lot of depth. The depth of field. I photographed this on a, I believe, a 12th
millimeter lens. So that is extremely wide
angle with aperture of f 2.8. If those terms mean
anything to you, like, it's a very wide angle lens with a relatively large amount of depth of field or a
wide depth of field. So I'm going to show you how to simulate that in After Effects. And what we're gonna
do is make this dye, this dye here, the
focus objects. So I want this object
to remain in focus. Now, the first thing I
have to do is go into the Camera options
of camera one, then enable depth of field
which is currently set to off. It's off by default. And then clicking this value and nothing initially
seems to change, Even if I zoom in,
you don't really see the focus of the scene changing. Now, that is determined by the amount set for the aperture, which is currently
set to 25.3 pixels. Now, notice what happens when I start increasing this value. So the scene appears to get
more and more out of focus. So the amount of blur
is determined by how, how high the aperture
is currently set. What is being focused on is dependent on the focus distance. So I can change this
focus distance to get objects more or less
into clear view. With a lower distance. The dice at the front here
will become more in-focus. And once I start
increasing the value, the actual background
becomes more in-focus. So you have a lot of control
over the depth of the focus. Now, note that the
focus will not change or the focus distance
will not change by default, at least when the objects
appear to move through space. So the focus distance remains constant regardless of the
position of the cameras. So we are moving through
different levels of focus because the focus
distance is set to this value. And if the position of
the camera changes, that does not change the focus distance because
there's no auto-focus here, like there would be on a camera. In other 3D programs
such as blender, you can actually very
easily create an autofocus. And after effects has
some, something similar. But it works in a less, slightly less flexible way because it's dependent
on expressions. So what I'm gonna
do here is press Control a and then U to
collapse all the layer options. And I want to link the focus of the camera to die number two. So I won't die number two
to always be in focus. Or actually what we
could do is connected to the background, let's say. So I'm going to select the camera which has the
depth of field enabled, and then select original. And what I'm gonna
do now is go up into the Layer menu and then go to
camera here at the bottom. And then link focus
distance to layer. And then when I click Okay, you will see that the
dice are extremely out-of-focus and the background is as in-focus as it can be. It doesn't appear
to be in focus, but that's just how the
photograph was taken. So what I'm gonna
do now is change the aperture a bit to decrease the blur on the dice because I want them to kind
of be in focus, then move out-of-focus as
they get towards the camera. So I'm going to expand
the camera options again. And I'm going to decrease the aperture until the
dice are in-focus again. And as they move
past the camera, pass the focus of focal
plane, as it's called, they will become
more out-of-focus, which is the effect
that I'm going for. And towards the end,
at five seconds, the effect is still
a bit too much. So I'm just going to decrease
the aperture a bit more. Something like this looks okay. So now when I play the
animation and zoomed out view, you will see that at first they are relatively in focus and then move out-of-focus as the camera
gets closer towards them. Because of what we just did. Linking the focus plane
to the background layer, to the original layer. The original layer will always remain in focus regardless
of the settings.
61. 6.7-The Cinema 4D renderer: So far, we have only
worked in a 2.5 D world, meaning that everything
was a cardboard cutout. And while we could place
things in three-dimensions, we couldn't actually
apply a third dimension to an object to give it
more depth, for example. And that's where the
cinema 4D render engine comes into play. Because where we've been
working with classic 3D so far, we're going to switch
the 3D renderer to cinema 4D and look at some of the options that
we have available. So here in the comp 6.7, the Cinema 4D renderer, I have this text frame and
I'm just going to turn this text frame into a 3D layer. And as you can see, we have a third dimension
available to us now so I can rotate it along
the y-axis, for example. And you will see that
it's 3D, albeit flat 3D. So I'm just going to
Control Z, that rotation. That was just to give
you a demonstration of what's actually happening. We now have a 3D layer. Now, I'm going to switch to
the Cinema 4D renderer by going where it says classic
3D and expanding this menu, then switching it to Cinema 4D. Now, initially nothing changes. And depending on your system, it can take a second
or a few seconds to change this renderer to cinema 4D because this is more processor
intensive, let's say. But now when I expand
the layer options, I no longer just have
text and transform. I also have geometry options
and material options. Now, the first thing we're
gonna do is actually rotate this text a little so that we can actually see what's
going to happen. So I'm going to
press R for rotate. And I'm just going to rotate
this along the y-axis. So, so we can actually see
the depth being applied. So it's at about 75 degrees. Then I'm going to expand the geometry options
of the layer. And here we will see a
bevel style of bevel depth, a hole bevel depth
and extrusion depth. And the first thing we're
going to be looking at is that last one, the
extrusion depth. So once I start increasing this, you will see that a scaling is applied to the y-axis
or the z-axis. So it's actually
getting some depth. And if I grab the
orbit seen tool, you will see that the
text is now actual 3D. Now it's not very visible yet. It's not very legible. And that is because there is no lighting applied
to the scene. When you're working
with Cinema 4D, you need to add a light to make things look realistic so that we actually have some shadow
and some drop-off and some other things that are required to make things
actually look 3D. So what you should imagine it, imagine is that currently
the scene is being lit to the exact same
amount from all directions. So everything looks
completely flat. So I'm going to add a light
to the scene and I'll be talking about lights further on in this
chapter a bit more. But this is just so that we can see what's actually
happening to our text. So I'm gonna go into
the layer menu here at the top and then go to new
and then choose light. I'm going to leave this set
to 0 light in a white color. And just for
demonstration purposes, I'm going to set the
intensity to 100% and then choose cast shadows just for demonstration purposes
later in this chapter. So I'm going to click Okay. And now we have some actual lighting
falling onto our scene. And the light is not exactly
where I would like it. So what I'm gonna do is
grab the selection tool. And I'm just going
to bring it a bit closer so that now we can
actually see what is happening. So now the text
has actual depth. As you can see. One of the other options
is to add a bevel. And a bevel basically cuts off the corner of each
shape or each letter, each character in this case, in a certain way. So I'm going to change the
bevel style to Angular. And as you can see, we now
have a little corner here. I'm on each edge of the shape and that changes
how light interacts with it, which I can demonstrate again by switching it to none.
And then Angular. So these corners, these bevels, actually catch the light
in a different way, making the shape in
3D more pronounced. So that's also something
that you can use. You can change the depth of the bevel to extrude the texts from the
background even more. You can also change the
style of the bubbles. So Angular is just
a straight-up edge. Then we have concave which cuts out the unbundled part
out of the main shape. Then we have convex
which does the opposite. And that for our purposes, looks about right, That's
what I wanted to achieve. I'm going to change
the extrusion depth to about 20 to make it a
little bit thinner. And you can just animate
this in 3D if you like. So I'm just going to grab
the rotation of this layer, of these Cinema 4D text layer. I'm going to animate the rotation to make it
rotate in place like this. And then actually now
I'm going to grab the y rotation
within two seconds. Let's say I'm just gonna go to two seconds in the timeline. I'm going to give
it a one rotation. So I'm just going
to rotate it once. Now you will see that our
3D texts actually rotates, and this is quite
processor intensive. This is a lot harder for your system to render
than classic 3D because it's actually calculating
the light values when it hits each pixel. So I'm just going to switch the preview resolution
to a third. And that's going to
decrease the render time, but also decrease the
quality obviously. But this makes these animations
a lot easier to preview. It's already taken me
about ten seconds to render a 2 second animation. But that's just how it works
in After Effects in 3D. I must say, as far
as rendering goes, After Effects barely
uses the graphics card, even for things like this. So if you have a beefy graphics
card that's not actually going to help you all that much when you're trying to
render scenes like this. If you want to do more with 3D and especially
this kind of 3D. Other programs such as
Cinema 4D or blender, or a lot more suitable for that. So that was the geometry options of the 3D layers in the
Cinema 4D renderer. In the next video, we're
going to look at some of the material options
which allows us to further change how
our text looks and how it interacts with
light and shadows.
62. 6.8-Material options: In this lesson,
we are looking at the material options
with which we can change how our 3D objects interact with light and shadows. For that, I have the composition and 6.8 Material Options. And I'm just going to expand
these layer controls and we will be looking at
these material options. Now, the first toggle
can be an important one. It's for cast shadows and
it is off by default. So this object
currently does not cast a shadow on other objects. And just to show
you how this works, I'm going to duplicate
this layer using Control D or Command
D on the Mac. And I'm going to move this copy back a little bit
along the z axis. As you can see, the front
object is currently not casting a shadow
on the back object, but it should according
to the position of this light and the
layers themselves. So what I can do is go into
the material options of this copy and then choose
except shadows is on. I was just double-checking that. And then cast shadows should
be on for the front layer. Now when it's on,
you can see that it casts a shadow on the
layer to the back, and that is because of the
position of this light. So once I move
this light around, you will also see the
shadows change and how the bevels and the shapes
themselves catch the light. So that is what the
except shadows does. I'm just going to
hide the second layer for now, the cinema 4D. We might get back to
that in a little bit. So we have cast shadows
and accept shadows, and these have to be in tune with each other for
separate layers. To get lights, to
cast actual shadows. You can choose whether or not
an object accepts lights. And when you disable this, you will see that we just
get the ambient light. So the same light values
from all directions. So that's generally something
that you do not want. You can enable
reflections if you want, because you can determine
how reflective an object is by playing with these
settings here at the bottom. We can determine how much an object is affected
by the ambient light. But to demonstrate this, I have to disable, accept lights here at the top. So ambient, if I start
decreasing this value, you will see the object
becoming darker. So that's not something that we require for this
particular scene. We have a diffuse value and
with a higher diffuse value, you will see that the object
actually reflect more light, so it appears brighter. We have a specular
intensity which makes the objects shine
brighter and lights, so it becomes a lot
more contrasty. You can determine the shininess of these specular highlights. What you will see is that
the actual position of the light is better reflected
in the actual layer, so it becomes more reflective. We have a metal values so we can determine the
metallicity of an object. Metallicity basically
determines how an object reflects light. If an object is 100% metal, the reflection will take on the color of the object itself. So if you are reflecting something in a
perfect metal sphere, the reflection will actually
look like that color. Now with a metal value of 0, this will not be the case. And you will actually see the light color reflected and not the color of
the metal itself. So that's what that means. You can change the
reflection intensity so you can make an
object more reflective. And that actually takes out the color of the object itself. And you only see the color of the environment because
it's perfectly reflective. You can change the sharpness of the reflection and the roll-off. Those are settings
that you usually don't have a lot of stake into change, but those are the general
material options. Now I just want to
show you something quick about reflectivity. So I'm going to change the
scene resolution to full. And I'm going to re-enable
this other layer. And I am going to click the back layer and
move it forward. So in front of this other layer, then I'm going to play
with the reflex toxicity or the reflection value
of this first layer. And you will see
that it is actually reflecting the other layer. Now, if I rotate this layer, for example, or just place
it slightly differently. Oh wait, that was
the wrong layer. Actually. I'm just going to
grab this layer. You will see that it is now
reflecting the other layer. Once I start rotating this layer or placing
it differently, you will see that it also
changes in its reflection. So this also allows you to
do some pretty cool things, especially considering that
you can also animate all of these values because
they have a stopwatch. And of course, you
can still animate the regular properties
of any 3D layer as well. So rotation,
position, scale, etc. So that was a quick look at all the material
options that you have available within After
Effects Cinema 4D renderer.
63. 6.9-Importing 3D files: In this lesson, I'm
going to show you how to import Cinema 4D files into After Effects so you can use them in
your compositions. And this way of working comes
with a few limitations. First of all, you cannot
edit any 3D artwork directly in After Effects
if it's made in cinema 4D. And something about
cinema 4D is that it's very comprehensive 3D program, which is basically the industry standard
for 3D animation. So this is a very
extensive program that has a very steep
learning curve, though I must say out
of all the 3D programs, next, the blender, it's probably
the most easy to learn. But you need to have a
basic working knowledge of Cinema 4D to work with cinema
4D files in After Effects. So that goes beyond the
scope of this course, but I just want you to see what happens when you
do import cinema 3D Cinema 4D files and how you can still edit
them in After Effects, limited as that editing
capacity may be. So for a 3D file, we can only use Cinema 4D files. And that is a fairly
standard industry format that you can find pretty
easily, generally speaking. And a site that I use for free 3D models is
turbo squid.com, which is owned by
Shutterstock nowadays. So I searched for plane and
then I filtered for free. And then for the
Cinema 4D file format. And then you can
download this file or any other free file and then
import it to After Effects. So I'm gonna go back into After Effects and I'm
going to double-click on an empty spot of the project panel to
get the Import Options. And then here I have this
plane Cinema 4D file. Then I'm going to double-click. And I'm just going to add it
to my active composition, which is 6.9 importing 3D files. So I'm just going to
click and drag it down into the layers. And that's going to give me this 3D object, which
is pretty cool. Like I can actually see this grid which comes
from cinema 4D. Actually. What I can now do
is actually change the camera to the comp
camera, because otherwise, I cannot even influence
my angle of view on this airplane because it's just copying what is in
the Cinema 4D file. So I can choose Comp Camera and then add an
actual camera for me to use. So I'm going to press
Control Shift Alt C and add a to node. Let's say 24 millimeter camera. So I'm going to click on Okay. And that camera is now actually
placed below my scene. So I'm just going to grab
the orbit tool and I'm going to rotate to
a different spot. Then I'm going to pan
out a little bit. So I'm going to grab
the pan camera tool and just move back a bit. And then use the orbit tool
to get the plane into view. As you can see,
this is already not an ideal way of working. And what we also do not have is a lot of control
over the position, rotation, et cetera,
of this plane. What I'm going to do
actually is just grabbed the camera controls and
then the Camera Options. And I'm going to zoom out a little bit by dragging
the zoom into the minus. There we go. Something like this. Note that this also actually changes how the
camera functions. So maybe a better option is to go back, grabbed
the transform, and just change the position of the camera to move
it back a little bit and then rotate it to
where I want it to be. So I'm using the rotation value to actually get the
plane into view. So that was very difficult. In other programs. It's a lot easier, like I said, such as cinema 4D
and in Blender. But this is just how
After Effects works. So what I could do is open this Cinema 4D file and then for example, rotate the propeller. And that animation
is then going to be directly reflected
inside of After Effects. Now, as I've said, the Cinema 4D part of that process falls outside of
the scope of this project. I just wanted to
show you how you can import these
files and how you can actually use the
after-effects camera instead of the Cinema 4D camera. If you're a native
Cinema 4D designer, then you would obviously
choose to remain to keep the cameras set to cinema 4D because that's
where you do your animations. But those animations can then be used inside of After Effects. And that was the whole 0.1. Final thing that I want
to mention is that once I grabbed the
transform controls here, you will see that I am extremely limited in what I
can actually do. There's not even a third
dimension to speak of. And you cannot turn
these Cinema 4D, these layers into 3D layers because it's just
displaying what is happening in that Cinema 4D file and nothing more, nothing else. You have no additional
control over it. There are certain
plug-ins that gave after effects more functionality
when it comes to 3D, such as Element 3D. But I will give a
brief overview of that in the plugins chapter.
64. 6.10-Light options: In this lesson, I'm going
to tell you something about the different
lights that we can use in After Effects
in the Cinema 4D renderer. So here I have the
composition 6.10 lights, and here we have the
same point light that we worked with in a
previous lesson. Now, first thing I
wanna do is show you the different types of
light that we have. So I'm just going to double-click
on this point light, which allows me to change
the light settings and also to change the type of
light that we have here. It's currently set to 0. I'm first going to change
it to a spotlight. And that gives me a cone of
light that I can influence. I can move this cone around
if I press OK in the pop-up. And then I can take this red arrow here and I
can move it further away. And as you see, the light cone ends
at a certain point. And that changes which area of the scene is actually lit
by this cone of light. So let me just move it
a bit closer again. And you will see that
now the cone of light is actually filling out
this cinema text. If I grabbed the point
of interest here, I change what is actually
being illuminated. So this is what the
light cone does. And sometimes you,
the spotlight does. Sometimes what you want is actually going to a
top view of a scene so you can see which area is
actually being illuminated. And so you can move
the light around more easily and its
point of interest. So I'm just gonna go back
to the active camera. Here we go. So then if we look at the options that we have here for the light in
the layer controls, we can change its intensity. We can change its color. We can change the angle of the cone so to
increase its size. So at a 180, it is shining light on basically everything
in front of the light. So that's something
to keep in mind. So by increasing the cone size, I increase how far the light is radiating outwards
from this cone. You can feather the cone to
create a falloff effect so it becomes darker towards
the edges of the cone. You have a radius for
the cone as well. And you can change whether
or not it casts shadows. So if you have different
objects in the scene, then you want shadows. Then you're going
to want this to be on which it is by default. So those are the most
important options for the light cone, the spotlight. So I'm just going to
double-click this light source here and then go into light
type and choose parallel. Now, parallel is basically the same thing as the spotlight, except that there is not a cone. This is just an area
that is emitting light from the entire surface
of the light source. The rays are actually
parallel to our scene here. So I can change the
position of the light. But that doesn't
actually do much. But you will see once
I start changing the point of interests
of the light, then I can change how this
object is being illuminated. Now, I can double-click
the light source again and choose the
final different light that we will be looking at, which is the ambient light. Ambient light, as
we've seen previously, is just light that is
naturally in the scene. So let's say you are outside, the sun would be creating
the ambient light. That is not very
useful in this case. But I just wanted to show you that you can actually change the intensity of
the ambient light so I can decrease
it, for example. And click Okay, and I'm going
to duplicate this light, which doubles the
amount of light. But then I'm going to
change the ambient light to to a spotlight. And what you will see is that the shadows are darker because the ambient light in our scene has been lowered
by certain amount. So that's something you can control with these
different settings. And you have some control, a measure of control
over the amount of ambient light in a scene by just adding your own ambient light. And that overrides the
default ambient light.
65. 7.1-Track motion: In this chapter, we are
going to be focusing on camera tracking and
motion tracking and camera emotion tracking
allow us to put things into videos teams that weren't there when the
video was created. To get started on that,
where we're going to work with the most basic form of motion tracking based
on a drone shot that you will find in the
course files for this chapter. So here in After Effects, I'm just going to double-click
in the project panel to get to the Open dialog box. I'm going to chapter seven,
track tracking motion. In the course files we have 7.1 camera tracking and I'm
just going to import this. And now I'm going to create a composition based
on this footage. So this footage is 2.7 k
at 60 frames per second. And I want a composition
that matches those settings. Otherwise, the tracking of objects in a scene
can get compromised. So you always want
your footage to match your composition settings when it comes to motion
and camera tracking. So I'm just going to click
and drag this footage into the new composition
button here at the bottom of the project
panel and release the mouse. And this is what the
shot looks like. It's just a basic rocket shot of a drone taking off and it's not playing
back to smoothly. So I'm just going to
put the resolution at half to get through
it a bit quicker. So the drone is about two. Okay. I'm just going to scrub
through the timeline for now. I'm not sure what's
going on with my laptop should be able to play
back this footage. So it's a drone shot taking off. And then the camera's going to roll down and aimed
back at the island, the island of bled in Slovenia, by the way, one of my favorite
places on the planet. Now, what we're going to do is attach something to
the church spire. So I'm going to put an
object here and I want the object to stay in place
as the camera is moving. So basically that means I
need After Effects to analyze the motion of what is actually
happening in the shot. And pick a spot
on the spire that the tracking is going
to stay stuck to. And to do that with this footage selected here in the timeline, I'm going up into the Animation menu and then
choosing Track Motion. And that opens up
the layer controls. So we are now in the layer. I can always get back
to the composition by clicking here for
the composition. But then we have this very
small little target here. Now, this target
is very important because we're going
to have to place this target on
what we would like After Effects to actually
track the motion of. So I'm going to zoom
in a little bit with the scroll mouse. And one thing that's
important for this tracker, if you want to move it around, you need to find this
black mouse cursor. So the white cursor is no good. You have to find
the black cursor, which is often why
you want to zoom in, because that only
shows up when you're inside the bounds of
these little boxes. So I'm gonna click
and drag this. And it's actually
going to give me a preview next to the mouse. And I'm going to place it
on this little window on the church spire and
then zoom in a bit more. And now I can actually increase this little search
box by grabbing one of the corners
and dragging it out a little bit and changing a
position a bit further. So this is what After Effects
is going to try and track. And this larger area is what? The area is where after-effects will be searching
for that object. This is the object and this is the search area for the object. So now before we continue, I'm going to actually create an object that is
going to be tracked, that's going to get stuck to this marker once
we composite it. So I'm going to go back into the composition and
grab the type tool. I'm going to click once in the composition and
then type tracking. The text formatting. Formatting
doesn't really matter. I don't want it to
be a lot bigger than the area where the that
I'm actually tracking. So I'm just going to
decrease the size of it to let's say 75 pixels. That's it. And what I also
want to do is place the anchor point where I
want the object to remain. So the tracking point
determines where the object is going to be centered once
the tracking is applied. So I'm going to grab the pan behind tool and I'm
just gonna go over here and I'm going
to place it on the left side of the text box. Now back into the layer
controls for the video. And here we have our tracker. Don't have the tracker panel
in frame here on the right, you can just click tracker and that's going
to bring us back. Now clicking the video re
enables the tracking module. There are different types of tracking that
you can look at. We will look at
one other type of tracking in this chapter. For now, we're just going
to leave it to transform. And I only wanted to
track the position, not the actual rotation
of the object, because this is not
going to rotate, we are only going to
move through space. So what I can do now is click this button here for
analyze forwards. And I'm just going to
zoom out a little bit because while it is tracking, you are not able to zoom. And I'm just going to play here. And I'm going to keep an eye on whether or not After
Effects is tracking it accurately by
determining whether or not it's moving
with the footage. Now, this is over 20
seconds of footage. So this is going to take awhile. But you will see as
the drone goes up, this track, 0.1 is staying in the same
place on the footage. So it's not staying in the same location
in the composition. It's actually moving along
with what is being tracked. And we're just going
to keep this going. What's important for placing your tracker points is that
there's a lot of contrast and that's why I picked this specific window
on the church buyer. Because there's a
lot of contrast. For example, if I had picked
the top of the spire, the video would have
started out with a lot of contrast because it was against the sky
with the sunrise there. So there would
have been a lot of contrasts between the spire, but as it passes
through the land, there is a lot less contrast. So it would have lost the
tracking at some point. So that's why I picked this
specific window on the spire. I'm going to let it go until
we hit about 20 seconds. When it hits 20 seconds, I'm going to click the stop
button to stop the tracking. What you'll note is that the window is still
just barely in frame, but then the camera pans
down and the track point is still locked in place,
which is fantastic. So once we hit 20 seconds, I'm going to click stop. And that's going
to be our track. Now, we still need to confirm the target for the tracking
data that was just generated. So I need to edit the target. And there's only one other layer in this composition currently. But here you have an overview of all the
layers in the comp. So that's the
tracking texts layer. So I'm just going to click Okay, and I'm not going
to apply it yet. I want to just
quickly show you what happens in a slightly
zoomed in view. And I'm going to
play the timeline or scrub through it rather. And you will see that
this tracking point is just locked in place
on this window, even when it's almost out of frame and the camera pans down. Now after 20 seconds, it loses the track because
I stopped at a 20 seconds. So what we're going
to do after I apply the transform
to the target, we're going to shorten the
composition to 20 seconds. Now, we have our tracking data, we have our target defined. Now I can just apply the tracking data and
it's going to be x and y. Then I'm going to click Okay. And then I'm going to
shorten the composition to the final tracking keyframe
because it just adds a bunch of keyframes
for the position of the track point and the
position of the text layer. I'm just going to click and drag the work area to
where my timeline is. Then I'm going to
cut trim the comp to my work area by right-clicking and choosing
trim comp to work area. Now, I'm going to
play the footage and I'm going to play it at a third of the resolution
just for brevity sake. And what you will see is
that as the drone takes off, the text is going to
stay firmly in place. I'm just going to let this play out until it hits 20 seconds. It's not playing
off in real time. I think I have to actually restart my laptop a bit
to clear some memory. But the tracking worked
out really well. So the text is
completely locked to this area telling me that
the track actually worked. It's not jittering around, it's not jumping around. It doesn't lose the
track at any point. So the tracking remains
accurate throughout. So far, at least, just keep an eye on it. So it's rendered
about 13 seconds. Just going to zoom
out a little bit. 15. I just want to take a look at the panning motion to see if the texts
still stays in place. And that does appear
to be the case. There we go. And now it will play smoothly because the scene is
now pre-rendered. And as you can see,
the tracking texts is just floating there in mid air. And it looks like it's part of the scene because
it's moving along with the camera or with the
motion of the object rather, this isn't camera tracking yet. We will look at that
in the next lesson. So that is how basic
motion tracking works. You define a target area
on what you want to track. You create an object that is going to be stuck to that point. You place its anchor point where you want the object
to be placed. And then you just click track. And after effects just figures out for you
what the position of this object should be in relation to the tracking point.
66. 7.2-Track camera: In this lesson,
we're going to start working with camera tracking. And camera tracking
is a process where after effects analyses
the camera movement of a piece of video
and then is able to replicate virtual camera that
follows the same movement. Now for this in the
exercise files, you will find a file called
seven-point to track camera. And I'm just going to
import this and create a composition based
on this piece of footage by clicking
and dragging it to the new composition icon here at the bottom of
the project panel. Now, this is a piece of
reversed drone footage. And when I play this, you will see that the water
is actually going up. So I edited this beforehand. I think I posted this
on my Instagram at some point for this
pretty cool effect. So the drone is actually
not taking off, it is actually landing,
it's going down. And I reversed the
footage later. So what we're gonna
do is just grab about 15 seconds of this clip starting from when
the drone starts moving up. So what I'm gonna do is put the timeline at
about 7.5 seconds. Then I'm going to clip it from the start by just clicking
and dragging the start point. I'm going to drag
that to the start of the composition and then
trim the work area. So I'm just going to decrease the work area to
whatever the footage is. Actually, let's go
back a bit further. Let's say too. When my wife there just
disappears off screen. So at about 14 seconds, then I'm going to decrease the work area and then
trim the composition to the work area by
right-clicking here at the top and then choosing
trim comp to work area. Now, I want to work
in peace and quiet. I'm just going to mute
the audio of this clip by clicking this
Mute button here. And now it will
play without audio. Now, to start
tracking our camera, I have to go up into the Animation menu and
then choose track camera. And this is going to start a
process that can take longer or shorter depending on
your available system. On my system, it takes
a couple of minutes actually time it for
now for this instance, I'm going to pause the
recording until it is done with this analyzing
in background, step one of two. Okay, there's about
15 seconds left. And indeed this took
about two minutes to analyze this 14
second clip of video. Once this process completes, Once this hits 100%, it's going to switch to an orange notification
saying solving camera. And that is where it actually analyzes the camera movement. And what the after-effects
camera I would have to do to replicate it. And this, again
can take a minute, but it's a lot shorter than the initial step of the process. So we're just going to wait
for the camera to solve. And after it solves, we get these tracking
points on our video. And if I play the video forward, you will note that
these tracking points, most of them stay in place
on the video itself. It's not going to smoothly because this is still a
render intensive process. But these points tend to
stay in the same place. Someone that some of
them would disappear, new ones will appear as
the footage progresses. But these tracking points are an indication that
there is a good solve. If they stay in the same place, a good self would be where these tracking points
actually stay in place. We don't need all of
these tracking points, but there's no real
point in deleting them. Because I am looking for
something very specific, which I will probably
find on this wall. Now as I'm mousing
over this area, you will see this
target, this bulls-eye. And what I'm looking for is a bulls-eye that has the
correct perspective. On this rock face. I would look for something
that is tilted slightly upwards and that is exactly
what I'm seeing here. So this is where I placed
my target by clicking once. Now what we get is these three target
points that I can still edit if I so choose. I'm not gonna do
that at the moment. But the next step would be
to add a camera and also an object to analyze whether or not the track is actually
active or accurate. So what I'm gonna
do is just find this target again and
then right-click. And then I can create
text and a camera, a solid and a camera, or a null and a camera. For now I'm just going to
create a solid and camera. And what that does is
create a solid layer, which is just a
place holder layer, just so I can look
whether or not the track is actually correct. So what I'm gonna do then
is just play the video. And you will notice that this solid is actually
stuck to the wall, which is fantastic
because that is exactly what I would want. The solid is in place and it stays in place
and it actually rotates along with the camera
because it is a 3D object. And that indicates,
that tells us that when we add 3D objects, two scenes like this. And if we get their
position right, mostly on the z axis, we will get a
pretty cool result. So what I'm gonna do is just go into the position of this layer. And I'm just going
to copy it for now. So I'm just going to
click on position and I'm going to copy the position. Now, I'm going to hide
this solid layer, which is just a
control layer for me. Like I just use it
to see whether or not the track is actually good. And then I'm going to
grab the type tool, click once and type in tracking. I'm going to increase
the text size a little bit and confirm that
with Control Enter. Then I'm going to turn
this into a 3D object. And initially it is
actually placed off-screen. So what are we going to do
is press P for position. And I'm going to paste the position of this
solid onto the texts. So now it should be
in the same place. But because it's farther
away from the camera, because the z position of this layer is now
over 41 thousand, it appears a lot smaller. So what I'm going
to do is press S for scale and just scale it up to whatever I
like in this scene. And now, when I start
playing the timeline, you will see that this text is just perfectly in place
on the rock face. So even though the drone is
swiveling back and forth, it is still staying
perfectly in place on the rock face and that is
exactly what I was looking for. That's a bit more difficult
to actually blend objects like these with
the background itself. So what you can do
is, for example, look at the blend
mode of the layer. Blend modes is a very
complicated topic. After Effects has
more blend modes than any other Adobe program. You can usually try
something like overlay, which makes it look
part of the scene, Let's say, even though it also makes it a bit too transparent. So I can actually duplicate this layer to
get a better result. Or I can look at one of
the other blend modes. I can maybe go for multiply. Yeah, that looks a little
bit better so that it looks like it's actually written
on the wall there. Which isn't perfect
because it doesn't have any individual distortion
along each character. But it does appear to be part of the scene as
far as the color goes, at least I'm not
actually able to wrap it around here with this effect. For that we can
use other effects, but this is the gist of it. So this is one of my favorite things to
do in After Effects actually to put things in
scenes that aren't there. One of the most
powerful tools to do that is the camera tracking. And whether or not you
are able to track footage accurately depends very much on the quality of the footage, how fast it's moving, the frame rate of the footage, and the camera movement, because this is a very
simple camera movement. This is just a pan up. So the camera is just going
upwards and that's it. But if the camera is also rotating along one or more axes, the tracking becomes
a lot more difficult. And After Effects will be less, will be able to, won't be able to track it as accurately as it can for
something simple like this. This is why when you
film stuff like this, you either use a
drone or gamble, so the footage is nice and
stable and tracking is a lot easier in After
Effects as you just saw.
67. 7.3-Masking basics: Another very powerful
tool that we can use within After Effects is masking. Masking allows us to
hide certain parts of a footage layer while keeping other parts of the
footage layer visible. And to demonstrate this
in the exercise files, you will find two videos which
aren't going to open now by double-clicking on an empty
part of the project panel. And those clips are
called 7.3 masking clip, 1.37 masking clip to, and I'm just going
to select both of these clips and
import them as is. Now, what I want is that the
composition that we will be working at in matches
the settings for the video, which is 1920 by 1080 at 30
frames per second frame rate. So what I'm gonna
do is click and drag one of these clips into the new composition icon at the bottom of the project panel and their release the mouse. That's also going to import
the footage to the timeline. And this is just a
10-second clip of my daughter walking
away from the camera. Now, the other clip
that we have here is my daughter walking towards the camera in the same setting. This video was
shot from a tripod or a locked gimbal
as the case was, so that the footage
matches exactly as according to the angle and position of the
camera by the way. So what I want to
show you is what happens when we
draw a shape layer, when a layer is selected
here in the layers panel. So when a layer is not selected, and I can do that
by just clicking on an empty part of
the layers panel. I can just grab one
of the shape tools such as the rectangle tool and just click and drag
to draw a shape as we've seen in a
previous chapter. I'm just going to undo
that with Control Z. But when the layer is
actually selected, we are able to click and drag. And then everything except
the areas that overlap this shape that I am drawing
are being hidden by a mask. So what I'm gonna do is this is this function has the
same way as strong shapes. So I can hold the
Space-bar to actually move the shape around as
I'm still drawing it. So before I release the mouse, and I'm gonna go at about halfway across the footage and then release the mouse. And just for clarity sake, I'm going to enable the transparency grid here at the bottom of the
composition panel, just so we can clearly see
what is actually transparent. So I drew a shape. Well, this layer was selected. Now everything
outside of that shape is being hidden by a mask. And this is also visible
in the layer controls. I have here mask one, which has several
different options, which we will be
briefly looking at. The first option here
is the Mask Mode, which is currently set to add. Add means that whatever
is within the mask, whatever's inside of this
shape is currently visible. When I expand these mask modes, I can also put it out, subtract, which is basically
going to invert the mask. So now everything inside
the mask is being hidden while everything outside of the mask is displayed visibly. We also have some
different modes which we will look at later
in this video. They basically work
the same way as the shape modes that we had
with ADD, intersect and such. So I'm just going to
leave it at ad for now. We also have the option
to invert the mask, basically putting it
in the Subtract mode. So I can just enable this to flip the mask to the other side. Now I'm going to expand
the mask controls. And mask path is something
we will be looking at in the project chapter where
we put everything together. We will be animating
the shape of the mask. I can give you a brief
example of this by just enabling the
stopwatch here to keyframe the mask path and
then go to 1 second in the timeline and switch back
to the selection tool here. Now, I can move the mask
around by going here to one of the corners and just clicking and
dragging the corner out. As you will see when
I play the timeline using the spacebar,
the mask path. So the shape of the
mask is animating. I'm just using Control
Z to actually go back. The mask feather gives us a gradient along the
edges of the mask, so it blurs the
edges of the mask. So when I click and
drag this upwards, you will see that the edges of the mask
are being blurred. So if you want a smooth
transition between layers, this is something you can
use and you will want to have an overlap of the layers that expands
beyond the mask. But that's something we will be looking at in the
project chapter. I'm just gonna put
these back at 0. We have a mask opacity
slider allowing us to partially make a layer transparent or the contents
of a mask transparent. And we have a mask
expansion slider, which allows us to increase or decrease the size of our mask. So I can click and drag this to the left to decrease
the size of the mask. And I can click and drag it to the right to increase
the size of the mass. So those are some
settings that you can change when you're
working with masks. And you can also animate all of these properties because
they have a stopwatch. Now, I want to show
you what happens when we add our second clip. So I'm just going to
press the UK to collapse all the layer options
here for clarity sake. And then I'm going to
click and drag 7.3 masking clip one down
into the timeline. And I'm just going to place
it below masking clip one. And now we see that we have these different halves of
the footage being visible. So when I hide, mask, mask and clip one by
clicking the icon, you will see my
daughter disappear. When I hide the bottom
layer 7.3 masking clip two, you will see this
transparency again. So this video layer is
below that video layer. And because half of the top
video layer is being hidden, we can see the rest of the video here on the
right, on the left. So when I actually
play the video, you will see a clone of my daughter walking
the other way. So if you've ever
seen this effect, this is how it's achieved. One part of the
video is actually being masked in a top layer, and then another layer
is placed below it, in which the other section
of video takes place. Now we've done this with
a regular rectangle, but you can do this with
any shape that you choose. So I'm just going
to make sure that 7.3 masking clip
tool is selected. And then I'm going to
switch to the pen tool. I'm going to grab the pen tool. And with this layer selected, I can then draw a shape, any shape that I want, and close the shape by
clicking on the first and then everything outside of that
shape will disappear. Now, I'm just quickly
going to show you that I can still switch
to another tool, the ellipse tool for example. And click and drag here. And that's going to add a
secondary mask to this video. So I now have two masks active, which you will also see
in the layers panel. So I have here mask two. Now I can change the mode of
this other mask to subtract, and that's going to hide what
ever is inside of the mask. And I can then grab the
Mask here and drag it around and that's going to hide whatever it is
being placed on. That is how those
different modes work. And this is also
something we will use in the project chapter to remove something from a
mask that we already have. If you wanted to
delete the mask, you can just click it here in the layer controls and
press Delete or Backspace. And that's going
to just get rid of those masks so that we
have our final result. And I'm just going to
play this one more time for demonstration purposes. And finally, I want to tell you about creating videos like this. Like I said, this was
shot from a tripod, essentially a gimbal
that I can lock so that the camera remains
in the exact same place. But that is not sufficient for creating
videos like this because, because you also want to
manually lock the focus, it's on autofocus, your camera. It will change
focus as a subject walks away from the
camera or approaches it. So I want the focus to remain
consistent between shots. I also want to manually set
the shutter speed, aperture, and ISO if you know something about cameras
at least so that the footage matches
exactly and there don't appear to be any
seams in the video. When I shoot both clips, you want the settings for
recording to be consistent between shots so that you can combine these shots in
after effects later. So that's also
something important when you want to create
shots like this, that the settings between
clips are actually consistent.
68. 7.4-Stretching footage: In this lesson, I'm going to
show you how we can stretch our footage so that it
appears to be in slow motion. And in this lesson, I'm going to show you how to
do that for an entire layer. And in the next one
about time remapping, I'm going to show
you how to do it for only parts of our layers. So only part of the timeline. In the exercise files of
this chapter you will find 7.4 stretching footage. And I'm just going
to import that by double-clicking it here. And I'm not going to
base the composition on this clip because it's
60 frames per second. And I actually want a 30
frame per second timeline. So I'm going to click the
new composition button here in the Project panel. And I'm going to set
the frame rate to 30. Make sure the resolution
is set to 1920 by 1080, and that the duration is actually 20 seconds
instead of ten seconds. So I'm going to click Okay. And then import this
footage to this timeline. Now, note that this footage is 60 FPS and we are placing
it on 30 FPS timeline. The footage is actually
only ten seconds long, so half of our timeline
is currently empty. Now, what I want you to
notice is that here at the bottom left we have
these four switches. And these four
switches determine which layer controls
are actually active. So I can actually take out
the track matte column. I can add the add or remove
the layer switches if I want to give myself some more screen real estate
here in the timeline. But what I want
you to focus on is the in-out duration,
stretch pains. So enabling that gives
us these controls here, the end of the layer, so the start point of
the layer is currently set to 0 seconds, 0 frames. The out is nine
seconds and 29 frames. So ten seconds, the duration is ten seconds and the stretch
is currently set to 100%. And I want you to focus on this stretch item
here because that allows me to slow this
footage down or speed it up. So let's say I'm going to
increase the stretch to a 150%. That is going to slow
down the footage by half. So clicking this value
here for the stretch, I can put this out of 150. And the new duration of the
footage is already displayed here at 15 seconds because it's gonna be
slowed down by 50%. So clicking Okay, you will
see that this item also becomes longer on the timeline, so it's now up to 15 seconds instead of ten where
it was previously. And now watch what happens
when I play back the footage. My daughter is
walking 50% slower, and because we have 6060
frame per second clip, the motion is still acceptable, so it doesn't appear to choppy. And we could use this footage
as slow motion footage. And with a 60 frame
per second video, you can actually go up to a
stretch of 200 before you really start to be able to distinguish the
individual frames. So putting in this stretch
at 200% and pressing Enter will allow me to create slow motion footage
such as this. Now this also
requires that you are able to shoot footage
in slow motion. Most camera phones
nowadays are able to shoot up to a 120
frames per second, allowing you to slow
down the footage four times to get the
30 frames per second. So that's something to take
into account when you're actually creating the video. Now, this is something that
we currently cannot animate. The stretch value doesn't
actually have a stopwatch. We cannot determine
that certain parts of the video are going
to be slow motion and other parts are going to be regular motion or even sped up. And that's something we can
do with time remapping, which we will look at
in the next lesson.
69. 7.5-Time remapping: In this lesson, I'm going
to show you how to animate the speed of a video using time remapping
and after effects. And for that, I'm going
to double-click here in the Project panel and
I'm going to import the clip 7.5 time remapping, which is essentially
the same video as we just saw in 7.4. So I'm going to import this
video and I'm going to create a new composition here
in the Project panel. And that's gonna
be 1920 by 1080 at a 30 frame per second frame rate with a duration of 20 seconds. And then I'm going to click Okay to create that composition, I'm going to import the
clip 7.5 time remapping to this composition by clicking and dragging it down
into the layers. And here we have the
same video as we saw in the previous lesson. Now, let's say that
after two seconds, I want this video to slow down to about half of
its normal speed. And then I want it to remain slow motion until the
video hits eight seconds. And then I want it to go
back to its regular speed. For that, we're going
to use time remapping. And for that we have to actually enable time remapping
for this layer. So what I'm gonna
do is right-click the layer and then go up
here where it says time. Then we have a toggle for
enable time remapping. And that's going to add two
keyframes for the time remap. These keyframes aren't important because this first keyframe signifies the start of the time for the layer
and this keyframe, this second keyframe,
or the last keyframe that will
be on this timeline, indicates or represents
the end of the video. So if I click and drag
this to the left, you will see that the
video becomes shorter. So I am going to go to
about five seconds, and this will now be
the end of the video. So all the video
is now compressed in time to this 5
second keyframe. So now when I play the timeline, the footage will
be a lot faster. Now I can determine where
this effect starts by changing the second,
the first keyframe. If I click and drag
this to the right, you will see that the
video is not moving. Then it starts moving when it
hits this initial keyframe. Where this keyframe is
determines when the video starts and where this keyframe is indicates where the video ends. Meaning that if I drag the
second keyframe to the right, you will see that the footage
actually slows down as it, as if I was stretching it. So when it hits ten seconds, this layer is going to end. But because we have
time remapping enabled, the video will
actually keep going. If we increase the length of it. Until we hit this
point of the timeline, we can actually increase
it a bit further. Because here it actually stops. So it functions as a
freeze-frame at the end, but that's not something
that we want currently. So what I'm gonna do is go to two seconds in the timeline, and then I'm going to
add a time remapping key-frame by clicking
the keyframe icon here. And then I'm going to
go to eight seconds in the timeline and add
another keyframe. And now moving the value
of these keyframes around is going to give us
different results. So let me just put this
keyframe back at ten seconds and decrease the layer length
to about ten seconds again. Now, the footage
is already slowing down here when it hits this keyframe and actually speeds up to make up
for that slowed down. So I would actually like to increase the length
of the video a bit. Now let's look at these values. Here. I want the time to be
exactly two seconds. Here at the 8 second keyframe, I want it to be
exactly five seconds. So between the second, second, so between 2 second 8, it will actually only
playback to five seconds. So it's going to
slow the footage down to make up for that. I also because I want it to
go back to its regular speed. After eight seconds, I
have to actually move this last keyframe
to about 13 seconds. So I'm going to go to 13
seconds in the timeline. I'm going to zoom in
a little and make sure that the layer ends and that this keyframe is
out exactly 13 seconds. So now when I play the timeline, the footage will slow down. Actually. This should be
exactly two seconds. That's five. So now playing the footage,
it's regular speed. Then it slows down. And it will play slowed down
until it hits eight seconds, and then it speeds up
again to regular speed, hitting the end of the
video at 13 seconds. So just clicking and dragging these keyframes
around and changing the time remap value allows you to animate the speed
of your footage.
70. 7.6-Roto brush: In this lesson, I'm
going to show you how we can cut a subject
out of a video. So isolate a subject from its background by using
the Roto Brush Tool, which essentially works as an automatic masking tool in certain situations depending on the footage that you are using. The Roto Brush actually requires a very clear subject
in a video so that, so that its movement can
be accurately tracked. But thankfully, we have
such a piece of footage in the course files of this
chapter in 7.6 roto brush. So I'm just going to
import that footage. This time. I'm going to create a composition
based on that footage. So I'm gonna click
and drag it down into the new composition icon in the project panel
and release the mouse. Now, this is another
slow motion video of my daughter just
walking through frame. It's slowed down to
about 50% speed. And note that at some point
there is a foreground subject which occludes
the visibility of hers. So she is hidden behind this
lamppost at some point. That's going to be something we will be talking about later in this slightly longer
than usual video. I want to isolate her from the background so I can
place things behind her, which I will also show
you in this lesson. So what I'm gonna do is grab the Roto Brush Tool here or
the second tool from the end. And then I need to actually
open the layer in layer view. So I'm just going
to double-click the footage here in
the Project panel, in the timeline panel. And that's going to
bring me into this view. Now, the Roto Brush
Tool actually gives us a green circle
for a mouse cursor. And the circles
size is important because it's currently set
to quite a small size. You might want to vary
this size depending on what you are actually
trying to wrote a scope, because that's what what we're doing right now is
called rotoscoping, cutting a subject from a video. To change its size, I can hold the control
key on my keyboard and then click and
drag to the right to increase the size. And click and drag to the
left to decrease its size. And I'm going to make
it about this big. And what you will see is that
there's also a green plus sign in the mouse
cursor indicating that we will be adding
to our row once we start clicking or clicking and dragging
on our footage, what I'm gonna do
is start here at the top and then click
and drag over her head. And that is going to put a
pink outline around this area. Now, there's also, once I
zoom in a little bit and grabbed the space bar
to move to the top. There's also a part
slightly above her head that is
currently selected, which I don't want
my end result. So I actually want to paint
this out of the Roto. So to switch to the minus. So removing from the Roto, I'm just going to
hold the Alt key, and that changes the
cursor to a red minus, allowing me to click
at the top here. And that's going to put the selection around
her head again. I can zoom in and out and use the mouse holding the spacebar
to actually move around. And again, I clicked
and dragged here and it select a part
of the background. So I'm just going to hold
Alt and click and drag over this area and that's
going to remove it from the selection. So I'm just going to keep
clicking on separate areas of the footage to increase
the size and making corrections using the Alt key
and just keep growing it. And depending on the footage, this can actually be
quite a lengthy process. But the whole point is that
for each subsequent frame, we will get better
results depending on how well we did with
our initial row. For this section, for her toe, I actually want to
decrease my brush size, holding control
and dragging left, and then just clicking and
dragging over this area. Then I'm going to grab her back leg and just
paint over this in one go. And that actually gives me a relatively accurate selection. And there we have our
initial selection. So once I actually go back
to the composition here, you will see that
on the first frame, she has already cut out of this video for the first frame. And all I need to do to get hurt cut out of the
subsequent frames, of the next frames is
play the timeline. Before you start
playing the timeline, you actually want to
make sure that you have all your footage
visible because she is going to move through the frame and you
cannot zoom in and out while the Roto is
actually being applied. So you want to make
sure that everything is visible so you can assess as the footage
plays, where the track. Might be going wrong. So I'm just going to
press the space bar and that's going to
play the timeline. And you will see that the pink outline is actually
being traced for each frame. So after Effects is tracking what is going
on in this pink outline. And it's doing its best to keep this pink outline
around our subject. Now this can be quite a time-consuming
process depending on the video that
you're working with and the speed of your system. But this is much easier than animating a mask around
a subject manually, which we will also be doing in the project chapter that I've referred to already
a couple of times. Now, this footage is
relatively easy to track. We have a very clear
subject in the video, it slow motion, so
there's not a lot of motion blur or there's no
motion blur at all actually. But there are some
problems that can arise. And that is something we
will see once we get to approximately eight seconds when this lamppost goes
through the frame. Because After Effects will
not be able to follow our subject when it disappears
behind another subject. So we're just going
to wait until we get to about eight seconds. And then correct. The problem as it arises. Track is still looking good. Even her feet are being
tracked relatively well. You will see in the
end result that this actually works quite well once we see the actual
isolated footage. And we're coming up on our lamppost here we
are at seven seconds. And once we get to
just about eight, we will see the lamppost appear. And what you will
see is that as she disappears behind the lamppost, that the pink outline
will also disappear. So it's just going to
crumple and go away. Now, what I want to do is
actually continue the track. When she appears from
behind the lamppost, I pause playback
using the space bar, and I'm just going to hold
down Control and press the arrow keys to jump one frame forward until I see her foot appear from
behind the column. There we go, There it is. Now I'm going to
zoom in a little and making sure that I didn't
have the Roto Brush active. I'm just going to paint
over her foot again. That's going to give me a new area that is
going to be tracked. And you can always zoom in a
little for some more detail. Change the brush
size if you want. And I'm going to skip a
frame forward again and another one that gives me
another part of her foot. So I'm just going
to paint over this, skipping forward until we get more clicking and dragging
to add this to the Roto. Going up a little bit, holding Spacebar, and then
it grows a bit too much. So holding Alt, I can drag over this area and that's going
to make it jump back. Skip forward another frame. Click and drag to add
this to the area. And I'm not going to
do this pixel perfect. I'm just going to grab
the rough outline because the edge of the light post
is actually quite blurry. There we go, skip forward
a frame and another. There she comes. And I'm just going
to take out this little bit of an edge here, skip forward a frame. And that will actually put most of my daughter
in frame again, so I can grab the back leg here, this area, and it
might go a bit too far because the shadow
areas are overlapping, but actually it
looks pretty good. Skip forward a frame using
control and the arrow keys. And another one and another. That's gonna give
me a full outline once I click and
drag over her foot. Now I think I may have grabbed
a little too much now. Okay. That looks okay. Okay, so now we
can start tracking again by just playing the
timeline using the space bar. And we're just going to let this complete towards the end. Tract looks pretty good. There we go. So now I can go back to the composition
by just clicking here. And you will see that she is
now cut from the background. And this is being
rendered live by the way, depending on your settings. So this can play a bit slowly. But she is now isolated
from the background. Now let's say I want
to put something behind her in this video. I want to add something
seen that wasn't there. What I can do then is duplicate this footage by
pressing Control D. And then I'm gonna go to the bottom layer and expand the layer controls
and go into Effects. Then I can click the Roto
Brush and refine edge and just delete this
by pressing Delete. And that should. Once the effect is
actually rendered. Because the Roto Brush
is currently propagating AB of a 136. So once this is complete, it should give us a view of the layer with its
background. And there we go. So now she is cut
from the footage. So she is on a separate layer
on top of this video layer. So what I can do then is
grab one of the shape tools, make sure that no layer is selected and then
just click and drag. And that's going to create
the shape on the top. So what I can do now is dragging down in-between
these footage layers. So now it appears that she is standing in front of
this shape layer. So this is how we
can add things to footage that weren't
actually there, which is going to be
the actual project. Once we get to the
project chapter, the footage isn't tract, so it's not motion
tracked and this is not a 3D object yet, so it will remain in the same place within
the composition, but it does look like she
is walking in front of an object while this object
initially it wasn't there. So that's how rotoscoping works. You can always go into the layer again by just
double-clicking it. And then making a, actually this is
the bottom layer that I should be looking at. So no, actually it's the front layer that the
effect is applied to. And then activating
the Roto Brush. You can change this effect
again once you click here and make changes as
the timeline progresses, if you saw some
mistakes that the program made as the
timeline was playing. But this is essentially how you cut a subject from a background.
71. 7.7-Content-Aware fill: In this lesson, I'm going to
show you how we can remove an object from video footage
using content aware. Fill for that in the course
files of this chapter, you will find the video
7.7 Content Aware Fill. And I'm just going to import
that to this project here. And I'm going to create a composition based on
this footage by just clicking and dragging it to the composition button at the bottom of the project panel. Now this footage is actually 60 frames per second
for brevity sake. And to speed things up, I'm going to change
the frame rate of the composition to 30
frames per second. So I'm just going
to press Control K or Command K on the Mac and go into frame rate and
then enter 30 and press Enter. So now it has to analyze
only half the frames. So in this footage, we have these two
hot air balloons. And what I want to show you
is how we can remove one or more of these air balloons by using Content-Aware Fill. And to use Content-Aware Fill, we first have to draw a mask around what we
want to remove and then animate that mask to follow the object that we
want to get rid of. So because this is a relatively simple object
with a simple background, I'm just going to grab
the ellipse tool, making sure that the Content
Aware Fill video layer is actually selected. And I'm going to click
and drag an ellipse over this hot air balloon. I'm going to put the mode
on none for now because I want to see the mask
and the actual video. And now what I'm
gonna do is animate the mask to follow
the hot air balloon. And that is exceedingly simple. I just expand the mask
options here and I'm going to keyframe the mask path at
0 frames and 0 seconds. And then I'm gonna go to the
end of the footage and then move the mask to wherever
the hot air balloon is now. So I'm just going to grab the selection tool
and I'm going to click and drag the mask
over the hot air balloon. And when I scrub
through the timeline, you will see that the
mask is following the hot air balloon
exactly because the hot air balloon is
on a set trajectory. It's on a straight line. So the mask path doesn't have to have any
complex animation. When you're working with
cutting out a person or a vehicle and the angle changes on the subject that
you want to remove. You might want to
use the pen tool instead of the one
of the shape tools. So you can draw a frame or a mask around
them more accurately. So we have our mask
path animation and now we're going to go into the Content Aware Fill panel on the right of the After
Effects interface. If you don't have this panel, you can always go
into Window and then Content Aware Fill to get
to the panel options. And just for now I'm going
to switch the mode of the mask to subtract
so that I get an accurate representation
of the mask within this preview, let's say. So scrubbing through
the timeline, it will give me a preview
of what the mask is actually doing and what
is actually transparent. Be what it will be filled
with, Content-Aware Fill. Content-aware Fill is actually
a Photoshop function. After Effects can lean on this to fill in the
individual frames. And that can be a pretty
computer intensive process, which is why we changed
the frame rate of the composition to
30 instead of 60. Because that means
that after effects only has to go through
half the frames to half the number of frames
to use content aware fill. But it's still going to
take a couple of minutes. At least. What we can then
do is choose what we actually want to
use as a fill method. And Jen, neurally speaking, you want to go for object
because this function is used to delete
objects from a scene. You will also want to
do, in most cases, is choose for
lighting correction, which by default, you can
leave set too strong. And that's because
when there are lighting changes in the scene, you want After Effects
to take that into account when filling
this masked area. And I want to go for the
entire duration of the clip. So I'm just gonna leave it
set to entire duration. If you have a more
complex scene, you can create a reference frame which is going to bring
you into Photoshop. And there you will
have to edit out the object that you
want to get rid of, which after Effects will then
use as a reference frame. But for most cases, you're not going to
need this unless it's a very complex scene. Now, I'm going to
click fill layer, and that is going to
start the actual process. And that's going to create a
fill layer at the top here. Now note that we
have ten seconds of video at 30 frames per second. So after effects still
essentially needs to edit 300 images, 300 separate frames for this process to
actually complete. And that's why it's
still going to take several minutes
to complete. So I'm just going to
pause recording until this process is completed. Okay, The process has
apparently completed. And just for
demonstration purposes, I'm going to switch
the mask mode from Subtract back to none. And you will see that
this mask is now empty. And I don't actually
need to mask anymore, so I'm just going to click
it here and delete it. So the hot air balloon
has disappeared. But what you will notice when I scrub start scrubbing
through the timeline, it will appear again. And also when I start
playing the timeline, it's actually going
to stay in frame. And once I actually put the timeline somewhere and
wait for a little bit, you will see that content aware
fill actually catches up. And it's going to fill
in this area here. But this can take
several seconds, even on a strong
laptop like mine, it can take a little while
for this to actually fill in. So that can be a bit confusing when you start using
this for the first time, when the object doesn't
actually disappear. The fact is, it will disappear if you just wait a little bit. Now, this also makes
it difficult to preview whether your
results are accurate. So usually once I
complete this process, I create a render. So I create an actual video, a reference to see if this
actually worked properly. So to do that, I'm
going to go into the File menu and
then I'm going to go to Export and then add to
Adobe Media Encoder Queue. That is going to open
Adobe Media Encoder, which we use to create actual videos out
of After Effects. Then it's going to load into this panel after a few seconds. Depending on the
speed of your system. And I'm just gonna go over a
few of the render settings. This file format by
default is set to H.264. Don't mess with this. Pretty much
everything you see on YouTube is exported in H.264. It's a very efficient and
very qualitative file format that you can use for
basically everything. So you don't have to actually go in here and mess with this. I will tell you what the
settings in this panel actually do in the file in the
chapter about exporting. But you don't have
to actually change anything here to get
good quality video. What are you going to change
is the final destination. So I'm just going to click
here for the filename. And I'm going to render
this out to my desktop. 7.7, Content Aware Fill. And H.264 is actually
an MP4 file format, which is also useful to know. So I'm just going to click
Save and then click Play. And that's going to render my video as soon
as it connects to the Dynamic Link Server,
reading X and P. And now it's actually going
to export the video file. And it's going to take
another five seconds or so. And once it completes
on my desktop, I will have a video file here, 7.7 content aware fill. Once I play this file, you will see that
the hot air balloon here has completely disappeared. So it is no longer
part of this video. So our results were
actually accurate. So it takes a little while to previous stuff like
this within After Effects until the
complete timeline is actually rendered
as a preview. I find it useful in many cases
to create an export like that just so we can see
our results a bit faster. So that is how you remove
something from a video. You draw a mask around it. You animate the mask to follow the subject for the
entire timeline. You go into Content Aware, Fill, and play around
with the settings. You generate a fill layer
which can take a long time, and then the footage
will be filled. And results like this are
exceptionally easy to achieve.
72. 8.1-Tracking our footage: In this chapter, we are going
to create a full project with some basic animation
camera tracking, rotoscoping and masking. So a lot of the aspects of after effects that we've looked
at in previous chapters. The end result will look
something like this. We have a 3D camera tracked
scene of my daughter. She has cut out
of the background using the Roto Brush Tool. The background contains
these animations which are limited to these
triangles on the wall. So they are masked
to these areas. And obviously they
are 3D objects because they are moving
along with our camera. So this is approximately
what we will be creating. If you look in the course
files for this chapter, you will find an After
Effects project. And the only thing that's
after-effects project contains or those liquid animations that we just saw
in the background. At the end of this chapter, we will be able to insert any animation that we
choose in this background. I just chose to use the stock
assets for brevity's sake, but you can insert any animation once our project is complete. So step one is to import the
footage to our projects. So I'm just going
to double-click on an empty part of the
project panel and I'm going to choose main clip
from the exercise files. Mine is called main clip one. I just reinterpreted
the footage to be 30 FPS instead of 60 FPS. But for you this will
be called main clip. And I'm just going to base a
composition on this clip by clicking and dragging it to the new composition button
in the project panel. So going into the
composition settings pressing Control K, I can see that it's
1920 by 1080 pixels at a frame rate of 30 with a
duration of ten seconds, so that matches
the clip exactly. The first step now is to 3D
camera track our footage. So with the footage layer
selected in the layers, I'm going to go up into
animation and then choose track camera
about halfway down. That's going to
analyze the footage. It's going to have to
go through 300 frames. And I'm going to pause recording until this tracking
is completed. Okay, there's about ten seconds
left on the clock here. It's still analyzing
and background. It's about to switch
to solving camera. Once it has solved the camera, we will start seeing these
tracking points that we also saw in the previous
chapter on the drone footage. And again, what I'm looking
for is a target, a bulls-eye, that seems to correlate with
the correct camera angle. So what I'm actually looking
for it because I want to animate something
on the wall is a, an exact front view
of this bulls-eye. That appears to be
the case about here. I could also choose a
different location, but this looks about right. So I'm just going to click once to place the bullseye there. And then I'm going
to right-click and choose create solid and camera. Now basically, I
only need a camera, but I want the 3D objects
that I'm going to add to the scene in a one
of the future videos. I want that to correspond
in the correct position. So I wanted to have
the same distance from the camera as this object. So what I'm going
to do now is just play the timeline and see if the footage tracks accurately and it's almost
completely stuck to the wall. So that is perfect. I don't need this tracking solid in my composition anymore, so I'm just going to hide it. And once we select
a different layer, now we have a 3D tracked scene that doesn't contain any
actual 3D objects yet. That's something we will do
in one of the future videos. For now, we're going
to start rotoscoping my daughter out of the background so we can
place objects behind her.
73. 8.2-Rotoscope the model: The next step in our
process is going to be removing her from the background using the Roto Brush tool. That works exactly
the same way as we did in chapter seven with
this particular clip. So the first thing
we're gonna do is duplicate the clip
on the timeline. So I'm just going to select
it here in the layers and press Control
D to duplicate it. And we will be
rotoscoping the top one. So I'm going to
double-click it here in the layers to get
in the layer view. And then I'm going to
grab my Roto Brush. Again. You can change the size of the Roto Brush by holding Control and clicking
and dragging left and right on the mouse. Then I'm just going to start painting out the first frame. And this works
exactly the same way. So I'm going to zoom in where necessary and delete some of these extra areas holding
Alt when I have to. I'm just going to paint over her silhouette so
that she will be out. And where necessary, I
can just Alt drag over the footage to delete any
areas that I do not need. Just going to grab
our hair hair over here and then move on
to her legs and feet. For this area, I want to
decrease my brush size a bit. So holding Control and
click and drag left. Just grab the tip
of her toe here. Is that correct? Yes. Okay. Then moving on to the other leg, you can be pretty generous with your strokes here actually, because there's a lot of
contrast between our subject, my daughter, and the background. Then all I have to do
to track the footage is to play back pressing
the space bar. And I'm just going to let
this process run until we hit about eight seconds where the light post is going
to come into view. So until then I will
pause recording. Okay, we are at about
7.5 seconds and the light post is about
to come into view here. And I'm just going to
wait for her to disappear behind it and move on a little. And here I'm going to
pause the footage and holding control and
using the arrow keys, I can move through the
clip frame-by-frame until her foot appears
here on the other side. I'm going to pick one frame
forward from this point, actually, and then start
painting over her foot again. I'm just going to
zoom in a little bit. And in this zoomed in view, you can use the spacebar. So hold down the spacebar. Actually move
across the footage. Okay, now I'm gonna go forward a frame holding control
and the arrow key. Then we get some more
of her foot and leg, which I'm going to paint
over with the Roto Brush. And in the next frame, we can also grab more of her
leg and part of her dress. I'm keeping an eye
on whether or not the Roto is still
accurate by the way, that it doesn't select any
of the background here. We can move up her torso
and grabbed her arm. We can just go ahead and
take part of her face. And now I'm going to move
on to the next frame, holding control and
the right arrow key. And it's already starting to
track it pretty accurately. So I'm just going to
click and drag over here to grab some
more of her dress. Just part of this. Moving on to the next frame. She is in frame almost
exactly, almost completely. Now it's actually grabbing
some of the background here. So I'm just going to Alt, drag over this area
to get rid of that, this little part over here. And then move on
to the next frame. It's grabbing her leg
pretty accurately. And now I can just paint in the right foot
along with her toe. And now the program
goes way too far. So I'm just going to Alt
drag over this area. This is not great yet, so I'm just going
to keep improving. And the more you
improve actually, the more you make
changes to this, the more accurate the
program actually becomes. So that's something
to keep in mind. I just saw a little problem
with her left foot, so I'm just going to go back
a frame and check if that is still accurate and
it does appear to be. And then just grab her leg again because when
you go back a frame, it actually forgets
the next frame. So that's also something
to keep in mind. And then I'm going to track
out the rest of the footage, zooming out a
little bit and then pressing Spacebar
to keep playing. And I'm going to keep an eye
on her silhouette to see whether or not the track
is still accurate. And that does appear
to be the case. So now the truck is complete and now we can go
back to the composition. So out of this layer view, I'm just going to hide the
background layer for now. So we see her separately
and playing the timeline, we can see that she is pretty decently cut out
from the background. So the next step is
going to be to add the compositions where
the actual animations are going to take
place in 3D space. So let's move on
to the next lesson to start that process.
74. 8.3-Adding 3D precomps: In this lesson,
we will be adding the pre compositions which we will use to create our actual animations
for the background. So in the project,
I'm just going to re-enable visibility
on the main clip. And what I'm gonna do is actually create a
shape layer that comprises the entire
composition so that it's the actual size of the
composition itself. So I'm gonna go up into the shape tools and
choose rectangle, making sure that no
layer is selected. And then just double-clicking
the tool to create a shape, the size of our composition. And the first thing
I'm going to do is pre-compose this composition. And that enables
us to just change the content of the
pre-composition at anytime without affecting how it appears in our
final animation. So I'm going to right-click this shape layer one
and choose precompose. And I'm just going to
name this animation one. And then click, Okay. Now what I'm gonna do is
create a 3D object here. I'm going to turn this
pre-composition into a 3D object so that it starts being affected
by the camera. I then want to give
this pre-composition the same position as our truck solid from
the first lesson. So I'm just going to
click the track solid and press P for position. Then click the word position and press control C to
copy this position. Then I'm going to click
on animation one, our new pre-composition
and press Control V to give it
the same location in x, y, and z space. And playing the footage, I can see that the
composition is actually tracking
quite accurately. Now, it's a bit bigger than I
want the composition to be. In the end. I'm just
going to go into S for scale for animation. And I'm going to put
this at about 80%, let's say 70% thereabouts. Let's be exact and
make it exactly 70%. Now, with the
selection tool active, I'm actually going to
move it down a little bit and a bit to the right, and then up a little bit
because I want it to mask it on this triangle
in the background. Well, behind here is
actually not a triangle, but a more complex shape, but I want to mask it to this
shape in the next section. What I'm going to do
then is duplicate this composition in the
composition in the project panel. So I'm just going to
duplicate this twice because I want to animate
on three rectangles. Then I'm going to move
forward in the timeline a bit like so. Grab main. Actually I grabbed the
wrong pre-comp for this. So I'm just going
to go to animation one and duplicate this. Then I'm going to
take animation to, and just drag it
down to the layers. I'm going to turn this
into a 3D object. And then I'm going to grab its position and paste the position that we
copied previously. Now, moving on
into the timeline, I'm going to move it to
the correct position. So I'm going to move it
to the right and down. And as I said, we will
be masking this later in this chapter so that it only appears within the
actual triangle. And I'm going to scale
it down to 70% again so that it's slightly smaller and then move it down
a little bit more. Then I'm going to
hide it so we can work on animation three. So I'm gonna move
forward in time again. Then I'm going to grab animation three and place it
on the timeline. I'm going to turn
this into a 3D layer. And then I'm going to
paste the position. And again, then I'm going
to move it to the left, move it down, and
then scale it down to 70% so that it kind of fits
within this triangle here. Now, I'm going to
re-enable visibility on these pre compositions. And you will see
that they will track accurately because they are 3D objects in a scene
with a 3D camera. Now obviously my
daughter is still behind these pre compositions. I can change that very easily by clicking and dragging
main clip, one, which has how our
rotoscoping result to the top of the layer stack. And that will put her in front
of these pre compositions. The next step is to mask
the pre compositions. And then in the
video after that, I'm going to show you how to insert any animation
that you want. In the next video, we
are going to be masking these objects to the actual
triangles in the background.
75. 8.4-Masking the precomps: In this lesson, we will be
masking our background shapes, these pre compositions to the actual wall
panels on this wall. And I'm just going to get
started with animation one, the pre-composition
animation one. So I'm going to hide number
two and number three. And then I'm going to
grab the layer opacity of animation one, and I'm going to
reduce it to 40%. So I can actually see the background that
I want to trace. To mask out only this
area on the shape. I'm going to grab the pen tool. And I'm just going to get
started here on this corner. And then click here right
before this clamp because we also don't want the animation
to overlap this clamp. And I'm just going to
chase a trace around this. Moving onto the next one. And I'm not clicking and
dragging to create curves, I am just creating
straight lines. Then I'm gonna go
forward a little bit until this clamp is visible. And because it's
already 3D motion tract and these are 3D objects, we don't have to worry about these masks staying
in place because they are 3D objects that
are already camera tracked. So just working around
this clamp here. Then I'm going to
click at the bottom. Then I can close out the
mask by clicking here. And now the visibility
of this precomposition is limited to this area
that I have just drawn. So now we can move on
to pre-comp number two. So I'm going to
find a frame around three seconds where this
whole triangle is in view. And then re-enable visibility on the animation to pre-comp. And I'm going to
lower its opacity to 40% so that I can start
tracing the panel. Click once on this corner here, and then moving on to this
clamp, tracing around it. Moving on to the next
clamp, tracing around it. You don't have to be
super accurate here. Obviously being more accurate gives better results in the end, but these edges are
not going to be visible because we
are only going to be creating our animations
in the center of the pre-composition in
one of the next videos. So it just moved on it
in time a little bit to actually see where I want to
place these masking points. And because these objects
are already tracked in 3D, we can just move around
until my daughter is either in front of them or
pass them already. Then click on the first
one to close the path. And now we have a mask
for animation to. Moving on to animation
three, again, I'm just going to make
it visible and then get the opacity out for animation
three and lower it to 40%. Then again, we're going to just outline the shape of this panel. So tracing around the clamp, clicking on the point. Then I'm going to
move forward in time a little bit to get a view of this clamp here and
trace around it. Next clamp. There we go. Then I can just close out the path by clicking
the first one. And now it's only
visible within the mask. So playing the
animation now you will see that these stay in place nicely because of
our camera tracking. This all works pretty well
until we get to eight seconds. Because these pre-composition,
despite that they have masks are on top of the
actual background footage. And that means that they
are going to display over the light post
moving through the frame. And that is a problem for pre-comp three and
pre-comp to four. So for both animation layers. So I'm going to
have to fix that. So I'm going to disable the
visibility on animation too, so I can just focus
on animation three. And then I'm going
to find a point in the footage where it
starts being a problem. So lets say exactly
eight seconds. I'm going to click
Animation three, and I have the Pen
tool still active. And what I'm gonna do now
is add a secondary mask that is going to cut
out of this mask. So what I'm gonna
do is just very simply trace the shape of the light post and then
move forward a few frames. And then I'm going to grab
one of these corners. And just a way, actually, what we need to do is go into
masks and then mask two. And we have to keyframe
the mask path. So I'm just going to go back
to eight seconds exactly. Keyframe the mask path, and then move forward
a few frames. Then I can just either click
and drag the mask around, or I can just grab
the selection tool, click on an empty space here, and then click back on
the mask to be able to move around these
individual corners. I'm going to move
forward a few frames and then click and drag
around the points again. And what you will see is
not representative for our final result because the mask is currently
set to add, meaning that everything within this mask is going
to be visible. Now that's something
we will be changing to subtract once we actually
finish this process. And this process is actually manual rotoscoping because
we are cutting something out of a video based
on a mask animation. So just moving on. And every time
there's a big skip in position, I stop playback. I stopped skipping
forward and I correct the mask because the
mask path is key framed. We can just click and drag
these points around to correct wherever
the timeline is. Now it's about to
move off screen. Quick autosave. I'm just going to keep clicking and dragging
these points around. You don't have to be
super accurate because the light post is actually quite blurry
in the foreground. And it's about to move
off screen one more. Now it's off screen
and so as the mask. So what we have now, once we switch mask to, from add to subtract mode, is this result here. So now the shape actually disappears as the mask
moves through frame. Now, this is also a problem for the animation
to precomposition. So I'm just going to collapse everything in animation three. Go-to animation to and
re-enable its visibility. Then I'm going to find
the point where it starts becoming a
problem and that's around eight seconds
and 12 frames. Then I'm going to
grab the pen tool. And again I'm just
going to click to trace the shape
of the light post. Now, before we move on, I have to actually animate
the mask path of mask to. So I'm just going
to add a keyframe. Then I'm going to
skip forward to where the overlap
starts happening, which is about here. And with the selection tool, I can click on an empty spot
and then click on the mask. Then I can just move it over. You will see that if I add this, if I put it on subtract, the shape is actually going to disappear instead of up here. So moving on a few frames, I'm just going to click
and drag the mask around. You don't want to skip too far ahead because you
won't be aware of any problems until you actually go back and
play the footage. So I'm just clicking and
dragging your thankfully, I walked at a pretty
consistent speed. So I can be relatively certain that this mask will
stay in place properly. And it's about to
move off screen. So I can then move
the mask off screen. I'm just going to scrub
through the timeline to make sure this worked correctly. And that does appear
to be the case. So now, playing
back the footage, you will see that
around eight seconds, these two pre-comps will
start disappearing behind the light post because we animated a mask set
to subtract mode. Okay. Currently still working at full resolution.
Okay, here we go. So it's going to
disappear behind the post and so does
the other ones. So our masking actually worked. One more thing that I noticed
as I was going to export this tutorial is that at some point the track
becomes less accurate. And that's because
the scene is actually hidden behind the lamppost
for the most part. So what we can do to
fix that is manually animate the position
of these main masks, Let's say on both Mask ones, on both of these animation
layers to get around that. Because as you can see, once I get to about eight
seconds and five frames, you will see that it
starts overlapping with the creases
between these areas. And that's not
something that we want. So I'm going to go to the frame where it actually
starts losing the track. And that is going to be, let's say, I would say it starts acting up around six seconds
and 17 frames. Then I'm just going to animate the mask path for mask one. Then I'm going to
move forward a bit. With the selection tool. I can actually select the entire mask and just move it into place
where I need it to be. And I'm gonna do that
again a bit further on. Currently, I'm only
doing this for the animation to layer. And then it appears to be pretty much correct
for the final frame. So I'm just going to
play the animation. And now it actually
stays where it should. Say I saw one frame where
it's too far away over here. So let's see how that
looks here. Okay. On this frame, it's too far off. So I'm just going to
click and drag it around until it is
where I need it to be. Go back a frame,
make sure it's okay. Okay. Now, this black,
this blue background is going to be hidden
in the animation, will be playing inside
of these areas. So it's not going
to be a big issue, but I just wanted to show one
of the common problems that you can run into when you're trying to animate
stuff like this. I can see we have the same
problem for animation three. So I'm just going
to grab the Mask, which is mask one. And then I'm going to
find the frame where it starts losing the track. And that's approximately
eight seconds and 32 frames for this layer. And I'm going to
grab the Mask Path and animate it by
clicking the stopwatch. Skip forward a few frames
and just click them, drag it back into
place where it should be skipped forward a few frames. Here we go. Now it's
slightly off-center again, so I'm just going to
click and drag it back. Skip forward a few frames. And again, it's not
where it should be. Some just moving it to
the right a little. We want to make sure
that at the end, when it becomes visible again, that it is in approximately
the right place. And here at the end, we don't seem to be
having any major issues. So I'm actually going
to just move it a little bit and then
preview the animation. Jumps around a little, but we're not gonna be able to see that in the final result. So this was basically manually
rotoscoping out this pole. And this pole affects the
accuracy of the tracking. So you have to make sure
that your masks at least stay in the same position
that they were before. So that you don't get any strange results once you actually start animating
these backgrounds, which we are going to
do in the next lesson.
76. 8.5-Adding animations: It's time to add some
actual animations to our 3D tracked and
masked pre-comps. For that. First,
I'm just going to organize my layers
here a little bit. I'm going to press Control
a to select everything in the layers and then press
U to collapse everything. So press the Uber key to
just collapse everything. Now, because we duplicated these animation pre-comps
in the project panel, they are actually
separate items. So what we're gonna
do in animation one will not be reflected
in animation too, so that we can animate
them separately. And what I'm gonna do now
is go into animation. Actually. Let's get rid of this
track solid because we no longer needed here just to clean up our
project a little bit. So now we only have six layers. So I'm going to go into the
Animation one pre-comp by just clicking here and here we just have our blue rectangle. I don't actually need
this rectangle anymore, so I'm just going to delete it. And now when I go back to
the main clip, by the way, this area will appear blank, but it is actually still just the same precomp
and it's going to reflect whatever we put in here. Now, we could just manually start creating
animations in here. But for brevity sake, we're going to use these
animation composer pre-comps about which I will tell you a lot more in the chapter about
different plugins. So here I have these folders with liquid
one, liquid 79111624. And we're going to just
click and drag these into the layers in order so that we can fill the
timeline with animation. So the first thing
we wanna do is just click and drag
down liquid one. And that is this transparent
liquid animation. I'm going to press O to
move to the final frame of this animation and then
open the folder liquid seven. And then I'm going
to click and drag to the timeline and I'm
going to hold Shift to snap it to the end of liquid one so that when
one animation ends, the next one, we'll begin. The same for liquid seven. I'm just going to
press O to move to the final frame and expand
the group liquid nine. Click and drag it into the timeline and hold Shift
to snap it towards the end. And the shift is very, the snapping here
is very limited, So you have to get
quite close to where the playhead is to
actually snap it in place. Press O again on liquid nine
and then import liquid 11. Press O on liquid 11
and go to liquid 16. And I'm dragging
the pre-comp and not the folder into
here, by the way. Then liquid 16, I'm
just going to click and drag this in.
And there we go. So now we have this
animation here of these different
liquid shape elements animating in the background. And I'm actually,
I'm going to go back into the main clip composition to see if that actually
works properly. So now you will see that these are actually
animating in place over there. Now we're gonna do the
same for animation to, so I'm just going to open up this pre-comp by
double-clicking it. Delete Shape Layer one. Then just start dragging
in these pre-comps. And again, we could place
any animation here. I just want something quick that looks fancy for the background. And that's why I'm
using these pre animated shapes. Liquid 16. There we go. Back to the main clip and
now we have this result. And I just wanted to
make sure that it looks okay towards the end. And that does appear
to be the case. So moving on to animation three. Just delete the shape layer and start dragging
in the pre-comps 179 and I'm holding Shift to snap it to
the end of the layer. In this case actually
we go liquid 16. Okay. Now back to the main clip. Let's say I want
the animations of animation through a 23
to start slightly later. I'm just going to select these and just drag them
forward in time a little bit. And the same for
animation three. So just select the layers, click and drag them forward
a little bit so they don't all take place at the same time. Now the opacity of these
pre-comps is still set to 40%. So I'm just going to
select all of them and press T and then change
the opacity to 100%. I'm going to change the
resolution of my preview to half, so the preview
renders a bit faster. Then I'm actually going to
play the whole timeline here. And the Roto Brush
is making things a little bit difficult
for live playback. But you will see that these
animations take place within their respected
respective masks, which is the intended result. For the rest, I'm just
going to scrub through a little bit to spot any issues. Don't appear to be many. So I think we're just
about ready to create a final render of this
composition of this project. So what I'm gonna do is go
into File and then Export and then add this composition
to the Media Encoder Queue. That's going to open
up Media Encoder, which again can take a little bit of time
depending on your system. It's going to show up
here in the queue. And once it's imported, I'm not going to touch
this file format. I just want to choose
a different location. And we're just going to
render this out into my AE folder as project results. Now, I'm going to be
very curious about the results of your project. So feel free to
send those onto me. And maybe I can even
give you some feedback. I just click the play button and that's going to render
out the project. And this can take a bit longer because there was quite a bit
going on in this project. So I'm just going to pause playback until the
render is complete. Okay, the render is
about to complete. So now I can just click this export file that's
going to open the folder. And here's our project results. Basically working
exactly as intended. So congratulations on your first full animation
in After Effects.
77. 9.1-CC vignette: In this chapter, we are
finally going to work with some effects within
After Effects. And to get started, I have in the exercise files which you can open by double-clicking in
the project panel, this video 9.1 vignette. And if you import that and create a
composition based on those, based on that video by
clicking and dragging it to the new composition icon
in the project panel, you will see the same reversed drone video that we've seen in a previous chapter when we started working
with camera tracking. And what I want to show you
is that there are actually a few ways of applying
effects in After Effects. One of the ways is
applying effects directly to the layer itself, which applies it to
the entire layer. So if I go into the effects and presets
panel here on the right, which if it's not
visible for you, you can always go into Window and then go to
effects and presets. And I'm going to
search for vignette V, d and e t. And that's going
to give me CC vignette. And this is in the
stylized category. And that means that if I go into the effects menu and
then go to Stylize, I will find the SCC
vignette there as well. Now, I can click and drag
this onto the layer itself. I can do that within
the composition or in the layers panel. That's going to
apply the effect. And the effects become visible here in the
effect controls panel. So once you apply an
effect, generally speaking, it will automatically
open the effect controls. And I'm just going
to reset this to the default value
and the vignette. A vignette is basically
usually it means instance style points for your video because it just
adds a darker border, which is cylindrical,
knocked cylindrical. It's elliptical in nature around the edges of your video
to make it more stylized. Let's say here I can change the amount of vignetting
that is taking place. So this is basically simulating what some more wide
angle lenses do. And this is used very often. You see it everywhere. A lot of people add this to their video just to make the
footage a bit more stylized, I can change the angle of view, which is going to squeeze the vignette towards the center. The center, by default, is set to the center
of the composition, but you can also click
and drag this around to get a different version
of this vignette. And pin highlights means that it tries to leave
the highlights alone. So at darkens the
highlights less, but it's still adds a
vignette to the video. So now you will see once the
pin highlights is at 100 and increasing the amount
doesn't really affect the lightest points of this video because pin
highlights is at 100. And if I decrease
that value again, you will see that
we get this result. Now, the amount basically determines the opacity
of the effect. But what I prefer to
do when working with effects is actually apply
them to adjustment layers. Adjustment layers are
basically invisible layers that you place on top of footage layers and then
apply effects to it. And to decrease or
increase the effect, you can always play
with the opacity of the adjustment layer to make the effect more or
less visible when you want. So you don't have to dive into the Effect Controls of the
individual footage layers. But you get the benefit of
being able to influence the, the effect layers of opacity and that it affects
every layer below it. So let me show you what I mean. I'm just going to delete
this CC vignette effect by clicking on it in effect
controls and pressing Delete. That gives me the footage
as it was before. And then I can go into the Layer menu and then
go to new and then create an adjustment layer that creates the adjustment
layer above the layer. And by default, it lasts for the entire duration
of the composition. Now I can just rename
this layer by pressing the Enter key and say vignette. Then I can apply the
CC vignette effect to this adjustment layer by just clicking and
dragging it over. And then I have the same
controls as we had before. But I have the added benefit
of being able to go into this vignette layer's opacity and decreasing it and
even keyframing it. If I want to
decrease or increase the effect over time,
I can even apply. I could even apply expressions
such as a wiggle to this opacity value
to make the vignette flicker a little bit as
the timeline progresses. So this is another way
of applying effects. And in many cases, this actually has my preference because it's just a little bit more flexible than
applying effects directly to the
layers themselves. Now, before we continue
to the next lesson, I just wanted to show you a quick use for this
kind of vignette. When you're just doing
some motion graphics, when you just animating
some text or some shapes. I'm going to make.
I'm just going to delete these layers here. Then I'm just going to create a shape layer that fills
the whole composition. I'm going to go into the
color of this shape layer, and I'm going to make it just a bright orange. And
then click Okay. And I'm gonna get rid of the
stroke by Alt clicking on the stroke color
three times to get to cycle it back to no stroke. Then I'm just going to apply the effect to this
particular layer. So I'm just going
to click and drag it into the composition. And you immediately get this cool little gradient
that is a lot more visually interesting than a
standard fill solid color. And again, I can play
with the amount to either exaggerate or pull
back the vignette. So this is just a quick, interesting little trick
that you can use to make your more flat compositions a bit more visually interesting.
78. 9.2-Curves: Before we continue in this
chapter about curves, in this specific lesson, I would like to explain
something about effects in After Effects. There are hundreds of
them and they all have different results based on
what you apply them to. These chapters are always very difficult to develop
in the sense that it's difficult to choose
what to actually talk about because
there are so many of these effects and
their results always vary depending on what
you apply them to. For this chapter, I've actually
chosen to just talk about the effects that I use
in a practical sense, the most compared to
the other effects. And I'm going to leave the
rest of the effects for you to experiment with on
your own footage or the footage that I've
provided you for this course. So without further ado, let's start looking at curves. So I'm just going to
import the footage for that lesson and that's
going to be 9.2 curves. And I'm going to basic
composition on this by clicking and dragging it to
the new composition button. And here we have
the same footage of my daughter walking in front
of the blob in Eindhoven, which is one of the iconic
buildings of my city, which is mostly obscured. But it's very pretty,
I assure you. So I am going to apply the
curves effect and I find that the easiest way to get
to the effects that you want to apply is the
Effects and Presets panel. You can also go into the
effects menu at the top, but you need to know
exactly what you're looking for and there's no
search function up here. So it's much easier to go
to effects and presets. So I'm going to
look for curves and that's gonna be in the
color correction tab. And one thing I want to point out about
these numbers here is that you need a
specific version of Windows to be able to
access these effects. So this as 32, meaning you meet, need a 32-bit operating system
to be able to use those. So if your system is old enough, you wouldn't be able to use
effects such as this one. And I am first going
to actually create an adjustment layer that we are going to apply this effect to. So I'm just going to go
into layer here at the top, new and then choose
adjustment layer. I'm going to press
Enter and just name this curves and then apply the curves effect to it by
clicking and dragging it into the layer here
at the bottom left. And that's going to
apply the curves effect also opening the
Effect Controls. Now, curves is in the
color correction tab, meaning that this is a color correction
tool that we can use. We can correct lighting, we can increase
contrast and even edit individual color channels if that's something we want to do. Now, here we have this
diagram and this is a representation of
all the light and dark values of this
particular video, of this particular image. The bottom-left presents the
darkest point of the video. So this would be absolute black. And the top right actually represents the lightest
point of the video, or absolute white when it comes
to this particular image, you can actually edit
all of these values. So if I start
clicking and dragging this bottom left
point to the right, actually going to map more of the darker tones
to absolute black. So it's actually darkening
the entire video. And the same goes for
the light values. So I can pull all the
light values to the left. And it's actually
going to map more and more of the lighter
tones of the image to absolute white until we blow everything out to white when we drag it all the way to the left. So that's how this
diagram works. Essentially. What you usually want to do is just add a point to
the middle and drag that around a bit
to get a bit of a more contrast he
looked to your footage. So what I can do here is click once to add an anchor point. And then clicking and dragging this line around will actually allow me to increase the
lightness of the image. If I click and drag
to the top left, or darken the image when
I go to the bottom right. What I can also do is
move this point up a bit and put it about here within the corner of the
first one from the top right. And then I can go down here to the darker tones and
just click and drag this to the bottom
right a bit to get like an S curve kind of idea, giving us more
contrast in the image. So I've darkened the
shadows and brightened the highlights of
the image a little to get this more
contrast he look. And just as for
demonstration purposes, I'm just going to hide this
curves adjustment layer. So this is my before image, and this is now the afterimage, which is a much more
visually interesting image because it has more contrast, the colors pop a bit more. And this is a correction
that you will use all the time if you
work with video, not necessarily even
in After Effects. Premiere also contains
a curves adjustment that you can apply
for color correction. And this is usually how
you want to use this tool. The curves Effect also
has an auto button which automatically
corrects the contrast and the brightness
values of the image. So in this case, it brighten it up quite a bit. And I actually prefer
my version here. So I'm just gonna go back a step to get that more contrasty
look that I had before. And again, because we are
using an adjustment layer, I can just grab the opacity of this curves adjustment
layer and just click and drag this down if I ever want
to tone down the effect. What you will find when
you're shooting video with a professional level
camera is that the colors and the lighting are
actually usually very flat when you're shooting with certain color profiles. And the curves
adjustment is one of the ways to get that more
interesting look and feel to your image because you have a lot of control
over the contrast. So curves should
definitely be at the top of your list if you want
to make your footage a bit more visually
interesting and color corrected to a specific look.
79. 9.3-Lumetri color: An absolutely essential
effect when you are working with color
correction is lumetri color, which was first introduced into Premier Pro and is now also
available in After Effects. And it's basically
a catch all for almost all color and
lighting corrections to your footage. So let's import the footage
we will be working with. And you will find
that in the exercise files 9.3 Lumetri color. And this is a slightly
smaller video because this was actually a proxy file based on an
longer edit that I did. It's Apple ProRes four to two. So it's a very high
bit rate video, which has an unusually
large file size for this kind of format as well. And that's because this was essentially shot in
a video raw format. And you will see what I mean once we actually get
to editing the colors. So I'm just going
to click and drag this to New composition. And here we have the video. Video is a slow motion shot of me just grabbing some
camera gear in Croatia. And what you will
note is that the, the footage actually
looks extremely flat, like they're almost
doesn't appear to be any color except orange. Maybe a little bit of
blue in the sky up here. But the footage looks
incredibly flat. And that is because of
the file format that this footage was shot in. These flat color profiles, which you can usually
select if you have a semi-professional level camera like a Sony A7 or
something like that, allow you to do a lot
more with the colors when you're actually
in the editing room, which we will be going into. Now actually, I'm
just going to create an adjustment layer so that we can apply the effect
to a separate layer. So I'm just going to
go up into layers and then New and then choose
Adjustment Layer. And I'm going to name
this one Lumetri by pressing Enter and just
typing in Lumetri. And then I'm going to search
for the Lumetri effect in effects and presets. Lumetri. Lumetri has actually
so expansive that I could dedicate an entire
chapter to this effect alone. We're not gonna go into
all of the details. We're just going to look
at basic correction and some of the fancier buttons
and dials on this effect. So Lumetri Color Yours
is applied and initially it does nothing because all the settings
are set to default. So I'm just going to expand the Basic Correction panel
here in the effect controls. And here we have the
option to choose a lot or a look up table. Now I don't have a
lot specific for this kind of footage,
but basically, a lot is a way to automatically
correct video when it comes to color and lighting based on the camera
that you've shot it with. For example, canon releases lots for most of
their color profiles. So to Sony, you can
actually find them on their own website or through affiliate websites of theirs. If you'll look for Canon
lot or Sony lot on Google, you will usually find a site that where you can
download these. I'm just going to show you
what a lot actually does. This is not the correct lot
for this specific video, but it basically just
changes the colors and the lighting and already gives us a much better looking image. Actually, this Alexa profile, which is kind of a
joke as a default. So I'm just gonna go back to
none to get rid of that lot. And here we again have
this flat looking footage. First we have here a
white balance correction. So what you can do here is if
you know that something in this video is exactly
a grayscale value. So perfectly black
are perfectly white, or any grayscale
value in-between. You can use this color picker to correct the footage
based on that. That doesn't give us a very
dramatic result in this case. Because there is almost no
color in the image as of yet. But this is something
you can use to automatically correct
white balance. The temperature and tint also have to do
with white balance. So I can just click and drag to increase the
temperature or decrease the temperature and
increasing it makes it more warm and decreasing it
makes the footage colder, so it makes it more blue and
gives it a blue color cast. If the white balance on your
camera was set incorrectly, you can get footage
that looks green or purple depending on the settings in the environment that
you were filming in. And you can correct that
using the tint slider. So going to the right, actually it gives it
a purple color cast. And going to the left gives
it a green color cast. And purple negates
a green color cast, and green negates a
purple color casts. That's why these
sliders are there. And that's what they do. I can also saturate
the colors a bit more and that's
something I'm actually going to do at this point. I'm going to put this at
about one sixty, one fifty. One sixty to give us a bit
more color in the image. And already the footage
looks a lot better because we have more stronger
colors here. And then we're going to
look at the light category. I can change the exposure and just increasing the
exposure makes the footage brighter altogether across
the image by the same value. So I'm currently overexposing
the shot with a 1.8. I'm just going to put this
at about 0.5, I think. Oh, no, not 0.5 comma five. Something like that. I can increase the contrast, which is something I'm
going to do and I'm gonna put the
contrast at about 40. And these values are pretty
high for standard footage. But when you're working
with raw images like this, with a flat color profile, these values are nothing
to be intimidated by. I can make the highlights brighter or darker
if I so choose. And I'm actually
going to darken, now, brighten them
up a little bit. Let's say up to 20. And then I'm going
to make the shadows a bit darker to get even more contrast in the image by putting it at minus 30. We can also change the brightest tones of the
image with the whites. I'm going to leave
that alone for now. And I can also influence
the darkest colors by decreasing or
increasing the blacks. And I'm just gonna, I'm just gonna put this up minus ten to give us this results. Now, try to think back
of how this footage looked when we
first imported it. And now we're actually going
to look at that by just clicking this fx button
in the effect controls. So this is what we started with, and this is what we have
now just by twisting some dials here in the
Lumetri Color panel. This is insanely useful
and insanely powerful, especially when you apply it to an adjustment layer
because you can influence the individual
opacity and you can still break it up into
different sections. Actually, you can create several different
adjustment layers for different parts
of your footage. So this is just exceeding
you Lee useful and it replaces most other
color adjustment tools just because it's
so comprehensive. And that's just looking at
the basic Corrections tab. We still have creative. We have curves where we cannot just adjust the lighting curves, but also color curves allowing us to change
colors in an image. We have color wheels,
HSL secondary, and even a vignette that we can apply through this
Lumetri panel. So I'm just going
to click and drag the vignette to the left a bit, because dragging it to the right actually gives us a
brighter vignette. And I'm gonna put this
at about minus 2.5. I'm going to leave the
mid points at about 50. I think that's where it
was actually before. Was it wasn't 50. That's fine. You can change the feather of the vignette to make it
less or more pronounced. This is actually
exactly the look that I wanted for this footage. So we're going to
leave this video here. I do encourage you to actually
go into the creative panel and give a look to these different looks
that you can apply. These are basically
Instagram filters that you can apply
to your footage. I could go for a Clean
Kodak B for example, and that gives me an
even more contrast, the image where the colors
pop a little bit more still. And I also have the intensity slider
here with which I can increase or decrease how this
effect affects my footage. So this is also something that can be useful
in certain cases. I'm actually going
to leave it at the basic correction that we did because I think the footage
already improved a lot. But I encourage you to dive into these panels when you have some footage that you just want to give a
little bit more tender, loving care, let's say for better results and just twist the knobs and see what it does. And you'll rarely
have to actually get out of basic correction
of vignette. Sometimes the creative tab
is useful if you're going for a specific look that you know from going
through this list. But just these two
categories alone, Basic Correction and
vignette are so incredibly powerful that I cannot recommend using
this effect enough.
80. 9.4-Gaussian Blur: Another absolutely essential
effect is the Gaussian Blur, which you might be familiar
with if you've worked with Premier Pro and or
Photoshop in the past. But this time we
will be working with the after-effects
version of this effect. So I'm just going to
import the footage for this lesson and that's
gonna be 9.4 Gaussian Blur. And that is again
the reversed bit of drone footage at the
waterfall at the beach and deliver in Colombia where it went on my first holiday
with my wife, actually. And I'm just going
to click and drag this to New composition and create a composition
based on this footage. Again, we're going to create an adjustment layer to
apply this effect to, because I'm also
going to show you a different benefit
or an added benefit of working with adjustment
layers as opposed to just applying the effects to
the layers themselves. And instead of going
into the Layers menu, I'm actually going to press Control Alt Y or Command
Option Y on the Mac. And that's just going to
create an adjustment layer. And I'm just going to
name this one blur by pressing Enter
and typing blur. Now, the Gaussian
blur effect is found in the Effects and Presets panel or in the Effects
menu at the top. But if you type in Blur, you will find a lot of different colors
that you can apply. So I'm just going to
look for Gauss J, G, a, U, S. And that's going to be in the
Blur and Sharpen category. And I'm just going to
click and drag this onto the adjustment layer
to apply the effect. Now the blurriness by default here in the effect
controls is set to 0. But you will see once I
start increasing this value, the layer itself
becomes more blurry. This is obviously something
you can key-frame. So I can go from blurriness to it being in focus
for this footage. So at the beginning
of the timeline, I'm just going to
add a keyframe. I'm going to put the blurriness
at something like 20. Then I'm gonna go to 1
second in the timeline. And then I'm just going to
decrease the blurriness to 0. And I'm now going to press U to get all the keyframes here. So u is the Uber key, has its known and that just
enables all the properties in the layer controls actually have keyframes and I'm going to
add the appropriate easing. So an Ease In for the second keyframe and an ease out from
the first keyframe. And that's going to look
something like this. So it fades from
blurriness into focus. And I can actually
increase the timespan of that effect to visualize
it a bit better, it starts out blurry
and within four seconds it now becomes in-focus. And I'm just going to
mute this footage here, this waterfall in
the background. So that's how to
apply this effect. But I wanted to show you a specific way of
applying this effect. And for that, I'm just going to go to the start
of the timeline and click the stopwatch for
blurriness to remove the keyframes while keeping
the footage actually blurry. Now, I'm going to make sure
that this adjustment layer, the blur adjustment
layer, is selected. And then I'm going to
go to the Ellipse tool, one of the shape tools. What I'm gonna do now
is find the center of my composition and start
clicking and dragging, holding the mouse down. And I'm going to grab
the control key to draw this ellipse
from its center. And I'm just going to draw this wide ellipse that
is wider than it's high. So I don't want to hold
the shift for a circle. I just wanted to draw
this wider ellipse. Now, what you see is that we have a mask and
this blur effect is only visible within this mask because it's applied to
this adjustment layer. That means that we
can actually change the mode of the
mask to subtract. And that's going to make
the center of the footage in-focus and the
edges out of focus. But this line is extremely hard. So you can actually see the outline when the
mask isn't selected. And that's not something I want. I want it to be a bit softer where the
transition is concerned. So I'm just going to
expand the mask options and look at the mask feather. And I'm just going to
increase this value until I get to something like 250, Something like that. So that gives a much softer
edge to the blur effect. Now when I play the footage, it gives this kind of
ethereal look to it. Because this water going up is actually being blurred
towards the edges. And I just quite like
how this effect looks. And this is just to
demonstrate that when you work with adjustment layers, you can actually determine which parts of your
footage are being affected by the effect by
applying masks in this way.
81. 9.5-Light sweep: Another effect
that's a little bit cornea in today's world, but is still used very often, is the light sweep. And that can actually
predict a light across our layers to indicate that
it has a shining light on it. And to demonstrate this,
I'm just going to create a new composition here
in After Effects. And that's going to
be 1920 by 1080 with a 32nd 30 frames per
second frame rate, and the duration is
gonna be ten seconds. And just for
demonstration purposes, the background color
is going to be black. So I'm just going to
create that composition. I'm going to grab
the type tool here at the top and click
in my composition. My type size is currently set to a 170 pixels and the
color is set to read. Because of what those settings do for the visibility
of the effect, you don't want white text
with a white light on it. So I'm just going to go in
here and type in light sweep. And we're going to
press Control Enter to confirm that text input. Grab the selection
tool and place it approximately in the
middle of the composition. Then in the Effects and Presets, we are going to search for light sweep and that's going
to give a CC light sweep. And I'm just going to
click and drag and drop this on the layer. And that's going to
place a highlight on these characters here. I'm just going to go
to full resolution so you can see it a bit better. Here in the effect controls, we have the settings
for this effect with all of which you can
key-frame by the way. So I can click and
drag the X position to actually drag it
across the layer. I can change the
angle of the light. So when I set it to 0, the light will be
shining straight down. I can change the shape of the effect and I'm just
going to make this smooth. I can change the width, which is going to affect more
or less of the characters. The sweep intensity is how strong the light is actually
falling on this subject. The edge intensity
makes the edges a bit more defined and gives them more of an embossing effect. And then we have edge thickness, which also increases how far the effect reaches
into our shapes. And also we can change
the color of the light. So what I can do is click
on this color and then click on the color picker
and pick this red. And I'm just going to make a
lighter version of this red. So I'm just going
to click and drag the color here a bit
to the left and click. Okay, and that's gonna
be my highlights. So to animate this, we just have to add
some keyframes. So first I'm going to place
it all the way on the left, outside of the actual text. And at the beginning
of the timeline, I'm just going to
keyframe the center. Then I'm going to go to 15
frames, so that's 2.5th. And then click and drag the
center across the shape here. And I'm going to place it
outside on the right side. So it's just going to
sweep across this shapes. So now we have this highlight
sweeping across our texts. So I don't use this
effect very often, but it's something
you will very often see when you watch a lot
of YouTube, for example. So this is how that
effect is achieved.
82. 9.6-Write on: The next effect we
will be looking at is the write on effect, which makes it look
like a layer is being drawn or written as
the timeline progresses. So here in After Effects, I'm just going to create
a new composition. And that's gonna be the same
settings as the last one. So 1920 by 1080, frame rate 30 and a duration of ten seconds with a
black background. And I'm just going to
click Okay in here. And I'm going to
create a text layer. And I'm just going to click in the composition here and
I'm going to type a 123. I'm just going to
take a thin font, something like quicksand light. You can also go from Myriad Pro, Light or something like that, as long as it's a thin font, which is just easier for
demonstration purposes. And I'm going to increase
the size to, let's say 300. And with the text selected, I'm actually going
to use the alt key and the right arrow key to increase the distance of the characters so I can place
them a bit further apart. I'm also going to change
the color to white just for demonstration
purposes and click Okay, and then Control Enter to
confirm the text input. I want this centered
in my composition. So I'm going to grab
the align panel and I'm just going to click on these to align options to
place it in the exact center. Now, I want to actually write this text as the
timeline progresses. And for that, I'm going to
go into Effects and Presets. And then I'm going to
search for right WR IITE. And that's gonna
give me the right on effect in the
Generate category. So I'm just going to click
and drag this onto the text. And that's gonna give
us these controls in the effect controls. And the first thing
we're gonna do is change the color of my brush to be better visible
against this background and over the text that
we will be writing. I'm just going to click
on the color picker and I'm going to
pick a bright red. And then increase
the brush size to be wider than the actual
character line of the text. So it has to be wider
than the text itself. I can then click and drag
this brush position around. And that's what we
will be keyframing. And I'm just going to
place it right outside the first character
of this text. And this is what we
will be animating. So I'm just going to click
here on the stopwatch for brush position
to add a keyframe. And you can see when I press the U key on my keyboard that I immediately get the
keyframes property, which is currently
the brush position. Then I'm going to
use Control and right arrow to
skip three frames. And then I'm just going
to click and drag this brush position over here. Then I'm going to skip
five frames, 12345, holding control and
the right arrow key, and I'm going to drag it down. Now, the further
you drag these out, the better the individual, individual brushstrokes
will be visible. This is determined by
the brush spacing. So I'm just going
to click and drag the brush spacing all
the way down to 0.001. Just to get a tighter fit
for the brush strokes. I'm going to drag
it to the bottom here of the one and then
skip ahead three frames 123. And then I'm gonna go
to the number two. So I'm just going to
click and drag it up. Skip three frames, go
here, 123, go here. And I'm just going to be
tracing all of this text here. 123. Note that if
you are working with a font that is a bit
more tricky to work with, that you can also key-frame
the brush size actually so that you can trace
around other objects. And 123, moving on to the 3123, skip had three frames. Click and drag it over 123. And going down here, 123. There we go. Dragging it down, 123 over here. And the final one is
gonna be two frames. Okay, there we go. And now when I
play the timeline, you will see that it
actually traces this text. But I don't want it to
just trace the text. I want to reveal this text as the brush position
is going over the layer. And for that we have to
look at the paint style. So I'm just gonna go
in here where it says paint style and then choose
reveal original image. And at the beginning
of the timeline, the texts will now be invisible. When I played the
timeline using spacebar, you will see that the
text is being drawn. So this is basically like a trim path effect that you
have a lot of control over. And if you animate
it across a layer, you can make it seem like
the layer is actually being drawn as the
timeline progresses. Now a fun little effect
is that we can actually Parents stuff to
this brush position. And to demonstrate this, I have here a stock image, which unfortunately
I cannot make available to you because
it's from Adobe Stock. And what I'm gonna do here
is create a selection in Photoshop of this
hand with this pen. So I'm just going to grab
the object selection tool and click and drag a
marquee across the hand, arm and the pen. And that's gonna
give me a pretty decent selection
of this subject. This function works
amazingly well in Photoshop and I
use it all the time. Then I'm going to copy this to a new layer using Control J. Then I'm going to hide the background layer
and I'm going to save this layer as a PNG file with
a transparent background. So I'm going to
press Control Alt S, go to my desktop. And I'm going to name this
Panza pen or hand with pen. And in Save As I'm
going to choose a PNG, so I get the transparent
background and click Okay. And I'm going to import this
image into After Effects by going to the project panel and double-clicking
on an empty spot, going to my desktop
and then looking for the document over
here, hand with pen. And I'm going to
import this into my composition by
just clicking and dragging it down and
placing it above the text. Now, the size of this layer
is a bit of an issue, so I'm just going to scale it
down to something like 30%. Let's say 35. What I wanna do now is place the anchor point on
the tip of the pen. So I'm going to grab
the anchor point tool and click and drag
the anchor point over from the center of the
layer to this pinpoint. Now what I want is to
parent the position of the pen to the position
of the brush position. The brush position is
visible here already. So I can just click on the pen care and
press P for position. And then I can use
the link property to go to the brush position. So I'm gonna click
and drag the link, pick whip to brush position. And that's going to parent
it to the brush position. And now, when I
play the timeline, you will see that this pen
actually follows the effect.
83. 9.7-Slider control: The next effect we
will be looking at is a slider control, which is used very often
in animated infographics. So what I'm gonna do here in
After Effects is just create a new composition with the
same settings as previously. So 1920 by 1080 with
a frame rate of 30 and a black background
lasting ten seconds. And then click Okay to
create that new composition. Now, I'm going to
grab the type tool, and I'm just going
to click here in my composition and I'm
going to enter a 0. The actual numerical
value doesn't matter. What we will be doing is
animating the numbers. Let's say you could
enter text here. It doesn't really matter. We're going to just
animate a number running from 0 up to something
like 79%, let's say. Speaking of percent i, we will add the
percentage marker as a separate text layer. I'm just going to press control enter to enter my text input, and then go into Effects and Presets and then
search for slider. And that's gonna give
me slider control in the expression controls. So I'm just going to
click and drag this over to the layer to apply it. And that opens the
Effect Controls. Now, clicking and dragging this value is not going
to do anything because the value has to be linked
to a layer property. So I'm just going to
make sure this is at 0. And then I'm going
to expand the layer controls because we have
to add an expression. So I'm just going to expand
the texts category so the source text is visible and the effects in which we
have slider control, which also has to be expanded. Now, what we're
going to do is link the source text to
this slider value. So I'm just going to
grab the link, pick, whip, and click and
drag it over to slider. And the slider value determines the text value within
this text layer. So you can go into minus,
you can go into plus, and you can animate this value
to get different numbers. So what I'm gonna do then
is actually animate it. And I'm actually going
to make sure that the source texts
expression here, which we created when we
linked the property to the slider is also visible because we will have to do a
little bit of work in here. I'm going to animate
the slider value from 0 seconds to 1 second. So I'm just going
to go to one period and then go to
something like 79. And that's going to
put the value at 79. But note that when we
play the timeline, we get some unexpected results. We also get a lot
of decimal places, and that's something we don't
want in our end result. So we have to actually round these numbers to full numbers. So not decimals by going into the expression and adding
a little bit of code. Here at the beginning,
I'm going to type math and then press Tab to autocomplete period
and then type round, and then tap to auto-complete. And then I have to put
this closing bracket at the end of the expression. So I'm going to get rid of this closing bracket and then put that closing
bracket at the end. And that will give me
the desired results. So everything within
this math round bracket is now being rounded to 79. I'm gonna give this a
little bit of easing. So I'm gonna go into the keyframe assistant for the second keyframe
and choose an ease in. And then choose an ease
out for the beginning. So that's gonna give
me this where it accelerates and
slows down to 79. The number is so
high that you don't really see the slowdown, but it suits our
purposes just fine. Now, let's say we are going to actually animate
an infographic element. What I'm gonna do then
is actually go in here. Actually, first I'm
going to center this text frame within
the composition. So I'm going to select the
text and the layers go to align and just make sure
that it's in the center. Then I'm going to draw a
circle around this text layer. So I have to make sure
nothing is selected. Otherwise, I will add it as a mask and then double-click
the Ellipse tool. And then I'm gonna go
into the contents of ellipse one and go
to ellipse path, unlink the width and the height. And I'm just gonna make this, let's say 500 by 500 pixels. Then I'm gonna get rid
of the fill by Alt, clicking the fill color until
we end up with no fill. And then make the stroke white. And the stroke thickness
looks about right to me, so I'm not going
to mess with that. Then we're going to add
a trim path animation. So I'm going to go
into Add here at the top with the Shape Layer selected and go to Trim Paths. Now we've worked with
trim path before when we were working with shape layers in the
chapter about shapes. So what I can do now
is actually animate this value with the start
and the end at 100. I'm going to keyframe the
start and go to 1 second. And then I'm going to
decrease the start value to 21 because that gives
me 79 on the other end. Then I'm going to apply
some easing to this, so Ease In for the end and
he's out for the start. And now when I
play the timeline, you will see not only
the percentage count up, but you will also see this bar filling up because of
the trim path effect. So that is a couple of things. I really liked this effect. It's very useful if you
want to illustrate numbers, making them a little more
dynamic and use that. You do that using the
slider control and for the progress bar, let's say which we
have here in a circle, we use a trim path
effect because it works with the same
numerical values.
84. 9.8-Particle systems: The next effect
we're looking at is the particle systems
affect which we can use to create particles for
something like rain or explosions or snow or whatever you desire
depending on the settings. Here in After Effects,
I'm just going to create a new composition, same settings as before. So 1920 by 1080, frame rate 30, a
10-second duration and a black background color. And then I'm just going to click Okay to create that composition. Now, to use the particle
systems effect, we need a layer to
apply that effect too. And for stuff like this, you usually use a solid layer, which is just a solid fill layer that is most often
used for effects. So I'm just going
to press Control Y. Or alternatively
you can go up to Layer new and then solid. And I'm just going to
name this particle. The name doesn't
actually matter. But the the better
organize your layers, the better the easier it is to work within
any given project. We can specify size
for this solid. I'm just going to make
it the comp size here, and you can choose a color. The color doesn't matter
because the solid itself is just going to disappear once we
apply the effect. So I'm just going to click Okay. And here we have a solid. And then I'm gonna go into
Effects and Presets and search for particle part tick. And that's gonna give
me these three systems. And for now I'm just gonna go with CC Particle systems too. So I'm going to
click and drag this over to the solid layer. And that's going to
apply the effect. And now when I start
playing the timeline, you will see an explosion
of these yellow particles. And these particles
are affected obviously by the settings in the effects. Effect Controls tab. The first setting here is the birth rate and
that determines the number of particles
that are born every second. We also have a longevity. And the longevity determines
when the particles die, so when they go away, so when I put it at 0.5, the particles will
die after 2.5th. Now, these are also values
that we can keyframe. So let's say at 1
second in the timeline, I want just one single explosion of particles to take place. Then I'm just going to
keyframe the birth rate here. And I'm going to start
the birth rate at 0. Then I'm gonna go
ahead one frame. So using control and
the right arrow key, and we're just going to
put the birth rate at ten. And then in the next frame, I am going to put the
birth rate to 0 again. And now when I press U, you will also see
these keyframes here. Once I zoom in on my timeline a little bit using Alt scroll. And now in one frame we
get this little explosion. I can also spread
these keyframes out a little bit more so I
can select all three, hold Alt and then click and drag to space them a little bit. And that's gonna give me a
slightly longer explosion. So I'm just going to go
to the second keyframe here and then get rid of the keyframes by
clicking the stopwatch. And now we're going to look
at the producer settings. I'm just going to move
forward in time a little bit. So we have some
particles on screen. Here. We have the position of the producer or the emitter. So you can change where the particles are being born
within the composition. We can also change
the radius value, which spreads them out
over a larger area. If you want to make it look
like things are raining down in a composition,
that's something you can do. And you can also do
that over the y-axis to fill the entire composition
when I play it now, you will see that
we get this effect. Just going to Control
Z that to go back. Then we have a
Physics tab in which we can change the
animation type. I can go from explosive
to Turley, for example. And that's going to give
the objects a rotation. Let's go to full-on twirl for a second and then we get
this vortex kind of thing. Which can be interesting. We can change the velocity
of the particles, meaning that they will be thrown out from the center
a lot farther. We can change the velocity
or the gravity of the scene. So with the gravity set to one, the particles will
inevitably fall down. Now, when I change
the gravity to 0, they're just going to
disperse in all directions. You can change the
resistance, resistance, you can change the
direction of the particles. And then you have the
particle settings themselves. So now we have this line
and we can change that to, for example, a shaded sphere. And that's gonna
give us this effect. We can change the size of
the particles at birth, and we can change the size
of the particles at death. So when they cease existing, which is determined
by the longevity, we can change the size
variation so we can give a bit more
variety in their size. And the color map is set to
birth to death, meaning. And then we have
these colors here. So they're going to
start out yellow and as they die, they become red. So you can also change these values to something different. I can make them a light-blue at birth and a darker
blue at death. Let's say. That's gonna give me, I'm
just going to put down the birth rate a
little bit to five because that ten was
a bit exaggerated. And I'm going to decrease
the velocity 2.5. Let's say. That's going to give
me this effect. So you can play with
these settings for all kinds of different results. Note that these
particles are not 3D, so this is just a flat effect. Basically, you are
playing a movie of this, these particles being born in
a flat frame of reference. So even if I turn this layer
into a 3D layer and I grab the rotation and rotate
it along the y-axis, you'll see that the
effect is flat, so this is not 3D. So it doesn't interact with 3D objects that you
put in your scene. If you want to do
something like that, you're going to have
to look at a plugin such as trap code particular, which does interact with the camera and with
lights natively.
85. 10.1-Animation composer: In this final chapter, we will be looking at
a few different things that didn't really fit in
with the other chapters. And we're going to start
out with a little bit of a plug-in showcase of a couple of plug-ins
that I use every day. The most important of which
is animation composer. Animation composer
is created by Mr. Horse and you can find
it at Mr. Horse.com. So just go to their
website and you can click here where
it says products, products for After Effects or
products for Premiere Pro. And you will end up at the learn more and download screen here. And animation composer
is a freemium plug-in, so it's free to install. And it comes with
a whole bunch of animation presets and
animated graphics and stuff like that that you can use without
paying a single dime. But you can also pay for these expanded packs
that gives you, gives you a lot more
video transitions and text animations and effects that you can apply two layers, which is incredibly
easy to use and completely changed how
I use After Effects, which I will show
you in this video. So you can download
it for Windows. You will get an installer. Within the installer,
you will have to create an account for Mr. Horse, which you do
have to activate, and they use that to
validate the license of any products packs that
you may have purchased, which are actually
pretty affordable. So if I go here where it says products and the products
for After Effects, we have these motion presets, which you can buy for $70. We have these texts
presets what you can, which you can buy for $60. They also have these
filmmaker transitions which are exceedingly
easy to apply. We have these animated
shape elements, 2D special effects, animated background, textures,
animated illustrations, and even essential
sound effects, which we will also talk
about a bit in this chapter in a few separate videos
because this plugin is so important for my daily work
with After Effects that I just want to make sure that you understand its
value proposition. In the exercise files, I have an Illustrator
file prepared. Once you install
animation composer. You can just follow
along by importing this Illustrator document
from the exercise files. And that's going to be
10.1 animation composer. I'm going to import
this as a composition with Footage Dimensions, layer size to put the anchor points on the center of
the layers themselves. This illustration, once I open it in, the
composition viewer, is just this little icon
of a game controller, which consists of several
different layers. We have a background layer, we have this shadow layer. We have the body of
the controller itself. And the separate buttons are all separate layers so that we can animate
them separately. So I'm going to bring up
animation composer by going up into Window and then choosing animation
composer three, there is currently an update, but what, I'm going
to skip that for now. And here I have a lot of different
categories that I can use because I have bought basically everything they've ever released just for demonstration purposes. And because I like
using this plugin, but you will have the
starter presets available. And that comes in
different categories. We have 2D layer transitions,
3D layer transitions, texts layer transitions, 2D layer effects and
effects for texts layer. And the cool thing about
these categories is that you get an instant preview of what the effect is
actually going to do. And that's relatively
unique in After Effects, because all the effects and presets of After Effects itself will not be visible until you actually apply them
to your layers. So here we get a preview of
how that's going to look. So I'm just going to
decrease the zoom level a little so that I have
a better overview. And I'm going to make sure
that the background layer here is selected. And then I'm gonna go
to the bottom most preset and then
click Animate in. You can animate objects
into the composition, out of the composition, or you can animate
both at the same time. For now, I'm just
going to go within. And that immediately
applies the animation. And you also have some settings
here that you can still influence for the number of bounces and the actual
scale being animated. And now when I
play the timeline, you will see that the background
layer is now animated with this really nice dynamic
and fluid bounce animation. So I'm just going to
put this layer on solo for a moment by clicking the Solo button
here in the layer controls so we can better
see the effect itself. So we get this really
cool, clean Bounce. Now, something happened
to this layer. There was this marker
added which says tRNA, and that stands
for transition in. The position of this
marker determines when the animation
has completed. So the further this
is into the layer, the slower the
animation will play, the closer it is to the
beginning of the layer, the faster the
animation will play. So when I put it more forward, the animation will play quicker. And I'm just going to
undo those two steps by using Control Z. And then I'm going to un-solo
this background layer. So I get the other layers
and then we're going to move on to the
background shadow layer. So I just clicked on
Background shadow and I am just going to choose a fade cubic inch
to make it fade into view. And then press Enter to
apply the animation. Then we are going to
the body controller. And let's say I am going to choose an overshoot
rotate here, and I want it to animate
in from the top. So I'm going to click top here. And then click in to apply the animation that
we already have, something like this that didn't play smoothly.
Now it did. That already looks pretty cool. Then we have these four buttons. And to these four buttons
I'm going to apply the same overshoot Scale
as the background. So I'm just going to select
these four layers by clicking on the top one and shift clicking on
the bottom one, and then choose the overshoot Scale from anchor
point and click in. Then moving on to the D-pad. Let's say I'm going
to choose this one. The ys rotate and I'm
going to make this come in from the left actually,
and then click Okay. Now when I play the animation, you will see that we have this nice dynamic
fluid animation for all of these layers. Now, I could easily
do this manually, but that is a process that
will take at least 15 minutes. And using animation composer, I can just choose a preset, apply it and immediately have this kind of
animation. Making. Animation composer
exceedingly useful for the basic animation stuff. So scaling, positioning,
rotating, opacity animations, It's all in there and you
have a lot of control over how these effects appear
with the Effect Controls. And while the list of presets
in the freemium version, the free version of the
plugin is fairly limited. The pacs contains so many
animations that for me, it's always an instant purchase and I cannot recommend it enough because it just makes the standard busy work
in After Effects, all these animations, just a breeze to go through and so
much easier to work with. Now, these animations
play out at the exact same time currently. And that's because the
start of the animation is linked to the
start of the layer. So if I want to delay
these animations, I would have to stagger them. So I would move each layer
forward a few frames and time. Now, that is something that
can be very time-consuming. In the next video, which is still about
animation composer, I'm going to show you how to use animation composer to
stagger your layers. So you have a lot of control over when animations
actually play out.
86. 10.2-Animation composer-transition shifter: Continuing on from
the previous lesson, I'm going to show you how
we can move these layers on the timeline so we can make our animation a little
bit more dynamic, because I don't want all of these layers to animate
at the same time. I want to delay the animation
by about five frames. With animation
composer installed, I can go up into the Window
menu and then choose the animation composer
three transition shifter. And that's gonna give me
this little pop-up window. And now I'm going to select all the layers that
I want to stagger. And then I'm gonna look down
here where it says stagger. So I want to stagger
the layers themselves, and I want to do
that by five frames. So I want to move each
layer five frames in time in reference to
the previous layer. And I want to do this in ascending order
because I want to go from the background
up to the D-pad layer. Then I just click do. And that is it. That is all I have to do
to stagger these layers. So now when I play the timeline, these animations
start five frames apart because of this
stagger function. And this is so
incredibly useful. I cannot emphasize enough how often you have to do stuff
like this in After Effects. I'm just going to undo
that and show you the manual way of doing this
without animation composer. So what I would
have to do is go to the Background
shadow layer and go to five frames in the timeline. I would zoom in a bit
and I would shift, drag the layer forwards. Then I would go to ten frames, and I would go to the
next layer and click and drag it forward the next layer. So I would go to 15 frames
and drag it forward. And I just messed up already. So this is a very
manual process that you will have to do for
each individual layer and animation composer makes
this so dummy proof and so easy that I cannot
recommend it enough. Again, like I said in the
previous lesson already. So just select your layers. Grabbed the transition
shifter from the window menu, click do, and that is
all you have to do.
87. 10.3-Animation Composer-Precomps: Animation composer also, also
comes loaded with a lot of pre compositions
that you can use for transitions between clips
that you can use to animate, to add animated illustrations or 2D special effects or other
things to your compositions, which also make life in
after effects a lot easier. For demonstration purposes, I
have put two video clips in the exercise files
which I'm just going to import now
to osha walking, 12 osha walking too. So I'm just going to select
these clips and import them. These clips are, let's see, 30 FPS, ten seconds long. So I'm going to create a composition that
lasts for 20 seconds. So I'm just going to
create a new comp. And I'm going to make
sure the duration is set to 20 seconds, so 20 period, and
then press Okay. Now I'm going to
import both of these to the timeline by just clicking and dragging
here and placing them. And then I'm going to
stagger them by just selecting one and clicking
and dragging it to the right. And I'm gonna make
sure that they actually overlap by zooming in and then placing them
exactly on each other. So when one ends,
the other begins. Now, I want to show you how these pre compositions work
from animation composer. So I'm gonna go up into the Window menu and choose
Animation composer three. And then you can take a look at the starter pre-comps that
we have available here. We have different categories. We have these overlays
that you can add. We have these shape
elements that you can add, which are also just
exceedingly easy to use. We have these animated
social media icons, we have textboxes, and we have transitions
that we can use. So let's say I want to add a transition between
these two layers. I'm going to put the
timeline exactly where they split and I can
snap it to that point, to that frame by
holding Shift actually. And let's say I want to just add this zoom and
rotate out transition. I'm just going to
click on the comp. And for demonstration purposes, I'm actually going
to add sound to this transition and then click Add to put it
in my composition. Now, it's going to ask
me to save the project, which I'm going
to do real quick. So I'm going to click Okay. And then press Control S. And I'm just going to save this to my desktop as untitled
project for now. There's already an untitled
project as they're often is. So I'm just going to click Yes. And now it's saved.
And I can use this transition that pop-up came in because it's
referencing a sound file. So you need to save it manually for that sound
file to be referenced. So now I can click Add, and it's going to add a
pre-composition to my layers. Now, once we get to this
point in the timeline, you will see that we have this transition which has to render first before
we actually see it. I'm actually going
to place it on top of the layer stack for now. This is centered at this cut, the cut between these two clips. So I'm just going to
let this pre-render. So I'm just waiting for the
transition to complete. Now I can preview
it in normal speed. And now we have this
super smooth transition that required 0 effort
to add to the timeline. So instead of animating the layers rotation and the
blur and the distortion, we just choose
this free precomp, we add it to the timeline and we have this really
cool transition. And you actually have
a lot of control over this transition by going
into the settings here, the edit settings
for the transition. You can change the
shape strength. You can change the
auto orientation, the amount of blur, the amount of color distortion, and the color distortion
settings themselves. So this is just
extremely easy to use. I use this all the time
to transition between. What I often do is create animations based on the
photos that I make. So I create a reel for Instagram and I
transitioned between the images with these
transitions because it's just dummy proof,
quick and easy. And it looks fantastic
compared to what you can do yourself in the same
amount of time. So you can also hear the sound
playing in the background. If you want to get
rid of the sound, you can just mute the
composition by clicking this switch here in
the layer controls. So this is one of
the transitions. Let's look at another item from the pre compositions,
from the free ones. I'm just going to go
into Browse and then I'm gonna go into textboxes. And again, we instantly
get a preview here. And let's say I want this
one, line, one down. Then I can just click Add
here in the timeline. And it's going to
place the end point where the timeline was placed. And then I can change
the color of the text. I can contain, change the
color of the container. I can change the fill
of the container. And what you can also do
is just click in here to change the text so I can
type in After Effects. Press Enter to confirm that, or that's actually
going to add a line. So just click out of the text
box and close the settings. And now I have this really cool, Sweet and easy texts animation without having to
actually add a text frame. So this is just so ridiculously fast compared to manually animating
all of this stuff. I use it all the time. I use it basically for every
project that I create. And these are just
the free presets. So if you go to Mr. Horst.com
and look at the pacs, then you can see what kind of added value They have
for you specifically. And I would recommend
the to-be layer. Motion presets, the transitions
and the text animations, and the 2D special effects because I use those
all the time, just a simple
background elements. And I'm not sponsored
by animation composer, I'm not sponsored by Mr. Horse. I'm just recommending
this to you because it completely changed how
I use the program, so I cannot recommend
this plugin enough. One final thing that
I'm going to show you is the anchor point mover. So I have this text
frame here selected. And now I'm just gonna
go to Window and then animation composer
three, anchor point mover. And that gives me this
little pop-up here, which I have on-screen most of the time when
I'm not teaching. And with this, I can
just quickly and easily move the anchor
point of a layer, a pre-comp in this case, to whichever position I
choose so I can center it. I can put it at the top. I can put it at the bottom. And note that this
is actually not the the comp size of this pre-comp is actually the full resolution of
the main composition. So it's larger
than this textbox. It actually fills out
the whole composition. So if I wanted to move the anchor point
of the texts frame, I would have to actually go
into this precomposition. Now, this is also
extremely easy. Of course, when you want to center an anchor
point on a layer, you can always double-click
the anchor point tool holding down Control
or Command on the Mac. But if you wanted to move
it to a different location, you can very quickly and easily do this using the
anchor point mover. Please take a look at
animation composer. It will make your life and
after-effects so much easier.
88. 10.4-Newton 3: Another plugin that I
would like to showcase in this video is that Newton
a0b0 or Newton three, which you can purchase
on a0b0 scripts.com. So this is not a free plugin, but it is extremely useful
for motion graphics, which I will demonstrate
in this video. A0b0 scripts, by the way, is a site where you can download many different kinds of plugins and presets
for After Effects. If you're looking for
something specific, like animating dynamic
text and such, then you can have a
look at this site. So I'm just going to search for Newton here and press enter. And that's going to
bring up Newton three, so I can click this. And Newton is a physics
engine within After Effects. And I'm going to dive
into After Effects in a minute and show you how
it works and what it does. They have some very interesting demo content here that you can take a look at which showcases what the
plugin can do. It's quite expensive,
so it's $250. So that's definitely not cheap. But it really depends on how
much your time is worth. Because if you are
working with a lot of physics-based
animations where things collide with each other
or rotate or fall down. It can really save
a lot of time. So I'm just going
to go back into After Effects and create
a new composition. And note that you can follow
along with what I'm doing now because you probably
don't have this plugin. So I'm just going to
click here on Okay, to create this new composition. And I'm going to quickly build a scene based on shape layers. So I'm going to click and draw, click and drag to draw a floor. And I'm just gonna
get rid of the stroke that was on there. And then I'm going to draw a
rectangle here at the top. And then I'm going
to draw a star. And then I'm going to draw a circle by just clicking and
dragging and holding Shift. And these are all on their
separate layers mind juice. So these are all separate
layers in the Layers panel. So I de-selected everything
before I drew the new shape. And now with this composition set up with this scene setup, I'm going to go into Newton. So I'm going to go into composition and then
choose Newton three. Where are these
plugins end up can be, can vary a little
bit because you also have plug-ins that go into File and then Scripts when it comes to doing
vessel, for example. They can also wind up in their own panels when
you go to Window. But this actually opens up a program within
After Effects. So I'm going to go into composition and then
go into Newton three. Now we get this scene
setup and the scene setup, I can just play by clicking
this Play button here. And once I hit, hit play,
everything falls down. And note that everything
falls down with a speed of 9.8 seconds squared. So this actually behaves as gravity would
behave on earth. Now, what I can do is click
on the floor here and I can go to the top left
where it says type. And I can change the type
from dynamic to static. And that is going to
make this not fall down. So now when I click Play, you will see these objects
fall in a realistic way. You will also see that
they bounce because they have certain properties over which I have
a lot of control. Now what I'm gonna do is move these objects around
a little bit. And I'm going to make this
star a dormant type object. That means it's
not going to move until it interacts
with another object. So what's actually
going to happen is this circle is
going to fall down. It's going to hit
the star and then move the star as it goes down. Now when I click
Play, we get this. As a result. This is completely automatic. All I have to do is just click and drag the shapes around, give them their different
properties and click Play and everything just behaves
exactly as it should. I have a gravity
control here so I can change the direction of
gravity if I choose. But I'm just going
to put this back where it was before
holding Shift. The strength of gravity
is also determined by this the distance
of this circle. So the radius of this circle. So I'm just going to
leave that where it was. And the next thing I'm going
to do is make this circle, this ball a little more bouncy. So I'm gonna go into the
bounciness and change this to 0.9 instead of 0.3
and then click Play. And now it's a whole
lot more bouncy. And it actually bounces
off of other objects. And that is one of the
most important things that this plug-in does. It allows object interaction
it within After Effects, you can't really say, okay, when this object
hits this object, I want this object to behave in exactly the way as
it would in real life. So Newton actually
automates all of that and it animates
everything for you. All you have to
do is click play. Another thing we can do is
give things inherent velocity. So what I can do is
click on this rectangle and then go into where
it says velocity tool. And then I can click and
drag something like this. And then I'm also
going to make weight. Actually, what I
want to do is this. And then you have to switch
back to another tool first. And I'm gonna make these
circled dormant as well. And now when I hit play, it's going to hit the circle
and it's going to hit the star and everything
bounces off of each other. This plugin has, I could develop a whole separate
course on this plugin because it has magnetism, it has pistons that
you can add to make objects move in a static way. Just a bunch of
different options that you can use,
create cool animations. But this is as far
as this demo goes. So I'm just going to render out this animation by
clicking out render here. And it's going to
end on frame 300. So it's just going to
play the animation. It's going to close
out of Newton. And now in the project
panel I have a comp to. Opening comp to, you will
see the animation play out. And all I had to do was set
up the scene and click Play. And now what I want
to show you is when I select these
layers and press U, you will see that the position and rotation
of these objects, objects was just automatically
keyframes for me. So these keyframes were added
completely automatically. I can still change
them if I want. So I can click and drag the position of these
layers around if I chose. And I can also share this project with people
that don't have newton. So this is a very
useful plug-in if you work with a lot of physics
based motion graphics.
89. 10.5-After effects projects in Premiere: In this lesson, I want to
show you how you can use animations that you've made in After Effects in a
different program, like Premiere Pro, which is mostly used for
video editing. So what I'm gonna do here is
create a new composition. And that's gonna be 1920 by 1080 at ten seconds long with
a 30 FPS frame rate. And then I'm just
going to click Okay. And I'm just going to use animation composer to create
a quick text animation. So I'm going to go into Window and then animation composer. And for demonstration purposes, I'm gonna go with
the free started pre-comps and then go
to textboxes and use the same text box that I used in the video about
animation composer. And then I'm going to click Add. And because the video that I'm going to show you
in Premiere Pro and I can't make that
project available to you because it's several
gigabytes of video. I'm just going to type in czar, grab Croatia, because that's where the
video was actually shot. And then I already
have this animation. Then I'm going to
save this project by pressing Control
Shift S to save as. And I'm just going to put
this on my desktop for now. And I'm just going to
call this text animation. So this is a very simple
animation obviously. But this goes for any project that you create
within After Effects. So now going into Premiere Pro, I can import the animation
by going into file. And then import. Then I can find this after-effects
file on my hard drive, which is here text animation. And I'm just going to
double-click this. And that's going to
give me the choice of which composition I
actually want to import. And that's gonna be the
main composition comp one. So I'm just going to click Okay, and that's going to
put this composition in the project panel. And you might have to look
for this a little bit. Here. It is with in the
motion graphics folder. So I'm just going to click
and drag this into the video. Play the timeline. Now you will see that the text animation takes place above all the video
that's there. This is actually linked
dynamically to After Effects. So once I edit this text or how it
looks in After Effects, those changes will
be automatically reflected within Premier Pro. So going back to After Effects, I am going to open
the animation, compose our panel again, and just go into edit. Click the layer. And then I'm going to
change the text box color. So I'm just gonna
make this blue. That's gonna make it blue. And going back to Premiere
Pro a second later, it will update and it
will also appear blue. So any changes that
you perform in after-effects will be
reflected in Premier Pro, which is exceedingly
useful because you don't have to actually
re-import anything or re-link anything. You just perform the changes
in After Effects and they will be automatically
reflected in Premiere Pro.
90. 10.6-Package: It's time to start
working towards actually exporting a video out
of After Effects. So creating a video
from our compositions. And to demonstrate this, I have the file 10.6 package. And before we actually
export a project, I like to create a
package of a project. And a package basically means that after Effects
creates a folder on your hard drive in which all the external
files that are used in that project are collected so that when
you open the file later, none of the links
will be missing. You won't have to
correct any of them. And everything will be nice
and collected in one place, let's say, to create a
package out of a file, I'm just going to go into the
File menu here at the top, and then go about
halfway down two dependencies and then
choose collect files. Now when you collect
files, so you get into this pop up where you can choose what is actually
going to be collected. And I usually go for everything. But you can do this for
specific comps if you want, or you can just
collect the project itself without any of
the external links. Now I'm just going
to choose All. And I'm going to click collect. Then you will be asked to choose a location
for this package. And I'm just going to put
that on my desktop for now. And I'm going to click Save, and that's going to create the package and open the folder. Here I have a report
of the package, which is a text file which shows what's actually
within the package. And if there were any mistakes, I have the after-effects
project itself and I have a footage folder in which the 10.6 package file is collected, which just this
Photoshop document which we worked with
in chapter six. So now I can put this
in a zip folder, put it on my Dropbox or Google
Drive for later reference. So this is a very handy way of archiving your projects so
that when you open them, you're not missing any
of the actual footage.
91. 10.7-The Render Queue: One of the ways that we
can render video out of after effects is with the
internal render queue. So after Effects
can actually create videos for you from
within the program. It's just that the
renderer is pretty limited in the file types
that you can choose. The files, video files
that come out of it are usually
absolutely enormous, which I will demonstrate
in this lesson. So here in the composition
10.7 Render Queue, I'm just going to go up into the File menu and
then go to export. And here the second option
is Add to Render Queue. And we will be looking back at the Adobe Media Encoder
Queue in the next video. So I'm just going to click
Add to Render Queue. And that's going to open
up the render queue here at the bottom. There's a few settings
that you can click here to change the
settings of your video. The Render Settings. I can click here to
get this pop-up menu. And I can choose the quality in which the video
will be rendered. Usually you want to
leave this at best, it, unless you actually
wanted to show a quick draft of your project, then you can actually
generate a draft preview. But usually you want
to go for best and do this at the full resolution, but you can also go
for half if you want. And it's going to display
the dimensions of that half size here
behind the actual size. But I'm just going to render
it at full size for now. And those are basically
all the settings that you want to look at in this pop-up. So I'm going to actually, one other thing that you might want to take a look at
is the solo switches. So when you're
working in a project, you sometimes put
things on solos. So you solo a layer to
hide all the other layers. Now, sometimes it's possible
that you forget to read, enable, or disable
those switches. So what you can
actually do here in the solo switches is
turn all of them off. It doesn't happen very
often and you'll usually see it immediately once
the render is complete. But rendering tick
can take a long time. So stuff like this as a precaution can be a good
idea to take a look at. So I'm just going to
click OK out of this. And then we're going
to look at the output module where we actually choose the
format for our video. Now, the format is
selected here at the top, and currently mine
is set to quicktime, which is also the default
on Apple systems, which I'm not working
on by the way, I'm obviously using
a Windows system. There's actually only a couple
of video formats in here. So we can choose avi or AVI, or QuickTime, or all these
different image sequences. So I can generate a JPEG sequence based
on this composition, a PNG sequence, an
open E XR sequence, which is kind of a raw format, or even a Photoshop sequence. If you want image sequence as just a series of images
out of your project, and this is something
you can do. But AVI and QuickTime
are generally not good file formats
to choose because those files are absolutely
enormous compared to other file formats
that we can choose in the Adobe Media Encoder. So this is not something
I would recommend, but it is something you can
do if you are so inclined. The format here is the
most important setting. You don't really have to look at anything else,
generally speaking. So I'm just going to click Okay. And then the final
setting is the output to setting where we choose a
location for our render. And I'm just going to
render this out to the desktop as an AVI
file and click Save. And now I can click Render here. And that's going to actually
start the render and create a video based
on this animation. And we have a fancy
little progress bar here where we see a percentage and how many frames are
already rendered. And after a little while, you will also see
the remaining time for the actual render. This is a relatively
simple project, even though it contains
some 3D stuff. So it doesn't take more than
about 45 seconds in total. Now it's done. We get this little ping of which I actually
really like that sound, even though it can
be a bit loud. So I'm just gonna
go to the desktop. And here I should have my
video 10.7 Render Queue. This is a 10 second video, almost 3.5 gigabytes in size. So this is not exactly
something you can upload to Instagram where I believe the limit is about 64 megabytes. So Avi and QuickTime are both
very large file formats. And you don't want to use them for stuff like this because it's just too large to handle. Now, you can use
post-processing software such as hand brake or Adobe Media Encoder to re-encode it to a different file format. But that's an extra step
that you can skip by just going straight to
Adobe Media Encoder. You can render video
out of after effects, but the files are absolutely
enormous unless you choose for an image sequence such
as a JPEG or PNG sequence. So I would recommend
against using the actual render from
After Effects itself.
92. 10.8-Media Encoder queue: Now it's time to look at the
actual Adobe Media Encoder, which produces the most
useful files because we have a much larger list of file formats that
we can choose from. Here in composition
10.8 Media Encoder. I'm just going to go into
the File menu and then go to Exports and then choose Add
to Adobe Media Encoder Queue. And that's going to fire
up Adobe Media Encoder, which can take a minute
depending on your system specs. And we've actually been in
this dialogue before when we were working on our
project in chapter eight. And the footage, the composition is actually
going to load into this panel once the connection
to the project is made. And again, that can
take a few seconds. And now we will be looking at the actual settings that
we can influence here, because last time we
just chose H.264, the default which is
the best one to choose. In most cases, when
you click on H.264, which is an MP4 video codec, which is extremely efficient. So it produces very
high-quality files, but the file size is
actually quite small. Here we can choose what kind
of file format that we want. So I can create a dot gif. From here. I can also
create an AVI file. I can just choose MP4, which is also going
to be quite large. I can choose QuickTime, a PNG sequence, H.264 Blu-ray, and the file format
that's actually going to be replacing H.264
in a few years. H.265, which is even smaller and even more
qualitatively correct than H.264, but it's not as universally
adopted as H264. H264 is actually
still the standard, the preset you can
leave at the source. So this is, this matches the
settings of the composition. So that's not something
that you have to go into here where it says video, we can actually choose
a different width and height for our
video if we so choose, but that's going to
crop in the screen. So it's going to
distort the footage, which is not something
that you want. You can change the frame rate
of the render by default, it's set to the
composition frame rate, which is set to 60. There is a little
checkbox here that you can enable for use maximum render depth
or render quality, you can enable that, but there will not be
a visual difference. You would have to
really pixel peep to see any meaningful
difference. And that's not something
that most people do when they consume
video contents. So that's not something
you actually have to do. Those are basically all the settings that we
have to look at. We see a preview
of our video here. We see an estimated file
size here at the bottom. So that's going to
be 12 megabytes. So I'm just going to click
OK to close this dialogue. And then we can actually choose the location
for our exports. I'm just going to click this
and put it on the desktop. And I'm going to
render this out as 10.8 Media Encoder
and then click Save. Then I'm going to click
the Render button here, this Play button,
and that's going to create the actual render. So that's going to actually
create the video file. So we're just going to
wait for that to complete. We don't actually
hear that little chime that we heard in Media
Encoder, but that's okay. We can, we can live without it. So I'm just gonna go
to my desktop and then I have this
video file here, which is only nine megabytes as compared to the
previous video file, which was 3.5 gigabytes. So if you put those
videos side-by-side, you will not be able to
tell the difference. I guarantee it that
you will not be able to visually distinguish
the videos from each other. Even though this one
is so much smaller, the quality is exactly the same. It's just a different way, a different method of
encoding the videos. So it's just in a different box, which is much smaller
than the other box, which would be Avi than Media Encoder is what we use
to create our actual video. And you end up
there by going into the File menu and then choosing export and add to Adobe
Media Encoder Queue.
93. 10.9-Setting background color: Before we wrap up the course, I just wanted to point
out something that is inherent to Media
Encoder when you start rendering out video with a transparent background or transparent elements
on your video. To demonstrate this, here in the composition
10.9 Media Encoder, I'm just going to hide
the background layer. And you will note
that the composition is actually set to
a white background. So if I press Control K for
the composition settings, you will see that the background
color is set to white. Now, watch what
happens when I go into Media Encoder and actually
render out this animation. I'm just going to go
into File and then Export and add it to
Media Encoder Queue. Bringing me back
to Media Encoder. And then I can choose the
Export Location here. And that's just gonna
be the desktop again. Well, actually, if I can actually get to the
to choose the file. Yeah. Okay. I'm just going to choose
this one and press Enter. Close out of this. I'm actually opening
the previous ones, so I have to actually choose
the file location here. So I'm just going to export
this to the desktop again, and I'm just going to name
this Media Encoder dash to note that this item has a
transparent background. So I'm just going with a white
background color chosen. Then I'm just going
to start the queue by clicking the button here. And what you will see is that Media Encoder fills
transparency with black. So it actually ignores
the background color of the composition and it just
fills it in with black, which is not something
that you generally want. It can be that you
want it to be black, but I want to show you how to get something
other than black. What you wanna do if
you want something other than black
is just make sure that no layer is selected and then double-click one
of the shape tools. The Rectangle tool preferably. And that's going to
give me a shape layer which I can move
to the bottom of the layer stack and then
give a different name by pressing enter and enter
just BG for background. And I'm going to make sure
that this layer is locked so I don't actually
change it later. So now it has a blue background. If I want to change this
to, let's say white, I'm just gonna go up
here where it says Fill and lock the layer again, and then head back to
the Media Encoder Queue. So I'm going to go into File
Export Media Encoder Queue. And I'm just going
to go to the desktop again and render this out
as Media Encoder three. And then click Start the queue. And now it's actually
going to render with a white background because I added this background myself. So if you have transparency in your composition and you don't want this
filled with black. This is how you would solve
that particular problem. Problem, just putting
your own background, give it a color, and then lock it so you don't accidentally influence it later.
94. 10.10-Outro: And with that, we have come to the end of this nine our course. I hope over the course of
the last 90 plus videos, I've managed to show you what you wanted to learn about After Effects and that I've met your expectations or
even exceeded them. If you have any feedback
about the course, or if you want to share your own work or look
at some of mine, you can either follow
me and contact me on Instagram at Martin from vagal or you can
e-mail me directly at info at easy dash 123 and l. Feel free to contact me at anytime regarding any questions about the course or feedback
that you may be looking for. As I'm always interested in
engaging with my students. So thank you very much
for your attention. I really appreciate it. And if you got this far, please let me know what you
thought about the course.
 Martijn Van Weeghel