Transcripts
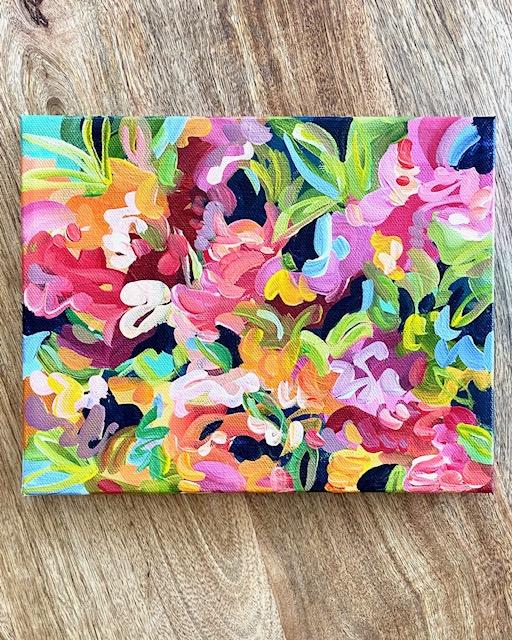
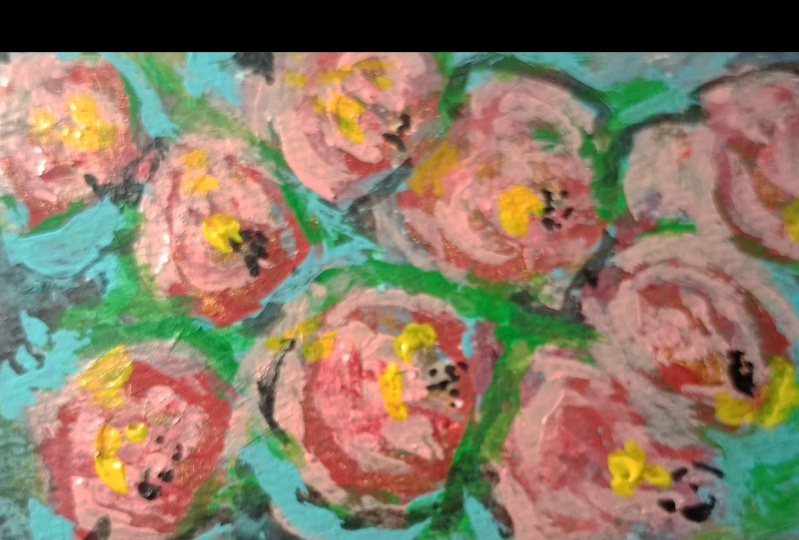
1. Introduction: Hey everyone, My name is L. In today's class, I'm going to show you how I make over my old ugly paintings that I don't want to sell. This painting originally looked like this. And I decided to give it a makeover with some abstract flowers. And I'm going to show you how I did that step-by-step. This is an 8 by 10 inch canvas. I used some bright and round paint brushes today. I have pallet paper, water and paper towels for clean up. And I also have some of my golden fluid acrylics. Feel free to use whatever paint brushes and paint colors you have on hand. I will list all of the supplies that I used in the About section below the video. For your class project, I would love to see how you make over your old ugly paintings. You can take a photo of your beautiful abstract flowers and upload them to the projects and resources tab below the video. All right, let's get started.
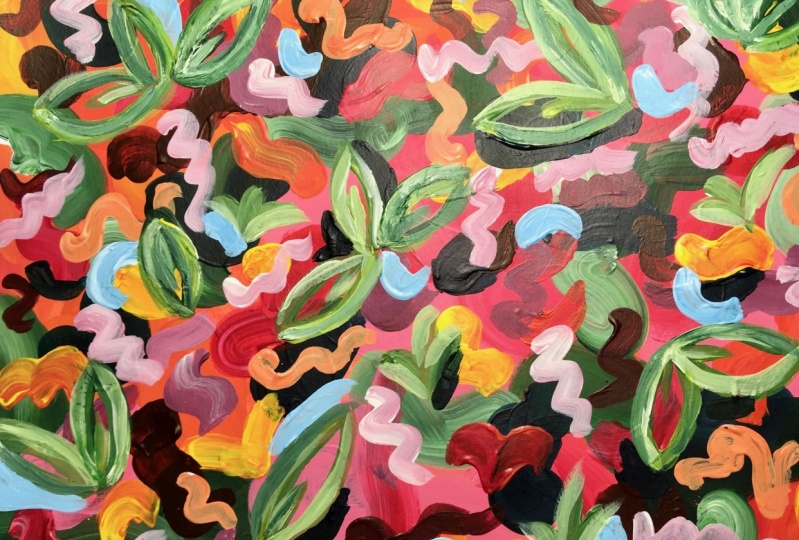
2. First Layer: Because I have so much green and blue on this painting already. I'm starting with my white, actually going to add a little blue so I can also mix some purple. This process. It's pretty easy, but it can take a long time because there are a lot of layers and involved. And you can go as detailed as you want. Are, you can go less detailed. It's totally up to you. I usually end up having to put it anywhere between 35 layers of paint on the canvas when I do this. But that's because I tend to over paint or tinker with my paintings for a long time. So what I'm gonna do is just start making big blobs of color right over my plant. I'm trying to do larger organic shapes, not going to paint circles. Just want to move my brush around and get some large areas covered different colors. So I'm gonna go with a little bit of yellow here. And maybe I'll make it a little bit orange. And this is going to be the underlayer of my my flowers. I find it easier to sort of just paint the sides as I go along. And then at the end, I don't have to worry about painting them a solid color. They just are already part of the whole painting. And then you don't need to frame your canvas. It's a little more muted because I had some purple and yellow mixed together and their complements and those two colors will desaturate. So it's really bringing that yellow into more of a mustard yellow. Complimentary colors will desaturate each other. So if you have purple and then you mix in some yellow, it's a good way to either do saturate your yellow or purple depending on the amount that proportion of paint that you use. I think this is probably a good start. I'm going to keep using the same brush. And I'm going to mix some more green and yellow and try to get some different colors as a base for some of my leaves. These well, not all of them, but some of those will pop through in the end. What I also want to cover some of them up. So I'm just going to swirl on some of my greens and blues like this. And just wipe my brush and I'm going to take some of that Payne's gray and get some darker areas in the middle. This will help to create depth and dimension. And it'll make your flowers look like they're coming forward. If you use some cooler, darker colors around them. So a cooler color will typically receive an a warmer color. Well, come forward. I think Payne's gray or turquoise, or even some Prussian blue is a great color to use. Are all gray colors to use? If you're trying to create depth around your flowers. I'm just mixing everything, trying to get different greens. I don't want everything to be exactly the same. And so you'll get a very different green by mixing Payne's gray and yellow. Then you will, if you mix turquoise and yellow, turquoise and yellow will be a very vibrant green. And you can see that the Payne's gray, I make so much more desaturated green. And I'm just putting this wherever. I feel like I have too much of one color. Say still wanted to cover up some of that background. All right, I think this is a good start. We're going to continue this process of layering. And what I'm gonna do is just start to use brushes that are a little bit smaller and start to layer more colors on top of this base that I have already created.
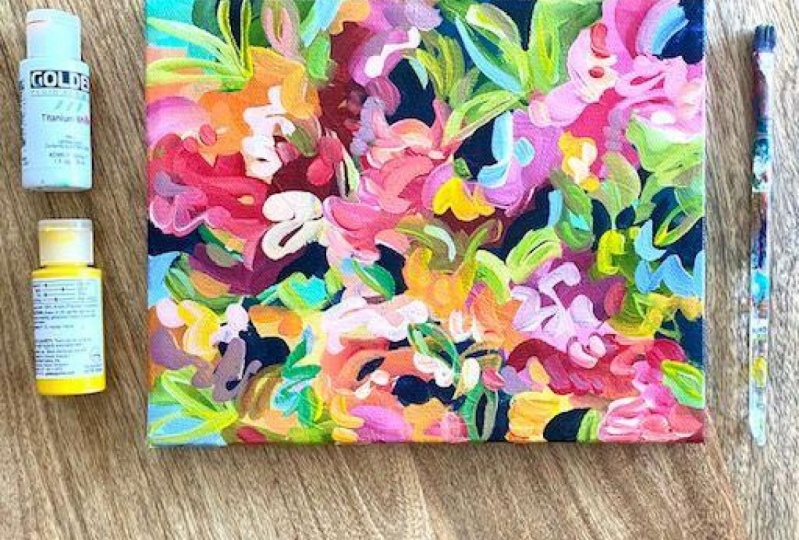
3. Add More Color: What I'm gonna do for my second layer is basically the same thing. I'm going to switch back to my warm colors. A little turquoise to mix my purple. I think I'll mix my purple down here, and then I'll mix my orange at the top. I have a clean brush. This one is a great size. H. Any brush will do where I'm not trying to make any specific marks. I'm actually going to be pressing my brush down into the canvas. It doesn't really matter which pressure using. I'm going to start to make some variations of these colors and layer them on top again in an organic way. And I'm going to layer over what's there, but also leave some of it's showing. And I'm going to just keep mixing versions of the same colors. It's fine to layer over your greens as long as they're dry. If they're not dry, you might end up with some ugly, muddy colors. This is a good time to experiment with your brushwork and different mark making. There's nothing you can do to mess up your painting because your acrylic paint is going to dry so fast that you'll, you can just layer over whatever you do that you're not happy with. I usually go back and forth several times between my warm and cool colors when I paint like this. Every time the painting comes out different because I'm not using the C. Brushstrokes are the same. Yeah, I guess the same brush strokes, the same brushes. I just grab whatever brush is clean and I have near meme. And I don't really have any formulas for mixing paint. I'm just kind of mixing mixing the red, yellow, and white here in different proportions. And I'm just trying to build up the layers slowly. Want to try to make sure I'm getting these sides covered so I don't have to paint them at the end. And as I continue on throughout the painting, we're just going to move to smaller brushes. And, but the same techniques, I will start to add in some shapes that kind of look like leaves. I'm going to just grab a clean brush so I can mix a nice vibrant purple, a little bit of turquoise base into my magenta. This is all, so this is a size 10, so I went a little bigger at the brush. Try to have your shapes start to go in different directions and to be different and have them be different sizes. So go across the canvas, also up and down. If everything is moving in the same direction, your painting is not going to be as visually interesting. All the objects are the exact same size and move in the exact same direction. I don't know. It's not it the paintings tend to not work as well. I'm just scanning and saying like, okay, Where could I use? A little more purple or red. And where does it look like everything's going in the same direction. And then, so I will intentionally make a different brush stroke like all the, this all looks like it's going in this direction to me. So when I paint my blue and green, I'm going to go over it in a different direction. Okay, I'm going to just grab this one. Actually, this one is not one kind of hardened up on me. I'm good enough. I'm going to move to this bright size 3, which is a little bit smaller. I'll mix some lighter green with all this yellow that I have up here. And I'm going to start to make some different shapes, some leaf shapes now I think. And I'm gonna go a little bit lighter. Not going to over mix the paint on my palette so that I get some streaky marks. This is all kind of going in this direction. So I'm going to go like that. Still kind of in the ugly middle section of the painting. So it's, it's very normal if you're, if you're thinking, okay, this is pretty ugly. That's not working out. It'll start to come together. I think a lot of people give up on their paintings too early because they're in that ugly middle stage and they don't realize it. They think they're just making about painting when really it's just the stage that all paintings go through and you need to work through them. And I don't mind that my red and green mixed right there. I wouldn't want that to be in all of my green, but I don't mind if it's a little bit mixed in there. I think you, you definitely can mix some ugly colors on your palette if you over mix all of your colors, but you can also really come up with some interesting new colors by playing around. If you mix everything, you're really going to end up with light gray and brown. But if you add like more blue or more red to it, you can get it to be kind of a nice muted color. Alright? Since I need to add more paint to my palette, I think this is a good time to let everything dry for a few minutes. And then I'm gonna go back to my warm colors and a smaller brush. Start to add in more of the flower details and try to bring my painting out of the ugly middle phase.
4. Layer with a Medium Brush: I'm liking my painting a lot so far. I think it's only going to need a couple more layers. I'm going to grab a round brush. This one is a size three. No, tried to mix some lighter values now and make smaller marks. So I'm gonna do pinks and peaches and probably light purple. And anywhere that I see, like big blocks of color, I'm going to go in with smaller details and really looser brushstrokes. I'm going to try to move more from my shoulder and get my whole arm going. Just to make some different fun shapes. So with the round brush, you can kind of push down or you can just use the chip. And so you can get thicker marks and much thinner marks. With this brush. I really don't use these a lot, but I feel like I should get some more purple and really just work the details. Now. Remember if you have things going like this was going in that direction. So I decided to put that pink on top of it. But going in the opposite direction. Don't forget your sites. And don't be afraid to go right on top of the leaves that you're making because the more mixed everything is, more idle work together. Something I used to do when I first started painting flowers was I didn't overlap enough. And it kind of in a lot of my older work, it looks like the flowers are just sitting on top of the leaves rather than everything being mixed in together. We're going to add more weight. And I'm looking still for a really large shapes and breaking them up by just adding some smaller shapes on top. That's a really muted purple here, but I think we're still just looking for the big shapes and adding some smaller shapes on top. I think I want a little bit more orange, so I'm going to get a clean brush. I'm still going to use around. But I don't want to mix any purple and with it because the purple will really bring down the saturation. I'm going to make it right by adding in some more weight. Looking for the big shapes, layering on top. That is basically the whole process. All right, I think I am out of the utterly middle stage. I can see everything coming together. Wanna make some more leaf shapes. And I think I want to add in a little bit more blue. So that is what I'm going to do next.
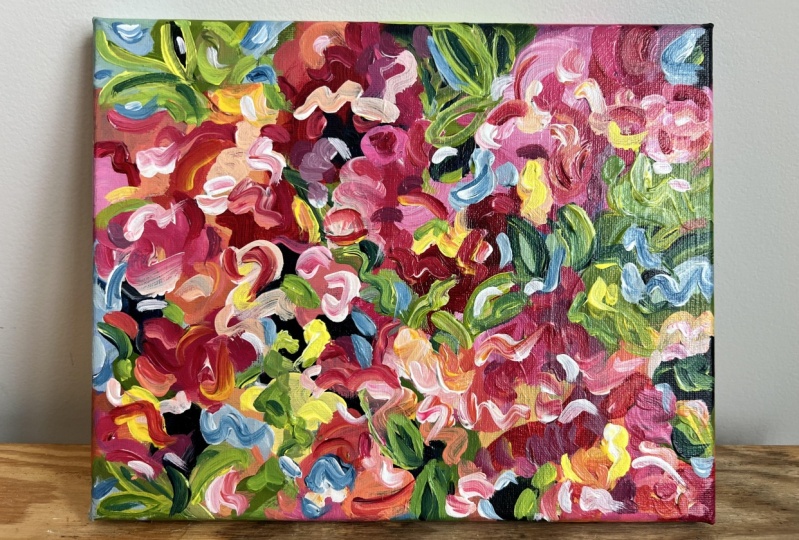
5. Add Smaller Details: Couple of things and we're going to take Payne's gray. And I'm going to go in and just re-establish some of these darker areas that I made earlier on in the painting. Want high contrast, helps to create the illusion of depth. Actually, I'll put that on water. And I'll get to some darker marks here in the middle a little bit. I think is probably enough. I think I'm going to make this area dark as well. Like that up against those purple hues. And I just added in a bunch of weight to that to get this more muted blue color. And it's kind of swirled with man, I'm just looking for spots that could use a little lightening up. You're going to grab a smaller brush now so that I can make more detailed marks. Some of my leaves make a few more leaf shapes. Going to mix in a little turquoise. And I'm just trying to scan the canvas and look at anything that seems like it's standing out to me as needing a little bit more color. I think I'm getting to the end. What I like to do at this point is to let everything dry and just stand back from my painting for a few minutes. I like to go about anywhere from six to ten feet back and get a different perspective. So I'll put it up on my easel and then take some steps back. And it'll be easier for me to see any areas that I think need to be a tourist still. Or if I'm finished, probably going to add in a couple more highlights. I think I already know that. Yeah, It's time to stand back.
6. Final Details: Final details, going back to my number three round brush. And this really could be finished at this point. But I just like to add a few smaller details. Couple of little small marks like peach and pink. Really light almost way. And I think this will make everything a little bit more vibrant. I hope you enjoy this whole painting process. Just remember, keep going. If it doesn't look right, just let it dry and layer over and will start to come together. You're going to work through that ugly metal. And if you repurpose your old paintings, I would love to see what you Create and you can take a picture of your painting and upload it to the Projects and Resources tab. You just click on Create project and then upload. And you can add a photo of your work. Learning. I'm going to start out. I hope you enjoyed this class. Thanks for watching.
 Elle Byers, Artist and Teacher