Transcripts
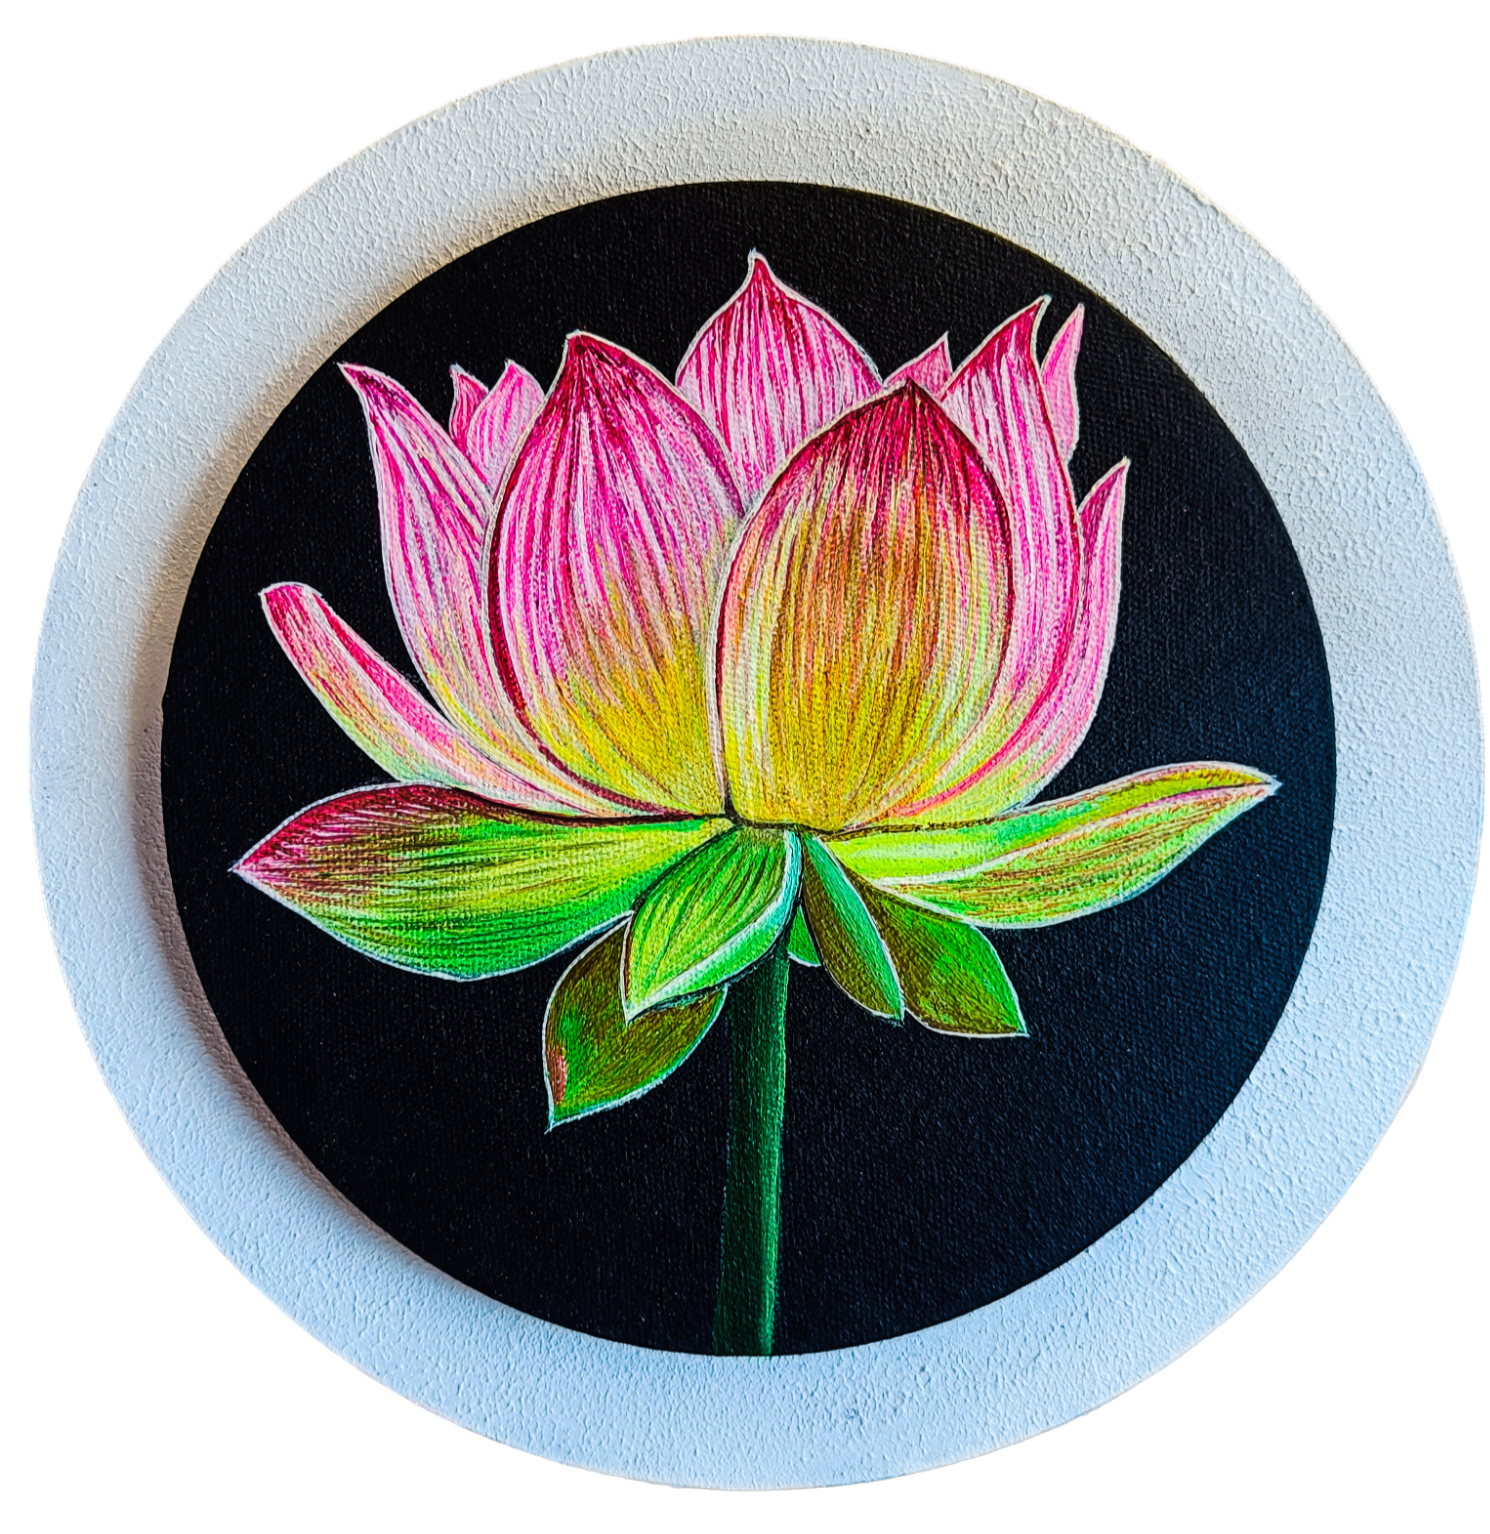
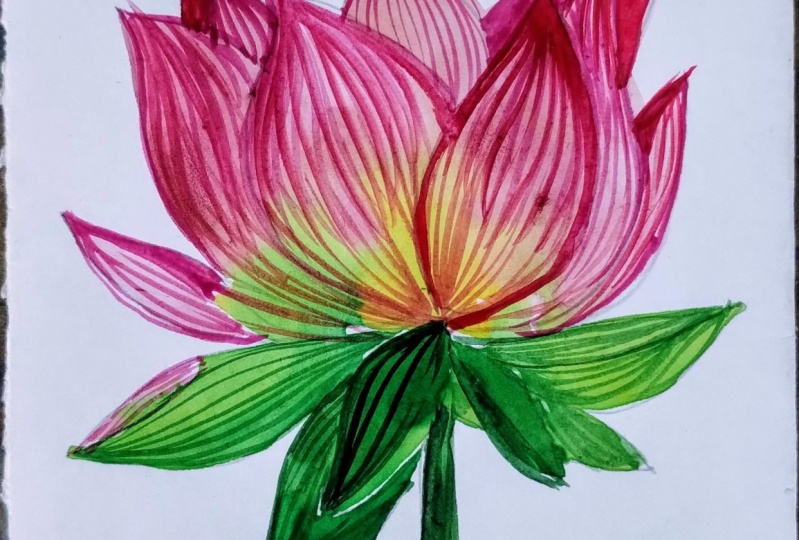
1. Intro: Lotus, a flower that struggles through mud to emerge,
beautiful and whole. Just like the flowers, we too have the ability
to rise from the mud, bloom out of the darkness, and radiate into the world. Hello friends. My name is Heni Senna and I am
an acrylic artist. In this class, we learn how to paint this beautiful
lotus painting. We'll also learn what
all we will be needing, The canvases and the
colors, waterll, color composition,
and the brushes which we'll be needing
for this painting. Then from blocking of the
petals to the detailing. Each and every part
we learn in detail. Looking forward to share my knowledge and
skills with you guys. I hope you will love it. Happy learning. Thank you.
2. Material Required: Let's discuss about the
materials which we will be needing to complete this beautiful, vibrant
lotus painting. The first thing which we'll
be needing is the canvas. This is the canvas which is 100% primed canvas,
acid free still. I have done primed it
twice with black esso. Since this is my white canvas, you can directly use
black canvas if you have. Now this is the
palette glass palette. These are the fluorescent
colors which I'll be using from Company Bristo and
from Winsor and Newton. Also let's discuss about the colors which
we'll be needing. The first color is black,
white, fluorescent red, fluorescent pink,
fluorescent green, fluorescent yellow, lemon
yellow, and opera rose. All these colors we'll
be needing for painting. The beautiful lotus painting. This is the glass palette
which I'm using here. You can use this palette
then the tissue, of course, the water container
which has two blocks. The two brushes, one is the rigger and one is the
round brush of size eight, and this is of size two by zero. Both these brushes
I will be using, just two brushes is more than enough for doing this painting. I hope you'll guys enjoy this beautiful Lotus painting in detail. Let's start with it.
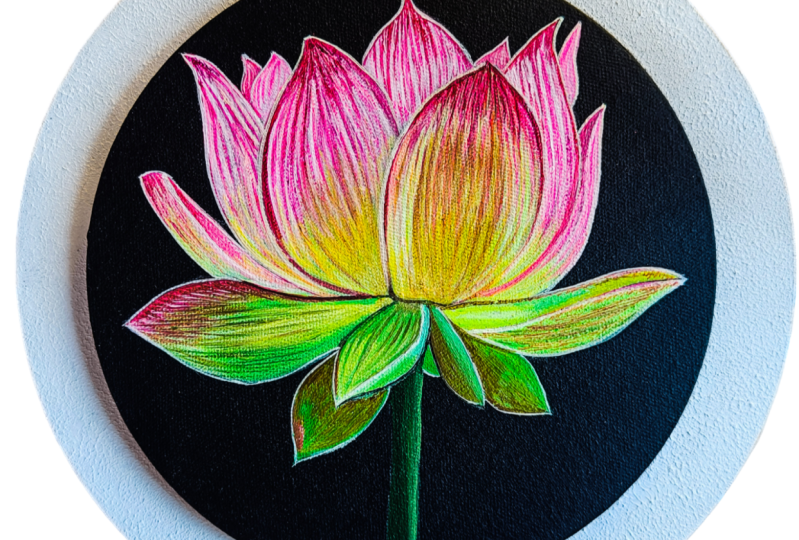
3. Blocking White Coat: Welcome back. Let's start with our painting. This is the sketch
which I have drawn. I will be providing the
reference image also. And the colors which I'm
using here is white. To just fill in the background
of this whole sketch, I am using white color
because it is opaque. And this is the round brush
which I'll be using here, this is quite opaque color. When you apply this
white color on this, it will become very
vibrant and thick coat of white will appear on it. And when you will apply
the pinkish color, be we are mostly using
fluorescent colors. We'll be definitely using white and mix with that
fluorescent colors. Because fluorescent colors
are quite transparent colors. White will be required
because white is quite opaque Here what I'm doing is I'm just
first outlining it, and then I'm blocking
the whole petal. Now this is the best
time when you can, if you have done some sketching, which is not correct. Now, this is the best time
where you can redo it and you can correct the mist and
just fill in the colors. I'm just trying to fill
in the colors now. Water is only on my brush. It's not on the color. That much water is required,
just on your brush. Dip your brush in
water properly, and then use that
raw white color and just try to
fill in the colors. Now, this first step is
a very simple process. You don't have to do much
techniques or anything, you just have to
fill in the colors. You can also use flat
brush for doing this, but use rigger brush or round brush for
outlining the whole petal. Now you can see I'm
just slowly filling out the white color on the petals. The first petal is almost done, same way I'll be doing
the rest of the petals. Also, whenever you're
doing any flower painting, whenever you're doing
the blocking, first, first outline the thing, the sketch, and then try
to fill in the colors. In that way, there
will be less mistakes and your color will not
go out of the boundary. This is the best way to
do the filling of colors, especially when you're
doing the flowers or any sharp area where you don't want your
colors to go out. If by chance the colors
come out of the lines, you can always remove those lines by using
the background color. Like here we have
use black color. If there is any mistake
in the outlining of it, you can always cover that
area with black color. In acrylics, we can
always redo the colors. Now. So slowly I'm painting all the petals
first I'm outlining it. I'm just putting in the colors. I put this video in.
4. Petal Blocking: Welcome back. Let's start
with our next blocking, that is the fluorescent
pink and white. On the topmost is
the fluorescent pink and the bottom it's yellowish. First, let's apply fluorescent
pink and white mix. Now why I'm mixing white
with fluorescent is that you add white to
any fluorescent colors. Because fluorescent colors are
mostly transparent colors. When you add wide to it, the colors become little opaque. That's why I have added little white to this fluorescent color. The above part is
mostly pink and the lower part is
mostly yellowish. I will add fluorescent
yellow over here. This is from the
Brustro company. The below part will be fluorescent yellow
and the above part will be fluorescent pink. You can see I'm using
the same brush that is the round brush which I have used earlier in most
of my painting. And this is of size eight, you can use according
to your base size. The more bigger the bases, the size of the brush
should increase depending upon the size of your
size of your canvas. You have to decide
your brush size. Here, the size of my
canvas is eight inch. You can use any size
canvas, whichever you want. You can use round square, whichever shape of canvas
you like you can use. Now you can see in
the lower part, I'm just adding
the yellow color. And I mix little white to
it to make it more opaque. I'm just adding this
yellow to the lower part. Still you can see the
color is not so opaque. Obviously, we'll
apply one more coat to it to make it more opaque. Whenever you're applying
second coat on any base, check that the first color
has dried up completely. Then only apply the second
coat on the painting. The lower part is
more yellowish. I've added more yellow to it. Now, the second petal, I'm just outlining
with yellow first. Then I'll start
filling up the colors. Now here there's
more of yellow and less of the pink color. I'm just first applying this yellow color with
my same round brush. Here, we are just doing
the blocking part. We are not putting
any details first, all the blockings will be done. Then we'll start
with the detailing. You can see I've done this yellow part
and the above part, we'll do with the
fluorescent pink color. It's a very simple
and easy painting, but when it gets completed, it looks very
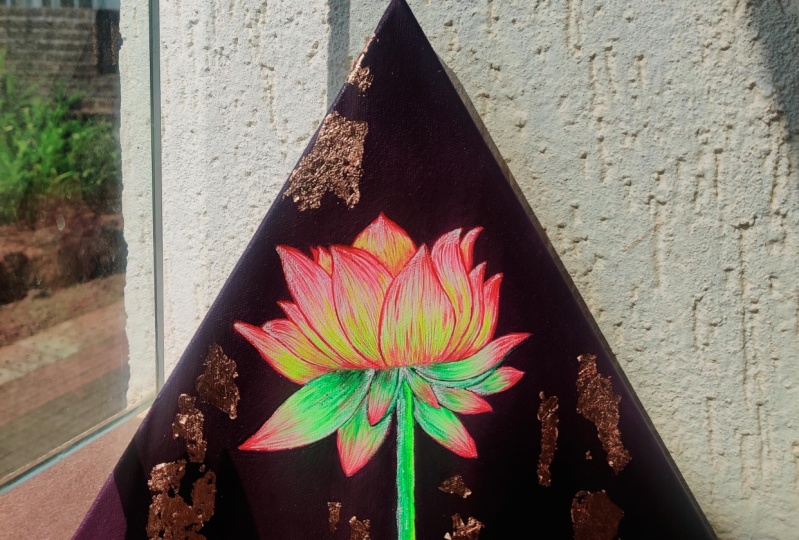
beautiful and vibrant. Especially when you use
black background behind even you can use deep green
background also behind. Try to use very dark background to contrast this
image of the lotus. I'm just trying to give
you a little idea how you can paint your lotus painting. Now. Again, the upper part is little pinkish
and as we go down, it becomes a little yellowish. Try to do it very slowly and avoid taking out the
colors from the boundary. If it happens, then always you can just hide that mistake
by using the base color. You can see simply, I'm just adding a fluorescent yellow at the bottom to
make it more glowing. Just adding more yellow
to the first petal, which we did because I can see a little blackish appearance
which is coming from behind, even if we have
applied white to it. Because it happens in many
cases that you have to apply two to three of it when you are using
the base as the black. Another thing you
can do, you can just leave this area
where you have drawn this sketch with white and color all the areas with black. That also you can do
to avoid applying white color, just outlining first. And then I'm filling the colors as I've already
said why I'm outlining it so that the colors remain within the boundary slowly. We have to do all the
petals in a similar manner, because the lower
part is yellowish, upper part is pinkish like that. We have to complete the petals, especially the above petals. On the above small petals, I'm just using that
pinkish color. That's it. Water is just on my brush. I haven't used mixed
water in these colors. So try to use 10% of water
and 90% of colors in this. So take your own time. No need to do it in a
hurry, take breaks, and do slowly and enjoy the process of
this whole painting. Once we are done with the complete blocking of the petals, we'll start creating details.
5. Final Petal Blocking: Let's complete the other few
petals which are left out. Just blocking this with
pink and white mix, just a little bit of
white and pink mix. And the first I'm just
doing the outline, I'm then blocking in the color. The main purpose,
the main thing when you're doing these types of
painting is the neatness. The more neat and crisp
the line is there, it adds beauty to the painting. The neatness adds beauty to
these paintings, especially. Just take care of
that in mind that the neatness is important
in such type of painting. Slowly, slowly, we
are moving towards the painting and
blocking the petals. Above petals are almost done. The below part is left to the
below part of the painting. It's mostly yellow
and greenish color. We'll add fluorescent green to it first I'm just
doing with yellow. Then we'll add fluorescent
color also in this, the above part is pinkish
and most of it is greenish in color,
yellowish in color. Just adding this
pink part first, the above petals almost turn. Now we will do the below petals. Let's add the pink color
first on top of it. We will also be needing
fluorescent green color as well. For doing the below
petals and leaves here. This petal is straight
diagonal lines, which I'm finishing it, then I'm adding
yellow and white. Then again, I just take more
of yellow and white mix. Then I'll fill in this
color on the bottom part. Just applying and trying to
blend this, that pink color. Just trying to fill in
this fluorescent yellow. This fluorescent yellow
is very bright color. It adds a real beauty
to this painting. Actually, again, fluorescent on the top of the
petal, to the lower part. We'll use a different color
just using for the top part, You can see how
slowly we are moving towards the full
blocking of the colors. Now I've just taken this
raw fluorescent pink and I just highlighting the
areas, the boundaries. Actually, I'm highlighting
it with pink now. Again, taking fluorescent
directly color and adding to the below part just fluorescent
without using any white. You can see how
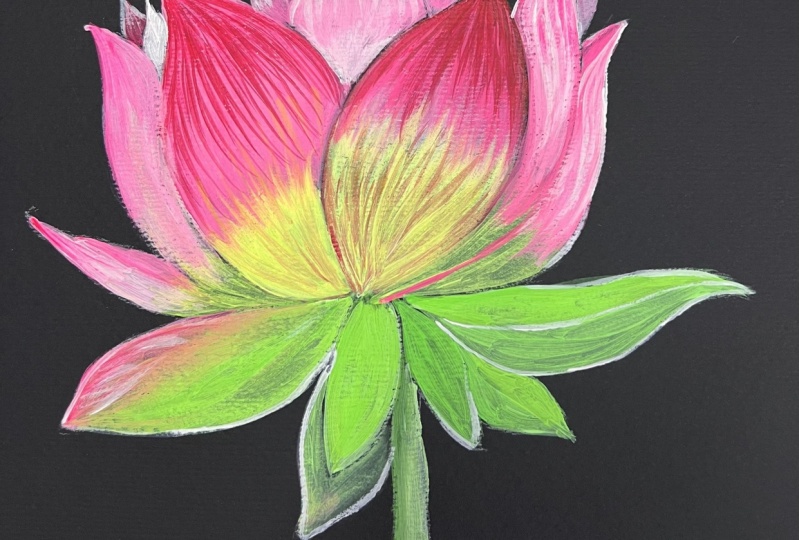
bright the color is. Now we will do the leaf
part in which we'll be using the fluorescent
green color. First, using this yellow
color just outlining it. Then we'll use the
fluorescent first to this. Choosing the right color plays a very important role doing
some realistic painting. Now you can see I've just taken this fluorescent green color. If you don't have
fluorescent green color, you can use normal green, permanent color also
for painting this, Just applying the colors, this fluorescent green color and just trying to
give a shade to it. You can see I've just used this raw color without
any water in that color. Water is just on my brush. That's it. That much amount
of water you have to use. Now again, I'm taking that raw green color with
little mix of white. And just applying to the
leaves which are below. I'll also try to give a
little shade to it as well. First, I'm applying
this permanent green. Not permanent green.
It is fluorescent green just applying this color. All these below petals are
mostly greenish in color. Just adding this color and taking a little
yellow and green mix. Again, adding to the lower leaf, just taking a little bit of pinkish color and adding to it. You must have seen that when the petals grow in
the early stage, they are little
greenish, pinkish color. That's what I'm trying
to create over here. First green bit of pinkish, I've added to this texture, we'll add more details to
it on the leaves part also. Now again, taking this
color, fluorescent green. Just taking a little
more of green, this black also to
do the lower stem, just mixing this black
color to this green. And I'm just first outlining the stem part and
then I will fill the colors this green. And very little amount of black. You have to add not
too much black, there should be very
little amount of black. Now, more black as we go
towards the other side to give a more depth to it and try
to blend both the colors. Now, blending in
acrylics will only happen if both the
colors are wet. Now just highlighting it with this yellow side to give
more depth to the stem. The stem part is almost done. Now we will be doing the good detailing of the petals and the below
green leaves as well, just highlighting a bit more.
6. Detailing Of Petals: Welcome back. Let's start
with our detailing. These are the colors,
fluorescent, red, frozen pink, yellow, white, black, and lemon yellow. So these are the colors
which we'll be using. Apart from that, we'll be
using green color as well. Let's first start with the
upper petal detailing. First, I'm just taking this fluorescent
red and black mix to make it a little
like maroonish color. And I'm just outlining
it first the petal with the same brush
which I have used earlier. Now here I will add
a little water to this color because I want
to make a little fluid. Whenever you are trying to
draw any lines or anything, try to make a color little fluid so that it can easily move. You cannot use thick
colors in that, otherwise it will be difficult for you to create thin lines. You can see just with
the tip of my brush, I'm trying to create the
lines for outlining it. You have to use a
brighter color here. I'm using fluorescent red. When I'm mixing it with black, it turns out to be a
little maroonish color. The lower part, it is more dark. I'm adding more black to it. Once we are done
with the outlining, we'll do more
details, more lines. As we see in the petals, there are so many
lines and veins which are coming
out of the petal. Let's first use this fluorescent
pink to create lines. Just creating lines and
adding little red to this pink and trying
to create more lines because the upper lines are
more dark than the lower one, just like we do the shading
part, just creating lines. Just a free flow of lines just
with the tip of the brush. And make sure that the
color is fluid, not thick. Otherwise, you will not be
able to create thin lines. Use these round brushes
which are having fine tip or rigger brush you can use to
create these lines. Now if you know a
little bit of shading, how we do the brush, shading or pencil shading, this is how we do in that. Also, just like that, we are using our brush to create some lines and shades of it. Just simple lines, curvy lines. The above lines are a little
dark and as we go down, the lines are slightly
light in color, just making it more dense
on the top. Do it slowly. Take your own time when you are doing such type of detailings. No need to be in a hurry because whenever we are
doing paintings are both, even single person has their own speed of
doing the painting. If you're not able
to follow with me, try to take your time, pause the video, and then do it. Now here I've just mixed white, lemon yellow and this
fluorescent yellow together to create some
nice yellowish color. Now you can see I'm just creating lines in between
those pink lines, these yellow lines to add more
contrast to this painting. Below, it's completely yellow. The lines, there are gaps in between these darker
lines in that area. I will be applying
these yellow colors. Light brush pressure,
you have to put in, don't press your brush, just with the tip of the brush. You have to create these lines. Very light brush pressure. I am high just touching the
brush, I'm not pressing it, just the above tip of the brush I'm using to
create these textures. Slowly, slowly, we are
moving towards more petals. We will be doing more details
in this, the main petal. Now here I'm using my rigger
brush for doing this. You can use of size two by zero, or three by zero depending
upon your choice. Just taking white and yellow, fluorescent yellow, and trying
to create more fine lines. Because with my round brush, the lines were coming
a little thick. I want my lines to be more fine. I'm using her Er brush. Applying this white and fluorescent yellow and
trying to create lines, make it a bit fluid. And then try to create
some nice fine lines. You can see how these
lines are coming up in between these pinkish lines. I've just made the
colors very fluid. Then trying to create the lines, take your own time and
do it very slowly, patiently, half
breaks in between. And no need to be in a hurry
to complete in one go, just adding a bit of green
and pink mix to give a color to this painting. The lower part is a
mix of green and pink, which gives a nice color to it. Especially the lower part. Just adding the lines
with this color, you can see very thin
lines. Are these? The more the lines are thin
and very close to each other, the more it looks
beautiful, actually. Now just adding red, white, pink, and again, trying to add the lines, the lines you can see already. The first petal is
looking quite beautiful. Just adding more of
these two colors, a little bit black to
make it more dark. Very little amount
of black you have to add because black is
a very intense color. If you'll add too much,
everything will turn into black. Just first outlining it, then we will fill the colors. Same textures will
apply over here. Also the above will be more pinkish and lower will
be more yellowish. Trying to add simple lines here you can see the lines
which I'm moving are in the same shape as it is of
the shape of the petals. Try to create the lines according to the
shape of the petal. Now adding more pink to it, now taking just white
and just adding more layers and more
lines to these petals. All these takes a lot of time, because these are like
a realistic painting. You have to, whenever you are starting such
type of painting, make sure that it
will take time. You cannot finish
this in one go. It will at least take your two to 3 hours
of your painting, of your time to complete
this entire painting. Now, if you are doing such type of painting for the first time, then it can take more
than two or 3 hours, depending upon the
speed of yours. Every person has their
own speed of painting. Depending upon their speed, the time will be consumed. So you can see I'm doing the darker colors
and lighter colors. Then again, I felt like the lighter colors are missing and darker
colors are missing. Then again, I'm outlining it. Similarly, you have to
do for all the petals. Now, let's do the third petal First. I've outlined it. Then I will create some more
shades, some more lines. Just a smaller petal can see, again, the same
technique here also we'll use. Now you can see the lines are curvy depending upon the shape.
7. Detailing Of Petals Part two: Now let's add more details
to the next petals. This is the same color
we are using here. I'm just outlining it. Make sure that your
color is not too thick, otherwise you'll not be able
to create some nice lines. Color has to be fluid, but not too much fluid. It should be a little fluid. Here you can see I'm just
using this rigger brush to create the lines instead
of using that round brush. Because these rigger
brush creates more thinner lines than
using round brush. As the curviness of the lines
depends upon the petal, how curved the petal is. Depending upon that, the
lines should be curvy. Now, here now I'm adding the lighter color,
that is white. You can see in the gaps which
are in between those lines. I'm just adding white to it. Now let's add more white
to this smaller petal. All these are
repetitive methods. Sometimes what happens
that we get bored. Okay, this is the same method. Let's do it, let's
do it quickly. That time is the real thing. When the mistakes happen and the neatness of the
painting disappears, Just take care of that and do it slowly
without, in a hurry. Because painting is just
a relaxing process. And you have to give
time to this painting, especially when you are doing
some realistic painting. Try to give a lot of time to it, to it in breaks, take breaks in
between, and then it. No need to do it in one day, take breaks, and take a week
to complete the paintings. No need to be in a hurry. Just outlining it more and more, giving the textures
to these petals. Now just I'm outlining
this with white first. Every petal has
their own texture. Each and every petal has their own beauty and
their own textures in it. Some are having white more pink. Now here I have added
Opera Rose over here to add more pinkness to it. Now, Opera Rose is a
different pink color. It's a pink color, but it is
more like a rosy pink color. Here, I'm using Opera
Rose also for giving more variety of pink to it. If you don't have any
fluorescent colors, how you can paint this, not having any fluorescent colors, just use red and
your pink color, normal pink color, and your
lemon yellow and white, permanent green and black. That's it. Then you can create
this fluorescent colors. Actually, they are
more bright colors, that's why I'm using here. But if you don't
have these colors, you can use that
alternate colors. Also just outlining it again and repeating
the same process, taking again white and
giving more thick, thick, white outlines to it to add
more texture to these petals. Once you're done with one
petal, see how it looks, how you can beautify it, how you can add more layers
and more outline to it. So, so when you will
come to know, okay, here it is missing, and here you can add more
lines and more petals to it. Now I'm just adding more of
red and this pink color, and I'm trying to give a little more light
color to this side. You can see there are
so many different types of pink which we are
using over here. Just keep doing slowly. They're just brakes
of lines, are there? Which adds beauty
to these petals. Now again, I'm using this opera rose white
and a little bit of fluorescent pink mix to add
more lines to the petal. Now the last petal of this side, first I'm highlighting the edge. And then I will start
creating the lines, just adding a little
red to it also. Now here I've used
fluorescent red. And if you don't have
fluorescent red, you can use any red, scarlet, red, crimson,
whatever red you have, you can use that now a little bit of fluorescent yellow to give the outline
to the billow part. Just taking care
of the borders so that the lines are
sharp and crisp. In all these paintings, the most important thing is the lines and the
sharpness of this petal. It should be clear lines.
8. Detailing Of Petals Part three: Welcome back. Let's
do the other petals, same palette we are using
here. And same colors. Let's take white
and a little bit of opera rose and mix it well. And start outlining the, this is a little light color. I'm just making it
more bright color. Just adding more lines
to the corner petal. Now here you can
see the lines are the a curve as the
petal lines shapes. Actually the lines depends
upon the shape of the petal, how the shape of the petals. The lines also should
move like that. I'm just adding
white lines to it. Slowly, we are progressing towards the detailing
of the petals. Now again, I'm adding
a little more of this opera Rose white mix to this middle part and giving more pinkish highlights
to this area. You can see the more lines and more fine lines you
create in these petals, the more it adds
beauty to the petals. Take your time and do it slowly. Do one petal at a time and
check how it is looking. You need more lines or
it is perfectly fine. All depends upon the
patients level and the gradual process which makes the whole painting
actually beautiful. Just mixing white,
making a little fluid, and creating more fine lines. These rigger brushes are actually very nice
and fine lines. Since the length of
these brushes are long, it can hold a lot of
paint on their brushes. This is the actual
difference between the liner brush and
this rigger brush. These are quite long
brushes and they can hold quite a lot of paint when doing
these line and detailing. Now I'm just taking
raw fluorescent yellow and adding more
yellowish to the bottom. You can see the
yellowish part is below more yellow and in between a little light
yellow and then again pink. Let's do the other petals, also the petals beside the middle petal. Let's start with
that. Now, again, I'm taking this round
brush and I will try to create the same technique which we have applied
to the other petals. I will be using for this also now just making
these lines more fine because I can see
some lines coming there now creating petal lines. Now you can see
it's a thick line. I'm not bothered about the
thin lines to create this. I'm just creating the line to make a border of
that pinkish line. Then we'll create some nice fine textures to these petals, like we did earlier
to the other petals. Now, once the outline is done, now we are good to go
with the detailings. Now first on the topmost part, the colors are a little bright. I'm just adding this
fluorescent red pink to it to make the
colors more bright. Just adding very little
amount of black to make it move darker color,
darker shade color. Just adding these shades
on the top first. Now the water is just
on my brush. That's it. Apart from that water, I haven't used that much. Amount of water is
more than enough. Now, again, I'm using
my rigger brush here. Taking Opera Rose and
creating some fine lines. Now you can see
the curved lines. Curves are according to
the shape of the petal. The lines should always move according to the
shape of the petal. In each and every
flower painting, you have to take care of how the petals are shaped and how, depending upon the shape, you have to create these
textures on the petals. Just adding the
Opera Rose lines, now taking a little white
mix and Opera rose, and then again adding more
lines, brighter lines. Here I'm using
completely thick colors, but water is there on my brush. If you are facing problem
in creating these lines, thin lines, you can add a little water to it to
make it a little fluid. And then create these lines the same process which we have
done for the other petals. Just the shape is different. That's it. Otherwise, the
whole process is same. You're highlighting
first the pinkish part, then the whitish part, so that it gives a nice blend of both the light
and the dark color. This is one type of
actually blending, You can say where the light and the dark color starts blending
together with each color, just adding more and more
lines and layers to it. Suppose if you see there are more bright lines and you
cannot see the dark lines, just add more dark
lines on top of it to give more layers of
the darker lines. Now below, again, I am
taking this lemon yellow, fluorescent yellow mix
and adding the details. These all are real time video. I haven't done
fast forward video of it because I wanted
you guys to see each and every step clearly
so that you can do it by yourself
without any mistake. That's why I haven't cut down the video in its proper
real time video. I hope this will be helpful for you guys to paint the other
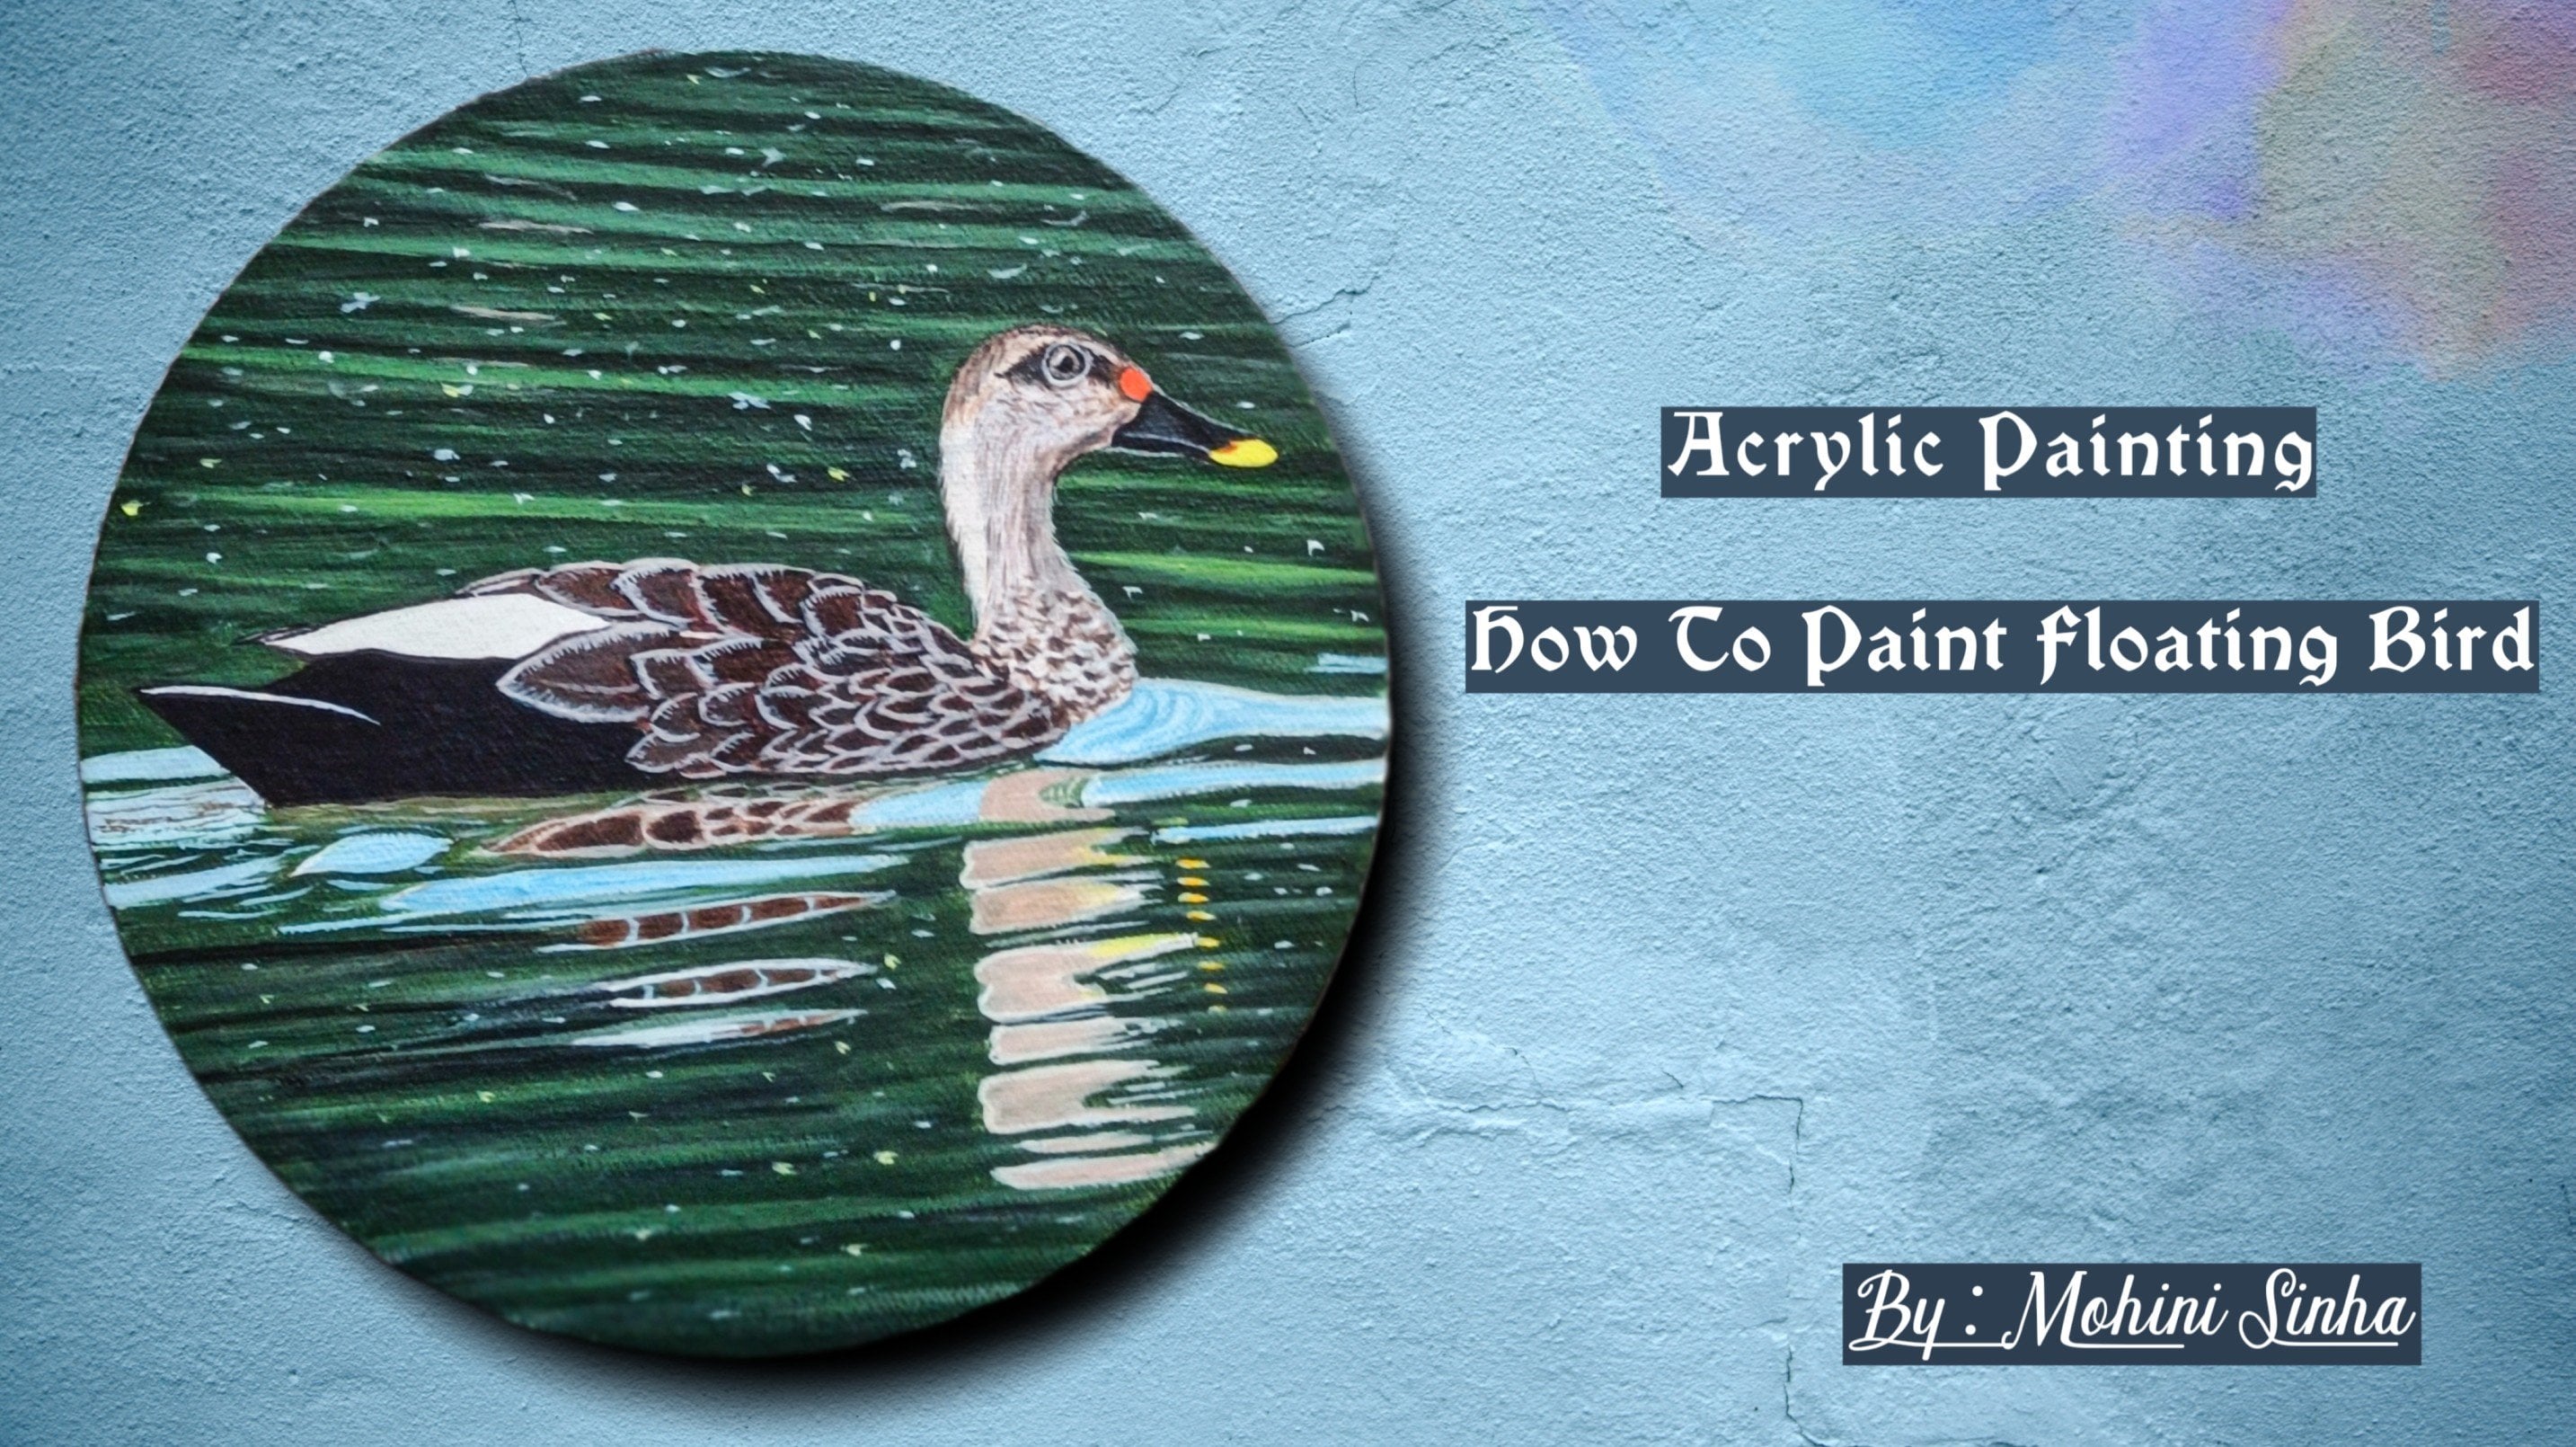
flower paintings as well. I try to teach different
different techniques. Like before that I did the cat painting in which there were like
very much for details. Now this is like the
flower painting, and there are lots of details
are there in this as well. And there was also bird painting in which there are
different details. Different different
techniques are used in different paintings, whether it is a portrait or the flower
portrait or anything. Flower painting or the
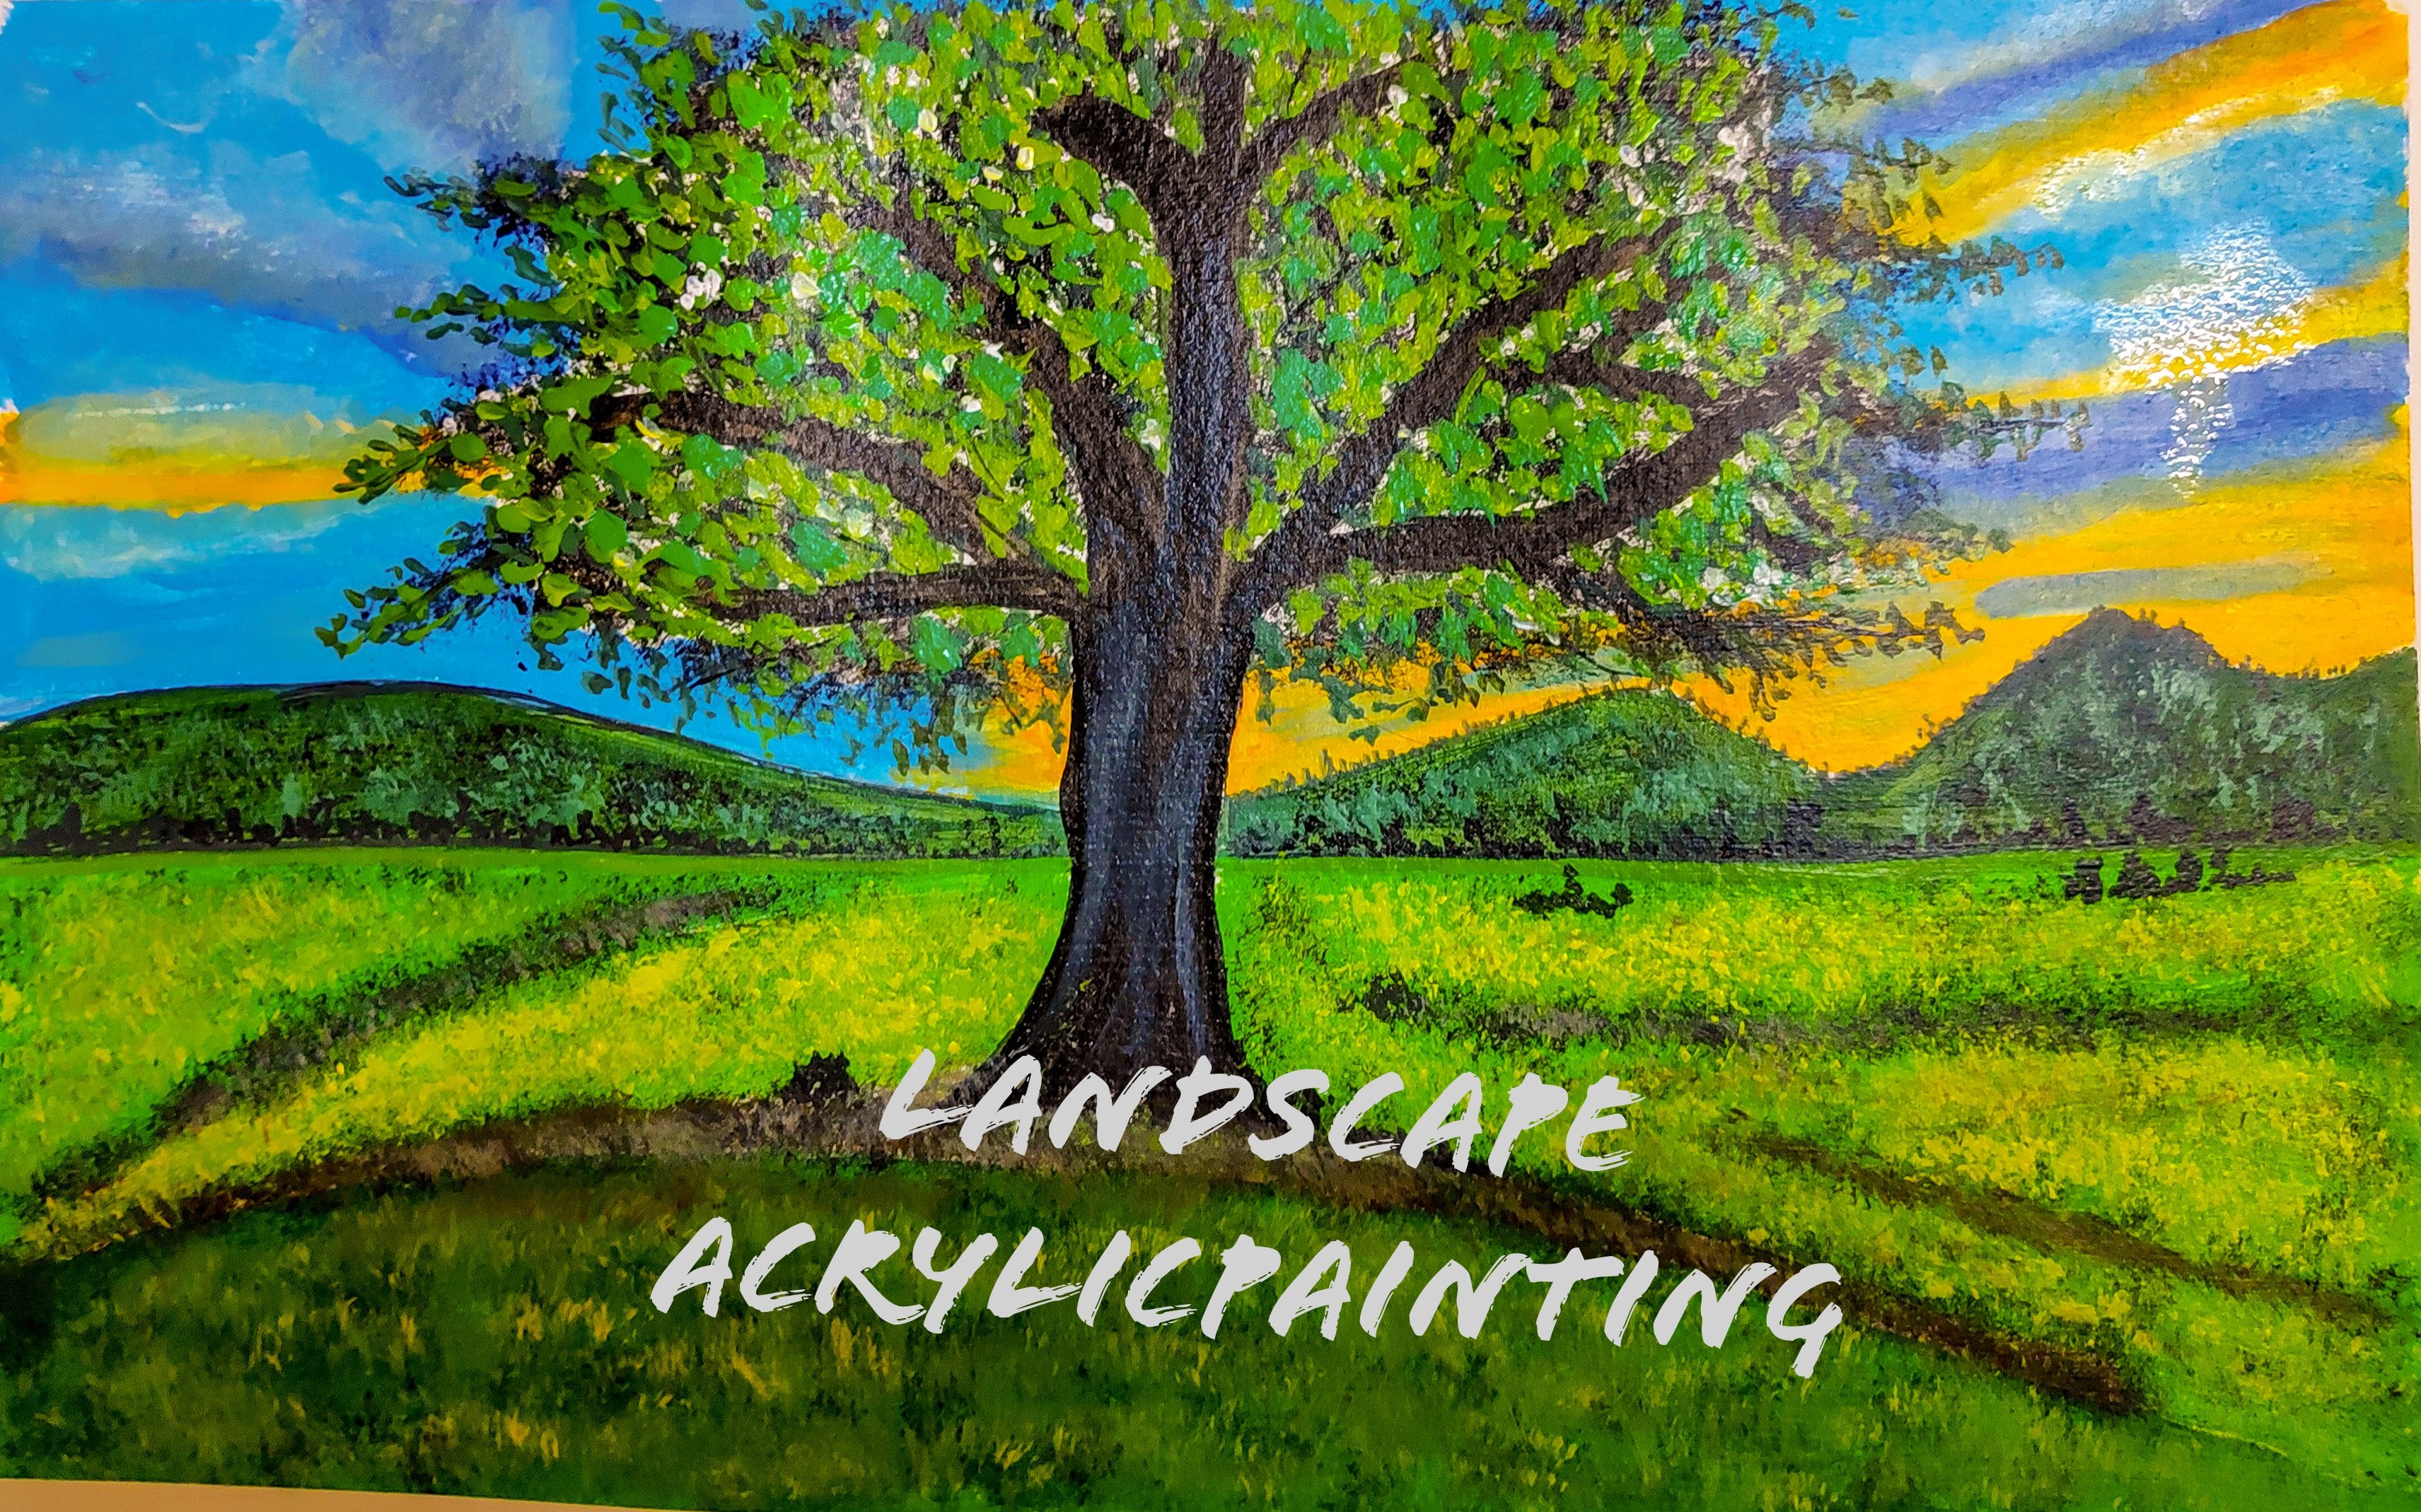
landscape painting, I really love doing
landscape painting also. After this class,
maybe I'll start with the landscape painting slowly. We are just applying the
layers of light and dark mix so that it gives a nice blend of the light and dark color. These are actually
the center petals, which has to look quite bright. We have to add lots of
layers to this petals. Now the smaller ones again. First I'm outlining it, and then I'll create small
lines of this pinkish color. Then the white color. A few more upper
petals are left, and then we'll start
with the lower part.
9. Detailing Of Petals Part four: Let's begin with the
other petals now, again taking white
and just outlining this side and giving
little texture to these small petals. Just adding more of pinkish and little
reddish mix of color, little black to
make it more dark. Let's adding from the top. Now, when you are
doing this outline, this is the main thing you
have to do it outline, then that painting will look
very neat and beautiful. These all outlinings play a very important
role when you are doing such type of painting. Try to do it very neat, make the color a little fluid. That line will come
very clear and crisp fluid means it
should not be thick, it should all be like
a milky type of color. Just adding more lines
to these petals, especially for any flowers, these detailings
matters a lot how you put the shade and
how you put the lines. In fact, even in
the rose painting or any other paintings,
all these lines, how it is going and how you're mixing it with the other colors, all these play a
very important role. Now here you can see how
my lines are moving. It's moving according to
the shape of the petal. We almost done with the petals. Only few, two are left. And then we'll start
with the bottom. One, same technique
I'm using here also. First the pink and then
the light whitish color. And then I'm trying to blend these two colors just
with each other. Just taking these
colors and just trying to make it more fluid. And I'm trying to
blend both the colors. I hope you are enjoying
doing this painting. I have tried to teach
each and every step with you guys so that you can
easily catch up with it. If you face any problem, you can always get in touch with me via
discussion section. I'm ready to help you. Or you can DM me
on my Instagram, that Ishi art Gallery, whatever. Each and every step, I do a lot of experiments when
I'm doing my own paintings and looking for the details that how this painting
slow, which color. So all these things
first come in mind, and then I start
with the paintings. Yes, the color which you're using also plays a
very important role. Always use better colors and first choose the
colors accordingly, test the colors, and then
start with the painting. Now you can see I'm
just first outlining it with white because there's
a fold in this layer. Now I'm just adding
a little bit of this yellow and up
top it is pink. And I will try to
blend both the colors. You can see I'm just trying to blend this yellow
and pinkish color. Now I'm adding a little
bit more of this red to give a little
mix of black to it, to add a little more
texture to this part, because I think this
is quite light, so I'm just giving
more darkness to this. Now, again, let's go back
to this petal and add again more layers, lines, just few lines which are going downwards, then again white. And just trying to blend the colors with this
little opera rose. And again adding a little
more to the edges, then taking a little white. And then again outlining
it with white. Taking a little more of
red and just outlining that to give a little
fold look to this petal. Just taking a little more
of this lighter color, mixing both the colors
and again adding these lines which are actually
dividing this two petals. I'm completely making
this portion a bit dark and adding a little more yellow to the
end of the petal. Now let's take more
of white and try to add the lines which
divides the petal fold. These small small details are there just adding
more lines to it?
10. Detailing Of Petals Part five: Let's start with the further
detailing of the petals. I'm just rotating my canvas towards me so that I can
paint this side easily. Because we have to paint
it like vertically. Just taking round brush and fluorescent yellow
and applying again a thick yellow and just
mixing a little white also because you can see it's a bit transparent color below. I'm just adding more of
this fluorescent and white mix in the
center to the sides. I'll add green. My green
has already dried up. I'll just add a little bit
of green to my palette. And then we'll start just
taking this fluorescent green. I'll try to apply
both the sides. I mix little yellow to it. Also to make the green
a little more vibrant. Just adding to the sides and
trying to blend the colors. Also simultaneously just adding this green color,
both the sides. When both the colors are wet, you can easily blend the colors. Currently, both the
colors are wet. Just adding more of this green, a little bit of black, I have added to this
to make it more dark, greenish shade, and a little
bit of fluorescent red. This is something different
color which comes up actually like color when the leaves are, whereas leaves are just
tiny and start to mature. How it appears, I'm trying
to create that shade, I don't know what
that shade is called, but slight grayish, pinkish, greenish shade,
something like that. Just a little details to this. Taking fluorescent
pink and red and again adding the details
first the outline, then just making it crisp
and clear the outline. Now I'm taking my
rigger brush because I don't want very thick lines. Again, I will try
to add the lines, just adding a very
thin line to it and creating these and
trying to create the shades you can
see to the sides of the petrol very thin lines. Whenever you are creating
such thin lines, make sure that your
color is fluid. Then only you will be able
to create such thin lines. Very small details add beauty
to the entire painting. These are very small
details which I'm trying to add it so that it looks
more realistic and beautiful. Now I'm just outlining it with black because there's a gap
in between these two petals. I'm just trying to make it with black so that gap reflects. Whenever you are doing
such type of painting, try to use the thinnest brush, either liner brush
or rigger brush. Here I'm using the
same rigger brush that we did earlier for
the petal detailing. Now let's take green color
and mix it with little black, little white to it, again, adding little
lines in between. These are very small
details which really adds a beauty to the
petals actually. Now let's add more of yellow like in the above we did
with pink and yellow. Here we are, doing with
yellow and green color. Now let's rotate it again, just adding more lines
to the upper part, which I've done pink. You can see already this
has come up very beautiful. The upper part, a few
below petals are left, which we'll be doing slowly. One by one, we are
doing all the petals. Now let's mix again this color. And just trying to connect
center petal, this line. And again, drawing the
line from the petal, which is coming
from the center to the downwards direction,
adding little pink. And I'm just going down and making the outline
of the petal first. Do it very slowly. Take your own time because
these are very small details.
11. Detailing Leaves: Moving further, let's begin with the other petals detailing. Let's take again our round
brush and mixing this, both red and pink color. A little bit of
green is also there. Just adding more lines to
the upper part of the petal. Just adding the lines so
that the two colors reflect. Now again, taking a
little green in it, just adding to the
leaves, which is below. Just simple lines and same curvy lines as the
shape of the petal. Now taking a white and
fluorescent yellow, again adding lines
to the lower part, because you can see there
is a fold in the leaves. I'm just highlighting it
that so that it becomes a little more prominent
with fluorescent yellow. Just adding more lines
below the leaf petal. Very small minute details just adds so much beauty and so
much realism to the painting. As you can see, I'm just adding a little
bit more of fluorescent over the lower part so that it becomes more vibrant
from the lower side. You can already see
it's looking so vibrant and magical when you use
black as a background, whenever you are doing
such type of painting, try to use dark background, then only that painting
will look very vibrant. Dark background can be
black, dark grayish color. Or you can use greenish color. That is the sap green color. Also you can use for
creating vibrancy. Now let's add a little bit more outlined to the lower part. Just adding green to
fluorescent yellow, just highlighting from below. Then taking white and just adding again the outline to it. Now let's take again
this fluorescent green and just add to the bottom
part of the first petal, which we did actually little
greenish touch to it. So we can see just taking
a little bit more white and then again adding further more vibrancy to this
part, lower part actually. Now let's do the further
detailing on this. Now taking this green and
fluorescent yellow mix with my round brush, I'll just highlight
the below line, one side only just
highlighting it. I'm just showing that one side, there is more light
than the other. I've just highlighted this area. Then I'll try to just
blend the color, just make it a little thick. Now let's do the
other leaves as well, which are left on the
other side first. Let's do the upper one. For the upper one, we'll take white and this fluorescent
green and yellow mix. And I adding first
on the above part, that is the top part, just adding more of white to it because this is quite vibrant. The upper part, just
adding it to it, then taking a little
bit more of green, just adding green to it, and I'll try to blend
both the colors. Now, just covering
the bottom part also with the slight
greenish color. Just taking yellow
and lemon yellow and just adding more yellow
on the top towards the end. Now taking fluorescent
pink, black, and fluorescent red,
just mixing the colors. Just taking my,
again round brush, I'll try to create the line
which divides these two. Let's take our rigger brush for doing this
because it would be difficult for us to use this round brush instead
of rigger brush. I'm just taking rigger
brush and trying to create a fine line which divides the upper area and the below
area just outlining it. Now adding little
small diagonal lines below to give a more
realistic to it. Just small small lines. Similarly on the
upper side as well, Few lines on the bottom part. Just few, not too much,
especially below. And just small lines just adding little
textures to below. First with the pinkish
color and now with this green and
fluorescent yellow color. Just a few simple lines
which we did on this side. Same we are doing
on the other side. Now let's turn the image and let's do more detailing
on this side. Just adding more lines,
very close lines. I'm not creating big, big lines. Very small small
lines which adds, uh, the veins and details to it. Very small, small lines now taking white, just make it a little fluid
and then start adding it, just adding the highlight below. As you see, the painting
is very simple, but the accuracy
and the lines are very important in especially the boundaries which
you are forming it. Take care of that when you are doing such type of painting. On the top of that red line, I'm trying to draw
this white outline. If any colors like spills out, just try to cover it with your same background
color that is black. Now let's add a few more lines, white lines and this fluorescent
lines to the upper edge. I think two to three
leaves are more left. Then we are done
with this painting. Just a few more details and
we are good to go in this. I've just added green and
fluorescent pig to give more highlights to this petal. Now let's do the other petal also just adding the same
color to this petal. And then taking this
fluorescent green and mixing more fluorescent yellow to it, and adding again
the lighter color. And I'm just blending
the two colors. One is the darker color and other side is the lighter color. When you mix pink to this green, the color becomes something different, like pinkish green, you can see here which adds like the realistic look to the
leaves and the petals. Now just adding a little
bit more light highlight to the other side of the petal. Very minute details are left. Again, pink and green mix. Just adding the highlights
to this lower petal. You can see I'm just filling
up the colors with the same grayish, pinkish color. I'm just covering
it with this color, the lower leaf part,
which is there. And I'm trying to
give shape also to it because here again, after doing the detailing, I'll just outline it also, I'm adding a little highlight of pink color to it as well, taking black in this mix and just adding more
details to this part. Just adding a few more details
to this part of the petal.
12. Final Detailing Of Leaves: Welcome back. So I've just taken a fresh palette of same colors, fluorescent colors,
and black and white. Let's start with further
detailings of the painting. Let's start with
first white color. And I have used here, again, my rigger brush, just taking a little
white and just outlining this area with white color as I want a little sharp lines, just adding little white
lines to this petal area which is a little greenish
color to the end. So again, this
fluorescent pink green mix more of green and just
mixing both the colors. And then we'll start with further the leaf
detailing first, I'm doing the first below area and I'm just
blocking it with this color. Why? I'm doing this with
Rigger brush so that the colors don't come
out the boundaries. You can use small size
round brush also for this. Now again, fluorescent
soliucent yellow, white mix with this grin. Other side I'm of the leaves and I'm trying to blend
both the colors. You can only blend both the colors if both
the colors are wet. Just keep that in
mind when you are using specially acrylic medium. Acrylics actually dry very fast, so you have to take
care of that in mind. If you will use too much
amount of water in this, your colors will dry very fast. If you're directly using color and very small amount
of water thick colors, the colors will not dry so
fast that you have to take in mind that try to use more
colors and less water. Similarly, I'm doing the
other petal as well. One side, little pinkish
green and other side, little fluorescent yellow green. And I'm just trying to
blend both the colors now, again, adding
more of green to it, outlining this other petal, and just creating some lines on this greenish side which
has more greens to it. There's a small petal below. I'm just covering it with green. Just taking more of fluorescent
pink and green mix again, you can see how brownish
greenish shade it comes. Actually a different
type of green is there. I'm not sure what it is called, just covering this
upper area with this where the two
leaves are joining. Especially the joining part, I'm just covering
with that color and just trying to give a
little shade to that part. And then the lower part, I'm just covering with this fluorescent green
and yellow mix. So you can see how the
blending is being done with just the rigger brush
and using two colors. You can use a round brush
also for this if you don't have this rigger brush
or the liner brush is also fine if you
are having it just outlining the outer area with
the lighter green color. Every part of the
petal outlining is very important,
very neat outline. And try to use
very pointed brush for outlining all these petals, especially the corner petals. Because the background is black. And if there will be any mistake or any lines which
are moving apart, it will automatically reflect
on your entire painting. Just making a little
more outlines to the part which is
joining the lower petal. Just making a little more dark. Now taking a little white color and just adding to the edges of the little
fluorescent yellow also. These are the final
details which I'm actually adding where I feel
that it should be there. Just see your painting and see where it is
lagging and just add a bit of color to it
to make it more vibrant. Look, now again, I'm mixing pink and black to make
it a little dark color, I'll just try to add
more lines on the top because I want that upper area to be more darker
than the lower one. Especially the upper tip petal, which should be more darker than the lower
part of the petal. We are almost done
with the painting. Just a few more
outlining parts left and we almost done just the final
detailings we are doing. And just more lines and more darker lines on the
petals. I'm just adding.
13. Final Touch Up: So welcome back. This is our last part in which we
are doing few details. Let's do some glazing over
the middle petal here. I'm using the same color, that is the pink
and greenish color, and I'm making it very fluid, transparent color
with adding water. I'm just adding a
little highlight in the center because the
center is quite dark. And I'm just trying to add a
little more glazing effect, the center part of the petal, adding more colors
to the center. And make sure your color
is not very thick. The color should be
so thin that the below detailing
should be reflected. This is the glazing technique
which I'm using over here on the petals
as you can see. To add more center
highlight to the petal. To give more depth to the
petal as you can say, just the center part, then adding a little more
of this glazing effect. Now let's do further more detailing where this
lines are required. We'll just add a few more lines. We are all good to go with the painting a
little more glazing. I'm adding in the center to give more depth to this petal. Now, once this is done, we'll add a little more
lines to the center, as well as to the sides
to make it visible lines. Because when we add a
little bit of glazing, some of the lines becomes light. I'm just adding a more
highlight to the side line. Especially leaving
the center one and giving more brightness to
the side area of the petal. Just some nice thin lines. Now taking this fluorescent pink and just adding a few more lines and
highlights to it. Just few more thin lines and
with this light color also. Now, this is just the finishing
touch which I am doing. If you are good to go
with the painting, no need to do the same thing. If you feel that
your painting is really good and it's
fine, the lines are fine. No need to repeat it again, because I feel that a little bit more of lines
should be there. So I'm doing it. When
you see your painting, then only you will be
able to depict the lines. Now I'm just outlining
this with white color. When you're outlining this, just make sure that your
color is very thin. Just adding a little
bit of yellow to it and just outlining
the whole area. Now this is the final outline
which we'll be doing. Your outline has to
be very thin and make sure that your color
is really very fluid. Then only you'll be able
to create those lines. Fluid means it should
be a milky fluid, not too much fluid. That the color becomes
transparent fluid in the sense that the color should move when you are drawing the outline.
And it should be thin. It should be that thin, so just outlining the petals. So just enjoy the process
of outlining slowly. I hope you guys have
enjoyed painting this. If you are trying this painting, do share me your project works. I will love to see them. If you have any doubts, any questions regarding this
painting and this project, you can ask me in the
discussion section. Also, you can DM on Instagram. That is Hi Art Gallery. Free to answer all
your questions. Also regarding this
white framing, you can see in the cat
portrait painting, I have shown how to
frame the round canvas. You can see that, especially the framing part for protecting the paintings. Once you're done
with this painting, leave the painting
for at least a day. Then next day you can
varnish it with any varnish, whichever you want to use, either satin gloss mat, whichever varnish you
want, you can use it. And at least two to
three at varnish. You should apply when you are
varnishing your painting. Because this not only
protects your painting, it helps in long run. Also, it helps to protect your painting from dusts
and light everything. Try to varnish it when you are completed with this painting. In each and every class, I try to teach something new so that you can learn something
new and different. Mostly my paintings are a
little bit intermediate level. It's not a big level painting, these are all
intermediate level, which requires a
lot of patience. But I'll soon bring one
painting that will be a landscape painting which will depict all the characters as
well as from big level also. And the intermediate
level also can paint those beautiful
landscapes. Next painting will be
mostly on the landscapes, Let's see and wait for it. In the coming year, I will be publishing that you can see. I'm just outlining it with
white and black lower one, I have just outlined
it with black. And the upper petals
I have outlined with white outlines Should be a thin, as posible, make it fluid. Then only you will be
able to outline it thin. We're almost done
with this painting and just a few more outlines
and we are complete. I hope you guys enjoyed doing this painting
along with me as I did. Because if you have any doubts, any questions please do. Ask me at the outline is done. I'm just rotating my canvas so that I can outline
the lower one also. So just taking a little black and outlining this
black portion, Especially the lower
outlines which are below. So just a few more. So do share your
project works and your reviews because it
makes me keep going. And motivated reviews
are very important for me so that I can
improve myself also. And this will be your project
work for this painting, for this class especially, we are almost complete
with this outlining part. I hope you guys
have enjoyed doing this realistic lotus
painting as I did, and hoping to see some beautiful projects
from you guys soon. This is it. Thank you for giving your time
and watching this. Do do share your project works. I'll be eagerly waiting
to see all your projects. Thank you and have a good day.
 Mohini Sinha, Acrylic and Gouache Artist- Nature Lover