Transcripts
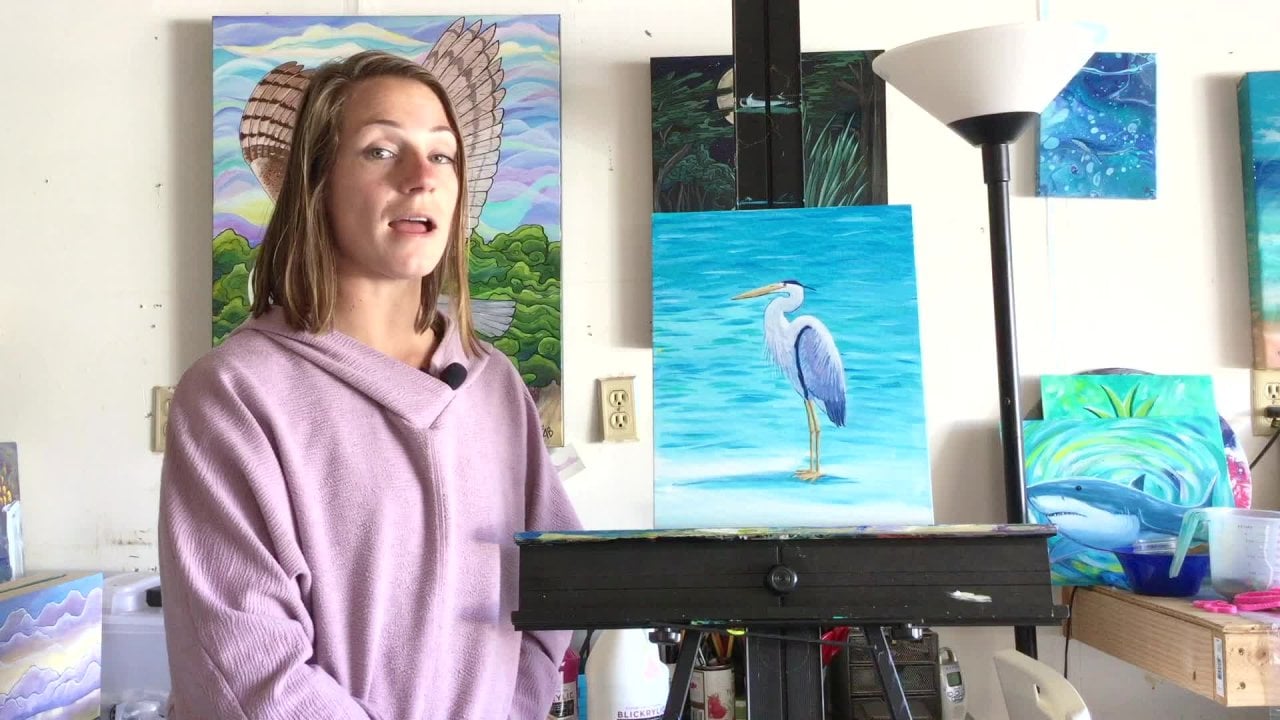
1. Intro: My name is Anna Stage. I'm an artist based in Santa Cruz, California. And I think the nature of wildlife of the area in this costume gonna introduce you to getting started with paint. So we're gonna go with supplies. You're gonna need basic techniques to get a variety of your pleadings, and then we're gonna do a simple landscape painting skills. This class is perfect if you've never seen before, or maybe down in just a little bit of words in a long time. If you just kind of the basics and have a good place to start from this experience, what I love about a Rolex is it's a really fun and forgiving Medio. It's water soluble, which makes it easy to work with enough. It's quick drying. Wait a long time. Players colors a really vibrant and like that, first tiles bring almost any creative. So let's get started
2. The Paint: All right, let's talk about acrylic paint across. Bean is basically a pigment suspended in an acrylic polymer. It dries as a thin film of plastic, so it's permanent and you cannot live the colors back up. It's usually the same pigments you see in oils and watercolors. Just a different medium, so handles a little bit differently than those do when you're picking out colors. To start with, I recommend beginning with the primaries, so you want to get red, yellow, blue and white, and that allow you to practice with mixing colors. You can get a variety of shades and hues just with that limited palate. The next colors I recommend incorporating into your palate er, earth tones, which are great for painting any subject in nature. So those would be yellow joker burned upper Rossi, Annam and similar shades. And then, once you get the hang of mixing colors, then you can try different shades and hues. You'll see at the pain story could get a little overwhelming when you get there and see a huge rack of all the different colors. So if you start small, you can expand. From there. You don't need a lot of pain to get started. I actually just get these little tubes on those last me a long time. You know, I only use like a little dollop for a sitting. So they go along where command getting maybe a bigger drug of white pain. Because I go through that a lot more. You can use it to tone down really vibrant colors and then also to add capacity to cover your service cause some peons could be transparent on the roads. If you add white, they cover the canvas a little bit better. Um, there's a variety of brands as well. That could be a little overwhelming liquid Texan Golden are the most popular for their quality, but you can experiment to find your favorites. There's different qualities to see. You'll find artists, quality and studio quality in my experimentation. I haven't found a huge difference between the two, but in general, the professional green pains have a higher concentration of pigments and you'll get more vibrant colors. So I would invest in the best paint that you can afford. And there's also different bodies, so there's heavy body and soft body heavy body is great if you want more POSCO effect and textured surface and soft body is good. If you want more soon, finish to your paintings. The last thing I'll talk about quickly is varnish, a curling painters ports when it dries and it absorbs dust over time. So when you're finished your painting, you want to give it a code of by varnish. That'll help maintain your paintings, vibrancy and protect. Against you be there's different finishes. There's gloss matte satin so you can pick your favorite experiment with what you like. My personal favorite brand is this liquid Tex, and I use the gloss varnish at the beginning and then do a coat of satin so it's not super shining, but the glass underneath kind of lets the colors shine through a little bit more.
3. The Brushes: If you pick one thing to splurge on when you're getting started, it's gonna be the brushes. For sure. You want to pick ones that are designed for acrylics. Synthetic hair is fine. Good quality brushes give you better. Control the pain, which gives you a better experience painting. You want to look for bristles that spring back when they're bent. Definitely try to avoid this. Those cheap brush packs with all these different shapes and sizes. They give you poor control over paint and the hairs fall out into your paintings. So try to invest in the nice ones if you can. There's a huge variety of shapes and sizes, but you really only need a few. I have a handful of brushes that I use all the time, so I recommend getting in large flat brush. Get in an expensive one, but not the super cheap ones. Come the Hairston fallout. So I just get this artist loft flat brush, and that's great for blocking in huge areas of your paints when you're starting the mouth and then a larger flat brush like this size 24 then to get more detailed, couldn't use like a size 12 flat brush and then good to have Ah, small round brush. This is a number four for details and lining. You can practice with those few to start up with, and then experiment whether those shapes and sizes and see what you like. You wanna take really good care of your brushes. Good care will make the last lunch longer, which is great if you're really investing a bunch of money into them. So why a painting? You want to keep them in water, Curly paint dress superfast. And if it drives in the some base of the bristles, it can be really hard to get out. So if you keep in water, that will protect, um, you want to give your brushes of really good cleaning after every session as well, so I recommend using think so or is something like the masters brush cleaner. Do not leave them in the water for an extended amount of time while you're painting, it's fine, but a few days is not. I'm definitely guilty of that, but try to avoid that and give your brushes a good cleaning after you use them
4. Surfaces and More: that way the rest of our supplies, So you're gonna need a surface to paint on. The great thing about a acrylics is super versatile. Would plastic glass, metal and more are common, starting with a canvas board, because it's pretty inexpensive and you'll get comfortable with the texture of the canvas under your brush. You can also use acrylic paper or mixed media paper watercolor paper that's also in an expensive option. Good to just kind of practice pushing the pain around. Then there's girl fashioned stretched canvas comes in a variety, his shapes and sizes, and it's already Jess. Oh, so it's practically ER, and then you can also use wood panels. I could see a different effect, which is really cool to its smoother, so it feels a little bit different under your brush. When you're painting, baby can experiment with different services and see what you like. It's all a matter of personal preference. I always use professional grade stretched Ingesson campus. That's my favorite. Make sure you don't use any flimsy paper like your regular printer paper, because it's really flimsy doesn't hold moisture well, what kind of collapse under your paint and then you want to get a nice palate to. You can use something a simple as a paper plate. Ideally, it's flat, non absorbent. Empty food containers works to. What I use is this Masterson's day with palette, so it comes with the lid. I can keep my paints inside, and then when I'm done painting, I'll just close it up and my paint still stay with for my next session. You want to have a cup of water for your paint brushes. You can also use a shallow pan to lay your brushes. Flatten after your insulin to protect the varnish on the handles. Make sure you change your water frequently if the water gets to dirty kind of muddy after colors, so just refresh that water every once in a while. As you're painting, I have, ah, simple little spray bottle full of water that I used to. Sprint's my pain as I go, because the paint does dry really past. That keeps it workable on my palette a little bit longer. If it's just sitting there for a while, and then I always have a rag hand, even use paper towels. Those air really handy for drying your brushes up, do you? In some you want to get the excess moisture off, cause if your brushes really wet, you have paint on it and you go to pain and connected up dripping down your canvas. That's no fun. And the last thing you might wanna get is an easel. You could get a tabletop easel or understanding diesel goes on the floor from, but you don't necessarily viewed one. You couldn't prop it up with a box or even just laid your painting flat on the table. Um, whatever works.
5. Techniques: right. So now we're gonna go over some techniques. So if you need to positivity or don't gather your supplies, you could do so We're gonna do some practical exercises, toe gain brush control. So what I've got here is my mixed media paper pad. You can use whatever you have handy, whether it's acrylic paper, watercolor paper, anything else. I went over in the supplies section and then I've got my pallet loaded up with white paint red, blue and yellow. The primaries will start simple. I have a cup of water for my brushes and a rag to dry my brushes after a ransom. And the brushes I'm using are the size 12 flat and the size for around. Since we're working kind of small right now, I'm just going to go with those two at the beginning. But you can use the same techniques with different brushes. So the 1st 1 we're going to go over is washing and blending. I'm just gonna my brush in the water cup to get it wet in seal. Just go into the red. Here, you can blend paint on your palate or on the surface that you're painting on. But I'm just going to make a little my bread mix on my palette here stirred around just kind of scoop stern until I get the color that I like, what kind of got this pink color and then just long, smooth strokes. If you if you feel like the pink is going on kind of dry, you can always add a little bit of water to the mix on your palate, and that will make it more fluid and cover up the canvas a little bit better. Be careful about adding too much water because it can make it kind of transparent. So then toe blend. Just gonna go straight into the white Now, haven't grants my brush, gonna start from the bottom and connected to the part that I just painted. See if you go up until the red, those long, smooth strokes and back down see how you get that really smooth transition. You can keep going. Let's try a little bit of yellow, see what happens there. It's paints a little bit pasty, so I'm just adding water to make it more fluid, do the same thing from the bottom here and work our way up. Go up and down until it's nice and smooth. That's how you do a wash and blend your colors. The next technique would go over is cross hatching. So if you're familiar with drawing techniques, it's similar and just doing with paint. So it's basically making kind of crisscross strokes with your brush, it's layer on another color. Let's go into the white. Do you kind of get textures? This William? It's a different way to blend your colors. Just play around with that. Get a handle pained, used to working with the brush and figuring out how much pain toe load upon your brush if you need to add water. There's also two ways to hold your flat brush so you can either hold it horizontal and you can make lines that way or, if you hold it vertical. You can fill in bigger areas. So depending on what area of your painting you're working on and kind of think about which way you wanna hold your brush. I looked over to another page. Okay, next technique is regular hatching, so we just didn't cross hatching. Regular action is just these parallel strokes. The debate into different colors. I started with the red going into the white to get a variety of shades in demonstration here. This is one of my favorite techniques to use for the surface of the water, peeing in the ocean scenes to do a lot of yellow, too. So that's hatching, huh? Okay, next one we could do is dry brush. So for dry brushing your not loading up your brush with a lot of pain, and you'll actually kind of naturally get that if you're going along and painting and all the paint off of your brush, it'll turn into dry brushing. That's like when you're loading it up with more pain already. But if you want to do this deliberately, and it's a good way to create this kind of like rustic texture, it's good for Europe eating grass or animal for see how the paper below the brush strokes still shows through. Get this cool texture. Okay, in the next technique, we're going to go over its stippling, still working just with same 12 flat brush. So for stippling, you're just pressing the brush onto the surface like so lifting it back up. Cannot color do same thing. Loser. Some good techniques to create texture in your paintings. Sometimes it can get kind of wrapped up, blending everything and making it smooth. But it's good to have a little texture and show that brushstrokes and your painting, because it gives them more dimension, makes it look less flat. Just keep playing around that. I try different colors. See how the paint mixes when you do this. And as faras mixing goes, you can mix colors on your palate like I mentioned before, like so or in his using yellow red. And you can also makes directly on your surface, which we kind of did already as we're adding more colors. So if I put straight red there and then go into the yellow and peanut on, you can mix it up right on the surface and adjust if you need a So maybe you think that it's like two dark like that up. You can just go into the white and exit right on your surface, and that'll brighten it up on, yeah, acrylic paint dressed super fast so it blends best when it's still wet. And then once it's dry and you go over, it doesn't blend anymore. Just paint right over it, which is also good cause if you paint something you don't like, you can just give it a minute to drive. You know over it, not layers can also partially mix colors on your palate, so here I'm not stirring it around thoroughly. So just a couple of strokes be underpinning the right side of my brush into the yellow. The left into the red and just kind of doing a couple of strokes can see how half of that breast stroke is reading half a C l O. So that's it. Partially mixing colors could get like a cool, streaky effect that with him. Then let's switch to our little round brush. Get it wet in the last technical go over was lining. So for this one, you kind of wonder not get too much pain on your brush. You can kind of wipe it off on the palate just by holding it flat, twirling it, and then when you have the right amount of paint loaded on your brush, you can play around practice with that. To get the hang of it, you can create lions the round brush. Maybe one of I got some little shadowy edges to some of your shapes. Just make a little doodles very the thickness of your line. Do it really thin by pressing softly on the surface. Or you can make the girl line pressing the brush all the way down. So just keep playing around those techniques that will help you loosen up with your painting on. Then we'll go on to the next lesson. It could be a project.
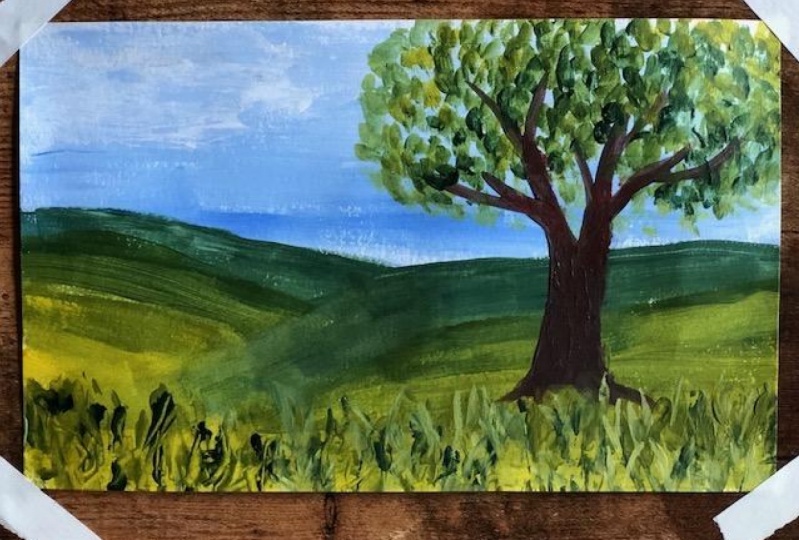
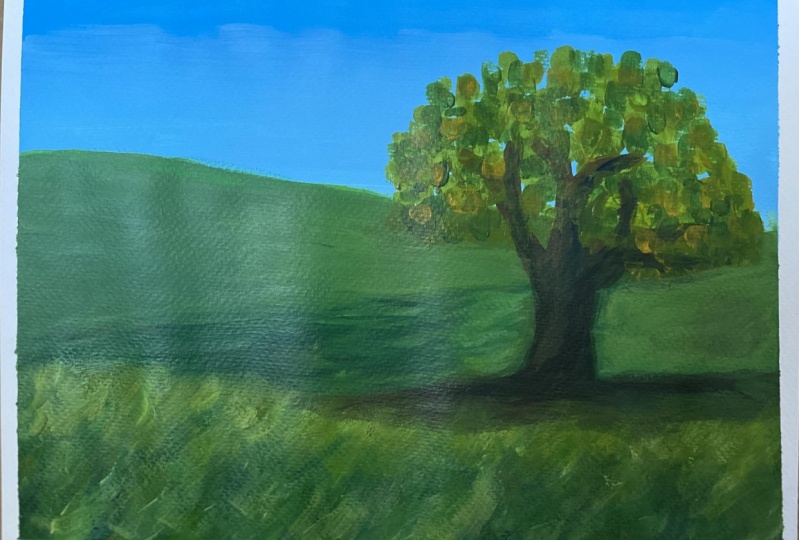
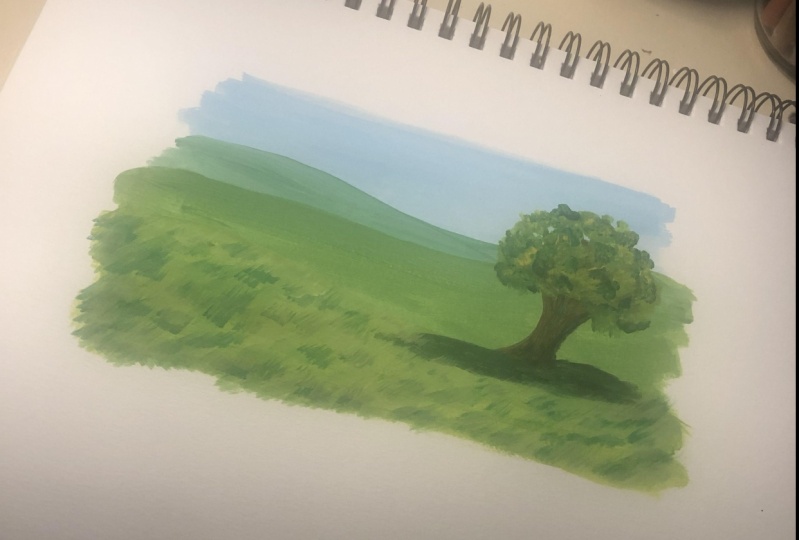
6. Project: project. So we're gonna recreate the simple landscape painting. So if you have a canvass board, you want to do it on You could do that. I'm just using mixed media paper. Still or what? For other surface, you have handy so fresh you paper it. If I've got my salad loaded up with the same primary colors there have been using for technique demonstration going to start out with my flat brush and we're going to start with a wash for the sky. So we're going to make a nice light blue color using a little bit of blue on more white. Just mix it up on the palate load of airbrushing. Start from the top Here, work our way down thinking of more paint as we need it. You can see I'm using swift, loose tricks. Don't overthink this part. It's a good color for a sky. Then what's blend of her hill in the background? So we're gonna make kind of like a pastel green, which is gonna be a mix of blue, yellow and white. Just keep adjusting until you get the color you like. That looks good to me. So I'm gonna add in a little role in Hill here. I'm painting over the sky that I just pain. I'm gonna make sure there's no white in between your sections here, just back and forth a few times. Smooth it out. Now, as we move into the foreground, we're going to get into a brighter shade of green. So do my blue and yellow there a little bit of white. More still four around here. Do one more foreground. Mixing a similar shade of green a little bit heavier on the yellow. Okay, now I'm switching toe my round brush We're gonna paint in a little tree, So let's mix some brown with the tree trunk, which is a mix of all three colors red, yellow and blue And it's oh, just a game of balancing. So keep adjusting That makes until you're happy with it. So if it feels like it's too yellow, we can have a little bit more red or blue until you find the right proportions. Those good brown to me. Get off my brush a little bit. Load of the end. We're gonna do some lining here, Make what you're drunk and I'm gonna dip directly into the blue to create some shadows. Just add some lines within that I don't blend it too much. So it remains a little bit streaky. The texture of the bark. I'm gonna add a shadow on the hillside too. So I'm gonna keep that brown I was working just kind of blended in with the green happened my palate a little bit more blue blues Agreed color to use for shadows and then to create the leaves of the tree. We're gonna use stippling technique, so I'm going to start with just a kind of medium shade of green. Can you similar color that you were using for the hillsides, Larry A paint over a tree trunk movement. Realistically, some areas open for sky holes shining through. We're gonna do the same thing, but add some shadows. Tour leaves, I'm going. It's a blue green, darker shade there. Just add some more scattered stippling whose do that one more time. But we'll make some highlights. So rinse your for shops really well. And for the highlights. I'm gonna do yellow on Dwight. There's a true and then we're gonna create some grass in the very foreground hill here. So, prince, off your flat brush really well dried off. We're going to use the dry brush technique for that part. So it started with that medium green that I've been working with just kind of start off the texture as you layer on with different colors. What kind of blend into each other give you more variation Colors You go into the blue won't be brown. Kind of mixing up random colors. Dark streets here. Similar to how we did the tree. Start with the mid tones, the not shadows and then going with the highlights rinsing my brush in between. No, I'm gonna go into that white yellow, have some of that green to the mix, removing from the back to the front. So that way, as you later bring with you into the foreground, it's more highlights. Just the white just building and building. Really years. There you have it. That's our little landscape paintings
7. The End!: thanks so much for joining us. It's not so much process. Enjoy. I'd love to see your project simply and shared a project section. And I'd love to get back to check out other people's work to always love having group Do that. If you have any questions, please just reach out looking Now I'm happy to help you. See you next time.
 Anastasiya Bachmanova, Artist at www.followthesunart.com