Transcripts
1. Your Feel-Good Art Journey Starts Here: What if building a drawing
habit felt less like just another task on your list and more like
a little daily treat? Hi. I'm Jutta, an artist
and educator from Germany. I help artists build their
skills and enjoy the process. Through low pressure art
making that feels playful, encouraging and actually makes you want to keep practicing. Welcome to acrylic marker
floris in Procreate. Your 14 days Feel Good
sketchbook challenge. In this class, we'll create one colorful floral
illustration each day. We'll use bold shapes,
playful compositions, happy colors, and a custom acrylic marker
Procreate brush set. Challenge is designed to fit
into your daily routine. And while it feels
light and playful, you'll still be training
your drawing skills and creating a steady
drawing habit, the low pressure way because growth doesn't have
to feel stressful. We'll be working
digitally in Procreate, and you'll find all the tools used in class ready
for you to download. All you need is your iPad
and your Apple Pencil. Of course, you can
also follow along in a real sketchbook using traditional material
such as acrylic markers. And at the end of this class, I'll show you how you can turn your floral illustration into a realistic sketchbook mockup using Procreates
built in tools only. This class is for anyone from complete beginner
to seasoned artist. As long as you love color, floorls and low
pressure art making, you're in the right place. So grab your iPad,
your Apple Pencil, and let's indulge in color. I can't wait to
see you in class.
2. Class Project: For your class project, I would love you to
share one or all of the flower illustration you create during
this challenge. You can post your
illustration just as it is, or place it inside the sketchbook mockup using the bonus lesson at
the end of this class. You can upload a single page, a few of your favorites or
keep updating your project daily throughout the 14 days as your sketchbook
collection grows. To create your project, just head over to the
Projects and Resources tab and click the
submit Project button. Give your project a title, add a cover image, and tell us a little
about your experience. How did drawing feel for you? And which illustration
was your favorite? You can add as
many images as you like by clicking the
upload image icon. Once you're ready, hit publish and your artwork will appear
in the project Gallery. I'm really looking
forward to seeing your colorful floals and cheering you on
throughout the challenge.
3. How This Class Works: Before we begin, let me quickly show you how
this class works. This is a 14 day
sketchbook challenge with one floral
illustration for each day. You can follow the
class day by day or move through the
lessons at your own pace. For each project, you can
draw along with me while watching the lesson and pause the video whenever
you need more time. Or you watch the whole lesson first and create your
own version afterwards. Whatever works best for you. I'll be working
digitally in Procreate, but you can absolutely
follow along in a real sketchbook
using acrylic markers, paint, colored pencils, or any
other materials you enjoy. If you're working in Procreate, make sure to download the ZIP file from the projects
and resources section. It includes my custom
acrylic marker brush set, the color palette I'll be
using throughout the class, and a sketchbook photo for your mockups in case you don't have a suitable
photo of your own. The easiest way is
to download and unzip the folder
directly on your iPad. Then simply tap the brush set and the color palette files, and they will automatically
import into Procreate. You can import this
sketchbook photo whenever you need it by choosing Import and then the
photo in your files app. At the end of this class, I'll show you how to place your illustration
inside the photo and turn it into a
realistic sketchbook mockup using only Procreate's
built in tools. All right. Everything is
set up and ready to go. Let's start with our first
floral. I'll see you there.
4. Day 1: Bold Orange & Pink: So welcome to day one of our feel good
sketchbook challenge. I'm so glad you're here. Before we start drawing, I just wanted to remind you that this challenge is all about
enjoying the process, playing with colors,
creating without pressure, and slowly building a fun
little daily drawing habit. So please don't overthink your illustrations too much
and just enjoy yourself. So let's jump right in and get
started with a new canvas. I've set mine up already. It is 2000 by 3,000 pixels, and I've chosen this
size because it will later on match
my sketchbook mockup. If you want to display
your illustration in the mockup that
came with the class, then 2000 by 3,000
pixels is the way to go. But if you want to create your own mock with
your own sketchbook, then you might need to do
your own measurements. I will show you at the end of
this class how you can make your own mockup and how you
can place your art in there. So look out for that at
the end of this class. But now let's go
back to this canvas. And if you don't
have a canvas this size or the size you will need, let me quickly show you how you can set up your own canvas. You tap the gallery button and you tap the
big plus up here. Then you tap this little icon here with a small
tiny plus in there, which brings you to
the Canvas panel. So here you can
change width, height, DPI, but also the units. And then you just type
in the numbers you like, you tap done, and you
tap the check mark. I would only recommend
you to keep your DPI at 300 pixels because it creates the best outcome when you want to print your
artwork later on. But because I have
my Canvas already, I'm just going to
tap Cancel for now, and then I will go to my newly created 2000 by 3,000
pixels Canvas. All right. And in our first illustrations, we are going to draw beautifully bold orange and pink flowers. It's a very simple illustration. It's just to get
used to the brushes, how it feels to draw
in this style on the iPad and just have fun. Let's get started with
our yellow color here. And then we are going to
pick one of our brushes. How about we are going to go
with acrylic marker round? This one makes nice
and crisp edges. That's why you see me using
it a lot for the outlines. And then we're just
going to place those center dots of
our bold flowers here. We are going to spread
them all over the canvas. Alright, let's check
the brush size. I think I want to go
a little bit bigger, and then I'm just going to place some yellow dots here in the center and just
spread them out evenly. I will also try to keep some at the edge of my canvas because usually that creates a
very nice indication of a seamless repeat pattern. Then we're just going to
start drawing the petals. Half of the flowers
I want to have in orange and half
of the flowers I want to have in
pink because that's just the color combination
I like the most. Since we have eight
dots for now, we are going to aim for four
orange and four pink ones. All right. Let's first
of all, add a new layer. And to make the work a
little bit easier for us, we are just going to drag this underneath our yellow dots, and we switch, let's say, to our dark orange first, and then I'm just going
to draw some petals here. And I want mine to
look like this. You just go with whatever
shape you prefer. So I will draw the
outlines first, and then I will fill my flowers
with a different brush. All right. And then
I'm going to switch to my acrylic marker. Let's say we use fuzzy, we adjust the brush size, and then we're going
to fill our petals with beautiful orange color. And as you can see, it leaves
some texture right away. When I color a petal, I always make sure
that my strokes are going in the same direction as the petal points towards just to create some
additional texture. And also, when I spot some areas where I miss
to fill in colors, I would usually leave
them because again, it makes it more natural, more real paper looking, and that's exactly what I like
in digital illustrations. Alright. That's the orange. Flowers done. I guess this
was the right direction. And now I want to
give the pink petals to the rest of my flowers. So let's add a new layer. Pick pink. And then I'm
just gonna switch to my acrylic marker
round brush again and just draw the same
petals just in pink. If you want, you can
have them overlap, but I decide not to, and that means I need to move this dot a little bit
away from my flower. So let's mark this layer
with the yellow dots. Let's go to the selection tool. Make sure you don't
have colofl enabled. You just circle around this dot. You tap the move tool, and you move the dot
away a little bit. And then I feel I also want
to move away this one. We do the same. I tap it, and I move it
towards the corner. But again, it's also fine. If you want to have your
flowers overlap each other, that can also create
a very nice effect. Okay, back to my pink layer, and let's draw more petals. All right. And now I want to
fill my petals with pink. So let's go back to
the brush panel, pick the acrylic marker fuzzy, and just fill the petals. All right. Beautiful. It
makes me already very happy. And now, since we have quite
some white areas here, which look a little bit boring, so I want to add some leaves
to our flowers as well. So let's first of
all, add a new layer. But then I want to drag it underneath the petals
because I might have them starting from behind the flowers just to
create some overlapping. So I'm going to go back
to my acrylic marker, and then I'm just gonna draw some Let's see in
which direction do I start. Let's see. Maybe I'm going
to start here and just draw this almond shape
from behind the flower. And if you don't
like this blobby ends round ends of your leaves, a good trick to get rid of
that because it's pretty difficult in procreate to draw pointy edges,
pointy corners. You could just go and pick
the same brush as an eraser, and then you could just
go ahead and erase the tips so they are as pointy
as you want them to be. Oh. Oh, that is brilliant. I just think pure lime green might be a little
bit too boring. So I want to add a
contrasting green color. So let's add a new layer. Let's turn this layer into
a clipping mask by just tapping it and tap the
word clipping mask. And then we're gonna pick a
new color, the darker green, in that case, I want
to fill half of the petals with a darker
green color like this. And you can see it doesn't
pick up the color here. It's just because underneath
there wasn't any pixel. I wasn't very careful when
filling the lime green leaf. So it doesn't let me
color the top as well, which is absolutely fine. The more little imperfections
are in your illustrations, the more human like it feels. So that's exactly what I aim
for with this technique. And I also, you know, enjoy to just draw
without pressure. Alright. I just feel like the white background is
a little bit boring. So why don't we fill the
background with color as well? So let's start with a new layer and drag it underneath
of everything. If you would draw in
a sketchbook now, you would have to
have a lot of work, making sure that you don't know, damage the nice edges
of your petals. So here in Procreate, it's a little bit
more convenient. And the trick is just having the layer at the very bottom. Okay, let's see. I think I'm going to go
with my very peachy, bright, reddish color here. And I guess I want to
go with the maker fuzzy again because it leaves
such a nice texture. And then I'm just gonna
fill the white spaces here. And if you want to have
it really real looking, you could just go and
draw around the edges first and then just fill within. You will also be able to see the stroke direction then
later on in your illustration. So that can look cool. If you want this effect, it makes it even more realistic. And now I feel it's still
a little bit plain. So you could go ahead and
add more decorations like maybe some lines within the petals or dots within
the yellow centers here. However, I'm just
going to go ahead, add a new layer and pick white. And now I'm just
going to draw with my acrylic marker round, I'm just going to
draw some white dots in here, just like so. All right. And here our
beautiful first spread is done. And this is how it looks
placed into my sketchbook. I really like it. But remember, you can always share your
illustration as it is. But if you like to
learn how to create your own sketchbook mockup and place your
artwork inside it, make sure to check out the last lesson at the
end of this class, and that's it for today. I'm already looking forward
to drawing with you again tomorrow.
I'll see you then.
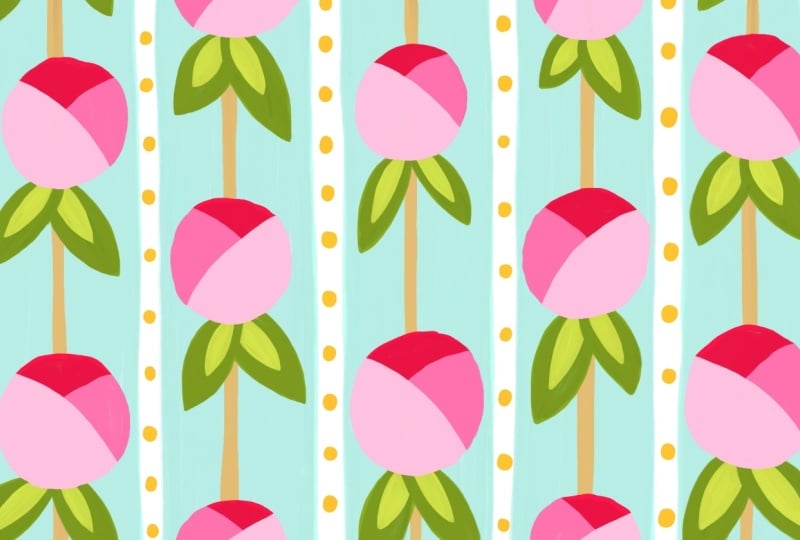
5. Day 2: Strings Of Peonies: Welcome to day two of our feel
good sketchbook challenge. Today we are going to draw some lovely peony buds because I like these
round shapes a lot. So let's get right into it. Okay, I've already opened my
two by 3,000 pixel canvas. You open the one in the
size that you need. And for this illustration today, I want to have chains
hanging from top to bottom. Like this. And on each chain are the peony
buds on top of each other, but alternating in height. Okay? Let me show you. It's hard to explain,
but better to show. Alright, I'm
starting at the top, and I'm just going
to draw a long line. And this is going to
be my first stem. Gonna clean up the
shape a little bit. And then I want to
draw one very close to the edge because I want my ponies to reach beyond
the border to just create, you know, this
seamless pattern feel. And then in between. Okay. In my next step, I want to draw the buds on top, so I'm going to add a new layer, and I will draw just
basically red circles first. I want to make sure that
the center here does not get a bud because it would look really
odd and boring. The eye would just
look at this.in the center and wouldn't
want to wander around. So that's why I'm going to draw the center peonies on
the stems on these here. I'm still using my
acrylic marker round. And then I'm going to draw
more circles up here. And now in the in betweens, I'm going to place
the rest of my buds. That's perfect. And
now we're gonna fill our shapes with
our red, as well. But let's say, now I'm going to use my
acrylic marker juicy. All right, so but now I want to layer our petals a
little bit, you know? The petals are behind
each other in a pony, and I want to indicate
that by just adding more layers with more
colors. So let me show you. So first of all, I'm going
to go add a new layer, and then I'm going
to pick our pink. Think I will go back to the
acrylic marker around again due to the sharp edges. Then I'm going to just
draw another whoops. This is what happens when you don't turn your layer
into a clipping mask. It's good that it happened
right now so I can show you. Now you would have to be really careful that you stay
exactly within the shape. And there would
be a lot of work, actually, and I wouldn't
enjoy that so much. My body would is
really tense up, my shoulders would start
hurting my neck, as well. So for me, it's easier when I don't have to pay
so much attention. So I'm going to turn
this layer just simply into a
clipping mask again. If we have Procreate, if we have all those
digital tools, why shouldn't we use
them to our benefit? But on the remaining ones, I'm gonna draw it in
the opposite direction. And now let's even add
another layer on top. Turn that into a
clipping mask as well. And now I want to pick
the lighter pink here. And then I'm going to draw a
third petal like this way. A so now I think like having a
plain white background that is a little bit too
boring for my taste. So I'm going to change that. I'm going to add a
new layer on top, but I will pull it
at the very bottom. Just drag it underneath
all the other layers. And then I want to pick my
minty green color here. And then with my
acrylic marker around, I'm just gonna indicate, like bold stripes here, and here as well. A little bit wider. I just want to have
a white stripe here, and then I'm going to let's pick the acrylic marker fuzzy, and then I want to fill the
stripe with color like this. Alright, but now I move over to my acrylic marker fuzzy again. And that then I'm
just gonna fill the areas with the minty green. And now I feel like here in these white stripes,
there's missing something. So I am going to add
another layer on top, and I will pick
probably this yellow here and my acrylic
marker around. And then I'm just
going to draw like tiny dots in here. Okay. Brilliant. And I
think my peonies, they miss some leaves, some green as a contrast color. So let me add a new layer. And I guess I want
it to be, of course, on top of our stems, but below our pony shape. So let's put it in between. Below the red on
top of the stems. And this time, I guess I want to start with my darker green. I'm acrylic marker around. Just decrease the brush
size a little bit. Then I'm just gonna draw two almond shaped leaves underneath my peonies,
just like soap. And then I'm just going to
fill those shape again. And I guess I want to go
back to the juicy marker. I want to pretend that
this leaf is on top, so I'm going to
start here and draw the strokes in
this direction and make sure we overlap and
have some texture going on. And again, if you're not so happy with the tips
of your leaves, you just pick again
a brush you like. I'm gonna go with acrylic
marker round as eraser, and I'm just gonna clean
my shapes up a little bit. Alright. Now I still feel the leaves are
a little bit plain. So I'm going to add
a layer on top, turn that into a
clipping mask again. I pick my light green, my lime one again, and I'm gonna switch to
the acrylic marker around. And now I want to draw like a similar almond shape just right inside here.
Just like this. And I might have
to pay attention about the indication of the leaves I've pretended
that are there, you know, the way they overlap. And here we go with our day to sketchbook
spread finished. And I really love
the colors together. That makes me very happy. And this is how it would
look in a sketchbook. And you can see it
looks pretty real. I love it. I just love
how the colors pop here. Alright. And that's
it for today. I'm already looking forward to drawing with you again tomorrow. So I will see you then.
6. Day 3: Whimsical Blooms: Hello, and welcome back to day three of our feel good
sketchbook challenge. Today, I feel like drawing a whole lot of colorful
fantasy flowers. So let's get started. I've already opened my tube
by 3,000 pixel Canvas. I think we're just gonna start with let's say we
start with orange. I'm at the acrylic marker Round, and I guess I want to start
with the bold oval down here, maybe another one down there. And maybe a third one up here. I think this one is not in
the right position yet, so I'm gonna delete that again. Then we can fill our
circles with color. And again, I'm going to go
with my acrylic marker, juicy. So in my next step, I guess I want to
spread some bold red. So let's go and add
another layer on top. And then I'm going to
switch over to my red. And I guess I want something
like tulip shapes or so. So let's switch back to
our acrylic marker round. And then let's see
where do we start? How about we get one here? Awesome. And I guess we can fill them with color right away. So let's go back to the
acrylic marker juicy. I think I want to go
with another shape. And I guess that's
gonna be in pink. So let's go to pink. And this time, I want
to put down, like, a proper tulip shape, so let's switch back to
the acrylic mark around. And then I'm just
gonna go with this, you know, half oval shape here. I guess I'm not happy
with this red shape, so let's move that
over a tiny bit. And now we just fill
that with color. And if you are not happy with the top
of this tulip shape, you could just go ahead and take the nice liner
taper that's in our brush set and just
use that to erase. And then you have a very
straight edge here. I want to bring some
yellow into the game. I guess I want to give these tulip shapies
here, yellow dot. And I guess I also want to draw yellow petals for
these flowers here. Let's just go ahead
and do that by adding a new layer and just
dragging it underneath. So let's switch back to our acrylic marker around
and pick the yellow. So as I said, I want to
have some dots up here. And then I want to
draw the petals all around these
orange ones here. And now we can just color these. And if you wish, you could also switch to the choosy marker. Now, I feel like we need
a little bit more orange. I'm going to go back
to the orange layer. Pick orange. How about we're just gonna add some dots up here, as well. But maybe this time
it's gonna be four. Great. So now I feel like my flowers need a little
bit of decoration, and I'm not very happy with the placement of
this flower here. So let's just mark these
two layers by swiping them to the right and
pick the selection tool. And then we're just gonna rotate this flower a little bit. Just have it in this
direction here. Yes, that's better. Okay. And now I feel they are
a little bit too plain, so I want to add I guess I
want to add some stripes here. So I'm going to add a new
layer on top of pink, and I turn that into
a clipping mask. I guess we can stick with
our acrylic mark around. We just make the brush size
really small with yellow. And I guess on top of
those orange dots here, they could use a little
bit of red if you ask me, we need some more red here. So we can actually just
go back to the red layer because it sits on top of orange and just
switch over to red. And then I just want to draw another dot here in the center. And then I guess those
big orange blobs could also use some lines, but, like, you know,
rotating ones. Let's see how that looks. So I'm going to add a new
layer on top of orange. And I'm going to turn that
into a clipping mask, as well. And then I'm going to
go back to yellow, and then I'm going to just draw, like, lines like this
all around the center. Now I also feel like
these dots here need to look a
little bit different than the ones on top
of the red flowers. So I think I'm just going to
draw smaller dots in here, and it works well because
it's on top of orange anyway, we're still on the clipping
mask on top of orange. A Okay, now I want to give
my flowers some stems, add a layer on top. Let's see. I think
I want to go with my dark turquoise color. So I think I'm going to draw
a flowy stem like this. Yes. And a lot of leaves. And let's say this time, it's gonna get
like round leaves. That's it. I don't think
we see a stem here, but I think our
pink flowers here, they also need a little stem. So let's check and
see what we can do here. Add a new layer. And how about we are going
with our lime green? Let's go with lime green. How about this time we start underneath our pink tulips here? We drag the layer
underneath pink. Like this. For example, They are a little bit plain, so let's add a layer on top, turn that into a clipping mask, and then move over
to the dark green. And I guess I want to
give these leaves like a darker contrasting
color like this. Great. And then I feel
like these bold flowers, they also need a
little bit of a stem. So this time, I guess I want
to start with dark green, and I also want to
stay underneath them. So let's add a new layer, grab this layer and
drag it underneath. And today, I really
feel plain is boring. So let's add more stuff to
these dark green stems. Let's add a new layer. Let's turn it into
a clipping mask, and I guess I want
to give it like smaller almond shapes just
in the center like this. Oh, beautiful. I just
feel like these here, they also need some contrasting
colors, these leaves. So let's add another layer
on top of the turquoise. Turn that into a
clipping mask, as well. And then I guess I'm going
to do the same here. I'm just going to draw some
tiny little ovals in there. How beautiful. I love that. This looks so cute. I'm just not a big fan of this background
because the background in white is a little bit, I don't know, too harsh for me. So let's add another layer and drag it at the very bottom. I guess this time, I just
want to use this off white tone here and just
fill it with color. Let's just go with this brush, but make it really big and
just draw in the back. And of course, you could just go around to create
some more texture. But I'm fine with
as it is right now, and I think I want
to add a little bit more of this minty color here. So I guess I'm going to draw some dots in the background
with this bright mint green. So let's add a new layer. Back to the acrylic
marker around. And this time, I create
some overlapping. And here's one of the rare
situations where I'm not happy how the minty appears
with the background. I think it is too bright
and too colorful. So I'm going to go
to the one tool and I'm going to pick
saturation brightness. And I guess I'm
going to go a tiny, little bit darker and a tiny,
little bit desaturated. I just went down 2%, and right away, it
feels so much nicer. And I would call it done here. If you think there
should be more, you just go ahead and
add more decoration, but I actually like
mine the way it is. And here it is how it looks
in my sketchbook, Mock Up. I really love how
this has turned out. And that's it for today. I'm already looking forward to drawing again with you tomorrow, so I will see you then. H
7. Day 4: Poppies At Night: Hello, and welcome
to day four of our feel good
sketchbook challenge. Let's just jump right into it. Open your canvas. Minus usually is two
by 3,000 pixels white. And today, I feel like
drawing some poppies, maybe at night behind like a
very bright blue background. So let's see how this goes. So first of all, I want to
start spreading my poppies. I'm on layer number one, and since I know I will
be drawing a background, I'm just going to go ahead
and start a layer right away. And on this layer,
layer number two, I think I will
start with orange. Let's check what
brush are we on? We're at the acrylic marker, and I guess I want
to stick with that. I just want to draw and
spread a lot of poppies here. And for my poppies, I guess I want to go with two hard shapes that are
kind of leaning to the side. And now let's just fill all
these shapes with colors. Let's go with acrylic
marker fuzzy. And in the background, I want to draw some petals, as well, but I want them to
contrast with the orange. So I'm going to
draw them in red. So let's switch over to red, pick our acrylic marker
around for nice crisp edges. And then I'm just gonna
draw petals back there. And right now, I'm
just sticking to the acrylic marker round because I'm lazy and I didn't want to switch back with my brushes. And sometimes you're lazy, and that's okay, too. I really love that red
and orange together. They look very pretty. And that's our poppies. And now we need their stems. And I don't mind when
they're overlap. So let's add a layer
underneath red and orange. And I would say my stems are going to be
this golden color again. And I'm still at the
acrylic marker around. So now I'm just gonna
draw stems here. Okay, that looks
beautiful already. And now I think my
poppies, they need leaves, and I want them to have, like, green, wavy leaves. So let's see. We're gonna add a layer on top, switch over to the lime green, and then we're just
gonna have them starting somewhere like wavy. And later on, we are going
to fill them with color. Yes, I love that. And I
also love the overlapping. Let's just fill them
with color again. And we could even go with
the fuzzy maca here. And obe by now, I think they need some
contrasting color as well. So let's go ahead and
add a layer on top, turn that into a clipping mask, and then I guess we're going
to go back to the darker green and just gonna
draw some some, you know, darker areas
here at the bottom. And I also feel
the poppies need, you know, some linework here. So I'm going to go ahead and add a layer on top of orange, turn that into a
clipping mask, as well. And I guess I'm going to pick
red and the acrylic marker. But again, I'm going
to go down in size. And I'm just going to, you know, draw a few lines up
there into the petals. And I guess we do the same
with the dark red here. We go up a layer. We add a layer, we turn
it into a clipping mask. I'm gonna go with
the brown here. Oh, that's wonderful. I love this as it is already, but I really,
really want to add, like, a dark blue background. So let's go ahead and do that. I'm at the layer one now, layer number one, the first one. And I'm gonna switch
to the dark blue now. And I'm going to go
back to my marker fuzzy and make the
brush size really big. And then I'm just gonna draw this beautiful dark blue in
the background. Oh, my gosh. And look how these colors pop. Yes, very pretty. And the remaining space here I am going to fill
with yellow dots. First, we start with
the dark yellow. I'm obsessed with
dots, apparently. And now, on top of this one, I want to add, like, another circle in the
center in the very, very bright yellow, like this. So it looks like the stars
are having a little glow. And here we go. That's our next illustration. Done. How beautiful and
how much fun that was. And here it is in my sketchbook. I really love how
this has turned out. And that's it for today. Thank you for drawing
with me today, and I'm already looking forward to drawing with
you again tomorrow. I will see you then. Oh.
8. Day 5: Folk Art Tulips: Hello, and welcome back to day five of our feel good
sketchbook challenge. Today we are all into tulips, and I've already set up my
canvas. You need yours. I think once more, it's going to be these kind of strings, similar as we did
with the peonies. So let's jump right in. I want to pick my
golden color here. And I'm gonna stay with
acrylic mark around. And first of all, I'm
gonna draw the stems here. I guess one is gonna be here. One is probably gonna be here. Maybe we have to move it. We'll see, we check
when we have our other stems because now I want to switch to a different
color, and you know me, I'm going to add a new layer and I'm going to
pick, let's say, this dark teal here, and now I want to draw with
the equal spacing here, I want to draw
another stem here. And then one in between. And maybe we can move this
one a tiny little bit. And then we can also move
the tier one, a tiny bit. So it's just more or
less equally spaced out. And I guess I want to go with two different tulip
colors as well. I think one's going to be pink and one's going
to be maybe blue. Let's check how it
looks with dark blue. Alright, so I'm going
to add a new layer. And I think I'm going to put the dark blue tulips together
with the teal stems. So I'm still at my
acrylic marker around, and I'm just going to draw like a dark blue tulip right
here in the center. Just like soap. And
the same height is gonna give us a tulip here. So it doesn't fit
completely onto the canvas, and that's exactly
what I'm hoping for. Then we will have
another one down here and another one down here. And we can see the bottom of the ones that would
follow on top. Great. This gives
this great indication of a seamless repeat
pattern again. Then let's switch to our
let's say the acrylic mark her fuzzy or
maybe juicy today. And then we're just
gonna fill our shapes. And then we can
clean up our shapes with the acrylic marker
round as eraser. Beautiful. Okay. So
that's tulips number one. And now we're going to draw the remaining one
here in between. Let's add another
layer on top of our golden stem layer
and switch to pick. And then we draw our pink
tulips here in the in betweens. All right. And then we can
fill them with colour. Let's go back to the juicy. I think the stems are
a little bit plain. Of course, we also
need some areas here where the blooms are
growing out of the stem, and we're just going to go
back to our golden color, pick our acrylic marker around, add them to our stems. But I want to clean
up the pink shapes. So let's go back there,
pick the eraser. Alright, and I think we
need some leaves, as well. And I guess I want to have
the leaves growing from right where the other tulip
stops like this, maybe. Okay, so we can fill
our leaves as well. Beautiful. And now we can do the same with our
teal stems here. So let's move over
to the teal layer, pick teal, and then first, we draw those little
funnels here. And then we add the leaves
right here in between. And now we can
fill these shapes. That looks great already. However, I think the tulips are still a little
bit too plain. So let's add some
embellishment to them. So I'm going to add a
new layer on top of the blue layer and turn
that into a clipping mask. And then I want to pick
a contrasting color, and I think I want to go into
the complimentary range, which for blue is yellow. So I think I'm going to go with this dark yellow or
bright orange here. And then I'm just gonna draw three loops at the
bottom and fill them in. Oh, wait. We didn't color
in the stems up here, so let's do that first. Let's go back to
the golden layer, pick our golden color. And then we want to draw the same pattern here
into our pink tulips. So let's add a layer
on top of pink, turn that into a
clipping mask, as well. And here I think I want
to go with bright yellow. And now I feel we need more
yellow and more orange. So I think I want to
use these colors as well to create contrast
in the leaves. We add another layer. We turn it into a clipping mask on top of the golden layer. And since we have
yellow in the pink, I also want to put yellow into the golden layer just down here, just as a contrasting color and a repetition of the yellow. Beautiful. And now let's do the same with the
teal layer here. So we're gonna add a new
layer on top of teal, turn it into a clipping mask, go back to the light orange and just give these leaves the
contrasting colors, as well. Oh, yes. I kind of feel like this is
getting this folk art, Scandinavian folk
art feel somehow. I feel like I would like a little bit more
contrast between yellow and the
golden ochre tone. So I want to go back to my ochre layer and I'm
going to hit the wand tool, go to Saturation brightness. I think I'm just going to
make it a little darker, 2% and all of a sudden the color pop way more. Maybe three. Yes, that looks much better. Awesome. I just think due
to the white background, it all has, like, a
pretty cold feel. So I'd rather have the
background in my off white. So I'm gonna switch I'm gonna
pick my off white here. Switch to the acrylic
marker juicy, bump the brush size up and just gonna color
in the background, and everything looks
much warmer right away. And here we go. This is today's
sketchbook spread done. It looks amazing. The colors really
work well together, and this is how it
looks in my sketchbook. Amazing. I really love
how this has turned out. Well, and that's it for today. Thanks for being here with me, and I'm already looking
forward to drawing again with you tomorrow.
I'll see you then.
9. Day 6: Blooming Cascade: Hello, and welcome to day six of our feel good
sketchbook challenge. Today is going to be
very colorful again. I think we are going with very colorful fantasy
flowers again. And also, I guess we have them growing on strings as well. However, we have
some of them growing upwards and some of
them growing downwards. So let's see how that goes. Since I'm pretty sure I'm going to put a color
in the background, I will add another
layer right away. I have my two by
3,000 pixel canvas, and you please go with a measurement you need
for your sketchbook. And then I check. I am at the acrylic
marker round. I think I want to have
a golden stem again, and I will put this
right in the center. Let's eyeball the
center at around here, and we are going to make
it a little thicker. And if we're not sure if
this is in the center, we can use our wonderful
Procreate to help us. So we set it to uniform. We turn on snapping. And then we check and
see where it will snap. This is the center. Okay. Brilliant.
And then I guess I want to have another set of
stems as we did yesterday. So let's add a new layer. And this time, why don't we
go with dark blue again? I really like the dark blue. And then I'm going to draw
another stem kind of here. Somewhere here. And in our next step. I want to place a flower right in the center here
of this golden stem. I guess I want to have petals in the background and
in the foreground. So first of all, let's
add a new layer. I think I'm going to
go with pink now. I'm just going to place almond
shapes here on the stem. And then I'm going to add
petal number two here. And we are going to seep the tips of these petals
down there as well. And I could imagine
that we'll also see some petals peeking
in from the side. We could also go
ahead and, you know, clean up the tips a little
bit if we would want to. But I'm actually kind of fine
the way it is right now, but I want to add some petals
in the foreground, as well. So I'm going to add a new layer. I'm going to go with orange now. And now I'm going to place those pointy oblong shapes here, those siga Pisks here on top. Just in case you're wondering, I'm still with the
acrylic marker round. I don't think we're
going to see one here, but maybe we are
seeing one there. Definitely not up there, but here we see the
start like this. Now I want to do the same just in the reversed
order, upside down. Here I want the orange
in the background, three petals in the background. And, of course, as we need
to have the reverse color, we want to add some
pink petals on top, so we can't obviously draw
them on the pink layer, so we have to add
another layer on top. Go back to pink. I just feel the contrast between the petals
isn't big enough. I want to add lines, but only to the
foreground petals. In that case, the pink ones. Let's add a new layer on top. Let turn it into
a clipping mask. And I guess I want to go with
light pink in this case, and I'll stick to this brush. I'm just going to turn
down the brush size. And then I'm just going
to add lines here to the petals just to create
some more contrast. Great. Now they are
much more visible. Perfect. And let's do the same with the orange
foreground petal. So let's add a layer
on top there, too. Turn it into a clipping mask. And now I guess I want to go. Let's go with yellow
or light orange. Let's check and see how
light orange looks. Let's turn around. H. Alright. Oh, that
looks brilliant. Okay. I just think the stems
look a little bit odd, and I think there
needs to be something like a thing where the
petals grow out of soup. I guess I want to
add that on top, and I think we also need leaves. So to this stem here, I am going to add, like something like
a dome up here. We don't see those domes
here at the sides, but we will see them
here at our blue stems. So let's add a new layer. And here we need to
do the same in blue. Hey. And now I want to give my
stem some petals, as well. And I guess I want to reverse
the colors once more. So to the blue stems, I want to add golden leaves, and to the golden stem, I want to add blue leaves. So since I'm at blue
and on the blue layer, And then, of course, we need golden leaves here
at the blue stem. So let's go back to our
ochre, golden color. Let's go back to
the ochre layer. Amazing. And now I feel like the leaves need a
little something because they look very plain. So I'm going to add
another layer on top, turn it into a clipping mask, go back to blue. And inside, I'm just
gonna drop like soap. And the same we can do
with the blue in golden. Let's add a new layer, turn it into a clipping mask, go back to the golden color. B. And I still don't
like the background. I think what's missing here is some color
in the background. So I think I want to try
how it looks with our mint green or very bright teal. And I'm going to go with
acrylic marker fuzzy, make the brush size really big and just draw
the background. Oh, my God, yes. Oh, yes. I really like this one. However, we used yellow in these petals here
or a bright orange. And I think we need to repeat
a lighter yellowish color. So how about we add
on top a layer, go to yellow and just let's go back to
the acrylic marker, draw circles here in between
the tips of the petals. I wonder how it looks
if we put another bright yellow.in the
center of the yellow dots. So, let's check let's find out. Let's just put
another layer on top, go with a very bright yellow, and check how it looks. If we add another dot, and I guess I like that. T. And here we go. Our today's floreed
spread is finished. And here it is in my sketchbook. These colors really
pop, and that's it. Thank you for being
here with me today, and I'm already
looking forward to drawing again with you tomorrow. I'll see you then.
10. Day 7: Cornflowers: Hello, and welcome to day seven of our feel good
sketchbook challenge. Today, I feel like drawing
blue corn flowers. I really like those flowers. They are so pretty, the blue so bright, and this is what we're
going to draw today. So first of all, I've started
my canvas, you start yours, and then I will switch over
to my dark green right away. And I will use my
acrylic marker around. Let me bump up my brush
size a little bit. And I will start with
putting down three vines. And then we're going
to add some leaves, nice and big pointy leaves. And in the in betweens where you feel it's a
little bit empty, we can add some tiny stems, where later on maybe some buds are growing out
of something like this. And I feel like we need
some here on the bottom, because otherwise we would
have three at each stem. That's kind of boring. And then we can
fill in our leaves. So just color them in using
the brush you prefer. I think I'm going to go with acrylic marker juicy for now. Can you believe we're
almost finished with our first week of
sketchbook florals? I hope you're enjoying the
journey as much as I do, and I can't wait to see your spreads in the
project gallery. Wonderful. And if you want, you can clean up the
tips of your leaves. And in our next step, I want to give these
leaves a little bit of lighter area here
right in the center. So let's add a new layer. Switch over to our lime green, and then I'm going to go
back to my acrylic marker. I guess I need to decrease
the brush size a little bit. And then I'm just going to
draw a smaller oval in here. And now we are going to fill in the style of the show our
beautiful corn flowers. So let's add a new layer. And then we are going to switch over to our
bright blue here. So let's increase the
brush size a little bit. And then we draw these super long hard shapes
all around the center. And this is our
first cornflower. So if we fill it in, you see it looks
very, very nice here. And now we just continue
to fill empty gaps with more of these
beautiful blue pops here. And you can see
I'm really loose. I'm just moving my hand. So, and then it's just about
filling the petals again. Really nice. And I feel like there's still a
pop of color missing. Like, within the center
of our corn flowers, I want to add some stamen, and I guess I'm going
to keep them yellow. Just a nice pop of color here. And I'm just gonna draw random
dots here in the center. Just like this. Yes,
this works really well. Beautiful. And now I still
feel we need some color. So I kind of want to add
some bright red or so, just to add some buds here, and these little
empty stems here. So, let's add a new layer. And drag it, I guess underneath. I think I will also change
the background color. I'm going to add a new
layer on top right away, and this is where I go ahead and draw my little butts here. Maybe let's see
what's going to work. Maybe something like this. This definitely is a
bright pop of color. Oh, wonderful. I love that. I also love the
overlapping here. Very, very nice. So, as I said, I don't
like the white background, so I think I'm going to go ahead right away and
pick my off white. And then I'm just
gonna fill that in with the fuzzy marker
pretty big again. Yes, and that makes it
much warmer right away. And still I still want to add some more color because I think there's quite
some empty spaces here. How about we go
with dark orange? Just some random flowers here and there where you feel
like it's a bit too empty. And this way, I guess we combine the red and
the yellow nicely, which makes the
whole illustration a little bit more cohesive. And I guess we could have either repeat yellow once more as the stamen within those
little orange flowers or we could try how
it looks with blue. Let's see. Let's go
to the blue layer, pick our light blue once more, and then we're
just going to draw a little circle in the center. And this way, the blue has
some repetition as well. And here we go. I
think we're done. And this is how it
looks in my sketchbook. Beautiful how these colors pop. I really like it. And
that's it for today. Thank you for being here with me and I'm already looking
forward to drawing again with you tomorrow in
week two. I will see you then.
11. Day 8: Hibiscus Daydream: Hello, and welcome to Week two of our Feel Good
sketchbook challenge. And today, we're on day eight. I'm so glad you're here with me. Today it's all about leaves. And I think I want to go back
to my golden ochre color. And let's check our brush. We're on the acriticmrka round, and I guess that's
a good choice. And then let's start by just
adding two veins like so, and we're just going to fill the entire stem with
big pointy leaves. These are the leaves that
will stay in the background, so we don't see
that much of them. They just cover most
of the background. So let's switch over to our
acrylic marker fuzzy for now, turn down the brush size, and then we're just gonna
color in our leaves. Beautiful. And then I
feel like I want to give them a little bit
of a darker center. So let's add a new layer on top. I don't think we need
it as a clipping mask, move over to our brown. Go back to the
acrylic marker round, but we need to decrease
the brush size. And I just want to draw like a tiny little triangle in here. And now we want to add some mint or teal
color ones on top. So let's add a new layer. And now I guess I want to go
with the teal color here. And then I am going to
add two more stems, but maybe going in a
different direction. Great. And now we're going to
do the same on these veins. We're going to add some leaves pointing in either direction. And now we can just
fill those with color. So I'm going to pick my acrylic fuzzy again and then
start just coloring in. And this time, I feel
like I want to add, like, a lighter vein on top, so I'm going to add a new layer, switch over to my light mint, go back to the
acrylic marker round, and then I just draw one line trying to taper it out
a little bit. Like so. And now I feel that this white background
really bothers me, so I want to change that. So let me add a
new layer on top, and I want to drag
it underneath. And then I want to go with
my peach color once more. So let's go to the
acrylic marker, juicy and just colour
the background in. Oh, yes, that looks
so much nicer. Beautiful. Yes, the green
leaves really pop now. And then it's time
to add our flowers. I think this time, I want to go with,
let's say, pink. And I want to draw something
like hibiscus, maybe. Just pink flowers that
have a heart shaped petal. I would say five ish. Just like so. And then, again, we go over the border to just create the indication
of a seamless repeat. Maybe one tiny bit
in the corner. Alright, and then we can
fill our petal with. Let's say we go. We go
with the juicy this time. All right. And now I
think I want to add some stamen to our flowers here. So let's add a new layer. Go over and pick. How about we pick the
light orange here? And then we're just
gonna draw these kind of shape here in the center. Alright. And I feel like
we're missing a little bit of contrast between the flowers and the leaves in
the background. So how about we add another layer underneath
our stamen on top of pink. We switch over to red, turn the brush size
down really low, and just add a few lines
here in our petals. Just confident lines
with your hand. And that's it. Oh, my gosh, I really, really love that. And this is how it
looks in my sketchbook. Really, really pretty. I absolutely love this design. And that's it for today. Thanks for being here with me, and I'm already
looking forward to drawing again with you tomorrow. I will see you then. M
12. Day 9: Chrysanthemums: Hello, and welcome back to day nine of our feel good
sketchbook challenge. I'm so glad you're
here with me again. Today, I feel like
stripy, very stripy. So first of all, I want to tint my background
because I feel always really bothered by the white because if you
think of a sketchbook, usually the paper is not
completely bright white, but more like of off
white or cream color. So let's just go
ahead right away, turn the brush size really up and just color the background. And in my next step, I want to add some stripes. So let's add a new layer, and I guess I want to go
with my dark blue today. Let's go with acrylic
marker round. Just bump up the brush
size a little bit. I guess I can cover
the spread with five, like really bold stripes. So let's see where we put them. I guess one goes here. One goes here, maybe. One goes here. Let's put that in the center. Let's go to uniform,
turn on snapping. And then we just got to
put that in the center. Great. And then there's one
in between here and here. And then we can make them wider. I feel like this
stripe should go a little bit over to the center. How about gonna move
it over a tiny tat, and then we can fill our
bold stripes with colors. Let's just go with
the marker fuzzy again and just colour it in. I just feel like they're
getting bigger and bigger. So I guess this one
is a little too thin. How about we gonna put, like, really big daisies on
top, not in white. But let's go with pink
and use the marker round. And now I really want a lot of petals and just go all
around the center. And the more confident you are, the less wonky the
petals are going to get. Oh I think this one needs to go to the side
a tiny little bit, so let's just move it over. Yes. Like so. Beautiful. Alright. Now, we just need to fill
those with color. And I guess I want to
stay with my acrylic mark around because it's easier to fill small shapes
with this one. H. I really like that the blue shimmers through the petals that
just gives it this, you know, real feel as if we'd use like real
acrylic markers. So as you can see, I'm using all the tricks to make sure my illustrations
don't look digital. So now on my next layer, I guess I want to add, like, some stamen again. And this time, I feel
like I want to go really dark with my dark brown. And I guess I'm gonna go with this kind of wobbly
circle shape. And I feel like
we're missing green. So I definitely want to add
some leaves from underneath. So I'm going to go back to my blue stripes layer
and add one on top. And then I guess
I'm going to pick my dark green shade here. This flower here gets
a leaf upright in this direction. Just like so. Amazing. Alright, and
now I just want to add some lighter center
into my leaves. So let's add a new layer on top. Switch over to the lime green. And then I guess I just
want to do it this way. And that is today's spread done. And this is how it looks in
my sketchbook. Super cool. I really love how
the colors pop. So thanks for being
here with me today, and I'm already looking
forward to drawing again with you tomorrow. I
will see you then.
13. Day 10: Rhapsody In Pink & Orange: Hello, and welcome
back to Day ten of our feel good
sketchbook challenge. I've got my canvas ready, so let's just dive right in. Today, I feel like
maybe warmer colors. So let's start right away
by coloring the background. How about we go with
our peach color again? Then we switch over
to our acrylic marker fuzzy and just draw some
nice peach background. Okay. And then I feel like adding a lot of
leaves and stems. We add another layer first. Hm. And then I guess I want to
go with bright red today. So, let's switch to our
acrylic marker around. I want to start with
just a big stem, which is going to turn
into a wobbly leaf. Right. And then we're
just gonna fill these five bold leaves
with beautiful red color. And I guess I'm gonna stick
with the marker fuzzy, and I'm just gonna
color them in. Alright, that's the pop of
color in the background. And now I want to add another
plant in the foreground. I guess I want to go with my pink and my acrylic
marker around. And then I'm just gonna add
more of these flowy leaves, I guess, here in the
foreground, just in pink. But I also want to
add some stems. A I just feel like this could lean a little bit in a
different direction. How about we gonna
rotate this one? Maybe a little bit like this. That could be better. And now
let's cut in these leaves. And this time, I feel
like I want to add some interest to
these pink leaves. I guess I want them
to have some stripes. So let's add another
layer on top, turn it into a clipping mask, and I guess I want to go
with my bright pink now. Go to my acrylic marker round, but turn down the brush size. And then we're just gonna give the indication of just
a lot of veins here. It So I think I'm going to add some
orange flowers here. Alright, let's just check. We're still at the
acrylic marker round. We bump up the brush
size a little bit, and then I guess I want
to have something like random petals with a lot of
pre space in between them. And now we just
need to ink them. And now I feel like
they should have some lines as well, the petals. So let's add a new layer, turn it into a clipping mask, pick, let's say, red, and then turn down
the brush size. And then we're just gonna give them some random
lines in there again. And don't worry
about the center. We're going to cover
the center in a minute. How about we add some dark stamen center to our flowers here
in, let's say, brown. So I've just added a new
layer and I pick my brown, and I think I'm just going to stay with my acrylic marker. And then I'm just gonna draw just whatever wonky blob here in the center
of our flowers. I think we could add
something like I don't know, like capsules or maybe
some seeds or pots, something like that,
but I don't want them to cover the flowers. I just want them
to be underneath. So I think we're just gonna add let's say we add a
layer below orange here. And then I'm just gonna
draw something like that, a seed pod or
whatever it might be. And that's it for today. I really like the warmth
of this illustration. And this is how it
looks in my sketchbook. A really nice pop of
color with the red in the background and the
brown in the foreground. Really, really cool. All right. So thank you for being
here with me today again. And I'm already looking
forward to drawing with you tomorrow. I
will see you then.
14. Day 11: Bluebells: Hello, and welcome to day 11 of our feel good
sketchbook challenge. Today is going to be
all about blue bells because this is a flower
shape we haven't covered yet. So I've opened my canvas
and I'm ready to go. And I already know I don't want to start with my white canvas. So let's pick our off white. We are on layer number one. Pick the acrylic marker fuzzy and make the
brush size really big. And as I said, we want
to draw some blue bells. So let's add another layer, pick the light blue color here and switch over to
the acrylic marker round. And now we're going
to draw these kind of bell shapes,
something like this. And then we're going to add some scallops maybe
at the bottom. And we're going to spread
them all over the place. I guess that's enough, and now we can fill
them with color. And I think I'm just
going to stay with my acrylic marker around as the small edges down here are really tough
to color otherwise. Oh Yes, and that's the blue bells done. Alright, so let's add another
layer, but underneath, so I'm going to move
a layer down to the background and just
add a layer on top there. And then I want to draw
the stems on this layer, and my stems are going
to be dark blue. I guess I would
look really nice. I just need to turn down
the brush size quite a bit. And then I want them to be like, really flowy the stems so
it looks like, you know, like they have this curve, and some in this direction, and some in the other direction. And now, where the flower
is attached to the stem, I want to add something like this kind of dome shape here. And in our next step, we are going to add some
leaves here and there. However, I don't want them to cover the beautiful blue stems. I want them to be underneath. So let's add a layer
underneath our stems. And then I think I want to pick my ochre golden color here. I'm still my acrylic
marker round. I guess the brush
size is also nice. Alright, I guess
that's enough, leaves. So let's switch to the acrylic marker fuzzy and then just fill
in the shapes. I feel like up here
is a leaf missing, but not another one that
leans in this direction. So maybe I'm just gonna draw it like from the
outside inwards. I feel like it's almost done. I just think the ochre
leaves, gold leaves, they should have, you know, some pattern on them. So I'm going to add
a new layer on top and turn that into a
clipping mask right away. And then I'm going to go back to my blue and to my
acrylic marker round. Then I'm going to turn
down the brush size. And now I think I want to give them just some
stripy pattern. M And here we go. And I think that's it.
It looks super pretty. And here it is in my sketchbook. It looks really, really nice. I really love how these
colors look together. Alright. That's it for today. Thank you for being
here with me, and I'm already looking
forward to drawing again with you tomorrow. I
will see you then.
15. Day 12: Full Bloom: Hello, and welcome to day 12 of our feel good
drawing challenge. I've already set up my
canvas and I'm ready to go. Today, I feel like
I just want to fill the canvas with
beautiful flowers, and they can look weird
and wonky and random. I just try to fill
each and every space. I'm pretty sure I will add another color
in the background, so I'm going to start by
adding a new layer right away. And then I'm picking my beautiful red and my
acrylic marker round. And then I'm just gonna draw
a whole lot of petals here. Alright, so let's fill
the shapes with color. I will just stay with my acrylic marker round
because they are pretty small, and it's going to
be easier to fill them with color. Beautiful. And now we're going to fill the remaining space with pink flowers kind of
in the same shape. So let's add another layer
and switch over to pink. Alright. And then we can
fill these with pink. So now I think we want to add something to fill the
empty spaces here, and I guess I'm going to go
with weird shaped leaves. So let's add another layer. And I guess I'm going
to go with a dark blue. And then I'm just gonna fill
in something like this, like a really wonky
and weird looking leaf that fills kind of
the empty space. They look a little bit
weird, but that's okay. And we can clean up
the shapes right away, as well, if we feel like
we need to do that. So it's really too cold
and harsh for my taste. So I want to tint
the background. Let's go back to layer
number one, which is empty. And then I think I'm
going to go with my peach color and pick
the acrylic marker fuzzy, and then I'm just going to
fill in those empty spaces. M Although I feel like something is still missing, so I guess I want to draw in some decorations into
the dark blue leaves. So I'm going to add a layer, turn it into a clipping mask. And I guess I'm going to go with the light blue here and
my acrylic marker around. And then I'm just gonna draw in another contrasting shape
here in the center. Alright, now, I
feel like we need something to cover the
center of our flowers. So let's give them some stamen. So let's add a new layer. And then we need
something with contrast. So I think I'm going to go
with the dark brown here. And then I'm just going to draw a nice brown oval circle ish. All right. And I think
that's it for today. And this is how it
looks in my sketchbook. Really, really cool. So thank you so much
for being here, and I'm already looking
forward to drawing again with you tomorrow.
I will see you then.
16. Day 13: Tangerine Daydream: Hello, and welcome back to day 13 of our feel good
sketchbook challenge. Today, I feel like all about scattering flowers
around on the canvas. I want to go with
orange and pink. So let's jump right in and start by painting the background
of our canvas in orange. And I think I want to go with
my acrylic marker fuzzy, and I bump up the brush size, and then I'm ready to paint. And and I really like
the stripy texture. It really takes a digital
feel away, right away. Alright. And in our next step, I just want to spread
like loopy flowers, you know, my favorite
movement loops, and I want to create those
on a different layer. And I guess these flowers
are going to be light pink. How about we go with
light pink today? I guess I want to
spread them everywhere, put them in random directions, like if someone just
threw them on the canvas. And I want to turn down the
brush size a little bit. I'm just not happy with
this shape up there, so I'm going to erase that. And now we're just going
to color in the shapes, and I think I'm going to go
with my acrylic marker juicy, but I guess we need to pay
attention with the brush size. And if I find something
that I want to clean up, I'm just gonna do it right away. Alright, so that's
step number one done. And I guess in my next step, I want to put some more pink into the bottom of
my flowers here, the same shape, just
a little bit smaller. So let's first add a new layer, go to the darker pink, and then I'm going to pick my acrylic marker round because that's a smaller shape and
that's easier to paint with. I'm just gonna draw the
same shape at the bottom. Then our next step, we're
going to cover the bottoms because our little flowers
here, they need a stem. So let's add a new layer on top. And then I guess I want to
go with my brown yew here. And then I'm just gonna define where the stems are going
to go first of all. And then we can give our
flowers some leaves. And that's all our stems. Beautiful. And as I said, we want to cover the bottom
of our flowers here. And I guess I want to make the leaves a little
bit more interesting. I want to give them
a contrasting color. So let's add a layer on top. And I guess this is better
when it is a clipping mask. So I'm going to turn it
into a clipping mask. And then I'm going to switch to my golden ochre ochre color. But I still feel there's
a lot of empty space. So I think I want to spread some random golden colored
dots here and there, just to fill the empty space. And I feel like we
don't even need this golden layer as a clipping mask because it's not really going beyond any border. So we can turn the
clipping mask off. And then I'm just going to draw on the same layer with gold And because these dots all by themselves are a
little bit too boring, I'm going to go ahead
add a layer on top, and then I'm just gonna fill
my off white in the center. And here we go. We're finished. That's our
today's flower spread. And this is how it
looks in my sketchbook. The colors look
really nice together, and it seems that I've drawn in my sketchbook right
away. All right. Thanks for being
here with me today, and I'm already looking forward
to drawing again with you tomorrow in our final
lesson. I will see you then.
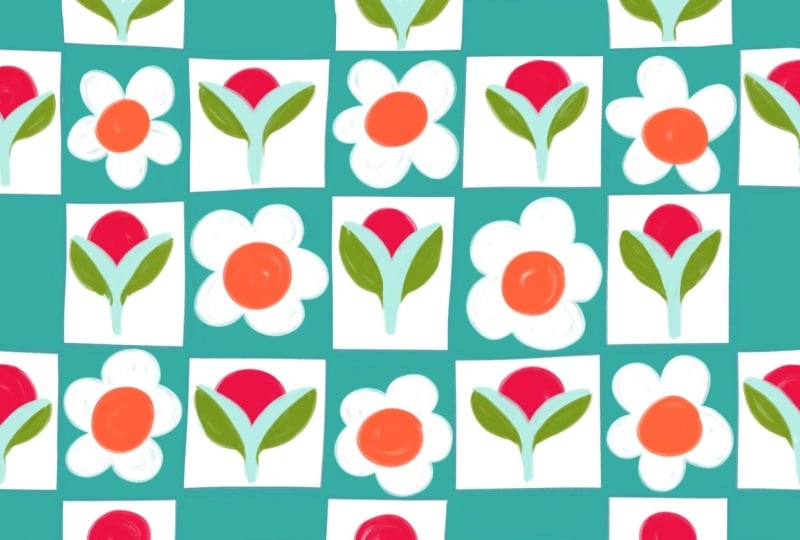
17. Day 14: Blooming Squares: Hello, and welcome to our final day of our Feel
Good sketchbook challenge. I really hope you've enjoyed
these two weeks and you are going to continue
with drawing every day. But now let's start our
final floral illustration. And I've already
set up my canvas, and now I want to paint the
background in my off white. And I'm going to pick
my acrylic marker fuzzy in a very big size. Today, I want to create something like a
checkerboard pattern. I want to have alternating dark blue squares and fill the squares later
on with flowers. So my contrast color is
going to be dark blue today. So let's add a new layer, pick our acrylic marker around. So my first bowls
stripe is going to be in the center somewhere here. Then I think we can
fit another one here and another one
close to the end, and the same is here and there. All right, maybe we
can move this one a little bit towards the center. And now we need the
horizontal strips. And now we just need to
color in our blue squares, just like in a
checkerboard pattern. I'm still with my
acrylic marker around, and I'm just going to go ahead and fill the squares with color. Beautiful. And our checkerboard
pattern is finished. And as I said, I now put
flowers in those squares. In my blue squares, I want to have some
daisy like flowers, so means white petals
and a yellow center. And in the empty squares, I want to have
like an orange dot with two leaves at the bottom. Let's add a new layer on top, and then I'm going to
pick my white white. This time, we are going
to go with white. And I'm gonna stay with
my acrylic marker around. And I want them to be
pretty large in the square, but don't go beyond the border. And now we just want
to color them in. And now on top, I want to
put a big yellow circle. So I'm going to add a new layer and I'm going to go with
my darker yellow U. And then I'm just
gonna draw like a large circle in the center. I'm still with my acrylic
marker around just with a big brush size. All right. Let's move on to our
next flower shape, which is going to
be orange first. So let's add a new layer on top. And then I'm going to
go and pick my orange. I just want to draw
like a bigger circle, more like to the
top of the square. Beautiful. Oh, I like the
colors already a lot. So in our next step, we gonna draw some leaves. So let's add a layer on top. I think I'm going to go
with my light green now. I'm going to stick to my
acrylic marker around, but I'm going to turn down
the brush size a little bit. One leaf goes here
with a little stem, and the other one goes
in the other direction. And maybe the stem
needs to be a little bit bigger. Like this. Very, very nice. But I think the just
lime green leaves are a little bit too plain. So I'm going to add
contrasting colors. So I'm adding a new layer, and then I'm going to turn
it into a clipping mask. And I guess I'm just going
to go with the dark green. And then I'm just going to draw the bottom half of our
leaves dark green. And here we go. Our today spread is finished. The final one. I really love
how this has turned out. The colors go really
well together. And this is how it looks in our sketchbook
mockup. Really cute. All right. That's it for today and also for
the entire class. I hope you enjoyed all
the floral patterns, and the drawing process was as feel good for you
as it was for me. And please don't forget to share your florals in the
project galleries. I'm really looking
forward to seeing a lot of beautiful
flowers there. And now let's move on to
the next lesson where I will show you how I
created these mock ups. I will see you there. No.
18. Create Your Own Sketchbook Mockup: As promised, I want
to teach you how to create your own
sketchbook mockup. As you can see, here I am with
a photo of my sketchbook. We want to put our illustration into the sketchbook and
to have that working. So nothing goes beyond
our sketchbook. We need to work with
a clipping mask. However, since this
is an entire photo, I can't put a clipping mask
yet only into the sketchbook. What we need to do is create a separate layer out of
our sketchbook pages. I'm still on this layer. But I'm going to pick
my selection tool, free hand selected,
color fill turned off. And now I'm just
going to draw all around the edges of
my sketchbook page. And I try to be as
accurate as possible. When I feel I need
to move my hand, I'm just going to
lift up my pen. I don't start at the very
end of this line because sometimes that creates
a weird zig zag. I'm just going to start
a little bit further away and we can even
just do tapping. But sometimes there's roundings and I want to follow
these roundings. This seems to be quite straight. But here we have it
rounding a little bit. Mm And then here, it seems to be quite straight. So I'm just going
to go until here. I just tap and then the line's gonna be
increased automatically. And this seems to be quite
straight to me, as well. So I'm just gonna tap. And then we need to just go back here to
where we started. But I see here is a
little rounding as well. So I'm just gonna follow that. And I'm going to close my shape. So as you can see, the background has
this tripe pattern, which means it's not selected, but our sketchbook
page is selected. And now I want to just
duplicate this selection here. And I have the copy and paste menu put on my Apple Pencil. So if I double tap here, it's going to bring up
the copy and paste menu. If you're still using the
default settings of Procreate, you just need to do
the three finger swipe down to call up the
copy and paste menu. And now I want to tap Copy, which means this
layer is copied. And then I do it again. I call my copy and paste
menu and I say paste. Now we have a separate layer. Let me show you which
is only our book pages. And now that we
turned off the photo, we can see we weren't as accurate and we can clean
up the edges a little bit. So let me pick my eraser and my nice liner tapered
with a small size. Just go to erase
those dark edges we don't want to have in our
illustration later on. And since we've copied
our sketchbook pages, instead of cutting
it out of the image, we still have the sketchbook
pages intact underneath. So it doesn't matter if we go a little bit into the paper. It just makes it
even more obvious that there's a sketchbook
underneath with more pages. Brilliant. Okay, so that's
our sketchbook pages. We can turn on our
picture again. And now I'm going to show
you how we're going to put the image into
the sketchbook. That means we need
to insert a photo. I'm just going to tap my wrench tool here and
then insert a photo. All right, so here we are with our illustration
right in our image. However, we can't see where
our sketchbook really is. So what I want to do
now is I want to turn my illustration into
linear burn blend mode. Like this. So now I can clearly see where
our sketchbook is. And I'm going to start moving my illustration
around a little bit. So first of all, I
want to rotate it a little bit just
to make sure it fits kind of the bottom edge, and then I want to make it a
little bit smaller as well. And now, of course,
it doesn't have the same distortion
as my sketchbook, but we can work on that as well. And to make it really
realistic looking, we want to cut our
illustration into pieces, and that's also pretty simple. So I'm going to go and
pick my selection tool, and then I make sure I see here in the middle the
center and I tap here. There kind of along
the center line of my sketchbook and all
around the illustration. And then I call
my copy and paste menu again by double
tapping on my Apple Pencil. You do the three
fingers wipe down, and then I just
say cut and paste. And you can see it turned
back into normal blend mode, which is no problem at all. We just go back and turn
it into linear burn. Linear burn does not only show us the outline
of our sketchbook, but it also makes the
color interact with maybe some stipples in your
paper texture, for example. So this is going to be seen
in the illustration as well, which makes it more realistic. All right. Now we can make sure that our illustration
fits the pages. I'm going to go back
to the move tool, and now I tap Distort. All I need to do is
I'm going to pull it so the corners fit the
corners of my sketchbook. Then we also create this interesting
perspective that makes the illustration
more realistic. Great. But now we can see
since it has straight edges, it doesn't follow the
rounding of our sketchbook. However, that's no problem. We just move over to warp. And now we enable advanced mesh. And now we can grab
those notes here and just pull the illustration
to where we want it to be. Here we need to go
down a little bit. I actually like when the
illustrations both halves overlap a little
bit because that creates this natural arise. Then we just pull around the notes until
we think we're happy. Now we can see we still
go beyond the border. But that's no problem.
We're just gonna turn this layer into
a clipping mask. Ta da. And here we
are. Beautiful. It looks fantastic. I can see I was a little bit
rough in my edging here, but that's no
problem whatsoever. You can try to make it
a little bit more tidy. And then we're going
to do the same steps with this half of
our illustration. So make sure we're going
to go to the other layer. And then we do the
same procedure. We tap the move tool. We go back to distort. And we pull the notes. And then we move over to
warp with the advanced mesh. I actually really like
the distortion here. Because if you check
in a sketchbook, where this creases
in the center, you always have a little bit of distortion where one page ends
and the other one starts. It's hard to draw in a real sketchbook and make
this really invisible. So this kind of makes
it even more realistic. But we still go beyond
the borders a little bit. So let's turn this layer
also into a clipping mask. And here we go. And it looks really,
really nice. If you zoom in, you can
really see the strokes, you can see the crease. And if you would want to add
a little bit more shading, you could definitely do so
by adding another layer, pick a dark color, maybe an airbrush,
a very soft one. And then you could just
add some shading here in the center just to make
it even more realistic. And then you would
turn that into linear burn or another
blend mode as well, just to have it interact
nicely with your layer. You play with the
opacity, and here we go. It really looks fantastic. I hope you will use
this mock up trick. You can do your mock up with
a lot of different things. Maybe you take a
photo of your cup or your mug or a book
or whatever it is, and then you can montage your
own illustrations in there. I hope that helps. So let's move on to the final lesson where
we'll wrap up the class. I'll see you there. Right.
19. Final Thoughts: You did it. You
reached the end of our 14 day feel good
sketchbook challenge, and I am so proud of you. I hope you had as much fun creating these cute
little floals as I did. Over the past 14 days, you've explored bold shapes,
playful composition, happy colors, and
different ways to fill a page without putting too
much pressure on yourself. But most importantly,
you've showed up every day. You practiced and you added a whole collection of new
pages to your sketchbook. Please don't forget to share your project in the
project gallery. You can upload your
favorite illustration only a selection of pages or your complete set
of 14 colorful florals. And if you've
enjoyed this class, I'd really appreciate you taking a moment to
leave a review. It helps other artists
find this class, and it really means a lot to me. You can also follow me
here and on social media, so we can keep
creating together. And if you'd like to learn
more about my philosophy, better your art the
low pressure way. Then feel free to sign
up to my newsletter, the wonky Art letter
or join my community, the wonky Art Society. And now I hope to
see you again in one of my next classes until then, keep creating, keep playing, and keep making art
the low pressure way.
 Jutta Schneider, Artist | Educator