Transcripts
1. Introduction: [MUSIC] Have you ever wondered how to add texture and dimension to your abstract
watercolor paintings? Hi, my name is Laurence and
I'm a self-taught artist. I've been painting everyday with watercolors for four years. My goal is to always explore
new textures and styles, and most importantly,
to have fun. My latest obsession
has been creating these beautifully textured
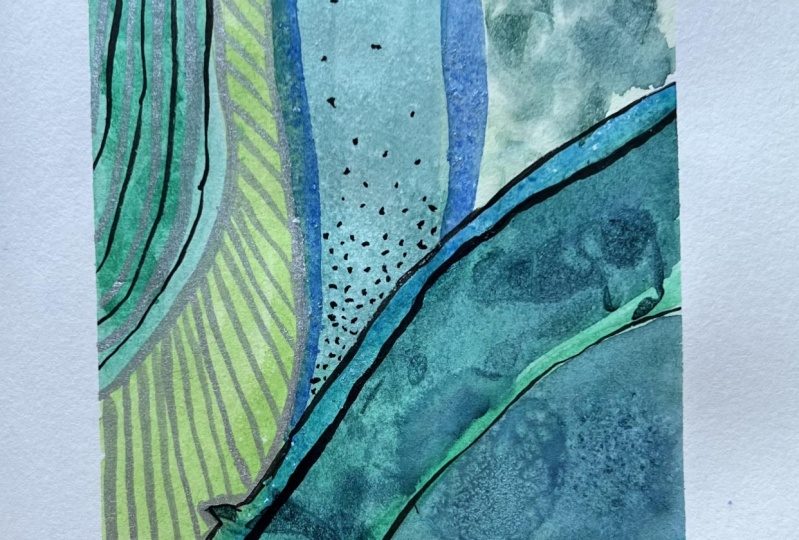
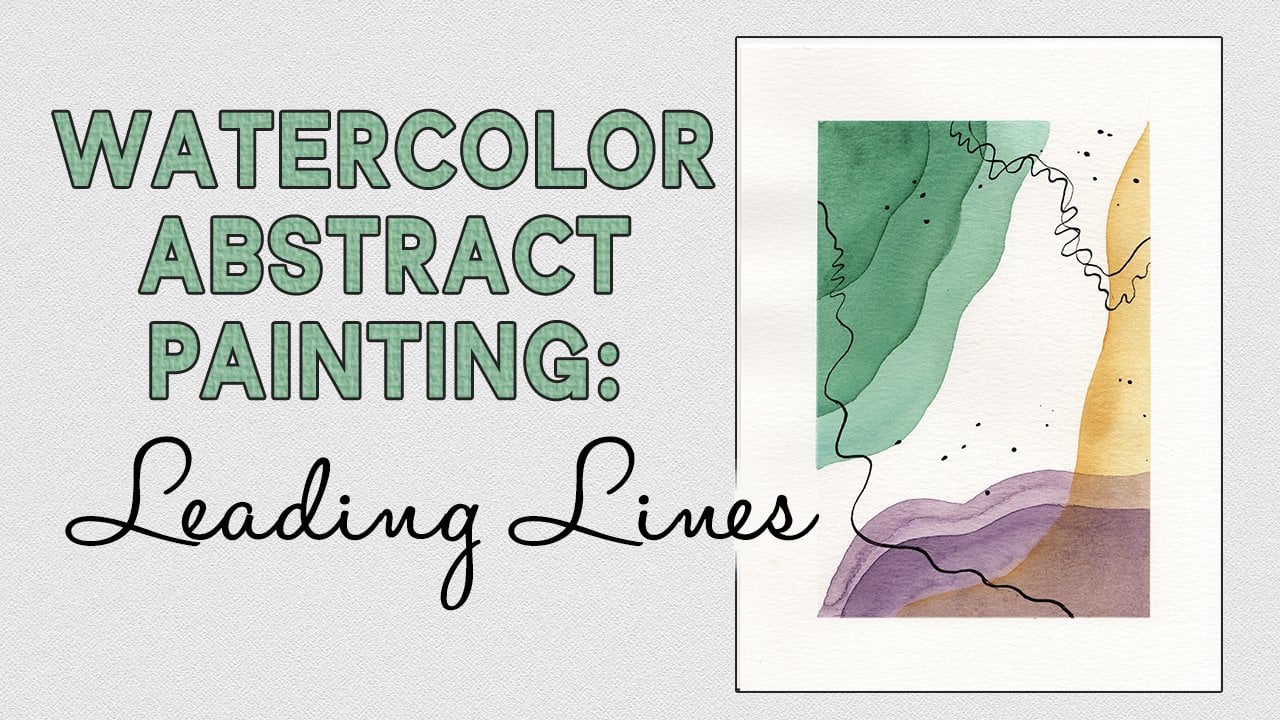
abstract watercolor paintings. In this class, we will create an abstract watercolor
painting together. We will talk about color
selection and swatching, which is always so much fun. We will explore
different ways to create textures
in our paintings, and we will talk a little
bit about composition. In the end, you
will be able to use these new skills in your own
paintings, abstract or not. I am excited to share this
painting style with you. I feel like every
painting session is a new idea of something
different to try next. This is an ever evolving
in this defined process. This style is super
interesting because you can use colors, values, textures, and
brushstrokes to convey a feeling or a subject in
your abstract painting. This class is for beginner
to intermediate painters. You only need some basic
watercolor supplies. Some watercolor paints,
watercolor paper, some brushes, some
painting tape. For the texture,
we will use salt, nail polish remover
and plastic wrap, and if you have
some acrylic inks. We will also use some white
or colored pens and pencils. You will create your own
texture watercolor painting, using the skills we
learned in this class.
2. Project: The class project
will be creating your own textured
watercolor painting. We will follow some
specific step, but just like watercolor, you're free to do
your own thing. You can choose your
favorite color combo, you can explore with textures and add the ones you prefer, and you can take your
inspiration from a person, an object, or a feeling. I would love for you
to share with us your final painting and all the different steps
that you take to get there. It would be super
interesting and inspiring to see your
creative process. Take your colors out and
let's start swatching.
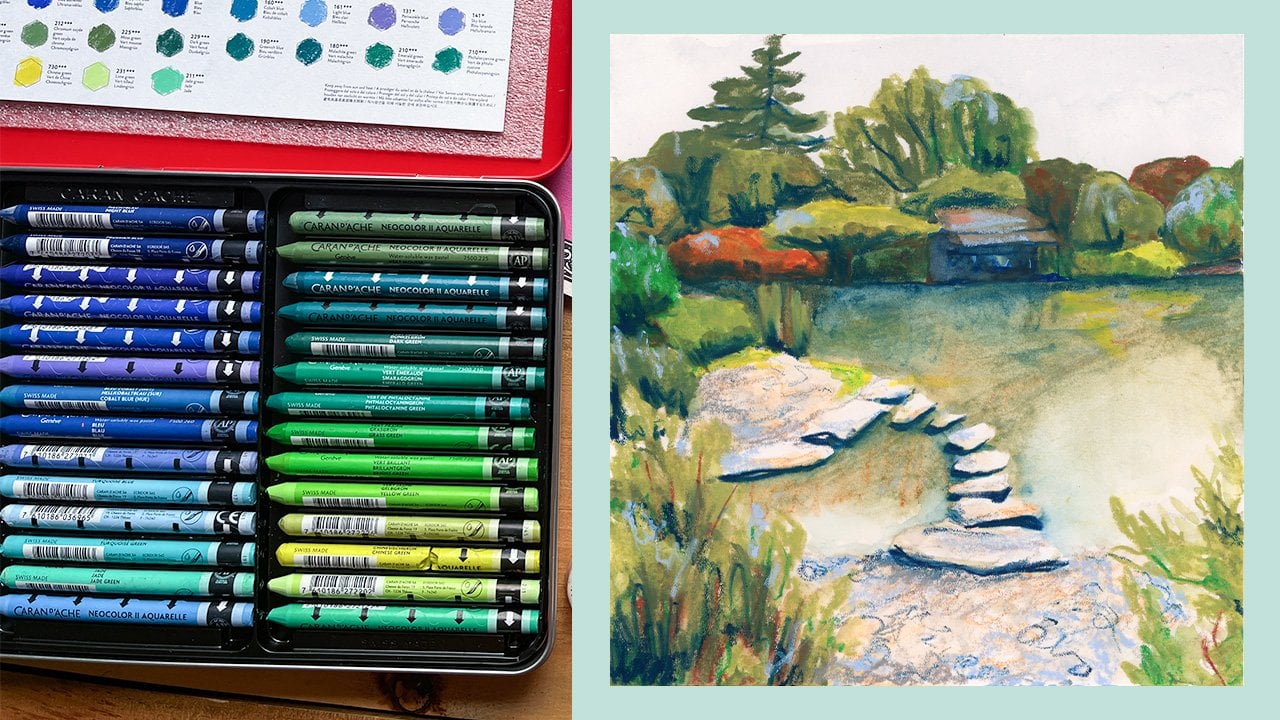
3. Color Selection and Swatching: It's hard to know exactly
what colors your paints are just by looking on the
tubes or the paint palette. That's why it's super
important to swatch all the colors that you have on a separate piece of paper. This is what I did here. I wrote down the name
of the colors and their properties so
that when I need to pick a color for a painting
I have a better idea of what the colors that
I have to me look like so it's easier for
me to make a decision. For my painting today, I feel inspired by
the ocean and I really want a soothing color so I'm thinking of using a blue. I have a couple of options here, which I'm going to
swatch on my paper. I'm thinking also of using a paler color which will
offer a good contrast, something like a beige. I'm thinking of adding a pop of yellow because I really
like this color combo. I'm going to take all of
my blues and yellows, I'm going to swatch them
on a separate paper and see what color
mix I like the best. Here are my blues
and my yellows. I also have two Buff Titanium, which I'm thinking of
using as my pale colors. Let's start swatching. I'm going to swatch all of
my colors on this side here, pick maybe three color
combos that I'm going to test here and then choose my favorite
one for the painting. [MUSIC] First, we have
Van Gogh turquoise blue. It's more of a green than
a blue so I'm not sure. Then we have Van Gogh
cerulean blue Phthalo, then we have Van
Gogh Phthalo blue, Van Gogh cobalt
blue ultramarine, then we have Daniel Smith
blue apatite genuine, followed by Daniel
Smith Indanthrone blue, and Daniel Smith
Mayan blue genuine. I'm also going to swatch Daniel Smith Buff Titanium
because it's a bit more yellow than Van
Gogh Buff Titanium but I think I'm going to use the two of them as a pale color. I'm going to write down all the names of these different colors because
I'm going to keep this sheet because this
can still be useful in the future when I want to explore different
color combination. I'm doing the work now, so I'm going to keep this
sheet for later use as well. Now is the time to look
at the colors you've swatched and try to think of different color
combinations we can make. In this case, one thing that
I find super interesting with some colors is that
they are granulating. If you mix them
with enough water they create some
texture in themselves. We can see it a little bit with this one, turquoise blue. We can see it with the Daniel
Smith ones right here, we can see it with
this one as well. These are characteristics
that I really like, especially when I'm
trying to create a textured abstract
watercolor painting. First, I'm going to use
this blue apatite genuine. It's not as vibrant as
some of the others. This is just a
personal preference. I think I'm going
to mix these two, blue apatite genuine with
burgundy yellow ocher. I think it's going
to be very pretty. Then maybe let's try
a more vibrant mix. We could try cerulean blue with the Cotman cadmium yellow hue and maybe a mix of
vibrant and less vibrant. We could mix the turquoise
blue with the yellow ocher. But this one is not blue enough. I think it's more
on the green side but now that I think about it, maybe green could
be good as well. Let's try this mix and then
we'll just pick our favorite. What I'm going to do
for my swatches is that I want to make sure that I still create a good
enough contrast. I'm going to use my paler
colors with every mix. Let's start with Van Gogh turquoise blue and yellow ocher. I'm going to start with a pale color and then I'm going to add the more vibrant colors. [MUSIC] I think it is a very pretty mix, but let's look at all the
mixes and then I think we'll have a better idea of
what everything looks like. Let's try now cerulean blue
with the cadmium yellow hue. Then let's try our
final mix right here, the mix that will be
a bit less vibrant. [MUSIC] Since I'm planning on keeping this sheet for
future reference it's even more important to write
what colors you use because you're going
to forget over time. At first glance, I think that there's two color combos that
are very interesting to me, which surprisingly
are this one with the turquoise blue and this one with the
blue apatite genuine. I feel like this one really
looks like the beach from the Caribbeans or
some warm place like this. But this color combination
is a bit more soothing, which was a feeling I
was aiming towards. We're going to pick this
one for this painting but in the future maybe I'll do a painting using these colors. For your painting you can
choose whatever color you like. You don't have to pick
blues and yellows, you can pick whatever
color combination you find appealing and then when you're done we can move on together and
do the next step.
4. Exploring Textures: Now is the time to explore
with textures using common household objects
and some art materials. We will use salt,
nail polish remover, cling wrap or plastic wrap, and if you have
some acrylic inks. Don't worry if you don't
have everything at home, you can still follow the
class using what you have. You could even use different materials and what
we're going to use today. If you do please share
it in the class project, because everybody would love
to know how it turns out. First of all, we're going to start exploring with some salt. You can use different
types of salt. Here I have a big grain of salt, but you can use some
finer ones as well. It's going to create
a different effect, which is going to be super
interesting for you to try. To see all of these
effects a bit better, we're going to use the
darkest color that we have selected,
which is the blue. Let me just add a
first layer of blue. Then we're going to
put some salt on top and see what happens. I'm going to need this part darker than this bar
just to see if there's going to be any difference
in the salt effect, if the color is
darker or lighter. To use the salt to
create a nice effect, you want the paint
to still be wet. You don't want it
to be super wet, but it can be dry. I'm going to put a little bit of salt on the paint and
we'll see what happens. [NOISE] As I was saying here, you could also do
another square with a finer salt and just see
what the difference is, but here we're only
going to try this one. To see the full effect, we really need this
painting to be fully dry, so while it dries, we're going
to work on other textures. This rectangle here,
we're going to work with nail polish remover. What is going to do is going to remove the color from the paper, but it's going to create some
interesting round shapes. Like with the salt, the effect that you're
going to obtain with the nail polish remover will vary depending on the
color that you use, and on the paper. Then I use the cap here, and I'm going to pour a little bit of nail
polish remover in it, and be careful not
to spill the bottle. I use these Q-tips, and you could just apply the nail polish remover
directly on top of your paint, like this, or you
could splash it. You have a bit less control, but it creates smaller
shapes as well. This is a very interesting
effect that you can create, but let's wait for it
to dry completely. On this square, we're going
to test another technique, which is to apply
some cling wrap or plastic wrap on
top of the paint. What it's going to do is that the paint
underneath will move, and we'll take the shape of air bubbles that are trapped
underneath the plastic, and it creates a very
interesting effect. The only thing with
using this technique is that you can't
control it too much, so you really have to
accept that the result that you're going to get is the result you're
going to get. Well, let's use two colors. Let's use the blue and the beige just to see how the
colors flow together. This technique works well
if you use a lot of water. [MUSIC] Now, let's put the
plastic on top. You can try to move
it a little bit to create different shapes, but that's pretty much it. Then what you could do
is you could just move your page a little bit
to make the colors flow. You could even move your
page like this and add some colors to the side and
just wait for them to flow, following the shapes
of the plastic. [MUSIC] It's spilling on this side, but it's okay, it's
just for tests. Now we're going to
wait for it to dry. On this last page, we're going to test
another technique, which is adding some
acrylic inks to the paint. Again, we're going to add a first layer of glue and
then we're just going to drop some drops of acrylic ink in it and
just see what happens. Then shake it, and
then see what happens when we put a drop
of acrylic ink, see how it spreads. [MUSIC] I find that it does this effect when
the page is very wet, when it's drier, the acrylic
ink won't spread as much, but it's still a nice effect. Now we're going to wait for
this page to be fully dry, and then we're going to see the final results of our test. I will wait at
about half an hour, the sheet is mostly dry. If it was a real painting, I would have waited even longer, because I really want
to make sure that it's completely dry before
I remove the salt,. But I think it's good
enough for us to remove it now since
it's just a test. Let's start with the salt. How I remove it is I
take a palette knife, but you could use anything. You could even use your fingers and just remove it like this, it's just that I find it a bit cleaner to use
a palette knife. I just go over it. Usually also, I go
on top of the sink, but I'm going to show
you how I do it. I just scrape it off like this. [NOISE] Then once I'm done, I take a fan brush like
this and I'll just go on top to make sure
that no salt is left. You can see that maybe it
wasn't completely dry because you can see the direction in
which I scraped the salt, which also is an effect that
you could create on purpose. It's not the effect I wanted
to create in this instance, but it's good to know that it's something we
can do if we want. Here we go, I removed
all the salt. Now let's have a look at this side with the
nail polish remover. I really love all the little, it looks like a drop of water on top of a lake or something. It looks like this drop effect, which is very pretty, and see something that we
can use in our painting. The effect is going to be more
intense on a darker color, such as this, but you could also try it on a lighter color
and see what happens. I think I did a mistake. You can see that this
part is very flat, so not much has happened
compared to here, we have a lot more texture. This is a more interesting
effect I feel like. In my painting, I'm going
to make sure that I create more texture in my plastic
than in this section. This is what I mean. You
can see that here in this flat section,
nothing happened. In this section here, there was a bit more
folds in the plastic. You can see that the paint follow the lines
created by the plastic. Same thing with this
line right here. When I paint, I'm
going to make sure that I create folds and crevices where the paint
will be able to flow and mixed together in
this interesting way. Finally, we can see here the texture that we
created with the ink. We spread, and it's very pretty. I think that using these
four techniques together, we'll be able to create
a very pretty painting. We can see a bit of similarities maybe between
these two techniques, but the difference between these two is that the
nail polish remover removes the ink but
it adds a color. In this case we added white, so that's why it looks similar because here we can see
the white of the paper, but I could have had
it yellow or red, whatever color I want it. Let's just take up this tape and you will keep this
page for future reference. Here, I realized that I used the wrong color for these tests, and this is the color
that I'm going to end up using in my
painting as well. I wanted to use Daniel Smith, Indanthrone Blue, but I ended up using
Mayan Blue Genuine. I'm not sure how this
mistake happened, but I'm not mad at it.
5. Create some Compositions: Now that we have
chosen our colors and that we've played
around with texture, it's time to think
about composition. Even if we're doing
an abstract painting, it's important to have somewhat of an idea of where we're going. What I like to do is create
a few thumbnail sketches in my sketchbook and pick my favorite composition
to base my painting on. So let's start working. You don't have to
use a sketchbook, you could also do this on
a separate piece of paper. But I'd like to have all
my sketches in one place, so I use a drawing sketchbook. So what I do is I
create a couple of different rectangles
representing my paper. Right now I'm really
thinking about the flow of my painting, which is something that will guide the eye throughout
the painting. I want to create a
movement in my painting. So as I said, I'm
inspired by the ocean, so I really want to create
some wave-like shapes. So let's say that I want my paint to work
from this direction. So you can see that we
have a flow like this. I'm going to paint some waves or something
that to me represent waves, they don't have to
be legible waves. At this stage, I'm also
thinking about contrast. So I'm going to draw on the darkest shapes to identify where the darkest and where the
lightest areas are. The darkest here will represent
the blue that I chose, and the lightest will be
the beige and the yellow. By now I'm inspired
by the ocean, but you can choose anything
to be inspired of and try to create a couple of
compositions with that in mind. As you can see, this
process is really quick. I really tried to draw loose shapes without
overthinking it. So let's do three more and then we'll
choose our favorite. [BACKGROUND] I like this one, I like its simplicity. I feel like both the dark and the lighter colors
have enough space to breathe in this
painting compared to other ones which are darker. I still am going to keep all of these other thumbnails for future paintings because I still like them and I think I can modify them and adapt
them for future uses. Now let's start painting.
6. Let's paint! Base Layer: [MUSIC] Now we're ready
to start painting. You can use whatever type and size of paper that you like. If you have different
types at home, I suggest taking the thicker one because we're using a lot of
water with our techniques. The thicker the paper, the less we're
paying and buckling will happen with the water. I'm using a watercolor block, which prevents the paper
from warping with the water, but if you don't have that, you could just
take your paper to your working station to prevent its warping
to the maximum. This first layer is going
to act as a base layer. We will try to do some loose shapes that resemble our composition
that we chose. We're going to add a
little bit of texture using salt and nail
polish remover, and then we're going to
let it dry completely. I'm going to start by putting
my paint in my wells. I like to use my biggest
paintbrush that I have because it allows me
to create looser shapes. We're going to do a
pair first layer. I also like to start
with the pale shades first to create some shapes that look like my composition. [MUSIC] Don't be scared of
using a lot of water. Also, you don't have to
cover the whole canvas. It's okay if you leave
some white spaces. Now let's add the blue and make sure that in-between colors you really
wash your brush. [MUSIC] Now before this first layer dries we're going to
add some salt on top. [MUSIC] Then we're also going to add a little bit of nail
polish remover. [MUSIC] Sometimes the nail
polish remover does a really big effect, sometimes, not so much, but it's always fun to use because you never
know what to expect. Now we're going to let it dry and once it's completely dry, we're going to remove the salt.
7. Let's paint! Strong Colors and Texture: Now our first layer has
dried and you can see all the beautiful texture
that the salt has created. I have removed it, by the way, so we have some nice
texture, which is very good. The second layer is an opportunity for us
to fix the composition. If there are some things that
were not satisfied with, it's the time to fix them. We're going to add more colors, we're going to add some ink, and then the plastic on top. When I look at my
composition here, this blue part here, it's thicker than here, so I think I'm going
to add more blue. I really want to have like a
central piece in the middle, maybe a little bit here, and accentuate this shape here. That's what we're
going to do first. But one thing before I start, I always like to add the
palette colors first, so, let's wait before
adding new blue. Let's add our pale colors, and we could add a
touch of yellow. I'm going to add
some pale colors. I like to go over some
colors that I already put. Your colors may reactivate. That's normal. It's okay. They're accepted. Now let's add a
little bit of yellow. [MUSIC] Now let's add the blue [MUSIC]. I like to add the
colors in a darker way, so we're going to
accentuate some areas. Now we could see what
happens if we add a little bit of white
ink in our painting. I want to be careful to add it in areas where it's already pale because I don't want
to add a big zone of pale color in the middle of what I plan to be a darker color. Sometimes I do lines like this. [NOISE] I just add a little bit here. Maybe before we add the plastic, we could add just a
little bit of gold [MUSIC]. Now I'm going to
add the plastic. When I did my texture test, I found out that the
plastic that I put, but it was too flat. Now I'm going to try to
create a little bit of textures in it and I'm going to add two pieces and
then hope that is going to do something a
bit more interesting. Let's put one here and let's
put one on top right here. Now, I could just move this
around so the paint flows. Let's use our salt on this [NOISE] right here
so it can stay at an angle. Sometimes I lift a little
bit of the plastic and I add some color
here so it flows. [MUSIC] I add a lot of
water and a lot of color. My goal is for it
to flow and follow the lines that the
plastic created. I can spend quite some time doing this because first of all, it's very fun and it gives
you even more control, well, to an extent. You can try to fix the
composition while adding a little bit more paint and color and you can try to add a bit more of
interesting elements. You can make the paint flow in the direction that you want. Well, you can try to. Now I'm going to put it on the other side
and I'm going to add some blue paint on
the other side. Sometimes I do that with
the pale color as well. [MUSIC] But I think I'm satisfied with it now so I'm going to put it flat
and let it dry. Once it's completely dry, we're going to
remove the plastic. It's always better
to wait until it's completely dry before
removing the plastic. Sometimes I even wait the whole
day before I take it off. I often work on
different paintings at the same time because
while one dries, I can work on the other and
switch between the two. But for the sake of this class, we're going to remove it now. I've waited maybe half an hour. Let's look up this plastic
and see what's underneath. [NOISE] This is super interesting. If I look at my composition, I can see that my painting is on the wrong side so
let's have a look this way. So beautiful. We can really see all the lines that
the plastic created. The paint flowed
through these lines. It created some texture
that we otherwise wouldn't have been able to create by ourselves just with
the paintbrush. Well, at least it would have
been really hard to create. Now we're going to
wait for it to dry completely before we move
on to the next step. We're almost finished. Only two steps left and
then we will be able to say that we created a beautiful abstract
watercolor painting.
8. Let's paint! Contrast, Texture and Composition : Now we have completed
a very important step, which is doing the
plastic layer. We have thought about
the composition. We have thought about the
flow of the painting, which in this case, it's like a wave going that way. We have made sure to
leave enough space for the pale colors and
the darkest colors. But sometimes I like
to add one more step, one more layer of paint before working on
the tiniest details. In fact, I could add as
many layers as I wanted. I tried to keep the layers
to a minimum because I don't want to hide what I've created. But sometimes I need one more
layer just to accentuate some shapes to add a
bit more contrast. If there's anything to fix with the composition,
that's when I do it. I'm quite satisfied overall
with this painting. Maybe I would like
to add a bit more blue here because
this white spot is quite wide and then I would like to
accentuate some areas. Let's start working
with the blue. In this step, you can really
do whatever you like. I'm just going to do
like one big wash of blue right here is
going to be super pair, but still it adds
a bit more blue. I would like to
accentuate this part right here. It's fun. This step is really
fun because you draw on top of what
you already created so you can try to see shapes in your painting
and just paint them. Make them a bit
darker, make them pop. I'm keeping in mind to flow of the painting in order to have the eye go in this
direction that I chose. But really at this step, it's really trial and error. You can do whatever
you like and it's possible that you end
up with a painting. You don't like that much. But you will have learned
something and you will be able to apply what you
learned to your next painting. Sometimes at this stage, I even add another
layer of plastic. Let's say there's an
area that I don't like. Well, I could put
a little bit of colors there and then put
just a tiny bit of plastic. Sometimes that's what
I do. In this case. I don't think this
painting needs it, but I could do it if I wanted. I also like to add some
fill colors sometimes. It could just add
a bit right here. [MUSIC] I can even add a bit more
yellow because I feel like we don't see it too much. [MUSIC] So you could work on your
painting for a long time. I am going to choose to
stop here, let it dry, and then we're going to
add some tiny details. At this point, you could spend a long time working
on your painting. I'm going to choose to stop here and let it dry completely. We will see each
other in a couple of minutes to add the
final details. But in the meantime, don't forget to share
what you did so far.
9. Finishing touches: Adding some Details: Now that everything is dry, it's the time to add
the final details. What I like to do is use either a white pen
or a white pencil. Sometimes I create lines that go in the same direction as
the flow of the painting. I put some dots, some little Vs, so I do some mark making. Sometimes I even
create my own shapes. I add some circles
and stuff like that so you can really do whatever
you want at this stage. It's your time to relax
and create some texture, even more texture than
what we have now. Today, I'm going to
use a Gelly Roll pen in size 0.8 because I
find that it's fine, but it's not too fine. We can see it well on the
paper and I also like to have a sheet of
paper on the side so I can just make sure
that my pen works well. Sometimes you can
get a little bit of paint on it so you can just clean it and
then use it again. I want to accentuate
maybe this shape so let's create a line like this. I often go on top of my lines a couple of
times just to make sure that we can see
them a bit better. You could also do some other media as you could add some gouache
if you wanted. You can do whatever you like. You could add a different color. I'm using white in this case, but you could add black or
whatever color you like. [MUSIC] This step is very intuitive. You don't have to think much. You just go with the flow. [MUSIC] Some paints apply better
on different paper. Right now I'm using a hot press paper and I
find that this kind of pen, it rolls really well. The paint goes on the paper very well and when
I use it on cold press, it's a bit harder. I have to go over my
lines a bit more, but still, the effect is
always nice either way. [MUSIC] I'm just following some shapes that are already on my paper without thinking
about it too much. When I work on a bigger size, I have to say that this step
is very intimidating and sometimes I think about my
lines a bit more in that case. Sometimes I do this last
step and sometimes I don't, you don't need to do it. But sometimes I feel
like my painting is complex enough that it doesn't need any more lines or anything else so I
don't do this step. But most times I find that adding these little
lines and marks, really add something
to the painting. [MUSIC] [NOISE] One other thing
that I like to do is grab a white charcoal pencil or even a watercolor
pencil and white and add more white to
some areas where I feel like it could
be beneficial. I draw on top of areas and then I use my
finger and I spread it. [NOISE] [MUSIC] You really
don't have to do this, it's just another way of
creating more texture. [MUSIC] [NOISE] Sometimes I can even use this technique to
hide some areas. Let's say I didn't like
this blue spot here. I could just put a bit
of white on stuff. It doesn't make it disappear, but it's less intense. You don't notice it as much. I think we're done. [MUSIC]
10. Final Thoughts: You did it. You created your own textured abstract
watercolor painting. In this class, we talked
about the importance of color selection,
of color swatching. We had fun with texture, and we created our own painting. You can do whatever you
like with watercolor. Sometimes watercolor
does its own thing, but if you learn
to work with it, it becomes your partner in all of your creative explorations. Don't forget to post your
process in this class project. I would love to see it. I encourage you to go check out your fellow classmates projects and to interact with them. I'm sure you'll learn a lot from their creative
explorations. I hope you had some
fun in this class. I sure did and I can't wait to see your
projects. See you soon.
 Laurence Plouffe, I like to paint