Transcripts
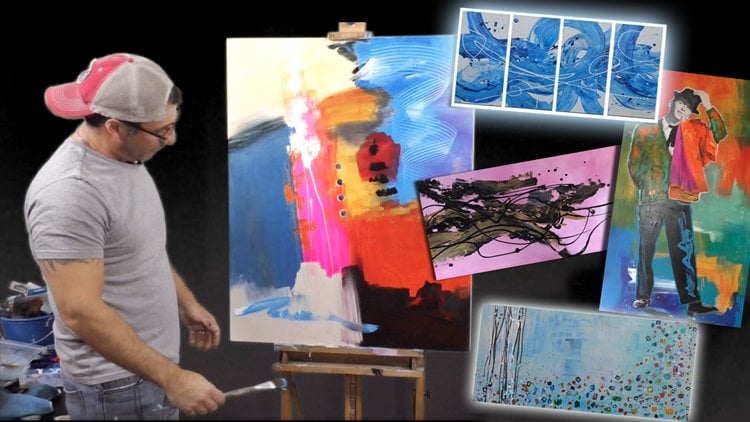
1. 1. Intro: Ladies and gentlemen, I am so excited about this next painting because we are going to paint it on wooden panel. It is not your typical wooden panel. This wooden panel costs are a fraction of what you would normally spend an auto score for our panel this big this is 80 inches by 24 inches, hollow core. And yes, you probably guessed it. It's a door. It is a hollow core guard without the holes for the maps, without the cutoffs for the hinges. This is a spreadsheet, a fraction of the cost that you would spend on a panel at an art school. This door costs me 24 hours. And I'll let you into my little secret. The baccalaureate has a little scratch. So when I went to the cashier and at my local home improvement store, I asked in my Brazilian way that you can take that soap that because it's a scratch and the Bank of this door. And sure enough, she did three for 50% off. So normally because Gore is like 30 bucks or so, I got it for $15 and we're talking, she huge 80 inches by 24 inches. So we're going to create a piece that's not only some twisting, but it's also going to be bold because we're going to have lots of negative space and the actual interests, the imagery is going to be towards the right of the painting. And all of this on the left is where it should be negative grad space. What's going to make this pain stand out is going to be the resid epoxy finished or we're going to apply it to her and also work within the color pigments as well as some spray paint them going to incorporate in there. It's going to be something that It's kinda make any room the perfect focal points. And I should be there as an analog. So be ready, be bold, be brave. We're working with the taxi arrest.
2. 3. Priming Process: We are going to prime our wooden panel with the kills Latex to it is a water-based primer that is heavier consistency. It's a little thicker than your regular drywall primer that I like it because it does mimic the same effect that you would get from a Gesso that's more expensive obviously. But the kills, in my opinion, does a great job at ceiling and priming any kind of wood panel or canvas fibers for that matter. We're going to apply it with our six inch short nap roller and apply onto our paint tray. And we will seal the veneer would give it a nice little stir. You can see that it's not as runny as most primers that this is a little thicker. Reported onto our tray here. Go.
3. 4. Let's Roll: So here we go. We'll just put it on there. Nice. And even from side to side, you don't have to be extremely perfect with primer because it's just an undercoat. And then we're going to obviously and our base coat once this dries and a few hours. Just make sure that you're getting all the word covered because this is a veneer that is made out of oak. And o is very grainy. Show. You definitely ship primate if you're going to use OK. You should primate. Before painting. Something like a pine wood or something that's softer, you could probably get away without priming it. Just start painting. But I always go on the safe side and add a nice coat of primer and anything that's bare wood or bare canvas. Just to give it a nice smooth surface for the paint to stick to. Nice, even Rawls, make sure we have no drips. Beyond that. It's a latex primer. We know that probably within an hour, hour and a half. It'll be completely dried and we will be ready to start our masterpiece. In short nap rollers I like to use over and over again when I'm dealing with latex primer or latex paint, you can wash and right away. Society dry and use them probably a good ten to 15 times before you have to replace them. Mobile conserving. We all know that literal. The Bri, you want a nice flat surface throughout. This one is definitely not going to be a textured painting is going to be flat as glass. And I mean grass. Once you see the shine that the poxy resin produces, it is like looking into a lake, Crystal Clear Lake. A little bit more here. And I'm also going to prime the sides and the top and bottom. And I'm going to move the bracket and make sure that I get every single square inch of this large wooden panel that some might call a door. But I like to call it a wooden panel. Nobody needs to know that it's a door from our local home improvement store that we got for half price. It's our little secret. Alright, so I'm gonna go ahead and take the bracket off the iso, finish up those products right there on top and the front of it and also get the bottom. And we were going to let this baby dry for about an hour, an hour and a half. And we will continue with our spectacular painting on our door. I mean, expensive panel. So we will be right back in about an hour.
4. 5. Black Base Coat: And we are now ready for our base coats. We're gonna use our oblique critic from Big make sparked survives is a monitor's black. And we are going to just apply it directly on to our board. And Roman out. It'll be there. And it's very important to know that we have our board suspended on these little trypan that keep it off the table so we can get E edges properly and also it helps out when the residue is applied. So the drips, I'm not sticking underneath the boards and they're going directly onto the table. And then we're going to have dropped off there. We're going to put on the science of the floor. And let's go ahead and roll this out once again with our short and amp Lawler. And we're just gonna have one came back into the board. Do their nice even coat. If you feel that you need to coach once it dries the go ahead and apply another. Usually with his Mars Black is very well paid and it does cover pretty good. Especially now that the one is prime plus v. Paint absorbs in his a nice solid smoke. We're gonna pretty fast. This is going to look fantastic once it dries, it gives it an intense amount. Fully dry. When you're working with acrylics? Yes. A drying time, I would see them with oils. We showed you a nice and even the stress 22nd finish. So it, it, it hides a lot of the roller marks. If you are using a glossier paints, use usually a suitable Elder Marcus once it dries. And then for sure Nesta given two quotes. And now we hit the sides. And this is where these little tripod legs come in handy because it allows you to get all the way down to the bottom of the profile. All the way around. You can tell that one application really goes a long way to cover pretty much the whole entire path. And that's pretty much if base coats is done. We'll give it an hour or so. And then we come back and we start painting with resin spray paints and pavements colored pigments of roads you mix into a resin finish. So let's let this dry and that's come down to about an hour, an hour and a half. And that started creating this masterpiece.
5. 6. Let's Get Shinny: We decided to wait 24 hours. Not because it didn't dry in time, is just because they got preoccupied with other things. So let me now for our exciting top codes of resin, spray paint, and pigment used altogether to create this awesome pain. So we are going to protect our hands or some latex gloves. If you feel like wearing a mask and you could do so. I won't for the purposes that you kind of want the ever to understanding very clearly if I do, but I do have the studio windows open for some ventilation, which is extremely important when you are working with spray paint and of course, with resin as well, even though they claim that it is an eco-friendly Ron resin mixture, but it's still not a bad idea to open up some windows and get that air flowing. We are ready to go. So we have our mixing cups that indicate the amount of ounces that we need in order to create a piece this size. When it comes to mixing the resin, we are going to use three ounces of resin per square foot. We have a total of 14 square feet. So that means 42 ounces total. So because we have Part a and Part B, that means that we're going to have 21 ounces of each partner. And the resin itself. What we like to use is the pro marine general purpose epoxy resin, which is pretty affordable considering that it comes in half gallon containers for the Part a and Part B. So the Part a will go in first and the Part B, we're going next. And I said what we're going to measure out. But the nice thing about these cups that you could find a home improvement store is that it does indicate the amount of ounces and the smaller ones do go up to 24 ounces, which is exactly what we need when he 21 ounces. So it gives us room for a little bit more. Once we have both of them measure out, we are going to combine the two, party and harpy into our larger container. And what I wanted to mix it with our mixing paddle attached to our quarters drug. Alright. So we will get started with our part B. And it's extremely important that you have the right amounts, the equal amounts of part a and part B. Because what happens is if you have too much of one and not enough of the other. The mixture when I dry consistently, it'll remain tacky and it could remain tacky forever. Then it becomes a big mess. And you would have to start all over because that particular piece would not be any good. Alright, so we are about 21, right there. Okay. Put there, say now we are ready for part b. Part of me is a little bit more liquidity than part a party seems to be more thicker consistency, then part B is, so what I like to do sometimes is stick it in the microwave for about 20 seconds or so. And that really helps it liquefy a little bit better and it's easier to mix. But in this case, we are going to leave it the way it is because we are mixing it with our head, which makes it a lot easier for it to break down. Ocr ounces. Here, we go, 21 ounces. And it flows a lot easier than part a does. There we go, 21 ANSYS. Put aside. I started aesthetic. We will get our part a on to our large container. Very gradually, very sticky. So at this point we are not too concerned about getting it onto the wood panel because obviously eventually all be covered up with the epoxy resin Next. Make sure you get as much as possible. If not all of it. Those are part of a career continued to say, and we now pouring our part be easier in part a and for sure. All right. We got a little piece of paper, therefore, the top of our bottle container. And that goes to the side. So I'll put my stories stick down. And there we have it. And it's extremely important that we mix on low speed for a minute, 30 seconds to a minute. And we said a little bit more, whose spin up so we get the XSS is much as possible. When it hits the sides of the container. Putting our drugs have side grubby, little bit everywhere. Then oaky. So this mixture, we are going to transfer a few colors onto these plastic clear cups. With our measuring, I'm sorry, we are storing sticks. And where we are going to make a new mixture with some color pigment added to each one of these mixtures. We really need a whole lot depending on what kind of the amount of color you want to add. So what we put that to the side there, what we are doing, we are using our pigment, the colors, these pigment colors are. This is an error. Why it's a pro white. Then we have static blue and we have acquired reflex violence. So these are more, the more or less same metallic finish. And we're just going to add a little bit, goes a long way. So put glue in there. And this is a grand that's called Pearl x. Found that any art supply store or any hobby store, we are going to use our hearing, their micro Pearl White. And finally reflex Violet. Then we'll put these to the second. And we make sure we stir that in to our eyes. Poxy resident mix. There's one. Shouldn't get all the sides, get all power makes it to the resident. And this will give it some real nice accents to our color mix. And in addition to the pigment mixture that I got to know over. But that's okay. We'll make it part of the painting. And in addition to our L pigment mixture, we're going to use spray paint on to our resident mix. Them will apply to our panel board. Okay, so now that I've been in us, we weren't ready to start. But again, we're going to work this in and it'll be part of it. Now, the way we spread out our mixture is with a, they call it a notch trial, the square an axe trial. And this you can find again at any home improvement store in the tile section, it's 1 eighth of an inch separation between each notch. And what it does is it distributes the Apache evenly because what she wanted to do is you want to get a nice even flow. Web's going to self level. By the time the entire epoxy cheers within 24 hours or so. It is also very important. They would take a level before we get started here, which I already did. We get a a maybe a fourt foot level in this case. And ensure that the table and the actual board is completely level horizontally and vertically, because B and that is a self-leveling product, it's going to tend to go towards its low point. And that's not the way you wanted to cure. You wanted to cure nice and even through outs. So we begin by apply in our mixture deliberately, generously. In the center. Then right here where we still have everything will add some more air. Should we get everything out? Literally go. And with our max trial, that would begin to spread it out. We'll use the fled and first murdered out throughout the entire surface. And already mixed it in with our pavement. You're already creating arts. And you go right up to the edges. Try not to let an overflow, Not yet, yet. That will happen later on. Come right up to the edge. Keeps running in and out. Kind of like, you know, so all I'm doing it, it's mostly without mixing it onto a mixture of a and B into the cup. You see that also very desperate onto sprinkle it adds to your surface. And since I work in, into the Pasi, mimicking a Luddite even right now. But once this thing cures, it will be all nice and leveled. All even glass-like finish. You can use the narrower side as well to get into the corners. This is why it's very important to make sure that you go with the three ounces per square feet rule, then this will generally give you knock the proxy for your surface. And if you feel that you're short, just go ahead and makes a little more and apply it. So you have about a good half hour to 40 minutes to work with this stuff. That's what the open time is before it starts to harden and cure. So you want to see if you could finish your project or at least spreading it out within that time. Go. Say you want to make sure they you're a florist protected, you know, every head, everything evenly distributed throughout the panel. We are ready to use the portion of the notch trial to get nice and even more on the edges. You should always make sure you pay attention to the edges because it tends to NAT once you grab as much as you're already in the center. So we are ready to go ahead and start everything out. And what it does is it's making a raking effect, affect that. So you have the same amount of depth of product throughout the entire board. In wherever it needs a little more. And it fills the void. And where we need to take somehow get to exactly what it's doing. Okay? And we're all self level, even though right now we have the, the track marks from not straw, and eventually it will all level itself out. That's the great thing about this product. You go, okay. Putting our child to decide. Now we are ready for our mixture. And we will start. With keep up again and they were, this is Reflex vitamins interact. So we're just going to apply it. And I said we're trying to focus more on the rights. Or in this case, my side is the left side of the new site is the right side of the panel. Because we're going to try to make it into some sort of negative space. So we draw our attention towards one side, right? And now we go with our move in. We're just mixing everything together. You go thinner by using your story steak or a go ahead. And apply thicker by just pouring it. And we're combining the two colors together, let it flow. And to make sure that you've got someone who, you know, spill over to the side sorts like got one Continuous Painting. Okay. Before our plural wife stirred up a little bit more, put that on top. So we went from dark to lefts. Shake. And then we'll have a little bit of an angle as well so it's not too uniform. And then incorporating what we still go earlier, just go ahead and add some more white here as well. There you go. Spilled some orbit to the sides and have a more genocides. And then I will do the same thing on this side as well. K. The next thing we're gonna do, we're gonna add a little spray paints. Again, making sure that we had the proper ventilation because this stuff can be toxic. And then of course, it's recommended to wear a mask. I normally do, but not when I'm doing a video. So if it up a bit, and what would you want to get the same story of steak that we used before. And we can apply some onto the actual board to have a little bit more controlled. If we add it to the stage, you get some droplets. It's going to look good. And I think we're going to use a little bit of the see here. Yes. Safflower blue as well. Plenty principally wherever. Just FOG soldered on to this site. Really low. And in addition to that, we're going to fog and a little bit of pero mis curl miss. This is the restore william Brand spray paint that I really like to use if if you're going to call those pretty good into a slick. Right? Now, we're going to start working this together. As you can see already. It's fracturing Some of the spray paint. It it it does then it makes it into these little puddles. See how it fractures, and make it goes into these little puddles once it hits the resin, for whatever reason. But what makes it even more of a fractured remote is where you get a little bit of alcohol. Isopropyl, the IR 91% alcohol pyramidal spray bottle. And yet as we spray some of it, I'm in linear fracture. That's awesome. It gives a real cool effects. It's a guy like what they call orange peeling effects. Okay? At the same time, we mix some of our blue, cobalt, cobalt blue pigment onto a little bottle filled with alcohol and recruited spray, a little bit of that as well. You can experiment with this stuff, make your own mixture. Not too much, just a bit. Okay. So in order to get everything mixed together, which it does, as you can see, it doesn't matter on its own. With time. It just levels off and an inner integrates together and it gives you like the coolest effect that you, for the most part don't have any control over. It does its own thing and it's got a mind of its own. You might be able to know how you want to lay out the colors. But at the end of the day, the colors are going to mixed together and do its own thing. Here we have in CodePen that must be very careful with it, especially in the areas with the alcohol or does is it levels off and you'll see bubbles a pop some of the bubbles out in order to get a glass side effect. Okay, with that being said, we are going to have these little craters. They are caused by the separation. Of the epoxy due to the spring of the alcohol. So once this drives, we are going to give it what they call a flood coats of just plain clear. He packs and resident throughout the entire thing. So it levels itself off. And you don't have these little indentations unless you want to keep it there and you're, you're happy with it. But in our case, we're going to put another layer of clear epoxy resin once we're done. And the other thing, if you do that heavy torch, what works real well is a hairdryer. You ever hear? And it pretty much does the same thing as what the torture do is pass the bottle or the air bubbles and then levels off everything nicely, especially in the areas where you have the callers may do in advancing fast. Okay. So given that we have some areas that we probably missed, which is okay because like I said, we aren't going to go with another flood codes in 24 to 48 hours. Are there any areas you missed? You could go ahead and fill it in and it are all soft level as well. There you go. Okay, so right now it looks like no little portals. But with time, it all evens itself out. And go ahead and okay, and like in the design so far, you just gotta do a little something here. And maybe what we'll do is a little bit of metallic black. So this area's not saw, produced this frugal don't moreover there to foggy and put a little bit more of approval white. Oh, yeah. Well that's gonna have a real good and will hit just this part right here, not the whole area and up none now in knowledge, just this area with some of the clearer alcohol. Not much is needed. Just enough to fracture the areas that you want. To go ahead with our peers route again. Now look at how cool this area here looks. I mean, it's amazing the way the coal blue with our metallic blue as well as the mixture of the largest fractures, everything of a spider web and just gives it this effect that you cannot probably produce on your own unless you have the time to go with a little paintbrush and started mimicking the same design. Alright, here we got some dig a little bit. When you have any bubbles that you want to break apart, those goals should love him and hit it a bit. And then we're time was bubbles will disperse. Okay, I'm going to get whatever little bit we have left and our bucket of our proxemic Stewart. And just for what my hand and Phil and decides, so we get the same layer is. Like I said, it's not too important to get it off when the sad, it's because we are going to do that smart codes. Once this first layer dries, you usually go. This is where the drips come in. So make sure that you're using the table that is protected that we have on our construction paper underneath there. And they just go ahead with your hand and add any extra resin to the sites. Will continue this a little bit later here. But I just wanted to make sure that we have exactly what we needed. I think I'm happy with the way our design turned out. We have all this negative space on this side. And our attention, I grammar to the right of your screen. And I think that once we give it that, that flood coat, the final flood code, it is going to move. Look unbelievable with a nice glass-like finish. So pretty happy with the turn out so far. I think that we'll look at all over, made sure we didn't miss any air bubbles and let this set for 24 to about 30 hours or so, making sure that we do not have any dust in a room. Because if you are working, let's say in a garage or a warehouse where it might be a little dusty. Those particles of dust fall onto the resin. They are, they're pretty much throughout the duration of the lifetime of the painting. So it's very important that you have a dust free area. And if you want to maybe put a room to CRT absolutely a fan to circulate air in the room that are probably help it, but make sure it's not directly onto the piece itself. Alright, so we'll be back in 24 hours for our flooded coats. And I'll move our resident finished with them being completed. And I can't wait for the final results.
6. 7. Final Flood Coat: And the irony is the Java code and final call to resident. So we've assembled middle class, we are going to mix three ounces per square feet. Below that we have 14 square feet an hour panel that Gary says Under 42 ounces. And I then usually I measuring cups. We're going to do 21 ounces per car and two-party. One ounce is part b. So we started with our partner a. And we'll get all the way out to translate that. Ansys knows. What's our product B, I'm sorry, our a and our RB would do the same analysis. And wasn't going to be heating this up a little bit later, about 20 seconds or so on this memory, let's explore a little bit easier. We'd gone wrong. And then we mix the two together. We're going to combine them into our leader and ensure we scrape off the sides and get it all happens. Okay. Okay. Now far harder. A little piece of paper there. Okay. Pouring it all in and sweeping the sides. Because you will get an exact measurements, equal parts on a and b. Because you do not want the mixture to remain tacky. If it's not properly distributed. You know, 50-50. So once again, what are the units? Along the sides of the wall? Because you will show no have any pregnancy that aside semana children at all. It's a medulla where once again and try it out showing that all the extra hour panels. Very good minima. So for this example, let's say that we have what we call a trip brush living expenses. Gosh. This is going to allow us to maybe bush editing that asides. And also we're going to do about chopping. Once we distributed the oxidizing and laid out with our match trial, we want to break up the pattern on the trial and we're just going to pick it up by blue member. Battle found chopping without botched. We found to do that. We have to make sure now that it is a cheap, friendly Bosch. We have to make sure that the Brussels, all emotions are out because we don't want to deal with movie versus Tamara passing mixture. So you would have already learned that? We're sure we get it out right away. Okay. So if I make sure that everything is thus three and there is nothing paid, and we are ready to pour our mixture. Nice paradigm of medical. Leave a little bit of a container for later on. And again, using our Macs trial, we are going to spread out service will do so with the thread Saj. And then we'll come back with, yeah, with the match die. So we have a nice even distribution. Even out to the edges. Yet, despite all of my colleagues were hired, any imperfection because everything nice and smooth and once he chairs. Once we had a nice, even a mouse or a product in the center of the painting nanowire metadata way out to the edges. To edge. We're going to learn about the sides and sooner or later on. And they sit in distributed evenly. So we're going to do is use the match trial. The product EPA, same. Even throughout the pain. We feed into some more material. I just push it again towards the edges with the flat side. All of the child. And you could feel the quality wherever there was more material, you feel you're pulling and pushing it in areas where it's lacking and distributed under nice and even more neural side. Who get to the the corners and the edges. Go. Again, you had allows a good 30 minutes working time. The first stuff starts to set. Then obviously it makes it a little bit, a little difficult to move the material around so you don't have to worry too fast. And obviously the larger the painting, the water tank is going to be take tremor, movement ability. I think we have everything distributed pretty Egan. Watch some software here. We want to try and rush. Well ahead of time before we do our choppy. That's where you used to rest. Whatever container, continent where butter and just start chopping away just to make up those top bar. That sometimes when maps, they're going away a 100%. So you just want to break up the pattern on the charts without within that set Bosch, just chatting away. They're finding patterns, nourishment its angle. Turning over a millennium abolished a little bit. And we actually did some of the tension that's in the check ourselves, which we know that Missouri has the tendency to create your own model of their packets. And this also helps break it up a bit, which of course are going to come through it without, without a clash in Hitler hairdryer. And when he got the rest of the model as well. Okay. Rotating the blush. Chapter 13 attention. First of all, you want to grab those referred or pill detours before the epoxy cure was I knew because once it dries with the letter tells him attaining getting those out. So you're sure that you go through the entire panel, look for any missiles there might be stopping that. Okay. So when do our first term G we had prior to outer edges. Sure. But it's covered with I seen any dry stats. We get our torch. Even false. I'm super lattice starts showing me hit goals before we go any further than what, any dividends or any good. So we make sure that we get any dry spots. And before the final torch. Yeah, it's never enough, Maria, nice. Touch. Wow. We keep making sure undergrad or surface cupboard. Little more their words to say he's looked good training, good humor. So now we're going to concentrate on the sides. Will decide it's going to deal with your mechanic if you want. I'd like to do and what the chip brush just cover the entirety or signs out of the panel. This is where the drips into your protected areas. We protect our flares. We pretend that our table because once you Patsy hits and surfaces that you do not wanted to, hey, it takes an hour to remove it. You would have to go with a razor blade or something one Siqueiros and trying to shrink by that stuff off and it's not fun. So I want to protect the arrows backwards. Toxin to be there permanently. Yeah. So as for the final floor calls, we are going to do the other side. And then we met this kinematic Fair 24 to 48 hours. We're going to then put hooks on the back and we're going to hang this baby up. And let's say we want to be very pleased with that was beautiful residue, pain, sorrow. And that's 24 to 48 hours. Tsunami comes out and we're gonna do a nice close-up.
7. 8. Let's Hang It: All right, so 20 flowers have passed this completely cured harness Iraq with a nice clear last night finish, you just see the reflection of the light in the studio. We're ready to flip it over at some V brings to the ends and hanged this baby up. Here we go. So we flipped our board over and now we're ready to add our D hooks to which you could find in any frame shop, I want people with the larger ones that require two screws. We have our tape measure obviously are fasteners, are drill. And we're going to measure four inches from the top here and then four inches from the top. And this side will be that this is a hollow door. We have about an inch inch and a quarter frame that's inside throughout the perimeter and that's where you want to screw it in because otherwise, you're just going to hit nothing but dead spirits. Number one. So here it is, all dogging, all hung up. We decided to flip it around. It's likely that look a lot better if we had the negative space on the right side and our image to the left. So now it's time for the most important thing. And next to always make sure that you sign your masterpiece. And this painting is done.
8. 9. Intro: Welcome once again, my artists friends. This is the PCB and waiting for it. We are incorporating everything into this painting, from printed images to spend saline and stamping, as well as some graffiti, little bit of glitter we have splashing and splattering with spray paint. This is going to be a fun one. Stick around. I'm going to show you step-by-step how we created this one.
9. 10. Cut it out: All right, so we are here with our image of our couple in Photoshop, turning it into a black and white image and bringing it to our FedEx office, where they will use their large format printer to give us a 22 by 28 photograph, copied black and white. And here it is. We're going to secure it down with some masking tape applied at the corners. So we don't have any movement as we use our exact or knife to cut the image out. So we'll begin by cutting into our paper, starting with Brando's hair. This is Brando NkT by the way. So it's a, it's going to be a nice, lovely gift for them. So we cut it into his glasses. Taking our time. Going nice and slow. This is the tedious part of the project, but well worth it. Always making sure that before we begin any new project and he knew cutting that we have a brand new exact or knife blade. We need a nice and sharp. And of course, be very careful not to cut yourself because these blades will do some damage. Alright, now we go and continue on top of the head around the hair. The hair is a little tricky because as you can imagine, you have the little strands. You want to capture as much of the details as possible. But there are occasions where it's just impossible to get the thin hair cut out just right. So you almost just skip through a you cut right through it and go around the head and try to get the thicker strands. Because at the end of the day, the majority of this image will be covered with paint, lots of layers with stencils, with spray paint. So it's not like we have to be extremely precise with the cut. But the more precise the better. Starting to cut around his jacket as jean jacket. And then we have our white border there. Obviously, we're going to get rid of it completely. Cut into the jean jacket and you can stop and start it into a section as long as at the end, the cuts joined together and you're left with just the couple and get rid of any background image that's there. Being careful with the face, especially because I believe what we're gonna do is not add a lot of paint to the actual phase. But we will add layers to the clothing. Possibly the sunglasses there Brando has on, maybe a little bit on the hair. But the actual skin tones on the face, we're going to leave black and white. So you have that contrast between the different acrylic colors and the black and white on the face. Faces. I realize not the most enjoyable thing to do is to sit there and take your time cutting. But trust me, when I tell you it will be all well-worth it. You could do this with anything. It doesn't have to be a couple. You could do a picture of a dog, your favorite celebrity. If you check out my previous videos, it is on abstract techniques revealed Volume two, you will see that I created a similar piece with the famous singer Frank Sinatra. It was quite a big P. I believe it was 24 by 48. So go check that out if you get a chance. Continuing with our cuts, again, with the strands of hair, making sure that we get the majority of any loose strands that are thicker where the blade will make a difference. But if it's too thin, it's just not worth cutting because you're cutting on both sides of the hair. And if you have a real thin piece, it's more than likely when it's time to glue it down, that particular strand of hair will come right off because the paper is not strong enough to withstand anything that is that thin when it is covered with the adhesive, then we're going to use, which is wallpaper paste. That's going to be what we use in order to glue it down onto our canvas. So now slowly we go ahead and remove the excess paper that we're going to just toss out. And being real careful where the couples meet right about here. If there's any snags, just make sure we go back with the exact or knife and cut into it. So you're not tearing the paper. As we have right here. We just cut it into his ear a little bit more to make sure there's nothing. Stuck. The risk tearing the paper and then turn into our image itself. Nice and slowly careful as can be. Little more details here. This is just regular paper. I believe that they use it for making or printing blueprints. And the large format printers at your local Kinko's. While I don't know if they still have king goes by FedEx or anywhere where they have the big printers that they print out. I believe it's called architectural paper, which is a large format paper that the widest that they come, I believe 36 inches and you can have it as long as you as you like. Some more finer details here. Being cautious there we don't care into the skin. And you can see we're cutting more into Katie's here. Very gall taking off a nice big chunk of it. And here it is. There's our image of our beautiful couple being ready to be applied onto our canvas chat that out.
10. 11. Paint Application: We're going to grab our 50, put a little water on there first. And we're going to start with a little white and orange next together here, we'll just randomly apply pain to our Canvas. Yellow here with pale yellow. I'm not bringing my brush yet. For blue, mix it into a yellow. There were good advance, as always, liked to work for us like I know patients or anything else. It's a mortar whites air. Again, most of this is going to be covered by our couple, our image. So we don't know at this point what's going to come through and what's going to be Hibbing behind for good. We need to fill the Kansas complete. So we don't have any of the Canvas showing through here with thermal. Lu, crumble it in. Going over existing colors. Again, making a fine goal edits. Here is where you'd like go. And whatever happens, happens. We're not too concerned about it all proper. Separation of color of cataracts were just stacked in every which way. So let's see here. D purple here. Remember Wien's we haven't rinsed brush once yet. So let me get a little bit more white here. We're getting into are the purple. We're blending. While the colors in their yellow here. We don't want to muddy it up too much here, so we gotta be careful. They think that I'm gonna rinse it just because. I don't like to have the look of mud anywhere onto the canvas. And of course, chances are it's going to be covered up because it's right here towards the bottom. And you would know the image is going to probably take up about 75% of the canvas. So all this, most of his enemy hidden, but we need to have some other colors come through once we apply the image that we see already into the Canvas. So I might incorporate some of the purple, some of the yellow onto our couples body. So it looks like it's going to be blending in to the and this snow. He probably getting a little bit ahead of myself by you or see what I'm talking about. Once we get to that stage. Let's continue here. Hey, we could also use our spray bottle here. And maybe there. Give me run the real spray, let it sit for a bit. Brief Theorem. And let that water soak into the paint. We'll go back with a paper towel and blast it and you will see some of the canvas come through. Actually, I'll use this reading here. So here, as soon as you bite it, it pulls away the paint. You a little splash of facts in the same thing here. Once we apply a rag, you're soaking up some of that paint that's absorbed by the water and just pulled it out of the Canvas. Just gives it a real four left, right? At this point I think I'm going to use my larger palette knife and maybe right out of the jar or with a light blue. Just apply it. Wherever you're going to get there. Your mood. I see more of this once. Our images, the canvas right now. And a little bit there as well. With our notch trout that you guys know I love so much. We'll see if we can remove a Moodle bits there. And right there. If go down, go to the sag, give it a little. You'd have a nice pattern there. And then all the colors, you know, come through. And that's it for now. Just a little bit. You don't need much adding that interest and excitement that we'd like to talk about. Okay, I think a little bit more color here and they're going to leave this be let it dry for about an hour or so, come back and we're going to attach our image to the canvas. And that's where the real fun begins. So here we go. Alright, come on up. If we go with our inch and a quarter brush here and some fluorescent green, a little bit of water and share, just go to school. And there's little funds like to call it ending a little fun. White. And I think we're going to call it a day for now, well, for about an hour or so, let me try comeback. A finer image with a wallpaper paste. Like I drive as well. And then we're going to start down in some more paint. We're going to start down on some strength, soybean, some splashes. And this painting is gonna look awesome. So space to stay too.
11. 12. Paste it Up: Okay, we are ready to pay down our image of our beautiful couple to the canvas. And just as I promised, the majority of the painting would be covered by the printed image. So you really don't know what's going to show and what's not going to show when you start paying. But that's okay. Because this is what this pieces all about. We're going to also bring back some of the colors that we used underneath and use it on the clothing as well as maybe the hair. But what we're gonna do is leave the skin on the faces. The, when the eye we're not, we're not going to add about a color to that. So everything else, the clothing, the hair, the sunglasses will have painted and but the face itself, I think we're going to leave it as is. But things could change as you guys well know. So, alright, put this aside for now. And what I'm going to shake up our wallpaper paste. There we go. With our everyday painters. Brush, brush with once you apply some of the page to Tibet now it does tend to curl up. Once we do that. So we have to be pretty careful. So we're going to apply it to the image working from the center out. And it's okay if we did an add the opinion itself because it's clear that dries clear and it does not affect the under painting that we did. So working our way out from the center out, we apply our wallpaper paste. And already I see that it wants to start to start to critical and start to curl on me, store. We're a little fast. And then also we're going to try to hit the same time via the rest to the canvas itself. We'll set that to the side. Here's the tricky part because it could tear on you if you're not careful. So what we'll do is we'll start at the edge and see here since them to stick together. And we're going to watch that we don't tear it because once it gets read, this paper, terrorism, very, very easily. So the bottom first doesn't have to be perfect. So put it here. And again, this image does not have to be completely flatten. You could have some ma, wrinkles on their once it is applied and then it just becomes part of the texture P, permanent texture process in the paintings. So I tore some of it up right here, but it's okay. So gentry, we weren't nice. Smooth over here. That's OK. What you do want to get smooth though is the face because that's one of the things that we'll use our palette knife and lifted up a bit. And sometimes you have to lift the reapply tour there, but again, not to worry. Okay. And I make sure that we get the hair there. Okay. And then lightly with our fingers, we push our way out. And I have some bubbles from the wallpaper paste underneath. But we're not worried about deaf equals now I'm going to use our street are flat, wedge and push all the excess wallpaper paste out. If you don't have a watch, it's no problem. You can use it on credit card or anything that's completely flat. Just the very careful and go gentle. Making sure that you don't brick more than you have to on the actual kilogram. Yeah, you can see it all come out in again. If you don't have it off the image, it's OK because this stuff does dry clear. We're going from the inside out. So all of this, we're going to paint it and make it all part of the jean jacket and her dress and maybe her shoulder, his arm just tried to incorporated as if we never skipped a beat. By the excess off. You don't want any bubbles. It's okay to have wrinkles, but you really don't want any bubbles to dry through. Okay. Taking your time. Pushing out. Nice is fluid as possible. So you, there's another big mobile, there's you work it out of the image. Well, that wallpaper paste right out of there. Okay. So we have a few little creases here, but for the most part, it is pretty flat. And which is what we trying to achieve. But if you have a few wrinkles, no problem, we're going to layer paintings after this. You won't even notice it. Okay? And you can get your random if you have any extra. And the face is the main thing that we're gonna concentrate is on the face that we don't have unnecessary paste. Were unnecessarily color. There we go. Perfect. We're going to let those dry overnight and come back and start applying more paintings. And we're going to apply our spent solving. And we're going to apply some sweater and some spray paint and see what we come up with soil comeback and 24 hours. And let's finish this up.
12. 13. Text, Splatter, Finished Edges & Varnish: Now that our grew and greater is all drying up, we are just about ready to get rid of the excess. No. What we'll do is we'll wash away all the extra that remains and the brain goes face. Would you get a small brush to have on the back on the canvas to ensure that we get rid of it all is because once we varnish yet, we don't want any extra greater. In some ways it's good cover very well here. Get it out of his teeth. All right. So I'll go and get the necessary we have here four back into our container. And then we'll do that later on. And what I wanna do now is maybe add a little bit of graffiti style text to the painting itself. When I decided to do is just include their name, Gideon brain though. And they don't put up with stamps were going to put established in the year that he started dating, which I thought it would be a nice little touch for this present that's going to go to them as little anniversary gift. So we're going to start with dot are thick, black marker. Squeeze out some law. Before we get started. We'll do just real graffiti style tags. Do rainbow. And then maybe Katie in white. Right over here. We could do is maybe embellishing with some paint. Make it stand out a little bit more with some sharing. Put it right over here. Here. We're shattering. Lakes are blue paint monitor. All of the left side of the letters. But again, I don't like the way the wind is sticking out. So we need to maybe just a little bit about the white. Or you send out just a little bit more. Letters are stacked on top of the dress as well as his Jean Jacques muffins. You fancy graffiti. Here we go. More whites and monitoring. And then a little bit more difficult time making this white because the background is so much lighter than it is with the black. So the y has to be really, given the second, third coats. For it to be noticeable. Think we almost got it. He's paying markers can be a little tricky because you have to squeeze out the paint by tapping it on to your surface area. Okay. So the brand or we're going to just keep it on. Some highlights, will do the same thing with the shadow rain. This will be z. Be a little tricky, and forget the rest. So by machine and alliterative, that'll highlights this black guy and his wife actually either here in a bit. As we go. We'll give never happen. Didn't figure we're going to go with the blue. The blue is not sticking out enough with the with a white lettering. Is a thinner monitor vital. But it works. Again. It's I find uniform, nothing too fancy. Stack is if it was a Tang graffiti tag and the wall, somebody even had time to do a perfect job right away from the cops? Yes. Most graffiti is illegal, right. So basically why stand out a little bit more? I wear the black outline instead of the blue. Trial and error. Whatever you feel is going to look best is what you use if it doesn't work the first time. You download a different column. That's all. Highlights. Little bit over bought. Silver, grow brighter here and there. More of a street proofreading. And that does it for the splatter. So next we're going to start using our stamping tools, which we are going to incorporate right here in the lower part of the canvas. So here we go. One robot you started dating, and we're going to use one of these before. So she had to come out. 20 seconds. So first part, c, And again is wearing yellow. The spacing is stablished. Maybe we'll put a little period here. The backup, our brush. Why we need October, we're going to abbreviate it. Here t where you deal with it. Longevity is seen. When you submit your book to uniform. Again, this is morally streets. Oh, painting where everything is not perfect when it comes to the tax or the image for that matter. So that's 22. Is r two. A common error. 2016. And the only thing that I think we're going to do now is maybe the embargo. Ah, I need with our oil pastels. And then I was believer or point to paint the sides, the edges black. This should read not have to reframe it which Hagen as-is. Be ready for. And that will be completely. So let's see here. Again, just adding another. In contrast, interests, as I'll just says, no rhyme or reason to leave this. Because that what we're trying to accomplish here, maybe a little bit more here. Some already share as well. We want to overdo it and so I think we're good for now. We are ready, just hate the edges. When I said this ten, you'll be ready for barber scene and ready to give frack and give it to our low, the capo as their anniversary get, we're going to do is just pour out their black acrylic to our palette there. A wooden board, you know, with a little brush and gigantic sheep wrapped in plastic bed is sort of washington. And every single time after we get wrapped up in a stage where there's an extra expanded it and use it for Rush onto her paints. Nice and motor would allow you to do is have the paintings facing away from me. Roll on the side of the canvas. Where if you keep it away from you, the imagery from you. It tends not to believe on two fronts of the canvas of your image. And gives you a nice straight line. Here in the front, were not so much concerned with the backorder it because no one's going to see it, sorry, it does not need to be on the screen. Return it over some more. When we do the same thing. Really hold a lot of pain. So for each side only, it only has two sides. There. This is how you get a real nice finish MOOC with a gallery wrapped canvas where honestly you have no staples on the side. This one doesn't even hash tables on the back. I mean, it's side. So really well comes you gotta canvas where they stretched it. Where there are no stabilization that just to see you. So there's only a capo on each quarter and that's about it, that it's all taught thing. And then they use a rubber seal to keep it all in place. So anyway, we are done with the pretty back down. And this can, this will be ready for one machine. First thing, we will evaluate science, you know, standard before we barn a ship. As you guys well know, I like to keep the signature for the very, very last step, but I would like to seal it in Novartis, so I will be signing it before we apply it with bondage to it, we are going to use a water-based botanist by min wax. And I will show you that step, like I said, Tomorrow. And the other thing is, we were going to make sure that we avoid biota, the glitter. Because what happens is a lot of times you will lose the spark or in the glitter when you've saturated with a water-based varnish or oil-based for that matter too. So we're going to try to go around the Black winner and then varnish the rest of the. And this will be ready for gift wrapping. So it turns out that we only had to wait about three hours for this to fully dry it. And we are just ready to varnish it. And this is our final step. I decided to go ahead and sign it. And also I think a little bit of correction here because I wasn't too happy with the way the d and d o came out that were too small for the rest of the letters that didn't match very well, showing the sanitary paint over them. The other quote, the green there and also some blue. And I did is I went ahead and made the DNA oh, a little bit bigger. So that's pretty much ads. We are ready to varnish. We are using a water-based min wax varnish, polyacrylic you could find in any home improvement store and you Harvard store, ai bi in gallons. And then I transfer into these smaller plastic containers with the lid so it makes it more manageable within just working out. Of big gallium and having to close the lid of the time I'm done with hang on. Hang with the pink cans you have to make smash them then with a, with a hammer and it just doesn't work very well. Suddenly we're going to go ahead and start. And then they said, we are going to go around the sunglasses because that's the only part that will not get varnish. So we'll use a smaller brush for the cutting in. And normally, I like to roll the varnish on with a six inch roller, but in this case, I think I'm going to go ahead and do the whole entire thing by a brush and show some of those brushstrokes. Once it dries because I think it would give it just a nicer Street feel to it. Instead of being extremely uniform as it would be in 1D when we roll it on with the with a six-inch roller. So again, we're going around the globe and you'll see that the varnish, the oil-based varnish life tends to go. I'm white, milky, but a dries super clear. The reason that I like to use water-based is for that reason alone, that it dries clear and not a yellowish tint that you normally get with mini-planets oil-based varnish. It has too much of a yellow tint to it and it makes the piece look weathered and old. And as if it were sitting in the sun for a long period of time. If that's the MOOC that you're going for. Great. A lot of people use the the coffee or tea dict papers to get them whether aged look. And you can accomplish the same book when you use min wax oil-based varnish because it gives you that that tent once it drives. But in this case, that's not what we're looking for. We just wants a clear finish and that's what we'll get when we use this water base. Polyacrylic varnish. Sort of cut it in with a smaller brush. Pretty much done so with our move to a bigger monitor brush to recover more. Well, we wanted to poor either solely flights here. Okay. So that's as far as we pull with this one-inch fresh. And now we'll use our 50. This covers a lot of RAM. So we're going to cross hatch for every signal direction, different ways. Hopefully, when it drives we get some of those brush strokes that will show through the varnish because I just think it gives it a nice feel to it. And sometimes, you know, once it dries my missus spy and notice that it's had is glossy. So then you go back and you hit either the dry areas again or you give it a second coat of varnish and it gives you even a glossier field to it, shinier. And if you really want to go crazy, you can top this with a, an epoxy resin finish. Given a glass slide look. That looks really, really awesome as well. But for now, we're just going to stick with our one-quarter varnish and see how that comes up. Here. We've got a little bit a smear from the WACC, which is twice b off a bit. And it would be a good shoe. Everyone. See it over here as well. So she's okay. Again, we've got that graffiti work going on in the sides to firstly get the front of it. Crosshatching, sorry the brush strokes. If you prefer to roll that out and get that smoother feel, by all means go ahead and do so. Okay. So now we'll get decides. Oh, sure, we don't have any drips. A little difficult to remember. Watson tries. So just smooth them out. Right? I think we are in good shape. Yeah. I don't think we miss any areas. Everything seems to be covered. Now we let it dry for 24 hours. And that's it. This painting is done. Hopefully. Katie and grant over like their gifts. And I would love to see what you guys come up with, whether you use an, an image of a couple or of a pet's owner, of a famous person or yourself, just fed on the young mares and have fun with it. Or see you next time. Thank you. Why?
 Gino Savarino, Abstract Artist