Transcripts
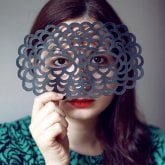
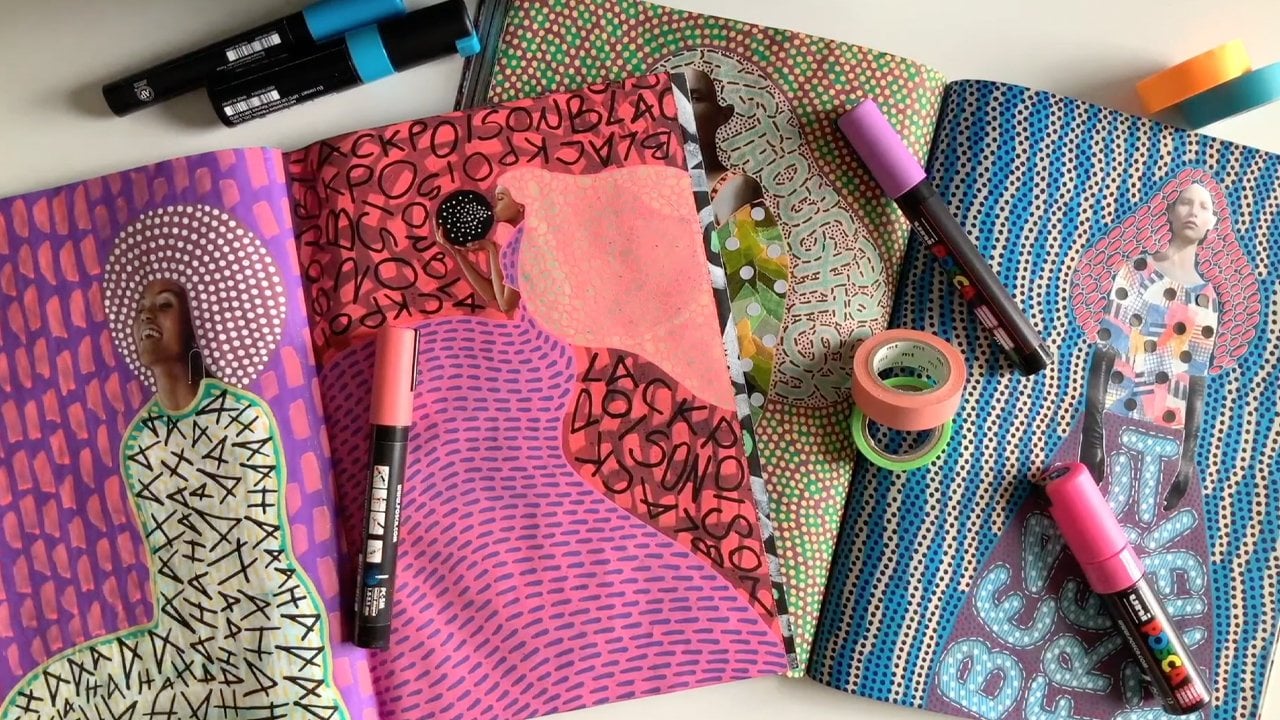
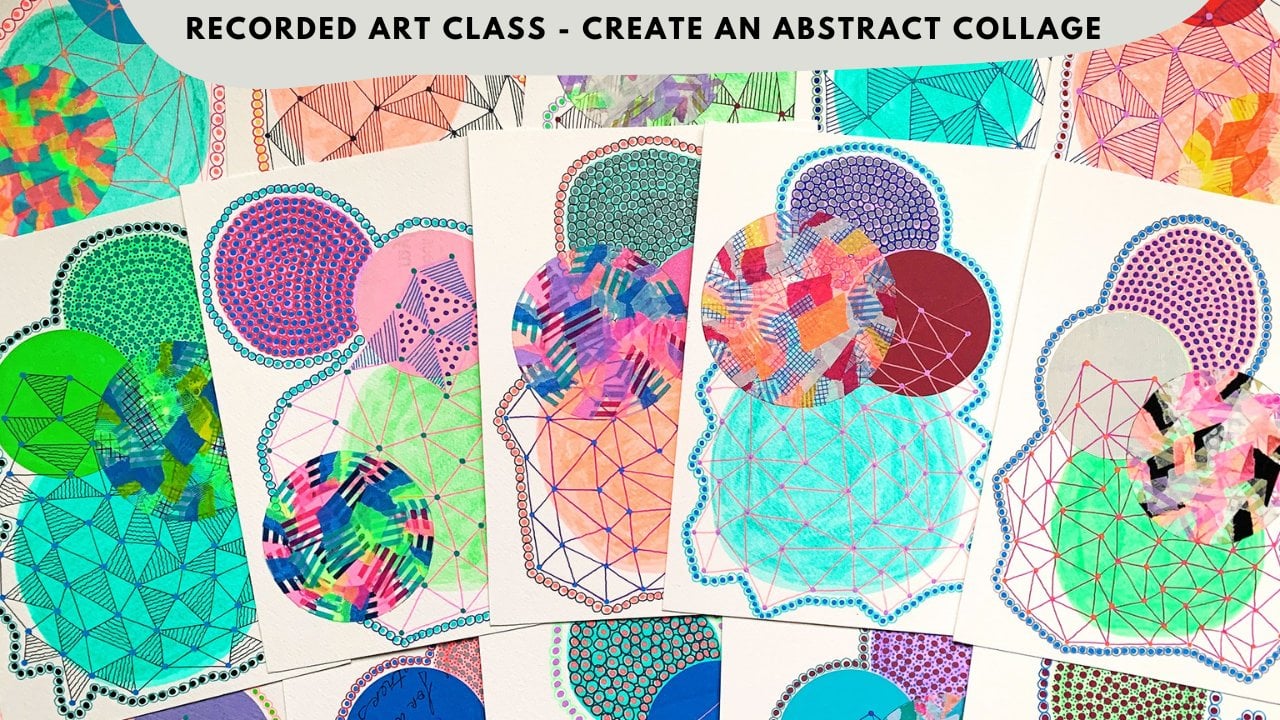
1. 1 Class Presentation: Do you love UPS for patterns? And are you looking for new ideas? Follow me into this creative journey. Hello, My name is now me Ivana, and I am an Italian artist based in London. Welcome to my class, abstract pattern design. My art practice is a mix-and-match of collage, photography and illustration, and involves the use of sound images as a campus. I love to manipulate any sort of features like vintage for traits, whole landscape, postcards and even more contemporary images. They find out propose of each image alteration is to completely transform their look and meaning. Good and also a little bit of myself into them. My art research is also focused on making apps for pieces, where I explored study of new forums, designing combinations and patterns. All my and made alterations. So their pictures are in fact abstractions. Constant research on patterns and thereby deviations that makes each of my art world so unique. I have an extensive experience in teaching. From 2017, I started to organize workshops in UK where I shared my passion for art to the local community. In 2020, I moved by events online. We saw him live classes to involve a wider international audience. But what are we going to make during this class? I will teach you a total of 20 different abstract patterns where I will mix and match simple geometric Ionic elements to create more intricate compositions. I will give you tips on making pattern cards, files, perfect two stuck together and pick up when needed. I will also share some useful info to create rules in order to remember a specific pattern. This class is perfect for any level, from beginners to skilled craftspeople. Everyone is welcome. I can't wait to work with you. So let's move into the next phase and see which materials we will need.
2. 2 Materials List: Let's discover one-by-one the materials needed for this class. We will need a cutting mat. Mine is A4 sized, a piece of white paper. My knees are normal print paper. A knife character or a Caesar. I will use the nice cutter, a ruler, an A4 watercolor pad, or any other thick paper? All of them. Did you have a tome, a pencil, a round object in my case is take some fine liner pens. I will use the Sakura Gelly Roll. You can use any fine liner. And for some extra declarations, I will use the posca pens and the quote is PC five MB.
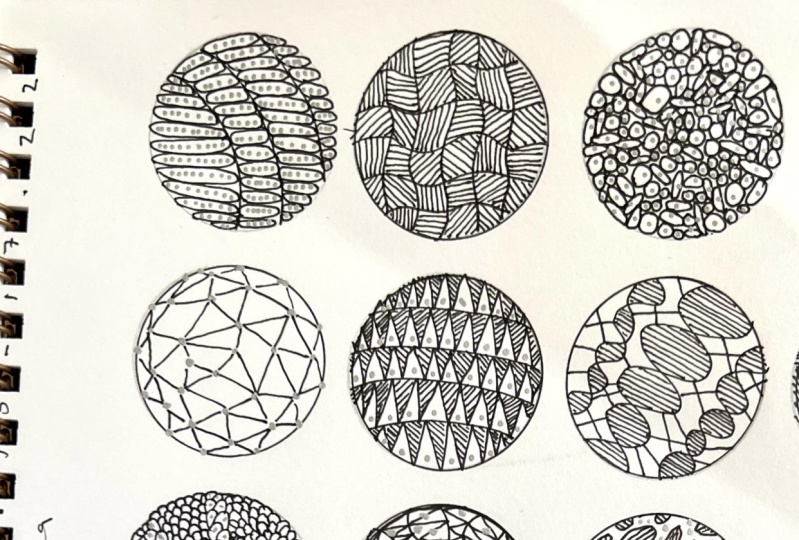
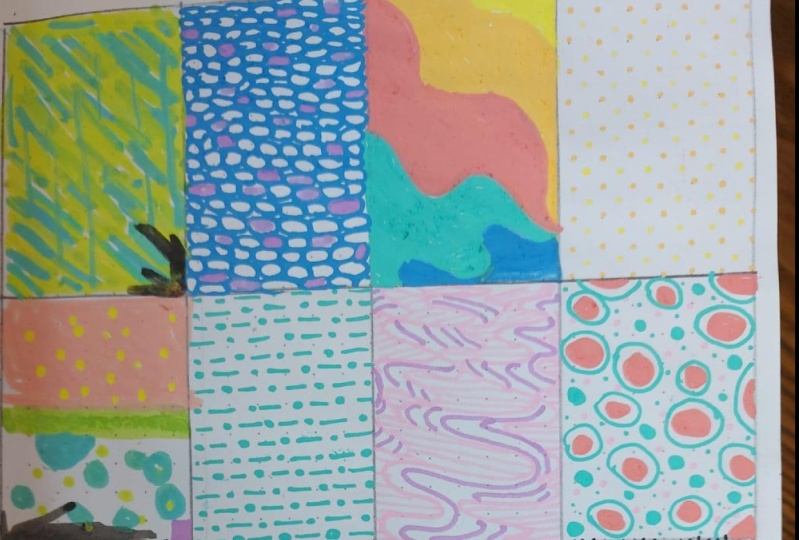
3. 3 Card Swatches Preparation: Now it's time to prepare our car swatches. Let's take one page from our watercolor pads, our ruler, and a pencil, cut the paper in four parts. We will have to repeat this process until we get 20 cards and you talk TO. Now we can take the tape and use it throng shape to trace a circle in the middle of each cart. If you prefer, you can trace a square or a rectangle. And it's thought we are now ready to work on each card creating our factors.
4. 4 Consistency & Rules: Before starting our creative journey, always remember, consistency is the key to success. And in my personal experience, practice makes perfect. Don't feel frustrated if the patterns will not be perfect at first try, you will just need more time to practice. That's it. Another thing that I want to share with you is the rules creation. In order to remember our realize a specific pattern, I usually write down a keyword name behind each. So I can have a simple but effective way to associate the name with the design. You can personalize this rule as you like. For example, writing down a shorter step-by-step description behind the carts. Pattern cards can be useful as a reference for future our projects, especially when we need some inspiration and new ideas. Moreover, we can also make small variants of our designs in reaching our database. You can also experiment in mixing two part turns in one and finding new ways to showcase them in your artworks. The sibling, these are infinite and a carbs will lead you through many exciting and playful creative discoveries. Workflow tips. Use the white print paper as a tester, especially if you want to exercise tricky patterns before placing them in your final cart. You can use multiple colored fine liner pens for each pattern stuff, if you like. Destroys can also be a useful way to whether visual reminder on how to recreate the designs.
5. 5 Pattern 1 Fence: The first thing to do is to divide in four parts our circle. So I will trace three curved diagonal lines. Now we can make our pattern filling each section with this geometric element and place in it enumerates on towel rolls. We will need to be as smart as consistent as we can in filling the sessions in order to get a nice finish. To add some extra color and complexity, produce the sign. We will put a series of dots inside each element using our posca pen. And this is our final result.
6. 6 Pattern 2 Fluid Check: We will need to divide in six part our circle, making five vertical and 5 or refund told wavy lines. As you can see, we ever checked area that we can decorate. On each square, we will place a series of parallel lines alternating their direction as follows. There are tickled her aids until diagonal on one side and diagonal on the opposite side. This is our final result.
7. 7 Pattern 3 Cell : Before moving directly to our card, I will show you on this tester paper the elements that will compose this design. These elements are five and they are a small, a medium of big circle and two ovals. One is vertical and the other one is horizontal. We will alternate these five elements into the space. And the starting point will be the edge of our circle. Now we have to move inside. But what happens if not all my elements can feed into the space? We need to adapt our elements through the space available. Sometimes we will have to skip part of the element sequence, but we can still have a consistent finish. For example, if you have to skip one of the five elements because of the space, just remind yourself to add it when possible, and then continue to follow the sequence. With the Posca pen. We will finish up the chapter. I'm doing a dot inside each cell created gives us our final result.
8. 8 Pattern 4 Wings: And starting from the top, we will need to make a series of long horizontal semi-circles that grew samples are simplified feather shape. Now we move right below this feather slide to place another sequence. Keep in mind that we will have to place each new feather in between the feathers that we have at the top of the line. Now we've the Posca pen. We will add a dot at the bottom of each feather. And this is our final result.
9. 9 Pattern 5 Grid: For this design, we will start using the posca pen, but you can recreate the dots using a fine liner. We will create a series of dots that moves into the space in a zigzag line that moves from the top to the bottom. So I can have a consistent presence of the dots into the space. Now we have defined liner pen. We will connect the dots, creating a series of triangles between them. You can decide to connect the dots in different ways and personalize this Creed as you like. And this is our final result.
10. 10 Pattern 6 Circus: We have to divide in five-part our circle and now have a weak trace for curved or read some timelines. In each section created where we'll have to draw a series of horizontal seek cycle Archytas. As you can see, now we have two series of triangles. In each section, we will have to keep n td the bottom triangles. While the top ones will be decorated with say a result diagonal lines, we will move to opposite sides on each section to create a sense of dynamism. Hey, we will finish the design using a Posca pen, placing a dot at the bottom of each empty triangle. And gives us our final result.
11. 11 Pattern 7 DNA: This is another design that will require a test or paper before working on a final card, we have to make too big a curved lines that merged together in order to recall the DNA spiral. Once we are happy with what we have done, we can move to our card and drove spiral in the middle, in the diagonal position. Now we will place another couple of the spirals on the left and right off the main one. Next step is to feel the spirals with serious or read some pen lines. Last thing to do is to draw a series of random diagonal lines into empty space left. And this is our final result.
12. 12 Pattern 8 Mountains: Let's divide our space using a series of regular horizontal seek cycle lines to recreate a Mountain View. Now we have a separate sections to feel and we will plead. Series of parallel lines are coordinate their directions as follows. Vertical, horizontal, diagonal on one side and diagonal on the opposite side. To finish up the design, we will use the Posca pen and apply a series of dots that moves into the whole space in a zig bug direction from the top to the bottom. This is our final design.
13. 13 Pattern 9 Wheat Spikes: This design requires our test of paper where we can act of size. The first step, we will need to recreate a chain of width spikes and the design mode like that. The chain can move freely into the space. I would suggest you to make one in the middle of the circle and then start to move around filling in a balanced way the whole space left. This wet spikes chains can also meet together and create an intricate composition. They can also move into the space, create curved lines if you prefer. As you can see now we have a series of empty areas in between our chains. And we will have to fill them with a series of semi-circles. We needed to decide which is the starting point of your first line of semi-circles to draw niche section. And then we can fill it completely. Continued, fulfill each section until all the areas are Dawn. The final batch will be to insert, adopt with the Posca pen on each wet spider created during our first step. And this is our final result.
14. 14 Pattern 10 Web : We will need it to separate the area in 16 slices using a serious off of curved lines that meet in the center. You can also add or remote this section from all based on your needs. Now we will have to trace the thick black line on each flight created. Last step will be to add series of seq flat bots that morphine could a whole space using the Posca pen. And gives us our final result.
15. 15 Pattern 11 Floating Meteors: We will have to make a series of irregular shaped ovals that recall meteors. But how to be consistent? Just keep in mind the simple room stark with big materials. You can also grow a specific number like five. Then draw medium-sized and finish up with the small fonts. To create a sense of space extension. I will also grow meat portions in the edges of my area. Now, inside of each method, we will place a series of parallel lines occur making their direction as follows, where Article four weeks until they are gone along one side and the lacrimal on the opposite side. With the Posca pen, I will fill the empty space in between the methods surrounding them with a series of dots. And do this. Our final result.
16. 16 Pattern 12 Surreal Targets: We will start from the center of our space and draw a novel that recalls the target. We will have to repeat these elements over and over until our space is filled completely. We can change the dimension and the shape each time in moving the space as we like. If you have the small gaps in between each element, don't worry, we will take care of them in the next step. Now we can take care of these gaps, coloring them with the same pen we've used so far. And this is our final result.
17. 17 Pattern 13 Origami Leaves: For this design, we will use a simple leaf element to create a total of 36 our glyphs lines that moves into our space. I will start from the one in the middle. Now, let's turn our cart 90 degrees and drove the leaves into these two areas. And then repeat the step on the rest of the line. Now, we can move the carved on this side and add the lease into DC area. Now that our leaves compensation is system, we can move into the background area and fill it up with parallel diagonal lines. If you want, you can use the ruler. We could have busker. We add a dot inside each leaf created. And this is our final result.
18. 18 Pattern 14 Hidden Cones: We will have to divide in four parts the space creating tree curved or it's Until lions. The second and the fourth section will be decorated with a series of triangles. The first and the third sections will be decorated with parallel diagonal lines that move in opposite sides on each area. Now we go back to our triangle's area and draw a series of small circles in this area. We will try to be consistent, keeping the shape of our circle similar to each other. Feeling entirely. Thanks. Now we can go inside each triangle and draw a series of horizontal and parallel curved lines that moves like that. In the 5th Shock the design. Let's go back to our lines only section and add some dots with the Posca pen that move synthetics that into the space. And this is our final result.
19. 19 Pattern 15 Relaxed 8: For this design, we will need to exercise first in our tester picker. Let's simulate the circular area of our card and then divide the space in birch call with three curved lines. The shape of the element to create recalls me, are relaxed eight. And I usually start from the top of my session to grow the element. Now we will have to repeat this element into this space and fill up the whole role. But keep in mind that piece element will continue to change its direction. Because we'll also change the space to feel like. So. You can magnify or reduce its shape based on the space available. And making this test will allow you to see what works. That's for you. Once you are happy with the result, you can now recreate the design into your card. As a final touch, we will make a dot on each section created through our folks come back. And this is our final result.
20. 20 Pattern 16 Drops: The first step to create this design will be to make a series of swirls and fill it up completely in a consistent way. It doesn't matter if the swirls at different sizes, and they can also move in different directions. Once you are happy with the composition. Now we can move into the sections created in-between the squirrels. We will keep the drops created empty, while all the rest will be decorated with semi-circles. As we did for the week. Spikes pop turn. We need to decide which is the starting point of our first line of semi-circles to draw in each section. And then we can fill it up completely. Continue to fill each section until all the areas are done. Now we can pick our posca pen and make a dot inside each drop. And this is our final result.
21. 21 Pattern 17 Bubbles: We will need to divide in four parts our circled making three vertical N3 or in some curved lines. As you can see, we have now a checked area that we can decorate. Each area will be decorated with a series of semi-circles. We need to decide which is the starting point of your first-line of semi-circles to grow in each section. And then we can freely to completely, we can move on each section in different positions or keep the same for all. To complete our design, we can take a fine liner pen and make a dot on each semicircle created. This is our final result.
22. 22 Pattern 18 Fragments: Let's start growing about four or five curved random lines into the space. And they can also meet at some point. Now we can focus on each area created, working on making other small curved lines inside each one of them. On this phase, it's important to avoid when possible, that this lines will catch up the edges. These will allow us to recreate this fragmented, the fact that we are looking for. And you can decide how big these areas will be, in which shape we'll have. The important thing is always to have consistency in the dimension of the areas. Create it. Okay. Now we can take our posca pen and draw what's doffed on each area we've made. This is our final result.
23. 23 Pattern 19 Sunflowers: In the first step, we will have to draw a series of circles into the space that simulate some flowers head. To create a sense of space extension. I will also draw so-called portions in the edges of my area. Now, I will draw a series of semester, of course, that recalls the petals around each sunflower head created. Next step is to draw out of some circles on the edges of my circular area to connect all the petals created. We will now add a smelly pet ofs crumbs we need around each flower until we have a connection between them. You can see that now we have some empty spaces in between the flowers. This will be filled with other sensor. Coastal will move around the area until it's completely covered. Last failed to do is to make a dot with the posca felt inside each sunflower head. And this is our final result.
24. 24 Pattern 20 Doily: Even if this pattern seems quite simple to make, it came through a little bit of practice to make it right. It's a series of semi-circles that move from outside into the inside of our work area. That gives us a three-dimensional illusion. As you can see, their shape will slowly become smaller and smaller. Each time we get close to the center, we will start from the edge creating a line of semi-circles that move around. And I highly recommend you to make larger sensor space so we can get a more successful final effect. Now we move at the top of the semicircle slime to place another sequence. Keep in mind that we will have to place each new element in-between the ones made in the previous line like this. The more willing get closer to the center, the more will be trickier to follow the previous step. Because the semi-circles are becoming smaller. So don't worry, you can just fill up the final area. We were seniors of semi-circles that have a similar dimension, keeping up consistent look. Now we just have to finish up our design, making some big sack dots with our posca pens. And it's giving us our final result.
25. 25 Assignment: And now extend to work. Grab your notebook, make cards, and create your patterns. If you feel overwhelmed, but the amount of work to do, just focus on one design per day, for example. Take your time and enjoy the process. Remember that you can make variants to this workflow and organize the rules to your needs.
26. 26 Conclusion: My hope that you enjoyed this class. And if you have any questions, please don't hesitate to reach out. Thanks again for watching and have a creative day. Bye.
 Naomi Vona, Italian photo archival parasite