Transcripts
1. Introduction: Hello, I'm C Jewel, am Illustrator and
graphic designer. Welcome to my new class. Drawing creative
geometric animals with adobe illustrator. In this class, you
will learn how to draw minimalist
animal illustrations. In adobe illustrator,
I will show you the main tools and
shortcuts used in this course, as well as how to quickly draw illustrations using
Adobe illustrator. Hopefully, after this class, you will be able to recreate
this technique and use this technique to allow you to continue to expand and
grow as an artist. I'm really excited
that you here, and I can't wait to help
you on that journey. Okay, so let's get started.
2. Sketch Visualize your ideas: Hello, everyone.
Welcome to my class. In this lesson, we'll learn
to go metric animal shapes. In this lesson, we will
learn about sketches. First, find the reference
drawing of the animal. Then import it into
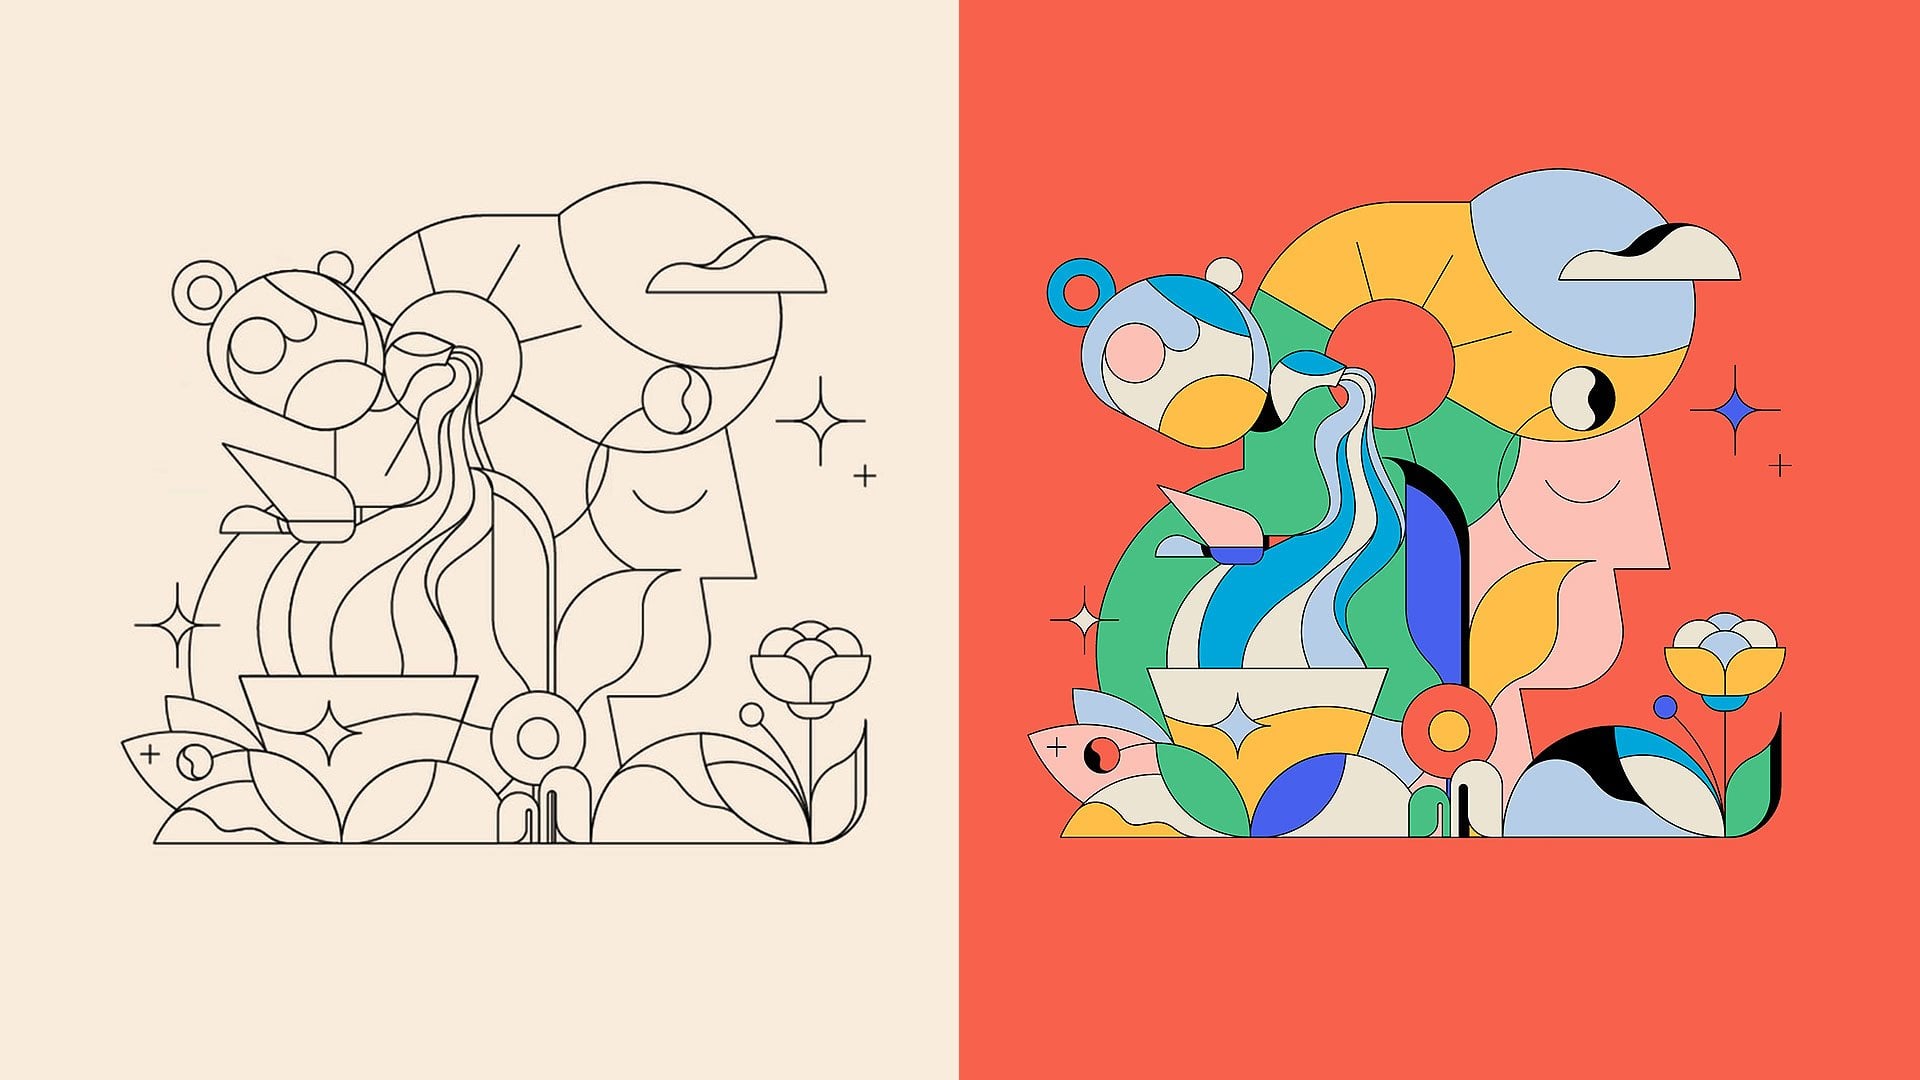
your drawing program. In the first step, we will draw the
composition of the animal. First, turn down the opacity
of the reference image. Then control and
two keys lock it. Then extract the outline
of the modeling. It doesn't need to
be too complicated. Simple drawing is enough. Okay after Plotin, let's
move it to the side. It's easy to refer to
when we're sketching. Okay, here we go. The eyes are the sole
of a living being. So I'll highlight
the characteristics of the dragonflies yes. The body is a tiny joint, and then there are the wins. I'm going to take a
more geometric feel. This long rectangle. Then feel in the outline. Perform geometric segmentation. Something like this
would be nice. Because it's symmetrical,
so we draw one side. After that, we'll just refer to the other
side of the join. You can play around with
what you want to divide. Joining out the characteristics
of the dragonfly. You can add this small
element to embellish it keeps it from
being too monotonous. The ragonfly tummy. I'd like to use this
circle to represent. A. Okay, so far all dragon fly is done. Let's move on to
the next animal. Now we'll draw the great heroin. Lower the pacity as
well. New layer. Giant herons are good
for growing round. The neck is a characteristic
of the great hero. This indented feeling. Let's characterize them so
that we can sketch them. Oh. Okay. First is the long point in males. That's one of its
distinctive features. Then there's the
curved indented neck. We're going to show it. I want to express
its body in curves. It's inspired by the neck. We can make the wins a more
complex. Make some cs. Then combine the lines. Because it has longer legs and the bottom will look empty, we can draw some
more water elements, all plant elements
for decoration. Okay, our giant herring is done. Let's move on to the next one. The next one is a
drawing of a butterfly. This one will be
relatively simple. So changes may be made. Still extracting the
composition graph. Okay, let's draw the big
wins of the butterfly first. I'd like to use
circles for the wins. This symmetry would
be. And then the body. A change Continuing
with circular cards. This will give a better
sense of symmetry because the butterfly's main
feature is its symmetry. Okay, this one's easier. The butterfly is ready. Let's move on to
the last figure. Finally, we'll draw the s. Still extracting
the composition. The triangles are
more distinctive. You can see that while joining. This shrimp is one
section at a time. The features are
more pronounced. When we sketch, it's best
to characterize it in this kind of section b
section way. First, the head. For the body group a couple
of circles together. To emphasize this section by section feature, and the tail. And then this feed, and then it's just
the line element, especially with some
whiskers on top. It can be exaggerated a bit. Our shrimp is now finished. In the next lesson, we'll draw our line
drawing from the sketch.
3. Linework Vectorize your sketches 1: Hello, everyone. Welcome
back to my class. We've already sketch to a
diagram from last class. Now, let's draw the lines. Let's start by taking the sketches we made
in the last lesson. Import it into a vector
joining program. Then lower its opacity by
about 30% and lock it, then start joining to keep
the geometric field stronger. I usually use mainly
the rectangle tool. The ellipse tool and the
pen tool to join the. The pen tool draws
in a straight line. Then draw the curve by
adjusting the rounded corners. Where there are rounded corners. This right angle can be drawn. This can be drawn by
dragging and the dot. Join the body next. The body is more circular. I'll use this ellipse tool. Let's start with a big circle. Adjust to the right size. Then rotate it, align the angle. Then use the Ss tool
to cut off access. Then extend it according
to the sketch. This kind of place can also be represented by joining
a right angle. Dog end drop to make rounded corners,
delete access points. And then the inside part. Same thing with the circle. Rotate and cut off the access. Aalign the points. Then
connect them together. Then draw the cut section here. I'll use the rectangle
to for the cut section. H. Use the rectangle tool to draw the main shapes. The internal divisions are
drawn with the pin tool. Straight lines are drawn
by dragging and dropping dots to reach curves. Same here. This way we can draw
more regular graph. Stronger geometric sense. There's another line
here connected adjusted. Rotate to the right angle. After shrinking, if the length is found to be insufficient. This can be done by
reducing the right angle. Adjust, and then continue to
set it to rounded corners. Same thing here back
to right angles. The shape produced in
this way is not easily deformed. A lining points. And then to draw the
line element here. Using the pen tool. Next, we'll draw the reps.
We have a trick here. First, use the pen tool to
draw few connecting lines. Then select the effect
Distort transform, effect. Then adjust the parameters. See the final result
in the preview. Selecting objects expanding. This will turn it into a line. Use the ser tool
to cut to access. Then use the pen
tool to reattach it. Drag and Drop to draw
rounded corners. The corrugated lines
are now drawn. You can add a few of
these elements as well. Finally, the two line elements. Still dot. And here's
the w two circles. As the final touch, our giant herring is, let's move on to
the next animal. Now let's draw the fly. Join directly on top of it. Because this figure
is symmetrical, so oraw one side first. And then when the time
comes Iojust copy it. Sell using the
rectangle tool to draw. Because dragon flies have a
strong sense of geometry. It's mainly the bonding
to to draw the outline. Use the ellipse tool
for the round part. Joining by controlling
rounded corners. Next is the internal
segmentation inside. Also using the rectangle tool. Adjusting rounded corners, and you get this
leaf like shape. Same thing here, and this square and then adjust
the diagonal rounding. This is the part where you
can draw straight line. This part can be rotated and copied and the other
side comes out. Now for the t. Here we'll
use the circle instead. Row one and then press CT and D. You can keep copying
at the same distance. And finally, it's. Let's
start with one side. Notice the poses Once you join it, just mil copy it. Move to the other side. The dragon fly is still
missing the final touch. The dragon fly is ready. Let's make some adjustments. Check what's there. Or maybe
it needs to be refined. Okay, our dragonfly is. Let's move on to
the next animal.
4. Linework Vectorize your sketches 2: Now, let's draw simp. Using mainly the ellipse
and rectangle chose. Owing the head first above
that is a small triangle. We'll just use the square and
drag the rounded corners. These are the same. Draw one and copy it. And then the e. Three circles here. Keep it parallel. Draw the cut part using
the rectangular tool. Enhancing the connectivity
between the bodies. Removing redundant lines. That's pretty march
it for the body. Next, we draw the
inverted triangles knees. Copy this directly from here. Then copy the other half. Then merge them together. And then the draw it like that. Here we draw it as a rectangle. Next is the feet. Let's continue with the pen. Drawing a straight line. Then the rounded corners. And finally, its whiskers, still using the pen tool to draw straight line. Make a loop. Adjusting its rounded corners. Adjust it a little more. And wheel down with the shrimp, and then look at the
over all effect. Next is the butterfly. Butterflies would
be relatively easy. Adjusting the opacity,
joining with the ellipse. Duplicate concentric
circles, shriirly inside. Make a cut inside after joining. Next, draw the body above
that is a semicircle. We'll use the ellipse to, and then we'll adjust the
rounded corners on the top. The bottom is also Oh. Here its tentacles. Still rounding the corners
by drawing straight lines. Then mirror copy. Then add a little more detail. It's possible to try a few different approaches
a little more often. There's also a cut
that can be made here. That's all there is to draw. In the next lesson, we're going to color then.
5. Final Coloring your graphics: Hello, everybody. Welcome back to my class. In the last lesson, we finished to join the lines. Then in this lesson,
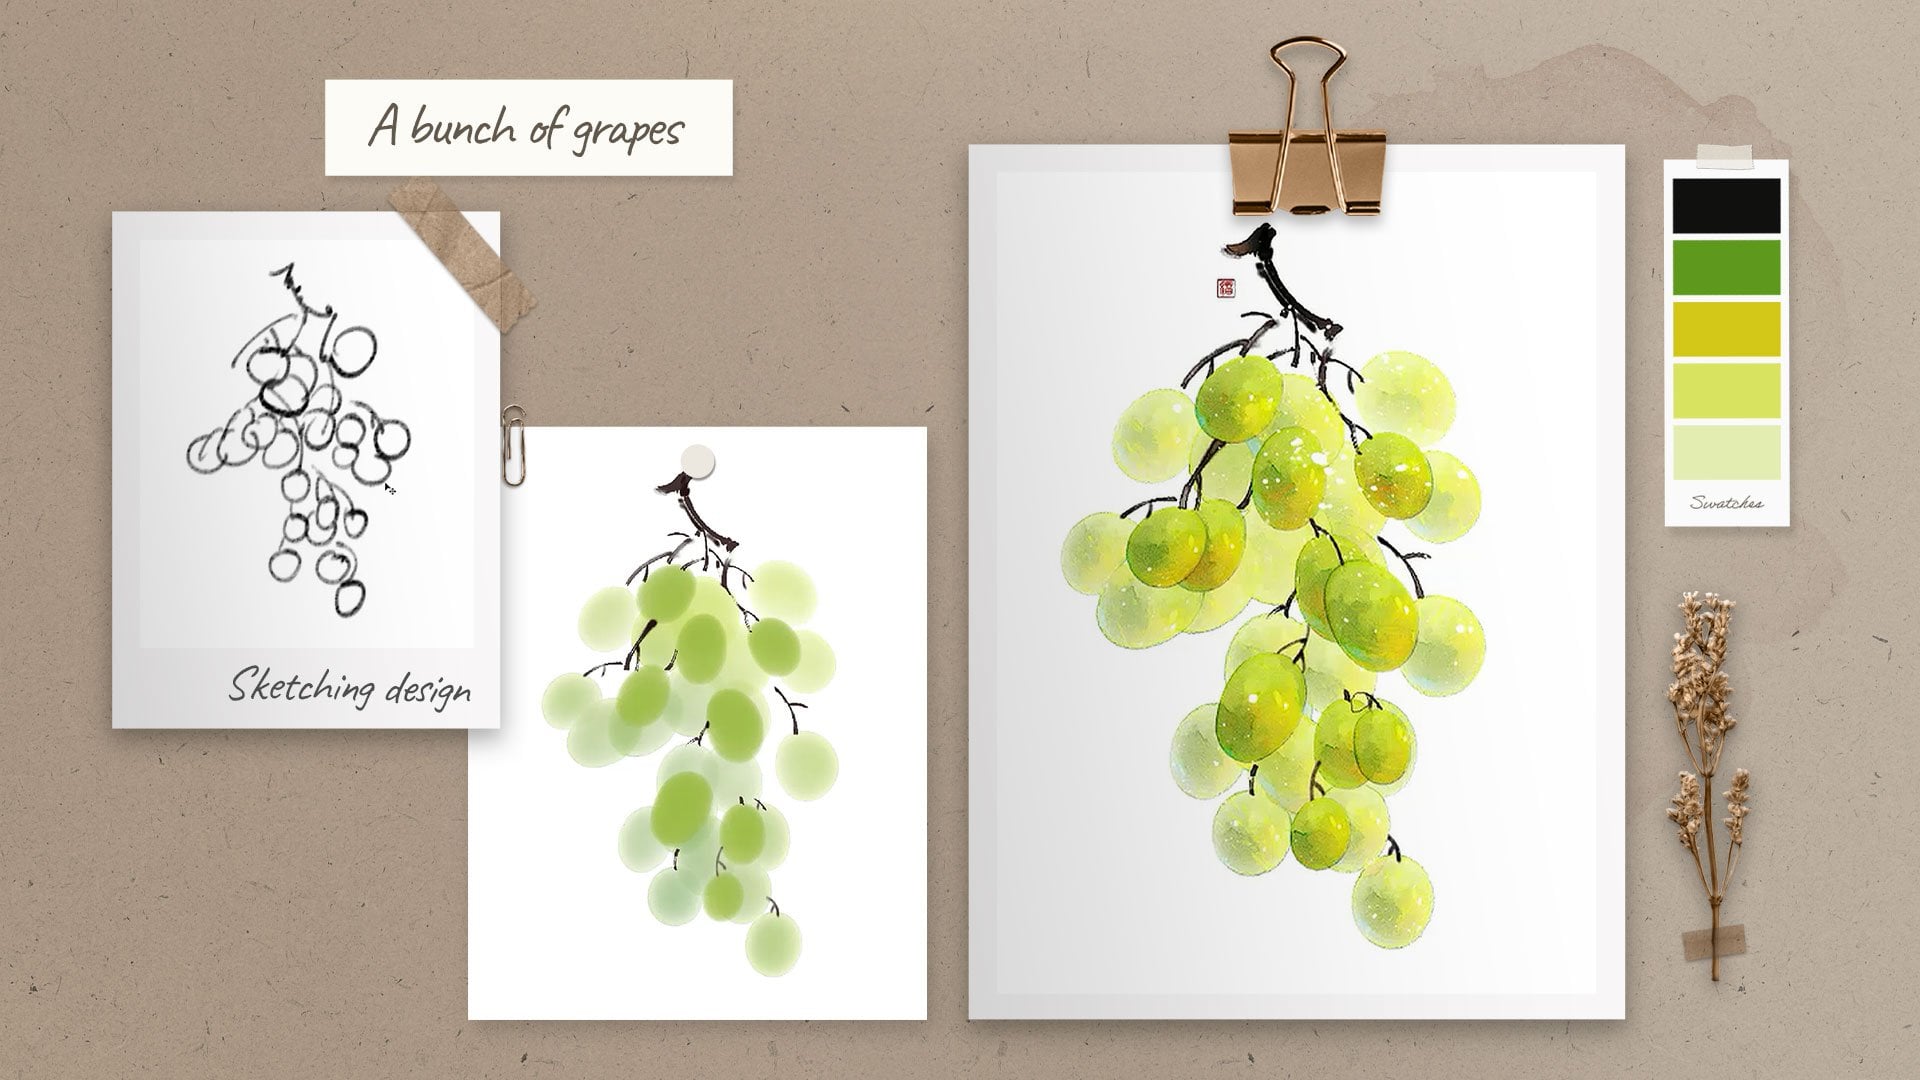
we'll color them. Here we've prepared the
color scheme in advance. After importing the lines, follow this color
scheme directly. You can use the dper tool. First, add the color
to the background. Next, color, yes. We can start by differentiating
it with different colors. First, match the
colors on one side. The other side can
be copied directly. Look. Could use a little tweaking. Try different color
schemes more often. Not too many colors because
the graphics are simpler. Two or three colors will do. You can add black and
white as a transition. Okay, the same color scheme
is used on the other side. The wins here have already
been painted well, and there are still
some small elements that need to be painted. We use black for the ice. Later touches like this. We can use a uniform color. Because the graph is smaller, it stands out more if
you use black color. Same with the body. Could do with a few changes. Okay, good. Let's continue coloring
the next animal. The next one is a butterfly. We'll use the same color
scheme for the butterfly. The background is still in red. Because the inside of the wings
has already been divided. So the upper and lower parts
are cut in different colors. Here to emphasize this outline. Black is used here. Yellow is used here. That's it. The feeling of
segmentation is reflected. Let's tweak it a little bit. It's the same here.
You can try more. Because the underside of the wins has already
been divided. So I'm going to keep
it the same as above. The transition in the
middle is in red. White is better. Next
up, the body parts. For the head, I'm going
to use this color. It could stand out, and then the texture inside. The tail Okay. Okay, the butterflies
are coordinated. Then we move onto color
matching the next animal. Then we move onto
the giant heron. This time I've switched to
a different color scheme. It's a bluish color. Let's start by color
in the background. First, the mouse. You can try more
different effects. Let's see which one fits better. Let's go with what feels right. Then it later. Because there are fewer colors. So no matter how you match
it, it won't be bad. It's not that easy
to make a mistake. So we can try a few more times. The overall color is darker, so I blue or black is good. Okay, our giant herring is done, let's move on to color
matching the next animal. Finally, we'll colorize the s. Still adding color
to the background. This color scheme uses the same blue tones
as the previous one. First, the head A. The use of colors
can be spaced out. Try a few more times. Because the graphs are simpler, there are also fewer colors. So you can try a few
more different schemes. The hierarchy is stronger here. We can space out the colors. Okay, so we are up to now, all the animals are
already colored. If one wants to learn
more about the other, you can check out
our homepage by.
 Xue Huajie