Transcripts
1. Consider Embroidery: [MUSIC] Hi, I'm Lilach Tzudkevich. I'm a textile artist
and a teacher. If you'd like to
dip your toes and start your first
steps in embroidery, then join me to a fun,
easy ocean-centered class. We are going to cover the
king and queen of stitches, the running stitch
and the back stitch, and produce beautiful
results to show off. This class is a key tool if you're considering
integrating hand stitches in your creative
projects like scrapbooks, art journals, and mixed media. Step into embroidery and make
it your own with the easy, achievable project and take some great tips to take along. Learn how to study, apply, and transform a visual to
an embroidery pattern. Get familiar with thread
types and needle types. Plan a color palette. Practice back stitch
and running stitch, and utilize them
to create texture and movement in your
embroidered projects. Anyone can embroider, let's make some waves. [MUSIC]
2. What Should You Gather?: [MUSIC] Before we
start a project, you first need to gather the materials you're
going to work with. This is a very simple,
and basically, you can find those materials in any craft shop or maybe you
already have them at home. These are the things
that we're going to need for the project. To begin with, you'll need
to print out the PDF files, the pattern, the color, and the movement charts
that are attached to this class info under
Project and Resources tab. Or you can sketch your
own pattern if you like. In the next class section, I will elaborate on creating
and applying your visual. In order to apply your visual, you'll need to have a
soft peak pencil and perhaps a carbon paper to trace the lines
on your material. You'll find detailed
explanations to that process in the next
class section as well. The best materials
to embroider on are even weave
materials like linen, cotton, and muslin. The more of a loose weave, the easier your needle will
pass through the material. Kitchen towels, for instance, are a great base materials. I'm using a light
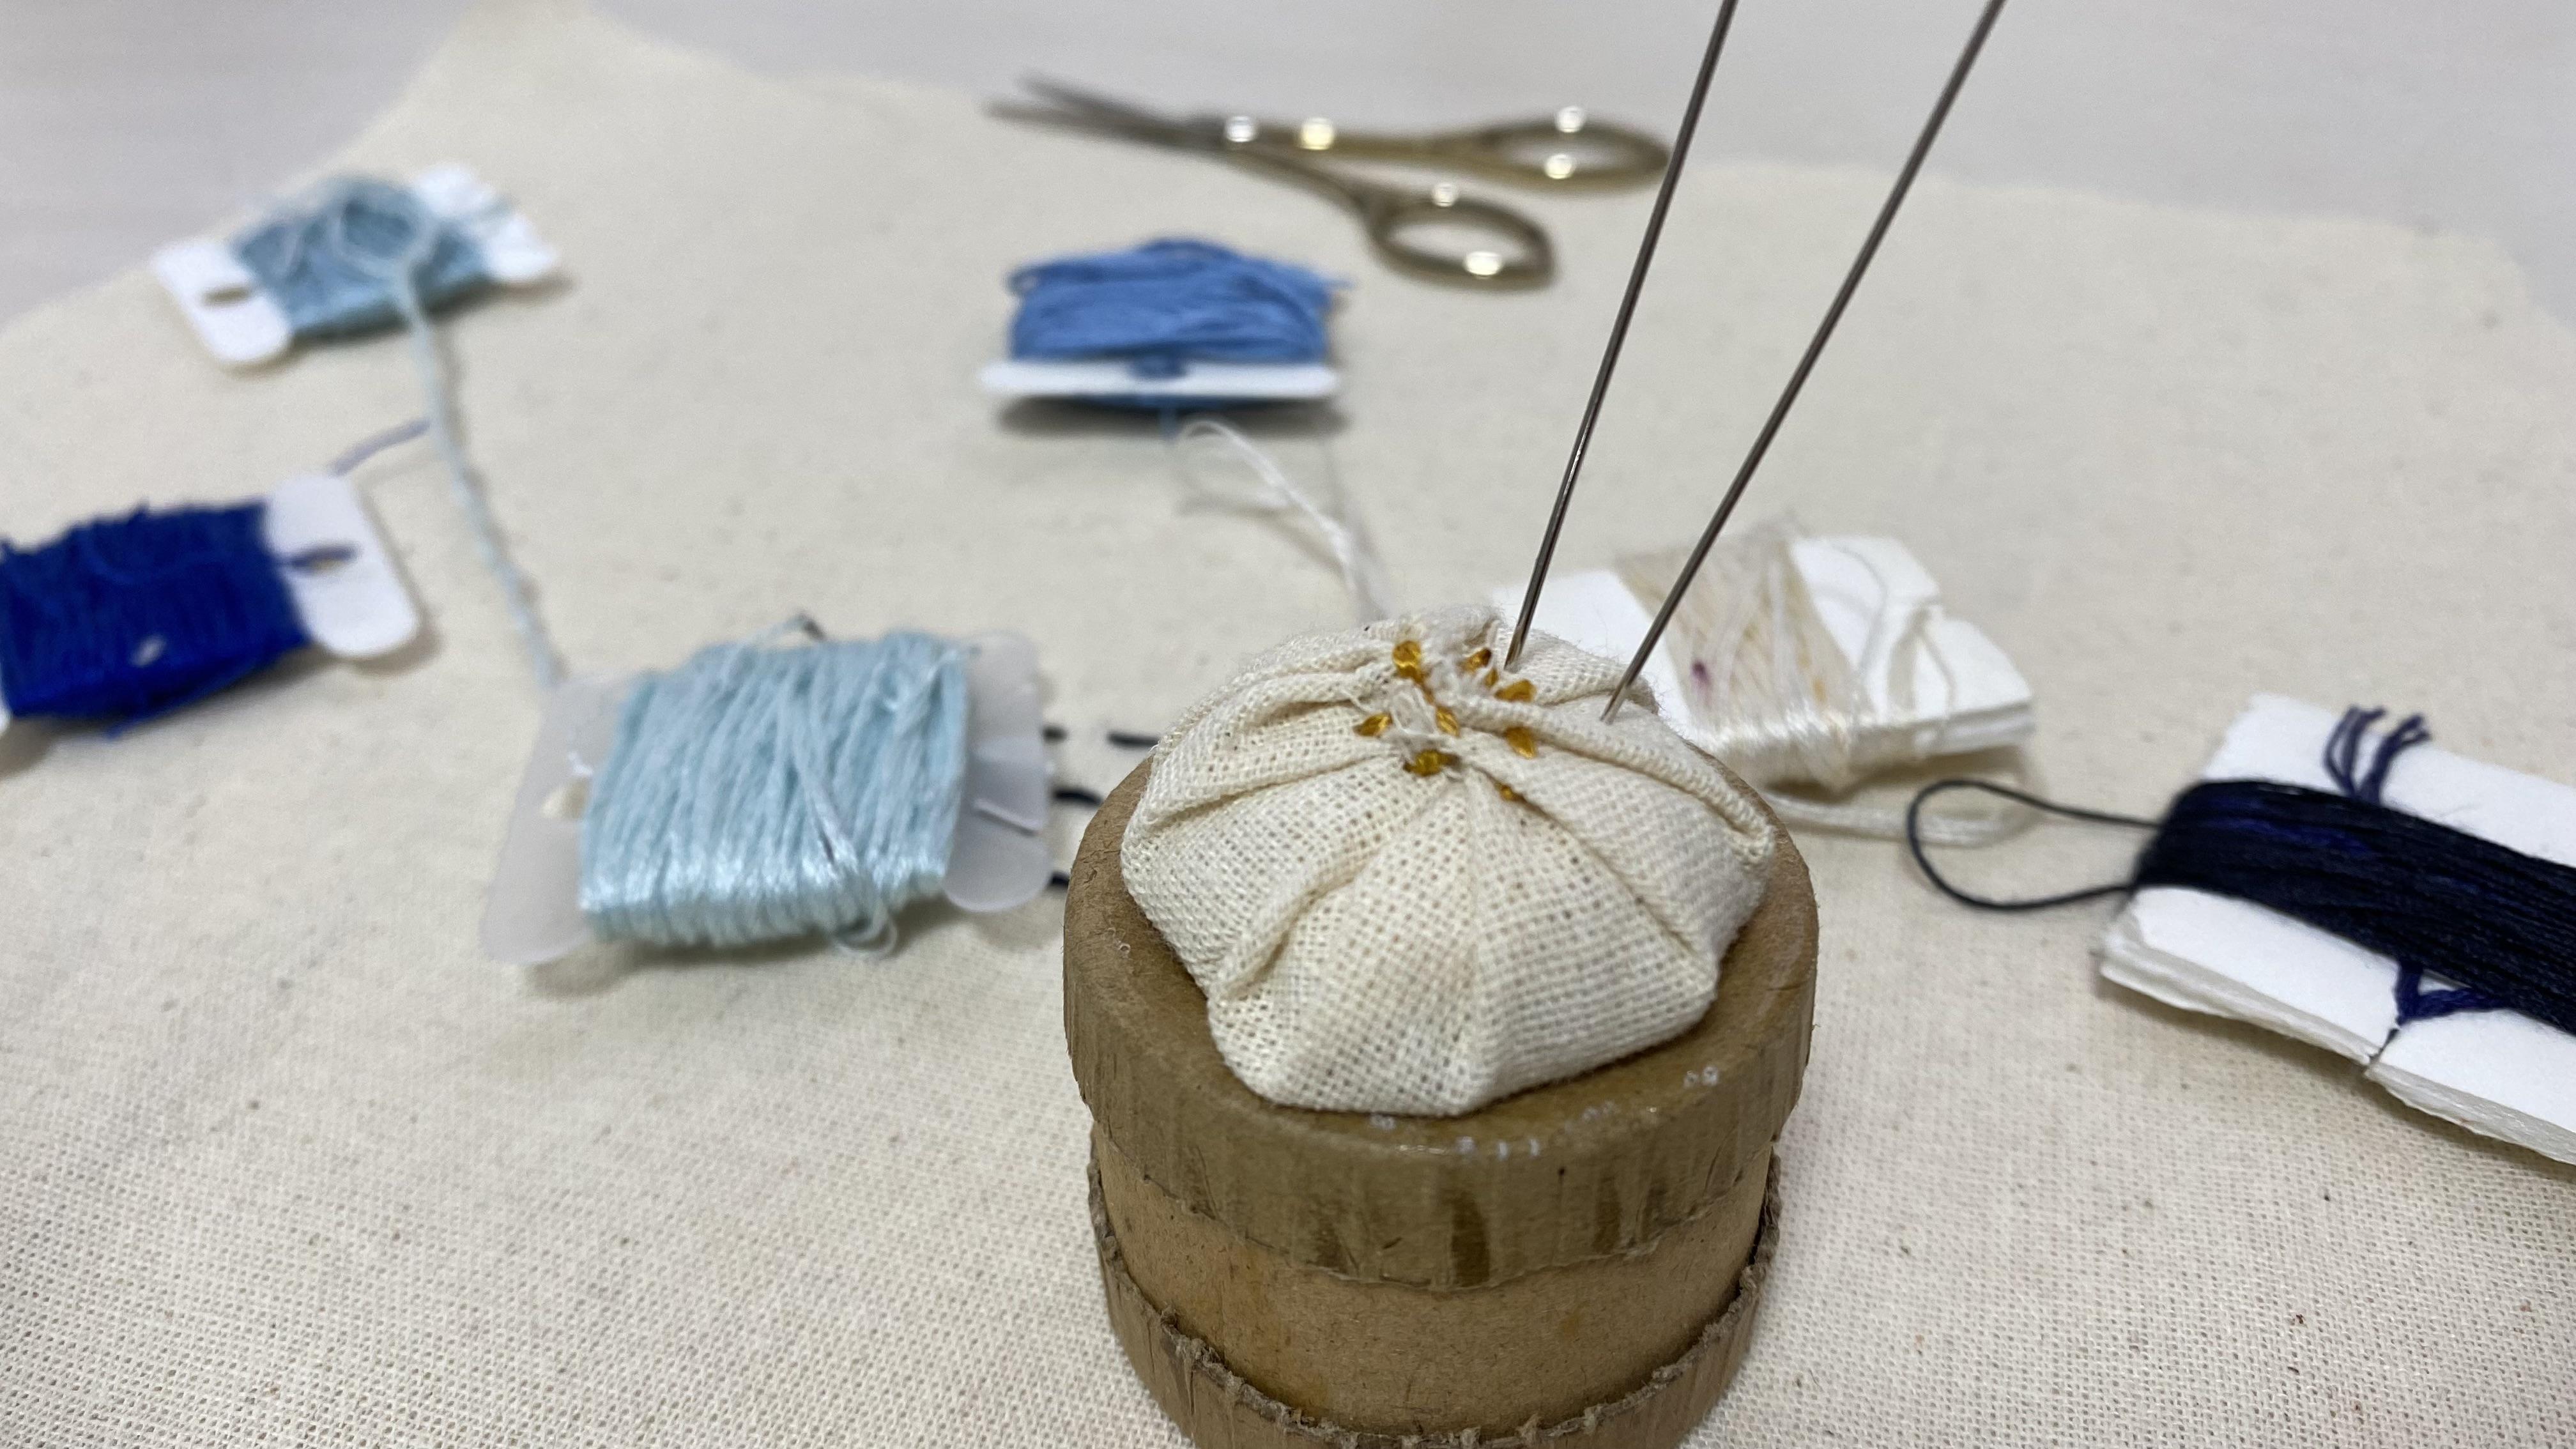
weighted muslin here. You'll need to have some
embroidery needles, preferably long and thin, between size 7-10 or any kind of embroidery
needle you have. You need to have embroidery
[NOISE] threads in the colors you like or
the colors I'm using, which are deep
royal, royal blue, corn flower blue, and ice
blue for your project. We'll also need a small
pair of scissors and wooden embroidery hoop if you want to frame your work in the hoop. Let's get started.
3. Creating $ Applying The Visual: [MUSIC]. Now that you've gathered
all the materials for your project, we're going to start
with the image. First of all, under this video, there's a tab called
Project and Resources. If you scroll down, you can find the PDF
pattern of the wave, the project we are working on printed out and have
it ready to go. Before I show you how to apply
the image on the material, I do want to talk about what
I do when I start a project. My preparation is first to research the visual
that I want to go into. I might read about it. I might look for images, just Google it or whatever, you go to your web browser, type the visual you are going
to work on and study it. Study how it looks like, what are the dominant
colors, shades, lights, what are the
main characteristics that make it unique, that makes it pop up? This observing and studying
will give you a lot of information about the
visual which you can later on apply it
into your project. I really recommend this step is really easy to do
and it will help you tremendously in every project that you are going to create, whether it's now or in the future to do a little
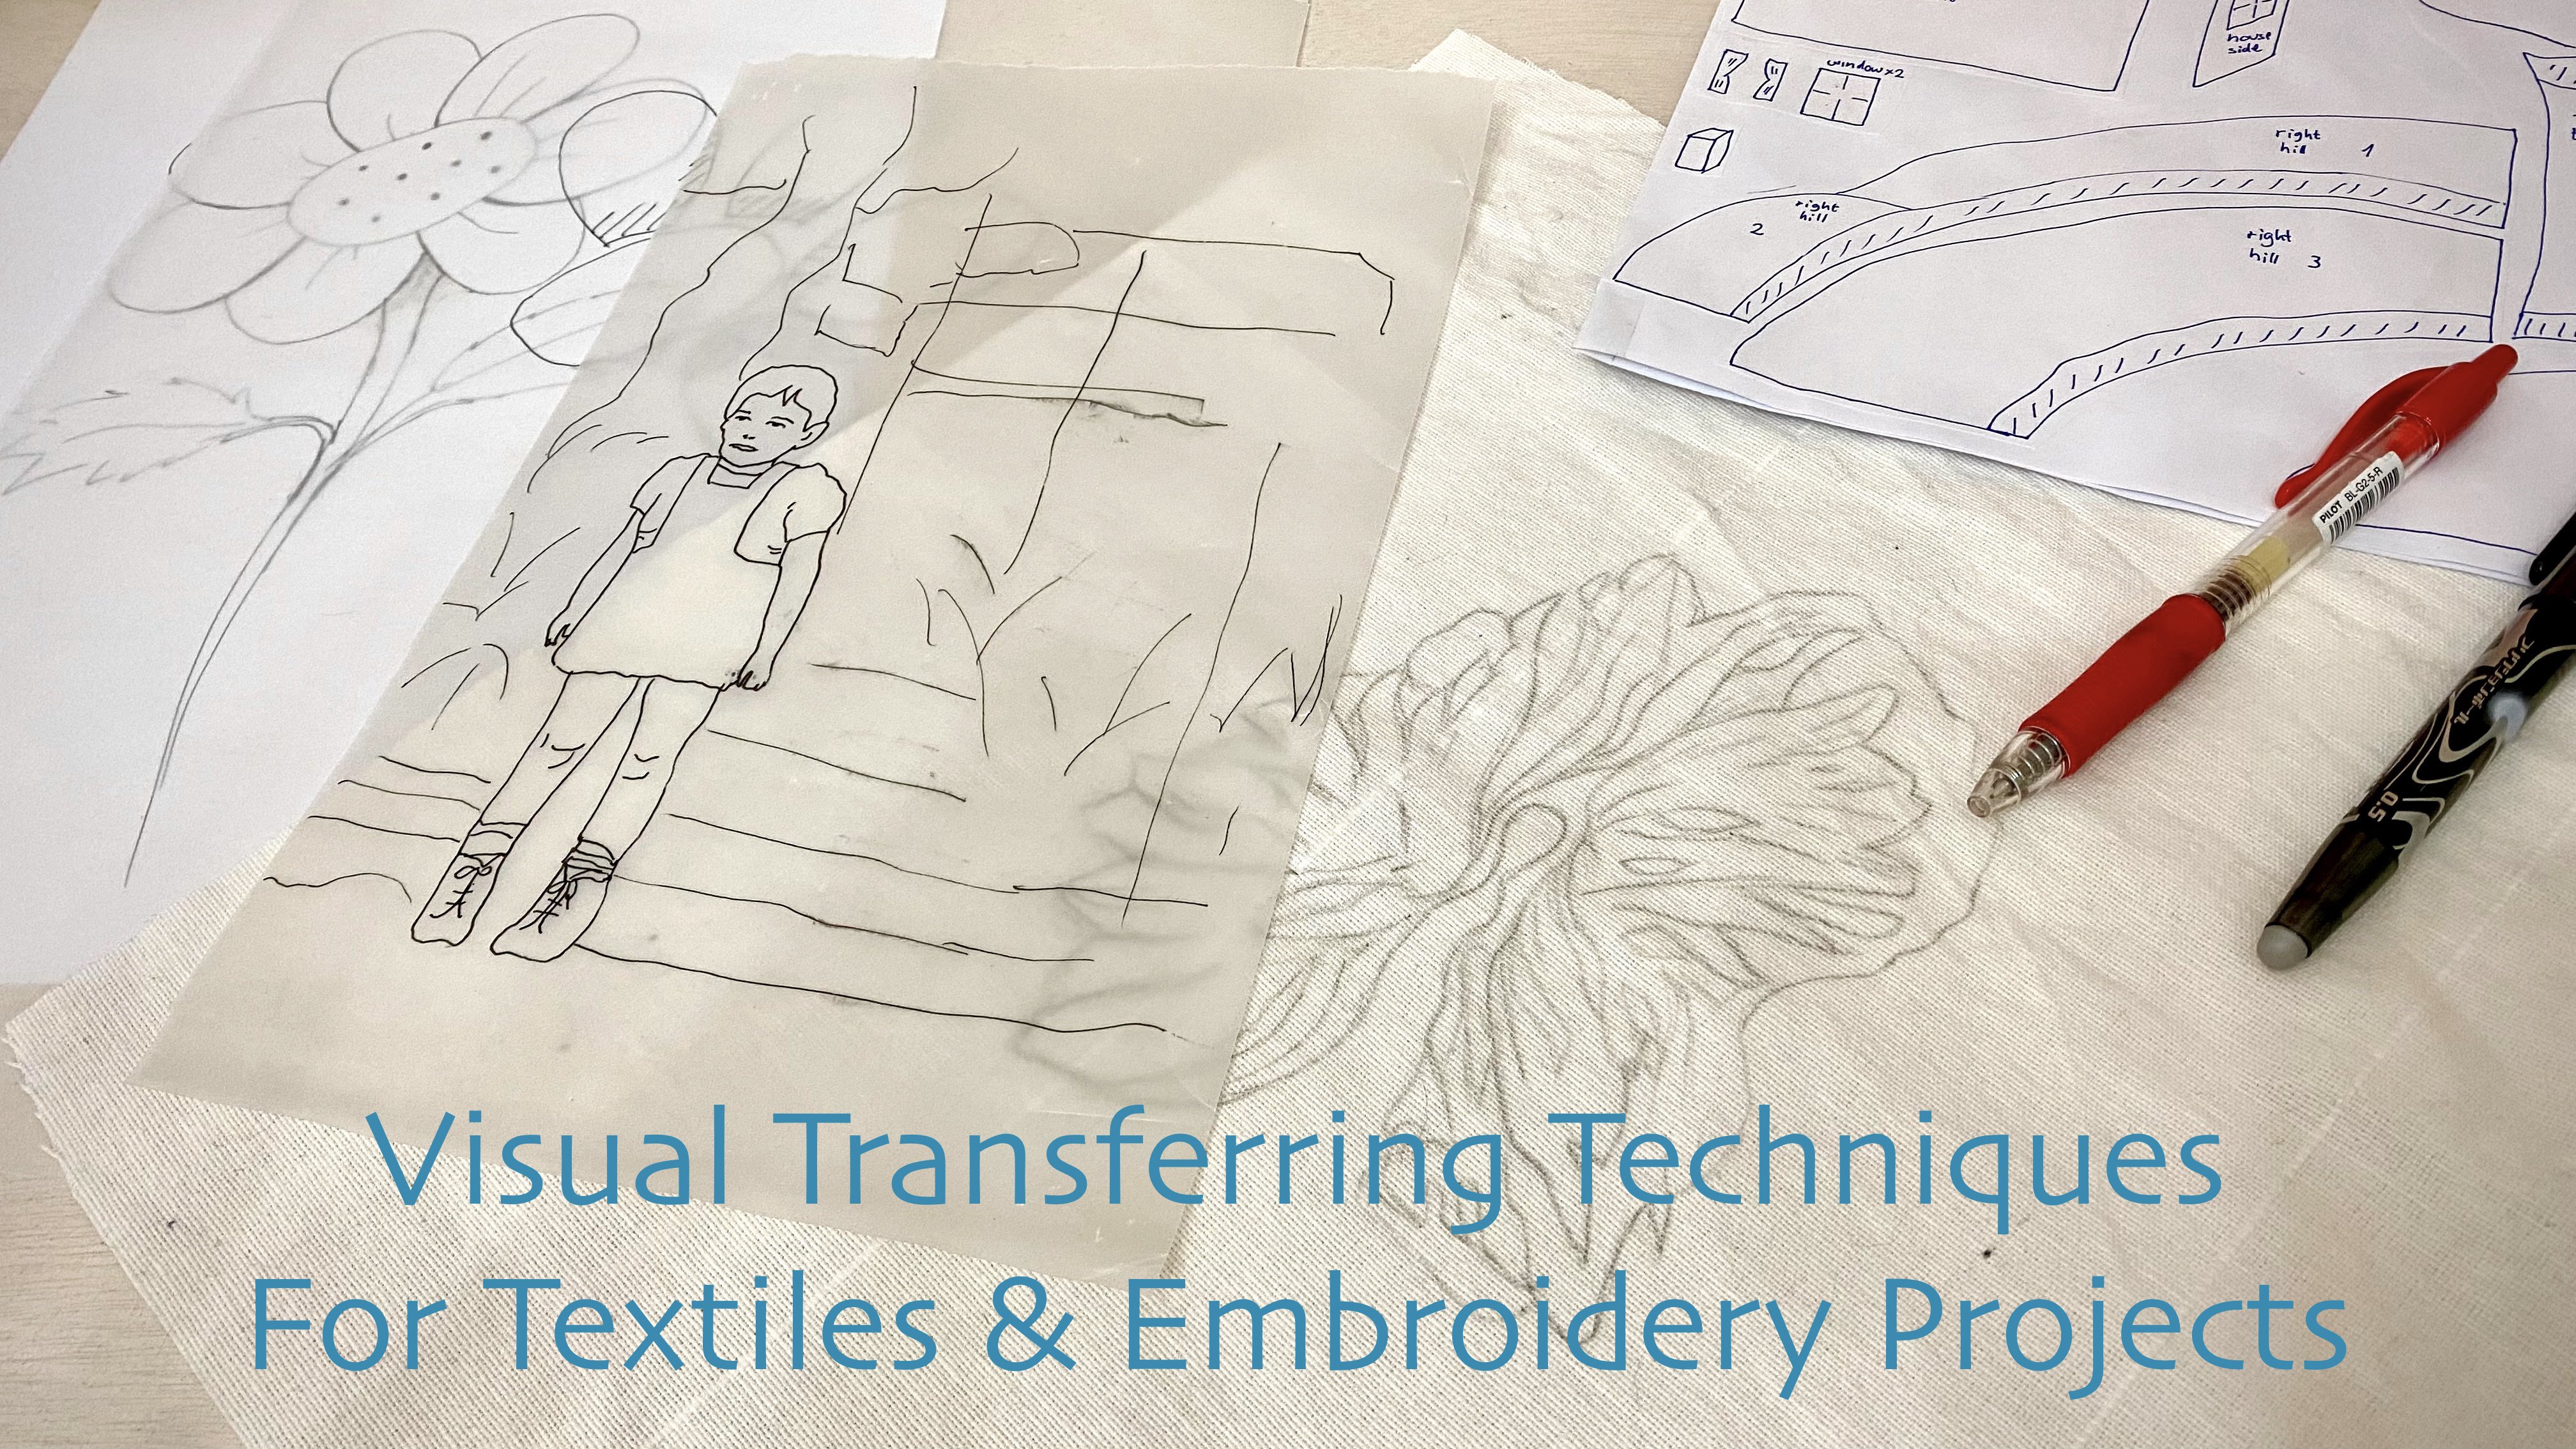
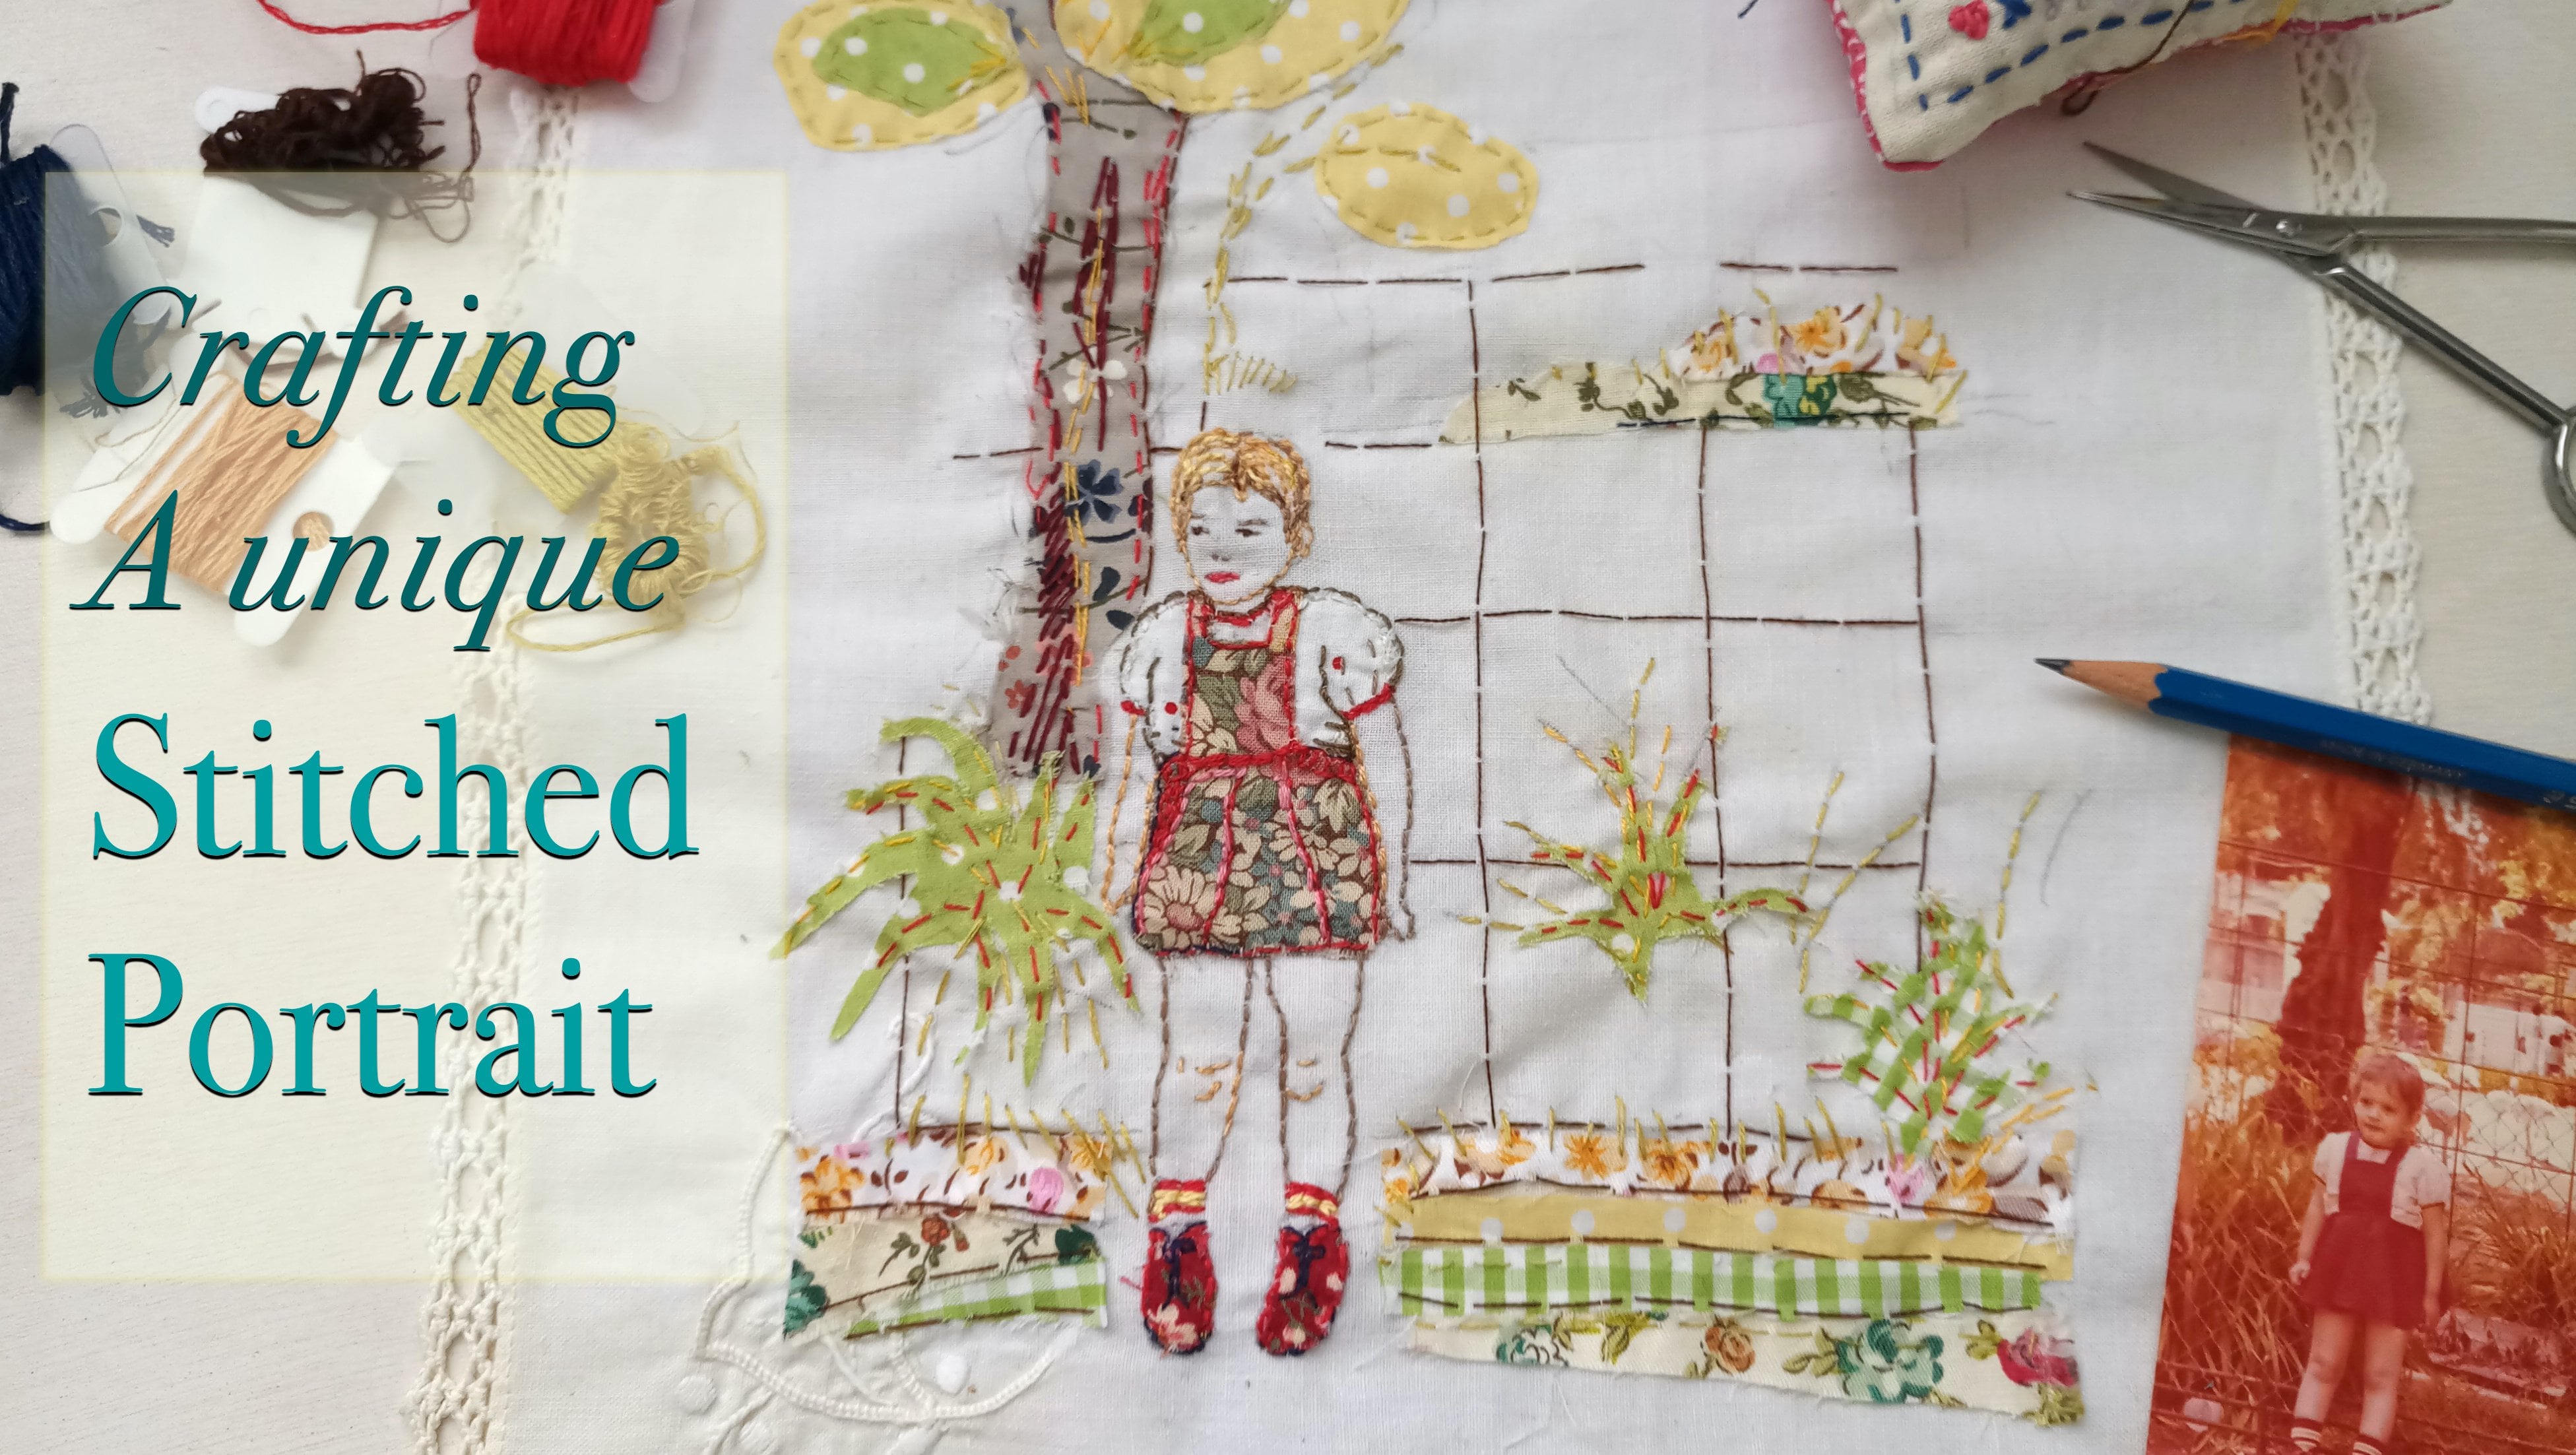
bit of visual research. If you are feeling
enthusiastic and you want to develop your own image
for this project, you may very well do so. You can watch my class
for image transferring techniques for textiles arts
and embroidery projects. You will benefit a lot from it, especially if you want to
develop your own image. When I'm done with the research
and study of the visual, I will sketch the image
I'm going to work with. I also framed the visual. Framing is not a must. Sometimes I like
working free with an unknown and but
framing or planning the size of your project before you start
embroidering can really help you define the start and end
point of your project. It gives you a certain
confident while you work. If drawing doesn't
come naturally to you, you can search for a line
drawn image online like so. After you choose the images, you will narrow the search by clicking on the tools option, which will enable you to search specifically for
line drawing images, which are easily
transferred later onto the material and you can print them out and use
that as a pattern. Once you're visual is
sketched and printed out, take time to observe
the movement. Those of you who will
use the pattern I've provided will find
the movement chart as well as the pattern. Try to trace the main
lines that makes your visual what it is
like I'm doing here. Those guidelines
will help you to know where to put your
creative emphasis. I emphasize the lines
on the sketch so that my stitches will follow the natural movement
of my visual. If I stitch following the
movement of the visual, as opposed to filling the
surface with stitches, I will naturally create
a movement within and by that bring out the
essence of it in my project. You'll see that in action in
the next steps of the class. For now, it's just important
to notice the difference. We're finally going to apply the visual on the material
of your choice. I'm using a simple
lightweight muslin, and the advantage of that is
because it's lightweight, it's thin enough so to
simply place on top of this sketch and retrace
the lines with a pencil. If your material is thick or you can't see the
lines underneath, you can use one of
the alternate options to retrace the image like so. You can use carbon
paper which will be placed between the
sketch in the material. You can use one of the light reflection methods
like using a window or a light pad behind
your sketch so that the light highlights the
lines underneath and so on. If you need to, or you want
to know more details and examples of how to transfer
your image to your material. You can watch my class, image transferring
techniques for textile art and
embroidery projects, which I have mentioned before. Now that you have the image
ready and you are ready to start embroidering then we're going to move on to the
next part of the class, which is embroidery one-on-one. In this part of the class, I'm going to explain everything that you need to know about needles and threads to start
an embroidered project. If you already have this basic information
you can skip that part. If you want to watch it anyway, then by all means. If you have any questions
about this part of the class about
the application of the image onto the material you can pop them in
the discussion area. All right, let's move on
to embroidery one-on-one.
4. Prelude To Embroidery: [MUSIC] In this part of the class I'm going to show you everything you need to know about hand embroidery, and I'm going to talk about needle types and thread types. These are actually the
basic materials and knowledge that you need to know before you start embroidering. A little note about thread
types and needle types, they can be a whole thing. My approach is I want
to get the job done. I want you to go into
the creative process, and therefore I'm just
going to show you the useful simple
information that is going to give you a
head start to embroidery. Let's go into it. Now let's start
with the needles. There are many needle
types depending on three key variables:
length of the needle, the width, and needle eyes size. Personally, I like working with long and thin needles
between size 7-10. The lower numbers
represent wider needles; thicker needles, and the higher numbers
are for thinner needles. Since I usually work with one or a maximum of two
strands of thread, this works well for me. If you like feeling
a wider needle in your hands or you're working
with a thicker thread, you'll need a needle that can
hold it in terms of width, eye size, and strength. So bear that in mind. Choosing or better approach
discovering which needle is the right embroidery
needle for you is a matter of personal
journey and preference. There is no right
and wrong here. If you are a beginner then it might be helpful for
you to start with the selection kit needles
so you can test them out and fill in your hands
which one works best for you. Take into account that discovering is an
ongoing process, [LAUGHTER] it takes
time and practice. Be patient with
yourself and work with your inner guidance to
what feels good to you. At the end of the
day all needles get the job done and they
are merely a tool. Now I'm going to
talk about threads. My approach to
threads is similar to needles in that sense
that they are a tool, and therefore they are too a subject of
personal preference. That said I'm going to
elaborate on different types, width, and uses, so you can make an
informative decision. The first thread I wanted to introduce to you is
the pearl cotton. When you purchase those, they look like a
ball of threads. Pearl cotton is made of
two strands that are twisted together and they're not supposed to be separated. It's quite thick, and
usually it's used for a cross stitch because it's
dominant and apparent. It's too thick for me, I usually don't work with it. The other very commonly
used embroidery thread is the embroidery floss which is made of six separate strands, which makes the [inaudible]. Usually you separate one, or two, or three strands, and work with them
but you can if you like work with full
volume of six strands. I don't do that personally. If you compare the width
then you can see that it's about half the
width of a pro cotton. If I take one strand from the embroidery floss and
I fold it in the middle, it's quite similar to the
volume you would get from the pearl cotton but it's
easier to thread on the needle. Now this may come
as a shock to you, but you can also work with
simple sewing machine threads. Yes, they are thin and
you will have to at least double them which means working with a double thread
but it's possible. Actually I do that
quite a lot in my project because I like
working with thin threads. Again, put the rules
as aside and work with your intuition and what you
like and feels good to you. If you have any questions
regarding needles and thread types you can pop
them in the Discussion area. I would like to shortly
relate to embroidery hoops, I like them very much. Usually I like them for display [LAUGHTER] more
than anything else. Many embroiders use
embroidery hoops to stabilize their material, their embroider in
the embroidery hoops. I really don't like
doing that myself. I like to have the
material free and soft, and to be able to
manipulate it around the needles and the
stitches that I'm creating. Personally I don't work
with embroidery hoop, but if it works for you
then by all means use it. That's my two points
about embroidery hoops. In the next part of the class, we're going to
start embroidering. We're going to start from
backstage which is a kindly little bit more
complicated than running stage, but they are both
simple, easy to learn. You'll get the hang of it really quickly and I want
to show you how I create lines and structure
emphasis with back stitch, and then we'll go into
running stitch which is the easier one that I'm going to show you a couple of
tricks about that as well. So back stitch, here we go.
5. Backstitch Inside Out : [MUSIC] Now we're going to start working
with backstitch. I'm going to start with
backstitch because we're going to
create the outlines of the shape of our
image and backstitch is great for that because it
creates a continuous line, which is what we want for
an outline of a shape. It emphasize the outline,
emphasize the structure, the shape of your
visual and this is why we're using it as an
outline and starting with that. Just before we go
into backstitch, I do want to talk
just a tiny bit about color palette
because planning your color palette for
the project is also an important aspect and it will help you to
do your project. Not just that but any
project that you do in the future if you plan
your color palette, you will have an easier life. I'll show you how to do that. Planning your color palette
can be easily achieved by laying out on the table the colors you are
considering to work with. You can see how well or
not they work together. Pre-deciding sometimes
feels limiting but in actual working with the predicted structure gives most crafters and artists
a sense of confidence. Knowing where you're planning
to go with your project is a reassuring feeling and especially if you're
lacking that confident, it will boost your creativity and your flow to get started. Remember how in the last step of the class I made the chart of the movement lines I'd like to emphasize in the embroidery. Now I'm going to put
my words into action. I'm going to start with the
first line I'm drawn into. This is the outline
of the inner wave. When I studied these
visual previously, I noticed how the energy
builds up under the wave. I felt the intensity and I
saw a strong line and shadow. I'm going to start embroidering
this force of energy with a strong line
using deep dark blue. Before I embroider, I tend to check how the
threaded color will fit by actually placing
it on my project. Seeing the thread in place
is always a good idea. There is one thing
to think about it and another to see it
in with your own eyes. If you're following my
thread and color chart, you might want to change
things around to fit your vision so this tape will
really help you with that. Now, as you can see
one thread is not going to live quite the
mark that I had in mind, so I'm going to use
a double thread. What I mean with a double
thread is that you take a needle and you thread one thread in the
needle and then you tie both ends together in
a knot at the end. This is a very
comfortable option especially for beginners. I work a lot with double thread because I like to have
a unified thread, it doesn't unravel and unthread
itself while I embroider. I do suggest to work with a double thread and now I
will show you how to do it. It's really quite simple. First you moisten and apply some pressure to flatten
the edge of the thread. Then you thread it through
the needles eyes and then you fold it in
the middle so you bring both ends together. You tie a knot by creating
a small loop around your finger and thread the end from one side to
the other like so. Then you pull to tighten. Now that our double
thread is ready, I'm going to start from
the back of the material so that the knot is hidden
underneath my project. I pass the needle through
the front and shortly after I pass it
back to the back. This will create a first stitch. You can make the stitch
as long as you want. It should be a length that
you feel comfortable with. Mine are about two
millimeters long. Now that you have
made a first stitch, keep on holding your
needle and pass to the front again and
this time you pass it one stitch length ahead so you have a
gap of one stitch. Then you turn the needle
backwards towards your first stitch
and pass the needle right at the end of
your last stitch. You're essentially
stitching backwards and this is why it's
called backstitch. While you hold the needle
under the material, you're pointing forward again to pass it again to the front one stitch length ahead of the last stitch and you are ready for your
next backstitch. Repeat this manner
for the rest of your contour or as
long as you want, it won't take long until
you get an accurate. At the rest of this contour, I wonder the less heavy
presence of color and thread, so I decided to cut down the width and work
just with one thread. It's also a great opportunity to demonstrate how it is to
work with a single thread. Before I move on to
the single thread, I'm going to lock this read in a similar way to the way I
locked it in the beginning. This method suits whenever
your thread is about to end or you're changing colors
or whatever the reason is. You're going to lock the end of the thread at the
back of the fabric. Now you don't want to wait until it's really at the
end of the thread or this step will be
inconvenient to impossible. [LAUGHTER] This
is how you do it. Pass in your needle to the back, thread or catch just
a few fibers from your material on the needle
and create a loop of thread. Pass the needle through this loop to create a
small knot and pull, then you can cut the rest of the thread or just
leave it to be. Now I'm going to demonstrate working with a single thread. Pass a thread, thread the needle's eye but this time don't bring
both ends together, just tie a small not at one end. The long part of the
thread is the one I'm going to
embroider with while the shorter part of
the thread is like a support handle to keep
the thread from unraveling. This method can also
work with more than a singular thread but for now
let's just keep it simple. For those of you who are
watching my hands like a hawk, you'll notice I'm
demonstrating here another method of time
the end of the thread. With this method you
loop the thread around your finger and then
twist and slide the loop to the
end of your finger and then pull that twisted
threat to the end. Magically it turns
into a note each time. You'll find out which
method works for you best by trying them
out and practicing. Now notice that when
I'm working with a singular thread or a group of threads with an open tail, I always tighten my
little finger on the short tail to secure
the ends from unraveling, don't worry if you
forget this little bit, a few trials and errors
where the thread slips away from the needle will
get you into the form. Few words about
intentions in details. I started my line with
a thicker thread and more condensed stitch to give it the movement and the
structure a boost. I then reduce thickness
of thread and later on also made some
small gaps between the stitches towards the
end of the line to air it out because the edge is more gentle in acceptance and weight. I use the stitches
and threads to turn a story to accommodate a look
and feel I want to convey. At this point it's also worth mentioning
to keep your original visual as an inspiration in arms reach while you
embroider your project, it will help you to
structure it in many ways. I'm going to construct the
outer outline of my wave. I plan the threads I am going to incorporate by placing them on the visual and feeling what I like and so is my vision. Then I will repeat the
backstitch outline. We're changing intensity
of colors from dark to light and thickness of threat from thicker to thinner. I started out the outline with the same dark blue
thread I used on the inner outline to have symmetry which I
am very fond of. Now I'm switching to
embroidery floss. As I mentioned earlier in the class with embroidery floss, you separate the
[inaudible] first and work with one or two
threads usually. Since I have a vast
collection of threads by now, I change my thread types
during my projects to accommodate whatever
creative we may have, whether it's a color, width or even a certain feel. But if I want to maintain a unify width in the
name of symmetry, I will work with a singular or double or even triple thread to do just that. If you're a beginner or you got all your threads
from one type then measuring and manipulating the threads to unify the
width will not be needed. But do remember, you can and I invite you to experiment with different
types of threads, width or thread counts to get different and
exciting outcomes. On the next part of the class, I am going to demonstrate how
I work with running stitch. But much more than
the technique, I want to show you what you can do with running stitch because it's such a simple
and versatile stitch. You can create a pattern, you can create texture, you can create depth, you can emphasize the
structure and do movement. You can add colors. The possibilities are endless. Let's move on into
running stitch and see how we can incorporate
it in our project.
6. Running Stitch Inside Out: This is the part where we
talk about Running Stitch and far more than just
talking [LAUGHTER]. Running titch is the most basic, simple, easiest stitch to use. If you ever stitched or
made any alterations, the chances are you have
used running stitch. I love running stitch. I use it a lot in my project whenever I want to
create a texture, add color, cast a shadow
a line or a pattern. Let's review the ways to stitch and approach
running stitch. At this point, you may want to use a piece of cloth
for practicing. There are a few ways to
work with running stitch. You can start by stitching
one stage at a time, which means you pass
the needle ones from the back of your
material to the front, and then separately from the front to the
back repeatedly. This method has
its own downsides, especially if you're not used to embroidery and so where you land your next stitch is a bit of a guessing
trial and error. On the other hand,
some people find confident in small steps
and that's also okay. If however you are going to use an embroidery hoop to
stabilize your project, then you'll have to
separate your steps like so as the embroidery hoop limits your hand movement
and the ability to manipulate the needle as we
will do in the next option. If you want to stitch one by one stitch with embroidery hoop, you either turn it from one side to the other or what
some embroiders and crafters do is that they hold the embroidery hoop
in one hand and guides the needle from
downwards towards up, like so. But again, this is a
trial and error and it's pretty difficult to
nail it to the spot. If your material is not mounted then you can slightly
manipulate it around the needle and unify few motions in one by
passing the needle to the back and in the same motion point it back to the front
and pull through. This option is both time
and energy efficient, keeping your hands and eyes
on the front of the project. You can also have a
better control and precision if you like over
where your next stage will be. The third option which I
am very fond of is a step up in time and effort and each to stack a few
stitches at the time. Not only it's super-easy, but it can also be super fast once you get
the hang of it. To stack a few
stitches at a time, I manipulate a
fabric gently with my hands to go under the needle, which makes the
stitch even quicker. You can quickly
create a texture or color or a sense of movement
with running stitch. If this is too much
for you or you feel better with a
step-by-step options, then always trust
your intuition and work in the way you
are most comfortable. Now let's apply the running
stitch in our project. I am using running
stitch here to emphasize the
movement of the wave by repeating the
main movement lines with added color and texture. I always feel that
this stitch is like an energy mark of movement
and I love that about it. Now, as you can see, I like stacking up the
stitches on the needle. What I'm doing is basically
repeating the same motion and stitch and using
different colors to add a sense of
light and depth. Just like I would if
I would let's say, crayon this wave on a paper. This is my interpretation
of the wave. Of course, your wave
can be lighter, darker, have different colors or be filled with stitches
in a different way. Your wave is yours to create, I'm just showing you
the possibilities. A helpful way to get
a grip is to plan your stitches in
areas of color by marking the surface
with a pencil and then filling them up with
stitches as I've done here. Notice that I am
grading the transition from dark to light with color, but also where each
color begins and ends. It's a more of a greater
transition which creates a softer more
organic look by the end. This class is nearly at
the end of it and this is my minimalist wave
where I really tried to show you how to emphasize the movement
with stitches. You can make your
wave full of color or intensity or
leave it minimalist, whatever works for you and reflect what you want to convey.
7. Recap & Conclusions: [MUSIC] Let's recap this class. We've covered the
most basic stitches, the running stitch
and the backstitch and how to apply
them and how to use them to emphasize shape and
movement in your projects. You have learned how to
create a pattern for your visual and how to create
movement in stitches. The one thing that I do
want you to take with you, the most important thing
is the joy of embroidery. To create something with your
own hands is soothing for the heart and it opens
up your inner joy. Embroidery is a great
tool in addition to any creative project
like scrapbooks, mixed media, paintings,
textile art. Set the rules aside and
let your creativity shine. If you like this class, then feel free to pop into my other classes revolving around textile art
and creative sewing. Any questions you might have, you can pop them in
the discussion area. Also, feel free to follow
me here on Skillshare and get notified when my new
classes are coming live. You can also follow
me on Instagram. It's under my name
Lilach Tzudkevich. Until the next class, See you. Bye-bye. [MUSIC]
 Lilach Tzudkevich, Textile artist