Transcripts
1. Introduction to Adobe Illustrator Advance: You're going to have the
basics of Adobe Illustrator, but still feel confused by all the options and tools in it. If your answer is yes, this Illustrator advanced
course is for you. Hi guys. My name is tell HA, and I'm an Adobe
Illustrator expert. So this course is for
all those people who already have the basic
knowledge of Adobe Illustrator. But hopefully by the
end of this course, you will be able to put
it in your resume a, as an illustrator expert. The goal of this
course is to help you overcome the fear of
using Illustrator, make a workflow much
faster and teach you all those advanced tricks
and techniques which the experts used to make
amazing art in Illustrator, we will start off
by learning about advanced ways of using
anchor points and paths. Then we will learn about
strokes and fills, make this layer text effect. And just also this paragraph, you will also learn about
advanced techniques later two shapes learn
Pathfinder in detail, warp, textural, anything,
make digital line art. And finally how to
make an enum possible. So cool. You will also learn about
advanced topography, how to manage fonts
using a font manager, some really nice tax effects and how to protect
into any shape. You will learn about blend and all the amazing things
you can make with it. And you're getting this
beautiful gradient, flower and fire blend. There are also
sections about colors, how to make patterns
and custom brushes. And finally, we are going to end with some advanced
tips and tricks which don't fall into any specific section but
are really important. And I forgot to
mention there are multiple projects for every
section in this course. So dead who weren't just
watch me make cool stuff, but also make it yourself. And if you get stuck at anything at any point during the course, you can post all of your
questions and designs in our community where I will post need apply to all
of your questions. So what are you waiting for
joining the course now? And I can't wait
to see you become an illustrator, read monster.
2. Section 1 - Achors & Paths: Guys, welcome to section 1. And in this section we are going to learn all about anchor points and paths. So basically we are going to learn how to add or delete anchor points, how to manipulate them, how to repair it paths as well. We are also going to learn about the scissors tool and the knife tool. We are going to learn about rounded corners that how can you round corners in Illustrator? And some other extra options obviously as well. We are going to use these horrible sketches which I made. And we are going to learn the curvature tool and the Pen tool using this. And finally, we are going to learn how to clean up your anchor points and paths and also how to basically smooth your images in Illustrator. So this is going to be a really exciting is simple jet two really important section. And I hope to see you in the section womb.
3. Add & Remove Anchor Points: Hi guys, welcome to the official first class of the course. And in this class we are going to learn about anchor points. So yeah, anchor points are very simple and yet very complicated. Because there are a lot of people who make designs on Illustrator, but not truly understand the whole concept of anchor points and the different tools which you can use to manipulate them, add them, and remove them. So yeah, in this class, in this very simple class, basically we are going to learn about anchor points. I have a couple of shifts over here. I drew them on purpose ordered, and basically we could work on them. So let's start with this square over here. So let me zoom in over here. So you can see, whenever you select a shape, you see a couple of points over here. So you can see this point and this point over here. So how can you add anchor points and move them? So let's just say I select this. And also you need to learn about the direct selection tool and the selection tool. So what is the difference between the selection tool and the Direct Selection Tool? And let's cover this in the tutorial as well. So if we let that reflection simple selection tool, and there's also a difference. If you click on this, this is black. If I click on this, this is white. So remember that the direct selection tool is white. So if I select the selection tool and if I click over here, you will see that it is giving me the option to simply make it bigger or smaller. Or if I click on any of the lines, if I click on the path, it will let me move. And if I click on the Direct Selection Tool, you will see that it is letting select the different points basically. So if I click over here, it will let me select a point and I can manipulate it. Okay, so I added the anchor points over here before. So let me delete this shape and let's make the shift from the start. There won't be any extra anchor points. And as you know, if you want to make the Sherpa in proper promote proper proportion, simply press Shift. I don't know why I'm, I'm mumbling. Okay, so I will click this. You can see if I click on the Direct Selection tool, it is not showing those extra anchor points. So like I was telling you before, if we click on this point, you can move it like this. And similarly over here. And what if I want to add an anchor point unless just remove an anchor point. So if I click over here, and if I click on Delete Anchor Point, so if I hover over this, it will let me delete it. So if I click on this, you will see that it completely removed the whole anchor point. And now it has connected this anchor point to this anchor point. Get it. But let's just say I want to cut out a chunk from over here, not the whole thing. So what I will have to do is I will have to first put in an anchor point. So let me come over here, click on Add Anchor Point tool. So if you click on the Pen tool over here, there is this Add Anchor Point tool, delete anchor point tool, and then anchor point tool. We will cover this as well. So let's click on Add Anchor Point tool. And let's add an anchor point anywhere you want. If you hover over any of the lines, you will see that there is this plus icon. And if I click on this, anchor point has been added over here. Similarly, I can add an anchor point over here. So northern, I will select this and then select the direct selection tool. You will see that I have two extra anchor points over here. Let me zoom in a little more. So you can see I have this anchor point and similarly this anchor point. So now if I click on this anchor point, and if I press Delete on the keyboard. So you can see it didn't connect this line to this line. It's simply the move this section over here. And if I hadn't added this anchor point, it would have cut out the whole chunk from over here. Okay, So let's just say I add another anchor point over here, like this. And now if I select all of this, let the reflection tool click over here and now press the Delete key. You will see that it didn't remove this whole thing, it only remove this part. Similarly over here, I can select this anchor point plus delete key, and it removed this part. And also, you can not only just select an anchor point with the reflection tool, you can select the whole line. So let's just say I want to delete this line over here. So I would click over here like this, make a box and northern I will press Delete key on the keyboard. You will see that the line between these two anchor points and has been removed. Similarly, I can come over here, select this line. Whenever press Delete on the keyboard, you will see that it removed the line between these two anchor points. So I guess you would have understand the concept of anchor points. Let me come over here and select this shape. And let's just say I want to remove simply disjunct from over here. Okay? So I will select the direct selection tool. And if I select this, I am selecting this anchor point. So I will press delete key and it will. Lead the whole thing. Similarly, I can select the line over here and I will press Delete key. So you see the difference. When you were selected anchor point, it will remove the whole thing. But if you select the line over here, for example, over here, and then press Delete key on the keyboard. It will remove dead chunk only. I know this class is a little boring, but these are the things which are extremely essential for you to become pro in Illustrator. Let's come to this squiggly line over here. And let's click on direct selection tool. Like I said, you can select on a point, click on a point and you can move it like this, okay? And similarly you can delete it. So if I click on read over here, it will move the whole thing because this is the only anchor point during this anchor point and this one. But let's just say I want to remove simply this line over here. So I will select the direct selection tool, select this line, and then simply press the Delete key on the keyboard and the line is gone. So how simple, Who was it? And let's cover a little bit about the anchor point tool as well. So let's just see if I select all of this, select the direct selection tool and click on this anchor point. So you will see that I have this handlebar over here. And if I click on it, I can move it. But if I click over here, I can also move this. But what if I want to manipulate this? So I will come over here, click on the anchor point tool. So you will see that I have a different kind of anchor point now. So now I can play around with the handles over here. You can see that I can basically create new handles and play around with them like this. And there is another way to access this. For example, you have the direct selection Selection Tool or the reflection tool. You can come over here first command to get this direct selection tool. And you can press Command Shift, sorry, Shift C, sorry. So you can press Shift C to get the anchor point tool. But the most commonly used thing is they're due, are working like this. And let's just say I want to add an anchor point over here. I will press Control or Command and click on this anchor point. I will get the handlebars as well. So no, I can basically move this like this and also adjust the handlebars. So yeah, this was very simple, but very important tutorial because I know there are a lot of illustrators, people who make illustrations basically. And they don't even know the basics of anchor points and paths and all that stuff. So, yeah, this was a very simple tutorial. And in the next class, I guess we are going to learn about parts. I don't really remember, but yeah, I hope you guys like this and see you guys in the next class.
4. Scissors Vs Knife Tool: Hi guys, welcome to another tutorial. And today we are going to learn about the scissors tool and the knife tool. Okay, so let me tell you this, a throne that these two tools are not used very much in Illustrator, like a lot of people don't use it. But I personally think that they are useful and that is why I'm going to teach them to you guys. Okay. So, uh, where is the scissors and knife tool? Did I say knife tool before? I don't remember. Okay. So I guess if you hover over any of these, okay, So over here, so under Razor Tool, if you right-click over here on the razor tool, you will get access to the scissors tool and the knife tool. So let's start with the knife tool. So basically, let me click on this again. So basically I have this shape over here are simple shape basically. And if I click on the knife tool, so it lets you cut off pieces freehand, basically in a freehand way. So I can click over here and make a line like this. And you can see that this part has been cut off. Simple. You can even little press Control or Command Z. Let me select this again. Click on the knife tool. You can make squiggly lines like this. And let me show you the result. So let's do it like this. So basically the knife tool has cut the whole thing into chunks. So you can see that I have the simple chunks over here. And if you are into making abstract designs and ordered stuff, you can basically use the knife tool to make really cool designs and all. But again, not a very popular tool. Some people use it, some don't. But yeah, it can totally come in handy for you guys. So the next tool is thus to the stool. So these are one of those tools which people just click on once and click on the screen and get this error in there. Simply leave it because they don't understand the concept behind it. Okay, So this is, this tool is basically some word like adding and deleting anchor points at the same time. So let me show you if I click over here and if I click on the scissors tool, if I zoom in over here. So if I click anywhere apart from an anchor point, it will give me this error. So I will have to click on this anchor point. So you will see that some part of this heritage has been removed. And now if I try to remove this, it, it, it hasn't been removed yet, but this anchor point is removed. So I can click on scissors tool again and maybe click on this anchor point. And now you will see that this part has been cut off. Simple. Let me show you another simple example. Let me move this to the side, and let's create a circle over here. So let's just say I have this circle over here. And I have added some anchor points over here like this and this. So what I can do is I can click on all of this slug, the scissors tool, and I can click on this. And this. And you can see that this is not part of this now. So I can click on this and move it to the side. Simple. So, yeah, a very counter-intuitive you can use just to the add anchor point and delete anchor point and the reflection tool for all of this. Or you could use your scissors tool. Personally, I just like the add and delete anchor point end-user selection on it. So yeah, I thought I would share this with you guys because it totally depends. Differs from person to person there. Uh, whom, what kind of tool you like to use. And I taught sharing would be a good idea. Okay, so, yeah, I hope you guys like this. See you guys in the next class.
5. Master The Corners: Hey guys, I hope you are doing great and today we are going to learn about corners. So basically in every shape in Illustrator, you can turn any corner into a rounded shape. Let me show you how. So let me select this and let me zoom in over here. So you can see whenever you click on a shape, by the way, this will only work if you are on Illustrator 2018 and above. I guess if you are below 2018, I would recommend you to upgrade first because this whole course which I'm making, I'm making it on illustrator 2021. But most of the things which I mentioned in this course, they are from basically you can access them on Illustrator 2018 and above. So yeah, if you click on any shape, you can see that there are some so-called overhear. These weren't available in, I guess, Photoshop or Illustrator 2018 and below 2018. So if I click on the corner over here, and if I bring it in, you can see that all the corners are getting your owner know. And I can basically convert this square into a so-called simple. And now I can bring it out as well to convert it into square. So I don't know why they have a rounded rectangle tool. This is so useless because you can basically do everything over here and more in just using just these. So I don't know why it only rectangle tool still exist in Illustrator anyhow, let's delete this. So, yeah, so you can select any shape and convert the corners into rounded corners. I can do this for the star as well. So, yeah, I forgot to tell you when you click on a shape, you have to press control as well because not all shapes show this. So if you click on this press control or command, so you can see that there are a couple of circles over here. So since this star has a lot of edges, only not these are the edges, but also the, these ones. So I can click on one of them and I can bring them all in like this. And what if I want to manipulate just one corner? So if I click on this one while pressing Control, you can see that it has been selected. Let me just woman a lot. So if I click on this and I click on this while pressing Control, only this corner will be selected. Know if I zoom out, and now if I bring this in, okay, Why is it not working? And we click on this again. And now if I bring it in, you can see that only this corner has been manipulated. And what if I wanted to manipulate and make it our own corners on these three edges. So I will click on this. I will keep pressing Control O on the keyboard and I will click on this. Then I will press Shift on the keyboard and click on this and this as well. And while having all of this pressed, I will move these in. So we'll create a new kind of Batman logo. But, uh, yeah, I hope you understood the concept behind this. And similarly, you can make these outside just these ones. Let me select these. And yeah, okay, So you have to make sure that you are pressing shift value. Do so. So if you click on this file pressing control, this will not get unselected. So make sure that shift is pressed and now you can move these out. Okay, right. Okay. So I guess you understood the concept. Let's come to this shape. We can bring this in, or you can select just one anchor point or two while pressing control and control or Command plus Shift and bring these in. And similarly here as well. So select this shape, press Control or Command, and simply bring these in. How simple is this? So yeah, this was an important tutorial on how to basically manipulate corners in Illustrator Soria. I don't know why am I seeing Photoshop again and again. So yeah, I hope you guys like this and I will see you guys in the next class.
6. Pen Tool In Detail: Hello everyone. Hope you are doing great. And today we are going to learn about the pen tool. So I have these very horrible drawings over here which I drew. I know I'm not a good sketcher, rather a really bad one. But we are going to learn how to use the pen tool on them. So basically, Pen tool is mostly used for creasing your logos and all. You can basically bring an image into Photoshop or Illustrator and then trace it. Or you can simply draw the path with the pen tool. So let me move this to the side. And let me bring one of these in over here like this and make it bigger. And what I will do is I will go to layers over here. And yeah, instead of Lear's just go to Properties and decrease the opacity like this. Okay, so let's keep it at like 40 percent or maybe 50 percent. Then I will go to layers over here and I will click on the Lock over here. So if I click over here, you will see that this layer is locked. So no, I cannot work on this, I cannot do anything on it. So I will have to create a new layer on top of it. You're gonna click over here. And now I can basically trace it. So let me select the Pen tool. You could click Tab P on the keyboard, or you could come over here and select the Pen tool. And let's simply draw this moon. Really horrible moon. Okay? So, yeah, basically I want to teach some really basic things which are not a lot of people knew about the Pen tool and artist, the reason they are so afraid of the Pen tool. So let's start from over here. So you can see that if you click once and if you click over here, again, it will create a straight line. But if you click once over here, and if you click and drag, you will make a go over here. Okay, What enough? Let me simply remove this white part so that we would only have this black stroke. And let's increase the stroke as well. Maybe add ten points. So you can see that we have this stroke over here. So let me delete this. Let us select the pen tool. So I will start from over here, click just once. And I can try to draw the whole thing like this. But you can see that I am going way out of the screen. And whenever you are working on an image like this, make sure to do it in parts. So I will click over here and make a curve like this. Then I can come over here. So you can see that it is automatically Italy following this go. So I can click over here. But now if I click anywhere else, you can see that I will have to basically reverse this. So I can now click over here and make it like this. And now come over here and simply click once. But you can see that this is a little demented. So you can click over here. So if you click over here using the pen tool, it will add an anchor point and we don't want this. What you can do is you can select the Direct Selection Tool. And you can click on this anchor point, sorry, this handle, and you can bring it in. But along the way you can see that it is also not ruining, but changing these points as well. So this is somewhat more original than what I was making. I can click on this as well. I can move this to the side. And we have this simple, horrible looking moon basically, no. Okay, so let's try using the same concept on this mango as well. Let me unlock this and bring this in. And we'll just move this to the top, basically, bring this in over here. And I will make this bigger. I should have created a portrait kind of Canvas before, but no problem. And let's go to Properties, bring the opacity down to 50 percent, go to layers again and lock this. Okay? So let me come over here and let me select the Pen tool. Simply press P on the keyboard. Y cannot be drawn this because this layer is locked. So I will come to this layer on maybe create a new layer, not let P on the keyboard and we have the pen tool. So I can click over here. And I can. So basically there is this concept of mountains and valleys. So the bigger parts are like mountains and inner parts are like valleys. So I can click over here and simply draw like this. And now you can see that if I tried to draw over here, let me clear my throat. Now if I draw or try to make a path over here, you can see that this isn't making any sense. So what I will do is I would click on this anchor point while pressing Control or Command. And I will. Instead of control, I will press Alt. So what is the difference between controlled and all the overhead? If we press Control over here and you bring this in, you will also disturb the previous handled. But if you click on press Alt or Option on Mac, you will see that you are bringing this in. You are basically breaking the anchor at the handle. And this way, you are not disturbing this line. You are simply disturbing this one over here. Okay? So what I can do is I can break it like this and simply bring this in a little like this and continued apart from over here. So I can draw this over here like this. And then I can continue over here. So I will have to bring this in a little and then draw over here. And I can continue this over here as well. And similarly over here. So the concept is to make the ship in as less anchor points as possible. So I can draw a ray to finish it over here like this. And I guess this will work. But the problem is that we have this really harsh kind of line over here. So I can try to, I gestured like this, or I can simply break this anchor point and not disturb this one. Okay? So let me click away. To be honest, we didn't do a very good job over here. But what you can do is you can select this again, select the selection tool, and you can click over here and adjust these anchor points. So I can win this order literal, bring this in a little, or move this in and return. Like this. I guess this is alright. Or I guess move this in a little. Or there's one more thing that you can do. We have already learned this in the smooth tool. So we can select this. We can click on the smooth tool and we can draw over here. And you can see that it is moving the whole thing for us. How cool is this? Let's try this over here as well. So you can click over here like this. And it is moving the whole thing for us. So smooth tool I loved us move to literally comes in really handy for you. So, yeah, let's select the pen tool again. I will click over here once. Then over here, over here, and then over here. So it is bringing, making things pointing over here. No problem. What we can do is because since this is a stroke, let me select this. And what you can do is you can go to the strokes. And over here you can see that this is stroke to the center, middle inside a line. You can make it middle so that we don't have direct kind of point issue. So let me make this a little bigger. I guess this is all right. So I can click the pen tool again, click over heroines and make a line over here like this. And just a curve and click away because I would like this to be a separate shape. Then select the pen tool again and click over here and make, okay, So if you click over here once and then click on an anchor point, it will disturb that anchor point. So what you can do is you can click the pen tool, click over here, and make sure that you are not clicking on, on this. You can click and get it, but not on this. So I'm going to click over here and make this leaf like this. Then I can come over here, okay? So you can see that we are getting this line over here and this handle overhead. And let's just say we don't want any of this. You can do is you can press Alt or Option and simply click on this anchor point. And it will remove everything. So I can draw over here like this. And I guess this is alright. I can adjust it later on. So I will select the pen tool again, click over heroines, draw this, let me just draw all of this really quickly. And similarly, we can click over here once, then over here. And if I want to let go of the pen tool, I will press V on the keyboard, V for Vendetta, and then press P again and then start making it again. So I guess this, this, all right, so now what we can do is we can simply hide this. And we have been ended up, we ended up with this shape over it. So I can select all of this, bringing this up or maybe just bring this down a little. And this looks a little too neat because the ship is in sports to be neat. So yeah, you can even play around with their TA. I can select the direct selection tool and maybe click over here, bring this up or down like this, and move this to the side. So again, we basically have a mango over here. No. So yeah, this was the basics and not the basics, but a little bit of advance for the Pen tool because there are a lot of people out there who are so afraid of the Pen tool and they never use it. And they are like frightened with the whole concept but with independent rule. But it is very simple if you know very basic things like the how to break anchor points, how to add anchor points, how to manipulate them, when to use our coordinator and basically when to completely remove the anchor point. So yeah, this was pretty much it on the Pen tool. I hope you guys really like this and after this tutorial, I hope you will be much more confident in using the pen tool. So yeah, see you guys in the next class.
7. Curvature Tool Vs Pen Tool: Hello everyone, Hope you are doing great. And today we are going to learn about the curvature tool. So the curvature tool is similar to the pen tool, but to be honest, I like it more than the pen tool because it makes your life so easy. So if you come over here, if you right-click on the Pen tool, sorry, right next to the Pen tool there is this curvature tool. If we click on this, you will get the curvature tool. But before that, let me move these to the side, bring just one of these in over here. Let me make it bigger like this. Or let's simply increase the size of the artboard. So let me make this bigger like this. So if you want to increase the size of the artboard, simply click on the Artboard Tool and you can make it bigger. And let's bring this in over here. Perfect. Okay, So I'm going to lock this layer. I'm gonna go to properties first and select this, go to Properties and decrease the opacity of this layer to 50 percent. All right? And then what I can do is I can go to layers and lock this layer. Then I will create a new layer on top of this. And I will work on this layer. So yeah, we previously used the pen tool, but now we are going to use this curvature tool next to it. So I'm going to use the same example over here. So how does the curvature tool work? So if you click on one line, 1 over here and you click another point, so you can see that it is automatically creating our goal for me. And if I want to draw in a straight line, I will click over here 1s, then double-click over here, then double-click, then double-click that it need to move this fill over here, then double-click. So basically if you want to add edge, double-click, and if you want to add a curve, you will just single click. So double-click is adding edge and just single click is adding alcove. Simple. So let me delete all of this. And let's increase the stroke to 10 points and select the curvature tool over here. So basically the whole concept of valleys and mountains is over here. So I'm going to click over here once. And I'm going to tell you why about what I did wrong over here. So I clicked over here once and when I click over here, you can see that I have this curve. And I can come over here and click over here once. But the problem with this is it will keep on making a cove over here. So let me press backspace over here. So after clicking over here, when I will come what here? I will double-click over here, sorry. First, join this, make sure that it is selected. And over here I will double-click over here so that I will have this cove, but after the curve I will have this edge over here. So I will click over here once because I won't ago. But when I will come over here. So you can see that the problem with this is that it is automatically going this and we don't want this. So let me press backspace all over again. So over here we will start, you have to basically think this through. Over here when the COVID com, this will be an edge. So I will double-click over here and start over here. Then I will put a single click over here. No, it will allow me to make a curve. I will come over here, and then I will double-click over here. Then come over here, single click. It isn't making letting me AKA curve and then a single click. Simple. And number 2 can do is you can click the direct selection tool and basically make things according to your need. How simple is this? So we have this moon over here. So this was very easier than using the pen tool. Let me move all of this to the side. And let's bring in this example over here, like this. And let's go to Properties and decrease the opacity to 50 percent. Then go to layers again, sorry, go to layers again and lock this layer. Let's come back over here. And let's quickly do this with the curvature tool. Make sure that you are not on the load layer because it won't let me, let you draw over it. So I will select this layer, select the curvature tool. So over here you will realize that this has to be Cove. So I will simply put one click over here. Then this is a mountain like mountain and valley concept. So I will click over here once and then come over here. So let's put an anchor point over here. And I still want this to curve. So I can make it like this. Or I can put an anchor point over here because this is somewhat OCO as well. Let's click over here. Then come over here, click once, and then click over here again. This is also alcove. So I will click over here, look over here, then click over here, maybe over here, or like over here. And then when I will come over here, you can see when I will click just once. Everything is an older null. How cool is this? Let's do the stem as well. So I will select the curvature tool. Either click, double-click over here, sorry, not this double-click over here because I want this to be an edge. Then double-click over here, double-click over here, and double-click over here. Sorry. Just to one's, okay, because I already had a graduate here. And then select the curvature tool over here again, you're slick ones. Over here, and click over here. Sorry provider in this book Augusto, we actually added anchor point on this. So I can click over here once, then click over here. And it will let me draw alcove. So since this is a mound in, I will click over here once and then click over here. Okay? So let us click on the, I want this to be a simple stroke. So I will select the curvature tool again, you're doing after letting go, click the curvature tool over again. So I will click on this ones. Then over here, then over here. Then over here maybe. So over here I will have to, I can put an edge over here. And birds, since this is a leaf, it could be rounded. So let me click over here and then over here, simple, I can let go of this by pressing V on the keyboard. And I can select the computer to nobody again, click over here once. It's selected the previous leaf. So I can click over here and over here than over here. And I can continue maybe over here like this. If you want to finish this off, you can click the pen tool and draw over here like this and maybe add a stroke over here as well. You're getting the idea. So now I can hide this and you can see that we have that seem mango, but here you can adjust this as we want. Maybe bring this up a little and move this to the side. And we have debt mango. But here you can see Nordau not a very good example because I'm horrible at drawing, but you can obviously define this. You can select this and select the smooth tool and you can make these things, these aids, we're more rounded and curvy. And maybe over here as well. So yeah, basically this is how you can use the curvature tool. I think that tutorial is getting longer. I heard another example over here of this flower. So yeah, let's make this as our task for you guys. You have to use the pen tool or the curvature tool to trace this flower. And you can submit it to me and I will make sure that I will give you feedback on this. So yeah, this is now your task. So yeah, this was pretty much it on how to use the curvature tool and the Pen tool versus curvature tool comparison. And personally I like darker, richer dollar more than Ben glucose if you saw easier to use. So I hope you guys really like this and I will see you guys in the next class.
8. Clean Up Anchors & Paths: Hi guys. I hope you are doing great. And today we are going to learn how to clean up anchor points and paths in Illustrator. So, yeah, uh, let me move these to the side and alerts work on this first. So what is just invited? I make it over here. Let me zoom in over here. So basically you can see that these are just three shapes, Okay? And the task over here is that I want to remove all of these points, or you can say join them so that I would have a clean look. Okay. So let me just delete all of this endothermic it from the start. I will select the Pen tool, simply press P on the keyboard, or you can select Pen tool over here. And let's click over here and a shape like this over here. Okay, Simple. And then we can reflect it. So you can select this, right-click on it. And overhead you can go to Transform and click on reflect. And over here, we will make sure that this is vertical and click on Copy. So now I have a copy of this. Simple. Why is it not selecting? Okay, so click on this, move it over here. And let's let the pen tool again and make a shape like this over here. Okay, Simple. And then select the Selection tool. So our task over here is let me bring this down a little. So our task over here is to basically sorry, Why is it not coming down? Yeah. Okay. So the task over area is to basically remove these extra lines. And how can we do so? What you can do is you can select all of this and then come over here. And over here you can see this joint tool. So if you click on the Shape Builder Tool over here, right-click on this, and over here, this joint tool to simply click on this. And what you can do is you can hover over any two points and it will join them according to their intersection point. So I can draw over here like this, and you can see that they are gone similarly over here, okay? So there is this problem with disjoined tool. Whenever you use it, you have to slit all the things again. So we have to select it. Then come to the join tool and select all of this. Then come over here again, click the Join tool and draw over here. Or you can basically assign a short key to it as well. But we will cover this later on on how to assign customers short piece. You can see that I have this really nice badge over here. I can add some text on it, whatever I want. So let me move this to the side. I can group it and move it to the side. Okay. So this was on how to clean up anchor points, sorry, or how to clean up pots. So now we are going to learn how to clean up anchor points. So you can see I have this shape over here, looks pretty normal. But when I will select the direct selection tool, you will see that there are a lot of anchor points in it. And let's just say, I want to manipulate this curve, I won't do make it more curvy. If I click on this and if I move it, you will see that because of all those anchor points, I cannot properly select and remove, basically manipulated. So there is this option in Illustrator to basically simplify your anchor points. If I slept on this, click on the Direct Selection Tool, you can see that there are a lot of anchor points. So what you can do is you can go to Object. So we will go to Object, then go to path. And over here you can click on Simplify. So it has given me this slider as well. I can click on More Options. And the more options are over here. So you can simplify the curve or you quotes, adjust the angle threshold. So what do I mean by this? You can move it to the left so the anchor points are getting low. But you can see that the shape is also changing a little. Or you can change the angle a little bit. So it is not changing a lot because anchor points are enough. So yeah, you can see that there were a lot of anchor points before. You can increase them like before, or you can simply decrease them. And over here there is an option to also convert two straight lines if you click on this. So it will converge is converted into straight lines and we don't want this. Let's keep it at like this. Enough anchor points to make this smooth and simply hit. Okay? So now you can see that we have the same shape now. And if I click on the Direct Selection tool, there are very less anchor points over here, No. So yeah, this is really handy. If you have something which is annoying with a lot of anchor points. The last thing is, I added this to the very end while I was making this tutorial. And yeah, the basic concept is to basically make things smooth. And this also comes in cleaning up. So I thought I would mention this over here. So you can see that I have this official word here and there are a lot of rigid edges over here. And this looks really weird. So what you can do is you can select this. And over here, if you click on the Join tool, the Shape Shaper Tool, sorry, I don't know why I call this shape builder before. Over here. By default, I guess this is set to pencil tool. So if you click on the right-click on the pencil tool, you can go to smooth tool. And with this move tool, but you can do is let me zoom in over here. So you can see that this shape also has a lot of anchor points, but also has a lot of ridges. So I can select this, it's like the smooth tool. And then I will draw over here like this. You will see that it will smooth all the edges and also remove the anchor points as well. So I can draw over here as well. Similarly over here as well. Let's come over here and let's draw over here. Similarly over here. So you get the point. You can do this for the whole image. So you can see that we have such smooth curves over here. No. So if I press Control or Command Z, you can see that this was the before and this is the after. How cool is this? So yeah, this was a quick tutorial on how to clean up your paths and anchor points and how to smooth and a vector in Illustrator. So I hope you guys really like this and I will see you guys in the next class.
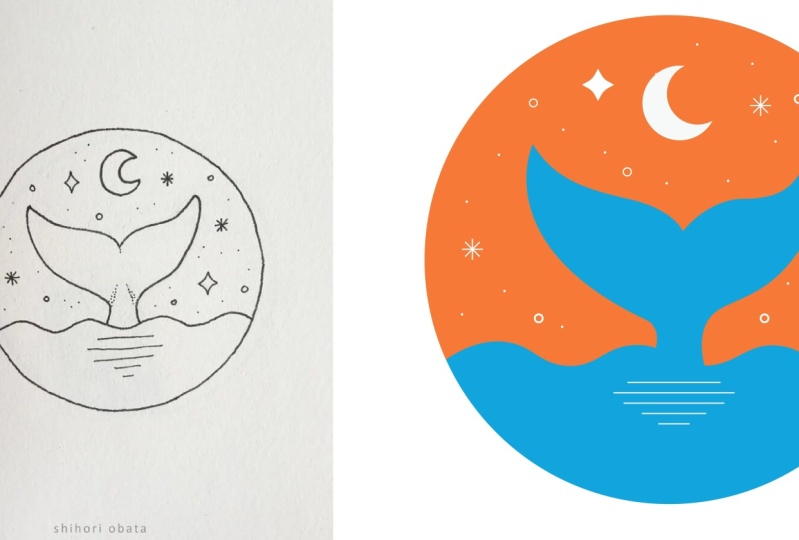
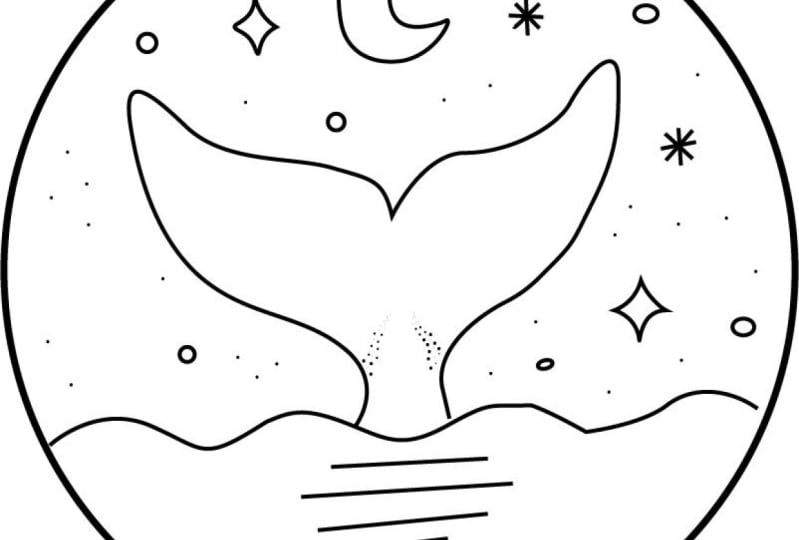
9. Project 1 - Trace The Drawing: Hi guys. I hope you are doing great. So I have a project for you guys now. So basically if you go to the course files over here and you can see that there is this project. The number ninth video is the project. If we double-click on this and go to Design file, you will have this image over here. So let me double-click on this and show it to you guys. So you can see that this is a very simple little drawing over here, very nice one. I actually downloaded this from Pinterest. So if I come over here, this guy is the owner of her hair. And so your task over here is to basically trace destroying using the pen tool or the curvature tool, or you can use both of them. You don't have to get into nitty-gritties of making the stars. But if anyone is able to basically make the whole vectorize the whole thing using shapes and the Pen tool or maybe just the Pen tool and the curvature tool. Extra points for that guy, I would definitely give that person a shout out. Okay, so yeah, this was your task and I hope you have fun making this. See you guys in the next class.
10. Section 2 Fills & Strokes: Hey guys, welcome to Section 2. And this section is all
about fill and stroke. No, fill and stroke
would be really simple and you might know
about them already. But there are some really
nice advanced tips and tricks which
I know could make your workflow much easier and you're designing
much better. You can see that in the tutorial you're going to learn how to make multiple lines
using a single stroke. So you can see that
this is a stroke, a single stroke, but it
looks like a roared. Then over here we are going to learn about some stroke options. So I have made all of this using single strokes and
yet it looks so good. I mean, like you can make
different elements using this. Over here, we are going to learn about this layered text effect, which looks really nice. Then we are going to make
something which I really like making and that is as paragraph. So you have, you are going to learn how to make this as well. Then finally, you are
going to learn how to use offset in Illustrator, which is really useful if you know how to use it properly. So can we hope to see you
guys in this section?
11. Add Multiple Strokes To A Path: Hi guys. I hope you
are doing great. And today we are going
to learn how to apply multiple strokes to a
single path in Illustrator. So if I click on one of these, as you can see that this
is just a single path, but there are multiple
strokes on it. And if I click on this as well, you can see it looks
like there is a road. But if I look closely on it, you will see that this
is a single stroke. So yeah, we are basically going to learn how to make these. Let me zoom out and
put these over here. That is a reason I really like Illustrator because
you can simply put the things out of
the canvas and you can still show them
later on anyhow. Let's come back over here. Okay? So the first thing which we are going
to do is we are going to create a circle
or any other shape. Let me come over here and
I'm gonna go to shapes. And let's select an ellipse. And I'm going to
draw a circle in the middle over here like this. So as you can see that the
stroke is really thick. So we can decrease the stroke. Let me decrease it
to maybe like 10. Okay? So for now we just have a circle with no
fill and just one stroke, dishes single stroke
with the gray color. So what if we want to apply
multiple strokes to a path? Because you can see
that this is the part. We can change the
color of this one. But what if I want to add
multiple strokes outside it? Would I have to duplicate it, make it bigger, and then change
the color of the stroke. And this is possible, but this is not the
best way to do it. So let me press Control or
Command Z, remove this. Let me hide this. Okay, so the color panel
is over here as well. Okay. So let me go to Appearance
panel over here. So we have property
spent over here. So Properties panel is quite different than
opinion Spanner. Let me come to
windows over here. So I'm gonna go to Windows. And over here you can
find Appearance panel. So I'm going to click on this. And let me bring this
to the side over here. Okay, so we have governance
panel over here. So okay, so Appearance
panel basically lets you edit everything
in Illustrator. If you want to transform
an eating oil, the information is over here. But if you want to edit the fill and the stroke and
the effects on it, you will have to edit it
doing from a business panel. So if I come over here, let me delete this. And let's just say I
apply an effect on it. So if I go to effect and then I go to
Distort and Transform, and then I go to
pucker and bloat. We are just drawing out
something and click on this. So we end up with this shape. And now if I wanted
to edit this, I cannot do so through
Properties panel. Okay, So there is
there is a dependence, burden and properties
panel as well. Anyhow, I guess the abraded
this in the newer version, illustrator, but the proper way to do it is through
the appearance panel. So you can see that this
is also a parent's. So if you click on this, you can see that the pucker and bloat effect is
applied over here. And if I want to edit it, I can double-click on this
and I can edit it even more. And if I want to delete it, I will simply select this and bring this down and deleted. Similarly, I can edit the stroke and the fill
and everything else. So let's just say I want to
add multiple strokes to this. So if you click on this, let me make this smaller. Let me bring this back. Go to Appearance. And let's collapse
it to Icon soda. It will be available like this. Okay, so let me bring this up so that you could
see these options properly. So if you come over here, you can see it says
New Stroke and over here it says Add, New Fill. And over here it says duplicate. So let's just say
I have wanted to add a new stroke to this. If I click on this, a new stroke has been edited, similar to the one
I have made before. Similarly, I can
click on Fill and it will add a fill
to the stroke. Let me press Control
or Command Z. And if you want to duplicate
the exact same thing, you can simply click
on this plus icon and it will duplicate it. So now what I'm going
to do is I'm going to duplicate it 34 times. And now you can see nothing changed because the size
of all of these is same. So I'm going to change
the color of all of them. I'm going to make the
topmost one yellow. After that, orange. This orange, and
then ping them red. Okay? You can see that we cannot
see the colors below it. So what we can do
is we can come over here and we can
increase the size. So as I am using the size, okay, So this is not working out because this is not selected. So I will have to
select this first. Now I will increase
the size and you can see that the stroke
is getting thicker. So I made this sturdy, I should have made it 20. Then I can come over here, made this 130 and this 140 and gene the
value of this one to 50. So you can see that I have just one stroke and
sorry, one part. And there are multiple
strokes on it. How cool is this? So let me show you
the one I made it for that record
kind of stroke. Let me close this. So I'm going to
select the Pen tool. I press the P on the keyboard, or you can come over
here and select this. And I'm going to
click over here, and I'm going to draw our enum
part over here like this. Let's increase the stroke. So I'm going to increase
the stroke over here. And these values are
not copied over here because it always picks
up the last color. So I'm going to change
the color to something like gray. Maybe this gray. And let's increase the
stroke to 100 and Enter. So you can see that we have
this gray line over here, and it doesn't mean
anything at this moment. So I'm gonna come
back over here. I'm going to go to Appearance. And I'm going to create a
new stroke on top of this. So I'm going to
click on New Stroke. And I'm going to change the
color of this one to white. And I'm going to decrease
the stroke to maybe ten. So you can see that I have
this line inside it now. And if I want to get debt
road kind of effect, but I will do is I'm
gonna make these dashed. So I'm going to click on this, go to Appearance again and click on stroke for this
specific stroke. So I'm going to click on Stroke. And over here, this
dashed option, I'm going to click on this and I can increase
the dash size. So maybe like Let's come back over here and you can see that we have this role. So yeah, basically, you
can do a lot of stuff with just one part and you can apply multiple
strokes on top of it. So yeah, this was pretty much it on how to apply multiple
stroke to a part. There is more exciting
stuff coming up in the next, coming
next tutorials. So I hope you guys
are really living the course to see you
guys in the next class.
12. Stroke Options: Hey guys, I hope you
are doing great. And today we are going to learn about stroke options
in Illustrator. And you can see that
I have some things, some elements on my screen. But I have made all of
these just using strokes. So yeah, you can make, pretty much make
a lot of things. You're using strokes. You don't have to worry about making these kind of arrows. You can do all of
this in strokes. So yeah, let me make a copy
of all of this or just move it to the side and let me zoom into
the canvas again. Okay, so how do I zoom
into the Canvas like this? You are zoomed out
anywhere like this. And if you want to
zoom into the Canvas, all you have to do is simply
press Control or Command 0 and you will zoom into
the Canvas. Pretty simple. Okay, so now let's learn
about stroke options. So I'm gonna come over here
and select the ellipse tool. The reason I am
only working with ellipsis is because I guess it is easy to understand
when you are working with a similar
thing over and over again. So I'm going to create
a circle over here. And again, if you want
to create a circle for the middle and with
proper proportion, while making the circle
simply press Shift and Alt and it will make a
perfect circle in the middle. Okay, So let's increase
the stroke on this. I'm going to increase
it to like 50. And let's check out some
of the stroke options. So you can select this and you can edit it from
the appearance panel, you can edit it from
the Properties panel. And then there is this
control bar as well. So most of the people
usually do this from the control panel
hold Control bar. So I'm going to click on this. You can click on any of the stroke options on
all of these deal. These are all the same. So let me close this. This was a previous project. So yeah, after that I'm going to select this and
I'm going to change, sorry, click on Stroke. And you will see stroke
options over here. I guess there is even a
Stroke panel in Windows. So if I click on this
and if I move down, yeah, there is even
a stroke panel. So you can totally use
any of these if you want. So I'm going to close this. I'm not going to use this, I guess the Properties panel over here and here
are enough for us. Okay, So coming
back to the point, so you can see that we can increase and
decrease the stroke. And then there is cap
and corner options. Okay. So let me tell you what the
corner options are first, they didn't bring
this to the side. And let's create a
rectangle over here. By the way, for the
rectangle tool, you have to press M for monkey. And this is the
short key for it. So yeah, I have created
a rectangle over here. And I'm going to select
this and if I come to Properties again
and click on stroke. So what is the cap
and corner options? So if I click on cap,
nothing will change. I will tell you
about this later on. But if I click on corner, you will see that these
coordinates are owned it null. And similarly, if I click
on this one, we will join. You will get this crazy
kind of corner like this. So if I make this bigger and this will
also become bigger. To be honest, I
never used this one. I use the corner one,
but never this one. So I'm going to bring this back. Also. What are aligned
stroke options? So you can see if
I hover over this, the line is actually
going between this and in this one the line is on the outside and in this one
the line is on the inside. So basically asks for now
you can see that this is the path and the stroke
is on both sides of it. And if I click on this one, you will see that the
stroke is on the inside. So this is the inside option. And if I click on this, you will see that the
stroke is on the outside. So yeah, these are really
some very simple options, but they come in really handy. Okay, so yeah, let me delete this and let's come back
to this circle over here. And I was telling you about options over here
for the cap options. So the cap option doesn't seem to be working on any of them. So if I click on
Dashed over here, or if I divide the path. So let us divide the path. So if I click on this, we have already learned about the paths and anchor points. And I'm going to delete 30 using the direct
selection tool. I'm going to select this and I'm going to delete this part. So you can see that
these parts are rounded. Reason if I come over here, I have selected this one. Initially. It should have been
something like this. So if you like grounded
things and if you are making a design
which requires you to make rounded edges, this comes in really handy. So this is actually a cap. Cap is like an end. You can even make it
like boxy like this. But I, to be honest,
I don't like this. And you can make it like this. Or there is one more
thing that you can do, which I really like to do.
I'm going to select this. I'm going to come
to stroke options. And over here, I'm going
to click on dashed lines. So if you click on dashed lines, you will get this really
weird kind of dash options. Let me click on cap over here. And you can see that
these are dashed lines. Basically the whole talk is
divided into different parts. I can make it bigger. Let's just say,
let's make it 100. So the lines are much bigger. Know, let me make this smaller, so they are becoming
bigger or smaller. I guess the stroke is
a little too much, so let's make it like 20. So you can see that we have
really nice lines over here, no press Control or
Command Z, a legacy. I want to make all
of this rounded. So I'm going to click on
stroke and I'm going to click on cap and
overhear round caps. So you can see this
looks so nice. So nice, right? Let me zoom
out to see what else we made. So we have arrows over here. Okay, so there are
some other options. So let's create a
path over here. I'm going to click over
here for the pen tool, I actually press P
on the keyboard. You can come over here and
click on the Pen tool. And along with it you can see the short key
for it as well. So I'm going to click on
this, come over here, click, drag and make
a path like this. Okay? So yeah, it is basically copying the last
thing which I did. So I'm gonna come over here, select this, go to stroke, and I'm going to
reset all of these because I don't need
these at the moment. I'm going to decrease the
stroke size to maybe 20. And yeah, okay, so how do, how did I make those arrows? So if I come over here, you can see that there is
the left and the right one. So basically if you
click this one, it will make an arrow
on the left one. And if I select this one, it will make an arrow
on the right one. So if I select this,
you can see there, there are a lot of arrows
and other things as well. So, yeah, you can basically
use any of these. So I'm going to select this one. And we basically have an
arrow, how Google is this? And when you will click
on this or if you decrease the stroke size
a bit from over here. And the arrow size
will also decrease according to the width
of the stroke symbol. So now I can copy this Control C Control Shift
V and put this over here. And also you can see that there were some lines on the site. So let's create
another stroke or just simply copy this
one and rotate it. How did I copy this one? Even though this is
an advanced course, I think there might
be people who might not know about this. Simply select anything, press
Alt or Option and drag. This will make a copy. And let's put it over
here and click on Stroke. And apart from arrowheads, there are also other
options, profile options. So let me remove the arrow here. And you can see that
there are some options. So if I click on maybe this one, so you can see that
we are getting this. Basically it is
starting really thin, then becoming thicker
and thinner again and increase the stroke
size on this one. So you can see that
this comes in really, this can come in really handy if you are making
like an eye maybe, or let's duplicate this one
over here and rotate it. Then there are other
options over here as well. Click on Stroke and an profile. You can see that we
have this option. And if I want to rotate it, sorry, flip it, I
can click on this. So you can see that this
looks like an eyelash. So yeah, there are
a lot of options in just strokes which
you can play around with and make a lot
of amazing things. So yeah, this was pretty
much it on Stroke options. I hope that you guys
really loved the class. So see you guys in the next one.
13. Layered Text Effect: Hey guys, I hope you
are doing great. And today we are going to learn how to make this
layered texture effect. Let me bring in my mike anyhow. Okay, so you can see that this
is a concept which we have already learned how to apply
multiple strokes to a path. And this is basically
the same concept. So yeah, uh, let me move this to the side and let's make
it from the start. Okay, So before we start, a lot of people asked me, how do I create this
black background? And the reason they asked me is because in a lot of my
tutorials on Instagram, I use a black background. So it is very simple. If you come down over
here into layers, you can see that I have
created a simple layer, and then I created a black, I created a black rectangle, put it as the background,
and lock the layer. And now we have a simple
background as black. Anyhow, let's come over here. Let's get a new layer and
let's write some text. So I'm going to select the
type tool and click over here. And let's change its color to white so there we
could see it properly. Let's make it bigger. Okay? So there is, there is this
font which I really like. It's called Candy something. So I'm going to search it up. I'm going to click on this, select all of this
using Control or Command a to the control panel. And let's write candy. Oh sorry. Candy. Okay, So there are a couple
of variations of this. I guess the simple
one is good enough. And let's write layer over here. So you can see that this is exactly the same
text as this one. Or maybe different. I guess this one is
different than this one. Anyhow. No problem. So yeah. Let me rotate it a little. I guess this is a
variation of this. I don't remember. So I'm going to
rotate it and return and then make it
bigger like this. Okay, So there is this
thing about the strokes. If you apply this on, directly on this, this
might not work properly. So you will have to make
an outline of this. So what we're going to do is
we are going to select this. Let's make a copy of
this in case we need it. So I'm going to
put it over here. Let's come back over here. And I'm going to press
Control or Command Shift O. So you can see that all of
these are outlines know. And if I click on this, you can see that
this is outline. No, it is not editable. So let me select this, go to Appearance
panel and now we're going to do all those
strokes over here. And so the first thing which
I want on this is Fill. I'm going to click on this. And I want the fill to be black. So I'm going to click on this, press I on the keyboard and simply click
on the background. So the fill is black and there is a stroke
on it which is white. So I'm going to click on this. And let's increase the
stroke size a little. I guess this is all right. But as you can see that
there are some lines below. We can see some lines
inter mingling. So what you can do with this is the interesting
part in appearance. We can click on this and you can actually bring the
stroke below the fill. And now you can see that we cannot see those extra
strokes over here. How cool is this? So I'm going to click on this. And now I'm going to
create a multiple strokes. So I'm going to
click on this one and then click on Plus
icon again and again. So I'm going to make
like 34 strokes, I guess four is enough. And I am going to change
the color of all of them. So let's run this
as a reference. So let me bring this over
here, make it smaller. And oh my God, what happened? So I'm going to
bring this over here and let's use this
as a reference. So let's let this one, okay, so the inner one is yellow, so I'm gonna make
this one yellow. Then the outer one
is somewhat orange. So let's click on this orange, then there is more orange. So let's click on this
one and more orange, and then there is
this purple one. So let's click on this
one and let's make it, I guess it is this purple. Okay, so we cannot see
all of this properly because these are
below each other. So now we will have to
increase their size. So we are going to give
this one S1 at one. We are going to
start from yellow. So let's make this
120 seems all right. Or maybe 30. Then
come to this one. And we will double this
because otherwise we won't be able to see this if
I make this 30 as well, it will just become
hidden behind this one. So I'm going to click this
one and make this one 60. Okay? So there are some pointing and pointy lines which you can see. So if you want to
get rid of these, you can simply click on the stroke options and make these rounded and
make these corners. And similarly on this one, who owned it and corner. Okay. So this is gone. Then come to this one
and make this one 90. Sorry, I have to
click this first, make this one 90. And we will have to
do the same thing on all of these basically. And let's move to the last one and let's
make this one to 120. So basically we are going as 30, 60, 90 and so on. And let's make this
rounded as well. So we ended up with this
affect how Google is this. And I guess there is some white
line inside this as well. So alerting read the size
of this white as well. And we are done. So let's move this to the side. Let's come back over here. Sorry. I actually press Control
O instead of Control 0. So we had this layered
texture effect. How cool is this? And the concept is very simple. You have to write some text, you have to make
an outline of it. And then you can write, you can basically apply multi brushstrokes strokes
on a Duke and apply maybe ten strokes on it
or it would be too crazy. But you have the
option to do so. So yeah, this was
pretty much it on how to create this
layer texture effect. I hope you guys really enjoyed this and I will see you
guys in the next class.
14. Spirograph: Hey guys. So today we
are going to learn how to make this
paragraph in Illustrator. So let me select this
and move this over here, and let's make it
from the start. Okay? So let me come back over here and let's create
a spiral graph. So the first thing which
I am going to do is I'm going to create a star. So I'm gonna come over here and there is the
Star Tool over here. So I'm going to
click on this and let me change the stroke to
something simple for now. Okay, so I want to click on this and I'm going
to create a star. So if you want to
increase or decrease the number of points
for our star, you can, while making the ship, I am pressing, Left
click on my mouse. You can press up on the
keyboard to add more points. And you can press down
to decrease points. So the least amount of points
which you can do is three, which is actually a triangle. So we're going to make four. So let's make it like this. Make sure that this
is properly centered and aligned and we are done. After that, we are going to actually apply a stroke on this. So I'm going to select this. And instead of this fill, I'm going to apply a stroke. So you can see that this is a stroke I applied on this one. So let's change the
color to something else. I'm gonna change
this to maybe blue, and let's make blue and pink. Okay? So you are
gonna select it. And after that you are going
to bring in the corners. So we have already learned this. If you want to bring
in the corners, you will press
Control or Command and you will see these options. So I'm going to click this one. And if I want to
select others as well, I'm going to press
Shift on the keyboard and click on this. And now I can bring all of
these, enlightened this. So I'm gonna, I'm not
gonna do it too much, just a little like this. After that, we are going to
bring these one outwards. So I'm going to
click on this one while pressing
Control or Command, then press Shift and
select the others as well. And while having
everything pressed, I'm going to bring these
out so that we will have, we will have this really nice, simple looking clean effect. Okay? So this was pretty
much it for the shape. Now we are going to basically
duplicate this in a circle. So I'm going to select this. I'm gonna come over here and
click on this Rotate tool. And you can see that we already have this anchor
point in the middle. So I'm going to
press Alt or Option and click over here
where it says center. And we have Rotate tool
options over here. So you can change the angle
to whatever you want. But I will keep it like four degrees because I won't
really small increment. And then I'm going
to click on Copy. So you can see that
it moved a little. So now what I can do is I
can press Control or Command D. And I can duplicate
this again and again. So default door basically. So I'm pressing Control or
Command D again and again, and I am done. And this is so cool. Basically, you can make a lot of amazing effects using
this technique. And this is at least paragraph, you can try it with
other shapes as well. So, yeah, basically this
is how you can create a simple looking spiral
graph which looks amazing if you use it
as a background or you can even make this paragraph
put a picture in the middle. And yeah, it would be
a really nice effect. So yeah, you can increase or decrease the size of
the stroke as well. So if I increase the
size of the stroke, it will look
something like this. I prefer the width less because this way the details are more prominent and
it looks really nice. So yeah, this is
how you can easily create a spiral graph
in Illustrator. I hope you guys
really enjoyed this. I hope you guys are
really loving the course. So, uh, see you guys
in the next class.
15. Project 2 - Create A Spirograph: Hey guys, So who is
ready for a project? So in the previous class, we learned how to make this really cool looking
spiral graph in Illustrator. And now you are going
to do the same. So this is your project. And you simply have to create a spiral graph with
any colors you want. You can use the
colors which I used, or you can go crazy and apply
multiple regions on it. And yeah, extra
points for someone who could come up with new
kinds of effects for this. So yeah, I hope you
guys have fun making this paragraph and I will see
you guys in the next class.
16. Create Multiple Lines Using Offset: Hey guys. So today we are going to learn about offset paths
in Illustrator. So we were already covering about fill in stroke
in this section. So I thought I would
teach you about the salary offset paths as well. So let me zoom out over here and let me put this to the side. And yeah, let me teach
you about offsets. So first I'm gonna
come over here and create an ellipse over here. So let's create an ellipse. And let's give it a stroke. So let's make it red maybe. And let's increase the
stroke to maybe like ten. So basically an
offset path is like an calculated my year for
increasing the stroke size. So if I click on this
and let's just say I want to increase this by
ten pixels or 15 pixels. You can always use the appearance panel
over here as well. And there are points
over here has well. But when you are trying
to make things at a really small scale
rebar by really small, I mean, really my new details and the offset path
comes in really handy. So I'm gonna come over
here, click on Object. And over here I'm
going to click on Path and then click
on Offset Path. You can see that it already
increase the size a little. So, but you can do is you can increase the offset
path to maybe like 30 or maybe
40 and hit Okay? And you can see that
this is like a buccal. This is like a separate
stroke over here. And you can do this
again and again. You can click this one object. Click on Path, and
then Offset Path. Let's make this one 80. Then select this one
again, update pot. And sorry, I think I
didn't select it properly. Object Path and where
it's offset path. And let's make this
120 and hit, Okay. Okay, so you can see that we have multiple strokes over here now and we can even apply
some colors on them. So I'm going to apply
this color on this one. And this, sorry, this
color on this one. To be honest, offset paths. I don't use of to
offset path too much. But it always comes in handy when I'm making designs
and took on a Saturday, like working with it. Okay. So, uh, why all of this is
not working properly because all of these are not
properly layered. So I can come over
here into layers. I'm kind of slipped this and I can bring one of
these up or down. So this one should be
at the very bottom. So I'm going to press
Control or Command Shift and then square bracket
to bring this down. So yeah, this is how
you can basically bring anything down or you can
do this on layers as well. So let me delete this so
that you won't get confused. Let me come back over here. If I select all of this, so you can see the blue one
is on top, then green one. So this blue one should
be on top of this one. So I'm going to bring
this one on top, then this and then this. So now we are in proper order. So yeah, this is how you can use offset paths in Illustrator. This comes in really handy
when you are making designs. So I hope you guys really like this and I will see you
guys in the next class.
17. Section 3 - Shapes: Hey guys, welcome to Section 3. And in this section you are
going to learn all about shapes and how to make
amazing things using them. So in this class you are
going to learn about this swirly logo and this
looks really amazing. Then in the next one
you are going to learn all about the
Pathfinder option. So over here, if you see
the pathfinder panel, you can see that this
looks quite daunting. And if this makes
you go crazy and you are afraid to use all of
these options, no problem. You are going to learn all about them in this specific tutorial. Then in the next one you
are going to learn how to wrap text around any
person or any thing. This one is all about how
to select similar objects. This one is about how to make this really
cool flip heart. And in the next month you are going to learn how
to make an eclipse. So this looks really
simple, debtor, little confusing, but you are going to learn
how to make this. The next one is about how to
make this digital line art. So you might have seen
these all over the Internet and I'm going to
teach you how to make this line out
of everything. So you can make this out of any animal or any other object. The next one is one
of my favorites, and this one is about how to
make this impossible circle. And finally, we
are going to learn how to make this
geometric line art. So this action is going to
be really informative and you are going to learn all
about shapes in this section. So see you guys in the class.
18. Shape Builder Options: Hey guys. So today we are going to learn about offset paths
in Illustrator. So we were already covering about fill in stroke
in this section. So I thought I would
teach you about the salary offset paths as well. So let me zoom out over here and let me put this to the side. And yeah, let me teach
you about offsets. So first I'm gonna
come over here and create an ellipse over here. So let's create an ellipse. And let's give it a stroke. So let's make it red maybe. And let's increase the
stroke to maybe like ten. So basically an
offset path is like an calculated my year for
increasing the stroke size. So if I click on this
and let's just say I want to increase this by
ten pixels or 15 pixels. You can always use the appearance panel
over here as well. And there are points
over here has well. But when you are trying
to make things at a really small scale
rebar by really small, I mean, really my new details and the offset path
comes in really handy. So I'm gonna come over
here, click on Object. And over here I'm
going to click on Path and then click
on Offset Path. You can see that it already
increase the size a little. So, but you can do is you can increase the offset
path to maybe like 30 or maybe
40 and hit Okay? And you can see that
this is like a buccal. This is like a separate
stroke over here. And you can do this
again and again. You can click this one object. Click on Path, and
then Offset Path. Let's make this one 80. Then select this one
again, update pot. And sorry, I think I
didn't select it properly. Object Path and where
it's offset path. And let's make this
120 and hit, Okay. Okay, so you can see that we have multiple strokes over here now and we can even apply
some colors on them. So I'm going to apply
this color on this one. And this, sorry, this
color on this one. To be honest, offset paths. I don't use of to
offset path too much. But it always comes in handy when I'm making designs
and took on a Saturday, like working with it. Okay. So, uh, why all of this is
not working properly because all of these are not
properly layered. So I can come over
here into layers. I'm kind of slipped this and I can bring one of
these up or down. So this one should be
at the very bottom. So I'm going to press
Control or Command Shift and then square bracket
to bring this down. So yeah, this is how
you can basically bring anything down or you can
do this on layers as well. So let me delete this so
that you won't get confused. Let me come back over here. If I select all of this, so you can see the blue one
is on top, then green one. So this blue one should
be on top of this one. So I'm going to bring
this one on top, then this and then this. So now we are in proper order. So yeah, this is how you can use offset paths in Illustrator. This comes in really handy
when you are making designs. So I hope you guys really like this and I will see you
guys in the next class.
19. Swirl Logo: Hi guys. So today we
are going to learn how to make this world
logo in Illustrator. So we have already learned
about the shape builder tool. We also learned it in
the beginner scores, my Illustrator beginner scores. And now we are going to make this really cool,
swirly logo effect. So yeah, let me select this and move this to the side and
let's make it from the start. I'm going to zoom in over here. How do I Is woman press
Control or Command 0? Okay, so the first thing
which I'm gonna do is I'm gonna come over here and
select the ellipse tool. And I'm going to create a circle over here,
but before there, I'm gonna come over here, click on this fill and I will make sure that this
is set to none. I just want the stroke. So let's create a circle
over here like this. And let's increase the
stroke to like ten points. I guess Danish too much
five is all right. So I'm going to select this. And if you want to duplicate
your circle in place. So I will press Control
or Command C to copy and then press
Control or Command Shift V. So now it is duplicated in
place. We cannot see it. But if I move this, you will
see that this is a copy. So now I'm going to
decrease the size of this. Maybe this is alright. Then I'm going to
duplicate it again. Control or Command C, or Control or Command Shift V. And then I'm going
to increase this tight. But this time while
increasing the size, I will press Shift and then
I will increase the size. It will show me the point. So you can see that it
is snapping over here. So now this is snapped. Why is it not working properly? Show me the line. Okay, so this is proper now. Now you can select all of this and make sure
to click on this. Let me show you what happens
if you don't click on this. I'm going to go to
a line over here, or you can go to Align tool, you can go to Properties. And you can basically, I want to align all of
this to the center of two. If I click on this, you will see that everything moves up and down depending upon
their mean size. Let me press Control
or Command Z. And now if you click
on this first, you will see that
this is selected. So this is actually
as a guide now and all of the components
will come down to this. So now if I click on this, you will see that everything
is properly centered. Nice, right? Okay, so now I will click on this and I
will duplicate this. So I will press Alt or Option, and I will drag it to the right. While doing so, I
will press Shift. So Dad, this is
properly aligned. Now select both of these
and copy them again. Same thing, Control C, Control Shift V, or Command, depending upon which
system you're on. And now rotate this
and while rotating, press Shift so that this
is properly angled. Done. Now I will select
all of this, sorry. And I will do the
Shape Builder Tool. So click on this and I'm going
to start from this point. Okay? So I will draw like this over here and keep going
out like this. Okay, similarly over here, click on this link here and
draw all over these lines. And we are good to go. And when we will make this, it will create a lot of shifts inside because we are
duplicating a lot. So if I move this to the side, you will see that there are already a lot of
circles in the middle. So let's try it
moving these circles. So I will click on this
and then click on this. This is not proper. Let's try getting the
circles. It is difficult. So let's select these
and move this to the side and now
lead the circle. So now we are left with
just these two shapes. Good. Now we will select these
press Control or Command C and Control or Command
Shift V to duplicate again. And now we will rotate it like
this at a 45 degree angle. So press Shift and it will
duplicate it like this. And you can basically
leave it at this point. So let's duplicate
this and move this to the side so that I could show you that you can
even leave it at this point. But what I like to do is
I duplicate it once more. So I will duplicate it again and basically leave
it at this point. So we have multiple
lines over here now. So now I'm going
to select all of this multiple
sections over here. So I'm gonna select all of this. Let's come to the center. Click the shape builder tool, and you will simply click
on all of these lines. So all of these sections. So I'm going to click on this, then this, and this. And we will keep on doing this. It sometimes takes time because
this is a heavy process. But yeah, you will get there. So I guess we are done. Let me click on this and
this one to conform as well. And then this is the last one. Okay? So I guess we are done. And now we are going to
apply a gradient on it. So I'm going to select all of this and I'm going to
click on the Fill, make sure that fill
is selected otherwise a gradient will be
applied on the stroke. And let's click on the
gradient over here. So you can see that it
already looks so good. So let me remove the
stroke on this one. And let's give the gradient. And you can see that
there are a lot of small points on this as well. This will happen,
this always happens. So there is a way
around this as well. And let's try doing this. I'm going to let just one
of these small points. Then I'm gonna go to Select and click on seam and
then click on appearance. So nor deselecting all of
this, let's try again. Go to Select Same. And let's see what we can do. Okay, so if we select
asked him fill color, I guess it should only
select those simple points. Now at deselecting everything. So yeah, no problem. We can select all of this
and try moving this to the side and select
these as well. Alerts, move out, put
this to the side. Now we can select all
of this and delete it. And I guess this is alright. Let's bring this over here. And you can already
see that looks, this looks so good. So you can select this and you can change
the gradient color. So I'm gonna go to
gradient over here. Make sure that gradient
is set to fill. Click on this. Why is
it not working? Sorry. Let me select this. Go to gradient again, okay, so we can change the color
to whatever we want. So let's look, slip
something crazy like this, green, maybe light green. And let's take the other one
as pink or maybe yellow. I guess this is green
and yellow looks nice. And we have this really
nice swirl logo. You can even apply a
stroke on it if you want. Let's select the white. So we have the stroke or muddled stroke,
whatever you like. So yeah, this is how you
can create this world logo. Yeah, while we're over here, Let's apply it on
this one as well. Let me increase this and
apply this gradient on it. So yeah, this is the mistake which I was telling you about. So since I had this on top, it applied the stroke on this. I don't want the
stroke on, uh, sorry, the gradient on the stroke, I want a gradient on the fill. So let me invert this and
now we are done with it. So yeah, basically this
is how you can create. Yeah, this didn't work properly because we didn't divide
it into sections. So let's divide these
into sections like this. Now it is looking nice. So yeah, basically
this is how you can create this world
logo in Illustrator. I hope you guys really enjoyed this and I will see you
guys in the next class.
20. Project 3 - Create A Swirl Logo: Hey guys, I hope you are doing great and ready for
another project. So yeah, in the previous class, we learned how to
make this word logo and now you are going
to do the same. So yeah, don't forget to
submit your projects to me. I've already taught you how you can submit your
projects in one of the previous videos
on Skillshare. So yeah, don't forget to submit your projects and I will see
you guys in the next class.
21. Live Shapes: Hey guys. So today
we are going to learn about life
shapes in Illustrator. So this is only available
for two shapes, which is an ellipse
and the polygon tool. So yeah, let me move
this to the side and let me show you what I mean. Let me come back over here. So I'm gonna select the
ellipse tool over here. And let me remove the stroke. And let's select any color, maybe this red color, magenta kind of color. And let's create a
circle in the middle. Okay? So I come over here if look, looks like a real normal circle. If I come over here,
you can see that there is this sign over here, this circle over here. So if I click on this and
I move it to the side, you can see that this
is a live shape. So basically I can
edit it like this. So a Pac-Man, her. So to be honest, I don't find a lot of situations
where I would use this, but this can really
come in handy if you are making a pie chart. So let me duplicate this again. And let me change the
color of this one. So let me change the color
of this one to maybe blue. Hit, Okay. And I will further
move it to the side. Maybe select this one
and move this over here. Like let me close it back and let me put this over here and then I will
duplicate this one. Let me change the color of
this one to maybe yellow. Hit Okay. And move this to
the side like this. And we have a pie chart. So yeah, these live
shapes, to be honest, I don't use them very often, but they can really come in handy if you are making
something like a pie chart. The other option is
the polygon tool. So let's create a
polygon over here. Let me change the color. So let's let
something like this. So if I come over here, and if I create a
polygon over here. So you already know
if you want to increase or decrease
the number of anchor points or the
points of a polygon. Like the Star Tool, you
can press up to add more points and press
don't do remove points. Okay? So if you have already
committed to your shape, you have already made the sheep knock and you
increase the points. Well, yes, this is the
power of the leaf shapes. I guess they are
only available in Illustrator 2020 and above. So make sure you have undershoot it and you
don't DnaA before this. So I'm going to click on this. And you can see that there are points on all of these sites. But over here you can see that
there is this extra point. Sorry. You can see that there
is this extra point and it says plus or minus. So if, uh, if you click on
this and if you move it up, you can see that it
isn't moving the points. And if you move this down, you can see that it is
increasing the points symbol. So yeah, basically
using these options, you can increase or
decrease the size. It is even showing you decide
number of sides over here. So let me move this down. And we have this. What is it? It is an octagon know, I guess I don't remember. I started this in chemistry. I guess six is an octagon, five is up and toggle on. I don't know about it. So yeah, basically these are live ship options which you
can use in Illustrator. I hope you guys
really enjoyed this and I will see you guys
in the next class.
22. Path Finder In Detail: Hi guys. So today we
are going to learn about the Pathfinder
panel in Illustrator. So this is the one over here, and if you cannot find it, you can simply go to window and you can find
Pathfinder over here. So you can simply click on this, and this will open up. Okay, So there are basically four plus 610 options over here. So I have basically created these different art
board for all of them so that I could teach
them to you properly. So let's start with
the first one. Let me come over here. Let me zoom in over here. So the first one is unite. So the Pathfinder is
basically similar to the shape builder
tool but on steroids. So let me, let me show you how. So let's just say you want
to combine two shapes. So let me select these. And if I click on the
Shape Builder tool, so you can see that I can
combine both of these shapes. So they are combined know. But you can do this easily
using the Pathfinder as well. So if I select this one
and come over here, and you can see that the
first option is called Unite. So I can click on this. And both of these
are actually united. Easy. Let's come over here. And let's go to Minus Front. Again. You can do all of this is using the shape builder as well. But using Pathfinder is much
more convenient and easy. So let's just say I want to minus the front from the back. So I can come over here and I can click on
Minus Front over here. And the front shape
will be minus out. So, yeah, you can do this
on shea butter as well. Select all of this using
the shape builder tool. You can minus out these two shapes and it will
give you the same result. But when you have
a lot of options, like a lot of things
going on a canvas using the shape builder
is always not easy. So dad, his wife
Pathfinder exists. Let's come to the third
one, which is intersect. So index, it basically
gives you the middle part, the intersection point
of both the shapes. You can select this. And again, you can click
on this intersect, and you can see
that it is giving me the intersection
point of both of these. Also. Why is it giving me this
color and not this? It always gives you the top
and the color of the dolphin. So if I come over here, you can see if I
click on Minus Front. Obviously this is
removing overhear, not a good example. But over here, if I put
this one on firm to if I press Control or Command
shift and right bracket. So the red one is on top. And now if I select this
and click on intersect, you can see that it is
giving me this color. So it always gives you
the color of the top one. Easy. So we have done this
so far, done this. Overhead alerts come
back over here. So let's go to exclude. Exclude is basically
opposite of intersect. It will remove this part
and keep these two. So let me select this
and click on exclude. So you can see it only
remove this part and this is keeping
these two circles, semi-circles or basically no. So the fourth option is divide. Let me come over here, and let's click on Divide. So you can select both of these. And if you click on Divide, and also you can check on
the icon of this as well. It actually tells you
what it is going to do. So basically it is
divide everything into chunks and not
remove anything too. If I click on this, you can see that
these are divided into different parts
and also it groups it. So if I'm trying to move this, all of this will move. So I will have to
first ungroup this. So this is a separate
shape and this is a separate shape and this is
a separate shape as well. Let's come to the trim one. So I'm going to select this. And if I click on trim over
here. So what happened? Basically, trim is
like Minus Front, but it keeps the shape. So if I click on Ungroup, you can see that it is
similar to Minus Front, but it keeps the
actual shape as well. Simple. Let's come to merge over here. So in merge basically, you can, if you have a stroke
on something, Let's just say I apply
a stroke on this. Sorry. I'm going to click on this and I'm going to apply a stroke. Let's make it white. Saudi black, hit OK. So a merge is similar to trim. But if you have a stroke on something and then you
apply merge on it, it will do the same
thing as trim, but if I ungroup this, it will remove the
stroke as well. Simple. Let me come over here, then there is this
crop over here. I really like this one. So whichever shape
is on the top, it is going to use
this as our crop. So if I select this and if
I click on crop over here, which is a fourth
option in path finders. If I click on this, you can see that it is using
this as our crop tool. Basically, this is actually
a compound path now. So if I click on
this and if I move this shape over here and then
move this shape over here. And if I select all of this, and since this one
is on the top, and if I click on crop, you can see that it dropped
everything like this. Easy-peasy. Let me come down over
here and go to Outline. By the way, if you want to
zoom into just one Canvas, you can simply click on
that specific Canvas. For example, if I
want to go to tonight and then press Control
or Command Zero, and it will move to debt canvas. Similarly, I can click
on outlined over here. You can see that there is
a black outline on this. And simply click on Control or Command Zero and it will zoom into this Canvas. So outline is very simple. It basically creates
outlines of everything. To be honest, I have
never used this one. But if I come over here
and click on outline, you will see that it
will keep all the colors and it will basically
divide everything. You can see this is
a separate shape, this is a separate line, so it doesn't create shape, it creates lines, and it
gives the colors simple. So let's come to the last one, which is minus back, similar to minus front. So instead of minusing
from the front, it uses the back one. So if I click on this one and
then click on Minus back, it will remove the
back one symbol. So these were all the
Pathfinder options. You can basically do
all of this using, I guess all of them, except for the outline when
you're using the Pathfinder, using the shape
builder tool as well. But the Pathfinder
comes in really handy if you have a
lot of things going on in a single canvas and you don't have space to
use the Shape Builder tool. So yeah, this was our
detailed tutorial on how to use the Pathfinder
panel in Illustrator. I hope you guys now aren't confident
using the Pathfinder. I used to be really scared
you to just simply click on all of these options
to check how they work. But then I decided to
do research on them so that I could teach
them to you properly. So yeah, this was everything
on Pathfinder tool. I hope you guys
really enjoyed this. I hope you guys are learning and I will see you guys
in the next class.
23. Advance Clipping Mask: Hi guys. I hope
you're doing great. And today we are
going to learn about the clipping mask and
NOR just clipping mask, other masking options as well. The draw inside option
and the opacity mask. And then there is also another
option called draw behind. So which is not very important, but it's over the air and
we are going to cover it. So let me zoom
back over here and all we are going to learn
about the clipping mask. So let's change
color of this one. Let me double-click on this or let me just I just remember why I kept them both over here. So I'm going to bring
in an image over here. For example, this texture
pattern I have over here, or maybe this image over here. Let's try on this image. So the reason I made
fill layer and with just a stroke is because they are actually work the same when it comes
to a clipping mask. So my images behind
my shape is infirmed. Your shape has to be infant
to create the clipping mask. If it's on the backside,
it won't work. So let me show you. I'm going
to select both of them. Right-click. And then there is option for
tasks phone, then a range. Similarly, if you come over here it says
make clipping mask. So if you click on this, you will see that basically
the whole image is over there and it converted
it into this clipping mask. And we can only see
the circle inside. And let me show you
the layers as well. So let me come over here. If you go to the layers, Let's put both of these
on a separate layer. I'm going to select them press Control or
Command X to cut it. And let's put it on
a separate layer. So I just press Control
or Command Shift V. So now we can see
this clipping group. Let me bring this over here. And we have this clipping group. Let me make this bigger so dared you could see
everything properly. So I'm going to
make this bigger, maybe like 40 pixels. Yeah. So you can see
everything properly. So this is a clipping group. When I click on this, you can see that this part is getting highlighted,
this circle. And if I look into
the clipping group, you can see that the
circle is on the top, the fill of the fill and
the stroke of a circle goes away and the image
is at the bottom. So if I click on this, it is taking the
clipping group and it will move everything. What if I just want to
move the image inside? So you can simply
click over here. You can see now it's
lifted the image. And now I can move it inside, just like the clipping
mask in Photoshop. Okay? And but if I just want
to move the circle, similarly, I can
click over here. And now I can, sorry. If I click on this, I should be able to
move the circle. So yeah, you can see that now
I can move the circle only. So these are like the
edges of the image. So I'm going to center it like this and we are good to go. So yeah, let me put
this to the side. Let me bring this back over here and release clipping mask. If you won't do release
it, you can click on this. And let me show you
what will happen if the image was at the front. So if I put the
image at the front, I will right-click on this, Arrange and Bring to Front. So now if I select both of them, let me zoom in, then right-click
and make clipping mask. It won't work because the image has to be
behind the circle. But yeah, let me delete this. Let me show you what
will happen if we make the same thing on a circle, which is, which has, sorry, only just stroke. So let me cut it and put
it on this layer as well. And let's delete this so that we could see
everything over here properly. So you can see that
I have this circle over here, this one, okay? And the images over
here, this one. Now I'm going to
slick both of them, right-click and
make clipping mask. So basically this is
exactly the same thing. There is no difference
between a filled circle or stroked circle
or any other shape. Okay. So yeah, let me press
Control or Command Z on this as well in
let me deleted. So you can basically do this
with anything you want to. I have some text over here. I'm going to bring it over here. Let me cut it in
question on this layer. So you can see that my textured
or text is at the top. So I wrote my own
name over here. Very tacky. So I'm going to
select both of them. Right-click and then click
on Make Clipping Mask. So you can see that the image
is actually inside my name. No. Let me zoom in and if I want to basically move
the image inside, I can click on this, open the clipping group,
select the image. And now I can, sorry, Select, select the image. And now I should be
able to move it. Why can't I move it? Okay, so there are
some things in which you can do this
because this image, it is text is editable. So dad is why it is not
letting me do this. So what you can do is
you can double-click on this to open up isolation mode. And now when you will
click on the image, you should be able
to move it here. So now basically
you can move it. So I'm going to place
it over here like this. And for the text, I can basically give it some stroke to see if
everything looks alright. So I'm gonna give
it some stroke. Go to Properties, increase
the stroke a little. And let's make the stroke black. So yeah, you can see that the
image is inside the text. Now, how cool is this? So yeah, this was everything
on a clipping mask. And now let me show you how
the draw inside option works. So let me come over here. Let me zoom in so you can see that this is the
normal option over here. If you come down over
here below everything, this is the normal option
which says draw normal. Then there is draw behind option and then there
is draw inside option. So let me just click on Draw behind just to quickly
show you how it works. So I'm going to select
like the brush tool and let's increase the stroke
to something really big. So now if I draw over here, you will see that it will
automatically go behind it. To be honest, there's
nothing special behind it. I can simply create a layer
below it and draw like this. But for this draw behind option, it only lets you draw anything
behind a specific object. So yeah, not very
important for me at least. So the one which
I like the most, this one, it's
called draw inside. So if you click on this, basically it converts
the whole thing into a clipping mask. Let me show you how. So now if I select the brush
tool like before, then if I, let me change the color to
black and increase the stroke. So now if I draw over here, you can see that I cannot even see what I have drawn over here because I have selected this as a clipping mask and I can
only draw inside this. So you can see I can
only draw inside this. So I usually make teach this concert with
by making a basketball. So let's try that. So I'm going to click
really darker kind of color over here of orange, like this. And then I'm going to
select the ellipse tool. Let's increase the stroke and see if this looks all right. So let me change the color. Let's let black. Okay. So let me increase the color. That's already
increase the stroke. And now I'm going to create basically a
basketball over here. So let me adjust it. I guess this is
how it looks like. Let me check. I'm just playing around with it. So yeah, you can see that we have basically made a
basketball over here. Not a very good one. But yeah, since I cannot draw outside and if this is
acting as a clipping mask, I can draw whatever
I want inside. And if I click on this, and if I go to layers over here, let me put all of this on
a separate layer as well. So Dad, you could
see what's going on. So if I open this, you can see this is
also a clipping group. Okay? So if I open this, this shape is at the very top and all the other
shapes are below it. So yeah, it is. Let's just like any
other tripping group, I can click on this and I
can move it up or down. So yeah, this is how the
draw inside option works. I really loved this option
because if your objective is to draw just inside a
specific path or a shape, this is how you can do it. And lastly, we are going
to cover the opacity mask. So let me use the
same image over here. Let me zoom out. So this was the
image which I had. Let me release the
clipping mask. And let me bring this over here. So let me put all of
this on a separate layer as well so that we could
see what's going on. So if I bring this up like this, let me, okay, let me
put it over here. So now if I create a clipping mask on
it, what will happen? Even though this is a
gradient and this is actually a gradient
applied on a shape. If I right-click, select this, right-click on it and
make a clipping mask. It will simply flip
all the sites, okay? So we don't want this, we want this to be
as a opacity mask. Basically. The top
part is black, so it should be
getting invisible and the bottom part should
be getting visible. Or you could do the
other way around. So we're going to
select both of these. And then we are going
to go to Properties. And over here you
can go to opacity. And there is this
option of Make mask. To be honest, I've
been frightened about this for a very long time. Then I decided to
learn about this. So you're going to click on Make Mask and look at the magic. So basically it is showing
you the mass, though. We already know the white
part basically means it is showing this part and
the top part is black. And the other part which
is completely black, it means we cannot see it. And we now have
this opacity mask. You can click on this. And let me tell you there is another problem which
a lot of people face. If you have the
opacity mask selected, you cannot do anything else. So you can see I'm
trying to select this and this is
not working for me. So for that you will
have to click on this. You will have to go to opacity and click
away from the mosque. So this is the mask and
click on the image. Now you will be able to edit
things or anywhere else. Sorry about that. So let's learn like this. Go to opacity and you can basically play around
with this as well. You can unclip it and
move this up and down. Okay. Let me come back over here. So, and this is also a
clipping group like before. So let me go to layers. Let me open this. And so this is actually working
as single image. This is a little different
than clipping mask. So if I click on this and go to Properties, go to opacity. And if I want to edit this, I will actually have
to release the, release this and
then make it again. And then there is
this option for basically knocking out and isolating and other
stuff as well. And if you want to release it, you can simply click on
release and the shape, the gradient and
the clipping mask and solid opacity
mask are separated. So yeah, this was everything on different kind of
mosques in Illustrator. And I know those of
you who use Photoshop, they find it very
easy in Photoshop, but it seems very
daunting in Illustrator. So I hope you guys,
after this class, you guys are very
comfortable using clipping mask and other kind
of mask in Illustrator. So I hope you guys
liked this class. See you guys in the next one.
24. Select Similar Objects: Hello everyone. And today we are
going to learn how to select similar objects
in Illustrator. So you can see that I have
a couple of objects of various shapes and circles and other squiggly
lines over here. And we are going to
learn basically how to select basically a
couple of circles, maybe a couple of stars, so that we don't want, we won't have to select them
individually like this. For example, if I want to select all the circles
which are yellow. So I'm not going to try to
select all of them like this. So by the way, I don't order this from free
pic and this is not my own. So this was just for
education purposes. Anyhow, I'm going to
let me close this. So there is this option in Illustrator which
is called select. So if you come up over here, you can see it says select. So how does this work? So I'm gonna let this
circle over here. Let's start with this. And let's just say I want
to let all the circles. So I'm gonna come over
here, click on Select. And then there is
this option of seam. So I can select based on Fill
and Stroke blending mode, appearance, fill color,
opacity, anything I want. Okay? So we are going to basically
select shape over here. So I want to select
all the circles. I'm going to click on this. And if I move this up, you will see that. Sorry about this. Let me do this again. Shape. So you can see that I
selected all the circles. How cool is this? Let me bring this back, press Control or Command Z, and let's try with
something else. Let's just say I want to
let all the squiggly lines, I'm going to click on this, then go to select. Same. So there is, obviously
this is not a shape. These are just squiggly lines. So I can select them based on stroke weight or stroke color. Or maybe fill color as well, and also fill and stroke. So let me click on this. So you can see that it
selected a lot of things. So everything which had
the same fill and stroke, you can see that the same color. We selected those. Easy. Let me come over here. Let's try with this
star kind of thing. Go to Select, click on same. And you can select
based on capacity or capacity of all
of these is same. So let's select them
based on stroke color. So if I click on
this and move up, so it will select
everything which has had the same stroke. Cool. Let's try over here. Let's just say I want to split everything which has this color. I'm going to click
on Select same and click on Stroke Color. And I'm going to
separate all of this. So basically this is a really handy option if
you have a lot going on, on your Canvas and if you want to basically edit
similar things, so let's just say I want to
make all the yellow elements, maybe blue in this image. So I'm going to select just
this, just this, sorry. And click on Select Same and
then click on stroke color. So these are all the objects which I have selected,
which are yellow. Then I'm going to click on
this and let's make it red. So you can see that all of these are red now
and by the way, it looks so good over here
because of the contrast. So yeah, basically this
was pretty much it on how to select similar
objects in Illustrator. To be honest, this is
not very advanced, but this is something
which a lot of people don't know about. So I thought we would cover it. So I hope you guys
really like this class. See you guys in the next one.
25. Flip Heart: Hi guys. I hope you are doing great. And today we are
going to learn how to create this flipchart
in Illustrator. So basically these are separate shapes with
gradients on them. And this is so easy to
make an looks so good. So we are going to
learn how to make this. So let me select all of
this site and delete it and delete this and
delete this as well. So basically, this
side over here, this heart half heart shape, this is the hard part. And if you can do this, you can do the whole
thing very easily. So let me delete this and
let's make it from the start. Okay? So I'm going to start off with a couple of
circles over here. I'm going to select
the ellipse tool. And let me change the
fill and the stroke and let's make the
stroke completely black. I'm going to increase
the size as well. Okay. Why did in the color
change I made it black. Okay, so basically I'm going to make two
circles over here like this and this one. And then I'm going to
duplicate it and make sure that they are
overlapping like this. You can put it like this
or maybe like this. This is the part you
basically have to eyeball. Doesn't, doesn't
matter how you do it, because this is going to be
the top part of the heart. So to make things simple, let us just centered this. So this part is actually
at the center of this. So now what you have
to do is you have to basically remove
parts of the heart. So what I'm gonna do is I'm
going to select all of this, select the shape builder tool, and I'm going to
combine all of this. Okay, perfect. Now what I'm gonna
do is I'm going to select parts which
I want to delete. So you can see that this
is the part which I can simply move out. So I'm going to select
the direct selection tool and I'm going to delete
everything else. I'm just selecting
and pressing Delete. So I'm going to
leave this as well, and I am left with
just this part. Now, I'm going to
select the Pen tool, set P on the keyboard, or simply go over here
and select the pen tool. And if you hover over here, you can see that it gives you a line basically aligned
with the pen tool. This basically means you
can extend this path. So I'm going to click on this, come down over here. So you can see
that it is showing the exact line where
this should lie. So I'm going to bring
it down over here and drag and simply create
a shape like this. So I know this is
not very perfect. Burke, No problem. So yeah, this is the
shape of our heart. And if you want to make
it even more smoother, if you think that some of
these parts are not looking. All right, we have already
learned about this move tool. So basically, if you
right-click on the shaper tool, there is this move tool over
here or maybe pencil tool. Right-click on the pencil tool and you will get this move tool. And if you think that some
parts doesn't look all right, you can simply draw like this and it will
adjust the shape. To be honest, for my shape, I think this looks all right. So now I'm going to select this and change this stroke to fill. And I'm going to apply
a gradient on it. So I'm going to click on
this gradient over here. And we have this black
to white gradient. So I'm going to
simply double-click on this and change the
color to maybe red. And we have this
shape over here. Easy. This was the hardest
part of after this, if this is completely alright,
so completely simple. So now I'm going
to duplicate this. I'm going to press
Control or Command C and then Control
or Command Shift V. Okay, so I made a copy of this. And now I will drag it. And basically, basically
I'm transforming it. So put it over here. Then do the Saudi. Do I, why can't I say do, do the same thing again
and put it over here. Let me make this a little
bigger, this as well. And now I'm going to select
all of this, copy and paste. Okay? Now you can right-click on
this and basically inverted. So I'm going to go to Transform
and click on Reflect. And over here you can simply hit Okay and put this over here. So we are basically done and all you have to do
is change the colors. So I'm going to
click on this one. You can totally
go crazy on this, totally up to you how
you want to do it. I'm gonna go to gradient. So alerts like this
pink, then come on, this one, make
this, this orange. Then over here, let's
make it yellow. Let's make this one green. And finally, this May
1 be this dark purple. So yeah, we are done
and just looks so nice and you can basically transform it to
whatever way you like. Of course, you have already
done the hard part. And basically this is
how you can easily create this fluid part. And I think there are
some gaps over here, so I'm going to let
all of this and move this to the left a little. So I guess this is alright. So here I just was
pretty much it. And for how on how to
create this flipped heart. I hope you guys really
like this and I will see you guys
in the next class.
26. Digital Line Art: Hey guys, I hope you
are doing great. And today we are going
to learn how to make this digital line
art in Illustrator. So let's get started. So let me zoom out
a little and let me find if I have
the actual image, okay, yeah, I have it over here. So let me basically
hide this one, and let's start with this one. Let me zoom in over here. So I don't order this
illustration from the Internet and it's
for or India, I guess. And we are going to convert this into this very nice
digital line OD. So yeah, let's get started. First thing which I'm going
to do is let's delete this for now so that we
would have extra space. Doesn't matter a lot, but I don't want destructions anyhow. So the first thing which we
are going to do is we are going to select the
Pen tool, okay? And make sure that the
two stroke not fill. So I'm going to change this. And if you want to
swap these colors, you can also press Shift X. So you can see that
this works as well. Shift X and I'm going to change the color to black for now. And let's increase the
stroke to like ten. So let me just test it out. I guess this is all right. Okay. So now I'm going to come to
the very end of the canvas. It doesn't matter a
lot if you are at the very end because the lines which go
above the animal, those are the ones which matter. So I'm going to start
at the very end and make a line over
here like this. Then I'm going to select this, press Alt or Option and
basically drag it out. So I have done this one time. And if you want to do
this again and again, you can simply press
Control or Command B. So I'm going to press
this again and again. And if I keep on pressing it, I will get this symbol. Okay? So let me select this. Let me put this on
a separate layer so that we might need it later on. So I just logged this layer
and put it on a separate one. For now we are working on this. So this concept is very simple. And also I forgot to
tell you one thing. Make sure that your
stroke is set to your calves and corner
are set to around it. And now we can basically
make that effect. So select all of this, including the animal, and simply select the
Shape Builder tool. And now what we can do is we can remove some of these lines. Most of the lines basically, I'm going to press Alt or Option and I'm going to
drag it like this. Okay, similarly over
here and drag like this. Let's come over here and
drag and move these lines. So simply do it over here, like this, like this. And I guess we are done. So now what we can do worse, we can hide the animal. So I'm going to
select the animal, the orange part and
simply click Delete. And we have this really
nice digital line art. And if you think that there
has to be some more detail, what you can do is let me
press Control or Command Z. Let's move back a lot. And I'm going to delete
all of these lines. Let me zoom in over here. And instead of
having a lot of gap, I'm gonna give it just
a little bit of gap. So just a little bit of gap. No press Control or Command
D again, like before. But this time you will have much more detail of the animal. So I don't think we have
to go beyond this point. I'm going to select all of this, then select the
Shape Builder tool. And just like before, we are going to
remove all of this. Similarly over here
and over here, and over here as well. So, yeah, this might
take some time depending upon the
shape of your animal. But this is so fun domain, so easy and it
looks really nice. And similarly over here. And I guess we are good to go. So yeah, let me hide the animal. That will delete this. Let me hide the animal and
just looks so on ice, right? So if you think that
there are parts which, which can have more detail, you can basically copy this, press Alt or Option. Click this press
Alt or Option and add them yourself like this. So I guess this seems all right. We have this really
nice digital line art. How cool is this? And you can put it on any poster
or whatever you want. So yeah, I hope you guys really enjoyed this, really like this. And I will see you guys
in the next class.
27. Impossible Circle: Hey guys, I hope you
are doing great. And today we are going
to learn how to make this impossible circle
in Illustrator. So, yeah, this is so fun to
make and it looks so on. So yeah, let me
select and delete it and let's make
it from the start. Okay? So the first thing which we are going to do is we are going to select the ellipse
tool over here. By the way, if
you're wondering how I got this black background, I have already taught it to you. You can simply go to Layers, create a black layer. And black layer, which should
be the size of the canvas, and then simply lock that layer. And that way you will
have a black background. Simple. So the first thing which I'm
going to do is I'm going to create a circle in
the middle like this. By the way, if you
want to create a perfect circle
from the middle, while making the circle, simply press shift this way you will make a perfect circle. And if you want it
from the middle, press Alt as well. So I am currently I'm
pressing Shift and Alt or Shift Option. And then I made a
circle from the middle. Okay, then I'm
going to copy this. I don't think I have to
tell you how to copy it. Control C, Control Shift V
and then make it smaller. Ok? Like I guess this is alright. Then I'm going to
select both of them. This is actually a separate
color, a separate shape. Let's change its
color so where you could see it properly. Okay. Now sled both of these, it doesn't matter actually. Then select the Shape
Builder Tool form over here and simply click in the
middle while pressing oil, oil, basically Alt or option basically removes using
Shape Builder tool. Okay, and we have this donut
like circle over here. After that, I'm going to select this and move this to the side, then press Alt or option, and move it to the side until you see this
intersection part. Can you see it on
the one in the pink? Okay. And now I'm going to change
the color to something else. Let's change it to orange. So basically this is like
the very edge of this shape. Okay? Now that we are going to
do is we are going to select the ellipse tool
again from over here. Let me change the
color to something very weird, something different. And then both of these, then I'm going to
zoom in over here and we are going to basically
combine all of this. So I'm going to make
a circle over here like this, basically an ellipse. And I'm going to try to
eyeball this soda at. Both of these would
look seamless. I guess this is all right. I can bring her down
a little, I guess. So let me zoom out, slag this and I'm going to
copy it at the bottom as well. And do the same thing over here. Just check if they look aligned. I guess this is all right. Perfect. So now what I'm going to do is I'm going to
select all of this, select the Shape Builder
tool from over here. And we are basically
going to lie and basically combine
these shapes. So I'm gonna come
over here, sorry, select from the top and
draw over here like this. Then come over here and combine all of these
shapes as well. Okay, so we will end
up with the ship. Similarly from over here. Draw like this, combine all this and we even
get this shape. Let me change the
color on this one so that you could
see the difference. So we have these two shapes. So we already have that
impossible circle, but it looks even more convincing
with a proper gradient. So first I'm going to smash
it down a little like this. And now I am going to
apply a gradient on them. So I'm going to select
in this one there to start with this one and apply a gradient on it and copy this. So this already looks so good, but you can add some different
colors to it as well. So I'm going to start
with an orange over here. I'm just trying to copy
what I made before. Then I'm going to add
some color over here. I guess this looks alright. And then simply select this press I on the keyboard
and copy this color. To be honest, it
doesn't look dad good. So what we can do
is we can select the gradient tool and we can
try to apply it or self, I guess this is alright. Then select this, select the gradient tool
so you can drag and at whatever side
which you will drag, it will apply the
gradient in that side. So let me make it like this. I guess this is all right. And we are good to go. How, how cool is this? So you can make it
even rounded or smush it even more
totally up to you. I think I like what I
have made over here. So yeah, this is how you can easily create this impossible. So cool in Illustrator, I hope you guys to do like this and I will see you guys
in the next class.
28. Eclipse: Hey guys, I hope you
are doing great. And today we are
going to learn how to make this eclipse
in Illustrator. So have you ever seen a lunar
eclipse or a solar eclipse? This, and basically this
is the same concept. So when the sun, I guess when the moon is at the front and the sun
is at the behind, you get this solar eclipse. So we are going
to make this now, let me select this and delete this so that we could
make it from the start. Okay? So the first
thing which we are going to do is we
are going to select the ellipse tool from
over here and make sure that there is no stroke
and we just want a fill. Okay, So I'm going to create a circle over here like this. We are going to apply a
stroke, but later on, and make sure the color of this is actually the same
color as the background. Okay. I think I didn't remove
the stroke properly. So yeah, we don't
have a stroke law. We are going to apply a stroke, but from the appearance panel, to be honest, doesn't
make much difference. But the reason why
I'm applying from over here is because
let me show you, let me change this
color to forget, I was thinking why not create a blue kind of solar eclipse? So the reason I
applied it from over here is because now I can
bring it down like this. So let me show you
the difference. Let me increase
the size of this. Okay? So now you can see that this is actually on top of this because the fill
is at the bottom. Can select the shape and you
can bring it down as well. Easy. And we can even
apply a blur on it. So I'm going to like
this, click the Stroke. And if you go to effects over here inside the
appearance panel, just you don't have
to go over here. Over here you can click on
blur and then Gaussian Blur. So click on Guassian blur. So it is taking some time. The Guassian blur
penalties over here so you can adjust it
according to your need. So I'm going to
increase it a little. So I guess 45 would
be all right. Let's check the preview. And I guess this is good to go. Simply hit. Okay, so we have
this simple line over here and it already
looks like an eclipse. So now what I want do is
I'm going to select this, and I'm going to select
the width tool over here. Okay? So the width tool, it is right now, right
below the rotate tool. So I'm going to select this. And from anywhere I want,
like form over here, I'm going to select this part
and I'm going to bring it up like this so that it
would be a little uneven. You have obviously
the solar eclipses, all lunar eclipses are
not exactly the same. So you can basically
play around with this. Or I can maybe press
Control or Command Z, select the width tool
again and again, try from over here as well. So, yeah, I guess
this is all right. After that, what
I'm going to do is I'm going to create
a shape over here. So let's convert the colors, remove the stroke, and I'm create a shape
over here like this. I guess this is all right. And I'm going to
rotate it a little and then I'm going to apply
a blur on it as well. So I'm gonna go to Effect, blur. And then Guassian blur. Same blur effect, but
you can make it even more harsh and hit, Okay. Okay. So, uh, when while
increasing the blur, you might be seeing boxes, like a box over here. So if you're getting that
kind of effect that you can do is you can go to effect over here and then
go to document raster effects
settings over here, Effect, and then document
roster effects settings. Click on this. And
basically this should be at like Teddy 2
or 16 or something. Ingredient is to like 100 and you won't get
her dad kind of weirdo box kind of
effect around your blur. So I guess I need to apply
a little more blur on this. I'm going to click
on Guassian blur. I guess this seems on
right and simply hit Okay, so I'm going to now
bring this below this. So if I wanted to bring
this below the circle, I have to right-click on this and then go to arrange
and send to back. Or you can also press Control or Command Shift
and then left bracket key. So now I'm going to bring this
below over here like this. Let me rotate it and
increase the size editor. And let's put it
over here like this. Then I'm going to copy it and
put it over here as well. The random it is, the better it will
look like this. And if thing, if you think that the width was a little too much, you can go back to the width tool and you can
bring this back a little. And yeah, I guess
we are good to go. So you can bring this in
even more totally up to you. So yeah, basically
this is how you can easily create an ellipse. Sorry, not an ellipse and
Eclipse in Illustrator. I hope you guys really
enjoyed this would be like this and I will see
you guys in the next class.
29. Swirl Candy: Hi guys. I hope you
are doing great. And today we are
going to learn how to create this world
candy in Illustrator. So yeah, I really like
making this as well. This is a really
fun thing to make. So yeah, let's make
it from the start. I'm going to select
it and delete it. So, so the first thing
which you have to do is you are going to select
the polar grid tool. If you don't know where it is, you can simply go to Shapes. It's not in the shapes. If you go near to the shifts is the line to
line segment tool. And at the bottom of this
is the polar grid tool. So I'm going to click on this and you can try to
eyeball it like this. But we want a couple of
more segments to it. So we are going to click in the middle and it
gives you the option. So I don't want any
radial dividers. So what are the radial dividers?
Let me show you first. So if I make this 10 and make this fight
five, what will happen? And let's make the width
and the size like 500. So let me show you
how it works first. So written height should
be 500 and hit Okay. So you can see that I have
this circle over here, basically a polar grid. Let me change its
color so that you could see how it works. So basically it has five
segments and then 10 circles. So if I want something
like without any circles and just segments, this is how I will do it. So let me put it over here. Let's select this again. So I wouldn't want any concentric circles and
I won't 20 radial dividers. And let's increase
the size to 1, 0, 0, 0, 0, 0, 0, 0. So my 11000 and hit, Okay. So you can see that I
have this null symbol. So let me delete this
because I don't want it. So now what I can do is I can basically color some
of the segments. So I'm going to select this. Let me remove the stroke color. So it is still over here, but we cannot see it. So I'm going to select this. And if you come over here
and the free-form tool, I think I actually
forgot where it is. Okay, So if you right-click
on the shape builder tool, you will get this Live
Paint Bucket Tool. So I'm going to select a color. Previously I made it pink. So let's create candy
off orange color maybe. So, yeah, let's make a
candy of this color. So you can click on
different segments, alternating segments like this, and it will color it. Simple, perfect. So now I'm going
to select this and then I'm going to go to effect, distort and transform, and
then click on to wished. Okay, so when you
click on twitched, you will get these
options over here. And let's just say I twist
it to maybe 40 degrees. Okay? So you can see that all of
the segments are twisted. You don't have to
do it too much. So I'm going to
keep it at like 20. And I guess this looks alright. Then simply hit, okay. But when I twisted them, you can see that all of
the sides are uneven. So this doesn't look
properly circled. So what I want to
do is I'm going to select the ellipse tool. I'm simply pressing
L on the keyboard. And you can also press, come over here and
select the ellipse tool. And I'm going to create a
circle in the middle like this. So you can see that these
edges are not proper. Let me change its color
or not, doesn't matter. And I'm going to select all of this and make a clipping mask. So right-click,
make clipping mask. So now everything is
properly so-called easy. So there is one
more thing which I can do or I should have done is duplicated the
circle which I made before, because this looks really plane. Okay? This doesn't look like, look
like a candy bar at all. So there has to be
some dimension to it. So let me select the
ellipse tool again. And I'm going to create a circle exactly the size of this. So it is technically
hiding everything now. But I'm going to apply
a gradient on this one. So I'm going to select the
gradient tool over here. And I'm gonna make a gradient which would be a
radial gradient. So from white to black. Okay? Now I'm gonna go to Properties
and decrease the opacity. So as I am decreasing
the opacity, you can see that we are
starting to get some depth. So I'm going to increase this, bring this out a little, and decrease the opacity. A little. I guess 30% is. Alright. So let's make it 30. Click away. And how cool is this? So this is basically just
white to black gradient. But when you put this
on the specific shape, you get this candy. So yeah, basically if you learn the basics of Photoshop
Illustrator properly, you can basically make anything. So let me go to the
gradient again. I think I should bring
this out a little more. And I guess we're good to go. So, yeah, this is
how you can make this really nice world
candy in Illustrator. I hope you guys like this and I will see you guys
in the next class.
30. Create Designs With Tilde Key: Hey guys, I hope you
are doing great. And today we are
going to learn how to make this really fun designs
using that 10-day key. So what is the two leaky 11? Let me move these to the side. And let me simply write it over here so that you
could see the tilde lucky, because I think it is
different on Mac and PC. So I'm going to try and
see if I can write it. So yeah, this is a two lucky. It is usually at the very left off of your keyboard on Windows. So right next to number 1
before actually number one. So this is a trilogy.
I don't know. I'm not really sure
about Mac where it is, so you can simply Google it up. So yeah, let me delete this and let's make some
fun designs using it. So I'm going to change the fill to stroke over
here and let's let some light color like
maybe this or maybe blue. I guess this is on right, then simply hit, Okay. And now I'm going to select
any of the ship towards, for example, the Star tool. So if you create
a star like this, we'll simply create a star. Okay? But a few
select the two leaky. Let me show you
what will happen. So I'm going to select
the Star Tool again. And while making the star, I'm going to press
the Tilde key. Sorry. I actually have to
turn this off because the tilde key is
actually for my, my, my cursor guide. So let's try again. So I'm going to
press that Eliquis and I'm going to
draw using this. And you can see I'm getting
search nice pattern. How cool is this flooding
make it smaller. So how this works
actually, let me show you. So let's just say if I select
the circle ellipse tool, and if I draw over
here like this, it will make a simple circle. But while doing this, if I press the Tilde key, it will basically
keep on copying it. So we have distributed
nice tornado over here. You can change its
color as well. Okay? And then Vicky works
really nice with the Star tool and also
the polygon tool. So let me change the
color to something else. Maybe this green hit. Okay, and let's let the
polygon tool and overhead, I'm going to select
the tilde lucky and simply draw over
here like this. And you will get these
really nice pattern. Our will is this. So yeah, till they key is really fun. And you can even use this to make some
really nice backgrounds. And totally abstract. Or obviously the thing
which I made over here, I might not be able to
ever make it the same way because unless you remember the paradigm of how you
made it or recorded. So yeah, this was pretty
much it on till they key. I hope you guys
really enjoyed this and I will see you guys
in the next class.
31. Project 4 - Create A Design With Tilde Key: Hey guys, So who is
ready for a project? So yeah, in the last class
we learned how to make different the abstract designs
using distilled leaky. So this is your project. You are basically
going to do the same. You can do the Star Tool or the Ellipse Tool
or the Polygon, Polygon tool, whatever you want. And you have to make some fun designs using it
and submit them to me. I've already told you how
to submit your designs to me so that I could give you
feedback on them properly. So have fun making
their designs and I will see you guys
in the next class.
32. Geometric Line Art: Hey guys, I hope you
are doing great. And today we are going
to learn how to make this geometric line
art in Illustrator. So let me delete this and
let's make it from the start. Okay, the first thing which I am going to do is I am going to select the polygon
tool over here. And let me select this
yellow color and let's create a polygon
over here like this. So I set the stroke to five. You can increase or decrease
and decrease it if you want. And after collecting the stroke, I'm going to apply
a gradient on it. So I'm going to click over here. And a gradient from red to yellow has been
applied over here. You can change the color
to whatever you want. So let's make it from
blue to maybe pink. And this will also work. And now we are going to
use transform on it. So I'm going to select it, go to effect over here, distort and transform, and
then click on Transform. Transform panel has
been opened over here. Let me set the
horizontal scale to 98 and vertical
scale to 98 as well. And then I'm going to set
the angle to maybe it, we can increase or
decrease it later on. So basically I'm going to increase the copies and
you will see the effect. So this is not proper because
the angle is too much. We can basically increase or decrease the
angle you can see. So I'm going to decrease
the angle so that everything would be inside this. So let's set the angle to two and let me
increase the copies. No. So this looks so on ice. You can create the
horizontal scale 297 100 and D6 as well. You can try different settings. Well, let me set it to 95, 95, and let me
decrease the copies. So I'm going to
increase the copies. And it looks really nice. And it is one more
thing which I can do, let me hit Okay. And I can bring
in these corners. So you can see this
looks really nice, but it is not proper. So you can click on this, go to Transform again. So basically I clicked
on a pittance, sorry, I was really fast. And then Transform. And you can change
the angle even more. So I guess this is all
right and simply hit, Okay? And we have this really nice, basically geometric line art. Let me make this
a little bigger. So yeah, this is
how you can make amazing geometric line
art in Illustrator. And I hope you guys
really enjoyed this and I will see you guys
in the next class.
33. Section 4 - Typography: Hey guys, welcome to section 4, which is all about typography. So you are going to learn some really nice advanced tips and tricks later to typography. You are also going
to learn how to make some really nice texture effects
like this one over here, which is stitched extra fat. Then over here we are
also going to learn how to make this
ethnographic texts effort. We are going to
learn how to convert any attached into
any shape you want. You are also going to learn how to make this
editable text effect. Let me show you. You can even edit this. So if I write 12 over here, you can see that it has been
edited along with the box. Looks nice now. And over here we
are going to learn how to extend textboxes. So for example, I
have some text over here and if I remove a
chunk from over here, you will see that it is
moving from over here. So all of this is connected. You can see these lines. Then we are going to learn
about variable forms. We are also going
to learn how to make this really nice
paper turn affects. I guess this is pretty much it. So yeah, can't wait to see
you guys in this section.
34. Advance Typography Tips & Tricks: Hi guys. I hope you
are doing great. And today we are going to learn some really nice advanced tips and tricks later to typography. So I have written down the character and
paragraph panel over here because I tend
to forget things. As a designer, I written
it down over here so that I won't forget what
I want to actually teach. So basically you can see that there is the
Properties panel over here. If you click on any text and the properties
change over here. And by now you should know
that the Properties panel and the control
panel are the same. We tend to use
Control Panel a lot because the options
are at the top, but you can do everything from
Properties panel as well. They are just more
extended over here. And everything which is in
control and Properties panel, you can also open
them separately. For example, that
Transform panel in the appearance panel, the Character panel,
paragraph panel, everything. So let's try opening
the Character panel. I'm going to come up over
here, click on Window. And over here you won't see them because they used
to be up over here, but now they are in
that type option. So I'm going to click on Type, and over here I'm going
to click on character. So you can see that
the character panel opened up over here, but the options over
here are not complete. If I click on this, overhear, this more option in
the properties panel, you will see that we will
have a lot of more options. So if you want to see
more options over here, you can simply click on
this burger icon over here and click on Show Options. So you will see all the options. By the way, to be honest, you don't have to know
about everything, but I will try to go
through as much as I can. So let's try with this text. We can remove this, Let's write something else. Let's write my name. And yeah, let's see what
we can make out of this. So I'm going to select this. So first of all, you can see in that you can change
form from over here, I'm going to select this font. You can select any
font you want. This is very basic. Then you can also
change the weight. Every font doesn't has a weight. So let me change it
back to connect, which is a phone
which I really like. So you can see that there
are a lot of weight options. These are actually
called weights or you can say boldness. So I'm going to
select Regular over here for no or maybe
let's let bold. I like this, okay. And you can see that there are other options over here as well, because in Photoshop,
in Illustrator 2021 and now in Illustrator 22 only do there are a
lot of new options. So if you find something over
here which is new to you, it is probably because you are
not on the latest version, but most of the things
are pretty much the same. Okay, so let's start
with the first one. You can basically increase or decrease the size using this, I guess if you hover
over these things, you can also see what is what, what it actually does. So everybody would dare to,
and if I hover over here, certain leading, okay,
So what this leading, basically if I write another line and I write
my full name over here, and I want to increase the
gap between these two lines. What I can do is I can
increase the leading. Leading is actually the
gap between two lines. Perfect. And similarly there is this another term which
is called kerning. Kerning is actually between
two, any two letters. So if I select all of this, I can current or
you can also call it tracking between these two, between all the characters,
basically, sorry. So using this, you can
increase the character width. Then you can hover over here. You can increase
the vertical scale. So you should never
do this to be honest, never apply vertical
or horizontal scale on anything because
it ruins the phone. So I'm going to bring
it back to 100 percent. And you can also increase
the width like this, to be honest, I wouldn't
recommend it at all. Then there are other
options over here as well, like you can increase
the set baseline shift. This is a new option
in Illustrator 2020 2, which has no use. We didn't have a lot
of use unless you are into typography
or into logo making. And this is a new feature which
came in Illustrator 2020, to which I really like. If you click and keep
on clicking over here, you will see that the
craters are tilting. So I really like
this to be honest. And yeah, this is pretty much
it for the character panel. There are other options
over here as well. You can capitalize things. You can make the first letter
capital and the second, and the rest of them smaller, then there is the
uppercase and lowercase, sorry, not the uppercase, but the superscript and subscript and underlying
and crossing. There are a lot of
stuff over here. You can play around with
all of these options. So this is a very messed up. Let me cancel this
and delete this, and let's write something else. So let me make this bigger. Why is it not working? It is supposed to write
the Lorem Ipsum text. I guess we messed up the
whole character panel. So, yeah, so let's see if we want to basically
reset all of this. So I'm going to basically
make all of this to auto, auto 0 and basically
make this 0 as well. So we're back to
the normal text. You can change its
color as well. So let me show you about
the character panel. So let me delete this and I'm going to
click the type tool. And you should know
that you can also drag to make text like this. Let me select
something less bold. And I'm going to
increase the size. So I'm going to decrease
the size over here. Let's make it 20. I'm just doing this
because I want to show you the paragraph panel. So let's copy this a lot. Let's copy all of this. And then like this. So let me tell you about
the paragraph panel. Let me click over here. And open Paragraph panel. Or what you can do
is you can go to Window Type and then
click on paragraph. So you can see that
the paragraph panel opened up over here. You can hide or show options. Took on a gyrus and not a
lot to Paragraph panel, but these options are
really important. So I wrote the text
over here like this on purpose because if
you select all of this, you can see that it is by
default set to left align. You can click over here to
set it to middle align. Then you can click over here
to set it to right align. And what are these options? So these are pretty much
like these options, but it just defies all the text. So if you click over
here and you can see that it is justifying
it to the middle. If you had a lot of text, it would spread it out. So yeah, these are pretty
much the same options. This is justify all. And if you had touched
on the right over here, this would be justified
left or right, depending upon your need. To be honest, I don't use
all of these options at all. I simply use left align, right align, or center line. This is pretty much it. So yeah, this was
pretty much it on how to basically use
the Character panel and the paragraph panel. To be honest, there are not a lot of advice tips
in this tutorial, but a lot of people
who are advanced into Illustrator and they don't know anything
about these things. So I thought I
would cover it and I will see you guys
in the next class.
35. Glyphs & How To Use Them: Hi guys. I hope you are doing great. And today we are going to learn about glyphs in Illustrator. I don't know why
am I using my name so often in these tutorials, but yeah, no problem. So basically you can
see that I have to form silver hair and I want to
show you how glyphs work. So first of all, we are going to open up the Glyphs panel. I'm going to come up over here, click on Window and
come down to type. So everything we just learned
to type is over here. Basically they have
grouped it up, which is very nice. So you can click on
glyphs over here, and the glyphs panel opened up. So by default, it is
sent to a general fund. And if you click on any font
like this one over here, you will see alternatives
or debt font. So you can see that if
you are writing French, you might need this character. So I'm going to click over here. I'm going to click on this, and there is this accent on it. So this is actually
used in French. And you can see that there are other options
over here has well, so if you are writing
French or German or any other language which has
the same script as English. You can use all
of these options. And not only this, the glyphs are really important when it
comes to typography. Sorry, not just typography,
but logo making. So let me come over here and
let me show you this font. So if I click on this font, you will see the name of
this font is personal. To be honest, it just
says personal use regular because this is a demo version. So the name of the
phone is could do. So if I click over here, and now I've opened
up the Glyphs panel. You can see that there
are a lot of options. And these are really
nice to be honest. So if I click on this, I'm going to click
on this story. We're going to select
this L over here. And you can see that it is automatically showing
me all the options. And there are different
variations of this font. So I'm going to click on this. So you can see that
this is search on lice L. So the font already
looks amazing. I can press Control or
Command G to move it back. Or I can select this, and I can select other
versions of this a as well. So I'm going to select
this and I'm going to see if there are other
versions of this. So you can see that this
one looks really nice. I'm going to click on this. So if I were making a logo, I would definitely
use this form in a team because this
looks really nice. So yeah, this is how you can
use glyphs in Illustrator. All you have to do is
open up the Glyphs panel, click on your text and it will automatically change
everything over here. And after Dad, you can click on the text and select
whatever you want. And I guess this looks nice. So if I click over here and simply
double-click over here, it will also add this overhear,
really nice Teilhard. Anyhow. I hope you guys really
like this tutorial and I will see you guys
in the next class.
36. Go Crazy With Type Text Tools: Hi guys. I hope you are doing great. And today we are going to learn about the touch-type tool. So if you come over here into the type tool,
right-click over here, you will see that there is this option for touch-type tool. So you can see that I have
some text over here by undermined wording that I
have actually destroyed it. I would have actually make
the outlines out of it. But no, if I select
any over here, and if I select the type tool, I can actually edit
all of this as well. To be honest,
disagreements and v, something which you would use. There are times when you want
to make something crazy. So this is the tool for you. Let me select all of
this and delete this, and let's write something scene. So why is it not working? Let me select the type tool. By the way, the short key for
the Type Tool is t. Let me click over here and let
me make the font bigger. And let's write the letter selected and click
the same font. So I'm going to select
bison over here. And let's make it bigger. Okay, So what is the
touch-type tool for? You can select all of your text and you can select
that touch-type tool. So touch-type tool is
like really crazy. You can select
individual elements and regional characters
while they are part of the text and
you can edit them. You can see that there is this option and the
circle at the top, you can basically rotate
your texts like this. So if I were making a logo, I might need this. And then I'm going
to select this. I can even make this bigger. Then I can select this. I can make it smaller, or I can even move it around. So I can move it
over here like this, which is not very
practical to be honest. I can even select it
and I can make it like this or bring it down. Like you can do crazy
stuff with this tool. And I'm not really sure
why this even exists. But sometimes if you
are feeling crazy, you can definitely use this. To be honest, this is
really easy to use. You would just have to click on any letter and you can edit it. So I can even bring
bring this over here. Can I bring it around? No. Okay. So you have to stay
within your lines. You cannot just bring
this m on this side. So yeah, this is pretty much it. You know how you can use
the touch-type tool. This is really
crazy to be honest. But if you want to mess
around in Illustrator, and if you want to make some
really crazy kind of type, you can definitely
use this option. So I hope you guys like this and you guys
in the next class.
37. Manage Fonts Using A Font Manager: Hey guys, I hope you
are doing great. And today we are going to
learn about a fund manager. So basically how offered
manager works and how you can use one to
manage all of your phones. There are a lot of fund
managers out there, but the best one which I have found is called phone-based. No, they are not
sponsoring this video. World. I wish they did. And foreign base, if you are
watching this, do hit me up. Anyhow. So what is
a former mentor? Let me show you let me, let me first show you
how you can download it. So let me open up
Chrome over here. And no, I'm not going to
open up the actual window. I'm going to open new
incognito more for you guys. So let me write formed
base over here. So just click on the first link. And it is a free software
and I loved this. Simply click on
Download and I guess you don't noted for
Mac, Windows and Linux. So depending upon your operating system,
you can download it. And after downloading it, let me close this. It will open up. Let me open this. It takes some time to open, but it is a green. Great for manager. So let me cancel this. So you can see, to be honest, there are a lot of
things over here, but I don't want you to
become overwhelmed by this. So I'm just gonna help you go through all of this
and T2, how it works. So by default, you
can see that it says favorite,
active and inactive. I have 3,222 font on my system. So it is showing
me all the forms. I used to have, like
68 thousand phones, but I then managed all
of them like this. So yes, you can even
make folders and collections in their
fault manager. So let me show you how it works. So the problem with a
font is dare to have to download and basically
install all of them. But when it comes to this four
major, you don't have to. Let me show you how. So, for example, if I
click on this brush forms, so you can see that there
is a circle over here. If the circle is white, this means these
forms are not active. So instead of, instead of
installing on all the phones, you can simply click on this. And all the fonts will
be sink into the system. How cool is this? You don't have to install all the phones. And if you see a green
circle which is not filled, this basically means any one of the forms in this whole
collection is sink. So I can click on this
to sync all of this, or click on this to
unthink all of this. And how fast is this? So let me show you. Let's just say I want to
use this ultra fresh font. If I come over here,
sorry, over here. And if I go to my fonts, let me click over here. And let's draw fresh
or ultra fresh. So I won't be able
to find this form because it is not
st. And this is a good thing because you don't
want all the fonts to be saint in your system
memory because it takes, because to be honest, it doesn't take a lot of memory, but if you have like a
1000 forms and installed, it will eventually make
your system a little slow. So I'm gonna come over
here and I'm going to click on this circle
over here in the brush. And all of these
forms are sentinel. And I can even
change this preview. I will tell you
about this later on. Let me come over here. So yeah, it takes some
time to think it. Now I can select all of this and let's write or draw or
refreshes over here. And how cool is this? So let me come back
over here to join us. I love this one manager. I have tried a lot of
our mentors in the past, but this one is the best. By the way, coma list
the name of my wife. So yeah, I was
just checking out. I was actually making a logo for her upcoming company hopefully. And yeah, I was checking out
different forums for her. So how can you change
the preview of this? I'm going to click on settings. So you can go to settings over here and you can
change the preview. So I'm gonna write something
like maybe big black bear. Okay? And I'm going to
click back over here. And if I click over here, and why is it not
working? Let me check. Why is it not working? So you can select
different types. Sometimes it doesn't
work properly. Okay, So it worked now. So you can see that it says big black bear and I can click on any collection and I can
preview all the phones. I can even make this
bigger or smaller. I can even align it left
to right or center. What does this do? I can
even change the background. So I can change
the background to red to see if this
works properly. To be honest, I
don't think I needed so I can even change
the color of the font. I didn't know this too. I, if I click on this, I can change the
color of the font. But let me set this to 24 because I don't
think we need it. And where does this option do with this feature is only
available in phone-based. Awesome. So if you are subscribed to
the monthly subscription, then you can do with
this option as well. And I don't know what this does. And you can even
reset all of this. So if you click on this,
everything would be resettled. You can even select
Forms and favorite them. But the best thing which I like is the whole folder
creation thing. So you can see that there
are a lot of folders. I have pretty much made
collection of everything. So if I want, if I'm making are
benignly to do food, I can simply click on this. And I have all my
food forms over here. And this makes working
so much easier. I would highly recommend you to check this for manager out. I can even click
on this arrow over here and I can add a
collection or a font. Like there are a lot
of options over here. And also by default, they have given you
all the Google Forms. So yeah, I totally loved this to dig this because
this makes working, especially in terms
of type really easy. So yeah, this was
pretty much it. Sorry, I accidentally
opened my Discord. And this was pretty
much it on how to use a foreign manager. These things are pretty much available in all the
foreign managers, but phone-based is the best in terms of oil,
the functionality. So I would highly recommend
you to start using it if you have more than one
hundred and four hundred. So yeah, this is pretty much it. And I will see you guys
in the next class.
38. Stitch Text Effect: Hey guys, I hope
you're doing great. And today we are going
to learn how to make this stitch dashed
effect in Illustrator. Basically you can make
it in Photoshop as well, Bert in Illustrator,
it is much easier. So let me show you how
and it is also editable. So let me click on this. And if I select the type tool by pressing T and click over here, I can write anything I want. So let's write something. Loads, loads. And you can see that
this is actually, it actually looks like
that this is stitched. So yeah, let me undo this and let me move it up so that we could
make it from the start. So I'm going to move
it up over here. I'm just moving it
up so that we could refer to the font later on. So the font over here
is called Berlin sons. So we're going to use this. Then we come over here, select the type tool
and write some text. Let me change the
color to white. And the font is Berlin science. So I'm gonna come over
here, sorry, over here. Berlin science, FB, I guess this is it that we check if this
is the right phone. Berlin songs, be Demi born. I'm going to select this and let's try again
Berlin's songs. Demi Bold. So this is the font. Let me change it to stitch. Vit CH. I guess this is
how you spell it. Let me make this bigger. Okay? So we are basically going to convert the fill into stroke. So over here you can click
the swap fill and stroke. Or I guess you can
also press Shift X. Yes. So you can also press Shift X to invert the
stroke and the fill. Or you can click over here. And you can see that we
already have the outline, but we want gaps in it. So I'm going to select this. Let me increase the
stroke a little. I guess this is all right. So you can either click on stroke over here or you
can click over here. So I'm going to click on
Stroke options. Over here. You can see that it
says dashed line. And boom, we are done. So basically by default, these won't be the
options for you. And you might have
something like this, 100. It will be something
like this for you. 10 in on maybe tenant and I guess these are
the default settings. So even this looks all right, but if you want to
have bigger stitches, so this is dash gap, dash gap. So what this basically means is dash basically means the size. So if I set it to maybe like 40. So you can see that the
size is increased and if I want to increase the gaps
between them as well. So I will select
this and make it 20. So you can see that in
the gaps are bigger now. So the gaps on this phone might be different
than this one, but totally up to you
how you want to make it. And this is pretty much it. And this is how you can create a stitch text effect
in Illustrator. I hope you guys really enjoyed
this, really like this. And I will see you guys
in the next class.
39. Create Anaglyphic Effect: Hi guys. So today we are
going to learn how to make this an English text
effect in illustrator. So you might have seen these in a lot of movies
and all basically, this is retro kind of, there is the retro
kind of feel to it. So we are going to
learn how to make this. So yeah, let me delete all of this and let's make
it from the start. So let me start with
writing some text. I have selected the type tool. I'm gonna make this bigger. Let's select all of this
and change the font. So I'm going to select
Times New Roman. I don't know why my
throat sounds weird. Anyhow, so let's
write something. I'm going to write
hippie over here again. So this phone, sorry, this effect looks really nice on these all kinds of fonts. So you can use it on
other fonts as well, but it looks really good
on these kinds of forms. So I have written this down in black and now I'm
going to copy this. To be honest, I
don't even have to convert this into outlines. I can simply use this font. So I'm going to
press Alt or Option, and I'm going to drag this. So you can see that I
am making a copy of it. And if you want to make a
copy and in a straight line, press Shift as well. So press Alt or Option
plus Shift and drag this to a little bit of left and change the color
of this one to read. So you can select a nice
shade of red over here. So you can see that
this one is at the top, but I want this to
be at the bottom. So I'm going to select
this and press all, sorry, Control Shift and left bracket key or command shift
left bracket key. Or you can also
right-click on it. Go to arrange and Send to Back totally up to you
how you want to do it. So I'm going to click over here. But always remember that knowing the short keys is better. So Control or Command Shift
and left bracket key. Then I'm going to make
a copy of this again. So I'm going to select this, make sure that I am
selecting the red one. So let me move this to the side a little and make
sure that I select this one. So I'm going to press Alt or Option and then move
it to the side. But again, I will
have some problem in this because this phone
we aligned properly. So let me press
Control or Command Z. And I'm going to bring
the black one up a little so that we could
select this properly. So I'm going to select this, press Alt or Option
and drag this to the right a little
and change the color of this one to something
like say an or this color. You can even select blue, even that works. We are done. So now we're going to click the black phone
and bring it down. And we are good to go. So you can even select
this and change the color of this one to psi on. So let me select this color. So you can see that even
this works properly. So by doing, by just
copying the colors, by copying the text and
changing the colors, you can make this
simple kind of effect. And if you have
seen, I guess if you have seen TikToks logo, let me check if this works. So if we write Tiktok logo, so I guess this is
the same effect. So you can see that this is pretty much the
same effect if they have just use cyan at the
top and read at the bottom, even in their vitamin. You can even do this on white, but it looks we're
much better on black and they have the
same effect over here. So let me come back
over here and you can basically make tick tock, tick tock, tick tock type logo in using this effect as well. So yeah, this was pretty
much it on how to make an infographic text effect. I hope you guys like this and I will see you in the next class.
40. Put Text Into Any Shape: Hi guys. So in this class you are
going to learn how to convert your text into any shape or put your texture
into any shape. So basically you can see that I have these shapes over here. This is a hexagon, this is a triangle,
and this is a circle. And I have ported these
texts into these shapes. So, uh, let me move
all of this up a little and let's make
these from the start. Okay, So the first thing which I'm going to do is
write some text. So I'm gonna make this bigger. Let's select the
text by sandwich. I use way too often. And let's write something. We'll go over here. So let's write shape. Okay? You can give it a color
if you want or don't. And then I'm going to
create a shape over here. So I'm gonna come over here, select the Ellipse tool and let's create a circle over here. Okay? So basically the shape
has to be on top of the text basically. So I'm going to double-click over here and
change its color so that I would know the difference if it's on the top, what node? So the shape is on the top. So what you can do is you
can select both of them. Then go to object over here. And over here there is
option for Envelope Distort. And over here, make
with top object, simply click on this
and voila, we are done. So basically you can make
this for any shape you like. Let's try something
else as well. Let me write some more
texture word here. Why is it not working? Okay, so let's try
some more text. Let's write IIT. Make it bigger. Let's make a copy so that
we could, could you use it? Then? I'm going to
select the polygon tool. And as I have taught you before, if you want to add or remove
points from a polygon, you can press up to add points and press down
to remove points. So if you remove all the points, you end up with a triangle. So I'm gonna hit it to
create a triangle over here. Let me change its
color so that I wouldn't know if it's
on the top one naught. So let me show you
what would happen if it's on the bottom. Let me put it over here, right-click, arrange
and send to back. So this is at the bottom. No, no. If I select both
of them and go to Object, Envelope Distort and make with top object,
this won't work. So the object has
to be on the top. Let me tell you a short
key for this as well. So if you want this
to go on the top, you can press Control or Command shift and right bracket key. And it will move on the top. And if you want to
bring it to the back, same thing, Control
or Command Shift and left bracket key. So top, bottom,
top, bottom, top. So yeah, let me
select both of them. Go to Object over here, then go to envelope distort, make with top object
and we are done. How easy is this? Let's try doing this with
some crazy kind of shape. I guess we could do with
this with the Star Tool. Let's see what will happen. So let's create a
star like this. And let's write
something longer. Let's write star. Okay. I know this is gonna
get messed up, but let's see what will happen. So let's go to Object, Envelope Distort and
make with top object. So yeah, it kind of works. I guess if we had a
three letter a word, it would have worked better. But, uh, yeah, just
looks all right as well. I guess this will look
better with the word eat. Let's try it. Eat because its sides are clean. So let me select all of
this and go to Object, Envelope Distort and
make with top object. So yeah, it kind of looks
better but not so well. So yeah, basically
this is how you can convert any text into any shape. You can write a create
a custom shape as well, and it will still work. So yeah, this was
pretty much it. And I hope to see you
guys in the next class.
41. Editable Text With Background: Hey guys. So today we are
going to learn how to make this editable text with
background in Illustrator. So if I select this, you can see that I
can change the text. And the box behind it is still
there. How cool is this? So let's make it from the start. Let me delete this. So I'm gonna write
some text over here. Let me make this bigger. Let's keep it like this
and will be changed the font to maybe this. Okay, so this looks nice. So the next thing which
you are going to do is you are going to go to
Appearance panel over here. And over here you are
going to add a fill. And if you cannot see
the Appearance panel, but you have to do is
simply go to Window. And over here you can see
there is the appearance panel. Simply click on this
and it will appear. So I'm gonna go to
Appearance panel and click on the fill. And after that I'm going to change its color to something, maybe this green, it
would be all right. After that, I'm
gonna go to Effect, convert to shape and rectangle. So you can see that the
shape has been filled. And also whatever color
you choose over here, it would be the color
of the background. Simply hit, Okay? Now this is a very simple step. Simply select this character and drag and bring it up
to the fill over here. And we are good to go. So now we can select all of this and I can write something else, like my name, her. And basically this was pretty much it doesn't even
change the color of this. So I can change
the color of this. And what if I wanted
to change the color of the background? Let's see. So if I come over here, if I click on this, and this is how you can change the color of the
background as well. So yeah, this was
pretty much it. It is very simple. It looks so good, and it is really
convenient to make. So I hope you guys
really enjoyed this and I will see you
guys in the next class.
42. Extend Text Boxes: Hey guys, I hope you
are doing great. And today I'm going to show you something really important
yet really easy. And that is textboxes. So let me show you
what will happen if I add something to detect. Let's just say I copy some of this and I paste it over here. You can see that all of this
is moving to the right. And similarly, if I move
a chunk from over here, you will see all of these
T38 textboxes are connected. So how did I make this? Let me delete delete these two. I guess all three of
them would get deleted. So let me delete this
one and read this one. So now you can see
all of the text. If I move this down, you can see all of the text
is moving down over here. Let me delete all
of this so that you wouldn't know
what's going on. So let's just say I want to create a magazine
cover or whatever. I'm going to create a
text box over here. By the way, if you know, want to know how to
create a text box, simply select the Text tool
and simply click and drag, and it will make a text box. Okay, So I have some
text over here. Let me increase the size so that you could see
everything properly. Why is the size
noting reasoning? Okay? So I have this text over here. And whenever you
write something and it goes beyond the text box, you can see that there
is this sign over here. Let me delete some
of the texts order to could see it properly. So let me delete all
of this just so much. Okay? So you can see
that this is the size of the text box and there
is no sign over here. But if I copy some
of this text, okay, and I start pasting it, you will see that there is
this little sign over here. Let me zoom in to show you. So you can see that there is
this plus sign over here. So what is happening is that all of the text
which was extra, which was beyond the limit, beyond the size
of this text box. It is at the bottom, we cannot see it. And if we move this
to the bottom, we can see it a shorter text. But what if we want to
paste it somewhere else? No, we want to extend it. So what do will
have to do is you will have to click on this plus. So make sure that this
sign is a pairing. Simply click over here once. And now you can see this icon. Let me zoom out and I'm
going to click over here. And you can see that it copied the same text box with the same size over
here and the rest of the text is
moving to the right. It is the same size. I can even increase or
decrease in the size of this. And now if I add
some text over here, let's just say I copy this
and I paste it over here. You can see that it is
moving to the bottom. And now since this
is overflowing, if I click over here
and click over here, now, this is extending and I can change the
size of this as well. So basically the use of
this is that you don't have to copy and paste text
boxes all over again. You can simply create
the right text once and extend the text boxes. So this was pretty
much it on how to use textboxes in Illustrator. I'm pretty sure I
know a lot of advice. Illustrator users who are professionals and they
don't even know about this. So I hope you guys
are learning a lot and see you guys in
the next clause.
43. Variable Fonts: Hey guys, I hope you
are doing great. And today we are going to learn about variable forums
in Illustrator. So variable fonts
are really powerful, especially in
Illustrator because there is a special
option for them. So you can see that I
have two forms over here, connect an acumen and we are
going to use both of them. So let's start with Connect. If I click on this font, you can see in the properties, I can change its bonus or width. So deviate using all
of these options. So these are premade forms of
whoever makes these forms. Whenever someone makes
these forms that they have to define all of these. But in a variable forms, this is something really
interesting and different. So let's just say I want
to make the semi bold. So I will select this option. And if I want to make it
medium, I will select this. But what if I am being
extremely specific? I will, I want to select a font weight between the
medium and semi bold, not at dialect, but
between these two. How do I do that? I won't be able to do it
properly using this font. But if I select acumen, this is actually
a variable font. So you can see that those options are not
available for this one. If I click on Connect, you can see that I will
have all of these options. But when I click on Acumen, I didn't have these options. I have this slider because
this is a variable font, so it has a variable
font slider. And if I click on this, you can see I can even select
these options as well. But I can click
on variable font. And you can see that there are weight and width sliders
over here and also slant. So if I wanted to make
it with less weight, I can bring this down. You can see that I have
this really nice 10 font. And if I want to make
it extremely bold, I can do this. How cool is this? So this is actually
a variable font. And then there is
this width as well. I can adjust this
and also slant. This basically means
I can tilt it. So to be honest, Few player on all of these
with all of these options. These are like maybe 2
thousand phones in one, because there are so many
options in this 900 days. 115, this, this, and
this is even in points. So you can imagine
how many forms you can make out of this. So, yeah, this was the idea behind variable fonts
and how to use them. And they are extremely powerful if you know
how to use them. So this was pretty
much it on how to use variable forms
in Illustrator. I hope you guys
really enjoyed this, really like this, and I will see you guys in the next class.
44. Paper Turn Effect: Hey guys, I hope you
are doing great. And today we are
going to learn how to make this paper turn
effect in Illustrator. So let me select this
and delete this, and let's make it
from the start. So I'm going to zoom out
a little and I'm going to bring this text over here. So basically the font which I am using is let me check it. Obviously connect. So let's
write something else. So let's write book over
here on the bottom bookmark. And basically we are going
to make the effect on it. So before you start
making defect, you will have to convert
this into outline. So I'm going to press Control
or Command Shift O for our. So after selecting this, you will have to go to
the free-form tool. So here it is a free-form tool. It is right next to the
width and the warp tool. You can click on this and
you will have to select the second option which is
called perspective distort. So I'm going to select this. And now if I click on this, I can basically bring
this in like this. Okay? After that I am going to actually apply our
gradient on it. So I'm going to select this. And if you come down over here, you can see that it already
has a solid filled, but I want to apply a gradient
field. Sorry about that. So I'm going to click on this. So you can see that
it has already automatically applied
the gradient on it. But this is not what we want. We want it to be black to
white from top to bottom. So let me change
the angle to 90. This is still not what we want because it is at the bottom
and black is at the top. We want the inverted. So we can collect
minus 90 over here. Okay? And also I'm going to
increase the black, the top a little so that the effect would
look more realistic. Okay, after that,
I'm going to select this and bring this down. And I am gonna
make it like this. Okay? So basically I distorted it
a little more. Soy diet. We would have debt opening
kind of book effect. No, I'm going to
select both of them. I'm gonna go to
object over here. And then I'm going to
go to where is blend. So later in the
course we are going to do a whole section
on this blend. But for now I'm just
going to show you how you can use it
to make this effect. We are going to click
on Blend Options, then go to specified steps. And let's set the
steps to F4 and hit. Okay. Then you can go to Object again, blend and click on Make. So you can see that
you might think that there are a lot of steps, basically, a lot
of copies of it. So you can decode
easy it as well. You can go to Object again, blend and blend options. And in the steps you
can decrease it. So I'm gonna decrease it to just three steps and hit, Okay. And I can bring
this up a little. And I guess this seems alright. Now I'm going to select this, press Control or
Command C to copy and Control Shift V or Command
Shift V to paste it. So you can see that we
have a copy of this, but I want to invert it as well. So I'm going to right-click
on it, Transform and Reflect. And we are going to
reflect it horizontally. It okay? So you can see that this
is at the bottom now. And I think the
effect is not proper. We will have to invert
the gradient on this. So what we can do is
we can delete this and let's converted at
it, let's expand it. So if we click on
Expand over here, now I think the
gradient will stay. So let me select this. And instead of copying
and copying it, but you can do is right-click on it, Transform and Reflect. And while reflecting it, we won't hit, Okay, we will click on copy. So I'm going to click on Copy. So now the gradient is proper because at the
bottom it should be right at the bottom and black at the top and our own
on the upper one. So now we can select all
of this, make it bigger. Let's bring this
a little closer. Not too much. And paper turn effect is ready. So yeah, this is how you can easily make this
paper to an effect. It is so fun to make
and it looks amazing. So I hope you guys
really enjoyed this and I will see you guys
in the next class.
45. Project 5 - Paper Turn Effect: Hey guys, Who is ready
for another task. So yeah, in the last
class we learned how to make this really
nice paper turn affect. It was really simple to make and you are going
to do the same law. You can select any word you like and you have
to create on this. So let me give you a world. You have to make the same
effect on the word magazine. Okay? So, yeah, I guess this
was pretty much it. And I can't wait to see all of your projects and I will see
you guys in the next class.
46. Section 5 - Blend: Hey guys, welcome to Section 5. And this section is going to be all about blend in Illustrator. So you are going to learn about blend and how to make them. You are also going
to learn how to make this really nice
long shadow effect using blend obviously. And like I said, blend is really important
and really fun to you. So you are also going to
learn how to make this zigzag line art using
the same concept. You are going to
learn how to make this tube texture effect and also this really nice
gradient flower. And the one thing which
I really love making, which is this fire blend. So all of this is using the
blend options in Illustrator. And this is really exciting
and really fun to use. So I can't wait to see
you guys in this section.
47. How To Use Blend In Illustrator: Hi guys. So today we are going to learn about the blend tool
in Illustrator. So if previously it was just
an option in Illustrator, you have to go to
object and then blend. But now illustrator has
added its own tool. So if you come over here,
there is a blend tool as well. So yeah, now we
are going to make some really interesting
things using it. So let me zoom out a little and let me move all of
this to the side. And let's make it from the star. Okay, so we're
going to start with this green hexagonal shape. Let me zoom back over here. So let me first let
the shape tool, and I'm going to select
the polygon tool and let's create an
hexagon over here. Let's give it a color. Let me give the same color is green and the stroke as black. Okay? So basically, you might be wondering that if
I created this, I would have copied this once and then Control D
and again and again. So this is something which
is not very feasible if you are doing the same
thing over and over again. And also there are other things that you can do with blend. Well, let me show you how. So I have this zone over here. I'm going to press Alt or
Option and drag it over there. So let's just say I want
a lot of copies of this. So I won't have to copy
this again and again. Let me show you how you can
make multiple copies of this. So I'm going to
select all of this. Then I'm gonna go to Object, Blend and then Make. So you can see that we have
a lot of copies over here, but you can even adjust this. So let me show you how. Then we can go to
Object again, blend. And over here you can
select Blend Options. So there are a couple
of options over here. You can select steps. So by default it is set to 11. I guess this is what
I was making before. So you can decrease
this if you want. Let's just say you
want less steps. So if it says five over here, apart from these
two, they will be 1, 2, 3, 4, 5 in-between these two. So I can increase
this like a lot, maybe this and hit. Okay. So you can see that the
blend tool is so powerful. So what is the next
thing which we made? Yes, upgradient? So let me come back over here and let me select the
ellipse tool over here. And let's create a
circle over here. Okay? So I'm going to create a circle. Let's remove the stroke. Let's give it a fill. So I'm gonna make this pink. Then I'm gonna come over here, copy this to the side. Let's change its color to
something like this, blue. So now if I want to
create a gradient, let me show you how I'm
going to let both of these. Then I'm going to go to Object. Or what you can do is over here, there is this blend tool. So you can see, I
guess Blend tool was introduced in
Illustrator 2020, but below or 2020, I guess it is not available. So you can see the if you
click on this and then I will click on this circle
and then on this circle. So you can see that it has made such a beautiful gradient. And I'm sorry, there is some
noise of water over here. I don't know what's going on. Something is going on outside. Anyhow, we are going to
continue with the tutorial. Okay, so after that, we are going to make this. So I'm going to make
another circle over here. Let's make it red. And let's invert the
fill and the stroke. Let's increase the stroke to 12 maybe and decrease
the size like this. Then I'm going to copy this to the side and make it bigger. So basically I want
this to be the smallest one and distribute do with the biggest one and in-between, I want them to
increase the size. So what I can do is I can select the blend tool over here. Then I'm going to
click on this one, and then this one. What happened? Let
me try this again. So I'm going to select this
one and then this one. So you can see, we have this. You can see that the circles are becoming bigger
step-by-step. So we can adjust this as well. I'm going to go to object, then blend and blend options. And let's select
specified steps. And I can increase the steps. So you can see that this looks really nice. Let
me set it to 40. They let me show you
that you can even edit it after making it. So I have made this a legacy. I want to decrease the stroke. So I'm going to double-click on this one to select
this specific circle. And let me decrease in stroke. So I'm going to set it to four. So you can see that
these are very slim, then it is becoming thicker
and thicker later on. So I can double-click on
this as one as well, sorry. And decrease the stroke
of this as well. So yeah, this is
pretty much it on stroke, sorry about blend. But there is one more
interesting thing which you can make using this. So let me move these to the side and let me select the Pen tool. And let's create a stroke
over here like this, maybe like this random shape. So basically what I can do
is after making the blend, I can place this whole blend on this and similarly
this on this. Let me show you how. But let's start with this one. I'm going to select this one, and then this one. Then I'm going to
go to object blend. And over here it
says Replace Spine. I'm going to click on this. So you can see that
it had been placed on this pine basically
the whole stroke. Let me press Control
or Command Z. Let's try on this one. So Object, Blend
and replace spine. So this looks so nice. So let me delete this and let's select the spiral
tool. Where is it? So here is a spiral
tool over here. So what you can do is you can
create a spiral using this. So I'm going to create
a spiral like this. Let's give it a color so that we could see
what's going on. And let me make this a
little smaller like this. So now what I can do
is I can select this, then this go to object
blend and replaced by in. So you can see that it
has been placed on this. So Blend tool is like really powerful if you know
how to use it properly. And there are a lot of
applications to it which we are going to discover
in the coming tutorials. But this was introduction to blend tool and Blend Options. And I hope you guys
really enjoyed this. And we are going to make some really nice thing
using the blend tool in the community tutorials will see you guys
in the next class.
48. How To Make Long Shadows: Hey guys. So today we are going
to learn how to make this long shadow
in Illustrator. So you might have
seen this effect on a lot of illustrations. So now we are going
to make this, and let me show you a
variation of this as well. So I have simple text over here. Let me move this to
the side and I'm going to delete all of this. So by now, I think a lot of you would have figured
out how I made this. Yes, we did it using the blend. So yeah, let's make it again. Let me select the
text tool over here. I can click over here, or I can press T on the keyboard
to select the Text tool. And I'm gonna, I'm
gonna click over here. So you can see I am using this formed which is
called bison bold. You can use whatever you want. I use this very often. And the heart. So let me make a copy of this. Let me zoom out a little. I'm going to press
Alt or Option and make a copy of it
and move it up. And while I am moving this up, I am also pressing shift. That way. It moves up in a
very straight line. Now I'm going to select this and I'm going to change the
color of this to black. Okay, Let's zoom out a little. And, but I'm going to do is, so basically how you
want your shadow, you direction of your
shadow to be in which side. You have to copy this
to data specific side. So I'm going to select it, press Alt or Option, and move this to the side. So make sure that it is a
little outside the canvas. Then I will show you how you
can even cut it as well. So I'm going to select this, then select this as well, go to Object, Blend and Make. So you can see that it is
showing two steps between it. Let me show you how you
can increase the steps. I'm gonna go to Object again, then blend and blend options. So previously we discovered
this then Steps option. So you can do the
same over here, but it will take a lot of time. And it is not very
feasible because you can see that there are
jagged lines over here. So instead, what you can do is you can select Smooth Color. And why is it not working? So, yeah, instead of color, you can select
specific distance. So you can see that it is now the distance
between these two. It is a setting
everything according to a specific distance. So you can increase
it or decrease it, lower, you decrease it. The smoother the line will be. Don't wanna keep it at two
pixels and simply hit, Okay. Then I'm going to click
on this and move this down while pressing
shift, and we are done. So you can see that we have
this long kind of shadow. It is often used in
superhero movies. And there is one more thing
that you can do is you can click on this and
double-click on this, then select the specific text. You can even change its color to something like this gray. And when you will do so, you will see that the rest
of the text is also changed. So how can you cut this off? Let me select the Shape tool. I'm going to select the
Rectangle Tool and I'm going to create a rectangle
over here like this. Now I'm going to select this, this blend and this shape. Then right-click and
make clipping mask. So now what happened is that we have made a clipping mask and
everything is inside this. There is another way to do this. I will show you in a bit. So I want to put this behind the text so I can
right-click on this, arrange and send to back. So our textures at the top. This is one way all doing this. Let me press Control
or Command Z. I'm going to delete this. So instead of making the
whole clipping mask, there is another
way you can do this and that is through trim. So I'm going to go
to View over here. And over here there is
this option of Trim View. So what happens when
you click on trim view? Basically it removes everything which is outside the canvas. So for example, if I
create a circle over here, and if I move it over here, you will see that
it will become, it will get disappeared as I
move it outside the canvas. So basically this is how
you can cut this off and you can even edit
this even at this stage. Now I'm going to select this, change its color to black again. And double-click over here, and we are good to go. So I guess whenever
you edit something that the Trim View
gets turned off. So you will have to
click on this again. I'd hold two via my mumbling. So yeah, we are
good to go along. So yeah, this is
how you can create a long shadow in Illustrator. I hope you guys
really enjoyed this and I will see you guys
in the next class.
49. Zig-Zag Line Art: Hello everyone. I hope
you're doing great. And today we are
going to make this zigzag line art in Illustrator. So let me delete this and
let's make it from the start. So basically first we are going to make those zigzag
lines and then we are going to
create a blend and replaced the blend on the spine. So I'm going to select the Ellipse tools or
ignored Ellipse Tool, Rectangle Tool over here. And I'm going to create a
rectangle over here like this. Maybe this size is all right. And then I'm going to change the color of
the stroke to white. Okay? After that, I'm going
to select this. I'm going to go to
object, over here, go to path, and over
here, split into grid. I'm going to click on this, then I'm going to
set this to 55. So basically they
will be five rows and five columns simply hit, Okay? So you can see that it has been divided into multiple squares. And these are different. I mean, you can basically
move them individually, but we don't need to
move them individually. I'm going to select
all of this press Control or Command
G to group it. And I'm gonna massively
rotate it like this. I guess we need to make it
a little smaller like this. Okay, so now I'm going
to select the Pen tool and I'm going to select something different,
some different color. So what are we would be
able to distinguish? So I'm going to start
from over here. I'm going to click
here, then click here. And you can see that we
are making zigzag lines. You can even make this
free hand if you want. You don't necessarily have
to follow what I am doing. But this is just a
guide as you know. So we are almost
done. After that. We can basically delete
these extra shapes. So I'm going to move
this to the site and I'm going to delete all of this. After that, we are
going to make a blend. Let me move this to the side. Let me create a circle over
here like this, not too big. And I'm going to change
the stroke to fill. So you can press Shift X or
you can click over here. So I guess Shift X is better and we are going to
apply a gradient on it. So I'm going to click on this. So you can see that I
made a mistake over here. Since this was on top of
the stroke, was on top. The gradient has been
applied on the stroke. And if I make this bigger, you will be able to see
the gradient over here. So make sure whenever you are
applying a color to fill, let me read this, make sure this is on the top, and now click on this gradient. So let me select any two colors. Misled, yellow and green
again like before, like this. And then I'm going
to select this one, copy this to the side. We can select the
blend tool over here. Click on this one, and then this one. We have created the blend. But we want this to
be a smooth gradient. So I'm going to click on
this and go to object blend and then blend
options over here. Let me set this to specified distance
and simply hit, Okay. So I know you think that this is a complete yellow
line, but you're wrong. Let me show you how. Let
me put this over here. And this is basically a blend. The green color behind
it still exist. We just need to access it. So I'm going to
select all of this. Both of these go to object, blend and replaced buying. And voila. You can see
that this looks so nice. I guess it looks like the light is coming
from this side and this side is shiny and there
is shadow on this side. So you can even
decrease or increase the size of these circles
or change the colors. So I'm going to click on this. And let's just say I want to change the color of
this specific circle. I'm going to open the
gradient panel and let me change the color of
this one to read maybe. So you can see that this looks, also looks really nice. Let me press Control or Command Z. I can even decrease
the size of this. And you can see
that it is starting from slim and then
getting bigger. But I guess this was
looking quite well. So we are gonna
leave it like this. So basically this
is how you can make this really nice zigzag
line art in Illustrator. I hope you guys like this and I will see you guys
in the next class.
50. Tube Text Effect: Hey guys, I hope
you're doing great. And today we are
going to learn how to make this tube text effect. So basically this is the
exact same concept as the zigzag line art which we learned in the
previous class. But we are going to
apply this on a letter. Basically, it could be a letter, LSD, whatever you want. Let's do sorry about this. Anyhow, let me delete this and let's make
it from the start. So basically there are
two steps to this. Make our stroke, okay? And then number 2
is make a blend. So let's start with the blend. Let me create a blend over here. It's a simple shape. I'm going
to apply a gradient on it. And let's let any two colors, I'm going to slide
blue and pink. Then let me cancel this. Then I'm going to
make a copy of this. Let's make it a little smaller. Don't want this
to be really big. And then make a copy of this. Click on the Blend Tool, click on this, and
then click on this. We want this to be smooth, so we're gonna go to
object and then blend, and then blend options and set this to a
specified distance. So I guess two pixels is all
right and simply hit, Okay. Let's make basically
a letter over here. So previously you
have seen that I created our letter D over here. So basically you can
select any tool you want. I'm going to select
the pencil tool. Here it is. So let me change
the color of this. Let me change it to two
stroke, make it black. And let me see if it is working. All right, okay.
So it is working. All right. I'm
going to click over here and try to make
a letter over here. Okay? I know this is not perfect, but we are gonna
work this way or work with this n and
just this later on. So I'm going to
select both of this, the stroke and the blend. And we are going to apply
this on the stroke. So I'm going to go to object, then Blend and Replace Spine
while it has been done. So let's make it
a little smaller. So you can see that the
dealers really demented. So we have already learned
about this MOOC tool. So even though we have
already made this, we can still adjust the stroke. So let's just say I select
the Direct Selection Tool. I can select on any
of these points. And I can move these. And the blend will
move along with it. So I can move it like this. So I'm going to apply
the stroke on this SRD, the smooth tool on this. So click on the smooth tool and let's try making this
a little smoother. From here. This seems all right. And now what we can do is we can even make this a little thicker. So I'm going to
double-click on this and make this circle
a little bigger. I guess this is all right. Thank Click on this
and double-click on this one and make this
one a little bigger as well. And let's decrease the
size of this electron. I guess this looks
alright, quite decent. So there is one more option
in blend which you can use. Let me show you. Let's just say you
wanted the ping to be on the outside and blue
to be on the inside. So how you can do this? So if you go to object, and since this is
already a blend, you can go to blend. And over here, it also says reverse pine or
reverse front-to-back. So let's just see, I
click on diverse pi1. So basically it has
inverted everything. So this was before, and this is now. And also you can completely
invert all the colors. Let's just say, let me click on this and let me change
color of this one. So I'm going to select this. Come over here. And let's make this
one maybe like orange. And this one, I know
this looks really weird, but I'm just trying to
show you something. So let's just say I want this to be on two to start from here, and this color to be here. I'm going to click on
this, go to Object. Then Blend. And over here, set this to reverse
front-to-back. So you can see that
it has been inverted. Did you see that little
press Control or Command Z? So this was, it was starting from over here and
then I inverted it. So yeah, this was
pretty much it on how to create this really
nice tube text effect. You can go nuts with it. You can make a lot of
crazy things using it. And I cannot wait to
see your results. So I hope to see you guys
in the next class and yeah, keep making amazing designs.
51. Project 6 - Tube Text Effect: Hey guys, Who is ready
for another project. So basically we learned in the previous class how to make this really nice
tube text effect. And you are going
to do the same. So you can select
any letter you want and you can apply this effect on it and do show your projects
with me because it really, it will basically
really help you a lot in becoming a good designer. A few still keep on getting
feedback on your designs. So don't forget to
do the project and don't forget to show
it to me as well. See you guys in the next class.
52. Gradient Flower: Hey guys, I hope you
are doing great. And today we are going
to learn how to make this extremely beautiful
gradient flower in Illustrator. So let me select this and
let's make it from the start. Okay, So the first thing
which we are going to do is we are going to create
our stored in the middle. So let me select the
stroke color to white. And let's select the Star tool. So I'm going to create
a star over here. By the way, if you want to increase or decrease the points, you can press up to increase the points and press down
to decrease the points. The star I want is to have
basically have eight sides. So also press alter option to get this bulky kind of star. So I'm gonna make a star
over here like this. Let's make it small. Let me zoom in a little. I'm going to select this. And also my stroke
is three points. I'm going to press
Control or Command and bring in these corners. Then I'm going to select it and I'm going to apply
a gradient on it. So I'm going to click on
the gradient over here, and over here I'm going to
click on this gradient. So dead gradient will be
applied on it to make sure that this is set
to radial gradient. I'm going to move this way to the right and
black to the left. Let's change the
color of this 12, sorry, change the color of this one to something
like this, orange. And move this to the right. And also move this like 80
percent of the whole length. And over here, after that
I'm going to make a copy of it and then make it
bigger like this. And I'm going to do the opposite of what is going on over here. So I'm going to bring
this to the left, bring this to the left as well, same as 80 percent, and move this as well. All right, and finally, let's make another copy. And let's make it bigger. And I'm going to change the
color of this one to read. This one to read and move this further as well, like this. So I know you cannot
see the middle one, but it will all make
sense later on. So I'm going to
select all of these, go to Object, Blend and Make. Then go to Object again, blend and blend options. So set this to specified
distance and hit. Okay. So basically we have this
blend over here and now we are going to try to convert this
into debt beautiful flower. So I'm going to select this, go to Effect, Distort
and Transform. And then you will click
on pucker and bloat. I'm going to set this
to 90 and hit Okay. So you can see that we have
this weird kind of story, ship, flowery kind of shape. Then I'm going to select
all of this again, go to Effect, distort
and Transform. And this time we are
going to select a zigzag. So I'm going to set this to 35. Absolute said the
reduced to five. And I'm going to
click on smooth. And we are done. Let me hit, Okay. And you can see that we have this extremely beautiful flower. You can also change its color by playing around
with the gradients. Or what you can do is
you can set all of this, go to Edit, edit Colors,
Recolor, Artwork. It's going to take
some time because the gradients are really heavy. And you can play it on the
colors over here as well. So it's going to
take a lot of time because it's quite heavy. So I guess this looks all right. Let me click over
here and we have this extremely beautiful
ingredient flour in Illustrator. So I hope you guys
really enjoyed this and do try
making this or this. This is so fun to make. So see you guys in
the next class.
53. Fire Blend: Hello everyone. I hope
you're doing great. And today we are
going to learn how to make this fire blend
in Illustrator. So you can see that it
looks like the surface of the sun and there are
flames coming out. So yes, we are going to
learn how to make this. So let me delete this and
let's make it from the start. So just like the
previous tutorial in which we learn how
to make a flower, this is pretty much the same, yet a little different. So I'm gonna come over here
and select the Star Tool. And I'm going to make
a star in the middle. Let me change this
to some other color. So I'm going to make a star. Like I said, you
can press down to decrease the points n plus
up to increase the points. You can make a lot of points
for this specific tutorial. Make sure that you have
like 12, 15, 18 points. I don't know how many these are, but these are enough. So let's make this. Then. You will press Control or Command and bring
in the corners like this. Okay, looks good. Law. We are going to apply
a gradient on it. So I'm going to click on
the gradient over here. By default, I have
this gradient. You can change it to
whatever you want. And I'm gonna make it a little bigger or maybe smaller because when the
flames will come in, it will become quite big. And then make a copy of this and make it smaller,
like really small. And then click over
here and change the color of this
stirred one to orange, and change the color
of this one to white. So, so far so good. Now we're going to
select all of this, go to Object, Blend and Make. Then go to Object
again, blend again, and this time blend
options and set the spacing to specified
distance and hit. Okay. Now we are going to apply pucker and bloat on this as well. So I'm going to select
this go to effect, distort and transform and
then pucker and bloat. And let's set this
to 90 and hit, Okay. And finally we are going
to apply it off and on it. So I'm going to select
this and go to effect, distort and transform
and roughen. So it is loading, it does take some time. So over here we are
going to set this to 37. Then this will be
relative detail would be it is updating along the way because I
have preview checked, don't so let me select this. I think I should
turn off preview because it's going
to take some time. So let's wait and
see if this works. Still taking some time. I'm going to fast-forward this
if it takes a lot of time. Okay, So I have turned
off previews order to, it won't take so much time. Let me set this to
0. And I'm going to set the points to
smooth. Simply it. Okay? So I think I messed up a little. Let me go back to a parent's
click on pucker and bloat. And pucker and bloat
will be minus 23. Hit. Okay? And we are done. So you can
see that this looks so good. Basically, let's
do a simple recap. You will create a star
with a lot of points. Then you will apply
the gradient on it. And after that, you are going to apply a
pucker and bloat. Where as you're to select this pucker and bloat
and then roughen. You can play around
with the settings, but the settings which I
told you these are the best for 1920 by 1080 Canvas. And we are good to go. So I hope you guys
really enjoyed this and I will see you guys
in the next class.
54. What's Next?: Hey guys, congratulations
on completing the course. And I hope by now you
feel much more competent in using Illustrator and
creating digital art. So I know this was
quite a large course, but every lecture in
networks necessary and I wanted to teach you guys
everything important. But remember, the
learning never stops. Even though I tried my best
to teach you guys everything. But there is always new things to learn
because, you know, Adobe keeps on updating
their software's every year, and they also bring
in new features. So if Adobe updates anything or brings
in any new feature, I will definitely make a video and make it part of this course. So what is next? I think that you should
start learning about Photoshop because Photoshop and Illustrator go hand in hand. They are like two of the most important tools
are designers should know. And they are also
the requirement for particularly every
design job out there. So if you don't know
anything about Photoshop, I would recommend you to take my Photoshop beginner's scores. But if you already
know the basics and want to take it
to the next level, you can take my Photoshop
advanced course. So I guess this is goodbye. I hope to see you in
another one of my courses and I wish you best of luck
with your design carrier.
 Talha Bhatti, Graphic Design Instructor