Transcripts
1. Introduction: I started off as a designer. My clients didn't seem to like my designs even though
my work was amazing. And I just couldn't
seem to figure out why. I later on figured out
that it is because of the way I was
presenting my designs. You see your client doesn't
care how good your designs, how you are making them, or what techniques
you are using. All they care about
is that how good their product will look in their design you are
making for them. So the answer to my
question was mockups. By making mock-ups, I was
able to show my clients, but the product will
look like in reality. And those same lines
started proving my designs. Basically, I was helping them
visualize their products. If you are someone who is
also facing this issue, this course is for you. We will start off by making
very basic mock-ups. We will then learn how
to make mockups in perspective like on
a mobile screen or a box out to make mockups of a coffee cup and also how
to make them editable. We will make a
realistic mock-up on a metallic surface
produced and also t-shirt. Lastly, I will show
you how to make a realistic mock-up
with original shadows. And in the final lecture, I will teach you how you can
sell your mock-ups as well. Basically, by the
end of this course, you will know exactly how to
make realistic mockups in Photoshop and how to use them to present your designs
to your clients. To who is this course for? This course is for anyone who does any kind of
client work because it is extremely important to show your designs with
real-world examples. At the end of this course, you will be given a
project so that you could implement everything that you
have learned in the course. Don't forget to share
your amazing designs with me and I can't wait to
see you in the course.
2. What Is A Mockup?: Okay, so before we learn
how to make mockups, I want to quickly
tell you what mockups are and why you should
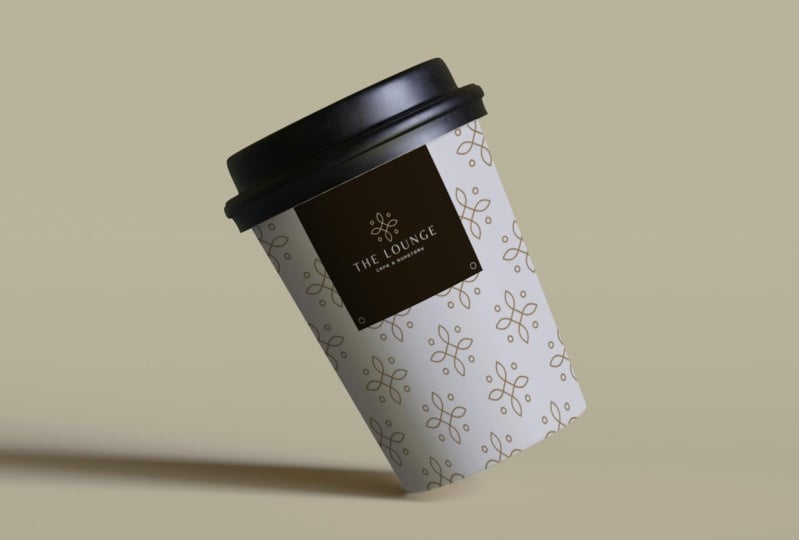
learn how to make them. So as you can see that I
have this image over here of a coffee cup and
it is all editable. It is basically a mock-up. So if I come over here and you can see that there
are different layers, if I double-click on this and let's just say
I want to change its color to maybe something
like this, orange over here. And if I hit Okay, you can see that it has
been updated over here. And along with all the
older design structure, like all the lighting and
the shadows and everything. Similarly, I can change the
color of the cap as well, but I can make it red
or something like that. I don't think I should change it because black looks classic. Then we can edit
the design itself. If I double-click on this, you can see that I can
edit all of this as well. I can edit the text as well
and also the background. Let me copy this color, which I put it in
the background. And let me copy this code and simply come over
here and change its color. And you can see that it has
been updated over here. But the thing is, as soon as
I will update it over here, I will press Control
or Command S. It will be updated
over here as well. So you can see this is
yellow at the moment, if I press Control or Command S. And it will take some time when I will come back over here. It hasn't updated. How cool is this? Similarly, you can even make the background black or
darker or lighter one. And there is one more thing
which you should notice. If I zoom in over here, we can see that even if I make a dark shadow is over there, and even if I change the color to maybe something like this, shadow is over there. But this is something which
is very useful for a mock-up. Basically, there are
two uses for a mock-up. Number one is to present
your designs because just showing all of this design
is not enough for a client. They have to basically
visualize it. So our mock-up basically
helps visualize the client. But their product will look like for which you are
making their design of. The second use is basically you can sell these designs as well. You can basically sell
these mockups to how? Let me show you if so, if you come over
here, basically, I have opened three
websites which are really popular for selling
design efforts. We have created
market over here then Envato elements and
three pick as well. If I write for free
mockup over here, let me load this. You can see that there are different kinds of
mock-ups over here. A coffee mug, mug of coffee mug, mock-up of coffee cup mock-up. There are also mock-ups for packaging and
other kinds of things. Okay, so why make them yourself when you can download
them from these websites? Well, number one is dead. Like I said, that when
you make them yourself, you can make them editable
the way you want. The second thing is basically when do you know how
to make mockups? You can sell them
on the website. You can see this mock-up
is like for $14. So if this person has maybe
ten sales to that $240, but this is just to show
you what is the potential for making money
through your mockups. Then you have invited
two elements as well. This is also a paid website and free pig is a free website, but there is also a
paid plan for it. Basically. You can see that
there is a cellular content option
over here as well. You can upload your mock-ups over here and basically
you can sell them. This was pretty much it
on the first lecture, I just wanted to
show you what is a mock-up and via you should
learn how to make those. In the later lectures, we
are going to learn all about making mockups from simple
to the advanced versions. So I hope that you
guys really enjoyed the first lecture and I will see you guys in the next class.
3. Create A Simple Mockup: So how can we make
a simple generator realistic mock-up in Photoshop? We're going to start
off very simple. And later on we
are going to cover some really complex
topics as well. Over here you can see that I
have this image of a person holding up card and I placed
a design on top of it. Let me delete this and let
me show you from the start. So I'm going to go to
my files over here. By the way, when you
will join the course, you can download all
the project files from the link in it as well. Over here as you can see
that I am under number four. I'm going to simply open it. And over here I have
the design file. So you have the
Soul, you will have the source files as well. You can practice
on these as well. But I would highly recommend you to make everything
from the start. So I have already dragged
and dropped these images, and I'm going to
drag this one now. I'm going to drop it over here
and then I will resize it. By the way, if you want to know how am I resizing
it from the middle, all you have to do is simply
press Alt while doing so. Otherwise, it gets
resized like this. But as you start working,
it gets resized like this. And if you press Alt or Option, you can resize it
from the middle. So I'm going to
bring it over here. If we wanted to basically
make it look realistic and the white background
is not working at all. You can do with this is like the most you're
thinking anymore curve. And that is the Blend Mode. Multiply. All you have to do
is simply select your image. And over here, we will
change it to Multiply. What multiply does is that it basically removes all the
white from the image. I'm going to transform it again by pressing Control
or Command D. Make it a little bigger, rotate it a little,
and we are done. I know I know this
is very simple. And for most of you guys, it would be like very basic. If you think it is very basic, you can simply skip this lecture and move
on to the next one. Yeah, we move into the image
of fee, basically zoom in, you can see that the
texture of the card is coming on to the texture as
well in the whole image. So basically, the multiplier is amazing blend mode if you
want to make mockups. Let's move to the
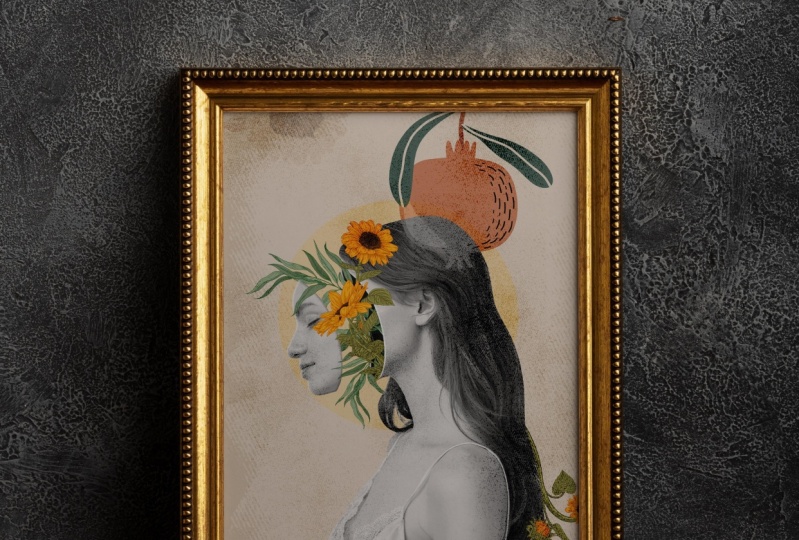
second example. Over here, you can
see that I have this very Christmas kind
of pattern over here. Don't know why I
was interested in the Christmas teams while
I was making this anyhow. So over here you can see
that I have this pattern and I've placed it on
top of this frame. Let me delete this. Let's make it from the start. Again, I'm going to go
to my project files. And over here, I will simply drag and drop this over here. Let me zoom out a
little and let me resize it. Let's zoom in. Though. There is one thing that you can always do while making mock-ups. Whatever you are placing
on top of anything, simply decrease the opacity. That way you can see
below the image. And it makes the work
very easy for you. But I will simply press
Control or Command T and transform it like this. I can even rotate it like this, but I want these to be big
and simply place it here. Okay? Now what I'm going
to do is I'm going to come over here and select the
rectangular marquee tool. And over here, I
will just simply create a rectangle like this. I'm doing a very rough
kind of work over here. So forgive me if I
make any mistakes. Yeah, I have basically
made a rectangle. Now I can increase the opacity. I will simply select this and I will simply click on
the mask over here. And we are done. Not really. So yeah, it is placed
inside the frame, but it doesn't look
realistic vibe because there are no shadows and highlights and
all that stuff. But what we can do is
simply select this. And over here, I'm going to change the blend
mode to multiply. And bam, we are done. Let me show you the
before and after. If I press Control or Command Z, you can see that this
is before multiply. And if I press Control
or Command Shift Z, you can see basically this
is redo and undo that. You can see that we can see the shadow over here
as well. Let me zoom in. Sorry. Let me zoom in over here. You can see I messed
it up a little, just a little bird. You can see that this is
working out quite fine for us. Yeah, let me zoom out a little. Let's fix this little
error as well. So I'm going to select
the Marquee Tool, create a rectangle over here. I guess this is enough. And I will select the mask. And with black, I'm
going to draw over here and we are done. But yeah, this was
pretty much it on how to make a simple
looking mockup. These examples are very simple, but this is just the beginning and later and later
in the course. We are going to do some
really complex work as well. So I hope that you
guys really enjoyed the lecture and I will see
you guys in the next one.
4. Create A Multi Use MockUp: Welcome back guys. In this class we
are going to learn how to create a
multi-use mock-up. Basically, in this
mock-up, you will have two areas which you can edit it. As you can see that
I have this image of a subway and there are
two frames over here. And I've placed two
designs on top of them. You can, if you want, you can place some
efforts on this as well, depending upon the
nature of your work too, I'm going to select both of these and I'm going
to delete them. Then I'm going to go to my
project files over here. Like I said before, when you will download the project files, you will have access to
the source file as well. And you will have access
to the assets as well. I'm going to basically drag and drop both of these images over here and press enter over here and maybe
resize them as well. I'm going to press Control
or Command T and the size. Let me hide one of them so that we could work with
just one of them. I'm going to select
this one and I want to place it on
top of this one. This frame basically like
the way we did it before. We can do the same
thing over here. We can simply decrease the opacity so that
we could see below. And over here, we will
simply going to press Control or Command T to the size it and place it in the frame. Like the way we wanted. But I guess this seems alright, I want the tree to be over here. I'm going to increase
the opacity, 30, not increasing yet because I want to make a selection first. Over here, I will make
US election first. Because otherwise I
wouldn't be able to see it. Then I will increase
the opacity. Then I will simply click
on the mask over here. And just like that, we have a very nice kind
of mockup over here. I can use multiply on this, but it won't make any
difference because the, because the background
is completely right. But there is one thing which will happen if we
change it to multiply. The shadow of the frame
is showing properly. We will use multiply over here. So you can see
this is the normal and this is with multiplying. Let me zoom back over here. Let me group this two. I will simply select this and press Control or
Command G on it. So this is grouped so I
can turn it on and off. Before the next example, I'm going to basically show you another way to make a mock-up. I'm going to this over here and we are going
to use a clipping mask. Because clipping mask is
amazing because it gives you the flexibility of
moving or older image without trying to
decrease the opacity. And second guessing it. What I'm going to
do is I'm going to simply like the rectangle
tool over here. And I'm going to
create a rectangle. So I guess it's alright. Sorry about that
background noise. So let me change. I guess I will have to basically warp it a little
because the image is not hundred percent
more, I guess. Simply pressing
Control or Command T. And with control pressed, I'm basically moving
it to the side. Now simply press Enter. It is general property
on the bottom. Let me fix this as
well. I guess it is. Alright. So let me change
its color to white. Britain. Double-click on this, okay, so it's working now. Now what I'm gonna do is I'm
going to select this image, this image over here, bring
it on top of this over here. Okay, let me move this up a little so that you could
see what's going on. And what I want to do is
I'm going to simply clip it down every press Alt or Option, and simply click between
these two layers. Again, press Alt or
Option and bring it between these two
layers that I can will change and simply click. Not. What is happening
over here is that it has been clipped
to the bottom image, which is the square rectangle. Now I can place it
anywhere I want. So I don't have to
basically lower the opacity and basically gets it. And I can make it
bigger or smaller. I guess this looks alright. And we are done. This is obviously much
better way to do it. And if you want, you can decrease the
opacity of this as well. Sorry, change it to multiply. And now if I zoom in over here, you can see that
we can basically see the shadows of
the frame as well. But let me zoom out over here. And this is pretty much it. Yeah, i we are basically
going step-by-step. I know this was simple as well, but this was a little advanced
than the previous one. And the next one would be even more advanced
than this one. So, yeah, I hope that
you guys really enjoyed the class and I will see
you guys in the next one.
5. Box MockUp - Perspective: Welcome back guys. In this class we
are going to learn how to make mockups
in perspective. As you can see that I have
this mobile screen over here. And then we are going to learn
how to make this as well. So yeah, let me come back over here and let me show you
the before and after. But this was the before, the actual image and
here is the after. And if I open this group, you can even see that there
is this lighting effect over here as well, like a flare. So we tried to make it as
realistic as possible. So let me delete this and
let's make it from the start. So if you go to
your project files, if I go over here, the more box mockup over here. So I will simply open this, then go to design
file and asserts, I will simply drag and drop
this mobile screen over here. If you drop it over here. And now we can basically
change your perspective. So let me zoom out a little. By the way, the picture I, the screenshot I took
was from an iPhone ten. So there are, as you know, that there are differences of
basically the screen size. But no problem we can
adjust it over here. But I'm going to do is
basically I'm going to press Control or Command
T to transform it. And then I'm going to,
on top of my Mobile, I can simply swap it. I will press control or command. The cursor will change to this. Then I can bring it over here, and similarly over here. But before that, I realized that I should make a selection
of the screen first. So I'm going to press Control
or Command Z to the side. And over here I will
select the mobile screen. All of this is simply white. I can select the
Magic Wand tool. Let me zoom in a little. And I will simply
click over here once to select all of this. Then over here, I will
press Control or Command J. And now you can see
that the screen is on a separate layer. If I turn this off, you can see the green
is on a separate layer. Now let me zoom out. I will select the mobile
screen over here. And over here, place it, press Control or Command T. And now I will simply put
it over here like this. I have press Control or
Command on Mac and now I am adjusting all of
this seems all right. I know it is a little
smaller than the screen. We will adjust it. As you can see that there are
some gaps over here. No problem. We can move it out a little. That is the reason we
made this selection. This seems alright. So yeah, as you can
see that this is moving outside the screen. We can simply clip
it down because we have made the screen
on a separate layer. I will make a clipping
mask over here. And just like that, it looks
so realistic, so good. So there was one more
thing which I did. I basically added a flare on it so that it would
look realistic. Let me put both of
these in a group. I have selected both of
them by pressing control, and now I will press Control
or Command G to group them. Over here, I will get a year to our new layer and I will
simply flip it down. Now, I can come over
here, the gradient tool. And over here, if you
go to the basics, there is white, then
black to white, and then there is transparent,
white to transparency. I would simply select this. And if I make
something over here, you can see that it
is making a gradient. So I will simply
select from byte to transparency and make a
gradient over here like this. Maybe a little more. Then all I can do is
simply reduce the opacity, maybe to like 50%. And now we have this
really cool kind of player effect on
top of us feeling it's like the light is
coming from over here. So yeah, I guess we
are done with it. So here's the before. Here's the after. There could be some extra
space down over here because the screen size is
different modalities or not, or concern over here. Before, after. Let me show you another
example over here, which is very different, but it is also related
to perspective. If I turn this, let me group both
of these, okay? If I turn this off, you can see that this
was a simple box. And if I turn this on, you can see that we have a very nice kind of
pattern on top of it. I have put the pattern
over here already. So over here, we have
already made a selection. I'm not going to
delete this because it takes some time to
make a selection and this is not a
selection tutorial. I just want to show
you the concept. Okay, so I'm going
to delete this and let me put this
out of the group. And what I have
basically done over here is that I selected the box, then I selected the
Quick Selection Tool and made the selection. Obviously I refine the
selection and it'll as well. And then I made a
mask out of it. Over here we have this
box on a separate layer. Now what we're going to do is basically we are going
to turn on our pattern. Or you can simply go to your project files and simply
drag and drop your pattern. Over here. I'm going to turn
this on and I'm going to simply click on this
while pressing control. This way it will make a
selection of all of this. Then I will simply press Control
or Command C to copy it. Okay, so it tastes
copied to the clipboard. Now you cannot see it
anywhere but it is copied. I will press Control
or Command D to de-select it before donkey. So Control or Command B. Sorry, I always do this because I just wanted to
make sure that you guys remember the short keys properly to Control or Command
D to de-select. Let me turn this off. And what we're going
to do is we are going to create a new layer
on top of this. And then we are going
to go to Filter. And over here we're gonna
go to vanishing point. Okay? So you can see that I
have already made this. I will simply press
backspace to delete it. So let me press
Control or Command minus to zoom out a
little over here. As you can see that using this, you can create a perspective. So if you don't, if you
don't have this over here, you will simply have to come
over here and press and, and you will have this
Create Plane Tool selected. I'm going to click
over here once. Then over here, you can go outside the edges a
little if you want. Because we will have the, we have, we already have the
box on a separate layer. We have this simple plane. Now what you have
to do is simply press Control or Command
and extended down. So you can see that it is already understanding
that perspective. By the way, if you
do anything wrong, it will automatically tell
you that you are doing wrong by showing this inbred. So e.g. if I move
this to the side, you can see that this is wrong. And overhead as well. I will press Control or
command and bring this down. So I have this
perspective over here. Now, all I will do is basically let me extend
it to the sides as well and it'll outside for that or design would be a
district properly. Now, I will press
Control or Command V to paste that design I made before. Why is it not working? Record press Control
or Command V again, for some reason it
is not working. So yeah, no problem. I will simply press OK you over here and it will be saved. Let me go back over here. And let me try
rasterizing this to simply right-click on
this and Rasterize Layer. Now click on this and press Control or Command C a
couple of times to copy it. Now, let's go back
to this layer. Go to Filter vanishing point. We have this over here
already and I will simply press Control
or Command V. Finally, now you can simply
resize this as well. Though I am resizing
all of this, okay? And as soon as I will drag
and drop it on the design, you can see that it is
automatically adjusting itself according to the
perspective of Willis this. So let me increase its size
from the edge like this. And from over here as well. And you can see that it is adjusting according
to the perspective. Now I will simply hit Okay. You can see that it is going outside and it'll no problem. We already have the box
on a separate layer, so we will simply clip it down. How do we cliffs things
to do the objects, we've simply press Alt or Option and click
between the layers. Bam, all the edges are gone. Now we can simply
change it to multiply. I'm going to change the
blend mode to multiply. And just like that, we have such an amazing
kind of mockup over here. So now we can simply select
all of this and group it. Though here is the
before and here's the after and zoom in over here. You can see that all the
shadows and all the highlights of the box are properly
visible over here. And our design looks amazing. But yeah, this was
pretty much it on how to create mock-ups in perspective. I hope that you
guys really enjoyed the class and I will see
you guys in the next one.
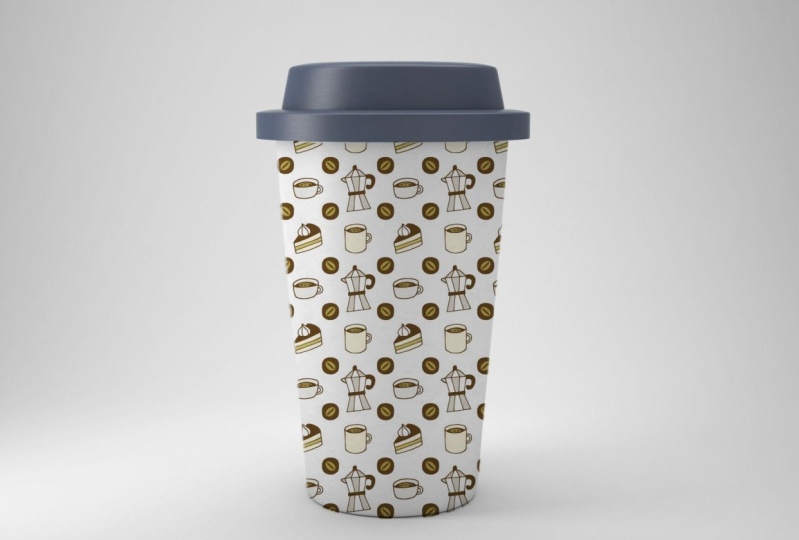
6. Coffee Cup MockUp - Warp: Welcome back guys. In this class we are going
to learn how to make this really nice coffee
cup mock-up in Photoshop. So let me show you
the before and after. The before and
here is the after. But let me select
this and delete it. And let's make it
from the start. Okay, So the first thing
which I have done over here already is that you can see that I have
a group over here. If I turn this on
and turn this off, you can see that the cup
is on a separate layer. And if I open up the group, you can see that the lid is on a separate layer as well and the body is on a separate layer. I have already done this
to save time basically. But if you want, I can show you how to
make a selection as well. This is not a selection
or masking course. Let's do it. No problem. Okay, so let's select
the cup first over here, I will simply select the
Quick Selection Tool. Let me do this real quick so
that no one would complain that I just made the mockups
and not the selections. So let me select this
object over here. I'm pretty sure that Photoshop is going to make a
proper selection. Yeah, it made a really
good selection. Simply hit Okay over here. And now we have to
separate the upper lid. I'm going to simply
right-click on this and apply the layer mask. That way it is a restaurant
is separate layer. So I can make a selection using the Quick Selection
Tool over here. Let's try it. Yeah, I guess I've been I was
making this before as well. There was some
problem in this area because there is not
proper contrast over here. Let's try doing this. Okay? This might not work properly. What I have done
before is that I will select the Pen
tool over here. I haven't click over here once. Zoom out a little. And over here,
basically I'm making a very simple kind
of part over here. Then I can select all
of this area like this, right-click on it and
basically make selection. Since all of this is
already transparent, I can simply press
Control or Command J. And now I will press
Control or Command Shift J. That way, it will not only make, put it on a new layer, but also cut it from the bottom. So you can see that the lid and the cup are
on a separate layer. We can rename them all
this scarf or body, and let's call this lid. And we can group them as well. So let's turn these on and let's start
working on the design. So I already
downloaded a design. I guess this was
also from free pig. I will come to the project
files over here and asserts, I have already used the club. I will simply put their
design over here. Okay. So let me
zoom out a little. Yeah, over here. Like you can see
that we don't have a straight kind of
object at the bottom. We have something
which is curving. So we have to make
sure that we adjust it accordingly that will press Control or Command Z and
bring it to the middle. Let me decrease the
opacity a little. Ok, and now let's
start working on this. So first I have and
make sure that it is the exact size as the okay. You can adjust it like this. I'm doing at the bottom. I'm doing it like
this on purpose because I will be with
singly warping it. Now what I can do
is I can basically increase the opacity a little so that I could see everything. And it is already are smart
object. No command three. And now what I will do
is I will right-click on this and basically
click on vote. By clicking on warp, I can basically walk
bit like anyway, I want to, I will bring
it down over here. Like this thing,
these to the side. Like this, if it
cannot see properly, let me zoom in. And as you can, as you know that we
have no problem going out of bounds because
we have already, we already have the cup
on a separate layer. Then over here, we will move
this up a little because the designer will go up
and over here like this. Then in the middle, which is a very important part
since it is curving. We will bring this down like this because it is supposed
to look realistic. And then on the sides
we can bring it in or that it would look like
It tastes around the cup. Simply hit Enter
synthesis, a smart object. We can always double-click on this and adjust
the original one. Let me cancel this. No, I can increase
the opacity again and I will simply bring
it into the group, but above the capillary. And I will simply clip it down
by pressing Alt or Option. Good enough. And how to make it a
little more realistic. It is so simple. Simply go to the blend
modes and multiply. And we are done. Simple was this. I basically separated the lid on purpose. I didn't need to, but I did it on purpose because if we do the
clipping over here, if this was not on
a separate layer, it would have
basically gone on top of the lid and then we had
to mask it out anyway. So let me flip it back and
this is pretty much it. Let me show you the
before and after. Here's the before and here is the after. Our goal is this. Then the next class. We are going to
basically learn how to make your mockups editable. Because at the moment, we are, all we are doing, we are only doing the
destructive work, which is not the way
to make mockups. So, yeah, I hope
that you guys really enjoyed the tutorial and I will see you guys
in the next class.
7. Make Editable Mockups: Hi guys. In this class
we are going to learn how to make editable
mockups in Photoshop. Does. You can see that I
have this image over here. Let me show you the
original image. And then I put a
screen on top of it. I even added this nice kind
of glare effect on it. So if I hide this, you can see that we have this
glare effect as well. But the thing is, all
of this is editable. How let me show you. If I double-click on this, you can see that this opens
up as a new Photoshop file. Basically this is
a smart object. Smart objects open
as a new file. If I add something
on top of this, let's just say this or maybe just create a new
layer on top of this. And if I select the brush tool and maybe draw something like this and press Control or
Command S to save this. You will see that this has
been updated over here. How cool is this? Along with all the
effects and everything? How did I do it?
Let me show you. So let's delete all of this and why not make it
from the start, okay? So I'm going to delete
all of this and I will make all of
this from the start. So the first thing which we
are going to do is we are going to make a simple
rectangle, okay? Not in perspective, not
anything like that, just a simple rectangle. So I'm going to come over here and I will select
the rectangle tool. Let's make a rectangle
about this size. Then I can resize it
through as big as I like. Maybe this weird. Okay. Now what I can do is I can simply convert it
into a smart object. I'm going to
right-click on this and convert it into a Smart Object. And I will call this maybe
something like this. Okay? Now what I will do is I will simply press Control or
Command T and resize it. Did over here. Let's zoom in a little. Let me decrease the opacity so that we could see everything. Flow of risk control
or Command T again. And these two the
coordinates properly, okay? Well I will put this
over here as well. This over here. And over here. If you want to
warp it like this, if you do it without pressing
control, it won't work. You have to press Control
or Command on Mac. Okay. I guess this is good to go and
I will simply press Enter. There is a little gap over here. Let me fix this. It seems alright. Okay, so now what we can do is we can simply double-click on this and it will open as a separate file because
it is a smart object. Then I will
double-click on this. You can see that this
is a separate file. Now what I can do is I can
simply go to my project files. And over here, let's import this skill share
screen over here. Okay? Obviously the screen
Share screen is not the same as the file we created. But we're going to do is we can basically say is you turn
it up just a little. I'm not extending stretching
here to way too much. Okay. No, I will simply
press Control or Command S. And now it has been
updated over here. How cool is this? And since this is
a smart object, it has been updated and
along with the low opacity, I forgot to change
the opacity so I can increase the
opacity over here. Now, let's just see if
I decrease the opacity. I double-click on
this and I create a new layer and I draw
something over here like this. Let's Control or Command S. It will be updated over here
along with a low opacity. How cool is this? But let me increase the opacity again. Double-click on this. Lake. All of this is editable. This is not destructive. I can edit this at
any point I want. If I delete this and I
press Control or Command S, and it will be
updated over here. So let me create that
flavor over here as well. So I will create a new
layer on top of this, and I will clip it down
for this specific layer. Then I will select
the gradient tool. Let me change this to two. Transparency. And I will
change the color to, let me double-click on this. And I will change
this color to white. Let's select this one
because it allows you to basically create
a gradient like this. Let's create a new layer and show you could create
such a gradient like this. By the way, we will have to change the color of
this to white as well. Otherwise it won't work. So let me delete this layer. And on this layer I
will simply create a gradient like
this. It looks nice. And now I can simply
decrease the opacity. And I really like it. I can maybe do it a little more. Okay. I guess this is alright. So let me keep it to like 60
or maybe like E is alright. Okay, so now what I can do is
I can double-click on this. Again. I can go to
my project files, and this is my YouTube channel. I can simply drop it over
here, not my YouTube channel. Just a simple YouTube screen. And I would put it over here, may be extended a
little entered. You can adjust this as you like and simply press
Control or Command S. And it has been
updated over here. Like this is amazing, right? Because you can make just
one mockup and you can put as many screens
on it as you like and it will look amazing
every single time. So yeah, this was pretty much it on how to make editable mockups. Later on, we will make
mockups which are editable, but not as simple as
a straight screen. There could be curved as well. So I hope that you guys
really enjoyed this tutorial. I will see you guys
in the next class.
8. Where To Find Images For MockUps: Welcome back guys.
In this class, I'm going to tell you about
all the websites from here, you can download images
to create mock-ups. So I have like four of them, five of them are free and the next three are basically paid. And if you want a
list for all of them, you can basically go to the
project files over here. And over here, you can open this PDF and it has a
list of all the websites, the free ones and
the period ones. Let me show you some of them. Over here we have three
pick, three pickers, like really amazing website for downloading images and basically all kind
of design assets. So let me write
mockup over here. And what here, then
you will have to select three and
then photos unless you have free pick premium and simply click on
search over here. So you will get all kinds of, I guess I didn't select photos. Yeah. So yeah, you will get all kinds of mock-ups over here. As you can see.
Three pictures like an amazing website for all kinds of images
like these ones. Then we have Unsplash over here. I have already written the word mockup and clicked on
search in all of these. So in Unsplash you can see that these have we
have toward bags and then guards and
puffy more mockups. I guess I use this one in the, one of the tutorials. So yeah, you can
basically download all kinds of images
from overhead as well, like this pillow as well. Then we have pixels. So let me search
over here as well. So you can see that
you're not going away. You can see that we have some
images over here as well. But the problem with these free websites is that you might be able to find what you
want over here. So e.g. if I write below
mockup over here, you can see that
I am looking for a white pillow to edit hand. It is not available over here. So yeah, when you are
searching on free websites, I will recommend you to
search on all of them. You might be able to
find some on them, but on the period website, obviously they are
always available. Then we have AC TZ, which is also an amazing website for all kinds of
design assets and also for these kind of
physically mockup images. Though, we then
also have Pixabay, which is a very good website
for these kind of images. And finally, we have the last E, which are the fade websites. We have invited two
elements, Adobe Stock, there is ice talk as well. Then there's Shutterstock. To be honest. I'm gonna
be honest with you. I use and what two elements I
have a subscription for it. I guess it is only $160 a year, which is totally
worth it because you get all kinds of
assets over here. Asserts and mock-ups
and all kinds of stuff. Then we have Adobe
Stock and Shutterstock. To be honest, I use free
pick and Envato elements the most because I get most of
the images from over here. But Shutterstock is like ODE. You get so many options over here that it
is totally crazy. Sorry if I'm talking
too loud into the mic. So you can see that there are
so many options over here, and you can make mockups
out of these images. But the thing about
Shutterstock is that it is extremely expensive because I guess for just have to pay for individual
images like you, I guess maybe a couple
of bucks for one image. So there are obviously
monthly plans as well, but you have to pay a
lot of money for it. So the two upsides, which I highly recommend R3, pig and Envato Elements. Yeah, this was pretty much
it for this tutorial. I hope that you would be able to find these resources helpful. I will see you guys
in the next class.
9. Metallic MockUp: Welcome back guys. In this class we are going to learn
how to basically make a mock-up of a metallic object like
this bottle over here. And if I zoom in over here, you can see that I have
this logo on top of it. I actually placed it. And you can see that
it looks so realistic. You can even see the
droplets and everything and even the
reflection properly. Let me zoom out and
let me delete this. And let's make it
from the start. If I go to my project
files over here, if I open this metallic
mock-up tutorial and in the design files
I will have the assets. Do I have already
used this image? And I will go in, I'm going to basically drag
and drop this over here. Okay, let me resize it a little. And before we even do anything, I just basically want to
remove the white background. All you have to do is simply
change it to multiply. So we are done with half of
the auditorium after that. But you have to do
is basically you have to make a selection
of your bottle. So let me hide this, let me select this. And over here, I haven't make a rough selection of the bottle. We don't need the
perfect selection because we won't be
using all of it, but don't worry about the edges. So I will press
Control or Command J to make a copy of it. Now, this is on a
separate layer. Like I said, don't
worry about the edges. We just need this
middle part, the norm. But now what I'm going to do
is I'm going to basically select this and I'm going
to move it up this layer. And I will turn on this local. But when I will turn this on, you will see that this
will look really weird. So now what I'm
going to do is I'm going to basically
D saturate it. Oh, can I do it? I will simply come up over here. Click on image, then
click on adjustments. And over here I
have it set to it, but basically I am
removing all the color from this specific layer. Now what I will do is I
will simply click over here and change the
blend mode to overlay. So because of this, this looks even
more realistic now. Now I can move the
logo up a little. Maybe. If I remove this, you will see that it
doesn't look realistic, but after putting it
on top of the image, it looks more realistic. Now I can zoom it and I can
even play with the opacity. A little, boy, I guess
70% would be alright. So let me group
all of these press Control or Command
G. Let's zoom out. If you want to zoom out
to the frame like I did simply press Control
or Command zero. This basically zooms
out like 100%. So here is the before, here is the after. You can also obviously make
this editable. If you want. You can basically make this
is already a smart object. You can put other logos into it as well and
make it editable. I just wanted to show
you how to put it on a metallic surface so that
you would know how to do it. You already know how
to make this editable. Yeah, this was pretty much it. I own how to put a logo or any design on a
metallic surface, basically how to make a mock-up out of a metallic surface. I hope that you
guys really enjoyed this tutorial and I will see
you guys in the next class.
10. Make Them Realistic - Blend if: Welcome back guys. In this class we are going to learn how to make a realistic footie or
T-shirt mockup in Photoshop. So I have this hoodie
over here and as you can see that I have a
logo on top of it. Looks pretty realistic. Then over here you can see that I have this editable mockup. You can change the logo as well, and you can change
the color as well. But yeah, let's
learn how to make these little press
Control or Command Z. And let's make these
from the start. I'm going to delete this. And yeah, so basically all
you've to do is basically I have this image over here and I will go to
the project files. You can see all the files
over here, the asset files. I have a couple of logos. Over here. I will select
that foodie have logo. I just made it for the
sake of this tutorial. And let me put it
over here like this. Okay, Then I will zoom
in a little bit as you can see that the person is
standing a little to the left, like he is a tilted a little. We will adjust
accordingly as well. Let me repeat this. And I will simply press Control or Command and I
will move this up a little. This looks all right. Now, now what we will do
is even not use Multiply, because if V was multiply on something which
is already white, it will get disappeared. Like it will look
something like this. No, we're not going to do this. But we're going to do, is we are going to use Blend If one, because the whole
concept of all of the specific tutorial is to
T2 blend F. But before that, what I want to do
is I want to make sure that the logo is
a district accordingly to the according to the folds of the sweatshirt or the
hoodie over here. What I'm going to do is it
is already a Smart Object. Admin decrease the
opacity over here. And let me bring it over here. Then I'm going to
go up over here, click on Filter, and then
I will click on Liquify. Liquify tool using which you can basically VOIP things that it is similar to
warp and transform, but even more powerful because
you get a brush with it. Let me decrease
the size a little. Maybe you can create a little. You can see that we have
folds over here, over here, and then over here, I'm
going to bring these, okay? Then bring it in from
over here as well. Similarly over here,
you have ideas as well. I'm not doing it way too much. Just a little. Then over here as well. And bring it up the size maybe. And then over here, okay, Then I will simply hit pokey. You can see that it is
according to the folds. Now, let me show you
the before and after. This was before liquefy. And now this is after liquefy. Such a big difference, right? I didn't do it over here because all of this
area is playing. Now what we're going to do
with it already looks amazing. Now we're going to do is
basically we are going to use something called Blend, If I will, right-click over here and then go to
Blending Options. And over here, you
can see that this is blended domestically and there is the underlying layer
slider over here. And using this, we
can basically bring up the layer which is
below this lobe over here. It is getting confusing. Let me show you how I will
bring this to the side. And if I bring it
to the side a lot, you will see that the
logo will start to disappear because it is
bringing up the layer below it. And add the point where it
is starting to disappear. I will leave it over here. Then I will press
Control or Trump, sorry, Alt or Option. And you can break the slider. Now I will bring
this to the left. You can see that it is starting
to make a lot of sense. And I guess this
seems all right. Now we can hit Okay. Now it looks even
more realistic. Let me press Control
or Command Z will show you the
before and after. I know you might
think that this is something similar to
reducing the opacity. But no, yeah, also
I forgot to change the opacity over here.
Sorry about that. So now we will double-click on this localized
because its opacity, I couldn't see it properly. So let me bring this over here. Like this. The video to starting
to disappear. No, I will bring the
slider like this. Now you can see the difference
properly to the side a little this over
here and hit Okay. But you can see this was
before. Here's the after. We can basically see the
falls below this now. But let me zoom out. So before, after, before,
after our Boulez, this, and obviously it is editable because this
is a smart object. Let's come on over here. So basically we have
a t-shirt over here. And let me show you the before and this was
the actual image, a white hanger and a
t-shirt and a background. What I have done is
basically I have made a selection of
just the t-shirt. And I left out everything else because I wanted to change
the color of the t-shirt. Yeah, let me move this out because I don't want to make the whole
selection all over again. And it will delete everything
else that we would have, at least save the
selection of the t-shirt. Yeah, you can always
make the selection using the Quick Selection Tool over here and make the selection. It was bleeding
out and it'll into the hangar because
it is also white. Do I have already
made a selection? Let me let me click on this. If I right-click on this by
pressing Control or Command, you can see that this
is the selection. So we want to change the
color of the T-shirt first. And after that we are going
to apply a logo on top of it. So it is very simple. All we're going to do
is we are going to create a color solid color
adjustment layer over here. Let me change it to
something like this. And I will simply clip it down so it doesn't look
realistic at all. So if we have a lighter
color like this, but do we do we simply change
the blend mode to multiply? Multiply is the answer to
everything in this case. So yeah, you can change the
color to whatever you want. I guess. This looks all right. Now, I want to place
a logo on top of it. Okay? So what I'm gonna do is I'm
going to create a new layer. And let me open
the project files. And I have a couple
of logos over here. So I'm going to bring
this one over here. Let me resize it and
bring it to the middle. I want to basically change it to look like that it is on the T-shirt and make it more
realistic like this one. So I'm not going to apply a blend if on top
of this because it failed basically bring out discolored and
not the t-shirt, not the folds of the T-shirt. But I will bring this down. Okay. I know the color is a little bit applied on top
of this as when now. And now what we can do is we can basically double-click
on this to open up Layer Styles or simply right-click and
go to blending options. We're not going to
play, I'm sorry, liquefy on it because
I guess Protein, this won't be a problem with
what I'm doing right now. I will bring this to the left. At the point where it is
starting to disappear. I will break the slider. And as you can see, at the bottom of the
t-shirt is starting to come up, Boulez this. And it looks really realistic. I can even apply some
liquify on it as well. But to be honest, I don't think it is needed over
here at the moment. So now that we can do with
this is a smart object. We can double-click on
this and we can change it. So if I go to project
files over here, let's just say I want
this logo instead. I will place it over here
and I will hide this one. I will simply press Control
or Command S. Why is it not? Letting me do this? Can't save this document because of the
original file format. Okay? So we will basically have to, I guess gesture is this. Okay? And if there's not working, you cannot save the file
using the file as is. So total risk models
will not be updated. Why is it not working? Maybe we will have to delete this. Let me read it properly. I have a bad habit
of not reading and save this document back to
its original file format, flatten layers and
discards extra data. As necessity. It is telling
me to flatten the layers. Now I can press Control
or Command S. But yeah, if for some reason it is, it wants me to
flatten the layers, I selected both of these layers and I press Control or
Command E to flatten them. Know I can come over
here and as you can see that the logo
is placed over here. Yeah, whenever you want
to add them new logo, create a new layer first and then add the
logo on top of it. So we are covered with this. Now we can change its
color to whatever we want. Maybe something like this or maybe something
like this over here. Yeah, Basically,
whenever you see a mock-up like this
on the Internet, this is how they make it. It is very simple. So this was pretty
much it on how to make a T-shirt mockup
and a pretty mock-up. I really hope that you guys enjoyed this and I will see
you guys in the next class.
11. Multi Editable MockUp: Hey guys, in this class we
are going to learn how to basically create a multi
editable mockup in Photoshop. So what do I mean by that? Let me show you the
original image first. So this was the original image, and then I've put
our design on top of them. Let me open this. Basically you can see that
this is a smart object, means it is editable. And if I open this, the thing about this is that when I will edit
just one design, it will get updated
on all of these. Let me show you. So let's create a hue and saturation adjustment
layer over here. And let's change the
color of all of these. So let me change the
color all of these to maybe something like
this, blue to overhear. It is purple at the moment. But when I will press Control
or Command S over here, you will see that it has been
updated on all of these. Not a good example, I know. But let's change it
to something else, maybe like this
rather than greenish. So I will press
Control or Command S. And it has been
updated on all of these. How cool is this? Let me select and delete this and let's make
it from the start. Okay? So the first thing which you
have to do is basically you will have to select all of these cans and put them
on a separate layer so that we could basically put their design on top of them. So I haven't come over here and select the Quick Selection Tool. And I will select all of
these cans individually. But let me come over here. And it's not very
difficult because there is a lot of contrast
with the background. You will have to
adjust it a little, but it is not such a big deal. Yeah. Let me fast-forward this so that I won't waste your
time with the selection. Okay. So I have made the
selection of the first scan and before I do the other ones, I thought I would basically
tell you how to do this. I will press Control or Command
J to make a copy of this. And I will rename this, let's call this and one. Then for the other
ones I will also do, can do and can treat. So I'm going to
fast-forward this again. Okay, so I'm done with
the selections now. And as you can see that all of these are on a separate layer. And now we can place our
design on top of them. So now we're going to do is
before we placed a design, we are going to basically make a rectangle
over here, okay? So that basically
we could convert that rectangle into
a smart object and place everything on it. So what I'm going to
do is I'm going to select the rectangle
tool over here. On the top most layer, I'm going to basically
create a rectangle about the size of the can. I'm just eyeballing it. It doesn't have to be perfect. Okay? Now I'm going to basically convert it into a smart object. And let's call it design. Let's call it design do
because this is going to be on top of the second GAN. Okay? So now what we have to do is basically make a couple
of copies of it. I'm going to press
Control or Command J a couple of times to make
two more properties of it. So let's call this
one design, one. And this one design. Basically, these are copies
of the same smart object. I will put this over here, then this over here, and then this over here. Okay? So this is the magic of making multiple copies of the
same smart object. Let me show you how. If I move these to the side, and if I change color
of one of them, just if I double-click
on this and if I change color of one
of them and hit Okay, then I will press
Control or Command S. It will get updated on
all of these out. We'll press Control or Command Z and let me hide the rest. I would simply work on
the design number two. Okay, So let me
decrease its opacity. Press Control or Command
D. This is a smart object. We can edit it
whatever way we like. And it won't affect the
actual smart object. I will simply put
it over here and then I will right-click
on this, click on walk. And now we can bring
all of this in. All of this out. It doesn't have to be perfect because we have the selection of the can and it will
look good either way. Let me put this over here. Okay, this looks alright. Now what I can do is I
can simply clip it down. And just like that, we
have this on top of this. And now I can use its opacity. Similarly on this one, this InDesign number one. I can put this over here. And let me decrease
the opacity for this. Now, let me toss from it. This is the thing
about smart objects. When you have a smart object, you can basically do
whatever you want to it, and it won't affect the
actual smart object, actual design which you have been either right-click
on this, warp it. So I think I will
speed up from over here that I won't
waste your time. Okay. So now I'm done with these. We have three cans and we have to be smart objects
on top of them. From now, it is very simple. All you have to do is basically double-click on any of
these smart objects. So I will double-click on this. And over here, I will
place my design. I'm gonna go to my
design files and I have this really nice kind
of grapes pattern over here. I'm going to drop it over here. No, I can basically resize it. And as soon as I will press
Control or Command S on it. You can see that it has been
updated on all of them. Cool. Is this let me close this. And on this one, you can see that it has
been updated over here. But the thing is that it
doesn't look realistic. All you have to do
is basically change the blend mode of all
of these diverse. Simply select this one and
change it to Multiply. You can see the
shadows over here now, then over here, change
it to multiply. Then over here, change
it to multiply. And we are done. Now. We can basically
edited if you want greater UN saturation
adjustment layer over here, maybe change the colors to
something crazy like this. Or maybe this is totally up to you and it will be
updated over here. But yeah, this was pretty
much it on how to make a multi editable mockup. Because there are times when you have a scenario like
this and you don't want to make a smart object for every single design
because every single can, because it is going to
be the same anyway. So yeah, I hope that you guys
really enjoyed this class. And I will see you
guys in the next one.
12. MockUps With Realistic Shadows: Hello guys, welcome to the last mock-up tutorial of this course. But to be honest, it
doesn't end there. Even after the course. If you find something
you want me to make a mockup of or teach
you something. You can always request it in
the discussion section and I will try to make a
tutorial on it as well. In this class, basically, we are going to
learn how to create very realistic mock-up
with the shadow as well. As you can see that this was the original image which I had. And then I've placed
this image on top of it. I basically cut out
the subject and I also use the actual
shadow of the subject. This is the final version. Let me select and
delete all of this and let's make it
from the start, okay? So I will go to the
asset files over here. You can find them in the project
files you will download. I have already used this one and let me drag
and drop this one. Okay? Like I always say, the mockup of any design should be as realistic
as possible. That is the whole
goal of any mockup. Let me resize it a little. And I guess this is alright. Okay. The first thing which we
will do is basically we will create a selection of
all walks over here. I will come over here and select the Quick Selection Tool. And select subject would be enough to make a
selection of this. Let me try making a selection
using Select Subject. And I will simply hit, Okay. And it did a pretty good job. But the problem
with this is dead. There is no proper
shadow with it. No problem. We will come
back to this later. But let me resize this a little. Let me make the make the
box a little bigger. I guess this is all right. The next thing which
we are going to do is basically we are going to place our
design on top of it. So we have already
covered this in one of the lectures using the
vanishing point filter. I'm going to create a
new layer over here. And then I'm going to basically go to the
vanishing point filter. But before that, let me go back and draw
my pattern over here. Let me drop it over here. This looks all right. And
let me do rasterize it. After that, I will simply
click on this area, not this area, the
thumbnail area by pressing Control or Command. And it will select all of this. No, I can simply press Control
or Command C to copy it. And I can hide this layer. Now, I will create a new layer. Let me bring this down. And on this layer
we are going to basically deduce the
vanishing point filter. I'm gonna come up over here, click on Filter and then
click on vanishing point. As you can see that I have
already created it before. This is for the previous design. So I can simply press
backspace to delete it. And let's make it
from the start. So let me move it to
the side and let's try making this dog here. And then I will
have to extend it. All I have to do is simply
press Control or Command. And then I can
extend it like this. And if it is not
working out properly, you can simply press over here. Let me extend it first. Then you can simply press Control or Command and
bring it up like this. And from what here as well, make sure that
decision nodes red, otherwise it won't work for you. And finally, we are going
to extend it from overhead. So I'm going to press
Control or Command and extended this. Let me extend it to
the side a little. I guess this is alright. So even if you are going
out of bounds, no problem, because we are
going to basically, we have the selection of
the whole in already. Now I'm going to
paste the design over here by pressing
Control or Command V. Let me resize it a little. And I will simply
place it over here. As soon as I will place it, it will get resize accordingly. Let me resize it a
little more like this. And I guess this Perfect. Okay. No, I was simply hit.
Okay. So I know it is going outside the bounds
and it'll no problem. It will simply clip it down
and all the edges are gone. Now we have to make
it more realistic. All you have to do is
simply select this and just blend mode
to multiply symbol. Okay? Another we're going to
do is the last thing which is left is that we have
to bring back the shadow. So if I turn on this layer, you can see that we have
the shadow over here, but we don't, but we
cannot cut it out. We cannot mosquito. So there is a very
special technique for it. Let me show you. I'm going to turn on
this layer again. Okay, I'm going to make
a selection using, I will make a mask on this
using this selection. To all I can do is simply click over here by pressing
Control or Command. And I will have the selection. Now, I can turn this off and
make a mask on this as well. But I would simply
click over here. And I have created a mask on it, but I want to reverse it
like the opposite of this. I would simply select
this and I will press Control or Command Shift
I, or is it not working? But it is Control
or Command Shift V basically have a cut out of
the background. Over here. And over here we have
the actual subject. Okay? Now what we will do is we will simply change the blend
mode to Multiply. I know you must be thinking that multiplies the answer to
everything in mockup. Be honest pretty much yes. Driver change it to multiply. But as you can see, that this isn't something
which is looking very good. But let me turn this on. Another we're going to do is
we are going to basically create a curves adjustment
layer on top of it. Okay? I'm going to select this and create a curves
adjustment layer. And the fingerboard goes, it
just wanted data is data. Using this, we can basically
alter or multiply layer. All I will do is
simply clip it down. Okay? I hope I'm not going too fast. Then I will bring
this to the left. By doing so, basically, I am removing the black areas and then I will bring
this over here. You will start to see that V are starting to
reveal the shadow. Oh, poor list this, but I
can do it a little too much, but it looks really weird. I just wanted to make it. So I don't want to bring
in white too much. Otherwise, it will go away. And I don't want to
bring in black too much. So we have to find the sweet spot where
there are no extra areas. And also we could see
the shadow, I guess. All right. This looks alright. Okay. Now we can zoom out a little
and let me bring this up. Don't worry, I will do a
recap for you as well. So let me select all
of this and group. This is the before, and here's the after, and we have the shadow as well. So if you are confused about the shadow part and let
me show it to you again. All we did was
basically we created, we created a mask on
the background layer. Let me turn this off. You can see that it
is an opposite mask. Let me click on this again. And then we created at curves adjustment
layer on top of it. By doing so, we remove
the black parts of it. Okay, so let me
click on this again. Let me bring this down. It was originally like this. By bringing in these areas, we removed the black parts, and by bringing in this area, we have basically
reveal the shadow. This is all right. This is pretty much it. This is how you
can basically make a realistic mockups with
shadows in Photoshop. This will come in
really handy for you and you can make some
amazing mockups using this. And even if you
open web sites like Creative Market and what
to and other websites, you will see that there are a lot of mock-ups which
looked like this. And they basically
do the same thing. And there is one more thing. If you are selling
your mockups and make sure that you rename your layers like
that color layer or the shadow layer or
anything like that. Because the person who will
be downloading your mock-up, you have to make sure that
you bring value to them. You basically provide a
good experience to them. This was pretty much it. I hope that you guys really
enjoyed this tutorial. I hope this wasn't
too long for you, and I will see you guys
in the final videos. So bye-bye.
13. How To Sell Your Mockups: Welcome back guys. I hope that you're doing
great and I really hope that you had a really nice time
watching this course. And I hope that you know how to make realistic
mock-ups properly. But now we are basically
going to learn how to sell them as well. Like I told you
before, that there are basically two uses of mockups. Why people learn how
to make mockups. Number one is to present it as I understood their clients in a very realistic way to make sure that
they wouldn't know, but they will be getting. And the second one is
selling your mockups. So I have mentioned giving you a PDF in the project files
which you will download. And over there, if I open this, you can see that I have
this pdf over here. If I open this, you can see all the websites which I
have opened over here. Going on all of these websites, you can basically
sell your designs. E.g. if I write a
mockup over here, this is Creative Market, one of the best marketplaces for selling designs and asserts, you can see that all
of these are paid. You can upload your
mock-ups over here. This is the one which we made in the previous class and
you can sell them. So how do you sell them? It is very simple. It isn't a no-brainer. All you have to do is
simply find on the website where it says
something like open a shop to work your market. You create a sharp on it. On graphic river, you click on Start Selling and then you
can create an account on it. There are some that some of these websites basically approve you and some of them
that you sell instantly. Then we have Adobe Stock, which also says cell. There is one more thing. You can create a single mockup
and upload it on all of these websites because there is no problem uploading
on all of them. And you can get sales from a single mock-up on
all of these upsides. In part two elements,
I guess you will have to scroll down
and click on become an author because on Envato Elements and altered or someone who sells their designs. And on free pig, you can also
click on cellular content. I know this isn't
something which is revolutionary or
something like that. I just wanted to
make sure that for those of you who don't
know about this, they wouldn't know how
to sell their designs. And there's one more thing. Whenever you upload a dying
on one of these websites, make sure that it is
high-quality content. No one wants to buy
something which is of low quality and
make sure that you rename the layers properly
because it would be easier for the person who will
buy it to use it. So yeah, this was pretty much it on how you can
sell your designs, your mockups on
different websites. I hope that you had a
really nice time in this course and I will see
you guys in the outro video.
14. Class project: Hello guys. I hope
you're doing great. I hope that you had a really
nice time in the course. The basically it is time for your class project and
it is very simple. All you have to do is
basically create a mock-up out of this
cup over here. You have to place
our design on it and the background as well. I have already given
you five designs. So you can basically put any one of these
over here and make sure that you put a proper
background color as well. Yes. You will have to
cut it out properly and you have to change the
background to any other color. And to make sure that
it looks realistic, your shadow should be
over there as well. But yeah, this was pretty
much it for your project. Make sure that you submit your projects to
the project section because only then you will
get your certificate for it. And after completing
the project, make sure that you also send it to me on this
specific e-mail. I'm going to put an
e-mail over here. And I can't wait to see
all of your projects. And I really hope that you guys have a really fun
time making them.
15. What’s next: Congratulations, you have made it to the end of the course. I hope that you learned a
lot from the course and I hope that you can make a
mock-up out of anything. No. But if you still
have any difficulty making any kind of mockup, you can make a request to the discussion section and I will make sure to
make a video on it. If you have taken this course, you probably knew the
basics of Photoshop. But if you want to go pro, I haven't advanced course
on Photoshop as well, which will definitely help you. Apart from this, I would highly recommend that you learn
illustrator as well. Because making mock-ups
is just one part. You need to learn how to make art board for the
mock-ups as well. So for that, you can take my beginners or advanced
course on illustrator. I have multiple courses
on design 2D as well. So you can simply visit my
profile to check them out. I guess this is by far No, I wish you all the
best and I hope to see you in another
one of my courses.
 Talha Bhatti, Graphic Design Instructor