Transcripts
1. Welcome to "Procreate for iPad Beginner Class": Welcome to the procreate
iPad beginner class. In this class, you'll learn all the basics about Procreate
and at the same time, you'll draw some
pestle limbs with me. So at the end of the class, you'll have an artwork
you can be proud of and you can apply
your new knowledge to a project right
from the start and use it for many
projects to come. If we haven't met yet. My name is Maria. I'm an artist and graphic
designer and teacher, and I love to create
digital products. To create these
digital products, more often than not, grab my iPad and sit down for a drawing session
in Procreate. If I'm not drawing,
you can fight. You're working on my
website, design resort.com, where I help artists
and designers to enjoy drawing and building
their online business. Procreate for your
iPad is the app. When it comes to
drawing raster images. It offers so many functionality and some aren't really hidden. So you need to get
familiar with the app first to create your own
artwork in watercolor, wash presto, any other
technique you can think. I show you how in a nice
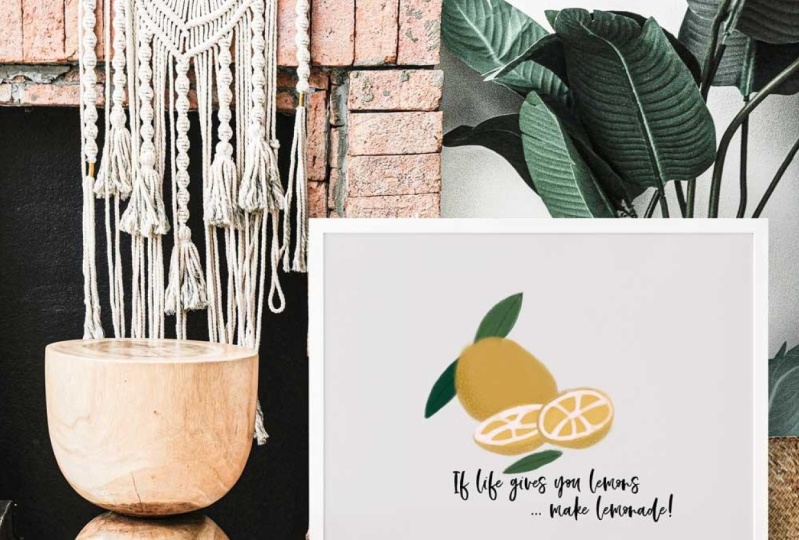
project you can use to create some wall art for your kitchen or as a
gift for a friend. In any case, it will
be great fonts. So join me now.
2. What Procreate is for: So what can procreate
do for you? Actually, procreate is not
a vector-based program. That means that you can
create a specific size, your images, but not that large as you could do with
vector-based images. But as an advantage for
raster based images, procreate is something
which really pretends to draw on paper. Like when you use watercolor
or gouache or whatever. You can totally get
this paper feeling. And the real killer
feeling actually, that what we are going
to do in this class, we are going to
sketch our lemon and we are using soft
pastel brushes, which are already
included in Procreate. And then you see how much
texture you can add with that. And besides texture and besides layering and besides animations, you can also use
the symmetry tool. You can do hand
lettering in procreate, and so much more. We do not cover
everything in this class. Just make sure you keep in mind, we are working in a raster based program and
not in a vector-based. And that's why we adapt
what we do to this program.
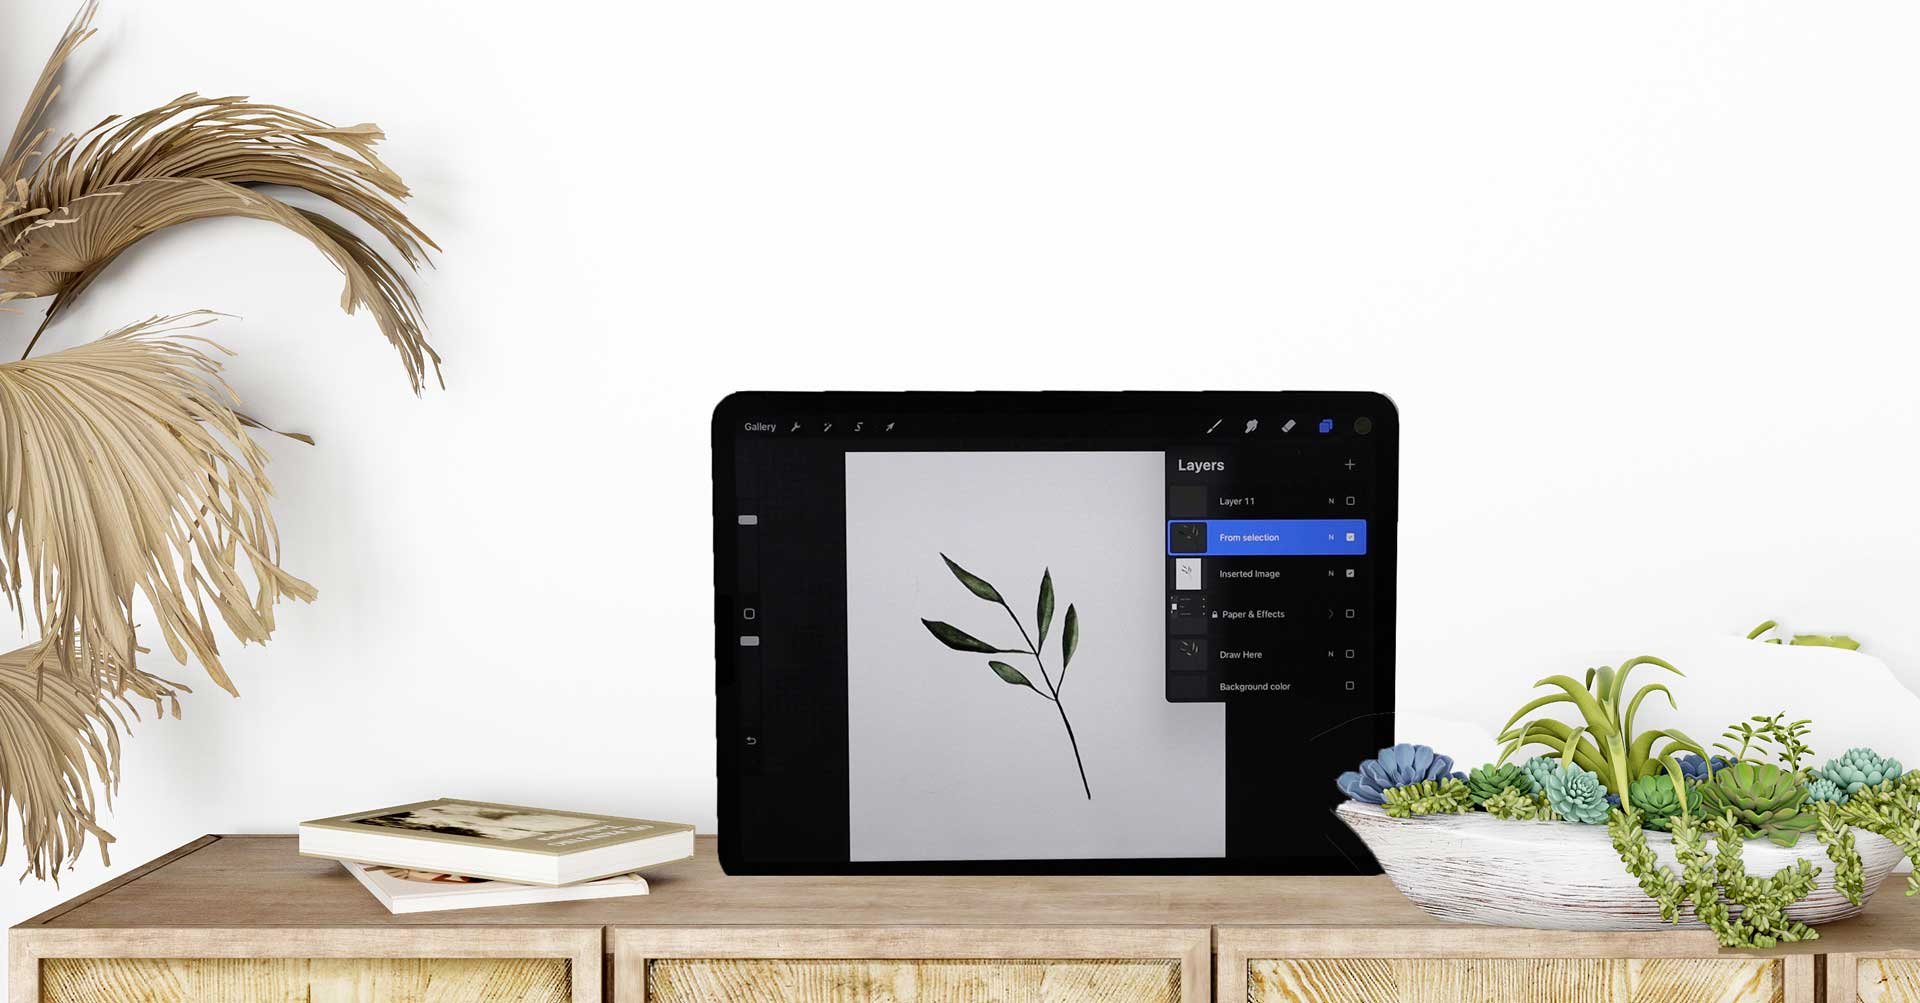
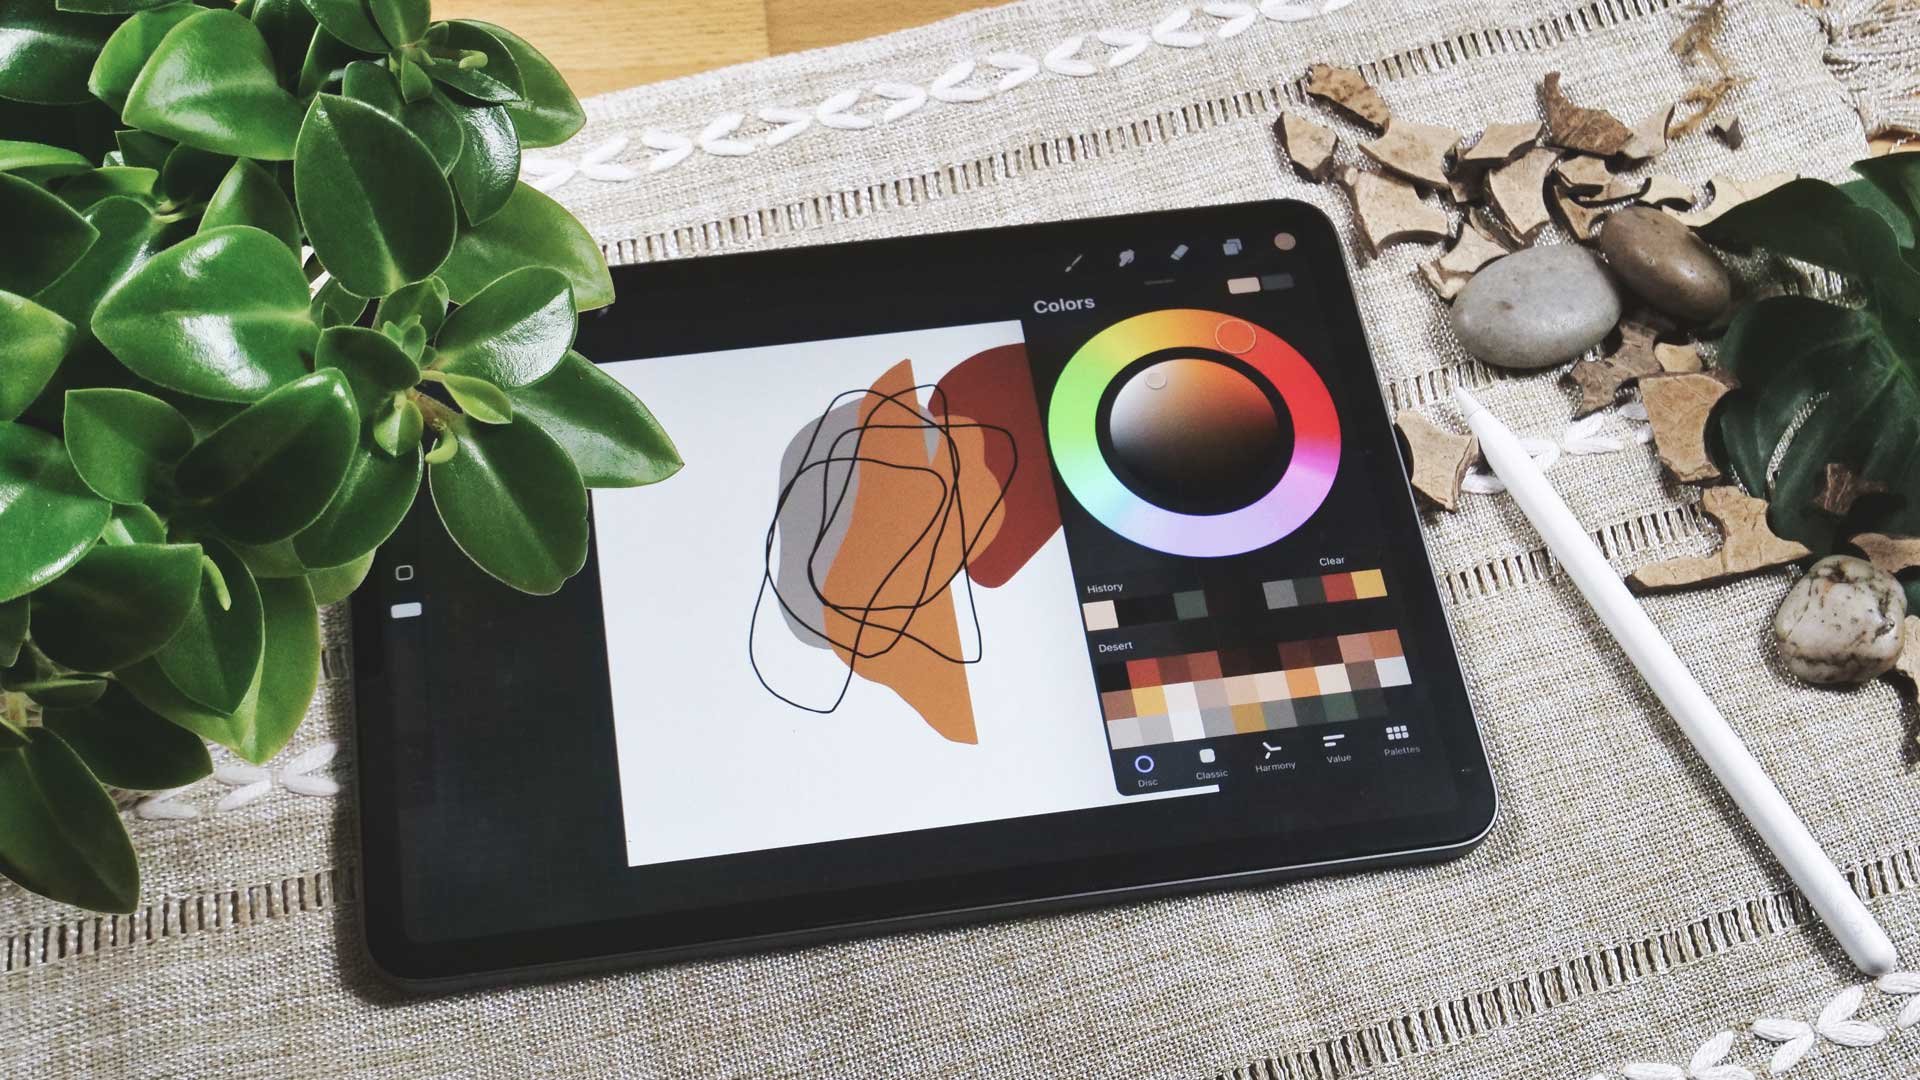
3. Save and organize your Artwork in Procreate: Once you open Procreate, you are in the gallery view. Here is a place where you
can find all your artwork. And most probably when
you started first-time, there's nothing in it. But when we start creating, you will quickly add up here and add all the
artwork you've created. In the gallery view. We can start by creating
a new document, and we will do so with these four menu points
here on the right, I just click here on the plus. And now I have several presets here and I just create
whatever document. And then you can see you have the tools which help you
to create on the right. And the tools which help you to choose the right
setting on the left. And we will go through
all these settings. But for now you should just know that we have
here the brushes, and you can pick any brush. There are already a lot of
brushes included in Procreate. But you can also import your own and then start
creating with that one. So just, let's pick a brush and a color here from the color wheel can easily
pick whatever color you want. And then you can start
drawing here on your Canva. So you can easily create
here if you hold the pencil, not really steep, but this way, you see the difference here. Let's go out again. Now. I have my new artwork here. And now we can put
them into a stack. Just let's open a few
different templates. Now. I have one with
the drawing inside, and now I create a new one. On, whenever I click
here on gallery, I'm back in the gallery view. What I will create another one. And then I have three documents, two of them MTN, one
was my scribble here. Whenever you draw something
here in Procreate, it is saved automatically. You don't have any menu
here to save your drawing. It just saves automatically and you can see it
in your gallery. So in Procreate, you have
stacks, sex or folders. And inside the folders
are several artworks. So you can easily do that by putting those on top of each other and show you
two different ways. So let's start by
clicking here, select. And then you see this
little dot here. And when I tap into that and create an arrow and
then click Stack, it's all put into one folder. So let me get out there with x. And when I go in here, you see three
different documents. Inside this, I can easily
move my documents. So if I want to have that one was something
on it on the left, I just need to move it there. Or I can also delete, share and duplicated here. If I want to just
click Duplicate, I have another document. And when I click Share here, you can see that there
are several formats I can choose to export and
share my document. Let's go out of the stack. You can also just
rename your folders. I say folders because these texts are
nothing but folders. So when you click on the word stack and you've
just click in here, you can now just
type in any word. I just put not art work. And then I have a new
folder named artwork here.
4. What Document Size and Color Space should I use?: Now we have two ways to
create a new art work. Whether you click
here on the plus and you pick whatever
you have here, or you can click here on top
right to create a new one. Or you can also say, okay, I want to have it
in that folder. So you can just create new
artwork here in that folder. So click here on the plus, and it's exactly the
same way as before. So let me explain
what you can do here. So whether you just
pick one of these, open them and create, or you create a new one. Then go here on the top right, and you start by
choosing the right size. So in this case, I use resultant by 3,000 because for most
cases that's enough. And I usually leave it to 300 DPI because 300
is pretty important. You need a high resolution because you have a
register-based image. And that means if you really make it larger, it gets blurry. So make sure you have
set this to 300 DPI, depending on the size of your document and
the DPI of chosen, the amount of layers varies. And it also varies because of the power of your iPad
at the age of your iPad. So if you have an older iPad
that will be lower here, or if you have a newer one
will increase, of course. So make sure you check that because it can
always be that you have just 345 layers
and that might be a little bit too less when you start creating your artwork. So let's quickly talk
about color profiles. So here we have RGB
and we have CMYK. Rgb is usually for
anything on screen, and RGB is usually for print. I say usually because
it always depends on the printer get what you want
to do with your artwork. Sometimes it is that
the printer says he wants to have RGB to start printing whatever
you have chosen. And sometimes they want CMYK and sometimes they won't even
their own color profile. You need to import. It's also possible,
So no worries here. But for most purposes, RGB and displays a nice profile. And the colors are pretty
bright and colorful, so I usually leave it like that. Then you have
time-lapse settings. That means that
video is recorded in the background with whatever you do when you
create your artwork. It creates a several
steps and then you can let it play and maybe
show on social media. And she decided what
size do you do that? You can do that in HD
into k or a four K, low-quality, good-quality
and studio quality. And as you can see, I usually use HD format and a good quality
as a compromise, so it doesn't get that big. And that size is pretty much enough for
every single need. You also have the
Canvas properties with a background color
and background hidden. You can toggle that on
and off if you want to. I'll leave it as it is. So last but not least, we can name our artwork. So I just type in here
and say in this case, three cells and pigs. And once done, I check everything
here and click Create. And my artwork has been created. Let's switch back to
the gallery view. And when I click now here, you can see that my
preset has been created. It usually it saves time. One, you quickly want to start creating you and you
have your presets. You don't have to create a
new document all the time. So you can just use a
preset and pull that up. And it is the size
you have set here. Great thing. Also, you can always swipe to the left click
Delete, so it's gone, or you click Edit, you can change the size
of your preset here. I just clicked cancel and then
I could just click Create. And here you go.
5. How to use Brushes, Blenders, and Erasers: Just as we have learned
in the previous lesson, we start by creating
our artwork. So let's go into this
folder and you see there are already
a lot of images, are a lot of canvases included, but I'm going to
create a new one. So I click here on the plus, and I choose the one in 3,000 best result
and pull that up. So now let's talk about brushes. When I click here
on my brush symbol, you can see that I have a
lot of brushes included. I can tell you there are already a lot included in
Procreate light, all of these here. But you can at anytime
import your own brushes, create your own brushes and also purchased brushes
which you import here. Here are some brushes
I have bought. And here are all the brushes which are already
included in Procreate. Now it's a good time
to get familiar with all these brushes
because there are so many that you can hardly keep in mind what you have used
and where you find what. So let's just pick something
and start drawing. And to do so, we of course
also need to color. So I click here on the
little color sign, whatever color you have here. And then you can choose
whatever color you want. And depending on
what you do here, it changes here on top. If you prefer. This one, you can go here
and pick your color, or you can choose
a harmony we'll, which helps you to
pick the right colors. So these are in harmony
with each other. You could also go from there. And you can also pick a color based on the values
you can choose here. And now the great
thing is you can also create color palettes. So once you have
found a few colors, you could hear create
your own color palette. Before we talk
about color prank, just, let's play with
some brushes here. So I go here and just pick whatever brush and
start drawing here. And now there are
other options as well. I can just draw with that one, but here I can increase the size of the breast as
you can see here, and just go here. And I can also reduce the
opacity of the brush. So if I do that, you see there is a huge
difference between those two depending on what you need, but you can always pick them. A great thing which
has been included is that here on top this recent. And here it tells you which
you have recently used. Because sometimes you
draw in a document and you can't remember
what brush it was. So here you find the
brushes you have used. So for sketching, I usually use the
peppermint or servant. Let's use peppermint
and pick another color. I go to the color wheel
and pick another color, maybe hear something black. So let's go there
and you see how different that brush is here. You see that now the opacity
and the size is on top. So this one is for sketching. While you can always
choose another one. And let's see the difference
here between those. It's not here on top, so let's increase that. And you see it's also
a bit different. Again. You see you have so many
brushes included already, but you can totally at your own and you can also
create your own. That's a completely
different class. So let me just tell you
you can create them. And we might go into
that in a later class. I can now let's talk
about the layers because procreate
is layer based. And as you can see, I have put everything
on one layer, which is not good
because when I turn that off, everything is gun. While if I would have created a new layer and have
drawn on that one. So let me draw here. Maybe I draw a little heart so you can see the difference. Then I can just turn
that off or on. I can turn those off and on you or just stacking and putting that on
top so it can happen. Assert layer. And maybe I just draw
a little star here. Oops, doesn't really
look like a star, so I use two fingers
and get rid of that. So I better draw a triangle
and draw a star like that. And then I'm going to
fill it with color so I can easily have my star
looks much better. When I draw here from top. So that's how your use layers because now I
haven't closed that. That's why it just
fills everything. Doesn't really matter now. So I just wanted to show you
how that layer stuff works. So let's go back to the layers. You can see the star is on one layer while the heart
is on the other end. All let's scribbling is
here on layer number three. Now, you can also
name the layers. So you type in here
and say Rename. And maybe you want to
name it like star. And when you click
Return, you're done. As you can go ahead and
do that with any layer. Or you can move it to the left, swipe it to the
left and say log. So nothing will happen to the layer or you
can duplicate it, or you can delete it. So I'm going to delete it now. It's gone. Yeah, that's how you go
about these menu settings. While here, you have completed different
settings for your program. Another thing you should keep in mind is that you do not just have brushes here like different which I'm
using right now. You also have the
fitting eraser. So if I have here my derivative and I
click here for longer, and now I have the
Durant as well. So let's do that again. I go to airbrushing,
pick whatever brush, and now go back to my brushes. I have to derive, and right now here I have whatever
airbrushing brush. And now I click
here and keep it, keep the pencil on it, and now it switches
over to derive. And so now you have determined
as well and you can much better delete whatever with
the same brush, right? So in this case, a bit tricky
because it's so small, but basically you
can just do that. We also have another tool here. It's a blender, true? Again, you have all the
brushes here and you can use, Let's pick another color to
just blend something in. I go here now on the
layer we already have. And I'm saying it didn't work. So you can see it better. You can see I'm smearing it now. Although I have that red one, it's still picks up the green. And you can just smear here and blend something
and make it different. So everything actually
which is on one layer. So when I go from this
to that layer and I keep going here,
nothing will happen. Why? Because I'm on
the wrong layer, so I can just do that here. Well, on that one, I can work on the heart. So let's see what's combat
the heart and the scribbled. So I could use the blender
tool here on that one. That's how you can
go about that here. One click on top-left and
we're back into our CEC. Or we have back in gallery.
6. How to add new Brush Sets to Procreate: So now let's talk about
cleaning layers because it's pretty easy and
we can quickly do that and importing brushes. So what I want to get
rid of this mess, I just go here on the layer thumbnail and
click Clear and it's gone. Or of course I can swipe to the left and delete
the entire layer. That's also no problem. And now I want to
show you that you can easily create
your own brushes. So you do that by clicking
here on the plus sign. And then you can name it
and completely go into the brush studio and create
your very own brush. So I just name it here. Artwork class. And now you have a hard time to decide
what you want to recurse. It's not that easy.
You really need to go into that and really just go through all the settings here and create your
very own brush. So you see what I
can create here. So now I have a new folder called our
class and a new brush, which I also need to rename. So I go in about brushes and
click here again the name. Then I can easily add
a name for my brush, but I'm going to cancel that now because I want to show you
how to get rid of that. So when you click here
on this one, you can, of course move it
wherever you want, or you can just
type on it and then rename or delete, share,
duplicate, whatever. You can do the same with a
brush tool, swipe to the left. You can just delete it. Yes, I want to delete it. And now I want to delete
the folder as well. So delete, delete. So now let's import
some brushes. And we do that by
clicking here on the plus sign and say import. And now it opens my iCloud Drive where I
have Procreate resources. I have downloaded
them on the Internet, so I'm just going ahead
and importing that one. And now you can see here that I have all these brushes imported. Now. I can use them. That's why we have
cleared our layer. Just make it green. Now. Let's play around
with that brush. You see what works and what not. It looks really
good, doesn't it? That's how it works with
layers and also with brushes. So of course I can delete them. I can also duplicate them. I can even change them. So when I click on
the layer here, I can change the entire brush. Great thing is, I also can reset the entire brush.
So I'm back there. Or if I want to play with it, I could also just duplicate it so I don't destroy
anything here.
7. Working with a „clean“ Canvas: If you want to create
your art work, you need to take care of working with fresh canvases,
with clean canvases. Because if I go now
here on my layer and click here on clear, you should think that
everything is clean. But when I go to the time-lapse here and
video and then just see, you see that there is what
I have had created before. So it's always better to
then just go out here. The lead that can start
a complete new one. So we have some new ones here. So I can just start
by clicking that one. When I now go to the time-lapse, there is actually
nothing but when I start creating something here
on it and then delete it, it's not clean canvas anymore.
8. How to use Reference Images without Copying?: So if we now want to
start drawing something, we need some reference images or actually I do that this way. I go to the Creative Commons. So let's go. I'm here in Google and now I just type
in creative common. And it's on Flickr. So we can just pull that up. And here are lots of images
to use for Creative Common. I just accept them all. And now I can use them. They are licensed free. So you can just type in
whatever I'm looking for here. Maybe a Citron or just look
here what you can go with. So I wanted to draw something
like that. Citroen. And I need the dimension, how it looks with,
which leaves without. So I'm just looking for images
just like that one here. I know how the leaves look and how the size of my Citroen is. So I usually make that large
and just do a screenshot. So I press both of these
and then type in here, I can crop it and it's
saved to my camera roll. So I just need sat here. And I'm done. Save to photos. And I can go on. I just pick a few images and to have some
references here. So how it looks inside. So again, make it bigger. Press two buttons,
hair, pull it up, crop it, and click Done to save it to your photos. Let's see what else
we can use here. I'd like to have one with
leaves, something like that. E.g. I. Now halls and lifts the
lives of my Citron book. Okay, so now let's go
back to procreate. I have already opened and now I go to gallery
to chew this tool here, and go to Add. And then I click,
insert a photo. And I can now pull up the
images I just had here. So let's go with that
one and another one. Click always on Insert photo, and you're good to go. Okay, so now I'm going
to make a bit smaller. Want to go to the other one? Same way. And number three. So maybe I can crop it a bit. Click on Canvas,
crop and resize. And then I can just
make it a bit smaller. I will need to space. When I start drawing. Click done. And I have
cropped my Canva. So now we need a new one. I create a new camera here, and then I use a new function, which is called reference. So let's turn that on. And if I do that little
window here opens, which is pretty handy, isn't it? And I click here on image
and important image, and then I can import
the one I have. So let's go quickly back. I show you the mistake
before it can do that. I need to save it or I need
to export it actually. So it's saved,
yes, in procreate, but I need to export
to be able to use it. So I click on Share and
I need it as a JPEG. Now I save image, and now I can go back into the new document
with my reference image. Click on Image. And when I now click here, I see the board I have created. And now I can put it somewhere
here and start drawing. I can even make it
bigger or smaller again. So it's very handy if you
need a reference image here. Now what I want is I want to have one of the search
warrants here in the center and some open search runs here, the bottom right. So I use one of the brushes I have shown
you already for sketching. Maybe Procreate weird
to have that one. So let's use that one
and see the sights. So it's here. Maybe it's okay to
clean that again. Because I want black
and to have that, I just type in twice here
and it's switches to black. So you can see black here. And now I start
drawing very loosely. So let's go. That's how my Citron will look. And here will be the open one. Make a new layer because I want to move it
later a little bit. So I'm going to do it like that. You see you go very loosely. I just have that as a reference. I don't want to do exact same
thing or copy it somewhere. I just want to place it by
now and see how it goes. Now I can go to that
layer and move it over. And the other one is here. And I can bracket here over. This is just my
sketch showing case. Most probably will
need that image. But now I start by
refining the image. So let's say here on that layer and say a bit here and start. Keep drawing. So just see
what you can do here. Maybe we want to
add a leaf here. And here, another one. And here it's in the center. Let's see how that looks. Now I have my leafs
here on that layer. Okay, This Pretty matter because I won't
need them anymore. But just case, I also
need that inside here. So that's what I do know. Maybe I put that on a new layer. I have something
here in the center. And then I go from there. Okay, that's the basic here. Maybe I add another leaf
here on the bottom. Maybe I get rid of it later. Okay. I guess we can make
that smaller enough. So now things are lying
on top of each other. So maybe I should change that and I'll
use the eraser tool. So I need to check
what's on that one. You see here on the bottom, there's the first one and I
need to get rid of those. So I'm going on the first layer and then
click here my brush. And maybe a use
another 16 be pants. Maybe. I click on that
under that took over. And then I can
actually delete what's inside here to have
a first overview. So that one is in front, that one is behind. So let's just see to
get it right for now. Which changed the layer
to get rid of this here. Okay, so for now, I just have a very loose sketch and I need to keep
cleaning that up a bit. Here. We need to
get rid of that. So I have a first impression
how my picture will look. Yeah, I'll leave it
like that for now. So now we can need to take
care of the right layer. But for now, that's
how it will look. And my Citroen here in the back and two
here in the front. And maybe a leaf or two. Who knows?
9. How do you sketch using Layers: So now we have done the sketch, please make sure you will have just one layer left
here of your sketch. And we use this sketch
like a tracing paper. If you create a new
layer here on top, you can move it to the
bottom, another layer. And then you can
basically draw on that layer and have this
sketching layer on top. So let's do that for now. That is on top here. I just drawn all the
colors and for that, we actually need some
colors for our lemon. So to do so we create a color palette and then
we go here to pellets. We have several options. So whenever I create
a new palette, now create new pallet and age, just say, let's call it lemon. And click Done. And now I can just type in
here to my color wheel. And you can also use the
other wheels here, of course, but I'm going to use
that one and I'm picking now nice yellow. So let's see if
that's a nice one. I just draw something here. On my layer. You see, it's hardly need
a bigger brush here. Now, we see it really. Well. We can always
clear the layer. So just go here. Go on the layer. Number two, click
here and say clear, and we are rid of everything. Now this one is under it again. So now we need some colors. We go here and just start by
picking here some colors, whatever color we use, actually it's up to us. But the good thing is to
have a few choices here. And we need yellow and green. We can do it like that and just start picking our own colors. We can also go to our pellets. Then click here on the Plus
and say New from photos. And then I pick one of
the photos we have. And now the picture
is the reference for creating all of these
beautiful colors and have that power. So now I can just
click on that one. And now it's here
on top and I can click here to have this one. Let me get rid of those because
they don't match anymore. And maybe I get rid of
the entire palette here. It's just one way of
creating pellets. And now we have this one. And let me give that a name. Let's name it lemon. So we know this is our
color palette for now. Now, I start with a yellow
and go to my sketch layer. As I said, we use it
as tracing paper. So we're now here on the bottom. That's our motive. And here on the top
we can start drawing. Now we just need a nice brush. I have the soft
pastel brush here. We can of course also
use another one. So let's go and see
which one painting, maybe C, which we have. You should have all those
as well because they are included. Let's see. That one is a nice one. No, I think I'm going to stick with the one
we had before, the soft pastel brush because
I like the texture here. Now that we have set the brush, we've got the opacity. She has a top and maybe see what size we need the
brushes much too big. So let's get rid of
that and reduce it. You can hardly see that. So it's always better to try it first here and
then we get rid of that. So again, make sure we,
on the right layer, we start drawing our lemon based on the shapes
we have here. I'm just going to fill that now. You see if I lift my pen, here are some holes under
it and shining through. So I might go over that again. But I actually like the shading, so I will leave it at
some parts like it is. But you can always go over
again and get rid of that. We're going to get rid of
the edges at a later time. So for now, I'm just filling it. And I still have, you see here, I still have these edges here. This structure shining through. Here's the first lemon. And now I want to have
these lemons and front. So I'm going to create a new
layer and draw these here. A little bit tricky because
they are the same color now, we could change that,
going to do that. So let's go to my colors
color wheel actually. And we make it a
little bit brighter. And then we're going to check
if we're on another layer. Yes. And then we
just go over it. You see it's a little
bit brighter now. Just as before, I can zoom in. You can really feel that. And I think we can do the
same here for this lemon. And now I'm going to
pick this color again because I want to create
this bottom here. Can even go crazy
about the layers and just create a new one. So we can clip that Intuit. Going to show you that in a bit. You see the edges get
sharper, smaller. I make my brush. Okay, we need to
get rid of that. Hopefully is on that layer. Maybe not. Let's see where it is. Yeah, it's on the other one. So I go to that layer
and just erase that. I cannot erase anything
from that layer. And that's the beauty of this because it's on a separate one, so that's pretty easy. Now, let's make sure
you're on the right layer. And I'm going to just refine
the edges a bit here. I can't hear draw
over it to make it sharper because the
slides here on top, over the layer on the bottom. So let's go over that. Okay, so let's the
lemon for now. We need to keep going here. We now have to
create these leaves. And I go back to my color palette and see
if I have a nice screen. I pick that one. And now I go over
the sketch layer, click new layer, and
put this one under it. Just as before. Because of the
tracing paper effect, I have my leaf under
the lemon already. I could also move that up
just by moving the layer. That's not what I
want right now. So I'm going to draw each
of these leaves for now, but I'm going to
put the other two on another layer because
they are more in front. And a mantra still the same, new color, new layer. So I'm going to make that
a bit brighter here. You see I have to
go over it several times to make sure that
I have covered it all. Something on Android. So it's not looking at. So let's see what that is. You go, something is here
still on this layer going on it and just erasing that. Okay? So it still doesn't look that clean because we have
that sketch layer one. If I turn that off now,
it looks much better. You could of course, refine that even more. So in case e.g. these leaves here,
I pick the color again and make it a bit
bigger and larger here, actually, and go
over my edges again. You see I have now
the eraser brush. Of course, you can also use your brush and make
it look nicer. But I believe on me,
That's helpful now. Okay, let's go to
the other leaf here. Same thing, picking the
color and going over it. Now it's color and
not with the eraser. You see those options work well. Okay, for now, I think yeah, More or less we have our
sketch done. So let's see. Yeah, yeah, right layer
and just picking here, because here I saw something. You can keep going. Of course you can go
crazy with refining this. But for now, it's okay. If we have this
rough sketch ready.
10. How to add Color: Okay, Now let's open
the Layers palette, and now we want to delete all the layers
we don't need anymore. Remember, I said new color, new layer, and that's why it can
hardly merge anything here. This color is unique, but those two are the same. So we can definitely merge them. This one and the one on top. So let me move that above. And we can pinch those together. So they are on the same layer. Actually the lemon peel it is. And the inside of the
lemon is on another layer. And now we have here our leaves, but this leaves are a little
bit brighter than this one. So I'm going to leave that
on a separate layer as well. Yeah, I guess that's it. We can turn on our sketch layer. So actually, we don't delete
layers here at this point, we better merge them. But sometimes it's the case that you need to delete or it
can delete them actually, in this case we cannot. But usually at this
point you should clean up your palette and
start deleting. Let's start here by now, renaming our layers so I can
type in here and rename it. Or I can just go here
on the on click rename, and then I name it
sketch and return. So I'm done. Now, I create a new layer and drag it below
the sketch layer. And let's turn everything off. I just keep it a little
bit longer here on top than everything turns
off except the one on top. And now I can just
turn on what I need. Let's go to the sketch layer
and reduce the opacity here. So I go to n here and just, you know, I can
turn it on and off. So let's pretend
it's on max now, I reduce it here. Now let's turn on alpha
lock on this layer. You can do so by tapping here on the sum and click
here on alpha lock, and then it's here
on alpha lock. When I click here,
you can see that it's turned into a
checker box here. So now you can see
that alpha lock is on. And now we want to make
our sketching more clear. So I go to the colors
double type in here, so it jumps to black, turn it off, go back
to my layers palette, and then I click here on fill. And now you have seen it. Everything turns pretty dark here because it's not
filled with black. So the great thing about
alpha lock is it everything which is already drawn on
the layer will be filled. That's a pretty sing
about alpha log. So you can easily change
the color of your layers. And that's also why
it's so important to have different colors
on different layers. Now, I'm going to
move these layers, another sketch layer, or I can move the sketch layer
on top actually. So I can now see what I'm drawing here
when I turn that on, I could now also change the colors here,
all these layers. So let's rename these
layers here to, let's say here inside
or a lemon inside. Maybe. Here it's lemon peel. And Hera, the leaves. We need to work with leaves in front and
leaves in the back. So now let me show you how
to change the color here. And we can easily do that by clicking here on the
leaf, click Alpha Lock. And as I said, what ever is now inside what we have
drawn will change. So we can now change the
color here we go better too. Use such realization here. Then we can change the
color here to our liking. Maybe it's a little bit
more saturated or brighter, too bright, so I'll
leave it like that. But you can change that
all here in Procreate. That's the beauty here because if you have it on
different layers, you can easily change that. Now, we need to make
decisions all the time. It doesn't matter,
we can do that. So let's go swipe to the
left click Duplicate. And now we can go back
to use such realization. And make completely
different looking leaf, maybe more saturated
but brighter. Then we can decide the
darker or the brighter leaf. So let's see, see here which one is better
for our composition. So I believe it's a darker one. I'm going to delete that layer swiping to the left click
delete and it's gone. Okay? So we're not done with our composition
because we want to, of course, draw the
inside of our lemon. So let's go back to
the color palette. And I grab white creamy color. When a type on it here, it comes here on top. And now we go back to our
brush and see the size, new color, new layer. So let me go here and
create a new layer. And see how that looks. I'm going to reduce the
opacity of the sketch. Again. We can see that better. Maybe that's enough already. Let's turn it off the sketch layer and
see how that looks. Yeah, it could meet a
little bit more actually, so I think it's
not bright enough. So now I'm going to do
what I've just shown you. I'm going to change the
color of these and I do that with usage organization. And I'm going to
increase the brightness here as well as the
secularization. So I like that much more. And now I can also
refine that a bit more. Make some parts a
little bit bigger. Or you see it still
has the old color. So let's get rid of
that type in here. So it takes over that color. And we keep going over it. And we need a second row
here on the left side. And I guess I'm going
to create a new layer, although I don't have
a new color recurse, I will leave the brighter one. I still want to
remove some parts. So it's easier for me. I turn on the sketch. You see, that's what I'm
going to remove in a bit. I don't need to sketch anymore. So let me turn that off and see what I need
to clean up here. Okay, So now we have to decide, so this lemon here is
in front of that one. So I need to get
rid of these here. So back to the eraser and make sure you're
on the right layer. And then you are just
getting rid of that. So it looks as if it
is in the foreground, what this is in the background. We can make this effect a little bit stronger by
just going back to the layers and
going back to this inside part better The Also because I'm going to
increase this one a bit. So I need to pick that color
again and go over it here. So as I said, that's the
beauty of Procreate. You can easily switch back
and forth as something, get rid of something, whatever you choose here. Now, I have drawn the surrounding and you
see what's wrong now, recursively inside of
the lemon has to go. So we need to go
back to this layer here and erase a bit here. So it works again. Okay, for now.
11. How to add different Background Color: So now let's put the finishing
touches on our lemon. It needs some shading on the inside and maybe
some stippling here and there and some
veins in the leaves. But before we do that, we want to change the
color of the background. To do so, let's go to the Layers palette and
go to Background Color. And then I can just switch here between the
different colors and see what fits best
to my composition. So actually, I'd guess I'm not a big
fan of all these colors. In general. I would hardly choose something very a bright and blinking more. The person who would use something like that
or dark green or so, usually I will end up here with a creamy white or
gray background, but that's totally up to you. You can choose what appeals
to your needs and what fits whatever you choose to do with your
composition here, you can change the colors even in your color
wheel a bit more. For now, I keep working on
the rest of the layers, and I do pick the color, the background color first, because the composition, Oh, it looks a bit
different depending on the color you've
picked there. So it most probably
a good idea to first have the background color before you switch
somewhere else. But now let's merge these
two layers together because we don't need to change
the colors anymore here. We don't need this sketch
anymore at this point. And now we can start refining each of these
layers to our liking. Let me know first, pick one of the
stippling brushes. I use one I have got for free, but you can use
whatever you want. I'm sure there are others
included already in Procreate. So just go through your brushes and choose whatever you need. Once done, once
you've picked one, go to one of the layers, create a new layer, Buffett, and pick the color. Now I'm make it a
little bit darker so you can see the
stippling here. And we start drawing here, make sure you're on the
right layer once again. And then you start
by just drawing over and you see it's too
big or too small whatever. So we can, we need to
adjust it a little bit. You can hardly say before. So just go over it and you see then if it fits your
needs or if it doesn't, you see, I need a few
tries to get that right. And maybe it's the
opacity I need to reduce. And then it looks fine. I think so because it's
not that strong right now, but still a little bit
darker. I like that. So keep shading here. On the other lemon peel. You see I do all the same. They're on the same layer. So I can just use a clipping
in a bit and clip all, everything which
goes over it inside. So just type on the nail and then choose clipping
mask and it's got, let's check that
you see there is no more siblings over the edges. And now we can keep going, keep shading here a little
bit and make it even darker, but that's too light. You can totally decide
what you want to do here, but make sure you have
something on the edges here, on the lemon peel. And then we move to the
inside of our lemon. And to do so, we just move to another layer, of course, to the inside
layer and create a new one. And then we start
shading once again, pick the color,
don't forget that. And choose one which is
a little bit brighter actually than the
one we had up front. That's because we
need the inside of the little lemon a
little bit brighter. And to give it a little
bit more depth, actually, just go over it and
brighten it up a bit. We can do it on other ways. I know, but that's
how I do it now because I want to have a similar look and
feel everywhere. Again, we are using
the clipping mask. So tap on the thumbnail, click clipping mask, and
you'll see what happens. The stippling
disappears once again. Now we're done with the
shading of the lemon and we need to switch
to our leaf layer, create a new layer on top, and then pick the dark
green color here. And we need to go a
little bit darker even. So we have the right
color for the vein. Before we do that, just go to the recent brushes and shoes, maybe the soft pastel brush and make it
really, really small. So it looks good. Let's start by picking
the right colors. So pick the green
and then go into the color wheel and
make it a bit darker. And then we can start drawing, make sure you're on
the right layer. And then I start drawing the wane and you see a
typo over the edges. It doesn't matter right now. I'm going to show you in a
second how to get rid of that. Let's do that again. Start somewhere
here and go over. So we have a wane and we
need to get rid of that. Of course, we click
here on Sunday, I'll click clipping mask. And it's got a
pretty easy right? And it's really nice if
you have clean edges. We do the same now with a second leaves and choose another color. We also go a little
bit darker here. And we start drawing the
veins on another layer here. So again, I start from the
top and go to the bottom. It's easier for my hand
to move like that. You need to figure how
you'd go about it. But you see what happens if
I don't do it like that? I just don't. I miss the edges. Let's try it again. Get rid of that beauty of
digital painting, isn't it? So I start on the
left side and go from left to right
and clipping mask. So all the same edges are gone. Now maybe let's pick
another color for the vein, like I showed you before. Go to hue saturation,
brightness. And now we just move here, secularization of bed
and maybe brightness. And also we have a
completely different color, but make sure it fits too. The overall look and feel
of your composition. So yeah, it's a bit tricky. So we need to slide foreign bank and see what works best
for our leaves here. Okay, at this point we
are done with our lemon, and I have picked a creamy
gray maybe in the background. But as I've shown you, you can totally
go with something else and choose another color. It's totally up to you. I'm more prefer this
calm backgrounds rather than they're
really colorful ones, but that depends on
what you want to use. Your lemon Four.
12. Your Project: Congratulations, you've done it. I hope you enjoyed the class
and you'll learn a lot. I know this, the
foundations class. So I have added a level of things you need to
know for further project. Just like filling
layers or using the Alpha Lock are
using clipping masks. All these kind of stuff we
have covered in this class. But I guess you didn't even
notice that you learned all this stuff and that's
a great thing if you did. Congratulations. And now it's up to you to get started and to try something. You don't have to draw Lemons, but you should draw
actually something. It's up to you if
you use lemons, if you use apples or whatever, maybe you want to drop and I know you're very
welcome to do so. But once you've done, please show me you're at work. You like the class. Please also check out the other classes we
have on this topic. Look for more Procreate classes. And I'm sure you will
find something you enjoy.
 Monja Wessel, Graphic Designer and Teacher