Transcripts
1. Welcome to the Class!: Welcome to the class, create an abstract art set. In this class, I'll
show you how to create your own digital
asset for sale. We draw our own clip
arts and procreate, support them and create
a graphic set from them. I also show you how to create
your own compositions and use them to make your own physical
products on pre-defined. If we haven't met yet, my name is Maria. I'm an artist and graphic
designer and a teacher, and I love to create digital
graphic sets for sale. Actually, I do that
on my own website, each design resort.com
since 2008. And I love to do it because
this graphic sets are truly evergreen and will guarantee an income
for years to come. In this class, we will first talk about why you should create a digital clipboard set and
what you can do with it. I'll then tell you what material you need and how
to get inspired. We will also have to plan
our graph except before we finally prepare our brushes
and colors in Procreate. To start drawing. I also show you how to
export your artwork, create a composition,
and finally, upload it to the
print on-demand site, printed five to have them create physical product just like Max pillows and
many more for us. If that sounds like a
skill you want to gain, join me in this class
and let's draw together.
2. Why we create an Abstract Art Set: Let's first start
with a question why we should create
digital art sets. So there are definitely
reasons for digital assets. I know it's a lot of work. I can also tell you to
create online class. It's also a lot of work. After all, creating
a digital product. Yes, it's a lot of work. But it then has a lot of advantages because you can sell it not just once or twice. And exchange time for money, but you can sell it forever. So the idea here is to create digital assets
which are evergreen, which are not related to a specific special
event over the year, and which are also not
related to a specific topic. If I create something, e.g. for Christmas, I can just
sell is around Christmas. And that is basically
not what I want. I don't want to make a
lot of money in November, December maybe to create
something for Christmas. But I need to make money
over the entire year. Because of that, it's a good
idea to have digital assets, which are actually evergreen. So we can do two sinks. We can, on the one hand
sell digital assets, which means you can
create a graphic set and sell that menu, give commercial use rights to others to work with
your graphics. So they can create something
from your designs. You can totally do that. And it also means that you can sell your set for
a higher price. I'm going to show you that
in a second on the computer. But let's first talk about
the second option you have. Once you have
created your ad set, you can also use the
designs you have created and create
something from them. So e.g. you're creating an
asset and abstract outset. And you go ahead and create
a wall art from that. You can sell on the one
hand, the wall art. Or you can create phone cases or pillows or whatever you want. On the other hand, you
can sell your asset. But you need to keep in mind if you have an art set and you give others the
option to use it to create their own
products from it. You also give away your
exclusivity in this case. So keep in mind what you want. Do you want to sell your
digital art set and that's it? Or do you want to
create a digital asset, create something from it, and sell that, or have others
by your digital asset. And then create
something from that. Once you have thought about
that and what you want to do, you can totally do that. You can create your own art sets and then start selling them. And that is what we're
going to do in this class. We're going to
create an art set. And if you are creating products from it or if you
are selling them, That's totally up to you. But I want to show you both
ways and how to create that. Let's jump on the computer
and I quickly show you that there are
actually such sites. Which cell, just these art sets and give others the right to
create something from them. Knife, open, design
cats on the computer. And that is just one side of many on the Internet
which sell digital goods. I have also pick one
of the sets here. I look at this one from
pretty little lines. And this is pretty new and
it's called make-believe animal flower and whimsical
seen illustrations, adorable animals. So what can you do? Let's say you have created this beautiful animal set with lots and lots of creatures. And now, what do you do? Do you want to sell
that set or do you want to create something from it and sell what you've created? After all, you want to sell what you make
the most money with. I believe it's a good
idea to sell such sets. No question. But on the other hand, you might want to have
physical products. And then of course
it's a good idea to create your own
products from those. And this totally depends
on what you want, isn't There's no
good or bad thing. It's just something you make more money from them
from the other. So creating such a set
is a lot of work, Yes. But then you are done. While if you have such
a set and then you are going to refine it and start
creating products from it. You have more work
on top, right? And then the question is, how much money do
you make with that? Let's think about
sidelight printed file. You create e.g. from the monkey, you create a beautiful mark. And then you are going
ahead, upload it to print. If I push it to your store, e.g. to Etsy or two you saw on your website and
start selling it. In the end you make 40%,
just about roundabout. And then you can say, Okay, the Mac costs maybe $20
and you make 40 per cent, so it's about $1, Let's say it's to get
something, a cut. And maybe you make
$6 and selling that set gets you $20
minus the commission. Design Cuts gets here. Yes. Well, what is better for
you and your business? After all? Most probably it is
just to sell the set, but it all depends on
what you want to sell. So just keep in mind
there are two options. What you are going to sell
is totally up to you. There's no better
or worse choice. It's just the question, what you want to sell. So let me quickly go through here and you can see
what you can do. You see what she
has all included? Chris is her name. She has included a lot of different little animals and sky items, umbrellas,
hats, accessories. Here you can see what you
can create from that. So here's created cards, and she has created Wall Art. And let's just scroll here. So it's about cards and most
probably things for kids. She can create beautiful
stuff for kids. You said something
together here again, card or invitation cards,
something like that. That's totally perfect. Or you create maybe stickers
from that is also fine. Yes. So you see there
are lot of options. You can use the work from her to create
your very own stuff. And that's totally fine. So just to keep in mind that
there are these options, you can also go ahead and just, just purchased these items and then start to refine them
and create a mock from that, you totally jump over the creation state of Europe digital archives is also fine. It just maybe not 100% you, because you have a style, you have a way to
create and draw. And maybe because of that hue, want to create your
very own things. I just wanted to mention to you these different
options you have. You decide what you want to do. In this class, we're going to
create an abstract artist. And of course, yes, we want
to create something from it.
3. What Material you need: In this lesson, we
want to talk about the material we need
for this class. And that's really not a lot. And actually, you can do with the material I'm
showing you now. You can do so many
different classes here and everywhere we curse. That's basically all you need. If you are drawing digitally, you can create whatever kind of material you
want on your iPad. This means you can draw
that with acrylic colors. You can also draw with oil, you can draw with
watercolor or parcels. It just doesn't matter. And even better,
it comes already. The program we also need comes already with many
inbuilt brushes, but we can easily expand that. Let me show you what you
need for this class. First of all, of course you need your iPad and I am
using an iPad Pro, but it's totally up to you. You just need to make sure that your iPad is Apple
Pencil capable, because that is basically what we need for our app we use. And that is procreate. And procreate is also
a very nice app which has everything I've just
talked about already included, which means there are
about 200 bucks brushes already included in Procreate, and you'll get it for a very cheap price
on the App Store. The disadvantage here is definitely that you
can just get it for the iPad or for Apple products and not
forming those products. So in this case, you just need an iPad
to work with Procreate. I'm sure there are other
apps for Windows as well. I just not aware of
those because I'm usually use Apple products because they are all connected. I can share my
files between them. So basically what you need is your iPad, your Apple pencil, and the Procreate
you can get for a onetime fee on the App Store.
4. Get inspired!: So now I have opened my
Pinterest app on the iPad. And what you see and
now my ports here. And I have already created a
board called abstract art. And let's go in there and see what I have
already collected. Maybe we can get
something from that. And if not, you
can always go back and just type in here a keyword, like whatever we want to draw. So I have typed in, Let's see, abstract art, desert. Let's see what is
coming up with. And you see already,
I already have. But maybe there are few more. I also liked that one. I don't know why it's
abstract, but okay, so let's just pin that. I just click here
pin and put it on my abstract art board and
collect all the images I think, which could help me
to get inspired. E.g. these are the leaves. I really like these leaves. So that is what I would also
just pin here on my board. Some are also great to create. Some maybe, maybe some color palettes
or one color pallet. Actually, you see there
are tons of paints. You can just scroll through and see lots and lots of stuff. So e.g. here, if I want to
have some green tones, so I might just grab that picture for
green tones later on. Once you feel that
you have enough. So let's go into my board. You of course, can add
many more keywords here. Scroll through and see if
it's all you need actually. So I think this one will be pretty nice for color palette. And then I might add some
colors from that one. And I'm also going
to need some shapes. So these might be the shapes I use later on or similar ones. So it just goes through and see if there is anything
which inspires me e.g. here, I totally like these
two images over, over. One actually is
the one image over to abstract art pictures. And I like these mountains here, which I could have totally
separately in my kid. As well as the moon and the sun. Yeah, later we can create
some compositions from that. And the same here, there are some cacti. Maybe I need them. I would now take notes to plan my kid and see what
I can use from that. I also totally like
here these shapes, this, these are just
organic shapes. It looks like you just put your brush down and made
some blobs here somewhere. Then you use a thin
pen and go over it. And nearly around your blob
and have a new element. So this is also something
I want to include in my kit as well as like
something like this. Here, this filled plants
and this is how I would now go through my inspiration board here and see what I
could use for my kid. I never want to copy, Of course this just
for inspiration. So just let's go through, see what we can use
here for the kid. Because you cannot just
draw ten elements or 15. You want more. Actually you want many more. Because you want
your kid to be huge, to give your customers a
huge verity of things so they can create many
different artwork from that.
5. Plan your Clipart Set: Before you can actually
start drawing, you definitely should
plan your kit is a note. It sounds a little
bit awkward because actually you are
a creative person and you just want
to stop drawing. Now you are inspired and
you have collected ideas. And now why can't you
just start drawing? But well, we want to
sell these things. And because of that, we really need to plan and think through if everything
we create is in it, in which if that can do what we actually
want the kid to do. Because there are several
positions of course. So e.g. the kid Chris created here from pretty little lines I
have shown you before. That's a kid with a lot of
cute elements and animals, which also comes with some flowers and some
scenery and all of that. And it has a totally
different purpose than a kid, which comes with
compositions and landscapes and all
that kind of stuff. So you need to make
sure that you know, upfront what you
want to create with your kid or have
something in mind, what your customers
can create with a kid. So it's always a good
idea to try things out. And what I mean with this is what I'm going to show
you now on the computer. So here on the computer you can see the kid from
Chris once again. And you can see all the
different elements here. You can see them on the left
now and the description. And you can also
see all the images. And what you see here is that you already had in
mind that you can create cards with
this kid and that you can create Wall Art and
maybe even stickers here because I'm sees this
as a sticker because it has these edge as a sticker has. So maybe she also had
stickers in mind. And of course here some pattern. So you already know what you can create with most probably also what she would
want to create with a kid if she uses
it for products. So you can totally
do that, of course. But she needs to
keep in mind that many other people will have
the same elements as well. That's why we talked about
in the first lesson, you are losing your exclusivity. If you give the right to other people to
use your products, to create products from that. So here you go with this one and she had in mind that you
can create cart with it, that you can create patterns, and maybe even you can build your own scenery
as she is shown here, create an article scene. So you can create your own
scenery from that with all the different elements
included in the kit. Of course, this is
not just for cars, although she has that in mind. You can totally put that
on a Mac or on a pillow. And that is what
we're going to do in this class once we have
our elements ready. So this is just one example. Let me switch to another one. Here. An abstract example. Here you see totally
different elements. There are not just these kind of figures like
animals and something, but there are also flowers, of course, this just a type, but there are a flower included in a scenery
in abstract painting, e.g. here you can see some mountains behind the
mountain, Zeus's son. So there's a completely
different thing. It has been created
to be able to give the customer the idea of creating abstract
art from this kid. Of course, is
completely different. The one is abstract,
the other one is hand-drawn kid with
comic, similar elements. But you can get it here. You can see there are already compositions
included in this kid. While Chris from
pretty little lines just gives you the
image and says, if you add this to this to that, you can get something
else from it. And this kid says, okay, here is a composition. Do something with
it if you want to. You don't even have
to put it together. So that is what I want you
to keep in mind when you start creating your
kit, please make notes. Go ahead, get a piece
of paper and a pencil, and take some notes and
think through what you want your customer or yourself to
deal with a cat actually. Do you want them to put
something together themselves? Or do you want to create
already some compositions so they can use a
ready-made elements and put them on products. That's totally up
to you of course, but maybe you rely
on the sentence. Don't make me think. There's a very famous book
actually about web design, which is called
Don't make me think. So. Which means give
them all they need so they can easily put things
together. It's up to you. Again. I always prefer to add those
to my kids because I want, on the other hand,
that people are able to create something
new from my designs. But on the other hand, I want them not to think, but just create
elements from it. So think about your goal of this and what you are
going to do with it. And from there on, plan your kid and see if
you need compositions, if you need backgrounds, if you need maybe some landscapes
or something like that, if you're just need
elements. So it's up to you. But please go ahead and
plan before you start.
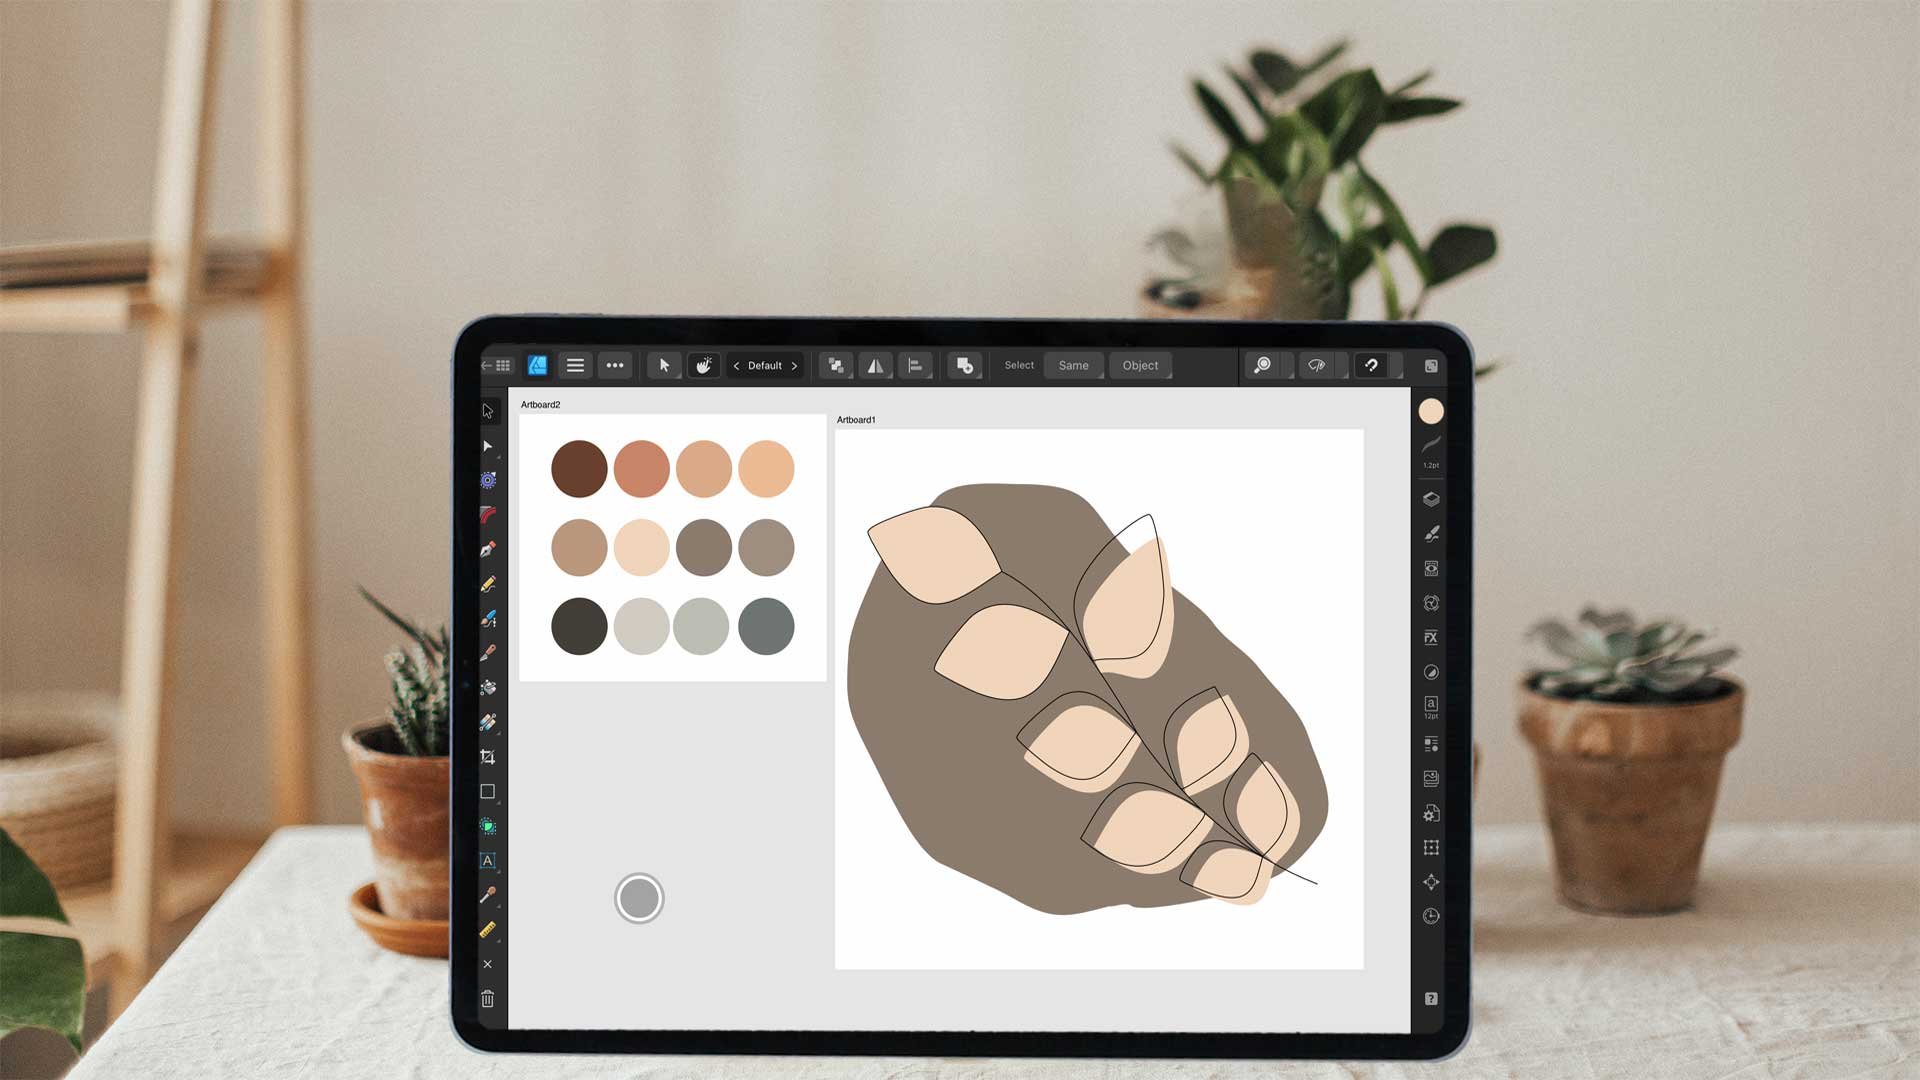
6. Prepare: So I'm back in my abstract
art board on Pinterest. And now I pick one of
the images and take a screenshot from it to create a color palette and procreate. So let's do that. I guess I'm going
to use this one because I really like
it with the green, red, blue tones
here, creamy tones. I think that will
look very good. So to do so, I just press
two buttons here on my iPad. And then I have a screenshot. It's now here on
the bottom left and I've put it into my camera roll, and now I swipe over to
pin to my procreate. I have created whatever kind of can vary you can,
it doesn't matter. The size doesn't
matter right now. So now we just load our image, insert a photo, then pick the image you have just
done a screenshot from. And I'm going to put
it somewhere here. The problem now is that I
have a lot of black here, but I'm going to try it. Otherwise, I need
to cut that first. But for now, I just try it. And I can now say that I want a color
palette from the picture. I would not even
have to open that. I can just go in here, here on the plus sign
and say New from photo. And then again, I
pick the same photo and it's going to create
a color palette for me. And now I name the color
palette. I really like it. I'm naming the color palette
and I just say desert. So I have maybe a work title
or maybe that's my title. Now I can get rid
here of this one. And let's try the
different colors now. So here's the black,
I guess. Yes. I just picked one of the lineup. Those simple brushes which really loved me, draw something. Maybe this one has a little
bit too frazzled edges. And most probably you
don't have that one. So you can always go to inking and pick the
mercury but brush, which will do the trick, or this one, or this one, they all will do the
trick and just have, you see the difference. If I zoom in here, there are no edges. Sorry, I guess I'm
going to use that one. As you see, I now have a
brush called Trisha seigneur. Read this because I often have my iPad and German
and sometimes in English. So maybe it's different for you. But pick one of these brushes, fine tip is also good
or guilt pan is nice. Pick something like that which has not so many
firsts that edges. And then you can test
all the colors you pick. Now, let's go over that. I like that one. I also like that one. And maybe some are too similar. If so, I can maybe this
one is very similar. I can try it first. Let's see this one. And then we pick that one and see they are
very similar, right? So I can get rid of one of them. And to do that, I just
type here on the color. I want to get rid off and click Delete swatch,
and that's it. And now I have an
empty swatch here, which in best-case, I'm
going to fill later on. It could now test each of these colors if it
all goes together, but I think it will. I might not use all the
colors, but that's okay. I just go through it and see if it's a good
choice if it all works together and how
it suits my needs. So it looks like white, but it was actually a
little bit of gray. So let's see what about
this one very similar. This one is white. We don't need that. I guess. I'm going to delete that. And now you see I have
some empty spaces here. And I showed you
how to fill that. So let's get another
image from Pinterest. And I go back and see, maybe it's totally up to you. You can use these
cards if you want to. Yeah, Maybe we do that because I want to have some
yellow tones as well. So let's take a screenshot. And now I'm going to show
you what I can also do here. I pull it up and then I cut it already so
I don't have all the black inside and
cut it nicely here. So this is just what gets
into my Procreate app. And this is helpful
if you want to create a color palette
from that image. So let me show you, I just click Done
now and save to photos and go back to procreate. And now we can do two things. First, we can create a complete
new color palette here. Let me quickly do that because that's not where
I wanted to show you. So you just pick that. I have a complete
new color palette. You see it's really beautiful. So I just leave it as it is
and just get in my image. Click here, Insert
Photo, make it smaller. And then I go here. And maybe I pick some of
these colors to fill. Tool is here, so let's pick
just one and see if they go. Yeah, that goes just well. So I'm going to add this
to the other color, Pell. See, I just typed
into the hole here. I have one of the colors inside, of course I can also
just type in that and then just go here and I have
that one also included. These are very similar now. So let me get rid of that again. I just want to make
sure you know how to play with these
different colors. Let's get that one in until you're completely happy
with your colors because this is the base of your kid and this is what
makes you sell or not sell because actually people look at something and they see the
colors and they decide, Oh yes, it looks
great or it doesn't. So make sure you spend your time with the
colors here you have. Once you have your colors ready, you definitely should have
a look at your brushes. So let's go here. And the problem now is that we now have on the
recent brushes, all the brushes we
have used recently. But this is from all projects you will
have in your library. It's not just based on the
project you have just opened. So it's better to have a folder with the brushes
you use for the project. And this comes while
you're drawing. You will figure out
which brushes you use and whether
they're your own, or you just grab them from your different
brushes you already have or which are
already included. It doesn't really matter. What matters is that you have a folder where you have
your brushes inside. Here's one I have created, but I just wanted
to show you how to create such a folder
and add a brush there. What you do is you go
here to the plus sign, and then you have
a new folder here, and you can name it. When you type on that here. You can just delete what? Untitled, and then you
say desert in this case. And then you have
your folder done. And now it's a bit tricky. So we just copy this
brush into that folder. So you have, whenever
you open a new project, you have the set desert and you know which
brushes to your views. So what I do now is I swept
the left and click Duplicate. So I know these are duplicate
brushes and but after all, I have all my brushes together
and that's really helpful. So now I just type
on this brush and go over my folder and you see
it gets a little bit black. Here. You really need to need to get
over it and make it black. Otherwise you are
not in that folder. Then your brushes wherever you see now here's a blue sign, so you are in the folder
and then I can release it. And then my brushes in here. So you see here sketchy brush inside and he is
sketchy brush one. Now, I want to rename it e.g. so I go here about this brush. It's my brush so I can do
whatever I want and I just name it sketchy, brush, desert and click Done. And then I have my brush here. And now with that brush, I can do all the sketches. So now we're prepared and we
can finally start growing.
7. Let's draw (Part 1): Cell. Now let's get started with
drawing our elements. I have opened Procreate, and now we need to document. So to get it, click here on the plus. And now make sure that
your document has not the smallest size because we need the elements larger. Otherwise we need to
convert them into vector. But I want to have high-quality or raster
images, so pixel images. So we can work with
those as well. For that, I can
choose here one of my templates for Tilden
pixel is just fine, but you don't have them. You can create your
own by clicking here on the plus and the corner. And then you can type in
here whatever size you want. And four cells and pixel
are just fine here as well. Now we draw them as
large as possible, depending on the size of your iPad and the
DPI you have chosen, and you should always have 300 DPI here for
printing quality, you have a number of
layers you can use. And for me it's 61,
that just fine. I want to put a lot of elements
in it in the document. Of course, once it's
full quotation marks, we can always use another one, so it doesn't really matter. Now make sure your
color profile is RGB because I like it more because of the
hue and saturation, you would just have more colors. But usually if you
want to print, you should use CMYK. But I stick with
the RGB display p3. Here. I don't care about
time-lapse settings now, also don't care about
Canvas properties. It's nothing we need
to work on right now. What we can do is we can give the entire singer name and I
can just name it desert e.g. then I click Create and
my document is ready. So now we can start drawing. And after you should have planned what ever
you want to draw. And that's why, I guess it's a good idea to start with
just the organic shapes here. So for me, I have picked
the organic shapes. Then I have picked
some line art I want to draw, then some leaves. That's all I'm going
to show in this class because otherwise you watch
over my shoulder for hours, meet drawing some elements. And I don't think that's
really helpful for you. It's just you need to, you need to keep drawing. Actually, if you have 100, 250 elements, that's just fine. So don't worry too much
about having just 20 or 30. The more you give your customer, the happier he or she will be. So give him a lot of value. So here's a color palette and we start by drawing some shapes. When you hold it, you see what happens. If that happens, doesn't
matter if two fingers go back to the shape you had, and now we're going to fill it. Just drag over. And if it doesn't go
into the corners, you can always draw
with your brush. And I'm using the
sketchy brush desert. Let's just fine with me. And I can always here
like this, go over it. So I have let's
sort it right away. Okay? Then once you have
your shape ready, make sure you
create a new layer. Otherwise you cannot
access them separately, which will really lead to
some trouble once you, if you wanted to, you can now turn that off as the
first element is ready. And now we can start
drawing a new one. But later on you need
to export each of them separately to provide
your customers with a PNG file or whatever. Even if you don't
want to sell it, but create your
own products from. It's also good to have
your very own shapes here. You, your own elements
on each on one shape. So let's keep drawing. I pick another color just
to give you some options. So you see that's not, you don't have to be an
artist to draw some shapes. You can also always
adjust the size of your brush here and of
course your opacity. But for now and we'll keep the opacity as it is
on hundred percent. And I have also the
brush pretty big because I need large elements here. Of course there will
be more colors, more shapes of each color. But for now, I just like
to have a variation, a very t. After all. I want to have some things to get something
done in the end of the class so we can actually
start creating something. You saw, I just
went over the line, but it doesn't matter. It's cut off. So
this is my element. Have a nice smooth edge. And now I'm going to
add some line art. So what I do now is I
turn one of the items on the bottom layer and then I go on top
and draw over it. So what I need now is black. If you don't have black
hair like this one, you can go to your desk and just double-tap here
and it jumps to black. So it wasn't real
black as you saw. We can keep drawing here. That happens. Don't vary. You can
always go back. Okay, you see what
happened now here. It's not very nice, so I need to draw
that in one rounding. We need to do that again. Okay? We can always
adjust it a bit. So if you need the same
brush you are using now as an eraser. You just saw here
this little line. And now I have the same brushes, same sketchy brush with all the settings I
have chosen here. And now I can just erase
a little bit here. Okay. It was too much. Okay. Dan, next one place. And same thing. Just make sure you are
on the right layer. Better. You double-check. Otherwise we start all over. Again, gray line. And now I can erase you layer. Okay? You see it's always
the same process. You just need a little
bit of patients. And then you can definitely
draw an abstract art set. Okay, Let me turn
everything on now. So now we have already
eight elements here. And I can basically use some and drag and drop them from
left to right or just use. Some edges from that. And now here's the line art. Here. I can turn everything
off when I tap here inside. Then it just the last one
which is on and I turn that off now and just
have these two here. Let me go to the orange one
now and drag it somewhere. I just go back in a second, but I want you to
see what's possible. You see you easily get
your line art done. So let's go back. I don't want to transform
anything right now. I just want to have
my shapes ready. So now I could say, if I would have now, let's say 30 more, I would consider this one as done and go to
my next document because then I have my line art and the
organic shapes done. Then I would go back to the
gallery named my artwork like line art and let's say
line art and organic shapes. Okay, Now, now we could put
those two into one folder, which I personally always like. So I just drag that
over this one. I know it's just one
project and I release it. And then I have a folder here
with these two documents. One might test document here, and one with the layout
and organic shapes. And now I can create a new one. So click here on the plus. And then I have created
the desert one. I just click on that
and I have a new one. I keep drawing. I have my colors, I have my brushes, and now I can keep drawing. Let's go on. Now. I will use this document for
some leaves and maybe sun, some stretches, beer, whatever. We just keep going because
this is definitely not ready. As I said, it should have. So maybe 150 elements, 100, 250, I said, but the more, the better. So make sure you
have a new layer, which usually is
created already. And now we pick another
color from our palette. Maybe now I use touch green. Stick with my brush. For now. When I do the scratches
a little later, I won't, I need a new one. But for now, we can
just use that one. Once my leaf is ready, I just drag in the color. Later on, I check if
everything looks good. But for now, I just keep
drawing. My shapes. Don't forget there's no
leaf like the other nature. So you can go from here. So now let's go over it to see. This one doesn't look so good. So I'm going over it. Once again. You really need to
check each single leaf here to make sure they
look as you want. When you are happy, we
can just keep throwing. Go back to my brush. Then I need to turn that
one off and get a new one. And I also pick a new color. Okay, Let's edge. So now we have two leaves. And now I go ahead and of course usually I
create more leaves, maybe ten to 15. But for now, I just want
to have a son maybe. And as I said, some scratches. So for our lessons
should be fine. You can just you just
keep drawing with me, draw whatever you like you see. Make sure you have the right
layer and just keep drawing. You can always get rid of the elements later on
if you don't like them.
8. Let's draw (Part 2): Now I draw a circle and
you see doesn't look good. But if I hold that down, it turns into a circle. With two fingers. It even gets a regular circle. So I just drag that in here. And I want to move
it a bit down. And now I make some, now I make some stress here. But I will do that
with a drawing guide so you know how
that works as well. And when you click on Edit Drawing Guide
and then symmetry, you can move the center. I believe that's a center. Yeah, maybe that's better. And click Done. Then when you draw
here a sun spray, here comes the other one. So let's do that. So of course that gets better. It looks better. But I'm
going to do that again. I zoom in more. Hold that down now you
see what happened. And now I can easily fill it on the right side and I have
the same one on the left. I could not just duplicate them and put them on
a separate layer. The next maybe. And then just duplicate
to go around. Or I have different ones all the time and later
I can merge that all. I guess I won't do that right
now because I just keep, keep going here and
draw my son race. I don't want him to equal here because I released my pen. This is why it didn't work here. So I really need to do that
in one drawing scan. Now. If you release,
it has a problem. And it was too close, then you also have a problem. Okay. So do that again. You see what happened. The drawing guide
is not on anymore, I guess because I went
to New layer here. So you see here it says
assisted and here it does. So now it's, it
doesn't really matter. Recursive, I can
just duplicate it. I don't have to have an
equal on both sides, so I can just duplicate that. And then I can move
that around here. Let me show you one more thing. I'm going to merge them all now. I have half of it ready and now duplicate it. Have it done. And now I can just flip it
vertically and horizontally, so it doesn't look that equal. And move it to the right. And now of course I have here some sunrise, some too many. I'm going to to work
on that in a second. Okay, so let's go to this one to be assisted one and
we turn these off, or we just get rid of
them with our eraser. Now you know how it works. And you see I just erase on the right and the
left is also erase. We could have done the entire
sun-like this, of course. But I wanted to show you
two ways of doing that. Can also just select this here. And then do three fingers and say cut. And it's gone as well. And now I'm going to turn
my sunrise on again. And now I will adjust them a little bit to have
it looking nice. I guess I need some more here. So I'm going to select them just like I did
before to get rid. I just need those
to maybe too much. So let's go around
the sunrise here. Again three fingers. Say Copy this time. And again three fingers. And you say paste. And now you have
two more sunrise, which I can place here. Okay, looks good. I could duplicate that one, these two, and then flip
again. So let's do that. Duplicate. And then flip and
move to the bottom. You see I usually make them a bit smaller, bigger, whatever. Just to yeah. To make them different again. Okay. You can leave it as it is. Or if you feel there are too
many or the covered one, you can delete that again. But for now, I think it's okay. So I merge all of those. So my son is ready and I can
also make it a bit smaller. That's it. So you learned
a lot with this sun here. And now we can do the
scratches I talked about. I turn that off. These are
basically just some dots, but I want a new brush. I'm going here over my brushes and see what
I can use for that. So you see, I can create these. They have a lot of
texture right now, so I might get rid
of that again. Let's see if there's
another brush. Maybe that one. Whoops. Pretty large. Yeah, well, it depends if you want something
like that or not. I do not want it mostly
without texture. So I go back to my desert brush, sketchy one and created
in another way. I just draw some squares. I just released. It.
Can't work as we learned. So I'm going to just draw
it here like that and then drag the color and see
that everything is filled. You don't have to be equal. You just have to be somewhere looking nice in the combination. And of course we can get
rid of these edges later. All right, now, these are just filler elements. You can use for the
one-one either drawing. But this one is a bit too big, so I cut it here
and get rid of it. Okay, Another element is ready, so let's make it smaller. And you can use it later, e.g. for their organic shapes
that should look nice. And now you keep going. You just draw some
more of these. Maybe draw some
rainbows and stars and all the things you get in mind when
you think of a desert, maybe some cacti, cacti. And there are so many
elements you can draw. Check your Pinterest board
for more inspiration. And just keep drawing. Here you see I have four elements and then
I have, I think eight. So I just will keep
drawing like that. I'm also turning them on, so I have a little
bit of an overview. And in the next lesson, we are going to export our elements into a folder so we have them ready and can
do something with them. Let's keep going here.
9. Export your Files: So now we're going to
export our elements. First of all, just
because I renamed my sec, I name it of course to desert. And have my SEC ready. Let's go in it and pull
up one of the documents. And now you see I have
four elements here. And I also have a
background when an export something
with the background. And even if just one
element is turned on, I have a white background. But what I don't want, I just wanted like that. We need to cut later because it has a lot of space around it. But after all, if I turn
off the background, it gets a PNG and PAG means it has a
transparent background. You can see that because you
can put something over it. You see it's still
shining through here. So that's what we want. So just turn that off right now. And I need to do it separately
with each of the elements. So now I have the
background color off. It's very important and now have marked one
layer, turned it on. Now you go here and click Share, and then you click on the PNG. And then you go here
to save to files. Or maybe you have Save to
Dropbox is fine as well, but a save it in
my iCloud folder. So I just click Save here
and I create a new folder. Just say here and name it. Desert. Click done. And I'm inside the folder. And now I need to name
my artwork. Was leaf. Doesn't really matter. We can do that later
on the computer. So now I have exported
this one element. And when I go now
to my folder here into the desert one,
there's one item. And this one item, although it looks like here, it has doesn't have a
transparent background, like it's white, but it's
actually is not. Click on it. You see it's black and it's
definitely a PNG file. I can work on later. You see now it says
Untitled Artwork leaf, but it doesn't matter. We can do that later
on the computer. So let's go back to procreate
and do it once again. Turn that off, turn
that on, and go again. Here, Share PNG. And then again save to files. And then I just don't
name it anyway. So just go there. And again, turn it off, turn the next one on. Here, Share PNG, save to files. And the next one you see the
second one is here as well. Click Save. And now it says replace, okay? Of course, because it
has the same name, I just say keep both. And now I have here in my folder all three
of my art work. Okay, let's go back to procreate and do it with
the last one as well. The small dots will again asked me
if it should replace, but of course I just take you both I'm going to rename
that later on the computer. Okay. So going to turn on again. And then we go back
to the gallery, to the next one. And we also do the same
with these eight elements. Again, make sure you have
your background color off. Then we need to do that for each of the items
we have drawn here. Now keep going. Just
go ahead and do it with all the elements
you have drawn. Then we have a look
at the folder. Just what I already said, just go back in and you can see I have it on a
transparent background. And even more important, I can rename it if I want to. I can do sit here as well. I can just type on
with my finger, keep it and then
just say Rename. And let's rename it to leave. Two maybe. But doesn't really matter. You can better do it
on the computer layer. For now. You just have your
elements all in one folder. And then we can go from there and create
something from it.
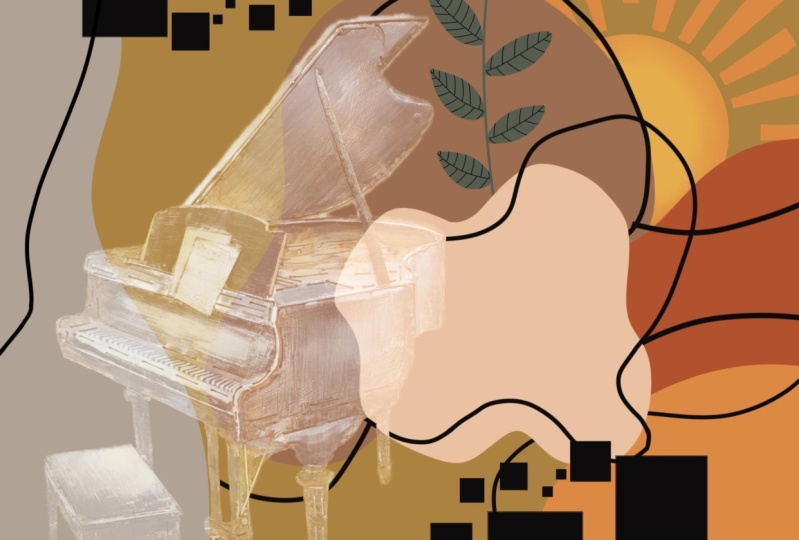
10. Let's make a Composition: So now let's create
a first composition. I want to put on a
Mac on print d Phi. But we just create
something simple for now. So for that, I create
a new document here, like the one we had
before for sound before. So that's just fine. Let's go out here again. And I'm going to grab some of the organic
shapes maybe or let's say to turn it all off and
grab orange one maybe. And just as before, I go in here, my layers just have
that one here. Three fingers. And I say Copy, and now I don't paste it
inside this document, but I go to the new one and paste it in here
and it's pretty cool. So I can just say Paste and I have it from the
other document here. So now let's place it somehow. Of course, the more
elements you have, the nice side will be. But for what I'm going to
show you is I should be fine. So now let me grab one
off the line art we have. It can also turn them all on. And then just go to one
layer and copy them. So let's go here. And I can just again three
fingers and say Copy. Go to my other document
and place it here. Can turn it around a bit. So maybe like that. And now I grab something
from this document. Again, I might I
might take the Sun, so I don't want
that layer. Again. Three fingers say Copy, go to gallery and place it here. On that. Of course, we need to
make it much smaller. And I guess I also need another
colors will look nicer. So that will be a mock. And let me give it
some more depth here. I go to organic shape layer and I pick another
color, maybe that one. Let's see how that looks. I believe it already
looks better, but we can, of course, try different ones here. Yeah. So not bad. Maybe we have the dark brown. Yeah, I like that. Maybe a little bit brighter. Now. You see you have to make
decisions all the time is not that you have something
done and that's it. So now, I think the question
is now, do we need that? Yes, I think we do. So that's how I leave it now. And now I want to
add some text here. I can totally do that
here in procreate. But I hate it. I hate to use the
text tool because it's pretty hard to work with. I show you click here and type in something. Okay? So now we need to make it
smaller to have it all in. We need to, It's hard to work
with that thing actually. You see, I now have
my happy day here, but I want to have another,
another form here. So let's go here. That's why I prefer just
exporting it and doing it. E.g. in Affinity
Designer of them saying, but you can totally do it
here as I show you right now. If you don't have
affinity or something, as also a good idea, maybe we need we pick
something playful. No, no. Yeah, that looks good. Okay. So click Done. I'm going to move that now. You see it works, but it's a bit hard. It's a bit hard to
work with that thing. It can change the color of
the entire thing as well. I guess I want this color
here to have it all similar. And once done, we can go out of all this and maybe
move it a bit more. So we really have
it in the center. And that's it. Now we have a quick
composition ready. And now we're going to upload that to print it and
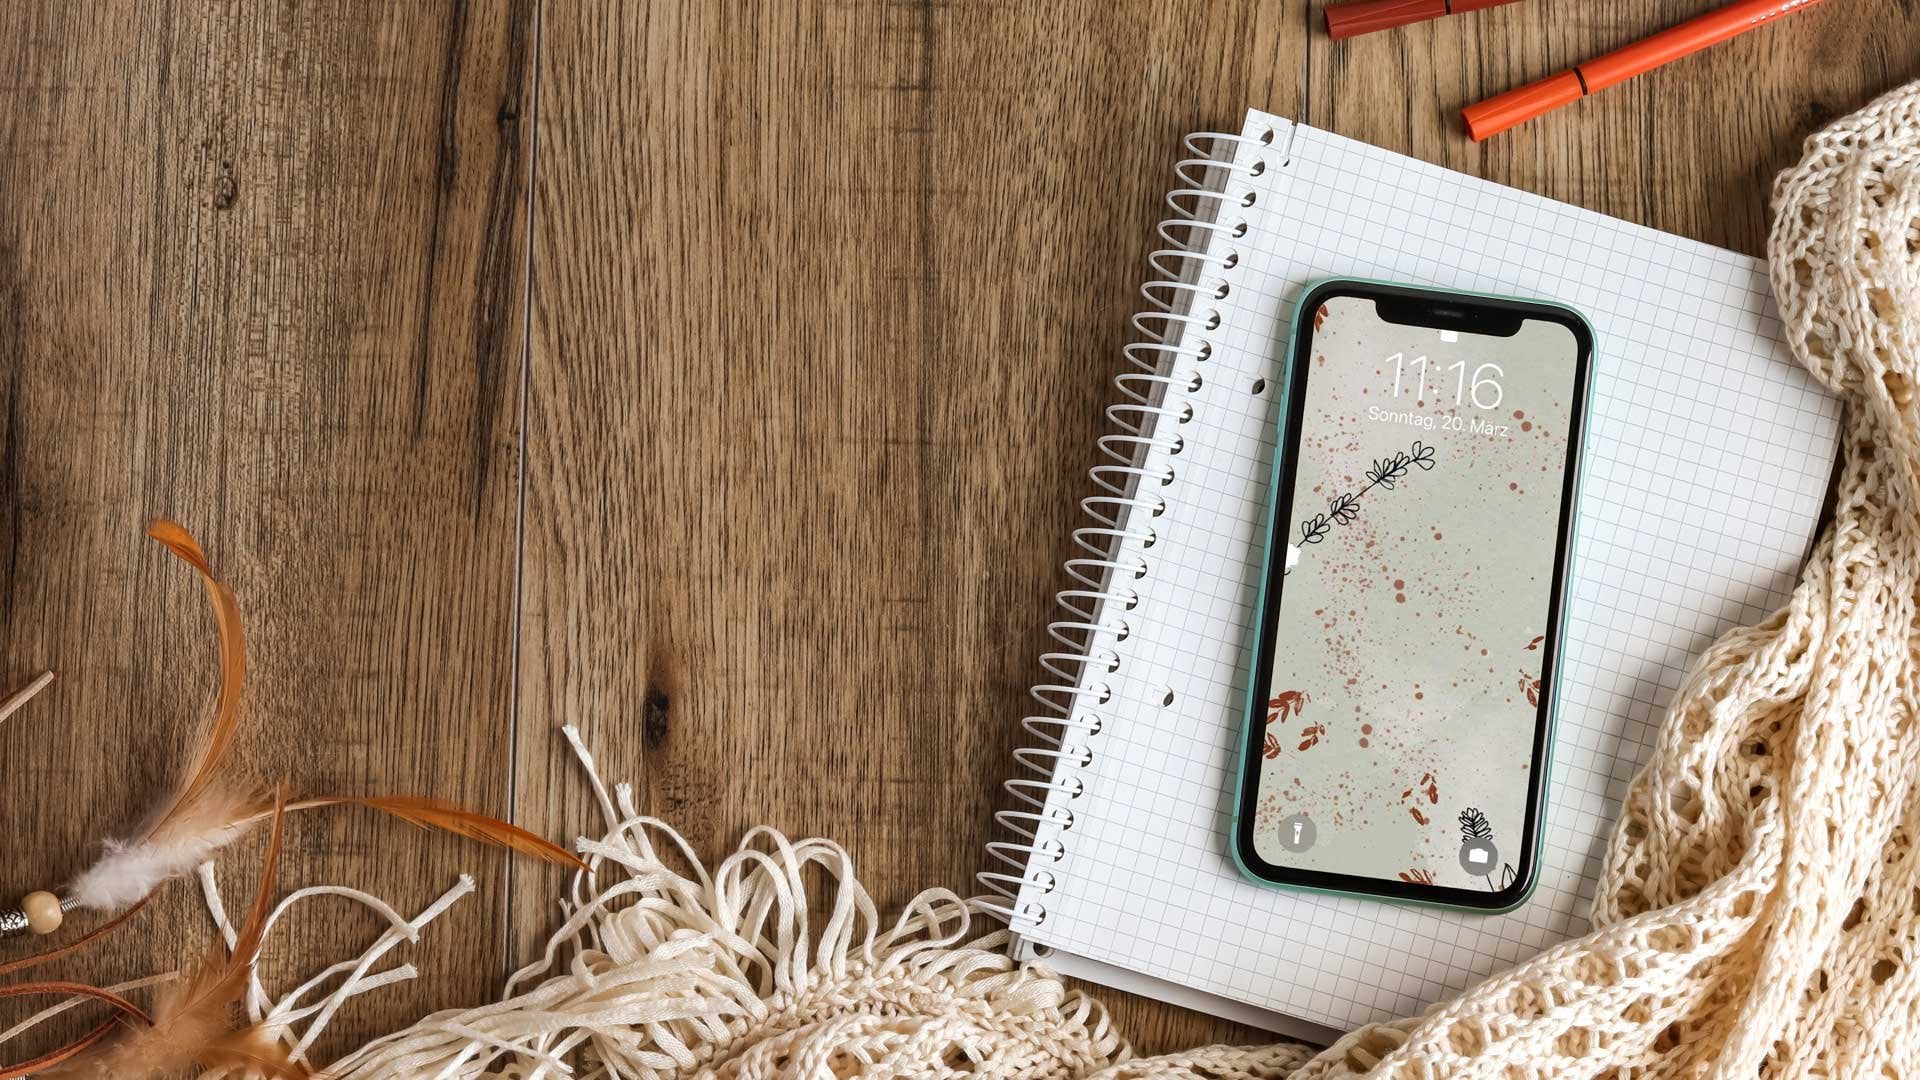
put it on a Mac. Let's do one more thing because
now we have a composition ready and we can totally use
it for kids, but with texts. And I'm going to just
turn off the background and turn off the phone tier. And then, whoops,
I just go to my, to my composition.
I'm merging that. It's now in a group, but
it doesn't really matter. Can also take it out again and get rid of the
groups just happened. And now this is my composition and I'm going to export
that for our kit. So let's go back here. And since we have
merged altogether, you can totally do that. You can just click here
on Share PNG again. And we can save to files and you see it in my
folder and I click Save, and it has been saved. Now, I'm going to
turn it on here, what I need and I also
need to as a PNG. So let me put that into
the folder as well so we can upload it
later on to the, to the POD side. I just say keep both. And now I have them all in here. This one was happy day. And the other one. Let's go into the folder. And the other one
was out the PSD. So without the phone
here on the bottom. So that's it. You can hardly see the line art right
now, but it's there. Yeah, let's see. We have that ready now and
we can start creating.
11. How to turn your Digital Artwork into Physical Products: As I said, you can totally
stop at this point. We have our kit ready. You can basically draw 100, 250 elements, just export them, put them on previews, and then sell them on sites
like Creative Market, you need to apply
for store there. But once you are approved, you can sell your stuff there. And you can do the
same with Etsy, but you don't have
to be approved. So maybe that's better
for the beginning. And you just can keep creating and sell there
and don't forget, put more compositions in it
and all that kind of stuff. Because if you give your
customers a lot of value, they will, yeah, it will be a good decision for
them to buy your stuff. And instead of the other ones, there is a lot of competition. But if you give well, you, you don't have to worry
that much about competition because there are people
who like your set. So makes sure they have
good reason to buy it. So now we go one step further. We use one of the compositions. You can do that as well
as your customers so they can create compositions as we have done in the last lesson. Then they can use
print if I e.g. print if I, I like that, Good. I like that a lot because I can easily connect it to Etsy, to my website, other
stores as well, and then just publish it there. I like it much more than red bubbles was hired to SIG
and all the sides and not that they are bad
it just because I can't exchange images and
all that stuff there. So that's why I prefer
to have my own. So now let's go to catalog, make sure you are
registered and logged in. And then click on macs. And now I just pick
this mark here. Half an eye here. It is produced in
the United States. So depending on where
you want to sell, you have to also pay for
shipping or your customer has to make sure you keep in mind
that shipping costs money. And if someone artists your mark and it's shipping to
England or wherever, it costs about 99 to $49 in
the United States for 99. So that's okay. I click that. Just have it in mind
and check always what you can expect your
customers to pay. So now at this point, we can get the file
from our device. So I just click
here on my device. Click Choose File and I'm the
folder in my iCloud Drive. And you might have it in your
Dropbox as fine as well. So now I click here on my
artwork and it's uploading now. And now they place
it here on my Mac. I move it a bit up, and now we can preview it
before we save it actually, I just click here preview. And now you see how your mark will look and I think
it looks pretty good. I will leave it as it is. But you can also check
all the other images here and you can totally
rid of all of these ones. It is added to Etsy
or your own store. And upload your very
own Max is fine too. Just make sure you
click Save product. And then you just push
it to your website. You can, you can turn that off. You don't have to get
all these images here, especially those
where nothing is on. And you just have the
title image and maybe you create some of your own. So you order your mark
and then here's it. And now you click Publish. And basically that's
all you need to do. You just click here on the
three dots and say Publish. And wherever it is
connected to here, I can just click at new store and it will
have a new store. And then you can just
publish it there and you have your product or hit your
very own handmade product, which is available nowhere
else but in your store. So that's it. Yeah, So now you have learned two important
things in this class. First of all, we
created this kit, so you have a totally unique
graphics from this kid. You can create your
very own compositions. And even better from
these compositions, you can create your
very own products. And the best thing is, it's all for free
printing PHI is free. One you sell. Come thing here. Of course, you are
charged, then. It is published to Etsy. Let's say it's
published to Etsy. And then you sold your mark. And then HE charges you, of course, a 27 to
publish your product. They are then they charge
you for the product, for the sale itself. Then of course, you or your partner printing
file is going to charge you. They are charging you can
see that for 63 or if you have premium is 356
and plus shipping. And that is what you need
your charge your customer. So whatever you do, you need to cover your
costs and then you have to pay yourself
for the design you've created and
you can do all that here on printing file. Let's see. I think
it's here or no, Here's the design scope back. But you can also click on that. And then you can say
how much you want to make when you
sell the product. Here you go. Product description. You can of course change
that on Etsy as well. Here you can set the price
and you had to prove profit. So I can say, okay, I want a profit margin
of 40 per cent, which is in this
case $3.09 send why would he charges me a bit? So I might change that price, but you also don't
have to have too much. It's 772 plus shipping. So you need to find a price which is good for you because you
need to make money, which is good for your
customer as well, because they don't want to
pay too much, of course. But you can figure that
it's totally up to you. You decide what
price you set here. You decide about
the description. This is a nice one, but
maybe you give a bit more or you give some
more images. Please. Take care of each of
your products and treated with would
love actually, the best thing I can tell
you. Treat it with love. And then you have it in your shop and you
can just keep going. You can create from
your one kid wait, which you can sell as well. You can create, yeah, basically 1015 products
and sell them as well. And of course, you can give your customers the right to sell your products when you tell your kid or you don't do
that, it's up to you. Okay, I hope you
enjoyed this class. Now, let's get to the project.
12. Your Project: Congratulations you did it. You have finished this class and hopefully already created
some shapes and procreate. This is also your project. I want you to draw some
shapes and procreate. And maybe just take
a screenshot of these shapes or take a
picture with your mobile. And then upload that to our project gallery and that we can see each
other's pictures, which is always great. Well, we can maybe get inspired from each other and
figure what we can draw. Because what I show is just
one way of doing things. You can do it completely
different and have a beautiful abstract art set. It's up to you, it's totally up to you. And it also depends
what has inspired you. So please go ahead, take a screenshot or
take a picture with your mobile from your iPad and then post your
image so I can see what you've drawn and all the
others can see it as well. If you now want to go one step further and work with the items
you have created. You might want to
watch the class create abstract wall
art in Procreate. Because in that class
we go ahead and pick the elements we have drawn and create something from them. So maybe you want to follow along there and join me there. So then you go one step
further and we're going to create some abstract wall art from what we have drawn
here in this class.
 Monja Wessel, Graphic Designer and Teacher