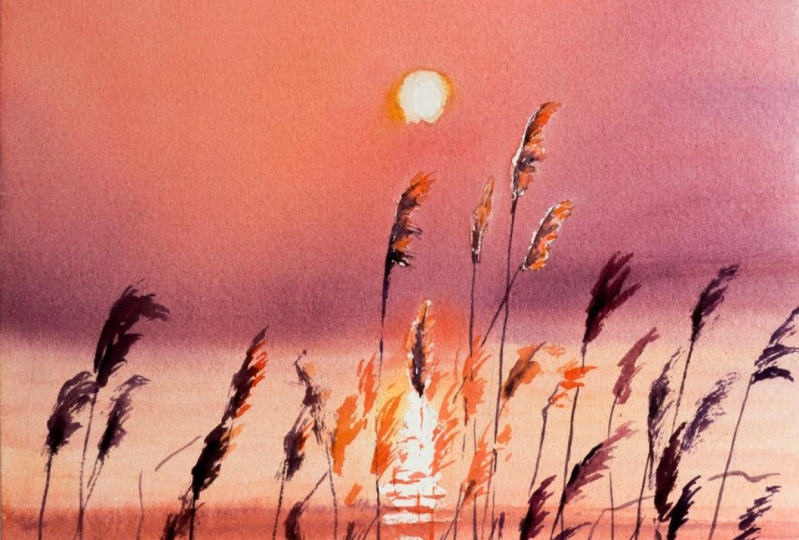
A Dreamy Sunset Landscape In Watercolor, Mastering Wet Technique For Beginners
 Evgenia Cordie, Professional Watercolor Artist, Belgium
Watch this class and thousands more
Watch this class and thousands more
Lessons in This Class
-
-
1.
Introduction
1:50
-
2.
Materials
6:05
-
3.
Get started
1:07
-
4.
Drawing
2:21
-
5.
Painting background
18:25
-
6.
Painting grasses
6:11
-
7.
How to make a best photo of your artwork
2:03
-
-
- --
- Beginner level
- Intermediate level
- Advanced level
- All levels
Community Generated
The level is determined by a majority opinion of students who have reviewed this class. The teacher's recommendation is shown until at least 5 student responses are collected.
259
Students
27
Projects
About This Class
Hi, I am Evgenia Cordie, a professional watercolor artist from Belgium. I would like to share with you great watercolor techniques, tips and tricks.
Would you like to relax, to paint without spending a lot of time on drawing but just focusing on a magic in your hand?
Learning while painting, experimenting and have fun.
Watercolor is truly magical, with mastering wet-on-wet technique your landscapes and visuals will never be the same.
This class is perfect for beginners or for anybody who would like to learn more about wet-on-wet and other techniques.
What will you learn?
- How to paint smooth gradient
- Less known approach of wet-on-wet technique
- Warm color palette and beautiful sunset color mixes
- Painting light
- Strategies what technique apply and when
- Difference between mixing palettes
- 3 ways to make a great drawing in a couple of minutes
- Smoothing pencil lines before painting
- Using masking fluid
- Wet-on-dry technique
- Dry-on-dry technique
- Haw to draw with water
- How to erase and correct the watercolor
- How to smooth edges of sharp strokes
Finally I’ll give you tips to make a nice digital version of your painting. To edit it for free and in couple of minutes.
Materials for drawing
See the corresponding chapter
Watercolors
See the corresponding chapter
Brushes
- daVinci 10 kolinsky red sable hair (natural brush, resilient)
- daVinci cosmotop spin 8 (synthetic brush with a fine point, resilient)
- Accente 2012 Brights 20 (flat synthetic brush)
- Winsor&Newton Foundation round 6, 1; flat 2, 4 (synthetic brushes, resilient)
- Winsor&Newton Cotman 111 (fine synthetic brush)
- Winsor&Newton Special value 4 (round synthetic brush)
- Accente 2210 - Taklon 1 1/2 (flat broad synthetic brush)
Reference photo
https://www.pinterest.com/magicalwatercolor/enjoying-nature/
If you’d like to try to paint a similar visual as well, you can look for an inspiration on this list of photos on pinterest:
https://www.pinterest.com/magicalwatercolor/enjoying-nature/
If you like this class, please be free to leave a review to help other students to discover this class.
If you have any questions don’t hesitate to ask me!
Thank you very much to paint with me! And good luck with your new creations :)
Music used in the video: https://www.bensound.com
Meet Your Teacher

Are you looking to grow as a watercolor artist? I'd love to help guide you through any challenges you're facing or chat about your watercolor journey! I offer personalized instruction and feedback tailored to your needs. Let's connect and create beautiful art together!
See full profileHands-on Class Project
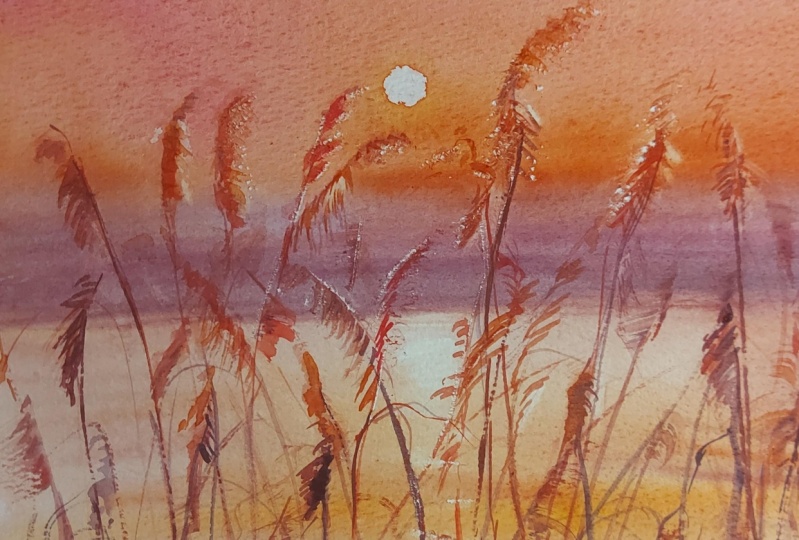
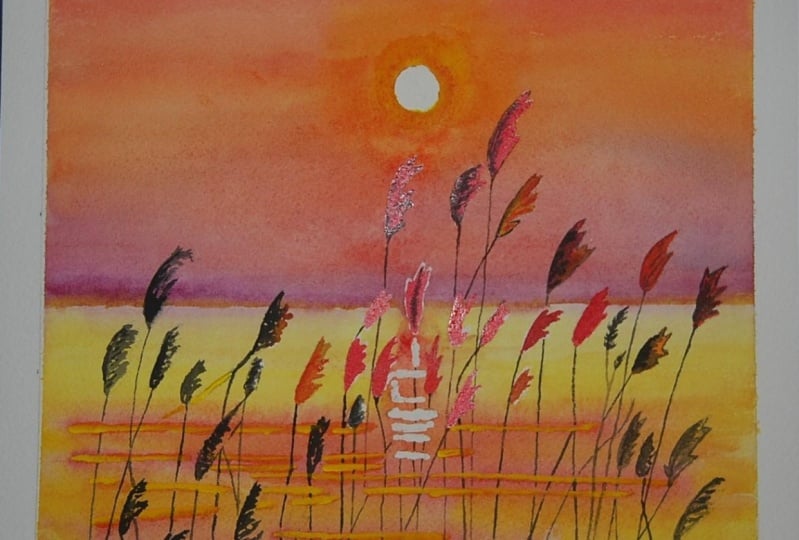
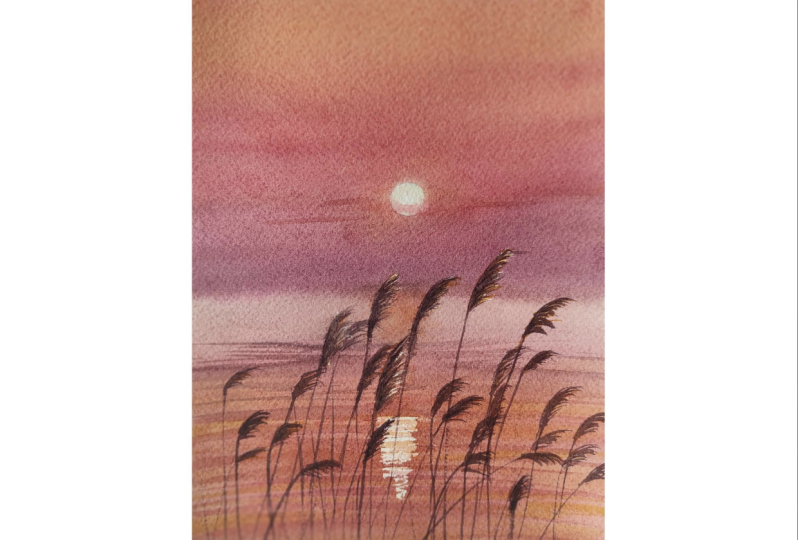
Follow the steps of the lesson.
- Make a good drawing
- Use masking fluid to all white objects and some grasses
- Moist the paper under the tap
- Moist a kitchen towel in warm water
- Flatten the paper before you start painting
- Paint the background wet-on-wet. Don’t use to much water when mixing the colors.
- Paint water lines
- Use a hair dryer if you’d like or let the paper dry
- Paint the water lines wet-on-dry, let it dry
- Remove the masking fluid
- Paint grasses, near the reflection-red, other dark. Try to use an almost dry brush with color to make artistic strokes. By holding the brush far from the point will help with it.
- Finally add some details such as ducks between the grasses.
Reference photo
https://www.pinterest.com/magicalwatercolor/enjoying-nature/
If you’d like to try to paint a similar visual as well, you can look for an inspiration on this list of photos on pinterest:
https://www.pinterest.com/magicalwatercolor/enjoying-nature/
In the attachment you'll find the reference photo, you can print it out as big as you’d like.
Class Ratings
Why Join Skillshare?
Take award-winning Skillshare Original Classes
Each class has short lessons, hands-on projects
Your membership supports Skillshare teachers
Learn From Anywhere
Take classes on the go with the Skillshare app. Stream or download to watch on the plane, the subway, or wherever you learn best.