Transcripts
1. Welcome to my Class: Winter is one of the magical
seasons of the year. It is the time for comfort. To sit back in our cozy corner, sipping a cup of hot
cocoa or chocolate, and enjoying their
favorite pastime. Have you ever tried
watching the sunset or a sunrise on a cold winter day? It is almost impossible to
watch a sunset and not dream. What if we could combine a cozy cold winter with
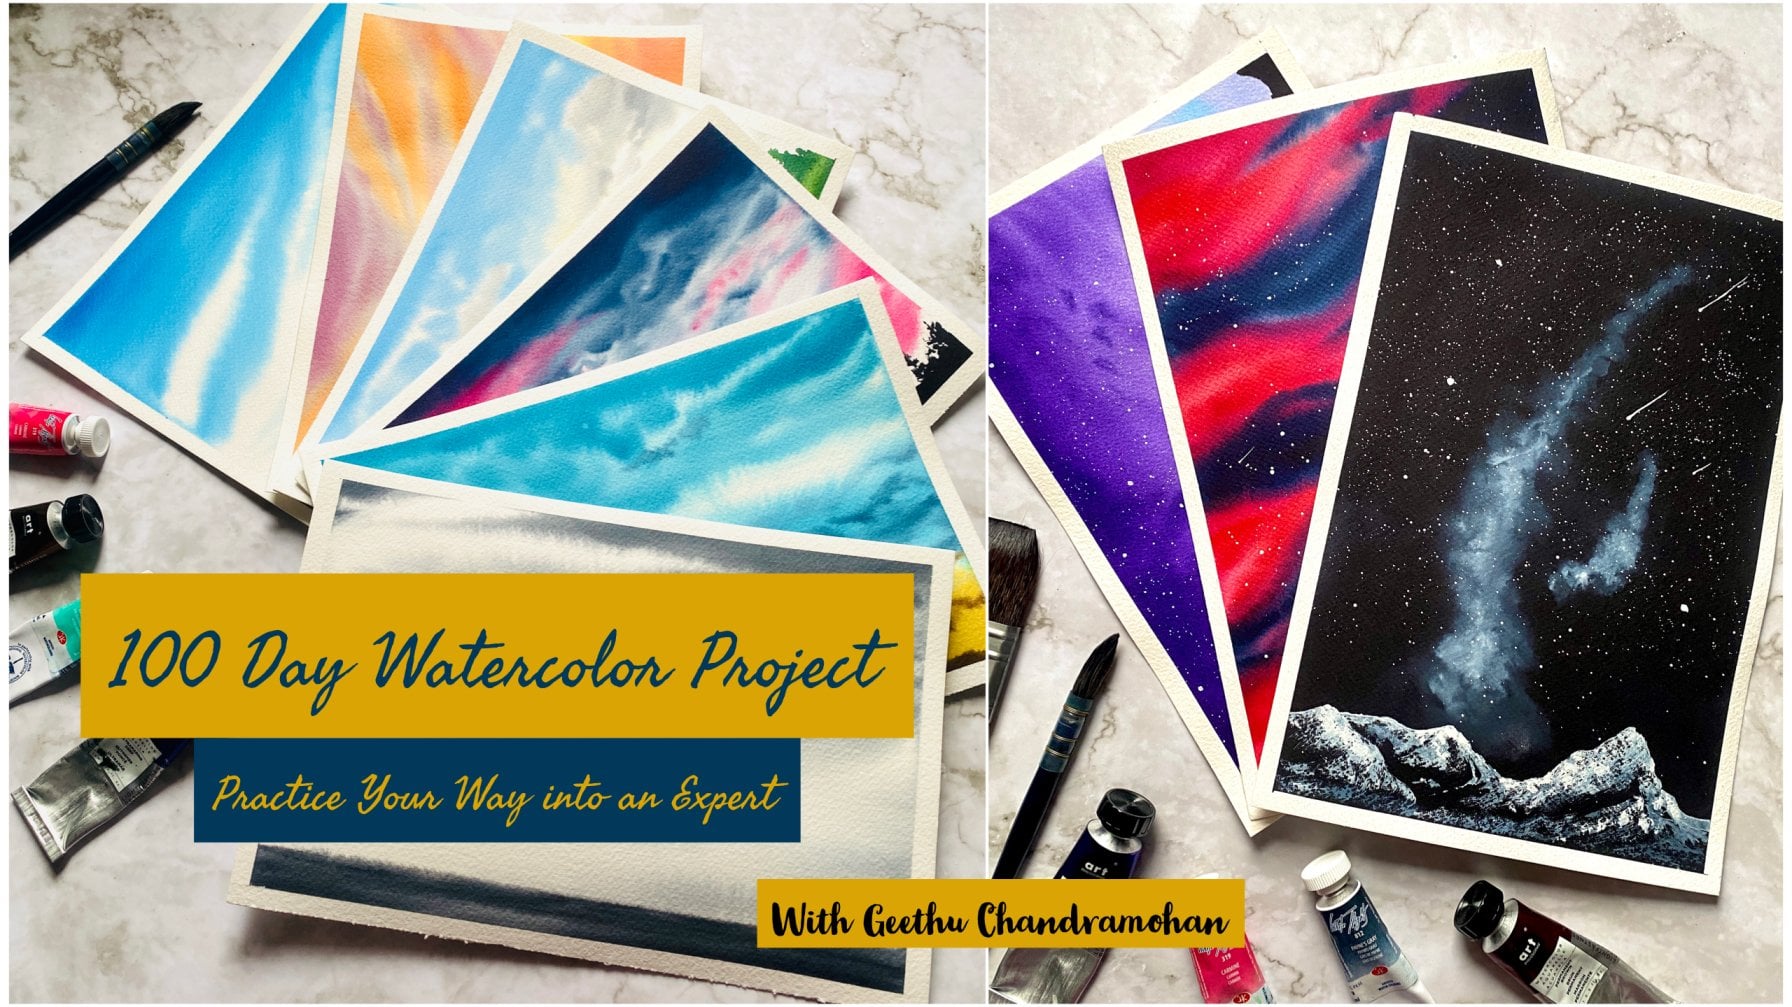
a beautiful sunset view? Hello everyone, I'm Geethu, an artist, an engineer, and an art educator. Welcome to yet another
beautiful class where we're going to explore our creativity with watercolors, and walk away with some magical paintings
to cherish forever. Today, we're going to explore the beauty of winter sunsets, the colors dancing on the
snow as the sun sets, and the sky speaks to
us in 1,000 words. As usual, we'll go
through each of the art supplies that we need
for this class in detail, and start with painting our
gorgeous sunset scenes. Each of the class projects
are in real time, which will make it easy
for you to follow, even if you are a beginner. If you are a beginner looking
to learn watercolors, then each of the projects
in this class is going to help you learn a lot about
this beautiful medium, and give you the perfect
control over small paintings. If you are an
intermediate artist, then the cute little
paintings in this class, is going to bring a
huge smile on your face as you remove the tape to
reveal your masterpiece. The first six projects of this class will take you
less than 15 minutes, and the last two less
than 20 minutes. Are you ready to step
out into the snow and watch the gorgeous
sunset with me? Grab your rod supplies, and settle down in
your cozy art corner, and paint these magical
scenes with me.
2. Art Supplies: Let us have a look at
all the art materials that we will need
for this class. First of all, most importantly, we need watercolor paper. I will be using people
from this Arches block. This is a French brand arches, which is cold pressed, 140 lb and 100
percent cotton paper, so 140 lb means it's 300 gsm. That means the paper
is really thick. You can see the thickness
of the paper here. This is one of the best paper
for watercolor paintings. I will be using this one over here and I will be
taking heat out of this paper and
cutting them out into small A6 sizes for all the
paintings in this class. Try to use any paper which is of our discrete quality and has a minimum of 300 gsm or 140 lb. It will be really
helpful for you to get all the techniques right. I will be cutting the paper
into A6 sizes like this. From two sheets of Arches paper, I have cut out eight sheets and this is what we're going to be using for the whole
of this class. You don't have to be
painting these paintings in the exact same size of
paper that I'm using. You can use A5, A4, or whatever size of
paper that you have. You don't need exactly
the same size. You can also go for
sketchbooks instead. If you have an A5 watercolor
sketch book like this one, you can also go ahead and
paint on your sketchbook. This one is the
sketchbook from HR. It's their perfect sketch book. This is also 300 gsm, 100 percent cotton paper. I always prefer to do my watercolor paintings on
100 percent cotton paper, which is of artist
grade and 300 gsm. But like I said, if you have any good
quality watercolor paper, then you can go with the same. You don't necessarily
need to use the exact same material or the same brand that
I'm using here. The next thing that we need is watercolor
brushes, of course. I will be using a flat brush to apply water
onto my paintings, as well as to do some
background skies. But you don't exactly
need a flat brush. You can also use a pointed
brush like these ones. Very large brush that you
have will suffice for this background work and
also for applying the water. Then you need a
smaller size brush, typically a size 2
or a size 4 one, or you can go for a size 1
for the extreme detailing. These are the only main brushes
that you will ever need. My smallest size brush
here is a size 4 one. The next most important
thing that you need is watercolor
paints, of course. Here, I'm going to be using the paints
from White Nights. This is a Russian brand
which is officially known as Nevskaya palitra and brand of paints is known
as White Nights. I have the tubes and
the pans as well. These are full pans and I will be using
paints from this brand. But you don't need exactly the
same brand that I'm using. You can go with even a basic
palette of watercolors, such as this one from Sennelier. It is their aqua mini set. You can see, there are just
very basic shades available. You can also go ahead with any watercolor
palette that you have. Because all of the paintings that we're going
to be doing today, the colors are not important, but rather the techniques
is what is most important. The next thing that we need is watercolor palette
to mix our paints. I'm using this
ceramic bowl here. It's got three wells
and I will also use this other ceramic bowl
for mixing my paints. You can use any watercolor
palette that you have and any space that you've got for
mixing your paints. Even if it's plastics, ceramic, or metallic, it
doesn't really matter. I will also be using
this plastic palette, which already has some shades
of White Nights filled in. You can go ahead with whatever watercolor mixing
palette that you have. Anything will do, so don't worry about it. Then we will need
two jars of water. Use any jar and
fill them up with water because one
would be to take freshwater to apply
the water onto our painting or paper for
the wet-on-wet technique. The other is to wash off
your paints in the water. Imagine trying to apply
the water onto your paper and you pick up this muddy
water and you're applying, it will have an
underlying color. This is the reason
why we use two jars. One will always be kept
clean and the other will have the dirty water in which you can keep washing
your brushes. We will also need
some paper towels, which will be
helpful in removing the excess water
from your brushes. You can dab on the tissues
and remove any excess water. You don't necessarily
need the tissue itself. You can also use a
cotton cloth instead. Next, we need a pencil and eraser to make our sketches before we start the painting, so I'll be using a mechanical
pencil like this one. If you're going to be
cutting out the paper from larger sheet of
paper like I'm doing, then you would need a scale as well as a paper cutter like
this to cut off the sheets, or you can go with
scissors as well. I'll be showing you
the entire process of cutting the paper so
you can follow along. Then I will be using this wooden board for
taping down my paper. You can either use
a wooden surface or any kind of board
that you have. You can also go for
the tabletop actually. You don't necessarily
need a board. You can stick your paper onto
your table or your surface. We just need a flat surface where you can tape
down your paper. Maybe you can also use a hardcovered book like
this one or a magazine or any kind of flat surface
that you can get hold of. It should just be
really hard such that it doesn't rip
off what's underneath. Lastly, we need masking tape. We're going to be using
this tape to tape down our paper on
all the four edges. This is just a normal masking
tape that I got off Amazon. You get these in normal
hardware stores as well, or you can use washy tapes. This is a washy tape that I
use in my paintings as well. Or you can actually go for
the normal cellotape as well. You don't necessarily
need the masking tape. Here is the cellotape. You can use this one as well. It doesn't really matter. It's just that masking tape is quite easy when you
apply the paint because the cellotape has a glossy
surface which could prevent the easy
flow of the paint. These are all the
materials that we need. Go with whatever
materials that you have. I have suggested all the
alternatives that you can use for continuing
on with this class. Let's get started
and I will show you how we can cut the paper first
3. Prepping the Paper: Let us now see how we can prep the paper for the painting. Here is my Arches block and I'm going to take
a sheet out of it. These are 9 by 12 inches and I'm going
to be cutting them down. For cutting them, obviously, we need to take
the measurements. My paper is 9 by 12
inches but your paper might be different and if you prefer to cut it
down like I'm doing, make sure that you
take a scale and take the measurements
of the whole paper and then divide it by two. Here here is going to be
along the length-wise edge, 6 inches by 6 inches. I'm just going to mark the
center of it and draw a line. Here I've marked the center
and I'm going to be using my paper cutter to cut
the sheet in half. I'm being very careful here. I'm holding down the scale with my left hand and then cutting along the edge
and after creating a groove, it's quite easy to cut down along the groove that
we have created. This is the process
that I always do. I always actually
use the roles of Arches paper and I cut my
paper out of them usually. Here I wanted to show
you how exactly you can cut your paper down
into smaller sizes. You don't necessarily need
the paper cutter itself, you can go ahead and
use a scissors instead. Now I have two sheets, so they're 6 by 9 inches wide. I'm going to be cutting this
again in two half-size. I've marked the center again and I'm going to be
cutting the center again. You can see I've cut it again into half,
creating small portions. Please note here, be very careful when using
a paper cutter. You don't need cut with the
paper cutter, of course. Here I have the two sheets cut out and I'm going to be cutting
this other one as well. You can see how out of a 9
by 12-inch sheet of Arches, I have got four sheets actually. I'll be cutting the other one as well and we'll get four sheets. This is an efficient way to use paper because Arches is
quite expensive as well. I've only used two sheets here, and I have got eight sheets in total. Isn't
that really great? This is what we will be
using for all our paintings. Now, I will show you how
we can take down our paper onto the surface or the
bold that we are using. Because we have to
be extremely careful when we are taping
down our paper. We need to make sure that
all the edges are intact. Place your paper on the board. I'm just placing it
in the corner here. You can actually place them
in the center if you want. Then take the masking tape
and stick it onto your paper. You can see I've left a very
slight border on my paper. You can have a large
border or a small border. It doesn't really matter, totally depends on how you
want your painting to be. I prefer small borders and especially because this
is such a small painting. That is why I'm going
with a very small border. Cut out your tape as
much as you need it for the paper and then stick
it very nicely and firmly. After sticking the paper, we're not done yet. We actually need
to make sure that all the edges are intact. I use my scale to
run along the edges and make sure that it is really intact on my board because
I don't want my paper or the paint to flow into the edges and to get
a clean nice border, this is what you would do. For all of the paintings
in this class, I'm going to be
sticking my paper like this and using these ones. Without any further ado, let's jump into each
of the class projects.
4. Project 1 - The Lone Tree: Welcome to the first
winter sunset project. The colors we need for this
project are Indian yellow, orange, crimson,
ultramarine blue, burnt umber, and Payne's gray. Don't worry that you need
exactly these shades. You can use alternative
shades as well. For example, for Indian yellow, you can use any
other yellow such as permanent yellow or Indian. For crimson, you
can use any other red or rose shade that you have. The colors that I have
listed here it's not really important just go with whatever shades
that you have. Starting with our pencil sketch, which is going to
be really simple. Let us first draw a
line in the center. This is going to be
the line of horizon. We will just be outlining the basic shapes
in our painting. After the horizon line, let's just mark the shape of a tree towards the left side. It's going to have a main branch and then
maybe few small branches. Just randomly with your pencil, try and mark few
branches for the tree. It is going to be a
really simple painting. After adding the tree, let's just add few lines on to the bottom part where it's going to be the
detailing on the snow. You can totally skip this and we can add it with the
brush later as well. This is not necessary. There, our pencil
sketch is complete. We're going to need a flat
brush or a large brush, which would be quite useful to apply the water onto our paper. Since we're going to work
with a wet-on-wet technique, we need a large brush. I'm going to use my
flat brush here. You can either use the
larger size brush that you have or you can
go with a flat brush. I'm applying water to
the whole of my paper. Using a flat brush
makes it easy to apply water to the
whole of the paper. That's why I use it. Otherwise, don't worry, you can use the largest
size brush that you have. Then I'm using my
mop brush size 2 and taking Indian yellow
and applying it to the top. I'm applying it to the top
area of the horizon line. This is going to be a
sunset landscape obviously. Apply an even gold
of Indian yellow from left to right
using a swift motion. Then on the top of it, we will add orange, right where you stopped
with the Indian yellow. There, you would
start with the orange and move towards the top. We're trying to create a very beautiful blend
here. You can see. Then the next color that
we will use is crimson. On top of the orange, we'll start applying
the crimson. You can either use a red here or another rose
shade that you have, or any of the pink as well. You can see I'm applying
it on top of the yellow. When you add a rose
on top of the yellow, it will turn into an
orange or a red shade. Be very careful when
you're trying to blend it. Don't blend it towards the
bottom, rather move upwards. This is the reason
why we started with yellow and we moving upwards. If we had moved our painting process from
the top towards the bottom, then we wouldn't have
been able to get a nice yellow shade
on our paper. Onto the topmost area, we're going to apply blue. Here I'm using ultramarine blue. You can also use cobalt blue or any other blue that you have. The blue will mix with the
pink shade right underneath it to form a slight purple
shade. That's alright. Apply the blue towards the top and we will just blend
these colors together. The next thing we're going
to learn here is how to make our painting
more vibrant. When we apply the
colors at first, it's going to be very light. We need to keep applying
multiple layers of paint to get it to turn vibrant. You can see I reapplied the pink again and I'm reapplying
my yellow now. Observe how I did not
move down the paint. That is the pink paint
from the top towards the bottom yellow
part because then it would turn the whole yellow
into a different shade. Then take more yellow. Now we're going to add a bit of reflection on to the snow area, the reflection of the sunlight. First, we added the yellow, then I'm taking the
orange and I'm applying towards the right side
in small strokes. Such that the joined yellow, where I stopped
painting the yellow. You can see just few
small random strokes. All of this is possible because we're painting with
the wet-on-wet technique. Now, we're going to take some blue and let us mix it with the pink to create a
slight light violet shade. More of blue in the mixture. This would create a
nice blue-violet shade. This is what we're going to
paint towards the bottom. This is the snow area and the yellow and the
orange that we painted was the reflection of the sunlight or the sun
rays onto the snow area. Towards the bottom, it's going to be the color of the snow. Yes, I know snow is white, but then we need to add
more colors on the snow to depict that because when
it's a sunset scene, the snow turns into this nice, beautiful bluish-violet colors. That's why we're
adding this color onto the snow rather
than leaving it white. Now, we need to blend the bluish-violet shade
onto the reflection area. Just few strokes,
that would be all. Here, you can see how
it has turned out. We have to wait for
this background to dry. There. Now it has completely
dried and I'm going to be using my size 4 brush to add the rest of the
detailing in this painting. I'm going to be
using burnt umber. You can use any
brown that you have. The brown that we're using
here doesn't matter. It can be permanent brown, Van **** brown, or any
brown in your palate. First of all, we're going to add the small bushes or trees
further away along the horizon. That line that we made almost towards the center,
that's the horizon. There further off
we're going to have some bushes or maybe
a group of trees. We just don't know
what it is because it's really far away. Use a very smaller size
brush like I'm using here and try to add some
smaller detailing. You can see I'm making these tiny lines all the way
on top of the horizon line. Now I'll mark along the horizon line that is
stained along the horizon line. On a straight line. You can see. That on top of the horizon
is what the bushes were. We're just going to cover
it up with the burnt umber. As I said, don't worry
about the brown paint. Just focus on the
technique here. Focus on trying to get
your brush to make those tiny little lines
such that they seem like some bushes or trees
further away from the viewer. Fill up the entire area
with the brown shade. You can add a darker
shade to it if you want. At random places, maybe
try dipping your brush in Payne's gray or
black shade just to get that different shades
of brown in there. That's what we're trying to do. Once you're finished
with that bush area, we will start to add our tree. Again, we need a really
nice pointed brush here because our tree has delicate branches and we have to try and get it really small. This is the main part
of our painting. The tree is closer to the
viewer and in the front. We'll add in the main branch. You can see I'm using
the pointed tip of my brush and adding the branch. You know how trees are. The trunk of your tree
has to be thicker at the bottom part and it should
be thinner towards the top. You don't need to focus on trying to get a
straight line here. It can be slightly
bent. That's alright. My tree here is going to
have another main branch. The main trunk is
split into two, almost towards the bottom. That's how I'm trying
to be in this. You can have a totally
different tree if you want. This exercise is just trying to make us understand how
to use our brushstrokes, how to get the techniques right, and to make use of the
fact that painting on a smaller paper is actually difficult than painting on
a larger piece of paper. This is because trying to get
those tiny details right, that's the most difficult part. You can see I have added two small branches or
twigs towards the bottom. Then again, using the
pointed tip of your brush, try adding few branches
for our trees. This is totally random. Just try to make some strokes. Always start from the trunk of the tree towards the outside. This is one major
thing that you need to take care of when we're
trying to paint trees. That is, to try and start your branches from the
trunk of the tree, and towards the outside. When you do this, the way you paint the branch and then
you lift off your brush, you would get a thinner line
than the other way around. That's why always start from the trunk and then move outside. You can see I've just added few small branches onto my tree. Just try to add random branches. Some on the left side and
some on the right side. Then towards the bottom, you can add few small twigs
or small grass, that's it. Now I'm mixing my blue and crimson again to create
a nice violet shade. I'm mixing crimson
and ultramarine blue. My ultramarine blue is in the
pan and the crimson I have taken it out of the tube and I mixed both of it to
create a nice violet shade. I'm going to use this
at the bottom part of the tree to create some
small shadows, that's it. Then some detailing on the snow we're going to be
adding with this violet. Now the stroke is
again wet-on-dry. Just like the tree after the complete
background has dried. Some lines on the snow. That's it. Just random. You can see how lightly
I'm drawing this. Just try to make some
very light strokes, not too much detailed. Some more towards the
base of the tree. There, our simple sunset
painting is complete. This was like a very
simple one, wasn't it? Let us remove the tape. Be careful to remove
your tape away from the paper because that way
your paper would not rip off. Here it is. Here's the
beautiful sunset painting. I hope you guys like this one. Let us move on to the next one.
5. Project 2 - Winter Mountains: Welcome back to the
second class project. The colors we will need for
this one is Indian yellow, or any other yellow,
Alizarin crimson. You can also use any of the
red shade that you have, ultramarine blue or cobalt blue, burnt umber, and Payne's gray. Instead of Payne's gray, you can also use black, and the same with burnt umber, you can use any of
the brown shade that you have in your palette. The pencil sketch of this one is going to be quite simple. You can see I've taped
down my paper here on all the four sides and I'm just going to quickly sketch
the shape of a mountain. This is totally random. Try to make some
small hilly areas and maybe some part of it sharp. You can see I've made one
peak here, which is sharp. Then add some other hilly
areas towards the front of it. Just some lines
onto our mountains. We're just trying to
mark the areas where we can paint with our
darker shade or the Payne's gray
so just the areas where there are not snow. We're just trying
to mark some areas. That's with the pencil sketch. Now we're going to paint
the sky region first. I'm using my flat brush here. Don't worry if you don't
have a flat brush, you can go with the larger
size brush that you have, any brush in fact, and try to apply water
onto your paper. Remember not to apply water
onto the mountain area, so we have to be very careful
and paint along the edges. Remember to apply the
water evenly without forming any large pulls
or blobs of water. If there is any large
pulls or blobs of water, just try to move it
outside of the paper. Here, now I've switched
to my pointed brush. This is my mop Size 2 brush. I'm using this to paint along
the edges of the mountains because I have to
be very careful and not paint along
the inside of it. A pointed brush would be
very useful for this. Then here I'm taking my
Indian yellow first. You can go with any
yellow that you have. We will start applying towards the right side onto
the wet paper. We have to be very careful
along the edges again, such that our paint does not
flow into the mountains. Using Indian yellow, you
can see I have painted the bottom part where the sky
is touching the mountains. My paper is wet and I'm using
the wet on wet techniques. When you're painting with a wet brush or wet
paint onto wet paper, it is called as the
wet on wet technique. Then the next color that I
will use is alizarin crimson. We can go with any
other red shade as well and we're going to apply it right on top of the yellow area that
we just painted. We're trying to get some
kind of a blended sky here. But this is quite different from the blend technique that
we used in the Project 1, because you can see
we're trying to make some random lines. You can see I've applied the red shade on top of the yellow as well
just few lines. We're you're trying to get different kinds
of blending here. That is in the form of
small lines so I've added the red shade and I've added a few lines
on top of my red. Next, we're going to take
the ultramarine blue. Or you can also use cobalt blue. We will add the next
line on top of the red from the right
side towards the left. You can see, I've not covered the entire area
towards the left, but just like a small line from the right towards the left. Then I've taken the red shade again and I'm adding
it towards the dark. You can see how that blue has
joined the red at an angle. This is like an advanced
blending technique. But I'm pretty sure
that once you try it, you will see that
it's very simple. The next thing is now, we need to make our
painting vibrant. Because when you're painting
with a wet on wet technique, the colors would just spread away in the water and they
would fade eventually. In order to make it vibrant, we need to apply the
shades multiple times. Re-apply on top of the
areas that you already painted in the same exact stroke that you applied earlier. You can see I'm
reapplying the red shade. You can also re-apply all
the other shades as well. You can reapply the blue
shade and the yellow as well, but just make sure that
you are trying to blend them correctly and don't add any more water to your
paper because that can lead to hard edges being formed. When you're trying to
blend each stroke, the most important part
here is to be careful that you blend along
each of the colors. That is, if you started
blending one color, then don't stop until you have blended the
whole of the paper. Because if you stop
at one area, that is, you started reapplying
the red shade and you just leave it at that, then your red area would
have more water or more paint and it
will just create hard edges along
the other shades. This is the reason why you
have to be very careful and not introduce any more
water onto your paper so you can dry your
brush using a tissue. Then, once your background
has completely dried, we will start to paint the
details on the mountains. This is going to be like
a very cool technique to paint some
watercolor mountains. First we're going to add the black lines
on our mountains. I'm using Payne's gray here. You can use a mixture of Payne's gray and burnt umber together to paint the mountains. Just some lines and some
strokes at random places. Use a pointed size brush
to get the best results and just add some
lines here and there. This is totally random. Use a mix of both
of these colors, Payne's gray and burnt umber. So when I say Payne's gray, I'm trying to get a
nice dark black sheet so you can use black also. Don't worry if you
don't have Payne's gray because if you're
using a basic palette, you might not have
Payne's gray in it. That's completely all right. Also burnt umber. It is just totally random. We just trying to add some dark rocky areas to our mountain. There are lots of spaces
that I'm leaving white. You can see that this is like completely random
out of my mind. If you asked me to recreate this I'll not be doing
it in the same way. But you can see how I'm
doing those strokes is just here and there
at random places. Then towards the
right, this mountain, we're going to paint it in
whole because it's like in the front and it's a dark
mountain without any snow area. The whole of it painted
with black or brown. Then the other places is where we'll just add some
random detailing. Remember, use the tip of
your pointed size brush to get the small lines
at random places. Now, here's the
interesting part. Now we're going to use our blue shade to paint
the snow on the mountains. We cannot leave it white. The reason being, this is a sunset scene and
during sunset, the snow turns to a
nice bluish shade. We mixed our blue
with red shade, crimson or alizarin
crimson here. You can get a nice purple shade. We're just going to add this
on top of our mountains. Use a lot of water in
your mixture and try to blend the whole thing
onto your mountains. You will see that the black shade or the
Payne's gray shade that you applied will start to flow because you're
reapplying on top of it. That is exactly what we want. We want that brown
and black shade to slightly blend with the blue. That gives a very nice
look to our mountains. You can already see
some parts of my gray has moved on to the other
areas and that's alright. Then, now take a medium dawn of violet and we'll just
darken certain areas. This is the areas where the
shadow is like dominant. In some other areas the shadow is just
going to be very light. You can see on my mountain, I have differentiates of violet. The violet I applied using the blue and red mixture,
the same violet. First I used a lighter tone. Then I picked up a
medium tone and I'm applying it on top of the lighter tone that
we just applied. This gives a varying tone onto our mountains and makes
it look more interesting. Just try to blend everything
with your brushes. Once you've done that, that's it. That's really it. Your mountain painting is ready. Your winter sunset
mountain painting. Isn't this really beautiful?
I hope you like it. Here's the final picture. Thank you for joining
me on this one. We have learned some
advanced blending technique for the sky here. And then for the
mountains we saw how we apply different
shades of violet to get that beautiful look
to our mountains with varying shades. That's it.
6. Project 3 - Winter Tracks: Welcome to the third
class project. In this one, we're going to
look at some perspective, both aerial perspective
and one-point perspective. The colors that we mostly
need are Indian yellow, Indian gold, alizarin crimson, ultramarine blue, burnt
umber, and Payne's gray. Don't worry if you
don't have Indian gold, you can use an orange
shade instead. The same with the yellow
and the other shades. You can use any
shape that is most similar to red in your pallet. Don't really worry
about the colors. Let us now make
the pencil sketch. First of all, it is going to be a horizon line and note
here I'm going to make the horizon line
somewhere almost towards the bottom because not exactly towards the center. Right below the center
part of our paper and then we're going to add
a road on our paper. The road it's going to
vanish away at one point. You can see the two
lines of the road, they meet at one point
on the horizon line. This is what is known as
one-point perspective. That was all for
the pencil sketch. We'll get to painting first and we're going to be doing
the wet on wet technique. Again, we're going to
apply water onto paper. I'm using my flat brush here
and I'm applying water. You can see here, I have applied water only to the top area of my horizon line, just right above
the horizon line. If you're using your
larger size brush, just make sure to
apply the water towards the top of
your horizon line. Then. Now I have switched
to my Size 2 brush. If you're using the normal
pointed round brushes, then use a Size 6
or Size 8 brush. We will start with
Indian yellow. We're going to apply
it as a straight line from the left towards the
right onto the wet paper. Then the next color I'm going
to take is Indian gold. Don't worry if you don't have
Indian gold like I said, you can use orange instead. It's almost like
an orange sheet. Don't worry about it.
Reapplying my yellow. My yellow lines, I've applied all the way towards the right
on top of the horizon line. The next color is
alizarin crimson. I will apply this towards the right and the
left on the top. You can see I've
painted somewhat in a staggered manner
towards the left, it's a bit towards the top
and towards the right side, it is at the bottom. This is because of
the extra space of Indian gold that we applied
on top of the yellow. Then the next color
is violet shade. You can use a violet
shade directly, or you can mix a blue and rose or red together to
create a nice violet shade. That's what I've done here. I've mixed crimson and ultramarine blue to get
a nice violet shade. I love the mix of the blue
and the red that gives the violet rather than using the fresh violet
from my palette. Here, what I wanted to show was another blending
style where we're blending our colors
in different angles. Another reason why I mix my paints that is to
get the violet shade is by varying the amount of
red and blue in your mixture. You can change it to a light pink shade and
a dark violet shade. You can see towards the right, I applied a pink shade, but that's only because I've
got more rows in my mixture. Then let us add few clouds
with the alizarin crimson. The clouds, I'm just using my pointed brush
and I'm dropping the paint onto my yellow and just very
small drops of paint. And you can see how those paints have created a nice cloud shape. Then I'm taking my blue again and I'm mixing
it with the pink. I'm going to apply this
on top of the clouds. I just want my clouds to be like a red and violet mix.
That is the reason. The red clouds are
going to be towards the top of the yellow and
the violet bluish clouds are going to be
towards the top of the blue region that we have applied or the violet region. You can see it's very simple. Now, the next thing
that we're going to try is we're going to see
the aerial perspective. When we say aerial perspective, it means that something
in the aerial view. We're going to have some hill or some bushes
towards the horizon. This is different from the one
where we did in Project 1. Because in Project 1, we did it with the
wet on dry method. But here our background
is still wet and we're applying the Indian yellow
onto that wet paint. You can see that when
you're applying, it is blending along
with the background that is slightly
flowing. That's alright. This gives a blurred
look to our bushes. This blurred look, we'll give it more of an aerial perspective. When something is far
away in a picture, you will draw it
less detailed and more blurred that is what is known as the
aerial perspective. When you come closer
to the viewer, it would be more detailed
and more visible. On top of the Indian gold, we will add darker tone here. I'm adding burnt umber. Again this is using the wet on dry method itself because
my sky region is still wet and you can see
how I've got it to be looking like a really
nice blurred effect. This is because of the
wet on wet method. Make sure that your brush is
damp and not a lot of water. Because if you're using a
lot of water in your brush, then the whole thing is
just going to flow away. Even though we're using the
wet on wet technique makes sure that there is less water on your brush and
more of the paint. I'm just adding few trees
with my burnt umber. You can see just some lines
onto my horizon. That's it. Here we don't need to wait
for our sky region to dry. You can go ahead and
paint the bottom part. Because even if you
apply the water, your yellow paint and
the brown paint that you just applied is going to
flow towards the bottom. I agree, but that's
all right here. Next, we will take the
Indian gold and we will apply some random
strokes onto our paper. Wet the paper first,
don't forget that. Then some random strokes with Indian gold for the
reflection on the snow. Then back to creating
the violet shade. I'm creating my violet shade by mixing ultramarine
blue and crimson. More of blue in your
mixture so that it's closer to the blue side
than the pink side. We don't want it to
be a red violet, but rather a blue violet. You can clearly see how
I have applied my paint. Onto this new region, onto the wet paper, we will apply this. When we're trying to paint
near the yellow region, we have to be careful that
our blue does not mix with the yellow to create
any green shade. We don't want a green
shade on our snow. Just be very careful. All of the darker mixture
towards the outside. As you move towards
the yellow region, try to make it more diluted so that it does
not create any green. Use simple strokes
with your brush just on the doe as a line. You will see that it's perfectly blending together if your
paper is wet enough. There, few lines, that's it. You can see I'm
creating the violet by mixing my blue
and pink together. As I said, I mix them together
just because of the fact that by just changing the amount of blue and
the pink on my paper, I am able to change the
color of the violet. Now, after the background
has completely dried, we will move on to adding
the roads on our paper. I'm adding the road again
with a blue violet shade. Very little crimson in the
mixture and more of blue, which will give me a
nice blue violet shade. This is what I'm going to be
using for painting the road, so the road or it's
not exactly road. It's like the vehicle tracks. Some vehicle truck
on the snow area. Again, following the rule
of one point perspective, you can see the tracks are like vanishing
towards one point. When it comes closer
to the viewer, you can see more of it. That's the one point perspective rule when
you're painting. This is quite useful
when you're trying to paint a road or a train track. Some object that vanishes
off towards the horizon. We're painting this with the
wet on dry method because our paper is now completely dry and we're applying wet
paint on top of it. The lines are just
totally random. I'm not trying to make any
detailed or exact lines is just I'm applying
my brushstrokes at random following the
shape of the track. These are just like
shapes on the snow. Then using a damp brush, I'm just going to move
my brush along the paper and let the paint
get applied on it. The brush is really dry and
make sure your brush is dry. What you can do is
you can try painting on the outside or another paper until your brush is almost dry and then you are running
your brush over the paper. This creates like a
dry brush method. This is actually called as
the dry brush technique. This is more seen when your paper has a rough
surface. Don't forget that. Now, we'll add some detailing
on to our landscapes. We'll add a tree
towards the front. This is what I wanted to show again about the
aerial perspective. Those trees and
bushes that were in the background further
off along the horizon. We painted that in a blurred picture mode because that was like
really far away. This tree that we're
building right now is closer to the viewer. That is why every single branch of the tree is going
to be like detailed. That is why we will draw the branches in a
very detailed manner. That is the basic rule
of aerial perspective. That is, things
that are far away would be less
detailed and more in a blurred way and
the things that are closer to the viewer
would be detailed. I hope you have understood that. Let us get to painting
the branches of the tree. This is exactly going
to be similar like the tree that we painted
in the Project 1. Using the pointed tip of
your smallest size brush, try to draw the
branches of the tree. As I said before, try to make sure that
your branches are such that each of them
originate from the trunk. Your strokes make them
such that from the trunk towards the outside rather than from the outside
towards the trunk. Because when you draw from the
trunk towards the outside, your strokes will get
thinner as you go outside and will give the
perfect shape of the branch. There you can see I'm almost
done with the main tree. I'm just going to add
few smaller branches and twigs towards the bottom because I just don't want my tree to be standing
there as a lone tree. You can add more branches or you can add more trees
towards the bottom. Here is the final painting. I actually forgot to click the record button while I was
removing the masking tape. That is why that
part is missing. But here it is. We have learned about
aerial perspective to make something blurred
in the background. Then the one point
perspective about the vanishing point and about adding detailing
to the foreground.
7. Project 4 - Following the Footsteps: Welcome to the fourth
class project. So we're going to paint a nice pinkish sky
with the winter, of course, and some
footsteps on the snow. So the colors that we're
going to be using here are carmine or queen rose or
any rose for that matter, then a violet, burnt umber, Payne's gray, any yellow such as Indian yellow or any permanent
yellow, and scarlet. Let us start a simple
sketch on the paper, so it's going to be another
line in the center. So that's the horizon line. And we're going to add some little zigzag
towards the middle, so it's going to form a
small mountain or a hill. On top of this hill, we're going to add a tiny house so it's a house in the distance. A cute little winter house. Just draw the shape of the house so you can see very small, just a triangular
shape and few lines. Then we will add a
snowy roof so that's why it's got a bit of thickness because
of the snow on it. The sketch is going to be quite simple that you
can follow along. Then we'll add a small chimney towards the top of the house, on the roof and a tiny door
and window on the house. So our house already
looks really beautiful. Then we'll have some
far off backgrounds, bushes, and trees
towards the back. That would be all for
the pencil sketch. So to get started
with our painting, we're going to be first working with the wet on wet technique. So I'm going to apply water onto the sky region
of our painting. So I'm using my flat brush
here to apply the water, but you can use any size brush
and just apply the water. Just be careful
around the house. We don't want the water to
be on top of the house. So along the edges of
our pencil sketch. So this is the main
reason why we draw a pencil sketch so that
we can paint around it. Apply the water evenly without any large pools or blobs of water. There that's it. So now we'll start
to apply our colors. So we're going to start
with crimson or carmine. So a nice pink shade, and this is what we will
start with at the bottom. Right on top of
the horizon line. So this is where we started
applying our water, above the horizon line
apply the pink shade. You can use your pointed brush. You don't necessarily have to paint with the
flat brush itself. That's all right. So I'm just using
my same flat brush that I used for
applying the water. Just use any brush
that you have and apply the paint
onto the wet paper. So you will see that
the paint starts to spread and create a nice wet on wet
effect on the paper. Again, very careful
around the house. So here this is where a pointed brush is going
to be really useful. I'm just using the tip of my flat brush. You can see that. So apply the paint
multiple times if you want to
really get it nice and vibrant because the
pain tends to get lighter, because it's spreading a lot and it would sink into
the paper as well. Then the next shade
that we're going to be using is violet. So you can either
use permanent violet or any kind of violet. If you don't have violet, you can actually
mix a blue and pink together to get a
nice violet shade. So here I'm adding
the violent towards the top and you can see I'm applying it onto the
wet paper and blending it with the carmine
that I just applied. So we will re-add the
carmine or the pink shade. So we're going to add this
multiple times and to create a nice perfect
blend between the two. That's what we're
trying to achieve. Because our paper is wet, it's really going
to be easy to get that blend on our paper. Now, I've switched to my size two mop brush and I'm
adding the violet again. I will also add the Carmine
again and mix it very nicely. So this is how I'm creating the perfect blend on my paper. We're working on the wet on wet technique and only because
my paper is still wet. So if your paper
has started to dry, then don't reapply the paint. Next, I'll switch to
my size four brush, which is a really smaller size. So switch to your smaller size
brush and use burnt umber. Our sky region is still wet from the paint that
we just applied. We're going to use the
blurred method again here, just like we did in the
previous project to get that blurred bushy background
further way in the picture. So using burnt umber, just add it towards the top. Don't really worry if
your paint has dried, you can just go with the
wet on dry technique. It is not going to make
much of a difference. It just means that
your background is not going to be blurred. That's it. But that's
completely all right. So you can see I've just applied the burned umber from the left side towards
the right side of varying length so that
it resembles the look of some further of trees or
bushes in the background. So we're going to
apply this right towards the left
side of our house, and then towards the
right side as well. So take a nice dark consistency of your burned
umber and add this. So you can see towards
the right side, my paint has started to dry and it's almost looking like
a wet on dry stroke. So that's why I said it doesn't really matter if your
paint has dried, you can just go
ahead and apply it. Now we wait for the whole of our background to dry before
proceeding onto the ground. So once background has dried, we will start to wet
the bottom part. So this is where
it's going to be the foreground or the snowy
region in our picture. So wet the whole of that region even the top of the hilly region where
our house is sitting on, just apply the water
and we're going to be adding violet and mix a little
bit of blue into violet. Just a very little amount of blue into the violate so
it's going to be like a nice blue-violet
shade and this is what we're going to apply
on to our snow region. As I said, again, this is going to be
like the color of the snow during the sunset. We will apply a more darker
tone towards the bottom and it should go
lighter as you go towards the top nearest
to the horizon. This is because the
foreground region, or the darkest color is towards
the viewer right below. So that's the reason why we are applying a darker tone
towards the bottom. Then, using nice
darker tone of violet, we will add some darker shades
on to the hilly region. So this is just to
show that there is some extra hilly
region in that area. But we don't want it to be too detailed because it's really far away from the viewer who's
standing at the bottom side. So you can imagine
that the viewer is almost towards the bottom
and has taken this picture. So that's why this
house is really far away and so are the hills. So take more of
the darker tone of violet and apply it
towards the bottom. So you can see I'm
darkening the bottom part. Now our paper is still wet and we want to add
in the footprints. So take a nice dark tone
or darker consistency of the violet and just dab
your brush on a tissue. Just because we want
to make sure that it doesn't have a lot of water. So remove any extra
water and use the tip of your brush and just dab it on the paper like a small footstep. We're trying to create
some footsteps onto the snow leading
towards the house. Here, we're going to follow
the perspective rule again. The footsteps are going to be
bigger towards the bottom. Then it would go smaller as it goes further away
leading to the house. So you can see I've added big steps towards the bottom and then just small dots as it was nearing towards the house area further away from the viewer. Once we have added that, we will wet the
region or the roof of the house which
is covered in snow. So we're going to paint that as well because we can't
leave it white. So we're going to
add a violet shade, lighter tone of violet
onto the top of the house and some random dark shade
to the left and right. You can see the varying
tone that I have applied. So it was a lighter tone of violet and then
just a few spots of darker tone onto the
wet paint so that it spreads and create
a nice darker tone. Then along the triangular area, we will also apply the violet again then once the roof
region of the house has dried, we will paint the house
so on to the windows, add some yellow tone
and the door as well. So it depicts the light
inside the house. Then we don't need to wait
for the window region to dry because we just want to create a nice
blending effect here. So take a nice, red shade such as
scarlet or carmine and add it to the house region. You will see that your
red paint spreads and there's very little amount of yellow left, but that's alright. Then onto the top of the red, we're going to add
some burnt sienna or burnt umber shade to create some nice shadows for the snow. Just onto the wet paint, that is the wet red paint,
the digestive light. We will add the brown
paint on top of that. Then we'll paint the right side that is the front of
the house as well, in a similar manner. So around the door
use the red shade. Just very carefully within the pencil sketch
alone will just paint the whole of the house red
and then we're going to add some dark shades with the burnt umber
already burnt sienna. There I've picked up the darker burnt sienna
shade and I'm applying it on top of the red to create a nice shadow for the house. So this is going to be like
the shadow from the snow. You can see I've covered
the front part with almost the brown shade. So, it looks really
beautiful when you have that brown shade
on top of your red because it creates a very beautiful blend
with the shadow. Now, I'm switching to
my smallest size brush. This is a rigger brush that
is helpful in painting trees, but just go with the
smallest size brush that you have with a nice pointed tip so that you can add some trees, just like we've been adding
for the other projects. Just add some small trees
right next to the house. So these are winter trees, you just need to add the
branches. That's it. Randomly, some lines towards the top and some main
trunk and some branches. Remember to use the
smallest size brush, and the tip of it. You can try practicing this on a spare piece of paper
first before you paint it onto the painting because we don't want to
create thick branches. We want it to be really thin. Here, our painting is complete so we can
remove the tape. Always remember, remove the tape such that you're pulling
it away from the paper. That is very important. Here, this is our final beautiful
winter sunset painting. I hope you all liked it.
8. Project 5 - Snowy Reflection: Welcome to the fifth
class project, and for this one
we're going to create a beautiful winter
sense of painting with some water and reflections. So the colors we're going to be using are permanent
red or Scarlet, burnt sienna, burnt umber, Payne's gray, permanent yellow, or Indian yellow, permanent
violet or any violet, and if you don't have violet, you can just mix
your blue and red together to create a
nice violet shade. So let us start sketching first. So we're going to create just a very simple
pencil sketch, draw the horizon line first. Then we're going to add
a slanting line like this to add the portion
where the water body is. Just join it with the other end. Then we'll have a
tree in the front. Just a very small tree, add few branches just as a placeholder for us to know how we're going
to paint them. Then the background
bushes or trees, there. So this pencil sketch was
really quick and simple. So we're going to paint
the sky region first, that is the background. So we're going to be using
the wet-on-wet technique. So let's apply the water. Apply water evenly
onto our paper. Make sure that you don't have any large blobs or
pools of water. Use any brush. It doesn't really matter. Then we're going to start with our permanent yellow
or Indian yellow. Using this, we're going to apply a very nice good of the Indian yellow
onto the sky region. So you can see I'm applying
it really vibrant, so I've got it in a very nice
concentrated consistency. Then the next color that
we're going to take is Carmine or you can go for permanent red
or permanent rose. So we just need a
nice rose shade. So you can also go for
Alizarin Crimson instead. This is what we will
paint towards the top. We will try to blend this
nicely with our yellow paint. So don't apply the yellow
in a very straight line. We just want to create
some shapes in the sky. So you can see I've got the
yellow at uneven places so that I can mix the
Crimson at random places. We paint with the yellow
again so that we have some yellow in between
the pink shade. Remember to apply
the paint multiple times if you need to
create it vibrant. Then next thing
is we're going to paint the reflection
in the water. So the reflection in
the water here is going to be exactly
as it is in the sky. So this is the reason
we'll apply the water first and then we're going
to apply yellow on it. So let's extend our yellow paint towards the bottom part
where the water body is. There towards the bottom
part of the water body, we will add our
carmine or crimson. You can see I'm blending
it with the yellow. So take the pink shade and
add it towards the bottom. Here, only a little part of the pink shade is
going to be seen. The other whole part
is going to be yellow. So just towards the bottom, we will try to create a similar blend like the one
we have created for the sky. Just some lines on to
our yellow paint there. Now, I'm switching to my size four brush and I'm going
to take burnt sienna. So load your brush with a very nice concentrated
amount of burnt sienna. We're going to add the bushes or the hills
in the background. So again, this one
is going to be with the wet-on-wet method itself because our sky
region is too wet, although it might have started
to dry, but that's fine. We don't want it to be
too blurry and too clear. So even though it has dried, it really doesn't matter. You just going to create this small hilly region,
towards the horizon. So that's on top of
the line that we drew. So we apply the burnt sienna. Now we need to create
the reflection of this hill on to our water. So we're going to take some burnt umber and we're
going to top on a hill first. So just towards
the bottom part of the hill region that is right
above the horizon line, we'll just add some darker tone. So the first color that
we used was burnt sienna, and then we're
adding burnt umber. If you're using a basic palette, you can mix your brown
with a little bit of black to get a
nice darker shade. Then, using the
same burnt umber, we're going to add some
reflection into the water. So we just adding this brown on top of the yellow
and try to blend that into the yellow by taking more yellow paint or you
can use water to blend it. You can see I'm trying to blend
it and I'm using my brush to blend the brown as well to create that perfect
look of the reflection. You can see, I'm
trying to create a gap between the real part
and the reflection part. So this would give the
deflection a nice real look. So that's why I'm using
my brush to try and lift off some paint towards
the middle of the reflection. Then once your background
has completely dried, we will paint the snow now. So we're going to paint with a wet-on-wet technique again. So we need to wet
our snow region. Remember, this is after our background has
completely dried. That's when we start
applying the water. Once you have started
applying the water first, we'll create some very few lines for the reflection of the
sunlight on the snow. So we're going to add that
Indian yellow onto our snow, just right towards
the left side, and then the rest of
the areas we're going to paint with violet. So pick up a nice
medium tone of violet, and we're going to add this towards the bottom
and the whole of the snow. The more darker
shade is going to be towards the very bottom part. So use the tip of your brush
when you're approaching the water body because we don't want our violet paint to be
spreading on top of that. You can pick up some more yellow and add some tiny strokes or tiny lines if you
want onto the violet. Just make sure that you take a nice amount of
yellow otherwise your violet and yellow can mix to make brown on the paper. Add the darker tone of
violet towards the bottom. So that means the more darker
side towards the bottom, add more shades
onto the wet paper. Here now the snow has
completely dried. So you can either wait for it to dry or you can use a
hairdryer to dry it up. Now we're going to add the tree, so we're going to use
our burnt umber shade. Mix a nice amount of burnt
umber on your palette. Start adding the tree, remember to use the
pointed tip of your brush. So get your smallest size
brush and try to use the pointed tip to create a
nice tree with few branches. We have the tree with
two main branches. If you have been following me along in the other projects, then adding this tree would not be really difficult for you. I'm pretty sure of that. So just relax and put
in those strokes. Let go of all your fear when trying to paint
those thin lines. Just go with your instincts. Just try to move your
arms on the paper very slowly and creating
those thin strokes. So the key thing is
trying to use the tip of our brush and to move outward
from the trunk of the tree. Add in as many
branches as you want. If you only want to add just a few branches,
that's also fine. Or if you want to add a
lot more than I'm adding, then that's also fine. So now I'm going to pick up more violet and we're
just going to add a few drops of violet on to
the bottom part of the tree. This is because I don't want
it to look like without having a shadow or any
effect on the snow. Otherwise, it would
look really weird. So that's why we just added
a few drops of violet to the bottom part and we can add some twigs with burnt sienna. Using the tip of your brush, try to add in some few tiny details onto
the bottom part of the tree, as well as some
areas of the snow. Then picking up violet again, I'm just going to add some
few very small lines onto the edge of the river or
the water body on the snow. So just few drops of violet with your brush and then
try to blend it. Next, I'm going to
take burnt umber and I'm going to add
a tiny fence here. Well, this was not part of the painting when I started
with the pencil sketch, but then I thought that
we can add this fence and try to make it
really more interesting. That is our painting. So just a few lines and try to join them with a
small thread line. So not a thread. So you know how it is just a
very thin line. That's it. Once you've done that, the painting is complete, you can totally skip
that if you want. So here, removing the tape to
review the final painting. Oh it's looking so
beautiful, isn't it?
9. Project 6 - Snowy Sunrise: Welcome to the sixth
class project. This one is not
exactly a sunset, but it looks like a sunrise, with its sun rays falling
on top of the mountains, creating a very nice
reflection on the snow, and the colors we're
going to use for this one are Indian yellow, Phthalo blue, Indian
gold, burnt umber, Payne's gray, yellow
ocher, and cobalt blue. Don't worry if you
don't have Indian gold, you can use any orange, and for the Phthalo blue, you can use any of the
blue that you have. You can just go ahead with the cobalt blue or
ultramarine blue itself, so don't worry about
the shades exactly. It can be any shade
that you want, don't worry about it. Let us start sketching
our mountains now. We're going to sketch some few lines on our paper for the mountains,
just follow along. It's going to be having a
really nice hilly shape here, and then another layer
of background mountains. Just few small peaks, so it can be larger
and smaller peaks, just in some random shades. Then another hill
towards the bottom here. Let us start painting the sky. Again, I'm going to be applying
the water for the sky, so this is going to be, again, the wet-on-wet technique. I'm applying the water
with my flat brush. Use any of your brushes, and just apply the paint evenly onto your paper without forming any large blobs
or pools of water. Then I'm switching
to my Size 4 brush, and I'm starting
with Indian yellow. I'm applying the
Indian yellow onto the paper Write
above the mountains, so carefully along the edge of the mountain because
we don't want our water to be flowing
on towards the mountain, so just right above it. Very carefully apply
the Indian yellow. Then the next color we're
going to add is Indian gold. Indian gold is a very nice, beautiful pigment
consisting of yellow and red mixed together. You can actually go with an orange shade if you
don't have Indian yellow. If you're using a
very basic palette, you can actually
mix your red and yellow to create this
beautiful orange shade. We will just add
some random lines on to sky with the yellow. Some really small lines. We're just trying to create an interesting
feature to our sky. Then the next color
that we're going to take is Phthalo blue. I'm trying to create a sky
by using blue and yellow, but without creating any green, so we will just see
how to do that. I'm applying the blue
onto the empty spaces, that is the white regions. But while I'm applying, I'm trying to be
very careful to not touch any of the yellow
regions with my blue paint. That's really important
in order to not create a green
shade on our paper. Because as you know, blue and yellow will mix
together to form green, and we want to avoid that. Phthalo blue that
I'm using here, and the Indian yellow
that I've used, both would create green
if mixed together, so that's why we will use
water to blend the regions and apply the blue paint only to those regions where we do
not have the Indian yellow, that is the white spaces
that we left behind. Can you see the gap of
white that are left there? We're going to
leave that glowing, so that it resembles the sun. It's like the glowing
sun in the morning. Add the yellow and the blue multiple times to create a very nice vibrant sky, and don't apply any paint
to the white region. Then once the sky has
completely dried, we can paint the mountains. Again, we're going to
be painting with the wet-on-wet technique
on the mountains, so apply the water onto the
top region of the hill, just the background mountains. The white region that we left is going to be
the glowing sun. We need to create that glow
on the mountains as well. This is the reason why we are using the wet-on-wet technique. You will see just in a
moment how we're going to create a nice glow
in our mountains. Apply the water evenly and then we're going to start
with Indian yellow, right where the glow is. But you can see I've left a slight gap of white on
the mountains as well. First yellow, and then
Indian gold adjacent to it, so use orange if you
don't have Indian gold. Right next to the yellow, we add the Indian
gold or orange. Then towards the farther
ends of the mountain, we will be adding burnt umber. Blend the Indian gold
with the burnt umber. Now, do you see the
reason why we applied the water onto our paper for
the wet on wet technique? This is because we
wanted to create a nice perfect blend
between the burnt umber, the Indian gold, and
the Indian yellow. Towards the farther end, we're adding the brown shade. Create a perfect blend
between the yellow, orange, and the brown, or in my case, yellow
Indian gold, and brown. We're trying to create
a very nice transition, and also be careful along
the edge of the mountain. We don't want our paint to
be going towards the sky, so just very carefully. Now, you can see that glow in my mountains, how the yellow, orange and the brown has created that really nice glow
from the morning sun. This is a very beautiful
sunrise, isn't it? The region where you
have left white, remember to leave
it white itself. Now we're going to add some
pine trees in the background. We're going to paint in the
wet-on-wet method itself, but with very little
water in our brush. We have to have more paint
in our brush than water. This is the reason why I dabbed off the extra
water on my tissue. We're going to add some blurred
trees in the background. The reason why I'm making this
blurred is because this is like the mountain that is really far away and
so are the trees, they are far away. This is the rule of aerial
perspective in paintings. When some object is far away, we don't draw it detailed. We try to make it in a blurred
and background manner. That's the reason why I'm going
with a wet-on-wet method. I used paints gray and while you're
approaching the glow again, we need to create that
glow in our trees as well. I've switched to burnt umber
when I reach the glow, and right where you reach
the center part of the glow, we will take orange
or the Indian gold. Can you see the transition
between the trees as well? First I started
with paints gray, then moved onto burnt amber, and then in the burnt umber, I started along with
the Indian gold. Again, I'm going back into the burnt umber towards
the right side. Once the glow region
is completely over, you can go back to the paints
gray or the black sheet. We will start adding the
trees towards the right side. You can see towards
the right side, my paint has almost
completely dried. I'm going with a
wet-on-dry stroke now and I'm trying to
fill up the whole region. But towards the top, I've added few lines to make
it look like pine trees. This is like a pine tree forest, which are so clustered
together such that you only see
the tips clearly. We'll try to add some
few detailing on to the tips and make sure you make that transition from the
paints gray and brown and the Indian gold such that they do not form
so odd in our painting. Now, we'll get on to
painting the hill. This is like the foreground, and this is going to have some nice real reflection of
the sunlight on the snow. We will add it with water first very carefully
along the edges. Do this after the pine
tree layer has dried. Either wait for it to dry or you can dry it quickly
with a hairdryer. Apply the water evenly, and then I'm going
to use yellow ocher here for adding in
the sun's rays. Now I'm going to tell you
something about yellow ocher. Yellow ocher is an
opaque pigment. When I say opaque, it's one of the properties
of water colors and its opacity will not let it blend easily with
blue to create green. Actually, it is a very
good color if you want to paint the yellow
and blue together. It would not mix easily
with blue to create greens. Here we apply the Indian yellow towards the top of
the hill region, and then I'm picking up my cobalt blue and adding it to the rest of
the region of the hill. You can see, I've
added it adjacent to the yellow ocher and it's not mixing with the yellow
ocher to create a green. This is a good shade if you
want to use it for skies. The reason why I did
not use this for the skies is because
I wanted to show you how you can actually
paint yellow and blue together without mixing green and without using
yellow ocher as well. But here we need it to be adjacent so at the
bottom here on the hill, I'm using yellow ocher. Cobalt blue onto
the hilly region and more cobalt blue
towards the bottom. Try to create some
lines on the snow. Then some more
yellow ocher towards the right side as
well adjacent to the blue again, there. Now we're going to
paint the bottom part. You can wait for your
cobalt blue layer to dry and paint the
foreground here. This is the most
foreground part that is the hill part that is right
in front of the viewer. We start with
yellow ocher again, and we apply it towards the top. This yellow is like the reflection of the
sun rays on our snow, which is creating this
yellow glow on the snow. Add some lines and leave some
white spaces for the blue. You can see I've left two large white
spaces for the snow, which I will add
with cobalt blue. I'm picking up my cobalt blue and I'm adding to
those places and you can see how my paint did
not create a green shade. Next, there is this
gap on the right side which I did not paint
with burnt umber. But if you did paint with
burnt umber, that's all right. I'm just trying to add some tiny detailing onto my
mountains in the corner. But since those mountains
are in the background, I don't want it to be too
much detailed so I'm just spreading them with water such that they look
like the background. This is like how we did
our mountain project, that is the project number 2. You can add a bit more
yellow ocher on the top to make it a bit more
prominent and vibrant. Remember, don't apply more paint if your paper has
completely dried. Let us now remove the tape. That was really beautiful
and quick one, isn't it? We learned how to apply a
yellow and blue together without turning into green in two different ways, isn't it? Also about yellow ocher
10. Project 7 - Winter Forest: Welcome to Class, Project 7. This is one of the two
which are the longest. We will learn to
paint this beautiful, gorgeous sunset scene with some birch trees
in the background. Let us have a look at
the colors that we need. They are Indian yellow,
Alizarin crimson, Indian gold, burnt umber, cobalt blue, and Carmine. If you don't have cobalt blue, you can also use any other blue. It's the same with
any other colors. You can go with any
colors in your palette, you don't necessarily need exactly the same colors
that I'm using here today. Let us start with
our pencil sketch. We're going to have a slight hilly region
in the background. This is going to be the snowy
background that we have. Actually, this is
the line that is separating the background
and the foreground. Then we're going to have
some trees in the front. Just make the trunk
of these trees. They're going to be
some birch trees and maybe some other
trees as well. That is what we're
trying to sketch, just the random
sketch of the tree. As you can see, I'm also
not making them straight, just trying to draw the
shape of the trees by a random method that
is trying to bend at some random place so
that it looks original. We don't want it to
be totally straight. I've added two
trees to the right, and now I'm adding two
trees in the center. Now let's add another
tree to the left, some more trees, in fact. So, slowly, and make sure that each of these trees are not
in the same line. This is the reason
why I add a line at the bottom part of a curve and then make
the tree from there. It's like these trees are at different
levels on the snow, so they're not like
in a flat surface. Make sure the trees are of
varying lengths as well, that is the thickness of them. Then ideally we
should be painting these trees by masking them using masking
fluid or something. But I wanted to teach
you how we can do that without using
the masking fluid. We have to make sure
that we don't paint on top of the trees because
they need to be left white. What we're going to do here
is we're going to apply water to the areas that are
between those trees, that is skipping the area
of the trunk region. We'll apply the water
to each of the areas. My paper here, that I'm using is 100 percent cotton paper
and it is going to withstand the time that I take to cover up all the
area between the trees. But if you're noticing
100 percent cotton paper, this might not be the case. In this case, you can actually paint each
part of the tree, that is, each section
separating the different trees. First, you would
apply the water, then you would apply the
paint because you don't want the water to dry by the time you come back from the other spaces. You can go ahead and
start painting, that is. If you forward to the part where I'm applying the paint,
you can see that. But if you're using a nice watercolor paper that stays wet for a
longer duration of time, you can do it the way
that I'm using, that is, applying the water to each section in
between those trees. This is because we're going to work with a
wet-on-wet technique, but we don't want paint
on top of our trees. That's the reason
I'm just skipping the region of the tree and
then applying the water. You might need to reapply the areas that you
applied at first. I'm starting with
Indian yellow and I'm going to apply it to the
whole of the background now. You can see the whole space
where we applied the water, we're going to paint
with Indian yellow. This is a sunset scene
that's why we're going to cover the whole thing
with Indian yellow first. This process is quite
simple, as you can see, all you have to do is apply the water to the
different sections in between the tree box or tree trunks and we'll apply
yellow paint over it. That is why I said you
could paint in sections. You didn't have to apply the
water to all of the spaces at first itself because the whole paper
might dry quickly. The only thing that we
have to make sure is, we have to be very careful that our paint does not
flow to our branches. But randomly, if it does indeed flow to some places or the
branches, that's fine. As you can see, for
some of my trees, it has gone on top of the trees. That's all right because we
will cover that later on. There now, I have added
my Indian yellow. Then the next color I'm going to take is Alizarin crimson. We will be adding the clouds
with Alizarin crimson. Just a few clouds
in the sunset sky. With your brush, drop the paint onto the yellow that is
on top of the yellow. But again, here, we're going
to do it along a line, but then by skipping the
region of the trees. You can see I'm
applying the paint and then I'm continuing
on to the next side, but on the same line but without painting
on top of the tree. That's exactly what we're doing. We'll just draw up your
paint at random places, just in the shape of clouds. We're trying to create a gorgeous picture here
with a nice background. Now, I have switched to
my size four brush and we're going to pick
up Indian gold and we're going to add
some bushy background. This is just like
the other paintings that we have done
in this lesson. We will just add them
in the background. If you don't have Indian gold, don't worry, you can
also use orange here. Or you can mix a
bit of brown into your orange and you'll
get a nice golden shade. The same way again. Skipping the region of the tree, we're going to apply the paint. Because our sky region or
the background is wet, we would get a nice
blurred effect because the paint
is going to flow, but not a lot because
it's not too wet. Make sure it's not too wet. Apply it in some random shapes like a bush, as you can see. So there. Now, I've applied the Indian
gold and I'm going to run on the top of it
with burnt umber. The next shade that
we're going to use is burnt umber and we're going to paint it on top of the Indian gold
that we just did. Adding two colors like
this will give it a nice variant look
because if you look at it, it's got that golden touch, and then it's got that
dark-brown touch, which makes it look interesting as if the
top part is glowing. Also this burnt umber is
like creating shadows to our bush, so there. Now, we wait for the
whole background to dry, and once it has dried, we will paint the foreground. The foreground part
is where the snow is and we have to be painting
the snow properly. Again, here we're going to
skip the region of the trees. In between the trees, apply the water carefully, just the different sections in between the trees
but all the way towards the bottom, there. Then we're going to add some reflection areas
onto our snow first. Pick up some Indian
yellow and drop it onto the wet paper at random places, just few lines here and
there. That should do. Then now, I'm going to be making violet like I've been doing
in the other projects. First you can start applying the blue and then
we're going to mix it with a little bit of carmine to create a nice
blue violet shade. More of blue because
I want it to be like a blue violet shade. This is what we're going
to paint on the snow. Again, skipping the
region of the trees, we're going to apply this. You can also use violet
directly but I prefer to mix my blue and red together to create a nice shade
of violet always. Carefully along the
different sections and along the lines
of the snow that we have added and very careful to skip the regions of the
yellow paint as well because violet mixed with yellow would give a brown shade, so we have to avoid the areas of the
Indian yellow as well. I don't need to be more
prominent with the bottom side. Lighter towards the top and more prominent towards
the bottom side. I'm going to pick up a bit
more of Indian yellow and try to make those shades
that I applied, that is the reflection
areas a bit more prominent. We'll just drop in some
more Indian yellow. But again, make sure that you do not apply too much on top of the violet because it might
turn into a brown shade. Then we'll pick up the violet again and try to add
in some strokes. Now, before moving
onto the trees, we have to make sure
that the whole thing is dry because we don't want the paint on top of the trees to be
spreading all around. I'm switching to my
smallest size brush. We're going to add
our birch trees, that is those trunks that is
just a pencil sketch now, we're going to transform them into beautiful
looking birch trees. All we're going to do is pick up some burnt umber and we're going to apply it onto the paper but in small lines on the trunk, that is from the left and the
right, just totally random. Some lines you can extend it all the way
towards the bottom. At the bottom, I'm trying
to create a nice base here. The rest of the areas you
can see what I've done, just few lines on
our tree, that's it. Then towards the left and right we'll create
some small branches. This is totally random again, the branches are just where
I feel I want to add them. There is no specific rule, just at random places. Some lines originating from the tree to the left
and to the right. We're going to be
repeating this process for all of the trees. What I'm doing here is, you know when I painted those yellow and red
strokes onto my sky, there might be regions
where my paint actually flowed into
the tree region, so those are the regions that I look for and
those are the regions that I apply the brown paint and some other extra
spaces as well. This process here, I'm trying to cover up the regions where my yellow paint float
into the part of the tree and I'm covering
it up with the burnt umber, and then adding few branches. For the next one, for example, you can see I've got a lot of yellow paint
covered of red. I'm painting the
whole thing with burnt umber because our
tree cannot be yellow. It's a sunset. That's
part of the sky. It cannot be yellow. That's why I'm covering the whole part of the
trunk with burnt umber. Any spaces that are left white, I'll leave it as white itself but if it's got yellow on it, I cover it with burnt umber. It doesn't really have to
be birch trees all over. Since I had to cover the whole of this tree with burnt umber, I'm turning this into
a different tree. That's why I added a
whole bigger branch to the right so that it
looks like some other tree. It doesn't have to be a forest completely filled with
birch trees itself, you can transform it to
have some other trees in the forest as well. That's
what I'm doing here. Look for areas where
you paint has spread, that is the yellow paint, and then cover it up with burnt umber by adding
small streets of lines onto the tree and
then adding branches. But if you're really
careful and none of your yellow paint has seeped
into the tree region, then just add these
burnt umber strokes at random places by leaving a lot of white spaces in
between the trees. You can see clearly
how I'm doing. Just some small lines, tiny detailing onto the tree. On some areas I
extended to cover the whole of the left side or the whole of the right side. Then towards the
right and the left, I'm adding few branches. All of these branches
don't necessarily stop them from the left corner and the right corner itself. Try starting some
of those branches from the center portion
of the trunk as well. That is the middle part of the trunk towards
the outside because they are not going to be exactly from the right and
the left itself. Some of the branches start from the middle
towards the right, and some start from the
middle towards the left. This process is
going to be entirely similar for all of the trees. Just enjoy the process. It's really fun to
add the branches. I don't know why I really love adding branches to my trees. All of these branches, they do not have to be in
the same exact size as well, so use them in varying sizes, in varying directions, add
multiple branches if you want. It's totally up to you
how you want to do it. You can also see these two
trees towards the right I've added less of
the brown spots. It's just totally random, totally up to you how
you want to add it. If actually you want
to cover the whole of the tree with burnt umber
as well, that's also fine. It would just turn into a
different forest. That's it. That's why it's going
to be totally simple. Just try adding the
random strokes. Once you've finished
with the trees, try adding some twigs and more branches of grass
at the bottom as well, because we don't want to
leave it as entirely blank. To make this painting
interesting, it's better if we can add some random twigs at the bottom. Just some random twigs and branches at the
bottom on the snow. I'm trying to add most of them
towards the trees because I do like my tree branches
standing alone in the snow, so I try to cover it up. But you don't necessarily
need to do that. You can just add
at random places, small lines and small branches. These could be the grass
coming out of the snow. Then I'll mix the violet
again and we're going to add some lines onto our snow to
depict that higher ground, that is the different
heights of the snow. As I said, this whole thing was a hilly region and different heights of the
snow where the trees are, they're not on the same line. We're going to do
that with the violet. You can see I've added some small curves and lines
extending on my violet. Because it's a wet
on dry stroke, I'm using water on my brush to just spread it a
little so that it looks more original and you can see now it looks more
like a hill now. There, our painting is complete. It's looking really
beautiful; isn't it? This is my most favorite among
all of the eight projects. Here it is, guys. I hope you like this one. Thank you for joining
me on this one. I hope to see all
of your projects.
11. Project 8 - The Glowing Shadow: Welcome to the next
class project. Here again, this is the other sunset
project which is one of the longest,
slightly only. The colors we need for this one, are Indian yellow,
permanent red, or you can use Alizarin
crimson, orange, cobalt blue, indigo,
Indian gold, burnt umber, and Payne's Gray. If you don't have Payne's Gray, you can also use
black, so don't worry. The same for Indian gold, you can use orange instead. You do not need exactly
the same colors that I'm using here. Here is the paper that I have taped down on all
the four edges. Starting with our pencil sketch, again, for this one, we're going to have
a horizon line somewhere just below the
halfway point of the paper. Then towards the center, we're going to have a small sun and right in front of the sun we're going
to have our tree. You've already seen
the picture how it is. I will also upload all of these paintings to the
reference section, so you can reference that to draw your
pencil sketch as well. But you can just
follow along and add these pencil sketch
with me because this whole process is real
time, you can see it. Add these branches or the
main trunks of the tree, and there, that's all
our pencil sketch is going to be because
the rest of it we're going to be doing
with our paintbrush. Let us paint the
sky region first. I've taken my flat brush, I'm going to apply water to
the whole region of the sky. Again, evenly, without any large blobs of
water on the paper, evenly apply the water. There, so once you have
started applying the water, I'll switch to my size two
more brush and I'm going to apply permanent yellow or
Indian yellow onto my paper. I'm going to be painting in
a semicircle manner now. This is quite different from the strokes that we
have done till now. We were doing straight lines
strokes and random strokes. This is going to be in a circle. Add the yellow in a
circle and you can see, I've skipped the
region of the Sun, but my paint is
definitely going to flow into that region
because I have not mastered. You will see in a while the holes and region is
going to turn yellow. That's alright. Apply the Indian yellow or
permanent yellow first. Then right next to it, adjacent to it, we'll add the next shade, which is orange. I'm picking up a nice tone of orange and adding it
again in the form of a semicircle going outward each time when I'm
applying my stroke. You can see the nice, beautiful blend of the orange
and yellow that I've got. Then the third color that
I'm going to be taking is crimson or permanent rose. Or even you can use Alizarin
crimson or red instead. We will continue on to the semicircle going
outward each time. Make sure to take
a nice consistency of paint in your brush. Apply the paint outward. Then towards the edges, I'm going to be adding
a little bit of blue so that we can turn our painting into our
violet in the corner. Applying the blue
right next to the red, in both the corners. Now you can see
the left side and the right side is uneven. I'm going to pick up more of my Alizarin crimson and
apply to the red side. That is towards the left. I'm going to add more layers on top of this so that the
whole thing turns vibrant. I will also apply
on top of the blue because I do not actually
want blue on my paper. What I want is I want
it to turn violet. This is the reason why I
applied the blue paint. But I'm going to try to
make this thing vibrant. I'm reapplying my orange. You can see now
I'm reapplying it and it's turning into
a nice vibrant color. I've added the orange, so let's add the
yellow again now. As I've been saying,
the key thing to have your paper stay wet for a
longer duration of time is to keep applying the paint multiple times in order
to get it vibrant. Don't stop your
paintings midway. That is, let's say you reapply the red and then
you reapply the orange, but if you stop there, then your yellow part
is going to look uneven because you did
not reapply the yellow. Now I'm using my tissue to
create the space of the sun. Just use the tip of your tissue, roll it up at the corners, and then dab off that part
of the sun that we want. Then create a round shape
around it, so there. Now the sun region is
perfect, isn't it? We're not complete yet. Let's go outside area and cover the whole thing and make it
into a nice purple shade. More of the Alizarin crimson
or carmine and there, so you can see now I've covered the outside and it looks
more like a purple sheet, isn't it?This is the reason
why I applied the blue. If you want to take it
to more violet shade, you can add a bit
more blue and then the carmine on top of it. There, that's it. Now, we're going to pick up a nice burnt sienna
or burnt umber shade. We're going to add the
background bushes. This is exactly going to be like all the other projects where we have added the
background shape. Those blurred effects
that we created. This is exactly
what we're doing. Use the burnt umber and just add some random
strokes onto the wet sky. The background is still wet and we're working on the
wet-on-wet technique. Drop some paint and when we
approach the sun region, we have to turn it lighter. This is exactly like
the other project where we did the sun glow. We're going to create
the glow here again. That's why I've used orange. I'm going to mix it up
with a little bit of brown so that I get
that nice golden shade. You can go ahead and use
Indian gold if you have that, but I'm just showing
you here how you can create that Indian gold. That is by mixing orange
and brown and then using that same color to apply
right near where the sun is. You can see my blend here. I've mixed the
orange and the brown together and then apply
it towards the center. Then towards the right again, I'm reapplying the
burnt umber itself. That center part
is where the glow is and that's why we
made that lighter, that area for the
bushes it's lighter. Make sure you blend them nicely. We don't want to see
a clear separation between the orange bar
and the brown bar. Now, we don't need to wait
for our background to dry. For this painting,
we're just going to paint the foreground as well. We're just going to
apply the water. When you apply the water, you'll see that your paint is spreading towards the bottom, but that's all right.
Let it spread. Then we will pick up some
orange and we'll apply right below the horizon line and also add some extra lines. This is again going to be the deflection on the snow
that is from the sun. It's glowing on the snow. That's what we're
trying to create. Then we will take indigo. Here it is like almost
the sun has set, and it's nearly getting dark. That's why we're going for a darker shade, which is indigo. We're going to apply this indigo in the other regions
of the snow. In-between the orange shade
that we have applied. Make sure to not touch
the orange too much because you might turn it
into a dark brown shade. We have to make sure that
the indigo is darker towards the bottom and
lighter towards the top. This is the region why we
wet the paper because it would create a nice
blend always that is the wet on wet
technique there. Now that looks really nice. Isn't it? We're just trying
to create a nice blend. I'm just running my brush
over the orange and the indigo to create an
even blend between them. Next, I'm taking my size 4
brush because I want to create some thin lines and
we have to make sure that there is not a
lot of water on my brush. I've dabbed it on the tissue
and remove any excess water. There's only paint now, and on the wet paper
that is the paint that we have just applied
is wet we're going to draw some lines. This is the line of the
reflection of the trees. Not the reflection exactly, it's the shadow of the trees. Here again, we will follow the perspective method where
the shadow is going to be thinner towards the tree that is further away from
us and near us, it is going to be thicker. Make sure that lines are
thicker towards the top. Towards the top, I
mean the branch, so it will be thicker towards us and thin at the point
where it join the tree. Then pick up some more
indigo and just run over your reflection and
shadow so that, you know it can be looking
like a seamless blend. After that, we will wait for
the whole background to dry. Now everything has dried and we're going to
paint the trees. I'm starting with
Indian gold first. As I said, if you don't
have Indian gold, mix a bit of orange
with burnt umber, and you'll get this
nice golden shade. We're going to add the trees. You can see right towards
the center of the sun, I have not joined the tree. I've left a slight gap. This is because of the
glow in-between the trees. Then towards the bottom, I'm adding with burnt umber. Only where the sun is and a little bit
towards the outside, we have the glue. That's what we paint with Indian gold and
towards the bottom we add burnt umber and
towards the top as well. Towards the bottom part, make sure that you are joining the trunk of the tree
to the shadow exactly. In the same line as where
the shadow is starting, because this is actually the
shadow of the tree itself. It has to match the exact point. Towards the center, if you want, you can join the tree by using a very lighter
tone of yellow, but it's okay to leave
it white as well. Then the branches that are
closer towards the sun, we will add them
with Indian gold. You can see just some few lines towards the left and the right. Then I'm dropping some
smaller dots and laces. Some tiny drops of paint. I'm trying to create like a triangular shape
around the tree. My branches are getting
smaller as I go towards the top such that it tapers
to a point at the top. Like I said, it's
almost like a triangle. Imagine a triangle and
try to paint inside it. But then don't be
like you want to exactly go with the
line of the triangle. Some of the leaves can go
outwards. That's alright. Because this is a tree, it
has to be totally random. Then further away from the sun, that is towards the top region, we will add more darker tones, so on top of the already existing Indian
gold and apply burnt umber. These tiny small dots. I will add on the top. I want the top region
to be more darker, so I'm going with the
darker shade on the top, which is Payne's gray. You can also paint
with black instead. That's only towards
the extreme top. This is the three
color variation that we're trying
to bring in here that is fast Indian gold towards the glue
or the sun area. Then we added the
next color variation, which is burnt umber
right next to it, around the area further away
from the sun on the tree. Then Payne's gray or black,
whichever you are using. We're going to be
doing the same for the other trees as well. But as you can see,
the other trees are further away from the sun, so you don't need to
create a lot of blue area. You can go with just
the two shades. Here I'm using burnt umber and I'm adding the tree trunks. Make sure that each
of the tree trunks are right where you
added the shadow. Don't forget that. The process of drawing the trees here is fairly repetitive. We're just going to add
some branches to the left and the right and then fill
them up with some leaves. Again, like a conical shape
or like a triangular shape on the paper and just cover it up with some
small tiny leaves. Nearly for all of these, you can go with
burnt umber itself. I'm adding this one on the left, immediate left of the sun, and the immediate
right of the sun. I'm going to add it
with burnt umber. Then all the other trees, all the way to the left and
all the way to the right, I'll add it with the darkest
tone, which is Payne's gray. Or you can go with
the black shade. Do any of the leaves that
are closer towards the sun, I will add some Indian gold. What I'm trying to look
here is, you know, those semicircular region where we painted with the yellow. The region where
there is yellow, I add tiny drops of
Indian gold there so that it can add that
glow to each of my trees. Then the rest of the areas, I fill them up with
burnt umber itself. Here, this is the tree
that's almost towards the left and it is in the red region of our
semicircular background. I'm adding it with Payne's gray because it's going
to be really dark. It doesn't have the
glow from the sun. The same principle
we're going to apply to all the trees
towards the right side. I'm applying the
burnt amber here. But then some of the branches of this tree is towards
the yellow region. Few of those branches, I will add some
Indian gold shade. Then the rest of the
areas with burnt umber. You don't have to
be stressed about the little amount of detailing
that we're adding here, we just have to use the tip of our brush and drop in the paint. Just tiny dots I'm making
to make those leaf shape. It's totally random. It doesn't have to be any
exact shape we have to make, it's just some tiny small
lines that I'm adding here. There. Now I've picked
up the Indian gold because I want to add in those little details right
next to the yellow region. Now all the trees towards the right I'm adding
with Payne's gray. Then towards the base
of each of our trees, we just want to add few lines. I'm adding them with
the burnt amber itself. You can try blending them with water so that those lines do not seem odd standing out because this is the
wet-on-dry stroke. It would stand out a lot. First apply the stroke and then just try blending
them with water. That's pretty much it. Your painting is complete. This one is gorgeous, isn't it? I hope you like it. Here's the final picture. Thank you all for joining
me in this class.
12. Thank You: Thanks to each and every one of you who joined me in this class. I hope you liked all of the
eight winter sunset projects. If you attempt any
of these paintings, don't forget to upload them to Skillshare as well
as social media. You can find me in Instagram
as colorful mystique. See you all in my next class.
 Geethu Chandramohan, Colourfulmystique - Top Teacher, Artist