Transcripts
1. Intro: Hi, my name is Min. I am an illustrator and a comic
artist living in Belgium. I create illustrations
for books and magazines. I make comic books, and I also use to
make animations. During the process of making
animations and comics, I believe character design
is an important thing. So today, I'm going to share five different easy
ways to guide you, create your own
character designs. The five mazels I share
with you are simple, even relaxing ways to draw. As you learn these five methods, you don't need to be
an expert in drawing to create unique and
interesting characters. In fact, my experimental
methods will help you accidentally create
funny expected designs. Whether you are a beginner,
practicing comic art, creating characters for a
story or just drawing for fun. These techniques will inspire new ideas and make
character design easier.
2. Tools: We are going to do
five exercises. For each exercise, basically, the tools are different. But I think the muster
half your sketchbook. We in your sketchbook. You also can use
papers also fine. And a pen can be a technical pen or color
pencil. Either is fine. And some colored tools
like colored pencil, M's a bit expensive. It's a fiber colored pencil. But you also can use some but this one is I get
from art supplies. It's also not expensive one. The colored pencil, this
is also good enough. If you don't have
colored pencil, you also can use watercolor
or just use both of them. So my watercolor
is Winson Newton, and this is a solid watercolor. You also need a brush if
you decided to use it. And we also need scissors,
do and magazine. We don't have a limitation for those kind of art materials, but the more art
materials you have you would get more ideas during doing those exercise
through those art tools, and your drawing will become
more complete and richer. The reason why that I suggest
to use your sketchbook for this exercise
because this is also a way that trying to
finish your sketchbook. I believe a lot of
people, including me, even I am an artist after
we bought sketchbook, sometimes we just
don't really use it, and I think it's a waste. So as long as you have the opportunity to doing
some drawing exercise, try to use your sketchbook, and then you would just
finish this sketchbook. You are using sketchbook, just to make sure
it's a five size. This is a five size sketchbook. If it's too small, then
it will be a little bit harder to finish
this exercise. At least A, A four is
also good. Let's start.
3. Exercise 1 : Blind Contour Drawing Step 1: Okay, we are going to do a very fun, very interesting exercise. This drawing exercise is
called blend counter drawing. So I first learned
about this exercise. It was once I went to an
art institution in Belgium. And this art institution, they specific teach adults to draw or do some art exercise. And because all of those adults, they don't really
know how to draw. So all of those art exercise
were very experimental. So even you don't
know how to draw, you still can enjoy
drawing a lot. And I think this is a
very good exercise for beginner to train your lives
and to make characters. So I think we can
start by drawing a self portrait
with this exercise. And in this exercise, it is better to go to a place where there
is a mirror to draw. So you can go to a bathroom or any place where there is a
mirror, you can draw there, or you also can get a photo of yourself in your computer
or in your iPad pro, and you just open the photo and look at the photo
and to draw it. So the rule of this
exercise is when drawing, only look at your face in
the mirror or at your photo, not at the paper. And also, when you draw, try not to break the lines, try to connect them. So I have my photo
in my ipad pro, so I'm going to draw it. You can see I placed the photo next to my painting
because I wanted to let you clear see how this technique makes the characters look
abstract and interesting. But I still can see a
little little bit of the paper will drawing this
blend counter drawing. So I really suggest
when you are doing it, try to do it in front of
the mirror or try to do it, place your photo in front of you that make you cannot
see the paper at all. Seeing the paper can create dependence, I really understand. But I think this method
requires courage. I used to taught some students that they are afraid of not seeing the paper because they were afraid of
making the mistakes. What if I do something wrong? What if I made the nose in another place in
a wrong position? What if I draw the face wrong, they were afraid to
make the mistakes, so they tend to
pick at the paper. I really really
suggest not to doing it because this exercise is trying to let you to improve your observation
skills just by your eyes. I understand people are
afraid of making mistakes, but in my opinion, mistakes can create
fine results. You would never know how
mistakes changing in your drawing that would give you a very exciting gifts, actually. So now I finished my blend counter drawing
of myself portraits. I also did some extra blend
counter drawing here. So this one is the half body of the blend counter drawing, and I also did one
full body here. And this one somehow
it seems like old man. It's me, but it
seems like old man. I think it was because when I was doing that blend
counter drawing, I couldn't know the distance of the eyes between
the eyes and the hair. So the forehand become
a little bit long here. And this is also another one that I was
standing in front of a mirror, and I did this one blend
counter drawing here. And also, this one, I did it
from of some of my photos, and this also looks
like old man. And this is a full body
blend counter draw here. So while you're doing this, I think you can imagine try to imagine that your pen
is touching your face instead of drawing on paper
and try to let your hand be guided more by the sensation of touch
than by what you see. So I think it's a really good
way of trying to learn how to use your hand with the lights and how to focus
on what you see. It's kind of like
meditation for me.
4. Exercise 1 : Blind Contour Drawing Step 2: I think all of those
portraits are pretty funny. So next step we're
going to do is we look at all of those portraits and try to find some
interesting things, interesting characteristics, and try to use all of
those characteristics or unique way to draw and try to use all of those in
our character design. So for example, the
first thing I noticed about all of those
portraits is their nose. It's kind of interesting. Like this nose is
like, only a triangle. And this nose is also this
drawing ways a rectangle. It somehow it looks like
a childish style joining. So I think we can try to use this unique drawing way
in our character design. And also, another thing I
noticed is the distance between nose and mouse is always a little bit far
away from each other. Like this one also the mouse is here and
the nose is here. They are a little
bit longer distance. I think it was because
when you draw, you couldn't really find the right location
of each features. And there are always a little bit miss silent with each other, but which makes it very funny. And also make this
character a little bit dorky or a
little bit adorable. So I think this kind of design, we definitely can use
it in our drawing. And also another
thing I really like it's the texture of the line. Like when I draw, I tend to
do the line like this and this kind of texture of drawing
hair or drawing clothes, we definitely can use it. And also, I noticed when I doing the blend
counter drawing, I tend to draw the body
in a whole line together. And I really like this
kind of owing way where the legs are very thin and
the fits are very big. Like this kind of contrast, we also can try to
use it in our design. Okay, now we can move
to the next step, which is we use all of those
blend counter joining and try to build up a new
character design from ourself. So you can see, I
learned from blend counter drawings
and I use this kind of style to add some textures and different characteristics
to my character. I hope you can also enjoy the blend counter
drawing exercise. And from this exercise, you can also get some
unexpected results and using this results method to
your own character designs.
5. Exercise 2 : One Line to Character: Okay, let's start practicing drawing character in a
very, very simple way. All you need is just a
pen and you sketchbook. First, let's draw a very
random line in our sketchbook and let the lines cross each other a few
times when you draw it. So we can do, like this. Just feel free to go with
the flow to draw this line. And we can write the line
to cross a few times, and you can draw across this
sketchbook across the page. While we're doing this, you also can listen to your
favorite music to relax and to draw
with the music. Okay, now we have a line. Then let's look at
this line and you can see where the lines
cross into a shape. Like, here is a
shape and here is also This is a very
big shape, actually. And here are a lot of
circles or some rectangles. And what we're going
to do is just we try to think of this as a
character's face or character's body and try
to use all of those lines and those shapes to build up
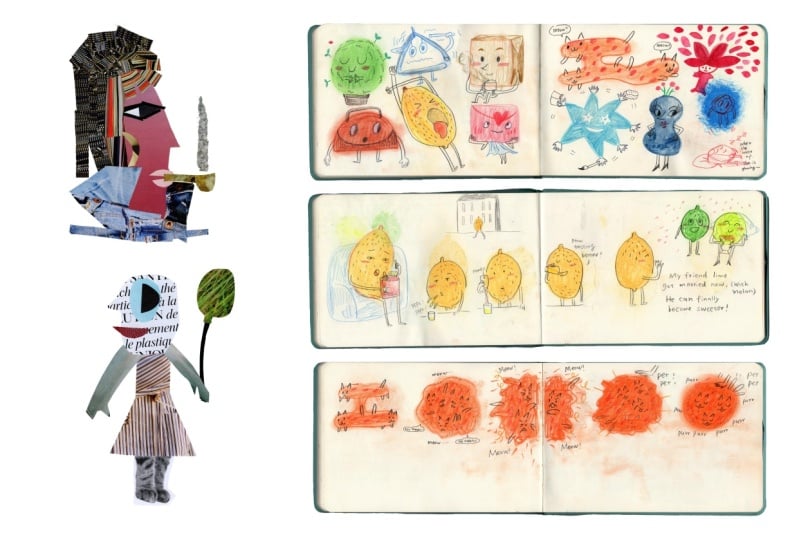
many different characters. For example, we can see this
oval on some people's face, and then we can add
some eyes to it. Will you draw? If you want
to reach your character, you also can just add
some item to reach them. You also can just add some extra lines or extra
shape to make it seem better. You don't have to be
imprisoned by just this line. You don't need to be just like I only can use
this line to draw. You can add more
other shapes online, but it still needs
to be based on this main line you draw
to create character. Next, I started to relax
and draw these characters. The important thing
is just to feel chill and subconsciously draw
whatever comes to your mind. Don't judge whether what you
are drawing is beautiful or interesting because
this is just an exercise. As you draw these characters, you can go ahead
and fantasize that each shape is a
character's face or body, and you can go ahead and
exaggerate localized bodies. For example, here, I drew the face big and the
body is crooked. You can try to use these irregular shapes to
draw parts of the body, visualizing them as wavy arms or fit a curve like this kind
of graphic transformations. Sometimes you can also draw animals to fill
with this line. I drew some cats, fishes, and flying birds. Sometimes you also can add
tools to your characters. Here I drew a boy holding a
book with cake and coffee. They are floating in the air. After you finish your drawing, you can add colors to it. I choose three colors, green, purple, and
florescent orange. When coloring, try to make different colors work in
combination with each other. For example, I
painted the cat in florescent orange and surrounded
with purple or green. Some of the characters faces, I did it with green
and some are purple. When coloring, you also can just feel relaxed to enjoying
the process of it. Well, here's my finalized
one light character drawing. I really like this
character with a big face and a
cat in her arms. I also like the part where
the boy is holding a book and there is a girl looking at
him and they see talking, and I think there
seems to be a story.
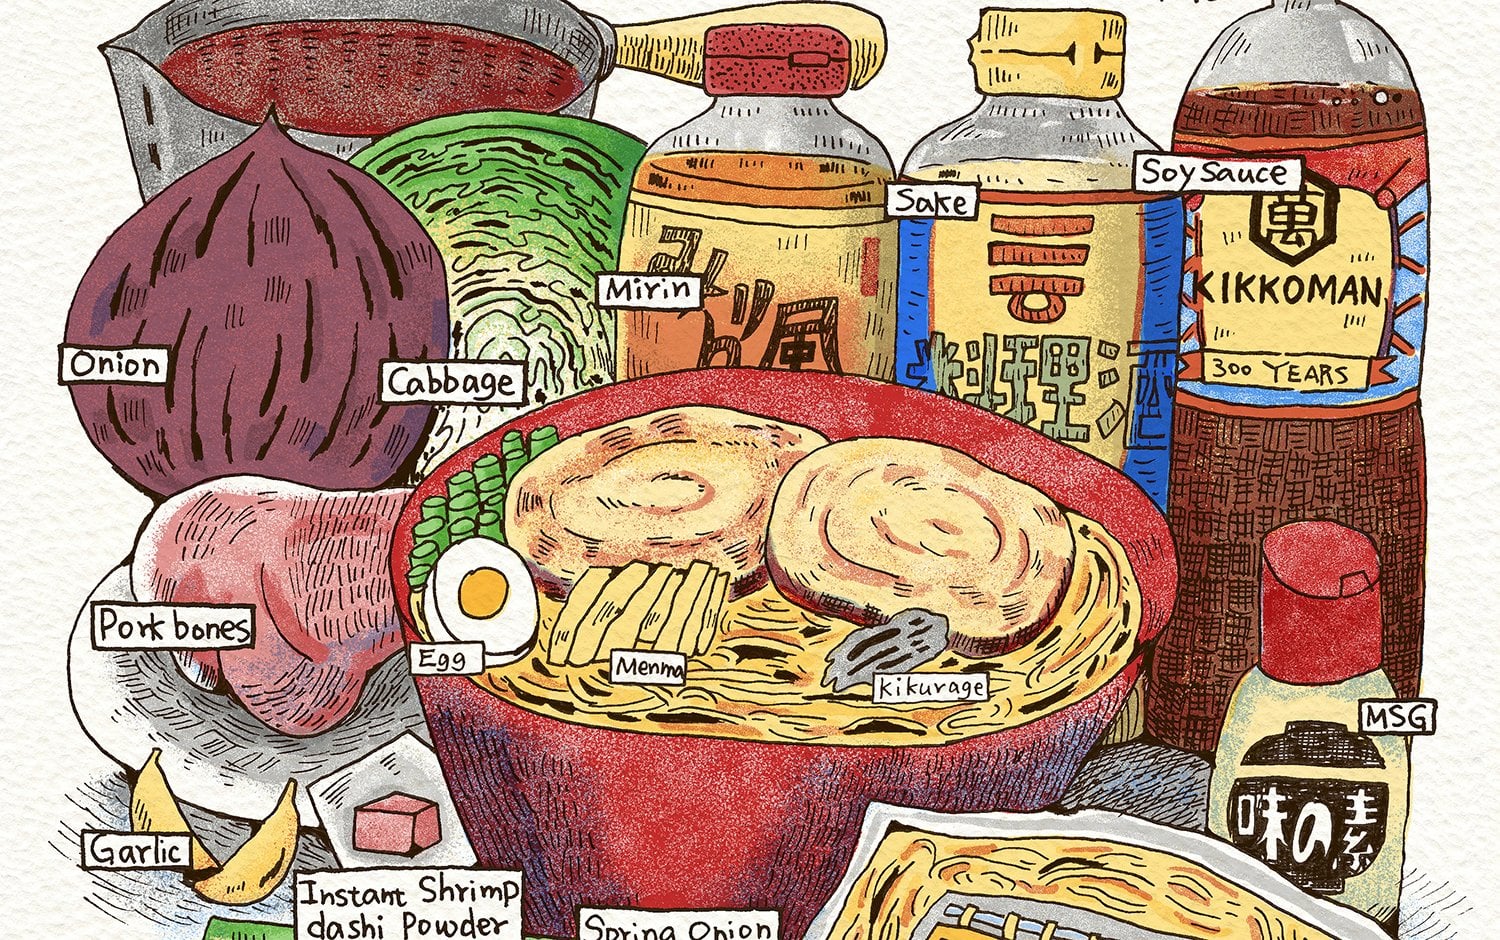
6. Exercise 3: Collage Character Creation: This exercise is a
collage exercise. So we need scissors and glue and magazines or
newspapers is also good, or some prints is
also good because we're going to create many
different characters. So I would suggest some fashion magazines will be nice because there
are a lot of models, a lot of characters
inside that we can use. We can use the faces, or we can use the body part
to recreate new characters. It will be interesting, I think. And also, if you have some nature magazines that there are a lot of
animals photos, also would be fine to create to combine it with those
kind of models together. I don't have a nature magazine, but I can print out some prints. So I printed out some cats, or veil or como, or other animals owls. I think it would be
interesting to combine them together and also some
very unique animals. In this fashion magazine, we also can find a
lot of colors in it. Like, here is a big brow
well, it's a skirt, but there are a lot
of texture on it, and we can use it. We can just cut a shape of it, we can cut a circle of it, or we can just use this couch, this button to
rebuild something. Okay, let's start. As you work on the college, you start to discover
the characters, colors and patterns
that appeal to you. It's a great way to explore the traits you enjoy
enjoying in your characters. For example, I've realized
that I like combining different parts
of characters and animals to create
little monsters. At this character, I merged human hand with multiple legs to form an octopus
like creature. Sometimes it's more fun to
cut out random shapes and college them into a
character rather than just using existing images. For this character, I used a text filled paper for the
face and graphic shapes for the eyes instead
of just cutting out eyes from
another model image. I also enjoy building characters using only
graphic buttons, dressing them in
stylish outfits, having them hold a coffee cup
or even smoke cigarettes. So in this design, this pink face character, I use colorful stripes
for patterns and turned a cutup photo
of a zipper into hair. In fact, I think
this idea of using zippers as hair could inspire
future character designs. It could look really cool. So here are the four
character images I created. I really enjoyed the process.
7. Exercise 4: Shape-Based Character Design Step 1: Okay, let's start practicing drawing characters
in a different way. First, I'm going to draw many different shapes
on my sketchbook. You can draw triangles,
circles, rectangles, whatever shapes you want, you can just draw it
on the sketchbook. And then I think you noticed I have some different art tools. So I have color pencils, and I also have water colors, some pasts, and this
is a tube wood color. I think you also can use
acrylic paint if you want. Okay, then let's start. I think I will use past
first to draw a circle. Yeah, let's feel color. There is one thing I like pestds You always can use your finger to separate those color powder to make it a little
bit soft feeling. You also can add other colour together to mix
them a little bit. And then we can draw a triangle. Just a feel free to
draw it. Relaxing. Square. At this step, you can try to relax and draw the shapes that whatever
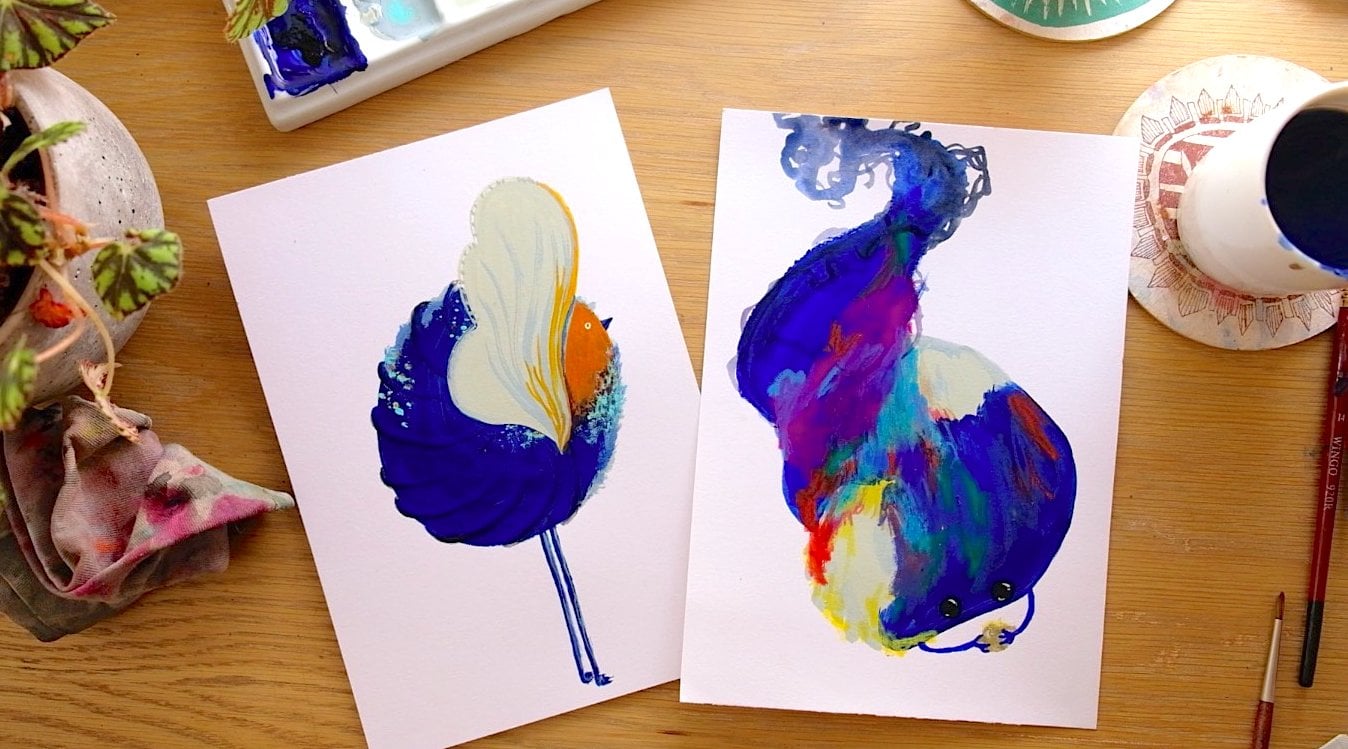
come to your mind. After I finish the
regular shapes, I started to draw irregular
shapes on another page. You can try to let your hands get you to draw
some random shapes. Here I drew some irregular
ovals and the leaf shapes. You can also try to find some things at home
and use them as printing tools to draw your graphic shapes and give your shapes some
special texture. For example, here I used
a piece of tissue paper, which I crumpled into a bowl and squeezed the paint
onto the tissue paper. Then you can just use this
tissue paper bowl to stamp on your sketchbook and you will get some special
blue texture here. All right, I'm done here
for the shapes part. Let's move on to the next step.
8. Exercise 4: Shape-Based Character Design Step 2: Okay, now my sketchbook is
full of different shapes, and I'm going to develop some characters based
on these shapes. So let's look at each shape
and those kind of colors. What kind of thing? What
does it remind you of? For example, the green circle, because when I do it, I use this kind of puzzle stick. So somehow it gives it a little
bit fluffy, soft filling. And this kind of
filling reminds me of some plants like mose or
some Japanese small Bonsai. So I think I'm going to draw a small mousse Oplant character
based on this circle. Another example is
this yellow oval. It reminds me of lemon. And somehow this oval is
a little crooked looking. So I think I will draw a lemon character just
stretching itself. Yeah, I think it will be funny. And also this bran half circle, I think I can draw a bread
or I can draw a purse. So basically, just base it on those shapes and those
colors and try to think, what do these shapes and colors remind you of in your
daily life and try to relate those shapes to
a daily life object that you have seen it and then try to develop as a character. So like I mentioned earlier, I turned this little green shape into a cute potted
plant character, and this yellow oval, I made it into a lemon guy stretching out with
his mouth wide open. If you are not sure how
to draw a certain pole, here is a tip, grab a
mirror and act it out. I really think it helps because when I was doing
comics or animations, when I am not sure about
the pose, how to draw, I already do that action
by myself and set my phone on auto shooting
time to take a picture of it, and then I can refer to
that photo to draw it. I think this is actually the fastest way to
get action you want. The triangles remind me of those musical
instruments triangle. So I made a character whacking itself on the head with thick. This bronze square give me a
delivery cardboard box wipe, so I drew one sipping
on a cup of coffee. For the pink square, I imagined a love letter
character who is in love. The irregular shapes can be a little bit
more challenging, but that's what makes it fun. My suggestion is try to mixing different objects together
and see what happens. Like this orange oval made
me think of an orange cat, so I turned it into three
linked together cats, and when one cat move, all three cats move together. The red flower, I saw
it as flower sprite. So I give it a little
face and the body. This blue star, I
imagined each tentacle as a hand and just went on
drawing a punch of hands. This random deep blue shape, I think it looks
like a vast to me. So I made a vast character. And this last blue blob, I thought it kind of had this
glowing gemstone energy, so I went with that. And that's it for this exercise, turning random shapes
into character designs. It's such a fun way to stretch your imagination and come
up with unexpected ideas. I hope you had fun with it.
9. Exercise 5: Emotion Sketch Stories: Now we move on to
practice how to continue to refine the
character you already created. Before we begin this step, let's do some preparation. I'm going to write down some
emotion words on this paper. Okay, now we have
our emotion words. They are joyful, angry, anxious, frustrated, lonely,
excited, and peaceful. And then we cut it
out, folded it, choose one, and base
it on this emotion, let's create something new. So when you get this emotion
world, you try to think, when people are in this
emotion under this emotion, what kind of dynamics, what kind of movements
they usually do? Or what kind of expressions, what kind of signals
or what kind of environment people usually
have under this emotion. So for example, my
words now is lonely. I think when people are lonely, they are usually alone. They're just staying
by themselves. Nobody comes to talk to them. They might walking by
myself on the street or just sitting next to the beach or sitting
in the couch, eating some junk food, like this kind of thing. So then you can go
and pick one of the characters you've already drawn to show this
kind of thing. So I think lemon
character it's great. And in all those characters, I think this one seems
the most complete one, and you can see a
little bit story on it. And also because lemon is sore. So this kind of
sourness of it makes me think of the uncomfortable
feeling of loneliness. So I think it will be
interesting to combine the sourness and loneliness together in this
lemon character. When you create
scenario also for your character based
on different emotions, you can try to explore multiple ways to
express that emotion. For example, such
now I mentioned, when a person feel lonely, maybe she or he is sitting on
the couch eating junk food. So I just sketched this
lemon character doing this thing and with somewhat
dejected expression. I also imagine him
spitting into a cup since lemon spit is supposed
to be sour, I guess. I drew him ads so
I drew him as a little so I drew him put
a little so I drew him, put a little honey into it into this cup and making
it taste much better. I also pictured him having
a best friend who is a green lime and he
get married to melon. So that contrast made me
think about his emotion. Maybe it's a sour sense of jealousy and loneliness
and he's realizing, Oh, now my friend can be sweeter, he get married and I am still along like this
sort of feeling. In the same way, you can take a defining trait of your
character and combine it with mood words with
those emotion words to explore how
they would change, act, and think in different I love this conjoined
cats character as well, so I decided to draw a
scenario feature in one. The emotion I chose was anger and I started thinking
about how that would manifest because I
guess if for conjoined cats, they must have many troubles
that when one moves, the others often need to follow. And I imagine the situation
where one cat moves in the opposite direction and causing an argument.
They would fight. The f would puff up into
a childe big orange bowl, and then their honor
would come in, pat them and suddenly
they'd become calm again. Like they are purp ple. I think it would be funny. All right. That's it. Those are five simple
techniques we've learned today to help you develop
your own character designs. I hope this process feels relaxing and sparks new
creative ideas for you. I'm excited to see what everyone comes up with during
this exercise. If you complete any
of the exercises, please upload your work.
I'd love to see it. If you enjoy my classes
and curious about my work, please feel free to check out my Instagram for more comics and illustrations.
Thank you for watching.
 Ming Yue, Illustrator/Comic artist