Transcripts
1. Intro: Hello folks and
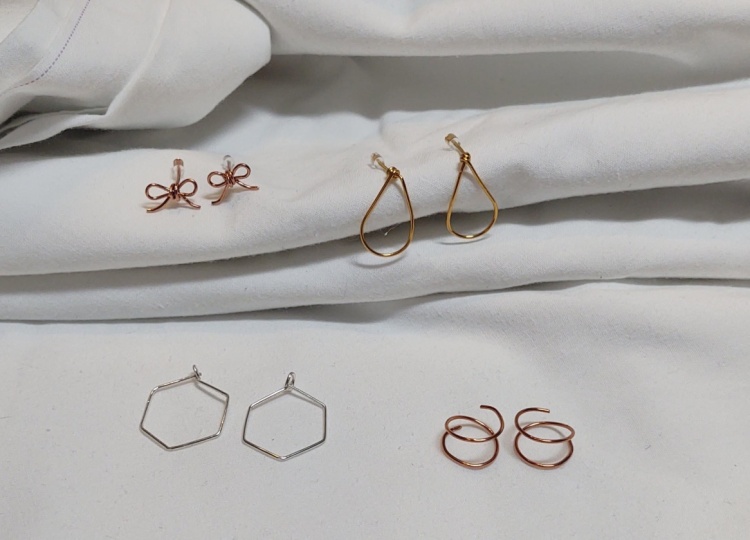
welcome to this class. Here we have four
small wear earrings that we will be creating. As always, I will show you the tools and materials
you need to make each project and have
fun as you follow along and learn to
create each new design. If you liked this class, I'm sure you will enjoy checking out my other
classes where you can find a variety of fun wire
jewelry projects to make. Now let's jump right
into the class and start making jewelry that
is like a wildflower, beautiful, unique and
timeless. See you there.
2. Faux Double Hoops: First off, we're going to be
making the foe double hoop and we will be using the
20 gauge brass wire. In gold. We will be using a pencil to wrap
our wire around. We have a file and
we'll be using the wire cutters who are straight runners and
the needle nose pliers. To begin, we're going
to straighten out our wire using our
wire straight NURS. Begin creating the earring. We're going to wrap our
wire around the pencil. Holding the wire
against the pencil, we will wrap it all the way
around completely one time. Wrapped all the way around. We will bring the long
end of the wire straight down until it is parallel
to where we begin. Here you can see the
long end and the shortened are parallel
to each other. Using the wire cutters, we will now trim that long end until it is the same
length as the first end. With the ends of the wire cut, I will now pull apart the
spiral, spreading it out. We will pull it fairly
far apart so that it is a loose spiral instead
of a tight spiral shape. Next we are going to file down both ends of the earring
with the fingernail file, testing it with your
finger to make sure that you've gotten all the
rough edges smoothed away. With the ends filed. We have one final step to
finish off our earrings. And for that we will be
bending the ends of the wire. So give it a slight
curve so that it matches the curvature
of the hoop itself. The needle nose pliers, I'm going to create a
small bend at each end of the wire so that it matches
the curve of the hoop. This little step it gives
the photo earrings and more authentic double
piercing look. With both ends bent. You can see that they line up with the whole curve
of the earring. Having created the
first earring, we are going to make the
secondary to mirror it. This will be important because of the way the
earrings are worn. With a spiral towards your face. You will put the
opposite end in your ear and then twist it
upwards onto your ear. Before wrapping the
second earring, we are going to place the first during back on the pencil, as this will give us a visual of which way we need
to wrap the wire. For the first
airing, we begin on the left side and wrapped upwards towards the
end of the pencil. For the second earring,
we will begin wrapping on the right side and then wrap upwards to create our spiral. Here we have the spirals wrapped in the
opposite directions. With the wire cutters,
we will now cut off the excess wire so that the
ends are the same length. Depending on how closely you
wrap the spiral to itself, you will need to
tighten or stretch the spiral so that the spacing
matches the first earring. Next step is to use the file to smooth down both
ends of the wire. Now we can use the
needle nose pliers and we will create those
bins on the end of the wire, like the first airing, to create a curve that
matches the rest of the hoop. Now that we've got this
second earring finished, you have created your very own faux double piercing hoops. Now let's head over
to the next video.
3. Teardrop Studs: Next up we will be making these raindrops studs
or teardrop stats, which have a nice teardrop or raindrop shape attached
to the stud post. We will again use
the pencil to wrap the wire on to create the
bottom of our teardrop. We will be also using the same brass wire in 20
gauge as well as our file. And we will use
the wire cutters, the wire straight NOR, and the flat nose pliers. To begin, you know, we always want to start
off with a clean base. So we're going to use the
wire straight runners and smooth out the wire. To begin making the earring, we will start by creating
the post and we will be used the flat nose
pliers to make the post, which is usually from
three-eighths, 2.5 inch long. To create the posts,
all we have to do is hold the end
of the wire in the needle nose pliers and then create a right
angle in our wire. Now that we have made the post, we can begin creating
the raindrop shape. To begin creating
the raindrop shape, we will hold the wire against the pencil to wrap it around it. Depending on whether you want
a long or a short raindrop, will determine how far away from the pencil you hold the post of the earring while you can straighten the raindrop after you've finished wrapping it. If you hold the
post while you are wrapping the wire
around the pencil, you can avoid
straightening it later. We will close off the
teardrop by wrapping the long end around the
post of the earring. Holding the teardrop
shape tightly, we will wrap the long end of the wire to the back
of the teardrop, bringing it all the way
around to the other side. Keep in mind as you
are wrapping that you want the long end
of the wire to go over the top of the post earring and then
pulling it tightly at the end, we will use our wire
cutters and cut it off flush against the
post of the earring. You went to cut the wire short and close to the
teardrop shape so that it is as small as possible while still holding
securely to the post. Now that we have cut
off the excess wire, we will take the flat
nose pliers and tightened the end of the wire
against the post, threatening it from the front. Mu will make sure
that the end of that wire is securely
under itself. And then while we have
the flat nose pliers, we will also straighten
the post itself to make sure that it is nice and square to the
raindrop shape. Now that we have
secured the end, you can see that the shape of our teardrop is a
little bit cricket. If you would like, you can place it back
onto the pencil to round out the end and give
it a more symmetrical OK. Or if you would prefer, you can also use a pair of
round nose or needle nose pliers to do the same thing
of adjusting the shape. Now that we have completed
creating the teardrop stud, we can finish off
the earring by using our file and smoothing
off the post of the earring to make sure
it is nice and smooth and well-rounded so that
there are no sharp edges. When creating your
second teardrop stud. To make a matching set, we will be wrapping the wire in the opposite direction of the first one so that
they are mirrored. So we will simply
be repeating all of the same steps for creating
the first earring. Except that when we come to wrapping the wire on the pencil, we will be wrapping it in the opposite direction
of the first airing. Here you can see the
idea of wrapping the wire in the
opposite direction so that they have
a mirrored look. You probably will
find it helpful to put the first area and
back on the pencil. This allows you to have a more tangible idea of which way you need
to wrap the wire. If you need to put the wire on the left or on the right
side of the pencil. It will also allow you to wrap the wire into the same exact
shape as the first earring, holding the base of the
wire against the pencil so that the earring turns out the same size as the first one. With the wire shape. Do we
want to secure the end? Here I will be using
the flat nose pliers instead of my fingers.
Either way works. The idea is simply to keep
the teardrop from losing its shape as you wrap the long end of the
wire around the post. When you bring them
along and around, makes sure that it is tight
against the teardrop shape. With a long end tightens down. We can now cut off the excess
wire with the wire cutters, cutting it flush against
the teardrop shape. After trimming the excess, we will use the
flat nose pliers to tighten down the
end of the wire to make sure that it
is flat against the teardrop shape and
tight against the post. Now we have come
to the final step of filing the post smooth. Here we have the completed
stats wrapped in the opposite direction so
that they are mirrored. Thanks for watching and I'll
catch you in the next video.
4. Bow Studs: For our third video, we will be making these
adorable boasted. These are made from
two separate pieces which we will then
attach together. We'll again use the 24-gauge
breast wire and the file. And we will use
the wire cutters, the wire straight
news that needle nose pliers and the
flat nose pliers. This stud is made out of two separate pieces that post
and then the bot itself. We will begin by making the bow. Before we start anything else, we're going to smooth
out that wire as usual. Then we will begin
the urine itself by filing the end
of the wire smooth. Using the flat nose pliers, we will leave as very tiny tail at the end of the wire
and create a small bend. Placing the wire in the very
tip of the flat nose pliers, we will bend over. Once we have done this,
we will switch to our needle nose pliers and begin creating the
loops of the bot. Depending on the size
of bot that you want, you will create the loop either closer or further away
from the end of the wire. I placed my pliers about
a quarter of an inch or so from the end of the wire and then began
wrapping my loop. The size of the boat
also will determine where you place the
wire in the pliers, how far down from the
tip that you wrap the wire as you finish
bringing the wire around, the loop should look like a
teardrop and not a circle. We will do the same thing to create the second
loop of the bow. And leaving a small space in-between the tail
of the first loop. We will then wrap
the wire around our pliers at the same distance from the tip as
we did the first, so that the loops
are the same size. We will now create a
bend here to match the first end of the wire
with the flat nose pliers. Usually I just I this up so that the second tail
matches the first. Once we have created
the bend in the wire, we will then take the
wire cutters and cut off the excess wire so that both
tails are the same length. Now that it is cut, we will smooth the
end with the file. Having wrapped the wire
to create the bow, we will now adjust
the shape by pushing both tails up towards
the loops so that the tails of the bow are
a little more spread apart and the shape of the
bow is a bit more narrow. You can skip this
step if you like, how the bot looks with the tails more straight
down from the loops. But I like how they are
spread apart and it gives it a nice dainty,
old-fashioned FOE. Now we will create the post of the earring and
attach it to the bot. Using the needle nose pliers, we will create a bend about three-quarters of an inch
from the end of the wire, about halfway down into the pliers to create a
small bend in the wire. And now we can attach
the bot to the post. The long end of the wire
will become the post. We want the top of the Bot where the loops
are to be upwards, towards the long
end of the wire. And then we will
wrap the short end twice around the bow shape. Holding the boat firmly as you
wrap the short wire around so that it remains perpendicular to what
will become the post. When you come to the
end of the wire on the second time around the
bot will press it firmly against the bow
shape and then use the wire cutters to cut off
the excess wire so that, that n does not stick
up above the bot. Once we have cut off
the excess wire, we will then use the
flat nose pliers to tighten the rap
against the bot. Taking particular care of
that cut end so that it is firmly pressed against the bow and will not
catch on anything. If you need to, you can use the file to smooth
that end down. Continue tightening
and squeezing the wrap until the bot no
longer twists within the rep. Then we can create
the post for the stat. I'm going to flatten
the wire so it's all flat perpendicular
to the bot. Then I'm going to cut the post three-eighths, 2.5 inch long. Then using the flat nose pliers, we're going to make
sure that the post is straight and
perpendicular to the bot. Once that is done,
we can then file the post and finish
off the earring. And now all you have to do
is follow these steps again, creating the bow and the post
of putting them together. And you will have created
your second boasted. Now I'll be seeing you
in the next video.
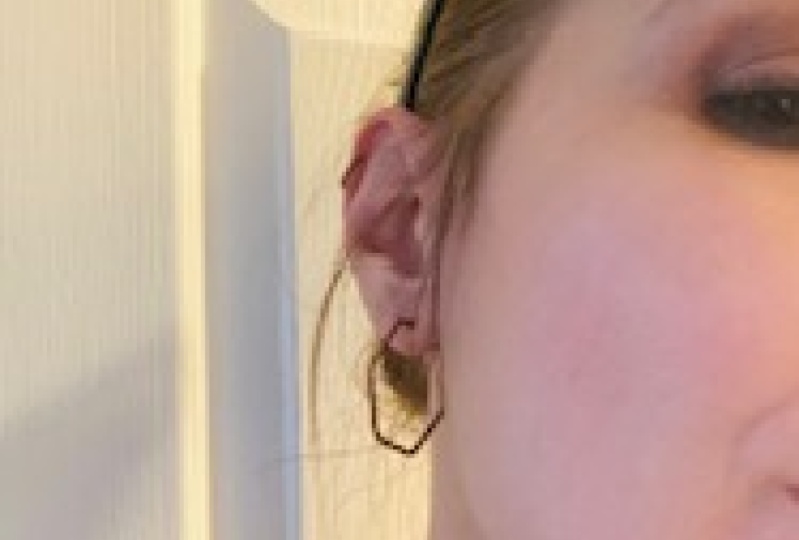
5. Hexagon Hoops: For our final video, we will be making
these hexagon hoops, which are a fun twist on
the classic who shape. These hoops are worn by
twisting the posts to the side, putting it in your ear, and then reinserting
the post into the loop. We're going to continue using
the 20 gauge brass wire. We have our file and the tools we'll be using
are the wire cutters, bar straight enters,
the needle nose pliers and the flat nose pliers. As always, we're going to begin by straightening the wire. Next we're going to file
the wire because this is where we are going to
begin by making the post. Now that we have filed the end, we can create the
post of the earring and we will use the flat
nose pliers to do this. The post of the urine will be about three-eighths
of an inch long, placing it in the base
of the flat nose pliers, I will create a slight bend in the wire that is not too tight. I have used washi tape to
mark the place where I want to bend the
sides of the hexagon. This helps me to make sure that every side of the hexagon
is the same length. Placing my wire underneath the first bin where
we created the post, I will create another
slight bend that is not too tight and create another side of the hexagon continuing around until
we have six sides. Keep in mind that the post
counts as one of the sides. Now we have created the hexagon. We have all six sides
counting the post as a side. Now we will create a
loop at the back of the earring into which
we can place the post. Using the needle nose pliers. We will now create a
loop at the back of the earring, including the loop. Once we have finished it, that last side should be the same length as
all the others. Placing the wire in
my needle nose pliers about a quarter of the
way down from the top. We're first going to
bend the wire 90 degrees in the opposite direction of which we will then
wrap the loop. This little trick
helps the loop, or any circle that you create to be centered over
the starting point. Bringing the wire all the way around to close off the circle. We will then cut it off
with the wire cutters. Once we have cut the excess wire will take the
footnotes players in flattened down that circle so that it is alpha and tightened. And then we can insert
the post into the loop. Having finished the loop, I'm going to use the
flat nose pliers to straighten out and tighten
up the shape so that it is a more uniform hexagon shape where all of the sides are equally bent at the same angle. Then we will also
straighten the hoop by using the flat
nose pliers across the earring to make
sure that it is all straight and nothing is twisted. Repeat these steps for
the second earring and you will have created
the hexagon hoops. Thanks for watching, and I
hope you enjoyed this class.
 Katrina Anderson, DIY wire jewelry and craft tutorials