Transcripts
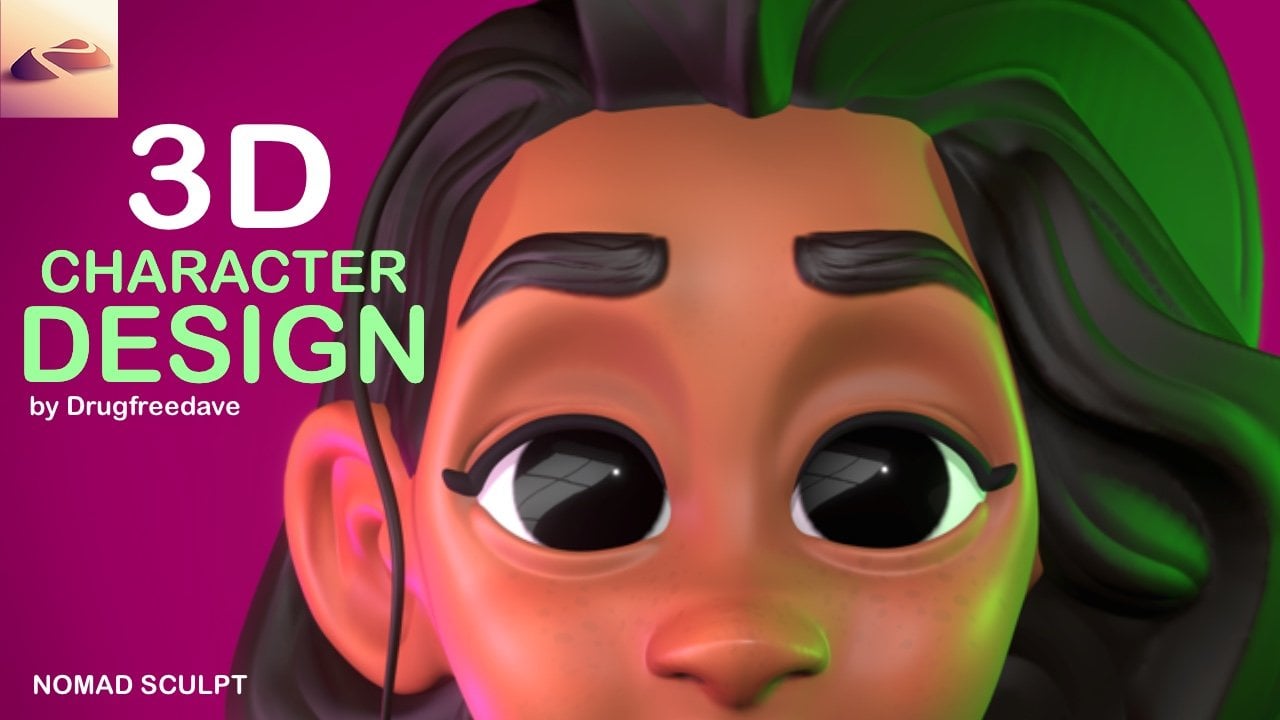
1. 3D Sculpting for Beginners: Intro: There's no better time
to start learning three D. Welcome to Three D Sculpting
for Beginners. I'm Dave Red, a
digital artist and content creator based
in Brooklyn, New York. And today we're going
to dive headfirst into three D Sculpting
with nomad Sculpt. Now you might be completely
new to three D sculpting or you might have
some experience with three D, but just
not with nomad. Or you might want to
start resin printing, which I love, resin printing and airbrushing and
all that stuff. You might want to
start designing your own video game characters. It's available on both
IOS and Android tablets. I sculpt on the subway
downtime at work on a plane. That's one of the
greatest advantages of nomad sculpting it. Being mobile is you don't have to be tied down to a computer. So today we're just
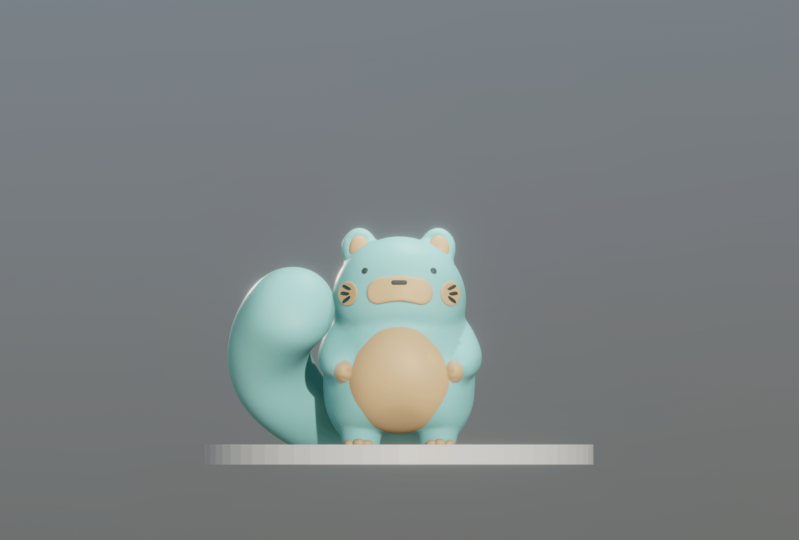
going to sculpt a basic three D
character from a sphere. Everything starts
with simple shapes. And once you learn to build everything up to what
you want it to be, then you'll just
slowly start to make more complex and more
detailed sculpts. So I never thought
that I would get into three D sculpting. It just always seemed way too
inaccessible, too complex. That all changes with nomad and hopefully that all changes also with the way that I teach. I'm an artist first
and foremost. I'm a traditional artist and
digital artist. It's good. So when I teach three D, I teach it in a way
that I would want to be taught in a way that seems
easy for me to learn. Click the link below to jump to the next course on skill share, and I look forward to
seeing you in class.
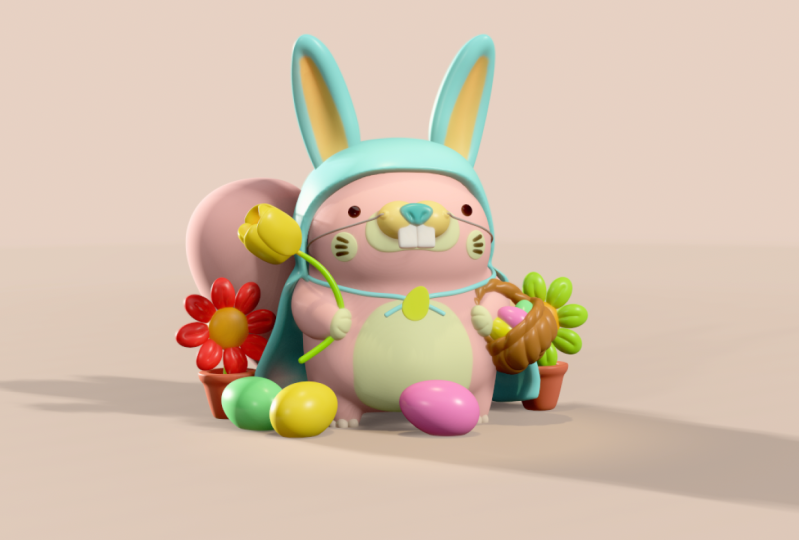
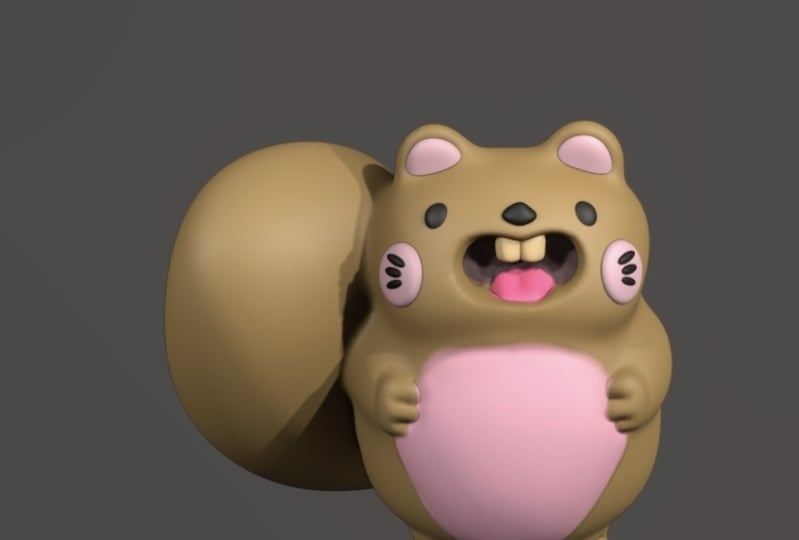
2. Class Project: So welcome to the class project. I keep my class
projects very simple, very loose, because I want it to be fun and I
want you to learn. So we're going to go
through and create this little character
from a sphere. And if you're just
starting doing three D, then by all means just stick to everything
that I'm saying. I'm going to walk you
through everything step by step so that you
don't get confused. We'll get through it, I
promise We'll get through it, we'll figure it out so
we can keep it moving with my classes. I never
want you to think that there's something that you can't do if you want to experiment. I definitely encourage
experimenting, having fun with it. Even if you want to do
the course and then come back and try something
else or change it. I was really nervous when I
started getting into three D, and that's why I started teaching and making
these classes. I think that's about it
for the class project. Be sure to post them afterwards, but I'll remind you at
the end of class now, there's a few different
ways that I'm going to do this character because
that's what I always do. I always make a character and then I always
want to experiment. So if you notice, the character might change the
way that it looks. But I'll show you
what I've done to make the changes so
you can make them too. All right, I think
that's about it. Let's jump to the next
video. Getting started.
3. Getting Started: Let's go ahead and open
up Nomad Sculpted. And you should have
something like this. Now if you notice, I just touched this little
cube right here. This is a snap cube. This is another way
that you can figure out where you're
looking at your model. You've left, but we want to make sure that
we're on front. You notice when I hit front, you see this grid
in the background, the green line and a red line. This grid, you can
also access it here. We'll just leave it on for now. Let's first go to this little camera icon and make sure we're
an orthographic. Then we want to make sure we
go to the little light icon here and we want to change
from Lit PBR to Matt. I'm going to be using G clay. If yours doesn't look like this, you can just tap on the image. You can see there's a
lot of Matcps here, but we're going to use
the first one, PXG clay. Let's import a reference image. We'll tap this little
photo icon here. We'll go down to
reference image that. Now we see the options pop up. We'll tap on the image. Import photos, here is
the little guy here. We'll tap on the image add,
then it should show up here. I'm just going to tap on
the negative space here, so that window goes away. I usually hit transform. What that does is it helps you to be able to
resize your image. So now you can move it around. You notice everything
else is grayed out. I think we're going
to put it right about here. That looks pretty good. Then you just tap
on the screen and it'll go back to
regular sculpting mode. The first thing that
I like to do is add some floor, some ground. That way when we're
building our character, it'll make it easier
because it'll have a place to stand rather than just
floating in the air. The first thing I
like to do is add a cylinder and just
make it a bit round. Just looks nice. We're going
to use this icon here, which is our scene menu. You see our default sphere. We're going to add a cylinder. We'll add cylinder. Now we see our cylinder here. You can pinch to zoom out and then you can use one
finger to move it around and you can see your three D
mesh, or your three D shape. I'm going to hit front again. You can use these nodes
to move it around. You can also, with two fingers, just tap to undo. But for this I'm actually
going to use this gizmo. The gizmo is just
your controller. This tool, you'll
use a essentially, it just has a lot of
different functions. If you see there's a
faint orange ring, this just changes the
size, the general size. Then you have these dots, like you have a
green dot here and a red dot. This stretches it. The stretch, the arrows move it around so
you can move it up and down, left and right. Then you have these rings. You see there's a blue
ring and a green ring. These just rotate it. That's just a brief
description of the gizmo, but we'll use it a lot in this. By the time we're
done, you'll have a pretty good understanding
of the gizmo. Let's just shrink this down
and we'll make it a floor. We're going to use this green
node here to just shrink it to a more floor type
size, something like this. Let's use that orange ring
to make it a little bit bigger, maybe
something like that. Now, I'm going to
use the green arrow to move it down so that the top edge is just lined up with this
red line on our grid. That looks pretty
good. I'm going to turn off the grid because I just don't like looking at it. We'll turn off the grid here
Now we'll go to the sphere, which is probably going
to be the body or the head you want to
tap on the sphere. Because any mesh
that you tap on, that's the one that's
going to be selected. Now we're just going
to use the green arrow to move the sphere up. We're going to add
another sphere that we'll use for the head, and eventually we'll just join these shapes
together. Let's add. Another sphere. Now we
have another sphere. You notice that this
sphere is orange. Actually, the cylinder
is orange as well. The reason why they're orange is because they're
not validated. You can do certain things to a three D object before it's actually part of your project. For example, this
new sphere that we added, it's not validated. We just have some
more options here. We're not going
to worry too much about them just validated. The one important
thing is valid. You won't be able to use
all the tools here if it ever happens that you add a shape and you'll
only see these, it's probably because
it's not validated, we'll just validate the sphere. And then it's just like
any other normal mesh. Once we've validated our sphere, we can just use our
arrow and move it up. We'll just move it up
towards the top and we'll shrink it a little bit using
the larger R and ring. Maybe we'll even squash
it a little bit. Let's use this green node on top and just squash it a bit. Then we can just move
it down a little bit. That gives us a decent blocking for how our character will be. He has a rounder head
that's on top of his body. Now let's tap on the body. Let's use the move tool. Also, your tools might be in a little bit of
a different place. Don't worry about these extras. You can actually make
your own tools and adjust tools and clone tools
and things like that. That's why I have all
these extra ones here. We use the move tool and make sure that
you're on the body. You notice you see
these two dots. That's because we're
using symmetry. If I turn it off,
it's only one dot. If you have symmetry
on, it's two. You notice that line that flashes symmetry is going to be very helpful when
you're sculpting in nomad. Here's the symmetry window here. I know it can get
very confusing, but I just wanted to show you that this is the
symmetry window. And there's a lot of
options that we can play around with for now. As long as it's on and as
long as you have move tool, we're just going to move this
to make it a little more, a little more wide on the
side, something like this. Here's the radius.
So this will kind of show you how much is
moved and how much isn't. We want the radius
to be fairly big. Maybe about 02:30, or so. This is the intensity. These two are pretty much the
same for most of the tools. You have intensity and then you have the size of the tool, we just want to push this down. Looks like he's fairly round. Something like this
I think is good. We'll even move the front part, or the top part I should say, because he's almost squarish. Now, let's turn it this way. Now we're looking
at the right side. Obviously it's a
three D character, so you have to adjust
the back as well. I'm just going to pull
this down a little bit. I'll even make this
a little bit bigger. You just want to pull
this down so it's a bit even with the ground. Same
thing with the front. We're going to use
the ground to make it even another thing. It looks like with his head, it looks like the head
actually slopes down. So I'm going to grab this part. The head, we can
actually rename it Head. We just tap on our little scene menu,
we have this sphere. We know that we're on the head. We tap these three
little dots and we rename it, obviously. We know this is the body, so we can rename it,
this is the floor. Actually, let's make this
a little more round. We'll tap this. We'll do Post
subdivision up to two now. It's just a little
more round now we can validate it, then
let's rename it. I'll just put LR for floor. Now we'll go back to the head. Let's just give it a little
bit of slope in the back. You notice how it
moves very smoothly. Everything moves nicely. I think that might
be pretty good. I might take the back, I might tap the body and then
move that as well so they're a little more even back. I might do the same thing here, just make it so it's
all a little bit even. I want to make
sure that his face is maybe a little bit
more flat than this. I'll take move, I'll make
it a little smaller. I'll make sure I'm on the head, and I'll just push
this in a little bit. You can even make it
a little bit smaller. I'll push it in a little bit just so it's a little more flat. Everything is a
little more lined up. Also, when I turn it to
the right, I'll hit front. There's other things
like for example, his head doesn't look exactly round the front
plane of his face. I feel like it is a little
squarish, just a little bit. So I'm going to use move and bring it up a little bit here. See how I just push it out? Just a little bit like that. I also want to give him
a little bit of cheeks. He has very pudgy cheeks. I'm just going to
take the move tool and drag the cheeks
out from the bottom. Move them over a bit.
They look like cheeks. I think that's a
little bit better. All of these little
details is what's going to make the
character interesting. There's 1 million
things that you can do. There's 1 million
ways that you can do. You can make him
thinner, fatter. Don't be afraid to change it. Make it your own. That's when it really starts to get fun. I think this is a good
space to pause on this. We'll jump to the next video, and we'll just continue blocking our character. Good job so far. Don't forget to save. We'll tap this folder here, We'll save. And I'm just going
to name him Kit. We'll save it as Kit. And now we have
our project save. The reason why I have
to save manually all the time is I
don't trust Autosave, but you can keep
your auto save on. I just don't like to have it on. But you want to make sure
that you saved as often as possible because sometimes
nomad does crash. All right, I'll see you
guys in the next video.
4. Blocking: Now let's move the
head and the body both up so we can
add his little legs. So we go to the Scene menu, make sure that we have
head and body selected. Then we'll use our gizmo. And then we'll use the arrow
to just move them both up. It's actually not
that much space, but I guess I can bring
it up a little bit more. I think that's pretty good. I'm actually going to use the
trim tool to actually just trim and have the underside
a little bit more even. I'll just tap the body
trim tool rectangle. I want to make sure that
I tap right so I know that everything is
perfectly level. Now with the
rectangle trim tool, anything that's within this white triangle will be trimmed. I'll start here. I'll just
do something like this. Now that's trimmed, now
let's add a cylinder. And this cylinder we'll use
for his little stumpy legs. We'll go to the scene
menu, add cylinder, so we'll use our gizmo and then we'll use the
larger orange ring to shrink to right about there
I think is pretty decent. I'm just going to squash it
a bit with this screen node. I'll move it over to the side. Now I want to tap the
gizmo option up here. It's going to bring
up the other options because we haven't
validated yet. One thing that we can do with cylinders is we can tap radius. Now you see there's
two little nodes above radius and
there's two nodes here. Now I can adjust this as I need, but I can use these orange nodes to make it more of a funnel
or a cone if I want. It just gives me a little
bit more functionality to just a regular cylinder. I think something
like that is fine. But I also want to make
sure I use the gizmo again to just move it
towards the front. Now before we validate, all I did was hit gizmo again
to bring up the options. Before I validate, I
want to hit mirror, then it's going to mirror
to the other side. I think that looks pretty good. Looking on the side of it
though it's no longer really, even, that's really easy. I'm just going to use
tap on the body and just use the move tool to
just adjust it so it looks like I think a nice little curve and
that's resting on the floor. I think I like now we'll add a sphere and we'll use that for the arms go here. This says mirror here. This is the cylinder.
It's one cylinder. It's within a mirror. That's
why we're seeing two. We can go ahead and
validate those. Just make sure that you select either the mirror or you
have them both selected. Then I have them both selected and I hit Validate
Join Children. Yes. Now we just have
the legs together, we can rename them Legs. Okay, now we'll add a sphere, and we'll use our gizmo. We'll move it up and
over, and I'll shrink it. The arms are, let's turn
it to the left side. Now, I'm just going
to use this blue node to stretch it forward like this. And I'll move it into the body, it looks like they're
right about here. I'm going to go ahead
and mirror this. So we have the other
arm on the other side, but we can still
just edit the one. I'm going to hit
Gizmo up here now. We can just flatten
it a little bit. Turn it, then I'll use this arrow to bring
it more inside the body. And then I'll use
this green ring because you can see they're
against his little belly. That's what you want
to try to emulate. Something like that. I think is pretty good. Of
course you can validate. It's still in a mirror here. Let's go ahead and
name the mirror arms. Let's clone this whole thing. I have both of these
selected. Let's clone it. Let's rename the clone hands. Now we have hands,
and let's just hide both of these
and go back to arms. One thing I was going
to note is obviously the arms are going to be
merged into the body. I'm going to go back
to the arms to move, and I'm going to
make the back side of the arm a little bit bigger. Maybe I'll make the
radius a little smaller. I'm going to just stretch
the arm a little bit. It's going into the body until I get a nice
shape that I like. I think that looks
pretty good and it looks like it's
going into his body. I'll stick with
that. Let's flatten, you can see that there's a
lighter part of his hands. Let's take the flattened tool. You might have to adjust your settings a little
bit if you need to. I want to make sure
I'm on the arm. Whatever we do to
this one is going to automatically happen on this
one because it's a mirror. I'm just going to
flatten out the arm. I want to try to flatten it
out. That's pretty good. If you have, the only thing that I would say to watch
out for is you don't want to flatten it
too much like this on this side because then it'd be hard for the
arm to come out. You just want to make sure
that it's on the inside of the little arm nub, something like that. I'll use the smooth tool to go ahead and just smooth
it over a little bit. Now let's go back
to the scene menu. Let's bring back our hands. Here's the hands that we cloned. We'll bring those into play. And you can see that they're just in the same place as the other ones are.
I'm going to hit left. You want to make sure that you have that you're on your hands. Let's actually go to the
sphere within the hands, we'll use trim rectangle. Let's just trim it about here because we only need
the front piece. I'm just going to
make a rectangle and then we'll trim
right about there. Only the front part is
coming out from that arm. This part we also
need to do his ears. Let's go back to our scene
and we'll add a sphere. One thing you want
to be careful with here is when I
added that sphere, it automatically went
into the mirror, which is the hands we just
want to go down to the sphere. Long press it and let's bring it up till it's
right underneath body. While we're at it, let's
go ahead and rename it. Okay, so now let's go
ahead and validate it. Now we'll use our gizmo. We'll move it up, shrink
it to about ear size. Now let's take this blue node, and we'll just flatten it up. Let's take the move tool. Doesn't need to be too big. I'll go to about 01:50, or so. I just want to remember,
symmetry is on. I just want to drag
the bottom down. Just make the whole thing a
little bit more round on top. That looks a little bit
more like the ears. Now, I turned it to
the right, I think. I just want to pull
it back out a little bit just for acute factor. Let's go to our menu.
We have the ears. Let's press the three dots in
clone. Now we have ear one. Let's rename ear
ones can do puffs. Okay, great. So now
we have ear puffs. The next we want to
do is use the gizmo. And we're going to use
the ear puffs to make the little parts a little bit
in the middle of the ear. Let's go ahead and move
this up, shrink it. Now, I'll go back
to the front view. You can see that it pretty much looks like these
little puffs here. You might want to
stretch it a little bit and then bring it down some. I think that looks pretty good. The only difference is
you can see that there. It's going into the ear,
which we don't have. Here's what we'll
do to fix that. Let's make sure we tap
on the regular ear. Let's use, let's use
something like clay. We use the clay tool
radius is about 80. We want to hit sub what
this is going to do. I'll just show you really quick. You don't have to do this. It's going to actually take
away pieces of the ear. We're behind this ear puff. I'm just going to
use the clay tool and just go in a circle
around that ear. All it's doing is taking away. If I hit solo, you can
just see the ear see it's just taking away clay. I'll hit solo again. Excuse the slamming doors. I'm just using the
clay tool to go around right at the
edge of the ear puff. I think that looks
pretty good and I might actually make the ear
puff a little bit bigger. Let's use the gizmo and just
make it a little bit bigger. Okay, so I think that
looks pretty good. So we can take our smooth and let's just smooth
out the ear a bit. That'll give us that
look as though, you know, sort of
like the reference. So I like that. I
think that looks good. Now let's take the ears
and the ear puffs. We'll go ahead and
straighten this out. I'm going to use my gizmo
and move them down. Maybe I'll shrink
them a little bit. Move them over to one side. Okay. Now they're in
the ear like that. I want to go to the ear mirror, then I'll go to ear
puffs a mirror. Now we want to just position
the ears in the right spot. It's a little hard
when they're in separate mirrors.
Here's something easy. Here's a little trick
that can make it easy. We have the ear puffs mirror
and we have the ears mirror. Just take ear puffs long press and we'll drag
it into the ear mirror. What's cool about that is
now we can select them both. Then we can use the
arrows to just move them and we can get them into the exact spot that we want. I'm going to use this blue ring to tilt them a little bit. I think something like
that is pretty cute. Get them adjusted and
then once you're done, you can just bring ear puffs
back into its own mirror. Let's make sure we save, then in the next video we
can maybe voxal remesh. Join his body, his
head, his legs, things like that, and continue doing detailing with our figure.
5. Voxel Merge: All right. Actually,
just learn something. Apparently, I can take the sphere from the hands and
the sphere from the arms. They pretty much work in the
same way what I did before. You don't actually have to do, I don't have to bring
it up into this. I can just leave
them. There you go. I'm always learning
new things as well. What we'll do is make sure
that the hands are selected. Make sure that the sphere
within hands is selected. And then we're just
going to use the gizmo. We're going to drag it
a little bit more into the body. Something like that. You see how we essentially just want to make this
even with the arm. Now that it's like that,
I might just go ahead and use this little node and
just squeeze it together. That looks a little bit better. You want to make it even. I'm going to use this arrow and pull it out a
little bit more. That looks even better to me, but I want to use the
move tool fairly small. Now what I want to do is maybe a little bit
bigger than that. I just want to open up the bottom part of the hand
a little bit like this. Then maybe just take
the top and just make it a little more even with
the arm, something like this. If you go up here to
this little stack, it says multis Vauxhall, dintpo miscellaneous.
Just go to Vauxhall. Let's bring this
resolution up to about 01:40 And then hit Remesh. You'll notice that
it might look a little more squared pixilated. We'll just smooth that out, then we'll use the crease
then it'll just look a lot. Okay, I think that
looks pretty good. And of course, if
you want, you can smooth it out to
make it a little more, a little more organic. Let's go ahead and
remash the face. For the head, we
have the body here, which we're going to
remash with the ears. Let's tap on the red
part of the ears. And just validate,
we have the mirror, let's rename it ears just
so we don't get confused. The ear puffs, we can leave those for now. We have the legs. Let's move that up.
We have the arms. Let's go ahead and validate. Join children. Yes, let's move those up. Hands, we can leave
with the head. We also need to long
press and bring up, I'm going to do a quick save. You'll notice that I
do save before I vox remish because sometimes that's
when the app might crash. Shouldn't now, but it's
just a rule of thumb. Now, just select
all of the parts that we want to voxmish. You can Vauxhall remish
up here, Vaxmish. I like to use this short cut down here and it's
the same thing. You'll notice that the number is changing up there as well. Maybe around 150. And then hit Remish. Okay, now all of
these are together. Now we'll use smooth, make sure symmetry is on
when you tap the body. Let's see if we tap the
hand and then the body. Let's go to the
symmetry option here. Just scroll down and hit
show line under advanced. Once you tap that, then you
can see your symmetry line. Sometimes I leave that on
throughout the whole scope. I always know which symmetry
line I'm working with. We want to use smooth and then we just want to smooth out. He looks like one
cohesive, pudgy character. Okay, I think that looks great. Let's not forget the ears. I'm not going to smooth too much on the front
part of the ears. I'm just going to concentrate
mostly on the back. Okay, that looks great. A little bit of
this chin section. Okay, now that he's
Vox will remesh, we can go ahead and
start working on these little details
for these three. I think I want to use cylinders. I'm just going to
do a quick save, then I'll go to my scene
menu, Add cylinder. We'll use our gizmo to
bring the cylinder up. I actually want to pull it towards us so that it's
facing straight at us. We could do that, of course,
with this little ring, but to make it more precise, we can tap snap here. There's two snaps you want. The one with the angle you
see it says 90 degrees. That way when you, when
you use the rings, it will only move 90 degrees. You can do various degree
degrees if you need. Okay. I'll turn snap off now. I'm going to take the bigger
orange ring and shrink it. I'm going to move it
forward so we can see It doesn't need
to be very thick. So I'll just use the
green node to make it a little more flat. This stretches across,
but unfortunately, when you stretch it this way, it doesn't have the
same shape on the ends. Here's what we'll do for this. Let's tap gizmo and
let's validate. Now we have our cylinder sphere. Let's go into the scene
menu and let's clone it. We'll tap these
three dots and one. Let's rename these. Let's
rename the first one. Let's say muzzle. Actually, let's call it a snout. I'll stick with my
preferred verbiage. Now, this cylinder,
let's name cheek cheeks. Let's just hide the cheek one. For now, let's go to snoot. Okay, we want to stretch it, but we want to stretch
it in a better way. That'll keep it
round on the ends. First we want to make sure
that we hit symmetry. Then we want to go
to vertex, tap it, change from auto
to vertex, okay. Then we want to make
sure that we're on the right symmetry line
so we can stretch it. We go to the symmetry
here, and let's hit local. Okay, Now I'm looking for the symmetry line on
this little piece. Okay, I see the symmetry line. It's red, it's going
right down the middle. That's perfect, because
when we stretch it, we want to stretch away
from that middle line. Let's use the red arrow. We're not going to
use the little node. We'll use the arrow and we'll
just pull it like that. Then we have that nice stretch. I think that's a good length. Once I'm happy I'm going
to turn Symmetry off. And then I'm going to
change this back to auto. Now I'm going to
Vauxhall remesh. It probably around
150 we vaxill remesh. Maybe we'll give it a little
smooth, a little smoothing. Okay, I think that looks great. Now let's use the gizmo and let's push that
back onto the face. Okay? Something
like that is good. Now we can just
adjust it to size. Maybe I'll make it a
little bit smaller. I think that's
actually pretty good. The only other thing that I was thinking about doing
was using move. If I wanted to add a little
bit of a bend in it, I could just stretch it up like that, but that's optional. Now let's use the move
tool and we'll add a little bit of a
bend in this little. So I'm just using the move tool, I'm just push it from
behind like that. That way it will
allow it to have a more natural move
it down a bit. It'll just fit to the face
a little more naturally. I'll use the rings to make
sure that it's perfect. Okay, that looks pretty good. Now, I'm just going to
smooth it a bit more. I'll also to just bring it a little bit
closer to the surface. You can make the move
tool a little bit smaller and just make
it a little more. That looks pretty good. Nice If you see that the face
is pulling through, then just pull out the middle section a little bit and then
you're good to go. Now we'll do the same
thing with the cheeks. We'll take the cheeks.
We'll unhide them. We'll use the gizmo.
Can move it up over, I should say, and
into the cheek area. We just want to do
the same exact thing. We'll put it on the che. We can use the move to just make it a
little more perfect. I'm going to go ahead
and hit solo down here. So all we're seeing
is this shape, then I can just give it a
nice push in the middle. Solo, again, just
gives it not curve. It should fit a little
bit better to the che. You can use the node to
make it a little smaller, can move it a little closer. I just had to sneeze. I'm always so nervous
about sneezing. I'm going to use the
smooth tool because of my herniated discs that I'm
trying to recover from. We'll use the smooth tool
and we'll just smooth this just so it's a little
more soft and round. I think that looks good. Once you have it
where you want it, we can just go back to
the Scene menu to cheeks add mirror and then it'll
mirror it on the other side. Let's make sure that we save. Now when we come back, we
can do the little nose, the eyes, the little whiskers. Maybe we'll do an
alternate face as well, just in case you want to try something different
for the face.
6. Face Details: All right, let's fear, let's use some spheres to make the rest of
these little pops. I want to go to body so
that when I add a sphere, it's just going to
be right underneath. Okay, let's validate it. Let's take the gizmo, we'll
move it up and forward. We'll make it really
small with the big, the larger orange ring. Okay? Probably even smaller. Something like that.
Now we want to stretch it the same
way we did before. Remember it's validated. So all we have to
do is hit symmetry. Go down to vertex
and then hit vertex. It should be still on X, which is the correct symmetry. We should be able to just
p and voila, looks good. We do something like that. I'm going to take symmetry off. I'm going to take vertex, put it back to auto, then
I'm going to box or remash. Actually you know
what, I probably don't have to box or remash it. The reason why I
would normally box remash it because if I
wanted to put a bend in it, let's just say that I wanted to make it a little bit of a
smile and bend it down. It bends like that,
which isn't good. That's why normally
I would just box, remash it at like
150 or something. Once you voxel remesh it, then you can put a bend in
it and it's a lot better. I don't really need
to put a bend in it. So now we can just use our gizmo and just move this
back to the surface. Something like that. You can resize it or
adjust it as you wish. Something like that
is pretty good. Now let's go ahead and
add another sphere. We'll add another sphere, and this will be the eyes. I'm going to use the gizmo, I'm not going to
validate it yet. I'll bring it up. Sometimes
it's hard to grab the arrow. We'll shrink it, We'll move it. Let's go ahead and hit
Mirror and go back to Gizmo. Now we can put the
eyes wherever we want. We'll go ahead and make
them a little smaller. I'm just going to rotate
them and then flatten them a little bit. Does make it a
little bit difficult because once you
flatten them and you really need to
make sure that they're even on the surface, I think that looks pretty good. Let's go ahead and validate
this once you have the eyes where you want them and then we'll just
rename it to eyes. Same thing with the cheeks. Let's go ahead and validate
and then rename them cheeks. Do a little housekeeping. This mirror is the
ear puffs we can validate and then
rename it ear puffs. What else? Hands. The hands look good. Let's go ahead and
validate hands. We'll do a quick save. Let's see what is the sphere. This is the mouth or nose,
whatever you want it to be. Now let's add another sphere. Bring it up forward, shrink it, move it over here. I'm going to go ahead and
hit Gizmo and Mirror. These are going to
be the whiskers. I'm not sure if I want
them exactly like this. What I think I want to do, I'm
going to hit validate now. We're just working
on the sphere. We can go ahead and rename
Mirror to whiskers. We're going to tap
on the sphere. Now I'm going to take drag. I want to take this sphere
and I just want to drag it to get a shape like this. I'll hit the gizmo again, we can move it out. I just want to shape something like this. I'll make it smaller. Back to whiskies, I'm actually going to bring
it out of the mirror. Now we're just working
with this sphere because it's easier to work
with one side. Let's hit pivot, pivot. That will center our
pivot to the middle of this little whisker here. Now, where do we want
to put them now? I think I'm just
going to move mine to near the little cheeks. We'll find our way
there with the gizmo. Sometimes it can be a little tricky get situated.
There we go. I think I want to
rotate it a little bit. I find that sometimes I come up with something
that I wasn't thinking, but I really like
it. Just experiment. It looks pretty
good on the cheek, actually, I like
that on the cheek. I'm going to go
ahead and clone it. I'll use the gizmo and then maybe we'll do
about three of them. Move it down. Maybe just use the little ring to give it a little
bit of a difference. Something like that. And then we'll clone again and then use the gizmo
for the third one. Gizmo can be a
little tricky give, give yourself some grace for
your learning to deal with. The gizmo can be very
confusing at times, but I think something like
that looks pretty good. I like it. Let's all of these,
we're in the scene menu. We'll take all of these
and we'll join them. We'll just long press and then add it to the
whiskies, whiskers. And it will add it
to the other side. Let's add a few other spheres
just to use for the toes. We'll add another sphere.
I'll just move it up. We'll use our gizmo
and just shrink it. Move it forward. Try
to move it forward. We'll move it over to one
side. We'll shrink it again. Now, I'm not sure if I
want to give him two toes. Three toes, like three toes. Just kind of maneuver it
into place so that could be one you can clone and
then just use the gizmo. Then you have the second one. Maybe I want to make
them a little taller. We'll take the middle one
clone and then move it over. You have a really simple
little three to set up, even though it is very
difficult to move. Here we go. I'll take these three spheres and just join them that
we'll rename it to. If we want to just adjust
them a little bit, you can rotate them, maybe you want them facing out a little bit. But I
think, I like that. Of course, we can just
go to scene, take toes, add mirror, and now they're
on the other side as well. Let's go ahead and take
both of these and validate. Yes, just rename this toes. Then we have the
little whiskers here. We can also validate. Now we have the whiskers. I'll do a quick save. Let's add this little belly section. I want to use a sphere. That way it's a separate mesh. Of course, we could
paint this on, but then we're
stuck to the paint. It's easier to change colors. Have things different colors if there are different meshes. Because then I can
just have this, this part, the cheeks, the hands, the toes. I can easily change colors. Let's go ahead and add sphere. We'll validate it and let's use our gizmo. And we'll move it up. And we want it just to be on
the surface of his stomach. I'm going to shrink it and
move it forward a bit. It needs to be a little bit more flat, maybe something like that. Starts to look pretty good. Now I'm just going to use
move and I'm just going to adjust the sphere until
it's how I want it to look. I'm just going to adjust this. Bring this in a little bit more, maybe push it up on the bottom. Okay. It's a little more flat on the bottom and this is a
little more flat on the sides. I think that looks pretty good. Now we have that belly part
poking out and it looks good.
7. Face Extras: As a little extra, I just want to try something
else for the face. I want to take this, this piece, hide it, then take the mouth
and hide that as well. We have the body here. If you want, you can always
Let's clone the body. We have body, okay,
now we have body B. Let's hide the original body so we don't have any confusion. Now you have an empty canvas. Here's one thing
that I like to do. I'll add another sphere. I'll use the gizmo
and move it up hoops forward, shrink it. You can add this here. This already gives
you a lot of it, just looks like like
a different animal. You can take this shear,
let's validate it. You can clone it. And
let's rename it nose. Let's say this is the nose, you can move, move this forward. Move it up, maybe stretch it this way.
Now you have a nose. You can use the
move tool and you can just make it look a
little bit more like a nose. Just flatten this side, maybe then maybe
flat in the top. Then it looks more like a nose. You can even take the
flattened tool and you can flatten out this front part
of the nose a little bit. Smooth it, you can
do things like this. And then it
automatically becomes almost completely
different character. You can take this piece, this sphere, we'll name this. So you can take snoop. You can make it a mirror.
We'll do ad and mirror. Now we have two of them.
We'll use the gizmo. I don't know why the
gizmo is down there. I'll do pivot, pivot. That didn't work.
Let's go to snot. There we go. You have to
actually click on the shape. Let's move these
out to one side. Maybe do a little shrink. There you go. And
that's very cute. It's that easy to just make different types
of characters. Also, you can shrink
the nose if you want. Again, that makes it look
like a different character. I like the big nose though. Okay, these look good. I'm just going to
Nestle, I'm going to go ahead and hide these
and try something else. Another thing you
can do is let's use mask and we're on the body now. Let's, we're going to
start in the middle. Let's make the mask a little bit smaller, like 30 something. Do something like this. I love to do these faces. I'm just going to make
it a little bit smaller, so I'm going to use the unmask, just make it a
little bit smaller. Because when you do
things like this, when you smooth it, they expand. Okay, that looks good. We're in the mask. We'll go
up to the mask settings. We'll hit invert, and then
we'll go to the gizmo. Now that we've inverted, the only part that will move is the mouth, the unmask part. We'll push that back,
maybe down a bit, then we'll go back to the mask, back to the mask settings
and clear the mask. Let's just vox remesh
this whole body again, just to solidify
this a little bit, let's see what
happens if we don't. Then it's not too bad, but it's a little too soft. Let's vox remesh. 200 is good. Again, you can
also vox remesh up here, and you just move it here. And then remsh, we'll take smooth and just smooth
out this little mouth. Maybe we'll even take pinch. Pinch is a great
tool and you can go around the edges and it'll
pinch the edges together. Okay? So that makes
it a little cleaner. We'll smooth around the
outside a little bit. Okay? Also let's take, I want to just move
this part out a bit. We'll move that part out a bit. Maybe the bottom as well. If you want you can,
you can use move, make it a little smaller, tuck the sides in a little bit. Then you have a
little open mouth and you can add another sphere, flatten it, make
a little tongue. You can take that
sphere and clone it. And then you can
move it up and tilt, tilt it forward, let's
make it real small. And then you can
easily make teeth. We'll just slide it
up a little bit. Move it over, make it a
little th, a little smaller. Then you can go back
into your gizmo. Go back into the
options and hit Mirror. Now you have two little teeth and go to like them
closer together. It's really fun. You can make tons and tons and
tons of creatures. I want to see how this
would look with the nose. I'll just take the tongue.
Go ahead and validate it. I'll call this tongue now. I'll just press three
dots and clone. And let's just see what
it looks like as a nose. I'll use move and just kind of squeeze the
back part a little bit. Here you go. Now he's
got a little nose. I think that's cute.
You can use something like layer layer is great. It just takes away a whole
layer. So you just adjust. Here's the radius and
here's the intensity is 50. And then you can
just, let's hit sub, you can literally just take out a layer, something like that. As you can see, I
just wanted to show you there's so much
you can do with these characters really
easily using shapes. Now I'll go back to
the original shape, but please feel
free to experiment. That's when you start
to have fun and that's how you really to use, and to use the tools to
just make things look cool. At a very simple, humble beginnings so to speak. Okay, let's take all
of these tongue, this tongue mirror I think
we can bring back body. Okay, and now let's bring
back the mouth and the snoop. Okay, so now we're
back to where we were.
8. Fluff Tail: Now before we light
and color him, I just want to give him a tail. Let's use the tube tool. We don't need snap.
Let's use path. We'll turn them around and we want to start the
tail from here. I'm going to touch
down on the screen, drag and then lift up. Then I'm going to move a
little bit further away. And then tap again
on the screen. And then drag a little bit, that's how you make a path. Now I'm going to hit
this screen button, and now we have our tube. You just have to
figure out if you want the tail to be on the left
side or the right side. But I guess for mine I'll
keep it on the right side. The tube tool, we want to make
this end go into the body. We're just going
to drag this in. We can add another node here and then we
can pull that out. We'll pull this as well. Sometimes the tube
can go everywhere. I'm going to lift it up here. I'll lift this one up here. If you need to make one go away, just drag it into each other
and they'll disappear. One of them will disappear. Essentially, I just want to have it coming
out of the body, resting on the ground, coming
out a little bit further, resting on the ground,
coming around the side. I'll add another node. And maybe there's another
little curve to it. Or actually it can be,
maybe it's a little curve towards him,
something like this. The next thing we want
to do is we want to use radius so we can adjust
the sizes of these nodes. If I tap radius, if
there's two, radius, radius, radii, if there's two, then you can adjust both sides. This is getting bigger,
this one isn't moving. You can make it
bigger and smaller. If there's three, then you
can adjust any of these. I usually use three because say I want to make this part
of his tail a little bit fatter and then maybe I want to make it where it goes into the base of his body a, a little bit thicker as well. I'll move the node
in a little bit more. That feels pretty nice. That felt I like that. Now if I want to make the
end of the tail round, I'm going to hit these
three little dots. I want to bring the subdivision 30-4 then Post subdivision. We'll move it up to 1.2,
That's not too bad. Let's see what happens
if we add another one, then it is a little flat,
we'll keep it at four. Let's see if we bring this
to three, maybe even four. I think four is good now. We just have to adjust the
sizes of things a little bit. That, it, it's tricky, but there we go to make
that, make the bigger. So it's all about moving the nodes until you
really get what you want. I like that. I think
that looks pretty good. I make the whole tale a
little bit thicker. There you go. I
kind of like that. I think it's cute. Hello? I'm going to validate it. I don't know if I want it to actually be touching the body. I like when it touches the body, but I think I'm going to
move it away. For now. I'll make the move
tool really big. I just want to move it away
from the body for now. Now let's just remesh the
body and the tail together. We go to scene, we have the
tube, then we have the body. Let's ox remash them together. 200 should be fine. We'll remesh then we'll take smooth and just smooth out
where the body meets the tail. They're officially
one nice piece. Here's another trick that
I really like to do. I'm going to take
Select Mask lasso. I want to make sure that I
have the body selected first. Then I'm going to
draw around the body. Oops, let's take Symmetry off and try it again
for the third time. There we go. I want to protect
down here as well. I'm protecting all of this
extra parts of the body. You'll see why in a second. Now, most of the body is
protected except for the tail. And I'm going to use move and I'm going to
make it really big. Then I'm going to push this
tail back closer to the body, even touching the body. Perfect. Now I'll go back to select Mask and then go back to
the mask and clear it. The reason why I did
that is because I wanted the tail to touch the body. But I don't want them
to be merged together. Now they're merged down
here, which looks great. If I need to, I can
still smooth that out. But they're touching here. But they're not merged.
That's what I wanted to do.
9. Lighting, Color, & Export: All right, great job so far, I think now we can just jump
into lighting and coloring, which are the final steps. Okay, so first let's change
from met cap to lit PBR. We'll go to this little
sun Metcap to lit PBR. What I like to do is take pretty much
everything that we have. If you have any of
these hidden things, you don't really need
to worry about those. Everything that you
have that's not hidden, I like to grab them all. Select them all, and
then use this little color sphere. I'll tap on it. And you can do any
neutral color gray. I have some browns here
that I always use. We'll tap on it and
then hit paint A. The reason why I do this is
because you want your model, you want your sculpt
to be neutral. When you light it, we'll go back to the sun and we'll
turn off the environment. Now it should be
completely black. And then we'll add
our first light. We add one light and I'm just
going to move it over here. The light is still going to be facing in the same direction. This is a sun light.
The only thing that matters if we were to
change the direction of it, but we'll leave it in, it's a default spot. Move it up a little bit. I'm
going to change this to two, maybe a little more than two. Maybe 2.5 2.5 Okay,
that looks pretty good. I'm going to do a
quick save now. We'll go back into the,
let's rename this key, this is the key light,
let's clone it. Then we'll move it over here. And then we'll use one
of the Rsjustlight. We just see a nice rim
light on the left side. Okay, looks pretty good. Here we go, perfect. So that's
a nice, cool looking rim. Rim light on the left side. We can probably
turn the intensity up a little bit on that light. Okay, so let's
change this to rim. Okay, let's take this key
light and we'll clone it. And let's rename it R two. Let's turn the sensitivity
or the intensity down 1.2 or so. We just want to change this.
It's hitting the side, the right side, so maybe
right about there. I'll turn the intensity
up a little bit. Actually I think that's good. We have one more light,
let's add a light. Let's name this TD for top down. We'll go up here. We'll change from sun to spot. Now we have a nice spot light. So I'll move it up
above his head and then we'll point it down
so it's right on his face. We'll move it up a
little bit more. Over a little bit more, Yeah. So maybe something like that. Let's go ahead and let's press this little shutter thing
and turn on post process. I'm going to turn my
quality all the way up. You don't have to turn your
quality all the way up, but I want to show you
the best looking view for post process. This is more like what your
model is going to look like. Once it's done, you can go through and play
with these settings. I would advise turning
depth of field off, but you can adjust
all of these and have fun with it and just see where it is that you really like it. You can save these
scenes as well. I'm going to put on DFD two, which is one that I always use. I'll just show you
the settings here. Feel free to pause if you want to try to
match the settings. Yeah, that's about it.
It's looking good. I'm going to take this
last light and just turn the intensity age now. Let's turn back on
the environment. Let's turn it down a little bit. I'm using my environment
that's attached to class. This is the environment
image. Let's use this one. Actually, let's just do
a quick coloring of him. We'll take the body, and this is a nice light blue. Let's move our reference image. So let's hit transform. And we'll move it over here. Then we'll tap now. We can actually see
everything at once. It looks like it's a little
lighter, something like that. Remember, you can change your roughness and your glossiness. He doesn't have much gloss, so I'm going to keep
the roughness up to about five point
something and pain all. I'll just fix this
really quick with move. Go next. We have these little puffs here which we can
actually put together. We have the ear puffs, the che, we'll snag
the cheeks, the snoot. And let's see, the
hands, the toes. I don't know if will
do this sphere too. I forgot to rename the sphere, but we'll do the same thing. These are just a light bige. We'll go down to
the beige colors and make them a little lighter. Actually, they're a
little bit darker, but the belly is a little
bit lighter. Okay. So now we have the
whiskers and these can be I don't have a
dark color like that. I don't turn the roughness up. I don't really want too much
glare coming off of them. Then we have the eyes, we'll make them the same color, and the little nose mouth will make that the
same color as well. All right. I think
it looks great. We'll make this white. Okay. And maybe we'll adjust
the background as well. I don't usually make it white, but let's make it white. Let's turn it the
same direction. So looking at it now, I want to make sure that
you can see it nice and clearly it looks
like we can change. Td might be a little too bright, so I'll just turn that down. A two is a little bright, so I'll tap that light and
turn it down a little bit. Okay. In top down, it looks like it might be nice
if there's a light right right on the
top of his head. So let's point a light
to come straight down, right around there. Then if you want to overall
a little bit brighter, you can adjust the exposure to make it a little
bit brighter. But I think that
looks really cool. I like it. Let's save this view. So we'll go here, Add View. I'll just name this 11. Then we have our little
view. You can hit Save. Last but not least, if
you want to export this, let's go ahead and get
rid of the reference. We'll tap on the little image. We'll tap on reference
image looks great. One more thing you can
do to really enhance your character is
you can take like, let's say for example,
the body tap here, the material, and change
it to subsurface. Then you can put the depth
down to like 0.100 or so. You can change all of these. Let's say for example,
you have the snoot, the cheeks, let's see, toes, the little belly, the ear puffs, the hands. Okay, we have all
the light parts. You can just join them together. You can join them together. And then let's change the
material to subsurface. We'll turn it down a little bit, that will just make your
character look more realistic. We'll go here, we'll change
this to subsurface as well. We change the floor to
subsurface as well. To me, that just
gives it a nice, a much more realistic look. If you want to export this, we'll tap on the little folder you want to go down to render and you can render the screen. Just always double
check that you have this all the way
up before you render. And also you want to make sure that you save before you render. Everything looks pretty good. To save it, you would
just press Export PNG and it will go ahead
and start exporting. But also if you want
to do a turn table, what I would recommend
if you're using an ipad, I would pull down from
here, hit record, tap on the screen, tap
on the Nomad icon, and then turn table. Then you can make it bigger. Your screen is recording
the turntable. It's very bright
on the back side. There's also one
last thing I want to tell you about that's
bringing the size. Right now, the scene is 535
K. The character is 535 K, which is pretty big because this is a very
simple character. Here's one way to
bring that size down. Let's say we tap on the
hands which are 98.6 K. We'll tap up here miscellaneous and then just go to decimate. We'll decimate once,
twice, maybe three times. Just make sure you keep
an eye on the shapes to make sure that they
still look good. When you decimate them, the snoot can probably decimate
once, maybe even twice. Still looks pretty good.
Same thing with the cheeks. They're eyes are pretty small. I'm going to go ahead and
decimate those as well. Check out the whiskies. We'll go ahead and
decimate those twice. I'm essentially just going
through all of these shapes. Decimate, take the body, decimate this little belly, decimate that things are
still looking pretty good. We have the floor, which
obviously you can also decimate. That's just another way
to bring down the size. Now it's 300 K.
Still pretty big, but not so bad. Oh, we have the toes as well. We can decimate, Decimate
those twice in the body. I'll decimate one more time. Now we're at 02:50 I think this is a decent
size for this character. It's still a bit big, but if you're conscious
about the size, that's just another way
that you can make them a little smaller. But
that's pretty much it. Hopefully you guys had some fun with this and
you learned a lot. I can't wait to see
what you make if you've done some different
mouths colors, things like that, but this
was a really fun one. I will see you in the
last and final video.
10. Thank You! : Welcome back. Thank you
so much for joining me. I hope that you learned a lot. I hope that you had fun. That's the most important thing about creating three D artwork. As with any type of artwork, you have to really have fun. And I hope that I've showed you ways that you can create whatever it is that
you need to create. There's always a way,
there's always ways to make things look good using shapes. You know what I mean?
Just kind of simplified. Just always be
thinking about that when you're designing
and when you're creating three D sculpts
and creating three D art, you know you can use
this for designs, you can always export
this stuff into blender. The rabbit hole goes very, very deep and it takes some time to learn how to do all those other
things and get there. I want more people
to be able to enjoy it and have fun and just
create art in this way. So hopefully that
has come across and hopefully you created
some really cool stuff. I encourage you to
have fun with it. Change things, change
the colors, go crazy. Add your own sculpts in, turn it into a monster. Turn it in, turn
it into a little, a bunch of cute
little characters. And challenge yourself to think of things
as simple shapes. Starting there and
then slowly building up until it looks the way
that you want it to look. And give yourself some grace. Give yourself some time. Three D is very complex
and can be very confusing, but you'll do yourself
some favors if you just start slow and start simple
and slowly build up. Make sure you check
out my Youtube. I'll probably have some
extra things with this. I'll probably bring it over into blender or
things like that. So make sure you check
me out on Youtube. I do a lot of nomad
sculpt videos, a lot of other tutorials
and things like that. I also have a lot more
here on skill share, so if you're here, please take some of
those other classes. And one more thing, be
sure to rate and review. It really helps me out and I would really appreciate if you can give me a
rate and review. And I can continue
to make classes like this as long as I'm doing well. So if you think I'm doing well, that's one easy thing that you
can do to help support me. Of course, I'm on
Tiktok, Instagram. Everything is drug free day. Facebook as well.
Hopefully you have fun. I appreciate every one of you. I appreciate you spending
this time with me. I appreciate you letting me
spend this time with you. I love sculpting,
I love teaching. I love being here
on skill share, and I love that
you're here with me. I can't wait to
see what you make. Keep drawing, keep sculpting. I'll see you all
in the next video. A.
 Dave Reed, 2D & 3D Illustrator - Brooklyn, NY