Transcripts
1. INTRO: What's up, guys
drug for Dave here, aka Dave Reed, total alcohol. I got a lot of requests for a 3D class with
character design. So I love doing
character design. So of course, I had to make a 3D course and nomad sculpt
for character design. We're going to use one of
my sketches and we're gonna go through the whole
process step-by-step. So even if you're a beginner, you should at least take my beginner course so you'll be familiar
with the platform. So we're gonna
start from scratch, we're gonna start
everything from a sphere. We're going to sculpt all
of the elements is arms, legs, head, his eyes,
tongue, mouth, everything. We're going to color it. We're gonna do lighting, We're gonna do post-process. So there's really a lot
of elements that go into one small character,
but it's worth it. And it's so much fun. And it's definitely worth
it when you have a lot of 2D characters and
you think that way. And then you can bring
them into 3D and you can turn them around
and light them. It's really, really rewarding. And I'm really glad
that you're choosing me to teach you 3D in nomad Skulpt. Okay, so let's go to the next
video, the class project.
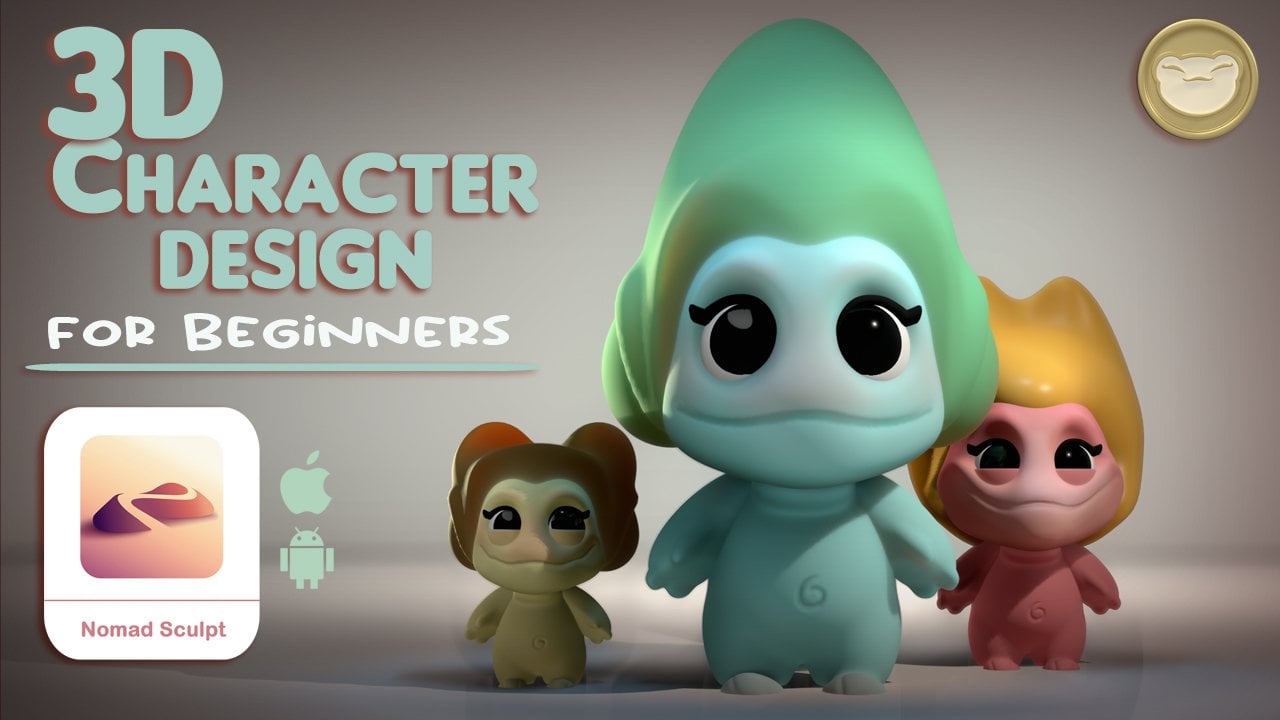
2. Class Project: So this class project, we're gonna be making
a 3D character. You can be as creative as
you want and you can do exactly what I do all
the way to the end. Or if you want to be creative, you can change the colors. You can change the size of them. You can give them a bigger
head, a bigger nose. You can change the tail. Anything that you want to do, you can do, I'm happy to see it. I just want you to
have fun and be creative and create some
great 3D character work. Alright, let's move on to the next video, Getting Started.
3. Getting Started: New Project: We'll just open up
a fresh project. I'm sure that yours will
open up with a sphere. So I'll just add a sphere here. Of course, yours might look a
little different than mine. All I've done is changed the background color,
which is right here. You just go this little
picture thing and then color. And you can change it to whatever you want
to change it to. Just like a bit of a
darker, neutral color. So you guys can see the grid
and everything for now. The first thing that I
always do is change my, change my model to
see where is it at. Right here. In this little option. I always change it to Metcalf. I'm using this med cap
just in case it defaults. You can just tap on
this and you can change all these
different mock-ups. So basically the light
won't affect it. So I can work on this model and the lighting will
stay consistent. There's no added lighting. It disregards all the
lighting around it. So I just have a better It's easier for
me to work because everything will be neutral and we can work on
a neutral 3D model. That's why I like to do Metcalf. Of course, if you don't
like to do my caps, you can just change this
back in work this way. But I would say too many gaps. Next, we just want to
bring in our image. So we'll go to this little
picture icon up here. Reference image was
from my last tutorial. We'll just click on that
picture and click on the Plus. Now you'll have
import image from. So I'm gonna do photos. And here's the,
here's our photo ad. Then your photo will
show up back here. Now, of course, if you want to alter it to make it smaller, you just go back
into this setting and then go to transform. You can move it around,
make it smaller. Like so I think something
like this was pretty good. It's also important not to move it off of the center line. So I moved my
sphere up and down. But once you go left and right, that will affect the symmetry. Of course, there's
a way that you can still have things symmetrical. But I think it'll be a more simple to just keep it on
the center line for now. While we're doing our initial
blocking and everything. The head, I'm gonna
break into two sections, a smaller section up
here where the eyes are. Then he has these rights,
these nice big cheeks. So for this fear, I'm going to bring it down. Then I'm going to make it
I'll make it a little wider. Remember, we're on the front, so we're looking
at on the front. So I have to make up
how I want him to look. You know, I mean, so because
he had round cheeks. That's what I'm
gonna do for this, for this part of the drawing. Now, I'm gonna make a
little bit smaller. This top part of his head. Maybe I'll just
shrink it a little bit because that's sort of matches what I think
his head would look like. This cheeks look pretty good. Of course undo is the
double-tap, just like Procreate. Make sure you're
in the right mesh. So you have to tap on
the mesh and then you'll know which Mesh you're on. Also, you might notice that your mesh is darker
or changes colors. If you don't want
that to happen, which I don't really like that. If you don't want
that to happen, then go to this cog here. Then uncheck this darken
unselected meshes. Because whichever
mess you select, that just so you know which mesh that you're actually working on. Personally, I don't
really like that because when I'm
coloring and things, sometimes that can be confused because it's a different color. I just like to uncheck that. Now I'm going to turn his head sideways and I'm going
to tap on the right. It's almost like
we're looking at him from the right side. Obviously, his head
is a little longer. I'm going to tap on
the lower one and just widen it up a little bit. Maybe I'll move it exam. I'll do the same to this. Just widen it up a little bit. And maybe even tilt it. Maybe it'll tilt
it, Bring it down. Hit View just so you can
see what mine looks like. I think this is a good general I hold it up sort of
the way he's looking. Now. Of course, this goes
up really high here, but I can always add
these eyebrows to sort of make that happen
at a later point. Add in some clay here, which will give it
that nice rise. But generally I think
this is a good, good start for
his, for his head. And also I am on orthographic. There's perspective
and orthographic. Orthographic. I usually do my sculpting with orthographic. Sometimes later on I'll
switch it to perspective, but it can change the
way that things look, obviously due to
the perspective. So sometimes it's easier
just to use orthographic. So you click on this camera
and just hit orthographic.
4. Basic Body Shape: Okay, so we have a general
shape of his head. Now let's do the general
shape of the body. I'm going to turn it. The front is facing out this
way the same way he is. Just so I have a
better understanding. I'm just going to
use another sphere. I usually start my sculpts, started things with spheres. Let me, let me label these
tapped on the scene. And I'm just going to
tap on this little pencil and label them, um, top head. And then base. Almost named it something that probably
wouldn't be the best. So I'm gonna do another sphere just in
case you missed that. I just, I just hit
the sphere down here. I'm going to use this
one to be his body. So I'm gonna make it
a little bit bigger. Stretch it out a little
bit. Bring it up. Now the head we're going to move eventually we're gonna
make an angled up. But for now I just
want to get the shape, the general shape of the body, which that looks pretty good. I'm going to turn
it to the right. Almost like we're
looking at him from the right side of
his, validate it. I'm going to use the Move tool. I'm going to use it fairly big. And I just want to
sort of flatten out this bottom part because friend now it's
too much of a point. His underbelly is very flat. Make sure it's really big. And then just sort
of flatten this out. That's better. Now I'm actually also going
to make it as big as I can. I'm gonna stretch it because
he's sort of stretched out and this kind of goes
underneath for this ankle. His little body part
like lower body and but part should be behind his head since he's
turned to the right. I'm going to move
all this this way. I'm going to make it a little
smaller and then I'm just going to pull this out because I sort of have to make up how this
part of his body is. I'm assuming it's going
to go around and then come around here and
then sort of curve up. We have to do come around
here and then do this curve. There's a few ways to do it, but I'm just going to
use the Move tool. I'll make it smaller. Then I'll just sort of
push, push in here. Bring this up,
push a little bit. Sort of bring this up. That's actually not too bad. You'll notice it's a little,
it's a little lumpy. So usually after I do sculpts, that could be a little
lumpy, things like that. I just use the Smooth
tool right here. I just used smooth and I
just moved everything out. Keep everything nice and round. Nice and together. That
looks pretty good. Physical body mesh is very soft, so be careful with the
smooth tool because it can really manipulate the clay. I don't really like
going into the mesh. So I'm going to tap
on this scene here. I'm gonna highlight
everything, check everything. Our gizmo. Just move him up because hello, only have one leg on the ground. That would be a room
for his it'll leg. Go to View again. This is a pretty decent start
for our little character. He's going to be in this direction and
eventually will tilt his head to be looking up
are looking in his arm. Now let's block out his little
arms and his little legs. Let's try with a tube first. If I can remember how
to get to the tool, let me just select one. Sometimes you kind of get stuck. If you have multiple
things selected, your tools don't show up. You just have to select 11 mesh and then you'll tools
will show up again. Tube tool, which I really, really enjoy using
the tube tool, I'm gonna hit curve. I'll turn it to his right side. And we have to sort of
mimic this arm here. If we just do a shape like that, that should be, that
should be good. Let's try it out. We'll start about here. Let's make it to about there. Now you see that
the tube is really thin and it's touching his body. That's easy enough to adjust. You just pull these out.
You just pull these out. So you just want to match
what he's doing here. Make the whole thing bigger. Pull it out a little bit more. Sometimes it takes a little
bit of time just to sort of justice where to get it
the way that you want it. But, you know, that's, that's 3D modeling or just sometimes
things just take forever. Now I'm gonna use the radius. You tap it once
and then you can, you can change it like this. Actually useful. If you want to do
the radius again, then you can adjust all
of these in the middle. We don't really need to do that. I think two is all we need. Because his his hand
is bigger here flat. His hand is a little bit down. I still wanted to be his hand to be pointing
away from his body. I'm going to move it
out a little bit more. That looks pretty good. It's a pretty decent match
to what we have up there. I can probably make everything
a little bit thicker. You can actually
make it bigger here too. Little bit thicker. That seems like a good,
like a good size. I'll go back to my radius. Just go back to two. Now if I can just get rid of this, get rid of the gizmo. I know I get rid of the gizmo. Oh, there we go.
So I tap on tube, gets stuck on little
things like that. Sometimes. I haven't really
used up in fairly busy, so I haven't been
able to really dig in as much as I do some weeks. Are his arms look, it
looks quite fat there. I'm just going to I like
it to have a nice curve. I made it a little long. So I'm going to actually
take out this section. The way that you do that
is just bring this close. Once they go red, then
they'll disappear. I think that looks better. I want to still bring his
palm is not in his side. Actually want to bring them
to make it a little smaller. I'm going to bring it
out a little bit more. So I think something
like that looks decent. Also, if you decide you want to add another one like
I'm going to curve this, this has got to be a shoulder, so this won't really fly. I'm just going to
tap on the line and add another section. This way I can totally
bend this one. Totally been that one in. Just fix this. So it's still a nice curve. Not bad. There we go. That feels good. It's a nice curve. Coming out from the body. Feels, feels pretty good. Of course, I can go to
the gizmo and adjusted. If I want to sort of change
the angle a little bit. Again, you just want to match, you just want to try
to match what you see in the sketch. But I
think that's pretty good. We can always adjust it
a little more later. Now let's do this. Arm
will do this harm, will do the opposite arm next.
5. Creating Left Arm: Okay, so let's do the
other arm using our tube. You don't actually
have to validate it. That way. You can always come
back and edit. But I'll name this one
right arm, our arm. As a matter of fact, it's good practice to
name all these two. This is body. Just
call this head. Will merge these eventually. We have that arm. Let's do two began
tube tool is selected. Curve. Now he's reaching. Let's turn to Him left. It looks like if I was
imagining this turned around his arm would
be kind of like this. I'm just going to keep it
simple and go like that. Again, we'll tap radius. That way we can. We can, before we tap radius, we can just make the
whole thing thicker. Will tap radius. So we
have the two toggles. We'll make this one bigger. I think I want I
have to Let's see. There we go. It's important. I want the hand to be tilted. I don't want it to
be like this because then the fingers here
and it's going to be hard to make him looking at it. I'm going to add a
new new point here. And just I want this to go into his body that has
to curve into his body. Number one, this is
the front of his face. So we don't want his hand
right in front of his face. Maybe the gizmo is the
best thing to use. We'll use the gizmo,
move it back. We'll spin it using the green. Move it back. Let's see how this looks. Still looks like it's right
in front of his face. So we'll use the
green to rotate it. We use the read to move it back. Now, we might have to also will probably have
to manipulate the body. Really makes it look
like he's reaching up. Feel free to take your time. You know, it's not easy
to it's not easy to manipulate and move things around if you're not used to it. But once you get
used to this gizmo, then it's a little easier. But you can see even
for me, I'm gonna, I'm gonna tap tube so
that gizmo goes away so I can see what I'm doing here. This looks okay. But his arm is straight, so his arm is straight out. So there's actually
less of a curve. I'm going to actually
bring these in, bringing those in, turn
it see how it looks. I'll turn it the actual way. This is kind of like the
way that he's standing. As you can see, this is flat. It's almost like
flat up and down, whereas this is not really
so I'm gonna try to match. That would be
something like this. And his arms still
would be straight. Straight than I have it. I'm gonna get rid of this and actually just
stretch that down. Because I think all wind
up bringing the body up. So we'll see how to
handle that in a bit. I think I'm going
to use the red, which is up and down. Sort of just all the movements
are on different axis. You just have to
get used to them. But if you take the time, you'll be able to get the arm and exactly the
position that you want. Just can be annoying. Sometimes. This is a little more vertical, whereas this is a
little more horizontal. But I can always change that
with the move tool later on. But all in all.
6. Blocking Adjustments: Okay, so let's do
some adjustments just to make them a little more like our sketch. The only thing
that I'm seeing is his belly is a little big. I'm going to tap on that mesh. I'll use the move tool. And I'm just going to make
them a little less clueless, plump, little less
plump out here, a little bit less belly. And he's a little wide. Make his head a little smaller. I'm going to choose both
the both for head meshes. Just make them a little smaller. Feels a little bit better. I'll try to bring this leg. His legs are a
little more stubby, so I'm gonna bring
this up a little bit. And I'm gonna bring it
over using this red arrow. Just little minor adjustments
that he might need. But I think he's
looking pretty good. So another thing we noticed, this arm actually looks a little big. Does look a little big. So I'm going to rotate
it a little bit, maybe down a little bit, move it over some. Maybe just make the whole
thing a little bit smaller. Bring it closer to his body. Now since he is stretched, this might be a good point to actually do some
work on the body part. So firstly, he still
is a little bit wide. So I'm just going to just going to skinny
him up a little bit. We're still using, we're
still using symmetry. Let me just put a little
bit more curve in his back. Butt area. We go. This feels a little bit better. A little bit more accurate. I can probably bring
metal leg up a little bit because it looks like
there's a lot of space here. I think it actually looks okay. I'm gonna take smooth, I'm going to smooth
out the bottom here. Make sure I tap on that mesh. I'm just going to smooth
out the bottom a little bit because his bottom is flat. The smooth tool is
actually pretty good for doing some manipulation
of clay as well. I like to call it a clay in
Mama named alcohol ugly. Right? How do we feel? So I
don't want to do the head yet because I want to
keep the head straight. Once we have the
details on the head, then I'll do the tilting. And we can sort of tilt
it a little bit better, but for now we're going
to keep it the way it is. I will, I do think that I want to go ahead and
stretch this mask, this mesh, the body, not on symmetry, so I'm
going to click symmetry. I'm going to use my move tool. And I'm really going to
stretch this part out. Here. It looks like we do
need to make sure that stretches in a way
that looks natural. That's the only thing
that I'm worried about is I just want this
to look natural. Now that I've, now that
I've kind of maneuvered it, I'm just going to
smooth it to get these lumps out so everything is smooth and just see
how that looks. Actually looks pretty good. It looks abnormal. If anything. Maybe I'll just Let's see how that looks. It looks a bit strange. Sometimes there's just a
lot of problem-solving. I think that's fine. The only thing is I feel like I don't
like how street this is. I feel like I need to sort of make a little more of a
curve here that feels better. I can even bring this
little piece out. I'll just smooth. Anytime I do, like any manipulation, I like to go ahead and
just smooth it out. Keep everything nice and smooth. That feels pretty good.
We're gonna rule eventually. Mesh these altogether too. So we will have a chance to sort of add some more details. So the only thing that's
bugging me now is I feel like it would happen is if I'm just gonna I'm just going to smooth this to sort of bring his sort of push his body back. That feels a bit better. I'll add a little
bit more curve here. His back. Just move this out a little bit. I think that looks pretty good. Now from the angle is
still has that shape. He still has that sort
of teardrop shape, which is what I really want. That's pretty much
what I'm trying to maintain here is
that nice teardrop. I'll add some curves here. Maybe even a little bit. If that happens, if you want
to just work on one thing, you can lock it, then you won't accidentally
hit another mesh. Will just get him up
a little bit more. Then we can actually
bring this arm down. So I'm going to unlock it. I'm bring this arm
down up a little bit. The next thing brings it
closer to the leg too. So I think that
looks pretty good. Just continue to make changes. You want to kind of get
a nice teardrop shape that's kind of like leaning towards the
back for his body. And just keep
working your shapes until you have something nice and you still
have these curves. We can fix all these
details as we move forward.
7. Cones for Ears: Let's give them some ears. And to make ears,
we're gonna use cones. So we're gonna go to Scene cone. We're gonna use the green
arrow and just drag it all the way up. We can zoom in. Careful you don't hear
any of these at all. Cons. Nice and high. Now we can rotate it. Let's see. That's his France. So we'll use the red ring
to rotate it backwards. Like that. We're
going to hit mirror. Because we want to
just mirror the ears. It's always easier to
do things like years. You can just do both
sides at the same time. Now we have our two and I'm
not going to validate it yet. Let's take the blue
circle and just make them a little bit
longer like this. Now I'm gonna go
to my scene again. I'm going to duplicate this. The bottom one.
I'm going to take the blue arrow and just
move it out. Like so. Here we go. Something like that. This
is happening on both sides. Even though, even though
this one is darker, it's happening on both sides. We'll go back to Scene. We're going to select
both of the cones. Then the bottom one,
we're just going to hide. Then we're going to
bring our voxel emerged down to about 225. Then we're gonna voxel emerge. So now we have
something like this, these little hollowed outcomes. Now if you can see
because his ear is it's kind of a
hard shape to make. So I just sort of had been
working on this style, so hopefully I can
get it in one go. I'm gonna bring these down and I'll make them a
little bit smaller. Just sort of move
them down so they're they're kind of attached
to his to his head. Now that I know they
look funny now. But we're going to
work on these years. Okay, so the first
thing I want to do is let's bring them all the swim out a little
bit behind his head. The first thing I want to
do is take the move tool. Just sort of stretch out
this end at the inside. So I just want to
stretch this out. Let's make the move tool of
a bigger, more general move. Something like that. Grab it from the inside
to and just bring it out. Something like that, a little
bit higher on the top. But essentially
something like that. Now we'll do the reverse
and we'll bring this edge. See how his ear, it comes out in the back and then you really
don't see any of this. This, I'm gonna drag
the opposite way. Just drag it down like this. Maybe even in a little bit. Something like that. I'll
make this a little smaller. Make my move tool smaller. Just so I can get
that nice curve. See how I have this in
a nice little curve. Just by using the Move
tool a little bit smaller, you can sort of get that
nice curve in there. You want the curve to follow
around the whole year. So if you see him sort of just rotating and just making
that nice curve there. Same thing with the bottom. I'll even bring this, drag this a little more forward because we don't really want to see where that's connected. That's looking
pretty good so far. Now I'm gonna make the
move tool a little bigger. And just going to
push this little bit. Just try to keep
it nice and round. I think that looks pretty good. Let's use the gizmo and we'll use the blue
line, the blue ring. Just sort of turn it
out a little bit, make them a little smaller
years, very small ears. Now we're just going
to tilt it so it's on that same plane as the head. So the head comes over and you can see these ears are
kind of aligned with that. So I'm gonna use this red one. Just bring it up like that. You can make them smaller. His ears are quite small. I'll use the red
arrow to bring them closer up a little bit. And can even use this green to sort of
make them a little smaller to the green circle. Loops. Make sure you don't accidentally hit another layer. That actually looks pretty good. And you can edit
this if you want the ears to be a
little more like that. If you want to turn
them out a little bit, I think maybe turning them
out as better because it hides this part where
they're connected. I think that's actually
that actually works well. I still think they
can be there we go. Bring them closer together. Something like that. I think there's
still kind of big. Take a look them far out. Looks like they would
be more flat, tinier. Maybe I'll just
take the move tool, make it pretty big and just sort of just sort of lower them down. Here we go. Kind of matches the drawing. And then you can just adjust to taste these kind of details. You can melt them into the head. Little bit. Something like that. I think
that looks pretty nice. If you want to bring this if you want to bring this up more, if he think this is
too much space here. You can tap on the ears, you can lock it or
you can solo it. Then you can use your move tool. You can sort of just
squeeze this up, some squeeze that up you
when you un-solo it. And then you can see the
other part of the ear. Again. You can just adjust it to taste. It. It's a pretty good looking,
pretty good looking ears.
8. Head & Eye Sockets: Okay, so now let's
get into a little more of a tricky part, which is the head, the facial features
and things like that. So I liked the
shape of his head. I want to marry
these two shapes. Let's go back to
top, head and head. And I think I want to
voxel merge them at 200. Then I'll just smooth. Just smooth them out. Looking pretty good. So we have to make his
eyes the eye area. There's a couple of
ways that we can do it. I think I might start with clay and make sure that you have subtract
on with the clay. I'll turn the intensity up. I don't want the
brush to be too big. We'll start with clay
will start with front. I'm just going to hit Solo. So the arm isn't
in our way at all. So two arches and it's sort of a flat
curve on the bottom. Let's just try and make that we want a little more
space in between. We're just using
clay and subtract. It's not bad. Now we'll just use the clay. The subtract clay. Just sort of dig
away at the clay. It's important you want to make those planes like
that plane here. This plane, the eye socket. If you have an issue
or if you mess up, you can always just
go back and fix it. I'm going to use smooth. And I'm just going
to smooth this out as I go and as
I removed more and make more work away
with the clay, every now and again, I'd just
like to go and smooth it out just to sort of keep
everything nice and in line. You can also use flattened. The flattened tool is
really good for sort of really working out those
planes that I was telling. Telling you about. Just the the depression
and the eyes. That sounds very sad. You know what I mean? By a flattened is really
good because it makes those it can make it really even, which
is what we want. Now I'll just go in and
smooth everything again. We're kind of getting there. We probably don't even need
to dig out too much more. But I do want it to be
maybe a little bit flatter. I want the plane to be
a little bit flatter. So I'll just dig out
a little bit more. I will just use flat and again, just make this a little
more little deeper. There. And then use flattened,
flattened it out. I'll just use smooth, smooth, smooth this out. I really liked my scopes
to be nice and smooth. So I'm constantly when I make changes and
when I do things, I'm always sure to
smooth things out. Of course, you can
do this to taste. Once you get it this far, you can actually
use the move tool. You can like if you don't feel like
you've made it to high, like his eyebrows are
very, very high here. He's a very happy little guy. You can actually
use the Move tool and just sort of
stretch out what you've made. It's pretty good. I try to bring this up a little
bit just to I have that. Pull it out a little bit, just so sort of flatten out that
plane a little bit more. I'll use the flattened
tool to kind of help. Can I help make that shelf? I'll turn my canvas. Feel free to spend as much
time as you need on this. If you mess up. You can always start
again. You can hit back until you
can start again, or you can just smooth
everything out and start again. You can always start again. There's no shame in it. Get it as perfect as
you want it to be. Because I mean, I
like my stuff to be I'll work on
things for a long, long time because I want
them to be really perfect. There's no shame
in starting over, starting again from
a certain spot. You just do whatever
you need to do, whatever you feel
comfortable with. Neighbors or home. I'll just move this out some. And if you have like
really loud neighbors, sometimes you just lose
the neighbor lottery. I'm happy with that. Thing I need to fix Is
this a little bit? Little bit not perfect? We go, so just match,
match the sketch. You can make some depressions. We can always add
some more up here later on if he wanted to
be a little bit higher. But I think that's a good start.
9. Muzzle Snoot: Okay, So to make his little
mouth, it'll muzzle. We're going to make
we're gonna use a box for the upper part. Then we're going to
use a sphere for the lower part that
we're gonna cut in half. And that'll sort of make
a makeup the two parts. Let's add a box. And same thing as usual. We will bring it up, bring
it out a little bit, and then just make
it pretty small. Museum in. One thing that's really important is that you
don't accidentally make this part too big. I tend to do that sometimes. I'll, I'll make my characters and I want them to look cute. But sometimes the muscle just
gets too big, so just bake, just keep it pretty
small, pretty high. So the edges are right on that. The eye socket. I think that looks pretty good. This thing out far
enough but not too far. You can always bring it
in. That's the first step. I'm gonna go ahead
and validate this. And what I think we can
stretch it a little bit. I'm gonna take the smooth tool and I'm just going to smooth, smooth out these edges. We don't need any sharp
edges. But just be careful. Don't smooth too hard
because the clay is very soft so it will
move quite easily. Just smooth out those corners. Now let's add a sphere and we'll bring it
up. Bring it out. We'll make it smaller. That's actually a
pretty good size. So we're definitely
going to have to do some manipulating of the
sphere and make it a little smaller like that. Now the next thing that I'm
gonna do is I'm gonna hit front so that we're looking at doesn't
have to be this big. There we go. So right now the lower
part is very big. We can always shrink it later, so I'm gonna validate it. But the next thing I
want to do is hit Solo. We just have that sphere trim and we're going
to use the rectangle. Now the reason that rectangle, we can just make the
rectangle and it will trim now completely in half, maybe a little above half. Like so. We'll bring it back. We can
make it a little bit smaller. We'll actually, it
looks pretty good. Make it a tad bit smaller. Like so. Mouth looks crazy now, but that's the general
bones of the muscle part. He's smiling. I want
to go to the top part. I want to use move. I just want to drag, drag this out and we can maybe make the move tool a
little bit bigger, a little bit bigger.
There we go. I just want to drag this
out to a sort of smiling. Let me keep this even. Just really sort of smiling. So that's pretty
good. Maybe I'll use flattened and just sort
of flatten out that edge. That looks pretty good. I'll just smooth it out. I'll make this, make this
brush a little smaller. Just smooth this out so
it looks, looks prettier. Even I'm doing the
blocking parts. I just don't like it to
not look neat and clean. I do like to smooth
out my portions. Now let's go to the circle below and maybe we can tilt
it a little bit just so it's, his mouth is open
a little bit more. We're gonna do the same thing. We're going to use move. We can just bring
these edges up. Like a smile. Smile, ish. Bring that mouth. Open their mouth a little bit. I'll just smooth,
smooth this out. Make sure I was
still on symmetry. Sometimes I started doing this. I'm not on symmetry and it bugs me because then you
have to, I just go out. I'll undo because when I'm
doing a face like this, I want it to be symmetrical
until the point that I don't. Now I'm just going to
bring those corners up a little bit more. Just widen his mouth a
little bit more. Same thing. I want to make sure that
these are connected. Bring the nose in a
little bit there. Bring this back. Just so they have
a nice connection. Also. I'm just going to I think
that looks pretty good. That's a pretty good start. The only thing other
thing that we can work on really quick before we move to the next video is
maybe just flatten this. So I'm using the Move
tool pretty big. And I just want to flatten this bottom part because this
is gonna be like flush with his like chin and mouth. Just flatten that part
out a little bit. That looks pretty good. That's a decent start and
we'll work on it from here.
10. Prepping the Snoot: Okay, so the next thing we
want to do is I want to marry this top part of
the mouth with the head. Then we can work on
the bottom part two, I don't even know which
one I want to do first. Let's open up his mouth
a little bit more. I'm just going to use
the flattened tool. And I'm going to make sure
I'm at the bottom sphere. So I'm just going to flatten
this out a little bit. I'll make this a
little bit bigger. Flatten that out a little
bit and give his mouth a little bit more openness. We still have a long way to go, but how can we smooth out make this
go directly into this, into his center of his head. Firstly, do we want this band like do we
want this sticking out? I think it might be better. It looks like this
might be flatter. Let's get rid of this.
Let's get rid of that. Let's use the flattened tool, make it fairly big. And let's just flatten out
this space in-between. We go just flatten that out. Symmetry is, symmetry is on, so you just have to
make sure that you kind of flattened it out. Well, I think that looks okay. A little more pressure
in the bottom. Like the way that I like that. Let's let's smooth
it out a little bit. Because like I said, I always
smooth everything out, not going to press too
hard because I think it might bring that form back. Sometimes when you smooth, it will bring back
what you just erased. Sometimes. Just keep it nice and smooth. I think that looks pretty good. I think his mouth looks good too sometimes I wonder if I want to bend this part
up a little bit like Ben this part up a little bit, but I
think it looks fine. Actually. I'm gonna smooth, I'm going to smooth
this out a little bit to make this a
little more round. Like that. Looks cute. I want to not too bad, but I want to make it a
little more seamless. So I might want to lift. I'll use the move tool and we still have
symmetry on of course. I just want to lift this up, this part of his nose
up a little bit. Maybe I'll press down
and lift up here. I'll press down in the middle. Lift up here again. I tend to do this a lot. It's the only way that I can get that slope, that nice slope. I think that looks okay. I think what I want to
do now is actually voxel emerge the top part of
his mouth to this face. Now that we have that
nice slope there, I'm just gonna go ahead
and solidify this. We have the head and
then we have the box. So I'm going to make
sure those are checked. Box emerged 200
voxel merge them. And of course we're
going to smooth it out. Now we have one whole piece for the top part of the mouth. You can smudge and actually
don't mind if it's a little smaller. That's okay. Because it doesn't look
like his his his mouth comes off that much. Okay. So now for this
bottom part of the mouth, it does protrude quite a bit. So I'm gonna bring the bat,
I'm going to bring it back. Just move it backwards
a little bit. Here we go. Just to kind of keep
things moving forward. I think I'm going to dig
out some of this clay, so I'm going to tap on the head. Let's make sure
it's still called. Let me change this one so I
don't get confused to hit. Make sure that's the right one. Okay. We're on the heads. Well, let's use clay. Make sure that we have sub you don't want
the brush to too big. Now I'm just going to just going to dig out
some of this clay here for the inside
of the mouth. And then I'll just smooth it. Smooth does bring it,
bring it back quite a bit. Now I'm going to
use the Move tool. I'm just going to hike up his I don't want it
to be too too big. I'm just going to hike
up. He's very smiley. This, so I'm gonna hike
up this section here. So I'm gonna lock the head so I don't accidentally move the
bottom part of the mouth. I'm just going to hike this
up maybe a little bit bigger. Here we go. Just
hike this up a bit. Get some of that smile. Actually going to pull it out. You see, you notice the
angle that I'm using. Sometimes I go even on
this angle so I can sort of push it
out a little bit. Of course. Just smooth it out
if it starts looking lumpy, just, just kinda smooth it. Anytime I see lumps, I am ready to smooth. It looks much happier there. Now let's give them a nose, because he looks quite
strange without a nose. So let's just try to knock
that out really quick. For the nose, I want
to add a cylinder. Here's our cylinder. We're going to bring
it all the way up. We'll spin it so that
it's horizontal. This is what, this
is the base that I usually use for noses, except for human noses
than I use a cone. I'm going to use the blue
so I can oh, I must have. Let's see here. I'm going to rotate it
just so it's subtle. When I do the blue,
it's not so skewed. Make it really small. His little face, even smaller. Right now we have a circle and we want it to be a
little bit triangular. It looks like it's
got a little bit of a triangular shape in the front. It's almost like a
mushroom in the front. And then it's flat on top. And then it looks
like it's triangular. Kind of going back. To start this process will
make it smaller still. I'm gonna start with,
I'm gonna validate it. And then I'm going to take the move tool, my favorite tool. Make sure we're looking
at it from the front. Symmetry is still on and
I'm just going to make, are going to make my brush
a little bit bigger. And actually maybe we can just pull it out
and just sort of make a triangular shape. Flatten the top a little bit. Make it smaller and
just sort of make this little more
triangular. There we go. Now, what we can do is as
long as we're on the nose, we can still use our move tool. And then we can
stretch this out. It looks all right. Then we'll just use the
gizmo to sort of move it, sort of figure out
where it needs to be. Maybe a little bit taller, a little bit smaller, maybe. I'll move it back some. This might take some actually looks like his
nose is a bit wider. So let me make it wide. Wider. Maybe it will maybe a little bit bigger actually than I thought. Which is fine. You know, I often have to I have to go back and forth and really just
figure out how I wanted. It. Actually looks like
his upper lip. This this top part might
be poking out a bit. Let me unlock it and then
I'll click on the face. I'll just solo the face and maybe I'll just bring
that in a little bit. Make the move tool really big. And just sort of this smaller. Maybe. We go and just sort of just touch it
in a little bit. Let's see how that looks. I'll tap on the nose, then I'll move that. See how this looks and the
angle it up a little bit. I'm going to use move
so I can sort of, right at the top is also
kind of triangular. Let's see if I can make
a triangular from this. And I would edit it out. But honestly, I do a lot of, I do a lot of problem-solving. Sometimes it's just sometimes
it's just difficult to really you have to figure out ways to get things to look
the way that you want. You want them to look. And it's not always
going to work. Immediately. Be nice, but unfortunately
that's not the way it goes. I might actually
want to even add a little bit to this nose here and sort of bringing
this up, let me lock it. Let me make sure
I'm on the head. Hello. I'm gonna lock and make sure that
I'm on the head lock. And just see if I want
to bring this nose up. Some might even help the nose up, some unlock it and
many bring the nose, the nose portion down, some make the nose a little bigger. I like this more simple nose. Looks pretty good. I'm going to tap on the
head again and just sort of smooth, smooth that out. Now I'm going to
tap on the nose. And hopefully I can just
smooth this down some. Now I'm just smoothing out
the nose so it's a bit I'm going to bring
the bottom part of the nose inwards a little bit. I'll just take the move tool. Just move this inwards. Also. This part actually
pokes out a little bit. So the tip in the drawing, this part sort of comes out, something like that. Let me smooth. The news
doesn't go back as far. I'm just going to try to
smooth that. It looks better. So smoothing out the size looks better than nose looks a
little more believable. Now, it's still a
little far out, but I think I might
be able to just slide it back a little bit. I think that looks much better. You may have to do a lot of, of maneuvering, but he just
wanted to have its smooth, sort of smooth into this. You want everything
to be smooth. You don't want it to
stick out too far yet, have you can make it
bigger or smaller. It doesn't have
to match exactly, but we just want to make it
look something like this. I feel like here the cylinder is a pretty easy way to kind of manipulate it
to what we need.
11. Mouth Elements: Okay, let's hollow his
mouth out a little bit. Because right now it's
just a little bit too little bit too much. I'm gonna use the clay sub. Make sure I'm on the mouth and I'm just going to
lock it so I don't accidentally mess
up something else. Now I'm just gonna
just kinda sub this, this clay a little bit here. I'm just going to smooth
it just so you know, so it maintains and
looks looks clean. I need to go back in and I'll
just play some more out. Smooth it, it'll bring it, it'll bring it back somewhat, but he has a nice smooth. Now we have at
least a little bit more of a depression down there. We can unlock it. We can click on the head and just get rid of
some of this too. So we'll do the
same thing in clay. Let's lock it. What does that in there? Maybe that's the rest of
the sphere that we used. Must be what that is. So
I'm going to unlock it. I'm going to click on this
sphere again, lock that. Bringing this back
to. There we go. I'm just kind of
get rid of that. This is a little
more cleaned up. The mouth. You can go back
and forth between the head and the mouth and just clean it up a little bit. Whatever needs cleaning. Actually. I can actually
make this a bit deeper. I think that's deep enough. That's deep enough. Not sure if I want his mouth
is a little closed here. I think this will work. Let's see what it
looks like if I was to use the Move tool and just move this slip
in a little bit. Because sometimes it's hard
to really know what's going to look the best. I do know that I need to bring up this mouth a little bit. Bring up these corners. There's just try to get
them into that crevice. Might be time to just go ahead and voxel merge the
sphere and the head. Little hesitant.
But I think it's time I against time that I
just go ahead and do that. Let's take this and let's
take the sphere, the butt, the lower jaw, the head, will voxel emerge at 200. And see where that gets us. Now let's smooth all this
out inside the mouth. Even the parts that you're
not really going to see. You just want them clean. You want every part. That's the beauty of the
3D stuff as you can. I love that you can see
everything from every angle and just clean everything is like everything to be
really, really clean. One thing that I might, I'm kind of been thinking about
doing is sort of dropping down this a little bit. So let's see what
that looks like. I'll just drop down little
lip type thing here. Just a little bit. Let's add a tongue. What had a tongue and some teeth in the next in the next video. But I think, I think this
is pretty good so far. We're making some good progress. For the tongue.
We're going to use a sphere will bring that up. We use the blue arrow
to bring it out. Flourishing of flatness. Flattened it this way to
reflect a little bit more. Doesn't need to be that thick. Once it's, once you
have it small and kinda like tongue size, you can do the insert. Bring it out, bring it back. The whole thing smaller. You want at resting. Or here's another thing that I almost forgot that I usually do. We bring the tongue back out. I'm just gonna go
ahead and validate it. So as long as you have a decent tongue size,
I'm gonna use move. Really big. I'm gonna give the
tongue a nice bend. Just by using the Move tool. Just kind of gives it a
more natural sort of bend. Let's see how that
tongue looks in their tongue looks okay. We can actually
smooth this a bit. We can smooth this lower jaw. It's not so, so round. It looks pretty good. If you want, you can actually
make you can use your clay subtracts and you can
make them out a little deeper if you feel
that it's not as deep. The brush small. Let me smooth that out. I have to put the teeth as well so I don't want it to be too, too low on the sides. But another thing
is you can always paint like when we paint inside, we can paint darker. And that will sort of make up for the actual depth
inside the mouth. Will go ahead and
add some teeth. We have two spheres, which will be our one sphere. It will bring up to
the mouth area to bring everything in front
so I can see it. Mirror. And then we'll slowly just take them apart from each other. Shrink can bring them closer. Now, I'm gonna use the red to make them kind
of an teeth shape. I'll make them a little smaller, rotate, bring them closer and we just sort of move
them back into position. Figure out how big we want him. But I do like this
kind of intricate, like work like teeth
and things like that. A little bit smaller. Maybe I want them a little
more towards the front. You can rotate them. See how they look in the sketch. In the sketch they're
a little bit more. This, I think. Little smaller. Something like that. Maybe let's see. Maybe it looks pretty good. I saw teeth in there. Let's see what it looks
like if I flattened this. Sometimes I like to,
I like to flatten, flattened out different aspects. It just looks better sometimes. It looks pretty good for
teeth and for the tongue. Next we can throw in some eyes. Will work on some eyes next.
12. Eyeballs: Okay, So let's add some spheres. I say OK so much. I have to restrain myself from
not saying it sometimes at the beginning of each video
because I'm recording in like five or six
minute intervals. I'm trying to even though sometimes they'll go on
for like 14 minutes. I don't understand
where the time goes. But I tried to I
tried to record in like six or seven
minute intervals. We have our sphere. Well, we've mirrored it because obviously
there's two eyes. Let's see how big
we want the eyes. I think something like that
is actually pretty good. Sometimes I do kind of
stretched out a little bit, something like that because I do like I do like when we tilt
the eye a little bit as well. I do like that sort
of almond shape. We'll go ahead and
validate and take a look. I do like that almond shape. Sometimes I do stretch
the sphere a little bit. The only problem with that is like later on I
might decide to, if I want to turn the eye, it's not, it's not
a perfect sphere, so it limits me
sometimes later on. But I actually
think that this is a pretty good the only thing that I could do is actually stretch it out a
little bit more. Maybe even by using
the Move tool. Stretching out the
corners like that. What actually think that
looks pretty good so you can decide how you want the eyes if you think
that looks, that looks good. The rest of the details
of the eyes are actually on the head layer. Before we do that, I'm just noticing that the head is a little bit of
a different shape. If you notice the chin here. And there's not that
much space underneath, but here there's a lot of space. This cheek axes a little high. So I'm going to use the Move
tool and make it really big. I'm just going to
sort of bring down, make sure I'm on that layer. So I'm just going to drag
down his, his, his face. Just sort of make it a
little bit thinner up here. Just drag down his
face a little bit. Let me solo. It doesn't have a nice
round head down here. I was worried about that. And I'll just stretch
that out a little bit. I think that looks pretty good. I'm seeing some lumps here. They might have been from
the movings, from moving it. So I'm just gonna
use the Smooth tool and just smooth this out. Just make it a little cleaner. Maybe smooth out this, this is from when I, when
I merge those two layers. Okay, so let's un-solo it. Make sure the ears
are still looking okay, which they are. And it does look like his head is a little his head isn't really matching
as flat as it is there. I think I'm going
to lower the head. Nice profile view. Just flatten his head
out a little bit. I've learned that like it's these small details that really, really change how
your character looks. Even things that may
not seem too important. You have to really pay attention
to every little detail. I think this flatter
head really, really makes a difference. It's actually this
is a bit straight. I feel like his head would
maybe even go down like that. Something like that.
That's the case. Then I'll just
have to bring down the ears and figure out where exactly I want
the ears to go again. But actually bringing them
down actually networks. Maybe I think that works. Head is quite flat on top, but I think I actually like it. The only thing that I
might have to do is sort of squeeze squeeze
his temples a little bit. I think that looks, I
think that looks better. Just gives the shape a
little more personality. Bring the ears down
a little bit more, angular them up, just so
I can get rid of that. I'll have to go in later
and really shave off. This. Doesn't look so curly. But we'll do that. We'll do.
13. Limbs & Fingers: Okay, so let's fix
up these limbs, see if there's anything
that we need to do. Firstly, I'm going to add
a little bit more curve to his arm. Little more curve. Since it's his face. It'll be pushing
against his face. Essentially. Let me
get rid of that. And I'm going to validate this. Another thing that we noticed. I'm gonna go ahead
and smooth out. Lower the intensity
of the smooth. Notice that symmetry is not on, shouldn't be on now because there is no other arm
that's matching this. I just want to smooth
out a little bit of this kind of sharp edge
around the top of his hand. I want it to be nice and flat, but it doesn't have
to be too, too crazy. Let's see The best way to change the the plane of his palm. I'm not sure if I want to use flattened flattened
my work Good. Flatten works well.
Flattened worked better than I thought it would. Let me actually flattened
around his wrist now. Well, let me just smooth. So I keep everything
nice and smooth. Okay, So let's add some fingers. We're gonna keep it
nice and simple. We're just going to
use some spheres. Made a new sphere. I'm gonna bring it
up towards the hand. Make it smaller. You go, there it is. So he's going to have
a thumb around here. They get even smaller
farmers around there. Now I'm going to clone, use one finger here
and now I'm gonna make this actually a
more finger size. All the other
fingers are going to brief fairly close
to this, this one. I'll sort of move it into
the position that we want, which is we can put a little butterfly or
something on his finger. We just want it sticking out of our little
mesh like this. And again, sometimes
it's a little tricky to kind of get it
the way that you wanted to. But you just got to
keep working at it. Stretch out a little bit, twisted a little bit. I think that's what we
want. In his fingers, actually. Little
little straighter. I'm going to switch it this way. Move it out a little bit. I still wanted to be
I don't want it to be behind this rage. I wanted to be in
front of the ridge. There we go. I'm going all the fingers to be
in front of that ridge. Tilt it. There we go. Here. This can be a little bit,
a little bit tricky, but that's pretty much, that's pretty much how
I wanted it to look. Now that I have that, I can make it other
little fingers. So I'm just going to clone this. Oops. Let me get back to
the tube. Here we go. Now I'm going to clone this. This one I'm going to
bring down. Here it is. His other fingers are
like folded folded down. I'm just going to
maneuver this until it's kind of folded
down like so. I didn't mean to do that. I didn't validate. I sort of might've get
rid of these cones. Let me we want our fingers to not stick out
like the pointer finger. We just want them to be
flat against his palm, the rest of the fingers. So I'm just going
to slowly maneuver these until they're flat, which sometimes can take awhile. Now I'm going to push it into his essentially
something like this. But it does get tricky with the rotations and
things like that. Use smooth and just
kind of smooth. Something like that. I
think actually works. Now I'm gonna take
this one and I'm also going to clone it. And I'll bring that down. I want to actually
rotate it a little bit. Here we go. Bring it a little bit closer to his other finger and
I'll bring it inwards a little bit. Here we go. So something like that
I think works for us. It'll pinky, I'm gonna
take this finger again because his pinky is
out a little bit. Let's go to the gizmo and I'm gonna just kinda
validate pointer finger. I'm going to clone it
and I'm gonna bring this down and out. I'm gonna make it smaller,
a little bit thinner. Since it, since it's
a pinky finger. Now I want to kind of move it back and just make it look like it's pinky pinky finger angle, which I'm not actually sure. Maybe something like this. I just wanted to to
look like a pinky. It doesn't really look
like a pinky right now. But I think it might
just because let me use the Move tool and
actually bend it some. If I bend it a little bit, kind of looks more like a pinky. I think. I can
actually make this, make these fingers a little
smaller. There are quite big. Let's select them both. Use our gizmo and just make
them a little smaller. Move them in a little bit. I already think
that looks better. Now we can bring our pinky up. I think something
like that looks okay. Maybe a little rotation. So it kind of goes with this. They might actually help. I'm actually going to
rotate it a little bit. Snug it up to this finger. Something like that
works for this thumb. Let's see. What do we want
to do with this thumb? Let's flatten it out. First of all, thin it up, flatten it, will
rotate it like this. It looks okay. The only thing that
I'm a little bit iffy about is this pinky. Let's see what it looks like. If it's just flat. I don't actually
mind that too much. I think that looks a bit better. So essentially it's
just these spheres that are touching each other. And that'll sort of imply
that there is little fingers.
14. More Fingers: So I do want to adjust the
fingers a little bit, I think, by just making them a little
bit more tap on each one. But just by making them
a little smaller square. I'm always looking
at different things. When I'm making characters. Sometimes things will just
bug me. And I know that. I know that they'll bug me if I don't if I don't change it. So sometimes I just have to go ahead and make the changes. I just wanted to fingers to
be a little more squared. Just not so round,
not so spherical. There's still spherical
but just not completely. Be actually nice to give
this a little bit of a bend. Go like this and then
I'll bring it back. Let's add some new
fingers to this arm. I'm gonna go ahead
and validate it. I think I'm pretty happy with the shape a little
longer than heads, but I think I'm okay in
mind that to too much. We'll go ahead and validate it. So all of these fears, fingers, I'm going to name this one. L thumb. L, pinky. I'm not going to
name all the all of the ones in the middle. I'll just know since they're
in-between the left. Now let's make some new spheres. I have to limit
myself sometimes, because otherwise I'll just be, I'll just be sculpting
for way too long and then I'll start troubleshooting
and natural shooting. I'll start brainstorming about different things,
different ways. It's not have to be
careful of that. Because I like to do
that. I enjoy doing that. But now for our tutorial, trust me, I could go on
making this guy like forever. I'll make it a little smaller. I'm just going to use
this middle circle to sort of move it down here. That's a good place for pinky. Now I'm going to clone. Could just easily tilt this. Bring it up. Not bad. I will sync it back
into his hand a little bit more clone. And I'll just keep
doing the same thing. Just rotating. It'll fingers. Then trying to work
them into his hand. Again, try not to
get too frustrated. I know that this part can be very it can be very tedious
and very time-consuming. Every time I do it, I'm
like I should just meet a character with three fingers. But this is how you learn. Really, really how you learn. By figuring out all of
this nonsense. I want to. Of this finger up
a little bit more. Only has four fingers, right? 12345. I really put
five fingers on him. I should've just keep
them for fingers. Let me slide all of these over. I'll make this pinky, little bit smaller clone. I keep accidentally
go into the body. Sometimes I actually
will make marks or do something to ruin a different portion and I won't I won't realize
it for awhile. That's the worst. I
can make this thinner. We go. Also notice that I'm sort of
tilting them so they kind of stay in this round formation. Even though it's a little
tricky to get them right, I'm kind of trying to make
sure they stay in this. Something like that looks okay. That hand. Now we just need a thumb clone, this big finger. Thumb. We want like the most
flat side facing us. Although the picture,
his hand is open. I kind of wish that
wherever way you turned the arrows would turn. His hand is open. I could always do it like to
figure out how to get this. There we go. Something like that. That's pretty good. The only thing I feel like
I need to still needs to be a little bit better placed. Feels a bit more natural. So that's that feels
a little bit more natural to me as fingers.
15. Feeties: Before I do his feet, I do want to adjust his
thumb because I can see in the picture is thumb
is at different spots. So I just want to test
that out and make sure that that
won't look better. If it's down here.
Sort of angled out. And actually okay.
Because I can, I can I probably need
to make this a little bit smaller here to sort
of make his palms fit, make them a little bit smaller. But I think they're I think
that works for his feet. Let's see what's the easiest way to do his little feet like that. First off, let me
go to the tube. I want to make this
flush so I'm gonna click left just so I can really see. Make this flat. Okay, so now I'm going
to validate that. Then I'm going to trim
it. But when I trim, I want to use the rectangle. That way. I know it's
trimmed perfectly straight to make the toes. I'm not going to make
little round hose. Want to make it a little
bit easier actually, or hopefully easier by using
a sphere. How do you guess? I'm going to bring
the sphere over, flatten it, bringing it around back. So I'm seeing the
very back of his leg. Kind of skinny it up. So it's about the same
width of the foot. Bring the four, etcetera. I really just want
his foot to be, let me get a little bit flatter. Something like this,
but only for the front. What I'm thinking, I'm
gonna validate this circle. So basically I
have a flat circle here underneath his foot and it doesn't really
look that good now. But I'm going to
click left again. I'm gonna trim, trim the circle. I'm going to trim it
up to about half. Whoops, I must not have
been on the shape. Right shape. Now I am going to trim it
to about half, like so. Then actually wanted to
just get rid of the back. I can probably
trim that as well. Let me click left again
and trim this as well. I can always bring this part up. Sometimes it's hard to figure out the easier way to do things. That's pretty much
what I wanted. Very simplified. I just wanted that edge to
go on his own, his feet. It might be easier to, let's see if I can
just clone this. If I clone this, Let's see if I can easily
bring it to the other foot. If not, I'll just have
to repeat the process. Let me see. It
would be like this. The side is might be a
little bit different to getting closer and closer. I'm just going to use
the middle tool to sort of get it in the ballpark. Bring it up. Then we'll sort of just
adjust it as needed. I think something like that
actually works quite well. Can probably make
it a little bit. I'll use the move tool to
make it a little smaller. Raise it up a little bit. I think that looks that
looks pretty good. I essentially just moved
it over to the other foot. When I when I voxel merge them, then else, I'll smooth it out. And then eventually
I'll just make some lines to sort
of imply toes. But this is a much more, much easier way to
do that to the feet. Let's figure out his tail. Because he does have a
seemingly fluffy tail there. And I think the tool will be
the best tool for the job. Will do curve. Go ahead and save this. We use our tube tool. We'll kind of have to guess. If this is the, this
is the general view. We want to make the tail
over something like this. I think. I don't know how I'm that far
away from the body. A little bit better. Just use a top view to get the tail sort
of in the middle. I'm going to tap
tube so I can go back to just the two of options. Thick tail, tap radius. Then we get this notch and I can make this bigger back here. Something like that I
think looks pretty good. But in the drawing, his tail, it looks a little lower. And it might even
be a bit bigger. Something like this. I'll tap to begin. Might actually be a
little more rounded. Get a little fatter here too. It looks about right? I'm gonna make this even bigger. Then I'm going to validate it and then I'm just going to try to sort of maneuver it so it's the right
shape from here on. So let's use move and
let's pull out tail here a little closer. Now. Let's see what
the smooth does. Take symmetry off
because it's not really not reacting
to the actual tail. Symmetry as like off
in the distance. So I'm just gonna take that off. Looking pretty good. Few issues but
nothing too crazy. This is very lumpy. Can't really see. I might just need to sub-divide. It, might be what
it is. Let's see. Let me just simplify the
tail and then smooth it out. I think that looks okay. I see, I do see
some points here, so let's see if I can use
flattened and flatten them out. Hopefully, hopefully they
don't come back when I did a little bit. I think that looks pretty good. We want him right now. He's not really leaning. It doesn't feel like he's
leaning on this leg. I want all the weight
to be on that leg. So let's see what's the what's the easiest
way to do that.
16. Renaming Session: I think the next thing, the next thing we should do is marry these fingers with
the palms and the limbs. So let's do that. We'll start with this finger. Thumb. There's are all
those other right fingers. For now, I'm just going
to simple merge that. Lift fingers. Good. Now let's try to get all of these right
fingers. His right fingers. I get so confused. Good one. Make sure we don't have lift
fingers selected. So simple merge those fingers. Right arm, right arm,
right arm, fingers. Simple merge. Right
arm, left arm. Select that. Left
fingers, select those. Right now I'm just
simple merging. Just so I have all
of these together. That's all I've done now. I'm going to figure out the
voxel emerge in a second. But I just want to have
all these together. Now we'll do the
legs. Right leg. We need the right sphere. Where is it? There it is. This fear. I don't have left arm
selected right leg. This fear. Simple merge. Now we have his
right leg, left leg. Some do that. I'm going to unselect that leg
and we define that sphere, the toes sphere, supermarkets. Now we have a left leg. This is much easier
to deal with. I do have all these spheres. Where did these this is a good
time to label everything. Eyes, teeth, which
I call t fees. This is the head. Knows. What does this tube tail, this tube lashes. I can hear, I can hear
the raccoon and the back. So I can delete these ears. Hears body. Okay, great. I'm gonna bring the
eyes up, the lashes up, over the eyes, body down. So that's always
really good to do. At least now we have
everything labeled. We can figure it out. The Google. I didn't say anything.
That's a good place to go. Excuse me. Just turned
into a labeling session. But that's fine. We'll move
on from the labeling session. Don't forget to take a break
and charge your pencils. Save your project, charge
a pencil, go get a snack.
17. Shifting Weight: I don't feel that he is putting enough weight on his on his leg. So I just want to just
add a little bit. We're going to make
some big moves. Now, I'm gonna go to my scene. I'm actually going to
highlight all of this, everything here by
just bringing it down. Left arm, right leg. So everything except
for this leg. I'm gonna go to my gizmo and
I'm just going to tilt it forward for him to
bring him forward. So he feels like he's a
little bit more extended. Where do we want this leg? Actually might want to. I think it's pretty good
where it is actually. I can use the Move tool and just move it a
little bit. Whoops. Take off symmetry. Just want to move
it a little bit. What we know, what it's time to bring these toes,
these toes together. The left leg is going
to get voxel merged. So we're just going to
go to this. Actually. We're gonna go to this
next page right here. Now page, this next option, we're gonna go to voxel emerge. Amish will bring us to
200, then will rematch. Then it has all these
funny-looking thing. So dismantle to smooth this out. Bring the intensity up. Just smooth this
smoothest leg out. I don't know why I got
so colony like that. Now that that is emerged, should be able to take
my move tool and just, just sort of move it in a
little bit at the bottom. Now we're gonna do the same
thing with the other limbs. We could possibly, we could possibly voxel merge everything together except for the head. I think maybe we'll do it. Let's live, let's
live dangerously. We're gonna take the body. Right arm, left arm, right leg, left leg, tail. Just make sure that
you're happy with it. Make sure that you're
happy with everything. We still can move
the head around, so I'm not too
worried about that. Now I'm gonna go to
this graph again, and I'm going to remeshing it. I'm gonna save first. Make sure we're saved. Then I'm going to rematch
it at measured at 300. I don't want it to be I don't want it to get like it did
like the other one did. So let's try this first. Not too, too bad, but it's still a lot of work. So let's see if, let's see if I voxel
emerge at 400. And I do keep sharp edges. Let's see what that looks like. A tad bit better. Now let's just smooth
everything out. Probably fast-forward this, because you don't really need to see me smooth
everything out. That's easy enough for you to follow for you to
do on your own. But it's kinda nice. I say I'm going to speed
it up and I feel like, I feel like making a speech. It's kind of nice to
voxel merged things. Because once, once I'm pretty
happy with something I can, I can always want to make
changes and go over it. But then I went up just
working on things too much. Sometimes they can become a different project because
I'll work on it so, so much. I'll just start to
make a lot of changes. Almost starts to
become something else. That's the one good thing
about the voxel merges. It got rid of those little
points that were on her tail. I think I think I did have to do something with that. Hopefully this old,
maybe it'll smooth. Seems like it's going to smooth. Smooth, smooth in it together. Not too worried
about the fingers because I can always
add a crease. I'll go in later
and add a crease to really get some separation where I want some
separation in the fingers. That's something
that I do a lot. So I don't get because when
I first started making kind of detailed scopes like this, I would, I would merge
them and then I would lose all the site definition. But I actually like
putting it in as a crease. Also because you can
change the color of the crease and make it
a little darker and then you kind of kind of
works out nicely. Everything. Make sure I got all
of the it mean bits. It doesn't look so crazy. Like this is looking crazy. This whole hand. Like these creases like I can just go back in with the crease tool, give
some separation. I'm not too worried about that. This bigger. Everything nice and smooth. Nice. I'm liking them live
in this little guy. Looks pretty good. Now we'll
come back and we can adjust. The head would have
actually been waiting for.
18. Head Adjustments: Okay, so let's adjust his head. He's got his ears, his little ears there. We're going to
select everything. So obviously his
head isn't really like nothing is
really permanent, permanently connected like these fingers
and everything are. So the tail is going
to be the body. I'm going to change
that to body. And I want to select all of
this except for the body. We have control of his head. We'll just use our
gizmo and maybe we want to turn it a little bit
or maybe turn it up. That looks a little bit more. We can be looking at his finger. Can actually turn
it a little more. I think that looks pretty good. So all I did was tilted. Sort of almost looks like he's looking at his finger
a little bit more. But I think that makes them
a little bit more sense. We'll just have to
make the eyes to make sure that it looks like
he's looking at his finger. But I'm pretty I'm
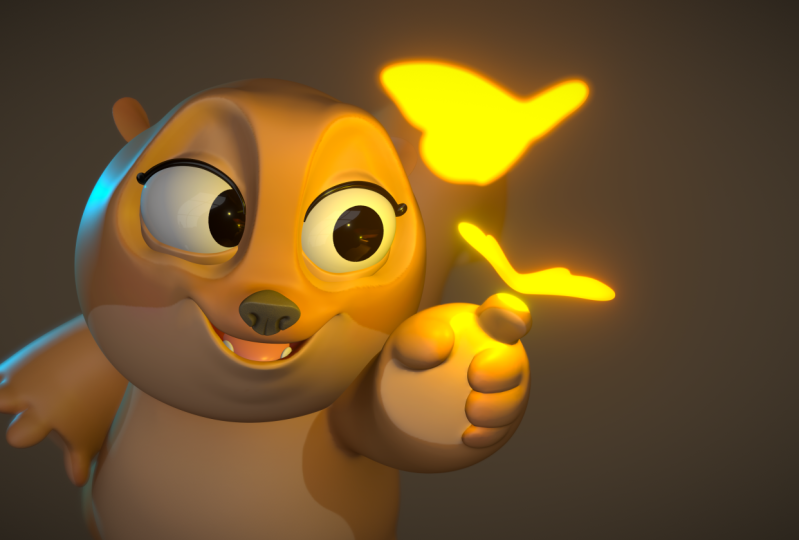
pretty happy with that. I must say. Let's take him out of mid-cap. Who should I make the take
him out of my cap and a PBR. We go look at this
little glucose, our little guy. Looking good. I think the eyes can
be white obviously. When x we don't have to be white and make them nice and glossy. I'm not sure about the
other colors just yet because we can choose whatever color we want
for this little guy. But I think this is a good
let me switch to perspective. Might be a good spot
for a for a photo. Just take a few screenshots. I don't know why why
am recording this. I don't know why
I'm recording this. Really liked the
way he looks now. I'm going to save it. I'm going to save it.
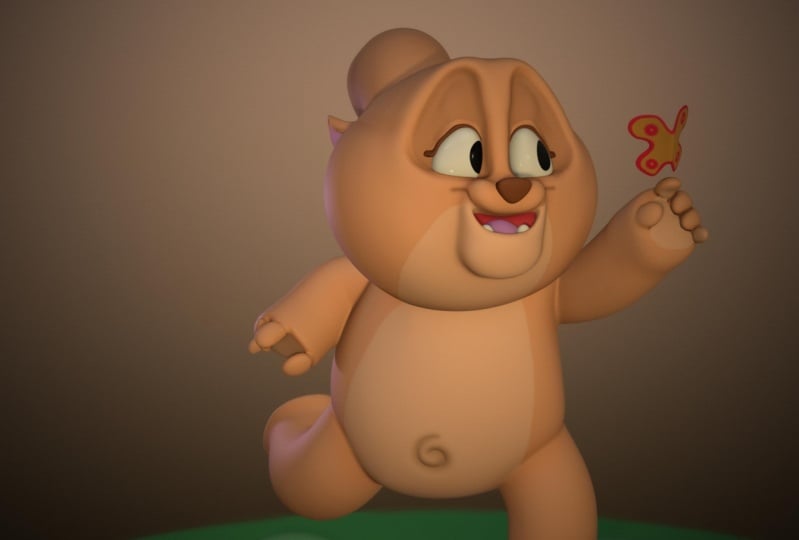
I'm going to save this. I would suggest saving how you have a now maybe
save an extra one. Because this will look
nice as a Metcalf, you always want to be
able to share your work. You want to get a share
before and after. And I think this is a good
point to share before, just to have it for your own. It's just nice to
have something like this because we'll move forward and color it
and things like that. But it's just nice to get
to this point and habit. So I would say save it and then save it as a different name. That way, if you do want
to come back to this and you want to do a
different mid-cap. For example, like
you want to do. You can do all these
kind of interesting met caps and just make it look
really, really interesting. There's like a cartoon one. Something like this.
How cool is that? It's a good place to
save and just save as so you have two
different versions of it. Let's make the little
butterfly that way at least all our technical
modeling is done. This is the last element, so let's add sphere. I'll just validate it. Now I'll do the front view. We can just flatten it out. We'll make it really flat. Put symmetry on. Notice if I remember how I, how to do the outline
of a butterfly. I think this is right, I'm doing it backwards. It looks like something like that. I believe. Let's take
a look at a butterfly. That was pretty close. The only difference
is sort of pointing. Maybe something like that. Didn't mean to do that. That's actually decent,
decent butterfly. Now in order to make it, make the wings sort of
separate and different, I'm going to use selective mask. I'm going to mask half of it. I'm going to take
it off symmetry. Somewhere, mask
half of it. Then. I'm gonna take my gizmo,
going to rotate it. I'm gonna bring it up. I'll just continue to bring
it back to the center. Rotate it a little more.
Maybe something like that. Remember to take the take the mask off by going back
to select Selective Mask, clicking the little
mask option and clear. Now, I'll just take move and give it a little more movement just
by pressing down on it. Then of course we'll
smooth it out. Feel free. You can, you can do a lot more details with this, with this butterfly if you want. I just like the eye, just like the feel
of a butterfly. Oops. Let's see here. Let me take it off. Symmetry. If you want, you can add some little legs on the butterfly or
something like that.
19. Better Butterfly: Okay, So I already
made my butterfly, but I wanted to make a better
version of the butterfly. So I just looked up a
butterfly reference. And this is how, this is just a bitter, bitter example of how to make
the butterfly silhouette. I'm gonna, I'm gonna use the top view and I'm gonna
make it really flat. Validate my sphere. Okay, so I'm just going to
follow this basic shape. You can either look up a
butterfly or you can just look at the way that
I'm doing it here. I'll just use the move tool. And I want to make
sure that I turn symmetry on symmetries on. Let me try local. Sometimes you have to go
into symmetry and do local. Now I'm just going to make this shape using the Move tool. I'll just slowly craft the
shape of this butterfly. By making the move tool
smaller or bigger. That sort of helps make it really small and
get some of those at all. Differences. Something like that I
think is pretty good. Again, I don't really mind if
I just implies a butterfly, so I'm not too, too crazy about it looking absolutely perfect, but I think that's a pretty
good outline of a butterfly. Now, I'll do the same thing. I'm going to use selective mask embryo to use the rectangle. Now with the selective
mask and rectangle, I'm gonna take it off symmetry. So selective mask rectangle and make sure to
remove symmetry. Now we'll make the box. We have half of our butterfly. Now I'll take the gizmo. And actually I will move
the pivot, pivot here. I'll hit pivot. Slide
this over to the middle. Now, I will uncheck pivot and
you have your Gizmo back. What that does is it moves the pivot point of where
you're going to rotate it. So now I can rotate this green and it rotates
on that pivot. That's pretty good.
We'll take a look at it. That looks pretty good. Now I'm going to go back
to Selective Mask. Click on the selective
mask options in a clear. I'll just smooth out this line. Also if you want, you
can use the Move tool, make it big, and then
you can sort of press down on it if you want a little more movement in those wings. Smooth out the bottom two. Now we have two options
of butterflies. They both look pretty good. Maybe we'll just make them both in interacting
with both of them. Now we have some
butterflies that we can work with if we decide to.
20. Eyes: Let's give him some eyes. I don't want symmetry. And the eyeballs
undo symmetry again. Make sure I'm on the eyeballs. Lock them. So I usually use selective
mask for eyeballs. Then I use the Ellipse. Now he's actually going to be looking at these butterflies. This is gonna take
some trial and error. I probably have to sub-divide. Let's see how bad it looks. It looks pretty bad.
Looks pretty bad. I'm going to sub-divide
the eyes twice. Let's see how it looks now. That's a lot better. By subdivided again. It's much cleaner, but we are sacrificing lot just
for eyes unfortunately. But I liked the
eyes to be clear. So I do allow for to use a lot of to sub-divide the
eyes a lot to get it, to get them nice and flat. And go ahead and save. I'm gonna use selective mask. Notice how I'm making it. The spot that I'm
putting his eyeball. This is so he can be really
looking at these butterflies. See over here. It doesn't really look, he's
looking at him. I'm going to erase this
and start again until I get something that really
looks like he's looking at them little too much. That one's pretty good. Now let's see what
this looks like. This is, take some trial
and error because it's a little difficult to
to really get at get him looking like he's
looked me to certain thing. It takes a lot of work
and it's worth it to take that time to really
get it right. Because sometimes
I'll get one right. But it might not look
right for the other eye. That actually looks okay. I don't mind if it looks
like he's looking at both of them are looking at one
rather than the other. That looks okay. I sort of believe this believe that he's
actually looking at them. It looks a little
weird from this angle. But most of the other
angles, I believe it. This situation,
since eyes are very difficult if you do get
something that you like. Here's a little trick
that you can do. Add a layer. I'm gonna name this iss one. Now. We'll go to our selected mask, who go to the Options,
and we'll invert. Now all of the rest
of the eye is masked. And then we can take black. We'll go to the Paint tool. We'll go to black. We don't want any roughness. 100% intensity. I think the brush kind of big. And then we can just fill
in our selective mask. Selected mask, clear. Now you have your
first option for eyes. If you want, you can hide this, can add a new layer. You can do the process
again and see if you can get a better, a better eye. You can just try
a different eye. It's always worth it to try out different options and see if there's something
that you like better. Anyway, I'm going
to continue to do this until I get
something I like. But I'm not going to bring
you through this process. I don't even know
what I'm saying. Let's just move on.
21. Adding Color: Okay, So I kinda like the
way that these eyes are. Here's just a look at
how I position them. I think that I think they look they look like he's looking at, I believe that he's looking
at the butterflies. See a little bit of an
anomaly with his cheek. When I'm looking here. This cheek, this kind of
looks a little bit odd. I'm not sure exactly why. It also could be
the focal length sometimes dealing
with you can change this once you start doing
post-production, post-process. And you can change
the focal length. So there might, well, that actually helps to
perspective helps to, I'm gonna keep it in
perspective for now. Just so I can kind of
get a good clear view of what our little
guy looks like. Let's color him. Actually first, Let's sub-divide the body. I'm going to unlock it. Will tap on the body. Let's subdivide it. The reason why I want
to sub-divide it is because we have to figure out a color and then we can make the toes and the details
and things like that. Let's figure out
a color for him. Go to the Paint tool. Like he would be a
sort of beige brown. Something like this. Feels about right, friends. Choose the same color
for his head, ears. And actually, it's actually a good thing to add layers
when you add this color. I'm just going to name it color. Then I'll paint it. Same thing with the head. Add a layer, added two layers. Color. I'll add this color. Years. At a layer. Color. And paint will do
is it'll tongue to go for a kind of a
pinkish, pinkish color. Teeth. Make them white. They
have some glass. And the nose will make a
like a warm, darkish color. Like this. We'll add
some roughness to it. It's a good general color. Of course, you can make them
whatever color you'd like. And asked for tos, I'm probably going to I don't know if I actually
want to keep this color. But as for tos, what I would do is
use the crease tool. Let's see how, let's see how
good the crease tool works. So first I'm going to
choose this color. I'm still increase. But now I'm gonna click it, I'm gonna make it darker. I'm going to make
the brush small. No symmetry. We should be able to get
some decently clear feet. That's all I wanted. Just to sort of imply the toes. I'm gonna get rid of this grid. Grid. Here we go. I'll do the same thing here. Just sort of imply that
there's some toes there. You can turn the color
off by unchecking this. Now we're just using the
regular crease tool. We want to just like separate
some of these details. Where did that come from? Increase will just
give you back some of those details that we lost won't be perfect,
but it's enough. Just add a little something. I think this has all, this is a little bit extra. Like I like to add in
these little details. Go ahead and smudge this out. Smooth it out. I should say. You can do the same thing here. You can just take crease. You could actually
make it darker. See, see what that looks like. Could totally use the darker one to the darker actually
looks better. This is where does this, I don't know where these
little things are coming from. Plato was saying sometimes
you'll be working on something and somehow it'll affect a different
part of the mesh. That just happens
sometimes I'm not sure why or how to prevent it. But next we'll we'll add this little color variation like the tech around his mouth and at the bottom of his tail.
22. Painting & Toes: All right. Let's give His let's
give them a little bit of a color variation on his body. I'm not sure yet if
I want to I want to merge his body and up top,
I might just leave it. Let's go to paint.
Choose this color. We'll go with Michael,
lighter color. Like this, I think. Maybe nice round here. You can go around him all
the way to his little tail. You can always come
back and erase. If the line goes somewhere,
I don't want it to go. Wish I could color fill, but I can't manually
color in all of this. I'll do erase. You can sort of clean up.
If I decided I wanted to, I could also not erase. Just add that little bit of paint on the inside of his legs, which I think I would buy. But I do want to make sure that it's if I'm going to do it, I want it to be nice and smooth. Something like that. Maybe paint the inside
his little hands, including the underside
of his fingers. And to be little
more careful here, since the fingers are closed. But this is also good because
it shows the underside. Lets you know that that's the
underside of the fingers. This is the top of the fingers, so we have a pretty clear, but now it's extra clear. We'll do the same
thing to the face. Maybe here. It looks
like it comes out. Turn symmetry off. Because it's given me
some really weird things. Because we turn the face. This is your time to shine. You know, if you want to
make different colors. Be really creative with this. I mean, this is your chance to really do any color you want. Any style. Just be
creative with it. Go back to the body. I want this line to be perfect. This is a very bold
line right here. This S-shape. I want that to be perfect. The bottom of the feet to make much smoother lines. Going from left to right. Got to know your strengths
and your weaknesses. I shift up. I should've done this on
another layer. That's okay. Nice. We'll do some more color details. The ears inside the mouth
and things like that.
23. Mouth Details: So let's make sure
that our colors are looking good a while. We'll add a little details. First, I noticed that
it's a good thing that we kept the hit
separate because things like this soloed the head. And I actually want
to fix this paint. Some use the paint tool. Long press, get that color back. I just want to match.
That's way too big. Just want to match match
the other side. Doesn't it? To be perfect. But that's a little better. A little better. Now I'm going
to take this color again. Obviously I'm gonna
go back to crease. Wanted to the darker color. I think I want to add it here. It looks a bit odd. Might be. Let me
see if I subdivided the head. Let me save it. I might just need to have
subdivided the head. Let's see if this paint goes
on better than it looks now. Because it's very
clean on the body, but it's not on the head. And that's why if
it's not subdivided, not going to look as clean. It looks a little bit better. Solo the head. So we can fix this side to sue for the color or
the back of the mouth. We'll just do a darker,
darker red tone, the roughness up.
I'll add a layer. Want to color this in? Sometimes a little
tricky to get in there. See how that looks. Pretty good. I don't want this I
don't want this color to go too far up, but I do want it
to fill the mouth. I think Bill looks pretty good. I'm happy with
that. There's this weird somehow got this
color underneath the mouth. I'm gonna go back to the
car layer, grab this color. It's nice because it'll just
go right underneath that. We just we just painted.
24. Color Details: I do want to paint a little
bit inside the ears. No. It was the crease. Somehow the crease has gone
rogue. That's what this is. This must have been
from the crease. Smooth it out, get my paint. Just paint over it. Luckily,
not too, not too terrible. We have to be careful with crease because apparently it can really go through ruin my smooth mesh. It's not cool at all. I'll have to try and
forget about that. Actually, I need to
smooth out all of this I think, let's see. So back to the ears
and add a layer will go with the pink. We can always lower
the opacity later on. We don't want symbol and we also want to make
sure that we don't have, we'll tap on this little pencil. We want to make sure we have
front-facing vertex only. That's under this little pencil next to the paint brush tool. All the way on the bottom. That way when we paint
it doesn't go through to the other side. Smooth. This first looks like it
needs a little smoothing. Which means the other side needs a little
smoothing as well. Since they are not.
There's no symmetry. Not too much, but I just want to smooth that out a little bit. Back to paint. Wherever it starts lagging, then I have to make
sure to keep saving. Another trick. Once after you save it and make
sure you've saved it. You can close nomad
and open it back up. Clears that temporary RAM
wherever you want to call it. Okay, so we're back on
the ears and now I'm just going to coat the
inside of the ears. Pink. It must have not. It must have turned off the
setting that I just did. It did. Now, I'll check that again. Front-facing vertex only. I feel like that
should be a default. Because really do you
color on a surface? And you wanted to go through
to the opposite side of the surface is one year. And then we'll do the other ear. He's got his little ears
and we can always lower the opacity of that pink too. Let's add a little blush. So I add another layer, name it plush will
make it more red. And we will lower the intensity. Will raise the
size of the brush. Which is one a little
bit on his cheeks. Very, very, very slight. We actually want
to make sure that roughness is very, very, very low-intensity. The cheek area. Solo this so we can
get the other cheek. This will make sure
that your characters feel nice and warm and alive. Some little bit of
redness in here. Here on the nose, some on the fingertips. Actually, I didn't have to go to body to body and
I'll add a layer. Blush. Little bit to his fingertips. Maybe he's a little elbows, knees. These are, these are supposed
to be very, very subtle, which is kind of hard
to do with these tools, but it's very, very subtle. And then on the ears as well. Back to the ears. Did I already? Some red to the ears? Here we go. Just that nice blush
just gives it, gives him some warmth.
25. Belly Button & Ground Platform: We've come along nicely ticket to put his
little belly button in. So let's do that really quick. Make it about the center.
I'm using crease. Cute little bit, It's a bit big. I'm just using crease
and maybe I can make it a little darker. I'll choose. I'll click the Color tab here. Long press on that. And then maybe I'll just
make it a little darker. Just to give it a little pop, make sure your brush
is very small. This is about the center
of his little belly. Let's just here we go. I like that. Could even be a little
less. Be a little less. Let's see what that looks like. Yeah, I like that
little belly button. Of course you can color these
butterflies if you'd like. I'm probably just
going to, let's see. I'm gonna make these little guys cool the paint them. Let's make them yellow for now. Because I might make them
glow a little bit later on. I love to make things glow. So let's get rid of this image. Tapping this picture icon in the morning to get
rid of our image here. But he does need some sort
of something that he's on. So that's the right view. Will make it really simple. We'll just add plenty hopes. Will add a plane.
I'll make it bigger. You can either add a plane
or you can add a box. Sometimes I do add
a box or a circle. Can add a box and just make it thin. Something like this. Or you can make a circle
as well, or cylinder. Oops, what did I just
do? There we go. Make a cylinder and just
make it really big. Squeeze it together. Looks
like he's on a surfboard. I believe you can actually
go into the settings here and do flat subdivision. Put this subdivision up to 23. That's sort of affects the
outside of your cylinder. That looks pretty good. So
we'll leave that for now. And the next I just
want to add a sphere, make it fairly big and
it will shrink it. I think I just wanted
a little bit of, a little bit of a surface like that I think
is a bit interesting. Almost like he's
running on the ground. So I'm gonna validate that.
I'm going to hit front. So it's nice. Now this is one of the
times where I want to go back to orthographic. When I hit front, everything
is perfectly aligned. Then I'll just trim this
rectangle. Just trim that. We have a nice at all. Wherever you want
to call that there. You can actually do this with. You can clone this. You can make other little, little changes in the ground. These can be like little dips, maybe rocks or
something like that. It is something to make it
a little more interesting. So something like that just
to give it a little bit of little bit of
movement on the ground. Let's go ahead and
color them all. So let's make it like a we'll make it like a we'll figure out a nice color for this
one in the next video. Be creative with the ground too. You can do anything you want.
26. Coloring & Lighting: All right, so let's
figure out what color we want this to be. I think we want a
roughness to be a pretty high just a nicely sort of
pale color I think is nice. Kind of a nice color for now. All of these spheres, I'm gonna simple merge them all. Pebbles. Hills. Rename this as well. Now I'll just paint all. Make them a little bit lighter or darker. I
think a little bit later. Looks nice. Now let's do some lighting. Let's see where's the
lighting? Okay, so here's the lighting tab. I still forget where these are
all time. The environment. I'm going to include
this photo for mine, which I will be one of
the one of the downloads. And if you want the same one
that I have, but of course, you can use any of
these environments, whichever one you
think looks the best. But sometimes I like to
turn the environment off. Then you just have complete
complete blackness. Then you can light
your scene and you don't have any other
thing in your way. So when you want to
let you see and go to this sliding option
here, add light. This is, this is a world like this matter
where you place it. For some reason I always
like to place it above. But wherever you
angle this light, that's where the light
is going to come from. For now, we'll keep
that where it is, but I'm gonna turn it off. I'll hit show. Let's
add a spotlight. So now we've added
a second light and you click on
this little square and you have these options. Let's do spot. And we're gonna make
this a little warmer. So we're bringing that
color up a little bit. So this lady is
right in his face. So we're just going to bring
it back over to the right. This angle it right on him. So this is the same
principles as the gizmo. Angle your light right on him. Let's move it over more. Bring it up a little
bit higher. Bac. Just sort of sort of
gets our whole scene. Another thing you can do is you can click on
this little tab. You can, you can
widen the cone angle. That will widen. For example, this is
very small cone angle. You can widen it out and
it's to get everything. I'm bringing in a
little closer to him. And of course you can raise
your intensity a little bit. Now I want to clone this light. Will do clone mixture right
there at the right light. Bringing the bottom one over to the opposite side and angle
it over him this way. Now he has two lights, roughly the same position
on him like this. Let's actually move it over a little bit more
and angle it on him. I'll do the same
thing with this one, bringing it up over
an angle it on him. Now he has the two lights there. We want to use this light
we could with this sort of. It's very, very bright, so we still have that option. I'll turn it off for now. Instead of using this light, you kinda have to be
frugal with your lights. There's only four. If I'm
gonna make these glow, then it might be nice to add
a yellow light for these. I think. Maybe I can do that fairly
quickly in this video. So right now they're
both yellow sphere. See other one. Okay, so
these are our butterflies. We can actually, we
could simple merge them. But the only difference is I
might want to change there. I might want to change
their position. Maybe I'll just undo that. Just named them both,
each butterfly. So P1, which ones? B1, B2. Those can be our butterflies. Now I'm going to
duplicate each one of these and I'm gonna put
it underneath each other. The one on top, the one on top. I'm gonna change
that to B1. Add. I'll do the same thing with B12. Duplicate it, bring it right
underneath the other B2. And then I'll go to the
top one, edit V2 add. So for the ad ones, right now we're gonna
go to this panel here. See the Materials panel. We go to this little sphere
and then we put additive. Then always unlit will do
the same thing with B2 add. Go to the sphere. Additive. Then always unlit. Now we have to have
a nice glow to them. And we'll add our last slide. For this one, let's change
the color to that same yellow at the butterflies are a yellow actually looks
very, very nice. Warms up our scene a lot. Really like that. Now let's take
this yellow light. Make it a point light. I think the light is right here. You can see it's very,
very bright right now. So I went to lower
the intensity of it. I want to I kinda
want to put it right behind these guys
because it's as though it's as though the butterflies are
giving off this light. Let me lower the intensity. Lot. Something like this. Now, the only thing other
thing the only other lighting matter that I wanted to put was it's
always nice to have some sort of glow
behind your character. Let's look, let's see what
this light looks like on. Not really doing
that much for us. I think this will
be better served. If we either use a point
light or a spotlight behind. I'll change it to a point light. I have it behind him. I don't think I won't
white be the color? I think I want to
change the color to maybe something
a little cooler. Maybe something a little cooler, lower the intensity
a little bit. It looks kind of nice. And I'm getting a lot of
shine on the ground. So I think in the next video, I'll make that a spotlight. And then I'll maybe
change the background. We might warm up the
scene a little bit. Maybe I can do it
with the spotlights. So we'll do that
in the next video. But I think he's looking
very good so far.
27. More Lighting: Okay, so let's I'm gonna change up the spotlights and make them a little warmer. Just so our overall scene is a little more, a little warm. Let's see what color
this light is. Light is already a
little bit warm. Let's see What a nice
background color might be. So I'll click on this
little picture here. Here's our background. I do still like a neutral
neutral background. Fairly close to what we had. Let's change this to a Let's
change this to a spotlight. The reason I'm changing
it to a spotlight. So I don't have a lot of shine
on the phone, the ground. Spin this towards him. Maybe I make the
cone a little wider, raise the intensity
up a little bit, and I can even move it back. Use the intensity a little bit. We want that nice, that nice glow on
the side of him. Nice rim light. Now it might be nicer to you could also try bringing it up and then
angling the light down. But I think I like it low. Like that. I'll turn the
intensity down a little bit. I don't think I want a shadow
associated with this light. You can turn the shadows
off and see how that looks. I guess it does look
better with the shadows because certain areas wouldn't
be getting hit by light. But I think it's worth
it to go through your shadows and see if there's any shadows
that you don't want. Although most of
the time they do. They do serve their purpose. Put it that way. Sleep better without a shadow. I can't, I can't really tell. Not sure what normal
bias actually means. Sometimes they'll just go
through and experiment. I do like the shadow, but maybe I just want to
move the light a little bit. Here we go. I don't
want the light from the from the butterflies
on his face. That was my main concern. Another thing that I
wanted to show you, remember we turn off
our environment. Now if you turn it on, it'll get a lot brighter. But you can lower the exposure. For example, this is black. But sometimes these areas
can be a little too dark. You can raise your exposure
of your environment to sort of fill in some of that darkness because there's no reason that it
should be that dark. There is ambient light. I think something like that. It looks pretty good. Okay, so now that we have that, let's go ahead and
hide our lights. We're going to hit
this little cog here. We're gonna hit our light icon when it's white and that
means that it's off. Orange means that it's on. We'll turn the
lights off that way you don't see them in our scene. Next thing that I wanted
to do, brain ****. I think I'm, I'm very
happy with this guy. I think he looks really
cute post-process. So I'll do a whole
video on post-process. And hopefully this
will finish us, finish us out for now doing
this post-process video. But I'm really happy
with this little guy. There we go and make it darker. This is just another little tip that I want to show
you about the mouth. I like the mouth, but
there's some things that were bugging me
about it enough that I wanted to make
another short clip of how I fixed the issue. So the first thing is
for this mouth area, I don't really like how
it's round right here. I feel like these lips
should be straight. Decides. I used Move. I use the
Move tool with symmetry. Let me make sure I'm local. I use the move tool. Moved. I'm I meant
move the move tool. And move these the mouth
inwards a little bit like that. It's more straight coming down. I liked that a lot more. Also, the next thing
is this red paint, this red paint layer here. Let's go to paint and grab that. It shouldn't curve
around like it does. It should just go straight up. Intensity 100, brush smaller. This should go straight up. You have to watch the, the symmetry here because
it could mess you up. I'm gonna take symmetry off. Because I just want
this to go straight up that little curve at the end. I wanted to go straight, straight up like that. And the last thing
that I wanted to show you is underneath here. I want to make a sort of lip. So all I do, let me just
make sure I'm on Layer. I'll do it on.
Another layer above. All I want to do
is make a lip and then make us sort of chin area. Instead of having
them connected. I'm just going to use clay. Quite smart and it's been a big, make sure you're on subtract. Then you can actually
use symmetry for this. You see how I make ellipse by getting rid of
some of this clay in here. Once you have that, then you begin the smoothing
process and you might have to do it
a couple of times. Just be careful if the if
the clay is very soft. I actually did this after I was finished with the
whole tutorial. I decided that I wanted
to change the mouth up. And it makes such a difference
visually that I just wanted to insert it
in a bit early on. The lighting is a little
bit different too. Now I'm going to up
the intensity and just sort of smooth out
this chin area. Just make it nice
and soft around. Can even make this
a little bit too. That way you have a sort
of Chin and you have a have a lip as well that I
think looks a lot better. If you want to level up and do some little special technique. You can take the
color of the lip and then you can tick
off all the roughness. When you're painting. You can paint even turn off symmetry. You can just add a little bit
of this gloss to the lip. And it kind of gives it a
nice little glossy like lip feel. If you'd like that. It doesn't have to be in maybe
not as glossy as a habit, but something like that just
so you get a little pop of light. Just a little extra.
28. Post Processing: All right, Let's
finish up strong with a nice post-process. We're going to use
this circle here. And we're gonna
hit post-process. Now, it really
starts to look like that beautiful 3D scene
that we all love. I love it. All right, so obviously you have all these options
that you can play around with. Depth of field is an
important one. Near blur. Let's see if you
have it like this. Whatever is closest, you know, we'll have a nice blur to it. Look at that, That's so nice. Then of course we have FAR blur. Things that are farther
away will start to blur. And of course,
wherever you tap on, we'll come into focus. Bloom is tricky. So just be careful with bloom, but it'll give that
nice, the nice glow. You can play with the settings
here where we're human, however much you want that
to really, really shine. And you can tell it's sort of it's sort of blooms from the light source
it looks like. So you can actually go
to these butterflies. Let's see if we can make
these a little brighter. I'm in B1 ad, that's
this butterfly. Let's go back to the materials
tab, this little sphere. Let's raise this opacity. That way it's a
little bit brighter. We can do the same thing
with this guy if we want, although I like it. Let's raise the opacity
of this guy as well. Now we're on we want to
be on the other B2 add. Go to our materials tab and
we'll just raise the opacity. That way they are, they're
just glowing a little bit more and they have a little bit of a glow coming off of them. So that's bloom tone mapping. You can change the general
tone and everything of the art. Color grading. I don't really have anything,
but if you wanted to, if you want it to affect
different colors, obviously, you can play around with this and see if you find something that you like. I guess I'll just show
you these real quick. This gives sort of like
an outline and you can pinpoint how you want the
outlines to actually act. The cavity would be like in these in these little crevices. And then you have the bump
I think is just raised. Anything that's raised. But I usually don't use, I use it sometimes
if I'm doing like reptile scales or something, it makes it look really cute. Chromatic aberration is cool and makes it look
like it's an TV. Very cool. 80s viper
wave style vignette. I really like. I usually add a nice vignette. I'll do a before and after. You can change the intensity
of the vignette, of course. Grain, you can adjust the grain. Sharpness saddle use those
sharpness and anti-alias. Ambient occlusion. You can play around with this. Just has to do with
the shadows and the ambient light and shadows
and things like that. You can adjust to taste. See what you like more or less. Keep max samples full quality. And if I'm going to, when I'm, when I'm
ready to save my art. And this is, you have to also mind your system and
what you can do. Hopefully, you guys haven't
had too many crashes. It just save this 3 million, which isn't too bad. You can go to this cog here, or is it think
it's the cog here? Will go to this little
cog display settings and turn up render resolution to
make it the most beautiful. Then we have our scene. So again, what I was
telling you a while back, you can actually
attended to perspective. I was on orthographic
the whole time. Perspective. Just lost
my pencil, me 1 second. We'll change it to perspective. Where was I in perspective? Now we have the vertical focus that you can actually change. That will make a big
difference on your scene. Changing this focus here so you can actually
see what's happening. I'll do it from a different
and better angle. C, it really makes
a big difference. Your focus. I think I'm pretty happy
with this little guy. This is a good place to stop. Otherwise, I'll keep going
on forever and ever. Just remember, you can edit and adjust your
hardest content. That's the one of the
best parts about 3D, makes it really, really fun, is you can edit and
have fun with it. And you can figure out the
best, the best angles. And you can save the
best angles like once you find
something you like, you can do addView. So you can save the
angles that you like. There's a bunch of things
that I might do for this guy. I can change the
eyes a little bit. I want this to be the hero
frame, something like this. I might move this over. I might move this butterfly over a little bit and
then move his eyes over. That way you can still see his
eyes on a frame like this. But there's a million different
things that you can do. And I would say that this is a good place to
stop for this guy. I'm very happy with. I'm happy with this. I think he looks very cute. Like this view to
it's kind of cute. So I hope that was useful. I hope that you got
a lot out of that. I had a lot of fun. I'll see you guys in the
next in my outro video. And we can just chat about the amazing 3D
stuff that we created. So glad that you guys
take my classes. And I know that they're long, but there's just I don't
think there's any other way. I mean, with years and
years of experience, maybe you can get faster. But in order to loan process, but it's so much fun
and it's so rewarding. So I'll see you guys
in the next video. The outro.
29. OUTRO: Well, you did it. Congratulations. I'm really glad that
you made it this far. I hope that you enjoyed it. I hope you learned a lot
because that's the biggest part of this whole 3D thing
and taking classes, it's just learning and
experimenting, getting things, getting things wrong so
that you can fix them and get better at all the
characters that you want to do, all the 3D work that
you want to do. That's what this is all
about. So I hope that I was able to explain everything in a way
that you understand it. If not, please reach out
to me, I'm happy to help. I'm happy to walk you through certain things where if
something was confusing, I'm happy to help out
and even I'll make more videos if it's something specific that you need to
know, just let me know. I'll make a video and post it on my YouTube or
something like that. Speaking of YouTube, I want
to let you know that I did continue on and I made like
a background in Procreate. And I added some details and maybe tick took
away some details. So there is more that I've done. I put it on YouTube. There's so much, you know, I never really feel like I'm
finished with the project. So after I finished
the tutorials, of course, I just kept going and kept going
and kept going. So be sure to check out my
YouTube because I have more on this character and
more things that you can learn on my YouTube. Of course, feel free to
follow me on Instagram, jug for Dave, drug for Dave 3D. For all of my 3D work, I have a procreate tutorials, Facebook group, procreate
tutorials and guidance. I'm on tiktok and
of course I have about 16 or 17 other
classes here on Skillshare. Make sure you take
advantage of that. Take all the classes learned, steal all my tips, steal all my tricks.
That's what I'm here for. I want you to learn. I want
you to get better at what you do and your design
that you're sculpting. Because that's what I'm about. That's what I love to do and
I love to see people's work. Make sure you post it,
make sure you tag me so that I can share your
work. I want to lift you up. I want to show off what you created in my class. All right? As always, keep drawing, keep sculpting, and I will catch you all in the next video.
 Dave Reed, 2D & 3D Illustrator - Brooklyn, NY