Transcripts
1. Introduction: Hey guys and welcome
to this course. My name is Austin. I'm a mechanical engineer
and one day for fun, I got a $200 3D
printer from Amazon. After printing a few
things for myself, I quickly had a ton
of people asking me if I could print
stuff for them. So I eventually started
charging for it. And before I knew it, I had more than 20 3D printers
that ran 247 in my basement. Now, that setup quickly became what's called
Create 3D.com, which is my company now, we've designed,
printed, and shipped literally tens of
thousands of parts. I absolutely loved
3D printing and I have personally
tried, failed, tested, and most importantly
perfected literally everything there is to
do with 3D printing. I have to stop the
intro for just a second and show you
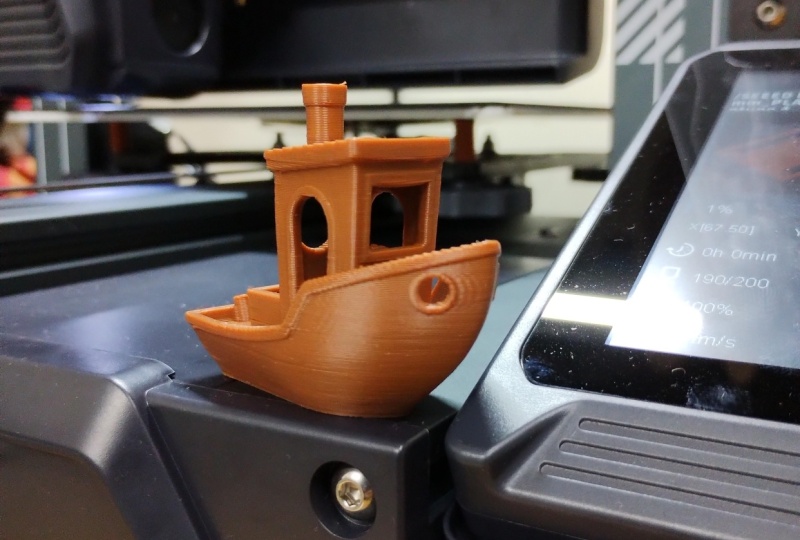
a project that we just finish this right here is the BB8 robot from Star Wars. I designed this and
then 3D printed it. You can see it fits on top of one of those robot vacuums here. Just wanted to show
you guys an example of an awesome project that was completely designed and 3D printed if you want
to see how it works. This is only does,
it's kind of silly, but it gives you a good example of some of the things that we can do with 3D printing if you have a good imagination. So back to the intro. Now, this course will cover everything that you
need to know from absolute beginner all the way to becoming an absolute expert, whether you're just unboxing your first 3D printer
right now or maybe U2 are a graduated engineer with some 3D
printing experience. This course is for you. When you finish this course, you'll be able to
print anything. And most importantly,
you'll have a full understanding of all
of the processes involved. So you'll be either
ready to push the limits of your
hobbyist printing or maybe if you're
interested in doing commercial work like Aidid, that something that you
will be prepared for at the end of this course.
So wait no further. Let's get started right now. I'll see you guys in the course.
2. About Me: Hey guys and welcome to
this quick introduction. Now this video here
is just for me to properly introduce
myself to you. I think this is really
important because you're about to invest a couple
hours of your time watching and learning
from this course with a mass availability of
information these days, learning from a reliable and a good source is
extremely important. So, who am I and how did
you end up on this course? Well, my name is Austin hardly. I'm a mechanical engineer
and I graduated from the University of Calgary
right here in Calgary, Canada. Basically right
after I graduated, I decided to start
my own company and do engineering design
and 3D printing. Now, while I was in school,
near the end of school, actually had everything set
up so that upon graduating, I basically just hit the ground running
with this company. Basically what happened
was in engineering school, we took a CAD design course. Cad stands for
computer aided design, which is essentially a
program called SolidWorks. That's the one that
we learned on, and it's just a fancy
engineering design software. After that course, I pretty much knew exactly what
I wanted to do. I was well equipped with the
tools to take an idea and turn that into a physical
object via 3D printing. And pretty much after I
got my first printer, I did a couple of
designs and prints. I knew this would be my career. I purchased a couple of
ender three 3D printers. I started posting
my design services available online before I knew it there was so much work
that I couldn't keep up and I actually opened an office
just down the street. They're on seventh,
seventh downtown Calgary. And essentially what
we did is a ton of design and printing for
the last couple of years, a little more about what we do. Basically, there's three
types of work that we do. Number one is if
someone just sends us a file to print, we
simply print it. Number two is if
someone needs something design and then print
it, we also do that. Then finally number
three, we have a digital sculpting
design part of the company where
basically we designed those fancy 3D objects
that you might see in things like a video
game or VR or AR, or something like that. So why is this important and why is
this a video important? Because basically the
first year and a half, I was all on my own
doing this company. I tried every type of filaments system design
software, you name it. I had to be efficient because
frankly we had no money. I was just coming
out of university. I literally started with a
$200 end or three 3D printer. Now fast forward to today and I am the CEO of the company and I oversee all the
incoming projects as well as the deliverables. So basically deciding
what projects we want to take on and then
confirming the designs, the prints, and the
settings before we go into hand things
over to the clients. If you can think of it honestly, we probably designed it and in this course It's now my
turn to equip you with the knowledge and the
skills so that you can be ready to print anything
that you can think of. I hope that helps. I will provide more
information later on in the course and
tons of examples of what we do in case you're interested in checking
out my company or the type of work
that we do as you might be doing some
of the same work. So let's leave it at
that and honestly, let's just jump into the course. I'm excited, I'm excited for you guys to learn
and take your ideas and turn them into real 3D
prints and real objects. So let's jump in.
3. Class Project: Hey guys and welcome
to this lesson. In this lesson we're
just talking briefly about the class project now, before you get caught
up, don't worry, I know most class projects
are extremely boring. I promise this will be one of if not the most fun class
projects that you've done. Basically all we're
gonna do is it's really simple as you
go through the course, I want you to please post photos of your very first prints and also the ones that you complete along the way
doing this course. That way we have kind
of a before and an after and just a little
timeline of those. Me personally, I still have the very first print that I did. It's sitting over there
and honestly it is just the sample
file that came with the SD card, the printer, and it is probably one of the most sentimental
things that I own today as that kind of shaped my career in the last five to ten
years of my life. So please, as you go
through the course, just do post some photos
that way I can see them, I can review them for myself. And it also gives
the class things to View and things
to engage with. Pretty much check them all. And I'm excited to see how you guys progress
all the way from your very first prints at
the beginning of the course to the last ones near
the end of the course. So that's all I wanted to
say with this video is to participate in posting your 3D prints into the
class projects. So that's it. I'll see you
guys in the next video.
4. Types of 3D Printing: The first thing that
we should address is what is 3D printing? Now if you're watching
this, chances are you might already know
the answer to that. However, this would be a
complete course without at least acknowledging and
quickly discussing the main two types
of 3D printing. So the first type and the main focus of this course
is called FDM printing. Now, the FDM stands for
Fused Deposition Modeling, which is just a fancy way of saying what we're gonna do is melt plastic layer by layer
to create a 3D object. Now, the other common
3D printing method is called SLA or stereolithography. There is a few
different names for it, but essentially
that is the process of curing a liquid layer by layer to create
that same 3D object that gets cured using light. Let me show you two
real-life examples of this. Behind me here you
can actually see this is a monkey here that we
sculpted and printed. It is actually an
NFT in 3D form, but it was done using
resin printing. Now, this could have been
done using FDM printing. However, it has some complex
geometry and small parts, so it was easier
to resin print it. Now, if we check out something
like this BB8 robot, this was done using
FDM printing. And again, this could have been done using resin printing, but because of the geometry, it was so much easier to complete this task
with FDM printing. Now this course will
focus pretty much only on FDM printing. Honestly, 99% of what I do
is done with FDM printing. Most of the
engineering work that my company does is
with FDM printing. Most of the client work that
we do is for FDM printing. And me personally, the hobby
work that I do just for myself for fun is done
with FDM printing. Essentially, the only
time that you really need an SLA printer or
a resin printer is war very small and
intricate models where the geometry of
those models is complex. Like maybe the little
points that you can see on this model here. By the way, if you're
brand new to 3D printing, all of this is a little bit
confusing or you feel like we're already just kind of
diving off the deep end. Don't worry at all. Just keep watching
because I will be explaining everything
in greater detail. This is just an introduction to the two different
types of printing. So let me actually, let me put this year for a
minute and let me show you three more examples
of things that we would FDM print and then three examples of things that
we had resin print. Let's start with the BBA, like I said, starting with FDM, as I mentioned this year, is that robot I showed you
this in the introduction. So why did we FDM parenthesis
versus resin print it? And the reason for that is
basically because of the size. This is a pretty large 3D print. To print this in
resin would require a really big resin printer where resident printers
are typically, are, they typically have smaller build volumes
then do FDM printers. So part number two, let
me grab this right here. This is a tire protector and it was printed from
a flexible material, which is the reason that
we went with FDM printing. That is because there is a
greater material selection. We can print things
like flexibles, carbon-fiber composites,
dissolvable, etc. All of those we will also be describing in greater detail. Number three, this year is an electric skateboard
or a one we'll stand. Maybe you're familiar with
it and maybe you're not. It is very, very strong. The board weighs about 30 pounds and when it sits in here, this does not even flex or move. This thing is solid as a rock. And the reason that
we FDM printer this is a because it was
really cheap to do. This whole thing here is maybe only a dollar or
two in filament. And also it's extremely strong, which is what we
needed for it to hold the actual
skateboard in there. Now for resident,
like I mentioned this year is the 3D printed NFT. Hopefully you can
see that I'll put some close-ups in there as well. But the question I want
to answer here is, why do we print this in resin
instead of FDM printing? And the reason is because
I wanted it printed with as high of
detail as possible. Now, most FDM printers, like the one you can see
behind me there have a nozzle diameter
of 0.4 millimeters, which means that
the resolution of those prints are
slightly more limited. Whereas with resin printing, you can almost not even see the different layer lines
on the actual prints now, resin print number two, I don't have one
of these with me, so I will just put
them on the screen. That is the mold for a ring. Jewelers like people
who make jewelry, absolutely loved resin printing for small complex geometry. Things like pendants, rings, necklaces, charms, all
that kind of stuff. What those have in
common is that they are small and highly detailed. People who use resin printing, use it to print stuff like that. Finally, resin
print number three. This is just a miniature
figurine here. Again, you can see
the level of detail. It's small and this is printed, it's only about 30
millimeters tall. What I want to say
about this one is that this figure is going
to be painted, which brings up another thing when you are resin printing, you can actually only
print in one single color. Whereas with FDM printing, you can actually print in multiple colors
at the same time. That there is
another difference. Let's put this guy
back on all guys, I love FDM printing
my company and I, we really don't do a
lot of resin printing, almost none to be honest. In general, most functional
parts are FDM printed. When should you get
a resin printer? I would say if you have one specific item in
mind that you plan on printing and only printing that one type of item like
different pieces of jewelry, for example, then resin
might make more sense. Now, when I look
around the studio here and I see a bunch
of different objects, like I see the light stand and the tripod and the
wall stand there. All of these things
would be FDM printed. I highly, highly recommend starting out with FDM printing. And if you really want to
add a resin printer to your setup later than
that is pretty easy to do as a lot of the
skills that we're going to learn here will actually crossover into
resin printing as well. So that's it for this
episode here or this video. Hopefully that clarifies the two different
types of printers that you might be
looking at if you are just getting started, if you're just looking
into printing and you're wondering what these
different machines are. Hopefully that clarifies
it up a little bit. Like I said, I do
recommend starting with FDM and discourse here we'll go over all of FDM printing an FDM
printing techniques. So I'll see you guys
in the next video.
5. Recommended Gear: In this lesson, we're
talking about gear. Personally, I'm a
bit of a Girsanov. I love gear, I love printers, I love hardware, I love tools. Do you name it? That's why I became a mechanical engineer. So let's jump in and let's
talk about the gear list. You'll find the gear list linked in the project
files of this course. So I'm just gonna
go through them one-by-one and talk about it. Now, every piece of gear
that you see on that list, we personally have
between 1200 those items sitting in the
shop at all times. So I literally use
them every day and I'm testing hundreds and hundreds
of different products over the last five or six years and that is the final
gear list that we have. So let's talk about it. Now, starting with
our printers is probably the most fun part,
but let's talk about it. So personally, I've owned
and use $200 printers as well as printers
up to $50 thousand. And here is the conclusion
because I think it's quite interesting for the
vast majority of people, I would say 99.9% of people, a basic FDM printer
is more than enough. Now interestingly, my company is actually included
in that 99.9%. A long time ago, I
made a poor decision and bought a very
expensive printer, thinking that it would open
the doors to all kinds of opportunities because it could print in these
specialty materials. Now it turns out that for
the one job a month that it actually brought in the US that specialty material and we needed that expensive for it was actually just a lot
cheaper to get someone else to print it rather than actually owning that
giant expensive printer. So that being said, the budget printer at the top
there is the ender three, the base model and are three, it has been the best and the
most affordable printer for the last eight issue
years, maybe even more. And it's actually the
first printer that I ever had at 1 in time. I actually had about 20
of them running 247 in my basin and that's
how I started my business hands down.
It's a great option. I think it's the best option out there if you're just getting into 3D printing and don't
have a big budget now, it also shifts as a
kit if you do have to build it and kind of
assemble the pieces together. Some people don't like
that, but honestly, it teaches you how
the machine actually works and aware all of
the pieces and parts go. So moving on next up is the
best overall printer k, That is the one that you
see behind me right here. Prusa machines cannot be beat if you have the budget and
you're serious about 3D printing and you're
getting it into it as either a serious hobby
or maybe even you're thinking about doing a little
bit of commercial work, I highly recommend
jumping in order a Prusa. The difference between the
Prusa and the ender three, basically, the Prusa will require less maintenance
and less tinkering. Eventually, our business,
we upgraded all of our industries to
prove some machines. It's essentially just
the next level for convenience, reliability
and precision, recommend just order
direct from Prusa to get the best deal and others
tons of resellers. But if you order a
direct from Prusa, you tend to get the best deal. There is also the option
on the Prusa website, you can buy either the kit or
one that's fully assembled. Now the kit teaches you how the printer works
when you assemble it. But I will note that the Prusa Kit does take
a long time to build, whereas the end or kit, it's kind of already put
together a little bit fun fact, when my business was
just starting out, I used to purchase
the Prusa kits. I would build them
and then I would sell them as built kits. I have personally
assembled between at least 5000 of those machines
right behind me there. So me I honestly never
want to see those again because I do know how to assemble it without even
the instruction manual, but nonetheless, you have to start somewhere and
that's where I started. So the last point
there on that list, there is the best
large volume printer. Now, this is the best printer if you want to print bigger pieces. This is the CR ten series. It's by far in my
opinion, the best option, especially if you want to print big pieces like cosplay helmets are honestly really
any other large prints that you're interested in doing. It's essentially
a upgraded ender three that is also bigger. So yes, that is by far, by far my first and
number one recommendation for a larger 3D printer. Now also on that list below is my recommended
resin printer options. If you're interested
in also learning resin or purchasing a resin
printer at the same time, you can go ahead and
get one of those. I actually have two
of the recommended resin printers
sitting right there. And if I'm being honest, they hardly get used because we personally don't do a
lot of resin printing, but that is the
option and that's why I recommend if you're interested in getting resin printers, realistically, you
can't order both an FDM and a resin printer for
quite cheap these days. So it is really cool to see
that the technology has become affordable and accessible
to almost anyone now. For the accessories,
any upgrades, okay, if you get the
basic ender three, I highly highly
recommend getting both the glass bed as well
as the PTFE tube upgrade. Those are linked, you'll see
them in the sheet there. If you get the Prusa, there is no need, but no matter what
printer you get, you should get an adhesive. We personally apply adhesive to the print bed before
every single print. I essentially look at it as
an insurance policy that your print won't fall off the print bed while
it's printing. If you don't want to
get the adhesive, you can also just
use a glue stick, put that on the print bed
before you start printing. It's not the best,
but it does work now, the bed leveling kit
that's in there again. Just for the under
three, it's essentially a probe that helps
level the bed. That one is totally optional. I actually don't recommend purchasing it at
the very beginning, but after a couple of weeks, if you find it
really annoying to level and mess with the
level of your print bed. You might want to
try that one out, which is why I put it on there. So the next one is a dehydrated. The dehydrated is
really important if this one does
depend where you live. If you live somewhere with high humidity and high
moisture in the air, I highly, highly recommend
you get a dehydrated. Our shop here and where I
am right now is in Canada, it's like minus 20 out
and snowing right now. So there's very little
moisture in the air and we don't really need
to use them unless we're printing in nylon
or something like that. But in general, the companies that we work
with all over the world, if it is human where they are doing work and where
they're doing printing, they all use dehydrated,
believe it or not, but your filament actually
absorbs moisture from the air and it can directly affect the quality
of your print. Lastly, on that little list of accessories is a screw set. Basically if you're
downloading files online and depending
what your download, if you download something
that's an assembly that needs to fit together, then you need to attach those pieces together and
it's likely that you can use these or that
those pieces were designed to be used
with this screw. Say here it's basically just the most common fasteners that are used in the
3D printing world. So if you download something
from Thingiverse and you go, you print all the pieces
you go to build it. Likely you can use
those fasteners. Next section we have up
is remote monitoring. If you want to connect your
printer to your computer and your systems and monitor it remotely and control
it remotely. You need a Raspberry Pi
as well as a camera. This enables you to
basically send files wirelessly instead
of using an SD card. And you can also just keep
an eye on your printer and pretty much control
it without actually having to touch the
printer itself. I highly recommend this. It's super convenient. And also when you're
outside or maybe if you're not home to
watch your printer, you can keep an eye on it. You can also start
prints remotely, which is a great feature
to save you time. Next up is filament. This section is pretty easy. These are just the links
to the ones that we use. Now, trust me, when I
say We'd probably tried and use every single brand of filament over the
last couple of years. And this is simply just the
most reliable ones that we found. Let's keep going. Next up on that list is
actually one of my favorites. Probably, maybe even my favorite right now because we
recently discovered this. This is a super glue
plus an activator, I get a ton of
questions about how do we print an assembled
big objects. The easiest way to do
it is to split it into smaller pieces and then
connect those pieces. And the best way
to connect them, or at least one of the best
ways is with the superglue that I attach there or the
fasteners that I linked above. However, the superglue is
your super convenient. I highly, highly recommend
that as your go-to solution, given that those parts that
you're building are not bearing a lot of weight
or taking a lot of force than the
superglue is perfect. For example, that BB8 robot,
I haven't right here. Every single piece on here, there's about ten or
20 different pieces. And all of these were actually
super glued together. Next time we have
air filtration. My opinion on this
one is slightly different than the opinion
of most people personally. I think it's worth
setting up air filtration no matter what. There's a lot of people
that say you only need air filtration if
you are printing in a toxic material like
ABS or ASA For example. In my opinion, I
think it's better be safe than sorry
and simply set up an exhaust system
near your printer that is basically
pulling in the air or other little plastic
particles that are in the air out and it is maybe
extracting them outside. A simple system like that. I think it's worth doing now, if you are just putting
in PLA and PET g, you technically don't
need to do this, but like I said, I highly, highly recommend
doing an interest, keeps him clean, it
keeps the air clean, especially if you're printing
in places that you live. If you have a little office at your house or
something like that, it's best to just keep
that space ventilated, that there is the gear list
from years of experience, that's what we use everyday
and what we recommend. I will continuously update
this list as we go. It doesn't change very often, but if it does, I
will update it. You will always have
access to that list. So I hope that's a ton of
help if you're just getting started out or if you're in
the market for a new printer, let's keep going
on with the course and I'll see you guys
in the next video.
6. Pre Flight Printer Check !: Hey guys and welcome to this
quick lesson on this one here is what I call
a preflight check. Basically, if you just got your new printer or even if you've already been using
it for a long time. These are the three
things that I recommend checking before every
single prints or at least checking once every couple of
prints just to ensure maximum safety as well as maximum quality that you're
getting out of your machine. Now, I've already recorded this lesson a little while back, so I'm going to play that now. This one's quick and
then I'll see you guys in the next lesson. So after you build your printer, it's critical that we go
through these three things in order to ensure the
maximum print quality, as well as make sure
that we're getting the least wear and tear on
your machine as it operates. Number one is belt tension. We need to check the X, Y, and Z belt of your printer. We want them type a, we don't want them too
tight or it will wear out your machine a lot faster than under normal conditions. A good test of this
is to actually just try and pinch
the belts together. There should be some resistance, but you should be able
to touch them together. If you struct about like
it was a guitar string, it should basically just
vibrate for a second. Next up is the wires. This one is also
really important because we don't want to fire. That's super simple. Just make sure to move your x, y, and your z axis. Makes sure that none
of the cables have even the slightest potential of getting caught on anything. This is extremely important and should be done before
every single print. However, please do
note that this should only be done when the
machine is powered on. You don't want to be
moving around the axis of your machine when
it's powered off. Because if you do
that, basically what you're doing is you're actually sending
power back through the machine and the
machine electronics, and that is not good board, so let's just not do that. Third, let's make sure
that our nozzle is tight. Okay. If the nozzle
is not tight, basically what
happens is it melted plastic can ooze out from
the top of the nozzle. It will fall, it will land
on your prints and then the printer head will
actually knock into it and basically your print
will just fall off the bed. It's a common cause
of printf failure. So make sure that
your nozzle is tight.
7. Where to get files: Hey guys and welcome
to this lesson. This one should be rather quick, but it is exciting
in this lesson, we're talking about
where you can get a free and paid files for
your 3D printing needs. So let's just jump into it now. We probably know
by now that we are looking for a dot STL files. And there's really three
or four main sources that people get their files for. Number one, free files, thingiverse.com is by
far the most popular. Let's just run through an
example here so that I can show you how to find good
files on Thingiverse, then import them into
your slicing software, and then using the other lessons
that you've seen so far, you can go ahead
and slice and then print all of those objects. Let's do that right now. Here we are on Thingiverse.com
and let me just show you a little bit about
how this website works and how to
find reliable file. So let's say for example, we wanted a, you can honestly, you can really search anything. I'm gonna search phone
holder, something very basic. Let's see what comes up. So you'll notice we have all
of these different options. You can see the little
heart thing here. This is how many people
actually liked the file. So in a way, it
kind of sorts it by trust in popularity
and things like that. So the files that have
lots of the likes on them are generally
pretty good files to print. So for example, let's say that I wanted to print
this file here, it says Kitty phone holder. Let's check this one out. What happens is it brings up here you can see
the pictures of it. And then also what you
get is this sort of 3D file right here in the
top right-hand corner. We can actually open a 3D view of this
file so that we can see exactly what we are downloading and then what
we're gonna be printing. Let's say that we
liked this file. We simply go up to the top right-hand corner
right here we press download files and
it'll bring you down here you see it
says thing files. And then we can go ahead
and press Download. Now, while this downloads for a second, Let's
talk quickly. This is the licenses that
either already talked about in the course or I will
be talking about it soon. So do pay a little bit
of attention to that in case you're thinking about
selling your 3D prints. Let's exit out of this. Let me point out a
couple more things. Comments. It's always
good if you're finding a file that doesn't have
a lot of likes on it, quickly go check
the comments and people will basically
comment and say, maybe this file doesn't work or the settings for this file, or there's a hole in this
file, something like that. It's just a good way
to double-check that the file is indeed a
good file to print. Next up we have make, so this is people
posting their prints. You can see this is just
another validation method. I encourage you to always go through and check just
so that you know that the file you're about
to print is indeed a good file and compatible
because as we know, some of these prints can
be up to 30408300 hours. So if you're going
to invest that time, you'd better make
sure that the file is indeed a good file. Now remixes is just a section that let's say I
downloaded this file. There was something I
didn't like about it, so I wanted to make a new file. I could go ahead
and edit that file and then upload it as a remix. And this would allow
other people to download my remixed version. So we have our downloaded file, it's right here
called cat stand. I'm gonna scroll this into
Prusa Slicer right here. And you can see that now we have r dot STL file downloaded from Thingiverse and that
is pretty much it in one of the future lessons or maybe you've already
seen it by now. We will go over slicing and
all the slicing settings for Prusa slicer so that there is Thingiverse and that's
how the universe works.
8. Basic Materials Pt 1: Hey guys and welcome
to this lesson. In this lesson it's time
that we start talking about the different
materials that we can use. Now, how are we gonna go through this as I'm actually
going to split the material section of this
course up into two parts. The first part being the basic, most common materials
and most US, That's what I think the
vast majority of people will be using it will
be interested in, in part two of the materials, I'm actually going to go over the more complex materials
like the dissolvable support, some carbon fiber, all
that kind of fancy stuff. So what I did is I've actually
already recorded a section that has been available on my YouTube channel
about basic materials. I'm gonna play that from the beginning and then
we're going to dive into the more complex
ones in part two. So here's the basic section. Let's watch this now.
And then after that, I'll see you guys
in the next one. It's time to talk
about some materials. I've been in the industry
a very long time. I printed with the
vast majority of materials that are available
on the market today. And I can tell you that PLA, BET G and abs are by far the most common use and also the most common
requested by clients. So let's talk a little bit
in depth about all of those. We're gonna start with PLA, but before we actually go in
and start talking about PLA, there is a few notes and
recommendations that I do want to make with
any role of plastic. Basically, a key point is
that moisture is the enemy. Okay? If you live
somewhere that's humid, you're probably going
to want to have a dehydrated or for your filament? Yes, the plastic that
is on that role will actually pull moisture out
of the air and absorb it. And that can really affect
the quality of your print. For example, if you take
a role of nylon and you leave it somewhere humid
or basically anywhere, when you actually go
to print with it, you can literally hear the
water and the moisture boiling off as that filament comes out through the nozzle. So therefore, I do recommend a dihydrate
are and especially, especially if you
live somewhere humid. I'll put a bunch of links
in the description of this video for the
specifics on that. Now my second recommendation
is print bed adhesive. The very first layer of your 3D print is
the absolute most important and we need to
be sure that it sticks to the print bed sufficiently. Now, personally, I use 3D printer adhesive on every
single print that we run. If you check online, if you go to the
Facebook groups, there's a lot of people
out there bragging Lego first layer, so perfect. No adhesive meeting. No adhesive needed. No one cares. Use print bed adhesive
if you want to improve the probability of
success on every print. If you think about it, if
you're about to run a tend to say 200 our print, the three sensitive
cost you in 3D printer, adhesive or even just a glue stick is basically just
an insurance policy that that print does not
come loose from the print bed and honestly,
it's just worth it. So I'll leave it at that you can take my word for it or not. You'll probably learn
on your own regardless. Now lastly, what we need to
talk about is filament costs. The prices of filament
are extremely variable, variable from one
store to the next. If you're only ordering a
couple of roles here and there, you really can't go wrong
just using Amazon, however, if you find yourself
ordering a ton of filament, reach out to a local supplier, ask them about a bulk order
discount or a coupon code. For example, if you
have a store down the road from your house and you're printing
all the time, just ask them, Hey,
I'm coming here, I'm always going
to buy your film. Is there any deal
that you can give me? You might save a bunch of money
into long-run doing that. Now we can get into
the materials. So starting with PLA, PLA stands for polylactic acid. Not that anyone really cares, but we do care about
are the properties and use cases of PLA. Pla a typical nozzle
temperature somewhere between two hundred and two
hundred and thirty degrees and a print bed temperature
of around 50 degrees. Now, when you buy
a roll of plastic, you will always have
the recommended temperatures on the box. Always, always start with those. The reason that PLA
is so commonly used is because it does
not shrink very much. Therefore, it's pretty easy
to start printing with. What happens with
some other materials is that the first
few layers that you print are so close to
the print bed that they are pretty much act
print bed temperature. So like for PLA, those first few
layers of plastic will be at around 50 degrees. However, as you move up and
away from the print bed, you're basically at
room temperature. So now what's happening
is that the extruder is extruding plastic at
the nozzle temperature, which is in really
quickly cooled down to room temperature. And that can cause severe
shrinking in some plastics. And this is a huge
problem for 3D printing. But fortunately, with
materials like PLA, we don't have to worry
so much about that. With PLA, we have a
nozzle temperature of around 200 to 230 degrees Celsius and a print bed
temperature of 50 degrees. Let's talk about the
pros and cons of PLA. Pros a PLA, as I
already mentioned, the low shrinkage upon cooling basically makes it
really easy to print. Next up is that it's
readily available. You can buy PLA pretty much
anywhere in any color. It is probably the
most common material. Next is a strength PLA, under standard conditions
is actually really strong, like a lot stronger
than you probably think you can make totally
functional parts with PLA. It is absolutely not
just for prototyping, that is a total myth. Now let's talk about
some of the cons because there are indeed some
serious cons with PLA. The biggest con
being temperature. Pla basically gets destroyed
by hot temperatures, typically around 55 degrees Celsius or 130
degrees Fahrenheit, PLA gets super weak. So for example, if you had a black PLA print
sitting outside in the hot California sun and
maybe it was holding up some tools on the wall,
something like that. That's a bad idea. Well probably warp and
eventually fail over time, it'll basically just melt. So we see this probably most commonly when people
print something for cars, they'll print something
like a cup holder, the leaving in a
car on a hot day. And then basically
they come back.
9. Basic Materials Pt 2: A pile of plastic. So basically if you're making a part that is going
to be subject to any sort of he simply just
don't print it out of PLA. Next con is at PLA is actually pretty expensive relative
to other materials. Okay, You'll figure
this out when you shop around for
different materials. But PLA is pretty often
never the cheapest, even though it is
the most popular. The next command is
with post-processing. You can't sand PLA very well. So for example, if
you wanted to print something sand a primate
and paint it than PLA, might not be your
best option overall. Plas number one,
it is fantastic. It's easy to print and
that is, it's so popular. Basically, if you're, the part that you're making is going
to be subject to heat. Just don't use PLA, which brings us to next up
we have PET g. I love PET g, We use it a lot, probably, maybe 40 to 50% of the things
that we print our NPV GTG. So what is BEG? Well, I'm not even going to
try and pronounce the name, but the best way
to think of it as that PET g is a
great alternative to PLA when temperature is a factor in the function
of your prints. Now yes, That is just
a generalization, but when you're
just starting out, That's a good way
to think of it. If you do some research on PDG, you'll see that things
like water bottles, that liquid containers
are commonly made from PEG or another
derivative of PE T. Basically pat G or
PET g does not get soft at that 55 ish degrees
Celsius like PLA does. Instead, PET g is good
to about 85 degrees, which helps us cover
that wide range of applications when we just
can't quite use PLA. Unfortunately, though PET g is not quite as easy to print with, it tends to be a little bit
more stringy and is sometimes tougher to get perfect
layers and overhangs. But let's just jump right
into the pros and cons. So PRO number one,
like I mentioned, that it's not affected by
heat as much as PLA is. That is probably the
primary reason why people use PET g programmer to
Peggy is really strong. It's actually stronger
and more durable than PLA in most cases, PRO number three, Apache
is really cheap now, this probably depends where
you live a little bit and I assume that don't
quote me on this, but I assume it's because in
large-scale manufacturing, they probably use so
much PET g pallets, they melt them down,
they turn them into lots of different things. And we probably use
those same palettes for PET g manufacturing
for printer filament. That's just my guess. Don't quote me on it,
but because of that PET g is often available
for pretty cheap. Now the cons, patchy is
tough to post-process. There are not a lot of
options when it comes to post-processing your
prints like PLA, it's not good to sand. You can indeed use some special
finishing products on it. But like I said, if you want to just
print something, Sanat private paint it, PET g is not the material
that you want to use. Likely if you start sanding it, it will actually
delaminate Or basically all the layers will
separate from one another. The next codon with printing PEG is printing Pat G supports, they typically actually end
up fusing to the objects. So printing supports
with Peggy is just not a great option and is
100% possible to do, but it is just not ideal. Column number three is that
when printing pet GED bed and the nozzle temperature
are actually significantly higher than PLA. So uses more electricity be it probably puts some more wear and
tear on the machine. However, see honestly,
just a failure percentage with patchy prints is a lot
higher than it is with, which brings me to probably
my favorite material which is abs. Let's talk a little
bit about ABS. Abs, although it is not really considered a
specialty material, if you are a hobbyist printer, I will consider this a
specialty material because as the operator of
your machine and as a person who is handling
all the materials, you need to be aware of the
difference between them. And there are some significant
ones for ABS, number one, and this is extremely
important is that abs creates toxic fumes, so you cannot release, you should not leave your printer printing abs indoors without
proper ventilation. Now, when I say
proper ventilation, I don't mean just like crack a window and go ahead
and print I mean like an actual duct and a
fan that is actually taking up the fumes
and exhausting them outside or
something like that. If you're curious,
I've linked to my setup below in
the description. But now it's probably a good
time to mention if you are interested in a very in-depth
course on 3D printing, I'm in the process
of making one. I'll link it in the
description when it's ready. However, don't worry, this video here that you're
watching right now has absolutely more than enough
practical information to get you started and cover all the basics if you
are just a hobbyist, the course is more for people
who are really looking to take their 3D printing
to the next level. Maybe do a commercially
or for people who want to learn how
to do things like take literally any idea and turn it into something
that you can print or for printing really
fast or printing really accurate specialty
things like that. Now back to ABS, pros and cons. Obviously con number
one is those fumes, okay, that is a huge con. It's kind of a pain to actually set up the ventilation system. It's just one more thing
that you have to do. But yes, you need to
be aware of that. Column number two is
the temperature is even higher than PLA
and PET g. Now you need a nozzle
temperature of between about two hundred and forty and two hundred and sixty degrees as well as in bed temperature
of around 100 degrees. Not all printers can even hit the bed to around a 100 degrees. That is just a reference value. You can't get away with
less than a 100 degrees, but it is a good
reference value. And now column number three. Number three is that
if you don't have a heated chamber for your printer or at
least an enclosure, what's likely going
to happen is that your principle
actually shrink so much that they may even crack
if they're big 3D prints. A heated chamber is by far the best solution and
an enclosure is okay. I know what you're thinking
with all of these cons. What could possibly
be good about abs? And while there's
tons and tons of parts that are manufactured
and made out of ABS. Here's why PRO number one is the heat resistance is better than PLA and better than PDG. Using abs are good to around a 100 degrees Celsius for
the part actually degrades. Pro number two is
finishing methods, okay, You actually can sound abs, so that's great for
people who want to make things like props or really anything that
you do want to paint. Pro number three is
that it's really strong when it is
printed right now. It's not even necessarily
stronger than PLA, which most people think it is. It's actually not, but
it is certainly durable. Pro number four is that
it's mass-produced, which means it's
usually pretty cheap. Again, basically, I just
want to reiterate that with no enclosure and
no venting system, it's probably not
worth printing abs. Pet g is pretty good.
10. Prusa Slicer Pt 1: Hey guys and welcome
to this lesson. This one is important. In this lesson, I'm going to go through the basic settings, improves the slicer so
that you can optimize your printing and get the
most out of your 3D printer. I'm also going to
talk about a few fun things like the fastest and the slowest print settings that I would ever use that way, you can have a reference
for if you want to speed up or slow
down your prints. Now, this video here, there will be two parts
to using Prusa Slicer. The first is this one
where I'm gonna cover all the basics and
get you guys started. And then near the
end of the course, I'm going to throw in
an advanced section for using Prusa slicer just for basically those people
who really want to tinker and optimize
all of their settings. That one is a fun video, but like I said, that
one will be later. Now, first thing is first, as the title suggests, we
are using Prusa slicer. Now, if you don't
have a Prusa machine like the one behind me
there, that's totally fine. I'm gonna show you
how you can set up Prusa slicer for any printer. Now, you might be wondering
why Perusall slicer, why not something like Cura, I think yours is probably
the most popular, popular one out there, but here's why Cura
is made by Ultimaker. We've used the
Ultimaker machines. They're quite expensive
and honestly, we just didn't love
it, so we ended up switching and try new softwares. We've used Idea Maker
simplify 3D Prusa slicer, and there was one more, but anonymously, four
out of four of us, a couple of weeks later sat
down and we all agree that Prusa slicer was by
far the best one. Additionally, Prusa as a
company, in my opinion, is the company who is
doing the best job innovating in the field
of desktop printing. So therefore, for
us it feels like a future proof plan to learn their software and become
experts with that. That being said on all guys, all slicers are quite similar. And what you could do is if you wanted to use Cura
or a different one, you can pretty
much just take all the settings that
I'm giving you from this video and then
plug them into Cura and it would do
the exact same thing. But frankly, if you're
just starting out, if this is your
first time slicing and working with STL files
and bringing them in and preparing them for
printing then honestly for the first ten to
15 prints anyways, I'm probably just going
to recommend that you use the standard profiles that are within any slicer
that you're using. So let's jump right into it. I'm going to bring my
computer over here. I'm gonna get my screen
recording going and we are just going to go through
Prusa from start to finish. So on your screen now you should see exactly
what I'm looking at. You can see I have Prusa 2.4
loaded on my computer here. Whatever version you
have, it doesn't matter, they're not super different
from version to version. But if this is your first
time opening the software, you're probably gonna see a screen that looks
something like this. Let's get started. This is
pretty much we're gonna go from start to finish with the basic settings
that you need, as well as setting
out proofs of slicer. So starting out at
the main screen here, you can see that the first
thing it asks us to do is to pick the printer
that we have. Now for example, the
machine behind me, there wouldn't be the
MK three right here. We also have a few MK
three S plus units. That would be this one. Or if you are using a different
printer, like I said, if you don't have
a person machine, I'm gonna show you what
we would do with that. But if you do have
a Brewster machine, go ahead and click them on
that you have and press Next. Now this ordinary here is
just the Prusa SLA Machines. We're not using
that. Like I said, we've already gone over
that in the course so far. This right here is the
other vendor section. This is where for example, if you had a andere three basic printer
that's in the gear list, this is where we
would add that in. So let's say that we
had an end or three. We will go, we'll
click on reality. We will go next, and then we'll click
on our end or three, or maybe you even bought
the end or three V2. So I know, I don't think they
enter three V2 is worth it, but let's go ahead
and let's say that we just got the reality
end or three, we can go ahead and
we can press Next. This part right here, okay? If your printer
that you have for some reason is not on this list, and maybe you even
built your own printer. This is where you
would add that in. So for me, I would go
ahead in here and I would say Austin's a 3D printer. Again, it's very likely that the printer you have
is on that list, but if it isn't, then you can go ahead and you can
add that in here. If you're doing that,
then you can go ahead and click next at this list, it's probably a RepRap printer for reference rep rap
in case you don't know, that's kind of like a very
old and original term with 3D printing rep rap
basically means you're, you have a printer that
can essentially print itself or parts for itself
or really any machine. So for example, the
Prusa machines here, they're actually made,
the parts for those are actually printed with
person machines. So rep rap is kind
of what that means. That's just a fun fact again,
it doesn't really matter. So moving on again, this is just part of setting
up our custom printer. This would be the x and
the why Bill Plate. You would know that if you have a printer that's
not on that list, nozzle diameter,
filament diameter, it'd be 0.4 and very
likely to be 1.75. Again, you would know that
if you are doing something like building your
own printer or if your printer is
not on that list, temperature, these we
can edit later as well. So I went to even
worried about those. Next up here we have filaments. Now under filaments, the
only ones that I actually recommend having checked
our generic abs, generic PET g, generic PLA, as well as the same counterparts for the
person and filaments. So that would be the person in PET g and the person meant PLA, the rest of this stuff
we don't really need. If there is a filament
there, for example, maybe you always
order reality PLA, then you could go ahead
and you could check that, but honestly, it
doesn't really matter. So I'm gonna go ahead and just uncheck all the ones
that I wouldn't use. And this is how I would
leave it for myself. So then I go next updates, leave those on this part
right here, reload from disk. Let's just go next and
then view mode again, don't worry about this because
we can change it later, but let's just
start with simple. Then go ahead and press Finish, and it will bring you to a
screen that looks like this. So welcome to produce a slicer. This right here would be the
print bed of your machine, whether that be the reality
machine or any machine or even one like the person
machine behind me here. Let's talk through the dashboard
here of Prusa slice are the main two buttons here
on the bottom where we have our 3D editor view
as well as our preview. This is actually
the Slice button. This is when it's
slices are 3D objects. So what I'm gonna
do is I'm going to import our very first 3D object. This is something
from Thingiverse. It's just called a
calibration cube. You'll see these all the time and I'll put a link to it so that if you want to use
this file, you can as well. So you'll see that
right here we have what is called a
calibration cube. Now, the thing about
our calibration cube, you'll notice that
on it it has an x, it has a y, and it has a z. Those correspond to the accesses or the axis of the printer. We can see if we go this way, this is our x with the
red arrow right here. Let me zoom in. So x is this one right here
going this way, the same way that it's running parallel to the x
on the face here. Y is going this way, it's with the green line here. And then z is our vertical that is going up and
down in 3D space. So that's our XYZ. And you can see that we have
more numbers over here that actually coordinate
to the actual x, y, and z. So you can see we
have position and rotation, the scale size, or also we have the checkbox here if you want
to work in inches, I'm just going to leave
mine in millimeters, whatever you choose, it
doesn't really matter. Let's go over the very
basic features of this. So right here you can see
that we can actually move around our XYZ calibration cube. The left-hand side
here you can see this is our move function, so we can move it along our
x-axis with this arrow. We can use the green arrow here to move it
along the y-axis, or we can use the blue arrow
here to move it up and down. Now improves the slicer. It will automatically lock
the object to the print bed. The reason for this is because if it wasn't on the print bed, you'd just be printing in midair and we definitely
don't want to do that. So that is our move function. Next up we have our
scale function. With our scale function,
if we use the blue, like just the top one here, you'll notice that it will just scale it in the z-direction. I'm gonna go ahead
and press Control Z on my computer here to go back, you can also just use
the undo function here, which also has the forward
function next to it. So that's how if you
see me going back and forth between things that I'm doing on the
computer screen. That's how I'm doing it
is just with Control Z. So next up we can move it in just the x-direction,
going this way. Again, Control Z,
I'm going back. And again, same thing
in the y-direction. All this is doing is basically
stretching r dot STL file. So if we use one of the four corner arrows here,
these are the orange ones. It will scale things
proportionately, so it's scaling x, y, and z by the exact same amount. What I'm gonna do Control Z and that there is our
scaling function. The next one that we have
is our Rotate function. This one again, pretty
simple as you can tell, all that we're doing is you can see right here we're rotating. We can also use, again, just using the red and the green different ways
to orient our objects. This will be going
over things like optimal object orientation
later in the course. But again, we're just
getting familiar with our 3D space here. So I'm going to go
Control Z, Control Z. And now we have our calibration
cube back on the bed. The last two right here. This one right here
is placed on face. What this does is
it will highlight the flat faces of your object, and it will let you basically just set it down how you want. So for example, if I
click on the Y here, now the y is on our print bed. Now it doesn't seem like
it's doing very much now because it is just
a calibration cube. However, when you do
import some 3D objects, you'll notice that it's very
obvious that they need to be rotated 90 degrees or
maybe a different amount. But what you can do
is just go ahead and place that face
on the print bed. So let's just go back here
to where our axis lines up. So there we go. So you can see we have our x-ray here That's going
parallel with the x-axis, same thing with the y, and
same thing with our z-axis. The very last sort
of main function here is on the left
side is our cut plane. So what we can do if we
press on the cut point, you'll notice that it gives
us this plane right here, that it will indeed
cut our objects. So what we do is you can
have two options right here. Well, you have three
except this one here that says rotate
lower part upwards. I don't even worry about that. So what happens is we have keep up apart or keep lower part. Let me show you if we go
ahead and we actually cut this object and we
keep the upper part, you'll see it gets rid
of the bottom half. And if I keep the lower part, you can see if I perform cut, it gets rid of the top. Now, if I keep both of them, you'll notice that
here we have our cube, there are calibration cube
is indeed cut in half. And for example, if I wanted to. Places on the face and maybe print these
next to each other. That's how we do
things like that. Again, it doesn't
really make sense as to why you would do that with
just this calibration cube. But once you start printing a
bunch of different objects, it all home makes sense to you and basically is
what I'm saying. So those are the
four main options. So now let's go over
the top options. So you'll see if we go
to the top toolbar here, we basically have the
option to import a file. If I click this, it pulls up our computer finder
and then we can go and we can find a
dot STL file to import. Alternatively, we
can go and we can actually just delete
a file like that. Or we can use the trash bin
right here to delete a file. The next one right here
is the Arrange tool. If I had multiple
of these cubes. Now what I'm gonna do is
I'm gonna press Command C, which is copy, and then
Command V, which is paste. And I'm just going to make
a bunch of these cubes. Now, you can only see two cubes, but there's actually
quite a few of them here. The reason for that
is just that they are all one on top
of each other. So if I go paste, paste, paste, I just added another
three cubes right here. And what we can do is we can use the Arrange tool here and it
will indeed arrange them. Let me show you one
more. So if I go paste, you'll notice it's not
in a very optimal spots. So if I press arrange, it does indeed put it into
a more print friendly spot. I'm going to go Control Z
back back and let's get our one single calibration
cube back. Here it is. So next up on the list we
have just copy and paste. This is again, I just use
Command C or Command V, but you can use the copy and paste up here too if you want. The next one right here
is the search function. I never use this,
but if you wanted to maybe look up the
layer height settings, for example, you could
enter that in here. I'll just show you if I wanted to adjust just
the layer height. You can see it actually
brings it up right here and we can go and adjust those
settings. I never use that. I don't think many people do and I don't think
you will either. But just for reference, we do indeed have that. Now finally, what we have is the variable layer
height option. We're going to discuss
this later because that is a little bit more of
an advanced setting. Now we have the side
toolbar here figured out and this top toolbar here. Let's talk about this
button down here. This is the preview button. This, if we click this, this is exactly what our printer is going
to do now yours, if you did just click, that, will look a little bit
different because I was already playing with some
settings beforehand, but this right here is exactly
what our printer does. So let's get out of that. And now let's talk about the options here in
the right-hand side. So you can see that at
the top here we have print settings and mine
says 0.3 millimeters draft. These are the standard settings. It will come with pers a
slicer just for reference, I typically keep it
between 0.10.3 is 0.050.07 is very fine detail. That is just the layer height. We're going to talk
about that in a second, but those are our
standard print settings. Next is the filament that was those checkboxes from before that we were checking
and importing. You'll see those and under your filaments
section and again, you can add or remove
filaments right there. Next up we have our printer. If you import a bunch
of different printers, this is where you'll see them. If you have a different printer, it will just change the print bed right here
to your current printer. So maybe if you ever Prusa as well as an end or you
can import both of them, and it just makes it easy
to switch back and forth. Additionally, it gives us
three kind of hotkeys, I would call them
to the supports, the infile, as well as
the option for a brim. I wouldn't worry too much about this because we are going to change all of those
additionally in our settings. And then you can see under
object manipulation, that is our position
rotation scale, size. And then you just
have the toggle for inches or millimeters. Essentially what this is,
Let's just go through them one by one from
the top position. This is the position of the
cube on the build plate. You'll see day is always
changing as I move the cube. Next up is our rotation. I showed you this earlier
with the rotate tool here. You can also, for example, rotate it 90 degrees in x. And that is just kind of
what our rotation does. I wouldn't worry too
much about that either. It is generally a lot easier
to just use the visual guide here when we're using things like scale, rotation
and position. But it does give you
these as an option. So for example,
on the side here, it also gives us
the scale option. Let's say that we wanted
to make this cube 200% bigger or twice as big. I do need to point
out, you'll see this little lock
function right here. This means is that
any change to x will also be applied to
Y and Z and vice versa. Basically, if you
change one number, it will change them all. So you'll see there
as I did 200, it's set everything
to 200, no Control Z. I'm gonna bring our cube back
to its regular size there. And I will show you if I take the lock off, what you'll get. And now if I change this to 200, it will basically just extend
it in the X-direction by another 100% or
two times total so that there is our main
dashboard of Prusa slicer. Now let's jump in
and let's talk about our print and filament settings.
11. Prusa Slicer Pt 2: Layer heights is
the distance that our nozzle moves up
every single layer. So right here you'll
see this little layer. It will move up 0.3 millimeters and it will
print the next one. If I zoom in a lot on here, you'll see them right here. It's gonna go, it's gonna print
this layer and it's going to move up 0.3, move up 0.3. And you'll notice if we use
this toggle right here, it will move at 0.3 millimeters. Every single line
that it locks you to, that there is our layer height. Now that one's at 0.3, let
me show you what happens if we put that at 0.1, let's say. And now we go back to plotter
and we can slice this. And now you'll notice
how many there are because instead of
the nozzle moving up 0.3 millimeters each
time it's now just moving up 0.1 millimeters. So you'll notice
there's basically just a lot more layers. Because there's a
lot more layers. It takes a lot longer to print. Printing at 0.1 millimeter layer height is very, very slow. Typical values are between, in general, 0.2 to 0.3. Like I said, 0.1 would be
for a very precise print. The rule of thumb for the maximum layer
heights is that it's 80% of the nozzle diameter. So for example, if I
bring my calculator here, let me just show you
we're using a 0.4 millimeter nozzle
if you just bought an FDM printer and this is your first time
going through it, there's a 99% chance
that the nozzle on there is a 0.4
millimeter nozzle. If I take 0.4 and I
multiply that by 80%, it will give us our
maximum layer heights, so times 0.8 and this will be
0.3 to the maximum height, the maximum layer height
that you should print with a zero-point for nozzle is 0.32. So again, what I'm
talking about, slow versus fast printing, what I want to
print really fast, I'll put that to 0.32, which is the maximum
that you can do for a 0.4 millimeter nozzle. Next one we have here is
the first layer height. Now we have layer height and then we have
first layer height. What the first layer height is doing is essentially
we're always going to make that slightly less than
our layer height because our first layer we
wanted squished into the print bed just a little
bit more than the other ones, just to improve the adhesion between the actual
3D print that we're making and that
print bed so that when our axis is moving, the object is not
tempted to fall off or become dislodged
from the actual print beds. So let's just set these
back to standard. You'll notice it comes
in at 0.3 and then 0.2, that is our layer height. Next up, we have
vertical shells. So let's start with perimeters. What our perimeters
are, are actually, let's talk about perimeters as well as our horizontal shells, top and bottom layers as well. So you'll see we have
solid layers top, bottom, and we have vertical
shelves, perimeters. What I'm gonna do is
I'm just going to show you exactly what these are. I'm gonna set this to five. I'm going to set our
top layers to two, and then I'm going to
set our bottom to ten. The reason I'm doing this
is just to show you, if I go into our platter here, then I slice this. Let me show you exactly
what those are. So let's just bring this slider all the way down here to
our very first layer. And we can see this year
is layer number one. Okay, Now we had, remember we had bottom, we hit top and we had perimeters essentially with our
cube right here. If I bring this out, our top layer is going to be
up here right above the Z. It's gonna be this part. Our bottom layer is
going to be right here and then our perimeters are the outskirts of
this actual cubes. So therefore, when I slice it, our bottom layers are going to have whatever
we put in there. So if I go to Print
Settings and I go here, our bottom, we put ten layers. So there's actually going to be ten layers of filament on
the bottom of this print. So you'll see here
on the very bottom, this will be 12345678910. I think I got it right. If I did, this next layer
will be the infile. And there you go.
You can see that there is our bottom
amount of layers. Now our perimeters,
we can see these very clearly here we
have five of them, so this is 12345. And then again, we just do
the same thing to show you what our top layers are if I
scroll up to the top here. Now this one might be slightly confusing just because
of the Z here. The Z is actually imprinted so the top layers are in the red. So you'll see that we have
top layers right here. And then inside of the Z, this is actually also a top layer because you'll
notice that the zed, like I said, it's imprinted. So the top layer of the Z
there is that inside part. So let me just show you, I
believe we set that to two. So if I go down two
layers, there you go. You see the infile on this side. And then again, that
will happen by the zed, so 12, and then that
is our top layers. Hopefully that makes sense. Like I said, we have bottom, we have perimeter, and
then we have the top. Let's go back into
our sprint settings. Now you'll see this option
here for spiral vase. This is just a
fancy print option. If you are printing
something that only needs one single perimeter, what it will do is it
will actually hollow out the entire object
and just print it continuously along the outside. And that's why it's called
a vase because frankly, this would be very useful if you were doing
something like printing a flower vase or the shape of it is just basically one
shape that goes out. It's hollow on the inside
and it doesn't have a top. Let me show you exactly
what that would look like. We're just going to have to
accept all these settings. And let's replace it
so you'll notice there it got rid of all of the inside and it
gets rid of the top. And you'll notice that there is just one single line that goes around on the outside that is called Vizmode or vase mode. You'll see it in pretty
much all slicing software. So now let's just go back
to default settings. You can press this
little arrow here and it will reset everything back. The next one there is
minimum shell thickness. We're going to talk
in great detail about that in the more
advanced section. Just leave that standard
as it is for now. The next one is seen position. This is kind of a more
advanced setting, but let's talk about it
now because it is here. So CME position, basically
what happens is for example, when the printer is
printing this cube, as we know it does
it layer by layer. But what happens is when
it finishes one layer, it needs a location to
start the second layer. And that's what
seemed position is. For example, let
me print this to the rear and let me
show you what I mean. So if I slice this, Let's go ahead One second here. Let's make sure that we have
infill turned on for this. It just turned it off because of the vase mode there
that we put on. So now we have seen
position set to the rear. Let's slice this and let me
show you exactly what I mean. So if I pretty much
pick any location along this cube and I use
this bottom slider here. This will show us the exact
tool head location now, because we have the scene
position set to the rear, you'll notice it starts in the middle of the
back of the print. Now if I go up to
the next layer or really any layer,
when I go back there, you'll see again the tool head is starting in the back at
the middle of our print. And sometimes if you have a giant print or any complex
materials there will, it will leave a little seam. And that's why it
is called the theme settings so that there
is arsine position. I would just leave
that at whatever it keeps it to as a standard. Now, this is Prusa 2.4, which is the newest one, and I believe they just added this fuzzy skin option here. I would completely ignore this. All that's doing is it's adding texture to the outside
of your print. So if you're printing like a dumbbell for
example, or something, they required grip,
you might use fuzzy skin setting
because it would just increase the friction
on your print. Basically, I would
just ignore that. You probably won't
ever used that, but nonetheless,
let's keep going. So let's go to infill. Infill density is
a percentage that your 3D print is
filled with plastic. Now, what this means is basically when we go
to print that cube, we're not going to print it
as a 100% solid piece of plastic because that would be a wasting time and beat
wasting materials. So what we do is we
set an infill value. Let me show you if
we set this to 5%, I go ahead and I slice this. You'll notice that
this red line here, only 5% of this cube is actually going to be
filled with material. Whereas if I go back and I said that five to,
let's say 80%. Then we go and we slices cube. You'll notice now it is 80%
of the void space is filled. And you might be thinking,
Hey, that's cool. Cubic or honeycomb
pattern wherever that is, that's our next settings. If we go back into our settings, the Fill pattern is
currently set to grid. Now the only two that
I pretty much ever use our grid as well as Guy road
or wherever you call it. And I'll just show you the
difference in the patterns. Let's just set this to
50 so you can see it. We'll be talking about this
later in the course as well. So don't worry too
much about it. But this right here is the
gyro head or thyroid setting, however you pronounce
it, that is just the different
infill pattern. Next up we have the
top fill pattern. What this one's doing is
it's basically just saying, if you need your print
to look really good, perhaps you're printing
something like a thin logo and it was
a really big logo. So you wanted that top
layer to look really good. You might want to change
the top fill pattern. Honestly, you don't
really need to, but it's just a setting in
case you want to play with it. I'll show you what I mean
here in the software. So by scroll up, as I said, this right
here is our top fill. And you'll notice this
red line here is kind of just zigzagging along. That is what we're changing. So if I change this to, let's say concentric
now it will do it in a circular pattern. You see it Here. It is
now going in circles. That's just the
top full pattern. Like I said, it's maybe
use if you're printing like a really big surface area, but flat logo, something like that you
might want to consider. It must jump back in here and now we have
bottom fill pattern. It's just the exact same thing. Okay, and now the next one
here we have skirt and brim. Now typically we would only
use one of these at a time. Let's just go through them. So skirt it. Is that material on the
outside that you were seeing. Let me show you here. So you've seen this
green material here. What this is is it's basically just purging out material around our object to make
sure that when it goes to actually
print our 3D object, there isn't something like
a nozzle clog or maybe if you change different types
or colors of filament, what it does is it gets at old filament out of the nozzle. This one right here
is a skirt and you'll notice that it lets us
change the distance. So if I went from two to say 40, this would be really dramatic, but I just wanted to
show you visually. You'll notice that now our skirt has all the way along
the outside here. So that is skirt now brim, let me show you when we
would maybe use a brand. So let's say that our
calibration cube here, Let's just scale it
really, really tall. So now what we have is a very
not ideal thing to print because what's happening is the print bed is gonna
be moving as we know, and then our print
is gonna be so tall that there's a chance
that it does fall over. So what we might want to do is actually add a brim to this. So what I'm gonna do, I'm gonna go back here and
I'm gonna go to a brim. And let's say that we make
this a 20 millimeter brim. Let me show you what that does. And you'll notice that
it does indeed lay a bunch of material around
the first layer of our print. So this way, there is a less
chance that our print does actually topple over and that there is our brim
setting next up. It support material. I'm gonna leave support
material off for now. What we're gonna do
is we're actually going to do a full video dedicated to creating supports
when to use supports, all that kind of information. So for now, we can
ignore support material. Let's go into filament settings. This right here are the
only part that you really need to worry about
is the temperature. This coordinates directly to our filaments settings
that we have where here. So like I said, if I change
this from PLA2 PET g, it will automatically populate these with the
corresponding value. So you shouldn't actually
even need to touch this as long as you select the right
filament on the outside. The other one that I do want
to point out is the cost. What you can do is you can
actually put your cost, and let's say that I spend
$30 per kilogram of filament when I actually go
through and I slice my 3D print in our
bottom view here, it will give you
tons of information. This is really cool. It'll tell you exactly how
much filament you use. It'll tell you in grams, it'll tell you the cost. Now this cost is based
on the amount of filament that you use timed the price that you put in there. So you can see this
cube right here. If my filament was $30 per
kilogram would cost 89. Sense that there is our basic
settings for Prusa slicer, so that should be enough
to get you started. The only other thing
that you need to do is go ahead and export G code. And then what you're gonna
do is you're gonna put that on the SD card that
came with your printer, put that into your
printer and then hit Print and you are good to go. So hopefully that helps. Like I said, this is just
the introduction part to pursue a slicer in a
video later on the course, I'm going to go through
every single setting and go over the expert modes, if you will, for
proofs, a slicer. So go ahead and play with that. How some fun download some
files from Thingiverse, put them in their slice them, and then I'll see you
guys in the next lesson. It's getting exciting
because now we're actually really jumping
in and doing stuff. So I can't wait.
12. Support Settings Explained: Welcome to this lesson. This lesson today
we're talking about supports and support
structures now. First things first,
do not at all be intimidated about supports. Okay, I'm going to let you
in on a little secret. Everyone is so
scared of printing more support or they try
to avoid it at all costs. But in reality, if you just
understand where they go, why they go there, and
how to put them there. Then there's really nothing
at all to worry about. All we're doing is we're
changing a little bit of the settings of
our output file. And then as usual, we're letting our printer take care
of all of the work. So in this lesson, what I'm gonna do is
I'm going to give you a little bit of theory
behind supports. And then I'm actually
going to jump in and go over an example of supporting a really popular
and cool file for you guys. This way, you'll understand
it and then I'll show you how I do it as well as
all of my settings. And just like usual, frankly, you can just copy
my settings and apply those to yours
and your prints. So let's jump into that now. I'm gonna show you the theory
now and then I'll see you in a minute for the
actual example file. Yes, let's talk about supports. This is extremely important and it's one of the skills that you have to learn if you want
to be able to print things. Here is the general rule. Essentially, you
cannot print something if there is no material
underneath it. Now, what this means is that if you look at the geometry
of your object, it always must have
material underneath it. If there is no material
underneath it, we need to add supports
or your print, it will probably fail. Let me explain what the
classic Y and T example. You see the Y here. Essentially this y is going
to print absolutely fine. It's at 45 degrees or over, you're pretty much good. There's no support required. However, if we look
at the T here, it's basically at 90
degrees or 0 degrees. Essentially it's
just horizontal. So we do indeed need supports or the printer will end up just spitting out filament
into mid air. I'll show you what I
mean on the screen here as you can see, the print material here
with a t is extruding, but it will literally just
fall to the ground because it doesn't have
material underneath it. Honestly, chances are guys you're gonna learn the hard way. Eventually what you'll
do is you'll print something and it will
fail and you'll go, Oh, I definitely
needed supports there. That's why it failed. Don't worry, we've all done it. I still occasionally do it when I'm doing something really fast. So I recommend. My last recommendation
is that I recommend learning how to use
manual supports. Basically what this is is where you yourself have
to go in and click on the object to add in
those supports manually. If you use the
automatic supports in your slicing software, it will likely use
a lot more material and a lot more support
than you actually need. Alright, now that we've
done some of the theory, let's actually jump in and talk about my support settings. And let me show you
how I would prepare a file for printing
with supports. Now, This one's gonna be fun. I actually designed this file
right here in SOLIDWORKS. You can see this here is our skateboard thing from earlier. And then around it
is this big shell. It's kind of like
Coupa shell from Mario or wherever it is. And you can see that this here is indeed the shell that's
in multiple pieces. So that being said, one of those pieces is right
here on our print bed. Now, you'll notice
that it is obvious this piece is going to
need some supports, will see the underrate here is gonna be
hanging in midair. And also this section
right here could also probably use some support. So how are we actually going to go about printing this object? Now, you can't see
this is one of the outer perimeter
pieces of the shell. And when I was designing this, I could have also designed it to be printed without supports, but it would've been
many more pieces. For example, I could have
gone and I could have split this file in half and printed them both
vertically on the bed. But then again, we're taking one piece for now
making two pieces or we just add in a little
bit of support right here. So let's talk about
our support settings. The very first thing like I
probably already mentioned is we do not use
auto-generated supports. If you use
auto-generated supports, it will just put
supports everywhere. It basically just goes
and it plays it safe. Let me show you what
this would look like with auto-generated supports on. You'll notice there's
quite a few supports. It's actually not too too
bad with this print here. We probably wouldn't need these, but this one's not
too bad generally, when we use auto printed or
auto-generated supports, it makes a ton of supports
all over your objects. So I honestly, I would
highly recommend do not use auto-generated
supports and learn where and why and how we're
going to put in the supports, which is what we're
gonna do right now. So first things first, I am just using PLA. This is a standard generic
PLA profile point to speed. None of that stuff really
matters because all we're doing is we're talking
about the supports. But you'll notice
right away from the beginning, generate
support material. I checked that
auto-generated supports. I uncheck that. First thing that we need
to know is if we go to the top contact z distance, this is one of the most
important settings. It should be set to 0.2. Now, depending on what version
of Prusa slicer you have, it might be set to 0.1, makes sure that's at
0 to the next setting is the top interface layers. Now this one is
definitely a preference. However, my opinion, I like to leave it on 0, no
interface layers. I find it much easier to
actually remove the supports from the object with
no interface layers. So I would encourage you to try a few different settings
and see what you like. But I believe that 0 is
the best for me and that there is the support settings that I use. It's very simple. Again, like I always mentioned, Prusa does the vast
majority of the work, especially for something
basic like adding supports to just a PLA print. Once we get to TPU prints, I will go over the
settings again because there is different
support settings for when printing in TPU. Let's go ahead and
jump back into the platter and let me show
you what we have to do now. So first thing that
we have to do is identify the locations that
will need supports added in. Now obviously, it's gonna
be this tab right here. And I think this
is a floating tab. Yes, so it will be
this one right here. Potentially, this area here
could also use supports. The easiest way to do this, I usually just slice the
object and this helps us go through and we can check out where we will
need those supports. So everything seems to be pretty well attached and connected. And then you'll notice this
starts printing in mid air. So if I go back, you'll see, you can see this
material right here. This is printing in midair, so it obviously needs to
have some supports there. As we go up. You'll notice this part,
this part right here. It would definitely
work without supports, but I will add some supports
just for completion as it will help the quality
of the print. And then again, you'll notice this tab right here starts
printing in midair. So we need to add
supports in there. Now, at the bottom you see I believe that
the auto-generated supports added in supports
all around this perimeter. We don't need to add those
that will print totally fine. And I also know this because
I have already printed it. So full disclosure a half. I do know what I'm doing here, so let's go ahead, let's
add in some support. So how we do this is I always
use the brush on tool. Now what this does is
it basically change, it changes your
cursor into a brush. So you'll see here I can now paint on our object Command Z. I'm gonna get rid of that. And let's go ahead. And so if you left-click
with your mouse, it will be blue and blue
means support enforcer. So what that will do is
it will create support. So all I'm gonna
do, I'm gonna paint this area here blue because
I do want supports on it. Now, this brush size
is really small, so let's go ahead and let's make this brush a little bit bigger. And we can see now I have
this part painted in blue. And that looks pretty
good as it is. So like I mentioned, I also wanted to do
this piece right here. I think just adding in some blue along here will
help the quality. And there was that other
tab that is right here. I'm gonna go ahead
and just simply paint this one
here blue as well. Now, what you'll notice is sometimes when
you're painting away, it kind of paints in 3D
and you'll notice that now they're supports
on the inside here. I want to get rid of that,
so I'll right-click, which will make it red. And the red basically
just cancels out the blue as the red is to
block all support. So I don't want supports inside of the little circles here is
that will pretty much just make them messy for no point at all because they do
not need to be in there. I'm gonna go ahead and
just get rid of those. That looks good to me. Now let's go ahead
and let's check on these ones so
that looks good. There's no supports
inside there. Now there is all this support
material on the back. It doesn't really matter if
it doesn't need supports. Person slicer won't
add the mandible. But again, we'd go ahead
and we can just cancel these out by right-clicking, which paints them red, which is indeed a
support blocker. So again, we can just go
get rid of this stuff. Now the other settings that
you can play with over here are the different
types of brushes, the size of the brush, etcetera. I usually recommend
to just stick with the standard settings
that it gives you. And now let's go ahead and let's slice this object and
let's see what we got. We can see we now have
support over here, which is exactly
where we put them. And none of them are
in this area here. Because in this area
what I'm actually doing is I'm inserting a kind of nuts and bolts and I
want it to be super clean there and
that looks perfect. Now if we go over here,
we can basically see the same scenario is we just put in those supports
where we need them. And finally, this
tab right here, this looks fantastic as well. You'd see there is
one support there, so maybe we missed an area
with blue and there it is, bingo, you can see that's
what it was coming from. So if I slice this, now that one support that was
hanging out there is gone. And you can see
that this here is basically the perfect
support settings. Let's go through and let's slice this model up
and see how it looks. So you'll see from the bottom it prints are support
structures, right? Once we get floating
material right here, it jumps in and basically they print on top
of the supports. Now, this same thing should occur for both of
these areas here. And it does as you
can see right here, it's always printing on
top of our supports. That looks fantastic. And one more time right here, you can see that we have
nothing printing in mid air. And that's pretty much
all there is to it guys. So like I mentioned,
we can either take five-minutes,
added the supports, or we end up splitting
up a bunch of objects, having a glue them together
or whatever it may be. So don't be scared of
support because supports can enable us to print
things that we previously couldn't
print before. And it can just make
our life easier by having actually less things to print because we don't
have to split everything up to avoid those support. So I hope this lesson helps. Like I mentioned, there's just those two
important settings in the actual Creusa slicer, which are contact Z distance as well as the interface layers. Remember contexts, z distance makes sure it's at least as 0.2. That's at least what I use. And then also for the interface
layers, I put it to 0. You can put it to one
or two if you'd like, but I would encourage you to try both settings and that is
it for this video guys. That's all for supports. Hopefully that helps and
puts you on your way. So you should be
good and confident to print pretty
much anything now. So I'll see you guys
in the next lesson.
13. Bed Levelling: Hey guys and welcome
to this lesson. In this lesson we're talking
about bed leveling now, bed leveling is one of, if not, maybe even the most important things that we're
going to do over the duration of this
course because we cannot have successful prints
without a proper level bed. Now there is a little bit
of margin that we have. The bed doesn't have
to be 100% level, but let's say it
probably has to be about 99% or maybe even 99.5%. Basically, what happens is
This right here is the bed. We can see on the Prusa, the bed doesn't actually change. But if you're using an NDR or CR tan or something like that, you'll notice the turn screws
on the bottom of the bed. What these do is they actually changed the angle of the bed and our goal is to always
have that 100% flat. Now the reason for this
is because we want the nozzle and the
bed to be perfectly parallel and we don't want a basically change of distance in-between
the nozzle and the bed because what that would
do is either compress our filament in or leave extra space if it
was too far away, and that would increase the probability of
a print failure. Now, the good news is that once you learn
how to do this, honestly, it takes like maybe
thirty-seconds to level the bed perfectly
once you get used to it. But please do be patient with this process as when
you're just starting out, it might take a
couple of tries to actually get the bed
perfectly level. So if we look at a machine
like the Prusa here, it actually has a little probe. That probe does is it goes
and it will go in nine spots. And it will actually just
calculate the distance between the nozzle or from
the probe to the bed. And then it will
determine how far away the extruder head should be from the bed to give us our first layer, a
perfect first layer. Now if you're using one of those other machines that
actually has a turn screws, what we need to do is
level the bed perfectly. And the general rule
of thumb is that if you use an eight by 11 sheet of paper and you make
that the distance between the nozzle
and the print bed, that will ensure a perfect
first layer every time. And that's what I'm
going to go into detail right now about how to do
that now please do now. There are a few different
ways to do this. The most common one being
to check the corners with the nozzle and an
eight by 11 sheet of paper. And just to make
sure that there is a little bit of
friction on the paper. That's a method that I'll
be showing you here. I think it's the best,
it's the easiest, essentially, once
you know how to do that and you can
do that quickly, it'll take you maybe ten seconds to level the bed
perfectly after each print. So that's what we're gonna
be going through right now. Make sure to follow along, do this one and then I'll see
you guys in the next video. Wait, most important,
probably of all is bed leveling and z upset. I repeat this is probably the most important thing at all. If you're about to
stop this video, you're bored, you're
sick of listening to me. Well, probably listen
to this one more thing. Now's a good time if
you do like this video, if it's helping
you, Oh, go ahead. Do hit that subscribe button and that Like button has
that helps me out. But nonetheless,
let's talk about the leveling and the Z offset. The goal is essentially to have a print bed that is 100% level. Meaning if we literally
took a level to it, it would be perfectly level
in the x and y directions. Then what we want is
for the nozzle to be the perfect distance
above that print bed. Let some of the plastic
comes out and it's extruded and just pressed
into the print bed a little bit so that it
does adhere and create a solid foundation for
the rest of the print. Basically, if this first
layer is not a perfect or within some range
of perfection, what might happen is
that at some point in time through our
one to even 200, our prints or print
could actually fall off and cause
a printf failure. And yes, I'm not kidding. I have done 208 prints. So how do we accomplish this? Well, I'm gonna be
using a Prusa here, so it's a little bit
easier because you don't have to adjust the
height of the bed. These are definitely my
favorite machines, but I have, or at least I used to have
about 20 enters that literally ran 247 and I always
had to manually adjust. Oh, so let's do this. The easiest way to
do it is to actually unscrew all of the screws at the bottom of your bed
and then just turn them all about five
rotations at a time, which will level up or down
all of the corners evenly. Basically just repeat this
process until the bed is almost touching the nozzle and then at that point in time, grab a sheet of basic
eight by 11 paper, put it under the nozzle and
make it so that the tip of the nozzle is just lightly
touching that piece of paper. You should still be able to slide around that
piece of paper, but there should be a
little bit of friction. I'll show you in the video here. Now what we want to do is
go to the top left corner, do that exact same thing, then go to the bottom-right, do the same thing, then go to the top-right, do the same thing, and
then the bottom left. Now that order doesn't actually
matter that much before anyone gets all crazy
in the comments saying you should do it
this way or that way. Let's keep in mind here
that we're adjusting by about 1 tenth of a millimeter. So just go ahead and make
sure that all four corners, as well as the middle
of the print bed have that friction between
the piece of paper. Now people all day are gonna
be arguing this on Facebook. Just ignore them. The best way to tell if
you've done it right is if your first layer looks
something like this. Now if it looks like this, that means that the nozzle
is too high off the bed. And if it looks like this, that means that the
nozzle is to close. This part of 3D printing will likely be really frustrating
at the beginning, but I promise you like within a couple of
weeks you'll be able to level the print bed
in 20 seconds or less, and you'll do it perfectly.
14. TPU Printing: Hey guys and welcome
to this lesson. This one's really
fun. You're probably wondering what all
of this stuff is. Well, today, in
this lesson we're talking about printing in TPU. Yes, TPU is that
rubber-like material that has lots of flex to it. All of the parts on the
table here are printed in TPU and these are
actually parts of my company manufactures
and sells. They are accessories for this right here that
is called a one-week. For example, this right here is just a little
fender that goes on. These ones are actually for
a bigger version of this, but they basically just
covered the tire so that none of the water gets on your legs and stuff
when you're writing it. This one right here
is a rim protector. So it actually goes around
the outside of the room here. It's gonna be tough
for me to install this from the other side, but you can kind of see
what I'm getting at. Here we go. This is how this
one fits on there. There's all types of
different things that we make this as just a few of them, but all of these
are printed in TPU. So what we're gonna do today, I'm gonna get rid of this. I'm gonna show you
my TPU settings. The print settings
is support settings, all that good stuff
because TPU is a, it's amazing to print with. You can make really cool
things like all of these. But B, it can be kind of difficult to print with if you don't have your settings, right? So what we're gonna do, we're gonna jump into
Prusa slicer here. I'm gonna go over to Files. I'm going to show
you my settings for those files so that you can kind of match those up if that's what you want to use. It actually print those and do a time-lapse of this 3D prints. So you can see our
models all the way from the computer, all
the way to the print. And then you can see the quality that these settings do make. I will note the TPU that we use is linked in the gear less. It's the same stuff that's
on the printer right now. They have actually changed their schools from
plastic to cardboard, which is really good to see as that's good for the environment. But that is exactly what's
on the printer right now, and that's exactly what
all of these are made of. So let's jump into the
settings right here and let's talk about
how to print TPU. Okay, so let's jump
into our print settings and let's go through all
of these off the bat. So the first thing we
see is layer height. Now, I will note this
is the only time that the first layer height should or can really exceed our
standard layer height. The reason for this is because essentially when TPU
comes out of the nozzle, it's almost like glue. It adheres very
well to everything. And because of that, we a, we don't actually need to use
adhesive on the print bed. And B, we don't need that first layer super
compressed in order to have a successful print
because it will stick really well
to the print bed. So I would recommend
putting this up to 0.3. The other thing that's
worth noting is if you're printing TPU and you're
having problems, one of the first things to
check is how compressed that first layer is
because that can lead to problems even
up to the 50th or the 100 layer of your print if that first layer is to compress, next up we have perimeters. There's nothing super
special that we need to take into account for that. And then as we go through, we can see horizontal shells. This is all fine. None of these settings
need to be changed. Now next up infile, Again, infill, we don't need to
change many settings. I will note that when
you're printing in TPU, the infile will
directly correlate to essentially how flexible
the different parts are. As you can see, this
one here is printed at 20% infill and it has
a lot of flex to it. Same with these
parts right here. It's also because they're
generally quite thin, but just keep that in mind that based on the percentage of info will determine how flexible
it actually comes out. Let's keep going here.
So skirt and brand, we can leave those totally
fine support material. This is where things
get really interesting. So let's go to the
platter and I'm gonna move this kind of O-ring
right here off to the side. And let's talk about what
is our XLR plug right now. So the thing about
this XLR plug, you can tell that
it's going to need supports and it's going to need supports all around this
outer perimeter right here. So there is a dedicated video
in this course to supports, but this is just a
separate little section on if you are using
supports with TPU. Now, the first thing
I will know is that it's best to not ever need supports when using TPU if you are designing
your own prints, just make sure that
you design them such that they do not
require supports. But if you do, for whatever reason
you need supports, this file right here, there was no better way to make it bend to require supports, but this is how we're
going to support it. So first things first is we're going to use the
paint on supports. Again, there's gonna be a
whole video in this course. You may have already taken
it, you may be coming up, but we're going to
use the paint on supports and we're just going to indicate exactly where
we want the supports, which is going to be all around this outer
perimeter right here. So let me just show you that. Now you can see that what we're doing is we are enhancing it. So the only place
it's going to put supports is around
the perimeter here. The reason for this is because supports in TPU can be
really hard to take off. It's the same reason
that TPU prints to the TPU sticks to the print
bed really well, like I said, it's basically like glue when it comes out of
the nozzle and we don't want a lot of that
touching our print, especially when it's in supports because we're going
to take it off. It can actually
damage our print. What we do is we go into
Print Settings right here and let's go through them. So the first thing is
generate support material. We need to have this turned on, but then auto-generated
supports, I always, always turn that off. We can just leave that as it is. Like I said, we're going to
paint on our supports every time the grid style is fine. This is where things
get important. Top contact, z, distance. Is 0.2. We need this to be 0.2. If you have it to 0.1 or 0, what's going to happen
is that those support, the support material is
actually going to be touching our actual print and you're not gonna be able to get it off and you're just going to ruin your print
trying to do so. So that's that I will just
slice this. I can show you it. So let's say that I left it to, well, let's put it to 0.1. Let's see if we can
see the difference. So at 0.1, when I go
ahead and I slice this, what I'm mentioning right
here is this distance. You can see it just barely
but the distance between this blue line right here and the supports that is
gonna be 0.1 millimeters. If I go back out of this, Let's go ahead and
let's make this 0.2. And let's see if Prusa slicer
will show us. There you go. I think you can see
the difference. There is more space now between the actual
print and the supports. Again, the reason for that is so that when we go to
remove those supports, we can actually do
so and that they won't be fused onto our print. So that is the first thing is make sure we
have that at 0.2. The next thing that I always do is the top interface layers. It defaulted to two. I always just put this to 0 just because it's easier
to remove the supports. This is just my preference. Depending on the object
that you're printing, I would encourage you to
play with the settings, but that there is a
good starting point. Now the next one and probably
the most important one is the x-y separation distance between the object
and the supports. Let me explain
quickly what that is. As I go through here, we can slice this again. And if I look at the bottom, we'll notice that this
support material is just slightly away from
the bottom of our print. Let me zoom in here
a lot so you can see this is a perimeter of our actual 3D print and then our support start right here. So there is a little bit of
distance in between them. If I go back into
my print settings and let's say I set this to two, which will be two millimeters. If you express it as a
percent, it'll be a percent, whereas a number it
will be in millimeters. And now let me just
show you the distance. You can see now there's
a huge distance between our support material
and the actual 3D print. Now, the reason again for
this is because we don't want the support material
touching our 3D print. Otherwise it will fuse to it and it makes it really
hard to pull it off. So this right here, obviously this wouldn't be
ideal because then all of this material right here is going to be printing
without supports. What we want to do is
find a happy medium. The best for this is
probably going to be around 0.5 millimeters. Let's see what that looks like. And you know what? I think we could actually
go a little bit less, maybe try 0.4 millimeters, and I think that will
give us the best quality. Let's see. There we go at that will
be perfectly fine there. So now we have just a
little bit of space in-between our support material
and are printed object. Now if I go and I
scroll this down, I can show you it from the top. So that is this distance
right here is now 0.4 millimeters and
that should be perfect. The quality of this
sprint will be a okay, That's that part right there. Now, the other setting
that I wanted to really point out is if we go back up to our layers and
perimeters and we have this on, Let's go to expert mode. And Bray here, avoid
crossing perimeters. This one's really important
whenever I'm printing in TPU, I leave this checks no matter what I'm printing, I always
leave that one check. The reason is is because let
me just show you in here. It's probably easier to show you with our o-ring that I have. So let's bring this
in here and let's forget about the
XLR plug right now. Let's slice this and
you can see that. Let's go to the point where we can actually see the toolpaths. So this is our nozzle head and you'll notice
that as I play it, the nozzle head just keeps
circling and circling. It won't actually crossover
the perimeters of the print. And why this is really
good is because TPU tends to ooze out of your nozzle and it creates
what's called stringing. If we haven't talked
about stringing, we'll be talking
about that soon. But basically what it
is is a little bit extra of the material is coming out when it's
not supposed to be. And that leaves little
imperfections on our prints. So to avoid that as
much as possible, we go into our print
settings there and we click on the Avoid
crossing perimeters. That is one that I always leave on for all
of our TPU prints. I'm going to try and
show you it again here. Wherever our two-headed is. Let's go up a little bit. Just give me a tough time
because this guy is there. I'm going to delete
this, slice it. I just want to really make
this point clear because I do encourage everyone to leave that setting always
isn't it? So here we go. You can see that the
tool head again, it's just going in circles
and circles instead of it actually crossing
over like this. Now, that will increase your
print time by maybe 10, 15% on the time-frame. But again, a trust me, it will be 100% worth it. For example, with this
rim protector right here, the print nozzle would
basically only be going in circles and it wouldn't
actually crossover. The perimeters got improves
the quality of our print. So those are my tips
from printing with TPU. Again, it's not
super complicated. It is something that you can
just go in there and set up one time and then basically never have to
think about it again. Just go ahead and save that
on your ST smart TPU profile, I recommend using the TPU that is linked in the gear list. It's exactly what we use, it's exactly what all
of these are made from. And now what I'm gonna do is I'm actually going to print these, show you a cool little
time-lapse of it, then that will be
it for this lesson. So TPU is one of my
favorite materials. You can make some really, really cool things and also
some super functional things. Like I said, all of these
are extremely functional. We manufacture
these, we sell them. And if you're actually
interested in seeing how we sell them, I do have a course that's
on Skillshare here. It's my Etsy course and
it will show you the behind the scenes
of my Etsy shop where we actually make
these and sell them. We ship them globally. And it's kind of cool
to see the behind the scenes if that's something
that you're interested in. So that's it for this one
guys, I really like TPU. Don't be scared to print
with TPU at the beginning, it's likely you'll have a
couple of failed prints, but trust me, it's a fantastic material
once you figure it out. And like I said, you
only really have to figure it out and
optimize at one time. So that's it for this lesson. I'll show you guys the time
lapses of these prints now, and I'll see you
in the next one. All right. We're back.
Those two prints are done. They're sitting in
front of me right here, and I will obviously include a close-up so
that you can't see them. But they worked
out really great. As I mentioned, the
supports for this one came off really easily and they both printed in high-quality and they will indeed
be functional, which is exactly what
we're looking forward now, I was setting up the time lapse rate before the
printer and then I realized that I should actually
just make an entire video on that time lapse
rate because I do get a lot of questions about how we actually make those cool, time-lapse videos of the prints. I'll put one here just so
that you can't see it. And so do you know what
I'm talking about? But yes, we are done
with our TPU now there is to other settings
that I do want to mention. The first of which
is being speed. I realized that I didn't
mention this before. Now when it comes to speed, I typically just leave mine at the standard 45 or 50
millimeters per second. That comes with the
profile that works for me. However, when you're
just starting out, if you don't have your
printer completely tuned or you're just getting used to printing with
TPU and the new filament, you should actually lower
that to even around, say, 25 to 35 millimeters per
second to just start out. And that will basically just
increase the probability of your successful prints when
you're just starting out. That's setting number one. Setting number two, I
was gonna leave this for the advanced settings
section of Prusa slicer. However, I do want to mention it right now and that's
setting is under the Output options and it's called complete
individual objects. Now what this does is it
actually, it's very smart. It makes a printer finish one object before it
actually moves to the next, instead of doing the first layer one and then the first
layer of the next one. And then going one-by-one, it does one whole object and
then it moves to the next. So for example,
on the print bed, if I had this piece here and this one here,
hopefully you can see this. It would print this
entire object and then move over and
print this one. That's another great setting. If for example, you
wanted to print, say, ten of these ones here, what that does is it just
reduces the travel time and the amount of
stringing In your prints. So that is it for
this TPU section. Hopefully that helps. Hopefully you guys are maybe
ordering some TPU right now and trying it out because
it is, like I mentioned, one of my favorite
materials and I highly, highly recommend
becoming proficient with it because it opens up a lot of options when it
comes to functional printing. So that's it. I hope this helped and I'll see you guys in the next lesson.
15. Setting for Fast Printing Pt1: Hey guys and welcome
to this lesson. This lesson is one
of my favorites because now we're
getting slightly more technical and we're
gonna talk about slow versus fast print settings. So why is this important? Well, what happens is one print could take
up to 25 hours, where if we just simply
adjust some of the settings, maybe it only takes five hours and that is a huge difference, especially it maybe you
have two or three of them or even maybe a 100 of
them that you have to print. It's really important
to know how you can speed up your prints and to what extent you can speed them up while maintaining quality. Let's jump into proofs.
A slicer, like I said, I'm just gonna take a basic file from Thingiverse and
I'm gonna show you my settings for
essentially slow prints and also for fast sprints. So let's open up Prusa
slice array here. Hopefully you can
see this, this year is the Nintendo logo. I believe you've
probably seen this on some gaming consoles or in the media,
something like that. So here is our Nintendo logo. Now, on the right
side you'll see that we have our quality, our generic PLA, and then
our machine type again, we've already been
through this in the basic process settings part, but let's start
with slow setting. So the slowest that
I would ever print something at these
Honestly 0.15 millimeters. I don't think I've ever actually printed below
that layer height. Now, again, remember the 0.15 is indeed our
layer heights. If I go to Print Settings,
Check over our layers, you'll see it auto
populates this with 0.15. Now, again, that's the z-axis going up by 0.15
millimeters each time. That is a very precise print. So when it comes to
printing slow 0.15, if you need something
to look amazing, that is probably
what I would do. You can obviously you can
go down to 0.05 or 0.07, but let me even just
show you the difference between 0.05, then 0.015. So if I slice this right here, we can see it's just loading up. And then what we are concerned about right
now is the print times. You can see in normal mode, this is gonna take
one day and seven, sorry, one day, six hours and seven minutes where the
one day is 24 hours. So 24 hours plus the six hours, that's 30 hours and seven minutes just to print
this little thing right here. And that's because of that layer height enough,
we go out of this. And let's go to the
0.15 that I mentioned. Let's slice the same thing. So we're at 30 hours
and you can see now it's only at seven hours, so it makes a huge difference. This is one of the most
important settings, like I mentioned, if you had
only one of these to print, maybe it's not that important, but you'll probably
find yourself in a situation where you want to print maybe ten or 20
or 30 of the same item. And that's when it's
really important to understand these settings. So like I said, 0.15 millimeters under
your layer height that there is pretty much the most precise
setting that I would go with the rest
of this honestly, I would just leave
auto populated. Prusa does an amazing
job with their settings. I think I've already
discussed this, but this is one of
the reasons why our company is so
heavily invested in the Prusa ecosystem is because they've taken
the time to actually go through and make the perfect set of settings for your printer. Now, Let's go through these one-by-one and
just talk about them. So again, the first
layer height, you'll notice that this
first layer height is actually larger than the other layer heights
just because, again, with 0.15 millimeters, like the z-axis is
hardly moving up, but we are going to start at 0.2 millimeters because
we want to just slightly squished into the bed. If the first layer was at 0.15, it would be squishing the filament quite
a bit into the bed. And it might actually be hard to pull your print off in the end. So that's that part right there. In terms of solid layers. Again, this is the
higher definition print, so I would pretty much just
leave all of that now infill, you can always
experiment with the infilled depending on the
function of your print. Of course, if you
need something to be super-strong,
increase that infill. The other thing I
will know is that if you need something
to be super-strong, I would also go through
in your print settings and the easiest one to do is
to increase your perimeters, maybe go-to for forests, my functional parts
starting points. If I'm making something that is holding a load
or something that's under pressure for perimeters is a really good
starting point for that. The rest of this stuff is
pretty straightforward. You'll notice that our speed,
I do want to note this. It starts at 45
millimeters per second. Now that is quite slow. 45 millimeters per second for our perimeters is quite slow. The rest of this stuff, I would just leave auto
populate it as it is. Let's keep going through this. So let's just go over the overall print time
for this one here we can see we get nine
hours and 13 minutes. That would be a pretty
high definition print of this little 3D Logo thing. The other thing I
want to mention is under our Print Settings, you'll notice that
there's actually two different kind of
categories of each of them. So you'll see we have 0.15
quality versus 0.15 speed. The same thing for
0.2. And then 0.3 is just draft because 0.3 is
a pretty big layer height. Now the difference between
0.15 quality and 0.15 speed. Let's check that out right now. So if I go 0.15 quality, Let's slice now and let's
see what print time we get. And you can see we
get seven hours and 28 minutes right down here. Let's go ahead. Let's
go back and let's set this one to 0.15 speed. Let's see how big of a
difference that makes. And now it is six
hours and 23 minutes. So a decent difference
overall, my opinion, the actual difference in quality is going to be very, very small. What they're basically doing here is if you go
into Print Settings, you'll see that now
the perimeters is up to 60 millimeters per second. That is just the speed that the nozzle is moving
around there. So I'm not gonna get too deep into the slow and
accurate print settings, essentially, like I mentioned, just go ahead and pick one
of the standard profiles.
16. Setting for Fast Printing Pt2: And you're good to go.
The main purpose of this lesson here is to talk about the FASB print settings, which we're about to
get into right now. So let's just take
note and remember, let's say this was
between 67 hours to print this logo on kind of
slow, more accurate settings. Okay, now things get
really interesting. Let's go over how we can
really speed up this print. So the first thing that we
should know is remember the six to seven our time that it was to print this in quality. Now let's go ahead
and let's speed up this print and
let's see what we get. So let's change this
year to 0.3 draft mode. And then let's go into our print settings down under the
layer height, it says 0.3. I go ahead and I make this 0.32, which is indeed the maximum
layer height we should ever go with a 0.4
millimeter nozzle. Remember, 80% of
your nozzle diameter will be the maximum layer
height that you can go. So that's just a good rule
of thumb to remember now, comes to perimeters never go below two. It's not worth it. One perimeter will make
your print extremely weak. So I always keep that
at at least two. Now if I'm really trying
to speed this up, if we look at the
horizontal shells here, we can see that we have
the top and bottom. If we want to speed this up, three layers on the
top is probably fine. Let's keep going through here. So now we go over to infill, infill set to 20% and grid personally with
something like this, you could get away with
between 5, 10% infill. So I'm gonna go ahead
and I'm gonna make this 8% and grid should be fine. Like I mentioned, the
only other one that I use is Guy road or
wherever you call it, either that or grid. So that is the one in
terms of infill density. I would pretty much
never go below seven or 8% because we do need to still make sure that
our print is successful. And I'll show you why
that's important here. So under skirt and bran, we can leave the one sqrt layer. That's totally fine support
materials speed now, speed, this is where we actually
make up for that time. So under perimeters
I'm gonna actually and make this 90
millimeters per second. And then I'm going to take
all of these and I'm going to increase some of these
are just my values again, you can experiment if you want. But this is a pretty
good templates. So 45 for the small perimeters. Now your external perimeters
are really important. This is the outside
of your print object. This is what you see visually. So we do like to leave
this pretty slow. So instead of 35, I go 40. Now infill, infill set to 85. I actually go and make this 100, which is really fast. So again, this is
only used when we want to print
something very fast. Here we go. The rest of this, wherever we solid infill, top salt info, we leave that
one alone support material. This one. We also leave alone sport
material, interface bridges, gap fill the rest of that stuff doesn't make a big difference
on our print settings, so we can leave
those alone as well. The rest of this stuff, we
don't need to touch this as just the advanced settings
such as the acceleration. Those are also determined by your actual
machine parameters. So don't, don't touch those. Now with these settings, I do want to note
now what we have is our nozzle is going to
be moving really fast. So the one thing that we do have to do is if we go over
to our filament settings, you'll notice that our
nozzle temperature is set to the standard PLA of 215 for the first layer
and 210 for the other layers. What I like to do is
actually make this 220 because we are having that
nozzle moves so fast. We just want to make sure
that enough plastic can actually flow out so that there is my standard or starting
point for fast prints. Now let's actually see how this slices and let us see
the print time on that. Here we go. We can slice
it and you'll notice we get two hours and 17 minutes, whereas the other one
was six to seven hours. So that's a huge,
huge improvement, especially if we had to
print say, 100 of these. Now, once I slice it, what I'd like to do
is go through and just make sure that I feel like there's enough infill and places that it isn't going
to affect the quality. So let me show you what I mean. As I come up here. It's gonna be totally
fine until we get to basically the top layers. And once we get to the
top layers right here, I just need to make
sure that there is enough infilled at once the machine actually goes
to do those top layers, it will have something
to print on. So let me show you if I go
up one more layer here, and then I bring
this to the side. You'll notice that as our print or as our
tool head is moving, it's going to be bridging
the gaps you're in-between. And the infill setting,
I believe we said eight, this will be totally fine
for this print itself. Now, if we set this
infill to say 0%, for example, then our tool head, it would have no infill to actually lay down
the material on. So it would be bridging this whole gap and
that would not work. That's why we can
never pretty much do 0% infill because the top
layers will be affected. Now, we could probably
even get away with three or 4% infill and then increase the number of top
layers if we wanted to maintain the kind of visual
quality of the object. But this is about as fast as I would be comfortable
printing this object at. So that is pretty much it for our slow versus fast
print settings. Hopefully this helped again, this is something that you just learn over time as
you experiment. Remember if you ever
have to print like 500 and something or even 1000, we've done lots of small
batch manufacturing. It's usually worth
it to print one of them fast and then really fast, and then as fast as you
possibly think it will go, then compare the quality
of those three items, pick the one that you like, and then use those
print settings for batch production
because that will save you days and days
of time in the long run. So yes, I hope that helps. That's it for this video and I'll see you guys
in the next one.
17. Machine Maintenance: Hey guys and welcome to this
quick lesson on maintenance, how the keyword there is quick. Okay, one of the
best parts about 3D printing and 3D printers in general for manufacturing is that they require very
little maintenance. As a mechanical engineer, I've done lots of work on
large CNC machines and oh boy, let me tell you we
have it so easy when it comes to maintenance
and 3D printers. So when it comes down to it, it's really just about
being proactive. And what I mean by
that is that most of the maintenance is
actually taken care of as long as you are
frequently checking on your machine now before you start your prints,
all you have to do. She's make sure that
there's no plastic strands stuck in the gears or
the rails or the motors. And always, always make sure that none of the moving cables are getting caught on
the frame because that could fray some of the wires. Now as long as you take care of those basic checks before
you start your prints, the rest pretty much
takes care of itself. So let's go over the regular maintenance number one, Greece. This one's pretty
straightforward, but what we have to do is add a light coat of Greece to the machine every
once in awhile. I would say probably
once a month is perfect depending obviously
on how much you print. Now, when it comes to
different machines, the location that
you're gonna put that Greece is gonna be
different, for example, on the Prusa there we do need to grease the rails of the x, y, and z-axis, as well as
the z-axis turn screws. Now if you have a
different printer, maybe you have, let's say
an enter three for example, the only place that you actually need to apply grease is to the z-axis rods that are just
behind the z frame there. Now I should also note
why do we even add grace? Well, it's generally added to reduce the friction
of moving parts. And what that does is it helps improve the longevity
of your machine. For example, if there is
less friction on the rails, then it requires less
work from the motors to actually move the tool head
so that there is Greece. Let's talk about number two. So next up for maintenance
is belt tension. This one's really easy, but
basically you should just be checking to make sure that
your belts are always tight, but not too tight. Make sure you can
pinch them together. But make sure that when
you pinch them together it takes a little bit of effort. Again, it's like a 1 second check before
you start your print, just pinch the belts and make sure that they are indeed tight. Now lastly, for maintenance, it's not a bad idea
to do a quick test on the tension of the screws and
the bolts in your machine. If you think about
it, basically what's happening is your machine is constantly vibrating a million times for every single print. And that can actually cause some screws or some
bolts to come loose. Now you should really
only have to do this once after the first
month of printing. But trust me, you guys, it's worth taking
an Allen key to some of those screws are some of the bolts
and just make sure that they are all tight, especially the ones around
the hot end and the nozzle. Because the absolute last thing that we would want is for
either the hot end or the nozzle to fall off mid sprint and land
on our actual print. And that is honestly pretty
much it for maintenance. Let's just keep
those machines in good working order and I'll see you guys in the next video.
18. Are Expensive Machines Worth the Cost ? : Hey guys and welcome
to this lesson. I wanted to talk quickly about the more expensive
printers and what you actually get when
you spend that money. Basically, I get a lot
of questions like, Hey, if my budget is maybe
three to say $10 thousand, what printer do you recommend? I get now Spoiler alert and I know this is
not exciting to hear, but I still recommend
that for 99% of people that they just get
a Prusa machine if you have the budget for IT. Person just has their
XL machine coming out, that is going to be
an amazing option. But let's still talk
about it because I do get this question
pretty often. Let's talk about what
we realistically get by spending that extra money on
a more expensive machine. So for us, I think I probably already talked about this
by now in the course, if not, I will later, but we've owned and used all
sorts of printers, the most common machines
in that kind of three to $10 thousand
budget range that we've used would be the
Ultimaker series as well as the raised 3D
series we've used, own both of those machines. Now, here are the
general upgrades as well as the pros and cons that
come with those upgrades. And that's the
important part is that all those upgrades have
pros and they have cons. We can't forget that part, so let's talk about it. Number one is IDEX. Now you get IDEX
with a few machines. I'd ec stands for
independent dual extrusion. Basically what this is is you
have two nozzles that are now printing at the
same time and yes, it sounds absolutely amazing
in practice we had the rays E2 **** in the shop
here for awhile and we also had a giant printer. It was like the size
of a fridge and a Costco, 30 thousand bucks. It also had IDEXX and
here's what we learned. Fyi, I'm not saying the brand of the $30 thousand printer because we ended up
not going with them. Still a great printer brand, but the IDEX wasn't
that functional. So like I said, basically I deck sounds
great in practice. However, there is one big
issue in that is that we have two nozzles or extruder
heads that are both attached to
the same x-axis. And what happens is that each of those extruder assemblies has a 100 different
components in it. And essentially the distance between the nozzle
and the print bed is never the exact same
for both tool heads. Additionally, if your
printer has any or if your print bed has any warping
or anything like that, it really magnifies that issue. Hopefully that makes sense. Basically, it was a
nightmare to actually get a proper first layer from both of the nozzles at the same time, we can always get a perfect
first layer from one nozzle, but then the other would
either be too high or too low. So the reliability of it just
wasn't good enough for us. Now I'm not saying that
every machine is like this, but just do a lot of research into the machine
that you're looking at purchasing if you are
going with an ibex machine. Frankly, I also would never recommend buying a
cheaper one if you think about it for
basically the same price as a normal cheaper printer, Some of these companies
are just throwing in IDEX there in hopes that you
will purchase that. But in reality, they're
actually keeping out on some other
components of the machine to make up for the ability to put IDEX in that
cheap machine, I recommend just sticking
with the printers on the gear list and you definitely
won't have any issues. So what is the better
option versus IDEX? Well, for the price of
one of those machines, you can probably just buy two printers and then
run them individually. And that will also double or actually half your production
time because you'll have two running at the same time
just on different printers. And it is worth noting that will also reduce the probability of failure by 50 to 80%
if you think about it, if your IDEXX print fails, if even one of the nozzles are one of the prints
on one side fails. Essentially they both fail, so you also lose the filament. Now, That's just my
thoughts on IDEX. It's not quite reliable. And in the future, if we do get a machine
and there's one that I can recommend
that is reliable. I will absolutely post an update video here and put it in the fearless
for you guys. But for now, I recommend staying away from IDEXX printers. Number two, when you
spend more money, you generally get an
all metal hot end or at least hot ends. It can heat up to
300 degrees Celsius. And over the reason for
this is so that you can print specialty
materials again, you just need to know if you're going to be printing
those or not. And I think I've already
mentioned this too, but 99% of people will
probably never touched them. Number three is enclosures. This one's actually really
important if you're printing lots of abs or ASA or
something like that, this one might be
worth the money. You definitely want an enclosure if you're printing
in those materials, generally, what happens
is your heat bed will heat up to around a
110 degrees Celsius. And if it's in an enclosure that keeps the rest of
the print pretty warm as well so that it
reduces the shrinkage. This one is frankly, the only thing that I
think is worth it in those more expensive machines. However, you can also just by an enclosure for a
cheaper machine as well. So that is definitely
something to consider. Last thing I should
mention is support. Some companies
offer tech support if something goes wrong, frankly, support
doesn't really do much. You're often left fixing
the issue on your own any ways they can just walk
you through the problem. But once you gain
enough experience or even just a little bit to a medium amount of
experience in 3D printing. Generally, you'll see the same problems all the time and you'll already know exactly
what went wrong. However, warranty is
an important one. If you're spending a couple of thousand dollars on a printer, make sure it has
sufficient a warranty. Lastly, again, I think if
you have the budget for it, the Prusa XL is your
best option unless you have a very specific use
case for your 3D printer. And if you do,
that's really cool. I would love to
hear about it and I think you should post it in the project section of this course that we can
see it and discuss it. Because that's great
information for everyone. So that's it for this lesson. I hope this helps in case
you're being tempted by those more
expensive machines. I'll leave it at that
and I'll see you guys in the next one.
19. Fire Safety: Hey guys and welcome
to this lesson on 3D printing fire safety. Now personally, when I
was just starting out, I lost a lot of sleep every time my machines were on and
I was out of the house. So in this lesson
I'm going to go over some safety tips in
ways that I can help to give you a peace of
mind that you can trust your 3D printer isn't
going to start a fire. So with that being said, there is good news and
there is bad news. Let me start with the good news. The good news is,
I have probably a cumulative couple
of million hours, maybe just a million
hours of 3D printing under my belt between
all of our machines running for the last five
or six years and not once did we even have a
close call with a fire. Now that being said, it is still important to take the necessary precautions
to reduce the risk. For me, honestly, most of
it was just a stressing. I hated that whenever
I left the house, it was on my mind that I
was just worrying about the 3D printers that we're
running in the basement. So like with everything else, I tried pretty much everything
until I came up with a system that we use
and trust today. Now I should go over, this is the bad news. The bad news is basically
that nothing is guaranteed. There is no way to 100%
guarantee fire safety. If you do everything that
I mentioned this video, there is still that chance
that something could go wrong. So that is my disclaimer. But what we can do is absolutely minimize the risk and
put in practices, put practices in
place that you don't have to worry about
it so much now, the millions and millions of printers that are
sold every year, in my opinion, I
think we would hear a lot more about fire safety. It was if it was truly a common
hazards slash occurrence. I'm not saying it's not,
but what I'm saying is that we can take precautions to control it and minimize our
risks such that at least I felt comfortable with our setup and hopefully you
can get there too. So let's talk about how
we're going to do it. Everything that I
mentioned here is also linked in that gear sheet. This is just my opinion. This is how we do it
and this is what I think is the easiest
way to do it. I'm going to show you them
all right now, actually, before we even go over
that first and foremost, the best thing that
you guys can do, honestly before you start your print is just to check over your printing machine and make sure that all the
basics are covered. So the most important one, just make sure that the wires are out of the way
from the print bed and then nothing
is getting snagged on the frame of the
actual print bed. For example, when your y-axis
is moving back and forth, makes sure that the bed, or make sure that the cable
that goes to the heat bed, make sure that's not
getting caught on the frame and fraying
any of the wires. That is the number one
most important thing that you can check before
every single brand. So after we are confident
our machine is good to go. Here are some additional
steps that we can take. Number one, I guess this is actually number
one and number two is remote monitoring
plus a shutdown system. Now, there's a lot of
different ways to do this. Some people even go to
the extent of re-wiring their printers into shut
off, some things like that. I don't think it's really
worth date here isn't easy solution that
involves two items. Number one is a
remote power switch. Okay, I'll put a picture
of one on the screen here. There's lots of these. It's simply allows you to cut the power to your
machine from your phone. So no matter where you are, you can just press a button
on your phone and it shuts off your printer. You simply plug the
plug-in there into the wall outlet and then
you connect it to Wi-Fi. And now you can just shut
your printer off at any time. To go along with that,
we need number two, which is a camera now yes, you may have a
Raspberry Pi camera, but there is a better
solution that is a higher definition and be
more reliable for this, I use a Google Nest
because it also has audio. So if your printer is
doing something funny, you will actually get
an alert based on the audio that the
camera has picked up. For example, maybe
a print fell off, it's behind the bed and the axis keeps bumping
into the print. You might get an audio alert
and then you can open up your phone and just quickly
shut down your printer. The worst-case would be if
there was a fire or a smoke, the fire alarm goes
off and now you get a notification
from Google Nest. You open it up, you use the Wi-Fi switch to
shut off your printer. You can see that even the
printer behind me here, we only use this printer
for demos and it actually has a smoke detector
on the side of it. So again, it's just
those little extra steps to give a piece of mine. Now, if you want to take
this one step even further, I know a lot of
people that do this, they put some sort of
automatic fire extinguisher above or around
their 3D printers. So now if something
was to happen, you'd get an alert from
your phone because the smoke detector
sound would be picked up by the nest Camera. You'd open up your phone. You could go ahead and you
could power off your printer. And you'd have a giant automatic fire extinguishers
method above it. So for me at least that was
good in terms of home safety. I think that is a
pretty good setup now, the other thing or at least the only other
thing that I could recommend would be maybe just check your insurance policy of your house and
make sure that you have make sure that
you're insured in case there was an
event of a fire. Now the reality is guys, you can never be 100% sure. Fortunately, with
the advancements in technology and they're
very reliable printers today that you can buy. And the good ways
to monitoring them like using the camera
and the remote shut-off, the odds are definitely
in your favor, so it helps bring
some peace of mind. Like I said, I'd millions
of hours of printing, not even one close call. So I do think that as long as you take
care of your machine, you do the maintenance
and you check it before you print you
should be good to go. These are additional
fire safety steps, so that is it for this video. This is one of those
things. Again, I get lots of questions about it. So I wanted to make a
full dedicated video to show you guys how
you can build a good, reliable system and give
you a peace of mind in case you're printing overnight
or one-year not home. So that's it for this one. I'll see you guys
in the next video.
20. Food Safety: Hey guys and welcome
to this lesson. So I get this question a lot, like at least a couple of
times per week through YouTube, emails, comments, etc. So I wanted to make this video and this lesson
here to address it. Now, obviously the
question being, is it possible to print food safe items now before I proceed, and this is just a disclaimer. I am not a lawyer or an
expert in food safety. This is not legal advice. This is 100% just
my opinion based on my years of experience
into 3D printing industry. And as an engineer who
has a deep understanding of the 3D printing process,
like all questions, the answer is not
super straightforward, but I'm gonna give you a
straightforward answer in case you are thinking about
doing this commercially. So here it is. You cannot reliably print with 100% confidence food safe items with a basic desktop
FDM printer. And here is y, and here's
my experience with it. This is the important part. So a lot of people like to print things like cookie cutters, food molds, chocolate molds,
pouring templates, etc. And the reality is, is it depending where
you're located or where you are manufacturing and
selling your 3D prints. There are legal guidelines
around food and food safety. This is the same
reason that you can't just go down the street,
open up a restaurant, and start selling food
before that place gets inspected and approved by the legislating
body that's there. With 3D printing,
there is a couple of things to consider
while actually a lot, but I'm gonna go over
the obvious ones. So Number one is the space between the layer
lines of that print. And in general, the
print itself is porous, meaning that food and debris can actually get
inside of the print, which can break the print down itself and also
yields things like bacteria and all
sorts of other things that is bad for food safety. Number two is washing. If you print something in PLA and you throw
the dishwasher, it's going to come out
destroyed and deformed. Now, yes, you can
use other materials, but washing them is always
a bit of an issue as it tends to either melt or degrade
that plastic over time. Number three, even if you
buy food safe filament, yes, you can buy FDA approved
food safe filament. But you have to ask yourself, is your PTFE tube, your nozzle, your entire hot
end in your print bed, etc. Is all of that free
of contamination? And the answer is no. There is the three
obvious reasons. There's at least ten other
reasons that I could go over. But basically, if
you're just 3D printing for home or for fun, you want to make
a cookie cutter, you're probably
going to be fine, especially because you know how to handle and care for it. But I highly, highly recommend that you do
not go and open up a store to sell things like
3D printed cookie cutters as there could be legal
implications down the line. So that is just my $0.02. Again, this is not legal advice. You can take this
with a grain of salt, but based on my experience, this is what I recommend to you if you're taking
this course now, there are specific 3D
printers out there. They actually 3D print
food like chocolate. However, let me
tell you a story. I had a big project
lined up a couple of years ago to 3D print chocolate. I actually tried to get
one of those machines here in Canada and
the company could not legally sell it to me because
their machine did not meet the food safety requirements
to be sold in Canada. Therefore, honestly, neither
does your desktop printer. Now, this might have
changed by now, haven't looked into
it in a while. Maybe there is a company
that's doing it successfully. But the moral of
the story is it's a very complicated process
and it's important to be aware of these kind of restrictions around what your
printer can and cannot do. I will point out there
is a way to do this. There's a much better
way and that is basically you can design
whatever you want. Let's say it's a cookie cutter, 3D printed, 3D printed
as a prototype, test it, and then contact a local
machine shots and make that item in something
like a food safe metal. Alternatively, you can 3D print something
and then actually make a mold of that in
a food safe material, which we've done a lot. Let me show you an example
of another project we did. We needed to make
an advertisement for 3D printing chocolate molds. So I made a giant chocolate Pokemon basically just to
show that it can be done. And I'm going to put some
clips of that video in here. Now, this was all done using
what's called a vacuum form. What I'll do is at the
end of this video, I'll put a link so that you
can see the whole video on 3D printing that
chocolate, Pokemon, basically guys, all
in all frankly, is there a market for
the commercial use of 3D printed food molds? Absolutely, but there are also a lot better
markets out there. So if this was your big idea and you're just getting
started, trust me, there are greater opportunities available to you or if you
really want to jump in, Do consider using 3D printing
as steps one of two, where that step two is to use the actual food safe part
via vacuum forming or sending your files to a
machine shop so that they can ensure the safety
of those parts. Again, if this is just
for personal use, obviously do whatever you want. I'm not going to
tell you what to do. Maybe you want to make some fun birthday cookies or
something like that. You are probably fine to
print them, wash them, and then I would say
use them honestly, then I would throw them out. So yes, that there there
is food safe filament, but using it does not mean that the product you've
made is food safe. I hope this helps. Trust me, I did at least 30 hours
of research awhile back because we were considering taking
on that big project. We're going to work with
a bunch of high-end chefs making fancy food items. And honestly it just
didn't work out because the logistics of it around
food safety, like I said, it is possible if
you're only using 3D printing for
steps one of two, but you cannot just print a food safe item and
consider it 100% food safe. Okay. I think I nailed
the point across. That's enough for this one. Do you want to check
out the full video on the chocolate Pokemon
mode that I made. Maybe that will spark
some ideas for you. I'll put a link on the screen to my YouTube channel and you
guys can check that out. Moving on, I'll see you
guys in the next video.
21. Sell your 3d prints: Hey guys and welcome to this lesson. This
one is exciting. In this lesson, I'm
actually going to go over how you can design and sell your prints if that's something that you're
interested in doing now, if you watch the intro, you know that that's
exactly how I get started. So if that's something
you're interested in doing, I'm gonna make these
two quick videos here, just talking a little bit about the process involved in that. If you just want to
print for fun and you're not interested in
selling any prints or doing any commercial work with the new skills that
you're about to learn, then you can go
ahead and just skip the next two videos or stick around and just pay attention because it might be something
that peaks your interest. So basically there are
two ways to go about it. Number one is it you do the
design and the printing, and then you sell
that physical object. Now obviously there is a
lot to that and that is a totally separate course
which I've already made. And you do have access
to the best place to get started is with a program
called Fusion 360. That's the easiest way to learn
how to design your items. And then what I recommend is list your items
per sale on Etsy. All of this is completely
free to get started, including the courses
that I just mentioned and I go over it in great depth. So if that's something
that you're interested in, which is designing and
selling your prints. I highly, highly recommend checking out those two courses. My company, we have a
bunch of Etsy shops. They sell basic 3D prints
and they do quite well. I go over all the
behind the scenes in the ETC course as well as
on my YouTube channel. I will put the link
below in case you do want those
additional resources. Now, the second
way to do it is to 3D print and then sell
prints of an existing file. Basically, you can make an
ad anywhere like Facebook, a GG, Craigslist, etc. And you can just advertise
your 3D printing services. So if someone finds a file from Thingiverse or something like that and they want
you to print it. You simply just charge
for that service. Again, I have lots of
free videos about that on my YouTube channel
that I will put below. With the second method, there
is something we need to keep in mind and that is
the legalities of it. Remember, you are using
someone else's property. So there is legalities
involved with printing and selling
someone else's files, for example, on Thingiverse or our licenses attributed
to each file. I'll show you a
screenshot of that here. Now I am not a lawyer, so I'm not going to
read it all out for you or try and give
you legal advice. Just click on those,
read them for yourself. It is pretty straightforward
and if you're ever in doubt, my number one rule is just
contact the person who's actually made those files and ask them if you can sell them. It's easy as that. We make files all the
time as a file author. Whenever we post a file
for sale on every website, there's a specific license
section that we have to fill out before we make those
files actually public. The whole system is
pretty straightforward. You just have to go and
read that for yourself. All of the file creators
know whether or not they've already given the
public permission to sell them. So like I said, sometimes the best thing
to do is just ask. Lastly, on Kickstarter,
for example, you'll see that you
can actually purchase commercial licenses to
print in cell files. You'll see it under almost
every single campaign if you want to sell 3D
prints of the files, just purchased the
commercial license and you're good to go.
I hope that helps. I know it's a lot.
Again, it's one of those things that you just
have to go through and learn. I've if I had to
go through and do it all myself too,
but fortunately, I did document how
to do it in all of my courses as well as
on the YouTube channel. So I do also just
want to say 1 second, say if this course is
helping you out and please do consider
leaving a review as that enables me to
keep making all of this content here
available for you guys. I can't stress it enough to
reviews mean the world to me as well as to the platforms that I posted this course on. So I'll see you guys
in the next video.
22. Final Thoughts: Hey guys and welcome
to this video. Now this is just a quick bit of final thoughts before
we actually conclude. So first of all, I will be continuously adding
videos to this course as I see fit now I should also note that depending
when you start this course, there may still be
a couple of videos uploading or being
uploaded shortly. Now I will also occasionally be adding videos at the
very end of this course, just showing some of the fun 3D printing projects
that we do here, like the BB8 robot that
I showed you previously. Just a good example of something that's more for entertainment, maybe a little bit
of inspiration, but it also do shows us the
potential of 3D printing. And maybe, hey, maybe it
gives you some project. India's now for more 3D
printing and business step. I do have a YouTube
channel that I posted videos on
fairly regularly. If you want, you can
go check that out at youtube.com slash Austin Hartley, and
you'll find me there. I'll put the link here. Again. Obviously all of
that information is just free content
for you guys. Additionally, if there
are subjects that you recommend that you
want me to add to this course right
here in video form, please do shoot me an
email at Austin at CRIDE 3D.com and then
the title of that email, please put Skillshare 3D
printing exactly like this. And that way it
will basically just filter it into my
recommended inbox. Now, I do read every
single one of those. I might not reply right away, but I promise a promise
I read and consider every single
recommendation because if you have a recommendation, it's likely that someone
else has the same one. Now, lastly, this is a
little bit of an ASP, but if you enjoyed this course
and you learn some things, hopefully some things
that will save you copious amounts of
time and even money. Please do consider leaving a review here, right
on skillshare. That's basically the only way
that I can keep giving all of this information out for free. We mean the world to me. If you could just take 1 second, go leave a quick review
of this course or if there's anything
from this course that was less than five stars, shoot me an email,
let me know and that way I can
improve this course. So thank you guys so,
so much for taking it. In the next video, I'll
go over the conclusion.
23. Conclusion: Hey you guys, and we made it this year is the
concluding video. So thank you so much for
watching this course. I hope it helped you a ton. Like I said, I did
my best to pack almost a decade of experience
into this short course. And hopefully what it
does is provide you with a fast-track to
successful 3D printing. In this course, we
went over basically everything for unboxing
or printer all the way to using
advanced materials and advanced print settings, guys, honestly, I had a ton of fun making this course and I hope that you guys also
enjoyed the lessons. There are two last things
I want to mention. The first of which
is that if you're interested in learning
how to design things for yourself so that you can 3D print things that
you're thinking of. I have a course on
learning Fusion 360. The software is free,
the course is totally free, everything is there. That course is also
up on Skillshare, so be sure to check that out. Additionally, if you're
interested in setting up an Etsy store to go
with your 3D printing. I also have a Skillshare course on that for you guys to see. Again, everything is 100% free. It's all hosted
here on Skillshare. That is it for this
entire course. I hope to see you guys in the
future and happy printing.
24. Case Study 1: Hey guys and welcome
to this lesson. Now, like I mentioned, what I'm gonna do
periodically is just showing you some updates
and some fun things that we have been making. Everything that I'm
about to show you, we design here infusion
360 3D printed here, and we actually also sell
it on our Etsy shop. Now the one thing all of
those have in common is that U2 can learn how to do any of
those if you're interested, all those courses 100% free, taught by me on my
Skillshare profile. So if you're interested,
check that one out. But let's talk 3D printing because 3D printing is the best. First thing that we
have made and 3D printed is this here looks
like it's on the board. It actually goes on the board, but this one I just
left there so I could show you this was obviously
3D printed in TPU. Now you might be
wondering, what is this? Is it just for show? Actually first, we
should probably talk about this. What is this? This is an electric
skateboard. It's called a one. We'll basically you just put your feet on like this
and then it goes, if you haven't seen one before, they are pretty cool, I
recommend checking them out. There also a lot of fun to ride, but what we do is
we designed and we 3D print and then we sell
accessories for them. So this is just a
really good example of some Ren protectors that we make in case
of board rolls over, you don't want the
REM getting dented by rocks and stuff like that. So this is just a
simple rim protector designed in Fusion 360
and then 3D printed. Next up we have this right here. I call these fender kickers. You can call them
whenever you want. They basically attach
to the board like this. That way when you're writing your feet are here
and if you want to do any tricks or kinda
jump with the board, you can see that the
profile there is shaped such that it will catch
your feet when you jump. Now this here is
also print in TPU. It's printed at about a
thirty-five percent infill, so it is quite solid. That is a second
example of something super practical that we
make for this board. Now, let's talk about
the third thing, probably one of the
most important, hopefully you can see
it on the camera there. This right here is just
a little TPU plug, again, designing Fusion
360 3D printed here. And it goes actually in the
charger point of the board. You're not gonna be able
to see this super well. But I will just show
you here for a second. You can see that it
goes in that hole. That hole there is
where the outlet actually plugs into the
board to charge it. So that just keeps
it kind of dust and waterproof while
you're riding. That there are three
great examples of practical things that
we 3D print here. And then if you're interested
in learning how to design, I have that
fusion course. If you're interested
in learning how to actually sell your items. I also have the ETC course, so that's it for this update. It I just wanted to show you
guys a couple of things that we've been working
on and then we have actually just launched. So see you guys in the next one.
 Austen Hartley, Entrepreneur | Engineer