Transcripts
1. Intro to 3D with Nomad Sculpt: If you're interested
in 3D modeling, and this is a great
place to start. What's up, guys? My
name is Dave Reed, aka drug-free Dave, you may know me as
a 2D Illustrator, cute animals, things like that. But this class today is
very, very exciting. It's something that I've
been working on a lot, and that's 3D modeling. So if you want to get
into 3D modeling is so great beginner course for
someone who's never done 3D, doesn't understand 3D and just wants to start fresh,
start from scratch. And let me tell you, it is
so addicting, It's so fun. It actually helps
my 2D illustration. It helps me think of things in 3D because you're
actually working in 3D. So we're gonna use nomad sculpt. It's an amazing 3D application. It's only $15, it's
just a onetime buy. So it's not like a prescription prescription
prescription subscription. It's not a subscription. I use it on the iPad Pro 2021
voter nomad Scope Website. Make sure it works. Make sure you can download it obviously before
you take this class because I don't
want to get you all excited and then you're
not able to do it. Again, it's worth $15. It's amazing. I think. I know you're going to love
it once you get started.
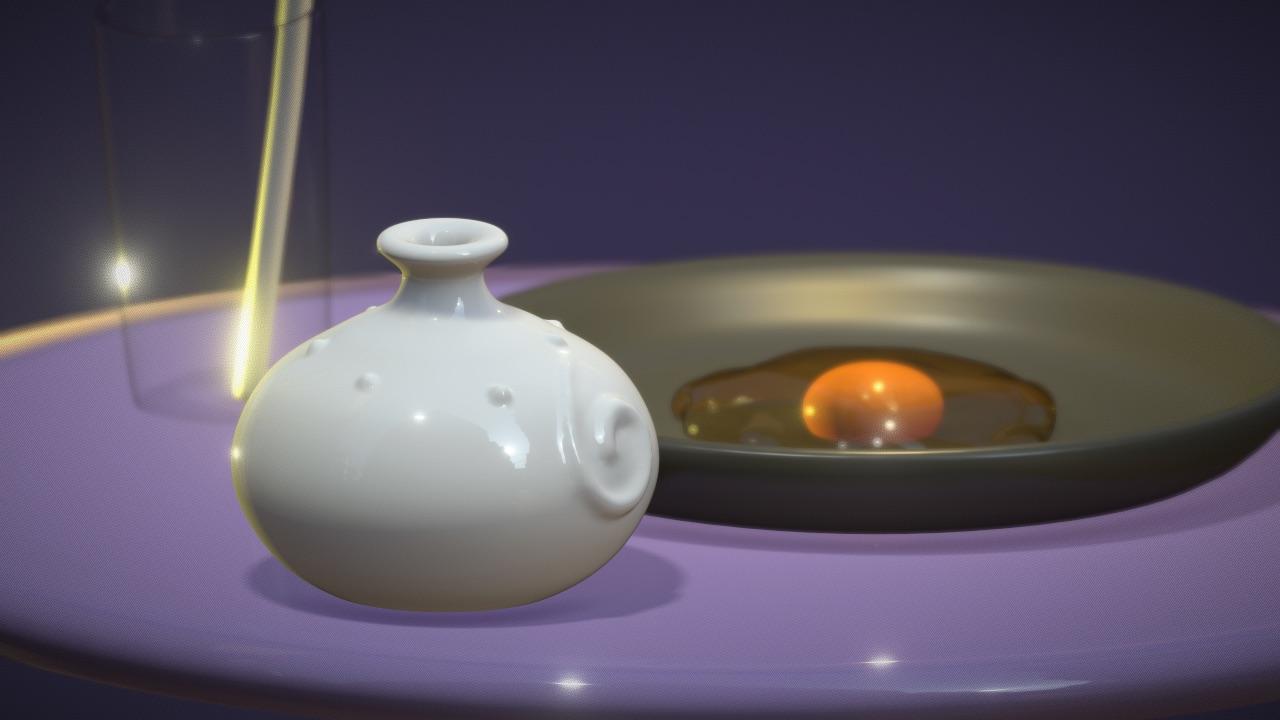
2. Class Project: Okay. So you know me by now, I don't really spend a lot of time discussing
the class project. We're gonna make an egg.
We're going to make an egg. We're gonna make an egg. Maybe some other
things on the side. Maybe a glass, maybe a vase. Really simple things. But essentially we're
gonna make an egg. You're gonna make a 3D egg. You can add some extra
stuff if you want. You can make it as
beautiful as you want. You can change the colors. There's so much that you can do. So feel free to be
creative along the way. That's the class project
also, when you're done, please post it to the
Skillshare group, the class the class thing where
everyone posts their art. I would love to see it
tag me on social media. All that good stuff,
all that fun stuff. I want to see what
you're making. I want to see what you're
making after this class. I want to see all your 3D work. So yeah, that's about it. That's the class project. Let's jump into it. The next video we'll be
opening nomad scoped and beginning to sculpt our
beautiful 3D object. All right, see you
in the next video.
3. Getting Started: Okay guys, welcome
to Nomad scope. Welcome to your first scene. This will be the
first thing that you should see, something like this. The colors might be
a little different because I've been
using the program. So some of the, some of the colors
might be different. But this is essentially it. You have your sphere here and you are in 3D first
things first, you want to use your fingers to scroll around the 3D object. And of course you're not
going to know what the front with the back
of the scene is. You can use this
little cube here. You can tap on it and it'll
go to the right side. You can spin it and
go to the front. You can look at it from the top. That's the first thing. Obviously you can pinch, make it bigger, make it smaller. You have this nice grid
that just shows the floor. The first thing that I do, I just feel this is
more comfortable. You don't have to do this. But what I usually
do is I go to, let's see where it is. I go to this little icon here, the shading icon,
and I use a mid-cap. I don't know what
that stands for, but it ignores the lighting
and it just gives you a nice clay type coloring. And for me that's just easy. It's easier to sculpt on. It doesn't worry about the
lights. It's always the same. It's pretty much
going to be the same. So it just makes it easier
for me to sculpt on. Again, that's in
this little bulb and you just hit med cat. But if you want, you
can just use you can stick with PBR that I like mid-cap makes me really feel like I'm using
clay to model with. Obviously this is a sphere. When you're making things in 3D, you always want to
think about shapes. It's all about building
things with shapes. From shapes. This little bar here. This one is all
your regular Save, Save As things like that. This one, this one will
be easier to figure out. Nomad scope will autosave. So you'll see a pop-up here. It auto saves every
now, every so often. You won't lose your work if something happens
to the app crashes. So we're gonna start
with this scene. This is your first scene. So this right here, it looks like a little
championship thing icon. This is the scene. Right
here. We have our sphere. Then we have primitives. All primitives are or shapes. Primitive is just a shape. Box, sphere, cylinder, tourists, cone, icosahedron, UV
sphere, plane, triplanar. The triplanar. I don't know how to use yet. The other shapes
are pretty simple. Let's make a will click on box. So now we have a box,
It's pretty big. You can't see the sphere
anymore because of the box. You'll notice that
this weird kind of funny-looking tool is now
in the middle of the box. This is a gizmo. It's right
in the center of the box. It'll be the one thing that you will get to know
really, really soon. In Nomad. It looks very complicated, but it's not once
you understand it. So here's our box. And what can we
want? What can we possibly want to
do with this box? We could change the size. If you want to change the size, use this orange ring around it. That's the first thing,
that's the size. Small, big. Just remember the outer ring is for the general
size of the box. Now you have three arrows, green, red, and blue. And they're pointing in
different directions. So you have the red,
the blues right here. You can change direction to
see the blue and the green. This is pretty self-explanatory. The green moves up. The red moves this way, left or right. If you turn it, the blue
will move this way. Now you can move your Square pretty much anywhere
that you need. Also just like with procreate,
if you want to go back, you can just double-tap and
it will go, it will go back. You can also go
back here as well. You can go forward. Those are the arrows. You also see that there's these little spheres that
the arrows are pointing to. Stretch. Really small, really
wide, or really thick. You can stretch
any way you need. We'll go for the top view. I'll tap on the
top so you can see the very top view stretch. You can pretty much make. Your square into a rectangle,
anything that you need. So these are all pretty simple. Play around with these shapes
to get familiar with them. It's very easy once you just
start to see this clearly. These were always be
not in the same place, but this will always
be what it is. You can always stretch it.
You can always move it. All these other little things that you can play around with to it is move it
in different ways. Everything moves in
a different way. The next thing is you'll
notice these, this sphere, you see the blue line, the green line, that's rotation. So obviously the red
will rotate it this way. You see the blue, you
can rotate it this way. Let's say we wanted to
move it off of the circle. So I'll use this arrow
to move it here. Get a better view here. If we were playing pinball and we wanted to hit this ball, we would need the blue
because you see the blue. The red goes front-to-back. The green is going
left to right. The blue is going
forward and backward. So we'd want to use the blue
to sort of hit it like that. This will take some
getting used to, but just play around with it with a simple shape like this. And you'll get used
to it pretty simply. Let's say we wanted to move the ball on top of
this rectangle. You just tap the shape
that you want to use. The gizmo will show up. See over here, we're in gizmo. There's a lot of
tools. Tools here. We'll get to those later. Right now, just worry
about the gizmo. And if you want to get
this here, move it up. Once you have it up, find this arrow, you
can move it over. Don't forget to change
your perspective. You want to move
it in the middle. You can use the read, will
move it to the middle. It's a good idea to
play around with these shapes and just
get used to them. I've tapped on the
square, I'm going to use the red because I
want it to be flat. Here is the auto save. I'm gonna put egg because I think that's what
we're going to make today. Now that it's flat, you see
the green is pointing down. I wanted to go down. I'm going to bring it down. I'm going to use, I'm
going to tap on this, so it's perfectly
on the left side. Now I'm going to
use, see this green. I'm going to use that to
sort of straighten it out. I think I want it
to be less thick, so I'm gonna use this little
ball to make it skinny. Then I'll bring it
down to this line. The floor. If we want to bring a
sphere down, tap this fear. We use this green arrow
and we'll bring it down. Take all the time you need to
sort of just play with it. Just have fun and
experiment with the gizmo. The gizmo is very,
very important. The next thing that's
very important is validating your shape. If you noticed when we were, when we use the square
and I'll just bring another one up just
so we can see. I'll show you how to do
all this in a second. But I'm gonna just going
to bring in another box, just like we did in the scene. And I'm going to have
another box here. I'm just going to
make it skinny. I'm just going to bring it down. You can really use the same
box that you did before. I don't know why
I made a new box. I just felt like
making a new box. I'm gonna put this sphere
back on top of the box. Get a good angle left. And my perspective might be off, so I'm going to look at it
from a different angle. Look at it from the top. Now I see that I'm not in the center, so I'll move the
ball to the center. And I'll use this orange
ring to make it smaller. Bring it down some. Now
that I'm back on the box. So this is the box we made. You'll see it says
validate an edit. Mirror. Mirror. If
you hit mirror, it will mirror your box. You can see this one
is sort of ghosted. It's not really there. It'll be there
once you validate. Validate just means save. So you see you're saving the square. It's
where you want it. You can still move it around, but you can't model something
and you can't move forward unless you validate,
unless you save it. That's actually just
adding it to your scene. Let me go back. I just moved back
to steps to now I have my square,
it's invalidated. And you'll see I have validate here any new shape
that you make. You can stretch it and you can make it bigger and smaller
and move it around. But you can't use any
of the other tools. So you validate it. Now that we have our square, you just want to hit validate. All that does is bring
it into your scene. So now you have a
square and a sphere.
4. Environment & Ambience: Okay, so when we change
this to a MET gap that was making it brown and
making it look like clay. We use the shading menu. There's actually
more to this menu. We'll get to in a second. So let's jump over to this
little picture right here, the background, and you'll see my background is probably a little bit of a different
color than yours. You can change the
background here. Let us say if we wanted
to make it lighter, red, you can go through
any color you want. For a background. You can make it whatever
is comfortable for you. Find one that looks
decent in the camera. Most take to
something like this. You can change your background
to any color that you'd like using this little
picture right here in color. Now you also see there
is the environment. So you can change, you can switch to environment. And as you can see,
it's a little gray. And that's only because
we're using mid-cap, which ignores lighting, it ignores the outside environment. Now we'll go back
over to the shading. Shading is this little sun icon. And you see how we change it to a mid-cap will
change back to PBR. Once I do some sculpting. Whatever my sculpting is, I eventually will change
back to PBR when I'm pretty much done with
the general sculpting. So let's just say we're done
with our circle in our box. We want to go back to
shading right here in the sun and we're
going to hit PBR. Now you have these fluke, little bit more like materials
were back in shading. These are our environments. So right now we
just have a grid. We have our scene here,
we have our grid. We have our two 3D shapes. The environment is
everything that is going to affect the shapes. The environment might be a sky, some buildings, everything
is going to affect the lighting on our
three-dimensional objects. You can see here, there's just some
regular, normal lighting. And this actually might
be from bytes that I've done on previous projects. Might be different for
yours, but that's okay. We're gonna go back to shading. Environment is down here. You can turn it off
and it's black, which means there's
no ambient light will turn on our environment. We can go through the
different environments. It is tap on these scenes. As you can see, this
is a lot warmer here. You have lots of different
scenes to choose from. I believe you can actually
add your own scenes. Let's see. What's a good scene to add. It makes it purple. You can actually see the
reflection of the little, a little moon here. Which is pretty cool. I've never actually
done that before. So that's your environment. Pretty simple. It just changes your
overall atmosphere. Everything that you change in your environment,
all the lights, they'll, everything will
affect your 3D objects. As you can see with the grid. Everything is sort of in
perspective right now. And sometimes that's not the greatest for when
you're trying to, let me check
something real quick. When you're trying to
make something and you want something to be very
clean and crisp and precise. Let's say right now I
double-tap it on the back. So now we're perfectly
seeing the back. But if I wanted to make
sure that this was very, very perfect and not prospective, that doesn't
really make sense. Let me see how I can
explain that better. There's a camera, this
little camera icon here. We're going to tap that camera. Right now we're in perspective. This orthographic. Watch how these
changes are seen. Our sphere got bigger. R squared just looks like, it almost looks
like a flat square. And you see the grid here. The grid is completely straight. If this was the floor, you can see that my
square actually extends past the floor. Tap tab. Notice how you keep using this cube so I can get
perfectly in the back. Let's say I wanted this to be aligned with the
floor perfectly. Now I can take my green arrow. I can move it up and it's
precisely on this line. Zoom out a little bit. You can see. The sphere is a little
bit going into, move it up a little bit and
going into which is okay. Let's actually bring it
down halfway. For now. Now it's halfway in. Let's say we want to center. It will look at the
view on the right. We'll move it a little bit over this way. It's pretty centered. We can look at the
top is probably a better way to see
if it's centered. I do little things
like that just to remind you of how to use these tools to use the
cube and use the gizmo. Once again, just
a little reminder if we want to make it really big. And we can do that. And we use these
arrows accordingly. But obviously we've
made a new shape. This can be like a
button or something. That's kind of how you
want to think about 3D, using different shapes
and using them together. Let's go back to
perspective for now because that's just looks
a little bit better. It looks more it looks more 3D. One last thing that I wanted to show you before we move on to the next video is using view. Right now the only tools we've
gotten to was the gizmo. Underneath that his view. Hopefully it's in the same spot, but just look for view
the little camera. Click that. It'll show you the actual view
of your shapes. You can see my shapes
or just plain white. That's how they look. If you're in this view. Once you, once you
use the gizmo, you can see that
they change color. This is your actual color because this is the
one that is selected. If I tap on the square, now you'll see the
squares, the actual color. Everything will
get darker unless it's the object that you
are actually working with. And that's just a way that
you don't accidentally, you're not with the wrong. Work on the wrong,
the wrong object. But just remember hit View to see how things actually look. And you can actually experiment with going back here
to the little picture. The Earth is not
the little picture. There we go. This little son
thing right here. You can experiment
with the environments. Will do mine again, see how it looks as we've made
that an environment. And these other environments. Which one will we use? We'll stick with this
Venetian crossroads. For now.
5. Painting & Surfaces : Okay, so now we have our shapes and we want
to add some color. And we can play around with the roughness of the
textures and the, the glossiness or the metal. Now, let's try our square first. You can see there's paint here. One of our tools paint. There's also a paint here. So right now there's no paint. You can go to paint here. And you can go to
the paintbrush. And it's the same menu. Anything that you want to color, any shape you want to color,
you want to tap on it. Tap on it. You can go to paint. You can go to the paintbrush. And it says material here. This is your
material right here. This ball roughness
makes it much softer. There's much less glare. You can bring it
all the way down. It looks shiny like a shiny gumball or
something like that. Metal NUS bring it
all the way up and it looks like like Chrome. These are just something that
you can play around with. The color is this
white bar here. And let's say we want
to make it dark. You can make it any color. We'll make it this
color for now. Now you can see here it
gives you a little preview. And of course if you
change the roughness, it'll make a little
preview as well. We don't want, I don't really
want that to be too shiny. I think this looks pretty good. Now I'm going to hit paint off. And now the shape is painted. Of course you can go
to view to see what it actually looks like closer to what it actually looks like. Now our ball up here is white. So I'm gonna go to
paint. Instead of paint. Let's just say that I was
messing, it was coloring this. And I want to color the ball. I'm just going to tap
on the ball here. Then I'm gonna go over here. And I'm going to
tap this right now. It's still on the last material, the last color that we chose. If I wanted to, I can
just hit pain all and it matches that color. And it gives you
some colors up here. You can play around with
if you wanted gold, you then you tap gold
and you hit paint all. Now it's gold. And since it's gold, you can actually see the
reflection of the image, the environment.
Anything that's Chrome. If the metal is up high. I'm gonna go back to our
little painting here. If metal, this is up high, then you can see the environment much more as you
would with metal. I'm going to go to this yellow here will make it a
little more orange. And that's a good color. And do we want a glossy? Rough will make a glossy. Now I hit paint all. Now we have our yellow sphere. Here. We'll go ahead and hit View. And you can see a more of an accurate colors
of what you've done. And this is really, really fun to mess around with. Really, really easy,
really, really cool. Play around with the colors, play around with the roughness. And we're gonna make an egg. So that's why I have this
yellow and I have this glossy. But if you want a
funny colored egg, you can change the color, you can make it a golden egg, golden egg yolk,
wherever you want to do. Of course, before we
finish up with painting. And the materials.
As you can see, this is very shiny. If this was some sort of
material that maybe it was, maybe has some different
color underneath this gloss. You can go to paint and
this is where you can be really creative
with your sculpts. So now I'm in the paint tool. When you're in the paint
tool you can actually use, you can actually use
these over here. We haven't really talked
about that because we just painted
everything as a whole. But these are the tools and
these are global tools, meaning most of the tools
have these two bars here. These two bars, the
top one is your size. The radius slightly move
my hands so you can see that's really big
and really small. If you had a paintbrush, you wanted it to
be pretty small, then you bring
that top bar down. And you'll see this
is round right here. I know it's kind
of weird that they have these two red dots. They're describing
a random place. The reason that there's two of them is because
there's symmetry. Symmetry is, if you
have symmetry checked, then it'll do things
symmetrical. So it'll do. Let's see if I can show you
an example of symmetry. There's like so much things that I wanted to do them all at once. But I'm going to try to make
it more, make it simple. I think we'll come
back to symmetry. I'm just gonna uncheck it. You see, I have
one of these here, which is good because
that's our brush. We don't want symmetry for now. This is our brush size. This is our brush intensity. That should be pretty clear. If you're painting. It's either gonna be very
heavy or a very light. Let's change this to, let's say there's a dark color underneath and it's
rough underneath. There's a roof dark
color underneath. Now our brush is equipped with the color
that we just made, with the roughness that
we just made. Right here. The brushes fairly small. I'll make it a little bigger. And the intensity is way up. Let's say that the
sun has been hitting. This is actually
still too small, so I'm just going to undo and I'm gonna make
the brush bigger. And I'm gonna lower the
intensity about halfway. Let's see how that looks. Now I'm actually
painting on a sphere. You can see the reflection. The reflection is
sort of getting less and less because what I paint when I'm painting
underneath is rough. It's not glossy. It's almost like the gloss has come off and
that part is rough. I'll make it bigger. You can see as I go over it and it
gets a little bit darker. If I press lighter,
kind of gets lighter. Now we have our it
looks like it's it's kind of worn down and
it's very rough there. Now if you want
it to be rougher, you can tap on the
little pink thing here. Or again, you can always
use the little paintbrush, whatever is easier for you. This is the same. This I like to use this
one though I normally, oops, I accidentally
tapped on my square here. I want to tap back on my yoke. I'm going to tap on
this little circle here or this little sphere. I want to make it a
little bit darker. And I'm going to turn the
roughness way up so there's no light that's going
to be coming off of it. Now, this will completely
dark in that light. That's very rough.
So now you can see it's almost
like a burn spot. Like someone's put
a lighter to it. That's one of the cool things
that you can do with paint. I'm just going to
double-tap and undo. Then we'll just play around
with another quick color. Maybe like a pink. I'm going to put the
metal nice way up. And then we'll just
do the same thing. We'll just paint it. Kind of an interesting,
weird metallic color. Now let's say we want
to take that metal NUS off and just use it as a regular paintbrush
will make it small. You can just use as irregular. Regular paintbrush
can make it smaller. But the intensity way up. Now you see there's
lots of different ways. There's lots of different
colors you can use. Roughness, metallic, very
fun to play around with. But that's the paint tool here. You can also just come here. He's a little shortcut. I usually use this. It's easier than going all
the way to the Paint tool. But whatever we keep wherever
you more comfortable, experiment with that
because it's fun. I'm gonna get rid of
our excess colors here.
6. Lighting: Okay, So it kind of
looks like an egg yolk. We have our little cube. Now let's add some lights.
That's one of them. One of the really
fun things about 3D and really making
it come to life is adding lights will go to
our little light here, or little sun icon. Maybe it's the shading window. Right here, it says lights. And that's where our lights are. Light. 100% or light is at
100% brightness. This turns the light off and on. Once we add more lights, this will make it you can
move your light up and down. You can copy, you can
duplicate your light. But we're gonna start with
just one light right now. Here's our light,
the gizmos on it, so it moves the same
way that shape would. But you see this
long white arrow. That's where the actual
beam is for our light. So it's not really
pointing at our, at our little yolk. So what we want to do
is use these rings. Tap on it, will move these rings to just
move it into position. As you can see, the light
changes as we move it. Now let's move the green. And it's always good to look at it from a
different angle. Let's go back to the front. I'm just going to twist
this little cube. Whereas the front, front run the frontal tissue
down a little bit. I'm going to bring our light up. I'm going to position
this white arrow down. Lights have There's so
many different properties. There's three different lights. You can go back in here. This is your color,
see this gray, this gray box. Very important. You can tap on that and you have all these options
for your lights. You have intensity. You can bring way up. I'm just going to skip over the
things that you don't really need to know for now. Shadow, you can see there's
a little shadow here. You can uncheck shadow if
you want to get rid of it. And lighting has colors. If you want to change the
lighting to like blue or pink, you can make it
very interesting. I'm playing with your lighting. I'll go for a warm, warm color right now. Another thing that
really affects your lighting is the type
of light that it is. Automatically went on
directional light. You'll have to play
around with these lights. There's lots of different
aspects to them, but I'll just show
you all three. So this is the spotlight. Spotlight works just
the way it sounds. If you want a shortcut
rather than going here and then go into light. You can also do this. You can tap on your light and
you see these little dots. You can tap on that and it
gives you a, a smaller menu. So right now we're in Spotlight and it gives
you different options. You can make the cone bigger. I'm gonna fly through
these because these you can sort
of play around with. They're very easy to figure out. You can help the intensity of your egg yolk and
of course, the shadow. You can manipulate the
shadow if you'd like. Move it over, move it up. And over. Here we go. That's the spotlight. Let's say we wanted to make
it a point light. Point light is actually, you know, what I like,
how the spotlight looks. So I'm gonna go back. I'm just going to turn
the spotlight off. I'll add a new light. Now, I went back to
our little Sun window. I'm going to add another light. You can add up to four. I'm going to add another
light. I'll change the color just so
I know what it is. We'll make it like a green. We'll make it, We'll
make it purple. Why not? We'll make it purple. I'll make it really bright. You can see this is
our purple light here. You can see which direction it's kind of looking at,
can change direction. You can move it up and down. See this light actually doesn't change no matter
where you move it. This is the point light. It actually doesn't
change as you move it. It only changes when you rotate
the direction either way. Now we'll turn our
other light back on. So let's click on this light. Will click on that.
We'll turn it back on. Now we have our spotlight. What do we want to
do with this light? Little bit of a weird light. So I'm gonna make it,
I'll make it white. I'll make, I'll add a
little bit of warmth to it. A little bit of yellow. Bring the intensity down. That looks a little more,
little more realistic. There we go. You can maneuver the lights
around and they just change. Obviously they changed the
look of your, of your art. Very important, very fun. Just be just play
around with them. You can change the intensity to wherever you
think looks good.
7. Sculpting Tools: Okay, so now I want to
fly through these tools. There's a lot of
them, so I'm going to move through quickly. One of the other very
important things about 3D modeling and things, so you have to keep in mind is, right now we have a
sphere and a cube. Very simple shapes,
not a lot of geometry, which means they're not
very complicated shapes. There's not a lot of geometry, so the numbers are low. This little grid here, all of this, it will be
very confusing at first. Slowly, it'll make more sense. But one of the main things
right here seen faces. This is basically how
dense your scene is. Like if you have,
if we have a bunch of different shapes that
are very complicated, this number would be up high. So I'm gonna use these tools. And some of the tools I'm
going to have to make my objects more dense in order to be able to see the tools clearly and to
use the tools correctly. We'll see that this number can quickly go up and get
into the millions. It's just something
to think about. It can be very confusing. But I'll try to move through as solely and I'll show
you subdividing. If you think of all the
geometry that makes up these, Let's see, it can turn that on. I just want to try to
show you the there we go. So this is now you can see
why they call it a mesh. All the shapes are
called meshes. The meshes is this is what
our shape is made of. If I want it to be denser. If I wanted to, I wanted to make this a more
detailed square. What I do is I go to this
grid and you can sub-divide. Now that I've subdivided it. Now each one of those
squares is for, and it can go on and on. But that also raises
your number up here. So now it's 114 K. If I
sub-divide again, it's a 162. Again, 355, again,
1.12 million again, and you get a warning
for 0.12 million. Very, very dense,
very, very density. You see it keeps going
and keeps going. Now we'll get into the tools. I'm just going to undo these
because we don't need them. Now we're back to where we were. I'm going to take off the wireframe because we don't
really need to look at it. I usually don't look at it. I just brought it
up so I can show you. We'll turn that off. Okay. So now that we have
that out of the way, It's okay if you don't fully
understand it right now. I didn't understand
it until a month or two after using the program. You'll get there slowly. But it makes sense for
some of these tools. Let's jump into the first
tool, which is clay. Clay. Again, a lot of my lot of my options are because I've already been using
these tools a lot. So I'm just going
to uncheck them. I'm going to uncheck sub
and uncheck symmetry. And I'm just going to stick
with these two tools. The radius of our brush in
a sense, and the intensity. So I'd probably leave
intensity up just so you can see what these
with these tools do. Clay is sort of like you're
adding clay to the mesh. Me figure out what
I'm doing wrong. That's a great example to show you what I was doing wrong. I actually had the box. I thought I was making doing
the client on the box, but I didn't have
the yolk selected. So you just have to make
sure that you click on the one that you
want to work on. Let's see if that did anything. I'm gonna go to my scene
here and I'm going to hide, I'm gonna hide the sphere. I'm going to go to the box. And you can see it didn't
make a few little marks here. I'm going to undo that. Undo
clay onto clay and clay. There we go. Now it should
be clean underneath. I do that often.
Sometimes I'll just beyond the wrong
the wrong object. Now we're on our egg. We're just using clay. So sort of like we're
adding clay to the mesh. And also just note that you can change the color of
the stroke painting. On all that means is if you're
using a tool and this is on that whatever color you have, whatever color you've chosen. It will add the clay, but it will add it as. And we'll add it as a color. We'll just keep adding and
keep adding and keep adding. I'll make the brush really big. This is just adding clay. Your mesh. That's the clay tool. Also neat. Let's say you want to, instead of coming out, you want to dig in. Let's make our brush
a little smaller. And as you can see, I'm in the clay tool. But now that I have this, now that I've tapped
on this color and a half stroke painting, I can just hold my finger. I can get this color. Now, this colors here. But now I'm going to tap on it and we're going to
make it darker. I'm also going to hit sub
instead of putting the clay on, it's going to subtract the clay. Now I fit sub I've
also the painting. Now it's subtracted. And you have that darker color. If you want to get
rid of it, just tap the little
circle thing here. You uncheck stroke painting. Once you see that,
cross through it, it's just going to affect
what you already have. It's not going to
add another color. That's clay. Brush acts. A lot of, it's actually
pretty close to clay. You can see it's a
little different, but it acts pretty
close to clay. I won't get into it now, but you can add a lot of
textures. You can add textures. That's what this is. If I wanted to add
texture to this, I usually use brush. I'll take it off so you don't
have to try to do this. I'm just showing you how
I would add texture. And I'll probably
make another video about adding texture. I want it to look like
an orange or something. I could add texture. There's so much you can do. I wish I could go
into more of a now, but I will go into
it in later videos. So let me get rid of this. Okay, so that's brush. It acts pretty much the
same way as clay does. There's some differences. You can experiment with it. Move and drag. Very similar. I use them a lot. Move. You can model that way. You can make it smaller or
you can make it really big. And it really brings
big movements. Go back. There's a
ton of options also. There's ton of options. Your tools. These will have to
experiment with. The only one I want to
point out as falloff. Let's say you want to make
something with a sharp, with a sharp edge coming up. Tap right here. So you have our
tool, the settings, and then you write here you
have this little pen icon and fall-off is very, it can be very important
if you want to make a point and you can go to one of these and it'll
pull up at a point. So this affects a lots of other tools to just experiment
with different brushes, see which one you like. Each one has very different, very different ways to
manipulate your 3D model. Drag is very much the same. I might have that, I
may have this wrong, but the only difference
is I believe drag only will affect what's
in your little circle. Whereas move, I think, will also move things
that are around it. But I believe drag will
only affect what is inside this little
area of the drag tool. So they're very close,
they're very similar. But I know if I want to really
flatten this out overall, I'll use Move, I'll make
it really, really big. And then I'll just
sort of do this to flatten the whole thing. That's moving drag. They're
pretty, pretty clear cut. Experiment with those smooth. Let's say we want
to use our brush. We make, we want to
make a swirl inside. Let me make this smaller. We're using our brush, we have sub now it's going
into the clay. Make a swirl like that. But it's a little, it's a little jittery, It's a little shaky. That's when you use smooth. Turn the size of our
brush up a little bit to make it too intense. Now we're just going to smooth. This. Just smooth,
smooths out your mesh, smooths out your shape. Smooth is very relaxing. Smooth works better when
you have less geometry. So the more simple the shape, the better the
smooth we'll look. I also want to show
you something else. We were talking about
geometry sizes before. So I'm gonna go back here
to our little grid here. Remember we were
subdividing right now, this scene face is
still at 102 k. Let's sub-divide it twice. Now we're at 1.57 million. Now let's use the
same brush again. And we'll just see
the difference. Will make the brush smaller. The difference is
way more cleaner, cleaner cuts, way more detailed. Go ahead and smooth
out some of this out.
8. Sculpting Tools (Part 2): Actually smoothing out
pretty well. Even smooth. It's way more detailed than when the shape
had less geometry. Because there's more, when
there's more geometry, then everything will
look more detailed. I'm gonna go back
because I don't want I don't want our
seemed to be that big. I'm just going to go
back to where we had it. Actually, I'll just get
rid of this one too. Now we're back at one. That's smooth. And that's
gonna be very, very useful. Let's say we want to use
clay and you just want to, let me take it off
sub want to use clay. You sculpt something out
but it's not very smooth. Click on Smooth. Make your
brush whatever size you want. I like to use a bigger brush. You can sort of smooth it out. So you get it where you want it, and get it how smooth you
want it. That's smooth. You're going to use smooth lot. Mask. Mask is essentially it just protects a place
that you don't want to, you don't want to have effected. Pretty simple. So
here's our mask. Right now there's masking
their selected mask. This is regular mask,
regular safety. Just like anything else. We have our brush. We paint a circle on it. Let's say we try to
move this shape now, the mask will not move. Let's say we use our brush. The brush will not
affect the mask, it affects the ends
where it's sort of not completely dark, but that's all mass gives. It just protects an area. Selected mask. You can use these tools
if you want to just make a lasso in a shape
that's masked polygon. You can sort of make
a shape this way. You can add little
circles like this. Let's say you wanted to add, I just did a turtle and
I use this to mask out the shell. Something like that. Tap this green thing. Now you have your
mask. Let me undo. Now the line. This,
this makes you, if you want to mask
a whole half of it, boom, you just use your line, tap online and then bring your line to
however you want it. Now half of it is mass, so if you wanted to
try and move it, only part of it will move. It can be rarely, it
can get very weird. You can get very, very strange. And you have
rectangle, rectangle, mask, and so on. But you get the idea. These tools are actually these tools are useful
for some of the other, some of the other tools like
trim, things like that. So you'll get used to
these tools and what works best in any certain scenario. Then you have paint, which we obviously played around with. I'll go to the color down here. I'll choose our blue again
because I looked really nice. Now I've painted, smudge. The paint. It like somebody to put some
matte paint on our egg yolk. Play around with
that. Of course, you can change the intensity and all that stuff over here. You can make the brush
bigger and smaller, flattened, flattened. Let's say we have our brush. We make like a
little nugget there. But we want the top
to be sort of flat. Then we just go to flat. Will bring up the
intensity way up, will just flatten it out. Just makes a flat,
pretty simple layer, which I don't use much actually, but it's sort of interesting. I'll just show you what it does. Pretty interesting tool
which I don't use very much, but you can see how it
can be very useful. Crease, Let's see if I can add a crease to
the edge of this. See how there's an edge there. And it just makes it
into a nice crease. Of course you can use subtract or you can make it
bigger and smaller. Pretty simple trim. I don't know why it does
that. It adds a random trim, their trim all these same tools except for it will
trim your mesh lasso. Now your mess is trimmed
straight through. Just want part of it. Part of it's trimmed.
Polygon. Same thing can make the shape the line. Let's say you want to cut
this whole thing in half. You can use your line. And whatever is white has gone. Rectangle, obviously,
straight through ellipse. Same thing. That's
pretty much trim. Split. Everything is the same. The only difference with split is it will turn this one
mesh into two meshes. Now if you go back here, you have 22 spheres
instead of one. Once I go back, two
before the split. Now we have to also, this is a good point and
a good place to show you. The sphere here.
If you want to put them on top or put
on the bottom, you can do that.
You can rename it. I'm gonna name a
yoke. Duplicate. Everything else is
pretty self-explanatory. Where were we project? I don't use project, so I don't really know. I don't really quite
understand it. I mean, it cuts things
but I'm not actually sure how it cuts things, so I don't really use it that much. You've probably
learned it before. I do inflate. Right now I have it
on sub I'll take it off sub inflate just inflates the pretty much
the simulates the surface. It's not really
adding a lot of mesh. It's sort of stretching
out what you already have. So just be careful with it. Because if you do it too much, then you can actually start
to break because it's just stretching the mesh
that you have. Whereas clay is
adding more geometry. This is stretching the geometry. So that's why it gets
really weird and ugly. But it can be very useful. So like when I'm doing drips or something like if I'm
making something like drip, I'll just use
inflate. Like that. I'll use inflate and then
I'll just smooth it out. If I want something
that looked like a drip that's inflate. And of course, you
also have the oops, let me go back to inflate. You also have the subtract. Then it just does the opposite. Pinch. Doesn't do anything
on the regular yolk. But I think I think it does pretty much
like a crease does. Let's see, let's add, let's do. It was at layer. I
think it's a layer that makes those kind of
interesting things. Let's use pinch,
pinch that together. So very similar decrease. Then I would use smooth to
sort of smooth out the bottom. I really wanted to make
it look like it's part of this 3D model. That's pinch. Nudge. In nudges. Simple. Rid of this stamp. Stamp is an interesting one. Right now. It's just a square. So if you do scanf,
it'll be a square. I have it on sub,
I'll take it off sub. There's your stamp. You notice the stamp
is very jagged. It's very jagged. So
this is one of the, one of the reasons that
when the geometry is low, things can look like this. Let's sub-divide our yolk. Oops, wrong one. So I'm
back at this little grid. Stolen a 102 k. I'm
going to sub-divide. Also divide twice,
subdivided twice. Now let's do our stamp again. Lot cleaner. These out. You can see this is a lot cleaner
which has continued to smooth. And you can see how basically
what the stamp does. I'm going to get back from the sub-divide
and go back to one. You can add different shapes. I'll add more shapes in a different video
because it can be kind of confusing to go into it. For example, I have a star. Oops, let me go back into stamp. Oops, let me go
back into my star. Here's the star. But if I really wanted
to make it clear, I would have to sub-divide. So I'd have to go to the grid, subdivided and make
more geometry. Then a star would
be much clearer. Make sure that my sizes, I'll go back again. Delete layer, I don't
know what that is. I never really use it. Then we have gizmo
tube in length, leaf. I am gonna do tube in
length in the next video.
9. Tube & Lathe : Okay, tube in tube here. Has these, these tools on the
left side, curve and path. I usually use curve. There's tons of other options. I don't actually use them
all. I just use curves. So I'm just going to draw on
the screen a two pops up. Essentially there's
your tube, it's closed. You have a lot of
options up here. If you're gonna make a straw, you can tap hole like that. So tube is very, very simple. So let's, let's try path out. See what happens. Two points. Make
another point here. And we'll click on
the little green. Now we have our tube like this. Let's say we wanted to
make it into a straw. Straw sometimes they do
have the bendy things, but I want it to be
more pointy like that. I want to bring this out
more and I want to make this straw longer like this. Now we have our straw but
we need a hole in it. So I'm gonna tap hole. Now there is a hole
through our tube. You can also edit this. See this radius here. You can tap on radius, tap on at once, and then you get these two. You can make it
thicker and smaller. You can actually tap it again. And then you can move all along. Let's see if you make,
if I want to make more sections and I want
to make them fatter here, something weird like that. So you can manipulate the tube lots of ways with these tools. Again, once you're
done and you have it, how you want it, you
can hit Validate. Once you validate, then
it's part of your scene. They can go up here
to the Scene menu. And now you have your tube. So I'm going to
rename that straw. Now we have our straw. I'm going to tap on the straw. I'm gonna go to my gizmo. Now I can maneuver this new
3D element in our scene. So let me move it out
of the way for now. That's the tube
useful for making. If you need to make
some sort of rope, even if you need
to shape things, there's some things
that the tube will be very useful for. And that's part of
the creativity of 3D. Using the tube and
using the shapes. That's tube. Let's get to Leith. Leith, you can make some
really cool objects. Faces, mugs, bowls, pottery. That's your leaf. Leaf
is really fun too. Let's choose curve. So late is very interesting. This line comes
down in the middle. Basically what you
want to do is you want to draw half of your shape. Let's just start out
with a very normal bowl. One thing that's easy, that's interesting about
late because you have to draw the inside of it. That's kind of weird,
but it'll make sense. Now I'm drawing my bowl, and I've only drawn
my half the bowl, but it's kind of flip it. And now I have my bowl. You can make lots of
interesting shapes. If you want it to be hollow, then you just make the
outside shell on one side. And you go, it's
hollow on the inside. You can use all of these things
to manipulate your shape. All these little dots you
can use to manipulate size, you can pretty much do anything. You can think of. These tools, which is
really cool, really fun. Let's just make a simple bowl. Actually, let's make
a, will, make a cup. Let's go to a school back to curves, so
we're still on late. Go back to curve. Will make, will make a cup. So when our cup to come
out like this, come up. And let's see how that looks. Pretty good. It's
very thick though. If I want to I want
to make it thinner. I'll tap on those little dots. Oops, me, add another one. I'm going to tap on
these little dots. Because when they're black, that means it's a right angle. I'm gonna move these,
all these lines closer. I want the bottom to
be a right angle, so I'm going to tap on that. I maneuvered all of these
to make the inside, essentially the inside
shell of our cup. Now I'm gonna go ahead
and validate it. Now we have a cup,
we have a straw. You can see everything
is really big. So now we'll just use our
other tools we use are gizmo and turn our
scene this way. See our stuff is a bit crooked. This is another thing that
It's a little advanced. But right now my,
my cup is street, but the gizmo is not
really centered. I'm going to tap on the gizmo and then I'm gonna
go down to bake, this is going to Bacon. Bacon. This is going to bake this
element to the gizmo. Now I can just move
it up and down. Basically, I just changed the
orientation of the gizmo to match the object in
where I want it. So it's still a little
off, but it's better. I'm gonna bring that
down to the ground and I'll make it much smaller. Actually, there might
be a good size. I'll move it over here, sort
of tilt it a little bit. Now let's bring our straw. Of course, you don't have
to make all these things. You can just experiment. But since I made him,
I figured I might as well try to make this work. But the straw into the cup, like this draw a
little bit bigger. Let me go ahead and
bake the straw as well. So let me hit gizmo big. I'll bring this drop down
into the into our cup. How about let's make it leaning. So we'll get a good
view and we'll just make it leaning against
the side of the cut. Like so. Now I'll just hit View. You can see our cup next door. That's very cool. Very fun to play around with. I just loved making
shapes with late. She's very, very
cool at the gizmo. Make it smaller, like that
better than our code. Actually. I'm actually going
to put these both together. Actually, I'm not
going to get them, not gonna get too much into it. I'm just going to move them
out of the way for now. I'm just going to that's our
length. We'll call it COP. Again. I'm in our little scene here. Another leaf. We'll call that genie
had he's supposed Genie. Now, we have our straw. I'm gonna select our cup
and our straw together. And now that gives me
just moves them both. I'll make them both smaller. They're out of the
way. And actually, you know what, I wanted to make one more thing with the Leith. I know I shouldn't I really
should stick to my schedule, but I wanted to make
a plate for our egg. Let's go back to me, unshare me, get off of the straw and everything so I can
get back to our shapes. I'm gonna go back to curve. I'm actually going to make this, I'll tap on front. That way in my life is
straight. For a plate. I want to make it out like this, maybe like a skill it something
like that. There we go. It's almost like a like
a plate, like a skill. It I'm just gonna validate it. It's pretty good. Now I'm gonna abuse my gizmo. I'll bring it up. Bring it over m ethic and I'm actually going
to switch to orthographic. Remember I'm switching to
orthographic so I can clearly see where the top
of the square is. There we go. I'll just make it
a little smaller. Move it over a little bit. Now you can go ahead and color these things just in case you don't remember
how to cover them. You want to just tap on whatever your shape
is, wherever you are, whatever 3D object,
you tap on it, you click on the color here. You can choose your
roughness, your metal, nice. You can choose any color. You can choose specific
colors from here. Just color in all of your
items, however you'd like.
10. Materials & Refraction (Part 1): Okay, so another
cool aspect of 3D, as you can make things
see-through glass, liquid, different
things like that. So I'm gonna touch on a few of those things and I'll try
to keep it very simple. Let's make the cup glass
sort of like a glass. Let me remember where
I have to go first. Okay, So this circle here, this material, this
is for the cup. If I were to tap on this straw, then the material
goes to the straw. So anything you tap on, It's going to have
the name here. So we want to be on the cup to the circle for the material
opaque, that's regular. Just a regular 3D object. You have additive, which makes it see-through,
as you can see here. Dithering, which also
you can see through. It, kind of makes it sort of a textured see-through blending. The same except it's
not really textured, but it does make it like
sort of translucent. Then you also have refraction. Here. The cup is like
sort of like a frosted. So index of refraction. I usually put that down to one pink glossy so that
makes it nice and glossy. Absorption, you can
play around with that. I usually don't use
absorption. Cast shadows. All of these things you'd
sort of play around with, they all make a difference. I'll turn the shadows, I'll turn the two-sided
shadows off for now. And also what really
affects this as the color, the color that you choose here
really affects the glass. So I'm gonna bring
the roughness down. Let's see what color we want. We don't want black,
we don't want read. We'll just keep it at white. Paint it. And now we have
our glass cup there. Now. We use refraction
and we're also, we can also use reflection
refraction for liquid. I'm gonna show you
some fun tricks that we can do to really make
this into an egg and oats. We've actually not really
mess with the egg and awhile. So we have our egg, I'll tap, I'll go to my gizmo. I'll tap on our egg. Now we can move the
egg up and down. What we're gonna do is we're
going to duplicate this egg. You want to go to,
to our scene here. Now we have yoke. Now I'm gonna hit Duplicate. I'm going to rename
it to egg white. Now it's egg white.
I'm gonna move it up. So it's right under our yolk. I've made a complete duplicate. But let's move it up just
so it's off of our egg. But I want to make this
into the egg whites. Let's make it bigger for now. And then we'll flatten it out. We'll use this sphere again
to really flatten it out. And let's stretch it. Stretch it both ways. So I'll use this fear
and we'll stretch it. Now. Let's make it into the liquid. Lead to the same thing
we did for the glass, will go back to this circle here for the material egg white. And then we'll go to refraction. Okay, so now you can see
it has this dark color, which is a little too dark. So let's change the color
of this refraction. Before we move forward. Let's make it sort
of like a yellowish. Because I think that
looks about good. We'll take the reference
or the roughness down. We don't want it to
be rough at all. So we'll take away all the roughness and then
we'll paint it. Now our refracted egg whites are painted, so let's move them. Let's move this down now. Back on top of our egg yolk. We just want to put it
on our skill it here, or a plate that looks
like it's on our plate. Now let's go into our
refraction settings. And let's just see. First of all, let's look at it. Let's always remember to go to View and get a real-time look at what you're working with. Now we can see our
nice egg white. We're going to go back
into the materials here. And of course what
I always do is they're bringing
this down to one. I hit paint glossy. And I do always do override
painting glossiness, even our painting it our paint is doesn't
have any roughness. I always tend to just check out, makes sure that
surface glossiness. Always go through these
option cast shadow off, see what that looks like. On, you can see which one
just looks realistic. Two-sided off on smooth shading. I was he put on for glass
and stuff wireframe. That's where I got the wireframe from before and it just shows the just shows the
mesh as you can see, which you don't
really want to see. Okay, so our egg whites
are looking good, but they don't really
look very natural. They don't really
look natural at all. I think I want to
turn two-sided off. See, still making that funny. But it's only when it's
only when I move it around. And I think that's just that's just the computer
kind of catching up, making all these shadows
and doing all this work. And that's why it
looks so ugly when I, when I move it like that. First, let's make our
egg whites smaller. Because I mean our yolk
smaller or yoke is very big. So we'll go to Gizmo, will just shrink this
yoke, will bring it up. Maybe a little bit more, and then we'll flatten it out to let's flatten it and
then we can bring it up. Flatten it a little bit more. It will bring it up.
So that looks good. Now it looks like the
yolk is in there. We'll hit View. Now let's make this look a
little bit more like yoke. So what tools do you think
would be good for this? All of these tools here, and I think the easiest
would be move and drag. See we can just tap move. Make sure I'm on the
yolk by tapping yolk. And I'll make this fairly big. Now, I'll just move
this out a little bit. I'll just move this out and make the brush a little bit bigger. Just move this out
in different spots. Can even pull it in,
in different spots. You can make the brush
smaller and bigger. That looks a little
bit more, not uniform. You do have to be careful
that you don't pull some of the pull the mesh up because
that will look unnatural. And if you haven't
problems seeing like see how I have
the plate here. If you just want to see
something in particular, you can actually go
down here and hit Solo. Now you can just see what
you're working with. So Solo was good. So if you want to take the
Move tool and if it looks like it looks like these are pointed up and you can just
move them down. Just move everything down. Using the Move tool. That way you don't
have to worry about sticking up because
that's very unrealistic. Now we'll just hit Solo again. Now we're back to our plate.
11. Materials & Refraction (Part 2): Another way to make this look
more realistic is to just add some movement inside our so it doesn't look like
a glass egg white. What you can do is just
use clay or brush. I'll use clay. I'm going to turn the
intensity down a little bit. I'm going to make the brush
a little bit smaller. We'll see how this works. Now. I'm just going to sort of, I don't have a color here, so it's just going to be
moving the mesh around. So I'm just going to draw on this mesh and sort
of make some movement. But you see it as
really look good. When I add the clay on
top, I'm going to undo. Then I'm gonna hit
sub, subtract. Now let's see how that looks. I think that looks a
lot more realistic. Make the brush bigger, you
can make it more intense. You just make some
texture on the egg white. Then you can go to smooth.
I'll just smooth it out. Just keep it nice and clean. Keep it nice and smooth. But you still have
that variation. Still have that boops. I'm actually using the
star as a texture. You won't be able
to see it because I'm still smoothing it out. But I'm going to move. At some point in
time, I must have accidentally hit this star. I want to go to the
white for the smooth. And I don't want to
use any color either. So I'm going to uncheck
stroke painting. But you can see
there's no real harm because it was just
the smooth tool, but you do have to be
careful with this. And just make sure that when
you're using your tools, you don't have anything
randomly selected, like symmetry or
things like that. Once you have everything
smoothed out. And it looks a lot more, lot more realistic, I can probably add a little
more yellow to it. I'm going to click on the color. I'll add a little more yellow. Then paint all. See
how that looks. That looks good. I was telling you before
when I used to make drips, I use the inflate tool. Let me just do
that really quick. Inflate is right here. I'm just going to
adjust the brush. I don't need it too big. I'm going to make the
intensity a little bit higher. Now. I'm just going to draw, I'm
just going to inflate this. I'll add another
inflate over here. Maybe a little maybe a little
inflate on the other side. I'm just slowly
spinning the mesh. I'll add a little
something over here too. I don't want it to
come up at all. I wanted to make sure
that it's staying down on the that looks great. Now I'm going to
go back to smooth. I'm just going to
smooth this out really just kind of relax everything. Looks good. We'll go to View and
just check it out, see how it looks. Another thing I can probably
flatten out this side, so I'll use the flattened tool. Whoops. Just flatten out
some of this area. There's a lot of things that you really have to
pay attention to the tools and figure out how
to be creative to get certain things to
look more realistic. Just move this
over a little bit. Now I'm, I'm happy
with my my egg whites. In his view, now we can see
what our eggs look like. Let me just smooth over
this a little bit more. I don't want there to be
that much movement in it. I think that looks a
little bit better. One last thing about
glass and refraction and reflections and things
like that is also your, your environment will
affect this as well. So right now we're on
Venetian crossroads. So all of these is going to affect you're seen differently. They're all gonna give it a
different look because they all have very different
ambient lighting. We'll go back to Venetian. Also always remember that
you can add a light, so we're still in this same
menu with the environments. You can also add another light. Just change the color so I
know which light this is. I'll change the type
of light. Let's see. Let me make it a point. Light
will bring it right over. Our eggs. Egg will change
the color to something warm. Warm, breakfast color. Breakfast atmosphere. I'll bring the intensity
up a little brighter. Economic, this a
little bit lighter. It doesn't have to
be that orange. All I did was add
an extra light. And you can see it really
makes a difference on our, on our egg. Let's hit you. And you can see it's
actually very, very bright. So I'm gonna go into it. I'm gonna lower the intensity. That's why it's important
to make sure you check out view to actually see how, see what your meshes
looking like. Let me go back into my settings. Most boring am I supposed
to be here we are. I just wanted to
check out if I wanted the shadows to be on it. If we want the shadows to
be on, that looks good.
12. Post Processing: Two things before we
get into post-process, which is what really makes
3D look really beautiful. There's two things
that were bugging me. I was looking at the
video back and I actually liked better when the egg white had cast shadows off. I actually like that better. That was one thing.
The second thing is I wanted to add a floor. So you see we still
have our grid, but I think we're
ready for a floor. So I'm gonna add
a new shape here. I'm just going to
add a cylinder. Now we have a white cylinder. And I'm just going to
color it really quickly. To use this, I'll make it rough. We'll do paint all. I would say I haven't
validated it, so I can paint it
and move it around, but I will have to have a
validate this eventually. So I'll just make it really
big and then I'll shrink it. I'll make it really big
again. That's good. I'll shrink it a little bit. Then I'll just bring it down. And I'll go to the front
and I'll just make sure that I'm level with
the ground here. And actually, I don't
know if I want this. I don't know if I
want this block. So I'm gonna get rid of it. This box, delete, it's gone. So our egg and our plate, I'm gonna go back here. Yolk egg. I still have it named late. I didn't name it, I
should've named it plate. Now I have those three selected. I'm just going to
bring these down. Hit the coming out of my plate. I can see in the bottom, That's OK. Now what's on the table? Next to our other objects? We have our cup and our straw. Let's move these over here. Let's actually move our plate. And so we'll move our yolk, egg. Uncheck those, Leith. Move those over. We'll move the plate and
the cup in the straw. Will move that a little closer. Then this we'll
just put over here, we'll make it a little smaller. Maybe we'll make it
a little bigger. I feel better now. I didn't notice that this was
a little crooked. So we just wanted to
straighten that out. Now we hit View and now we
have our little table setup. Now we can actually get
to the post-process. That is this little
icon right here. It's almost like a little
shutter post-process. So once I turn that on, this is where all the
magic comes into play. And I'm gonna turn these off. That way we can just figure
out what they're doing. Here's our scene. I'm also wanted to get rid
of these lights because the lights are great. The lights are wonderful. But I think it's time to
get rid of these icons. Now I'm just gonna go here
and you see display settings. So I'm in this little, this little display settings and then I'm gonna hit light icons. Now the light icons are gone. Let's go back into
post-process quality. I always put keep mine
at full so I can see the full quality anti-aliasing. I don't really worry about
that sharpness grain, and don't worry about
those vignette. I always put that on our
distinct. It's prettier. It has a nice soft, darker halo around the edges. I always like vignette. I always keep that on. Chromatic aberration. That kind of gives it
this sort of like old timey sort of eighties feel when the colors are
a little bit off. It's kind of interesting, but we don't really need it now. Curvature, I don't
use color grading. Color grading is
basically just if you want the scene
overall to have like a this will change the whole
hue of the whole scene. It can be useful if you're going for a certain mood and then at the end you want it to be
like nighttime or something. Just wanted to kind of
go for a nighttime vibe. You can do something like that. You can, you can take colors
away and things like that. I don't really need it for this. Blum. Blum is very, very interesting. Bloom will add to
the shine on things. See that egg yolk. Make this bigger. Bloom is very important
because this will give you like a certain shine right now I'm just
changing the threshold. You can also change
the intensity. Radius. I usually like to
keep down pretty low. You can play around
with bloom is very fun. Depth of field is
very important. This is almost like a,
like a camera type thing. It's bugging me. The maestro isn't hitting the
bottom of the cup. But that's okay. You can tap on certain things
and it will go into focus. You can also make it so the
far things are very blurry. You can make it so the near
things are very blurry. Now the front of this
table is blurry. I can see the egg and the back, back there is very blurry. You can also change it. You can focus on whatever you want at the back of the table. That really gives
it a nice 3D look. Also, remember we're in, we're in orthographic,
we're not in perspective. So perspective will actually
be a little bit different. So I'm gonna come back to
that at the end. For now. You can stick to,
you can stay in orthographic or you can
stay in perspective. Either way. But perspective will be, we'll give it a more
realistic 3D look. But I like to do that
at the end is like a little treat at the end. What else do we have
to go through here? Ambient occlusion. Ambient occlusion is the like the bounce shadow off of
whatever is in the area. So what's a good way
to kind of show this? See now it's showing
the bounce from this dark plate onto the table. With ambient occlusion. Strength will make
it darker like that. Size. Curvatures. I'm not really
sure what all that means, but you can toggle it and
you can play around with it and you can really
see the differences. Let me make sure
that it looks right. It doesn't make a really big
difference with the shadows. It does make it look
a lot more realistic. We'll go ahead and keep it on. What's next reflection. Let's see if we
have anything that would cause it to be reflection. This is basically the
reflection is probably better if I had a
really glossy floor. And then these things would
shine back onto the floor. I guess I can make
our table glossy. Let's make our table glossy
and see what happens. I'll take out the
roughness paint. Now you can see the reflection. You can see the
reflection of the leaf. Actually, you know what? Really quickly I want to
use the only use the brush. I want to make a design on this. I never did use symmetry. I don't think I ever went
back to symmetry on this. But I'm not gonna
get into it and it's actually kind of confusing. But I did want to make a I'm going to sub-divide
this so I can get a clearer I can get a more clear sub-divide.
See how that looks. Maybe one more time. Sub-divide. That's what an add a little, a little detail here. Just for fun. I'll just smooth it out. So it looks like it's
kind of integrated. Lower the intensity of this. Because it needs to
be a lot smoother. It looks like it's
been made with from a skilled ceramic person, person who's proficient
at ceramics. A little, just a
little something. Always fun to add little, little pops of details. Numbers using the inflate tool. To just make some more
little details here. Why I didn't really want
it to mix up some details on our little
pottery thing here. I think that's everything
with the post-process. As you can see, this is off. Obviously easier to kind
of make things and do TTL, do details with it off. But once it's on, it's really beautiful, it's
really brilliant. And it looks really,
really nice. I think that's pretty much everything that I
wanted to touch on. Snow depth of field. Let me turn the grid off.
I turn the lights off. I meant to actually turn
the grid off as well. Back here and display settings. We will turn back on that
beautiful depth of field.
13. Final Turntable: Okay, so now that we've
gone through post-process, the only thing left to do
is to show off your work. This is one of the most
exciting things when you finish a really cool sculpt. I probably should have made
this a cooked egg, right? But that's okay. Now we want to go to this
little nomad sign. Oops, let me let me cancel it. So this little nomad sign
up here in the top-left, that is what will give
us our turntable. And now that I've seen this,
I'm just going to save my egg. I'll just save it. But here on the
top-left, this nomad, you want to click on that
turntable speed 0 to one, which usually a good
speed is what I like it. And then you hit turntable. Then you can zoom in. Wherever you touch will be, will come into focus. Can touch the egg and the
background. Can touch the cup. And you can, you saw how
easy it was for me to go off and just try to make everything better and
add liquid and this, and that it's really
easy to just have way too much fun with
this application. It is, it's a lot, It's so much fun, There's so much you can do and
there's so much potential. I think it's really,
really fantastic. I hope that I was
able to explain things in a way that's
as simple as can be. I mean, it's very
involved process. There's so much to
this application. But again, there's
so much potential. It's really a lot of fun.
Once you get used to it. Time, just spend the
time to get used to it, to get used to the tools. And you will figure it out. And you'll just get better
and better at making models. I can just watch these all day.
14. Exporting & Importing: I just want to quickly go over saving the project menu here. You can export your
art, you can share it. So right now we're in the project menu
where you can save. This just saves wherever
you're working on. Save As if you hit Save As then it'll show all
of your other things and you can hit
this little plus. So if you wanted to say like egg to or something like that, you can save it as a
different filename. Rename, obviously
renames the file. Open, will open a new scene. And it will, it will get out of this scene that
you're in right now and it will open a
different scene. To scene. This will add all of the
other elements to this scene. Actually, it looks like, let's see, let's
see what it does. Here's this. I just wanted to make
sure that it was a little confusing on there
when I was looking. This adds the egg from the
other scene to this scene. That's how confusing this
it can be sometimes. But if you saw what I just did, if I'm confused about something, I make sure I have my project saved and then I can experiment, I can try it and I
can see what happens. And honestly that's how you
learn with this application. So add to seen. It adds all of these things, any of these elements, it'll add it to
the current scene. So I'm actually going to include some other objects
from my other scenes. If you want to bring one of
the objects that I've also included in the
downloads for the class, you can go to Add To seen here. So import new file. You can pick whichever
one that you want. I'm not sure which one
I'm going to add now. I probably had the
turtle and maybe like a doughnut and
a few other things. But let's say we wanted
to do donuts, sprinkles. Now we have the doughnut. Next two are next to our egg. I'm going to add a few of those. So if you want to look at them and just sort of
mess around with it, at least you'll have some
other objects that you can check out and make
some nice scenes with. If you don't want to, if you don't want to take the time and make completely new things, at least you can
see how they look. You can play with the lighting, all of that other, at
all that fun stuff. Let me delete. That's these import
add the scene. If you want to add one of the
other objects that I have, just go to Import and cosine. You can play around
with the auto save. The default is
every five-minutes. Export if you want to
save certain elements. So let's say you want
to save your egg. Let's say you wanted
to save the egg, the egg and the egg yolk. So what you wanna do is you highlight
these in your scene. Now, these two are highlighted. You just get rid
of all of these. Now you just have your egg here. Now you go back to export. And it's just works like, just like any other app
where you export GIT F. Just export as GIT F. And you can export
the selection only, but we only have this
selected, so it's fine. You don't need to
export normals, all these little question
marks you can look at, and it'll tell you what
these things mean. So let's just export this. And I'll just save it. And I'll name it eg. And yoke. Oops, I can't spell
egg yolk, yolk. I saved that. The next thing is render. Render is just when you export to just to save the image
of whatever you have. So we're back in the file. We're back down to
render for k screen 720. These are all just sizes
for K is really big. So let's export and
fork export PNG. He gives me this option because it's going to be a big file. So that's what that is.
But I always do that. It looks scary because it's red, but I always choose Export. I was due for k because
sometimes I like to make backgrounds and I
just want the file to be big. I want the image to be
big and high-resolution. So this is what it
will look like. Then you can just save image, this little icon and
then save image. It doesn't really do anything. It just goes back to this. Then you hit done. Now, we have our
little egg here, just the image of it. That's pretty much,
that's pretty much all of these options. If you want to. Obviously you unhide
all of these. If you just want to
export the image, then you just go down to export. We don't want to
export the GIT F because that's the whole file. You want to, you want
to go down to render, and then you want to go to
whatever size you'd like. Also, if you don't
want the background, then you just do
transparent background. And then you can export. And it's a transparent
background. The last thing, if you're
on an iPad and you want to export your your
turntable, this is what I do. All I do is I swipe down here and then I hit
Screen Recording. Three-to-one, you get
your little countdown. Then it records the screen. And then when you're done, you just go back into that menu. You hit stop. A little nomad to
stop the turntable. Then you have your little
video of the screen grab. I just wanted to add
that in at the end. Just so you know how to export
your very cool 3D model.
15. Teacher's Notes: All right, So that's
it. We made it. I hope you've had a good time. It is very, very complicated. There's a lot to go over. So it's okay if you feel
a little bit overwhelmed, just take it one step at a time. Use very simple shapes. And the more that you do it, the more it'll become easier. I'm really glad that you
guys joined me today. I love doing 3D modeling. Please share your work. You can follow me on Instagram. I actually have another
Instagram account. So my regular one
is drug-free, Dave, but I made a new one
drug-free Dave, 3D. There. I'm just going to post all my 3D work going
forward on YouTube. I also have some
nomad sculpt videos. I have my process videos
where I go through and do the whole process start to
finish. I also do lives. I do a lot of lives
making 3D work, doing 2D work, animals. So you can join me,
you can talk to me, you can ask me
questions because I'm right there and you can see me and you can see me working. And I have a lot
of fun doing that. You can join my Facebook
group where I have lots of 2D tutorials in Procreate or Facebook group is called procreate tutorials
and guidance. And you can also join the
nomad sculpt Facebook group. I don't run that group,
but it's awesome. I always post my work there. You can post your work there. And you can find out a lot of answers about nomad
and you can ask questions and so much
great useful information on the nomad scope
Facebook page. But yeah, that's it. That's the start of your 3D
journey. It's really fun. Just keep going with it, and you'll just keep
getting better and better. And I can't wait to
see what you make. Alright, that was really fun. I loved it. I hope you did to keep drawing, keep sculpting. And of course, I will see
you in the next video. I messed it up. I messed it up. Let me start again. As always, keep drawing, keep sculpting. And I will see you all
in the next video.
 Dave Reed, 2D & 3D Illustrator - Brooklyn, NY