Transcripts
1. 3D Cute Creature Design with Nomad Sculpt: What's up, guys drug-free Dave, here and welcome to
another Skillshare course. This one is 3D cube
creature design. And we're making this
cute little alien. He's sort of resembles the
predator from the movie. So we might just go
with baby predator. I'm gonna be using the iPad Pro to that and 21 for this class, but no mass scope is also
available on Android. So just make sure that you
can work in that it runs fine on whatever system you have
before you start the class. So this class is
a little bit more advanced than a strictly
beginner class. But if you've been
playing around with the applications and you've pretty much understand how
to use most of the tools. You can take this class. I go through everything
step-by-step. Everything is clearly explained. It's really available for
anyone who wants to learn 3D, wants to do 3D and wants
to make characters. Alright, so let's
jump to the next class, the class project. We'll just go over a
little bit more about the class and all
the things that I included in the class that we're going to
use in our process. Alright, see you
in the next video. Really glad you guys
are joining me. Hopefully a lot of you
guys saw the time-lapse. That timelapse is specifically
from this course. I just kept all the videos
and edited, edited them down. That's the that's the
hardest thing for me to say. Edited edited them. Edited them down. I just I can't make
it sound cool. I just edited them all down. I just edited it. Edited it. Okay. So those are those just so if you're coming here from that
video, then that's awesome. Get ready to start
making some really, really cool 3D models
and 3D sculptures.
2. Class Project: Alright, welcome to
the class project. I do have a bunch of resources that are included
with this class. Of course, the pencil sketch to the procreate sketch of our little creature
that's included. Make sure you
download that also. It's one alpha. Eventually we're going to put a freckles on him. I've included that Alpha. And when you get to,
just make sure you download it, when you
get to that step, I'll show you how
to upload it to nomad and put it in nomads. So then you can use it
to help make freckles. I actually use it a
lot because a lot of my characters have
freckles, freckles for q. So also I've included
a few environments. So anytime I do my scopes, you'll notice nomad scope. They have about five
or six environments. You might have seen
them. They're like different outdoor photographs, like panoramic photographs. Well, I made some in Procreate. So I'm going to include those because a lot of
times when I model, I just use those and you might want yours to look
exactly the same as mine. So I'm going to include
that with the resources. Okay, so I think
that's pretty much it for the class resources. We're going to make
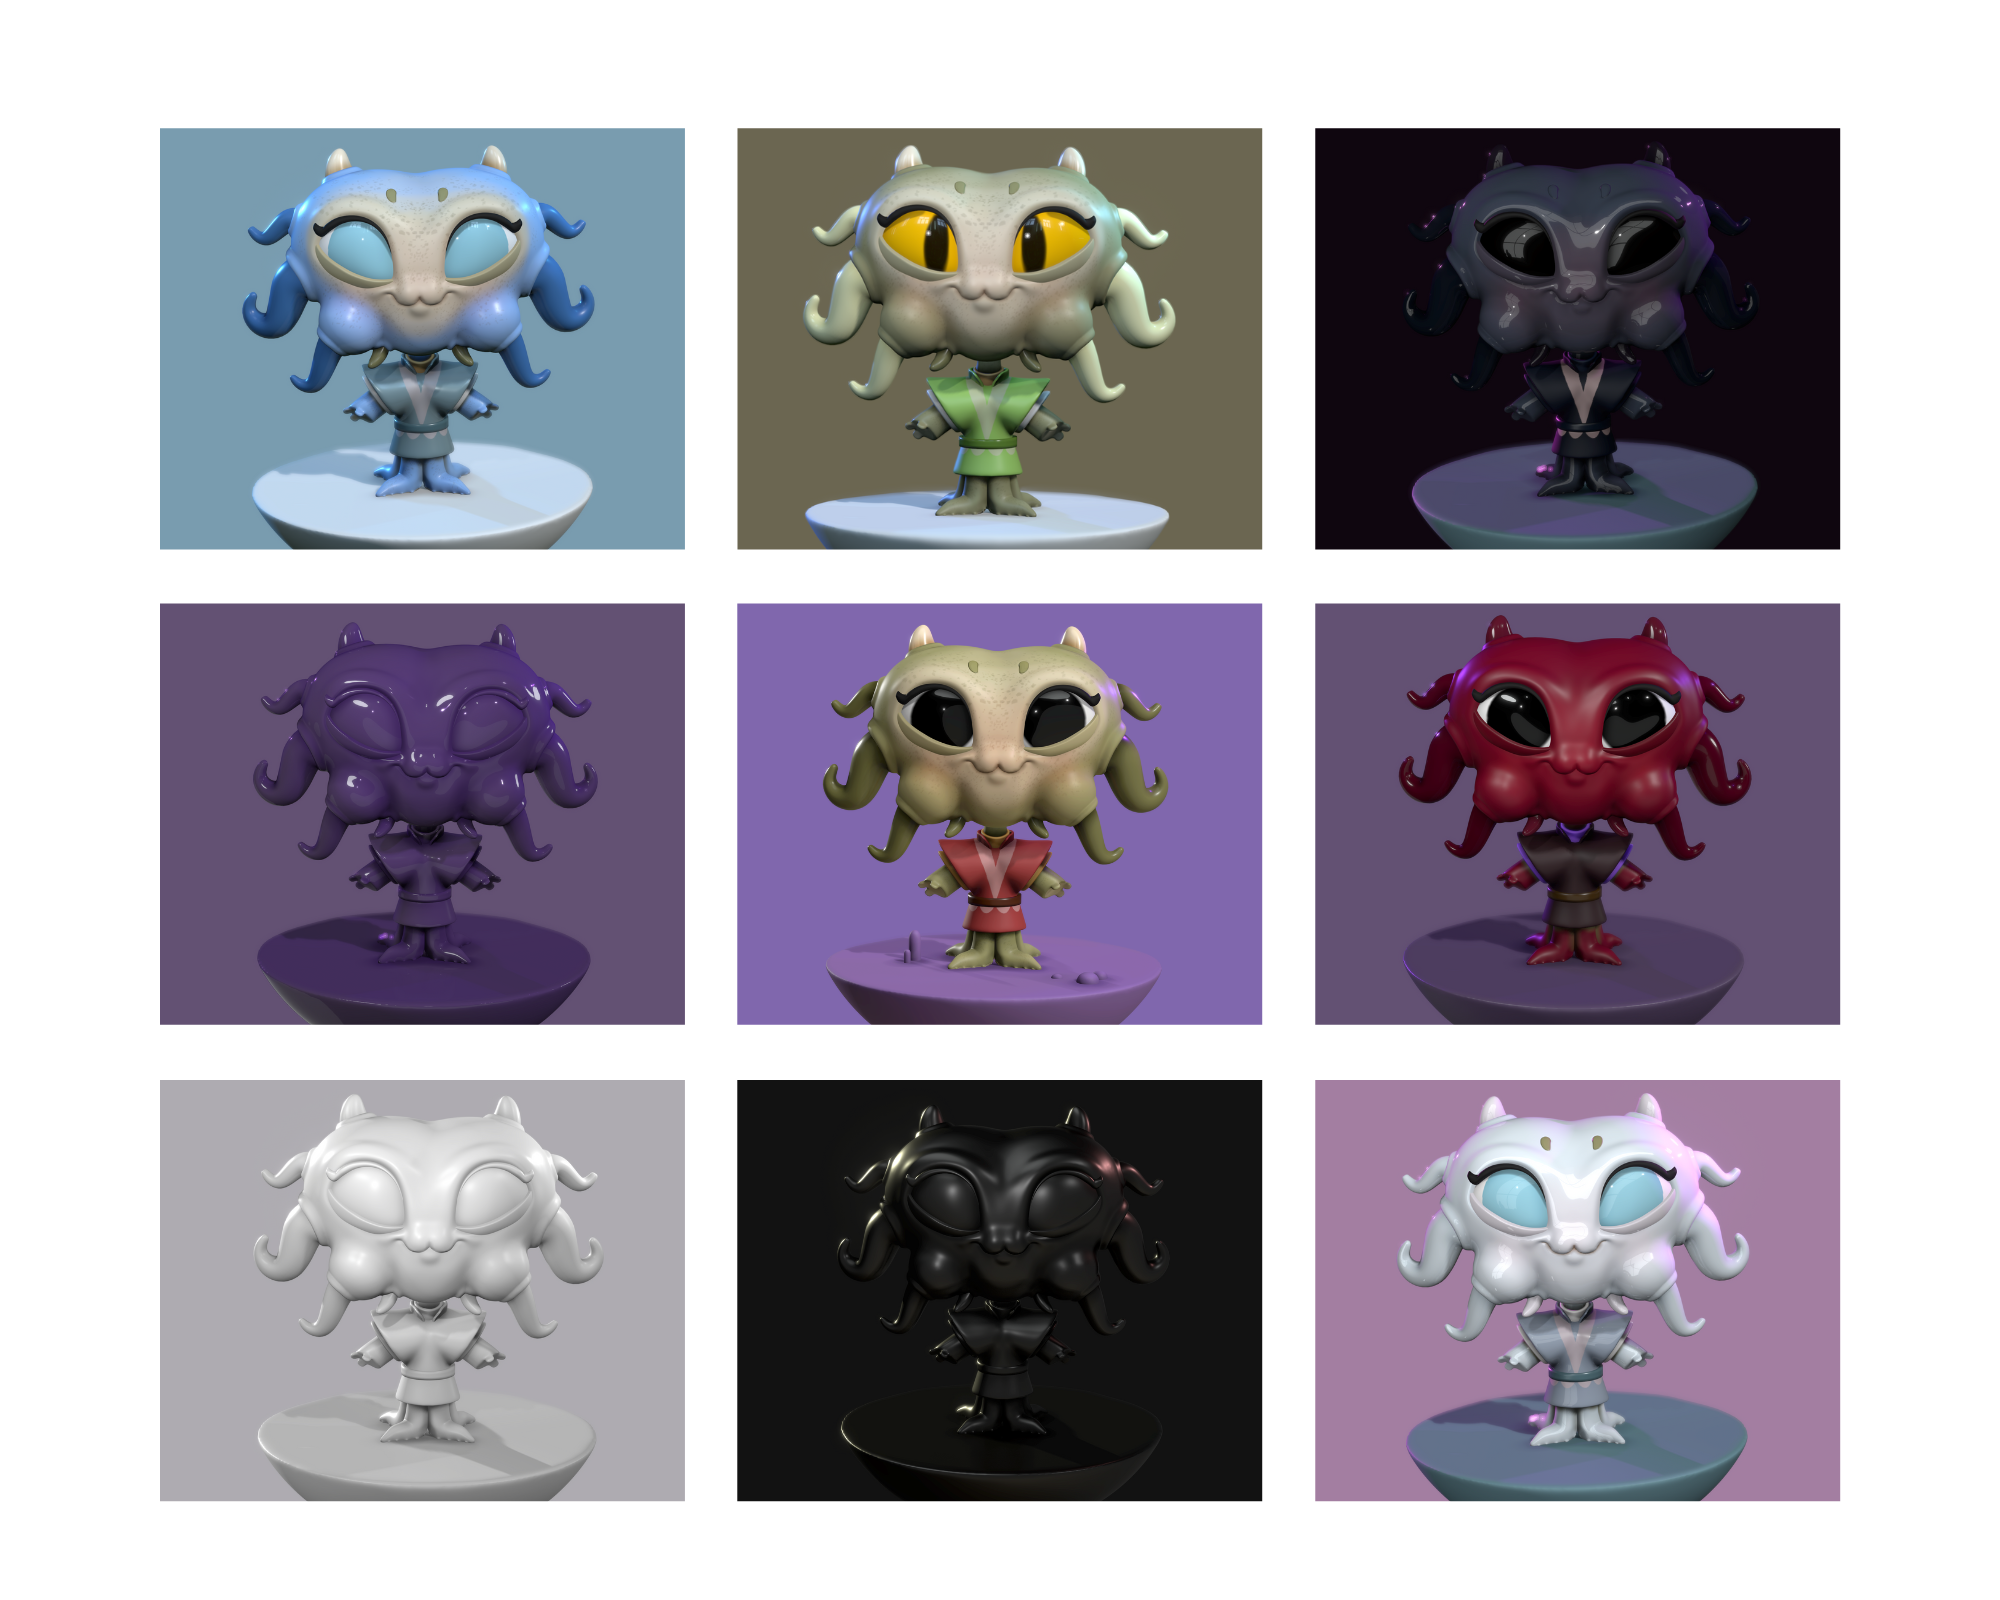
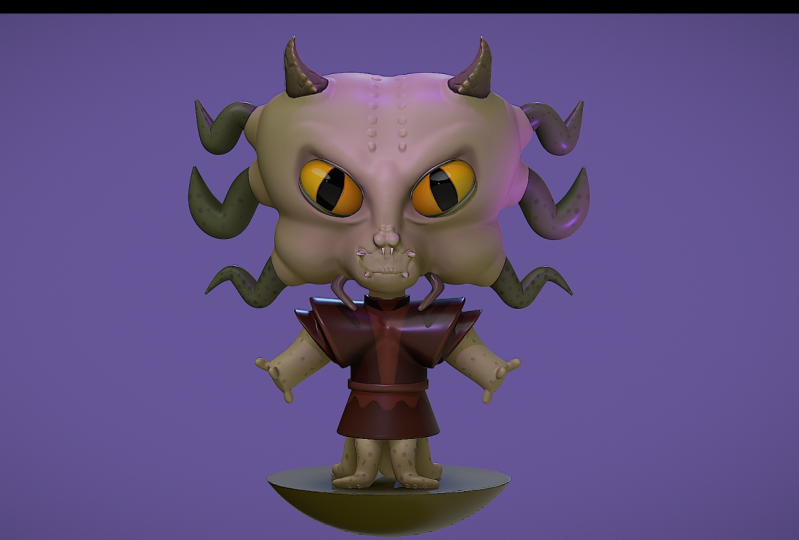
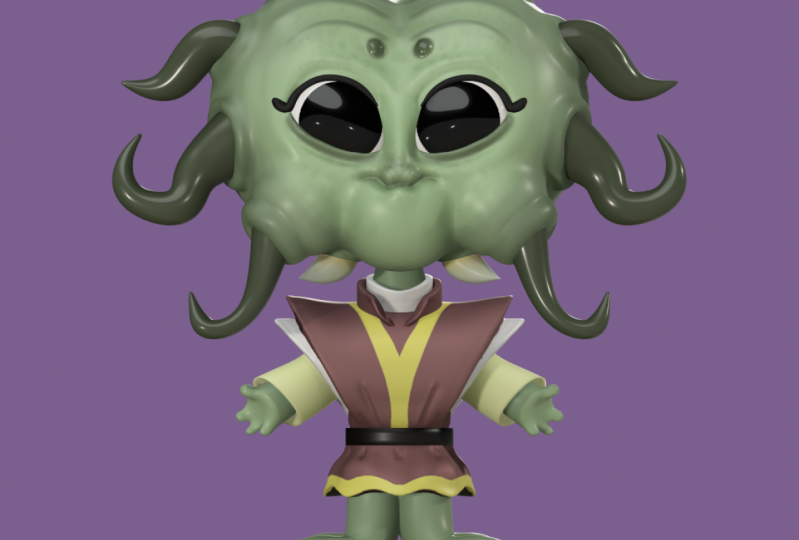
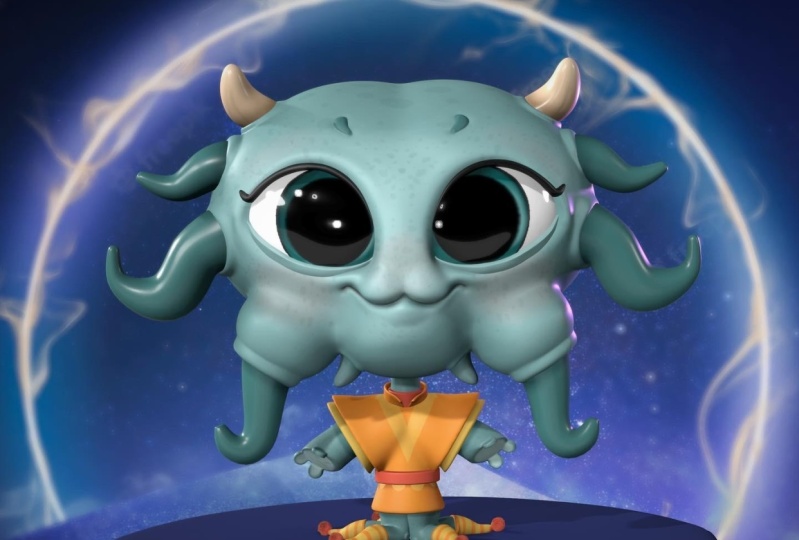
this little character. Also pay attention
to my thumbnails. And maybe I'll, maybe
I'll add a link or a gallery so you can
check out my thumbnails. I really enjoy going
through and just changing the colors and
changing some of the, some of the elements like changing the colors
of the shirt. She calls it the
tentacles, skin, things like that using
different glossiness and roughness and metal missed. So I have a lot of fun
with that and that'll be an easy way to just show you different variations
that you can make. Of course, when
you follow along, you'll get the character
that I'm producing. Like I always say, you can change things
that you want. You can change the colors, you can change the lighting. I want you to take
everything that I'm teaching and then I want you to also know that you can take this information and then
use it however you see fit, change things,
change that color is really easy, it's really fun. And you can get some vastly different looks
just by changing, just by changing the glossiness or just by changing
certain colors are changing the lights are using different
environments, things like that. So just keep that in mind that
you can do what you want. Have fun with this
class, relaxed. I'm here to just show
you what I know. And if there's anything
that you have issues with, don't hesitate to write
me here or write me on social media or
something because sometimes I might not
see all the comments. So just reach out to me and
I'll, I'll get back to you. I'll help you as much
as I can because I appreciate all you guys and I just think
this stuff is fun. So, alright, let's move
on to the next video. We're gonna get
started sculpting this little baby
predator character. And the next video is gonna be getting started.
I'll see you there.
3. Getting Started: Okay, First things first. So when you open up nomad, you will see a sphere and your background might be a different color background. If you want to change that, just go up to this
little icon here. You can tap the color and you can change it to
whatever you like. At least like to do something
a little more like this, maybe something a little warm. But you can change it to
whatever color that you like. And also when I sculpt, I like to do Metcalf. So that disregards all
the light of the scene, it just makes it easier
to scope for me. So I go to this option here and then I just
hadn't met cap. And you should have
something like this. Also, if you want to
turn off the grid, just go to this cog here
and you can turn the grid off and on and off. Okay, so now let's
bring our image that we just saved from procreate
into nomad sculpt. And we'll put it
in the background. So we'll just tap this icon
again, reference image. And then once we have
our images here, we can tap on this hit plus
import image from photos. We'll import this little rascal. So we tap it and then hit Add. And then we'll just
go to transform. You can't see it right now. It's because this window at this dialog box is blocking it, but it's right behind here. So we'll just tap transform. And then once you hit Transform, then you can you can maneuver it and just
make it so you can see it. But I think right
here is pretty good. Okay, so now that
we've placed it, you just see simple
tap to x transform. So then you just tap
the screen and then it's back into regular
sculpting mode. So first things first, I always tap on this little camera and
I hit orthographic. And just take a note of this
little front thing here, this little cube,
which is very useful. So we can always go back to
the front of our sculpt. So those are the basics.
We have the photo in. In the next video, we will start sculpting by blocking
the character out, which is how I sculpt
most of my characters. I think it's a lot easier and
you can pretty much build up to sculpting anything
when you block it out first. It's actually the same
way with drawing too. So blocking is very useful. We'll get to that next.
4. Blocking: Head Shapes: Okay, So let's start
blocking out our character. Of course, there's
always multiple ways that you can do things. So I'm going to try to show you some examples of different
ways to make different shapes. So starting out, I always look at the shape of all of
my shapes in the art. Hopefully that makes sense. So when I'm looking at
his face or her face, its face shapes. And the easiest way that
these will be to make I focus on the front
first, of course it's 3D, so we have to turn it and figure out the depth of the head
and things like that. But I like to stick with
just the front view first. So you can see that it dips down in the middle
and then it's round here, and then there's some
other round pops. Now, initially the easiest
way that I think to do it. Two spheres sort of
shaped similarly. And maybe two more spheres here. And maybe another sphere
here, something like that. So that's sort of feels
like that's the best. And then for these little
things on the side, maybe tourists, because
they're sort of, they're sort of
shaped like that. So let's try with
the spheres first. Whoops, I don't know why I
just made another sphere. So actually we can
go ahead and delete this fear because
we want to make a new sphere and we want to have all of these
mirror options. So just to show you again, I went to this menu, the scene, and I just added a
sphere down here. And you'll see it's
in yellow writing. That means you can,
you have some options. So I'm going to hit mirror. You see this validate, we're
not going to hit that yet. Just hit mirror. And you can move it
and you see the ghost of the second, the
second sphere. So something like this, we can make it
smaller if we want to make sure we can
see our character, we hit, just hit front
so we know it's in the front. Something like that. You can see they're
not that far apart. Maybe something like, maybe
something more like this. So we can go ahead and
validate symmetries on. So we can actually use the Move tool and see
how this comes around. It's a little bit
pulled out here. So we can use the
move tool right now, intensities all the way up and sought radius is about 260. So we can sort of pull
out this one side. I know it looks funny, but scopes always look
funny in the beginning. So you can just sort of
try to match what you see. Something like this. So we just basically want to get the top of the
head right now. That's really what we're
paying attention to. And now we have this
area and this area. But I just want to
show you another way that you could possibly do it. So I'm just going
to hide this layer. So I'm gonna hide it
by tapping the eye. And I'll add a new sphere. So if you have one sphere, I'll just go ahead
and validate it. You could also do this by
just tapping the Move tool, making sure symmetries on. And then you can also, you can always build out like this. You can sort of just match
the same shape that we made. Now of course, there is sort of like a
crease in the middle. So then you might
have to later on at decrease in the middle
or something like that. But I think those are the
different advantages of using two spheres because you automatically get that
crease in the middle. And I think that's the method
that I want to go with. But it all depends
on your drawing and really what you
want it to look like. There's always options for
making certain shapes. So I'll go ahead
and delete this and bring back our double sphere. At another sphere, you
can bring it down. You can do the same thing, just tap mirror and then
you can bring it out. You can make it
smaller like this. So something like
this and they're kind of off on the side. A little bit. Something like that. Just as long as
there's enough room for this last fear here
for his little chin. And one thing that you
want to pay attention to is now that
we're making this, this part, I think it's more towards the
front of the head. So I'm just going to turn
it and we can tap right. So it's perfectly
right. I'm just going to bring these more up to the front and I'll turn it back. And that feels a little
bit better to me because obviously we want the head to go back, but
we want the face. Most of the facial features are going to be towards the front. Of the face. So something like this, I think is pretty good. Can maybe move it
up a little bit. Maybe something like that. We'll hit validate. And there's another way that you can do something
like this as well. So I'll just hide this layer. A lot of my videos, people
want more examples, more examples and
tips I think it is. So I'm just going to go
through my thinking. And here's another way to do it. So we'll go to the sphere
and you can try clay. And clay is pretty good. And we'll intensity, we can put pretty
high, maybe like 75. And we'll put the radius up to about 65 or so, maybe
a little bit more. Another thing that you
can do is you can take, make sure that it's on symmetry. We're using clay, makes
her sub isn't selected. And then you can, whoops. And if that happens,
that's because the color is selected the color. So just tap on the color here
and then stroke painting. So that's what that is. Any tool that you use
that's used with a color, it's called stroke painting. So we just turn
that off and then it will just raise the clay. So you can do
something like this. Sort of lead off and then
kinda let it go again. Something like that. And then you would just
take the smooth tool. You can make this
move tool fairly big and then you can
always smooth it out. Like so. That would be something similar to get
those similar shapes. So that's just another
way that you can do it. They actually look pretty good. I'll stick with the spheres just because but there's other
ones look pretty good. And I think I'm going
to move them up a little bit closer. So I just tap on them, hit the gizmo and just bring
them up a little bit more. There we go. So I think that
looks pretty good. Next, he has like a
little chin here. So we'll just use
another sphere. And we won't mirror it,
will just bring it down. We'll turn our sculpt and then we'll bring
it over like this and just make it smaller. So we'll just bring it
up so it's at the front of the head, whips. And then we'll bring
it down a little bit. Okay, So we can't see. It's probably a little bit, these are a little bit shorter. The two-sided ones are the chin is a little bit higher up. So I think something like
that. It looks good. And that's his little
chin so we can it doesn't have to
be that far forward. I think something
like that is good. Maybe somewhat even with
the rest of the head. So I think that
looks pretty good. So we can go ahead and go back to the gizmo
and just validate it. So now we have the essential
shapes of the head. We have these two little
things here in this sphere. And when we merge
them all together, that will make the head.
5. Blocking: Neck & Horns: Next, let's make the neck. And for that I think we'll
just use a cylinder. So we'll tap here. And then we'll add our cylinder
here, which is very big. So we'll drag it down,
will make it smaller. Maybe something like that. Okay. So now we can turn it just to see where it is on the head. And maybe we'll just move
it back a little bit. So something like that. I'm gonna go ahead and
validated once you're happy with how thick it is, I think that looks pretty good. We don't want we don't
want it too big of a neck. So I'm gonna go ahead
and validate it. And now well wished while we're we're still on the I can't talk sometimes while we're
still on the cylinder. Let's tab move and make the intensity is,
is all the way up. And then we'll, we'll
make the radius about one forty, one fifty. One thing that I like to
do is I'd like to have a slight a slightly larger like base like I like to have
a curve to the cylinder. So I'm just going to
use symmetry is on. And I'm just gonna
use the move tool to move it out and
then move it back. And notice how I'm
spreading it out from the bottom and then pushing
it more in the middle. And then I'll turn it. And I'll do the same
thing with tap, right? So it's perfectly right.
I'll do the same thing here. I'll push in and then I'll bring the neck out a little bit
and I'll sort of push in. Sort of do the same thing. Just so it has a more of a
realistic neck feel to it. Something like that. You can even bring the
front down a little bit. That always kinda
looks good. So if you wanted to just make the
head or something like that, That's always looks nice when
it comes down in the front. But we're gonna,
we're gonna give, We're gonna make
a little collar. So we shouldn't have
to worry too much about the bottom part because
that will be covered up. Now the next part is,
let's do these little, maybe they're little tiny round horns or
something like that. So let's use for
something like this, since they're more around, I would just use a sphere. So we'll tap here. We'll make another sphere
and we will mirror it. And then we'll move
it out and move it. And we'll make it smaller. And then we'll just put it
where kind of where those are, maybe something around
here, something like that. So let's turn it to the side. And these look
like they would be a little bit tap, right. So it's perfectly right. A little bit towards
the front and down. I feel like they would
be maybe around here, actually, maybe more in the
middle, something like that. Okay, I think that looks right. So we can go ahead
and validate them. So now we have two spheres, although as you can see, there's still the
same, the same sphere. We just have two of
them. So let's rename this as to rename it horns. Just so we remember. Let's tap cylinder
and rename that Nick. And this, these three spheres will just remember that those
are parts of the head. Now if we want to
get this more round, I like to use the
Move tool so I didn't change size from
what it was before. And I'll just sort of hoops
will tap on the sphere. So we're on the right mesh. I'll just sort of take it and maybe I'll make
this a little bit bigger. Stretch it out at the top. Just sort of bend it until it sort of looks like what
I want it to look like. So here I'm just
pushing and pulling. And remember that
you do have to turn, turn it just to make sure
that it doesn't look really weird from one direction. So something like this, I
think looks pretty good. We can actually put
more of a bend in it by just being a little more
aggressive with the move tool. But I think that looks
pretty good. Let's see how it looks when I turn.
It looks pretty good. And I do that a
lot. I always play around with the move
tool and that's how I get a lot of the
shapes that I need. So I'll just tap the gizmo
and then we can just reposition it to
where we want it. Maybe we'll make it
a little smaller. Loops. Just take a look. Maybe little tiny
bit smaller, even. Put it a little bit
closer together. I think something like
that. Okay. So now he has his little horns on top and he has this little neck. It sort of looks like
a praying mantis. But okay. I think that's good for now. I think next we will, Let's block out
the rest of them. Maybe I should do the face. So I think we'll just
block out the body next.
6. Blocking: Body Cones: So next let's block out
the body slash clothing. And initially when I look at the shape that I've made here, it sort of looks like
it's either a cylinder, either a cylinder
that has slices like this to sort of make this shape. Or it could be two cones that are sort of like this
and maybe add it together. Or it could be, it could be a, a two of them together. So let's try. I probably wouldn't do this, but it might work
in some instances. So I've made a cylinder
and I'm going to tap snap. Now, this snap option
will allow you to rotate in a set degree. So for example, if you
want to rotate it, but you don't want
to have to guess the perfect horizontal level. You can hit Snap 90 degrees. And then you can
take it and it won't turn it will only
turn 90 degrees. If you notice I had snap on
and I was able to turn it. That's because I
didn't use the blue. See how there's the red
green, and the blue. If you use the black,
it'll still be normal. But if you use the blue, then it will stick to the snap. And you can change
the increment here. So change the snap
two horizontal. We don't need that anymore. And I will bring this down. To make our model a
little bit smaller. We can go ahead and validate it. We can bring this down. I'll make it smaller. And I always turn to
the side just to make sure that it's
where it should be. I'll bring it up a
little bit more, maybe a little bit bigger. So something like this. So now we can stretch
this cylinder out by going like this. So maybe about there. Okay, I think that it
looks pretty good. We could always stretch it
out a little bit here too. And maybe it will
stretch out a little bit longer as well. So let's bring it
down a little bit. Because we want to leave some
room for the color as well. Bring it down a little bit
right to the end of the neck. I think that's pretty good. We can always we might have
to bring it down a little bit lower later on. So let's stretch it
out a little bit more. And here is one thing
that you can do. We can use the trim tool. So that's over here. Trim. You can turn symmetry on. And you can take the line. And how the line
works is you put your point down and you'll
see this white screen. So that's everything
that's going to be cut. And so long as we
just angle it in, sort of like how the shirt is in the
drawing, we can let go. Then we have this shape similar to similar to the drawing. And actually I think
that looks pretty good. It might have to just smooth
out some of the edges, but we don't really
have to do that now since we're just blocking it so hard for me to not start working on the
character like that. So I'll just leave it. I need to learn some discipline
so we can tap on it. We can go to gizmo and we
can still stretch it out and we can still move
it however we need to. And that looks pretty good. I will show you the other way that all that I was
going to do it. So I'm going to
hide the cylinder. And another way
to do it would be to go back to the
scene and add a cone. So I'm going to tap Edit. We don't need that right now. I'm going to bring the cone down and I'm going to turn it. I don't think it
has to be perfect. So and then I'm
going to mirror it. And we could do
something like this. But it might not be
that we could do something like this and
then add another cylinder. And we'll just bring that down. And let's tap the,
let's tap these cones. And let's turn to the side and just kinda make them a little bit more like the body. Okay, that looks pretty good. So let's validate these. Are they already validated and
we already validated them. We can validate this to
let's see, validate. So this is another way to do it. We could just add
these two cones and this body, this
body cylinder. We can even take Move, can make our brush a little bit smaller and then we can pull out here so that
it's a little more, so it makes a little more sense. Can pull out the back
to something like that. So that's another way to do it. And I would have to
take both of these, checked them, simple merge them. I can always go to the gizmo
and then make it smaller. And then we went up a
little bit like this. So that's another option. And I don't know which one
I liked best to actually, they both look pretty good. Let's take a look
at the other one. This looks pretty
good, but I think the other one might look nicer. I think the other one
might look nicer. So maybe we'll use that. Let's take another look
at the cone option. I think. So after much deliberation, I'm going to stick
with the two cones and the cylinder method. So I'm gonna go
ahead and delete. Let's see. I'm gonna go ahead and delete this
cylinder and we'll just stick to the cone method. Next. He kinda had, it
looks like He has like a little belt here. So I think the best thing
to do for that would just be to add another cylinder, bring it down, make it smaller, but bigger than the
previous sphere. And we'll just shrink
it down like this. Of course, you can make the belt bigger or smaller
however you wish. Right now. I don't we don't really
need a hole in the middle, but just to demonstrate the whole process
or the whole thing. See when you tap hole, then the middle is taken out. So we might as well leave
it. I think that's fine. So I'll go ahead and validate
something like that. Can make maybe move
it up a little bit. Okay. So now the bottom part, he also has another
almost looks like a, like a toga or
something like that. So I think to do that, we will add another cone. And I'm gonna do, I'm gonna do snap and then I'm
going to flip it. Oh, actually, no, I don't know. I don't know why I
wanted to do that. This is actually perfect. Let's just make it smaller. And let's stretch it out. So it's roughly the
shape that we need. I can make it a little smaller, but I think something
like that looks perfect. I think
that looks good. So we're going to validate that. But if you notice, we really made a very long cone. So just tap on the cone. And if you hit Solo
on the bottom, if you don't see solo there, you might have to
go to where is it? Solo should be there. Solo should be on the bottom. So just go to solo, tap on the cone and hit Solo. And you see it's
really, really tall. So all you have to do is just take trim and I like to use box. You can use the line, but I
like to use the rectangle and just go like this
and then just cut it. So then you don't have to worry. So when you hit Solo, now you just have
this smaller portion. So I think this is pretty good. The only thing that I'm
noticing is we'll probably have to make the
neck and the outfit a little bit smaller
because right now I have sort of everything is
a very big version. We should just do that now. So we have this, this put the neck down. So we have the neck
cone, cylinder, cone. Let's name all these. So this is the just to bottom shirt for this
cylinder which is two belt. And for this cone will
make that shirt and neck. So I'm just going to
check all of these. Check the gizmo will
just make everything smaller and raise it up. Something like that. Think it's looking
pretty good so far.
7. Head Tentacles: Okay, so let's make these little tentacle type
things coming from its head. So for those I think
we'll use the tube tool. Now. The tube tool is let
me just tap on anything. So the tube tool is very useful. And it's one of my
favorite, one of my favorite tools that
I use all the time. So we're going to do path. So it looks like they sort of, they may be around sort of the back of
the head a little bit, like maybe back here. So I'm just going to
hit front for now. You can't be in tube if
you're in the tube tool. This one work unfortunately. So I'll just go to gizmo front and then go back
to the tube tool. We have path selected. And so when you
have path selected, so we'll make points. So for the little
one right here, we'll make a point here, a point here, maybe
three points. So we'll start up here.
We'll do a point. The lowest it will go.
And then another point because it's sort of curves up. So something like that and you
can move these all around. If you tap on, if
you tap on them, you'll see that they go black. So that'll, that'll be
an angle versus a curve. I think something like
this looks pretty good. And we can just hit
this little green. So now we're in a place where
we can still edit this. We can still edit
our curve, our tube. But it's just we just want
it in the right place. So I think that's pretty good. I think another we'll go ahead and finish
on this 1 first. Okay, So we can tap
Edit in these options. And edit just allows you to go back and edit your
little points here. So this one actually
comes up and then it curves back
down into the head. So I'm going to add
another point here. I'm going to pull this
one into the head. And now I'll turn it and just make sure it's where
I want it to be. That looks pretty good. I do want this whole
thing to tilt backwards. Sort of like it's sort of like it's instead of coming
straight out from his head, they're sort of going
back, back this way. But I'm gonna do that later. I'm going to make the curve. And then later on we can just, we can just use the gizmo and then we can
just rotate it so that this point is probably
a way back here somewhere. But for now, we just want
to get this curve right. So we'll use these. So I'll just change this
middle one down here. It goes down a little bit, and then it curves up. So that looks pretty
good and you can make it as close to
this as you want. I guess I should I should
make it pretty close. So something like that.
So the next thing that you see is the size
is not really right, because here the
sort of comes to a point and then it gets
thicker at the back. So for that, you just
want to hit Edit. Again. Loops are
not edit radius. So we want to hit radius. So you notice that when I tapped radius now there's a
yellow point here. If you tap it again, now there's a yellow point on all the dots. So in the beginning, when you change the radius, it changes the radius
of the whole tube. When you tap it twice, then it changes the radius of each each start
point or end point. So that's what, that's
what that does. If you tap it again, then you can change all
of them independently. So we just need the
front and the back. So maybe something like this. I'm not going to make it really, really sharp because then it will be hard to
make it rounded. And we want our character Cute, so we want to keep the edges. We don't want it
to be too pointy. So I think this looks
pretty good for now. I'm just going to tap
front and take a look at it here that looks pretty good. And then you can adjust. So once I get it
to a place where I kinda like it,
I hit the spline. So that makes it nice and curvy. So now you can take
these points and really get them nice and curved. You get them how you like them. If you need to add a new one. If you don't feel like
it's curvy enough, you can add a new one like that. Okay, that looks pretty good. And another trick
that we can do, instead of doing
all the dots again, since we've already
done this much work. Let's just go here. Notice that the tube
is still yellow. Let's just duplicate that. Go to gizmo, bring it
down, bring it out some. We can make the whole
thing a little bit bigger. This one feels like
it's a little bigger. Okay, so now let's just
go back to the tube. If the gizmo is here and
you want it to go away. Just go to the tube option. So now that we
have that, we can, we just want to make this a
little bit more of like a, like a question mark thing. So we want to make this
a little bit bigger. So it's as easy as just dragging these points until you have it. How you like it. Make this bigger, can adjust
how it goes into the head. This one is not quite, It's sort of like a
little bit below. So we can get even, we
can even bring it down. Like that. I get really
excited making these scopes. And sometimes it makes it
really hard for me to speak. It's kind of funny. So I'm going to make this
a little bit bigger. Like that. I think that looks pretty good. And I feel like this
actually comes lower. So I'm gonna pull this one
down a little bit more. And it curves a lot here. I feel like that's a
little bit more accurate. A little smaller. So that feels a little more
accurate to me. And you can adjust it and
just make it look good. Make it look how you want it. But I think that looks I think that looks
good, pretty good. Let's see if we need
to add another one to make it a little rounder. That looks nice. Okay, so I
think that looks pretty good. So now there is a third one. And it sort of looks
like it's coming off of, off of this part. So it's a little bit
closer to this top one. So I just have to,
it's this tube. I'm going to duplicate that. I'm going to name
this one bottom. Tentacle ten. Is it a yes? I was worried I was
going to spell it wrong. I'm not the greatest spelling. So this one can be the middle. And this is going to be the top. Okay, So we'll just
go to the bottom. We'll go to the gizmo
and bring it down. And same thing. We just want to
put it in a place. We can use the blue. Can use that. Oops. We can
use the blue to rotate it. Get it off snap if it's on snap. So we'll rotate it freely. Maybe we'll bring it a
little bit closer here. We will just rotate
it a little bit more. And this one seems a
little bit longer. So I'm going to tap tube
so the gizmo goes away. And then we'll just
bring this out. So it's a little bit longer. So something like that. In memory you can always just, you can always
adjust it and sort of bring it in a little bit,
but that looks pretty good. The only thing else I'm
seeing is I might need to make this end a
little bit fatter. I'm just gonna bring
it up a little bit. So we can put it there or we can actually put
it in the drawing. It's sort of coming
off of this thing. So we can always
place it right here. Like that, depending on how close we want
it to the drawing. So that looks good. And it's actually a nice
space in-between here. And one thing that
I'm noticing is since I've made this one so low, we might make it lower. We can actually bring
this one down too. So maybe it's like
right around there. And then this one
can also come down. We can sort of
keep them nice and even something like that. Okay. As I turned to the side, I'm going to bring this
one up a little bit. I'm going to tilt it back. Like I was saying before, I did want them to
sort of tilt back. I'll tap on this one. I'll use the green,
tilt it back. And sometimes it's
a little tricky to sort of get that right, but just play around with it. And just try to keep
the tilts minimal. So it doesn't get too crazy because you can
easily get too crazy. Okay, I think that
looks pretty good. The beauty, the beauty
is thing about this. This one's at 11 minutes. So the next thing really quick before we go on to
the next video, Let's tap the tube. So all of these we're
just going to hit Mirror. Mirror will tap this one, will go mirror, will tap this
one and we'll go mirror. And now you see we
have both sides. Okay? We also see that the
body is still a bit big, so I might make this smaller. But we'll see you
in the next video. Sort of figure out
what we need to do.
8. Adjustments: Okay, so after looking at it, there are some adjustments
that I feel we need to make just to make it a little
more true to the artwork. Okay, so let's go to the shirt. And I'm actually going
to separate this. So we're at the shirt and
we're just gonna hit separate. So now we have
shirt, shirt, shirt. So we have both these cones, which we can actually put
back together. Simple merge. So we have both the cones and then we have
the bottom part. So I think for both the cones, I'm going to take the gizmo, just make it, just shrink
it up a little bit. Move it up like so. And we can even make it a
little bit smaller here. Move it up. So
something like that. And we'll take this
bottom cylinder now and we'll make that even smaller
and then bring it up. So it's something
like that. Okay. I think that looks a
little bit better. And maybe we can stretch this. Just stretch it a little bit
so it matches up with the, the cones a little bit more. Okay, so I think that
looks a little bit better. We can take the bottom
part of the shirt. So let's get the bottom
part of this shirt. So that's gonna be the
belt and the bottom shirt. So we'll just select those two. We can bring them up
to kinda where they would go, something like this. And then we'll just
make them smaller. Move it up a little bit,
something like that. So that's a little bit
closer to what we have. I think that looks pretty good. And the another thing that I'm seeing is I feel
like these horns, they're a little
bit close together. So I think I'm going to,
I think I'm going to build out the head
a little bit more. So I'm going to tap
on this sphere. I'm going to tap on move. I'm actually just
going to spread it out a little bit more. So it's a little bit
more of a heart shape. And I'll just adjust this tube. I'll just adjust it to come
out a little bit more. And then I'll tap on the horns. And I just, I just want to
spread them out a little bit. And then I'm going
to rotate them. I feel like that's a little
more accurate to the drawing. Okay, since we're here, we can add the cylinder
for the color. So we'll just go to the scene. And then we'll add
another cylinder. So we've just added
another cylinder. We're going to bring it down. And we'll just make it
smaller, color sized. And now we can use the whole. So we we've made the
hole, can shrink it down. And I'm just going to
tilt it so you can see you can see the
hole in the middle. And somehow, I think
I must have hit something because it's it
was little bit stretched. Let's take a look. Here we go, and that's fine. I'm just gonna make it smaller. Make the whole thing smaller. I need to make the
neck a bit smaller. So let's just make the next smaller and can stretch it out. Okay, now we can make the
color a bit smaller too. Now let's move it back so it's
actually around the neck. Okay. I think that
looks pretty good. I think that's a good color. And one thing that
I'd like to do with colors, I think I might do this. Do it once we, once we
bring this all together. But let's tap on the color. We'll tap on Gizmo. Should I go, should
I validate it? Okay. So we're just going to stylize, we're just going to loosen
up the color a little bit. And to do this, we're just
going to use the Move tool. So I've tapped on the color, will just use the move tool. Validated. I think we
validated in the last video, but if not, just
validated, so I'm gonna, I'm gonna bring
this down a little bit just with the move tool and then I'll use drag.
And I'm just going to. Sort of pull it out, push it in at the bottom and then
pull it out at the top. Something like that. I can use Mu, I can use drag. And I'll just sort of pull
out a little bit on the top. I think that looks pretty good. That's nice. And if you want to, you can always stretch it
out and just make the, make the color a bit taller. And as we look in the back, you see there's too much
of the color showing. So just tap the cones, tap move. And remember its
symmetry is still on, so it's still going to build up both of these and you can just, you can just bring that up like that, something like that. So when we, when we
bring all this together, we'll tap on the cylinder
that's in-between. And we can do the same thing. Just be careful it doesn't
come out of the belt. Actually. Let's just leave that alone for now because I don't want anyone
to get sort of confused. So we'll just leave
that alone for now. But I think this is
looking pretty good. We'll adjust it a lot more. Once we voxel merge
these shapes, then we can smooth it and
it'll all look like one shape. I know it looks a little
bit disjointed now, but it always looks like that
in the blocking process. Okay, So let's see
what do we have next? So we have these two
little things next. Let's do, let's do those. And I think for those, I'm
just going to use a sphere. I'm going to bring it down.
I'm going to bring it out just so we can sort
of work on that shape. I'm gonna make it smaller. And then I'm going to mirror it. So we have to then validate. So now we have there are
two spheres we can just drag will make the drag doesn't have to be
too big of a brush. So we'll just drag it out. This is very similar to the
little horns that we made. So I feel like
something like that. What kind of squish them
together a little bit. Again, I always
make, I always do little shapes like this
using the move and drag. When I zoom in, I have to make the brush a little bit bigger. And move tool will
sort of move to kinda moves a lot of
the surface area. Drag sort of moves a smaller
portion of the surface area. So I think this is pretty good. So something like this. And now we'll just
move it up into place. So we'll just drag it up with the gizmo, will just move it. And we can even rotate
them sort of towards the front by using the
green, the green ring. And we can move them
up over a little bit. It looks like they're a
little bit more slanted. In a little bit smaller. Maybe. You can adjust to your positions of
where you want things. But I think that
looks pretty good. Maybe even a tad skinnier. They need to be a
little skinnier. So something like that. And just remember that I sort
of brought them up. So they're sort of in the front in-between these two spheres. All right, that's looking good. Now I feel like these
are too far apart. I'm always adjusting. Never be afraid to just
continue to adjust things. This the only way things get to look as perfect
as they can be. Don't be afraid
to adjust things.
9. Arms: Okay, For his arms. So I think the best
tool to use is we could always do them
the same way that we did the spheres. We could do it that way. But I'm feeling they look
more like cylinders. That if we just use the
move tool and push, we can give them a nice curve and it will have
the flat bottom. So we can put us through that
all three that'll digits. So fingers. So let us
go to the scene again. And actually before we
do that, let's just, let's just organize lower
mandibles, maybe mandibles. Why not cylinders? So this is the color shirt. Shirt. We can put these together, just make sure that you uncheck. If anything else is checked, you don't want to add anything together when your
simple emerging. And remember, simple
merging just allows you to separate if you need to. Okay, So I'm gonna put
shirt above bottom shirt. So now we have the bottom shirt, shirt and we put belt
right in-between since he goes shirt,
belt, bottom shirt. Okay, so now we have color, we have lower
mandibles and we will add another cylinder and
we'll bring it down. We don't need to
edit it just yet. So now we'll move it over. Make it smaller. Maybe something like this. The closer to the body. A little bit smaller and
then we'll just rotate it. So now that we've rotated it, Let's stretch it,
will mirror it. So now we have it
on the other one. Now let's turn to the
side and make sure that the position is actually
it looks pretty good. We can, we can put it down a
little bit lower. I think. Something like this.
So now I think we can go ahead and validate this way. We can use the Move tool, fairly big loop up to 15 or so. And like I always do, I'm going to stretch the
end tip, push the middle. Stretch the end. Sort
of pushed the middle. Kinda pull at the bottom. So this just gives me
that nice little curve. And the arms, like the drawing has a push on it in the middle. That gives you that nice curve. And now we can
adjust the placement because we've moved them
around a little bit. So we just want to make
sure that they're still in the right place
where we want it, where we want them to be. I think something like
that is pretty good. And also another thing
that I forgot that we cut, we probably could
have done before this is to take this shirt. See, I just put
them back together. What I meant to do is
let's separate them again. So we have shirt, shirt, shirt. And let's, Let's
take the two cones, simple merge them
and duplicate them. So now we can put the
original two back together. So we'll just simply merge that. And we're going to
bring this bottom one. If you get confused, it's easy to get confused as to which shapes you're
actually working with. So I'm just going to
hide this one shirt. And then with this, I'm just
going to move around with the gizmo just so I
can see what it is. So this is the, this
is the original shirt. This isn't just the cones. So I'm just gonna hit Undo. And I want to bring this
layer, the shirt layer. Let's rename it
mean shirt for now. Okay, which is different
than this one. See, this one is just the cones. So I just want to make sure
that you don't get confused because sometimes it's easy to get confused with these layers. Because when you
merge something, that layer always
goes to the bottom. So sometimes you can
just get confusing. So just make sure that
you're moving the main shirt back-up above the belt. So now we have this other shirt, which I'm going to
relabel under undershirt. Now we have the undershirt
and that's gonna be see these little sleeves
sort of coming out. So it's in order to do that, let's see if we can stretch. And then we can just
make it smaller. We can stretch it again. Make it smaller and
we might have to. And you notice how
we'll make it smaller. Notice how when I stretch, It's sort of the bottom part
goes a little too weird. We want to see the bottom
part like we do here. So I might have to rotate. So I'm going to make sure
that symmetry is on. And I'm going to rotate. Now I'm going to bring it down. And maybe in a little bit, something like this,
maybe a little bit smaller and then a
little bit spread out. So something like that. I
think that's pretty good. Okay. And also for the hands
are for the arms. We want the we want to
see a little bit of this, a little bit of the
flat side of the palm. Actually need, maybe
we need to make the arms a little bit smaller. But we want to see the
flat sides of the palm. So to do that, we'll
just take drag. Drag is the best tool. Put the size up to about 200. And we're just going
to drag the back part. So we'll just drag that up. And we'll push the front
part from beneath. So we'll push the front part, drag the back part out, and just sort of repeat that. And as you see, as
you stretch it, now you can see more of the, you can see more of the sphere. Okay, I think that
looks pretty good. So next we just have the, we do have a bunch of
the eyes and face stuff. But I think next we can do the fingers and a
little tentacles. Has little leg tentacles. But I think he's looking good.
10. Fingers: Okay, so for the fingers, are there's a few
ways that you can do fingers on a little
character like this. You can inflate them. So the clay still very soft. It's only 6,208 vertices. So you can always sort of
build out your fingers. Since he has little
round fingers. You can sort of build
them out like this. And then you can voxel Ramesh. So you would go to
the grid foxhole and rematch them and about, you know, something like that. Maybe even a little less. You can really mess
them at like 1180. And you can smooth
them out. And you have nice little round
like nugget fingers. But if you want to be a
little bit more precise, I like to use cylinders. Now this does get a little
tricky because cylinders, sometimes when you're
rotating and adjusting, things can get a
little bit of added, a little bit confusing. So we'll just have to, we'll just have to manage that. So let's just label the arm. Arms and put it down here. Okay, So I'd like
to use cylinders. So we'll drag it down. Over, will make it really small. You can zoom in. So we'll make it really small. Something like that. And now I just want
to sort of put it in the same position as I did
for the one I used inflate. So we'll just sort of adjust it. And we'll just drag it into our mesh, into the other mesh. And this is where it can
be a little bit confusing. Sometimes It's really easy to get mixed up trying to
adjusted and move it around. But you just have
to move your use, have to move your canvas around and just figure out how to get it, where you need it to go. And it does get easier. It just takes time
to learn how to use the tools and get
everything in the right spot. But I think that
looks pretty good. Let's just check out view. That looks pretty good.
It's a little big. So I'll just make it
a little bit smaller. I'm going to have really
liked little nugget fingers. So another trick that I use, I'm not going to validate yet. We can go ahead and mirror it. And once I'm happy
with that finger, we can either validated or if you're like me and
you're a little nervous, don't validate it yet. You can just duplicate it. And we have the gizmo. So now we have where we're,
we've tap Duplicate. So now we can move this one. And we can have as other
little nugget finger, nugget finger right there. So we can just rotate it until it's like right on the
curve of his hand. Just like the other ones,
something like this. It looks pretty good. And the back part
should line up. Should actually line up. So the back part, There we go. So it should be more, a little bit more like that. Let's move this one
down to just so they're sort of in line
with what the cylinder. Okay, so they're looking good. So now we just have
to add the thumb. So tap the gizmo and you can duplicate
like we did before. You can hit Duplicate or
you can just hit clone, clone and then just pull it off and it makes
that other shape. I don't know where on
the where it's going. Just drag it back out here. There we go. It even gets a bit
confusing for me sometimes. But once you have it
in the right position, just continued to rotate it
until it is nice and thin. Dummy, little nugget thumb,
something like that. I'll tilt it. Actually looks pretty good. And we want it to
be about equal. So let's take a look. Yeah, I think that looks great. I think that looks really good. So the last the last step
with these, the fingers, something a little
extra that I like to do is just, let's see. So we can go ahead and
validate all of these. If you're happy with them. I like to use the Move tool and I'd like to
just sort of push. Radius is about 250 or so are actually doesn't
need to be that big. We'll bring it down
to around 200. I like to push tap on the finger you
want to do and then I like to push a little bit. I'll do the same
thing with this one. I'll just push a little bit. Same thing with the thumb. And I'm just pushing
in the middle. So it sort of has a so I started just gives
it a little curve. I just think that just
helps out with the shape. And again, once you do that, you might have to just
adjust them so that they're even with
the cylinder again. Which can be tricky,
but you just have to maneuver it to
where it needs to be. See how this one this one came up some I just want
it to be even. Just a little bit. See this one sort of came all the way off the
hand for somehow. Just move that down. Move this one down a little bit,
give it some space. Okay, it's a little bit better. I still want to tilt it a little bit, something like that. So just, you know, it might take some time but just want to, you just want to
get them to look sort of in this general space. You can use this
circle in the middle of these women
generally move them. You just want them to
look something like that. I think that looks pretty good. So once you're happy with
your little fingers, then we can come back and we can do a little leg tentacles. And we'll do those
pretty much the same way we did these tentacles.
11. Tentacles & Legs: Okay, so we're gonna do a
little leg tentacle ease. What I like to do is add
some sort of ground. That way I can sort of set the leg tentacles
a little bit easier. So what I mean by that
is I'm just going to add a sphere and I'll bring it down, will make it big.
Maybe around here. Okay, Let's just
do the front view. And now I'm just
going to validate it. And I'm going to take
trim with my rectangle. And I'm just going
to cut most of it off since it's just
like a platform. So now we'll just bring it up to about where I think
the tentacles will be. We can raise it up
a little bit later. But I just always like to, I
always like the atmosphere. So now we'll just use tube, which we used before,
same exact way. We'll do path. And it looks
like there's two up here. There's two there, there
might be one in the back. So doing the same thing, we'll just add a point here, point here, maybe a point here, and then maybe a point here. So four points. And we can always
adjust them later. So we'll tap the green. And o c Sometimes it does this, it makes it a bit weird. So let's just go to edit. And we will bring these
to where we want them, which is a little
bit tap, right? So it's perfectly right. We want these a
little bit further up, are a lot further up. Because these look
like they come a little bit more in the front. So something like this. So it looks something like this. So I'm going to bring
a shorter raise it up. And then I'll raise this
up to by using the gizmo. So something like that. Looks about right. So of course, we'll just go back to the gizmo so we can get the options again. And we will, we need to
make it thicker number one. Then we want to
tap radius again, because with radius, we can
make the front n smaller. Okay, that looks pretty good. And it looks like
they're not it's not just like a regular
tube, it's thicker. I'm going to tap radius again. And I want to make
this bigger too. So I'm going to bring
this in and closer, smaller and maybe just
angle it down a little bit. Something like that. So we'll make this nice
and fat to like this. So now this is, this is more fat than the actual end,
but I kinda like that. I think it looks good. We want to look like there's
waiting on, the tentacles. Are on. We want to look like that. This character has
some weight to it. So the bottom we're going
to spread out a little bit. We'll figure out how to
make it look really good. Later. We just want to
really get the shape going. So let's go ahead and
mirror it so we can see how it looks
with two of them. I think they look pretty good. Now the drawing, they're
not separated that the top. So maybe we can just drag
this over so that they're not separated and we can still get
that nice size difference. I think that looks pretty
good. Let's hit spline. And sometimes you just
have to readjust. But spline is good
because it makes it nice and curved and
that's what we want. We really want it to
be nice and curved. Now I'm just kinda moving
this over a little bit. I think that sort of fits, that feels that feels right. The only thing that it
might be a little different as maybe this is
a little shorter. Tentacles in the drawing
are a little shorter. So maybe something like that. Once you have those, again, you can just go up here and
you can just duplicate this. And we can drag it
back with the gizmo. And we can actually
just rotate it like so. Using the green, the green ring. So we can rotate it like so. And then we can put them. We can just, we don't really need to
go too crazy with it. We can just do it like that. And it might come when we, when we actually
come to color this, we might even delete those
and then color the front ones and then duplicate those. That way we don't have
to color each one. But I don't want to get
ahead of myself just yet. So I think that
looks pretty good. So let's duplicate
this one again. So we'll duplicate it again. And for this one, I'm going to take off of mirror. And I'm going to move
it in the middle. And I'm going to twist it. Just so it's sort
of in the middle, Let's move it back and see
if we can just sort of get it positioned as though
there's a fifth one there. I think that looks pretty good. The only thing I'm seeing
now is I just want to, oops. I just wanna make sure make sure you're tapped
on the right one. I just want to make
sure that this is nice and flat hitting the ground. So I'm going to bring these
closer to the ground. Because again, we want the
weight so we don't want it to we don't want that
much room down there. So something like that. Looks pretty good. We can do the same thing
with the other ones. We just looks good. Can't remember which
one weighs the front. That's when it's good to
have this little cube. So we can just hit the front and know which one
is in the front. And I think that
looks pretty good. Okay. And looking at the drawing
there a little bit long. So I'm going to, I'm going to bring
them in a little bit. So I'm gonna use the
top one and just bring them closer to the middle. And then I'm going
to select them all. And just short of shrink
them. Sure. To bring them up. That looks better.
And then we'll bring this up to the sphere. Okay, So I feel like we are
sufficiently blocked out. Our character is blocked.
I think it looks good. We'll just check all sides. I
think it looks really good. So next we can start
merging these and voxel merging these work on
the eyes, the face details. And then we can do some
coloring and lighting. But this is the hardest part. So go back, take a look at it, make sure you don't want
to change anything. Make sure you don't want to
make anything different. It doesn't have to look
exactly like mine. You just want to
look good and you want to, you want to enjoy it. You can add more tentacles, less tentacles, bigger horns. You can change anything
that you want. You can make them have two big tentacles or you can make them just
have little legs. If you want to make them
have a little legs, then you can just do like
she wanted to have legs. You can do something like
add a you can add a sphere. And then you would just mirror
it and make it smaller. You can mirror it like that. Will make them a little smaller. We don't want them to touch. You're going to stretch it out. You can validate. Then you can use the Move
tool and you can just sort of, um, or drag, you can use drag and you
can just sort of build out, let me drag really small. And you can just build
out like little theories. You know, just sort
of stretch it out. You know, something like that. Then you can move them closer together once you
kinda have the shape. And let's say if you
wanted to do little toes, toes, I know I'm at that age. We're actually
having kids sooner. I think that time
everything is tos ease. Everything is cute. You can
do something like that. You can mirror, it. Can be the outer little toe. And then you can duplicate. And you can do the same thing. We'll make this, this sort
of enter TO like that. You know, a little bit more. You can do something like that. Easy little feet VDS, which is actually really cute. I don't know which
one I like more. So there's tentacles
and there's feet. And you can choose which
ones you like better. So I'll simple merge
the toes. Toes. Linux. And we also have the tentacles. Okay, I think that's a good
place to stop for now. So when we come back, we'll just start we'll start
really getting into it. But congratulations on getting the hardest part of
the sculpt done.
12. Voxel Merge: Okay, so now it's
time to go ahead and voxel merge some of
these shapes together. I'm gonna do the head first. Now, I'm not going to do
the tentacles just yet. I think I'm going to, I think I might simple
merge them together. Simple merge just
means that I will connect these
tentacles together, but I won't voxel merge them. I'll just Voc swimmers like these spheres, this
fear, this fear, this fear of voxel merge those, which means that
will be one shape. Instead of simple merging, which will make 1234566 shapes that I can separate
at a later point. Once you box will merge, you can no longer separate. But I think that's what we want. Alright, cat here on my screen. I think that's what we want for the head and also the
back of the head. I think it looks fine. I don't
think we need anything too crazy for the back of the head. I think
it looks pretty good. And I think maybe we'll add in the maybe we'll add the neck. Let's see. You know what? I'm going to I'm just going
to take drag and I just want to drag a little
bit of this down. Let's see how that looks. Push it up a little bit. Just so it's sort of
going into the neck. I think that that looks
a little bit better. I'm always looking out for
little details like that. But everything else, I think the rest of the head
I think is fine. And just before we
go any further, just make sure that you liked these tentacles like you can actually make them
going straight down. But we're not going
to, we're not going to voxel merge them. So you can always change them at a later point of
view if you decide to. So let's start with
a voxel merge. I know I'm feeling very
talkative right now. And think about a day. A day or two has gone by
since the last video. So, alright, so We're going
to voxel merge these spheres. So let's start with the biggest
fear will just go here. Now we see sphere here, and we see all of these. I think these three, we want to voxel
merge and we can also Bosphorus the neck. The
neck looks pretty good. So let's check the neck. And then those three. And for now that's what
we'll voxel merge. So we'll go to the grid
right next door, ring mesh. And let's make it two
hundred two hundred mesh. And now it is one piece. Now that it's one piece, Let's just take our smooth. And we can, radius can
be about 80 or so. Intensity is pretty
high, about 80 as well. Symmetries on because this whole thing is
still symmetrical. So now we're just smooth out. Let's make this a little bigger. So now we'll just smooth out his face and just see how it
all blends nicely together. I loved that. I loved blending
stuff together like that. So just blend. You can go
you can spin it around, whatever you need to
do, get comfortable. It's got a very
heart-shaped head. So just go ahead and
smooth your model out. Just make it nice and smooth. Nice and cohesive. I think that looks
great. Soften it up. So let's say even it has the
little dip in the middle. I see that, that little dip in the middle, but looks good. But I liked doing this because it just adds
a little something. When you put these shapes, they're just a little
bit more perfect than dragging them out of
the of the sculpt. They just look a little
bit more perfect to me. Okay, So now for these, I'm
pretty happy with this. I'm going to keep it
true to the drawing, even though you can feel
free to kind of make them straight and look a
little bit more like, you know, like sort of like I don't know
what they would be. But you can maneuver
them however you like. But I'm going to go ahead and
validate them. I like them. They look good. So I'm going to validate each of these and you
can see as I validate, they pop up on the other side. So let's just validate
all of these. We have the horns
almost a validated, validated those as well. I think everything
else is validated. You can always go
back here and you can check to see what is yellow. There we go, CDs,
his little legs. So I'm gonna go ahead and
validate them as well. So now they're validated. So now we're all validated up. And we can start dealing
with these, these shapes. So firstly, I'm going to simple merge all
of the tentacles. So that way we have them
all together in one spot. It makes it a little bit easier. Top tentacle, middle tentacle. In vitamin tentacle.
They look pretty good. So I'm just going to
simply merge them. Also be careful that you
don't have something else. Ticked. Simple merge. I hate when I do that. So let's just simple merge
them. So now they're together. I'll rename it tentacles. And I'm just going to
bring this way backup. We're bringing back up here. Hold the neck, Let's rename
the neck to this is head. Let's bring that
all the way up to. Now we have the head and
we have the tentacles. So we're looking good. We actually could put together
we have these and then we have these lower ones. If the lower mandibles, and then we have the horns,
they're very similar. I might make them the
same color, maybe. But for now, we'll just
do a simple merge. And we'll just call them. We'll just, I'll just
add horns to the end. I like to keep, keep my layers nice
and organized. So that's why I that's why I do that. I think
there's looking good. We'll keep these two
separate for now. He still has his toes. Okay. I'll bring this up. So it's always good to keep your keep your scene list organized. Okay, So, oh yeah, so let's go ahead and
smooth these tentacles out. Get them looking like something, makes sure that symmetry is on. We're just using
the smooth tool. And we'll just sort
of smoothies out. And actually don't
mind that they can get there getting
a little smaller. But it's mostly the ends that
I just want nice and round. You can lower the
intensity if you need to. If it's if it's just
moving way too much, just lower the intensity. We're just smoothing. Notice how the n gets nice and round. And it looks really
good. I liked that. Love it. I think it's looking
really great. And I think that's I think
that looks pretty good. Now that we have that,
I think before we go, I can probably squeeze
these in in this video. I like to do I'd like to do areas where it sort of
comes out of the skin. So let's use the inflate tool. And I just want to
show you my options with inflate my settings. Let's see. Do I have anything
special for inflate? I don't think I do. But at least you can see
sometimes I just like to show the menus just in case like something isn't working right,
or something like that. At least you can look and
see what my settings are. But I think these are
pretty, pretty basic. I don't think I have anything. I don't think I should have anything to different
than what you have by using the inflate tool, which I really, really enjoy. I'm gonna, I'm gonna
bring the radius. Let's see. I bring the radius
down to like 50. For now I'll bring the
intensity up to like 80. Let's see how this looks. So inflate is great for loops. Make sure you tap on the head. That's where we want
to tap on the head. I'd just like to inflate
around like that. See. And it kinda
gives us nice sort of pop out and makes
it looks like it's actually coming out of
the, out of the head. Let's do that for this too. And as you can see,
I just have to guess and put it around the backside and
see how that looks. I actually messed
it up really bad. See maybe if I do it this way, it'll be easier from
looking straight at it. It's pretty good and that's something that's a
little weird there. Let's see if I can just use
drag and just drag it in. It looks a little funny. Yeah, let me do it again. I'm a stickler for details. We'll go back to inflate and
maybe we'll just have to, you can always do one side
and then do the other side. Let's do one side
that we can see. Let's try to just
bring them together. It might be better. And we
can always smooth them down. And let's see how that looks. We use smooth. We can get them a
little cleaner. That looks pretty good. Pretty good, but I
might go back over it. This is the problem. I'm like, I'm so obsessed with
the smallest details, I'm going to turn, I'm
gonna go back to inflate. Let's try this again. Okay, I think that's
actually pretty good. That's better. It's better for me. Now let's
do it with this one too. It looks good. And we can do with the horns. Horns is good because we can, we can easily go
around all sides. And then we can also do it here. So let's just pull
this out a little bit. Hard to see down here. So I'm just going to do my best. I think that looks good. Okay. I think that looks good. That's a good place to pause. Get a snack, get some
water, and we'll come back. And I think we'll either voxel merge or maybe
we'll just do the eyes. Let's box will merge
the rest first. And then we'll do the eyes, maybe in the video afterwards.
13. Voxel Fingers: Okay, So now we're gonna
box will merge the rest. The rest of them has his
little tentacles here. Well, maybe we'll, we might not, we might simply merge the legs. That might be better to
simple merge the legs. Because I think I might I part of me wants to go and
put little suckers on Maple, maybe just using
the inflate like we did or maybe using, um, I think you may be using
inflate and just making little, little balls and then like
depressing the middle. So they kinda look like suckers. We can deal with that
when we get to it. So let's tap on the arm. And let's tap, honestly, we have this cylinders here. So the cylinders
look pretty good. Let's tap on the arm. Let's tap on all of these cylinders because
I think these were all fingers. What is this fear? I don't know what
that is. Okay. So now we have the arms
and the cylinders, and we can voxel,
merge them together. So let's voxel
merge them at 200. And before we voxel
merge this at 200, I'm gonna go ahead and save. Okay, so now we go
back to voxel merge. Usually it usually
even if after, after I save it, it maintains
what I have selected. So I'm just going to go back
here to this little grid. And Ramesh, we'll
see how that looks. Okay, So we see that
they look very bad. Okay, so we want
the cylinders to be a bit stronger
so they don't look so crazy when we walk
swim, voxel remiss them. So I'm going to sub-divide
them a couple of times just to make the
clay a bit stronger. And then I will, I'll just box will merge them. So let's tap on the cylinder, will top on one
cylinder and we'll go to the other ones and
we'll just simple merge them. So now we have the
fingers together. So I'm going to bring
this up to the arm, which is our little finger. We can rename it to fingers. We have little fingers,
we have the arm. And let's see, right
now the fingers are, the faces is 999,900. So let's subdivide twice. That's making them
very, very dense. Of course, I'm gonna
go back to the arm. And I'm also going to go back to the grid and I'm going
to sub-divide it twice. Okay? So I think this should
work pretty well. So now we have arm and fingers. Let's voxel, merge them at
200 and see what we have. If it's still messed up. They look a little bit better. They look a little bit better. But I think we might be able to remember them at
a higher resolution. Let's try three hundred. Three hundred I think
is pretty good. I think that's doable. And
also it sort of brings, it brings the numbers down even though we sub-divide it a lot. Sometimes I have
to sub-divide and Remus certain things
just so they work, just so I can, so I can re-mix them together without
them getting so distorted. I hate that should
smooth out pretty well. Because we really just want
little nugget fingers. So the smoothing
out is pretty good. We go, they sort
of come together. Things always start out
really, really ugly. Sorry, I'm just
getting in my way things so we start out
really, really ugly. And then when she
started just go with the process and
they start to look, okay, we'll make this
a little smaller here. And I think that looks
good. It's not bad. We'll just smooth out the
rest of his little hand. Here we go. I think
that looks great. And of course you
can take you can take drag if you need
to adjust anything like if you want to
maybe like push that in or pull that out or something like that
or just move it slightly. You can just use drag for that. But I think these are
looking pretty good. I'm pretty happy with his hands. Okay, so next, let's see
what do we wanna do next? Let's box will merge this part of his
shirt and this part. And I guess we can box them
or is this part as well? So we have bottom shirt. Let's see, bottom
shirt, main shirt. Let's main shirt. And what does this tube and see, Let's see what some
of these tubes are. Bottom shirt, main
shirt, undershirt. So we're just missing
whatever this is, this whole that's part of Maine. Sure. I forgot that
I put them together. Okay. Main shirt,
bottom shirt. And I think these two we
will voxel Ramesh. So let's see, let's do 200. Will remiss them together.
Then we have that. Now with blue wrong tool. So I'll just smooth. So we'll just do smooth
and we'll just rematch. I'm not too worried
about this edge. Actually think it looks fine. But you can always pinch. If you wanted to make the
edge of this shirt sharper. You can just pinch. I'll
show you how to do that. I'll show you an example. I think the shirt
looks pretty good. Now at the bottom here. Hello, I loved doing some smoothing. I'll
tell you that much. Once again, I appreciate
you guys being with me and hanging with me and doing
these these classes. I have so much fun
doing scopes for Skillshare and showing you guys what I
know and just really, really having a good
time and almost feels like I'm hanging
out with all of you. So I really appreciate you guys. All know what came over me. I couldn't help it. Okay. So that looks good. I'm very happy with that.
I think it looks great. Today. I want to do with this. I wanted to show
you the pinch tool. So here's the pinch tool. Here's my settings. Nothing crazy here. So pinch tool, if I wanted
this to be sharper, I could use the pinch tool. And I can pinch like this. Symmetry is on, should
actually smooth out those little wrinkles
to pinch, pinch, pinch. So I'm just kind of
going along the edge. And it will find that
edge and it will pinch, pinch your clay together to
make it a little sharper. So that's the pinch
tool. I'm a fan. Okay. I think I think
we're good there. I don't think we actually
have to do much to this. Let's just smooth it out. Let's just move this one out. So it looks a little
less like a cone. Okay. I think that looks good. I think the belt looks fine.
I actually don't eat. Don't even think I need
to do anything with that. So the little tentacles on the bottom or the
little Nazi me tubes. Okay, tube, tube. So let's go ahead and
simple merge these. So i've, I've ticked all of
these tubes and the bottom. And we'll just do a
nice simple merge. And we'll call these
leg tentacles. You can actually call
them whatever you like. But I like leg tentacles. They're not that, not that
strong at the moment. Let's smooth and see
how much they move. Okay, that's not bad. Sometimes you have to be careful because if the clay is too soft, then they can start to really warp and move a
little bit too much. I think that's good. I think that's I
think that's perfect. This one, I'm just going to
drag a little bit down into the ground. Let's
make this bigger. And the reason why, the
reason why I drag it into the ground is because I want I still like I
was saying before, I wanted them to look
like that there's weight. I want them to look
like there's weight. I think that looks pretty good. This needs to be and it
gets rid of that shadow. Because see how
there's a shadow here. So it sort of gets rid of that because I want there to be that
contact with the floor. Like something like if a
tentacle or something. If something's splat on the floor and there's
weight on it, then it's going to be
it's going to be flat. So I might do, I might
actually go in inflate, but I might do that at a
later, at a later time. Because I can go crazy
with the details. I think this is I
think this is looking good so far. I'm
really happy with it. I think we can actually color it and and start lighting it. I'm not sure what
else I want to do. I'll show you a little
trick with the neck really quick as
well for the color, Let's tap on the color. Sometimes I do this. So let's, let's take drag. Let's take drag and this
drag out the middle. Let's actually, let's solo it. So let's drag out the
middle like this. You can un-solo it. If you wanted the color
to be like this. I like the color up, but I
just want to show you this. I'm not going to
keep it this way. Let's use trim tool and let's
use, let's use polygon. Let's tap front. Let
me go into gizmo, go back to front, back
to the trim tool. Polygon will just add one here, one here, and one here. I'll make them all. I'll tap on them so
the dots are black. So something like this. And then let's just cut it.
14. By the Collar: And that's okay. We can always, you
know what I did. Here's another here's an issue. So that's an issue. Okay. So if you have
something like this, what happened was when
I cut when I cut it, I had cut through the
whole entire thing. So what I should've
done was I should've masked I should've
masks the backside. So I'm just going to
show you how to do it. As annoying as that is. I'm just going to go back
and show you exactly what I should've done and I'll
show you what happened. So I use the trim tool, I used polygon and
I went like this. So would cut this part and
it cut the back part two. So like if I do lasso
and I go like this, It's going to cut
through the whole thing. So that's what I did. So in order for it
not to do that, I'm just going to
turn Let's solo it. So I'm just going to
turn it to its side. I'll use a mask. So we use selective mask. And we'll just use
the rectangle. Now that we have the rectangle, we'll just square that off. So now all of this is protected. Now we can go back here. Tap front. Also, I just wanted to note
just make sure solo is down there. Is always down there. Okay. It's lock selection. I use locks sometimes. So I just wanted to make
sure that it wasn't solo. I didn't want you guys to
not know where solo was. But there are some options here, the shortcut, so
that those are here. So these are shortcuts. Maybe you might need
some that I don't use. But for example, LOC, you go like this and goes away. But anyway, we're
just going to be using solo and we're
going to use the Trim. We're going to do the
same exact thing, will go Trim Tool polygon. And we don't really doing
that to do polygon. You can do lasso, but I like polygon. I just feel like it's
a little more stable. Okay, so we'll do this. This will cut our
trim, our color. Once we tap the green button. So now we have the same
thing we had before. And let's go ahead
and unmask it. So you can go to the selected
mask or the regular mask. So we'll go to Select
and Mask and we'll just tap on it and
then just hit clear. And we can hit Solo so we
can see our handiwork. And we'll do the same thing, drag, and we'll push, pull, push, pull a
little bit more here. I actually don't really need to. I think that looks good. So another thing I did before is I just use the flattened tool. Here's my settings intensity
is about 50 something, this 83 for the size. And oh, before I flattened, let's go ahead and refresh it. So we're gonna go back
up here to the grid. And let's just
remember it at 200 and make it a little
bit stronger. Like so. Now it has all those, so we'll just smooth,
smooth it out. I really should have
just kept this simple. It's so hard for me to
keep things simple. It really is the problem. So let's go to flatten, and then let's just
flatten out these sides. That can flatten out the
top two if you want. Sometimes it really gets
warped a little bit. So we'll flatten out at the top, which is smooth
and see if we can smooth away that little thing. If you have something like this, it might help to just
remember it again. Let's see what happens
if we refresh it again. Then we'll flatten it. Oops. Let's just take flattened in school
right around the corner. See if that helps you smooth
it a little bit better. The flattened tool can
be a big, big help. I use it, I use it a lot. Because sometimes you want it, you want to use flattened a lot because you want
those nice planes. You want those nice
flat surfaces. They can catch light
and catch shadows. Now I'm just see I'm
just smoothing it out. Nothing too crazy. All
right. It looks pretty good. I'm just going to take
drag and I feel like I just wanted a
little bit higher. Something like that. It's pushing the bottom. Pushing in the
bottom sort of makes the top sort of curl out. Yeah. Something like that. There we go. Make it nice and calorie. Okay. I think that looks good. Last but not least,
maybe I'll just drag them together a little bit. That actually might be better
with with the move tool. Let's try the Move tool. I think that looks pretty
good. I'm just gonna go ahead and try to smooth
this out a little bit more. Drag this up. I like my scopes to be as perfect
as I can make them. And again, if you really
want those sharp edges, just use the pinch tool. And you can try to
find some edges. You can kind of edge
them up a little bit. Okay, I think that looks good. Now really quick, we'll go back to what we were doing before. We'll just go up here.
We'll add a cylinder. This whole song and dance again. We'll just bring it down, will make it smaller. Bring it down again. Smaller. Tap hold. Now we'll just position it
so it's inside the collar. Is college is co-opted
the head video, this was supposed to
be doing his eyes. Now you guys are
waiting for the eyes. I'm waiting for it too. I always get a little bit of anxiety because everything
that I'm doing, I'm like I have to I don't
know what I'm gonna do, but the way that I
work is always so, so much so contingent on how
I'm feeling in the moment. That's just how I work. So I don't plan out
everything exactly. I just use I use what I use. Let's move it up a little bit. Can actually be a
little bit smaller. So we'll just put this
in that in there. That way it looks like a
color within the color. Make it a little bit
smaller, little bit lower. So something like that. We'll validate it and
maybe I'll just even use drag and just drag this
down a little bit too. It looks a little bit, little
bit, little more realistic. Test smudge bigger.
There you go. So he's got a
little color inside is little collar kind of thing. I like it. I think it looks good.
Okay. So definitely we'll come back and
we'll do the his head. So now what I like to do is take drag and I'll push the bottom, pull off the top,
pushed the bottom, pull up the top,
push the bottom. And I usually do something
like this if I want like a, like a nicer color, Let's just smooth it out. And as you see
that, That's what I mean by the clay is too soft. See how soft the clay is. If you have that situation. What you can do is remission. So let's just rocks will
be measured at 200, will remember it can smooth out. The clay will be a lot stronger. So this is what I do, like if I wanted some sort of color, I could do something like that. You could even flatten it
out with a flattened tool, can fix it up a little bit. You can just take smooth, just smooth it out, make
it nice and smooth. Actually looks pretty good. Sometimes if it's a
little off like that, I just go like that to sort
of fix it up a little bit. But I think they call
her actually looks nice. So I might keep it. Might keep it. Okay.
I think that's good. We'll come back. I might mess around a little bit
more with this, but we'll move on to the eyes. I think, I think it's
time to do the eyes and the face in the next video. So we'll finish messing
with the color and then we'll get to the
eyes and the face.
15. Eyes: Alright, so for the
head, the eyes, the main thing is the eyes
is we want to really get, we'll tap on the head. That's where we're
going to work. And sometimes here's a
little trick that I do. I'll take the crease tool, make it fairly small,
didn't it'd be that big. So I'll take the crease
tool and if I want to test out and see where I want to put something so I can
just take the, I draw it in like that. Just sort of draw the
shape of the eye. And it kind of gives
you an idea of what, if where you can, you can do in the mouth would be the mouth looks
like it's about here. Something like that. So that just gives
you a little bit of a sense of what's happening. So the first thing that I feel, let me just see if
we can erase those. So I'm just going to take
the let's see what I will use clay or will I
use layer? I'll use clay. Let's use the clay tool, the symmetry sub, because we want to take
some clay out of this. So I'll bring the
intensity up to about 70. Size can be a little bit smaller
and then to be that big. So firstly, I'm just going to start doing that same
shape that we did. Just note that the eyes, the width of the
eyes is almost as, almost as wide as
this as this sphere. So we don't want to make the
eyes too close together. So that's the only thing
that I'm worried about. Well, this needs
to be way smaller and see how it just make
the shape of the eye. By removing the clay, by using the subtracting
the clay from the mesh. I remove a lot of
the clay like that. You can get a pretty good idea of what it's gonna look like. Actually think that
looks pretty good. So I'm gonna go to smooth and then I'm just
going to smooth it. So you have that nice depression where the eyes were,
the eyes can go. Another thing is,
since we use spheres, you can see there's
nothing here. I want to add a
little bit of mass to his his little nose area. So I'm just going
to use clay and I'm going to take it off, subtract. Then I'm just going to
fill this in a little bit. So let's fill that in a
little bit like that. Then I'm just going
to smooth it. I do a lot of this sculpting. The head is still nice and soft, so the sculpting
isn't very difficult. I'm just going to use flattened. Flattened is good because I
just don't want it to be too. I want it to come out, but I want it to be flat. So we'll just
flatten it a little bit like that and
then smooth it. This is all like a taste thing. Like I'm just working out how, how I want them to look. But I think that
looks pretty good. In another trick that I do
for the eyes is I'll take the drag tool and make it fairly small and see how these eyes are kind
of like just circles, whereas these are sort
of like half circles. So I'm just going to use
the drag tool to drag out and sort of make that
dome a little bit more. So what I've basically
done is just, I'm just using the
drag tool to make this straight line because
there's a straight line here. You can drag it
out a little bit. I'm just using drag
to use to make that straight line
the trade here. I'll just smooth
everything afterwards. Because you know me, I
like to smooth everything. So next let's take, we'll take clay symmetries on. We don't have subs, so we want to add clay. And I just like to add it around the top part of
the eyes like so. I'm just going to
take smooth and just smooth, smooth that as well. You'll notice a lot of
times when I do something, I'll smooth it right afterwards. Just so it maintains
that feeling very cohesive with everything
else and everything is, stays nice and nice and smooth. Let's add some actual eyes. Will go here. We'll add a sphere. And we can bring it
out just so we can see it will make it smaller. Slide it over to bring it out some and then
will mirror it. Then we have our eyes here. We can bring them together. Maybe they can be a
little bit bigger in. So something like this. I think that actually
looks pretty good. I might, I might
actually stretch them. Let's see how that looks. If I stretch and then I rotate, it might actually look alright. So just make sure
they're not sticking out too far from the head. But I think that
looks pretty good. And you might have to play
around with the shapes. But essentially I just
stretched it out because the eye sockets I have or
a little a little long. They're sort of
like long this way. So that's why I just use the red circle and I
stretched out the I and then I just adjusted
it so it looks like it's sitting in there a
little bit more naturally. So I'm just gonna go ahead and validate so we can take
a good look at them. And I think I think
it looks pretty good. The only thing that I'm seeing
is I'm going to take drag. I'm going to make it quite
big and be around 230 or so. I'm just going to try to drag
drag it down a little bit. I'll even do it here. Okay? Because I just want, I want the eye to be resting
on this bottom part. So that's kinda why
I did that. Okay. I think that looks pretty good. I think I think I like that. Let's take drag. And you can see here, let's just experiment with making will take drag,
will put that down. And let's just see if we, oops, let's tap on the head and make sure
you tap on the head. Just didn't see how that looks. I think I think I like it. So I'm going to take drag again. I just want to actually, another tool that you can
use is clay, very small. And just adding a little
bit of clay here sorta, we'll give it a little bit of a bottom thing and you can actually do
it up here as well. Just sort of accentuates
the eyes a little bit more. Let's move them so they
don't look so crazy. Smoothing is very important. But I just wanted to
give the eye socket a little bit more
of an edge here. I think it looks, I
think it looks good. And hopefully it will look
better once I once we add, once we start coloring
and things like that. But I think as of right now
that looks pretty good. If you want your
eyes to be bigger, you can do the same thing. Just take drag. And you can make sure
you tap on the head. You can make these a
little bit higher. This let's take the eyes. Hopefully it will
work that I can just make these bigger as is. Map a little bit, back a little bit, maybe. See how that looks. That looks a little bit better. I think. Stretch the eyes
out a little bit more this way and then push them in some way. I think that looks pretty good. So essentially you just want your spheres to look nice and settled inside of
your eye sockets. And if they don't always
have to be perfect spheres, but you do want to keep
them just nice and smooth. You don't want to have too much. They still want to look round. And I like having a little
space around because later on, this dark part will use the tube and we'll
add that in there. But I think that's pretty
good with the eyes. Feel free to continue to
mess around with them until you get eyes looking
as perfect as you can. Sometimes it's a little tricky. And just remember that
you can use drag. That you can maneuver the
eyes a little bit using drag. If they start to look a
little wonky in some spots, you can just cheat it, sort of stretch them out
a little bit like that. Like I've just done. Yeah, I think they look good. This is a little high, so I'm just going to push
this down a little bit. Here we go.
16. Snoot Trade Secrets: Okay, so let's add this little, has little snooty here. So I think the best thing to do, let's make sure we're
tapped on the head. I'm going to use inflate. I think he has two little round, cute little things there. So let's just use inflate. And let's just
inflate like this. That's pretty good.
And we'll just take smooth and we'll
just smooth that out. And we'll use that
as a template. So now we can take crease, we can make it quite small. Symmetry is still on and we'll
just start in the middle. We can just make a
nice crease like that. And then you have
that sort of cute little, cute little face. I think it looks pretty cute.
Now, the only difference is this one is a
little bit smaller. And we can always, let's see, let's let's see what happens if we make
it a little smaller. I really like that though. Another thing that
you can do that I should be doing.
Here's a little trick. You can use layers.
So let's add a layer. And we'll name this
one snoop one. And let's try to do the same
thing that we just did. So use layers often, I should've been
using them more. We'll go to inflate and we'll do roughly the same
thing that we just did. We'll go that will
smooth, nice and smooth. Then we'll take a crease.
Start in the middle. There we go. I'll give a nice creased. It'll snap there and
we can smooth out. I smooth out like underneath
and around it sometimes and sometimes I have to
go back over it with the crease just to make it look, just to make it look pretty. Here we go. Something like that. Now this is actually on a layer. So when you get
rid of the layer, you completely get rid of it. So we'll get rid of that one. We'll add a new layer. And let's just name
it small snooty. I realize I went
through that fast. So these options here, this little pencil, Same
thing with the layers. The little pencil
that always renames. So now we're on
that small Snoop. And let's just use
inflate again. And we'll make this
one really small. We'll make the Deana
Fleet really small. We'll make these
really, really tiny. There we go. We have the little circles
that we can smooth out. Then we can take crease.
Start in the middle. That is little happy mouth,
something like that. Then you can go
back and forth and see which one you like better. This might be a little cuter, but I feel like it's
a little too high. It feels a little strange to me. So I'm going to delete it and I'm just gonna go with this one. Even though it's
a little bigger. You can always recreate it. So if you decide that you
want to make it less, I think it's sticking
out a little too much. So I'm just going
to smooth it out and push it back into the
face a little bit more. And then I can use crease
and then I can just decrease it. Once we color it. It'll be better to go back
and we can we can color it, we can add a little
bit of a darker color, whatever his faces. And that will just accentuate this crease and make it a little, make
it a little better. So there are some little pops right there which
could just be paint. I think that I think that
I think that'll be fine. It's just paint. I don't think we need to
get too crazy with them. Okay, So now we're gonna get
into some trade secrets, some things that I like to do, little tricks that
I figured out. So sometimes I want a
lower lid on the eyes. I think it makes them
look a little bit cuter when you have
that lower lid. So one thing to do, I'm going to show you my magic. One thing we'll do is
we'll go to the eyes. Then we will might
be called sphere. So if it's fear,
just rename it I, so you just go to the eyes, the spheres, and then
you duplicate it. So now we have two. So next we'll go to the gizmo
and just make it bigger. Something like that. Okay,
that looks pretty good. So now we have
those bigger eyes. So let's take the trim tool. The last those fine. So symmetry is on. So this will do it to both eyes. So let's just go
ahead around here. Just trim that off like that. Then it even looks like
it's a lower lids. So once you have that trimmed, we can go ahead and refresh this so the plays
a little bit stronger. So we'll just go here. Remember it around
200 Ramesh, those. We can smooth it out. And smoothing is good because
it will push it back. Because we made it,
we made it quite big. So we'll smooth a little bit
and then we'll take flatten. And symmetry is still lawn intensities about half and the brush is pretty small, around 35 or so. We can just flatten
out the top part of this eyelid. Let's
see how that looks. Yeah, it looks pretty
good. If you need to, you can use drag if you
need to straighten it out. If you want to, like bring
it some parts a little bit lower, something like that. And you can always take
the gizmo and you can slide it in if you feel like
they're a little too thick, you can always slide
them in a little bit. I think that looks I
think that looks cute. I liked the lower lids. So I'm going to keep them. You can decide to keep them
or not or not keep them. Let's rename this one low. Okay, so now the next thing
that I wanna do is let's take inflate will make the brush fairly small, around 30 or so. And we'll tap on the head. And I'm gonna, I'm
gonna do this. We're still on this new layer. We're good. And see how we made these, uh, these, this crease
come up like this. So this would be the cheek, this would be pushing
the cheeks up. We're going to take inflate and make sure
you're on the head. Just a little thing like this. Like that. I know it looks weird. And then take smooth and
just smooth it out. Maybe I'll add,
maybe I'll do that again a little bit
more right here. And then just smooth
it out. So what that does is now I'm gonna
go back to my crease, bringing the crease
down around here, and then go like this. Now we'll add a lot
of magic to your, to your, to your drawing. It gives them a
lot of expression. I'll use drag and I
can just push this up. I meant for it to be up
a little bit higher. So I'll just push it up like that and see the difference
that that gives him. It makes him like, like it just gives them
that little smile. So experiment with that,
experiment with that. I love doing that. We can smooth it out so
it's not so aggressive. I'll smooth out the
bottom as well. So something like that.
I think looks cute. I'm also not sure about
the bottom lip of all, if I want to give
him a little bit of a bottom section here. But Paul experiment
that and then we'll come back and I'll let
you know what I decided.
17. Lip Suckers: Okay, So I feel like he
needs a little bit of a lower section here. So I'm just going to use clay. We don't, we're not
using sub anymore. We're adding the
clay very small. And I'm just going to add
the clay here like this. So I'm adding it to the bottom. Then I'm just sort of popping it out a little bit like that. So it almost looks like He has like a little bit
of a bottom lip. Then of course I'm just
going to smooth that out. So it's just like the
hint of a bottom lip. And then I'll go ahead
and do my crease again. So it sort of makes light, makes it look like
he has a little bit. These little details
I feel like really, really help sell certain things. Like I feel like it's more
of a mouth now because it has that little
bit of a shadow here. So just keep that in mind. I like this. I like that they're separate, so I'm just going to
Rebecca in the grid, I'm gonna go to the multilayers and I'm just going
to sub-divide. Let's use the inflate and see. Alright, So the fun flights
a little bit better. One thing that we can do as
well is we can use den topo. So let's see how
the inflate works. It's the same, it's
the same menu. Den topo dynamic topology. Let's hit the little diamond. We're using inflate. So we'll hit Enabled
and hit Okay. So now we're on
the leg tentacles, we have the little diamond
and we're using inflate. And as you can see, it's
very, very precise. With dynamic topology. You have to be careful because
you might try to smooth it out and it will still be doing the dynamic
topology thing. So you just have to
be careful with it. So for example, if I want to
inflate a little bit here, here, here, here as well. Go to smooth, then turn it off. Then you can smooth out like so. To get the little depression, I think you could probably use clay and really, really tiny. Right in the middle. Oops,
du sub, right in the middle. Notice I'm still using
the dynamic typology. And then you can
smooth that out. And that actually works, that actually works well
as like a little tentacle. Then you could do them that way. You can go to smooth,
smooth them out. And that actually
looks pretty good. Smooth, smooth them out. You just have to do
that on every side now. So you can decide to do that. I might, I might
just speed this up. This is me getting
completely carried away. But I think that's the
beauty of it is I just, I find it's so fun to figure
things out on the go. And I just had to work
that into how I teach. Because that's just literally the way that I create heart. That's, that's the way that
I feel most comfortable. There are a lot of people
that can do tutorials. Everything is worked
out in perfect. But I I don't work that way. My work is never perfect. I'm always changing
and I'm always rethinking things and figuring
things out on the go. And that's just how I
create, create my art. So that's what I, that's
what I have to do. Okay, so now we can just, I can just go through and
just smooth all this. Again, you always want
to smooth everything. Keep everything nice and clean. Very important. You always want your scopes nice and
clean and smooth. And as long as you do that, as long as your sculpture
nice and clean, then no one's going to know what program you're
using to make it. Which I loved that
people always ask me what program am I using? And when they asked that to me, that means that they feel
like it's good enough to be any of the any of the
big big dog programs. But that was
actually kinda cute. I mean, I kinda like them. You can decide if you
want to keep them or not. I probably should have
just done them on a layer that way I could
take them on and off. But I like them, so I guess
I'll, I'll, I'll keep them. Another little trick
that you can do. If you want. You can
always flatten the top. Let's go ahead and
turn. Dynamic typology of you could always
flatten the top of these. If you'd like a few, like
a flatter, identical. So something like that. And you can take pinch. You can also like pinch. It will try to find
like a, like an edge. And you can usually,
usually find an edge like that there. So you can use pinch
and you can try to find like edge if you want to, or you can just
do sometimes I'll do sometimes I'll do clay. And I'll just draw, whoops, let me take it off sub. And I'll just draw like this. And then I'll sort
of smooth it out. And then I'll sort
of take pinch. And I'll use that to make that, make that pinch like that. That nice straight line. Hopefully you can see
it. Pinch it some more. So something like that. So that's another
trick that I do. I just use clay and make those
make those lines that way. But I don't think he
really needs them. I think they look good. Just round.
18. Eyelashes: Let's add the will use the tube to make
his little eyelash. This is also a very stylistic
thing. I always do it. I love to make the eyelashes. So we're going to
use the tube tool. We use path, which is
kinda zoom in here. And one thing that I
use with the path tool that will be useful for this Is a go to the,
go to the settings. And every point that will
snap every point to the edge. Instead of just making
things out in the air. Sometimes you can use it and
it'll go out in the year, play around with them to
sort of figure it out. I'm not sure I'm explaining
it. Exactly right. But essentially when
you have every point, then every point,
for example, 12345. Maybe we'll do one here
and we will do in here. Then we go like this. So it snaps them to
VS, start and end. So we'll go one, we'll do the same
thing, path 23456. So sort of do the same thing, go like this and see
how they just kinda went inside instead of
being like on the surface. So that's the difference. It could have been
out in the air. But I've realized
shut off the Han. You wanted to every point. Tube tool path. We don't want to
start too far down, so we'll start maybe about here. We'll make a little
curve to about there. And then we'll come out
like to tap that one black. And now we will go like that. So that looks pretty good.
Now we'll tap on it. You see our options here. You can go ahead and mirror. So you don't forget to later. Now next, we'll tap on
these and we can see, why are you not letting
me edit and there you go. So sometimes if you don't see
the thing, just hit Edit. Even I get confused sometimes because I know I
never really turned that off, so I don't
know why it was off. So you notice I hit radius, it starts out at one little dot. I'm going to hit radius again. And that makes a yellow
dot here and here. So this will allow you to
make two different sizes. See how this one's
getting bigger, the other side is
not getting bigger. And also remember you can move
these around as you wish. You can change that
again if you want. The black just means
that it's like a right angle, like
a sharp angle. So something like this
looks pretty good. I want this side to be
bigger than this side. So we're going to zoom
in and make this small. So something like
that looks good. Then we're gonna go
ahead and Spline. That makes it nice. Smooth curls or smooth curve. I'm going to take this and just, I just want to stretch
it so that it goes into the mesh that way it's
a nice smooth transition. I think we're good, so I'm gonna go ahead and validate that. I think it's looking great. Okay, so the only thing that
I want to do with these now is smooth out this end. So I just take smooth,
smooth this out. So it's not looking so crazy. Smooth out the bottom a little more to sort of give it a shape. And then just take drag and just sort of give it a little bit in a
little shape like this. Sometimes I'll sometimes I
flatten it out a little bit. Really know why, but
I like to do that. So something like this. And you can even you can even take the
bottom and drag it. This is very much
a detail thing, but sometimes I like
this bottom to be flat. So I just sort of take that out. So this is straight and
has a little bit more of a rather than being
really, really rounded. I think I kinda
like that better. So I'm just going
to smooth this out and just make it pretty like so I think that
looks pretty good. They're actually a little bit I'm just going to take drag. Just sort of push them
down a little bit. Here we go. I think
that looks better. I don't know why I had them pointed there were like pointed really high up and I think they look
better when they're not pointing that high up. I can take my flatten
is flatten them out some. That's better. That's much better. We don't want them pointing
all the way up like this. We want to sort of
have them pointing out a little bit more. So I had to kind of change that. I'm not too worried about this because it's
going to be black. And we're going to come
back and start coloring. So we're going to come back
and we're going to change. We're going to go here, changes the PBR minds will do it now. You can see it's dark. So when we get back,
I will come back and explain all this and
we'll get into the PBR. We get into coloring
him because I think this is the
hard part is done. Congratulations, we
made it this far. In the next video, we
will get to color in.
19. White Lights: Okay, so now we will change
from Metcalf to PBR. If you notice he's very dark. And that's because
of the environment. So the environment
is any one of these. You can see that I
use my own here. These that I drew in procreate. They all give it a
very different look with different colors
and things like that. So the environment is
very, very important. That being said, let's see
animals when I want to use, we use this one for now. We'll use this one for now. And I'll include all include
some of these in your class. Leaves this one for now, but you can use any one. But I think we're
actually going to turn the environment off in a second. So PBR, we can color it. We can do all that fun stuff. Right now it's white. And what I like to do is I
like to select everything. So I'm just going to
select everything here. I like to go here and just
turn the roughness up. I like to use white would like
to turn the roughness up. Dupain all. I disliked the way it looks
really like the way it looks. So I'm going to
actually save this. So I'm gonna go here and
Save As and hit the plus. I'm going to name
this one white. This will be the mat cap. If I want to come
back and just have it and just color
it a different way. I just like to have a backup. So now we have that one. So now I'm gonna go to Open and we'll go back to the one that
we were working on before, which I guess it's
technically the same thing. Yeah. Actually, I think it is
to complete the same thing. Because if I go back here, yeah, that's, that's
like a previous version. So anyway, we'll continue
to work with this. But when I do save it, Like save as I'll
just erase white. I can just erase
the whole thing. Just save it as baby predator. So now I'll continue to work. I think it looks really good. Okay. So I think now a cool
thing to do is to light him. So let's go to where we had our environments and turn it off and you should be
completely black. We can actually get rid of the, let's get rid of the,
the reference image. So we'll go to this
little image here, and we'll just turn that off. We can come back later and
turn it on if you need it. So all the lights are off. We have a great
looking silhouette. And now we can start
adding. Our lights. Will go here, add light. That actually looks really nice. I like to tap on the light here and then
bring it up to white. You bring the
intensity down some. So this is a directional light and it actually
looks pretty good. Let's see where this light is. I can even see the light.
Check my settings. So I had my light
icon turned off. So I'll go to the cog and
just turn it back on. So directional lights you
can move them anywhere. It's just when you start
messing with the rings, do they start changing? But actually think where it
was looked pretty darn good. And also just remember
to note that we're on orthographic and
eventually we'll change it to perspective. You know what will
change it to perspective now, I think that's fine. So let's set this is the, this is the perfect front. Let's set this will take, this will go to this
little icon up here, the camera and do Add view. And we'll just rename it front. Now if we want a different view, we'll go ahead and
do like a different one, something like that. So let's add that view as well
and we can rename a hero. You can do some other
ones, you can do side and stuff like that. But let's get back to let's
get back to lighting. Go back to this little sun icon and we'll add another light. So this one will move over
to this side and let's take the green and just put some
more light on the other side. Just switched the
green, but I want it to come from a different
I don't want to just let him completely
I want to do something like the light comes
from the back and see how, see how, when I have the light
coming from the back now, this white arrow and it gets
these nice pops of light. That's what I want. That's what I really,
really loved to do. So something like that. So it's sort of
lights up this side, but we do want some shadow here. We definitely want
some shadow there. So another light that
I like to do also. And let's see if
we can make him. Is he completely white? Oh, he is. Okay. So another thing
that I like to do is let's add a new light. Actually, we can turn this
one on white as well. So we'll add a new light. With this light, Let's go
ahead and make it white. I'm just going to
change the color just so we can see it
a little better. So I'm gonna make it I'll
make it a little warmer. Just so we don't confuse it. This third light. Let's go back into the menu. You can actually get to the
menu from here as well. The lights will always,
when you tap on a light, it will always have
this little box. That's a shortcut to the menu. So if we tap on that, I want it to be a spotlight. And I want this to
point to his face. So you just have to maneuver the light so it's
pointing in his face. We can change it to white. I'm gonna move it back up. I kinda want it to
be on an angle. I want it to be like just
straight onto his face. So I'll slide it a little
more over to that side. And then I'll just make
it point to his face. And I'll tap on the
little thing and I'll turn the intensity down. I don't want the
intensity be to, to break something like
that. They can sell it. That's a more natural level. I just wanted something I
definitely wanted something to light up lighten up his face. Okay. So I think three lights
is pretty good for now. The next thing that
I want to do is add the environment back. So we'll go back here. We can add the
environment, but we'll, we'll go to the bottom and we'll turn the exposure
all the way down. And then we can
slowly bring it up until we have what looks like
an like a natural level. I'll make it bigger here. So you can see, I think that looks pretty good. Something like that.
Hey, that looks good. Let's tap the eyes. And we can change them to tap on this little
globe here, the color. And we will take off all the roughness
and then hit paint. All the eyes are a
little bit glossy. And I think this looks
really, really cool. So I'm gonna go ahead
and save screenshot. Well, actually first
let me just save the project because it's
always good to save. And then I just want
to save a screenshot. It's always good to save
screenshots of your characters. And you can also see them with
a transparent background. And another little
trick that I do, I'm gonna go to the cog
input render resolution and raise that up to two. So now I'm gonna go
to for k and I have transparent background and
I'm going to export that. I feel comfortable
because I've already, I've already just
saved it again. I always, I always
like to say before I export like for k. Okay, good. So we'll come back and add some, will change the colors around
it has some cool colors.
20. Coloring: Okay, let's experiment with some color for our
little rascal here. He's looking so good. I'm very excited. So I like to use a lot of
layers when I'm adding colors. So we'll start with the head. I think I want a greenish sort
of a greenish beige color. Since we started calling him, since I started calling
him the baby predator, I have to hold I have to make
them reptile ish colors. So let's add a layer here, and we'll just call it, we'll call it base. It'd be the base color. And let's see what color
we want to make him. So I'm thinking sort
of like a greenish. You can turn the roughness up. I think roughness, roughness around for 60 is pretty good. Now we just have to find
what color we want. I'm thinking
something like this. We can always change it later. I'm thinking
something like that. So let's just do pain all. I think that's I think that's
a decent color so far. And we'll go ahead and
tap on the fingers. And actually another
thing that we can do to really help us here is we can, we'll take the head. So tap on the head, head. And let's see. The leg tentacles in the arms. The arms were the arms. The fingers are now the arms. Let's take that one. And let's simple merge
all those because those are all his skin. The tentacles are as well. But I might I think I want to, I think I want to color in the
bottom of them when I just sort of make the bottom
of them a little bit darker so I don't want
to add them in just now. We'll talk about that
a little more later. But now that we have his body, we'll call this one body. And now I can just paint it all. So now all of his body's
painted the same color. So I think that looks, that
looks good for the horns. So let's do more
of a beige color. Kind of like beige. Maybe like a light
like a light beige. It can be a little bit
more glossy than the skin. So the roughness is
down to about like maybe 300 or 250 or so. We'll paint all those look good. For the tentacles, I think will make them
a little bit darker. So maybe like
something like this. Like a dark brown. We can turn the roughness up, some, maybe something like that. And you can experiment,
experiment with these colors. I think these look pretty good. I do want to see what it would look like if they were green. So let's go back to the
tentacles and just paint them green and see what
they look like. Maybe like a darker
green, black. We want a lighter color
groups. The tentacles. About a lighter color. I do like them close
to this color, so we'll just make them a
little bit darker, I think. Whoops, I keep doing the head
instead of the tentacles. So what does make them
a little bit darker? I think something like
that looks pretty good. And maybe we'll change the
roughness a little bit. Make them a little
more glossier. Maybe just a tad. Okay. I'm liking that so far. I think it looks
pretty cute. I do. I'm not sure if I want
to make these these, I might want to make
this same color. So if you want to do
that, if you're on paint, just just hold your
finger over the color. And then you can just
take your paint tool, tap on the lower mandible, and then I can just
color it in manually. I think I think that might,
I might like that better. I think what I wanna do is
let's make a new layer. So now we'll name that green, and I'll just paint them green. So now they're on
that new layer. So if I want to get rid of them, I can always come back
and just turn that off. Okay. So this one will
match this color. We have the bottom lids, the load, the lower lids. So let's go ahead
and first pain all. And I think there's a good
I don't think we need to change the color
at all for those. For this eyebrow piece, this will be black. I'll turn the roughness up a bit because I don't want
any shadows on that. So that's black. And for the shirt, Let's go back to our
little reference image. So we'll go up here, we'll bring back the reference image. It looks pretty good. I'm feeling like some sort of either a grayish
or a maroon ish. So let's try, let's
try the maroon ish. First. I was thinking of
something like this. I think it needs
to be that rough. I was thinking of a sort of a
color like that underneath. Let's try the other colors. So let's go back here. We'll add a new layer. Name it option. What
if we did it more? What if we did a little
bit of metallic, more metallic color? So it could be
something like that, but I think I like
the other one better. Let's delete this. I think I think this color just feels a little
bit better to me. And then we have
underneath the shirt, we have the color,
we have this color. So I'm gonna grab this color and let's just see how
it looks if we color this color in. I'm
going to undo that. I feel like this color
needs to be this color. And then I think we should
make these the same color. So this undershirt can be maybe like, maybe like a, like a
gray might look nice, but also it could
be like a beige. They might also look nice. I think I like the beige. Let's make this beige as well. Let's make this grab the color of this on I
grabbed the belt again. And then maybe just
like a darker version like it could be like a brown even like maybe
even in brown leather ish. So I'll bring the
roughness off it, off of it a little bit. So maybe something like that. It's a little leather ish. And part of me
wants to smooth it. Let's see what happens
when we smooth it out a little bit. You can see the clay
is very, very soft. Clay is very, very soft. Nothing. I'm going to leave it. I think it looks
fine. I don't think I need to go too crazy. Okay. So we'll come
back and we'll just continue to color
them some more.
21. Color Details: Okay, So let's add some
details to his, to his skin. I kinda want this area to
be a little bit more beige. So I'll just go to paint. I'm going to grab the color. And I'm gonna go ahead
and add a new layer here. So add layer and I'm
going to call it page. Okay, so we have this
color and I'm just going to go up a
little bit lighter. Not too much. So something like that. And then I'm want to maybe
make it a little bit more. Something like that.
That looks good. So we don't want to paint all. We just want to use
the paintbrush. And I'm going to lower
it down to about 60%. And we're on our beige layer. And I'm just going to color
in kind of around the eyes. Remember? Symmetry is still on some coloring
around the eyes. Sorted just going around
as little as little face. Then I'll just do
another layer over the middle to kinda set
that to be nice. And clearly the other color
that we're using here, you can lower down the opacity. And if you want to add a little bit more to the
back of his head like that. So I think that
looks pretty good. So next, and here's
a little trick. You can take a brush. Let's see how do you do it? If you tap on it and
you can do clone, clone the smooth tool, and it will show up down here. So once you clone
this Move Tool, go to your clone, turn the
intensity all the way down, and then you can actually
just smooth out the color. So that's what I've done here. I have the regular smooth tool, I have the clone smooth
tool with 0 intensity. Now I'm just going to
smooth out this color. Okay? I think that looks pretty good. We can do the same thing
with I think the bottom of the tentacles
and then the bottom of the hands as well. I think those all need
to be that same color. So we're still in
the beige layer. I'm gonna make this brighter. And I'm just going to
color in his hands. I'll make the make the brush
smaller switch a little bit easier to maneuver. Let's go ahead and Solo. Get everything else
out of the way. I'm gonna go ahead and
bring it up to a 100%. Sure we get this little thumb. Then I'm gonna go to my smooth, and I'm just going to
smooth this out a bit. And you can always
take the paint and you can always erase. If you decide you want
a more of a hard line, then you can erase it like that. Mr. Erasing, sometimes I get it. It starts to go a little bit
too much over the fingers. So I just wanted to clean
it up a little bit. Okay. I think that
looks pretty good. I also just wanna do the bottom
of the tentacles as well. So I'm going to
paint those as well. Oops, let's get it off a race. Here we go. Okay, it looks good. I'll do the same thing
with the other ones. I'm not gonna be too too crazy about where the paint goes. Okay. Nice. So now he's painted
underneath and I'll take the smooth tool and just
want to smooth that out. Or maybe I won't. Maybe it looks good if it's, if it's not smooth. Let's see. If it looks better
when it's not smooth, and just turn the
paint down and you can just make sure that
it looks good. Something like that. It looks kinda nice when it's not smooth. Loops taken off of a race. Because it sort of
makes it look like just a flat bottom of
the the tentacles. And I like that. Go to erase so I
can clean it up. I do like to keep you want to keep your paint and
nice and clean. Now it looks clean. Look clean. This one has a little
bit of an issue. So we'll just sort of pretty
this one up a little bit. Okay. So we'll go un-solo.
I think that looks good. Okay, so before we finish
off this video and other thing that I
like to do is add some shadows to certain areas. So I'm going to tap
on the skin again. And I'm going to
add a layer and I'm gonna name this one darker. I'm actually going to place it underneath using this here. That's the wrong one.
I'm going to undo that, this little arrow sign, so I'm going to place it
underneath the beige. So now I'm gonna go to paint. I'm going to grab this color. And I'm gonna make it darker. Going to get it off of a race. I'm just going to darken
up the areas where it comes into contact
with other things. So darken it up a little bit. Maybe even like down
here, down the crevasses. And then I'll take my smooth. I might've made it too dark, so we'll see how it works. It works well. So
now I'm just taking my smooth and I'm
just smoothing out. So I've just darken the
color a little bit. Smooth out the creases. I think that looks
good, so I'm going to do that on the arms as well. Paint darker color. You can see I'm just
kinda going around. Let me get rid of this
for the time being. I'm just going to
hide the sphere. So it's not in my way. Whoops. Whoops. I don't know what I was just
on the wrong thing. Now I'll use my smooth and
I'll just smooth this out. Okay. We can do the same
thing to the neck area. So we'll just paint paint along their use or smooth and
just smooth it out. I really loved doing like
subtle details like this. I think it's I think it's great. You guys probably already
know that about me. And I also want to do
it to these tentacles. So let's take the
tentacles and we'll grab the color will make
them darker loops. We want to make sure that we're painting on the tentacles. I'm just gonna do this
darker color around the outsides of
all the tentacles. Right? Where it comes out, where they come out of the head. This is the great part
about the symmetry is I don't have to do all this
twice on both sides. Loved, that will do
it on here as well. Kay, smooth. And I'll try to smooth this out
as quickly as possible. You guys can all do this
in your own time because it's very easy once you kinda get the hang
of what I'm doing. Loops, just makes sure that
you tap the correct layer. Okay, Just smoothies
out, nice and smooth. And last but not least, Smith. Okay, it looks good for now. And we'll come back. We'll do the same
thing to these horns. And we'll give them a little bit more
details on his face.
22. Freckles: Okay, so let's add a
little bit more detail. The horns. We'll grab the
color like we did before. We can go in and paint tool. We'll grab this color. I'll tap on it,
will just make it a little bit darker and
maybe a little bit warmer. Then we'll just paint
along the bottom. And it's being
really, really crazy because we haven't
really meshed the horn. So it's a very, still a very
simple like small shape. That's why it's like jagged. But that's actually
fine because it makes it easier to use our clone smooth tool or smooth tool with
no, no intensity. And just move this in. Sometimes it gets crazy though. I must have moved to
a different layer. Sometimes it does, sometimes it just moved to a different layer. Okay, those look great. Here's another little pro
tool. I shouldn't say that. I'm not having them off. I consider myself a pro. Let's take the paint,
Let's grab this, will make it a little darker. And you can use the crease tool. You can just add in like
little elements like this. It's sort of give the horn
like a little bit of texture. You can smooth them
out so they're not. So just to give it a little bit of that
texture, I love it. Love it. Okay. So he has here, he has some little bit of
a little round thing here. So I think for that, we're
going to use a new layer. We'll call it details. And maybe we'll make
it sort of like a darkish green color. Maybe. Let's use clay. Let's see how Clay
works without didn't topo doesn't work very well. So let's turn on
dynamic topology. Enabled. Let's see if we can see the difference
here. It's a big difference. But we want to use
clay with the color, so I have to turn that, actually have to tap on the color. So now what we'll do
it with the color. So I'm just going to
make it sort of like a shape like this. I think that looks pretty good. I'm certain that smooth
it out a little bit. Something like that. I'll turn the intensity
all the way up. So something like this, I think that looks pretty good. I'll just make this
smooth, very small. And then I'll just
smooth this out. Then I might be
able to use crease. I don't need dynamic topology, so I'll turn that off. And sometimes you can just
sort of go around things. And they help shape
whatever you're trying to make. Something like that. They can take paint and
erase erase around it. And I don't know
if I want to leave dynamic typology on or off. And if you think these
are coming up too high, you can take flatten. I want to turn
dynamic typology off. You can take flattened, make your brush pretty small
and you can always flatten this out to probably
look better. Okay, I think that looks good. Okay, so now we can add some some sort of
freckles if we want. Let's add them on a new layer. We'll call it freckles. What we're gonna do on
this layer is pretty cool. So I've included some, I've included the
freckles Alpha. So this is when you'll
use the alphabet. You can just go to
this little box here with a line through it. Add the plus photos. Then just import your
Alpha, so does go to your, that your freckles Alpha
and import that in. And it will show up
probably around here. Once you do that, you
will see it here. Just tap on that. And so we're going to use the paint
and we're going to use the alphabet and
make the freckles. So we're gonna go into
the paint options. So we go here to this little, this little stroke
or whatever it is. And we'll see, we can
see the alpha here. Here are my settings. I just want to make
sure that you can see my settings so you know that
we have the same settings. I'm going to change the falloff to this, the straight line. Okay? Now for these settings, I'm just going to change the stroke type to
grab dynamic radius. Okay? And then we should
be pretty good to go. So again, we're using
the paint tool. We're using a new layer called freckles that we haven't
done anything with. And as for here, this is where this
gets important. My intensity is at about 20 and the brush size is a little over a 100,
maybe like a 110. And I'm just gonna, I'm just going to see when you drag it sort of makes
those marks like that. So that's what we want. And if you make this smaller, these are gonna be smaller. I think this is a good size. Also, the bigger
that you make it, the bigger the dots get. So just keep it small and just
sort of add some texture. So see, I'm just adding, I'm just adding some
texture to the skin. Some of them you can
make a little bit bigger. If you want. Maybe back here on the
head, a little bit bigger. You can experiment and maybe
you want to be a little bit, a little bit darker. Maybe even. I like mine a little bit lighter. I like them, I think
a little bit smaller. I definitely want to
put some on the nose, some around here for his eyes. And don't be afraid
to like kinda go back if you don't like the if you don't like the
patterns that you've made, just go back and just just
change them until they look. I'm kinda just like
spreading them out. I don't want, I mean, I
know they're symmetrical because I'm using
the symmetry tool, but I don't want them to look
too crazy, too symmetrical. So you can see I'm just
using I'm just doing little small spurts even
in different places. Just as her to give it a
little a little flavor. I think that looks
really, really good. Can add some on the neck. Maybe. You can add some
on the legs too. Why not? On the arms? I can add some little freckles. Okay. So let's bring back our
little sphere on the bottom. And let's just color this in. Maybe like a grayish you Arena metal mess
up a little bit. Just paint it. That looks good. Maybe you can even you can even smooth around if it looks a little funny, smooth it out. I don't think it
has to be perfect. Not too worried about the
sphere. It's a little weird. It looks better Street. Okay. I'll do, I'll Ramesh it. Ramesh the sphere. So we'll go here and go to
voxel will just remeasure it. And then maybe we can smooth it out without getting all crazy. Okay, So last but not least, we'll do the eyes
smoothing out the edges. This little sphere.
Marketing is smooth.
23. Painting Pupils: Okay, so that's that. So
let's just do as eyes now. So it has really,
really big eyes. Let's tap on the eyes
is make a new layer. We'll do this pupil one. And here's another tool that I, that I cloned, a
cloned the paint tool. But you don't have to
call him the painful. You can just do this with a regular pen
tool if you'd like, or if you'd like to clone it, just hit Clone and
then take the clone. And unfortunately
it doesn't keep, it isn't cheap these settings. But I find it a little
bit easier to clone it. And then we'll go to
this little option here. And first I want
to make it flat. Then grabbed dynamic radius. So now we just have an extra, an extra paintbrush
with those settings. So I'm gonna go here and
I'm going to go to black. I don't know if we went
all the way black. Maybe not all the way
black but close to black. All the way black. We want to bring the roughness all the way down so it's glossy. Oh, we want to do the
middle in this town too. Okay, So now we're
using our paint tool. But we're just using we flattened out the falloff and we did grabbed
dynamic radius. So now go back into here. Let's hit Save
first just in case. So we'll go back into
this little alphas. And will you find this circle? So here we have the circle. So we tap on that. We tap back on the eye. Now we can symmetries to lawn. It's gonna be really
ugly and jagged. So that's not going to work even though they do look cute. So let's undo that, will take the I, will
go back to the grid. Multi-rate subdivide. Subdivide. Unfortunately, it
makes the eyes very, very dense, but that's the
only way to get clear. Clear eyes will do
something like this. Which looks pretty good. It looks really cute. And just kinda see where
you have the best. Where they kinda look the best. I think that looks really cute. And you can figure
out how big you actually want them
that might be too big. Maybe you might want them
a little bit smaller. But I like I like the bigger
eyes I kinda like, is like. So let's save that as pupil one. We can make a new layer. We can hide that layer. And we can try
something else out, like maybe this big. That's kinda cute. Let's add a new layer and
let's just try something else. If it was a little
bit closer together. And remember to always air closer together when
you're doing eyes. You want them to be a
little closer together. This actually looks like
he's a little cross-eyed. But instead of, you
don't want them to be in the middle like this. You want them to be sort of
in the, towards one another. Otherwise, it'll
look like a doll, like it will look lifeless. So you always want to have
them sort of close to it. Inwards. You want to have them inwards? Okay. I think those are good. I don't know which one I like best. These look almost
exactly the same. So I think I like
one of these best. I think I like this.
If you want it to do, if you wanted to make them
make an make the eyes. If you wanted to
have them looking like both in one direction, then you can just
turn off symmetry and you'll just have to
do them one at a time, like maybe one is over here. Then you'd have to just figure out how to get
it to look right. And it can be a little tricky
to get them matched up. That was weird.
So it takes some, you know, it's a, it's
a bit tough to get them looking in
different directions. But it just takes work and you have to figure out
what looks right. And also the eyes are just
so big that it makes it a little difficult to go. That's actually not too bad. The key is to sort of
match up these lines. That's like, that's
like part of the key. But it's a little, it's
a little difficult to match them up. It just takes a lot of work, um, but be careful with that
because that can really, really ruined, like even
if you make a good sculpt, the eyes have to be really good. Like if I was if I was making this, I
would just keep going. If I wanted I wanted
him looking that way. I will just keep going until I got something that I liked. But I'm not gonna go too
crazy because I think forward is is just
fine for this. This is the one I liked. I
think that's the one I liked. Okay, so let's put some
final details so we can. Another layer that I do on
the eyes that I always do is the shadow will take black, will lower this
down to about half. And we'll probably
even lower it more. It looks pretty good. So we'll go to our
regular paintbrush. And we'll put the
intensity all the way up to radius can be, and
that'll be that big. And let's make sure we
get rid of our Alphas. So we'll just tap that one and
then tap the white square. So it should have the
red line through it. And also let's go back
to the brush and just put it to one of these guys. Now it should be back
to a regular brush. And also go back to here and turn off grabbed dynamic
radius, put it back to that. So remember, just go to this little paintbrush, this toolbox. And this should be white. I'm going to preset
and go back to that. Glossy black. And remember the layer
is down like 50%. So we'll start here
and then we'll just make our brush a
little smaller. Here we go. So we'll just do
something like that. Whoops. And you know what
turns symmetry back on? And then when you
do it on one side, you don't have to
go and do it on the other side.
Something like that. You can actually make
it a little higher. And also with the crease. So now we're back on
the logo to darker. Actually, no, we have
to go above darker. So let's go to Details. Want to go to Details? And let's take this color. Make it a little darker. We'll take our crease
and then we're with tap the color that way
the color will show up. We'll make it really small. And then we can add
that color in there. That really gives, gives
it some extra depth. We can take smooth, you can turn the
intensity down on smooth, and we can just smooth
it a little bit. Just so it's not so jagged. Managed to take your crease
and just go over it again.
24. Looking Snazzy: Okay, so we'll just
take our crease. We're using the darker
color, very small. And we'll just make this just gives it a nice and dark. So it really shows that separation or
that like that depth. So I'm going to use smooth
and make it really small. I'm just going to try to smooth out some of this
around the mouth. It looks pretty good.
And then I'll just going to take the crease again. I'm just kinda give
it a little bit more depth there in the mouse. And of course you can
do some extra painting. He has some paint on his shirt. So we'll do I feel
like it would be very light, something like that. It will go to Paint. Make
the paintbrush pretty small. So not a clothing designer, but it's kinda fun to,
kinda fun to do that. Okay, so now let's maybe here's like a V. Maybe this goes
around like this. And it comes to a v here. So maybe it comes to a V, maybe it goes all
the way around. Can use the eraser to
clean it up a little bit. Let's do solo so we can sort of see it a
little bit better. I think that looks good. We can take a race
and maybe we'll add something like this down the middle. Something like that. If you think it's too much, you can always go to the
layer and you can sort of, it's not so bright. Compensate for that cone. Please just have fun
with this experiment. The hardware has already done
now it's just time to have fun with your sculpt
and just enjoy it. Enjoy what you've made. So let's go ahead and save. The only other thing I can
think about is maybe I want to take advantage of
this last light that we have. We do have one more light. If I want to change the
color a little bit. Make it a spotlight. Maybe we'll put it behind me. We can get some fun glares. On the opposite side. The cone angle. So essentially just
taking the light, I've put it behind pointing
at the back of the head. And I'll just go into the
options and make the cone, you know, a little bit bigger. Like that. Let's
see if I make this white and see if we make
it a little cooler. A little warmer. What we like. I'll save this light for now. I'll just keep it white. I'll just lower the intensity. I'll lower the intensity
just so it's a little bit, What's a little something? But I think it looks
good without it. And later on, I
think I can change the color of the background
and then change the color. I mean, I guess I
should do that now. Let's save. So I don't know if
I'm going to save this part because I really
think it looks great. Let's go here. Let's turn off the reference image and let's change the color
of the background. It's maybe like a nice purplish. Look good. Something like that.
And then I would change the color of
this last light. Purplish. Turn the intensity up. That way. What you're seeing is a bit of
that environment, you know, reflecting
back on the character. So what happens if we put it
a little bit more on top? Actually liked it. I liked it back to them towards the side. So let's go back to our front. And there we have it. I think I think it looks great. I'm really happy with it.
I think it looks great. It looks better than
what I imagined. Hopefully you guys enjoyed it. Take all the time that you need. I mean, it's not
an exact science because there's so
much variation. There is so much different
than you can do. So just experiment, keep going, keep it up, play
with the lighting. There's so much that
it makes this stuff really fun to, really fun to do. And I love, I love doing it. A little bit brighter. Just a tad bit. I think that'll be better. I'm just gonna go here
and turn the lights off. And I might as well save it. I can always change it later.
I'm going to keep a gray. I'm going to save
this as, saved as, so now I'm just going
to export it as four K. Whoops, I'm going to turn off. Transparent background.
Looks so good. Okay. There we have our
little baby predator slash, little, cute little monster
that we drew in Procreate. Alright, I'll see you
guys in the next video. We'll just wrap it up, chop it up, and I'll see
you in the next one.
25. Post Process: So post-processing, you just go to this little shutter button. You hit post-processing. And that actually will make
it look very, very real. So just, you know, you can go through these and sort of play
around with them. I usually do the
ambient occlusion. Here is without
Here it is width, so it just adds those nice
shadows. It looks pretty good. You can adjust and
play around with it. And then you have
depth of field also. So here's without Here's width. Depth of field always
makes it look really good. It just looks away more
natural with that. Bloom. If you have a really bright
highlight, then bloom, we'll kinda blow it out and make it look
very, very bright. But you can
experiment with that. Then you have all these
are the ones that you can experiment with. Vignette is sort of
nice to mix a vignette. And let's turn it
down a little bit. I do like vignette. But here's without,
Here's width. There's a lot of options here, a lot of fun things that
you can play around with, different ones to turn that
on before you print it. Here's without, looks
pretty good still without. But here as with, just adds all those nice shadows and things that you need
for your character. So I just wanted to make sure
that I came back through and showed you showed you that actually this might
be the wrong color. This should actually
be a lighter color. Let's go to paint. And let's go to the
eyelids. The low lids. Yeah, I think those should
actually be this color. I think that's actually better. That's actually correct. And also if you really
want to go crazy, I don't know if I'm
going to keep this, but a lot of
characters I do add. Let's add another layer
and do an color reddish. So sometimes it just
this just shows that there's blood and the cheeks and kinda makes it
look realistic. I'm going to turn the intensity
down to like 35 or so. Radius about 70. And then
I'm just going to use red. And let's see how this looks. I'm going to make the
brush bigger actually. Sometimes you just
softly add a nice rouge, maybe a little bit
on the nose area. Turn the intensity down
a little bit more. Maybe a little bit
around the eyes. Like so. Maybe you can add
some to his little hands. And maybe even this
little little tentacles, maybe just a little smudge here. Now I'm gonna go back to our smooth tool
with 0 intensity. The intensity is all the
way down and then make the brush a little bit big
so we can just smooth. And we'll just smooth out the ones we've put
on his, on his face. Smooth it out and then we go to the layer and just lower
the layer until you just barely see it. Like that. We can look at it without width. A little bit harder. There we go and there he is with this little
extra steps like that little bit of redness
just adds a little bit of life, a life to them. All these little details make that they add up to
make a big difference. So I think I think
that's everything. I can't believe I
almost forgot that. Um, I don't want to
leave you guys hanging. Alright. So we'll officially really
see you in the next one. I don't think there's
anything else. I forgot. We'll see.
26. Thank You! : All right guys, thank you so
much for taking this class. I hope you enjoyed
it. I hope you made something that
you're proud of. Of course. Have fun with it, keep going, keep going with it. Like change things. You
can make environments. You can make like little, little plants and
things like that. Keep going with it,
keep working on it. Change the colors,
have fun with it, make it your own, and
please upload it. I can't wait to
see what you make. You can upload it
here to the projects, but also tag me on social media. You know, I'll post it on
my, post it on my story. Things like that. I
love boosting you guys. I love seeing your work. Of course, I'm on YouTube. I'll probably do a YouTube live. So if you're seeing this a
little bit further down, just go back and look for the actually have a
Skillshare playlist. So you can go to my
Skillshare playlist, playlist and you
can see different, different lives that I've done that or in conjunction
with different classes. So I'll do a live in conjunction with this class
where I keep working on him and maybe change things
and change colors because I always do that
after I finish sculpting. It's just part of the fun
for me sometimes I just like I can't I can't stop. I have to stop at some point in time
because it's a class, but I can't stop, of course, Instagram drug-free,
Dave, TikTok, drug-free Dave, um,
and where else? Also? Facebook, my videos are
doing really, really cool. And Facebook, I don't know
if you're on Facebook. They've read drug-free, Dave. I think Facebook.com
slash drug-free. Dave, should bring you
to my regular page and you can follow me there and check out
videos and stuff there. But yeah, I think I
think that's about it. The next class I'm
going to do is the actual sketch that I
used to make these class. So that's gonna be in
Procreate again on the iPad. And we're going to
use symmetry to just make these really
cool characters. And that's how I actually,
how I made this character. I just use symmetry
and I just was doodling and making characters
for the other class. So that's gonna be
the next class. And of course there's gonna
be a lot more classes, 2D and 3D. I love teaching here. I love making new classes, and I love all the feedback
I get from everyone. So we're just going to
keep this thing going, keep learning, keep
getting better. Because it is what it
is, that's what we do. Alright, so with that said, keep drawing, keep sculpting. Don't forget to post
your baby predator and shout me out if you post
it on social media. So I can give you
a little boost. Keep drawing, keep sculpting. I wonder how many times
I'm going to say that. Keep drawing, keep sculpting. I'll see you all
in the next video.
 Dave Reed, 2D & 3D Illustrator - Brooklyn, NY