Transcripts
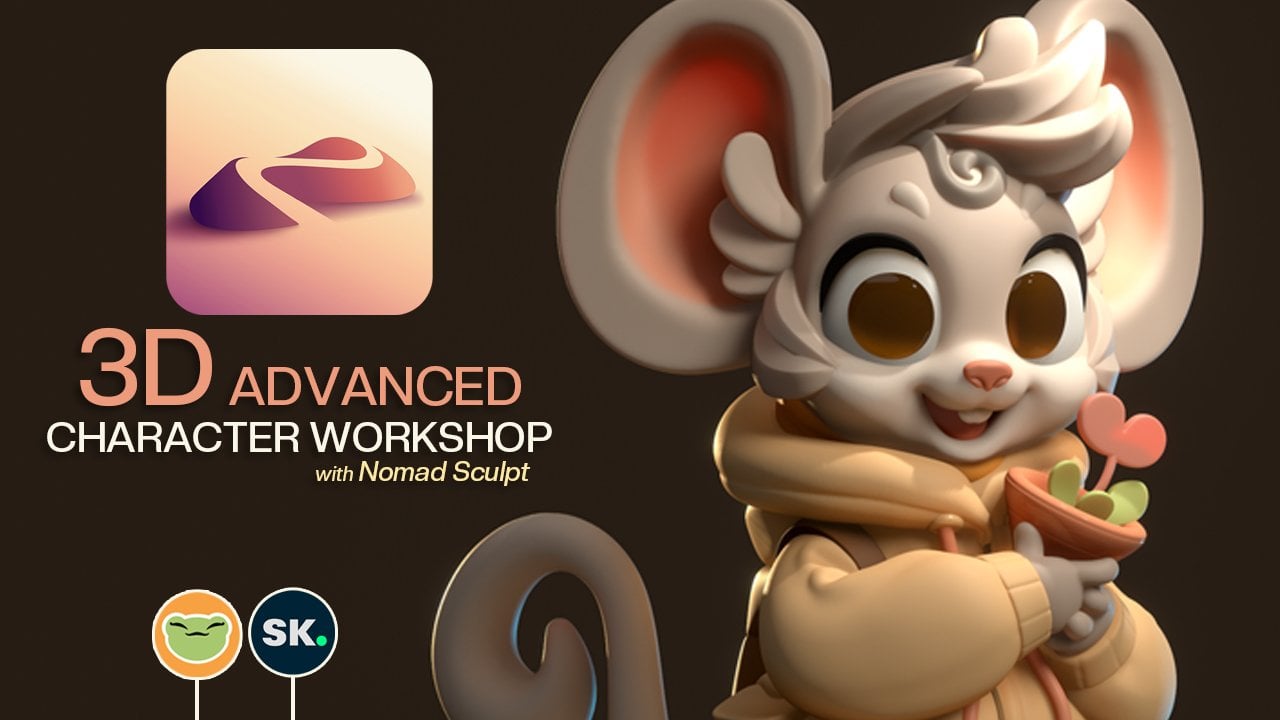
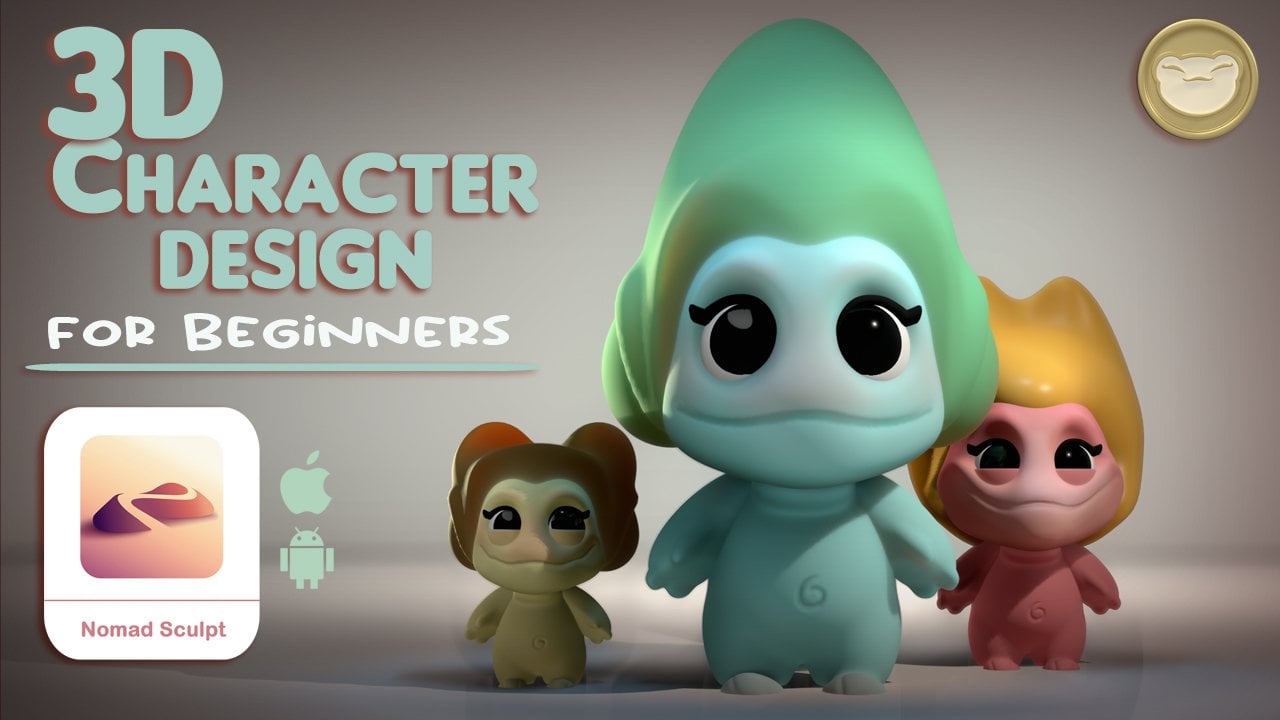
1. 3D Character Design Workshop : I created this entire
three D Sculpt on my ipad in a program
called Nomad Sculpted. I love two D character design. But being able to turn
them into three D has just been welcome to my three
D character workshop. In Nomad Sculpt, I'm
a drug free Dave. And I've been drawing
traditionally forever, right up to the time I
discovered digital art. With procreate, the
ability to design characters in three D has
been a game changer for me. It also ignited passions in art. I didn't even know I had, I've been able to export
my three D sculpts to blender for more
in depth work. And I've also started creating physical art hold in my hands with resin
three D printing. This class is geared
towards those of you who know the basics of nomatsculpt and just want to get better at three
D character design. Here's what we'll
go over in class. Opening and preparing
our scene for sculpting, importing our reference image, blocking out our character using simple shapes or primitives. Tailoring the shapes to
exactly what we need. Adding details like teeth,
tongue and fingers. Simple scene lighting
and painting techniques. Post processing to
make our art ready for render or to send to
other applications. If you're not sure if you're experienced enough
to take this course, I wouldn't worry
too much about it. I'll go over each step I'm
making and why I'm making it. If you've been working
in Nod for a while, you'll still discover new
things to add to your arsenal. From my workflow, I continue
to learn new aspects of the program and
more efficient ways to sculpt with each
and every project. Speaking of projects,
in the next video, I'll go over what
we'll create in class, and I'll also expand
on ways that you can switch things up and
really make it your own. Once again, I'm drug free, Dave, and I look forward
to seeing you in class.
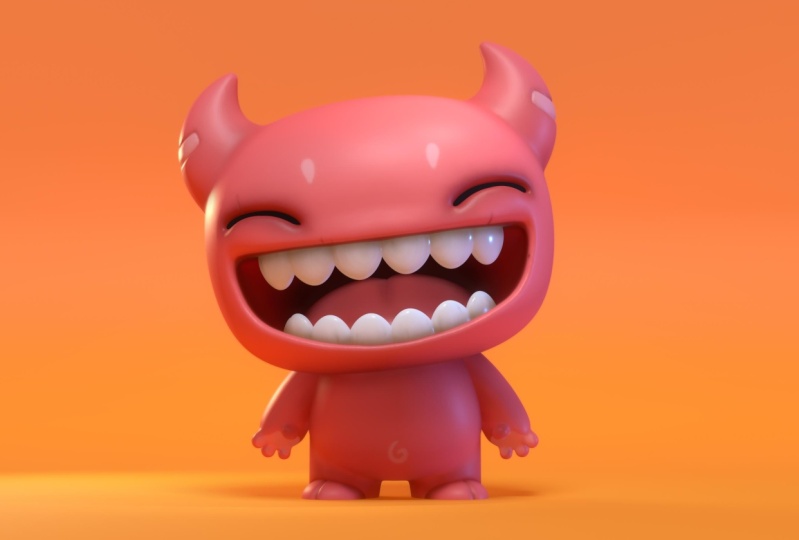
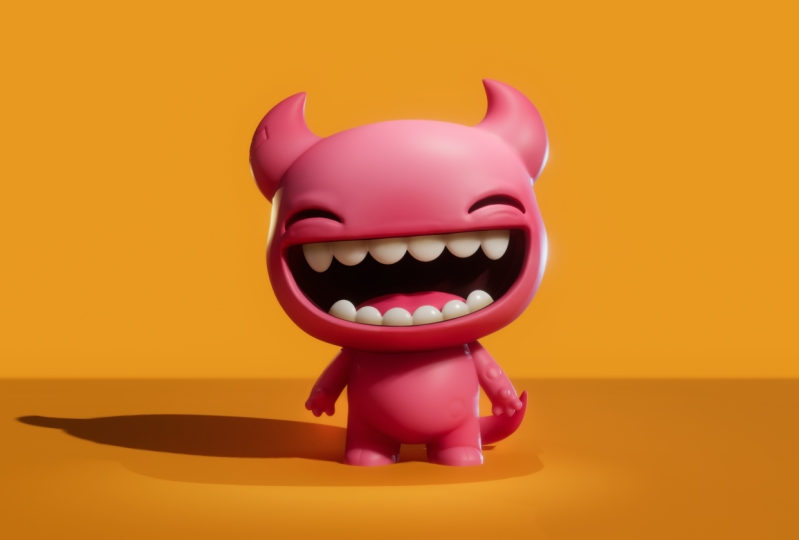
2. Class Project: So this class project will not only be the character that
we create in this class, but I'd also really love to see various different types
of the character. I want to see you do your thing, I want you to expand on it. I want you to work on it. I want you to really make it your own. All right? So this is
essentially what your character will look like once you
get through the class, but there's so many fun
things that you can do as you go through. Just
think about these things. Once you're going through
everything for the first time, just keep in mind
the things that we're doing and things
that you can change. Also, one thing that you can do, if you get to a point
and you're like, oh, we get to the teeth
and you think, I really like to do the teeth a different way, I want
to come back to it. All you have to do is go here and save As, and then hit New. Then you can save it
as a new version. This will be CP
for class project. Now we have lucky
CP and you have your other one that will
still be in there somewhere. This is the original one
that I started with. This is the new one CP. Now that you have CP,
I'm going I'm going to go to the teeth and I'm
just going to separate. If you need to come
back to this video, you can just remember that
you can come back and you can separate things as long as
you've just joined them. If you've joined them you can always go back and separate. If you've axial remesh that's different but things like teeth. Once you finish
with the tutorial, you'll be able to come
back and separate them. Let's say you want to
just use your gizmo. You can change the teeth round. Maybe you want to act actually this to this tooth in. There we go. If I want to select these, maybe I want to adjust these and give him like little fangs. You can do something like
that. Might be cool. You can also use move. We'll turn on symmetry
and we'll go to the head. You can use move, let me
turn stroke, painting off. And you can, you can
adjust his head. There's so many things
you can do, literally, just like head shape will drastically change the
look of your character. I have to adjust the teeth. Now, I'm just going to
join them all again. Then what I'm going
to do is split. I'm going to use rectangle and I'm going to split
these bottom ones. Now the bottom ones, I
can adjust as I need. I can push them down, maybe make them bigger if
I want things like that. You can also add new shapes in. Let's say you, let's say you wanted to do some
bigger horns or something on him, that's pretty easy. Or let's say we want
to use the sphere. We'll paint the
sphere. You don't have to follow like what
I'm doing to the T. I really just want to
show you that there's so many interesting
things you can do that are really simple. I'm going to mirror, even
if you're pretty new, just come back and you can
follow what I'm doing here. If you have any ideas, I'm going to validate
this sphere. And then I'm going to use move. We don't need symmetry
because we're in a mirror. And we'll talk about
mirrors a lot in class. I'm going
to stretch this, kind of push them
back a little bit, tilt them back,
something like this. Maybe I want to take these
fears and clone them. Maybe make them smaller and kind of put
them in the front. And then maybe you stretch
them out. Something like that. You can play around with
the different tools. In flight is great. If you have horns or
something like this, it's really easy to just add some details like
that around them. You can give them a nose. Let's use a sphere. I use spheres for everything. I love using spheres. This
class project is so long, but that's one of
my favorite things. I just love when you can even give them around
nose like that. How funny is that
to validate it? And you can use, I love using you can just make him a really interesting character just by
adding some new shapes. Looks like stitch,
actually the colors. You can change the colors.
You can make it white. You can make it like a
dark chocolate color if you want, we'll do
something like that. The tongue maybe is a little purple and you have the teeth, let's make them nice and glossy. As you see, there's
tons of things you can do to your character to
really make it unique. Just have fun with
it, move it around, experiment with the tools,
see what you come up with. I want to see one that you
have that looks like mine. And then just make one
that's really crazy, make one that's really
fun and just go for it. Once you finish
your class project, please upload them to the
projects and resources to have. You should be proud of
your class projects. Don't ever feel you have to compare your art to anyone else. We're all on different levels on different journeys and we
all have different tastes. Next up, we'll be
getting started. We'll begin by importing
our reference image and setting up our scene so we can begin the sculpting process.
3. Getting Started: All right, so let's get started. Firstly, this should
be your default scene. We have our sphere here, the grid in the background. If you don't see the
grid, it'll be down here. If you don't see it down here, then it will be up
here in the cog here. And you can turn it on
and off there also. Just so you're aware
of these shortcuts, you can adjust them here. Okay, first things first, let's bring in our
reference image. We want to tap the photo here. We'll tap reference image. Then you tap on the image, her on whatever image is there. And let's import, just go to the place where
you saved it. Photos. I think mine is just in
my photos here somewhere. There we go. And add on. It'll show up on screen. You can hit transform. Once you hit transform,
you can move it around. I usually like to
put it right in the, snug in this little
corner right here. Then you tap on the screen and it'll go back to
regular Sculp mode. I always like to sculpt Tcap, which I forgot to mention
if yours is in PBR, that's just regular white.
I like to sculpt in. If you tap G clay, you
can tap on the clay. It has all these
different mat caps. I just use this default one, it just makes it easier to
see, easier to work with. I'm also going to
turn off the grid. Let's make sure that we
tap this little camera. We want to make sure that
we're in orthographic, that way we don't have any
perspective distortion when we're sculpting. There is one last thing
that I want to do. Let's turn the grid back on. Oh, there it is, that we disappeared
on me. Very odd. Anyway, also this
little cube thing, you may see me tap this. So you can just quickly
snap to the certain points. If for some reason you
don't see that it is, it's in one of the snap cube. Snap cube. On and off snap cube. The one thing that I
like to do before I start sculpting is
just make some ground. I use this red line
as a horizon line. That's just what I use as a base for the ground or the floor. A plane would be
the most efficient. The only problem with a plane is if you're looking
at it straight on, you actually won't see it. What I add, I like to use a box or a cylinder.
I'll use a cylinder. Let's take this little green, we'll just bring
it in like that. You can also use gizmo and
we'll just make it bigger. The gizmo is just
the controller. We'll just make this
smaller like this. Now I'm just going to put it, it's right below the edge, is right with that red line. I'll just move this sphere up. Now we have our base. This is going to be our floor. And also really quick, let's tap the gizmo button here and let's tap these
three little dots. Let's bring the post
subdivision to two, that way it looks
nice and round. Let's just validate it. Let's go over to here cylinder. Let's tap three dots name, we're just going to
change the name to floor. I usually do L, R. Okay, good. Now that we have that, I
don't need the grid anymore, so we can just work this way even though we're
using Met caps. I like to use my own
custom environment. Essentially what the
environment will do. Just to show you, I'll
go back to lit PBR, the environment which is still in this lighting
panel, it's down here. If I tap on this,
you're probably going to have one of these
default environments. You can see they slightly
change the color. Actually I can turn the exposure up so you can see it
a little bit better. They change the
color in the tone, actually, the light sources
that hit the sphere. I've included my own environment that you guys can download. It's in the downloads
and resources, or projects and resources.
You can download that. All you need to do is just
go to this little sun here. Go down to the environment tab. Tap on the environment. Tap. Import photos, and then just find the environment
image that you've saved. Tap on it and Tap, add that way it'll show up here later on when we go into lighting and things like
that. We'll go back to this. I'm just going to put mine back, but you can just leave yours at default when we're in Meca. This doesn't really
come into play, but it's something that
will come into play later. I just thought it was a good
time to just show you now. So that way you have that set
up and when we get to it, you won't have to import
it in the program. I'm just going to
go back to Metcap. All right, now in
the next video, we can start blocking
the character, which is basically getting all the elements and
shapes together, making a really rough rudimentary three D
sketch of our character. And then we'll move
along from there, just refining and refining, until we have our
cute character.
4. Blocking: One of the things
I think is most important about my style, my formula, how I
go into sculpting. What saved me from a lot of anxiety when I'm thinking about sculpting characters
is literally just looking at it and saying, okay, when a character is done, it seems very complicated. But when I'm looking at this, I see a sphere that I have to do a little bit
of manipulating a sphere, but nothing really
too complicated. Two horns, very easy. We can do that with
the tube tool. You could even do it
with two spheres, but I think we'll
use the tube tool, we'll do those on top, then another sphere
for the body. The leg can be two cylinders that get slightly
bigger on the top. The arms can be two cylinders
as well, that cylinder, two tubes maybe with a round the round at the end and then you just
add the little fingers. The tail can be another tube. The tail can really go anywhere, it doesn't have to
go up into the back. That's pretty much it. We'll use a mask and we'll
make this shape. And then we'll invert the mask and push it in to the head. That will give us
this open space. Then we just a separate little
teeth and separate tongue. Then we can do the
same cut out like we did with the
mouth for the eyes. Then the details is just
the icing on the cake. When I think about anything, when I look at any sculpt, it's not really that complicated because my brain automatically
breaks everything down. It's a really important
thing that you do, whether it's humans,
characters, animals, anatomy. Just break it down into
the shapes we have. Where are they?
If you go to add, you have your primitives, that's all you need to make. Pretty much anything,
I don't know. I just think it's
important to drive home that when you're
making characters, it's important that
you break down everything into the shapes, no matter how complicated it is. That's the method of thinking
that I think works and just saves you from anxiety and not knowing where to start.
I use a big head. That's what we'll start with.
We'll start with the head, we'll just bring it up there. Blocking is really easy. Let's see the body that we can actually just
use this sphere and we can just use clone. We'll just tap the
three dots and hit clone. This one
will be the head. We'll just rename it head. This can be the body,
we can rename it. Then we'll just take the
gizmo, the green arrow, and we can just drag it down and make it a
little bit smaller. We don't have to do
anything too crazy yet. Maybe we'll bring everything up a little bit more just so we have a little bit more space. Okay, The legs can be cylinders. We'll go here, add cylinder, then we'll just use
our gizmo to shrink, move it up, we'll move it over. It'll be something
like that eventually. Sometimes I just,
I do one side at a time because we can always
mirror it to the other side. Now, that's fine. Well, we can mirror
it for now just so we can see our shape. Here's our mirror
that we just made. Here is the actual cylinder. If you want to adjust
these, it's important to know that you have
to tap the cylinder. That's where you can
move these all around. Also change the
name of the mirror, two legs that whenever
you get to validating it, when we want to merge
everything together, it will take the
name of the legs. Okay. I'm just going
to tap head that way. When I add another shape, it
doesn't go into this mirror, it just goes in its own
place. We'll do add. We want to do another
sphere or do we want to do a cylinder or a tube? Let's do a tube.
We'll tap tube here and we can use path it's
coming from in the head. We'll just start there. Tap down on the
screen, drag lift up. I guess we can do one. If you want to do two joints, you can just tap again. Or you can just do one
long arm like this. Which is closer to
what the references. Then we just tap the screen dot, now we have an arm, but I'm going to
turn it to its side and I'm just going to move it into place it a little
bit in front but Make sure we tap front.
Something like that. Again, of course we can
mirror it to the other side. Those might be a
little too forward, so I'm just going to hit the gizmo and just
move them back. Okay, now we have this
mirror that we'll rename. We'll tap the three dots
and we'll call this arms. Okay, now let's do the horns. We'll do the same
thing. We'll use the, let's get out of here. I'll just tap head. We'll use the tube and we'll
start up here. Let's use path again. Actually let's use curve. We'll just make a
little curve here that sometimes it gets a
little funny towards the end, you can bring these nodes together and then they do
what they're supposed to do. Okay? Now we'll just
tap radius up here. What that allows us to
do is make this side, this side big because we have
the two dots on the radius. Of course, you can
tap it again and then you can adjust any of the nodes where you can tap
once more with just one. Then everything is just one
size, we'll do the two. It seems like this is
a little bit wider here, something like this. We may not even need
this many nodes. Actually, it looks better
with that extra node there. It's a little bit more round, we think it's
something like this. Let's hit radius again, so we can adjust these inside
spheres if we need to. Sometimes it gets a
little funny like that. Here we go. Maybe we just need to bend that
a little bit more. Okay, that's pretty
good for now. Of course, we'll have to adjust these and that won't
be too difficult. We'll just tap the
mirror so we can see. I also like to put them
in a similar position. Let's hit a line. We'll be here. When you hit a line, it just
aligns to the world origin. What I mean by world origin
is that this will be, if we're looking at
it, at the front, this will always be, the
red will always be right. If you don't hit a line, then depending on how you move this, the gizmo will just locally, like in a local direction. Let's see how can I say
that? So it's a little bit more clear right now. The gizmo is pointing in accordance to how
we move the horn. If we use a line, it doesn't. This will always be up. It's just easier if
I want to move this up and move it over
and even tilt. It just makes it a lot easier when we look at the reference a little
bit more like that. They're on the top of the head, but we still have to adjust the face and all those things. But I think this is
pretty good for blocking. The only other thing we
can add is the feet. Let's tap head, let's
add some spheres. Let's make sure we save.
Let's go to the folder, save. This will be, we'll
just call them Lucky. For now, you can name
it whatever you want. I don't know what
Lucky came from. O. We'll tap gizmo for
this little sphere. We'll make it smaller. Let
me zoom in a little bit. Just bring it down a
little bit smaller. I'm going to move it
over and forward. I'll probably just flatten it
out a little bit like that. This will be pretty
easy to just make into toes a little bit more. We'll just move it there, it's not coming out that much,
maybe something like that. Then again, of course we
can hit mirror if you'd like. We go back to gizmo. Maybe stretch it
out a little bit, maybe stretch it out that
way. Something like that. We'll hit front.
Pretty good blocking, I think that's pretty
good for this video. And now we can just
adjust it and make things a little bit closer to these shapes
in the next video. But let's make sure that we
have everything labeled. These are feeds, you may
call them feet if you wish. What is this? These are horns. I'm just tapping on the mirror, tapping the three dots. Just renaming them. Very important to
rename everything. Okay, we have everything. It looks like it's in order. I'm going to do another save, because you can
never save too much. We will fine tune our
blocking in the next video.
5. Tailoring: Okay, now let's just work
on some of these shapes and we'll just get them a little
closer to our reference. Obviously the head, we
use our gizmo and it's a, it's a little bit
flatter and wider. We can take move, we
can use the move tool. We can make it a
little bit bigger. We want to make sure that
we have symmetry on here. If you'd like, you can
go to symmetry and you can scroll down to
advanced show line. This will show you
your symmetry line. This red line, you can see that this is symmetrical
on both sides. I'll just use the move tool to widen out the
head a little bit. For example, I'll pull this
out a little bit here. Pull it out a little
bit on this side. Just try to get that
wide head that he has something like that looks like it's a little bit
wider on the bottom. Here's another little trick,
you can hit Solo down here. That way you can just
see what you're doing. Make this a little bit
bigger, something like that. Looks like it's a
little flatter, maybe a little
more round on top. I just adjust things little by little until
I'm happy with it. So make sure we make it a little bit high too.
That looks pretty good. You can't forget that you have
the sides of the head to. All I'm going to do now, I'm still using the same symmetry. All I'm going to do now is just move the head and just
make it a little bit wider, a proper head shape,
That looks pretty good. I'm going to turn
it to the top view also because I don't want it
to be too narrow back here. It's just important to move
in different directions. Excuse me, move in
different directions so you can make sure that the
head is making sense. I think something
like that looks good. I scroll around, it looks
a little thin somewhere. I'm looking at the bottom. Now, I might want to just pull this out a
little bit at the bottom too. Okay, I think that
looks pretty good. All right, so let's hit solo
and bring everything back. I made the head quite big, but actually pretty well. I can't help it. But to
continue to work on things, I don't know, I work on
things to perfection. I think that's an important
thing to do as well. Like you want to work on things until they look really good. This is your art. If you want
to make it look good now, just go ahead and adjust
all of these things. Like the horns. I'm
just adjusting them. I think they look
pretty good there. You might want to have them to the front and
leaning back a little bit, I think that looks pretty good. But just turn it to the side, turn it to the top
just so it looks good. Maybe they're a little
further back on the head. This is where you put
your little spin on it. There is another thing
that I might do, that this is a stylistic thing. If you hit gizmo once you have generally and in
the spot you want, you can play around with
things like profile. If you tap profile, you can have these horns which
are a little different. You can tap this and then
you can further mess with your horns thing, you can give them some
ridges and things like that. There's a lot you can
do with the horns if you want to mess
around with the profile. I think I'll just leave mine
round like the reference. Okay, now that we have that, I want to make the body
a little more tear drop shaped because it looks like
it's tapered a little bit. Of course it goes into the arms, but let's use the
move tool again. Let's make sure that
this is validated. Again, all these shapes, you can see this is just
a clone of the head. Doesn't need to be validated, it's already validated
the arms and stuff we'll have to
validate later on. Once we get to them, the body, we can already use
the move tool. I'm just going to hit front, so everything is
front and center. Even though it's behind
or within the head. You can still edit it as long as you're
selected on the body. I can tap where the body is in the head and
still edit it. All I'm going to do
is just bring it in and make it a little bit
more teardrop shaped. I'm going to make it
a little bit wider on the bottom, something like that. Maybe I'll even bring it in just so he has like a little belly. I'll adjust the back
a little bit too, just make a nice teardrop shape. I think that looks pretty
good. I think his head is. Let's see what
happens if we select the head and the horns. Let's actually drag
the horns up near the head so we can
select them all. I might want to just move
the head up a little bit. It's in the middle. The body is in the middle of the head.
I think that looks good. Okay, the arms, let's just use these and
make them a little big. Actually they're fairly thin,
maybe something like this. There is a way to, to
make the cylinders, actually I'm not
sure if I can do it with cylinders, I think I can. You can make cylinders
round at the end. You just have to tap here, put the division X to four, then up the Post subdivision. But I don't really
think it works that well for such a small
shape like that. It would work if it's bigger, if it was like it works
a little bit better. But when it's really small, it doesn't really
work that well. We're not even going to do that. I'm just going to
go back to here. I'm just going to bring these in a looks like there is a,
a little bit of a bend. So I'm going to add a new node in the middle just by tapping. And just give it a little bit of a bend, something like that. Maybe we'll just
add some spheres. I'm going to add a sphere. And we're just going
to put this on the end and that'll just make the end of the cylinder round. Sometimes there are
ways to do things, but I just find that
I'm going to tap gizmo. I'm going to actually turn it to the left and I'm going to
give his arm a little, a little bit of a bend
to the back as well that sometimes I like to do
whatever seems the easiest. Sometimes there are
technical ways to do things, but sometimes I don't want
to be bothered with that. Like I just want to do what I need to do quick, keep it fun. Something like that, I
think is pretty good. As long as you like
the size of the arms, then we can actually just
go back and validate. Let's make sure we
validate the arms. Once the arms and the
tubes are validated, make sure you go to the arms, the red arms and just
validate both of those. Yes. Then it all becomes one
shape once you validate. Now, I'm just going to
do a quick save now, we can do a vox remesh. I like to do them by
pulling up here and then adjusting the
voxal remesh here. All this is is a shortcut. Again, remember the shortcuts
are all here, x remesh, it's the same thing
is going to here ox, then this. It's the
exact same thing. 152. This is on 152. You see they both change. I'm going to do it
probably like 150, just remesh and then just
smooth out the arms. But we have to put symmetry because now it's just one
shape called the arms. Okay, I'm going to move
them up a little bit. I think that's pretty good. I think that's pretty
good actually. Now the, if we go
to his little legs, let's use the gizmo and let's just concentrate
on the one leg. Actually, we can
just go back here. Let's tap on legs. Actually, let's leave it. What I was going
to do is go back here and then take
it off of mirror. And then just
concentrate on one, but it can be a
little bit confusing. I'm not going to do that.
What I'm going to do is take the cylinder and just drag
it out of the mirror. Now we can just work on
the cylinder by itself. I'm going to tap radius, the top orange note, I'm
going to make a little bit wider and I'm going
to stretch it up. You can see there's a, it goes straight down
here with the body. What I think I want to do
is just rotate this a bit. Move it out a little bit, more like that, a gizmo. To bring these options back, you can make this a little
bit wider going up, maybe even make that
a little smaller. What's important is
you pay attention to the negative space. By negative space, you
look between the legs, there's a very short minus space before it hits the floor. You can see like mine
would be much longer. All I would have to do
is just move the legs up or move the whole thing down towards the floor
a little bit more. But I think that's good once
I'm happy with that leg, Let's take a look at
the back actually. Yeah, I'm pretty happy with
that leg. It looks good. Do I want it a little bit
thick? That's the only thing. I'll use the gizmo and
just make it a little bit thicker maybe,
something like that. I think it's good. I'm just going to bring it back into a long press and bring it back into legs and that
way we get the other one. Okay, You can see there's
a little more space. There's a tiny bit more space. Let's shrink it this way. Maybe we'll make
them a bit smaller. I think that's perfect. Something like that. Another
thing that you can do, you can turn it on its side. Maybe you want the legs
to be a little bit wider this way as well. I think that makes sense. Another thing is the belly. We're seeing too
much of the leg. There's a few things
we can, we can either take the legs and move
them back a little bit. Or we can take the body
and use the move tool. We still have our symmetry. We want to make the,
the belly nice round. I'm going to pull it out and
pull it a little bit over the legs. Pull it out. So when we look at
it straight on, I really want it to be round. I'm just going to edit
this until it looks round. There we go. Now it looks
round in the front. That's really what I wanted. I might make the body a
little bit more narrow in. There we go. Maybe bring
this in a little bit. Maybe we'll give him
a little, but too, but we don't have to
do that right now. Okay, I think that's
pretty good for now. We'll come back, we
might give him a little, but we'll continue to tailor
him to his final shape.
6. Buns and Feeties: While we're here. Let's
give them a little. But here's the body. We just to add a sphere. I don't know why
sometimes my voice gets very light and
airy like that. We're just going to move the
sphere towards the back. We'll shrink it down to
nice peachy but size. We can just move it
over tap gizmo mirror. Then we can just adjust it to
the perfect size in place. We'll move it in. This is
at your own discretion. People might be a
little bit uneasy with, with a T like this personally. I I I think that's pretty good. It needs a little
more pokagekayn, make each individual
one wider like this too if you want to
have a little wide bound. But I think that looks pretty good. I'm going
to validate this. And then I'm going
to go to the mirror and just make sure
we name that. Bum. Maybe we'll name it cakes. Now, cakes is, it's
a little too hip. What should we
name it? Buns just has a nice ring to
it. It's light. I don't know who's
taking these classes. I don't want to be too much. Okay, this is looking really good. Pretty
happy with this. Let's take the horns and
let's validate them. Once you're happy with them, let's smooth them out. Now if we try to
smooth them out now, I think they're going be okay. We're still in the mirror. It's good to know if
you're in a mirror. That way you don't really need symmetry
if you're in a mirror. Because if you're in a mirror, whatever happens to one side will happen to the other side. What happens is this is
very low, this is 752. If I smooth it, we're
going to lose a lot of it. Actually, it's not that bad. But what I want to do is vox
remesh maybe around 150. If you get these little squares, sometimes you can
just smooth them out. But if you don't want them,
what you do is you go here, multis subdivide that, subdivides all of the
geometry in it, in here. Honestly, we can
probably smooth it now. I think it'll be
fine. That's fine. I was going to box remesh again, but we really don't need
to because we'll probably box remesh again when we
merge this to the head. What I'm really worried
about, not worried, but what I really want
to do is make sure that the top part
of this is smooth. See that it looks smooth. Now that was the only thing
that I was worried about. Also, if you want to
be really nit picky, you can go in and you can adjust a bit to make it a little bit more a bit steeper of a curve. I don't know if that's
the right word. You can just adjust it
a little bit as you need to make it as perfect
as you want to make it. I think something
like that is good. You can also take your gizmo if you want to make it a
little bit wider this way. Something like that. Just don't forget that you have
all those options. You can do whatever you
want to do with this. All right, cool. Let's see, what do we want to do next? Let's take these little feet. We'll use, oops,
We'll use our gizmo. We'll bring them up pretty
much to where we want them. I want to move, you got to be careful that you're actually hitting what you
want with the gizmo. His toes are pointed
out a little bit, so I want to bring those over. Maybe you can even turn it
a little bit like that. I think that's pretty good. Let's bring everything down. I'm going to tap front
and I'm going to select everything except for the feeds. So let's check those boxes
and then we'll just bring everything down like this. I might need to make the
legs a little bit longer. Let's take the legs. Are we still in a mirror?
Oh, yeah, we are. Let's make the legs a
little bit longer, maybe. Something like that.
Okay. The feet look good. All right. I think I'm
happy with the legs. Let's go to Gizmo
and let's validate. Let's go here. We
have the legs here. Let's go ahead and validate our legs. Now the legs are good. We'll hit Save. All right. Now let's
take the legs, the body, let's just
remish them together. We're going to go val and
we'll remish them together probably around maybe 175 or so. Oh, what did I do that? Why did that turn that
color? That's so odd. Let's take the legs and box
remish them around maybe 150. Okay. So now we'll take the body and let's see, how
big is the body? The body's quite large, so now let's try
it. We'll do 180. There we go. It just helped
to validate the legs first. Actually, we probably should
have done the butt as well, but we can just undo and
then we can just the buns. Let's go ahead and
validate them now. Let's see if we can just add them and we'll just
do the same thing. Box remashuround, 180 or so. Okay, Now all of this
is one piece and we can smooth it out,
perfect little buns. You can see the legs have
that cut out over the feet. I think the easiest
thing to do is to use this foot shape
to cut into the leg. I'm just going to move
it back a little bit, where I want the toes to
go, something like this. Now what we want to do is we're going to use a bullion and we're going to use
these foot shapes to trim out of the body. First we need to
take the Fts and validate join children.
Now we have that. We're going to clone it. We'll hide one of them.
We'll hide them both. But we only have
Petes one selected. Now we want to select
the body as well. We have the body and we have
Petes one selected except Petes one is hidden.
Now we'll hit Boolean. And Boolean it's just
going to cut out of, that's why we cloned the foot. Now we have our back
up foot still there. Let's go to the mesh, the body, we can rename it. Sometimes it changes the
name, which is annoying. We'll change that back to body. Let's box, remesh it
again at 180 is fine. But what I want to do also is save just in case
we get a crash. Now that we have oxyl remeshed, you can see it's
a little craggy. We're just going to
smooth this out. And it should smooth out, okay? Should smooth decently. If you really want
to get nice with it, you can use the flattened tool and you can flatten it out. Just bring the flattened
tool over the edge. I do love a good flattened tool. You can do something like that. Also, I'm going to
bring the feet, so I'm going to tap on the
feet and bring them up. I think I trimmed them
before I had an issue. When I was first recording this, I tried a different way. I had to go back and try
it in an easier way. I have to actually
trim these again, but I'll do that actually. I'll just do it now. But you
should already be trimmed. I'm going to take
the body, the fees, everything and just move
everything down about there. Okay. Now we have a nice flat brake where matches the reference. Let me trim, hit front and
then I'll just trim my feet. The fees, I do. I have
to trim them both. Yes, I have to trim them both because I'm no
longer in a mirror. The only thing else is this
is really detail oriented. But if you want to, you can use the move
tool and you can, you can bring that a little
bit more into the foot. Same thing with back here. You can also do it with
the foot if you want to just adjust it so
it's a little more or less showing a little
bit more of that ledge. But it's actually
better to do it, or with symmetry because we wanted to happen on
the other side as well. I probably should have
done that with oh, no. I did it with the
body. The body was already symmetrical.
The feet were not. Now the feet are symmetrical. If you're going to make changes or if you're
going to adjust, just make sure you
have symmetry on. Okay, I think that looks great. There is like a
little split there. You can just take case, probably you can just add
a crease down the middle. I think that works.
It's really fun. So far, I'm liking it, so I
think that looks pretty good. So now we can think about the arms and if they're thick
enough, I think they are.
7. Arms & Fingers: They're not in a mirror anymore, but this might make our lives
easier if we take the arms, just go trim and
just trim one off. Take symmetry off, there
we go, turn symmetry off. And then we can trim
one of the arms. That way we can just
work on one arm, It's a lot easier. Now you can see the
gizmos in the wrong spot. So we'll go pivot, center pivot. Maybe we want to make
the arm a little bit thicker if you
want to shrink it. If you want to
shrink it this way. Let's see, we take it off a line that doesn't work either. If you want to shrink it,
let's take it off of a line. Let's pivot. And then let's use this ring to turn the pivot so that the green is facing the way we
want to shrink. It could be the red tube, but we just want to make it
so we can shrink. We hit pivot again, now we have the ability to
just shrink it like this. Okay? But I think it looks
actually pretty decent. Actually. I think I
like it back a little bit where I had it. They might want to
tilt it a little bit. You just want to find a
place that's perfect. Maybe we'll move it a little bit more smushed against his body. You can even move and you
can just, if you want, to, give the arm a
little bit more of a bend so that it's a little smaller going into the body, I think
that looks better. All I did was just just
pull that a little bit, so it's going into the body. Now, for the fingers, I think we'll just use inflate. Let's look at the palm first. Let's use flatten and
just make a palm. I'm just going to flatten here. It's a really fast, easy,
efficient palm area. Just get it nice and flat. I think I didn't mind
too much on the front. So you might want to
do it a little bit on the side bottom, but
it's really up to you. You can do it anywhere you want. Okay. That's nice and flat. The only other thing I'm worried about is I might have
did it a little bit too much on the side of the arm,
and this is normal for me. I work on things and
I'll go back and change things until I'm
really happy with them. I think that's very important. There's nothing that I
do that just comes out perfect as I'm doing it. What really makes things good, I think is a lot of changes. And just making things perfect. Even this little piece, for some reason I feel like
this isn't really smooth. I'm going to use the move tool. I'm just going to puff
this out a little bit. I just want the arm to
have a nice arch here. I'm always looking
at things like this. I look at different
angles, and I'm just like, how can I make this more, just perfectly perfectly smooth? Because those curves and things, that's what we see, what we like about
certain characters. That's the simplicity of it. That's what I try to look for when I'm making my characters. We'll use inflate. It's got a little thumb here and
three little fingers. That shouldn't be very difficult
at all for the fingers. I want to actually
flatten out more of this when I make
characters like this. When I draw
characters like this, I usually make the
end of the arm flat. I give a lot of
room for the palm. So I'm just going to
widen this a little bit, something like that. You'll notice as you go
on, it's important to make these characters your own and do the things that
you would normally do. Don't feel like a slave
to the reference. You can do what you
want. I want to use inflate and we're going
to go in really close. We might have to get
rid of this floor. Let's tap the floor
and let's go to our thing and just hide it. Okay, We want a thumb. I'm going to inflate
probably around here. I'm just going to do a
couple inflate inflations. And then we're going
to do three here. Pretty simple, just inflate on top of each other.
Another one here. Notice that I'm bringing them, I'm bringing them
underneath each other. So I'll do the first
one on the outer rim, and then I'll do the other
one a little bit more inside. That way the finger
is a little curved, That's pretty much all that is. The arms are pretty small. Let's go ahead and go here. Multi and subdivide, Okay, That actually looks pretty good. Let's see how soft they are. If we smooth, it might
be a little too soft. It's a little soft. I'm going to box remesh, maybe around 175. That'll add a little
bit more geometry. And now we should
be able to just gently smooth out the fingers. I think that looks great. Okay, now the arm
is looking good. If you want to turn the
arm over like this, you can actually do a
lot just with the gizmo. You can move it around
however you want. Don't forget that you're in control of where you
want the hand to go, how many fingers you want, You can move around
as you'd like. I think that looks pretty good. Once you're happy with that, you can go ahead and take the arms. You can do add and you can add a mirror that will just
mirror it to the other side. Let's go ahead and bring back our let's save our progress.
8. Head & Face: All right. Yeah, I think
we're looking pretty good. Another thing I'm
noticing is the, I have the head
up a little high. What I'm going to do
is take the head and the horns and just bring
them down a little bit that I'm also going
to take the move tool, it doesn't really, mine makes a funny shape here and I
want that to just be even. I'm going to make the move tool, remember we're on the head,
we're using symmetry. I just want to make sure
that that's nice and round. Okay, that's a
little bit better. We'll just pull out
the head a little bit. Flatten that face
area A. Perfect. The reason why I flatten it out a little bit that's pretty flat is because we're going to be doing all
this stuff with the face. We don't want to to, to
round. Let's take the mask. The head is 98.3 If you go
take a look at the mask, it should be decently sharp. Decently sharp, maybe. Let's start with the eyes. We have the horn, the
eye comes a little bit down here and then over it's
probably about right here. Let's just try and
make that shape. Don't forget. If
you're not happy with it or if you
want to change it, you can just do unmasked. But the main thing that
I want to do is make sure that these eyes
are nice and thin. Because when you carve out, it actually makes it
quite a bit bigger. It makes the space
quite a bit bigger. I think that looks pretty good. We'll make them a
little bit smaller. Okay, now another
thing that we'll do is let's keep the same masks and now let's just make
this shape on the bottom. This is pretty simple. Let's
see where it lines up. It lines up right at
the end of the eye. So that gives us a bearing. And it's not that
far from the mouth. Be around here. I'm
still on unmask. We'll go straight across. Then we'll go down
and we'll just use the frame of the face for
the bottom of the mouth. Then we'll just color that in. Okay. Decent, decent. But now is the time where we see what looks right
and what doesn't. Firstly, I want to make this a little bit
more round here, and I don't think I
wanted to go that low. Of your alterations.
That was a bad job. Your changes and what you want different is probably going to look a little bit
different than mine. This is when you just
look at the reference, you just have to make your best decisions on what you want to change and what
you think looks good. It would be nice to
eventually the live classes, I'm not sure if I would still be able to see
what you're doing. You'd probably be able to
see what I'm doing live. But something to think
about it. Back to mask. Okay. The only other thing that bugs me is I think I might want these a little
bit further apart. The eyes, he has more
space in between. What that might mean is
actually bringing the mouth as well over a little bit more, and then actually bringing the eyes a little
bit further apart. So I'll just do it that way. And then I'll just
take Unmask and let me just fix these up. Let's just unmask the whole
thing and I'll start again. Even I mess up and I have to start things
again all the time. Also, another thing
I'm noticing, the mouth should be
straight across. I have mine at a little
bit too much of a curve. These edges are real sharp. I want to go ahead
and make those sharp. Okay, that looks good. It might be a little too big,
but I think it looks fine. Now let's try again
for these eyes. I think it's way better. Way better. We'll do
unmasked and then just refine them a little bit. Okay, I like that a lot better. Okay, so let's go
ahead and save, and we'll come back and
continue with this little guy.
9. Face & Mouth: All right, Once you're happy
with all of your marks here, all we have to do is
go back to the mask. Click on the mask settings
invert, then use gizmo. And we can just the unmasked parts back way back in the head. I push them back far enough. I'm actually thinking about
printing this character. I want to print, push this back far enough so
that when I print it, this will be pretty
much black inside. But I think that's pretty good. And now I'm just going
to go up to the mask and clear now I'm going to hit Save. I think it's a good time to actually take the horns
and validate them. And then take the head and Vox remash, the whole
thing together. Let's see how that
looks. Well, Vox remesh maybe around 200. Maybe around 250. Actually we want to sort
solidify what we have here. We'll remash that together at 02:50 Now we can
take our smooth, you can bring all this together. Symmetry is still on. Now the horns are officially
part of the body. We have to be a little
careful with the mouth. Hopefully, it won't
start to move too much. Don't worry about if the
body is poking up like that. We'll fix that in a moment. But we just want to
smooth out this mouth, the eyes just get them
nice and smooth and clean. Looking okay. I think that looks pretty good. There's a little ridge
also on the nose area. I think I'll take clay. As long as symmetry is on, I'm just going to
go back and forth, maybe a little bit in the middle and just add that
little ridge and then just take smooth and
just smooth it out. I love little details like that. It's very small, but it just adds a little
bit of a ridge there. I like it. There's another
thing I want to do. Let's hit front and
let's hit select mass. We want to protect this
bottom part of the mouth. I'm going to hit Rectangle and I'm going to start
with my apple pencil, or I'm going to start
right here over the mouth. I'm going to hold down. That's not what I wanted to
do. I'm going to drag that. The mouth is pretty much
protected like that. Because I think drag, I just want to try
and skinny up these. Yes, a little bit more. It's a little tricky because when you move it wants
to move the top as well. I think what I have to do
is take select and lasso. I might actually have to
protect the top parts as well. We protect the top parts and drag should help us make
it a little bit bigger. We should be able to make this a little bit thinner, these eyes. Something like that. Now I'm
going to clear the mask. Okay, I think that looks fine. And I'm just going to
box remesh again at 02:50 Then I'm going to
smooth over everything again, even these ridges
inside the mouth just give everything
a nice smooth over. Okay, now I want
to take flatten, and I just want to flatten out the ridges of the
mouth a little bit. This is something that I always do in most of my characters. So you can see how
I just angle it so I can go nice and
straight across. But we're still using symmetry. So we only have to
do to the middle. I'm just flattening that
underside of the mouth. Then I'll just take smooth
and just smooth that as well. Take flatten again,
I think I just want to flatten this ridge. Because I don't really like
when the ridges look craggy. I didn't do a great job there. So I'm going to try
to start again, maybe even start from
this side and just go up. I'm just flattening
out that ridge. I think that looks a lot nicer. And I'll do a light
soft, smooth over that. I'm going to take the body trim and I'm just going to trim
this part of the body. Okay, that's trimmed. We'll make sure to
check the other side in case this happens. Whoops, We want to undo, we'll turn it sideways. Here's another little trick,
we might use this later. I'm going to tap on the head, then I'm going to
which one is it? This little material blending and we're going to
bring this down. Now what happens is we
can see through the head. Now I'm going to
tap on the body. I'll just use trim and lasso. With lasso, I'm going to take this whole
portion and just trim it. Hopefully that trim the
part that was showing. It looks like it did.
Then we're good. Tap on the head again and just bring the blending
back up to one. Let's save. Okay, cool. I think we can block in
he has a little tongue. That's pretty simple. We'll just go ahead and add a sphere. Take herkizmo, move it up, flatten it, make it a
little bit smaller. Flatten it a little bit more. I'm going to tap gizmo
and then validate it. I'm going to take the move because we still have symmetry. And I'm just going to put a little bit of a bend
in it by pushing it up. Maybe even take flatten and flatten off the
sides a little bit. Make it look a little bit more tngyybe do a little smooth. Now I think it's pretty
much shaped and we can just place it inside the mouth. It's too big. Flatten
it, make it way. Maybe even angle it
down a little bit. We want to do
something like this. As you can see that the mouth
doesn't go in that far. What I like to do is just use layer and make sure
you're on the head. You can actually make
sure you're on sub, you can actually add some
space for the tongue. You can just do a
few rows of layers, maybe even a smaller. You can turn the radius down and do something like this and it
will look like the throat. Now we'll just take smooth
and just smooth that out. It works because it just
looks like a throat. Now you have your tongue and you can move it around and have a little bit more space with the tongue. I think that works. Make it a little thicker and maybe just make it
a little more squat. I think that looks good. Then you have your
layer again if you want to just make sure
you're on the head. If you want to add a little bit more space
back there and then just smooth it out,
something like that. Okay, all right, so we'll come back and we'll do some quick teeth.
Make sure to save.
10. Mouth & Teefies: Even though what I just did in the last video
works, I actually hit undo. I actually think
this looks cleaner. The only thing
that I'm concerned about is having enough
room for the teeth. I'm going to take the
tongue and move it up. I'm actually going to make
it a little bit more wide. There is something
else I can do. I can move and actually pull this part of the
mouth out a bit more. If I do that, I
think I want to take the mouth and yeah, I just open this
up a little bit, which makes it look
more like a mouth. I think I like that
a little bit better. I'm going to move and just pull up a little
bit more on that then. I'm just going to smooth it out. I think that looks nice. I'm going to use
layer this time. I'm just, I'm not going to
make a very big opening. I'll just make a very small
opening and just smooth it out so we can have a
place for the tongue. I'll even make the
tongue a little bit bigger and maybe push it back. If you want a little
extra credit, you can take the tongue
and you can take case. And then you can try to
follow that center line. Let's solo. Try to follow that center
line all the way back. It's difficult, but it'll separate the tongue
and then you can, so let's vako re
mesh the tongue like 150 then you can smooth it and it gives a
little bit of that separation. Yeah, like that. Small details, but I like the small details. Okay, Finally, these
teeth are pretty simple. This is the tongue,
let's rename the tongue, Let's add another sphere. So we'll move it up and forward, and shrink it with
the orange ring. We'll flatten it out. Oops,
We'll move it straight up. Move it outward a little bit, to the edge of the mouth. Then we can just use gizmo, or we can tap where gizmo is. It'll bring up these
options and mirror, and then we can use the
gizmo to move these apart. You can make the teeth however you really
want to make them. You can use things like
we can validate these. Now we have this mirror which
I'm going to name teeth. This is our teeth are
going to go in there. Now that the shape is validated, we can go ahead and if
we want to use move, if you want to make them
a little bit sharper, you can shape them
however you want. Move them, maybe just
stretch them out a bit. Also another thing I like
to do, the front teeth. I like to make sure I angle
a little bit like that, then all you have to
do is clone them. You just add more and just
move them into place. Get a nice little arch
going, keep them touching. One of the main reasons
I like to keep them touching is when I print this, I want to print them all
as one teeth shape shape. Okay, we still have room
for the other tooth. We'll go ahead and
clone this as well. We'll move this over,
maybe we want to. Really show that arc inside the mouth like that. Okay, now we have our teeth. We can take this whole
teeth thing in clone. Then we have this bottom part. We'll go to the red, the mirror. I think it should be the green. If we tap the green, we should
be able to go to symmetry. Oh, no, we can't. Why
do they do that to me? Okay, let's go to each one. We go to this green,
we'll make sure we tap the green symmetry local, then flip object. Then go here to the
second one, Green. Turn off the red
local flip object. Same thing for this one.
Run symmetry, green. Turn off the red
local flip object. All we're doing is flipping each object on the green axis. The green axis is
straight across. We flipped it from
top to bottom. Now let's go to those teeth. Go to the gizmo. Actually, let's just go back to the regulator that we'll
turn that back off. I'm not actually sure
like what these do. It gets very confusing
with symmetry. Let's just turn that off now. We'll go to our gizmo, and I'm going to
do pivot, pivot. Okay. It's still
in the same spot. Let's, let's uncheck the mirror. I think that's where
I was going wrong. We should be able to
just move these down. It's a mirror of
those top teeth. Now, we can just
place them down here. They look like they're a little bit smaller in the reference, we'll make them a
little bit smaller, then you can just
tap on each one and you can adjust as needed. Although I think these
looks pretty good, I do want to bring them
up a little bit closer to the edge of the mouth. It looks great, but I would say experiment
with the teeth. Experiment with different types of teeth, different shapes. Have fun with it.
This is an easy way to add your own twist to it. You can give them a
little fangs if you want, can take move and just kind of, you know, maybe you want to
give them some little fangs. Lots of fun stuff you can
do. All right, let's save.
11. Optional Details: All right, let's add some
of these little details. These are random details, but you can add any
details that you want. Some look pretty good. First, I thought of
something that helps me get over this situation that's happening
with the tongue. Over the tongue,
I'm going to take flatten and I'm just going
to flatten this out. I love that as a solution. I think it just looks
good all around. Next you have some little
details like that. Looks like a little button
or something like that. I don't know if I
want to add that, but maybe I want to add these
parts underneath the eyes. With that I can use crease. You can just do little
creases in there like that that could work. I don't know if I want
to add those as well. All of these other
little objects you can probably do
with the crease, you know, things like
that actually looks cool. Oh, actually it would have been nice if it was asymmetrical,
but that's okay. Let's turn symmetry off. Maybe we want to do
something like on his arms, things like that you can do. You can give him a
little belly button. Maybe we want to
give him maybe like a little x on his belly button that might be cool
or a little spiral. You can do something
like use the mask. Go in real close with the mask. Let's turn symmetry off. Maybe I want to do
like a little spiral. That's what I usually
do, belly buttons. I don't know, I just
like the little spiral. And then you just invert
and you can push it in like that, clear it. I might have to vox or
remash the body again, I'll probably do around 250 and see what this looks
like when I smooth it out. It's interesting like it, I'm going to turn off the line, the symmetry line, kind of cool. But you can also do
an X or you can just do something like
a little crease. But yeah, I don't know. I don't know what
details I'm going to do. I might not do any more. I really like the
way this looks. I don't think I need
any more details. Let me just make sure
I trimmed the feet. I can't remember I did good. Okay. I don't think I'm going to
add too many more details. I pretty much like him as
he is. We could do a tail. Oh, I don't know. I did
the little butt though. Maybe I don't need the tail. If you want to do
the tail, just use the tube tool curve and you can just do
something like this. Just make sure that it
goes like into the body. Maybe like over the
little butt thing. I wouldn't do it up in the air. I would do the tail like resting
on the ground like this. I would do something
like this really easy. Then I would do radius and probably make this
a little wider here, maybe make this a
little smaller. Then I would do the profile. I would definitely do profile, I might add, make this like a diamond
instead of a square. I guess it's not a
diamond anymore, but you know what I mean,
make a shape like that. Maybe I'll make this
a little bit thicker. Yeah, I do a tail
something like this. I might do validate it, maybe I'll give it a little bit of multi
subdivide it maybe twice, and then Vox Resh, it maybe around 160 or so. Smooth it out, make sure that the tip is nice
and smoothed out. I'd probably do
something like this if I was going to do a tail. But I really don't
think he needs a tail. I like the tail. Take, flatten, flatten
out the end of it a little bit more smooth. It, a little bit more
smooth the end as well. It's not too bad, actually
not too terrible. You can take move or drag, and you can actually open
up the tail a little bit, make it a little bit more
flat. A little bit more flat. Flat, flatter. I don't
know what they're right, terms are good thing about art teacher, not
an English teacher. You could do
something like that. It does cover the butt though. That's the only thing. The butts like my favorite
part. Okay. Yeah. That's pretty much
what you would do if you wanted to do a tail. Since he has a tail, I
figure I might as well just show you how
I would do that, but I'm keeping the butt. Okay. I think that's good. I think I'm good
with the details. When we come back,
we will just do some simple lighting and simple coloring
and that'll be it. A great job so far.
Yeah. Let's keep rocking and rolling, baby.
12. Lighting & Post Processing: All right, so we're
going to do really simple lighting for this guy. First, let's change
from Met cap to PBR. Now everything is
going to be white. We'll go into here and
we can take everything, even the floor, tap on the color here and we
can tap on the paint. You can pick like
a neutral color. I usually do like
a terracotta type color, like this color. And then I just do paint, you can find it somewhere here, 4073, That's what I'm using. I like it because it's
just like a neutral color. Now that we have
that, we're going to go ahead and turn
off the environment. Now it's black. That's what we want. Now
we're going to add a light. We add our first light,
raise the intensity to probably around two, okay? Now we're going to
take this light and we're going to
move it over here. And we're going to move it up. See how this arrow
is pointing to it. Using a sun light, doesn't
matter where the light is. All that matters is if you rotate, that's all that matters. But the default
position is good. We're just moving it to where it looks like
it's coming from. Okay, as we thought, I heard something out back. We'll go here. This is
where our light is. We're going to rename that key. That's our key, light clone. This is going to be, Let's
bring this light down. Let's point it like this. I'm going to rotate. I want
it on the side of him. It doesn't really matter
where it's positioned. Again, like I was saying, let's just hit front, but I want to hitting the
very side of him. There we go, like this
in this area like that. And two is good, This
light I want to change. So we're going to
tap that white, go to bluish and just
make it nice and cool. All right, we'll
clone this light. We'll change the color to more of a warm tone,
warm yellowish. Now we're going to move this
light to the other side. We want to make
this the rim light. We'll go back to our
lights here and we'll just change it to a
rim light is just going to be a nice bright pop of light along the
opposite edge. Now we're just going to turn this light until we get that. I hope you didn't hear
my stomach just now. I'm going to rotate it down. Here we go. So
something like this. We want that nice bright
line all the way down. I might even raise the
intensity up a little bit. Okay, so let's turn
on post process. So we'll go here, we'll
turn on post process. You can see it's a
little bit different. This is closer to what your actual final product
is going to look like. I'm just going to
turn this up once, let's do a quick save. Might as well. Let's jump
back into post process. Okay, I have this
on, I have this on. Ambient inclusion
is around there. Honestly, I usually don't mess with that too much nowadays, but you can play around with it. This is essentially like all
these shadows and things. If you adjust it, you can see it makes
a big difference. I try not to use too much of it, but that's a whole thing. We'll just leave it where it is. Depth the field is off,
we don't need that. Now, Bloom, just a
tad bit tone mapping. This is, this is a
little bit complex, but you can play around with it. It just changes the
exposure and saturate. It just changes the look of it, but it really makes
a big difference. You're probably better
off just leaving it off. But I've tweaked mind
to how I like it. I'll keep mine on.
This all looks good. What do we want to do?
Okay. Yeah, we can see all the lights and
everything. That all looks great. Let's go ahead and
add another light. This will be TD. We
just rename it TD. Let's tap on sun and change
it into a spot light. We'll bring it up. We'll
bring it over a little bit. Let's just point it a little
forehead like right there. We'll make it a little softer. We'll tap these
three little dots and make it a little more soft. Maybe punch it up a bit,
something like that. I'll do a quick save, then we'll turn back
on the environment. We'll go here, back down to environment,
we'll turn that on. You can see it's very bright. 2.89 We're going
to turn that down. We'll get a nice fill. But it's not super,
super bright. Maybe 0.8 I think it is. Good. Okay. I want
to take the head. We can actually do
this. Let's take the teeth and we'll
validate these teeth. Validate, we'll
take both the teeth and we'll just join
them together. So now we have tees, the arms, we can take
those and validate. So now we have the arms. Make sure we rename it okay. Now we have the
body and the head, all the parts that
are like his body. We go here and
we'll change from, it's blending, we'll change
them all to subsurface. Then here with the depth, I want to bring it down. We'll bring it
down to maybe like 0.05 I think. Is
that what I want? Maybe 0.1 0.1 think is good. Okay, we'll take
the teeth and do the same thing, subsurface. We'll bring that
down a little bit. Okay? I just find
that subsurface just makes things look way,
way, way, way better. Okay. I think it looks great.
13. Coloring & Rendering: Okay, so let's just
bring in a floor. So if you didn't want
to use a cylinder, what you can do is you
can bring in a plane. You go to your gizmo and you
can just make it really big. We'll bring it up to
right above the cylinder. And you can stretch it out, we can change the
camera to perspective. I'm going to bring
mine down to ten, but I don't really use perspective all that much,
to be honest with you. I like the orthographic look. I'm going to move this so you can see it a little bit better. Move it over here, okay? All right, so now we have
something like this. If you want to save your view, like if I want to save this, you just hit Add View
and I'd like to just do it numerically. So
now we have our view. If we do something and
we want to go back, you can just go
back to the view. Okay, let's just color
it the same color. And let's try to color the
background a similar color as well, just here. And we'll change this color. You just have to find
a similar color. You may even want to do a color that's close to the
one in the reference, which is a little bit more red. So that you can do something, maybe a little,
something like that. If you do it this way, what
you want to do is go back into post process and you
can turn on depth of field. If you tap on his face, then this should
eventually blend out, but you might have to adjust. Would turn far all
the way up thing, then at least the
back will blur out. It also blurs this, but we don't really
need that anymore. We see what color it is. We can go ahead
and turn that off. Then we can go back to our, we can take the head,
the arms, the body, and the feet, and we
can go here and we can just them find that color. I think it was
something like this. It was something like that you can adjust if you want to
make it a little bit shinier. You can do that here by just
turning down the roughness. The teeth we can make white. You can turn down the
roughness on those as well. Make them nice and glossy. The tongue, I guess that's
also a pinkish color. We'll make make it a
little bit lighter pink. We want it glossy but
not too glossy, maybe. Something like that.
Okay. Looks good. Yeah, I like it. I
think it looks great. You can go ahead and adjust
the lighting if you want. You can make it a little bit dt, bit lighter, but
that's pretty much it. I think he looks really good. You can always adjust all these things like what
we're talking about. You can adjust the
ambient occlusion. You can add more of it. For example, the inside of his mouth can be
a little bit darker. You can also adjust
the key lights. It's always good to go back
and just adjust your lights. Make sure you have
them where you want them, see what it looks like. If some of the lights are, they might be too bright. Something I might
do for a light like this is I might change
it to a spot light. That way it's not spilling so
much over the whole scene. If you change it
to a spot light, let me turn off post process so that I can do this quicker. You just move it
back so that it's like on the back of him. You just do the same thing. So you can see, you can see where the beam is. You can turn it up a little bit. Then you have, you still
have that rim light, but now you have a
lot more control. You can move it to where
you want to move it around to and it's just a
little bit darker. I'm going to turn
post process back. I think he looks great. I don't think I like such
a light background though. I might turn this back. I
like a dark background. I might turn the exposure
down on this a bit. I like that light. See that
makes it interesting too. Turning the key light down
makes it interesting as well. There's lots of
things you can do to really make it and make it fun. But I would say I'm
very happy with this. Okay, If you want
to do a turntable, let's save what we have. Actually, I'm going to
say that lucky one. I do say that. So if I want to go back
and change something, I can You know what, for lucky one, we'll give him
a nice bright background, even for the floor, we can
make this a little bit, we'll make it a
little bit brighter. We'll make the environment
a little bit brighter too. We won't have them so dark. Okay, so if you
want to turntable, just tap here and then
tap the turntable. It works a little bit better if you don't
have such a big, this big plane in
the background. He would just spin easier. You can also do, if you have an, on an ipad, this is where you would do like
your screen recording. Okay, stop. Sometimes it's hard to get the
turntable to stop. There we go. Let me get rid
of this reference image. If you save the view with
the reference image in it, then it will bring that back to. So I'm just going to update
this that isn't in it. This is actually a much
better view, nice and big. I'm going to save another
view and just name it two. Okay? In post process, make sure that all the
bells and whistles are on. Make sure everything
is on that you want. You just go here and
go down to export. Don't go down to export. This is if I wanted to bring
it over into blender. You want to go down to render. I usually do screen, we'll
just export the screen. I will show you what
the final looks like. I might do some little
extra things too, and I'll show you that as well. But such a fun little character I think I will want
to print him eventually. I hope you guys enjoyed it. I can't wait to
see what you make. Even if you do this one, save it as another copy and
change the colors, add some stuff to them,
change the teeth. Have some fun with it. I
look forward to seeing it. All right, I'll see
you in the next video. Right after this, I don't even know what
I'm saying anymore.
14. Extras!: After playing around
with some colors, there is something else
that I want to do to sculpt that I just want to
show you because why not? For the head. I'm going to tap here and
these are the layers. I'm going to add a layer now. I'm going to rename this
layer inside mouth. You can add more
layers if you want, if you want to do other details with
paint, things like that. But with this layer,
what I'm going to do is take paint and I'm going
to grab this color. I'm going to tap on here, tap the little eye dropper. And tap on the color. Then I'm just going
to take this color and make it darker. Actually, I could probably
just make it red. No, I think I'll
keep it just darker, but I'm going to bring the
roughness up a little bit too. I don't want any shiny like glares or
anything in the mouth. I'm going to turn post process off because it's always good to turn this off when you're
just working on things. Then I'm just going
to color inside the mouth. Symmetry on, unfortunately you
have to do this. You might want to
change the color for if it's a
different skin color. Or you can just do like an
inside of the mouth color, like maybe a dark maroon
or something like that. This is your typical
inside mouth color or universal, I should say. Might gone a little
bit too far with this, so let's go ahead and
erase that, okay? If you start to have
issues with things coming up on the wrong side, you might have to just go into the paint tools and
then just go to filter and just do
front facing topology. That way it doesn't go
through to the other side. This is just another little
useful thing you can do. This will enhance the
inside of the mouth, so it will be nice and dark. You can also do things like
take the color of the tooth, make it a little darker,
and then go along the inside of the teeth. You can add a layer,
you can make this, then you can go along
the inside of the teeth. Then you can use
the smooth tool. You can turn the
intensity all the way down and it will only
smooth the color. The beautiful thing
about this, if you feel like that's too dark, you can always lower the
opacity of the layer as well. It's just a few little tricks, but have mom, your
characters color them. This is something
that I always do. I wanted to make sure
that I just showed you some things that
I was doing after class because I
want to make sure you guys get as much information as you can to make
the best characters that you can, All right? All right, here's
some other tips and things that I did
with this little guy. First, I made all these stars. They're pretty easy to make. Essentially the way
that I make them is let's say a cylinder. Let me turn off post process. I use a cylinder, let me turn on the lights a little
bit brighter In here, I use a cylinder, I'll use
snap and snap it forward like this and then just
squeeze it together. All I do is really
just use a radio. Actually, you probably don't
have to snap it that way. That might just make it a
little more confusing at first. Just leave it how it is now that we have our cylinder,
we'll just go here. We have a cylinder,
Let's name it Star. We'll add a radio repeater. So you go to add and then radio. Then you have the
radio here and you, I'm going to rename
the radio Star. One thing people get hung up on, If you try to move this
around and do things, you can't be on star. Because if you use the gizmo and you try
to move it around, it's just going to
move the whole thing. Just remember, when you're
doing a radio or any repeater, a repeater is any
of these in red? Any repeater get out of this. You want to be on the
shape on the star. We'll just have gizmo to
bring back these options. Now let's see, Let's go back to the radio so
we can adjust these. Let's say a five star
with five parts. I'm going to go back to the star here and then I'm going
to go back to Gizmo. This is just going to be
on our original star. There's one star
that's in a repeater. We move it over, this
is our original star. It's just repeating five
times. That's pretty much it. Basically, you can
bring it like this, then you can validate it. We haven't validated
the whole radio, we just validated our
little star cylinder. Now you can take move,
you can turn symmetry on. Let's see, you just do
something like this. Actually, I don't think
we need symmetry anyway. You just make those
pointy and you can see it's already a star. And then once you're
happy with it, you can just take these two, the star thing and just
validate the whole thing. Then you can box
remesh it maybe like, doesn't have to be
anything crazy, Maybe like 125 or so. Then you can just to or
round edge if you have, you can just go like that or just smooth it out. Then
you have your star. You can make it a clean
or as different or as fat, or as
skinny as you want. You can put more things on, That's pretty much just a quick and dirty of making the star. But anyway, I'm going to delete this star because
we don't need it. I just placed all
these stars around. I placed some on the
ground, things like that. You can make them
glow in no two. To make them glow,
all you have to do is for example, I'll
just hide this. These are the original stars. All I did was join them
together so like I can separate them. This is how I made them. Then at the end, I just took them all and I just hit Join. Now we have our stars. I'm just going to
rename it stars. Now we have our stars.
All you do is clone it. You have stars and stars. One take stars, one go here,
additive, always unlit. You can see they
get very bright, but they might not
look too bright unless you're in post process. When I turn on post process, you see they get really bright. You can control this
by going back here, and then you can control
it from the opacity. You can also control it in
post process with the Bloom. You can adjust all
that with Bloom. I'm going to delete these stars because I already have
ones that I like. That that's how I did the stars. Now, these will give a soft glow, but they're
not like lights. They don't emit light.
It's just like a cheat. Unfortunately, we can
only have four lights, but they still look
like they're glowing. They still read as lights. You can see I just painted
him a different color and I put some dark color
around the eyes and some blush on his nose and cheeks area
and on his little fingers. Of course, everything
is a subsurface. Then you get the nice
light shining through. If you have a bright
light on the back, they'll shine
through the fingers. But yeah, that's about it. Oh, and also remember
to use your layers, which I showed you
in the last video. I'm you'll probably see this around class and I just
wanted to show you. And when I make the thumbnails, I just want to show you how I make all these different things. Because I don't want you to see one that I made and be like, oh, well how did I do the stars? How did I do this?
How did I do that? I just wanted to make sure
that I showed you because I have a lot of fun working
on things after class. Yeah, that's pretty
much it for the extras. If there's anything else, I will include it elsewhere. But for now, I think I've
taken enough of your time. I will see you in the
next and last video.
15. Thank You!: Welcome back. Thank you guys
so much for joining me. I hope you learned a lot with
this class and I'm really looking forward to what you
do to really change this up. I really want to see
something outside of the box. Feel free to go crazy with it, make something outrageous,
make something over the top. Those usually become the really
fun sculpts that we like. And it also kind of unlocks our real creative juices once you start kind of getting in the zone and just
having fun with it. And again, be sure
to upload these to the projects
and resources tab. I'm really looking forward
to seeing those also. If you want to share
them on social media, be sure to tag me,
whether it's Facebook, Instagram, things like that. I'm at drug free.
Dave on Facebook. I'm Dave Red, an Instagram. I'm drug predave.
Just be sure to tag me and I'm happy to
share your work to my story. I love sharing my student's
work to my stories. So I'm going to be doing a
lot more with this character. I actually want to
three D print him. So if you want to join
me on that journey, be sure to subscribe
on my Youtube. Youtube.com slash drug pre Dave. So I'm going to work
more on this character. Make the pieces that are going to fit inside the character. Like the teeth are
going to be separate, the tongue's going
to be separate, and maybe the head will be
separate from the body. I'm not exactly sure yet, but I'm going to be doing
all of that on Youtube. From making the project to
bringing it into the slicer, to printing it, that process, and also airbrushing it, painting it, all of that stuff. Add me on Instagram drug free. Dave Tiktok, drug free. Dave, if you're on Facebook, I'm there too, is just Dave Red. If you have a question
that is a little bit difficult to answer
just by, you know, typing things out, I'll
probably just make a video about it that way more
people can learn about it. Again, I really appreciate
you allowing me to show you what I know and allowing me to be a part
of three D journey. I hope that you continue
to make a lot and I hope that I get
to see it as well. All right, with that, keep
drawing, keep sculpting. And I'll see you all
in the next video. And there is one more thing
actually in the intro, I did talk about
blender as well. Now I love bringing my
sculpts into blender. Blender is a free program. You have a capable computer. You know, I don't
really know much about computers and
things like that, but I managed to download
Blender onto my computer. So I do bring my
sculpts over there. I'm going to show you some of those because I
think they came out really amazing and I just
want to share them with you. Also check my Youtube, because sometimes I
make those videos where I bring something over into blender and you can kind of see me work and
see what I'm doing. There's a lot of
magic in this stuff and I just really hope
that you're as excited about it as I am
because I love making these classes and I just
love three D sculpting. So I love sharing it
all with you guys. But I promise that's it. Keep drawing, keep sculpting. I'll see you all
in the next video.
 Dave Reed, 2D & 3D Illustrator - Brooklyn, NY