Transcripts
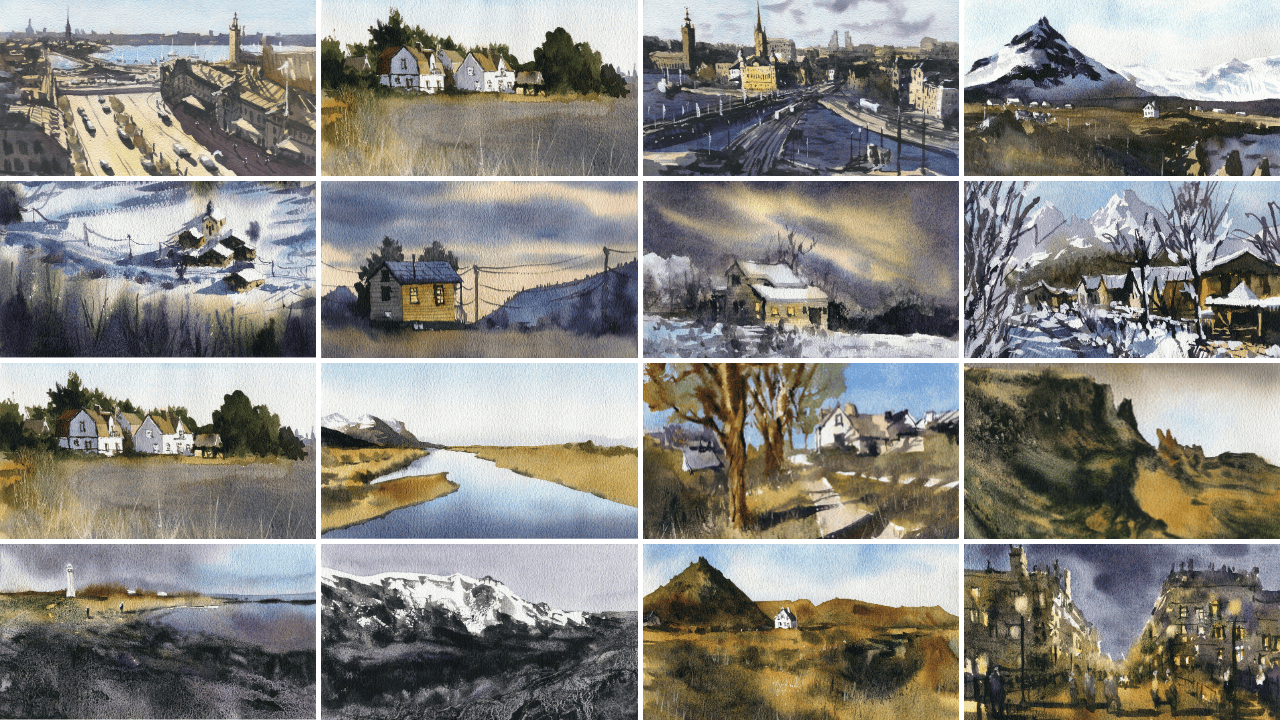
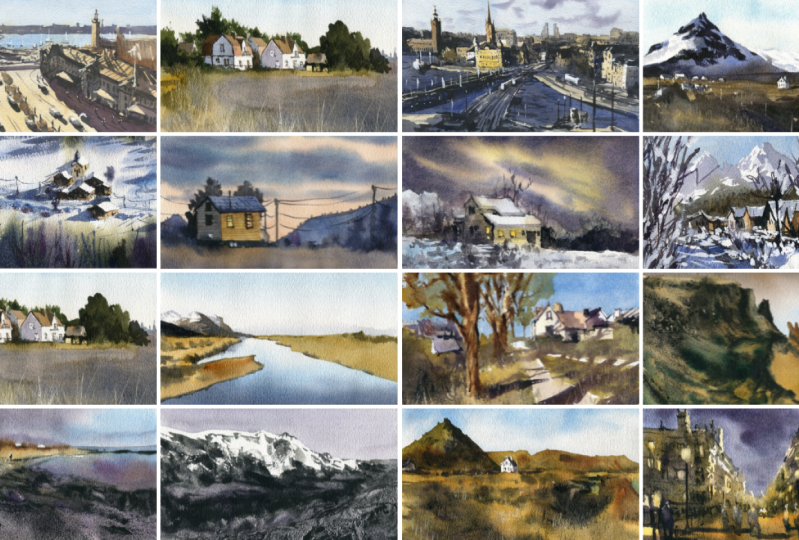
1. Introduction: To 30 days of loose watercolors, Northern Europe and beyond. If you're thinking
about painting, but feel a little intimidated
or unsure where to start, you're in the perfect place. This class is designed,
especially for beginners, and anyone who's ever looked at a blank sheet thought
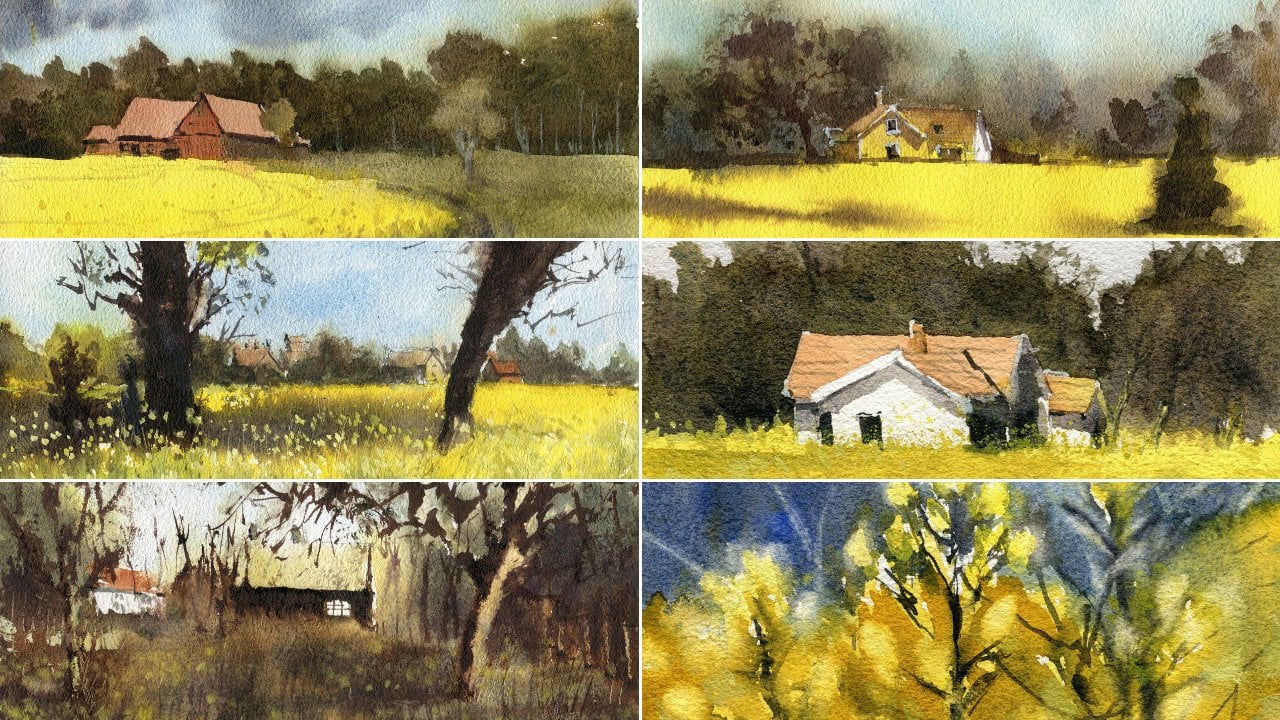
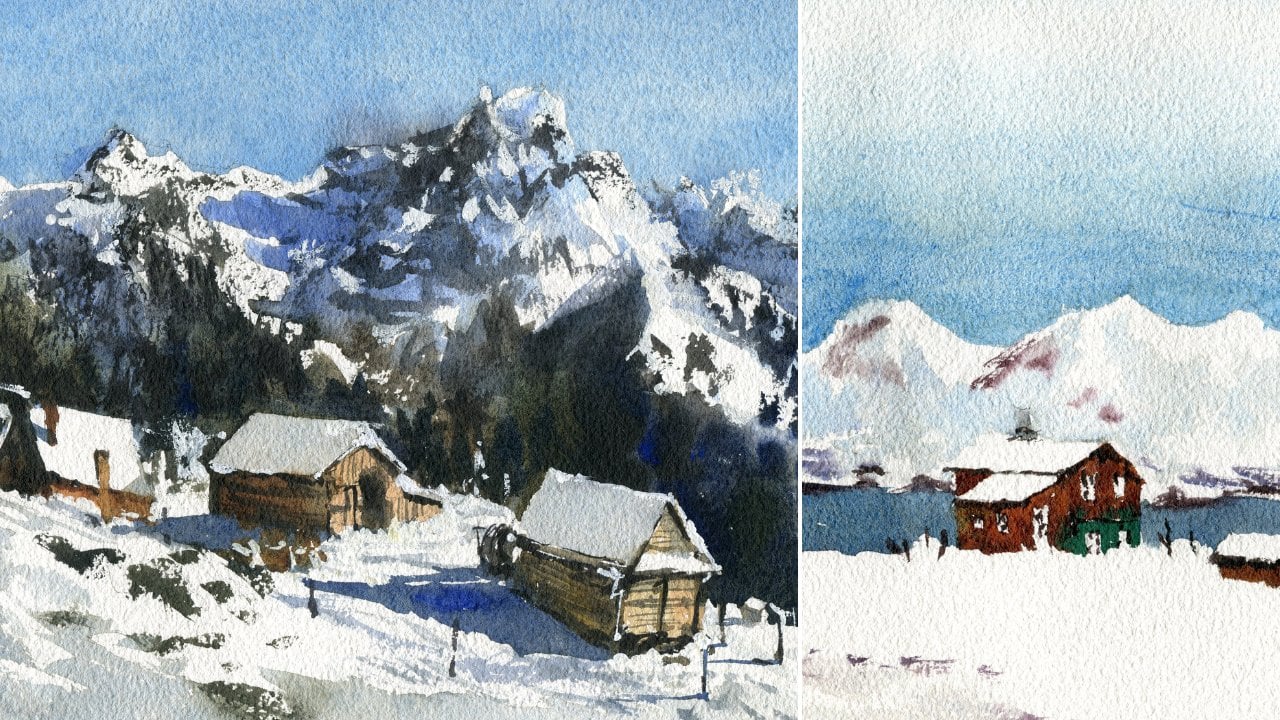
to themselves, I don't know where to begin. Imagine crisp, snowy landscapes
with soft inviting hues, charming villages tucked under a blanket of snow
and those beautiful, subtle shifts of light and shadow that make every
scene come alive. In this class, you'll see that watercolor isn't
about perfection. It's about capturing the mood, the movement, and the
magic of a moment. Over the next 30 days, we'll dive into a relaxed, hands on approach
that takes you step by step through the
entire painting process. We'll start with simple sketches
and basic compositions, move to playful washers,
thoughtful layering, and finish with
some gentle touches that add that extra sparkle. I'll be there with you
every step of the way, demonstrating techniques
in real time and sharing tips and tricks to help you feel confident and creative. This isn't about rigid rules or having to match
someone else's style. It's about learning to let go, embracing a bit of
happy accident, or maybe finding your
unique voice as an artist, even if you've never
painted before. We'll explore various
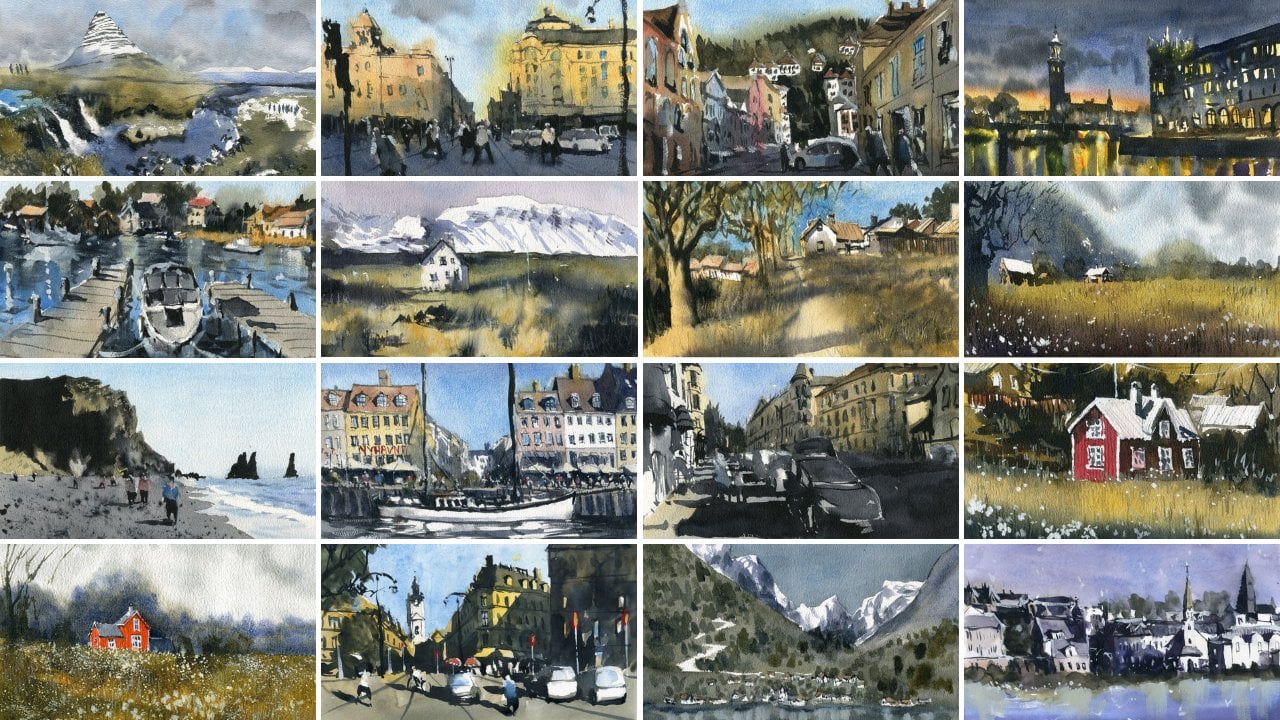
scenes inspired by the breathtaking landscapes of Northern Europe and beyond, inviting you to experiment with loose flowing techniques that let your creativity
shine through. So grab your watercolors,
set up your workspace, and let's turn those
initial uncertainties into beautiful,
expressive paintings. It's all about having fun, learning at your own pace, and celebrating every small
victory along the way. I can't wait to start
this adventure with you. Let's make some magic together. A
2. Materials Required: So before we get
started in this class, I want to just go through the
materials that I'm using. This is really going
to be important for you to understand because in order to get the same sort of
effects and colors and, you know, accuracy in
some of these paintings, you're going to need similar
sort of materials, okay? But again, don't beat
yourself up if you can't get all these materials. At the end of the
day, it's just best to use the materials
that you have. But I'm just telling
you so that you can have the highest likelihood of achieving the same sort
of outcomes as I have. So let's have a look first
at the paper that I'm using. Now, you notice with
the paper there's actually a fair bit
of texture to it. And one of the
important things with watercolor paper
is to make sure, especially when you're looking
at landscapes like this, that using a medium or
a rough textured paper. Now, it's also called cold
press and the medium or, you know, medium slash
cold press, okay? And it just leaves there's a
bit of grain on the paper. Okay. This allows you to achieve these nice smooth washes,
gradations you know, basically allow you to really large areas as well and not have water pool
in certain spots. So it's very important
to make sure that you've got some kind of
texture in your paper. Okay? This paper behind
here is completely smooth. So if you look at
the difference, I mean, it's like night and day. That feels a little
bit, I wouldn't say like sandpaper,
but sandpaperish. That feels completely smooth. So when you paint on
something like that, you are going to get some of these bloom like effects
here if you're not careful. And, you know, I've been
painting for very long time, and I still cannot avoid some of these bloom like effects. So keep that in mind. So I'm using smaller
sort of pieces of paper, as well, I believe this
is one eighth sheet. So about A four size
for those in Australia, so pretty small sheets of paper, and I wouldn't go any smaller
than that because then you're going to have to get
too close to the paper, and it just becomes
very tedious. So that's all we need to know. Oh, and what I also do is
I use bit of tape here. And I just tape the edges down. So you can see all the paintings I have this nice border there. So I just tape it
down to a bit of cardboard or a bit of
plastic, keeps it steady. And when you're
ready at the end, you can peel it off
cause otherwise, the paper warps and that kind of thing while
you're painting it, it can be a bit annoying. So, here are some other
materials. I've got brushes. Now, not going to need
all these brushes. I'm just going to show you
the main ones that I use. I barely deviate
from these brushes, and then I'll go through
some of the others. So firstly, these are
watercolor mop brushes, and they have a large belly, a sharp point, and
they're very soft. So this allows you to get
in large areas of color, like the sky in this
particular scene. Here, if you use
something like this, a little round brush to get
in that sky, you're gone. You're going to have
to keep refilling go backwards and forwards. It's just going to be a mess, and you're not going to get a
nice smooth wash like this. These brushes here, the round brushes are
basically for detailing. Now, the larger one here, you can get away with painting larger shapes like mountains, the side of a house,
that type of thing. But even for the sky, you know, the only thing you
might want to do is some of the green bits here. But the rest of it,
there's no way you can even use a large round
brush out there. So round brushes are for
detailing, they're for control. You know, therefore, you know,
little bits of line work, and mop brushes
for larger areas, smooth washers, clouds,
that kind of thing. So what are these other
brushes that I have here? Let's have a look. So these are some rigger brushes, okay? These are kind of
special rigor brushes, but the normal rigor brushes that most people have just will have this
center part of the brush. Like a very pointy, long tip. Okay? This just a reservoir,
holds more water. Now, these brushes
are great because it allows you to get in
little details like this. The trees in the background. I did these with the
rigor as well, okay? And, you know, it
holds a lot of paint, and you can get really
fine thin lines. If you go in, even with
a smaller round brush, it can be difficult to do that. So it's a good tool to have. It's not 100% necessary, but it's good to have.
This is a fan brush. As you can see, the head is
shaped a bit like a fan, so it allows you to get in these little brush strokes that resemble tufts of
grass, things like that. I just use that for
texture from time to time. I'm actually due for a new one. This one is in terrible shape. Coming up next, we have
these brushes here. So these are like, flat brushes. I use these sometimes, and you probably only just
need one, if anything, okay? These are more of a bonus. And sometimes I will
use them, for example. Let's see if I can find an
example here, you know, the downward brush
strokes for some of these cars, you know,
the reflections. It just makes a sharper and a squarish
shape that runs down, okay, rather than using a round brush like
this or a mop brush. So you probably use a larger mop brush to
accomplish the same thing. That's just an optional tool
that you have available. It's not 100% necessary. We've got three different ones. I barely use any of
them in my paintings. This here is a
filbt brush, okay? So this is basically
a little brush with a a kind of rounded tip. But how should I put it? It's like kind of being blunted off and it feels very soft. So this is used to right at the end to paint
onto certain areas, lift off paint to create
a bit of softness. I don't think I use this
in this particular course, but it's a good one
to have sometimes at the end to correct
mistakes, to lift off paint. Okay. But that's basically it. I've got a bit of towel here, you can see, it's very dirty. I just use this to control how much water
I have on the brush. It's really important
to have that or at least some type of
paper towel or something. Okay? Now, moving on to paints. Okay, these are my
paints and my palette. Looks really messy.
Don't worry about it. A lot of the time,
when you're painting, you're gonna mix a lot of
these together anyway, and they're gonna make a
really nice grayish color that you can use in
many areas, okay? But, of course, in
some paintings, especially when
you're starting out, you're probably best having
a very nice clean palette. I can get away with it because my mixing techniques
are a lot better. Yeah. So let's start off with
how I arrange my palette. So on the left side
here, I've got all the warm colors, okay? So I've got an Indian yellow, yellow ochre, which is
a granulating yellow. Indian yellow is more of a
nice golden sunset yellow. You can also use a
quinacridone gold. That works well. This
is Pyl orange, Pyl red. I've got a quinacridone
burnt orange here, which is a granulating orange. Okay? This is not necessary. It's just another color I have. I've got Hansa yellow here, a very vibrant, typical
yellow, bright yellow. Cerulean blue, really important. This is how I paint
skies, sometimes water. I've got a lilac here
and a turquoise, okay? These are colors that I can sometimes use from time to
time to get in, you know, an interesting piece
of clothing or, you know, some water. I
don't use these that much. Ultramarine blue,
this is essential. It's a quintessential blue. You can get away with just
having the ultramarine blue. The hs are yellow, and a red. Those three colors really will get you through this
course, maybe a brown. Moving on, we have a
couple of browns here. I've got burnt
sienna up the top. And further up, we have a
raw umber or burnt umber. It's just a darker brown color. Now, I've got a
undersea green here, which is basically a dark green, a granulating dark green. And the rest of
these are basically just purples and pains
gray slash neutral tint. So these are really
just dark colors. I use a lot of
purples for shadows. You can, of course,
mix your own purple. If you've got a ultramarine
blue and a red, mix them together, you get
a very nice purple as well. Now, there are a
couple of scenes, a couple of class projects in this class that have
some granulating paints. Now, granulating paints
create this kind of effect, as you can see in these two. These are the actual scenes, or there's quite a few of them. As you can see, they create
this sort of effect there, where the paint separates, you've got another
effect like that there, and this one's quite quite
an obvious effect as well. Okay? Now, the paint
that I'm using for this is Mars black
or lunar black. And that's basically what
creates this kind of effect. It's a kind of iron
oxide pigment. I mix it in with some
other pigments as well, as you can see a bit of
that green bit of purple. As well as that, I do use some
other granulating pigments like ultramarine
blue is granulating. A lot of these purples
that I use as well, they are granulating purples. So you just need to check
the tube, ask around. And yeah, for those
particular lessons, I'm going to be using
granulating pigments. And it's an effect that some people like and
some people don't like. But I think it's
good to have it in your repertoire and, you
know, give it a try. So that pretty much sums up
everything that you need, apart from a small
water container. Normally, I just use a little tupper like a little plastic
container or something, a water bottle, a
recycled water bottle. That's important as
long as it holds a decent amount of water,
you know, ideally, 700 meals to one liter
of water for mixing, so you don't have to keep on
emptying it and refilling. Some other miscellaneous
tools that you might see me using in this class. I've got a spray bottle. This spray bottle, of course, just sprays a fine mist. Okay? I've used this quite often from time to
time to re wet areas. Sometimes sometimes
I'm not fast enough, and sometimes you
just once you need extra time to work into an
area. That areas drying off. The spray bottle is going
to allow you to do that. If you just drop water in with the paintbrush, it's
going to bloom. It's going to disperse. That water is just going to be too concentrated in one area. It's just going to cause
a lot of effects that will annoy you and potentially
ruin your painting. Spray bottle really important as long as it
produces a fine mist. I got a mechanical pencil here. Any kind of pencil will do. We've also got an eraser here. And surprise, surprise. Interesting little tool here. This is a little pocket knife that I use to
scratch off details. So here's an example here, okay? You can see you've
just scratched off some little indications
of grass, okay? This is important
for some scenes. And another thing you can use
is just a bit of plastic. You've got a bit of
bit of credit card, you know, an old credit
card you don't use. Kind of a little piece off,
shape it into a point, and you can use that
even the corner of it to scratch off paint.
3. Day 1: Watercolour Essentials: Okay. So before we get
started in this class, I really want to go through some essential
watercolor techniques and some background knowledge. For those of you who are
just starting out in watercolors or maybe looking
for a bit of a refresher, it's quite important
to understand this. Now, firstly, I want to talk
about choosing a brush. So you need to choose a brush based on the shape
that you're painting. So for example, let's
say, over here, I have got a square, okay, and I've got a circle really
basic a square and a circle. Now, with the square, there's a couple of
brushes that you can use. So you've basically got a
flat brush and a round brush, so I can pick up a bit of water. Let's pick up some paint here
on the side of the palette, and I can just easily
go through cut around and paint that square
in with the round brush. Now, I can do the same thing with the flat brush here. Okay? Here you go. Just going to paint into that area
like that. Okay. And as you can see, it's
a little bit easier when you're painting a
shape like a square, and you're using a flat brush because the flat brush
already has the same shape. If you look at it, there's
the same shape as the square. Now, if we try to do this
same thing with the circles, you can find a bit
of an issue here. So let's go with
the round brush. Here we go a little
bit easier, okay? Move in. Now let's go
with the flat brush. Okay? This becomes a
little bit harder, but it's still doable. Okay? It's still doable, but with
a few more brush strokes. Okay. So I guess what I'm trying to highlight is sometimes when
you're painting buildings, you know, a flat brush
might be better to use, especially if you're
painting a bunch of silhouette of buildings. Now, it's not
entirely necessary. I just use a round brush. I can paint anything
really with it, the same, you know, same shapes that you can,
but it just takes sometimes a little bit more a few
more brush strokes, okay? Another thing you're going
to have to keep in mind is, you know, is the thing
that you're painting? Does it have, for example, a lot of detail, a lot of sharp little
details and points? In that case, you
might want to use something like this rigor brush. Rigor brush has a very
fine point, very fine tip. Almost like a needle
tip, and look at this. You can get in little
details like this, you know, like these
tree branches, and I use this a lot
in my paintings. Okay. So that can be useful as well. What if you're painting
a really large area? Painting a really large area. These brushes are not
going to hold much water. So you're gonna need something
like this, the mop brush. It's a brush that
basically has a sharp tip, but a really large belly
holds a ton of water, so I can go ahead and pick up some color from the
palette, and look at that. I can just keep on going, paint this entire
area of the sky even without re
loading my brush. So those are the main things that you're going to
have to keep in mind. You know, there are these
little other bonus brushes, I like to call
them like this not rigor brush, or fan brush, which can be used to help create some little details like
grass and stuff like that. It's not entirely necessary. It just saves a bit of time. But brush choice really important because if you
don't choose the right brush, a lot of the time, you're
going to have some issues. You're gonna run out
of paint too quickly. You know, you got to really look at the shape that
you're painting and think, you know, is this paint brush
really gonna carry through? Do I need a larger paint
brush to paint that? Say, if I've got
a smaller circle, you know, a little circle, I can get away with using a tiny little round
brush like this, okay? But if I'm painting
a large circle, there's no way this
brush is gonna carry enough paint, you know? If I paint a person, this is perfect because I can get
in just enough detail. Okay. And the brush is
able to carry me through. So quite important to be
choosing the right brush. Can't be using some
gigantic brush like this. Gigantic mop brush, and
trying to paint a person. Look at that. It's just the
waters going everywhere. It's creating a bit of
a mess unless I want to paint a really big figure, okay? So yeah, important to choose
the appropriate brush. Okay. So the next thing I want to talk about
basically some techniques. So wet and wet and wet on dry. Let me just flip this
around a little bit so I've gotten more space
to play with here. So wet and wet is basically
a technique where you, as the name implies it,
paint into a wet area. So say, we've got
a sky wash here. Nice little sky wash for that. Just a quick thing like that. The paint is all wet. Now, I'm going to do another
one down below so I can, uh highlight wet and dry
in just a moment, okay? So hopefully that
will dry off in time. Now, this area is wet. If I go ahead and pick up some other color and drop it
in, check out what happens. The paint moves around. It spreads a little
bit, doesn't it? Okay? It doesn't stay
put. The edges of the paint appear a
little bit furry, okay? And soft. Less detailed, okay? If I paint on this
bit of paper here, that I haven't wet at all.
Look at the difference. It's sharp, you know, it doesn't it doesn't the
paint doesn't move around. So when you're painting
things like clouds, distant objects, wet and wet is a really good
technique to use. It's quick, it's effective. Even when you're
painting landscapes up close and you want to, you know, for example, get in some greens, some little bits of grass
and stuff like that. You know? That's a really
good way to imply you know, a bit of grass, you know. At the same time,
I like to combine both techniques wet on
wet and wet on dry. Okay? It just blends in
nicely, as you can see here. But again, you're not going
to have the contrast, the sharpness that
you get, okay? So whatever you put in there, while the paper is wet,
it's going to spread. And my biggest tip here is to make sure that you're using enough paint on the brush, okay? So here I'm dropping in
quite a lot of paint. I'm not using almost any
water on the brush, okay? Because let's say if
I put in a lot of water into this mix
and drop it in. Look, it's just too much water, and it mixes everywhere, okay? It causes a mess like this. So when you're going
into an area that's already wet and you want
that brush stroke to still, you know, still appear as
a distinct brushstroke, you're going to need
to add more paint into that mix and less water,
as you can see there. Now, this bit at the bottom
has pretty much dried off. So we can do the
same thing here. For example, let's put in some. I'll use a bigger
brush for this. Let's put in some
background details. Let's have a look, some
pick up some of this paint. What have I got here? I'm
using a lot of leftover paint. It's gray, mountain or something there in
the background, okay? Look at how the edges are sharp. They don't blend or, you know, they don't have any furry
edges, like up the top. This is wet on dry. This is what you use
for control, okay? This is super important
to know the difference because people often get frustrated when they
paint a brushstroke and, uh, you know, the paint
moves all over the place, creating a gigantic mess, or it just looks too
sharp and rigid. So yeah, very crucial. Very crucial to do this
to sort of practice little these little
exercises, okay. Another thing I suggest is
also wetting the paper, letting it sit wet
for a little while. So, for example, just let it sit for a little
bit longer here, and have another square
here where you just paint and then paint it and
then go straight into it. You'll notice that at
different levels of wetness, the paper reacts
differently, okay? The more wet the paper,
the more spread of the paint when you drop
in some additional paint. So the only way you can figure
this out is by doing it. I can explain this all day, but you really need to train yourself to recognize the
importance of timing. Timing and wet and
wet techniques, wet and dry techniques
are so important. If you get the timing right, then you can get the effect and the form that you're after. In this section of
year, if we're getting soft abstract shapes, the
timing there is great. Goes straight in. It's
already wet, go straight in. Something that's less
abstract and more defined. Not going to move
around once you put the paint in there, wet on dry. That's what you
do. And you never just use one in every painting. You often use a
combination of both. So you might have some clouds there that are nice and soft, and then you have
this sharpness, and I find the combination of both of them both of them are just together make a really
magical sort of painting. So it's not a matter
of which is better. They're just tools in your toolbox that
you need to employ. So another thing I talk about
a lot is light and shadow. I only touch on this
for a little bit. But let's say, for instance, we have a let's have a house
or something here, okay? Side of a house, okay? And we'll do another
one here as well. Highlight this, okay? Good. So we can have the light
source coming in from this way and from this way. Right? And in each of
my demonstrations, I will show you how to basically paint the
light in each scene. But this is more of
just a quick quick one to get you started
on the concept. Now, Let's say that the light's coming in from
the right hand side, right? So you're going to have a bit more a lighter sort of wash.
Oops, that's too dark. A little bit of a
lighter color here on that right side of
the building because, of course, the building
is catching some light. Now, same thing here, you're going to have maybe a bit of darkness on the
right hand side. Great. Great. And that's the light here
on the left hand side. Now, what I gonna need to do? Because the lights coming
in here from the right, you're gonna see some darkness
on the left of the scene. So here bit of darkness. Okay. So you're going to get
that sort of pattern. Not only that, you
probably get a bit of shadow running across as well. Okay? Depending on the angle, sometimes the light might come in on a really weird angle and the shadow might come out
like this, even, okay? This one here, it's
quite simplified, but the same sort of
deal here, you might get a bit of shadow
running to the right. Okay, that. And, you know, window
or something there. So these little exercises
are fantastic to practice on because this is
just one value, one color. But you can focus on just
that one color, the strength. And one thing I
really love doing is just picking up
that same one color, and let's just say
I can go like that. Even lighter, add more water. With watercolors,
you just have to add more water in order to
lighten a particular wash. That's the only way that
you can lighten something. To darken it, you
add less water. Okay? So it's a higher
concentration of paint. Let's add some more. Oops. That's too much, but you get the idea, okay? It's even more and more. Okay? So, the more
paint that you use, and the less water the darker. The darker the wash will be. Now, this works for
pretty much everything, but it's more it's more
obvious with darker paints. If you're using a yellow, you're going to see the
same effect as well, but it's not going to
be as obvious, okay? And what that means is that there are some
pigments that have a higher range of values that you can get from
them, high tonal range. And some pigments like cerulean
blue and Hansa yellow, you might only be able to
get a few different shades and you can't tell
much difference. So really important, you know, when I go through
the demonstrations, you're looking at the
reference photos, really ask yourself when
you're painting something, look at the photograph
and think, is it light? Is it dark? Is this part of the
building lighter or is it darker than the
other part of the building? Okay? Everything is in relation to the light on the building. It has to be painted in
relation to the darkness. So another little tip,
I'll suggest, as well, is when you look at
the reference photo, you can squint your eyes a
little bit, and if you squint, it just reduces the complexity
down so that you can focus more on the values on whether something
is light or dark. That's another little trick
that I learned along the way. So, let's have a
little practice and sketch some basic things that might appear
in this course. Now, the first thing I'm going
to sketch is maybe a tree. All right. Now, we got a tree starts out
with like a trunk, of course, so a wider sort
of trunk at the base. And I'm just using a
little round brush, okay? Just paint like that. And as you go up, I like to just lift off the paper a little bit, have
a lighter touch. And here, you can
then start to create these branches that come
off the top like this. Really important
little branches. So there you go. Little branches. You just lift the brush off a little bit. Okay? And straighten
out that tree, maybe get in a bit of a
shadow or something to the left like that.
That's a basic tree. Okay? You can use a rigor brush. A little a little brush to do the same thing
might have, like, a thinner tree
that just runs up, and then you've got some
branches off like that. That's another tree
that you have. Okay? Notice at the branches, they sort of split off into two and sometimes in very random
sort of ways as well. Alright. Don't make them too you know, too similar to each
other, the branches. But there's still
a general shape, but sometimes some branches will go off on a tangent
here and there. Now, you might have some grass. So you can use this little
rigor brush to flick in a bit of paint like that
just with some grass. Look at that simple just move that brush
around like this, and you can get some
nice grassy effects. Alright? Around the base of the tree. This takes a little bit of time. So sometimes people like to use something like a ban
brush like this, which just is a brush that has these multiple bristles
that are flayed out in ways so that they appear to be a you can draw
multiple lines, okay? This is a great brush. I
use this from time to time, and I use it in this scene
as well in this class, I mean, so look at that. In a quarter of the time, I could have done
that with the rigger. But the rigor does
allow you to get much more detailed
blades of grass. So I wouldn't restrict myself from using one
or the other, okay? Some little bits of grass. Now, let's try
painting some people, you use one color. So people. So the important thing when painting people is the position of the head is so crucial. So I I've got the head
here, versus I'll have the head slanted to the right a little bit
and slanted really, really far to the right. We'll get the body
on. And the head is kind of like an oblong
shape I I paint on. There's the body, kind of like a longer oblong slash
rectangular shape. There we go. And then we can put in a couple of
legs at the base. Maybe the arms down at the side. So that's a person kind
of walking through maybe. Now, this one here because the head's slanted to the right, you can see the body now
comes off on this angle, which means this person
could be running. Yet again, this one here, person really
sprinting, you know, sprinting to the right. So the head position is where
you want to start first. Sometimes you might want
to paint a person that's just standing in sideways. So I'll do this.
Um, paint the head, then paint the
body in like this. And then I'll put the legs in right at the back like that. So it looks like
they're sort of just standing on an ankle, okay? Let's do it again like this. There we go. You join
the legs up at the back. So they kind of look like
they're standing to the side. These two people could be
talking to each other. And again, you change the
The slope of their heads, as well to make
it look like they are potentially
talking to each other. And when people
talk to each other, their heads kind of face and slope a little bit
towards each other. So this is a good
exercise. There we go. These ones look better.
A hand out there, maybe they're talking
about something like that. Okay? These are the basic
figures that you need to, you know, paint in this
class. They're pretty simple. Okay. But when you have a
combination of these figures, you know, you can really get
a complex looking scene, make it look more
realistic like there's actually people walking through, you know, different stages of action doing different tasks. Now, that's pretty much it. I could go into buildings, but we have talked
a little bit about, you know, we have used
that exercise up there. In terms of buildings,
the demonstrations will more than cover how to paint each building in
each particular scene.
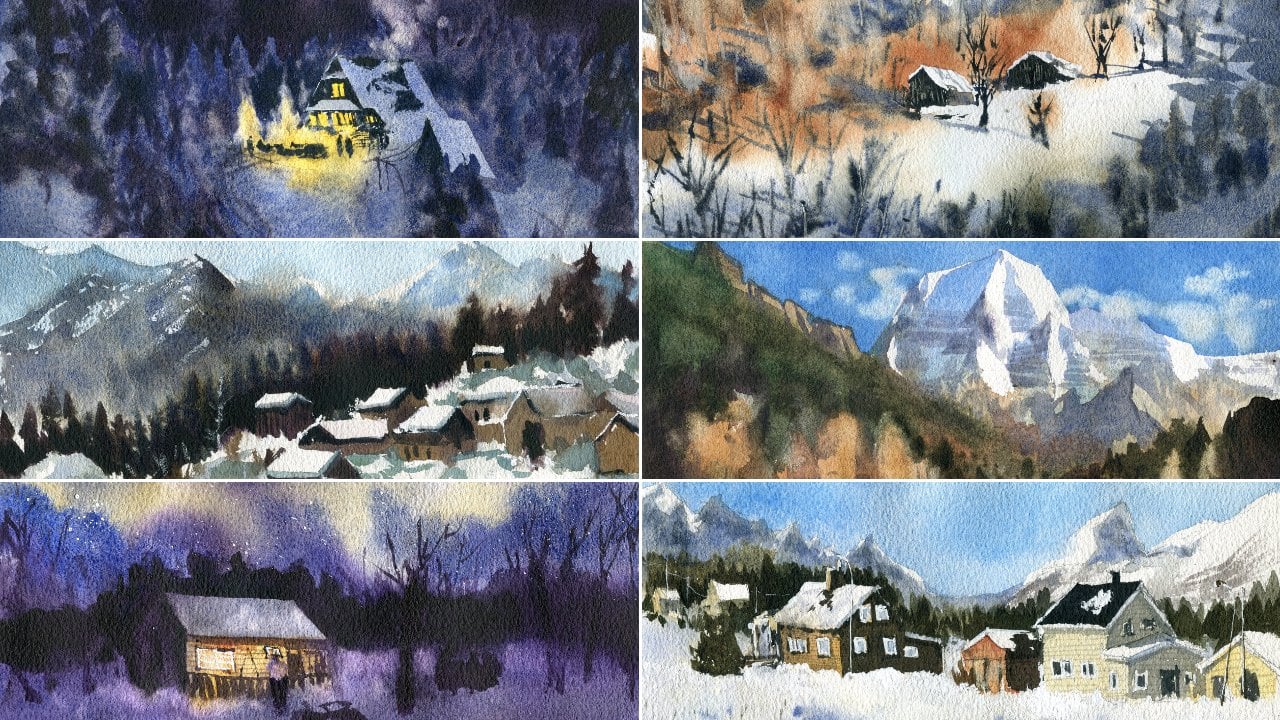
4. Day 2: Aurora Drawing: Okay, let's get started with
the drawing for this one. And I'm going to leave
a bit more room at the bottom of the
scene to imply, like, some snow and
let the house actually sit on a little bit more land. Now, the hardest
thing in this scene is really drawing the house. And we've got this
triangular bit there. Runs across, runs down, you've got this other bit here. These Scandinavian
houses have, like, a really interesting
look to them, and I think it's
worthwhile paying a bit more a bit more attention to make sure you get in the
general structure of them. So that's the rooftop. It runs across like this. Runs down here, okay? Good. Just really observe the lines of the top of the house
because some parts are, you know, basically
very squarish shape, as you can see, kind
of rectangular shape. There's this side here
that pops out there, and then it sort of comes down, and then that joins
onto this part here. And there's a ton of snow on the roof, as well,
as you can see. It's just a ton of snow. So I really want to make sure
we imply some of that too. Okay, that comes down there in the back there, where is this? Actually, how far does it
come down? Maybe there? Yep. And then you've got
this sort of left section. I don't know what that
is, like, another roof sort of area there, and then it just runs downwards. It's difficult to see what's
exactly in the back section, but that's roughly it. And here, we've got this
bottom part of the house, and with snow and stuff
here in front of it. But that's basically it.
I mean, basically it. So, a couple of windows, let's just put those
on here first, just on the side of
the building there. You've got a couple
here as well. On the side there,
there's a window here that's a very bright. There's a bit of
light coming through. There's one here, and
there's one here next to it. Also, there's lots of
light coming through, another one here that's darker, sort of a doorway or
something there entrance. The houses actually a lot more detail than
I initially thought. But that's good because I think it's going to I think that will work very well
in this scene. There's not much not
much detail in the sky, so let's put in this mountain running throughout the back, runs down there, then you've got, like,
a darker sort of mountain on that section. I think there's another
another mountain. Maybe I just make it
taller so that it comes out more this down, and then it kind of gets darker at the base,
and there's, like, a shrub or something here runs over to
the right hand side. There's obviously
some little trees as well that stick out
from behind the house, which is going to
be very important to make the rooftop come out. I'm going to outline
that roof a bit more a bit harder like that, so then just come out
for a little bit more. Okay, let's have a look.
There's a lot of stuff here. There is a bit of snow. I mean, just all across the
bottom part of the scene, you can see bits of snow. And it's difficult to determine exactly where the light
source is coming from. But it seems like the right
hand side of the house is illuminated maybe by an external light
running to the right. You know, it could be
like a car coming in. So I'm going to just follow this general light pattern and imply maybe
these mounds of snow that have a bit of a light coming from the left or
shadow running to the left, and this should be
good for our painting.
5. Day 2: Aurora Painting: Okay, let's now take a small mop brush and what I want to do first is do all the
mountains and what have you, because the sky is a lot
darker than the mountains, so we want to leave that
till a little bit later and make sure that I've got some color all these mountains. Probably just a large round
brush will do the trick, as well, like I'm using here. Okay, let's pick up
some ultramarine blue. I'm going to pop that in
board this kind of mountain, and even a bit of cerulean
will do the trick, as well. Okay, let's just get this here, okay? Something like that. Coating around the house a bit. The the tops of the house, we do need to put in a
bit of this color as well to imply the snow. Again, it's just that same
bluish value that I'm using. Bring that down. Even if it's just to
tint it a little okay. It's a bit of mountainous region there off in the back as well, that's also going
to be a little bit. You have a bit of bluish
tint to it as well, like that. Good. All right. Moving further down, I'm going to maybe grab some
purple and see if I can feather some of this
purple through the blue and make it just a bit
darker down the base. Okay? A bit darker
down the base. I'm not fussed at the moment if there's a
bit of white left behind, but this does need to
be a little bit darker. I've got some black paint, especially just to
use right at the base here to really bring
out that darkness. Needs to have some of it
here on the right, as well. I don't want there to be too
much like color, vibrancy. I mean, just have
enough in there. These trees might be green
or they might be purplish, you know, it doesn't matter. I just want some kind of darker contrast here
for these trees, okay? Just move along,
same purplish value, move along to the right there. Good. There we are.
It's looking good. I'm gonna actually apply a bit of that over to this side, too. It's just missing out
some of that color. Even on this part
of the mountain, there's, you know, you can
see a bit of darkness there. There's even a bit of darkness here as well on the mountains. So this is I think this
is going to help create, again, this illusion of light on top of the
houses, the house. I mean. So's have a look. Good. Now, the ground, we're going
to just need to put in some of this bluish value
again, really light. We're going to keep this,
like, really light. It's almost all water. Some of this stuff
might actually, I might skip over part of that. Yep, then I'll
continue on like this, make it a bit darker
here at the base. As long as it's kind of bluish, it comes up like that. There we go. So we have some
snow shapes. All right. Simplified snow shapes. And a clear separation in
the background as well. Alright, I'm going to
put in a bit of color. Now on the building, I'm going to pick
up some kind of creamy creamy sort of color. Now I'm mixing a bit of yellow with white guash and just
applying it into the house, the bottom part of
the house here. Let's just see how it looks. That's okay. I mean, really, it needs to be the entire thing like even here. Let's just do that as well. Remembering a cut around those windows that have some light in it
because I'm gonna also drop in a little bit of light, bit of yellowish contrast. Let's grab this drop
it straight in. It's just a really bright
yellow there, and there. Oops, it's kind of
spreading throughout. I don't want it to
spread too much. Um let me just grab some of that creamy color and
go back into it again. So no big deal, but, yeah, that's a little bit too much
of that yellow that spread, but we can get away with it. Just look more
vibrant. That's all. Okay, moving on to
the sky bit now, and this is the
fun part where we get to paint the aurora. And I'm going to be
picking up some yellow mixed with a touch
a touch of green. Maybe I can actually just mix
this with ultramarine blue. Yeah, there we go. Just a
bit of this Indian yellow. In fact, Hansa yellow
will work very well as well with a
bit of ultramarine, touch of ultramarine in there. And I'm going to
put in this kind of section like that there. And what have you
got a bit here, just a bit of this
so you can see, just a bit of this
aurora pattern, yellow and blue, right? Yeah, so I make it this
classic green aurora color. Yeah, you can see some
warmer values as well, like almost like a bit of
reddish value here as well. Why not add in a touch
of red in that section. Keep it very light.
When you're doing this, it's almost all just it's almost all just
water, you know? Okay, I'm going to spray
this down a little. Good. Bray it down
a little so that it stays doesn't move around
doesn't move around too much. Okay? Maybe some
more bits like that. Okay, maybe a bit here. 'cause I find that it's
if you're not careful, this just starts to evaporate once you put in all
the darker values. So I'm going to grab
out my mop brush now, and let's mix up some purple. Got some purple already here on the palette, bit of purple, different kinds of
purples that's of blue and it's well in there. Bit of ultramarine. Let's
start off at the top here. See this color. How
does that appear? That looks alright.
Start off at the top. Now, this is where you kind of got to be
very, very careful. We kind of just touch
on to some parts of it. And then leave leave
it to sort of seep in, leave that color to seep
in and do its thing. Okay? Move through. Let's have a look here as well. If you get these little furry
bits, that's fine, as well. Just leave them B. And sometimes I think
it helps to leave the leave the palette. Not the palette but the the board so that it's
completely flat, right? And then in some sections, you can move it downwards like that to encourage it to run. But most sections, really, you want to just let
the color seep through, do its thing and try not
to alter it too much. Sort of just touch on to the
some sections like that. There, look there
around the greens, try not to go all the
way into the greens. Like you're just
letting it by itself, just mix in by itself, okay? More purple. I really like my purples. And the darker you use the darker sort of
purple that you use, the more detailed, more vibrant and brighter the
aurora section will appear. So see how I'm just
continually feathering in more paint as I go. This has got a bit of black
mixed into it as well. And I'm also cutting around these mountains as
well. This is tricky. I'm just doing two
things at once, cutting around these
mountains and also trying to leave those
greens in there. Those amazing greens. Okay, here, same thing. Let's just cut around
that mountain. And here, here. Same deal. You leave the paper flat, it just means that
it will dry off and look more like the
same once it dries. So if you're slanting the paper, all kinds of, you know,
which you can do, you can do it like this so that you get a bit of movement. Have to be careful. You
don't do it too early. Okay, so I just slant
the paper like that. And continue on, as you can see, just adding in a little
bit more paint in areas to encourage that
aurora to show through. And you get this nice fluidity, this movement of the paint
as well, as you can see. Okay, at some point,
I have to stop doing this because it will become too overwhelming and it
won't blend as nicely. So probably at that point now, We can even slope the paper
the other way like this and the lighter portions will flow
into the darker portions. While the paper is still wet, just a great little trick. Okay, fantastic. So the top part is now dried. Let's work a bit on the house. So we can see here on the
left side of the house. It's pretty dark. So I'm going to pick
up a bit of black, a bit of brown E and I just want to get in some type of darker value here
on the left hand side, but I also don't want
to make it too dark. So let's see how we go. Maybe this is good. You always test it a little bit first and then go into it. I'm gonna touch off actually with the roof, but
it doesn't matter. We still able to
indicate close enough. Now, there is a bit of
darkness here in the roof. Can you see in here, there's
this kind of section where there's a bit
of darkness here. In fact, it's kind
of you can see a bit of shadow cast by that
part of the roof, even there, there's even a bit of darkness underneath
that part of the roof. You know, you just, um, putting in those little
details, indicating them there. Okay. Now, here
we got that part, we're just going to
cut around the light. Here we go to indicate indicate it better there
running downwards. Okay. And there's a couple of windows
here as well to the left. Plus, of course, these, like, bits that run
downwards like that. I can't exactly
see what's there, but it's close enough
to what we want. And I'm using this sort
of purplish value down at the base to create extra
darkness down at the bottom. So that it sort of it
just looks darker here. And there is a
shadow, you can see, that's just cast, you know,
all the way to the left. It's pretty dark. So we have to make sure that
this is implied, you know, some of that running through a
bit of that shadow. Again, it just looks
like maybe there is a car or something that's
casting, you know, creating some light and So this trying to just
imagine a bit of snow, like a mound of snow here, and perhaps it's just casting some shadow here
to the left, as well. You know, there,
I'm just picking up some little details and
trying to indicate that. Okay, that's mounds of snow. This is just bluish
value, really, a bit of bluish color that I have leftover
on the palette. And a lot of this
stuff I'm kind of just making up because
if you think about it, it's, uh there's nothing
here in the reference. I'm just extrapolating
from the reference. Yep. This is like a larger
bit of snow or whatever here. The I look just I'm trying to
remember not to overdo it. I can be a bit zealous
at times overzealous. Darkness at the base. Runs up here, there and even inside the
buildings like here, you can probably put in a bit of extra darkness
underneath the roofs and things inside here, for instance, as well. Um, yeah, it's just a
bit of extra detail. There's these windows
here that I'll just indicate with a bit of this
darker paint wet onto wet. Oh, that doesn't look too good, but it's close enough,
I suppose. Yeah. Let's have a look.
Where else do we have some contrasts in there? Maybe that part of the house? I do notice inside you can see in these
mountains, there's, like, a bit of you see these, like striations
in the mountains. I'm just going to imply scratchy little
sections like that. This top part, there's actually
a bit of something there, like a bit of
shadow or whatever, soften that off a touch. It's always important to
soften some parts off so that it doesn't look too sharp where you don't want
it to look sharp. Okay. Just again, reformulating
and just seeing whether this is all making sense or not here on the
left side because we've got, of course, some darker sections and lighter
sections in here. That need, you know, implying two Here we go. It's kind of like another
layer of shadow, I suppose, you can just put in over
the top in some areas. Helps to split this up a little
bit, this whole section, um, So, look, there's bits and
pieces here in the ground. Like I don't need much here, really, just a bit of dry brush. Never underestimate how much
a little dry brush work can bring together a painting, make it look like there's texture or details there when there's actually
not much at all. Here on this building, you see there is actually a bit of shadow underneath
the rooftop here. So let's put that in. It goes all around the
windows, actually, like here. Sharp edge. Like that. There
is also a bit of, you know, darkness up
here in the rooftop here. It sort of like
the mound of snow. It's like that little lip,
the edge of it, really, that has a bit of color up on the edge,
something like that. These could probably
do with a bit of darkening up here
for these trees. Some of them anyway.
I don't want to do it to all of them, but there are some like, I don't know, maybe just
on the edges of the house, like here to bring it out. Just a technique
that you can use. This is just a bit of darker paint just
feathering around. I don't want to get rid of
all that background stuff as well that actually
looks pretty good to me. So like just a purplish, dark mix, really there. Um, can even see behind this area there are some little
trees that we can imply, like, little brush
marks for this stuff. Yeah, maybe a smaller
brush will work better. Smaller Rigor brush. Okay. You can see here there's just
these, like, I don't know, indications of trees or whatever that are
running upwards. You can see some
of them even here, like a little little, you know, one little
marks running through. So this is to indicate
some of that stuff. I might even could put
in a tree here as well, make it look more
balanced up, like there. But this stuff helps
to make it look like the house sticks out more. Here as well, there's a portion
here that I need to do. It's just not
really, there we go. And I'm just feathering
the brush off in spots. Don't have to connect
all the branches because if you connect
all the branches, I find that it
starts to look a bit unnatural at some point. I'm not even looking at the
reference to draw these in. I have enough enough kind
of brushstrokes to imply what's there. Okay. Good. You do these frames of
the windows a bit better. Let's try to do some
of these whoops. This part of the building here, especially that's
kind of reddy. Dark. Actually, so that extra darkness
in there would be good. Uh these windows, well, that Just balance some of
these up with a bit of darker sections as well running through some
parts of the snow. This. Okay. Now, last thing I want to do is just
put in some of these, like, marks that run across
the building you get in these Scandinavian
houses 'cause they're made of just planks of wood. So a bit of implying
this would be good. Let's see how we go. Yep. So it's just like some horizontal lines
running through like that. Okay. And we'll do
it here as well. It's very light color.
Don't overdo it. Oh, got it to the window. Damn. This is tricky. Probably just do that
separately here. Good. Yep. Okay. And we are finished.
6. Day 3: Snowy Village Drawing: Okay, let's go ahead and get
started with this drawing. And we've got this nice
little town here that's, you know, situated on the side of this road running through the
center of the scene. I really like this composition. There's a bit of division. This road forms a
natural division, and it kind of comes in around the third of the way
mark up the top here, dips down a little bit, starts coming down
around about here, again to just wouldn't say
third from the bottom, but nearly halfway
from the bottom. So I think this is a nice yeah, definitely nice little scene. And I like that there are all these houses here with some sharp shadows
running to the left. There's trees as well, all through the scene with these
shadows running through. And some of the shadows
are pretty sharp. Some of them are a bit softer. So I reckon I'm going to get in a little combination of both
of these types of shadows. But let's have a little
sketch of these houses here. Now, I think I'll
start maybe with this larger one right
in the center, okay? It's kind of a rooftop
like this, right. And I just got to make sure
I get that in accurately, there, that's the rooftop. And then at the base, you've
got this sort of uh yeah, this bit there, and then you got the side
of the building there. Of course, the
building goes all the way to the back like that. That, so let's go ahead and
get some of this stuff in. There, there is also
this another kind of building to the right
that sort of overlaps. If you see here, it
runs down there, kind of, you can only see the bottom of the
building roughly there. So that's going to be okay. There's also a top
part of the building there that kind of runs
towards the back as well. This part here sort of
just a little slither. You can see how the buildings kind of overlap with each other. You really have to
you really have to pay close attention
to how they overlap. But there we have it. And we've got another
sort of rooftop of that building out in the
back sort of section. I've drawn them a little
bit closer as well. And hopefully that's just going to make it
easier to paint. And this looks like a
church or something here. Let's just get that in and the
side of the building here, there is also this
snow covered rooftop. Of course, there is a kind
of tower here as well. Just let me get that top of that church tower
in or whatever. And the back end like this, that sort of side, they're
running Oops where is it? Of running to the left
of the building as well. Just extend that a bit more. There's also this
building here to the the left hand side. Um, let's just get
this in there. Now, it doesn't have
to be, you know, the exact same size. Just make sure you've
got a few of these sort of cluster of buildings
hanging around each other. So those are the main buildings. Let me have a look.
Actually there's one more. That's a small one
in front here. I barely just just missed
it out, but it's here. The rooftop runs just
underneath this one, there, there, and
then you've got this underp of the
building here. These buildings are
just situated on the sides of the road,
as you can see there. And you know, there are some little windows and things inside, but I'm not
gonna bother with that. Let's get this one in
on the other side. It's around here. Let's put the roof in. Same sort of deal, like that. And let's go and
put the bottom of the building in here,
here, like that. Great. And, of course,
you've got this shadow, these shadows
running to the left. I think we'll get
them in. You know, I'm tempted to draw
them in pencil, but I reckon it's just
going to be easier if we deal with them all at once afterwards in some
watercolors, sort of sharper. And you can see
these little poles that run down like that. And, of course, some
indications of trees, which we can pop in there
one tree here, actually, that's just kind of like
some dead trees or not dead, but they're probably just,
you know, hibernating. And then you've
got trees up here. I'm merely just putting in
roughly where they might be. You've got this really interesting
tree line here as well. We'll be able to get
this all in with the watercolors
much more easily. But an indication of
that would be good. Here on the side of the
road, you notice there's also, you know, some snow. It's kind of piled up
on the sides, I guess, you know, through the plows or whatever that
have come through. That's going to
cast some shadows as well, these mounds of snow. So I'm just trying to indicate
a bit of that to remind myself to put in some of
those shadows later on. Also some coming in from
the right hand side, but I think that should
be good for the drawing.
7. Day 3: Snowy Village Painting: Alright, let's go ahead and get started with the painting. And I think the first
thing I'm going to actually do is put on some of these warmer colors that
you see in the buildings. Like for this example,
this church has a bit of this yellowish kind of
value for the bottom parts. I'm going to put
in a bit of yellow ochre, just like that. Also, be careful not to go too
far into the white because we want to leave some of that for later just to
indicate the snow. So just a nice little, you know, rough
indication, I suppose. Uh, yeah, just some
warmth in there. That's going to really help. You see it in some of
these other buildings as well, like here, you know, you see it running through
part of it here, here. All I'm doing is just mixing up some brownish colors and yellowish colors and
dropping it in, okay? It doesn't have to be
anything complicated at all, just something to
indicate light. And I'm using a little
round brush to make sure I can cut around
everything else, as well. Okay, lightwh It's
mostly just water with a little bit of paint
in there. All right. And we can add in some
more colors afterwards anyway, some darker values. But for the time being, I think this is
going to be great. It's just going to be
something for the time being. Okay. Yeah, this one
here actually has some darker bits around. Let's just drop this in. Yeah, the right hand side, perhaps some yellowish
value like this. Have a look at this building, probably some more darker, warmer, warm, dark
sort of value here. Okay, for this little underside of the building. Good, good. Right. That looks like all the
buildings pretty much covered. You know, I've got this
one I've forgotten about. Let's just put some
of that one in. In fact, there should
be maybe a side of the building that I
just draw in like this. So I think what I
will start doing first is I'm going to add in a backing wash of a very
light kind of wash of blue, and just a cooler color
is going to be fine. It doesn't have to be
over the entire thing, but I think parts of it, I just want to get
rid of some of the white of the paper, okay? So I'm going to go over
parts of it as long as there's some water
in here, okay? You can see there's
also some cooler areas in this scene like this. So this is just a bit
of cerulean blue, mostly mostly just water. Okay? And then you've
got the rooftops, which you just need
to cut around. I don't have to be
perfect with it, but I find that it does help to leave some of
these rooftops really white, sort of pristine, white, almost. Okay. Good. I just need something here, something to get rid of the
white of the paper because the snow isn't actually
completely white, if you look at it. The rooftops do
look pretty white, but the snow is a slightly
blue tinge to it, so this bit of water is
going to help with that. Okay. It's not perfect. I've got all of it,
but that's fine. That's gonna be enough. Okay, now we've got this kind of bluish tinge running
through, which is good. I'm going to leave this to dry a little bit. Let's have a look. What else could we
do at this stage? I think what would be great is if we get in some
of these buildings, not buildings, the trees. So I've got some green mixed
up here on the palette. I'm gonna go and
grab some of it. Uh, Green and brown kind of mixed together. Okay. Maybe more brown. Let's grab
some more of this stuff. More brown. Greenish
brown color. Oh, right, let's drop
some of this in here. And the paint is already wet, so there's not that much
you need to add in. I'm using a little flat brush. And funny enough, also, a bit of blue can help. 'Cause as you see
in the corners, there are some little
bits of blue in sections. It's kind of like a
cool color in parts. Okay? So I'm going
to drop this in. And look, I'm just using
the brush to create these sort of pointy bits
to indicate some trees. Now, we want to also make
some of them a bit taller. Don't make all the
trees the same, yeah, the same shape
or the same value. Definitely, or even
the same color. It's kind of like
a greenish blue that you see running
through the bottom. This is great
because it actually helps to frame the scene. Okay. And these bits of white, these kind of little specks
there are going to help to create this sense of snow maybe. Yep. I'm gonna actually just
make this all into one. Uh, yep. Here on the right hand
side, more blue, perhaps, bit of this ultramarine blue, again, creating these
shapes of the trees. Okay. You can continue
to add in color, as well, while the
paint is still wet. You can reshape, add
tiny little details, as you can see, yeah. I'm just using one brush, just a little flat brush, okay? Sometimes it helps
just slant the paper downwards so that the uh, the paint doesn't
run too far up now. Don't want that. Okay. Good. And up the top, I'm going to do the same thing just with a bit of greenish blue as
well. So run that up. Here, here. Okay. Just run this through. I can also grab a
small rigor brush, get some of this paint, as well, and get in some of these trees. Oops, more green. Little bit more green
for some of these trees here, like that, as well. There's only some
of them up here, and then there's
one here as well, like a pretty dark one here. I'm just going to
plunk in like that. Okay. Good, good, good. So kind of let this
sit for a bit. Let this sit for a little bit, but we do need to
put in some shadows. Some of the shadows I
want to get in sharper and some of them I'm
just going to leave in pretty much the same value. So Yeah, in the wet and wet. So we want some wet
and wet shadows, and we want some
sharper shadows, especially for these
little houses there. So I'm going to let
the top of it just continue to dry
off a little bit. And I leave it laying flat here. And I can grab also now
a little flat brush, same kind of flat brush. After the paints had some time to sort of
soak into the paper, you can just sort of add in those wet and
wet shadows, okay? So let's have a look
wet and wet shadows. We can pop in some
purple here as well. That would be good
bit of purple. Yep. Wet and wet is magical. You can just imply so much
details and interesting here. But you have to sometimes, while the paint is drying, re
sort of adjust some spots. As you can see, you know, there might be some
areas that just have a bit more detail and you want to put that in That, this is all gonna blend, so you don't have to
worry. All right. Okay, so this top bit should
be starting to dry off now. I'm going to mix up
some cerulean blue with some ultramarine blue to get in a kind of darker
blue value for these shadows. If you look at them, they're
pretty kind of bluish. Let's bring this across. So that's going to connect
on, as you can see, this bluish shadow is
going to connect on with these little
trees and things. I always like to
dry the brush off. I'll pick off that
bit of blue paint and then I'll dry the brush off, okay, so that it doesn't, like, just go through
and completely obliterate everything
and create a mess. I thought look here. You know, you got
some of these shadows running in from the outside of the scene and notice how
the paint is spreading, but it's also not overly, you know, it's not overly spreading through
the entire scene. So let's just, you know,
pop this through like that. And that's what happens when
you paint wet on too wet, you need to wait a
little bit to just give the paper time to soak the soak in all
that water. Okay. It's a bit too dark,
but that's okay. Yep, all the same thing, these shadows that you can see just running over to
the left hand side. It's all just one big shape. You know, you've got stuff coming out at the top, as well. This part up the top
is kind of dried off, but I can just feather it in a bit so that it
looks more consistent. Um, good. Okay. There you go. And then
you've got this road. And, of course, you know, on the road, like I
was mentioning before, you have these little bits
of snow that are piled up on the sides and they're
creating a bit of a can you see that? Just a little bit of this shadow running towards that
same area in the back? So I'm just trying to
indicate that like this. You know, you got some
sharper bits, but, you know, for the most part, I'm
just trying to get in the softer sort of shadows. You can't get in any of the sharper shadows
anyway because it's, yeah, it's too early for that
everything is still wet. There we go. We can get in some darker
blue sort of shadows and parts like you can see
here just near the road. Yeah, this is great to
just pop in while we can. This is still getting there. I got to continue to
just monitor that a bit. Um, Great. Back to the rigor
brush, I'm going to pick up some real dark paint. This is a bit of purple and
a bit of brown that I'm going to mix together to
create a very dark value. And from here, we can
do things like drop in some maybe some
verticals, take a look. Oops, more blue, bit
more blue in there. Yep, some funny little
verticals like this. Okay. There's also
this tree here that's, like, also got some leaves. Yep, a bit of shadow
running to the left here. Uh, to a look. Yeah, there is, like, a
little tree here as well. I barely didn't see that, but there's something
there. Okay. I'm just trying to put in
some little details for, like, trees and things
running through here. Some verticals like that. There's just not much
sharpness in here, so a little bit of this is going to
make a big difference. Even for some of these trees
you see here in the front, there's actually some, like, verticals just running
through this area. So you need to have balance of balance
between all this softness and having some sharper values and sharper shapes going
through this scene. This is the telephone, these little poles
that are running down. And I'm just trying to
quickly indicate them. There's not obviously the paper hasn't completely dried yet, but you can still
put in a bit of something here. That's
another one there. You can even, like,
indicate, you know, these little bits of line
power line like that. But let's have a look. You know, it's so subtle. You don't have to draw
the whole thing in sort of connect them up a bit. Okay? Just let it makes sense. You know, you know, there
could actually be a power. No, it's actually I was
thinking of maybe putting one here you could do
here or something. Um yeah, it's no big deal. A lot of this is just
indication of stuff. I was the main road
somewhere here, isn't it? Let's just try to
indicate that main road a bit better. Alright. Good. Now, before I put in the
shadows for the for the houses, I'm going to just work on the shadows on the actual
bottom part of the building. So for that, we're going to
need some round brushes. Got a bunch of different
round brushes here. But I've got a medium sized one. I'm gonna pick up just
some leftover paint, brownish, bluish paint,
whatever it might be. And I'm going to go into the bottom part of
this building here. And you can also just
leave some of that S, you can just leave some of that previous wash
on there as well. You don't have to
color all of it in. The building is not, you know, completely the same
color as well. So you can just leave
in parts of it, you know, that might
be of interest. Um, indicate indicate
little things like windows and
stuff here as well. Let's have a look at this one. There again. Yep. Take a look. This one behind. Sort of got
some darkness there as well. Just gonna just get
that all in. Why not? The church Oh, this is tricky on. Kind not
really that dark. I'm gonna just make
sure I'm gonna put in a light wash of gray
or something here. There you go. A bit maybe a bit of tinge of blue or
something in there as well. Um, there we go. That's not bad. Just need that to be a
bit darker at the base. Okay. Good, good, good. Are you this area here, the roof, the tower on top. I just wanted to indicate that little bit of
Detail up the top there. Let's have a look.
What else do we have on these buildings? Not all that much,
really. Not that much. I think we can go in and get in the little shadows
around the buildings now. And I'm just gonna be using
this same round brush. But the shadow color is
going to be more bluish. I've got some
ultramarine blue here, and it's just mixed in with a few other kind
of purples here on the palette I want it to be
a fairly dark bluish value. Uh, yep. Good. So let's go in. Yeah. That is sort of like
a sharper shape like this. Here we have it. Sort of connects onto the
building, as well. There we go. Good. That's the sharpness of it. There's also all
these little can you see just these
little bits of snow that are creating also
some sharp bits of detail, so you can go ahead and get some of this stuff
in now, as well, just with the same
value so that it all, hopefully, kind of blends
together a bit, okay? So we got a bit and this
rough paper is fantastic. It just makes it so
much easier to do it. You can see the texture of
the paper show through, which makes it a lot easier. And you can see on
the other side here, there's, there's actually
another house here. I didn't get that one in. It doesn't matter. We can sort of try to pencil it in here. Yeah, there is some type
of house here, actually. So I might just try to
indicate this anyway. Yep. Just behind there could be like behind same blue value
just running through here. Okay. Anything anything to indicate
these shadows or getting the impression of some
shadows would be fantastic. Okay, so let's look
at these ones. They've got some shadows also running in the
same direction. I mean, these are all kind
of formed by that same. You know, you can see it sort of coming from this
building, as well. It goes onto the road, actually, it's pretty large
kind of shadow. Um, that connected onto the building. So important to do
that. And remember to leave some of the white
of the paper, as well. Okay, this is a little bit tricky because it's still
kind of wet this area, but I'm gonna put in
this shadow anyway. Let's make it maybe a bit more exaggerated
coming out here. But maybe a bit here, this building behind like that. Good. Okay, so we've
got these sort of sharper kind of shadows
running through. And then, of course, we've
got some really soft shadows. And I want to compliment
these soft shadows with some sharper ones here
as well. Check this out. Just that same value
that I picked up before, put in some of
these sharper sort of shadows running
through the back. Okay? These need to
be a bit darker, connecting these
trees on and see how I'm just dragging that
brush through through so that it's nice and
get these nice sort of sharp and sort of
marks on the page. And it also, as you can see, picks up the nice texture
of the paper, okay? Let's try to get this
bit of the road, a bit more of this indication of the stuff on the road, as well. The tree, you know,
that little shadow. I just wanted to
redo that a bit. Um. Some of these poles, you know, they do have
a bit of a shadow. Why not just put in indicate
some of that, as well. It's not a huge deal, but, um, you know, why not? Where I can Okay. It's important to put these
shadows in quite quickly. Um, yeah. There's also you can
see here at the bottom, there's this little trail
that's running through. You can see almost someone
walking through here as well. You can put in little
indications like that. It's not a huge
deal, but, you know, these sort of squiggly
lines of it could be snow, you know, some snowmobiles or whatever running
through here. Uh, yeah, there's even here, you can see there's, like, some tracks that are
running up here. Um, Something here as well. I don't know what that is.
Like another some ridges. Okay. Good. Um, just checking this stuff down the base. That looks right. For the buildings now, I want to just
create some proper, you know, it's actually on
the left side of the roof. It's actually a bit
darker, can you see, just a bit of cooler color on the left side
of the rooftops, because the light source
is coming from the right, so you're going to get a lot of this sort of stuff
on the rooftops, on the left side of
the rooftops anyway. So I'm just trying
to indicate a bit of that and getting it
to blend with the, blend with everything
else, as well, nicely. This part just needs to
be sharpened up a bit. It all just depends how much time you want to
spend on this to, you know, to bring
out the details. You know? It's not
100% necessary. But the more time
you spend on it, obviously, the more detail
that you can get through. You're up the top.
I want to just, I want to make
another sharp mark there to end it a little bit. Here. Same join on these trees. Let's put on some little
details of the trees, just some sharper, you know, marks running up up
like this, okay? 'Cause now it kind of just
looks like a bunch of leaves, but no, you know, what do you call it,
trunk of the tree. So something like
this would be good. Um, you know, some here at the
base as well, maybe a few. I don't want these to
be too numerous down here because it might kind of detract from the
rest of the scene, but some of them here
will be good, I think, just to balance out this area because it's a lot of softness
running through the base. Okay. So now let's have a look. I want to get in
some darker marks. Through the buildings, like maybe a bit of darkness
underneath there. Just here, it's just
tiny little areas that we want to use to bring out
windows and stuff like that. You know, I can just kind of put in details on the building. That may or may not be there, but tear white,
does it does work. It makes it look like
there's details there. Uh yeah. But you want to leave a lot of that previous wash
there as well. You don't want to get rid
of all of it entirely, keep it fresh looking. Keep the previous
washes in there and um this is just to indicate some extra little detail and contrast running
through here, especially. That Take a look underneath
this one as well, there. There's some darkness still. Uh amazing thing about watercolors is that once
you start layering things, the detail just
starts coming out. You know, you've got
to be patient and give it time to show through. You got to stick right
through to the end. In fact, otherwise,
it sometimes just doesn't look like anything
if you're not careful. So Yep. Let's overlook. This house
here is pretty dark, actually, so I'm going to call
that one in as well here. And the church, you know,
you've got a couple of windows like that. Then you've got the domain
there something there, and then underneath the rooftop, we can just indicate
some of this. There's a window here on
the side, and of course, this tower on top, just indicate that a bit more. There. You know, it just depends how long you want to
spend doing this, almost at the point where
I'm ready to call it. It looks decent enough. And maybe these little you
see these little poles. I just thought why not just quickly re adjust
some of them again. What else do we have? Yeah? Look, there's some little
some shadows as well, still running to the left
for some parts here. Okay, I just wanted to re
emphasize the darkness for some of the shadows that
are being cast. Good. And, um, yeah, I think
I'm gonna call it.
8. Day 4: Snowy River Drawing: So this is a relatively
complex scene, and we've got all these
houses to the right. We've got the mountains
in the background. Plus, we've got this tree
coming in from the side, and, you know, I'm thinking, probably simplify
this tree down a bit, but we've got to imply all this snow running through
there as well. So let's start off firstly by putting in probably the most easiest
part of the scene, and that's just roughly where the bottom of the
mountains finish off. Now, you can see, like, there's some green trees behind here. I'd say maybe just less
than a quarter a third of the way down,
roughly about here. Now, is the area where we've got a bit of this
kind of you can see here, a bit of this river running in, and it doesn't appear to be
completely frozen just yet, so it's kind of this
darker color like that. Then you've got, of course, on the river, you know, you've got all these
little bits of snow and coming up
the river bank here, you can see just these sort of bits of snow and
you've got some of these branches and things
coming up as well, okay? So don't to make too much
of a big deal of this, but yeah, just having enough enough bits and
pieces in here will be good. Now, I think what
we can do is really just start with some
of these buildings. I'm going to try to mark
out roughly where they are. So that's a rooftop
maybe there, here. Now, the reason I'm doing this is just
to make sure there's enough room enough
room in here for me to put in all the rest of the
details, you know, like that. And then you've got this
sort of larger house here. So I think that's
gonna be alright. That's gonna give
me enough room. So look, when you're
drawing the houses, always just look at the
general shape, okay? And here, you can see, it's kind of like a
triangular shape there for the rooftop runs across
to the back like this, and then the signs of the
house come down like this. Alright. And then on the sort of
Building here in front, you've got this same
sort of structure. Again, it's kind of
around the same height like this there. And then this comes down. Okay, comes down like that. And then you've got
the sides like this. Look, it's not as long as it is in the reference,
but that's fine. It's there's always going to
be some little adjustments. Plus the sheet of paper
that I'm using is not as wide as this
reference photo. Okay, so there we go. This is another sort of house there, and I'm going to just
bring this down like this. What do we have here? It's like a this kind of area
running there underneath. So this is kind of like the side of the rooftop,
like, right there. And you've got some windows, that kind of thing
there behind here. It's going to be a lot darker. Little another little
house here again. And, you know, it's just kind of these repeating
sort of structures. Here there is another kind of rooftop of another
structure here, and it just comes
down like that. And then, of course, you've
got this larger kind of roof to the right. And it comes down like this. Of course, you've kind
of got to get this sort of area of this retaining wall. And you can see
there's even little bricks showing through here. So I reckon I'll
try to put some of these in afterwards,
just a quick indication. Remember this is,
this is a very, very loose painting, but we still want to make sure that we have enough details. This structure here
is interesting. There's like a
triangular structure, and then you've got a
bit of a rooftop running here to the back like
that, like that. Then underneath there is kind
of what you might call it, nice little bits of wood
structures running across. So again, I'm not fussed
on all the little details, put in a bit here and there. There's something kind
of another bit of snowy area just running
here as well behind, covered in snow anyway. There's a little spot there. I mean, all the
way through this, there's all kinds of yeah, we've basically
got all these sort of trees and what have you. And it's so tempting
for me to actually, like, draw them all in and
try to put the snow on. I think we're going
to just shortcut it in the end and
use some guash, a bit of blue mixed
in to get in sort of spots of snow on
the trees itself. Otherwise, I'm just going to be spending way too much
time doing all of this. But yeah, you've
got a tree here. I'm just going to
indicate roughly the location like here, maybe. There's another something coming in here from the side, perhaps. Okay, that's looking okay. Maybe I'll get another
one like there. Okay, now, we've got this
tree kind of running up. It's really kind of large tree. I'm just thinking, how do we
want to simplify this down? I'm just really thinking to
myself this is bit much. We can get that all in afterwards
anyhow, with a bit of, um, yeah, we can paint it all in mostly with
the watercolors. I don't want to really
spend too much time on it. There's a kind of a sort
of mountain back here, okay, with all these trees. And then it seems like it may kind of go over to the
other side like that. I'm just guessing that you
can't really see much. I mean, even in here, there's check this out. There's
a building here. I almost just manage to see it through that
clearing there, and then you've got, like
this other building here. So again, don't
feel like you have to had in all the buildings
exactly as per the reference, try to change it around. And if some objects are masked and you can't
see what's going on, you know, you can bring
them back out again. Don't feel like you
have to, you know, abide by the reference
picture too much. So here are these mountains
here in the background, and I'm going to just indicate the rough little peaks on
the top areas of them, okay? Oh, this one looks a bit wonky. Okay. Just a little
indication of where the mountains end and
the sky sort of begins. This comes down
in a more sort of downward sort of slope like
that, and check this out. It just comes all the way down, ends about here, but then
starts again going up, okay? And I also like to put in
a little indication of, you know, some of
the darker parts. Like here, there's another ridge that just runs all
across like this. There's, this is all pretty
much a similar sort of color, except you can see there are
parts which are just sunlit. So, yeah, we want to
imply some of that later. Um, through there. But so far, I think this
is looking pretty good. Just seeing if there's
anything else I could draw in there that might help, you know, the case
situation here. I mean, there's
windows, of course, like here on the houses, let's just line them up,
make them the same height. Um, you know, there's windows on the sides of some of these, you know, some of
these, as well. Okay. Alright, that's looking good. So let's go ahead and get
started with the painting.
9. Day 4: Snowy River Painting: To get on some of
these nice warm colors that you see
on the buildings. And there's a bit of
grayish color here, so I'm just going
to pick that up. Put that onto this building. That's going to be kind of gray, as you can see, you know, maybe the side, I'll get
in the side as well there. Apart from that,
there's just a lot of these browny sort of yellowy, browny sort of colors, and I really want to
make sure that we have a lot of these in because really our only chance to get in the warm
warm colors in this scene. So there we go. Let me
just make that a bit more. That's better like that. And at this stage, we don't worry about getting
in, you know, any of the details or
that kind of thing. All we want to do is
just make sure we've got a bit of color, okay. And, you know, this area is
actually, like, a bit dark. This sort of rooftop, but
I'm going to make it gray, so it just blends in a little
bit to this wash down here, and the front of this building
is actually kind of white. Los almost looks almost white
from that sort of section. I could leave that. Well, I put in a bit of gray down on the
side of the building there. Uh, that looks a bit funny. Let me I'll just dull that down. Let's
just dull that down. It looks a bit too
white in there. Alright. So the next ones, I'm going to just pick up
some kind of darker color. Now this is again, brown, like a bit of brown or
gray. Drop that in here. There's also some of
these kind of orangy, more kind of vibrant
colors that I'll drop in a bit of this as well. Oops here, here, and then we've got this kind of yellowish building
to the right. There, which I will
just paint around. And, of course, you've
got this, like, triangular shape there in
front for that object. I don't even know what
that is. Doesn't matter. And for the rest of it,
you've just kind of got, like, more warm values. So, you know, in here, it's just kind of again, more of these warm
sort of colors. It's just brown, essentially, I'm just dropping
in bits of brown and what have you, here as well. Underneath, it's kind of like a yellowish, some
yellowish values. This is yellow ochre,
which is a really nice, kind of really nice kind
of subdued yellow color, and it granulates as well. I think it's one of one of my favorite colors that I actually use in almost
all my paintings. Anytime I want to just
dull down a bit of yellow, I'll drop in a bit
of that there. Let's have a look. Do
I have anything else? Yeah, maybe behind here. I could just get in some more of that stuff that
bit to the right. Here, good, good. Okay. Now maybe the whole goal
of this just to get in these these warm colors, okay? Alright, so let's have
a look at the snow. Parts of the snow are
really, really light. I mean, you've got almost
it's just white down here. But thinking to myself, maybe I could make it a little bit, like,
slightly darker, just a little bit of
blue running through it, just so that it gets rid
of the white of the paper. Okay? But it does look
really, really white. Just thinking what we can
do here is probably just, um, I might get another
shadow running up here, 'cause it just looks too
stark and white over there, but I do really like I do
really like the fact that, yeah, there's some nice
blue values running through for the
shadows of the trees. We really need to imply that. So let's have a look. What can we start with first? I reckon what we can
do is start with the we're going to start
with the mountains, okay? A bit of ultramarine blue
and a bit of purple. I'm going to mainly
just mix up this really hopefully subdued value. And there's some grays on the palette as well that
I'm going to mix up. Okay, let's drop this in. Now, the right hand
side of this mountain, you can see, it's
kind of darker. So here I am just dropping
in this color very, very sharply like this. Okay. Coming down like that. Here, just bring that
across underneath. And importantly,
most importantly, we are kind of leaving out
a lot of white as well. Don't paint it all in without
leaving out the white. So for example, here with the
roofs of these buildings, see, I'm just kind of
cutting around the rooftops. Really important to
leave those kind of like a stark white
value, like that. There could be another building back there here,
bring that down. Okay, it's really light
sort of wash of this color. It's just a cool value. So it's probably about ten, 20% paint, if anything. And over to the right hand side, I'll just dole down
that blue a little bit, water it down a little bit, and then I'm going to
paint this right side in. Join it on nicely. Okay, let's see how
we can get this all in in this
sort of one shape. So here you can see on the sides of this,
you know, mountain, there are these little kind of spots you see that tiny little spots
of darkness in there. So I'm just indicating
some of this stuff, right? Just indicating little bits
of that because not all of this mountain is going
to be just white. So you got to make
sure you're leaving in some shadows
running through there. Can even make some of them up. It's normally the light
source coming from the left, so you can play around
with this color. Okay. Good. Take a look here. There's this kind of
ridge. You can see this ridge of
mountain ridge there, so I'm going to leave
a bit of white and then get the rest
of it in like that. Keep it really light, as
you can see, super light. Okay. Then you're running
off to the left hand side, and to who knows what is
happening over there. That should be quite
enough, though. Now, down the base, you can
see there's a little area actually that has like
some green values, which I really want to put in. So I'm going to pick up
just a bit of green. I don't know what it is.
It's just a dark green. If you go any kind
of dark green, use that drop that in this area. It's a little bit darker,
but still transparent. And I'm going to use this
to sort of cut around, as you see here,
these little houses. And it's so important
to have a brush like this mop brush that allows you
to just cut around shapes. Okay? Got a nice
pointed you know, here, especially for the
tips of the buildings, the rooftops of the
buildings, you know, you only get one chance
to pretty much do this. Okay, so that's some of them. Do we want to move
this to the right? Maybe, maybe, maybe, maybe. You can put in some
darker bits as well, wet and wet while I'm here. Yep, drop in a few sort of
darker splotches of paint. Yep, I want to make
this much more visible. Okay, good. Good. Right, oh, so those mountains
on back are looking, you know, pretty
decent, I would say. Now moving down here, I'm going to just I'm going to
just add in a bit of this same blue that we'd mixed up before,
this cooler color. And over the trees, I'm going to leave a bit
of this white in areas. And the point of doing this
is just to make sure I maybe have some white highlights contrast for the trees
that I put in afterwards, 'cause I'm going to go over
the top of everything and really indicate
some of this white. But, I should be able to do it faster and with some difference rather than just go through
with the guash and do it. Oh, a little bit of
that might be good. I've forgotten to put in a bit of warmer color for
this house here. Let's just do that. It's
just a bit of warm value. Maybe here as well, okay? What's this, it's
just a burnt sienna. Got a bit of burnt sienna. Yeah. Good. And let's go ahead and
start painting in. Um, the the blue, the snow. So I've got
ultramarine blue here. It's really, really
sort of blue value. But actually down the base here, it's just kind of, again, like this may get
a bit more purply. Yep, that's better. But,
yeah, it's the shadows. The shadows are kind of
just this blue blue sort of shadow that runs all the
way to this edge there, so you can see ultramarine
blue to get that really nice. Um, cool value. Okay, that. Of course, the water
is actually darker. So we're gonna have to do that. We're gonna have to
add that in as well. So some more blue, but I'm going to also
add in other types of purples and things just to make it subdue it a little bit. It's not too vibrant. Let's have a look here.
Okay, that's looking right. So let's start off at
the back here where the river kind of begins
like maybe back here. Bring that through.
It's kind of like a purple mix with
brown mainly. Yeah. Okay. Now we know this all
goes all the way through, and then you've got kind of
like this bank like that. Um, here, good. Good. And then you've
got some of these, like, bits of snow,
these rocks here. And I'm going to leave, like the left hand side of
them to just look a bit more kind of
illuminated, I guess. So we look here. Good. Kind of goes just around
maybe there, if anything. Okay, good, good. Now, this blue value really has to stretch over more to
the right hand side. I'm just going to
blend this along to this river and then we'll
carry some of it up like this, coming up through the through
this area, like that. There. Leaving a bit of white
and things as well here. Yeah. There we go. Just some of this shadow, I guess, extending over
from the left hand side, and I'm going to do
it here as well. Just a little bit of this cooler value running to the right. Okay. Good. I think
this is important. This is really going to
make the snow pop out, look more realistic. Okay? And now what we can start
doing is putting in a bit of this cooler value into the rooftops of some of
these buildings, okay? So here on that side, you know, we've got a bit of kind
of bluish value here. Let's just paint
that in like that. Here, it's kind of
like it's mixed parts, but that should be
sufficient like that. Yeah, you're kind of leaving
parts of it, as well. So you're not coloring
the entire rooftop in, but just some parts
you can leave kind of dry brushed off as well that as long as you've got
some a little bit of light still left
on these roofs, okay? I can probably
just get away with leaving this one looking
a bit more bright. Okay? There we go a
bit of darkness on the right hand side
of this object, whatever it is, you're
kind of just picking out some cooler values
on the rooftops. It's all you're doing.
That's all you're doing. Just picking out some of
these cooler sort of values. Even here, maybe, you know, I just noticed I
could put a bit here, here, this building
in the background, I might just put in a bit
there for the roof like that. Okay? Just a bit of
little bit of that. Okay, good. Let's have a look here down below all the snow. That's looking right, actually.
That's looking right. I do think maybe a bit, like, running across,
like there as well. Just some other shadows on
that other side so that yeah, so that it sort of looks like it's constant all across, okay? Good. And important to
leave all this white. You got to leave
all this white in there as well. Super important. There's not enough
blue in this water. I just want to drop
something here. Why not? Yeah, it just looks a bit weak. But of course, I do think I'm having some darker
values in there afterwards I'll get in
with the final wash. It's going to actually
turn out much better. Let's see. What
else can we do now? What else do we want
to paint? I think we're going to start off doing the final
kind of dark wash. So let's give that a go.
10. Day 4: Snowy River Finishing: So for the sky, I am going to pick up a bit of
cerulean blue here, and keep in mind, the sky
is actually a little bit lighter than the rest
of the mountains. So I'm just going to pick up
a really light wash of this blue and bring
that across, okay? Like that's just from
the top of the scene. I'm going to move this down, okay? Move this down. And this is the
important bit where you kind of cut
around, see here, just sort of cut
around the white parts of this mountain like this, leaving some little tips, white tips in that
running through here. And just like this. I want to be quick
with this, as well. Yep. Okay, good, good, good. So we got that mountain
there in the background. Then we'll do the
right hand side now, bring around the same
wash downwards like that. Okay, I want these
mountains to be, you know, I want them to look
like they're there, but I want them also to be
a bit of an afterthought. Not too much focus on them. Okay, so there we go. That's it. Just a quick little wash. So almost no painting
there. Okay. So that will kind of dry off. And let's uh let's have a
look. What do we want to do? Let's work on the houses first. Once the houses dry off, we can put in the we
can start putting in the actual trees afterwards. So now, it's a bit medium
sized round brush. And let's get this working. So we've got some brown. Let's get some brown,
some different colors, a bit of blue, bit of
brown, a bit of purple. And I like to have
all these sort of mixed together slightly. Um, just so that I can create the general darker
sort of value. And I was looking at the
reference and thinking, What do we want to
imply in here, as well? So I do want to make
sure that the light is much more obvious. Okay. Let's have a look
completely dried yet, actually. I'll give it a quick dry. Okay, let's go. So that was like this sort of little section there. I
don't want it to be darker. Let's pick up a
bit more a bit of gray mix up some of
this stuff like that, and mix that in, make sure
that's a little darker. The rooftop here should be
a little darker, as well. Might actually darken
almost the entire section there underneath for
that little rooftop. Okay, of this. That can be maybe the side of the building or something there. Good. So blue, a little bit of ultramarine
as well in there. It's always important
to make your grays mixed up of different colors. It makes them look a
lot more interesting. Okay, let's have a
look at this section. There's maybe a bit
here some detail here. You can make this
up, by the way. You don't have to have
all this in exactly. The right hand side of
this building is, like, a little bit darker, like here. There, it's just dark
in that section. Okay. Here, that section's going
to be darker there as well. The rooftop here has, like, a really dark value in
this section, like that. There. A couple of windows that you get sort of
these really darker looking buildings
running through. Let's put in a bit
of shadow there. Um, let's have a look. What do we have here? Maybe a bit of again, the
side of that building. And this building as well, maybe just a bit
of darkness here. Okay, good. That needs to be a
bit darker, as well, just to bring out the
side of that building that Okay. Now, this building
here up the top is kind of there's a bit of
darkness up the top here, so I'm going to pick up some
more purples and browns. Let's just mix some brown
and purple in together. And I'm going to get
this whole dark area underneath this part
of the building in. And of course, you got some of these kind of little
windows here as well. Quickly paint them in. But yeah, the top section
is actually pretty dark. You've got this kind of
juicy color running across. Let's put some blue in
there as well. Like that. Um, Yeah, it's not exactly There are some
darks in here as well. You can just see just little
just darken this down. We'll have to get those windows
in once more afterwards. That looks better. It
looks a little bit better. Now, running across to this structure here, I
don't even know what it is, but let's just paint
in this little part here underneath the roof of it. And pretty much around it, there's all these
darker spots of, you know, really
dark sort of value. So I'm going to just go in and do a bit of
cutting around. You can see where I
painted in the drawn in, I guess, some of
these wooden areas. So you can spend more time
on this if you'd like, but otherwise, just kind
of do what I'm doing here, just kind of cutting
around some of the indications of the
wooden structures. That's going to be right. Okay. Okay, good. Just needs to look
like there's a bit of darkness there. That's all. The sun catching the light off the light just catching off
this area parts of it anyway. Okay. Looking good,
looking good. Um, let's see. What else do we have in here. So those houses are kind
of looking quite okay. We're almost at the
part where we can start putting in the trees
and that kind of thing. But I don't want to get
too carried away just yet. Do notice you know, through some parts that
there's even some kind of darker areas underneath just running through these
parts of the buildings, here, here, you know, just trying I'm trying to just disrupt some of
this stuff happening. There Okay, good. I'll put in some
white afterwards to bring back some
of those details. But let's go ahead
and I'm going to pick up a large rigor brush. And with this, I'm going
to just pick up purple, a lot of purple and
a lot of brown, mix this together to
get a really really sort of dark kind of value. And I'm going to put in, like, indications
of, like, trees. So this is one here, run up like that. Okay? Just quick little
indication of this. I hadn't even drawn this in
with the watercolors, okay? The sky has not actually completely dried off,
but that doesn't matter. Okay? There's also
something else here, another tree coming in from the right hand side
of the scene like that. Another tree coming up here, maybe disrupting this house, going into those mountains in the background there,
check this out, kind of move this brush
around and create a bit of interesting
sort of details. Here, you've got some shrubs, looks like running
through this snow. I'm going to put a few
brush marks there. You know, there's a few just
running over here as well. You know, just
really dark little dark sort of marks
that are running down the bed of the river. And here's a chance
as well to just start to bring out areas of the river. So I'm going around
here and I'm just kind of outlining with
the rigor brush. Some of these rocks, you
can see around the snow, especially around these
white bits of snow, you can see that there's
these darker sections. So this is important for
you to just indicate maybe these are some rocks or
whatever on the riverbank, and it kind of helps to mark
out the river bank as well. I might put in a few little
shrubs there as well, running through this area. Good. Okay. Even with the bottom of
these trees, hit the ground, there's a bit of
something there as well. Okay, good, good. Now, the left side of the bank, there's going to be some
little also darkness, bits of dark there as well. So I'm just outlining
that. Okay. Just kind of bled too far up. I'm going to wipe
that off a touch. So tempted to just make this go all the way out. Should we? Okay. Why not? Let's just make it go all
the way up out of the scene. Didn't intend for
that, but okay, we've got this tree
here to the left. A couple of trees anyway, so let's put them in. Again, with the rigor, it's
just some darker marks. And also, you can use a
smaller round brush or this. Little round brush, some purple and a bit of brown
mixed together. That creates a very
nice dark value. All I want to do is just
cover this left hand side of the scene with some
of these marks, joining over to the
right hand side a bit. There you go. There's so
much going on in here, you're almost, you know, scumbling the brush pretty
much through this whole area. Okay, continuing on, I still want to make sure that there are some darker marks and bits
and pieces running through the left through this kind
of mess of trees over here. Okay? But that should be okay. Just more kind of
verticals would be good running through
in some parts, but some little fine
fine brush strokes as well running across, hopefully helping to connect
to the scene as well. I mean, it's just
crucial, I think, anyway. One thing that I like
doing as well is I like to pick up some darker
greens or whatever paint here and just dropping
drop some of this in into the background where
we might have some trees. We've got all kinds of you know, bits and
pieces back there, but essentially
because you've got so little sharper kind of marks, I think this is
really going to help. Plus, hopefully, it might
even help me to bring out the rooftops of some
of these let's see here, some of these little houses. So notice me, I'm just going
over again and really making the bottom of this
area darker. That. Intentional scratch off
a bit here and there. But as you can see, it's really it's really
starting to make those houses pop out a bit more very important to do that. I think anyway to create a little extra
element of contrast, but not too much,
so I'm going to just lift off touch like that. Okay. But I want them to just
pop out a little bit more. So more little bits of scumbling around will be good as well, just like around here
for these trees and, uh it might have some longer bits of branches and stuff
running through as well. Yeah. I don't want to
overdo it, though. I just have to be very
careful because I can get a bit trigger
happy at times. Good. Yeah. The main thing is
just these darks really need to be
quite dark and it's a difficult thing to do because you're really
just trying to mix up as much paint as
possible for this. There's maybe another one here. I just miss this one. There's
something there as well. Because these bits of darkness
here are going to form the basis of the snow once
we get some of the snow on, and it's just going to look
much more interesting if we have more darks running through. Let's take a look
underneath these, I'm going to start just picking out some little details now, for example, this window here, another window here, there. For instance, maybe a little round brush
is going to be better. What is actually. Yeah. Okay, good. M Okay, fantastic. Let's see what else do we have? Yeah, just kind of
really thinking about how I can bring out
some extra extra darkness, extra bits of contrast here, I could deal with a bit
there, have a look. Maybe some windows
or something now the sides of the
buildings like this have been underneath the
rooftops as well, like there. Okay, that's this house. There's something there here. Kind of just picking out, looking at the
reference and finding maybe there's some little bits of darkness here or there on
the roofs in the rooftops, that kind of thing, bringing
out some structure. There is even a
window, it looks like a little window here.
You barely tell. You almost barely tell
what is going on in areas, but you can see that
there are some dark areas and it's like almost
a fence or something. It does look like a fence
actually running around here. So I can just imply imply that and then bring some
snow into it afterwards. Okay, these bricks we
had applied before just quickly in a few little
scribbling details here. Okay, good. Okay. Good. Little windows or something
here in that house in the distance and just
a little more outline for the rooftops. I mean, I can even just
put in some windows, some details for that house. It's not there, but I
just want to do it. Okay. Stick. Let's give
this a little dry. Okay, final step, we're
going to bring back some of the highlights with this
white guash that I have here. And, of course, here
I think there's just a bit we can
bring back there, any kind of white sort of area. Now it's not going to be
completely white, I think, with this squash, I've got it mixed in with a few other
bits of paint as well. But you can bring
bits of it back. And most importantly, I really want to get this
sort of indication of snow on parts of these bricks and things.
I'm going to put that in. I'm going to just try to
imitate the reference. You can see here there
are some bits of snow like qualities there
sort of So that, you know, a little
bit of water as well through that mix here. You know, another cool thing
is like this, the trees. You know, you can see the
trees actually have a bit of snow on them as well, but
there's a little darker. I'm gonna mix some gray into it, maybe some little bit of blue. A little bit of blue into
this squash so that I've got some little indications of
some snow on the trees. Let me just bring that
up like this. Yeah. You can see it helps to
outline the branches. Of course, I don't want
to overdo it as well. This is just a few little bits and pieces up here, sporadic. Pretty sporadic sort of
looking as well, you know, here you've got some maybe on this other tree behind a bit of snow there running down
the tree into the ground, too, you know, we can
actually bring back some little bits of snow. And you know, you
also get on top of the fence that I was
talking about before. Not only that, but there are these little
structures here. I don't even see
exactly what they are, but they look to
be like parts of them to be parts of the
house in the background. So I'm just going to,
you know, put that in. That looks like it was
another structure, like in front of it. No big deal,
something like that. And let's continue on. That's probably a bit
too much to erase, maybe just errase part of that. Too many too much
of a sharp edge, too much of a sharp
edge there to apply. Maybe a little bit like that there running in there
would be better. These shrubs, of course, the snow here in the little bits of highlight highlighted
bits of snow in here. Look, this tree. Oh, here we go. This is going to be a bit much. But using the same color, I'm going to go through
and just put in a few little bits and pieces. Okay. Good. I almost just bringing
back a little bit of snow a sense of
light, I suppose, in areas as well. In.
11. Day 5: Snowy Mountain: Is a nice and simple composition
that I want to try out. I think this would just make
easy scene for a beginner. And let's first go ahead
and put in, you know, the most basic
part of the scene, which is basically a
house here at the bottom. I'm going to leave a bit
of space at the bottom of the past I probably about
5 centimeters or so. And I'm going to start
putting in this shack. And all it is is you've got
this triangular sort of part here for the roof.
Comes down like this. Actually, part of
it is obscured by the tree, the tree to the right, but can actually still get in this sort of section
there, like that. It's a funny little view. It's almost like coming from, coming from, like,
beneath, looking upwards. It's interesting looking view. Yep. Let's have a look here, that bit of snow on
the rooftop. There. Yeah, very quiet.
Difficult to see exactly where the
roof actually starts, but I want to leave a bit of
white just on the roof here. So, yeah, it's going
to look a bit more. It's gonna look a
little bit better. Maybe this will
just be the tree. So here, coming in on the
right side, tree here. Okay, you've got more here. A lot of this stuff you're
gonna just be able to get in with the watercolors, so it's not a big deal at
all. There's some trees here. You can see I do like
how they kind of go up this sort of mountain, the sides of the mountain. But some of them just keep going a little bit
further up, okay? And I think that should be good. I don't think there's really anything else that
you need to draw in. This is a pretty
basic little scene. So let's go ahead
and get started. So what I want to do
first is this whole area, actually, I want to just add
a little bit of blue, okay? Just a tiny bit of blue
to get rid of the, yeah, basically, the
white of the paper. So just to kind of
get in this sort of snowy sort of look, yeah. But anyway, it's just
a bit of color there. And cutting around
this house, as well. If you just want to
really cut around the rooftop and maybe
the base of it, as well. Okay? It look cool. That's too much. That's too much.
It doesn't matter. You can shift this around. It's actually very difficult to see what I'm cutting around, to be honest, without
enough color in here, so tiny little bit of
color would be good, okay? There we have it, you know, kind of like a bluish tinge, which is, you know,
you've got areas which you have this sort
of bluish tinge anyway. A bit of gray maybe up
the top here as well, a bit more blue. Just want to feather this
to make it get rid of that white of the paper. Good. And into the house, I'm
going to drop some color. Okay? And it's
basically just going to be some brownish value. So I've got some of
this burnt sienna. Great color for this. Now, dropping it in like that, and all the way up to the rooftop where
you've got the white. So there we have it just a
nice little edge like that, and then we're going to
bring this all down. Some of this is
going to seep into the to the other sides, I'm not gonna worry too much. If it seeps a little bit into the ground where the snow is, I'm not too fussed. Okay? Okay, there we go. Just
a little bit of brown. That's it. I'm going to be able to get more details
on afterwards, anyway. And let's have a look
down at the base here. Now, we want to wait just a little bit of time for this water to dry, okay? But kind of hot day
today in Melbourne, so I can actually go
ahead and pick up straight away some
different paints. So over here, got
a bit of green, a bit of undersea green. Alright. I've got
a few other colors here on the sides as well, can actually remember
what color this is? I think this is. It's also
another type of green. Okay? Other type of sort
of green value. And what we can do is just
sort of drop this in. Check this out. Drop it in
like that, and it will spread. I think a smaller brush will be better a
little round brush. And look at that. It just sort of spreads around. And, you know, do you notice, maybe there's a
little bit of orange. I'm gonna get a little
bit of unacrodone burnt orange and drop a tiny bit of this in
here as well, okay? And this is so much fun. I really like painting
wet into wet, and you can get all
these nice sort of values running through
and nice soft details. Okay, does help to just
leave it to dry for a bit, but you can see how that
paint is just moving around, doing its thing, absolutely
beautiful effect. Okay, put a bit of darker
purple paint maybe somewhere on the left side of the
trees to indicate the shadow or something. Okay. There we go. Let's see. Where else have we got
another one there here. It's spreading quite
a bit, isn't it? You got parts of, you know, the paint just
spreading in areas, but I'm going to try to keep
this as contained as I can. There's little
parts, can you see little small trees just sort of running through
the background, rocks and stuff like that. So you want to imply
some of this stuff as well so that it's
not all the same. Even up the top here, you've
got some I don't know. There could be rocks or trees or something up in the back. Okay. Good. And I think these are sort of rocky sort of shapes
running down the sides. I'm gonna pick up
some brown bit of this it's basically raw umber. I'm gonna drop in here
for some of these, like, rocky shapes
that you can see, just running down the side
of this mountainous area. You got some of it here. Maybe you can see it's sort
of these rocky outcrops, I suppose, that the snow
hasn't completely covered. You've even got some
maybe at the top here. No, just exaggerate a
little bit up there. Okay, I really think I'm
gonna have to exaggerate some of these shadows as well. Might think of putting
one in another tree, maybe another tree here as well. Some other larger ones
up the top to hopefully, again, cast make it look
like it's casting a shadow. Okay. I was just checking how it
looks if it's balanced or not. It's looking okay.
As kind of brown and putting a bit of brown and maybe a bit
more green in there. Okay, good. And while
the paint's wet, that's where you can just
sort of drop in some more and reshape and
that kind of thing. Just play around with this.
This is a magical sort of really the magical part of watercolors that I
absolutely love. You can't do this in
any other medium. And this was to my, you know, dismay initially when
painting watercolors, the ability to control this, the lack of ability
to control this in the beginning was
a big stress for me. But, you have to learn to just go with it and realize you're not going to actually
be able to control this. To a certain extent, you can. But mostly mostly not. A bit of neutral tint
and a bit of purple. I just want to drop in some
darker value tree here. It's actually meant to
be, like, a darker green, but I've added way too
much neutral tint. That's right. That
can just sort of go over the edges of this
building like that. Sharpness there, and it
just comes down like that, like a bit of sharpness. Then I might have
another one here. Just moving through
this section. Larger trees, of course, are going to be great
for this section. And these trees are kind of
getting a bit you see them, they're sort of
becoming a bit browner in this section because they are looks like the leaves
have started to fall off. Okay, so they're kind of these you can see the little
twigs coming off, which will get in in a moment. I'm not completely finished yet. This is just really a way to start now start getting
in some bits and pieces, some little details, okay? Okay, good. Good, good, good. Okay. Let's grab my rigor brush. Rigor brush. And I'm picking
up really dark paint, just the dark paint that's
leftover on the palette. As much of it as I can.
Maybe some neutral tint just mixed in the
corner as well. Let's have a look
what we can do. So we want to put in maybe
some little, you know, verticals running
through in areas. Um, Like that. Okay. Sort of just shaping off some of these
trees at the tops like that. Especially around this house. I think this is going to
create a bit more contrast. There's even some behind here, there's a bit of darker valued
house or something here, or tree, just drop around the
white part of the rooftop. And because I haven't put any water into
the rooftop, you see, it's not really made
any sort of color run. I'm just again, sort of putting
in some more verticals, especially in some areas
where there may not be, you know, those
verticals as well. I want to add a
bit of complexity around here because
we're sort of grasping at straws for some
of this detailing work. I'm going to grab some blue,
some ultramarine blue. We're sorely needing
some really want some blue kind of values
running in here, as well. We're just missing some of it. Okay. Good. So this is all starting to dry
off and do its thing. But what I want to do is put in some little little shadow, some little soft shadows. So gonna grab some
ultramarine blue, mix it in with some
cerulean blue here. Good. And let's get in these shadows. Now we can see the shadows
sort of running to the left, aren't they like that side? More ultramarine, actually, just a little more ultramarine. I'm trying to really
emphasize these shadows, running to the left, okay? Changing the reference
photo just a little bit, maybe make some of
these quite long. Some of these shadows
a little bit longer, but they're just kind of, uh Yep, maybe a bit here
behind the house, as well, like this part. Some of these trees make cast
a shadow as well through there, even across here. Why not? Let's just get a bit of that blue through
there, as well. Okay, good. That's the great thing
about this paper. Rough watercolor paper. You can just really get in these nice Oops. Nice bits of white running through there. That's
what I was trying to say. That very abstract. You know, a smaller brush, and I'll quickly again, just start putting in
maybe some of these trees. Maybe a little rigor brush
will do a better job, okay? You know, you can see
in some areas having some verticals running
through here might work. Especially especially
where we've got areas of quite
strong contrasts, you really can produce more interesting looking
scenes like this, rather than all be kind of kind of all wet
into wet and blurry. This sort of just adds
a little bit of detail on in areas that you want, there's even some sharper bits like this running up there, little shrubs and things. And this area hasn't completely
dried yet, actually, so you can kind of go in, put in a few bits and
pieces and details. You can even darken
some of them as well. Good. And you can also pick up a little pocket knife and do things like scratch off paint. So, you know, like
here maybe or here, where you might find some, some trees, I guess. Yeah. Again, just I just helps
to break this area up, so it's not all going to be the same same same old, I guess. Makes it look a bit
more interesting. Got to be careful with it, not to kind of overdo
things as well. So yep. Maybe a little lift
up here, you know? Down the base, I think, is going to make bigger difference. Okay, so final
finishing touches. I'm going to exaggerate
some of the shadows and, of course, also bring out
this house from here. And I've got really browns, just some dark brown in here. Let's just put this let's
just start round about here. It's gonna be darker
underneath this little part of the shack comes up
underneath here. That probably should
have left a better. Yeah, I can just do that maybe. Should have left a
bit more of that, um wood lighter wood color. Okay, cut, maybe some
of these windows. This some more like that. Yeah, I sort of just
sits on the on the snow. Um, I just sits
here in the snow, and then you've got a bit of shadow running
to the left of it. And maybe just dark. There's a touch more here underneath the roof
part of the roof anyway. And then we've got some
sharper kind of shadows. So I want to put in
ultramarine blue, really just a bit of
ultramarine blue here. It's diluted down as well. I might work on
these ones first. Just some of these
trees you can see here, they're maybe casting a shadow to the left there, you know, just some sharper sort of shadows running
through the snow. Um, like that. 'Cause you've
already got a lot of those softer shadows running in, but this is gonna kind of
help to balance it out. That kind of to the left. There. Mm. More blue underneath the house, kind of like the shadows being
cast by the trees as well. I want to leave a bit of white, too, so it's not
all just, you know, blue running down here, a little bit of that snow feel.
12. Day 6: Helsinki Drawing: Let's get onto the drawing. And the first thing
that I want to do is put in roughly
the kind of water line, and there's not
much water there. There's just a little bit, but I'm raising it a
bit further than in the reference photo
just so that I can get some
reflections later on. I'm also thinking
about maybe putting in a couple of boats here as well. I'm just quick indication. The reason why is I want
to balance this house on the right hand
side with all that white paint on the
outside of it. So let's firstly, let's find that sort
of middle area here. So there's like this rock here, rocky sort of area on
the coast like that. Gonna leave out that
little pole behind. Oh, fantastic. And there's all these
rocks and things here. It's not much at all, but that just needs to
be a different color. Okay? Then it turns to this
sort of nice greenish value. You can see behind there.
Okay, getting on these rocks, these sort of outcrops of
rocks and stuff here first. Okay. Now, this is the area that we really need to kind
of pay attention to. And we've got this house here. I'm going to put the
front of it in first. It's like this white rooftop
and also not the rooftop, but the front facing
part of it, like this. Okay? That's it. Just a little detail, just like that, essentially. Okay. Fantastic. Behind, there is also
some more details, but I just want to get
this little bit in first. This right hand side here, you've got like this
tower like shape. I don't know what it is,
but it kind of goes up like this and goes upwards there. It's just some sort of structure just pointing
upwards essentially. Let's draw in this top part here and I'm going to try
to simplify this down to maybe this rectangular shape that comes out at at
the base like this, and then we have this
dome shape on the top. There we have it,
something like that. Good. And let's have a
look. What else do we have? There's probably a bit
more detail in here. This left side, there
is as you can see, that sort other structural
components as well in there. The bottom just sort of
flares out a fair bit. It's decent for the top
of this little dome. What have you? Good. Now,
the side of the building, you've got this kind of bit
that juts out like this, comes across like that. There's another part here, atriangular sort
of part as well. I just want to emphasize that
the side of it a bit more. Don't really see that
in the reference, but I want to yeah make
it a bit more Obvious. Now, underneath here, this is when things get
a little bit tricky. There's like windows, and then there's sort of sort
of white areas. So I'm going to bring that down. But remember, we've
got this tree just running through here, okay? And here on the left
side of the building, I'm just going to put in some
little details like this. This whole area kind of just
needs to be in the dark. And it's very kind of
bluish back there, which I like offsets the warmth. There's another kind of
dome like shape back there. Look at that. You can barely
see exactly what's going on, but you can generally
tell that there is the side of the building
running back there. Okay. Let's get some details
of the building. So the top section, there's
these sort of bits there. There's looks like a
balcony of some sort there. Then there's some more
little windows on the side, which we'll have to get in with a bit more
detail afterwards, but this is going
to be good enough. For now, there are
some of these, like, balustrades here you
can see just going up. Looks like they kind of lead
up to the right hand side. You can't see exactly
where they go, because there's all these
trees blocking the way, and there's these rocky
outcrops there as well. A bit of white detail
here for, like, another staircase running
up to the building. Okay, fantastic. The rest of this is just, yeah, it's sort of tree
shapes, like there. You got a larger one here, maybe that just
comes up, goes down, and then you've got, like, parts of the trunk of the tree, as well, which we're
going to leave white. Some more tree shapes there
just to kind of indicate. Now, this left hand side
is a little bit easier. You're just going to put
in the general shape of these trees like this, and of course, you've got
some verticals as well. That some verticals, some close
to the ground like there. But they're kind of growing
up from the grassy coniva. So yeah, this is
going to be good. Yeah, I just wanted to draw
in a little bit of it, make life easier afterwards. Okay, and of course, in front, there's just trees
all over the place. There's like a tree heaven going in front of the building. It's going to be a real
important part of the scene, of course, these boats, as well that I thought to
indicate here and here, you know, perhaps maybe
I could get a purse. There's thinking
when I get a purse, there's a couple of people just standing by the water like that, maybe just having
a conversation, another boat there, for example. Yep, I just want to
create a bit of contrast, little bit of contrast. I think I'll let's just think
how we're going to do this. A might be a bit too much. I'm just thinking
maybe just three. Maybe just three boats
should be fine like that. We'll leave them white, as well. Uh, yep, fantastic. Okay, we are ready to get
started with the painting now.
13. Day 6: Helsinki Painting: A bit of color for
these buildings, I want to firstly get in
some of the roof color, which is going to just
be burnt sienna, okay? Just a bit of burnt sienna. I want it to be, like,
a really warm color, warm, sort of brownish color. So this top part there, I mean, pretty much everything
behind like that, going to be able to
just get in with a quick little wash,
rooftops anyway. And really trying to keep that
area of white exposed too. And this has to be
really quite light. So you're mixing in
maybe 10% paint. The rest of it is just water. Alright. The dome, as well,
you got to take a little bit of
care to cut around. But if you've got a little
round brush like this, you're gonna be fine
or a little mop brush. Okay, so go up. There we go. That's probably the hardest bit of the painting, to be honest, getting in this sort of
dome like structure. It doesn't have to be perfect, but certainly I think it helps to maintain a bit
of accuracy there. Here on the rooftop
again on the right, I'm just going to go all the
way to the edges like this. Okay, fantastic. And, of course,
we've got this one here as well in the background. And, you know, part of the
work is also cutting around these later with the
blue paint for the sky. So we're not quite done yet, but this is the kind of light
that we're painting in. We need to be careful with it. Okay, great. So those are the kind of
warmer bits that we needed to put in there. Let's have a look. What else do we need to do? I think that is looking
pretty decent for the rooftop sort of areas. Now, really, for the next part, I just want to put on some kind of bluish paint
maybe below here, mix it in with a
bit of the brown. I just want to make sure there's some type of paint running like a cooler paint running down the sides of
the building here. I'm going to go
over it again with some other color,
some bluish color. But for the time being,
we can go through that. A lot of this other stuff we
just need to leave white. So moving further down, I'm just picking up really, it's a leftover color that
I have on the palette but if you've got
some grayish paint, that's going to be fine. Just mix your three
primaries together. You can get some kind
of grayish color. And let's have a look Yep. Just for these rocks. Oop, that's too dark. Let me just re jig that. Yep. Just for the
bottom of this house, there are some
sort of dark spots underneath of the brickwork
or what have you. Okay. And of course,
leaving some of this out. Okay, good, good, good. Am I gonna carry this down? If I can just try to get all this in with one
wash, that's the best. Possible outcome, really,
you don't want to spend too much time
fussing about, okay? Now, moving further down, I'm going to mix up some
green, a bit more green. I've got a few different
greens here on the palate, but just going to put in a very muted green,
some yellow, perhaps. Let's just get
some more of that. There we go. Yeah.
I just want that to really and I'll use
this also to maybe cut a bit around this side
of the building, okay? But it's really, again, it's a soft wash. You don't
want to go too dark here. Especially down
the front where it becomes almost this outcrop, this rocky sort of outcrop. I just want to make that like a grayish color for
now, like that. Cut around this
little boat. Yeah. Bring it all the way to the edge for water. Do the same here. It's kind of like
a grayish value that you can mix together with
all your three primaries. I use neutral tint
saves a bit of time. Oh, I went over that
boat by accident. Okay, and moving my
way upwards again, let's just start to
put in these trees, and I can do this
all wet into wet. Leaving a little bit of
white for the trunks. But, you know, at
the end of the day, a lot of this stuff
was going to be implied with some guash, so it's not a big deal
if we don't get this in correctly, 100% correctly. Let me just get in forgot to put this section here of
this backing area, which actually is darker. Kind of like a bluish color. Just want to blend that in with the side of that building. Forgotten about that before. Okay. Good. The rest of it is just kind
of greenish greenish colors running through, Kate? Okay. Good. Let's put in some of the sky. Cerulean blue. Sort
of cerulean blue. And I just want to
double check first, just want to dry off the top of this building so that I don't get any furry bits. Okay, let's go straight
in. Cerulean blue. Why don't you start right
at the top, cerulean blue, really light wash,
probably be at 15% paint. And I'm going to bring this down the page cut around
the buildings, which is very important. I'm gonna make maybe make the area around the
buildings a little darker. S that's I don't want to overthink it as well, so just go in, get it
sorted and continue on. But yeah, it's kind of just making sure you're implying
some of that light. Okay, a bit of light. It's actually on this dome. Geez, it's a bit
tricky, isn't it? Just cutting around sometimes. But if you've got a thin
tip brush like I do, it makes easy work of it. Your brushes really need to have a point to Good. Just coloring through
the back area here. And I'm not fuss now. I can just start mixing some
of this skywah downwards. If it goes into the trees. No big deal, 'cause I'm still
not done with the trees. I want to paint some contrast some darker contrasts in there. Okay, fantastic. I always like to carry
around a spray bottle for this so you can just sort
of spray into parts, areas that haven't
completely dried yet. You re wet it, encourage colors
to sort of mix together. I didn't get any on top of the building because I
think that's just going to cause that color to mix
around and look not so good. So let's grab our round brush, make a medium size round brush. I'm going to start
putting in some darker values here, okay? So I got other greens, but darker sort of green values. Maybe some purple as
well would be good. Do have some purple, a
little bit of purple here. And we can do
things like add in, you know, some darker
areas of trees. The light source is coming
from the right hand side. So some of this stuff
you want to leave out, you want to make it look
a bit lighter as well. But here, I just want to
kind of put in a bit of darker areas on the edges
of some of these trees. You know, down the base as well, you can just see some
darkness, you know, here. Look, there's some
darkness in here. Just kind of picking out
a few bits and pieces. Of course, on the
actual building itself, you can see there's
actually quite a lot of some dark value here, which I want to pop in
just to really emphasize the brightness of
the light hitting the house, back to the green. Not all of it has to be
painted in wet to wet as well. You can sort of leave some
sharp bits as you see. Really important. Ar. Let's have a look what's going
on here on the left side. There's some shadows
actually running on the base around the base of
some of these trees. In fact. Okay, but you've got
some darker bits of green here running
to the back areas. There there's get that sort of bit up the top here
of the trees as well. You kind of making
sure that you've got the full range of
values, I suppose, not just, you know, 11 green value, and that's it. You want some lighter ones. You know, as you see here, there's even some purples
in there as well, which are not a big deal. We just want to make sure you've got a lot of different
things going on. And of course, there
are, you know, near the rocks, there's
some details there as well. I think I'll go through
and get that in later. But for the time being,
I want to actually start putting in some of this water. So back to the mop brush. I'm going to pick out
some ultramarine blue. Drop that in here.
Let's have a look. I'm just going weigh
this up a bit, maybe a little bit of
brown in there to just, uh subdue it down a bit. There's also some
purple in there, a bit of brown, bit of blue. Okay. Like that. Still, I want it
to be fairly blue. Cut around here, this boat. Okay, you're going
to have some sort of sharper edges in places, other parts just leave it. Um, Good. Good. Yeah, you got this, uh, area underneath like
that with a reflection. Um, we're gonna have to
work on that a bit, though. I don't want to leave it
completely that color. Me purple, purply sort
of blue down the base to create a sort of a darker
sense of contrast there. Um, good, good, good. I might just soften. I'm just really thinking
to soften off that edge. It's too much. I need to soften this bit of water on the edges like that. It's Okay. Good. So then we have some kind of waves and stuff running across the surface of the
water as well. It's going to look a bit better. And maybe some of this like
brown that's above here. So, as you can see, this top part, the reflected
water reflected area here, maybe from the top
of the building. Okay, needs to have
some of that in there. Otherwise, I think
I'll leave the white. That looks pretty pretty
interesting, actually. Okay. Let's put in. I'm gonna drop in a ton of this green that
I have leftover, just so that it
also reflects a bit of the trees and things. Uh, yeah, it's not
just completely blue. Okay. The base, again, more blue and a bit of purple perhaps to really just draw
out that extra contrast. Water needs to be darker than the sky significantly darker. So that's why I'm really
spending a lot of time here mucking
around with it. I think that looks decent. So right. What else
do we want to do? Really, it's just looking at the trees if we
need anything else to, you know, anything else we
want to put in with the trees. But really, for the time being, the trees look quite right. Actually, I want to leave
it for a bit and then maybe go back into it to put
in some extra details, also lift out some colors, some lighter sort
of values as well. That's going to
be quite helpful. But yeah, as you can see, you can sort of
just drop painting, darken around some
parts as well, let some interesting blooms
or what have you form. It's these little
contrasts that actually make your painting look
quite fascinating. You've got to have a
lot of those in there. And I'll add more in later, maybe with a bit of wet on dry. Alright, let's have
a look at the house. I'm going to need to pick
up a smaller paint brush. Now, this is just a
little round brush, and I've got some
ultramarine blue mixed in with a
bit of brown here, ultramarine blue and brown. Okay, but mostly
ultramarine blue. I want a nice little, you know, coolness, especially running on the left
hand side of the scene. So let's have a look
how that looks. I think I need to dry it
off first. Okay, fantastic. Let's go ahead and
get in some of this cooler color
now for the shadows. I've got a bit of ultramarine
just mixed in with this other color
leftover on the palette. It doesn't matter
exactly what color is. As long as you've
got a bluish sort of value in here, you're
going to be fine. So you can see there,
just sort of kicks out underneath this really
nice sort of bluish value. And you've also got
it runs right next to the as you can see, right next to them to the white. I'm going to mix in some
brown with the blue again. I just want to darken
this a little bit more. There we go. Yeah,
just to make it really look proper properly dark. Okay. Just make sure I
really straighten out this section to the left. That I mean, it all is
pretty pretty dark, really, as you move out
towards the back, even this sticks out there, that's sort of also part
of the whole thing, okay? It's all trees running around. No big deal.
Something like that. And we can start putting in a bit of detail now.
Let's have a look. Up here, I do notice
there's kind of a shadow running to the
left of this building. So let's get a bit
of that in there. Like this sort of
runs all the way down like that left
hand side of the tower. And this one here as
well, you've got, like, a bit of that shadow running to the left
hand side, like that. Bit of shadow underneath even. Yeah, there's some kind
of shadow here as well, from the tower casting
a kind of shadow. Might, like, emphasize that
a bit better like that. Okay. There's actually
a chimney here. I almost forgot to put it in, but I can emphasize
that a bit like this side of this
building there. Okay, little top part
of this white area. I'm going to outline with
some of this darker paint. You know, you can also see some little details like on
the edges of this tower. I'm gonna just indicate some of this 'cause it does
sort of run through, as you can see,
nicely like that. Okay. That Okay, bit of detail in
the building now, just on these little
details there, like on the windows, just popping a couple
of windows like that. Um some more little
windows down below here. Simplify these down. There's also some underneath
this area like that. Okay. Good. Water down this color touch and I
can start putting in some extra little bits and pieces to bring
this all together. Okay. You can't get this in exactly, but it's just enough
enough in there. Okay. Tiny little details
like for example, these like balustrade
or something here. Okay. The rooftops, I think, would do well with some
little like marks like that. Good. It's really
just extra detail in. I want to just jig that
left side a bit better, like that. Good, good. I want to put in a bit of shadow underneath the
building, the rooftops, so just indicate some
of this stuff here. So you can see,
actually, it's quite dark inside some areas. You've got bit of shadow here. Shadow running to the right like this. What else do we have? There's a bit of shadow
here at the top, as well that has to be put in this uh kind of balcony area. There's a bit of shadow
underneath there like that. Okay. Just emphasizing a few
of these other marks. Really, it's not a
huge amount of detail, but just something to keep
it looking more interesting. Okay. More green and other
darker values. I'm going to drop in here for
some darker sort of trees. It's just a kind of rigor brush, but it's got a larger belly. You can use any sort of rough
looking brush for this. Okay. Just want to add a bit more sharpness onto some
of these trees like that. And hopefully helps to
sort of bring out part of this, the house, as well. I think the trick is leaving out enough of the previous wash, as I was mentioning before. There's also these shadows
running to the left, which are quite
important to imply. These tree shadows,
basically. Ah, good. I just want to outline a bit of a area here that separates the rock and the
trees down over here. And also, I don't want
it to look too forced. Okay? That's the bank. Good. And I'm gonna pop in some downwards war sort of brushstrokes
here and there for this, the reflections of
some of these trees, but I don't want to overdo it. Yeah, just have enough in there, essentially to imply some of the trees being
reflected below. Okay. But on the
right hand side here, for example, you see, you've
got all this lovely light. I don't want to get rid of that. Just want to make
sure that's still, you know, more or
less showing through. But, bit of this
feathering technique does help to yeah, I guess, make it look a bit more
blend those dark bits in, I suppose. Okay. Quick try. Alright, I've got a
bit of white guash, and I'm going to use
this to just bring back maybe some of these reflections
just a little bit here, maybe on this right
side as well, moving downwards,
yep, like that. Also, the boats, the
reflections of these boats, maybe a bit running downwards
down the page like that. Um, yeah. Good. This way looks better. Just a quick downward
stroke like that. Maybe some little bits on
the shore like that. Okay. I don't have some just
little waves in between, that kind of thing
there and the trees, I think I will just put in maybe indication of
some of the trunks. I don't want to overdo it. Just something to indicate some light of those
trees back in the distance there.
And we're finished.
14. Day 7: Iceland Drawing: All right, let's
go ahead and get started with the
drawing for this one, and I'm going to put in the
horizon line just underneath the middle section of the paper and bring that all the way across
to the right hand side. It does shift up a little
bit on the right hand side. But apart from that, it's, yeah, really just almost
in the middle or slightly below the middle
part of the scene. It doesn't have to be exact. You can even shift it
around if you want. Now, here is this mountain. I'm going to put this
one in first and firstly just estimate roughly
where the tip of it is. I think we'll leave
that to be the tip. And then it comes
down roughly to around just after the
midpoint of the page. So maybe like here, okay? This mountain is
important to get in roughly because it
does form a yeah, it does form a big
part of this scene. So, look, there we go.
Hopefully, like here. Of course, I can just sort
of spend more time on it, but I think that's
going to be enough. Just something like
this. Okay, so we've got this mountain
there in the background. Of course, there's
all these kind of details in the mountains as well. We can
put in some of it. So over here, you can
see there is a kind of ridge that runs, you know, across kind of areas that
are not covered by snow, just sort of like that
darker rock area, but really the right hand
side of the mountain, if you look at it, it's
almost like the same color. It's just all dark, okay? Plus, you know, you've got some really dark spots
intermixed in here, which will get in later on. We don't need to do that with the pencil work at the moment. Okay. And let's have a
look down in the end here, we've got this kind of
big misty mountains all the way in the distance there, and you've got kind of, like, another ridge here, and this goes all the way across to the right
hand side, I'll leave it. We'll leave it like that. Okay. I left a little bit more room. The paper is a touch wider than the
photograph I've taken, so we're going to have to
just make do with that. And you can see there are these small also ridges running
through the snow. Okay, coming to the
right hand side. Great. Fantastic. Okay, so let's start
putting in these houses. I think this is going to be the most difficult
part of the scene, funny enough, and it's not
going to be too hard at all. This house mainly is going
to be the one that's going to take up more real estate. So the rooftop is going to be just this
sort of triangular, like, shape, Okay,
triangular like shape. It's really I thought it
just looked incredible. This house just in the
middle of this area, stark, sort of white
section of it, as well. Quite beautiful. And that's the
rooftop of the house. Now there is a little chimney. I zoom in and just make sure
I get this chimney in okay. Right? It's easier with the
mechanical pencil to do this. Now, of course, it doesn't
have to be perfect as long as you've got some sort of semblance of a chimney there. You should be fine. And the same thing goes for
the bottom part of the house. Let's get that in here. Okay, run that across like that. And you got the side of
the house here and well, the front of the house
and the side of it there. Okay, so a little bit
more care, I suppose, for this section is
certainly warranted. There are some smaller details
on the house, as well, which just sort of tempted to
add in a bit of something. But again, I'm not going
to focus too much on this. This is going to be
quite a loose painting, so, you know, we've
got some windows. This stuff here we can kind of get in afterwards with a bit of a darker sort of watercolor
paints near the end. I think that's going to be it's definitely going to be better. There is this darker sort
of ridge that runs behind, and I'm going to put
this in because it runs just behind the
rooftop, as well. This is going to help to add
a bit of extra contrast. Runs all the way across
there, and then, you know, you've got the cliff, the face here, I guess, near the water. And behind, you've got
these tiny little kind of houses that just peek
out behind there, and I'm going to indicate
some of them, of course. Now, just thinking how
many I want to put in and whether I want to actually make too much of a deal of these, but just something there
in the background, I think that's going to be good. You know, a couple of
little houses back there. Okay. And you've got this
kind of bit of shadow or this ridge running
to the right hand side, like a darker sort
of shadow here. Now, all this area is going to be quite interesting
because we've got this, like, road that runs
all the way into the scene here like that. And then here. And then the road just runs into
the scene, I suppose. There's across a
little bridge there. Okay, but there's also the road leads around the
side there, as well. Okay. But over here, you know, you've basically
got these rocks. Now, I took this
photograph to leave just enough shadows in here
and a bit of light here, but a lot of this is
really in the dark. So, you know, we just want to
imply some of these, like, rocks here and you can see
that sort of rock that's got a right hand darkness
on the right hand side. There's like
darkness here, okay? A lot of this we're
going to have to get in with the watercolors. Don't try to, you know, draw it all in or to
color it all in in pencil because it's
going to Yeah, it's going to be unnecessary. Just waste time, okay? So that's another
kind of rock there. I might make another one
up just here as well. Okay? There's probably
another one here. And here in the water, you've got more of
these sort of rocks or shapes down here in
the water. Okay, Rocks. This is all just like complete darkness
apart from a bit of water that's reflecting some
of the light from the sky. So I really want
to make sure that we preserve that water this whole area here
that I've left white. Okay. Great. Let's have a look. What do we have? Down here?
There's another mound. Let's put in this little mound kind of in front of the house, like there, there's again, a bit of shadow
running to the right. It all depends really on how much detail you want
to pop in here, yeah. It's not necessary to
put in all this stuff, but I do find it helps
as a bit of a guide, so you don't have to worry
later what you're doing, what you're actually
painting, even though this is all quite abstract, okay? There's light running
through this whole section. This is going to be interesting, really interesting
to sort of paint. And, you know, that's getting
some more of these hills, sort of hilly areas here. Okay. Good. Join this one on. Better. That's good. Fantastic. And behind,
you've got, you know, cars and such like just
sort of as you can see, just the shape of
these vans and things. Some of them are cars.
People rent out these cars, and then they just
drive them through. Okay, simplify them down so that there's not I don't
want to spend all day, yeah, just sort of
painting these in, okay? Just have enough
detail in there to just imply rather than state. And here, you know, you've got some more kind of these bridges and mounds
and things running behind. And you've also got some
smaller kind of houses. Like here, there's a
rooftop of some house. I'm gonna just see
just imply some house there may or may not include it after.
Let's see what happens. I think we should though.
It looks good this way. Just change this one. You know, you can make
them look more house like if that even
makes sense, but yeah, just sort of make the
rooftops look more, uh a little bit more detailed than they actually
are, you know, like this. You kind of have to make them sometimes look more like
houses, funny enough, because you're losing a lot of detail in the painting
when you're looking at the at the actual
reference photo, it's so easy to spot all that detail, but
with the painting, you really have to pay extra
attention to make sure you include some of this stuff.
Get rid of that bottom part. That's enough. Just
the rooftop exposed. Should be fine there.
Everything back here is pretty dark. So having a look just seeing
if there's anything else I need to include back here, I think, um, I think we've pretty much I think we've pretty
much covered it. Yep. I think we've
pretty much covered it. So let's, let's get
started with the painting.
15. Day 7: Iceland Painting: Going to add a bit of
cerulean blue to the sky and also just maybe spray down a part here just
to make it quicker. Okay? Now, I just want to drop in a very light
wash Cerulan blue. It's about five to
10% paint, okay? Almost nothing in there. And it's a pretty warm day
today, actually in Melbourne. So actually, I do think a
lot of this stuff is going to spread and dry faster. So just cut around
the mountain for now. Alright. Down here, the edges
of this mountain. Alright. We really want to make sure you leave a lot of white
in this scene, okay? Now, moving down here, this is where things can
get a little bit tricky. I'm going to just drop in a little bit of I've got some grayish sort
of paint leftover. I'll just drop in a little
bit of that here, okay? Well, in this sort of
cloud shape you know, thing But I'll leave a bit of that sky whiteness of the
sky sort of peeking through, but a lot of this is
really just a lot of this is basically just a bit
of really soft cloud area. So it's like I wouldn't say
it's the white of the paper, but almost the sort of
white of the paper. Okay. So yeah, I'm gonna
dull that down. I might have to
lift up some paint afterwards to really get some of these white contrasts
through in the sky. But yeah, I didn't want to leave any really sharp bits
of white in the sky. I find that can really be jarring at times if
you're not careful. Okay, so you've got the sky wash pretty much all dried now. And what I'm going to do is just start picking up some
additional blue. So I've got some
ultramarine blue here. I'm gonna drop that into the
palette ultramarine blue, maybe a little bit of
cerulean mixed together. This is the whole section on the right side
of this mountain. It's kind of all
if you look at it, it's pretty kind of
bluish in value, but we want to make sure
it's the right value. So I've probably got
of this darker blue, probably about ten, 15%
mix of ultramarine, okay. And then again, with
a little bit of that cerulean blue in there. Okay? It to be careful. I'm just flicking
paint everywhere. And do this from time to
time if I'm not careful. Okay. You kind of get
one chance to do this. And here is that ridge, this little ridge that we
were painting in before here, so I'm just going to let's
just try to get this in. And remember, it's kind of like this whole right hand side of the mountain that we
really need to get in. And don't be afraid to leave off a little bit of white on
the paper, as well. Okay. You can just see in some
parts I've left off, okay? And it's not completely even
this mountains as well. You can see sort
of some you know, some sharper ridges and points. So yeah, have a bit
of a play around. Don't be too worried about
the accuracy of this. As long as it's
following the drawing that you had put
in there before, that's all you really want to worry about, to think about. Okay, so it comes
down roughly here. Okay? I want to use a
little bit more water at the base and add
in some more blue, maybe a little bit of
purple as well, okay? And this is to hopefully just leave a bit more
paint here so that I can continue this wash further down once I'm done because
it's a very hot day. This is going to
dry quite quickly. The houses are here as well, so I'm kind of just cutting
around these houses quickly. Alright. And we've
also got a bit of this sort of shadow running here on this side of
the mountain, yep like that. It's a really basic
kind of shadow there. Okay. Good. I know it kind of looks a
bit funny at the moment, but we'll need to put in the other darker bits of the mountain afterwards
once this is dried. Let's move on to the
right hand side, okay? We got really we got
to be quick with this. Now, there's some little kind
of lighter bits of snow. Can you see there
just lighter bits of bluish colored snow that run
through this white area, this mountainous area
in the background. So I'm just dragging
the brush through, not trying to make a
big deal of it, but, you know, something
there is important. Right? There, look, there's
definitely more darkness of shadow and light and shadow, is what
I'm trying to say. But, you know, just, I'm trying to do this
all in one go, as well. See how you got
these sort of little downwards triations in the ice. And, um, a lot of
this is just kind of, you're making it
up almost. Okay. Leaving a lot of it just white. Okay, fantastic. Let's
move down the page. And I've got some green
already here on the page, but if you've got on the palette but if you've
got any darker green, just mix up a little
bit of darker green. Tiny bit of that, uh A kind
of dark green, really. I'm going to start dropping
this in at the base, okay? It's kind of like
a dark green mixed with a bit of
ultramarine blue, okay? So it's kind of like a
bluish green right here. It's quite dark. We need to make sure we've got some of
this stuff here, okay? And this is already dried, unfortunately, but
some of it hasn't, so I can kind of you know, feather a bit of this darker
bit darker sort of stuff in. But this isn't the end of it. This is just a touch
of it to get it going. I'll have to work on more of these dark parts of the
mountain later on, okay? But what we're
doing here is that I'm just sort of cutting around the rooftops of these
little buildings, okay? Use that sharp point
of the brush to do it. And I'm actually bringing down this bringing this down
a lot further than is implied in the
reference photo because I really want to just make these
houses pop out more, okay? And there's actually
more green in there, but it doesn't matter. It's just continue on. Like a bluish green color. You mix them together,
they'll start producing interesting combinations
inside on the page. So that's not too, you know, worry too much about the
accuracy of the color. Just make sure that
you've got darkness here. Now, behind this whole
white house, as well, Oops. I've lifted off some
pant down there there. Now, behind this whole
white house here, I'm going to also add in
this darkness behind, okay? Now, really got to be
careful here to just again, cut around the rooftop. Should probably be
using a smaller brush, but I can get away with it. I don't like to change brushes
unless I really have to just takes up too
much time, I find. Gone up a little
bit too far here, can lift off some
paint like that. There we go. With
a bit of tissue. There's a little
bit of correction that's possible
with watercolors, but you want to avoid
doing that too much. Okay, so here we go. These house is here as well. Yep, let's just bring this. It's kind of like darker
ridge, I suppose. I'm going to put in more
purple because I think there's just there needs to be
extra darkness here. It should be kind of sharper as well in front of this mountain. Okay, I might have to kind of go over that side a bit more, but, yeah, just for the sake of
doing this all in one wash, I think it's just
easier to do this. Okay. Again, cutting around these little silhouettes of the houses or what
have you back there. You know, this is
all just kind of one big darker spot there. Yep. Yep. That darkness
just runs all the way into the back of
those mountains. Okay. But I might
have to just rejig that line once this stuff
has dried off a little bit. Okay, let's have a look. How's everything looking now? Not bad. Not bad. So a little bit more
extra darkness, I think, in this sort
of ridge, as well. Here, just carry this
downwards a little more Yep. I'm really just trying
to put in a bit more of this darkness around the
building so that it comes out. Yeah, more sort of stark. Okay? Now, I'm going
to grab some green, just some normal green with a bit of yellow
mixed into it. Now, what we're trying
to do is just mix up a lighter green, if
that makes sense. Just a lighter sort of green. We don't have much light in
the bottom of the scene yet, but we want to put it we
want to make sure that this comes in nicely. So here we go. And let's just go around. You know, we've got going to bring this all
the way through, and I'm connecting see the
top part there as well, connecting it on all right. So you might get a
bit of a line there, but it should sort
of blend nicely, okay, bottom of the house. Just cut around it.
Just cut around it. Don't worry about
the house for now. As long as you've left it
white, you'll be okay. Alright? If it's too dark, just add some little bit
more water and continue on. Okay? A bit more
yellow in there to just make it a bit more lighter. So but look here, again, these cars and
things down below kind of, um, look, it's not
100% necessary, but I think maybe just
implying them will be good. Implying some objects, cars, or whatever here, anyway. So be a house. That
could be something distant house or something
back there. Okay. Bit more lighter green by
just adding more water. And I don't want this green
to be too vibrant, as well. So let's move this across, and, you know, here is
the same sort of deal. We've got these kind
of houses there, and the paint has already sort of dried in
that back area there. So it see how it's forming
a nice little sharp edge. I don't really need to much. I'll just leave that, okay? Now, on all these kind
of rocks, you know, you've kind of got this kind of moss that's growing on
the left side of them. So I will just paint
a bit of that. Really should get the
whole thing in, yeah. And then afterwards, we can get the darkness in the moment because we're going to put
the darkness in as well. We're going to do
this all in one go, but I just want this to have enough green first before
we attempt the rest. I love painting wet and to wet and especially for
these type of scenes, you're going to save yourself a heap of time
and come up with something quite incredible if you allow the paint to work
with you, right? So that's just the
same sort of green. Of course, you know, notice
how I'll just sort of drop in some other darker bits of
green here and there as well. Just, you know, don't
be afraid to do that. And here, you know,
near the road, look, we're just going
to bring this down, cross cut around those, you can see those like cars
and this sort of yeah, we'll have to redo
that afterwards. Great. This road, as well, I think I'll add
in a bit of gray, got some Pains gray
here with some blue, a bit of ultramarine blue and
pains gray mixed together. You know, this needs
to be in here as well, the indication of this road, it goes across to
the right hand side, as well, maybe around the back there as well
behind this rock. I'd love to just blend
things together, you know, create a bit of Uh, Harmony. Alright This is starting
to dry, which is good. Now, over here to
the left hand side, I'm going to paint this
in pretty quickly. So more yellow, a
little bit of yellow, some yellow ochre, as well. I think that's
just a bit too bit of yellow ochre with
some white guash. I just want to dull this
area down a touch so that it's not too I
still want it to be, you know, have a lot of
light showing through, but I don't want it to have too much too much saturation
and brightness in there, say brightness, but two sort of gaudy looking colors running through that section, if
you know what I mean. Okay, so that bit's done, okay? Left some whitened
things out on that side. Now, here is the part that we need to paint
in wet into wet. So I have myself
this same brush. I kind of looking around.
Let's have a look. Now, stuff has really
started to dry, especially on the
right hand side. Okay, but it's not
completely dried yet. But what we can do is start to mix in a
bit of darker paint. Now I've got some purple which I'll mix in
with neutral tint, maybe a bit of blue,
a touch of brown. We want this to really be the darkest part of the
entire painting. This has to be really dark, but it's also got
to be interesting. Don't want to use normal
just black in there. So let's drop this in, okay. Now, we've got a bit of a soft
edge there, which is fine. I do want this to
happen in some parts. So there, okay, some of this
will spread up a touch. Can use a hair dryer to
just dried off a touch. And we're going
to continue along looking at that
reference photo and getting in this
sort of coastline, I suppose, here, okay? Cut around that. You know, you've got a bit
of the shadow, as well. Now, some of this
is going to spread and some of it will
just stay put. But this sort of shadow here that runs to
the right hand side, I want to get some of that in. Okay. Right. The some of this darkness
here. All right. And, of course, the
right hand side of these rocks are where we've got all this sort of darker
color that we want to imply. Okay. So let's
just work on that. It has to be mostly dried. Okay, there is also
something here. Look, I'll just get in the
right hand side of the dark a bit and then cut
around it like this. Okay. I just This is just a bit
of hit and miss, I suppose. It's not going to be perfect. By all means, not
going to be perfect. We're just trying to get an impression of
what's happening here. So it's like kind of a bridge here you can see that
just runs to the right. And then, you know, you've got the road
down the bottom here. And it's just darkness around
this edge of the cliff. Okay? Just complete darkness. And underneath, this
is where you've got all the real dark colors there
just running under, okay? So I want this all to
just join up nicely. Like this is even in the water, there's a bit of this dark sort of rocks in the water as well. Let's get in some
of those here and, you know, here, maybe, you know, just little darker
sort of rocks. Okay? Leave that
for a little bit. Now over on this
right hand side, you know, I'm going to actually re wet this section a touch. Because it's going to be
easier to paint wet into wet. Now I'm going to mix a bit of
green into here as well so that it sort of moves better. It looks more kind
of like grass. And remember, we're
leaving in some of this light running through
this whole section as well. So don't forget about that. This whole section here
is kind of like a bit, again, a bit of grass
leading to the right. Here, you've also got this
same sort of thing like that. The It's very loose
kind of work. Don't try to don't overwork
it and don't overthink it. Just try to use a few
brushstrokes to imply this, and it might not look like much. It might kind of look
like nonsense, actually. A lot of the times
I paint this stuff, and I think I don't
know what I'm doing. But if you focus
on if you focus on the light and the darkness and just paint the
light and the dark, have faith, and it will
come through in the end. Kate. Some more kind
of shadows there, the grass, as well. That's just a lot of there's a lot of stuff
going on in here, really. There's a lot of stuff
going on in here. There's even, like, a
smaller mound here. I've just used one
brush this entire time. I'm going to actually
switch over to a smaller round brush to
aid me aid in this sort of issue here because
it's just becoming too hard to paint with that larger brush to
switch to a smaller brush, kind of like a detailing
round brush, I suppose there. Like that. Good, good. It kind of goes up
a little bit more, and you can see just some of that more of this sort of stuff, these mounds or whatever that are just running
across the scene, because it's not just one
green color running through. There's a whole lot of
different colors running there. This area down the bottom
will do in a moment. But I want to also work
on this area here. There should be some blues here. I'm just going to use
some cerulean blue mixed with a bit of ultramarine blue, and we'll paint this in quickly, and it needs to be
lighter as well than the surrounding darker values. Kate. Just as long as it's blue, cutting around all these
mountains and stuff. Not mountains, sorry
these little rocks and things here, Kate. I kind of wanted that to blend a bit more,
but that's fine. We'll make do with
that. That looks that definitely
looks like water. Keep it blue. Now, this area here, I'm kind of a bit
worried about this because I do think it should be darker due to the shadow
being cast from the left. So I'm gonna mix up a
little bit of blue, drop some of this in here, Kate. And we will get that road
in some grayish value here. Good. Okay. I don't know if it's still 100% looks like a road,
but it looks better. Makes more sense. Okay. Just having a look to see
if there's anything else I want to imply in here. Um, I think that
looks pretty good. So we're gonna leave
it, give it a dry and then come back to
it with a second wash.
16. Day 7: Iceland Finishing: So everything has all dried now. And the next stage
of this painting is basically just putting in all the final finishing touches, all the darks, well, the darker sort of
areas and details. So the mountain area is what
I want to work on first. This has dried sufficiently now. So we're going to mix up
a bit of I'm going to get some purple and a
bit of ultramarine blue. Even ultramarine blue
should do the trick. I want to keep this pretty
dark, as well, okay? It's mostly probably
about 60 or 70% paint. The rest of it is water. Okay. And I'm going to start maybe here. Let's
just test this out. Okay. Now, that ridge here, that's got to be darker, okay? And I'm using a little
round brush for this. Okay. Now, the trick to this
is try to be intentional. The more I find that
I'm touching onto the page and modifying things, I find that the
more amateurish and the more kind of uncertain
the brush strokes look. So you kind of got
to be quick with it. And areas where, you know, you might want to just
dry brush like this, see, to just get in that darker
rock or whatever in there, kind of spread it a little bit too far to the right,
but that doesn't matter. Okay, we're just going to
darken this bit here as well, down the base here. Yep. And again, this is kind of to even reemphasize this line here, this sort of sharper line where the mountain disconnects from the rest of the
scene in the back. Okay. But let's just continue working on this
mountain first now. I don't want to spend too
much time doing this. So let's just put in a few
little brushstrokes like that. You know, we've got Jesus, all these sort of darker
spots up here as well. Let's get some of this in, okay? Remember to remember
to be careful and leave in the previous wash a lot of that previous
wash, as well. Okay? So it's not all, it's not all just darkness
running through here. Good. Okay. Now,
something I want to do here again is just I want
to add on a bit of a rake, behind behind the buildings. It's almost like,
like I said before, this darker edge that
separates the buildings from the actual from
the actual background. I can only do this wet on dry. I tried doing it before,
but it was just too wet to be able to imply that. So we've got that
opportunity to do it now. Okay. Good. It's kind of like a greenish blue mix,
greenish bluish mix. Round about here, just
sort of stops there. And yeah, it's a bit of
this rework, I suppose. You're going over the top of some previously painted stuff, but I don't normally
like doing that, but I have to do
it in this case, to make sure that we get in a much more crisp,
sharper edge there. This area of the
buildings, like, I need to smooth this
off a little bit. Let's just do
something like that. Okay, good. Some more here. I just doesn't look strong
enough here. Right. Like I said, the less you touch
the painting, the better. All right. That looks
pretty decent out the back. Separates out the mountains
and the back area. The touch now, I'm going to
switch to a smaller brush, a little round brush. Okay. Probably the smallest
ambush that I have. This is a number four, I think. So let's put in some
of this roof color, which I'm just going
to mix up now. Really, I've just got panes
gray and a bit of brown. Okay? This has to be
pretty dark, as well. And also got that chimney, which we've kind of
lost out, actually. I'll have to bring
that back later on. But we can leave a bit
of it still there, maybe, okay, like that. Now, this rooftop, just
color it in darker, like that. Here we have it. That's the roof and the
left hand side as well. Just a bit of color there
to the left of it. Great. Now, underneath, you know, this is where we kind of need to just imply some little details. So I might just drop in something there
for, like, a door. You know, this can be
a window up the top. From this distance, you know, you really can't see all
that much going on, okay? So you're just kind of
making these little shapes, I suppose, indications
of detail. Um, things that may or may
not actually be there. Something like that
that's enough, okay? A bit of ultramarine blue or just a cooler value to the right hand
side of the building, as well to make sure that the shadow
is implied like that. Okay, that's all you
need. Just a little bit of color like that to the
right hand side of it. Wish it was a bit bluer more
blue in there, actually. There we go. Just
retouch that a bit. Well, the paint's still wet. You kind of got have an
opportunity to fiddle. The touch. Okay? Of course. I just need to
join this on with the shadow again like that to
the right side. Some of these shadows,
I tell you what, it does it does pay dividends to retouch
some of them, okay? We're going to have to do it
in a few different areas, not just this area as well. The houses, so the
same sort of deal. I'm going to simplify this down, and you can see there in the
background there the houses and light source coming
from the left hand side, so you're gonna get maybe
a bit of darkness here, you know, a bit of darkness
underneath like that here. Again, this is all just um kind of indicating indicating
bits and pieces, really. It's, it's not going
to be perfect, but sometimes you might
even want to exaggerate, like, parts of this
like this here. Maybe I can put more
darkness on some parts. The right hand side, like that. Bit underneath here. These are supposed
to be cars and I've lost the detail of those cars, but maybe I can just imply a window or something like that there
in the back end of the car. Again, I'm not fussed about putting in all the details
for all this stuff because you can really get
dragged into something and, um, forget the whole what the big picture is
at the end of the day. So that's the house.
I think the house looks pretty decent, okay? The rest of it is, yeah, just adding in some final finishing
touches, some final shadows. I'm going to I reckon
I'm just going to spray this area a little
bit again, okay? So that I can get
in some shadows, but also make sure that it doesn't look too sharp in areas. So look at that just
something here. Yeah. Because, this area
does need to be a little bit little bit
darker, okay? Yeah. Even if you have some
sharpness in there, it's also not the end
of the world, yeah. I just needs something
here in the foreground to make everything sort of
come together, right? Some darkness in the foreground. It's really necessary. I think, in my opinion, anyway, I think it's necessary to just dark and really add some extra darkness
into the foreground. A lot of this stuff already
just kind of dry as it is. Um, we shouldn't dry
really any darker. Yeah, this sort of road that I'll just indicate
here, you know, just with a brush like that.
What else can indicate? Maybe like something here, like a bit of the undulation of the land and another
something like that. Okay. It's not just the same color. There's a whole lot of bits and pieces going
on in there that you need to indicate. And, uh, Maybe I'll put in
a bit of yellowish guash, as well here a little bit of yellow and a bit of white guash. Some parts, I don't know. Like there, perhaps.
Not too much of it. Something Just something
to come through. Dab it off a bit.
You have a bit of this milky sort of color. Okay. A bit of scratching off here
as well with a little blade to again help with the indication of this
grass in the foreground. You've got to do this just
as the paint is drying. I've got in a little bit too
late near the bottom part, but near the top here, you can see, I'm getting a bit of having a bit of luck here. Okay. This also helps
to separate this sort of higher land from
the road below. Alright? Because at the moment, it's kind of not so obvious
that it's above ground. So, yep, it adds a
bit of extra texture. A little bit of extra detail. Of course, you can paint it in, but I think it looks a
bit more natural when you do it when you
actually do it this way. Okay. Put a bit of blue
in for these cars, whatever it is, just
gray or blue here. I want to get them out
of the way a touch. Um, Yep. There's just a road
underneath them, as well. I'm going to imply that. It's difficult Okay, but I just wanted
to darken those off darken those cars
off a little bit, 'cause I thought they just
look a bit a bit too much. Now, I thought also here we could imply some
darker bits of snow. Like you can see
there's actually another layer of darkness
in some parts like that. May be here. Okay. And. Exaggerated a touch. Um back here, there's some maybe little ridges or what have you. The distance. Okay. And also here, I think a little bit of something will be good
running through the whites. It's not just completely white. It's actually some coolness, the intermediary
section, I guess, here. But there are parts where it
just sort of joins on almost Okay, touch of white guash. This is going to bring back some highlights at
top of this, chimney. Shanty where I can
sort of bring it back. Something like that. It
looks a bit crooked. Let me try to fix that up. Okay. A bit of light
maybe on the roof here. Little something like that. Yeah, this little house is kind of important,
maybe a bit here. Um, you might have
areas where you just, uh, think you put too much, um, snow, too much,
um, too much snow, but too much blue,
so you can sort of bring some of the
white back like that. Try not to overdo it, though. It's kind of just a bit of
dry brush over the top. Okay, helps when you've got
textured paper like this. It really makes it a lot easier. There's also maybe
a section here. I could do this on like here. Okay, it hasn't
completely dried yet, but it doesn't matter. I might just blend a bit. I just want to bring a
little edge of this kind of down a touch
like there as well. Bit of light on some of these rocks to the left
hand side, anyway. Very light bits and pieces. You even see, like,
the little poles and things running down the Sea, just these tiny little um Flags, is that a flag? Looks like a little
flag. I don't know. Indications, I guess.
Put another one here. Why not? Maybe another one coming out at the
scene like there. Another one here, maybe. Yeah. Okay. Helps to give the scene a bit
more more context, 'cause really at the moment, it's just a lot of um a lot of abstract looking
shapes, isn't it? Okay. Great. And I'll
call that finished.
17. Day 8: Stockholm Drawing: So this is a pretty
ambitious scene then. It's a photograph
that I took while I was standing on this, I think it was just an elevated tower and a viewing platform, I suppose, an area that was
kind of half closed off, but I managed to get my camera through one
of the grates and take this incredible
photograph of Stockholm. And there's so much
going on here, and I think the temptation is really to draw everything in. But what we want to do is
really look at this scene from the point of view of the light coming through from
the left hand side. You've got the main
shapes of the building. So you've got the large stats whouset here, this
central building. I can't remember
what it was called. That's got to be, I think, probably some kind
of royal building, and on the right hand side here, it's your legal sort
of building, actually. And on the right hand side here, just some additional sort of buildings being hit by
the lights on the left. Now, it's all these roads, cars, tons of things here and there, but we're going to, you know, try to simplify this
down as much as possible and come up with, I think, a more
cohesive looking scene, and we're going to edit out
some bits and pieces, too. So yeah, let's go
ahead and get started. So first thing I
want to do is look roughly where the
buildings hit the water. Now, we've got to
kind of separate out the kind of
areas that are uh, you know, where the water is and then basically everything
else above the water. So I'm just going to start
drawing a line here. Now, this is just underneath the midway point of the scene. There is some kind
of shrub here. There's a boat here as well, okay, near the
edge of the scene. Okay. I'm going to
just quickly draw in an indication of that boat. It's a ship, actually, there. And then you've
got like this sort of that comes out here. Now, I think what might actually help a bit
better is if I start sort of penciling in this road that's coming in from the
left hand side of the scene, all the way through to the center, I wouldn't
say the center, but just underneath the
center point of the scene, like roughly here, okay? Doesn't have to be
too much for now, but just enough to, just
enough to get started. Okay? That's this other kind
of train tracks over here. Okay. And I believe this
part here goes into the old town of Stockholm, okay? And then, and here we have the, you know, it's just so
many little details. I'm going to get distracted if I don't get this sort
of road in first. There's other row that
comes out going to the right hand side and finishing
off near the base here. The really big aim here, guys, is that we want to
just simplify this down because if we don't
find a way to simplify this, it's going to be an absolute
an absolute nightmare. Okay? So those are
the general roads, I suppose, that are just
going into the scene. There's kind of a bridge or
something here you can see, and behind there, you
can see just another, you know, track just
leading all the way behind. It kind of gets a bit dark. But here, you know,
you've got little cars. You know, let's just
see if we can draw I'm going to draw a bunch of them
in just basic little boxes. Yeah, maybe just zoom
into the photograph to get a better better indication. If I can draw one in,
especially that will give me a bit of a a bit of a indication so that I can kind of copy that general shape on
for the rest of them. Of course, these cars come in all shapes and sizes as well, so we've got to, I don't
want to overdo it. It's a back kind of
windscreen there of a car. There we go. An
indication of a car. Again, this well, these
shapes and things are probably going to
change later on. In fact, that is too small. That car is way
too large, sorry. You're always just reassessing. Whenever you're drawing something
in, you're reassessing, looking and seeing whether
it makes sense, okay? And the scheme of
everything in here, it's way too large. So I just make it smaller, okay? So it sort of looks like
it's just going in. That's even almost
a little too big, but we can get away with it. Um what else do we have here? You know, is like another
This is a train here, and you can see the side of it. It's really just a long
rectangular prism, if you think about it. Just a long kind of
rectangular prism. There's another here as well, this uh other part of the secondary train
here in the back, again, disappearing
underneath this bridge. Okay? So you've got two
trains and very simplified, as you can see, not really
much to put in there. These two rectangular shapes. You're always
looking to simplify down everything
into basic shapes. Okay, don't draw the actual
car or the building, draw the shape of it. And that's going to make life
a lot easier for you, okay? What else do we have here? Just go to outline
this a bit better. There is a bottom part
here that sort of, just the bottom part
of the scene here. And I'm going to just
extend this out. It's gonna be pretty dark
out in the bottom, as well. So I reckon I will
simplify this area down a lot and just
make it, you know, a fair bit darker, once we get once we get to
that point anyway, so there we go. That's another part of this
dock, docking area, I guess, there, and there's
another bit of machinery and bits and pieces
sort of sticking out here. And at the time, they were doing a heap of construction
down below. So I was trying to sort
of get rid of that so that I yeah didn't sort of include into the
reference photo. Okay, so that's
kind of the bottom, the little planning part of
the bottom area, anyway. And I want to just get in here. Let's have a look roughly where is this main building
in the center? It's a yellowish side. Reckon it's like a bounce. And smack dang in the center, but the darker side anyway. I'm just going to start drawing in now very loosely as well. I don't want to put
anything in that's going to be too set in place. It's just a rectangle
on its side. Inside the building, you've got these other bits and pieces. You've got another
rectangular bit. Then you've got this kind
of shape like this here, here, you've got another
sort of semicircle there. The trick is to just
keep Keep it simple. Okay? Keep it simple. And it's the rooftop
here. Thank you. And let's have a look.
This right hand side. There's more details. You know, it's really
just darkness, so you don't have to just
put in too much there, but something like that, and the dome of this I
want to say the dome, but these sort of pointy
bits on top as well here. We just want to indicate that. Now, I can't see
them too well, but, you know, again,
you're just sort of looking at it and
simplify it down. They look like
kind of triangular triangular shapes on top, that's gonna that's
really going to help. And in the whole building, you can see there's these
little windows all over, so we can just sort of drop in a few little marks
like this, okay? It's actually quite
a detailed building. I remember actually, I think, sitting in front
of this building. You walk by the water.
Absolutely beautiful. I got to find out where
it is, what it is. I think I know it,
but I just can't remember off the top of
my head at the moment. Let's draw in the
side, you know, again, more of these
little buildings here. And it's really futile to try
to get in all the details. Now, just kind of putting
in as much as you can. Let's have a look
at the scene now. We've got this tower behind. I think it could
even be a church. Yeah. So let's just sort of
analyzing it for a second, seeing how far you
want to put this up. Bit of paper I have as well, is a little bit taller
than the reference I have. So that's alright. That means it'll just
get a bit more sky in. So I'm going to get in
this tower just behind, well, the church
or what have you. And let's get in the
side of it like this. There, it's actually
not that tall. It's kind of like around here. I'm trying to make
it a bit taller, but it's going to look funny if you It's gonna look funny
if you're not careful. There you go. Take your
time with this drawing. This is a very large
sort of scene. A lot of real estate to
fill out on the page, so you kind of got to definitely
take your time with it. The That's the second
part, like that. And then here and you've got these sort of spires or whatever
you call them, and then you've
got the actual top of the tower or the church. Keep calling it a
tower that just comes up like that. Okay. And again, I really
am not interested in getting the exact little details
of everything on there. Just a brief indication, I think, is going
to be quite enough. It's a window on the side. You got another
window maybe there. You just bring this down a bit. Okay. Yep. And, you know, you've got something here. I don't know what
that is. It's like a behind there, as well. The amount of detail on this you know, is
just incredible. There's so much going
on here that you really want to you really
want to be careful. And there's, you know, simplifications, where we see there's this building
here in the background. I was going to put
in that, you know, just some kind of building
all the way back there, and sort of building
in the distance. I actually goes along the
right hand side a bit more. That's like a rectangular sort of building. Comes down there. There's all these las
shapes and bits and pieces. God, it's just so
much happening there. So look, as long as you've
got the main buildings, you're you're going
to be fine, okay? So you got this
one here, there's all these sort of
other ones here. There's another building
that sort of sticks out. There's another one
here, then you've got another side of the building
there, and then there. And then, of course, you've
got this rooftop, that. It's so hard to see
exactly what is going on in this area. But we can certainly
indicate some details. A lot of this stuff is going
to be in in darkness anyway. Okay? There's another
building here that has, like, a nice bright side that's
hitting the light, you know, so it kind
of there it's here. There you are. Right side of it there, that's
hitting the light. And you've got,
like, the rooftop. Like This okay? That's going to be
illuminated by some light. I don't want to
forget about this left hand side because this is important as we're spending
too much time on that side. It's getting this sort of
foreshore area there. Okay. Got that sort of shrub
that I drawn in earlier. There's a building right here. A bit of darkness on
the building, as well. And going to go up a bit. You've now got
this other sort of building here to the
left with some windows. There's so much happening here, so you really just
want to be careful. Don't overdo it. And then you've got
this building here all the way in the
background that is probably a lot more simple
than it looks like this. Okay, some windows, and
that's pretty much it. Now, here you've got the
stads who set to the left. Se city City Hall building, believe in Oh, this is a
tricky building to do, but let's just give it a go. So there's some darkness
here to the right hand side. And then you've got this tower. Let's make sure that the
tower doesn't go up too far. I'll put the top point like look roughly
about here, maybe. Roughly about there. Okay?
And let's keep in mind, this is a look at
the shape of bit. It is just a rectangular shape. Yeah. Just a rectangular shape. And just start putting
it going up, okay? Like that. I can spend
all day on this, but let's just simplify
that down, okay? Looking at the shapes inside it. It's a triangular bit. There's a couple of
verticals there, and then there's lot of interesting sort of stuff
going on underneath there. And then it just sort of
tapers into this this, you may call it, rectangular
shape like that. How far does it go down?
Roughly about here, hey. I may get a bit
larger. It's actually looks better that way. And let's get that left
hand side in, as well. This is quite important, okay, because this is, you know, it's a very, obvious
landmark in Sweden. I might bring this up a bit
further, yeah, like this. It was a little bit
too tall before. And we'll just get in
the left hand side, roughly like this, and we've got a bit of this kind of rooftop
or whatever there as well. Okay, how does that look? How does that look? Looks right. I'm just trying to see if I'm always just
trying to compare and just see if it's actually the right proportions in relation to everything
else in here. So I think it looks okay.
We can get away with that. So there are these little as
you can see down the side, these little bits and pieces. There's a windows, doors there. You actually walk down
there. You can go in. There's a really large
courtyard inside. And, um, during some
parts of the year, you can actually climb up
all the way to the top. I was trying to get there, but I wasn't able to on the day. They had closed it. So let's go put in some of these other buildings
here in the background. Check this out. It's all just white
buildings and there's, you know, triangular bits. It's just Look at that. It's just kind of
overlapping shapes, yeah, of these kind of buildings and things
there in the background. And of course, uh, you know, there's these
triangular bits as well, which is interesting, okay? It all the way in
the background. Um, I think that might probably be a little bit too much come to think of it now just simplify this down so that I think having having some of these
buildings too tall, it's gonna mess around with the mess around with
the tower or touch. But having a little bit of white back there is
going to be good. Okay, some distant buildings. That's all you want in there. On the right hand side, again, more of these sort of shapes. Look at that. Buildings
in the background. You can barely tell what
is happening in there, but you need to put something in there to indicate the details. A lot of that will
just disappear, I believe once we're
done near the end. Let's have a look here
on the right hand side. Where will we up to
roughly about here. We might start working
on this building here. You've got kind of
a few buildings really that just
sort of stick out, and they are behind
trees as well, but you can see the sunlight
hitting the side of them, you know, and, you know, I just trying to
make out the roofs that yeah like that.
There we go. That's one. Okay, there's a tree
here on the side, so it's kind of obscuring a
good part of the building. Okay. And then here you've got let's look what
is that building? Is the thing with some
of these buildings that they're so
intricate and detailed that when you try to
draw everything in, you're just inevitably
going to fall short of implying it. We're not implying it,
but getting it in. So you just have to do
your best to to imply it. Okay? So there's the side
of another one there. You know, even if they're not in the exact so called right spots, it doesn't matter, okay? Just estimate as much as you
can, because like I said, if you spend all day doing this, you're going to drive
yourself absolutely mad. Yep. It's kind of like
this row of buildings, you know, just these kind
of row of buildings that just overlap next to each other. I mean, just like this, really, and they just separate out
into different sections. This one's got a bit
there and the rooftops, of course, just go into
the back like this. Really, a lot of stuff
going on in here, but that should be
good enough, okay? And of course, when
we start painting, it's going to be a
lot easier because we can just detail more. So let's put in some more stuff here
in the background now. I'm going to try to
reduce actually, a lot of this in the background
to a basic silhouette because if I sit here and
try to get all this in, it's going to drive me mad. So this is just a bit of an indication of all that
stuff in the background, but, again, it's not going
to be a heap of details. You see this sort
of some shapes in the back that are more obvious. Okay, but apart from that, there's just a whole lot of details that almost
blend into one. You could get it in
with one sort of color. There's darker bits. Who knows? What's in here? There's another. Ah,
these buildings here, these two sort of interesting
looking buildings. Let's get them in. Uh, I wonder what these are. I
should know what these are. Okay? But they just
have a very, you know, very kind of it's
interesting shape, and I bet you this is just some kind of important building, maybe
a hotel or something. I don't know. But I've
got to get that in. Okay, 'cause it's
just too obvious not to put in the
detail for that. Okay, so what have we got here? We've pretty much got a lot
of what we need in here now. And this stuff here
in the background, again, it's just, you know, just simplifying that
that line there in the back of the buildings,
all the way in the back. This is looking a little
bit messy to the left, so I think I might
just tidy it up and touch and simplify it down. Now, this is something
that you have to be careful with in watercolors. Like, you are trying
to tell a story here. And if you're not careful,
if you're not careful, you can end up with something that's way too crowded,
way too detailed. Fixing my razor. Okay.
So let's have a look. Stand back and have a look. Now, we've got
pretty much all of the yeah, all of the
main buildings in. I think for a little sketch, this is looking decent. But I think what we want to try to detail more is some of this
foreground stuff. Okay, because there's
just a lot going on here. And if I don't kind of put
in a little bit of detail, now you can see here these kind of bits that stick
out of the water, like people put the
dock their boats here, I guess, underneath
the bridge, like that. You know, this adds a
bit of complexity and a bit of interest down below. Okay. You look at this. There's even
I don't know what this is, like, a little shack
or, you know, you know, those portable buildings
portable buildings maybe just sitting on top
of this area there. It's just a It's just a box. Drawing a box. It's all you need to do
for some of this stuff. And you don't even really need
to get all this in anyway. It's just look, I
reckon I'll probably just dull this all down later and make it
quite dark at the base, fade it up so that
I don't have to uh, detail all this because
it's so much, really, it's, it's too much. Yeah. Even underneath the bridge, you can see here, there's
a lot of this darkness, and then you can see some
vertical parts of the bridge just kind of blending a
bit into the water, okay? I don't want all these cars and things to be a central
point of the scene. I want the eye to sort of go in, but then focus on the buildings. So let's have a look there. There is a bus here, it looks like a bus anyway. Let's just get that bus in. Looks almost a little bit
larger than the train even. Gigantic sort of bus like that. Is it a bus? Yeah,
I think it's a bus. One of those really long sort of buses. What's here
in the background? I don't know what
all this stuff is. There's a lot of detail here. I think they were
constructing something, so we can I can
actually just, um, omit a lot of this detail for later and also work on
getting in some shadows. Like, think about how
I want the shadows to come through,
maybe like that. Yeah, thinking about
this for a moment. And there's not really people. There are people walking around, but it's so tiny. I mean, I can just maybe
indicate some of them later on, but they're just so tiny there that you want
to be very careful with how blanche you
put them in, okay? But you can put some people in there. This is
like a road there. Yeah, I actually think some
of these buildings should be a touch like further down, but it doesn't matter. We can make do. Okay,
let's have a look. We can sort of make
some little shadows come across that kind of thing. Having a look.
Great, great, great. All right, let's
go ahead and get started with the painting.
18. Day 8: Stockholm First Wash: Let's go ahead and
grab that mop brush. And the important thing here
is we want to make sure we've got all this kind of these lighter values
running through. The bottom part of the
scene is mostly dark, but you do have some
little highlights of kind of warmer
areas in there. So I reckon I'll start
with this building here. Let's just go in with
a bit of yellow ochre. And I've got a bit of
Indian yellow, as well. Let's just drop this in. I don't want it to
be too vibrant, but also it does help to have, some kind of light source in this scene and just make it look like there's
a bit of golden color, I guess, on the building
itself. Okay? There we go. That's nice. Bit of that. Yeah, it's quite a central
part of the scene. Okay. Now, guys, if
you end up going over the top of some areas and it
mixes, don't worry too much. We just want to get in a indication of all the colors
and the details in here. This stuff is all going to
be covered over with some. Darker values afterwards. This building here, I'll probably just leave
some part of it white like this left hand
side of the building there. Okay, just to really
emphasize the light. Good. It's just yellowy color. You can mix other colors
like there's a bit of brown or something
here as well. Like this building, for example, that could do with a bit
of brown up the top, okay? Blended in. Now,
very light wash. This is what I'm using here is about I would say
five to 10% paint. The rest of it is just water and we have to be very
light here in order to indicate the sunlight hitting
these buildings, okay? Because if you're not careful, we can make this way too dark, and it's going to look
overworked, okay? Anywhere in the
scene that you might see some, you know,
check this out. There's like a bit of
yellowish area there, you know, a bit here behind. You just go in and just drop
in a bit of that paint. There's also a lot
of gray kind of areas that I can just you know, put in a bit of
color there, okay. But essentially, you've
just got a lot of warmer and darker values
running through here, okay? And even here, there's some kind
of white building behind. I we leave that in. I don't know what
that is, but let's just leave that in anyway. If we can really
work on getting in a little indication of
everything and just try to sort of combine
the shapes as well. So it's not just
one it's not just, like, individual building
standing around, but kind of like a
clump of buildings. I think this makes
it a lot easier. Even this whole area out
the back, see there? I'm just trying to get
this in with one go. The sky I'm going to
worry a bit about later, let's not bother with
the sky just yet. Really, I just want to get in a nice background
wash for all this. It's so important and to keep it all in one big layer as well. Okay, here is brown bit of Yep, just a little bit
of brown there. And then in the background, I've got some bits of yellow
ochre here and there. But really, for a lot of it, it's just we can drop in
this kind of grayish value. And again, the gray
is just a combination of all the colors
remaining on your palette. I like to use blue and a bit
of brown mixed together. That tends to work quite well. You know, just Oh, gone a bit overboard
with that one, but it doesn't
matter here. Okay. And let's just bring
this wash down the page. All right. You're always remembering to keep some parts of the light. Don't try to paint
everything in. You know, even some of
the buildings you could potentially keep
white, or if not, just put in some yellow or something down the sides
of them just to indicate that light source running to
the left inside, like that. Maybe this building
these buildings here could do with a little bit of color as well,
leave that one white. Really, for the
most part, if you look at all these buildings, they're just, like, yeah, they're just kind of
the grooves are gray, but the rest of it is kind of, um, lighter on the left
side. Okay? What's here? Yeah, there's some darker sort of part of the
building there. Just get that in quickly. Um, really on the
left side here, there's just yellowish color. I'm getting really got to
make sure that we always have to remind myself this is just the lighter part of the
scene that we're painting. We're not trying to get in
any details at all, okay? We're just getting
in some light. So more yellow here. Yep. No harm adding in
too much yellow. You can always get
rid of it later. There's this building here. I just forgot about
this stuff to the left, so we've got to quickly get some of this
stuff in as well. Down below, forgotten,
but there's a lot of this grayish
color as well for the bottom part of the building and this
road area, I guess. I just spray this a little
bit so that it oops, so that it just spreads a touch. I feel like that's just not
blended nicely. Okay, good. There we are. Of course, you've got this kind of boat
to the left hand side there that you can just
indicate quickly. And I kind of lost out on the detail
for this boat, actually, but just with the brush, you can put in some
indication of where it is. Okay? It's made it
maybe a bit too big. Put it roughly about there. Okay. If you go light enough, it doesn't nothing will come
through, so don't worry. Okay, good, good, good. Here at the base of these
buildings some light Oops. Sprayed myself to face. Okay. This area, it's really
just a combination of browns and grays and God
knows what's in here. But yeah, I might just leave
the front of those front and the top of these little trains or these indications of trains, I suppose, something
like that for now. Okay. This yellowish value
running there, but it's really just
the same old color, if you think about it, it's just kind of like a grayish value with some
yellow running through it. I find this is going to make a better simplifies
this a lot more. I can get in some guash later to bring back some
really light areas. But yeah, this is going to do. Again, you know,
the big goal here is just trying to get in
the lights on the scene. Here I'm going to put in
some ultramarine blue, bit of ultramarine blue, because this is
all kind of yeah, really dark and cooler. But it mixes in, you
can see with a lot of this it mixes in, for sure. So it's not just blue. It's kind of warm colors
in there as well. So that's what I mean
I mean when I say, you know, it's kind of futile to really paint every
little thing in. You've got to look at
it as a whole and force yourself to paint in the bigger picture
of what's going on. Okay, so that's something there. The water as well here is
going to be interesting. I think I think
getting in some of that basic sort of water in there would be good
just to complete the scene. But let's first get in some colors for this
building here to the left. Using a bit of brown, burnt tumba, and burnt sienna. Okay. There we go. Just get
that all in and we go. The top part here, this is quite tricky. When you've got a
smaller mop brush like this, it just helps. You can paint pretty
much anything in the scene with this brush, but you just got to
be a bit careful. Yep. Like that. I'll detail it. I'll detail it more later. It's kind of tricky, isn't it? Get in all the little details. I've forgotten to rub off this
bit of lead pencil there. Let me get rid of
that. Okay, again, just sort of blending to
the right hand side. Great. Really just remembering as well to be so careful
with this because, you know, the temptation is really to start going in here and painting everything in. Yeah, I need to cut around that building a touch, as well. Okay, let's have a look at these buildings
in the background. I'm just going to put
in a bit of blue, a bit of ultramarine, color with gray, kind of like a grayish
ultramarine blue color. Good. Just something to indicate that there are some
buildings in the background. All right. Like that. Great. Great, great. Okay. So going back to this water that I was
going to do before. But let's quickly get in this
kind of road that you see. Running to the left
hand side of the scene. Again, this is going to be a very simplified sort of road. I don't want to take too
long with that. Okay. Good ultramarine blue with a bit of this
leftover gray again. Let's just drop some
of this stuff in here. Another thing that's
good to do as well is, you can see some little
reflective bits here, just, like, warm bits
running downwards. So you can just put a
bit of that through and then blend it on the
edges with blue like this. And the whole aim of this is just to get in a little bit of that softer feeling,
I guess, okay? But all this is
probably just going to it's mostly just
going to blend, if you look at it, okay? And it's not the final
color of the water. We're going to put in
some more afterwards, but this is just something to add in that kind of
backing blue of the water. So we have some
softer areas as well. Okay, let's go to
the left hand side, and notice I'm doing this all
pretty much wet into wet. So there's not a
lot of contrast. There's not a lot of areas
that you can distinguish when the water starts and when the actual road or whatever starts. So you're kind of it very loose. Here in the back, let's
do the same thing. This water you can
see runs around here, and then of course, you
might have a bit of that reflection of the
building running through here. I don't know, just like
the warmth of it anyway. Unfortunately, it's
kind of turning a little bit greenish as well because of the blue mixed in there,
but it will be okay. Okay, like that.
Let's move this up. Now, there's that boat
up the top as well, so I just want to
leave something to indicate that boat
or cut around it. More ultramarine blue, all the
way to the back end there. Okay, and keeping in mind, this is not the end
of it, as well. It's just enough to get in a bit of the water so
that it all combines, looks more cohesive. Okay. Fantastic. Now, I think that kind of does it
mostly for this part. The light areas, anyway. And what we can do, what we can start doing now
is just get in the sky. So this is pretty
easy you're just picking up cerulan blue. Just mix up a good
proportion of this. And I really want it
to be quite light, pretty much as light
as you can get it. I'm going to give the top of the panting a
bit of a dry first. The reason why I dried it off
first is to make sure that, um I'm gonna need a
larger mop brush yet, is to just make sure that the buildings don't
run into the sky. So a lot of cerulan blue. I've got a big mop brush.
This is gonna help. I should have painted
that top part first. Let's just bring this down. Anyway, it's really like
about 5% paint, okay? I want to keep this
sky as light as possible so that
everything else, all the buildings and
that just really pop out. Okay? This around the buildings, just be a little more careful. Especially the towers here. Yeah, let's just get this in. It's a very simple wash. I try to mix up
the same quantity of paint first, as well. A large proportion of it, so then I don't have to go
back and remix it again. Okay? I think also what I might
do is add in some clouds. I do think this sky needs to
be broken up or touch it. Will look more
interesting. I think it will look more interesting
with some clouds in there. So let's just firstly get
this wash out the way and, you know, same sort of
things, just the same color, the same mixture of color, and I'm going to bring
this over to the right. Like this good Great, great. Some stray brush hairs, trying to move. Yep. Okay, so I'm going to
pick up a bit of purple, maybe a bit of pains gray. Just mix this up together, purple and pains gray. Um, I just drop in something like this,
some shapes here. So different purples, but it has to all be done kind
of wet into wet like this. I'm trying not to
overdo it as well, some quick little indications
of clouds in areas. You make the clouds up the top a little bit larger, as well. That's gonna help to indicate the perspective of the
scene just a bit more. You know. Good. I think that should
be enough. Tempted to go back into it and do more, but, yeah, I think
I'll just leave that. That's gonna look good and we'll give it a quick try again.
19. Day 8: Stockholm Second Wash: Alright, so the next
step here is really just getting in all the shadows
and little details. So I've got a round brush here. I got a couple of round brushes. And we're going to
just go through and maybe start
thinking start from the left and maybe in the
center here just to get in the darker areas. Now, I want to do
this all in one go. I don't want to
keep going back and ding around and changing it
around and stuff like that. So I'm mixing up
like a whole bunch of darker paint just
purple with brown, maybe a bit of ultramarine
blue, as well in here. Good vulture Marine blue. Okay, good. So let's start. I reckon I'm going to start with this building here to the left because I think
if I don't get it in, if I don't start off
here, it's going to be difficult later
since I'm right handed. So testing that out, how does that look dark enough? It more. Means gray
maybe in there. Good. It really has to
be quite dark, okay? So thinking to myself, as, well, how can I paint this in quickly
with a few brushstrokes, the fewest
brushstrokes possible. Okay, look just simplify that
down the top of the tower. Okay. I'm also trying to leave in as much of the light on the left
hand side as possible. So there's little
details you can see, just these little
kind of bits and pieces sticking up
and what have you, as well, which I will,
uh, add in there. There's a couple little like, see just a couple of
little bits there. Bring that down. Let's just
do this. There we have it. Oh, yeah, it kind of goes
up a little bit further. There's, like, a couple
of the bits and there, as well. Look, simplify it. So that's the side
of the building. And on the left hand side, we've also got, of course, a ton of these little the
little openings there. They're kind of just like doors, archways that lead into the courtyard, like
I was saying before. Near the base,
there's, like, a bit of this separation, as well. They're good. Let's have a look here
on the right hand sign. Let's just again, continue on and get this
large sort of shape in. It's really just a bit of
shadow on the right side. And, of course, you've got
this building here as well. S I need to get in as well. But, there should be some
green here for this tree, a little bit lighter as well.
Just put in some of this. This is a bit of
yellow ochre running through. Lighten down this tree. It sort of goes all the
way here there, maybe. Good. Made it a lot
bigger than I needed to, but it doesn't matter. Um, good. Now, here, we've got
this kind of darkness that's hitting the left
side of the building, and there's, like, a bit of
shadow on the roof here. Okay, good. What
else do we have? Again, there's, like, bits
and pieces in the background. It's almost just like
the triangular sort of parts that I painted in before a little something
bits and pieces back there. This part of the
building kind of has the rooftop in the distance. And then, you know, behind
is where you've got some other buildings,
bits and pieces. Okay. I'm trying to just
get in a bit of a sharper detail here on the left side of the
on the left side. So it will come out better. I simplify this down.
Some more blue. It's just a bit too much. Bit of blue back in there. Good light. More. You'll find that in a scene, a lot of this stuff in the
background just ends up fading into this
bluish like color. So you can get away
with it and just kind of indicate some of
this here and there. I like to leave a bit of
white white, but, you know, the previous background wash that was in there
in the first place, rooftop as well here kind
of should be darker. Let's get that in here and Good. You know, you've kind of got
these little windows well. So what I mean when
I say just try to paint everything
in all at once because it makes it so much more efficient if
you can do it this way. Okay. Let's put in
some more here. It's another roof or
something here as well to the left side. Oops. Sometimes things don't really go 100% your way in
terms of the plan. I mean, I was wanting to go a little bit less into
the building to the right, but I couldn't
quite get it there. So you just make do. Now I'm going to put in this little shadow here
to the left side there. But apart from that, I mean, you've really just got a lot of light, like, showing through. Like, if you see
here, it's sort of just underneath this whole area. So a little bit of line work just to indicate
the edge would be good. Okay, good. And, of course, this
area where the boat is just want to indicate
that a bit better. But I don't care for too
much detail, really. We have to make the water a lot darker afterwards as well. Alright, let's work
on this building. So with the building, I'm
just going to go a bit of ultramarine and kind of
like a grayish ultramarine. The right hand side, here, this is the top of
it. It comes down. All right hand side,
is just filled with shadow, like here. So you can definitely
just go ahead and get most of this
in with a single well, not a single, but a few little
brush strokes like this. And I'd like to just detail the building
a little bit, as well, because this is super important to make it
come out, of course. From the, you know, you can see the sort
of rooftop and then it pops down like that. And Yep. Sarah, behind. Let's get this all in. Try to do this in one go. Leave the light on
these domes, as well. See that left hand side there. There's a little bit of light. So just, um, yeah, sort of cut around it a bit. And just sort of You can see there's
like a little little details in there as well. You know, it's
downward brush strokes to indicate some of this stuff. Again, like what I was saying, I just try to simplify
where possible. There's the windows. Brush
stroke here and there will do the trick. The cute. Just get in this church, the right hand side
of it behind quickly, join it on while the roof of the building
below is still wet. But I just should finish
these bits off here. Yeah, some vertical
marks for the windows. Okay, so let's get this in here. Let's we've got this
top part as well here. Like that. Good. Some
details for the window. Yeah. I might just put in a bit of darkness behind the building
here as well. Help bring it out more. Okay. Good. Bit of lighter color here now for this building
in the background. I'm going to just
continue downwards and hopefully get in the rest
of this shadow pattern. Okay? More blue
mixed with brown, bit of blue and brown
mixed together to create a kind of
ultramarine blue and brown, just to create a darker value. Okay? I do think, yeah, this needs to be darker. It wasn't quite enough before
doesn't we can get that in. Keep switching between
this larger round brush. It's tricky to just
get this stuff in. Hey, Kate. Leave a bit of, you know, you can leave a bit of yellow in there for that
previous wash, as well. Really, some of this stuff, you are just you're
flying blind sometimes. I mean, I just make sure that I feel like I've got something that
resembles the reference photo, but with a scene like this
with so much going on, it's impossible to get in every single building
exactly as you want it. Okay. Here we have
an interesting part. So this is that side
of the building. I really wanted to get in,
leave the white there. So let's just leave that. Some buildings back
there as well. Good. I don't have to repaint all
that stuff in the background. I'm just gonna leave
that this down. Building to the right here. You start moving on to these
buildings now and you've got a lot of kind of
interesting stuff going on. You've got the
rooftops, like this. Like that. More blue these rooftops. Then there was
this building here that is kind of
hitting the light, but I struggle to see what exactly the side of the
building looked like. It's very complicated, so
we'll leave it like this. Then we can move that down. I've got another building there. This rooftop goes up
here, into there. What else do we have yet? Again, another sort of rooftop
here runs to the back. Sort of just simplifying things down at the end
of the day, okay? Good. Put in a few little
a few little marks on the page. Okay. A lot of these buildings,
it's just kind of indicating stuff
going on in there. It's a tricky side
of that building. There's all kinds of trees
and things there as well. I'm not going to worry
about that just yet. This kind of comes
down, though, here. And Yep. It's, like, a lower part there. Then you've got
trees and things. And of course, you've got this road that goes all the way in. In fact, a lot of this
stuff just kind of connects onto a road running
through the center here. I'm going to mix up
a bit of purple, a bit of brown, a bit of blue for
this part, okay? Like the make this sort of rewet this so that
it blends up a touch. It's just dried off too
quick for my liking. Okay. Yeah, this whole area is going to kind of
be in the light. But, you know, for example, I really think that getting some shadows running here is
going to be so important, like a bit of blue, maybe let's just make
the shadows blue, running to the right like this. I put some water in here. So it's just made it easier to get in
these softer shadows, but it's also going to
make it more difficult to get in sharp details. So we'll have to
see how it goes, okay? There's a tree here. Look, it's just as you can see, I'm not really bothering with
the complexity of detail. It's just a bit
Yeah, there we go. That could be a bit of
shadow running there. Okay. All right. So look this area
near the water there. And the roads just
running down the page. Now you see how I'm
just kind of, uh, really simplifying
this down here. I don't want I
don't want there to be excess of, um, it detail. Okay? But shadow running to the right cast by
one that bridge, maybe this by the
bus and some objects in here, as well, okay? Whatever it is, I just want something in
here to bring out the contrast on these
buildings because we've just got so many I mean,
look at that. There's just so much going
on in these buildings. So a bit of darkness
is really going to help bring out the
lights on the buildings. In some parts anyway. Okay. Having a look at what's going
on here in the background. There's a lot of
stuff going on here, but I want to reduce the
detail down and just add in another layer of
color back there. No, of course, eliminating
all the light, but just some bits and pieces. I didn't want to, but I might I'm just thinking whether I got to go back into these
towers out in the back. I think that should
be all right. Let's just leave it like that. Okay, so the roads, let's just get in this
indication of the roads. And you've got little cars just running through
here as well that I will just leave out a bit of
color lighter value, okay? And bits sort of here and there. Of course, you know, here is that other train as well running down the
front of the scene. And again, it's that same sort of pattern
I'm trying to replicate. Here, kind of like a a bridge, I suppose, like running
into the back end. It could do with
some more purple. You could do with a bit more,
yeah, like running that. At the end of the day, a lot of this stuff here in the
foreground is really just quite light or quite
dark, actually. I think what I will do next is work on the
darkness of the water, and it's really
just a lot of blue, maybe some purple
in there, okay? There's something definitely
over here, for example, there's a lot more
darkness, okay? Plant that upwards in there. Just sort of get it in
next to that area here. Sort of cut around that part. I was mixing in a bit more the remaining color on
the palette so that it doesn't look too like
it stands out too much. Okay. Can leave some of
that previous wash, if you want, as well. It's a bit late for me.
I've gone over most of it. I just wanted to really darken
that area here as well. This is interesting
because it kind of falls underneath this bridge
area, which is very dark. I mean, you probably
want to add in a bit of neutral tint or something, just using a dark value
underneath that bridge. Behind here, let's just go back into it blue
and a bit of purple. Again, just to bring out the bring out the water, the sharpness of the
buildings as well. And I'm just taking a bit
of care here to cut around this boat that we'd
indicated, this ship. It's kind of a bit
smaller, maybe like this. Okay? Good. But it
needs to be darker. Okay. Sort of look
back at everything. It's looking okay. I want to work a bit on some
of this stuff now. I'm going to just now, this is just a lot of
indicative kind of work, but here at the base, especially, I do think some extra darkness
is going to help to bring this all together. All right. So just carry this downwards and just add in a bit of
this bluish value Okay. It kind of what I
was saying before. I want to just make it pretty
dark here at the base. All right. Let's get this a little dry.
20. Day 8: Stockholm Finishing: Really, it's just the
finishing touches from this point onwards. I'm going to just
try to pick out some real dark areas like here
on the edge of the water. You know, you've got these
little details as well here and the water to like
the indications of these bits and pieces little jetties or what have
you where people standing on and people mooring
their boats, as well. Okay, let's just get this
other part in here as well. I'm just using a small
round brush for this. And I think it's really
necessary to do a bit of this final detailing work well, it's really what just
brings everything together. You know, even there's
some verticals here, which, you know, we can imply, but I don't want to put too much emphasis
on this as well. Okay? Just have something there a bit more brown
in that actually. It's just a bit too much. Yeah, here we go. I don't even know exactly
what these are. They're just, you know, parts that we can use to
connect up the scene. Okay. There's final touches,
really, of this whole area. And you'll be surprised
how a little bit of a little bit of this can
suddenly just sort of bring together bring
together the scene, make it look more realistic. Okay? Those trains again, supposedly just
coming in like this. You know, just get those
tracks in like that, as well. There's so much on here
that there's no point me trying to get in all
the details of the tracks, and, you know, we
will spend all day, and it will be a
an absolute pain. So yeah, but you
can see here there are all these I don't know. There's all these details
just running across. So just trying to indicate
some of this stuff, and again, like, detail, just
details, darkness here. It could be something casting a bit of a shadow to the right. I don't know. Just bringing
out this area touch. And, of course, because
we're in the foreground, it's a little bit tricky. We want to make it darker. But it's just a lot
of mess in here, industrial stuff and
tracks and things. So yeah. We got another vertical here. Let's just put another vertical there or something,
another one here. Good. Little details
like the rooftops, maybe, where are the
rooftops going to start like here and then go up? Maybe. Sometimes you just
lose some detail and this can help bring it back like that. Okay. See where these ones will go kind of up here as well. But Okay. Like this should
have some windows on the side of the
building there, and the rooftop should
be a bit darker as well. So I'm going to just darken
that rooftop a bit like that. You know, this building
here, here it is. We've lost out on
some detail before, but it also has a darker
sort of rooftop like that. There, you know,
there's some windows, but, of course, we've
got that whole um, miscellaneous area here,
which us just kind of tree trees an area that
I decided to leave in. There's also some
little maybe windows on the sides of the buildings. So let's just put in
something like that. Yep. Of course, on the ground, maybe some more of these
like kind of guiding lines, I guess, on the ground. I know they don't really
exist in some parts, but just helps with the overall
perspective of the scene. Maybe here as well, outlining the bridge a bit more. Yep. Underneath here, you know, there's actually a
lot of darkness. I can just indicate that. Underneath that boat. It's
also kind of dark here. Good more windows or implied windows anyway. Sort of put some of them in
the background and, you know, through some buildings just to indicate what's
going on back there, but I wouldn't overdo it. Maybe on this one here. This could do with some little
windows and things here. Yep. Yep, there we go. Yep. Additional darkness areas
of darkness around some of these spots to help
bring out the light Shape this tree a bit better. A bit of extra darkness on the left side of
this building as well, sometimes you'll find, yeah, just places where you
right at the end of the scene like now, right
at the end of the painting, you just find times where you know you just have to darken something to
bring it out further. So I really want to do this
for this building here. Okay, in some spots darken, especially right next to the light. You've
got this contrast. If you darken there, it's
gonna really pop out. There's actually a lot of
detail on this building. It's just so much on here, but I will only imply it. Otherwise, we were going
to be a bit stressed out. What else do we have on
it? Pretty much about it. The water just darken
that off a little. This ship is going
to benefit from some extra light
on it afterwards. We'll put that in later. Some guiding lines running
through here as well. To indicate that walkway
or what have you. Sort of indicate some shadows
running on the right side of these some of the buildings in the
far background as well. I missed out on that. But try not to interfere with them too much because
in the background, those buildings really
need to be lighter. Extra detailing, just
a bit of a bit of darkness back onto
this main building. You know, in this
part of the painting, all you're doing is finding little details that you
really want to draw out. Okay. I just wanted to redo that bit that touch as well,
extra darkness. You know, even in
here, there's just so much that you can still do. Um, like in this in this area where the
cars are, the motorway. You know, there's there's bits of darkness running
through here as well. You can see just like that. Um, but the cars are sort of, you know, you can
see just little bits of them showing through. I don't care much for
the detail in there, but certainly a little bit
of Sharpness does help. Just soften this
bit a little bit. And then some verticals. I'll have to go through
some squash and bring out a bit of that
detail later on. Okay. Li on the right hand side. Maybe a bit of darkness there. Darkening those rooftops,
something here as well. More buildings out in the back. I'm just building detail, a little bit of detail, okay, with again, darkening
some rooftops, putting in some windows. At this point, I'm not even really looking at the
reference anymore. I'm just painting and putting
a few sort of vertical, horizontal lines running
across like this and just trying to indicate details. A little clock
round a bit there. Sort of some detail there. I just want to darken a bit at the base of
this building, as well. So parts to just bring
out the buildings and touch separate them from
the ground, like that. Good. A bit of blue in here. Just a bit of bluish shadow running through this
section in the center. So was going to be good. A lot of this stuff, you
know, as you can see, it's just implied detail. It's really not much in there, if you think about
it. But it's enough. I do think some little
marks on the water, some tiny little marks
like this could be good for just indicating some ripples on the water, that
kind of thing. I can't really see them. They're so small, some
of these ripples, but I don't know, just help to blend
a touch, I suppose, so that we don't have the
same monolithic color running through
the entire thing. All right. Here's the
shadow again of this bus. I thought I would just
quickly add that in there. Maybe some people or some cars. Okay. Let's just
kind of indicate some cars maybe coming through. Okay. I could be be a car. Yeah. Um, really simplified. I don't think I'd
get any people in here might look a
bit funny, actually. You'd be surprised, what you can imply through just a few
seemingly random brushstrokes. You know. But, you
know, for example, if I have a shape here,
which might be a car, then suddenly you can get a
shadow running to the right, which makes the composition
maybe look a bit more interesting or not, you know? Something like that. Train here as well, a bit of that bring
the light back. Do you see some of these, like, bits of light kitten, some of these rooftops
and things as well. So you can just sort of you
can just add in a bit of guash on the top of the
roof like that. Some areas. You know, you can get a bit running through
the buildings, sort of seeing like, you know, underneath the roofs,
that kind of thing. What else do we have?
This boat here does need to be a lot lighter, and there are some
vertical marks as well. These, I can see just these tiny little bits and pieces here. Okay, good. Areas that you might
want to highlight, I've put mixed in a bit
of yellow with the guash, and I'm going to put in
this area where the, you can see it here as well, kind of where the
water hits the. The edges of this tree. Great, and I'll call
this one finished.
21. Day 9: Iceland Landscape: Okay, let's go ahead and get
started here on the drawing. And what I want to do first is just put in
the horizon line, and it's kind of just
where the grass starts and the mountains end
going to touch the ground. So it's about it a little bit below the
middle point of the page. So let's just draw a line
running across fairly straight. Doesn't have to be perfect,
but something like that. Actually kind of
goes up and down a little bit to the
right hand side. Okay? Now, running
through the center, we have got a bunch of,
you know, bits and pieces. We've got this kind
of body of water that's coming in like this. It's a bit running out there, and then it sort of
comes all the way down and disappears off the bottom of the scene here to the left. I took this from a
moving vehicle, and, you know, it's actually you can actually do
this pretty often. And that way you can
sort of photograph little areas that usually are
quite difficult to get to by foot passing by. So there we go. We've
got this sort of center area where we've
got a body of water, we've got the grass and some
pebbles and rocks here. And here on the
right, of course, you've got some little
bit of land that goes up, you know, some smaller
shrubs and things here. Okay, there's not many
trees in Iceland. You don't come across
too many of them. Now, this left hand
side is interesting. I want to put in this mountain it's all the way
in the distance, but it makes the scene
a lot more interesting. We don't have to get it
exactly as per the reference, but do you think keeping
it similar would be good. It comes down here, that second part
of the mountain. Then you've got the
edge, this third mountain that just
goes up and then it's got some interesting shape
on the edges there there. There we have it. And of course, there's a lot
of details in the mountains. There's lots of snow, but there's also this kind
of brownish rock as well. The light source is coming from the left hand side as well. And you can see here
there is a line that bisects the bisects
this mountain area in half. There's a bit of darkness
on the right hand side, same with this
mountain here behind. It's actually casting
a little shadow on it. Okay? We're going to have to be a little careful
with that one. Okay. But let's go ahead,
look what else we've got. I mean, it's pretty
basic, I think. That should be enough. We
should get started with the drawing now we can get
started with the painting. Alrighty. So starting at
the top of the scene here, we're going to want to get in nice even wash of cerulian blue. Starting right at
the top. I do have some other paints
here on the palette. Just got to be a little careful
so that it doesn't mix, but it's about 5% paint. It's very light. I always
like to start usually a little darker at the top
and then fade that downwards. And with these sort
of washes, as well, it helps to just angle the
page downwards like this and then simply add more water
and carry this wash down. Okay? As you move down the page, just add more and more water. All right. Just continually
adding more water. Okay. Now, we're getting close
to these mountains now, so we've just got to be
a bit more mindful that we're cutting around
them like this. Okay. More water. Again, just bringing this
further down the page. Okay. It's really just almost
100% water by now. Good. Okay, so that's a nice
flat, even wash, okay? And I said, you achieve that by sort of angling the
paper downwards a bit. It's very light, very light. Now as we move
further down here, we're going to
repeat this process, but we're going to
do the opposite. So I'm going to start with more water here in the background. Um, just make sure I've got a little bit of teeny
bit of blue on there. It's a bit tricky to
There we go, like, a little bit of tiny, little bit of blue out
in the back, okay? And as I move down
the page, Okay, through all this are here,
I'm going to do the opposite. I'm going to add more paint. Okay, a bit more blue, Cerulean, going all the
way to the edges here. Me. But let's just move I want to get this section
in first, like that. Good. Let's move this
further down here. It's more so as we move all the way down to the
bottom like this, we're going to get
a more darker blue. It's just cerulean
blue, by the way. So there's really not much
variation in cerulean blue, even when you mix
less water into it. Okay? So this is kind of a part where I like to mix in
a bit of other blue. So I've got some I've actually
got a bit of purple here, side of the page, little
tiny bit of purple. I'm going to mix in a
little bit of ultramarine as well and a bit of cerulean, so that we've got this kind of dull down version of
the other colors. Let's drop that in. Let's have a look. Yep, that's better. It's almost like
a purplish color. Slightly bluish,
purplish color. Okay? Feather this in. And
it helps when you got this really uh really sort of textured paper like
I'm using at the moment. It makes it a lot
easier to do this. Don't want any of these
white bits to show through. These little bits of white
sparkly bits as well. So I'm just taking
care more blue. Okay, I've not mixed
up enough color, but that should be
okay. There we go. Try not to mix too much water in there as well so that
it dries faster. Okay there we go. Right. So that's a nice, in my opinion, a nice little wash. And we
can go up a little bit, just sort of continue
to mix this through. But I think that
looks pretty good. Now, over here, there's a bit of reflection of the
mountains from above. I'm going to drop
in a little bit of this darker value here to
just indicate this, okay? That reflection of the mountain
there in the background. A little bit of that is
just such a small touch, really, all the way
towards the back. Now, it really
helps out the paper is not completely dried yet, so we can do this fairly easily. Okay. Now, this part of the scene out the back is
actually a little bit tiny, little bit lighter,
darker, sorry. There's almost like a layer of mountains here or something. I'm just going to drop in a
little bit of color here. And this is kind of to indicate these clouds on
the horizon line. Can you see that?
Just a little sort of section of clouds back there. So quick. And this will go up a
little bit, hopefully. But, um, that's
all I want to do. I don't want to put too
much paint in there. It's going to overdo things. But it's all wet into wet work. So all this stuff
is going to dry. Now, let's have a look. What
else do we want to do here? Well, we've got you know, we've got all this stuff here
on the right and the left, as well, the grassy
sort of areas. And of course, we've
got these mountains, which I'm going to
leave, I think, a lot of the white on there
to begin with, to a look. What do we want to
do? I think what we can do is start
with some browns. So smaller round brush. First, I might also be good to put in a bit
of some color here. This hasn't dried yet.
Yeah. It's right. It's sort of dried, but we'll make do. So this is just a bit of
burnt sienna and a bit of raw umber that I'm mixing
up here in the palate. Trying to kind of mimic this
sort of browny color here. It's not that dark. It's I don't like that, I guess. Okay. Not bad. Something maybe a
bit more brown. And dry off the brush
a little bit so I can get in some side
brush strokes like this. Okay? Now, this is going
to be important to indicate these little areas of snow running through
these little striations, you know, super important. And further down here where it hits the
here the grass. Okay? Just color in
the right hand side. I'm going to have
to actually get in some sharper shadows afterwards, but this is just that kind of
backing color that we need, that kind of brownish
value that we need. Dropping in some a
little bit more kind of burnt sienna in there. Let's have a look on this
right hand side again. It's the same sort of deal. We've really got some this
brownish sort of color. All right. I hope it doesn't spread too much into the sky, but for the most part, it looks mostly dried, so you should be able to work
your way to the right here. Okay. There we have it. Sort of edge that um Edge of that mountain. Okay. The rest of this, I'll
kind of leave and I'll go back into it a
second round. Okay? The bottom, however,
we can kind of just darken here. The base. To the left, let's
have a look here. We've really got quite a dark
contrasting shape there. It's like I mean,
it's almost black. We've got some brown and a
bit of neutral tint here. Touch of blue, just
touch of ultramarine, drop this in here. This is quite a dark shape. Okay, running in from
the left hand side. If I get a bit of wet and wet work here,
it doesn't matter. I might have to probably
redo some of this later, though. Okay, good. There we are a bit of that
darker shape to the left. Of course, some of
it seems to come into the foreground
as well here, the foreground, the background
area below the mountains. Okay, great. Now moving on to
the next part of the scene, I'm going to mix up
some green and a bit of yellow to get a lighter color. Now, also, what I'll do is just use some yellow ochre by itself, and you know, if we
look through the scene, it's really just pretty, you've got just tons of yellow running through
the entire thing. I'm going to use
this brush that's just a little little
round brush. All right. I want that to be more
transparent there at the back, just shift that a
bit. Add more water. If you find that you've got just too much color,
just add more water. Okay? So I'm going to bring
this all the way up to the horizon line here, okay? Even here. Look at that. There's
these shrubs here, but we're going to
put in some more color for them afterwards. What I want you to
do is just get in this yellowish color
here for this grass. Okay. I've not had to dry
the paper off at all. It's a pretty hot day
today in Melbourne, but if you paint slowly, you're going to be able
to get this effect in pretty easily. Got to
be patient with it. Okay. I mean, through it's
just yellow ochre. Nothing else. Yellow ochre. Great. So inconsistent
parts in there as well. No big deal. Let's
just drop them in. Um, up the top here, see if I can feather
in a bit of green. Just a tiny bit of this
green there to the right. Don't want to overdo it, but
just something like that. Alright, so the
left hand side now, let's grab that
same yellow ochre. Now, this has kind of dried off, unfortunately, but it's okay. I was hoping for a
bit more blending. Okay, there we have it. Bringing down that yellow ochre. Lots of water in there as well. It's mostly just water,
maybe 15% paint. Ten, 15% paint, if anything. Okay. Bring this down. These round brushes, they're
great for detailing, but they just don't
hold much water at all, so you have to kind of be
a little bit more careful. This area, these rocks, they're kind of a
more browny color. I've got a bit more
substance to them. So I'm just going to add in
a touch of darkness here. Um, I'll go back into these in a moment
as well, but just, something like that gives you a good starting point. Okay. Gonna start just mixing
in a little bit of paint and dropping it in
here near the edges. And a smaller round
brush is actually going to help much more
with this nakae. So I'm just going
to drop in a bit of darker neutral tint, okay? Yeah, a little bit of
darker neutral tint. It's just on the edges. Okay, of this section. Even at the back here, you
can see there's, like, a darker sort of line
going out the back. You know, there are
little indications. It's almost like, you know, just of the areas
here. It really helps. It helps to sort of bring,
you know, do it everywhere, but just in some parts, it helps to make it look like
it's more three dimensional. Sticking up a bit. Okay,
dropping some more in here. This is like another again, some shadows running
to the right. Very basic sort of shadows. But a lot of this,
I'm just leaving leaving that previous washing. Now around the edges
of these as well, you've got the
same sort of deal. You've got this thin kind of
line almost in the edges. Mix up some of the darker paint and a bit of brown together. Okay? See, just these
little sections that seem to come out a bit sharper
sections as well. Okay? Great. So really just touch and go. This is really almost
an exercise in patience and self restraint
because I have this tendency just want to go
in and paint everything in. But, you know, at
the end of the day, remember, we want to preserve
this beautiful wash. So this is just a bit
of green mixed up. I'm going to drop
in a bit of it here for some indications
of some shrubs. These little shrubs here
in the distance like that. There's not really much in
there, but just something to, you know, just something
to add in, you know, across the ground, you might get some little shadowy
areas as well, rejig this shadow, this
darker section anywhere here. Runs a bit to the
right. And bits of green here as
well, it does help. These were the areas I'd
painted in a bit earlier with wet on wet but redoing it. Okay. Let's work on the
mountains a little bit now. So I'm going to
put in some blue. Ultramarine let's start
with this ultramarine. Doesn't matter exactly
what it is, really, but just a cooler value,
I guess, would be good. I can even be purple. And what I want to do first
is go into the mountain. I'm going to mix up a bit of maybe paints gray
as well in there, kind of like a cooler
shadowy shape. The right hand side
of this mountain, you can see here there's actually a fair bit of
darkness running through here, so I'm going to indicate
that like that. Bring that down. This, of course,
connects here as well. A little bit there. There.
Oops, go up a bit too high. Doesn't matter. It's a bit of shadow here as well. I'll get that in in a moment. But for the time being, I can
just work on some little, you know, striations or what have you running through
the rock, just like this. Turn the brush on the side
and then drag it through, and not overthink it as well. But you just need
some cooler bits, cooler sections inside this top of the mountain area anyway. So, you know, implying some
things here and there. All right. Just kind of looks more like a
mountain, I suppose. Okay? Comes out of the sky touch. Yeah, this here has
a shadow, yeah. Alright. Let me also
go into this part. Kind of just making it
come out of the sky a bit. Yeah. Blend this a bit more. Let me go. I just want to strengthen this darkened area
here a little bit. So I'll go back into
it again with some blue and a little
bit of Payne's gray. So it's definitely like a darker sort of
shadow like this. You maybe got a bit
more running further. Yep. It doesn't have to be
perfect, but just, um, I think it's gonna make
it look better this way. Just a few like another layer, a darker layer in front. Quite a sharp sort of layer, tempted to just soften
part of it here as well. Alright, and we are finished.
22. Day 10: Uppsala Drawing: Okay, let's get started with
the drawing for this scene. And this is an area
called Uppsala in Sweden. And we're going to go
ahead and probably just draw a line just underneath the mid section of
the page around here. Okay? This is the area where the houses touch the land, okay? Just underneath the midpoint, and it almost goes upwards
down the back there, okay? Ends up a little
bit higher here. There's some kind
of building there, and I think a few more
smaller buildings and trees here as well. So I'm just going to scribble
a little bit of that in. Now, the main detail and everything here is
really just these houses. The rest of it is going to
be a lot easier to paint in. We don't need to
draw much. But let's start off with these houses. I'm going to start
with this main one here to the left, okay? And you've kind of got
this beautiful white sort of side of the building here. And I'm going to go put in
the sort of area of the roof. Now, the rooftops, you got to look at it almost as
if it's a saddle. They call this I think they
call it a saddle roof. I don't know if that's
a colloquial term. But yeah, it looks a
bit like a saddle, so you kind of got a
triangle a bit up the top. And then the second side
of the roof sort of come down with a very, very subtle sort of angle, okay? Let's go down out. I've made these a little
bit bigger as well. I just want to make
these buildings. Yeah, I just want to make
them a little bit larger than they are actually
in the reference. So get the sides of the
building in like this. You can see there's
a bit of it that just sticks out as well. But let's just get
in the top part of the roof comes in the
side down like this. Then you've got this bit
that comes out there. I'm just trying to
look at this as I guess smaller shapes
within shapes, a triangular shape that
comes down like this. Then this goes back into
here uh, like that. And this is all kind of
dark on the side like that. Alright, let's get the bit of the left hand side
of the building that sort of comes down there. Yep, good, like this. Maybe a little bit further. Then you've got the back end of the building that just goes up there and then finishes like that coming
through the building. Okay. And the whole white
area of the building is actually behind this
tree there as well. So there's quite a bit of space and in a
little bit, closer. There's all these little
bit line work you can see there on the sides of
the building like that. That's another sort of line. You know, here, you've got like it's just a rectangular
sort of window, another window here,
another sort of squarish window,
another window here. I'm trying to get it
just to line up a bit more with that
window up the top, but coming down like that. Okay. Okay, now, continuing
on with the drawing. We want to get on the right
hand side of the house. It's kind of just extends
more like this, comes down. And it runs around
the side there. Now, there is a kind of white
balcony over here as well. You can just sort of see
it coming out there, and then there's, like,
a bit of white here. So I'll imply that like that. Um, there we are a little
something like that. And the upper part of the house, just
running across the top. It gets a little
bit complicated, but we've got this chimney. It's kind of just
a rectangular sort of shape like that comes down, and then behind that chimney, we have got the part of
the roof that stretches across there and
comes down like this. Okay. Probably actually
comes out a little bit more on an angle. You really have to
look at the angles of these lines. They tricky. There we go. That looks
a little bit better. Okay. Ah, right. And then we've now got
the bottom of the house, which sort of comes
out like here. Great. Okay. Now, the sides
of the houses, you've got these
couple this house here you got two windows there, so I'll pop that in, simplify that down a fair bit, as well. Okay. So that's that
main main sort of house. Now, there is something
here as well. I'm just going to pencil in. It looks like a triangular
shaped rooftop here, just sitting behind
in that area. So I'm going to put that in. This is just a quick
indication, I suppose. Okay. Like that. A lot of it's just covered in there's some shrubs and
things out there as well. Now on the right
side of this house, we need to get in this
other house there, which is, again, triangular
top of the roof, then it comes down like this. And you got this
other side there. It's really, I mean, this stuff out in the back is not much of a doesn't take too much
work to get it in, okay? Simplify this down. The main houses I really want to get in is
obviously that one we've drawn in before and
then one on the right. I think those are going to be
the main areas of interest. Okay? So let's get
in this one here. It's kind of like
a triangular top starts roughly about
here, comes down there. Okay. About here,
actually, e maybe there. Comes down like this,
like the right hand side. Okay. And it's really just
this sort of structure, triangular side of the house. Let's get in the rooftop. Again, there is some
kind of you know, some kind of a
chimney here as well, which I'm gonna need to put in. Yep, something like that. We have a look, what
else do we have? We've got this other part
of the house to the right, which is kind of like this interesting
triangular, like, shape. Again, there, just looking
at this in terms of shapes. Okay. That's the only way you can draw a lot of this stuff, because if you end up
getting too bogged down in the details of the house and
looking at it as a house, it then becomes impossible to draw other part of the roof coming over
here to the right. Good. It doesn't
have to be perfect. The proportions don't
have to be exact, but I think, you know, do pay attention enough. Okay? There we go. So that's
the gist of that house. There's also, you
can see window here, window here, there's a couple
windows here on the side. I reckon I'll darken
some of those as well. Another window
there, a door here. Then you've got a door there. Okay. Then on the right, you've got yourself in a kind of maybe a barn or
something like that here. Okay. So it's just
like the roof exposed, and then there's
a couple of other rectangular sort of objects, squash shaped objects
here could form part of a fence or something
like that, as well. Okay. And you've got all
these you know, large trees around, and this
is going to be important. We're going to get these
in quite sharp once we once the rest of this
is done. All right. Good. Now, I'll just
quickly indicate here on the front this kind
of area like that. Looks like they just harvested something some crops
in the middle. I don't know, or just sort
of mowed down that area. But there's a lot of
grassy sort of area here, and I also want to make
sure I maybe get in a large shadow running
across the scene somewhere. Yeah, I'm thinking
maybe I might get like an indication of just a
large dark shadow here. It could be a cloud from above, really the light source
is coming from the left, so there's no trees
to the right, but it, you know, it could be a cloud
if I make it soft enough. You do see some shadows here
as well on these shrubs, bits of, you know, longer grass. So yeah, let's go ahead and get started
with the painting.
23. Day 10: Uppsala Painting: Okay, so first things first, I want to get in a light wash of cerulean blue in the sky and start off the top
here, very light. It's about 5%
paint, if anything. I might just darken the top of it a little
bit more like this. Okay, a little bit
more on the top. And as we move down the page, you know, make sure I got
in a bit more contrast, a little bit more color
up the top there. We want to just drop
in water, okay? So I'm not putting
in any more paint. All I'm doing is
just adding water. This is going to allow me
to get in a nice flat wash. Okay? Just adding water more water
as I move down the page. This will lighten slowly lighten this wash until
you've almost just got to I wouldn't say
the white of the paper, but getting close to that. Now, I'm cutting around these rooftops and the
buildings as well. Just a little bit of
something like this. You've got to be a
bit careful here, but it's not a big deal if
you go over them a little. I just want to
leave that area of those houses white so that when I go in with
some warmer paint, it does show through. Okay, I'm trying to do
this fairly quick as well. I didn't want that.
That's a bit of green, but yeah, it doesn't matter. There's actually some plants, shrubs and things there anyway. Okay? Sometimes you
do get a bit of extra paint that accidentally
mixes onto the page. Just continue on.
Don't worry too much. Okay. Good. That's a really
basic sort of sky wash, okay? Because I've held the paper
in a bit of an angle as well. It makes it a lot
easier to do this. So for the rooftops, I'm going to be using
some burnt sienna. Just like a reddish brown color. This would be perfect for
this area of the roof there. I'm going to just
start going in here. Hopefully in just one go, we can get this all in
really light I mean, it's just mostly
mostly water in here, so we don't have
to overthink it. Alright? Let's have a
look here on the roof, the, um, chimney, bit
of something like that. Okay, let's have a look. This right side. Yeah, this
whole area can just get in. It will need to be
darkened anyhow, so just I'll just get it
painted in the same time. The really important thing is to make sure you
leave the white. Okay, so don't, don't color
everything in this color. Leaving the white below. Getting a tiny bit of color
spreading into the sky. But I think we won't
actually bother with that. The reason why is afterwards, I'm going to get in some
of those trees behind, so they will kind of cover up
that brownish color anyway. Okay, let's continue on. We need a smaller brush. This is a bit tricky to do. Keeping it very light, again, just um This is all just
a touch of burnt sienna. Okay. Fantastic. There's a little bit of
something here as well. A bit of brown, like a shade or something there. Left hand side. Look, you've got also this
same sort of color there. But it's actually darker. I just want to put this
in so that we've got something some
color on that side. It's mainly the right hand
side that's important of the building because
that's going to be where the light shows through. Okay? I've actually gone down
a little bit too far. This area down the
bottom should be a more bluish value
later, which I'll get in. Okay? It doesn't matter so much. There's more so that right
hand side and getting in the rooftop area. Okay. And yeah, like I said,
I'm not really so fussed if this goes
into the sky a touch. I really like to
paint everything at once in terms of joining
all the areas together. And sometimes when you
pause too much and you dry it off and start again, you lose that
beautiful fluidity. So have faith in the process
and know that, you know, sometimes those little
marks in the background, they might look a bit
funny at the moment, but afterwards, we can make them a lot
neater, tidy them up. Yep. This should actually this whole chimney I can just get in. A lot of cutting around
these white sort of sections they're important to imply to leave out but okay. There's also some
this house here, it's kind of like a
brownish rooftop, as well. Maybe a bit cooler, but
I'll keep it brown. Can you know, I got some purple. Drop that in as well. It's actually pretty dark. But I reckon I'll have
to redo this afterwards anyhow to really bring
out that contrast. And you've got, like, you
know, inside as well, some of these white
contrasts which you can leave out to Okay. Good, good. Trees and things I'm gonna get in over the top of all this. I just want to make
sure we've got in the right values and
everything like that. Um, Now, we have to imply the shadows inside on the actual
buildings themselves. So I'm going to be
using same round brush, and I'm picking up some
ultramarine blue, okay? A bit of ultramarine blue
for this one to the left. All, just a bit of ultramarine
Blue. Very light wash. It's probably about
10% not even 10%, but, like, 1.1% paint, even. Let's just drop this in here. Hopefully, this is dry. The rest of it should
be. There we go. Let me just bring this down. I'm going to have to reassess this as well and
just make sure that it's the right strength, okay? But let's drop this in. You can see it sort of goes
all the way to the left of the building to the
right of the building, here, this is where I really
need to make sure I've got a bit more darkness
or contrast here. I also want it to run into the I don't really want
it to run into that area, but it might do a little, which isn't a huge deal. But let's just get this in. There, then it comes
down like that. Okay. Essentially, you've got yourself the shadow on the left
side of the building. On the right side, it's all just light hitting the
front of the building. That I'm going to need to
darken off a touch later. Now, this building
here's kind of got a more warmer color
running through it. I'm just added a little
bit of red into this mix. Okay. Through here. Like that. Fantastic. And what
have we gotten here? We've got some Yeah, I reckon I'll go with
that kind of more of a bluish value as
well inside section. And hopefully this
also contrast with this rooftop here like that. A the rooftop and create a bit of this
white side of the house, make it sort of pop
out a bit more. Here we go. It's a bit
of negative painting. And we've got the same
sort of deal here. Let's just do that. Sometimes just leave a
little white edge there to bring it out more. Um, Yep. Good. Well, let's have a
look. What else do we have on the building that
we might need to imply? Not really that much. Not really that much at all.
I think the rest of it, we can get in with
the second wash and some little detail little
detailing efforts, okay? I'm gonna get in this rooftop here to the left as well,
forgotten about that one. Does need to be
pretty dark, too. Just popping out of the
Out of the darkness. Oops. Yep. Here we have it. Something really
simple in there. There's even some type
of, I don't know, like a vertical here. But yeah, what we're going to do now is we are going to start
putting in all of these, all of the different
shrubs and the trees, pretty much all in one go. So I'm going to give
it a quick dry first. Touch of yellow ochre for these indications of
these fence areas. There's not much yellow in
this scene at the moment. So a touch of that's
going to be good. Hopefully that will
dry off. Soon. Okay. But let's go ahead and get in all of these trees and
things here in the background. I've got some undersea green. Whatever green that you
have just use, okay? It's just going to
be a darker green that would be
preferable. All right. Because we really want
to make sure some of these trees pop out. So let's start off over here. I'm going to pick up
just that greenish mix, and we're going to go into
this area and get that in. You can see the trees. They
sort of just cut around the part of the
houses as well, okay? Like that. Down here. Well, sort of
overlaps like this. You even got a bit
of overlap here on this side of this building, which comes down even further. But I don't want to get
too carried away Jess yet. I do want to work on this area here behind
the house, as well. So we just darken
an edge like that. And as you can see, you can just kind of
bring out the details, yeah, the little
details, I guess, of the houses and things. Without much effort at all. Okay? Try to use fewer
brushstrokes, if possible. Um, I might exaggerate this
one a little bit, again, just to bring out the
details of the house. But this house, anyway, I'm gonna have to
make darker, okay? Mm. The rooftop anyway, of this
left side of the house. Okay? But here, we're
going to get some trees. You know, this one sort of
go all the way up like that. And I'm trying to get a bit of the texture of
the paper, see? So being very careful
with how I do this and just trying to get it
in with just one or at least a few little at most a few little
brushstrokes. Okay? This is going to
create extra contrast. Oops. I've gone into
the house too much. Let's not worried about that. There's always going to be times in watercolor where you just, you make a little
mistake here and there. You've just
got to run with it. Okay. Just continue on. Do the best you can. But
this is quite crucial. This whole area is very crucial in order to bring these houses
out of this whole area, there, let's, um, maybe bring
a bit out here as well. Um, this could just be more
branches or something there. I'll simplify that down. Um, yeah, I'm making
it look like there's more trees than there actually
are back there, okay? But I think this is a good little technique I employ to bring
out the rooftops. And you can see it's
already starting to work. Yep. A little something back
there. What have we got? Oh, these ones here
would be kind of good to play around with, as well. This section. There is a larger tree or
something behind as well, especially near this
area of the roof, we've got a lot of
white contrast that's gonna really help
to bring it out. Okay. Little branches and things as well, if you
think that helps. When you've got a
sort of detailed, well, thin brush like this, that has a thin tip,
it really makes this a lot easier to do. Okay? And you can
see I'm dropping in some darker arts as well in this mix so that it doesn't look
like all just one color. Okay. Now as we go over
to the right hand side, things are getting
darker and darker. You know, I've got
the same green. Let's just continue on. And you can see it
goes around the house. I'm going to make
it pretty dark. Yeah. The cut around this rooftop
or whatever, there come up. Blend this in a bit to the
left side. That would be good. Yeah, this paper is drying
quite fast, actually, so they're just darker green. I mean, really, we
should have some bits of that darker green here as
well to just contrast. With watercolors,
it's so important to have different contrast, different values
running through. So it doesn't look all
the same and monotonous. Okay. But also we want it to
look even don't overdo it. These trees, they're
pretty big sort of trees. Check this out. So again, I'm just
using that round brush to get in the general shape, the edges of this tree. Okay. Take your time
with this around, you know, but I'm
scumbling the brush, moving it around in
different directions to kind of get a yeah, to get more interesting
looking shapes. Okay? Trying to lend this
on as well with the this house here you can see there's
actually little bits of green and trees in here. I don't want to get
rid of that. Yeah, I don't want to get
rid of this nice, kind of yellowish value as
well running through there. But, you know, we
do have to make sure that there is some
green behind that as well. Alright. So but a little darkened here, just a little bit on the
edges down here as well. It's kind of like
what I was saying. You can't have the same value running through
the entire thing. You've got to darken
off in parts. Okay. Now, there are
some, you can see here, some little darker
shrubs and things running through the
front of the building. You know, it's obscuring
some parts of it. Even here, you know, you've got some smaller brush that's going to
make this easier. Little shrubs and things. I'm trying to make this
as randomized as I can, make it look as randomized
and natural as I can, because it is tricky to
get this uh get this in. You notice there's
like a little bit of warm little bit of
shadow running in front of this building here
being cast by the fence. So I'm going to just
imply that here. Okay? Maybe something like that. Okay. All right. On that right hand
side, as well, I do notice there is this kind of distant buildings and things which I will look. I'm just going to
imply this with a few little brush
strokes, and that's it. Like, it's all just
gonna be one big, I don't know, shape or
whatever out the back, and I don't want to I don't
want to add any more detail, something quick like that, okay? We'll work down the page. I'm gonna This area looks
almost a little bit purplish or yeah, kind
of, like, warmer. Warmer, purplish. So I'm going to pick up maybe
a bit of purple. Yeah, let's pick up
a bit of purple. I'm also going to mix
it with some brown to just dull it
down a bit, okay? So it's kind of let's
see how we go, okay? Let's drop that in here.
I still fairly light. And hopefully I can
get this to blend a little bit with
that wash above. Another thing to keep in mind is I think what will be
good is if we get a bit of yellowy sort of
green here as well. You can see it just sort of runs permeates through
parts of the scene like here. It's not just, you
know, darker greens. We've got to have some of
this stuff here as well. Unfortunately, this
has dried off a bit, but, you know, we can trying to bring it down a little
bit more like that. Yep, here, you can see
it's sort of dried off. But again, I can bring
this down and let it blend through a bit because this whole area has
not completely dried. It's only partially dried. Good. I might continue on
actually down below here. Just bring this greenish sort of wash with some yellows
perhaps down to the left. More green like this, bit of yellow ochre perhaps
running through here as well. Sometimes I like to
drop in a bit of white guash with the
yellow ochre to get kind of a sandy sort of value
for some of these shrubs. Like that. You can see it's yellow ochre mixed with
a bit of white guash. Now, try not to overdo this
as well because you can easily make it look very
opaque and not nice at all. So let's move this across. I need a larger mop
brush. Yeah, there we go. I don't want to
add too much color in terms of saturated
colors in here. So I'm using a lot of duller values, except
for that area there. Okay. Let it let it sort
of sit there for a bit. Now, the rest of this area, I can actually get in with that same is that purplish
mix that I had before, purple with a bit of brown. It's sort of this color
that a bit more purple. And I'm really hoping as well, that some of this
stuff will blend with the green above, okay? I don't want it to completely
obliterate all that green, but just a little bit of
mixing is going to be nice, because there is actually a
sharper edge here as well. So let's just do this does help to just hold the Hold the
paper a bit as well, so that the wash runs
downwards, travels downwards. It almost looks like a lavender field or something,
but it's not. Let's get this running through. Because this area has already
been, as you can see, it's a bit wet at the bottom, it should just blend nicely because I don't want there to be too many sharp
edges in this scene. There is a bit of a
sharp edge there, but that's fine that actually looks like how it should
in the reference. Okay. All right, so we've got that all travel detail and stuff
traveling through now. Let's have a look.
What else do we potentially need to do here? Now, one thing I really
wanted to do was get in a big shadow running across
the bottom part of the scene. Okay? So, before we do that, I think I will try to
add in some extra darks, okay? So extra greens. Kat maybe here. Yep, and just make
it look like there's a bit of a shadow
running to the left, again, for some of these
shrubs, maybe a bit here. You know, this is all
just wet and wet work and trying to work this through while everything
is still impermanent. Alright. Just drop a bit of this stuff in a bit
of blue as well, okay? You can sort of see on
the on here as well, these little marks, I guess, of where the machines
have gone through. So a tiny bit of
this would be okay, just to imply Let's continue. I don't have to make
this too obvious.
24. Day 10: Uppsala Finishing: Here at the base, this is where I'm thinking of just
changing the composition up a little bit
and adding in some purple and blue and
creating some kind of some kind of shadow here running
across the foreground. So something like this, drop that in there and
just carry that along. Okay. While it's all still wet, this is a good way to get it in. But I do want also, of
course, some of that nice, lovely green that's
showing through. So yeah, let's just
darken this down a bit. It's just a bit of purple with ultramarine
blue mixed into it. And this can kind of
just look a bit like maybe some cloud shapes coming in from the
right hand side. Just feather it in until you
feel it's kind of enough. Okay. I think that's
looking pretty good. But now, what we can do as well is start scratching
out some small highlights, and all this is basically
is just getting in some little indications
of this grass. Vertical marks like this running through it's a bit of a trick. And it I guess helps
to outline the center of this field as
well to make it look more separated from the
grassy region here. I'm using a little
pocket knife for this. You can use a credit
card as well, or a bit of plastic
that does the job. Yep. Yeah, there's a bit more here. I'm going to have to
wait for that to dry. Um, yeah, I'm gonna
have to wait for that area to dry a
little bit first. Yep. Yep, continuing on. Just a bit more of this
scratching out work. Then again, it really helps to indicate this sort of grassy texture that's difficult to get in, actually,
with watercolors. But we can put in a bit
of guash afterwards, which I think would be
a good idea to really just finish it off. But as you can see, it's quite effective quite
effective little technique. Okay, now in the buildings, we're going to
just do some quick finishing touches and detailing. So left side of
the building here, there's some brownish value
that I'm going to pick up. It's just a brown color, really. And I'm going to paint
this rooftop in so that it comes through darker here. A Yep. And it's the same thing actually behind except it's not as
dark on the top of the roof, so I might just lighten
that off a bit. It's still darker than the trees in the background, though. Let's see what we can do.
Okay. That's something. A bit more neutral tint added in to just darken
this up some more. Um, yeah. So there's these little
details you can see in the house like this sort
of section of the roof. A little bit of darkness here. And really, this work is quite important to just get in the structure of the
building better. But by all means,
we don't want to over detail any of this here. So you can see this sort
of darker region behind. We just want to get
this in quickly. You really just if
you think about it, you're just coloring in in a darker value to get
in these shadowy areas. You know, you've got this side of the building
there, the window. You've got another window here. And I find that often
the less you detail it, the more it almost
looks like what it should if that even makes sense. But I'm saying, like, the you got to try to get these little bit
of line work and things in just one go and kind
of accept the outcome. And the good thing with this, as well is that you just don't end up spending
all day doing it, which is the most frustrating
thing in watercolor. There's, you know,
that's a window there. I don't want to bother
with it too much. So I'm just putting in some
tiny quick little details. There's a window here
underneath as well. And here, you know, just a couple of brush strokes should do the trick,
as you can see. And this side of the house, this kind of detailing on
the side of the house there, as well, behind here, you know, there's some little
details for that house, but honestly, there's
not much at all. It's almost like it's just a tree there in the background, and then you've got maybe
some green area here, but not much at all, something to draw out contrast. But, um, Yep. More brown and what have you here. The rooftops. Oh, these chimneys, yeah, we've got to get
in just a bit of the shadow on the left
side of the chimney. And in one like that. Let's have a look
here, this chimney. Okay, good. Of course, this side of the
building here is gonna be a bit
darker, this area. Like that. Okay. We've got some
windows and things here that are in
white, actually. I might be able to put those in with a bit of
guash afterwards, just a bit of finishing touch. But I'll put in some of
these little windows, here, the darker parts of the
windows, the doors as well. Just a few little quick
dots. That should be fine. Um, yeah, I could put in more, but I think that
should do the trick. I'm going to use some
real dark paint now. This is some neutral tint. Just real dark paint to get in. So final little
guess, contrasts. Okay. A Maybe extra contrast as well around some
of these houses, just a bit of darker
value in parts. A bit of green as well, just to get in some
shrubs near the edges of the edges of the houses. A bit of darker color
for these trees, like running just some
darker contrasts, I guess, for some
of these trees. Detailing at this last
stage of the painting. H. I thought I'd try to just darken off more
of this sort of frame area, as you can see, these
little frame bits of the building to make
it pop out better. Um, Yep. I've forgotten this balcony, unfortunately, I've kind
of got in a bit too much. That should just all be
something like that in there. Just bringing out
the edges of some of the that building, as well. Now, very subtle sort of touch, I think I'll just add
in a little bit more of this raw burnt sienna here. The top part of this
roof is actually a bit darker than the bottom. Just a little bit darker. Look at the chimney,
chimney also. No, it's catching that light, but get a bit of that in there maybe the same
with this part as well, it's just the angle that
the light's coming in. It's a little bit It's a
tiny bit darker on top. Not really an issue
with this one here. But thinking I could do with a bit more a little
bit more darkness and a bit more reddish
sort of color. So let's just add
in another layer. Yep, there we go. But yes, a little
bit of white guash. I'm going to just tidy some of this stuff
up on the houses. So here, I've just lost
a bit of that highlight, so I'm gonna bring it
back quickly like that. Oops too much, actually. But there we go. Maybe a little tip there. You can just find little areas that you
might want to bring back, little bits of light that you
might want to bring back. Certainly can see some in that
building here on the left. Obviously, it's better
to do this, you know, to leave out the white
in the first place, but it's always it's not
always possible to do this. So this is the next best thing maybe a bit there's a bit
of white here as well. I've also noticed
maybe, you know, you can see on these windows, there's may bits of
white in there as well, so I can just do this like that. You're really just using the gouache to bring out
some tiny little highlights. Here and there. I don't
want to overdo it as well. In fact I might just go
over this again with the darker color.
It looks too much. I'm mixing a little bit of
yellow into my white guash. And with this, I'm going to just flick in with rigor brush, a bit of this effect here
with the lighter grass. Okay. This is just
to get back again, a bit of extra contrast
in detail all this grass. I don't want to
overdo it, though. It can be a mistake
if you're not careful because then it will start to kind of
overwhelm the entire scene. But, yeah, there's definitely
a need for this here, running through this purple, especially yellow and purple
are great complimentaries. So this is going to
hopefully work out nicely. That was a bit too much here at the base,
but it doesn't matter. Let's have some of
this running through the purple as well. Just a little bit of these
marks and keep them a bit more randomized, as well. Two. I have a few that are kind of longer, you know,
here and there. It kind of helps with
the whole framing of this scene, as well. Yeah. In the front, you
can just do some, like, larger strokes as well. That tends to be the case as
you get closer to the scene, just some more marks.
And we are finished.
25. Day 11: Iceland Scene Drawing: Okay, let's get started
on the drawing. The first thing I
want to do is put in the area at the back where the mountains kind
of hit the ground. I think that's about just above the middle part of the paper. So around about here, we
want to give it a bit of room going across. It does actually go up a
little or something like that. Now, let's go ahead and put in the details of these mountains. I know there's one sort of
coming up the edge here. Now, we don't have to
get this in exactly, but definitely we
want to make it resemble what we have
here in the reference. So that sort of larger
amount to the left just goes all the
way down. Like that. And, you know, one thing
about these mountains as well is that they're going
to be darker than the sky. So we'll have to get
the sky in first. That's another kind of bit of mountain that just
comes down there. Then there's another sort of smaller mountain there in the background that just
goes all the way off. It's actually got more of
this sort of shape like that. Then you've got, I guess, some smaller ones
here in the front, and they just kind of form a bit of a
silhouette like this. There's lots of
ridges, bumpiness. Okay. All this is kind
of quite distant. So there is, however, a smaller kind of area here that just goes up and it
has some light, okay? A lot of this is just to
pencil in the general details. We don't want to get
in anything extra. We want to wait for the actual
watercolors to do that. So everything underneath
here is we don't really need to do except for
this river, okay? Now we know the river
sort of comes in here, just underneath the
middle part of the page. Okay, so I'm just going to do it with one kind of hand first, the general structure
of the river. It's quite complicated. Actually. There's a
lot going on here. Um, I'm not trying to I don't want to
I don't want to get in all the details exactly, but just sort of make sure
that I have some kind of river running from the left to the right of the scene, Kate. That maybe kind of just goes like this out onto the right hand side
of the scene like here. Fantastic. Actually gets quite
complicated, really. But, we'll just have to simplify this one
down for the sake of, you know, keeping
it quite basic. I array some of those
little lines in there. Now, we have some
little buildings. Now, there is a church, I think, some kind
of church building. There's, of course, some shrubs, not shrubs, but they
look like shrubs from this distance,
but, like, trees here. You know, there is a
church somewhere here. Let's just put in the
details the rooftop, which is this kind
of triangular sort of shape like that comes down. It's kind of white, the
side of the building here. Okay, top of the building, you've got this sort
of rectangular sort of squarish shape. Then you've got the roof there. Of course, let's get in this side of it like
that. There we go. It's just a little side parts really basic sort of building because I don't want to spend too
much time on it. And I also want to exaggerate
maybe the light hitting the left hand side of the right hand
side of the building. I mean, fix that
up a little bit. Really got to pay attention
to the line work. Okay, that's your
church for you. It's a little bit bigger
than I anticipated, but it doesn't matter. Okay? Something
here and the front. I don't know exactly
what that is, but you've got these
other buildings here. It's kind of like you got this
triangular sort of shape, and then you've got another triangular sort of shape there, and they just sort of overlap
almost with each other, as you can see until
there's, like, one larger one on
the right hand side. But, as you can see, they just kind of line
up next to each other. Like this, quite simple
sort of row of houses. There's, you know, some
trees around, as well. I kinda got this
pointy top of them. Alright. And these trees are important
because they're going to form the basis of the
reflections here in the water, which are actually
quite quite obvious. In the foregrounds, there
is a kind of walkway here. You can just see just make
it up this zigzaggy walkway. You know, you look at that. Sent of coming towards the
front and then it just comes out and then it disappears
behind these trees here, which I'll have to
get in afterwards. If you look very
closely, there's also some people just walking around on there, right? That little path then comes
out more at the base here. I will just change this
around a bit so that it comes up more. Maybe go back down again. That. Good. I think maybe I'll put some trees running
through it, as well, just to break it up
a touch. Fantastic. We'll probably just add some more water areas
in there as well, keep it looking interesting. Right, and we are now
ready for the painting.
26. Day 11: Iceland Scene Painting: Alright, so I'm
going to start at the very top of the
scene and get in a nice wash of cerulean blue. And this is mostly water. It's about 5% paint. I always like to start off a
little bit darker up top and then work my way down
putting in some extra water. So there we go. I've got the paper
tilted, as well. Just drop in water,
as you can see here. This paper that I'm using
is rough textured paper, so it takes up a
great deal of water. Absorbs a lot of water. So I'm just bringing
this wash down. Yeah. And, um, I might actually go through
the mountains as well, because they're kind of
a bluish color anyway. Great. Okay. So I'm going
to just continue So I'm just going to add on a little bit of
yellowish color now. This is yellow
ochre. Drop that in here and continue this
wash down the page. Okay. I also got some
kind of gray color, but I just want to continue
this wash downwards, and back to the cerulean
again to create some a little bit
of a bluish color, I guess, around some of
these bits of bodies of water we see here,
this river here. I want it to be pretty much
the same color as the sky, maybe a little bit darker. Okay. Maybe a little bit darker. And I can work around
that afterwards. That's no big deal. Okay. So more yellow ochre
around the top here, moving around these buildings. No. I do want to actually
put a little bit of yellow on top of the rooftops
of some of these buildings, like maybe these ones here. Okay. That's going to have some light, I guess, reflected into it. Alright. Yeah, I want to change
the reference photo up just a little bit so that it looks more you know, so that all those
trees are not just the covering all the
houses in darkness. You might leave this one
white for the time being. We'll see how we go.
Okay, cut around. This is just water with a
bit of little bit of white, not white, but yellow
in there as well. Moving down here, you know,
this is kind of interesting. I'm going to cut
around this path. I'll probably leave
most of it white. Okay, it's just a
bit of yellow ochre and perhaps some orange, tiny bit of orange
in here as well. Do see you see some
of these trees. They've got some nice orange. This was a time I took
this photo in autumn. So do you get a lot of this these sort of nice
colors, golden orange colors. But I don't want to overwhelm this entire scene, so, you know, I'm actually also using some yellow ochre
in here as well. Okay. The path doesn't have to
be exact, as you can see. I'm just sort of using it a little bit as a kind of
guideline to continue on. Okay, good. Fantastic. And here you can see it's
sort of a bit of this orangy color like that. Again, Great. Let's give this a quick dry now. Alright, so let's get
started on the second wash. The first thing I want to do is go right into these mountains, and I'm going to pick myself up some ultramarine blue here. Okay? Ultramarine blue. I do have a bit of purple
leftover on the palette, which I think I'll use as well. Mix it in so that it doesn't
look too sort of vibrant. There are also areas of the mountain that
are more brownish. It's kind of like a brownish
blue color, but bluish. But if we essentially just
use a a cooler value. We should be completely fine. Yeah, I just like to have
a few different kind of values mixed up. Okay, so then we can have a bit of a play around
with different ones. Okay, so I've got just
ultramarine here, and I reckon what
I'll do is just go through do that one in
the background first. So that's the lightest one. Let's drop that in, okay? Looks pretty light light
enough for me anyway. That uh let's move this over
to the right hand side. You can't get this in perfectly, but that's going to
be close enough. In fact, all the
stuff in the closer by where the grass starts
is a little bit darker. That area in the backs
important to get in first. I just want to be
very quick with that. Okay. Now, hopefully
this will dry off touch because I want to get in a secondary layer
on here as well. No, it doesn't have
to be perfect. I'd rather this just go
all together as one, then have it look
all disjointed. So here is the little mountain, what have you on the left. Okay? It's a little bit darker, so I'm gonna go darker here. But uh, um, I might just do
this one here quickly. Bit of real dark sort of paint. This is what I mean. So bits, I would
rather it just spread, if it means we can do
this faster, like that. Kind of all in one shape
might just be easier later. Okay? Now, let's move over
to the right hand side. Again, it's that
same same sort of cooler value with
the round brush. Okay. Notice, I'm not really using much water
in here. Just enough. There's not really
any excess that's gonna take up too much Okay, great. Let's move
a bit further down now. I'm going to mix up
some a bit of green, I think, just a bit of green, like a slightly subdued green. And let's just drop this
in underneath here. This will slowly kind
of just blend through. Okay. But you can see where
the mountains roughly start you've sort of left it
there for a bit to dry. Okay. There we have it. It's a lot a little bit of wet and wet painting,
as you can see here. Okay. Move this wash down, just adding some more water, little bit of extra green. Okay. Through this, there are
some sort of darker spots. I'm going to just indicate a few little darker bits
just drop in like this. It's just darker green color. Okay. There's also some, you know, yellows and things
running through here. So I will also drop in a
bit of this yellow ochre, which is great for indicating a lot of this stuff
without it looking too stuck on or too To gaudy, I suppose, you can call it. So here is where we end
up with the river, okay? Now, we know it comes
in, like, about here. We're going to cut around some parts and work my
way through here, okay? Just with the same green. Keep this area a little bit wet as well here on
the right hand side. So I'm just adding in a bit
more water here so that it this bit stays wet. And I'm just increasing the concentration of
color a bit as well. Put a bit of dried paint
there that came off. Good. That's the river.
There's actually. There's one that comes in here. Then there's a second
one that sort of comes in here, just underneath. Yeah. It's a lot of cutting
around work and a lot of implying what's there. So it's not 100% precise,
but you're getting there. These little darker
parts as well, like ridges and things
there in the background. That's what the
darker color is for. You just sort of drop it in
and let let it figure it out, sort of melt in
and do its thing. I think I'll mix in a
bit of yellow into this green as well. Good. Um bring this around here. I really got to be careful
not to let this stuff dry off because it's gonna create
a funny darker mark, too dark of a mark
if I'm not careful. So just keeping that bit wet. Okay, here. Again, I'm
just going through it. Bit of brown as well. Okay, I'm not going to
be perfect with this, but we'll get close to
implying what's happening. Okay. And then
we've got that area of the river to the right. Okay. I'm gonna
just paint around this little church, as well. And it's important to
have a fine tip for this Brush with a fine tip. Okay. Continuing on. Don't want to make this
wash too dark as well? Because remember, we've
still got to get in some light running along the
ground, that kind of thing. So this should dry off still semi you know,
you know, fairly light. Let's continue on here. Okay. Good. Bit more orangy color as
we get down the bottom, mix with green as well. Okay. Exaggerated that a bit, but I think it looks good. Now, I'm going to
be using a smaller round brush and I'm picking up some darker sort of paint. So just a bit of neutral tint. And I'm going to go around
some parts here, for example, this area of the river. You know, I'm just going to drop in a bit of darkness here, Kate. This is to kind of help the help it sort of come
out more, bank anyway. Kate. But more darkness behind here as well,
maybe in there. And that sort of part there
as well behind there. This is sort of
started to dry off. But as you can see, you can still get
in a nice bit of ar furry edge in some parts. Okay. And it looks more
interesting this way. It looks more natural, okay? There's actually some there's more land in the middle
here and bits and pieces. So I'll just do a quick
indication of some of that. Don't want to overdo it, though. You know, just something
running through there. You need more of that
darker value in some areas. Sort of just helps to outline the detail, you
know, of that river. And you also got this path that has a bit of shadow
to the left of it. That's the same
sort of deal there. It's basically just the
light catching on to, you know, the left side
of the path. Okay. Bringing it through a touch
27. Day 11: Iceland Scene Finishing: Okay, I'm going to
go ahead and put on just work this little
area here quickly. It's the mountain
that's just a little bit darker coming
out behind there. Something small like that. Okay. Cause there should be
something in there, plus this area here, which has another layer of sharper sort of mountains
in the front, okay? So it's just a bit of blue
for me to indicate this. Not much at all. I'll
bring this all the way up. It's almost kind of darkening this mountain to the
right a bit more. But I'm not really fussed at getting in all
the little details. Just something like
that's gonna be fine. Alright, so let's put
in some of these trees. Now I'm going to be using
some dark green and brown hopefully to just sort
of get in this You know, you can see here there's a use up the paint on
this brush first. I want to swap to a smaller one. But yeah, it's sort of
these darker trees, as you can see, just
behind the buildings. Okay. The larger ones. A bit of neutral tint in there to darken
this off even more. You can barely almost tell the color in these
because they're so dark. Um, Yep. But you have to make
these pretty dark so that the previous wash, you know, can show through
and appear like it's lighter. You know, especially
these trees on the right. They just barely see the
green in them at all. So I'm using mostly
neutral tint here. It's all just darkness and some blue would also be
good in this section, I think the base
of the building, as well, these buildings, you've just got a bit of
maybe, something like that. Oh leave that. I'm thinking if I leave
these buildings like that cut around the
rooftops of some of them. Okay. And Basically, imply a bit of light. Maybe hitting the roofs. You're gonna get
a bit of darkness on the sides of the buildings. So I'm just using
ultramarine blue all this. Let's try this out.
Yep. Connect that onto the shadow underneath.
Just a bit of ultra. That shadow running to the left. Well, maybe a bit
of ultra here on the side a bit of
the rooftop with, you know, indications of the tree branches and
things casting a shadow. Okay. Same deal here with
this little building, so gonna get some blue
here on the front of it. And on the side, probably just leave it a
little bit lighter, but still a cooler color there we go. That's a church. Let's get in some trees
and things surrounding. And don't be afraid to also mix in a bit of orange in
here as well to just, you know, add some variation. Another tree. It's quite dark sort
of in this section, but I also have
left in a bit of, you know, light indication
of light Anyway. These trees you'll see
at the base of them, they'll have a bit of a shadow running towards the
left hand side like this. So you just kind of imply that. That's this sort of scene, you just really
have to simplify it down and imply what's happening. You can't get everything
in, certainly, but you can get a close enough, you know, close enough
kind of impression. Just little bits of light
peeking through that will be enough. Yeah. In the background. There's
some little kind of, you know, sharper bits
as well in areas. So I'm just, like, using
some dry brush technique to bring out some of
that detail, you know. It's also kind of these roads that almost
lead out like that. I mean, this is a lot of, you know, just suggestive work. Just some dry brush work really, as you can see, there could
be some roads there behind, and there'll be some
trees here as well. So I'm just getting
a few more trees using the side of the
brush to, you know, make it a bit more
loose, as you can see. Yep. Good. The reflection in the water, that's
pretty important. I'm going to mix up
some darker paints, just neutral tint and dry the brush off a
bit. Let's try this. Might actually go
with a flat brush. Flat brushes are just
I find them be a lot easier to get these sort of
reflections in the water. Or not. Okay. The reflections are pretty
dark, almost completely black. They have some purple in there. Purple will probably
be better as well to just get these in. Okay. Just trying to sort of mix
these trees up the top. Can you see these
sort of these trees there trying to
mimic them a bit. Just down with brush
strokes, really. Don't think too much
of it. Okay, good. That could be like that looked
like a path or something just on the edge of river there. Now, same sort of deal. You know, for this
stuff here on the left, I'm just going to put in a
few indications of trees or whatever there to fill
up that space a bit. Of course, there are some
darker spots in the background, but mostly it's just a, it's just mostly the
same sort of stuff. Okay. Going to have to do add in a little bit of this here
in the foreground, as well. Y. Just kind of building up complexity
where there's not really much going on in
here, if you think about it. I think what we'll do is pick up some of these
sort of trees here. We can just drop in a bunch of these with the round brush, just drop in a few
sort of tree like shapes here running
through in the foreground. Yep, like this. These can then be used to create a bit of a
shadow on the ground. And also kind of, they kind
of helped to line the path, make it look like
this, something there. Okay. Now, back to the gonna grab some sort of
purplish sort of paint and blend this on to the tree. Okay? Just kind of make it look like they are
casting the shadow, these sort of
shadows to the left. Okay, good. Good. It's just a bit of bluish paint.
Nothing special. But, um, yeah, maybe a bit of colour on the left side
of some of these trees, bit of dark color on the left side of the
trees to just give it more more of a presence
in some parts. So more darkening on the
left side of this path. Yep. Maybe here, as well. Yep. Now, we've got all this stuff
here in the foreground. Um sort of thinking what we want to what we kind
of want to do for this. I think I will add in a light wash of purple
here just over the top of maybe this area so that I can just getting a bit
of extra contrast, I guess, to blend this to the left side here where there is a
little bit of something, bit of darkness here. Okay. But because of all
this nice orange, orange sort of color, I'm just tempted also to
make good use of this, okay? I've got more, you know, I've got some more kind of orangy sort of paint here
that I can just drop on, of course, leave out a bit of the that previous wash
on there as well. But this is just going
to kind of bring it out more towards the front. Okay? It's a little bit
of squash in there. I didn't mean to
put that in there, but I'll have to deal with it. That's fine. It's
just a bit of orange. Yep, you might see some of
it in the trees as well. You just have to replicate
it a bit some parts. Okay. So this stuff
here in the background should be pretty
much dried already. Just want to re wet that quickly because
there was a bit of paint there that
shouldn't been there. But yeah, basically,
we're going to add on some details with a tiny
little round brush. And bring back, yeah, just some of the windows
and stuff on these houses. So let's try it
first, maybe on here. Okay? It's kind of just a
little touch and go exercise. First, on the rooftops,
as you can see there, just a little something, then you can put in
a little indication of the windows like that. The base, there's
a little bit of darkness at the base as well. The separators on each
of the, you know, when one house starts and one finishes as well,
that kind of helps. Little windows on the
side of the house. Okay, it's so quick. I don't need to
really do much there. The church is a little
more complicated, but we can get this done, the top part of it there, and then the left
side and like that. You kind of just drawing, if you think about
it with the brush. There. There's a
few windows here, one, two, three windows. I didn't do the top of it
so well, fortunately, but, um, I try to get it more pointy. Okay. That will do. So really dark values. Yeah, just right at the end. I think this is going to help to just bring out some
extra contrast and details and some spots. Okay, near the river there. This is just neutral
tint, by the way, nothing nothing too
much, you know, these shadows thought I'll
redo some of them it Um, but I don't want to
overdo it as well. Got to be careful
because they all start to look too dark. Good. Bit more detailing
on the river bank, just a bit of indication of
where it starts like that. Alright. Let's give
it a little dry. Okay, a little bit
of white guash, activated with some water. Let's see what we can do. Now, over here, I do think
that this little, you know, I don't know if it's
a road, but there's something here that's
like running across the river bank that needs
to be indicated like that. There, doesn't have to be a completely straight
line as well. You sort of just may do with it. There is also a bridge here. I almost didn't put that in, but there's a little bridge
there, something indicated. There is something here as well. It's like a see it just
like a little pole. The church could do with a
bit of highlights, okay? Bring it back out of touch. These houses, you know, just a little bit of light
maybe hitting the top of them. Sides like that. Invent something here as
well. Just something there. Path, bring back part of it. Fantastic. And we are finished. So one final thing I like to do once everything's
dried is I pick up a bit of bit of
water on the brush, and I will actually
lift off some paint, and I've got a little tissue
bit of tissue paper here. And it's just lifting off on the kind of right
hand side and in areas that I want to imply
or bring back some light. Okay? It's just water
and another brush, okay? Just sort of scrub away, lift off in areas. Um, this really adds a new sort of dimension
to your painting. It makes it look I think it
makes it look more realistic. It brings back some light,
which is what we want. Some of these areas,
anyway, You know, it's mainly on the
right hand side that it just looks like we
want to make it look like there are there's
a bit of light just bouncing off here as well. Anything that you think
also looks a bit too harsh and needs to be
softened, you can do this. Okay. But remember to leave on. Remember to also leave on
the previous wash. Like, don't get rid of all of it. The goal here is just
to get in a bit of extra light to recover
a bit of that light. You could say, there's stuff in here as well that
we can just lift off. You know, it looks like a kind of a mass of different colors, but once you, you know, put a bit of water on the
right hand side of some of these trees, suddenly, it looks like, you know, you've got a bit of light
coming through there, catching onto some
of those trees, which is really
important. You know. Some parts you kind of
just want to leave. There's a bit of light
maybe peeking through here. Well, you can even get a bit of light coming through
the ground if you do this. Just recovers a
bit of that light. You probably need
some of that showing through here to indicate
that, you know, the house is also a bit of
light coming through here. Just to be light
coming through here. Really lifting off a
bit of that paint. Maybe in the background. Some of this stuff
in the background, I do feel needs to
be just, again, softened down a little bit. Some of these trees there. They just look a bit too harsh. Um, Yep. Fantastic. I'll call
this one finished.
28. Day 12: Stockholm Drawing: Okay, let's go ahead and get
started with the drawing. And this reference photo
is actually a little bit narrower than the
paper that I'm drawing on. So I'm going to actually
extend this out a little bit further to
the right to accommodate. And we've got the line
all the way at the back. If you look at the the line where the buildings in the far background touch the water. That's about a third of
the way down the page. So I can measure about a
third of the way like that. Okay, very, very roughly and then
start drawing that line. Okay? This is really
important because it's going to form the basis of everything
else that you draw in. Okay? So we've got
enough we need enough space down below. And, of course, you know, you've got the buildings and what have you here
in the background, which I'm just going to quickly indicate a line like
that there, okay? This will need some
more work afterwards. We've also got some
buildings here. And what I want to do
as well is kind of get these buildings to the left in a basic
little perspective. Now, you can see if I sort of
put my finger there, okay, and then draw a line
coming into the page, you should end up
around about here. All right? It's kind of like a I wouldn't say it's almost like
a one point perspective, but just from a
higher vantage point, I suppose, that's the
vanishing point, okay? And then you've got the
buildings down below, okay? So I think what I'll do is
split this in half first, and I'll get in this
kind of building here. It looks like it's
like a rooftop of quite a nice building, okay, something like that. And I want to try to
get rid as much as I can this building
right at the bottom, because it just looks I
think it just looks a little bit ugly for this scene. So if I could just
get rid of that. Okay. It's almost This line is almost vertical.
Okay, like that. That's the side of the building, and then you can sort of
see it kind of going down. The buildings in
construction as well. But of course, you've
got this other building here behind it as well. Maybe I'll make it
touch smaller like that and I can get in some windows of that
building behind there, just indicate that a bit more. Okay? That's the rooftop. Now, when I draw
these buildings, I always try to make this very, very, you know, simplified. I don't know, look at all
these windows and say, Look, it's just a
rectangular sort of shape, draw that in. You know, that's
all you need to do. Don't need to torture yourself over getting in every tiny
little detail those windows, especially afterwards,
you can, you know, you can definitely
put some more in with some with some watercolor work, but look what these
little structures on the What are they? Look kind of interesting. I
don't know what they are. They're kind of a bit
tricky to draw on. Kind of like cylindrical
design things. I don't know what
they are. But let's put that on anyway, okay? Calls so. That's sort of casting
a bit of a shadow. Okay, let's continue on. I'm not quite sure
what these things are. But, you know, they're just a repeating repeating structure
at the end of the day. So I'm not gonna get too
bothered about that. Oh, there's, like, a bit that jumps out the
edge there like that, kind of like a rounded
off edge as well. You can spend all day
doing this, really. But, you know, try to try to keep it try
to keep it simple. You know, there's even little bits
that jut off the side of the building here as well, okay? A bit of detail down below. Okay? This here is the road, and you can see it
sort of run all the way from the back, okay? And there's actually
some water here, all the way over here. And
then in the background. Well, this is the
the older buildings down towards the back end. But there's a little
bit of water here, and then you've kind of
got this highway that runs through the center
of the scene here. You got bits that run
to the left here. Now you've got another bit
that runs to the right there, goes all the way behind. Then there's a kind of a bridge here in the center of
the scene like that. Okay. Camera they're going very light with this
'cause I don't want to over exaggerate this yet. But, you know, these buildings
here in the background, look, I'm just going
to simplify them down. They're just rectangular
shapes there, you know, down on the
edge of the water. You know, this will
be a silhouette, really, at the end of the day or we'll make it maybe a
little bit larger than it is. Just a silhouette hanging
out in the background. Zoomy zoom in a little bit. Okay. Taller. There are some kind of bits of rooftops that have, you know, little bits of light
sunlight on them, as well. You can imply that. Two. Okay. Just something
pretty simple like that. Okay? Now, on the
right hand side, I just want to get in this road and I know
it comes all the way out, maybe finishes here. Okay. Better cut out this bit
at the bottom as well. Make some stuff out down
the base so it doesn't look like it's all
over the joint. Now, there's the bridge
and this building kind of starts just
underneath here, okay? Gonna try to get in a bit of the rooftop first, like that. And sometimes you
need to zoom in a little bit to figure out
what is exactly happening. But, um, you know, again, you don't to overdo
it as well, so Yep. That can be the front of it. The little detail like that. Okay. Let's have a look. What else do we have going on? Well, it's kind of just runs
to the right side like this. Actually goes in
a bit like this. You've got the side of the building. Then
it runs like this. Yeah. There's even
a if you look here, it's like that that
then like that. This sort of shade here
underneath as well Okay. Sort of checking whether
this is tall enough, I think it is because there's
water that runs behind it. I don't want it to be too tall. Just leave that
blue beautiful sort of blue harbor behind. And there we go. Now, I'm gonna have to
extend this building out a little bit further,
like I mentioned before. You know, there's
definitely some extra details going on in here. So I have a second
reference photo, as well, which shows a bit
of that other building. Let's go down like that. So just going to start by
putting in this side of the building and the area
that connects onto the roof, I suppose, like that. And I'm going to get in like a larger kind of element
there of another rooftop. The back like that sort
of in the background, another one here, another side of the
building like that. Okay. I just
disappears off here. And, of course, you know, there's gonna be a large
shadow that just runs across that side, so
it's no big deal. Okay. Of course, there's
actually a lot of little details in this
building as well. But, um, we can apply that better with some
watercolors afterwards, so I don't have to
spend all day kind of laboring away at the drawing. Now, in the background here, we've got the Stshuset which
is the town hall area. I'm going to make this
a little bit larger. Just try to make it more
obvious than the back. Okay.'s kind of
this sort of area, there, then it goes up, and there's like a
triangular bit like that. There we go. There we go. It's something there
in the background. Let's have a look. There's
also this side of it, the right hand side of it. It's all pretty much it's
almost all in darkness. It's very difficult
to see exactly what's happening in
here, but, you know, that's another
sort of part there as well that has a little dome, and then there's a bit
running behind it there, you know, and there's actually
a museum of some sort, I think that's blocking. That's blocking here. So I wonder if I want to
actually put that in. Or if I can just pretend
that it's almost not there and just continue
on with this other part. Look, I'll put something
in here, anyhow. It doesn't matter too much. I know that there's
some white sort of flags and there's cars and, like, a road running
behind there, as well, so that can be good for getting in some nice
shadows behind there, as well. Okay. And let's let's have a
look at what else we've got. Now, these buildings are just look they could do with a bit
more detailing, obviously, but I'm not 100% faster
as long as we've got, you know, the basics in there. Something I don't quite like
about this section there, maybe just getting a bit more of this three dimensional
look to it like that. Yep. Kind of it's very difficult
to see exactly what's happening behind in the shadows. But we can definitely
imply that. There's also darkness
running through there, so it's easy to get caught up in all of this
really, really easy. So, you know, I'm just
intentionally trying to simplify it and make it get
easier to draw. Okay? You count the little windows, a couple of windows
there, and then you've got this sort of bit
that sticks out here. Look and then this
should kind of be running along like that. Yep. And this is like the
little um, shade area. Yep, which will be kind of darker underneath
as well here. That's going to be a bit darker. Ah, these little boats. You can just see them
kind of in the distance. And I might just use this here, put in a few more boats
running along the water. Okay. I have little sails
sticking up as well. That really just helps
to bring them out, make them look more
like boat boats. And there is, I think,
another sort of shade here. I'm going to just
rejig this one, put this one in as well,
like another shade. Here, let's try maybe
another one here as well. Okay. I've had to extend
this one down just because the page is
quite quite large, quite wide compared to
the reference I have. So some of it, I'm sort of
sort of just winging it. Okay. And I think
as long as I can, as long as I can get in a sort of indication that there are, you know, these little details in here, that should be fine. Wuside of that This will cast like a large shadow
to the right, as well. Okay. Let's take a quick
look back at everything. I think the right
side has decent enough details for me
to progress through. There are some cars, you know, just kind of indicated by these little boxes here
in the background, maybe a little
something here as well, these little boxy
like shapes, okay? That's going to help to just
indicate some of the light, the light effect as
well back there. The left hand side
needs some work now. So let's have a look. This is less important. Now, I just got to get in this building to the left like that. That's something.
Then you've got another side of the
building there. It goes in, you know, like that. You know, they're just kind
of boxy looking shapes that just overlap with
each other. Think of it. Think of it as that and not uh yeah don't worry too much
about all the detail in there. But you do want to leave
some of these areas here, kind of like with light on them, you know, with some
indication of light later. But these are just all kind of, I guess, apartment
blocks or hotels. They're not older buildings. These ones are older,
but not the ones here in the back
end of the scene. You know that just sort
of disappears off. And, of course, in
the background, this is now where I can just
start to solidify this line, make it much more obvious
here in the background. Okay. And let's get this sort of silhouette of all these
buildings in now. Again, I don't really care
about the tiny details, but, you know, see
that dome there. There's some buildings that
stick up a little bit higher. That's gonna be, I think, gonna make the skyline just a little bit
more interesting. Okay. I don't care too much
about anything else, some little bits
that maybe pop out. You know, you can see
here in the background, it's mostly just flat
anywhere, something like that. Okay. Now, we've got
parts of this road. We really got to get in. Now, this is the footpath on the right hand side
that I'm going to put in. And then here, I'm
also going to put in an indication of a footpath, okay, where people are
walking down below. Of course, you've got these
roads that just, like I said, they sort of go off little highway areas that go off to the
left and right. Then you've got this kind of bridge running across and
underneath the bridge, there's a darker shadow. Probably put that
back there, actually. It's a little bit too far down. Don't be afraid to erase stuff
at times if you need to. Yeah, I put this down
a little bit too far. I want it just underneath. Just want it underneath
this area here where the highway disappears off. So the highway comes
in at the back, and you've got a bit
that goes to the right, and you've got this bit there, and then you've got this sort
of section here that just scoots off scoots off
to the left like that. And a bit of darkness
and details there. But it's kind of just
right underneath here. That's where it should be. This bridge. Okay. There
we are. That's the bridge. And then some shadow underneath
that bridge like that, which I'll just
quickly indicate. When you're drawing this
type of stuff as well, you want to use your arm to
draw going to make it easier. Um, it's part of the
section of that building. Alright, so now let's get in, like, some indications
of the road. So there's a kind of a
line maybe bisecting. There's this kind of
island in the middle. Traffic island, it's
not quite perfect. It sort of runs like
that. There's trees. You know, you can sort of put in a tree or something
like that here. Yep. And then we
have these cars. So there's also people in there. Let's pick out a
few. There's a bunch here, just the top of the car. It's just looking downwards, so you've kind of
got this rooftop, and then you've got
the windscreen, and then you've got the
bottom part of the car there, maybe a bit of the side of the car that you
can see, like that. And then you've got shadow
that runs in front of the car. So that's something. Let's try another one here. This cars kind of going into
the scene like that, okay? Doesn't need much at all, just an indication
of it being there. Okay. Underneath, it's
going to be darkness and this sort of shadow, again, running towards the back. As you draw cars that are
closer to you as well, you basically just
need to create some extra extra details
and make them larger. Okay? There's even
some people there. There's tiny little people which we're going to have to put in to run to the back
there like that. They're just sort of
walking around below, just kind of make a
really small Okay. And as you move to the back, they become even more
difficult to see. Alright. This is probably something I'll do later on with the brush. But yeah, closer by, you can actually
just indicate more. This one is too large still. You need to make them
tiny. Like that. The cars are going to be just
most important, I think. I need to put in a few
more a few more of them. The ones like touch
closer maybe, like that. You know, it look just a
little something may we go. This could be like another car that's just like
behind it, maybe. Uh, or not. Just
leave it like this. There's all this stuff down here as well that's
kind of confusing, but I want to just make sure I get in the shadow
of this building. It's not 100%, like, straight, but it does
come down like this. And keep in mind, can change the shadow, you
know, if we want to. But it's if you
change your shadow, you also have to change
the shadow of all the other you know, cars and things. So you can see the shadows
running all in one direction. Okay. So we have to, it
has to make sense. This area is going to be
kind of under darkness. I will make this light effect
on the rooftop also more obvious once we get down
to once we get down to it. So building here also behind. I'll get that in there. There's so much in
here that you're almost just scribbling
around at times. So more cars. Let's put another one in maybe
here close to the front. It's the rooftop side of it. Think of them as little boxes. It's all you kind
of want to draw in, like, these little
boxy shapes, okay? And then the shadow
in front of it. Um, kind of thinking to put in some other ones that
are just closer like this. You know, in the reference, you see there's some
others that are just almost next to
each other like that. That's going to look more
interesting than almost just piled up next to each other like this for some of them, and then you might
have another car that's just, you know, going in to the scene and like the back end of the
car like that, okay? And they get smaller. So just make sure
you're always implying that as you go further
down into the scene, um, On top of this
bridge as well, it's going to help if we make it look like
there's some cars here. This is like a van or something, some sort of van,
couple of wheels. That's all I need in there, maybe another one here as well. Another one just in front
there, that sort of location. Smaller ones here,
maybe disappearing off. Yeah, this is tricky because
you kind of at some stage, you're just implying
what's happening and you can't see so well exactly
what is going on. But you've essentially just got these sort of
boxy looking shapes, and they have to suffice. They have to suffice.
Okay? Great. I might put another one here
just to sort of, you know, down here maybe join up with this shadow, the touch. Maybe a little larger as well because it's
near the front. Yeah that's another one
sort of here maybe kind of in the dark. Here. In that same shadow pattern
as you see on the Oops. It's more like this, isn't it you see coming
off this building, but this shadow is gonna need
to be pretty dark as well. Any more cars? Any more cars? Maybe one more here, rooftop of a car, and then the back
end of it like that. It's the windscreen on the
front of it, you know, there we go just a bit
of shadow there as well. I think it definitely helps just give the
scene a bit more life, even these people just
sort of standing around, as well, this is going to
be interesting for later. Of course, um, you know, how much we put
in there depends. Now, you can see these trees. I'm just making these
circular shapes to kind of indicate the
tops of those trees. Like there, I'm just going
to do that here as well. Okay. There's more than I've actually than
there's actually there, but just to indicate it. Okay? We looking at this, if there's anything else I
want to put in here to really finish
off this drawing. I think I think this
looks good enough. We can get started
on the painting now.
29. Day 12: Stockholm First Wash: Okay, so we're going to get
started with the painting. And the first thing I
want to do is get in a really light wash for the sky. I'm going to be
using cerulean blue here, all the way up the top, as you can see, and might actually go a little bit darker straight
up the top like this. This is just going
to allow me to make it fade downwards into
a slightly darker value. Now, this lighter value, I mean, so this is a large mop
brush that I'm using, okay? It's pretty much the
largest mop brush I have, and it picks up a lot of paint, which is going to be crucial if I want to get in a
nice smooth wash. So as I move down the page, I'm just going to
drop in some water, just a little bit
of water like that, and then continue on continuing
to drop in water, okay? So it sort of just goes lighter
as we move down the page. Um, we can go over
pretty much the entire back end of the
buildings and stuff because they're all a
little bit bluish anyway. But I'd want to leave Oh, yeah, I just want to leave a bit of something here on the
left side of this building, this tower, because this is actually it's more
like a warmer color. Okay? But I can cut
around it. That's fine. Right sides not a
big deal. Okay. And little inside there, as well, it's kind of
a lot of warmer value. So I don't want to go too
far down sort of roundabout here to where that
harbor is in the back. Okay? That's kind of
about all I want to do. Let's have a look down
this sort of section. There are some buildings that have some warmth
in there, too. But this area here, I
want to just darken. Now, this is actually
darker than the sky. So I'm going to just get that brushwork in
and also see if I can get in a bit
of it's difficult, but I was trying to get in a bit of white of the paper
here and there. In a little bit of
it, but that was, unfortunately, we
managed to get that. Sometimes, if you
go fast enough, you're able to imply that. I'm going to cut around
these little boats and things in here, as well. Let's just go all the way to
the right side, like that. Yeah, look, as long
as it's a little bit darker than the
sky, you're fine. There we go. Good. Now, oh, there's a little bit of
maybe blue here as well. I got a lot darker
blue because this is a bit of the water that
goes under the bridge. So yeah, just go to
darken that a touch. We can bring back a
bit of that light later with some guash
and white guash. Okay. Good. So we've got in
some of that water. Now, what we want to
do is start putting in the warmth of the buildings and the ground,
that kind of thing, and trying really not
to overthink this here, because it's tricky
not too often, you look at all the colors and the complexity
of what's happening in there and you want
to replicate that. But at the end of the day, we've just got warm values. So this is a bit
of yellow ochre. I've also got some burnt sienna. Can drop that in for some
of these buildings here, even a little bit out
the back there as well so that it's not
all the same value, you know, a little
bit up here, here. It doesn't matter because
we're going to change that up anyhow afterwards, but this is just a quick
little backing wash for this whole area. More yellow, I think, just
down on the left hand side, there's just I want to
imply this sunlight that's hitting the
buildings, okay? Brushes drop in a
few little hairs, but that doesn't matter. Okay, come down. Here. Okay. We can almost quite safely
use just a few warmer values. This is burnt sienna
to get this in, but I don't want to use two
sort of vibrant colors. So this road there, I'm going to actually
mix in a bit of gray. Got some pains gray here. I'll mix in with the yellow.
Dull it down a little bit. You can also mix purple in with your yellow to just
dull it down, too. So it becomes a bit
of a grayish color, as you can see, like that. Probably a little
too dark, actually. Let me just lift off
some of that paint. It's way too dark. I want to make sure that it's, you know, it's almost just it's
almost all just paint, and most of it is just, sorry, most of it is just water,
and the rest of it is maybe five or
so percent paint. Okay? So yeah, just got to dilute down that
gray a bit more here. It's kind of like
a grayish yellow. There, for the road, don't be afraid to leave out bits
of white and things as well. Good. Okay. Now, all these
buildings, actually, they're going to be dark
in the front end anyhow. But on the rooftops, you do
have some yellowish values, so I don't know,
not 100% yellow, but it's sort of
like a warmer color. So I will put in some of
this here to imply that. Even if you put too much, it's
not a big deal because you can always remove it afterwards. Building here in
the back the studs whose just gonna get in a
bit of that warmer value. That's important to
imply what it is, it is, more of this, you know, warmth to the
right hand side as well. Blend that in better. Okay. You're almost
just trying to get in this effect of this warm kind
of color on the rooftops. And then, you know, afterwards, you actually put in the
rest of the details. But yeah, I'm actually going to start just
thinking, what can I use? What color can I use for this? I reckon I'll just use a bit of yellow for the sides
as well, you know? Because I think we're just
going to make them bluish, kind of a bluish color. And I'll go over that. With maybe purple, actually, purple and yellow work well together because they're
complimentary colors. And when you mix them together, you also get a more dull version of whatever resulting
color that is. It's kind of like
a gray, I suppose. Whereas, if you start mixing blue in here, it
might turn green. But with yellow ochre,
it tends to be fine. You don't get too
much of that issue. I'll cut around
these cards as well, again, just because I want to. Yeah, I just want to make
it look more you know, create a bit of light,
effective light on the rooftops of
some of those cars. C, of course, go back in with
some guash, but, you know, you've also got to be
careful because it might ruin the beautiful
kind of contrast. Doesn't look as natural, but I tend to use guash
anyway at the end. Let's go in there. Again, this is all
really light color. It's pretty much like 95% water. The rest of it is a
little bit of paint. The large mop brush
really helps as well, covering a larger area. Okay. So we've got the entire
painting covered now. So I think what we'll do is leave this to dry and we'll come back to
it in just a moment. Okay, let's get started
on the next wash. And I'm going to be using a large
round brush and also a larger, well, not a large, but maybe
a medium sized mop brush. So kind of thinking which area do I want
to start in first. I'm thinking out the
back might actually be the easiest place to begin with. What should I use?
Maybe the mop. I'm thinking the mop
brush might be good. I just want to get in a very light silhouette of
what's going on. So we'll be using some
ultramarine blue. Plus, I also have
some leftover kind of purples, which are
going to be great. Kind of like dull sort
of purples back there. Okay, more of that blue
and lots of water as well. Let's give this a shot, okay? Now, we want this
area in the back to be pretty light, okay? Not too dark, just so that
we preserve the skyline, you know, get an indication of what's happening
out the back there, but at the same time, it's not gonna overwhelm the rest
of the scene, okay? You can just leave out some
halor underneath as well. You know, these buildings
also have like you can see just a bit of light sometimes they hit
the top of them, so I'm just going
to leave that out. If I can just do this
quickly and get it out of the way because the more you sort of spend
out there as well, the more tempted you are
to actually detail and make start looking like like
actual buildings and things. All you want is just a
quick silhouette, okay, because otherwise
you're going to get too bogged down and
all that stuff with just one little transparent sort of line out the back there to indicate the
edges of the buildings. And also, using the
tip of the brush, cut around this building
so that it doesn't go into the light Okay, there are some little buildings and things here in
the background, but it's quite difficult to see. You can go over it in
another wash afterwards as well to bring out some
details of the buildings, but I really don't
think that's necessary. Okay. Okay. There we go. A little skyline out the back. Now, I'm going to
move my way down the page and darken
this wash a touch. More blue, more purple here. I actually grab the
another round brush out 'cause it's got some more It's just got a bit
more umph to it here. Good. I could, you know, overdo this if I'm not careful. I'm just trying to be
mindful of this area. It's darker, a little bit
darker down the base, so just added in a little bit more neutral tint.
And what else do we have? We also got this like
drive of the brush, like kind of this edge here, it then turns into, like, a area there like the edge of this island. Now, put in a bit of
darkness at the base as well and drop in some extra darkness in some areas of the buildings. So this is going to just
give it a bit more, give it a bit more life and variation because at the moment, I think it just looks
a little bit boring and not convincing enough for those even for a
silhouette of buildings, something like that, create some inconsistencies back there. Okay, so coming down now, we've got this road,
just not road, but this highway that runs over, and then it goes sort of well, we've got some water here first. And then we basically got this highway that
runs to the left, okay? So I'm just going
to get that in. And then we've also
got this highway that runs to the
right like that. And then some little
indications like this. Okay? So really keeping this, you know, pretty simplified. We'll move down the page, and remember to
sort of leave off. See the top of these buildings. They do have a little bit of
light on the top of them. So I'm just trying to
indicate some of this stuff, okay, which may or
may not be there, but this is I think it's important parts just to preserve some of
that yellow wash. Okay? That's a building, as well, that's got, like,
some something here. Oops. I've gone over too
much of it doesn't matter. At that. Let's see.
What else do we have? It's getting to the
point where here. Yep, it's just a darker value. It doesn't matter
exactly what color it is though I'm using purples, some brown and purple
mixed together. That tends to be a really nice color for some of the stuff, these shadows and things. I'm just going to
simplify that one. Especially here on this side, I don't want there to be too
much detail and contrast that will drag the viewer away from the rest of
the scene, okay? But you can see, there are some little highlights
in there. Okay. This top of the building has got some highlights
on it as well. See, you can see the
top of it there. So I'm just going to leave
that come down like that, get that side of the
building in there. Of course, you've still
got this these sort of buildings here
that have a bit of darkness there, just
behind like that. And what else here,
there's, like, also another part of that
building in front like this. So it's tricky, isn't
it? And you kind of like bit of perspective
work, really. These kind of balconies or something walkways on
top of these buildings, they just need to have some
quick indication like this. Okay. Good. And you've got little details on
the building, as well. You can see just tiny
little something that down. This here these little, I
don't know what they are, but just parts of this parts of that building
that sort of stick out a bit, but they do cast a
shadow, as you see. So that's what I'm
trying to imply. Now, there's little
shadow sections here as well like that, sort
of hitting the light. And then behind it, it's
all just pretty much dark. I prick some blue bit
of brown to just mix this blue and brown
together to get in a nice darker wash. It's kind of hot day today, so it's the paint is drying a lot faster than
I would like it, too. Just get the mop brush. This is easier. This is why I love using mop brushes
sometimes the paint. You just it saves you
so much time. Okay. That's the side of the building. And, of course, we've
got this other part of the building
here in the front, which is like a
secondary building, which we will just imply like this and then get in
some darker details inside. I don't I'm not interested in making it look super detailed
or anything like that, an indication that there's
another building there. Okay? We can get in some of
the actual details of the windows and
stuff like that later. More here on the side, yet, bring that up a bit, actually, so it looks more consistent. Good. Okay. So I'm going to do
the same thing here, but just bring this
through the center here. I mean, this other
part of the road. I think we can safely
start putting in some shadow areas underneath. Plus, I will outline
this area of the road, this highway that
sort of runs over the top of the scene there. And then you've
got a darker sort of shadow underneath here, so just something like that. Simplify that down. That's. Okay. Good. It's actually pretty dark some of these
regions inside here, but I'm going to just imply some shapes
and who knows what? It's very difficult
to see exactly, and you're going to
be really stressing yourself out if you try to
get this all in exactly. You just want to
make sure there's a bit of a shadow
there, I suppose. When I'm finished
that, I'll go through and actually detail
this road a bit more. Now here, I forgotten this building here
in the background. I just need to imply this
with a smaller brush. Left it out because I think it's it's just a
better idea to do this now once the sort of other sections around it
have slightly started to dry. That way, I can get this in a bit more detail and make it look like it's coming
through the front, as well. Having a look at that. Good for me to blend it as well, just a bit with some
of this other stuff. Some little darker parts there
just to make sure this is looking like it's in front it should be a little darker than what
we have in the background. Okay? All right. That's
looking decent. Let's start working on
these other buildings now. The right hand side, we've
got to really get in, really got to get
in a nice sort of wash running on
these buildings. So
30. Day 12: Stockholm Second Wash: Ultramarine blue. Also
got that same old purple, ultramarine blue,
purple, bit of brown, as well. I got brown ochre. Actually, brown
ochre is a good kind of color to use mixed with
ultramarine to get a very kind of subdued there we go, subdued sort of cooler color. So let's do this. Okay? So you're coming
across like that. I might sort of imply maybe some light on the side of the
building just catching. I want to make this a little darker than the
reference photo as well, I don't know, to, I
guess, bring it out more. But let's see how we go. There's tons of water
in here like that. Um, you know, this whole shade, I'm just very tempted to, like, try to leave some of it and maybe get in
a bit of shadow like that, but leave a bit of the top just showing through like that. So then, um, it just looks perhaps a bit
better, more interesting. Okay. Uh, the same thing for this one, actually on the right hand side. And yet, this sort of shadow goes all across the
top, like that. Maybe it catches a bit
of the light there, but for the most part, you know, you've just got that darkness running across the
right of the scene. Okay. Maybe more blue, just a
touch more cooler value. I like to just grab out when
you're doing the shadows, leave some other values on the palette as well so you can just grab
them out like this. Same sort of deal here. I think I'll just again
create this effect where it looks like it's catching a
bit of light on the roof. Not the roof, but the little what I mean? Little shade cloth. The You don't have to color
in all the buildings as well. You can just leave some
parts of it uncolord. This needs to be sort
of blended in here, this top part of the roof. Gotten about that. Mm have a look. What else do we have?
There's actually tiny there's tiny little
details on this roof. Mm. That This little chimney
or what have you. What sort of run down
just make some of this run down like that. I also might be good to just indicate some
parts of the roof, like this line work. Can
you see what I'm doing? Just a little bit of
line work to indicate, like the directionality
of the rooftop, and I'm doing this while
the paint is still wet, so it doesn't look too obvious. Goes through sort of works
with what we've got on there. Bit of the rooftop here
is also a bit complex. There's so much
going on in there. Let's get in like a
light brushstroke here. Again, I'm going to have to just make some of this stuff up, leaving a bit of light
there like that. Again, there's some bits
and pieces on the rooftop that they're casting some
little shadows that we can imply something behind
here, another object. Mm. More purple and a bit
of that brown there. Again, just to exaggerate this effect of light on the roof for the building
in the front anyhow. Okay. It really helps these sort of darker objects that
appear in the background. They will give the scene more, extra detail, make it
pop out what we want. Okay. It's started to dry off, so I got to be careful here. Mm. Yeah, let's do the same
thing here like this effect. Some of this stuff I'm just
making up here as well, I don't really have a proper
reference for any of that. But that can be part
of the building. Okay. Let that dry off to
do its thing for a moment. Up on the back end of the scene. I want to add in details here. This is going to be kind of
more brownish the right side. So test that good. I want it to be darker
on the right side. Hold and brush so far
down so that I can do this with more accuracy. Moment it starts to look good, I just let's just
continue downwards. Let's not fiddle around with
the top bit any longer. I'm known to overwork things. I'm not careful. Okay, good. Now, underneath, we've got some, you
know, details like this, and then to the right hand side, there's this part of
the building, as well. It's just becomes more
let's have a look. This tower a little
bit too tall, so I'm just going to try
and get rid of it. Do this. Really just, you know, the aim here is I'm trying
to blend it on a little bit with the
restless scene down below. So, you know, this is the
I think it's a museum, some sort of exhibition
center to the right. Doesn't need to really
look like what's in that photo, but yeah. I think just darken off
a touch here and there. Really there's actually
a road running behind in that section. So just leave that in
to leave that in there. Good. Sort of look at
all these cars here. Yeah, I will actually
put in some green for the these trees, just a little little bit of green like that
to just see up the, like a bird's eye
view of these trees. Yeah, just trying to
make them a bit messier so that we don't have most, um, obvious looking details. Okay. I want to get
in this shadow. Let's get in this
shadow of the building, and it's going to be darker than the rest
of the building. So I'm going to mix
myself up really let's go with purple and a bit
of that brown again, dark brown and purple and make a really great shadow color. I know that it sort
of starts about here and goes all the way down. So yeah, if it blends
into the building a bit, I really don't mind. In fact, I kind of prefer
that it does that, um, okay? And if the shadow is not exactly
perfect, as you can see, sort of, you know, it should be connected
onto the building. And remember, we
can always bring out parts of the building
afterwards, too. So That's that car. Good. A bit more brown in this. Okay. A little rigor brush that
I'm going to pick up now, and this is to just put in
some little marks on the road, I suppose, to indicate details. We desperately need
some of this in to give it a bit more definition
and a bit more interest more round brush, I'm just going to pick up some darker paint and go in the shadow,
get the shadow in. Let's try to also
do this quickly. Not too much fiddling around. Shadows. You just need to sort of follow the follow that
one a bit as well, the direction of that shadow. These little shadows
bring out the detail, the light of the scene. So, you know, even just
a little bit of darkness underneath that car
like that really helps. That was a car as well here. I think I forgot
almost missed it out. Little people, you know, just maybe get in a few of them They also have shadows
too, something like that. Oops. Oh, it's on the harbor and tiny detailing
efforts to put them in. Of course, these little cars off in the distance as
well, you can just, uh try to indicate some details like the
shadows underneath them. Well, I mean, I'm
putting some in there that don't even look
like they're there at all, but I can just, you know, can wing it make it look like
there's something there. Two. Of course, in the
cars themselves, it would be helpful
to just create a bit of shadow on the
back end like that where you essentially
get the bit of the softer light once that previous shadow has dried so that it doesn't
all just run together. It's kind of on
the left hand side of the car, the shadow, left hand side and
the back like that. Doesn't require that much
effort. Just enough. You wouldn't want to leave
some of them white. Why not? Um, Yep. Cars just, again, they're just a simplified
indication of them, making some look like they're going all the way
back there, as well. Um, yeah. These sort of shapes
actually help to bring the scene together,
tie it together. So it doesn't look too
disjointed, you know? I'll put something here as well, the more perspective
lines in areas. Some parts. Yep. Dry brush. Can be intimidating, but, like, important as well. Okay. I'm getting closer. So with this smaller
round brush now, I'm going to pick up
really dark values. This is just basically
a bit of neutral tint. And I'm going to go through and indicate some of these
windows and things. So dry off the
brush a little bit. Now we can go it's one
couple little windows here. Don't be careful
with this, as well. I'm tempted to just really go to put in so much
detail in here, but you can you can overdo it. So don't just be careful. This area here, the
rooftop is darker, so I need to indicate that. And running towards
the right. Gear. So little shadow areas
there on the rooftop that I've not been able
to imply super well. Okay, sort of, you know, little windows on the
sides of the buildings. Sometimes a little rigor brush
will be better for this. It rig a brush. Especially some of these
fine lines that move down the edges of the
buildings like that. Yep. This whole sort of
section here that should be a little darker
underneath the building there. That maybe like a bit of
this vertical line work. Okay.
31. Day 12: Stockholm Finishing: Okay. I just scrabbing out
that smaller round brush again and go to continue on. With this, go over here
a little bit too much. I'm going to lift off
this bit of paint. Let me go over the tissue. Again, this is just
a really dark value to really just bring out some
final finishing touches. I can zoom into the reference and also
have a quick look at what's the extra detail
in here as well. I can really bring
out some tiny bits of additional information. I want to kind of make these some darkness
behind the building, as well to help bring
out the light on top. Also forgotten some
of this stuff here, this detailing top
of that building. Again, just small
bits and pieces and extra darkness and things down the bottom of
the buildings that you see, kind of like for the shops and, you know, you can even have people walking down
there as well. Let's put in some more
of these windows. Bit of detail. Bit of
detailing back here. This kind of structure here. I'm just going to put
some verticals on it. But m. So more windows here, so just simplify
this down again. Don't want it to, yeah, take up too much real estate. Just sort of finding
some areas where there's darker
contrast, I suppose. That's really what
you're trying to do in this last step of the scene. You're not You're not
trying to find things that, you know, you're just trying to add in detail
for the sake of it, but it's really to add on to the already
existing shadows in detail. You know, you can see here
the shadows of these trees. I think that would
be important for me to just put in or indicate so that the trees
look a bit more, you know, more realistic. You know, they will have shadows running underneath
them like this. Put on a little few
of these, like, darker spots running through.
They could be windows. They could be
anything, really, but just some more contrasting
bits and pieces. So more detailing for these
roads out the back as well. Did say I was going
to continue on with a bit of little detailing
work with them. Uh, just nearly edges. You might get a bit of extra
darkness kind of here. So just a little
round brush for this. When it dries, it shouldn't
look too obvious. Now, what will be good is also maybe some indications
of windows and things like tiny little windows might appear through
there in the background. You know, just
simplify them down, touch and dab it off
a touch as well. Some areas you might think, Oh, that just could just be darker,
drop in a bit of paint. You know, that little bit here, for example, maybe a bit here. You want to create some
little contrasts in areas so that it doesn't
look all the same. Even this area in the front, just keep going over it again
and again because I don't feel it's dark enough just yet. Okay? Dark and neutral tint, really, dropping that in. That's the thing with
this paint. It does dry lighter a lot of the time. So you often misunderestimate the section and then
have to go back into it again to repaint
it, which is fine. It person bit more a few more people maybe
standing around here and there. Maybe some person could be here. Little people the dark It's tricky to draw
them in smaller. The add an extra bit of darkness underneath
the cars as well. More a little detailing
on this building. I've done a lot of
detailing on it, but just rejigging out of Okay. I will put in some white
wash to finish this off. O. Got a little round brush, clean off, pick up
some white gosh, activate it with some
water, some clean water, and you can see some sort of parts that I might
want to bring back, I don't know, some tiny
highlights areas that could work. Um the people, the little figures like a bit
of light on the shoulders, for example, the back of
these cars could do a bit of, you know, this one here. That one looks fine, actually. I don't think I
should touch that, but it's a bit late.
It doesn't matter. Maybe here. Sort of these
people walking down below, can sort of get a bit of
something here like that. Of course, these boats out in the harbor the uh little sales. I try not to overdo this, but a few more is
not gonna hurt. No, I just know, it's a bit much. But I did say that I'm trying to bring back
some of this sparkle here. Look at that, just a bit of
that sparkle from the sky. All I'm doing is just
using the side of the brush to bring that back. And you got a bit here as well. Like this side of the brush, it just yeah catches
the rough of the paper. Little bits of laguase lighter
colored guash in there. Maybe you can put in a bit of yellow just so that
it looks nicer. Like a rooftop or
something that you can just paint in like that. Here in the distance, you know, there are some little who knows? It's something in there as
well, what else can we do? There's a flag here. I might shift the flag just
over this side so that, um Yep, shift the flag here. Let's just think it looks better so that it doesn't block. And see, do we have any more high light
high lighted areas quite think that looks
pretty pretty decent, but, you know, sometimes you get a bit of
light that catches on the sides like
that in the building. Um, I got to be
really use this very sparingly so that it's, uh Yep. Okay. Just had a bit of a break here. I thought that would be good. Break in the darkness. Sort of do it in that sort of places here and there
as well to the left. We're finished.
32. Day 13: Porvoo Drawing: Okay, let's get started
with the drawing. And the first thing
I want to do is just pencil off the edge, the edge of those
trees in the back. So I took this photo from a bird watching
tower in Finland. This was off a little island in Povo And I sort of A just so
that it was quite balanced. The photograph. Now, let's have a look here. We have some trees on the left hand side.
They sort of come in. Now you don't have to
get this in perfectly, but we do want to make sure that they're kind of a bit
taller than the others. So you need to reshape this. That's fine. Just make
sure they're a little bit, they're a little bit taller
than the ones to the right. Sort of come down here and now you've got another
sort of section in front. And again, it's just kind of a smaller
section that goes about to the middle
part of the scene, middle part of the
scene, about here. Okay? It's actually like a tree line closer that goes a little bit
further in to the scene. Okay. Now, over here
to the back end, there is another sort of
darker tree line, actually, that just runs like this and runs down and you have smaller
trees as well in front. There's a bit of water here. You can't really tell, but
just in the back end there, there is a little bit of water. I don't know if I
want to get that in, but we can try afterwards.
Let's just see how we go. And all the way in the back, it becomes so difficult to
see exactly what's going on. But the important thing is you have variations of these trees, so it's not just the same shapes all the way through, okay? And there's actually a darker here you go like
a darker section of these trees that
run over the top, you can see here and just sort of go all the way into
the background like that. That's going to be
important to just make that area in the
back a bit darker. And there's some shadows
running to the right. This tree here, there's some shadows running
into the scene here. You know, it's
actually quite a lot of shadow in this scene. I almost want to reduce it
down a little bit because it seems a bit too much
here at the front. I really like the
fact that you've got this beautiful kind of yellow, grassy, kind of dried, sort of grassy area here. And uh you know, especially this section
here where you've got some water sort of opens up into
this area of water here. It's a kind of a swampy area. And, you know, on
the day I noticed there was just a
ton of birds in, you know, running
through this area. I should be actually a little
bit further to the right, but I'm going to look, I'm going to try to
enlarge this section of the water a bit more Okay. I always can change
this up a little bit. Don't feel like you
have to make it exactly as per the
reference all the time. You know, there's a bit of
you see a little bit of darker section there in here, just at the base as
well, here, here. Okay? This whole
section really Good. All this is gonna be
done wet into wet. Okay, so it's quite a
quick little sketch. There's not much else
I want to do here, so let's go ahead and get
started with the painting.
33. Day 13: Porvoo Painting: And the first thing I want to do is start off with the sky, and I've already got some
gray on the palette, just a little bit of this gray, which I'm going to drop in here or the base of some
of these clouds. Okay? Just a little
bit of kind of, purplish, grayish
color running through. Okay. Then I'll just add in
some water up the top here. Just going to blend this a little bit further
upwards like this. Okay. Yep. Good, like that. I don't want to let that dry. So I've got to be
pretty quick with this. Coming down here, there's
probably seems to be a little bit more color here, a bit of darkness there. Sometimes you'll find at
the bottom of the clouds, there's like a little bit
of darkness at the base of the clouds as well
here like that. Just indicate that wet
into wet while you can. Now, further down the page, you've got more of this kind of cloudy sort of
area down below. So I'm just going to quickly
put in a bit of that, okay? Good bit of that cause a
lot of it's gonna come out like I'm going to add some
more blue into it anyway. It's no big deal. Okay. Now, cerulan blue
for the rest of it, pretty pretty light
cerulean blue. Okay? And I'm just
gonna blend this in to the cloud like that. You want to leave a bit of white in the sky.
You can do that. I tend to just, I tend to just kind of blend it
together so that it looks, um, it just looks
more like one shape. Some people like to leave
more white on the paper. I can leave a little
bit here and there. It's all up to you. It's completely up to you. Okay? Really light washes. All this is I mean, you're talking about five, 10% paint all the
way through, really. Okay. Down below here, that's going to be
blue as well. Okay. So we're getting to the
point where the where you've got some crossover now, I guess, between the trees. So I will just kind of cut
around these trees a bit. Not too much, but just
enough so I can kind of end it all here. Okay. If you go over it, it's not
a huge deal, by the way. It's just I like to keep sort of crisp edge
there so that we can really make the colors
of those trees and things pop out more. Got it. Now, this whole area at the back really needs to be
quite dark as well. So the first thing
I'm going to do is actually just dry
this whole thing off. Now that's all completely dried, the next step of this painting
is to get in those trees, the tree line at the
back, plus all this grass and the warmth here
in the foreground. So I'm going to go in with a
bit of kind of orange color. Now, this was near
the end of Autumn. So you do see some of
these, these sort of, what you call it like
orange looking trees here. There's a lot of water
in there as well. I've just got to make sure I
keep this light here, okay? Just for some of them like
that here in the front. Okay. You know, kind of orange,
but at the same time, there are still some
greens in there, so I don't want to
make it too obvious. You know, in the
background as well, you might see a
little bit like that. There, I'm just sort of being very quick with this as well, just seeing if I can put in
a little bit of that orange. That's all back
there. But I mean, for the most part, you've
got lots of greens in here. So I've got some undersea green. It's basically a
dark green color. But I'm dropping a
little bit of this in as well to break that area up, make it a bit more look a little bit more
interesting so that it's not the same old orangy color because that's not the reality of what's
happening in there. Okay. Now, the tree line right at the back, we're
not going to touch that. We're gonna leave
that until later. Okay? But all this stuff
here, we can get in. No, some orange, some greens. You can see the tips
of some of these. You can like the tips
of them as well. I'm just trying to really darken a bit more
up here as well, and keep a few of them maybe
just poking out like this. But trying not to
overdo it as well, is tough thing to do. Kind of a bit of touch and go. Okay. Let's go over to
the left here. Okay. So you're kind of keeping
things fairly light still. Okay? But it's darker on the
left hand side, obviously. Okay? And then right
there at the back, that's going to be
our final darker sort of tree line once we get to it. Okay? But for the time being, we don't want to bother
too much with that. It's just a bit of color
there, and that's all. Did mention this little
bit of water there. I don't know if I
can really imply that just with a
bit of cerulean. Let's just drop that
in to see if it might look like something,
okay? Back there. Just a really basic
sort of cerulean blue. I'm not gonna bother too
much with the details. Now, as we move down the page, this is where I'm
just going to start picking up some greens. I've got some dark green, but I'm mixing in
some yellow ochre, which is, like, a dull down
sort of yellow, as well. So I think what's going to be best is if I
actually go through and do this little touch of
grass here down the center, so you can see it's kind
of a really kind of sandy sort of grass that
runs through the scene. You know, you've got some
running to the right hand side, and this is just a
bit of yellow ochre mixed with white guash. And the guash just makes
it more kind of milky, almost like a naples
yellow. Okay. I'm just going to be
quite careful this to cut around the water
area here as well. There's meant to be some
water in here that's got to be preserved for later. Okay. But all this stuff, you know, I can get in easily. But I'm using a
large round brush for this for extra accuracy. Okay, good. Let's go in
with the greens now. I've got some undersea green, and it's just like
I'm going to put in maybe a bit more yellow,
yellow ochre in there. Now, let's just carry
this downwards. The trees in the back are
still a touch darker. So we got to keep this we got to keep this area in the
front a bit lighter still. Okay? And I like to blend this green on with the
yellow that's already there. See, I'm just sort
of touching on to the yellow like that. Okay? Maybe I can put a
bit here as well. Alright? Just for the sake of
bit here to the left, it's the same sort of deal. It's pretty light green. We want to make
sure that's pretty much as light as we can get it. Okay, join that
down to the trees. You probably use the mop brush for the rest of this.
It's gonna be quicker. Yep. Again, you know, joining it onto that yellow to the right. Bring this down.
Okay, fantastic. So that should all
blend together nicely and do its thing. And basically, what I want to do now is to work a bit on these little bits of blue here because it needs
to also sink in. So the same kind of round brush. I'm going to pick
up the same kind of round brush. Ultramarin blue. Bit of ultramarine blue. And let's drop this in here. Good. Looks like a
good sort of color. Here, yep. I kind of
like a bit of water, I suppose. Yeah. Okay? This will blend and don't worry about that.
Just let it do its thing. Okay? Let it do its thing. Does have to be probably
a bit darker than that. There we go. That's
a bit better. The top part does have
this downward sort of you see these little
marks at the base here, where the grass kind
of touches the water. I'm going to just
indicate some of this now because it's going to be too obvious if I wait
later to do this. Okay. And actually see
some of it go all the way into the background
or touch there as well. Let me just get
some more in that. It's kind of just indicating this edge, suppose, the water. Doesn't have to be
perfect. Good. Um, Okay. If you've got a little
rigor brush as well, I find these rigger
brushes are great. We're just implying tiny bits of details like grass,
little striations. I'm going to pick up
some a little bit of this yellow ochre and just feather in a bit of this from place to place
like that just to get in. Some of that contrast and make it look like there's some texture in this grass
because at the moment, it doesn't really look like
there's much texture there. It's just a lot of
as you can see, it's just a ton of space. So this is going to help a little bit,
just to imply that. I just a rigor brush, be surprised what a few
little brushstrokes like that can do sometimes. Okay. In the back end, I want to continue to work some maybe a bit of darker
green in here as well. So it should I think it should
just have a little bit of extra darkness in spots but Here, as well. So more darker green where this crossover is. You're almost just
purposely leaving in a touch of sharpness
or the yellowy part. Yeah, and then you kind of just blend this
other green into it. It makes it look more
green more yellow, I mean, if you do it like this. The yellow sort of
sticks out more. Okay, so this area in the
back has probably started to dry off already. Mm hm. So we should be close to just getting in some
of those details, but I've got some extra kind of darker paint here that I'm
going to drop in from place to place to bring out some
small little you can see here, just little contrasts and
things running through. There's actually a
bit of I don't know, it's like a darker section there in the back that
runs through as well. The whole area is
not the same color, so you have to do
things like this. Otherwise, it just
comes out flat. Okay, there'll be
some lifting out, I think, at the end, as well, but this is a good way to kind of draw
boundaries as well. Okay. Let's work our way through
to the back section, and I'm using a smaller
round brush for this. G to mix up a bit of purple
and a bit of green to get a dark value of green.
Maybe we'll start here. Yep, yep, and work
our way through. Now, remembering to leave that
previous wash in as well. Don't just eliminate
that previous wash. It's important to
keep some of that. Okay? Be quick with
this, as well, not to, um, okay, here, this is the part that we got to be
careful with again. This is the section where I'm kind of cutting around these trees,
as you can see. The tree line out
the back comes down, but the trees in the
front are lighter. Sadly go to make them pop
out better afterwards with some lifting off work. Okay? Here, look, there's also, you can see at the
base of these trees, there's a bit of
darkness as well, like here, right hand
side of that tree. That's a bit of darkness there. There's a bit here,
here as well. So you just Okay,
something like that. Back to that larger
shape in the distance. So here, let's
follow this across. Again, cutting around
some bits and pieces. Sometimes the less the less you sort of touch
the paper, the better. Okay, here, there we go. Now moving over to
the right hand side, it's going to get dark
again, so more green. Okay. Remember you leaving out some of that stuff as well, not just painting
over the top of all that previous wash. That's the whole point of this to
get in different layers, different contrasts
of what we see. Okay, let's cut around
these ones here, move all the way to
the right hand side. Okay, and there we go. We are finished with
that tree line. You might want to just flatten
out some parts or just re jig some areas like that. These look funny at the moment, but we're going to
use at the end, we'll lift off a bit of paint
to make them softer, okay? So I want to make sure
I've got these shadows, these really strong shadows running in as well,
which are important. Okay? There's a bit of shadow
running to the right there. Can you see? I'm picking
up a bit of dark paint. It's just green and
purple mixed together to get in a bit of
that shadow like that.
34. Day 13: Porvoo Finishing: Okay. Then you got
this one, as well. That's just a cast a
shadow to the right there. Alright. All of these trees here pretty much all in
complete darkness. But you have to make
sure this shadow comes through and a bit of a
softer edge to it, as well. Because this area is
still wet, you know, getting that softer edge
is a lot more easier. So I like to paint wet and
to wet where possible. It's the mop brush. Swap over to the mop brush when things when you're painting
larger areas. Otherwise, you're gonna be stuck here for who
knows how long? Okay. Yeah. All just darkness really
here at the base, and goes all the way
into this sort of section and maybe
finishes off a bit there. Let's try here.
Coming in a bit more. Trying to soften soften it
off on the edges as well. Uh here. Okay. Is run a bit more to the right. Let me just, let's
just get it in. I was going to shorten it, but I think it looks
better like this. So yeah, I was gonna
finish it off maybe a bit before that. So, I reckon what I'll do as well was add in a bit
more blue at the base. Yeah, a bit more blue
or a bit more kind of purple ish mixture, like here. Even within the shadows, you can see that there are
some darker spots of shadow. So you have to also imply
that, believe it or not. Okay. So it's kind of
just purplish paint that I'm dropping in here, just purplish, slash blueh
kind of paint, okay? Good. Now, I've got a little
fan brush here, and the fan brush is
going to be great. Here to imply more of
this grassy effect. And I'm also wanting to
scratch off some paint. I've got a little pocket
knife here that's going to do well
for that with that. Now, just leave that to
dry for a little bit. In the background here, I want
to make sure that some of these trees also
have you can see, kind of, like, darker
spots at the base. So kind of like it just makes it look like
there's, you know, a clump of different shapes, not just the same gigantic
sort of clump of trees. They are composed of a
few different trees. Um, yeah. Just a bit Less is more trying to just darken some of these trees a touch as well, so that they come out of this darkness here
in the back end, especially because they're
quite close to us. So they do need to be darker. Maybe just more darker
shadows here as well, near to the left hand side. I want to exaggerate that a bit. The darker the shadows are, the more the light's going to pop out on that right hand side. But I don't want to overdo it, as well, so yeah. Back to that mop brush
mop brush, the fan brush. And a fan brush has a kind
of this sort of effect here, lots of little bristles, and you can basically get in lots of brush strokes
on the same direction. Okay? So I've got some of
this what you call it, like yellowy colored guashe
mixed with it's just yellow mixed with a bit of um
a bit of white gash. Here I'm just trying to
imply the grain I suppose, the grain but basically
the smaller brushstrokes for this grass because it doesn't really look
much like grass yet. But some of these
downward brushstrokes and stuff like this
is going to help, especially while the paint
is a little bit wet still. I didn't want that,
but it doesn't matter. It's kind of, um, So don't go too far
down or you'll get this sort of thing happening. But that's not a big deal.
Just go over it a bit. Okay. And, as you can see, they're kind of these, little tufts of
grass, I suppose. I don't want to overdo
it, because actually, in the background, it
looks pretty good already. If you get off. Get too much, lift
off like this. And yeah, 'cause you don't you want this beautiful transparent effect
to show through. So sometimes I tend to just if I'm not
careful, overdo it. So we've got to be careful here. K. I want to put in maybe
a bit more back here, just like receding back
a touch. More yellow. Warmth really receding
back a little bit. Okay. But yeah, I mean, at the end of the day, that is a shadow that runs to the right, so we can't get rid
of that completely. As well, good. Just sort of redo
that shadow a touch. Make it a bit darker. Just looking at that section. It's better. I thought it just looked a bit out
of place for a second. Now, this other
technique here, sort of, use the edge of a pocket knife, and you can scratch away
parts of the scene. Some parts have
already dried off. So I can actually just rewet quickly like that the
few sprays my spray bottle. This should just reactivate just enough so that I
can do this thing. Okay. I want to get this
three dimensional sort of looks of the grass going into this little area of water here. Okay. Maybe some more here, just some, you know, bits of
grass running through. Okay. And also here. You can see just
on this part where the The shadows are, you can also get some little, you know, little bits of
grass that catch the light. And you can do this, sort of scratch off a few
tuffs of grass and things here that will help make it look like
it's coming through. Even in the
background, you know, there's some spots that I
haven't completely dried. I can sort of scratch
a little bit off. Yeah. But it's mainly
just here, I guess, in the foreground,
there are some, you know, these bits
and pieces of grass. I think that's
kind of important. Not all the areas have
completely dried yet. There's only some
parts that have dried, so you got to be kind
of careful here. I also don't want to overdo it. So, you know, you're going
to get a bit of light maybe catching some grass
here near to the edges, you know, the edges
sort of thing. But in here, you're not gonna
see much of that happening. So you've kind of got to be, yeah, kind of mindful of that. Yep. I want to re wet
this part a little. Just that part. So I can scratch off a
few tufts here too. It's very difficult
sometimes in watercolors to create texture because Yeah, it can be tricky. Scratching out technique
is one of the best ways I know to imply some of that in
a very subtle sort of way, making sure you're
not overdoing it. Also, look, this area here, I just want to make it a bit
darker again near the base. It's just not quite there we go. That's looking a bit better. It just wasn't
reading right before. Reading here should be
darker in some spots. I'll have this grass
going upwards as well to help cover
this up a bit. The spray. A lot of this stuff is
starting to dry off. I'm going to speed up the
process using a hair dryer. Alright, so final
finishing touches, what I'm going to
do here is pick up a small brush and I'm going to just lift
off a bit of paint. So I'm going to scrub onto some areas like here, lift off. Okay, the edges. And I've got this brush is actually
called a Filbert brush, but you don't need one of these. It's basically a
blunt edged brush. You can use a round brush. That works pretty well, too. You know, I can just
make this a tree here that's sort
of peeking through the peeking through this area so that there's a bit of light, I guess, showing there, like coming through those trees. You're really just picking
and choosing some bits to, you know, bits and
pieces to lift off. It's more sort of around
here, I would say, like the little sunlit
bits of tree things, it's just clean
water that you're just picking up
at a clean water, then dabbing it on, then lifting off straightaway. You're going to make
these sort of group of trees go back just a look a bit smaller as we
go back into the distance. Okay, but they still
look kind of like defined individual
trees as well. Okay? And some of them might go up a bit higher, like this. Okay. Let's just go up
here and lift this off. And they do look a bit like more Just the same
sort of shape as well. I'm trying to vary their
shape a little bit. Where's that orange. Oops. That's just a little
bit of orange. I just dropped in
there to bring some of that color back warmth. Here, lift off. Okay? Some of it you don't
really need to touch. Where some of it it would benefit just by lifting
off some paint. Okay. Add some softness
into the background. These trees as well.
This could do with some softening around the
edges of that tree line. Like this, just a
bit of softening. Okay. Of course, trying not
to overdo it as well. Is a bit more yeah, a bit more green on the right
hand side of those trees. But you bit of shadow
underneath here. Some of them. Don't want that.
Let's just clap it in again. And we are finished.
35. Day 14: Helsinki City Drawing: Okay, so we're going
to do this noc turn scene here in the
center of Helsinki, and I took this photo really late at night the first
night that I arrived, actually, and it
was quite misty. I just bumped the contrast
and the exposure levels up on this photo so that I can get in enough detail
for the buildings. But we're going to make
this pretty loose. Now, on the ground here, we're just going to
put in a little area where the buildings
touch the ground. So just around about
maybe here, okay? Leave a fair bit of light. And what I'm doing here, I'm
just putting in the kind of left and right hand side of this building
right in the center, you can see these two kind of towering areas on the left
and the right hand side. So let's pencil this in
very simply like this. Leaving enough room up the top, as well for the sky. Okay? Something like that see
these little pointy bits up the top there. And in the center
of the building, you've kind of got these
bits that come across there. I'm just looking at it as
just little shapes, here, a little bit like that,
and that comes up, forms a little triangular
section like that. Looks like that comes
down there, connects up. Okay. Another bit that
goes up here, runs across. You zoom into this image a little bit further to have
a quick look at this. It's actually more rounded off. It's difficult to see,
but it's more rounded off and then top there, and
then it comes down. Okay. That some other building there in a chimney
or something there, and then on top here, you've got a bit of detail like that, and then you've got a flag. It must be the finish flag can see a little bit of that on top. Okay, so there we have
it. The main parts. And let's carry this down now. Remember, there's a
lot of this stuff that we don't
really need to draw in because we've got this tree sort of all the way
in the front here. Alright? That's covering
up most of this building, but we do have some
little darker bits that I'll just scratch in here, okay, little bits and pieces. Here, like windows, I suppose. This bit sort of comes down
as well, like this here. And we've got a statue in
front of this building. Well, not sure. I should look up the historical significance of this statue. I'm not quite sure
what it is for, but really it's just a person on if you think about
it, just a person. Okay? That's all you need to
sort of betray here, okay? Setting up the top, there are some more trees kind of here, kind of shrouding it. Okay. Now, to the left and
right of this building, get this bit more symmetrical. But left and right, this building, we have
some details here, so there's like an arch
sort of thing here, and this is the light of
the building as well, so we really have to make
sure we leave that in. Same at the top
of that, as well. And we've got ord of one here at the bottom, like this, okay? And some more kind
of little shapes here at the base there. What else do we have? You know, there's little lights on these windows that are on
the building as well here. They really stand out
in all this darkness. And, of course, you've even got some lamps like here, maybe, like, running to
the left and right. Small little lamps. There, let's have a look. There's some more of
these little bits here. I'm just really trying
to simplify this. Mm one, two, three, one, two, three, like that. Okay, bit of detail on
the building as well. But, for the most part, it's pretty much in there. Now, we've got this building here to the right and it sort of is composed of multiple sort of
buildings, as you can see. And, you know, goes across and then like
that, across as well. A little central part there. The rooftops are
just kind of darker, a little bit darker
than the sky. Okay. And as long as they
just sort of stick out, you know, that's fine. I think there's actually a tree, like a larger sort of tree out in the back
there. It's hard to see. We just zoom in a little
bit. No, it's not a tree. It's actually just buildings out really far off
in the distance. So just getting a little
silhouette of that. Like this, I thought I was
going to get in a tree, but that actually looks better. Okay. But then these
buildings also have some kind of
rooftop on them as well. So I'll just imply some
of this detail like this. And you've got all
these little windows, of course, on the
buildings as well. At the base, you've got like some little shops that
look to be closed. So lights as well. Okay? I'm going to exaggerate the darkness on
these buildings a bit as well. But you've also got this tree here kind of coming in
from the right hand side. You know, look just the
base of the tree. There. Then you've got main
part of the tree above. You've even got
some people walking around. One person here. You can have someone
just sort of walking or standing almost,
like, here, here. You put the people
in different poses. It helps to make the scene
look more interesting. There's a bench or
something here, I think. I can't really see
exactly what it is, but there's some kind of bench. There's some shrubs, some
shrubs here as well. You know, just
looking at more of light and dark areas, good. Oh, I forgotten to get this in. There's another building
here to the right. I will just have to draw
it in over the top. And it's, like, another sort of building out the back, okay? Forgotten to get that
one in, but that's okay. We can sort of squeeze it in there in front of
those other buildings. Okay? It's pretty loose, this
drawing, as you can see, it's almost a bit
scribbly, if you ask me, but, you know, a lot
of this is going to be covered with
watercolor anyway, later. On the left side
of the building, you've also got I've
got something there. It's like that same
building, I suppose. It's running across the back. Actually, it's like
a there's, like, a secondary part of the
building just running across, get that top of it in. Yeah. Maybe it's really
difficult to see, but there's something
here, okay? It's just dark. It's
not a big deal, okay. Try not to over exaggerate this. You've got this other
sort of building here as well to the left there. Okay, and some little windows, details of the
windows like that. And again, kind of rooftop here. Well, nice loose
kind of drawing. There's little lights as
well on the building. We can bring them out a
bit later in extra detail. But I think, you know, another figure another
figure or two, one here maybe maybe another one closer to the front
of the scene. Like there, that could
be Interesting, as well. Make sure I get these
legs in more accurately. Yep, like that. Maybe someone here just
over in the back. Why not? Alright, so let's get
started with the painting.
36. Day 14: Helsinki City Painting: Really, to begin with,
I like to put in all of the lighter sort
of values first. So we're talking about a lot of this golden sort of color
that's coming from, like, over here, for example, there is some kind of
what you call it lamp. White. So a little bit of this
yellowy color here, okay? You do see a bit of it up
in the corners as well. So let's just get
some of that in. Alright on the buildings. Really, at this stage,
I am just putting in a bit of this Indian
yellow plus yellow ochre. Okay, to to get in this light. And as I move down
the page, as well, I'm really putting in less
color so that it is lighter. Even this tree here, you know, we could even pop in a bit
of green in there as well, a little bit up the
top perhaps like that. More yellow. Okay. Let's use the larger mop brush. I think this is going to
accomplish this a lot faster. Okay. Yellow. Yellowish sort of value
here in the ground. It's like an Indian yellow. I'm going to mix this with
also some yellow ocha so that it doesn't look too vibrant. Okay? This all runs across the ground. I kind of want to keep this
stuff, like, wet as well, so we can re wet it
afterwards if needs be. Okay? The time being, it's not a huge deal. Just as long as we've
got a little bit of we've just keep all that light on the buildings,
it's so important. Now here, I'm going to just add a little bit of light to
the side of that building. Now, these buildings, I'm going to pick up
some yellow ochre, so like a less vibrant yellow, and we're going to
blend this sort of in. And I've also got
some burnt sienna, which works very well also. So just cutting around some of these windows
and things as well. This is, mind you,
sort of nit picky, but I want to just make
sure I've got a really, really bright contrast
for some of these areas. Even up the top
here, you're kind of looking at it
being almost white. But yeah, it's not a huge deal, just trying to get that
highest amount of contrast, you have to save those whites. Otherwise, yeah, when you paint over the top
of them afterwards, you're gonna miss out. So Yep. This area is kind of
getting a bit grayish. I've got some other
grays here in the palette or it's like
a bit of purplish color, I suppose, that I can just
drop in up the top here. Okay. Just a little something. In there? Yep. Good. This tree is a bit of green
will be good there. Just drop in a bit
of that green. Notice I'm just really trying to trying to get in a really
light wash for everything. I'm not bothered about
the exact color, making sure I've got
a nice fluid wash running around
this entire scene, leaving out a few highlights
here and there, of course. Alright? Let's have a look on the
left side of the building. I'm probably going to
use maybe some more this purplish or
darker color here. Yellow and purple primary
colors, not primary colors. They are oppositional
colors on the color wheel. They're complimentary
to each other. And so when you
mix them together, they just result in a dull version of basically
almost a grayish color. So they're good
kind of mix to use. When you want to get in more dull version of whichever color. So for me, I just want to
dull down that yellow. Over in the back
here, let's put in some bits of purple maybe there. Then in the buildings,
again, it's just, you know, yellows, pretty much any kind of
warm colors in there. I'm going to use
yellow ochre now. Okay. If I can just
do it in one go, that's going to be the best way. Do it quickly, get
it over with. Okay. In the ground here, we're going to start
putting in a bit of light as well there to the
left maybe, like that. I can leave in a bit
of white. Why not? This is when it gets a little bit tricky
because you're basically starting to now put in the darker sort of
values in this scene. So it's a little bit tricky. I think what I'll do is let that top bit dry off
a little bit first, but I'll work on the bottom bit. This is some purple that I
have a little bit of purple, great color to use that will
get in this shadow here. Maybe some brown in it would also help a
bit of extra brown. All right. Well, brown in there. Really, it's just a gray. But purple is a good I
like the color purple, especially when you
combine it with yellows. Okay? This is a dull
kind of purple, as well. You can see there's little
bits of this running across even the right
hand side there, you might have a bit
underneath this tree. You know, there's a bit
running across the scene here. It's not going to be perfectly, you know, have all this
light all over the place. You're just going to
have bits and pieces of light peeking through. Darker here, the left, just to really bring it out. It's tricky because
you want to also preserve the yellows
on here. Okay. But this is going to be nice and hopefully create
some nice gradients, some nice nice sort of wet and wet effects and get this to blend together
and do its thing. Now, this part should almost
be dry up in the sky. So I'm going to use this
same kind of color. It's like a purplish color
mixed with some brown, maybe, purplish color
mixed with a bit of brown. And what do we have here? Just just a darker sort
of value, essentially, that we can use
to paint the sky, okay? So let's go. Let's just do this
all in one go. It's pretty dark sort of value. I do have some ultramarine blue, as well that I've
mixed in there. Of course, you've got
the finish flag here, which I'm going to cut around. I really want to
make this darker, but it's tricky to
get it really dark. Okay, that's the flag. That's just cut around
it a bit like that. You only get O has
to do stuff like this and if I don't
have to use the wash. Prefer that. There we go. Kind of like the
edge of the brush. Good. Okay. And this is kind
of the point where I am just kind of, you know, carving around and creating
the shape of the building. And this isn't the
end, by the way. The buildings are
actually darker, but this is just a way to
get in the sky wash first, and then we can get in the rest of the buildings afterwards. Because if we go in
to the buildings, I think it's just
going to make it I prefer to paint
from light to dark. Okay, so this is kind of like
I wouldn't say a mid value, but certainly it's not as dark
as some of the buildings, so we can get away with
painting some of this first. Okay, good. And, you know, notice I'm leaving out the
rooftops here as well in the background just that I
remember where to put them in because it's tricky to figure
out where everything is. Okay? All right. More purple and brown
mixed together. Okay, here to the left. Again, cutting around some of these buildings
like the top there, that's going to be, you know, go a bit of light there as well. Yep. Good. Good. Okay. Okay, there we have it. You know, the sky's in. The sky's in. Now,
on the buildings, notice that there
is a bit of shadow. It's not just all
completely light. You've got some of this sort of shadow running on
some of the buildings. Like for this site, it's, like, a little bit darker, you know, and then you've got a
bit of darkness here. Okay. There you know, you're just implying some of this with
some of that purple, okay? And it's kind of why I
use that purple as well. It doesn't change the
value, not the value. It doesn't change
the color very much. It just sort of dulls down that yellow and makes
it darker, okay? But what I really want
in this scene is really kind of nice soft shadows running across some
of these buildings. Okay, might switch to this
smaller brush as well. I'll give this might give
this a quick dry in a moment, but this is a quick, little bit of something I
want to put in here first. Now, if any part of the scene complete has
completely dried off, you can just spray
it down like that, a bit of water and just
go kind of back into it again and drop in some paint
wet and to wet like that. It's a good way to preserve
as much light as you can. Okay. All right. I'm going to give
this a quick dry.
37. Day 14 Helsinki City Finishing: Okay, so everything
has dried off now, and what we want to do is
mix up some dark color. I've just got some
neutral tint here. I'll maybe drop a bit of
purple in there as well, a little bit of brown to, you know, spice it up a bit. Now, over here on
the right hand side, we still have some
of those drawings of the rooftop detail
of the rooftop. So I'm going to use this
brush to go around. Shape this rooftop in. And this needs to kind
of come out a little bit from the buildings
itself like this. I'm just going to
paint this part in. You know, you've got
this kind of rooftop here as well. It's quite dark. You've also got this light
here that I've not preserved, but we can probably lift out some of that paint afterwards once we get to it or not. Let's see how we go afterwards. I want to put some kind of
sharper shapes for the roof, like they're just coming
through, you know, making it look like, you know, there's more going
on back there. And I'm making the rooftops a little bit more brownish,
as well as you can see. They're just kind of a
little more brownish. Thank you. And Yep, sort of figuring out this area. This area can probably just put this side of a building or something
in there in the back. I've kind of painted, overdrawn that line in earlier. So yeah, this can do. For now, this is like the top of that tower
or what have you here. There's still a lot of light on that left side of it, so
I'm going to leave that in, and we're going to work on
this part of the building here or in one Okay. Look at that. Just a
quick thing like that. In a bit of detail on
the building as well. There's some, you know,
windows and stuff. Sort of simplify this down. Okay. Of course, there's this
sort of tree here, just getting a bit of detail
underneath it like that. And, of course, the
base of the tree, let's use some darker paint to imply that part of the tree. It's hitting the ground
there, something like that. And, you know, the base
of the buildings as well, you see there's like this
some shrubs and things, windows, that sort of stuff. So I can just sort of
imply that and also the little lines on the buildings there sort of
separating out the buildings. You can go ahead and do
some of that, as well. Okay, I'm just popping in a few little windows and things that I think might be there. No. In the distance. We've
even got some people here. Let's put in this person. Another person here. And here, Okay. You know, a little bit of
shadow maybe running to the left as well for these figures. Yeah, all these buildings, I need to just darken
down a little. There's too much light on them. So I'm picking up some
kind of bluish color, some darker sort
of bluish color, but it's still
diluted a fair bit. And I'm just going
to go over the top, cut around some of these
bits of light that I'd left in from the
previous wash like that. I might get in some
of these windows back here just for the
sake of it like that. Oops, something like that. I do also think
that the buildings here could do with a bit of that bluish value like running through some areas like this top part of
the building like that. Um, yeah, it just looks a
bit too stark at the moment. Spray that down a little bit. Okay. Down here, a left side of
the building up the top. There's a bit of light
on the roof here, but inside this building, it's all just pretty
dark, really. So I'm going to leave that but just add in
this extra layer, I suppose, of this bluish value. A little bit of that on this tip of this building, as well, some sort of color
that's running upwards, so I'll have to soften
that off a bit later. Okay.'s more blue. So green for this tree needs to go in front
of the building here. And around this statue, as well. I'm trying to darken
this down extra that. These little shrubs or whatever down the base as well, I'm
just gonna put that in. There, I'm going to have
to redo these figures I've sort of sprayed a bit
too much water on that side. But that's okay. Once this dries,
we can go in and redo reduce some
of those windows. Another thing I like to do
is just lift off some color. There's too much on here,
use a tissue bit of tissue, and you can do this
sort of thing. And that just will lighten up lighten up an area
if you've gone too far. Okay. Back here. With the rooftop in. Let's get some of
this like this. So that it hits the sky. Good. Then a bit of darkness
in the background here, I think would be good
to just bring out the building here
and front more. And this sort of same
deal at the back here. So I'm just going to bring this some darkness down the page. But still leaving
a good amount of the yellow on the
page on the paper. Kate. We have it. Bit more maybe darkness behind here again
to just bring out this building to the left more. You notice just parts of
the paper starting to dry? Like up the top, I'm
just going to mix in, start putting in a bit
more little details. So kind of dry brush on
using a smaller round brush. Make little details now. Where is it here? I think this sort of like a triangular sort of
section like that. Behind it got this sort
of darker section there. Oops, maybe it should go
up like that more. Yep. A little bit of line
work goes a long way with these sort of scenes. Yep. And just darken a bit
also around the edges. Top part of this building, I'm gonna get in just with some quick indications
like that. Yeah, not much. Just so that it sticks
out of the sky a bit. There is a bit of light
up there as well. It's kind of like cooler
light, I suppose. Um, Yep. These sort of bits and
pieces like stick out. There could be like
chimneys, I think. Bit darkness on the
left side of it there, and you just indicate stuff. It's not really there,
but some indications. Dry brush work here
in the background. I just darken a touch. There's anything
there, but I just want to darken behind this. And it's just the same
sort of stuff I'm using, just neutral tint, okay? Down the sides of this building, you'll notice there's,
like, a bit of, you know, detail
detailing there, so you can just sort
of put that in. And, you know, these little windows and
stuff you can detail. It's why I don't like to
draw too much in pencil because I'm gonna be doing
it afterwards anyway. Okay. Uh, statue. Same tree. I got to
make it a bit darker. So more black in that section. Okay, a little more
detailing work here on this window like that, you know, this tower well it's a bit much, but that's okay. Building here, the left. Again, just some little sort of details. We
have the windows. That's I'm gonna respray the bottom and get in
a touch more darkness. I've just covered
up the rest of it so it doesn't spread too much. U. More of this neutral tint. Here. Ben building across
here to the right. Okay. And, hopefully you can
just get in a bit of black here to just bring in
these figures you are walking into the scene or
out of the scene here. But, um, I want them
to kind of blend in with the bottom here as well. So, uh head needs to be
a bit bigger, maybe. That Another figure, maybe
a couple of figures here. That and a bit of light also running to the
left hand side for them. Sometimes a shadow running through the back like that from our sort of unknown location helps to just bring
it all together. There's a person here I
forgot to paint in like that. Well, and let's just put in some of these windows
that we lost out before Tops of the buildings just can do a bit more
line work like that. Even here. Of the building sometimes
just have a bit of extra darkness down below
to anchor it to the ground. Quick little dry off. Okay, some little
finishing touches. I'm going to put in
a little flag here, a little finish this blue cross that runs across
the flag like that. Just so that it
kind of looks a bit more like the finish
flag, I guess. Okay. I think that does
the trick for that part. Now, what I want to do is actually lift off
some paint to give this impression of light firstly coming off
this section here. So I'm going to use this
part of the building. This part of the building
here that will lift off, create a lamp or
something like that here. Really kind of light section. Okay. Then I'll use
this flat brush to kind of make some marks like
that and then lift off, especially near here,
like that maybe. Just kind of make it look like we've got a bit of
light that's spreading from this area a bit of yellow
little bit of yellow here. This is going to make
more sense if I put in bottom part of the lights. I like this coming
through like that. Okay. So more lifting out with this fillbt brush
I have so scrubbing away. Yeah, just to make it look
like there is, I guess, some kind of light there. I'm going to do it here just
on areas that I want to soften more edges of buildings, that kind of thing you can lift off and get a bit
of that light back. And I think we're going to
call that one finished.
38. Day 15: Gamla Stan Drawing: Okay, so let's get
started with the drawing. This is Gambler's
Stan in Stockholm. And really, you've just got these silhouettes
of the buildings. You've got this kind of water fountain slash statue
here to the left. I took this photo when it was pretty much the sun
had just gone down, but you can see there's still some light
there in the sky, but the buildings actually darker than the rest of
the scene from the ground. So let's go here. Let's get in a rough little
sketch of what's happening, and I'm going to leave
less of the ground, okay? It's just I want to zoom into the photo
a little bit more. Now, the first thing
I want to do is sort of cordon off
this left hand side. We know we've got this building
coming in from the left. Something like this
comes down here. You know, there's
another building here, and then there's, like, another sort of building here that has a right
hand side there, as well, like that. Good. Now we've
got these sort of four buildings
here to the right. And these are kind of
quite iconic looking. So I'm going to put
this in kind of here. Sort of a rectangular
like shape. Okay? The next one, also similar
rectangular like shape, and maybe put the
top a little bit of the details of the little
stories, what have you. But I'll get more into
that in a moment. This one comes out a
little bit in front, as you can see. You can
see the side of it. Just emphasize
that more and then go down for the right hand side of the building like that. And there's something on
the rooftop, as well. You can see there's,
like, another sort of part there on the roof, that. And this one here to the
right kind of just you know, you've got this sort of rooftop
that runs down like this, and then, you know, comes right down to
the front there. And to the right hand
side, we've got this, like what you call it other
building to the right. I think this is actually the the Nobel Prize Building
Nobel Prize Museum here. So it's just some
little details. There's some pillars, little
columns there, like that. And then you've got
some windows, you know, just I'm just putting
in some little details, not much for that. Just something Okay? Good. And you've got sort of like a sort of
bush or something here. It's not a bush, like a
shrub, ornamental shrub. And, of course, here you've got this sort of building
here in the back, but I want to zoom into this
image a little bit more. There is a structure here. I want to move it maybe
a bit over to the left. Okay? I think I saw someone refilling their
drink bottle here as well. So it must maybe connected
to an aquifer or something. And nick there, and
it's just kind of like a tower sort of structure here. It looks like a really old
structure from who knows when. But there it is. It's just
something in the foreground. I don't want to emphasize it too much because at
the end of the day, it's more of a shadow
than anything else. Here there is this
shade cloth behind, which I quite like there, and maybe another
going to just make another indication of a
shade cloth here like that. Another one. Yep, and it's just sort of like a fenced off
area. This is a restaurant. Looks like there's a guy
maybe standing here. Maybe let's just put
someone there anyway. And these buildings,
there's not much really to put in just a simplified windows up the top there, like that. Okay, let's have a look
at this building now. I'm just, you know, going through a second
run of detailing, and we can put in
things like windows. That's a window. It's
another rooftop area. This is all going to be
darker, this building behind, so it's going to bring out a bit of the light actually
on this building to the left. Let me just detail it
in a bit more. Okay. The rooftop or something coming off the right
side of the roof, and there's little chimneys
and little details there on that right side of the
building there as well, okay. There's another building
there in the background. We don't need to worry
much about that. Okay. But, you know, you've got these little windows, as you can see here
on the buildings. So look I'm just putting
in a few of these Okay. You probably have to emphasize
those a bit more later, and you've got this
sort of shade here and a lot of light
underneath this building, right, fair bit of light that we're going to need
to put in afterwards. But here, you know, it looks like
there's some sort of shade cloth or
something here as well. There, there's a bit of light. There's a entrance or some door. There's another window
here that's full of light. And we're gonna we're going to put this building in
a bit more straight. And let's go up here, the part that goes
up to the top. And if you've drawn it in kind of inaccurately in the first
place, it doesn't matter. Just draw over the
top of it like this. At the end of the day, you know, we're just trying to
get an impression of all this stuff, okay? So not try not to
worry too much. It's a window up here, and I'm using my arms kind of to draw just to get this
kind of these windows in, you know, look one, two, three. How many floor? Three
of them, one, two, three, another row
beneath, like that. This one here. You've got this section that
runs up like that, and then you've got this
section up the top there. Okay, something like this. And there's a window here. There's a circular sort
of bit up the top. The darker sort of circular bit. And then you've got
these windows, so one, two, and I'm using my
entire arm to draw, okay? I'm not really moving my fingers here so that I can get in these squares or whatever
more accurately. There's some more. It's
like a shade here. You can't really see much of it, but it sort of extends there. Then you've got
this building here. You've got a shade that
just runs like this. There. And the building to the right, there's not really much
there, but I'm going to put in a bit of a shade anyway. Okay, just to keep this going. Okay. Windows. You know, the trick to doing these
is to not think too much. Just make sure you've got the number of stories
right on this building. This is an interesting
one. I've got a read of this line
here for a second. Redraw this bit more accurately. Where these two buildings
connect together, there is a better harmony
that comes down like that. There, then this whole side of the building is in
the frame, actually. Then you've got this
part, which is like the left side of
the building. Good. And here we go again, just another detailing
on the rooftop and One, two, three. It's like four of them. One, two, three, one, two, three, and the
final one here. Final sort of floor, I suppose, you can call it. The sides of the buildings here. You've got some more
little bits and pieces. Okay. Just make this
look a bit neater. Good. All right. One maybe getting some people, maybe some people
running through here. So put someone here maybe. Walking into the scene, we can get someone here. You can see the light reflecting downwards as well,
which is interesting. We have to get all that.
I'm gonna get a lot of that in wet into wet
actually afterwards. So Maybe another person here that's just kind of walking to the right or something,
making smaller. And this is all just
gonna be, again, the bit of downward
brush strokes for the reflections
of these figures. Reflections of stuff
running down the page. Okay, so let's go ahead and get started
with the painting.
39. Day 15: Gamla Stan Painting: And to begin with, I'm going
to start putting in a bit of light for the windows. So the kind of yellowish light
that I see through here, maybe a smaller brush like
a round brush will be better if it doesn't obviously have paint
on it to begin with. Uh, yeah. Bit of yellow. Goll it down a lot. Especially underneath
these shades and things, you know, they're not
even completely yellow. There's kind of
orangy colored as well, very vibrant colored. Just warm colors. At
the end of the day, you know, if you think of red, blue, red and
oranges and yellows, mixed together, that's all
that's all I want in there, you know, here on
the windows as well, a little bit of yellow, again, just sort of bringing
this stuff out of, you know, some of
the windows here, um you know, a lot of the buildings really
just have a warmth to them, which you want to imply, might as well just get
the whole thing done. But yeah, again, I'm
just also trying to make sure that I've got different
colors running through, not just the same warm colors. There's some other, you
know, bit of orange, bit of different shades
of yellow kind of thing. Okay. Because we're
going to go over this all again afterwards anyhow. Maybe some burnt sienna here
for this building, good. More yellow here
as we move down. Don't want to remove this beautiful light that you
see further down the page. So you kind of got to be careful with this building
here to the left. I think I'll just grab
the larger mop brush and do this with this building. I don't want it to
be too vibrant, just a bit of that color. Been some yellows
in that building. Some more yellowish sort
of values on the left. Yeah. And to the right as
well, more yellow ochre. Okay. Now, I want to do that thing that
I was saying before, want to get the light kind
of reflecting downwards. So I'm just going to grab some yellow ochre and a bit of brighter Indian yellow,
mix those together. And I'm going to just do
this sort of thing here, okay? It's quite exaggerated. But you'll see what I mean afterwards cause
I'm going to put in some I'm going to put in some cooler colors
through this so it's not just all completely This color. Okay. So down at the base, I will put in some purple. Maybe some purple mixed with a bit of this
brown color as well. So brown and purple
mixed together. Let's have a look at
that brown and purple. I want it more vibrant, maybe a bit more blue in there, but not too much, okay? And just drop that in like this. And we can get, as you can see some little contrasts already. Alright? More paint. I need more paint on this
brush. It's not enough. You know, you're kind of starting off at the
edges of the building, as well, so it's not just all Maybe a cerulean blue in
here would be good as well. Just it's more of a
softer sort of blue, less Yep. That's nice. This rough paper is
that you get a lot of this white leftover on the page, which is great at times, but also tricky other times. So yeah, you see this
sort of stuff now mixing into the buildings above. If it gets too much,
just lift off. I think we should
be okay, though. Now, in the sky, I'm
going to drop in some cerulean blue mixed
with this purple value. Let's kind of have a
look at how that reads. I reckon I'll go with
a larger mot brush as well. See how that reads. I think it just
needs more cerulean in there, more cerulean. But I do like the fact that
there are some clouds. I want to put in some
of those as well. Okay. But these areas of the buildings would have
somewhat dried already, so you can just cut
around them like this. Okay. Got a bit of purplish color here that
I'm going to drop in. I don't want to overdo it. But just getting in the sky. I don't want it to
mix too far down. But it will mix, and
we can't avoid that. In fact, we want it to mix. So clouds, maybe some
darker clouds up the top. Just dropping in a bit
of purple up at the top. Oops, way too much.
I don't want that. I'm going to soften
that off a little. Just some serlem
I've added in again. And, um, yeah, again, dropping in some more colour. So it's a bit more
dark up the top, but then it fades down
into a lighter blue value. I like this granulation
type effect as well. I get some clouds
some darker clouds maybe something just
running through in parts. A quick little dry
off near the top. Alright. So the next step
really is just getting in the dark areas
of the painting. Yeah, it's kind of
like the mid values. So you see here
on this building, it's kind of like
a brownish value. So I'm going to go in
there and let's get in let's get in some details. And I'm just using a small flat brush
round brush for this. Okay? So we can just get
in some of this in one go. Of course, I can spend a
lot of time on it, but, uh, I think if we keep
it simple darker. It's going to look better. Okay. And here, the windows, I'm just going to op in
indications of them. As we get further down, I'm going to leave out I'm just going to lighten
off this wash a bit as we move further
down and also just cut around those bits of light
areas as well, okay? Good. Building to the right
is a little bit lighter. There's not much to do here. I'm just going to
use another wash to go straight in here at
the top of the building. Let's just get in a bit of that. There And we've got one to the right here now. I'm going to add some
cerulean blue into this mix. Yeah. But it's kind of like cerulean blue and brown mixed together. Don't have to get all
these windows in as well. We can just leave
some of them dark. Okay. And you have to keep in mind as well, that a
lot of this stuff, we're going to go over a
second round in a moment, too. So yeah, let's just
get this all in. The shade at the bottom here, this little shade cloth
is important to preserve, as well as some of
that light below. So Yep. We're trying to blend it into the bottom part of the
scene a little bit, but, you know, a lot of
these wet and wet sort of reflections slash
shadows here in the ground. I want to just leave,
to be honest with you. Um. Okay, let's get in this building to the left. Same sort of deal here. Shade is actually a bit
darker, this thing here. Yep. Going a bit darker
with my colors now. This building to the left, needs to be really dark. Um, and I don't want to spend too much
time on this as well. But there is a little
see that little window, as well, there's another
little window here. So you just kind of cut
around and make it your own. And then there's
this, like, statue. I mean, that just
runs, to be honest, all the way up, like there. So this just kind of
can blend into it. Like that. Come down the
page, hit the ground here. I mean, there's
all kinds of stuff running below. Not a big deal. Okay. This little shade, as well, little shade cloth. There, there is some details on the buildings like some
darker values as well. I'm going to put
in just this kind of building to the left, maybe some more blue
in the bluish value. We can leave out
a few spaces for these windows or what
have you, as well. Bits and pieces back there
that I want to emphasize. There's even a person
standing around here that I can
kind of vindicate. Yep. Glad be another person there, just the sort of chairs
and stuff out in the back. Just picking up darker paint. This is neutral tint for this little bush or
whatever there as well. You know, you've got
some of these people that painted in before. This person here to the right. And we've got this building
here to the right, which I think I
might keep kind of lighter, part of it anyway. The rooftop, I can
just get in with an extra bit of darkness. But with the rest of it, should be kind of good to go. There's sort of thinking whether I want to put in
a few little line work, bits of line work on the ground Some of these sort
of reflections of the people walking
around just a bit of leftover paint that
I have on the palette, to get some kind of dry brush strokes running
down the page. This is kind of important. It was a rainy day, so you got certainly you have
some of this stuff. Okay, especially
it's coming from the darker objects in the scene. You know, you get
even a bit from the buildings up in the
background, for example, some of them are going
to cast a bit more of a shadow down below, especially, you know, these little windows and stuff as well, like that. Here, you know,
you've also got a bit of darkness running below. Okay. Keeps it looking interesting. Join the legs on
to this, as well. You can even put more people
in if you want to like that. Good. Now, the final step is
to bring it all together. I'm going to use
a smaller brush, a little round brush for this
and some very dark paint. It's just, like,
neutral tint, really. Try the brush off a little bit. And we're going to do
stuff like, you know, put in little details, you know, the frames
of the windows. You got to do this quite
sparingly, as well. And some of the
windows you just want to kind of painting darker or make them
even less detailed. Uh, Yep. If you make them too detailed,
it can really ruin it. The rooftops, as well,
a little bit of color, darkness on the
rooftops would be good for some of them
like this rooftop see, it's just really it's
going to look better with another coat on top, like that. I don't overdo it, though. This has got something on top, like these little
antennas up there. Okay. Good. You're really just
finding bits of detail to bring out
of the buildings. Uh, you know, the roof as well here does need perhaps a bit more
detailing up the top. Let's have a look at this one. There's some darkness here, darkness on the left side
of that building there. You know, there's
a bit of shadow on the left side
of this building, like running to the left there. There's another kind
of window there maybe another window here. This is just a little
bit of work that I can do to bring
out that building, make it look more interesting
and detailed Okay. Well, you went a bit overboard
there, but doesn't matter. Let's have a look. So
more of these windows so you just see just kind of putting a bit of detail in for some of
them, leaving the others. It's a bit of touch
and go, really? You're just seeing what
you can add in to make it look more look
more interesting. It's mainly the
frames of the windows that I like to
emphasize a touch more. Maybe make this
darker here as well. That section in between
these two buildings. That way, this building
can pop out a bit more. Okay, good. Darker line in between again. And again, just with some more little brush strokes for the windows
with neutral tint. I just want to really
get a nice, juicy, darker color for some of them, but others just leave on a bit more of a lighter
value for some of them. Uh, Yep. You can see there's
little bits of line work in the
buildings as well. So don't forget to capture some of this stuff
here and there. Okay, a little bit more details here on this other
building to the left. There's some darkness there
in the background as well. Why not? This is a building. Kind of, that's the
side of it there. Good. Some more these ones just darken this part of that
building down a touch, as well. This one here. Parts of it anyway. And then you've got, of course, this statue that I
can't even really see, but, you know, it's
implied in there. It doesn't need to be doesn't need to be
overstated. That's fine. More people, I think would
be good. Just another. You. And not forgetting the little downward sort of reflection marks,
I guess, of them. You can just, as you can see, bring them out a little bit more with that extra darkness, so that really pops
out of the page. But when this dries, in fact, it always dries
lighter watercolors, so it's difficult to kind of anticipate what's
exactly going to happen. Okay. Some more little details
here for this building. I'm going to put in some
windows and indications of another layer
of windows here, I guess. It's a huge deal. Just something quick,
little bit of white guash. And I'll mix a touch of
yellow in there as well to just make it match the warmth of the light
in the background. So, you know, here, maybe on the shoulders of
some of these figures, like, something like that. One just this one looks better. There we go. Some little touches of highlights, I suppose, you can get them on bits
and pieces, you know, on the windows,
you can even bring back some of the windows, too, if you want to. So just touch on like that. Of course, it's best to leave the previous wash
to show through, but this makes it more
interesting at times. Get you these little
areas that just pop out that you've lost before. Even little dots in
places can help kind of imply some light
spilling through in areas. Okay, and we are finished.
40. Day 16: House Drawing: Okay, let's get started with
the drawing for this one. And we're going to just get
in the ground roughly about, it's just a little slither
of land at the base, okay? Just something like this. A lot of this is really just sky. Those mountains in
the background, so just probably over
just over an inch of space at the base or
if you're in Australia, maybe about like six
or 7 centimeters. Okay. And let's have a look. What do we want to do here? Well, I reckon the house is probably the best
place to start. The base of the house is
gonna be around about here. Okay, like that. I'll just get this
kind of going down. Now, at the bottom of the house, you see there are some little
you know, shapes, really. There's like a couple of these. They're actually gas canisters, I can see, little gas canisters. I'm going to put in some basic
little shapes like that. There's other things
here as well, which I'm not quite
sure what they are, but it doesn't
quite matter, Okay? It's just more just
getting in that base. Now, let's get in the
side of the house. We've got to be pretty careful with this to make sure it's, you know, fairly accurate. The side of the
house, like here. Great. Now, the top might be a little bit too might have
gone up a bit too high. That doesn't matter. We can just finish it off
roughly about here. Have a look roughly about there. The house sits pretty flat as well on the ground like that. So that's the side of it. Because we don't have
really much detail in here, you know, we really have to make sure that this house is fairly accurate, and I like to see this sort
of triangle a bit here. I like to put in the
edges of the triangle, the three points
of the triangle. I mean, in order to
join up the edges. Okay, so it sort of gives
you a quick indication. Before I go in, some people
like to use a ruler, but I really like to do this by hand most of the
time because otherwise, you don't build the
skills, you know, in the case that you
may not have access to a ruler, you know, it might not be possible for you to get down a scene like this. So there we go. Got the roof. Well,
that side of the roof, anyway, that sort of pointed bit in that left hand
side of the house. Now, let's just get
in this side there. And then the top
of the roof, Okay. Really have to it's tricky. You've got to make
this quite accurate. I find that otherwise,
There we go. Quite accurate, because that's all going to be pretty dark, behind the house, as well, you can see there is
this sort of tree there, some branches and stuff
sticking out to the left. You've got this kind of mountain there to the left, as well. Kind of goes up and
down, disappears off the back side of the
house down there, okay? Let's get this side in
a little bit darker. That Okay, that's the base. I actually think there might
be something closer behind. Yeah, there is a little like
another secondary layer here of a shrub or a tree
line in the back. And actually, under the house,
it's pretty dark as well. So this joins in with all
that stuff in the back, okay? And we've of course got some
little details as well. On the house, there
is this chimney that just goes up into
the sky like that, so just kind of indicate that. There. Then, of course, you
have the windows and the little features in the house like this window here. Okay? Just to make sure these lines
are straight like that. And what are we house? We've got this other one
down below as well here. And there's, like, a kind of
white rectangular square, you know, whatever
down the base there, as well, I don't
know what that is. We're going to leave that. There. This window here is
pretty important because it's got the reflected
light from the sky. So let's draw this in. And, of course,
there's actually all these little details in there. I reckon we'll do that later on. But I can just sort of
sketch in maybe some of the lines of the window frames
that will get me started. And this one here
to the right, also, it sort of goes up a bit
higher and just comes down. A little bit lower than that
first window to the left. And this is darker inside, so you've kind of got some
like a lighter sort of frame, and the inside's dark. There's all these lines
as well on the house, but we don't have to
worry about that yet. Now there is a little porch
out the right hand side here. You can see it's
like a wooden porch, and then you've got some stairs or something just
sort of coming down. It's just a silhouette of them, and then you've kind of
got some more that just run as you can see run down to the right
hand side like that. Okay. There is also some sort
of, you know what? I should have drawn this
out a little bit more. And actually, this comes out a little bit
further like that. Let's redo this line. I
didn't quite see that. It does come out a bit further. So it's good to find these sort of things
in the beginning. Yep, there we are. And then this makes
more sense now this bit of bit of the roof, the support system on the right hand side
of the roof spa. Okay, so I'm going to
get in this silhouette of this mountain here so you
can see it sort of going up. And where does it
finish? Roughly just above this section of the roof, like there maybe. Good. And then, of course, we
have some of these poles. There's a pole here. An electricity pole
or something there. And we've got one to the
right hand side as well, and goes up past
those mountains, too. It's a bit taller. I'm assuming
it's also closer to us. Bits and pieces. All the lines, power lines and things
we will get in after. I mean, really, there's actually a few bits and pieces here. There's like a tree here. And then there's also like
a bench or something. Here, it's so hard to see, but there is a bench
of some sort here. You know, some other shape here. I think this is like
a chair or something. You can just see it. Something like that. Okay.
It's not a big deal. So we are ready to get
started on the painting.
41. Day 16: House Painting: Alright, so for the sky, what I want to do
is basically to work on a nice kind
of pinkish color. So I've got some red here. Plus, I've got a bit
of Indian yellow, Indian yellow and red. I just want to make
a really light, pinkish sort of sky. And I actually going to
need more of this color. I'll just mix up a
fair bit of this on the palette here.
Let's just keep going. So we've got kind of a nice
kind of goldenish color. Maybe some orange in there
as well would be nice. I've got a bit of other orange. Okay? But it's mostly just pink, which is diluted red. Let's go ahead up the top. I also like to sometimes put in a bit of
neutral tint to just This is pains gray or neutral tint to soften
this down a little bit, so it's not all the
same, not too vibrant. So drop that in. Let's just go for it. So just to kind of warmer
color there in the sky, I'm going to drag this down. I don't want it to
be too obvious. I've got the brush
kind of angled the paper angled downwards
as well a little bit. Okay. Make the top a little
little a bit darker, maybe there. Coming down. Okay? And as I slant the paper, you can see the wash comes
down a lot more evenly, okay? I'm gonna cut around those. Well, you know what? Oh, actually, that's fine. I was gonna I was just gonna go over
the top of the mountains, but I think it's
better if we don't. Let's cut around
this house, as well. I'm going to try to
do this fairly quick because there are some clouds
I really want to get in. So this pink part just
has to be done quick. Even if I go over part of the house here to the left,
it's not a huge deal. It's more the rooftop,
because the rooftop is very kind of cool in color. A bit here. Good. There we go. Okay, so that's that. Now, I'm going to mix up
a bit of cerulian blue here and maybe a
touch of purple. I've already got a bit of purple left on the palette anyhow, but, you know, purple and
cerulan blue together. And the idea here is, I just want to get in you know, have you even got
some lilac color here, that can work as well. Lilac, turquoise, cerulean blue, just to get in this kind of clouds sort of color
up in the sky. It's kind of like a
complimentary color almost to the oranges
'cause it's so cool. You know, let's bring some of
it over more to the right. Okay. I want to let this sort
of melt in nicely. Well, let's, you know, touch on, but don't overdo it.
You know, there we go. This is a pretty large cloud, so I can, you know, have a bit of free reign
with that, not worry. Uh, too much here. Let's get some more in
here, run to the right. Okay. Great. Constantly sort of
checking this as well and seeing if
it's dark enough. There are just some
parts that I want to darken a bit more, add a bit more contrast. So you can see just some
of these clouds are a little bit darker through it, not the whole way through, but just in some areas. So I've just mixed more of
that purplish color in. Um, this is the only time
you can do this stuff while the paper is still wet because otherwise
it's going to look too stuck on afterwards. Okay. Here is a
cloud also sort of cloudl shape behind the
house, like about here. We can get Oops. I've gone too far.
It doesn't matter. The great thing about
these clouds is that you, uh you know, they're all kind of abstract shapes
at the end of the day, right? So if you don't get them in exactly as per
the reference photo, and I wouldn't even
recommend trying to get them in exactly as
per the reference photo, it doesn't matter
because as you can see, it all works out in
the end, anyway. So just having a look to see what else can we
sort of feather in here? I know there's a little bit of extra something in there would be good bit of extra darkness here, there. All right. So I'm gonna leave that sky. I know if I keep going into it, it's going to probably gonna
cause a bit of a mess. This areas dried a bit funnier. I see if I can feather it
through a bit like that. Just encourage this
to blend a bit. I don't know why it
dried a bit funny, but sometimes you just get that you just get that happening
from place to place. Okay. Fantastic. So let's give this dry and we'll do the
rest of the scene. Alright, let's get in some of the light here on the house. I'm going to use
some of this yellow, a little bit of this
yellow from the previous. It's kind of like
Indian yellow, I guess, and I'm really diluting it down, and I'm just going to put a little bit of it here
on the windows, okay? Just like that. You almost it's almost just the
white of the paper. Okay. But you'll just give it
a bit more of a sort of a bit more of a warmer
look to it, right? So it kind of looks like
maybe it's reflecting the sun off behind
in the scene, okay? So that'll dry off nicely. I'm not gonna worry
too much about that. Alright, so let's get in the details of the
side of the house. I'm going to use the light, I mean, on the
side of the house. I'm gonna use some yellow ochre. Yellow Ochre is probably
the perfect color for the side and kind of like
a darker yellow ochre. So I'm not mixed too much water in with it and just sort of checking the reference
photo checking. I just think it needs a bit of maybe a bit of red
in there or something, just to darken it down a bit further and a touch
of neutral tint, maybe. Just grab a little bit
of that darker color. Just have a look. Yeah,
that looks about right. And I'm just going to go kind of you've got to
be careful with this. But yeah, cut around
the rooftop, okay? Now, if you go into the
rooftop a little bit, it's not a huge deal. Okay. Remember this side
of the house is still, you know, it's
still sort of dark. Okay, so there's not a
heap of light there, but it's still, you know, you can see it's still reflecting
the light from the sky. The light source,
which is kind of like in front of
this whole scene. I think the big thing is
to just kind of cut around this window here to the left. I really want to cut
around this window. It's come down. Yeah. Again, it's not a huge
deal if you end up going over to other parts
of the painting, 'cause most of it's actually darker than this section anyway. I'm just trying to get
this in pretty quickly, but also making sure that
it's applied evenly. And there's a bit of
texture in there as well. I think that's important
to make sure you've got a bit of texture there
with the yellows, just kind of kind of has a bit
of that wooden feel to it. Well, we'll have to go over it a second time round,
anyway, I think, to get in some extra, yeah, some extra little lines
and things, okay? That's looking quite okay. That's looking quite okay. I'm just seeing
if I can even out this line on the rooftop a
bit better like that, maybe. Okay. Maybe like that. Good. Now, the left
hand side of the house, we're going to do a bit later. But I reckon what I can do is put in the bottom
part of the house first. This has to dry off, and then I can get a sharper, a nice sort of sharper and crisp kind of edge
to all of this. Otherwise, it will look um, yeah, it will look too soft. That lime will just blend in. So actually, I think I'll
just dry it off quickly. Okay, so the rooftop, we're going to get in
now with some blue. I'm going to use some
ultramarine blue or the roof. Okay, let's just dilute
that down a little bit. And we have to be
careful here, as well. It's in this area where
it touches the sky, you've got to really just take extra care you've got
this kind of chimney, as well, which I'll
get in afterwards in a secondary wash once
all this stuff is done. Yeah. Yeah, just being very,
very careful to create a nice sharp edge
against the sky. Good. This blue is still
fairly transparent. But, yeah, it's like a
mid value, I suppose. Not as dark as the
mountains in the back, but getting close to it. Okay. So maybe go bits of the roof sort
of coming out here. It is actually dark underneath this part
of the roof a little. So I'm gonna pick up a
bit of neutral tint. Gonna pop in some of it here. If I can let it just work
a bit in wet on too wet, I think that might be better. Even though the scene
doesn't have that, yeah, I just think it will
look more more natural. Okay. Is that left
side of the house. Let's bring it down here. Good. Of course,
underneath the house, there's all this other stuff. You've got this
like support beam or whatever near the rooftop. Then it kind of turns
a bit more brownish. So I've got some brown
here so we can just sort of add in some of this work, a few brushstrokes
for the porch. Like that underneath.
Here's the thing, you know, you've got actually
some bluish same, you know, these two little
gas canisters id over. They're kind of this
bluish tinge to them. Same with some of this
other stuff here, even, like, a kind of a bluish tinge on
parts of the building. Okay. I reckon I can just start
working into this left side. I'm gonna mix bit of brown into this into this yellow
create myself, like a bit of maybe a little bit of ultramarine as well in there. Okay. Oh, we'll have to do all the other the
windows and stuff afterwards. We'll go over the entire thing. Okay, good. Bring this all down. Here's the tricky
bit where we're just gonna create
a sharp edge here. Okay. I actually wasn't as
hard as I thought. Just go to get it in once. Same with that left hand side. Okay, good. Cut around this
little thing here, whatever it is, as well, and then you can see
underneath the house, it turns pretty dark. So I can grab some of this
neutral tint neutral tint, a really dark color. And I'm going to just
blend this again, okay? See how I'm just letting
it sort of blend above. You're not going to get that
here on the right hand side, maybe through some of this
stuff underneath the house. But it is pretty dark under
the house, as you can see. So it's just a way for me to
indicate some of this stuff. And and these gas canisters
are difficult to do. But you can sort of indicate
couple objects there. Okay. Underneath the house. Move all the way to the right. Here, it sort of just blends on and you've kind
of got a lot of this dark darkness
underneath, you know, there's a bit of other
bits and pieces there, which I'll cut around and just, um, We probably use some
guash afterwards anyway. It's difficult to get
this stuff all in. Okay, great. So I'm gonna work now
in a couple of things, I'm gonna work on the mountains
here in the background, and we want to blend
this nicely, as well. We don't want it to yeah, I don't want this all to
kind of look too sharp. Okay? So there's two
large mountain shapes. I've got a larger round brush. And for this, I'm going to
grab some ultramarine blue, maybe a bit of purple, as well, ultramarine
blue and purple, but more ultramarine in there, I guess, a little bit
of cerulean, as well. Dilute this down a fair bit. Okay? I reckon I'll do the
right hand side first, just because it's not as wet, maybe a bit more
ultramarine in here. Okay. These little kind of
mountains off in the back. Another thing you got
are these kind of bits of the trees and stuff sort
of sticking out in areas. I'm going to just feather
the brush a little bit near the edges to try to create
some of this effect like that. Tempted to use another brush, but this is going to be just
overworking it if I do. Okay, so like that. It's a bit darker, a
little bit darker there. Yep just sort of feather little
bits as you can see here, just like to get
these little trees that poke out the top. Some of them anyway. Okay. Good. Right. Get this in right hand side. I'm going to just bring
this washed down. So more ultramarine. I'm running out of this mixture. You need a bit more
come down all the way to the base like that. I'm going to need to repeat this on the left hand side as well. So you've got this kind of mountain shape
coming up there, goes down and sort of touches the left side
of this building a bit. Yeah, good. And, um, maybe make this a bit more jagged around
the edges like that. A few of these little trees
poking out the top, as well. This is kind of similar to
that right hand side, okay. Now, here we've kind of got that area where we've hit
the front of the scene, so where the ground
is essentially. The ground is like
a it's like a kind of there's a little bit
of warmth in there, but there's also it's
mostly still quite cool. So I think I'll start off with this a little
bit of brown first, tiny bit of this brown color. Um, and then I'll
just feather in some blue as we move through the scene all the way
into the foreground, because, yeah, I
don't want it to look completely disjointed
and separate from the rest of the scene, but at the same time, I think it needs to be some
extra warmth in there. I'm going to use my larger
mop brush for this. Purple is always a good
intermediary color as well for these type of areas. So I'm picking up
a little bit of leftover purple on the palette. There's also some more
to the right here. It's kind of like a
slightly dull purple, granulating, Okay. It's not too cool, but
it's also a little bit warmer than just
using blue itself. So that's why I do
like those purples. Now, again, this whole
area does need to be darkened down a bit, as well. The mountains mountains
off in the back here, there are some shapes in front of those
mountains as well. So I'm going to depict them with a bit of again, bit of purple. Maybe here. I need
a smaller brush. This is a rigor brush I've got just so that I can get in a bit more shape
to some of these, you know, trees
or whatever here. Like, you can just see
there's some shapes, and, you know, there's some bench here or something like
that, as well. See? It's not even really obvious. All right. But there's
something there. And then there's
also this tree here, which I need to get
in wet into wet. Okay, to wet as well. Put another one here
next to it, perhaps. And here, there's also
something, you know, there's a closer by sort of shrub or whatever
in that section. All right. And of course, we can kind of darken
a bit under here. I think we've missed out a
little bit of something here. Why not just dark
and there's a touch. The rigs also great for these tiny little
finishing touches or detailing efforts,
essentially. Like that. You've goot this, like, chimney, as well. See if I can just paint
this in with one go. Yeah, so I was hoping to
leave that bit of white on there to get a bit of indication
of the light hitting it. Just looking at that might work. Okay. This window, let's start putting in
a few details as well. It's good to let your line skip over
parts of it, as well. Okay. Quite a lot
to paint on here, this, but that
should do the trick. This right hand side
window, as well. You've got it's kind of like a more warmer brown
around the edges for the frame the inside's like pretty dark. I think I'll have to
do that a bit later. Um, I'll have to do that a
little bit later. The cross. I think the bottom one does have cross as well, like that. Left hand side,
same sort of deal, kind of, like, just darker. As you can see, just these
sort of darker windows here. Except I can color these
in a bit with the rigor. I don't mind that it takes a
bit more time to do it with a rigor to color in these windows cause it needs
to be fairly accurate. This thing here, maybe just indicate the
edges or something. Like that. There's
something here. I don't know what that is part
of the building, I guess. Yep. Okay? A little bit of the rooftop details
of the rooftop running. This of the tiles, edges of the building. Just put these little
indications of the wood running across
really simple like this well slats of wood, I guess. I can do this one a
bit faster. Cute. Some darker spots behind
the house like here for these other darker
trees, I guess, these kind of need
to come out a bit and blend that on with the
left side a touch here. It's not overdoing it,
being careful. Okay. Dry brushing a bit off
the top as well so that it's not overdoing it. I'm rethinking whether I
want to extend this over to the right side of
the house or not? Maybe. I think another
one could be good up here to just again
emphasize the rooftop. It's a little strategy that
I use from time to time to help bring out the details. Light. We got this
like power pole here. Get this coming down. But there's another one
here a bit more simplified, I suppose I intended. Where's that rigor. N that
rigor brush one more time. And, uh, I need you to create
some of this stuff here. These power lines and drawing
up in the house like this. But see how they see
how they kind of leave this incomplete trail
almost, like that. It looks better
like that, but the brush sort of as you can see, just sort of travels off and
leaves some rough marks. You can see it traveling through the left side as well here. So this is probably going to another house to the left there. Okay. Any other
finishing touches? I mean, this is looking
decent already. I'd be darken these, these bits. Little I reckon these
windows as well, I'm going to just
get them in yellow. So just a touch of little
touch of yellow for this. The windows. I was going to
make them completely black, but I think it would look better with
some light in there. Something like that.
Let me just lift off. There we go. And
we are finished.
42. Day 17: Scotland Drawing: We've got all these large kind of mountains starting
out to the left. But of course, we
have some light on top of those mountains. So I'm going to pencil the
kind of edge of the mountains, but then go down. This is like a kind of
sharper drop here as well. You can see there's
another bit here. Sort of this whole structure, well, these mountains
anyway, they kind of end right here in the
center of the page. There is another one that
sort of sticks out like this. The kind of comes down, another sort of structure there. It's quite abstract.
And the way, you know, I really like these sort
of mountain landscapes, 'cause you can never
really get it wrong. You know, let's go down here. And there's a back sort of
mountain there, as well, okay? There's a lot of stuff
going on in here, yeah. And we're going to
let the painting do most of the or the
brush, do most of the work. But you can see there's, like, a really large shape here it
comes down like that there, and then you've got,
like, you know, these little bits here
like that as well. And then you've got this
large kind of shadow that runs up this mountain
almost like this. Okay. Okay. Good. You know, even this, to be
honest with you, I think I'm going to just erase this shadow because it
looks a little bit, a little bit too obvious. I'll just have to remember
to do it afterwards. It reminds me not to
overthink all this stuff. You know, you really we just have some little
spots of light, and the rest of it
is just, you know, darkness behind inside here, especially this whole area
here is kind of quite dark. So good. And there's some darkness here, more bits here,
and there's, like, a darker section there in
the background as well. So
43. Day 17: Scotland Painting: So up the top, I'm going to pick up
like a grayish value, maybe with some more
brown in there. Up the top here, it's quite a at a menacing sort of
sky at the top, really. If you think about
it. Look at that. Pretty dark. I've got some gray, and it's just the combination of a few different values that I have on the pale,
everything mixed together. But I have popped in a bit
of brown there, too, okay? Just to add a touch
of warmth inside. I'm gonna go back to my
palette and mix up, like, a lighter gray now, with water. I'm really just adding
water to the brush. Alright. This part I've actually
still gonna make a bit darker, perhaps, like that. But everything else can just be like kind of a
light gray color here, just dropping in this. And I'm cutting around some
of these mountains as well. Oops. That one shouldn't
be colored in, but this one here, yep, here. Okay? Just using more water. It's really as light as I
can get it at the moment. Okay. And as I move
down, I'm going to start picking up a
bit of cerulean blue, and just of feathering
in a bit of this cerulean blue, as well. Okay, so we've got a bit
of these blue skies mixed with that kind of grayish. Area up the top, spray
that down a little bit, encourage it to blend together. Yep, yep. Great. I'm gonna just drop in some more darkness up the
top, feather that in. Yeah, that's better.
Just kind of making sure it doesn't start suddenly. You've got to transition
from dark down to lighter. You only get one chance to
do this sort of sky stuff, and then you got to accept
how it turns out. All right. So kind of on top
of these mountains, you can actually see there's
a bit of green there, so that sort of permeates
through the entire scene. I'm going to what I'll do it just firstly let's just
dry all this stuff off. So we've got that sky
all dried off now. So again, we just want to make sure that we have all
the light further down below. So it's really just green. If you look at the tops of these mountains, check this out. It's really just a
really light wash of green that hits the sky. I'm trying not to
actually go too far into the sky just so that it clips the edges really like that for this
top section anyway. Then you've got this bit here. More yellow, just a bit more yellow to make it lighter
and more kind of vibrant. It's really this whole
area there, okay? There. And, you know, the rest
of it's sort of brownish, which will drop in in a moment. But here, we've got more green running down
the side here and this side of this rock
as well, like that. There's so much. So much of it. It just depends
what type of green. Some parts are darker so
you can pick up a bit of darker green and
add it in to areas, especially out this side there. It's sort of darker. The greens out the back here, but you've still got sections
of really lighter green, which I'm going
to imply as well. But you've got to have these
two kind of mixed together. So you've got both yeah, both sort of light
and dark areas. And these sort of
tips, as you can see, they stand out really against the background
and brownish, actually, I'm going to
put in some brown here. Just some brown ochre, brown ochre and
some black parts. All right. Just sort of get it to
come out of the sky a bit. There we go. These
ones on the right. This part here also
needs to be darker, more of this black. You can use lamp black as
well when you mix it in, and it's going to help with
this granulation effect. So you can see it sort of
just gone through like that. There. And then you've got
this sort of area as well, which I'm going to
add some more brown, I think some yellow ochre
on the side of this one's going to be good, too. It's not really that dark. This side of this rock. It's kind of like that.
Then the other parts of it actually got darker. Oops. Here we go. Brown, more of this brown ochre. Okay, you just want
to really make this blend together here as well. That sort of part
of the cliff face or whatever blends downwards. Okay, good. Let's work more on the
left hand side now. Again, dropping in some
more of this black paint and brown brown ochre. And it's important to make sure it mixes
in with the green. So if you don't
have enough green, there should be quite a lot
here, make sure you go in, pick up a bit and paint
this left side in here. Okay. Even around here, this should
be a lot lighter as well. It's like a yellowish
green, lighter green. That all this stuff
down the bottom. I'm going to add in
some of this black. It's like a lamp black
or lunar black as well to try to get in some more
these granulating effects, especially with the shadows
and stuff here as well. But we do need to do
this bit as well. This left hand side
of the mountains. There is just a lot of this stuff running
down through it. Black and brown ochre
both granulating colors. If you don't have
granulating cutters, it's not a big deal. You can still get
away with this effect that's just not going
to work as well. Okay? I think the trick is, I just sort of touch on and then go, just sort of touch
and go, really, because you have to
sort of leave parts of the paint to dry off
and then continue on and mix it along with
the previous washers, kind of blend it along
with the previous washers. So it's important to
let it do its thing. Here, I'm going
to add in more of this black as well
on the left side. I had a streak here. I didn't want that, but we can just work that through.
It's no big deal. This is actually
going to be part of this larger shape here, this rock, as you can see, it's just it's quite
dark in the foreground. Okay, let's just drop in some
more of this lamp black, and this is going
to create this sort of granulating effect here, hopefully for the these
sort of foreground rocks. As you blend in with the moss, the grass and the moss
that just together, it I sort of looks
better, paints itself, really, makes it look like
little rocks and things, okay? Once it actually spreads out, it doesn't look as dark as it
is when you first apply it. Okay? You need to
darken again here. This area needs also febutive. That should be darker there, perhaps. Okay. Really trying to locate areas of the painting that is considerably darker like here. It's like a fair
bit darker there and just dropping in that
black paint like that. Here, I think it's
actually darker, some parts as well, like that. There's like a shadow
here running behind. That just sort of
runs sort of cast by this shape, another rock shape. You got to drop some of
this stuff in so that it looks more more interesting. Okay, here down at the base. I want to get this rock
in there. Drop it in. And also at the same time, just trying to work in some
of these background details. You've got to do all this
while the paint is wet. Otherwise, it doesn't work. You have to really
plan this out. But at the same time, there's only so much
planning you can do. This rock here is a shadow
that runs up the mountain. And then you've
got kind of, like, these little striations
that just run through the mountain
like that as well, and some of them just go
up there and some of them just go further down
like that. See? Follow the Yep. Okay, so I'm just
getting this rock, the side of the rock
there that's in darkness. And then you've also got
to remember that there is a shadow that runs all
the way behind it there. I was drawing in before, but decided there's no point we can just get it in
by painting like this. The edge of the rock is not
this just needs to be put in more There we go. Just so that it looks
identifies more like a rock. Okay, good. Darken a bit more
around there as well. I really want to use more of this black paint and
the brown paint, okay? And we're figuring out just
the parts that are darkest, especially on the sides
of these rocks here. Um, Just before I go
in with some water because I think we're
going to need some water to create some interesting
little effects in here, that will imply detail. I mean, it's already
granulating quite well anyhow, but it's more of a
additional effect once I use the spray bottle. Here, there's all these
little details of the See that all these tiny
little details in here. Make that darker
darker here still. Base is always looks better. We add more darkness. Great. Just implying some of the smaller rocks running towards the back
like this as well. Okay. Can I just do
a bit of spray work? Up here, hopefully just encourage this stuff to
move down the page a bit. Okay. And it might backfire on me, but I just want to create some interesting
looking extriations maybe running through the rocks. And again, you know, I might
have to redo some parts of it while it's being
while that's happening. So stuff down the base here is, like, moving around
a little bit. Well, really got to
be careful not to eliminate all that light, too. Um, yeah, this should be a large shadow here running towards the back for that rock. Again, this is the bit of
brown and bit of the black. I'm just re jigging this
area that I went through and sprayed because it's moved
that paint a little bit. Hey. Mop this bit up where it's gone into the sky. There. Not a big deal. So you can see the paint's just granulating and moving
around a fair bit. I can also sort of flick
water onto certain areas and just let it do
something as well. Need this shadow. See how it sort
of comes through, makes it kind of
look more rocky, a little bit there
in the background, this sort of area mottled
kind of effect there. Still somehow managed to
preserve the light in that rock, which is what we really want. Stuff here, it's not a big deal. I just want to maybe give
it a quick spray like that. So that it blends better? Final little spots. Maybe some purplish color
as well like this in here, just a little bit
for the shadow area. Some of the rocks,
create a bit of interesting coolness running
through here as well. I'm laying the paper
completely flat now so that the water doesn't
really run any further. Two we'll let the water run a little bit. Through Yeah. I just want to soften
this bit here, touch. Yeah. That's better. Yeah. I've got the pocket knife. I might be able to scratch off some bits while it's drying. Yep. I'm just trying
to get rid of a bit of this color on the rocks. As you can see here on the
cliffs, there's, like, these little lighter
bits that we can imply with some
scratching off work that kind of makes it
look a bit more interesting.
44. Day 18: Kirkjufell Drawing: Let's get started with the
drawing for this scene. And firstly, what I
want to do is just put sort of this area where
the sky touches the ground, so you can see the
sky a little bit about a third of the way
through the top of the scene. So if you divide the
scene into three bits, just go to start maybe
penciling in around here. And also keep in mind, you can put in more
sky if you want. I mean, actually, there's quite a quite a lot of room here. And the front of
the scene although there is some grass
and stuff like that, you know, you may want
to include less of it. So I'm actually trying to
might put in a bit more of the sky because
I quite like that. There's a road that
runs all the way down here to the right. Okay, finishes a little bit
more further down like that. Okay. Now we're going
to get in the mountain. The mountain starts roughly
in the center of the scene. So just put a dot down the
center of the scene like that. And then we're
going to go up. I'm also going to put in the general point of where
the top of the mountain is, like, about here, and then the right side
of the mountain here. Okay, so then I can slowly
fill in the gaps, okay? And at least I know that the height of the mountain will be roughly accurate rather than waiting to get all the way up there and then realizing I've not left enough space
for the top of the page. So yeah, this mountain
has quite a unique shape. It's not a complete sort
of point at the top, but yeah, there's some little jagged
edges, that kind of thing. So I'm just trying to
imply a bit of that, it starts off kind of
like a slight incline, and then you've got
this bit that just sort of goes up here, let's join this up like that. Something like that. All right. That's good. And on the right hand
side of the mountain, let's bring this
down. Like that. Another bit that sort
of juts out, comes. You know, it's not all just completely up and
down. Bits that jut out. Okay? So run that down
to the right hand side, and you can see here
also, there's, like, another bit that sort
of juts out there, and then it runs down and disappears along to the right
hand side of the scene. There are some distant
mountains here as well, pencil in a bit of
little something there in the back of the scene. Okay. Good. Then this road, as you can see, sort of comes in roughly here, and then it runs out to the
right hand side of the scene. So just indicate
something like that. Now, of course,
on the mountains, you've got all
these little funny ridges, these darker ridges, which we just have to
take a note of mentally, but don't draw them
in because, yeah, it's just going
to take too long. You don't need to do
that for the painting. Now, over here, this is where things get a
little bit tricky. We've got a tuft of grass
to the left hand side, and then underneath it's
just kind of these rocks, you know, these jagged
sort of rocks coming down. So it's sort of just making sure that you've
got these tufts, these indications
of these tufts of grass that we're
going to leave green, like a lighter sort of green. And also, there
is a bridge here, and that runs across like that. There's a guy walking
across this bridge that seems to go all the way to the left hand side of the scene. Alright? So just pencil
this in roughly like that. You know, it doesn't
have to be perfect, something to indicate
a little bridge there. You've also got some
people walking in the distance here
behind these mountains, and I'm just going to
indicate their heads and their little tiny
little heads and little shoulders and
maybe some legs. You know, this is a going to indicate the scale of
what we're looking at, you know, these figures are
just serving that purpose. I don't want to be spending all day on this,
but just, you know, putting in a few
little figures here, space them apart in random
sort of ways as well. Don't have them spaced
apart exactly, you know? And there's actually a few more tiny little people just
here in the distance. I don't want to even I barely
even want to imply them, but there are some like right in the distance
there like that. It's just tiny. Okay, so here we have
this kind of pool of water that the that's
collecting up here, where this little waterfall
starts to come down. Now, with the waterfall, you want to make sure
that you're preserving, like, a lot of this
white color for later. Okay. You can, of course,
get it in with some guash, but it's best to just leave it. And I'm just putting in here, you can see just some little, you know, impressions of the water streaming
downwards like that, right? There's moss in here,
that kind of thing. Don't worry about that. A lot
of this stuff you can get in afterwards with
the watercolor. You're going to
need to let things mix together in this
particular scene. You can't paint in
every little rock, every little splash, you know. So this is kind of you see
the bottom of the waterfall, there are these kind
of roundish areas of white where the water sort of hits the hits
the darker water, right? The rest of it is
just sort of dark. It's just rocks all around. There's moss, okay, like that. And there's a smaller
little tiny, little, what do you call it, waterfall here that's just popping out at the right
hand side there. So I'm going to
just indicate that. So underneath this
group of people, look, it just sort of spurts out the side of the
rock like that, and then it hits the water
here in the same sort of roundish sort of area
on the ground, okay? And on top of the waterfall, this area is just you
can see these sort of green mounds of where
people are walking. So it's kind of
important to imply that. There's a lot of green
all along there, again. And I'm just going to draw now the boundary
of where the water is. So you want to obviously
indicate the top this sort of greenish mound and
grass moss up the top. But then you also
want to outline where this pool is pool of water
body of water is below. So let's go around. Again, it's just generally
outlining where things are. You don't want to
draw in every rock. It's just where the grass
is. Okay? There we go. It's just a little outline. The rest of it we can get in, in the middle of all this water, you can see there's this kind of bit of land here
that's, you know, this would have been
part of the land, you know, behind it, but it looks like it's
been eroded away. So it's kind of looks like a little island or something in the middle of this
stream or river. So let's get that in, okay? Just a little indication
of it like that. Bring it over to the
right hand side. There's some snow
on there as well. Whether I'm gonna bother
with that, we'll see. And, of course, we've got
all these little rocks and stuff around. You can put in a
few larger ones. On the right hand
side, you've got this larger mass of rocks, which I'm just going to
indicate with, you know, a bit of scribble here to remind myself that there are some
here, some rocks here. There's a bit of
white water as well or maybe snow that's
sort of there. Alright, so let's start
putting in the foreground. We know that it comes in here, the grassy sort of stuff
in the foreground. This is going to be
important because this is forming a contrast of a bit of light in front of this
in front of this stream. So just sort of draw the
outline of it like this. Go up. You know, it doesn't
have to be perfect, just so that you've
got a foreground, you've got a midground, and you've got the good
old background there. So let's have a little step
back and assess what we have. Now, I noticed there's a few little rocks or mossy
areas here to the left. I'll just want to indicate
lightly in pencil, you know, you know, a few rocks here and there. These sort of areas
they're like, sort of snowy jagged areas of rocks down at the base here. Let's just indicate
some of that. Again, it's more of a guide
for me, more of a guide. And also this part here, I have to remind
myself that this is elevated land
out in the back. So Yep. Is little kind of trails and roads running through
that kind of thing. Good. Let's go ahead now and
get started on the painting.
45. Day 18: Kirkjufell Painting: Planning this out is a little
bit tricky because firstly, we have this nice, you know, bright sort of sky. The mountain also has
if you look at it, it has a really light contrast of light hitting the
top of the mountain, the mid to the top
of the mountain. So keeping that in mind, but the rest of the mountain is a little
bit darker, okay? So really, we want to make sure the sky is the lightest
part of the scene. And when we get in the mountain, we get in all the, you know, the grass and
everything like that, that's going to be
darker and sharper and it's gonna sort
of show through. So yeah, the only way
we are going to be able to do this is by just starting off
with the sky first. And let's first go ahead
and get in a bit of blue. So might actually start off with a little
bit of gray color. So a little bit of
gray on the palette. You just mix up whatever you have whatever color
that you have leftover. Your three primaries can produce a very nice sort
of grayish value as well. Very, very light. You're talking about it's
about 5% paint, if anything. And I'm just going to drop this in here into some
parts of the sky. You know, you can see
here there's a bit of this grayish value
kind of goes up, sort of fluffy, gray. Okay? Look, just join this
on and make these sort of little bits of grayish
color there in the sky. And don't make it too dark. So that was way too dark. You want to just keep
it about 5% paint. About 5% paint. And this is going to go
near to the mountain, very, very close to the
mountain like that. Down below here, let's
bring this across. More Oops, see, too dark, again, way too dark,
doesn't matter. Alright. I'm doing this so that once
we go in with the blues, the blues are going to be if you look at the actual value, the blue is actually darker
than the grays up in the sky. So we want to preserve some of these
sort of grayish arrows. You bring them down further
to the here as well. If you're going to make
some of these clouds a little bit smaller. As we move down the page, they kind of become smaller
and thinner as well. Don't worry about the
people. Go over the top of those people if
you need to, okay? And let's have a look.
These clouds, of course, continue a little bit to the right and behind
the mountain, as well. Remember to keep it
very light, see? When I've accidentally mixed up maybe a bit too much paint, I will, you know, I actually add more
water to dull it down. Okay, run to the right. This
here to the right. Good. And don't be afraid to leave some of that white on
the paper as well. At the end of the day, these
clouds are composed of, you know, gray, bits of
white, that kind of thing. I do also like to re wet the paper a little
bit afterwards, but be careful not to go
into the mountain area. Alright, so that's, you know, your general sort of grayish
clouds in the background. This is going to start drying a little bit, which is good. But while it's still wet, we're going to pick up
some cerulean blue, just a light blue
that we've got here. Let me mix up a little
bit of this here. And we're going to start off right on
the top of the scene, and I'm actually
going to make the top a little bit darker. Tilt the paper just a little bit like this and we're going to add the blue to the top there. Where you've got this gray, I'll just nip the
edges of it like that. Just going to nip
the edges a little bit and let it blend through. Let the blue kind
of blend through. So therefore, you have
a kind of mixture of blue and a bit of
grayish color, okay? So I'm going to
move down the page, continuing to move
down the page. As I move down the page, what I'm doing with this
blue is that I'm just adding a bit more water. A little bit more
water so that we've got lighter sort of blues,
you know, at the top. I keep it touch darker. Okay. Lighter as we move down. And this can be
challenging because it can mix with the grays, and then you might lose
the coolness of that blue. And so you have to reload from time to time and
put in a bit more, you know, tiny bit more of that cerulean in there
to get it to mix. But you're filling
in all the bits of white with the blue. Little bits of white
with the blue. And, you can leave a little, you know, tiny bits of
white for the clouds. I think I'm just for the most
part, will color them in. Right. You do this
fairly quickly as well. I don't want to spend
too much time on this. Okay, especially down
the bottom, you know, look just a touch of that blue
to fill in those sections. And if you've done
this quick enough, the blue will mix with the grays and it will
create a kind of nice little contrast they're not going to be as sharp
as the reference photo, but I don't want them
to be that sharp. That's more of a
stylistic choice. If you want the
clouds to stand out, the kind of grayish
cloud to stand out more. All you need to do is just
simply wait for a bit longer, and then start
putting in the blue. But for this particular scene, I kind of want all the clouds
to blend a bit together, but still have some contrast
of the blue in there, the lighter blue
with those clouds. So good. So bring this all down to
the base roughly about here, and that should be
skywhPretty much done. And you can also add in a bit more blue in
areas like here, for example, I did notice this area just looks
a bit too, like, stark, so I can drop
in a bit darker blue, bit more of that cerulean
here in areas to again bring out the contrast
of some of these clouds. Okay? Again, like this, keep it very light like this. There we are. Try to bring out this shape
of the larger cloud better. While everything is still wet, you have a lot of leeway to
alter what's on the page. When it starts to dry off, then it becomes very
difficult to do this type of thing without, without
mucking it up. Okay. Good. Sort of having a
look down below, perhaps a little bit of blue down below is going
to be better, as well, a little
bit here. Alright. That's it. So I'm going to leave this
to dry a little bit. But we can also speed it
up with the hair dryer. Okay, so moving on to the
next part of the scene, we're going to do
this pretty much all in one big go, okay? So we're talking about
all these bits of green. We were talking
about the mountains, except for the really
dark bits, okay? So let's mix up, and I've got a mop brush here. I'm going to mix up a little
bit of ultramarine blue. And I have some
granulating black here as well, which
I'm going to drop in. You don't have to use
anything like that. I just this is more of
a stylistic choice. I'm going to drop in a little
bit of this blue ink here. Now, the sky is actually you can see it's kind
of a bluish gray, but the mountain
has, I would say, kind of like a cooler
gray color in the shadow, so you can see that
running through the top, okay, as well as the
bottom of the mountain. And it's a soft kind of soft
sort of shadow, as well, which I'll have to try to, you know, even out
once we're done. I'm going to test this out.
Let's test this out here. How does that look?
It looks okay. Looks okay. I'm
gonna continue on. This is like, again, just a bit of that darker value on the bottom of
the mountain, okay? And remember to leave
that light hitting the left side of the
mountain and then kind of carrying up to the right
hand side of the mountain. Okay? So just go in and
drop it in like that. It doesn't have to be perfect because we can soften off
that area in a moment. But this whole area needs
to be a little bit darker. Okay. Down here, the right hand side, this little bit of the mountain that juts out on the
right hand side as well, and kind of darken as you
need to as it goes through. Top of the mountain,
same thing as well. I'm using the same sort
of cooler gray value. I've gone down a little bit too far actually there.
That doesn't matter. Just try to get in the silhouette
of the mountain, okay? I know there's a lot of
other details in there, but let's not worry about any of those other details just yet. We want to just make sure we've got this top part
of the mountain in, this sort of mid value. And I'm holding the brush
very far down to the top. This allows me to get in
a bit more control here. Don't normally like holding
my brush up this high, but it just allows me to, yeah, get in a little
bit more accuracy. Okay? Now, where the edges
of the mountain are, I'm going to drop in a
little bit of water here and just allow that to blend
a bit like this, right? Might do it to the
bottom bit first. Just tap the edge of it and just that's all you need to do, sort of
tap the edge of it, and this paint should sort of spread a
little bit upwards, and, you know, we can imply that little bit
of light in there. Don't touch it too much. Just add the water onto the edge like that
and simply move on. I'm already kind of
overdoing it personally, but it doesn't, just a
little bit like that. Okay? Therefore, you get a kind
of a softer blend from the from all these sort of darker bits up the
top and further down. Okay. Good. All these
granulating paints have really helped this
granulating color, as you can see, it sort of looks like a bit of potential mountainous rockiness
and things like that. So I don't want this area down the bottom
to completely dry off. Let me just start to just
add more water here again. I try to let this one
stay there for too long. It's tricky because
you have to just keep this line at
the bottom alive. You keep it alive so that we can bring this
wash down the page. Now, coming over to
the right hand side, we're starting to see some
greens in this scene. So I've got a bit of green here. And I'm going to drop this in. It's a very light green. You can also add in a bit of yellow. I've got some little bit
of yellow ochre as well. I don't want to make
this too vibrant, but I'm mixing up a
nice kind of wash of this yellow ochre and
a darker green, right? And this whole area,
as you can see, runs across down the page
like this and to the right. In the background, in fact, there is a kind of mountain in the distance.
I'll get that in later. The trick is to blend
this green in with all this other stuff
up the top. Like that. Keeping in mind, there's
also a bit of, like, this white in there as
well for the for the snow. So, you know, in
parts of the scene, I'm just kind of
leaving off a bit of a white of the paper to
kind of show through. Okay, let's bring this all
across there to the left. You know, this is that sort of tuft of grass that we'd
painted in before to the left. So let's do that. Let's get
that in little tuft of grass. There, okay, a little tuft of grass and
name here on top here. Maybe a little bit of this
yellow to drop in as well, keep it a bit more,
you know, lighter. You know, roundabout here is where you've got
all that water. So you've got to make
sure you keep some of this stuff white,
very careful here. So this is where, you know, all that work that we did
before comes in handy. So let's drop in the bits of this green running through
and remembering to cut, not to touch the white
of some of these areas. And there's also there's also, if you look through
it, there's areas of brown and stuff like that. So I'm also going to leave
the paper leave a bit of the paper there for the
white and the browns. Okay, let's bring this through these little streams of water. We're just cutting
around the streams. Leaving the streams white. Let's have a look
on this left side. There's some more here as well. So let's again, just
cut around some of these streams of
white like that. And the way I'm painting as
well, see, I'm just very, very sporadically kind of going around and cutting
around this stuff. Now, this here kind of
has sort of a look. Kind of overdone it
with this waterfall. Eventhough, there's a lot
of stuff coming off here, there, but, you know,
it doesn't matter. No big deal. Up the top, I will continue on to add some blues
and things later. But I'm going to just quickly see this area started to dry. We don't want this to dry. I'm just going to quickly add in some more paint here on
the right hand side. It's a pretty I fels a little bit warm
today in Melbourne. So some of this
stuff is actually this paint is drying a lot faster than I had
anticipated it to, which is making me work
a bit faster, okay? And here underneath, we've got
a bit of this green swell. Good down here. You're just bringing
this green down the page, all the
way down the page. And where it sort
of hits this water now bit of the green here on the bit of the green here on this little
island in the center. We're just remembering. We're just trying to
get in a little bit of the light running through. Okay? We're not really putting in any of the
details just yet. Now, I've got some
brown that I can drop in a bit of brown, little bit of tiny bit
of this brownish paint. And this is good because it's
not just as you can see, it's not just all of
this, you know, green. There's actually some browns and some grayish paint as well, which I can drop in
kind of brownish, grayish paint that I'm going
to add in for these rocks, Okay, a little bit
of these rocks and drop them in like that. Okay? While keeping the greens. Okay, it's dark around here, that maybe some more gray paint. Bit more of a darker gray paint like this. There we
go. That's better. This has to be in here as well, bit of this darker
value in there. And also, while the paint
is wet, it's, like, the best time to go in
and do this type of stuff because you
want it to just show through but not uh take up too much
real estate in here. I'm not looking really
at what I'm painting. This is kind of something
strange to say, but I'm looking more at the
looking more at the value, whether something
is light or dark, There's some real,
real dark bits in here that I need to put in as well. I don't have to make it like the reference, but
just, you know, enough to make sure there
is some changes in there. I also like to use this. I go to a little spray bottle. I'll spray some parts here, cover those mountains,
give this a spray. This will keep the area kind of wet to give me a bit more time. And encourage some of this paint to sort of spread
upwards as well. You got this looks like that
bridge as well up the top. Why not just start putting
in a little bit of that? I've got a bit of
black paint here. Drop in a bit of this
detail for the fence. The and so far, I've painted all of this with just one brush, if
you think about it, there's really not much Let's put in these little
handrails there, like that. Just using the tip of the
brush to indicate that. Tip of the brush there. Et's have a look at
the right hand side. Now we've got sort of here
on the edge of the water, this kind of darker ridge. We've got also some darker sort of lines running to
the right hand side. So just dropping in
a bit of this paint here to indicate
these sort of roads. There's a road there
running like that. There's some little bits of the mountain,
as you see here, that seem to be also, you know, slightly darker, so I
can drop in a bit of paint imply some of this stuff. Use your arm and just sort of try to get in a few
little marks like that. And this will you know,
a lot of this stuff will kind of fade off a
bit afterwards as well. Dropping a touch of
purple in here, too, because these roads have a little bit of a
coolness to them. Alright? Look at that. There's just they're just
tracks or something. I don't even know.
There's I guess places where people live walked,
that kind of thing. Alright, so here we are. We're at this point where we
are starting to now put in, you know, these little
middle midground areas here. So remember, we're just adding in little bits of these
sort of darker parts. But they're more mid values. The real dark values,
I'll add in later, but you can see here I'm just
emphasizing this edge of this edge of where the green
area touches the water. And there's browns in here. I'm not even really
looking at the reference. I'm just looking at how
light and dark things are. Right? All this stuff, even, I probably have to redo a lot of this on the left afterwards
in another wash. It's just it looks a bit
too what do you call it? Yeah, it just looks a little bit too abstract at the moment. Okay? Now, here is this sort of
pool of water at the base, and I'm going to start
adding in some blues. So I've got a bit of blue, got a bit of purple and blue
and a bit of darker black. And I'm going to just
get in this area here where the water hits the um, what were the these
little spouts of water sort of hit the bottom
here with a big pool, and cutting around
like that, okay? Leaving it all kind of white. Alright. Bit more blue, if you think that
it's not cool enough, like, especially
down the base here. I'm gonna add in
a bit more blue. Okay, a bit more here. There really should
be some extra greens on this left side, to be honest, to the left. Some greens on these, like, tufts of grass
and stuff here. I'm just going to
put in a bit of this greenish value inside. More this blue. And I also like to swap over sometimes to
a little not a little but, like, a larger round brush. If there's areas that I
need to re emphasize. This area here, you know, this could do with a bit of
grayish color or something. It just is what it is, okay? A little bit of grayish area for all these rocks and things. But I've let that edge dry
a little bit so that uh, there's a bit more
sharpness running through here as well. So here we go, just
continuing down the page. Of course, you've got some of this white water here as well, or whatever it is,
it could just be, um you know, it could
just be a bit of snow. But you just letting the
brush skip over parts of the paper and also adding
in some blue in here, too, a little bit
of ultramarine blue in this sort of section. So it's not just completely, you know, completely blue. There's some darker bits there, as well, Just skipping
your brush over the page, leaving some of that there. It could be light. Could be just a bit of that white water. Doesn't matter. But we do have to make sure that all this water here
is pretty dark. So make sure you know, if it's not dark enough, go back in there and add in that darkness while
the paper is still wet. Of course, you've
got the magic tool, which is this little
spray bottle. Absolutely, a lifesaver to just keep things
alive for a bit. So you can see,
it's not just blue. There's some darker values, some blacks. There's some grays. But for the most part, you know, I would say that
it's mostly a lot of cooler values in here, even some purples, too. And this is important
because you also want to make sure that this area it sticks out and it looks
like it looks like water. Looks like slightly
darker water. So um, yeah. Now, these areas on the left
hand side of these sort of green rocks rocky sort of
areas have started to dry. So I can put in some blue now, and hopefully this won't really mix too far into the green. So I can really just sort of keep some of those greeny rocks. I really like those rocks there and also add in
some darker, like, kind of black values
in there as well, further moving further up. I've got some lamp black, which I will drop
in here as well. This will granulate
nicely. Okay. The longer you wait
for the paper to dry, the more the more sharp, those marks will show through. So I'll just have to
re wet that section a little bit to encourage
this to blend a bit. These little striations
on the rock as well. You notice they kind of, you know, little tiny
striations like that. I want to imply that. And then, you know, wear these sort of tufts of grass
up here as well. There it's a little bit darker before it sort of turns
into those tufts of grass. I think I'll soften the
top bit off afterwards. I've let that dry, but I would
have preferred if that was actually a bit
more a bit softer. Continuing down the page. Let's again put in
more of this blue, and I'm noticing it's
not dark enough here. I need to go darker
because when this dries, it's going to look
way too light. So more of this ultramarine, there's a bit of
purple there as well. You know, it actually goes
all the way down here. This is where I drew
that guiding line, I guess, down at the base
where everything finishes off. So that's got a bit crazy with this ultramarine blue,
right, like that. As long as you don't make
the whole thing really, really vibrant blue, it's
going to look better. Funny enough, the blue stands out more when you use
it in certain spots. Otherwise, there's no area for the eye the mind to
make a comparison with. There we go. And what have we got
down the base here? Starting to, you know, hit this area of grass in the front. So here we are
again at this point where maybe put in a couple
of these rocks. There. We've got some brown as well, it's dropping a bit
of brownish color for these rocks here. Notice how I'm just
doing this all in one wash because
we're not done yet. It's, you know, the
finishing touches, we're going to bring back
all the little details. Okay, so moving down to
the front of the page, all this stuff should
be starting to dry now, and this is a good time
to add in a bit of green. So I'm mixing up a
bit of light green, dropping this in at the front. I might use this larger brush. It's gonna be quicker, a bit more yellow in here to keep it, I guess, a touch brighter. And I'm going to
keep this encourage this to blend in a
bit with the water. But still, I still have enough of a have a contrast there. So that's why you want to
leave that previous wash of the water there to just dry a little bit before you do this. Otherwise, all that blue is just going to run down the page. Okay? So we've done this
whole sort of thing. We've painted from the
top to the bottom. Should have this main area
at the bottom in now. Of course, there's
a bit of snow here. Let's just, you know, you can leave a bit of
white on the page. I've forgotten all
about the snow. So a little bit of that you
can leave in if you want. I should have left
more in up the top, actually, but it doesn't matter. There's also things you can
do like lift off with a bit of tissue, that there. But in terms of
sharper bits of snow, you'd want to do
this sort of thing. We just skip the
brush over the paper. Okay. You do also have
some darker values. You've got some brown and
kind of warmer colored rocks, which I will drop some darker value in
here here and there. It's not much, but just
a small little specks of something here with
some darker paint. Otherwise, this whole area at the front is gonna look
too sort of stark and, um, stick out too much. So yeah, this is a
good idea, I think. Just drop in some little
bits and pieces here. I mean, there's something here. I don't even know what that is. It's like a mound
of something there. Okay. So we've got some
texture in the foreground, a little bit of texture
in the foreground. Good.
46. Day 18: Kirkjufell Finishing: This was the area that I was
a little bit concerned with. I want to just get this
to blend upwards a bit here and pick up a smaller brush to do this bit of water and just rub onto this sort
of little edge like that, encourage it to blend
upwards or touch. Like this. There, here, there's a little bit
of I think I just blend a little bit of this
area here as well, upwards. Just anywhere where I see
maybe a contrast that is too much too harsh,
I want to do this. Alright so that
blends a bit better. Another thing you can do, as
well at this point is just, you know, pick up
a bit of paint and then flick it onto
the page as well. I do think that still the water in the background is just not
dark enough for my liking. There's some parts
here that I want to really emphasize and drop in. So going back into this water, and we're at the stage of the painting where
we are putting in the final dark bits
and pieces, yeah. The final dark bits and pieces. So dropping in those
little sections that kind of make the painting come out and
create extra contrast. You know, there's
like a rock here. I don't even have an interest of implying it with
that much detail, a little something here.
There's a rock above there. In fact, that rock is more
like a darker black shape, so I'll drop a bit of this color in a bit of
lamp not lamp black, but lunar black,
which is Mars black. Just another name
for Mars Black, here, here, you know, I'm looking around
the reference photo and thinking to
myself, you know, where are the darker bits we are the final dark
finishing touches, give it a spray as well
to bring it back alive again and just sort
of continue on. Of course, there's a lot of this area that's
already almost dried, but I can go in one more
time and start to just put in touch of this darker
detail here and there, near to the edge of the water. Here there's a little bit of
again, a little edge here. There are these rocks
and things that have, you know, a bit of darkness
to the left of them. So I'm going to just
imply some of this. And this is too I just want to rewet
that because it just looks too much for
the time being. Again, drop that in to the left to indicate
some of these rocks. Bit of this black to the left of these rocks
and areas like that. Underneath the Hopefully, this
will granulate out nicely. The bit underneath here as well. I've lost some of that
snow from the base, but a bit of guash afterwards will bring that back.
No problem at all. I do notice there's again, some black sort of rocks or darkness here. I
can drop that in. You know, you're just building up the detail of this
painting by very, very slowly adding in
some wet on wet details. You know, here,
I've noticed also some sharpness would be nice. It's attempting to just
rewet this whole part, but I do think a bit of extra sharpness and
detailing for I don't know, these areas of these rocky
areas here would be good. So I'm just picking up this
dark value, dropping it in. This is also going to create a bit more sharpness when comparing it to the stuff
in the front of the scene, all these rocks and things here. So just dropping
this in, of course. And this water is actually a bit darker around there as well. So, look, I'm just dropping in a bit bit more
extra paint there. So you sometimes it can be difficult to explain
exactly what I'm doing. But in essence, I'm looking at the reference photo
and I'm thinking to myself, well, what's light? And where's the light?
Where's the dark? Let's try to Let's try
to emphasize that. This fountain here like,
very not fountain. The um this little waterfall is tricky because there's also, you can see, darker bits
running through it. I'm going to just try
to add in a little bit of color through some parts of it so that it's
not just all white. Dry brush this through. Some spots dry brush part
of that through like that. Here. It's not just completely
white in there. A lot of this stuff,
I think later, I'm going to go in
with Gilbert brush and just soften off the edges. It looks too sharp
at the moment. But if I try to go
too much into it now, it's going to I think
it's going to ruin it. So yeah, this is just the
base, as you can see. I need to make sure there are some extra darks around here, the rocks and
things at the base. Just sort of entering putting in a few more little bits
and pieces, details. Yeah. Something running
across here as well. I don't know what that
is another bit of something because
we want to just make sure that all
this stuff here looks the way we want
it to look before we kind of let it dry off. Now, even here, I've noticed
this bit of the water, again, is just not dark
enough for my liking, so I'm going to just readjust
it, readjust some parts. You know, there's a rock here. I'm going to leave that rock. You know, that could
be another rock. I've just, you know, decided
that's another rock. We're going to bring
this across again. So yeah, mix this paint
around a bit more. 'cause it's all wet and too wet, this paint should just spread but, yeah, I want the
main this big sort of contrast between the water
and the front of the scene. Alright, let's give
this a little dry. Okay, so I've mostly
dried this off, but I've left the
paper slightly, you know, slightly damp. Sometimes I find that just helps to keep the
final brush stroke. So a little bit softer.
Now, the first thing I want to do is go
into the mountains. Now, the mountains is what we've kind of left all
the way to the end. And you can see that there are these little striations in the mountains that
just come through, and this has to all be done. Wet on to dry. So I've got a bit of brown and
a bit of black, essentially, a bit of
brown and a bit of black. Doesn't matter exactly what
color as long as you just got a darker value here. And most of this is just paint. It's probably like 20% water. Let's go up the top.
Let's start here. I want to just test this
out a little bit first. And a flat brush works
very well for this because it allows you to create these sharp lines that
kind of match already with the sort of as you can see,
these little striations. So I'm going to go across, and let's just try to
mimic these sharp lines. On the top of the mountains. So there you can see, they kind of come across almost like diagonally like this. Whoops. I've stuffed that one a little bit.
That doesn't matter. Look, at the end of the day, in the day, it's just an
indication of what we have. So let's not get to
a fuss like that. There's more another line
running across like that. You know, these little there's a couple of them that are just, you know, they start
midway through. I like to also use see how I just drag the brush
through and allow the previous wash to
show through, as well. That's really
important. Not letting the entire brush strokes show through at
times is important, okay? More of this stuff. Look, it's just a
brief indication. You only get one
chance to do this. So yeah, dry the brush off a little bit as well
if you want to create these little this effect that I'm doing now
that's kind of like, you know, you can see
part of the brush stroke, but other parts of the brush
stroke don't show through. You know, you can see
here as well, you know, just in the white
sections here, you know? Same sort of deal just
across like that. And you find that these also the darker brush
on the right help to indicate the edge of the right end of
the mountain, okay? You just got to do
this one. It's like drawing with the
brush, essentially. And I don't want to make
these too dark as well, because I find if I
make them too dark, they're just gonna
pop out and create a two distracting marks there. You just want the mountain
to look more like how it does in the
reference with the details. And, you know, ideally
you want these, you know, the amazing kind
of softness behind the mountains and the sharpness to kind of contrast through. You know, even here, look,
there's these sort of, like, bits of it that sort
of come down like that. It's a bit much, even. I don't want to
emphasize that too much. There's a little
road or something. I don't know,
something that runs up the mountain here to the left, and then it just stops, and then you got a
few more bits there. And then you've, of course, got this area that runs to the
right of the mountain. It's like a road
or something here. So I'm going to just
use the edge of the brush and just bring
this down like that, and we're going to
bring this across whatever this is, like that. Don't worry if, you know, your brushes break apart a bit. You know, I think sometimes when you have these broken brushes, it actually looks
more realistic. Okay, there's all this wet
and wet stuff as well, which you can just leave
in or you can do this. Alright? Do you have a look at the left
side of the mountain? That kind of looks
fine to me, okay? You've got these bits of
waterfalls and stuff like that. Let's have a look.
What else do we have? You know, it's really
you're really just picking off the final
touches of detail. I like to grab a small round
brush as well to do this. Like, there are some people
here in the background. There's a man walking here. On this bridge. And I'll just get
a silhouette of that person in just with
a bit of darker paint. Okay. Here. God, I've got a lot of this leftover paint
on the brush. Get rid of that.
It's too much here. And it's kind of
walking in, like, from here.'s put the head in, then the body and
legs maybe like this. Just to again, get
a sense of scale, sort of sense of
scale into all this. The ones in the back as well. There's a few sort of
figures here in the back. I'm just going to imply, again, the head and the body and legs. I want to simplify
this down legs there. There's someone maybe here, like walking as well. Someone walking towards
the mountain there, maybe someone walking into
the scene, a couple here. Um yeah, the less you sort of touch the paper here,
it's the better. These people are just here to
indicate a sense of scale. So the ones right at
the back are tiny. You can barely see
what is going on. But as you move
closer to the scene, you know, you've got
this figure here. It looks a little
bit darker. Okay? With this remaining dark
sort of paint that you have, you have some choices, really, you can just go
through like this and darken off some spots. I quite like how everything, you know, looks
quite granulated. So I don't think
I want to really, I don't think I really want
to alter much of that. But, for example, back here, there are some, you know, maybe some rocky areas
that I could just bring out better in this
sort of section. Little rocky sort of
sections like this, um, with a sharp, little bit of sharpness of
this black as you can see, cutting around the
green as well, so that you've got some
darker kind of ridges. It's just finishing touches
really to to make it look less soft because I know from all that
wet and wet work, it can just disappear. All the little sharp details can just disappear
into all this. Now, there's one thing
I've forgotten about. That's all this pool
of water up the top, which we're going to bring
back with some guash. As well. Once I sort of
finish off some of this little detailing
work, okay? They're just sharpness,
little bits of sharp contrasts in here because
there are sharper areas. It's not just, you know, the same value all
the way through. Good. Yeah, I'm just seeing if it's time to do what I
want to do yet. I think it could be time.
Let's get in I'm going to grab another brush and I'm
going to lift off some paint for these
waterfall areas. So a bit of clean water,
and let's just do this. I'm going to rub
onto the edge here, lift off there
because we've really got these waterfall
area coming through, but it just looks too sharp
in a lot of the spots. So this is just my way of blending it together. Like that. Of course, some areas
of the waterfall are going to be sharper. So don't do it to
the whole thing, but little areas like this, they add a sense of they just make it look like it belongs more
into this scene, I guess. You know, you see
here, for example, little spurts of
water just coming off in different directions. That's important too. To imply. And I find if I go in with the guash,
well, I mean, I can. I'll probably use some guash afterwards to re emphasize this. But if I use the guash
through all of it, it's actually going to make
it look very unnatural. I will only use the gouache for just a little few little
spurts of paint or water coming off up the top there
where I've not been able to recover some of
that paint, as well. That white. See here, I'm just extending this bit of water to the left because I
accidentally gone too far in. That's right. Just lift off. It's mainly where it hits the the water, there's
softness around. It's not just this, you
know, completely sharp area. So, you know, you
can even create new little spurts of water
like here or something. You can create something
coming through here. You know, it's not very obvious, but something like that, lifting off the tissue and blending so that it looks
more natural. Here as well. But yeah, again, like I said, I'm going to go in with some
white guash later and bring all this out and make
it actually look a bit more bit better. Through the Through the water,
there's also, you can see, kind of bits of the
background showing, again, so I'm just trying to, like, get in a bit of that. The directionality
of the water can be implied through through
your brush stroke, see? It looks like the
water's coming out in this direction through the way you form your brush stroke, you know, cause with
each brush stroke, there are tiny little
lines that form. And those little lines um, yeah, I can make it look more
or less like a waterfall. Okay, so I mean, it's a really basic thing
I've done here, not really much, not
really much at all, okay? Sort of having a
look to see what else I want to put in here. I mean, I could keep
going on forever, but that's kind of, you know, that's not my aim. I'm going to grab some I'm going to just spray this front part of the
scene down a little bit. And I want to add in a
little bit more green, a little bit more kind of darker green here
because I think that this whole area is too
light in parts anyway. So a little bit of
darker green. Okay. And this will just join on to everything hopefully
because it's still wet. I've re wet the paper. Here, there's a bit of
darker green up the top. Here there's a very much darker green here
on the right hand side. I think this just looks a
bit better rather than it being the same old green
that we've used before. More contrast as well. That looks a bit better, a bit more interesting. Okay. So let's think, what
do I want to do now? Let's get in some squash
to finish it off. So I'll dry it quickly first. Okay, a little bit
of white guash. And I've also got myself
a small rig of brush, different kind of
rig of brushes. The first thing I want
to do is just see if I can add some spouts of water, some interesting kind of
bits here for the waterfall. So like some little bits of
some wispier bits of paint, I suppose, and the
waterfall, here. But one thing I've not done before is we've forgotten
to get in the top part. I forgotten, but I
guess in order to just get in a more
smoother wash. I haven't looked at this
stuff up the top here. So we can get that in
just a bit of this guash. I've mixed it in with
some cerulean blue, and the water, of course, appears blue because it's reflecting the color of the sky. Okay? And then you can just, you know, change the directionality of that water to make it
kind of come down. Like the origin of just shows the origin
of where the water is where the water
is coming from here. And let's just bring that down. Bit more of this bluish. It's kind of like cerulean
blue mixed with a bit of cerulean blue mixed with
gouache up the top here, you know, it needs
to have an origin roughly where it's coming from. Just little bits of that color, I guess, to indicate
the water up the top. O the top. Good. I also want to mix a bit
of darker paint maybe into this section here. It's actually, you know,
you got a fair bit of darker colors running through this section near the water, so let's just do this. Okay. Okay. The rigor brushes are just great for
adding details. Okay. Another thing I might want
to do as well is just put in some quick highlights for some of these rocks
and the snow, that kind of thing down below. So again, same rigor brush, let's just see what I can
do here. It's a bit there. Maybe I can get a bit here, some bits of snowy
effects like that. Just drag the brush
over the paper and let the Let the paper sort
of pick up the paint. You've got a fair
bit of it in areas like even here in the water. Um, it's up to you whether you even want to
do this because actually, it can look a bit unnatural
if you're not careful, okay? There's that snow here in the center of the scene as well. This sort of whole parts
just got a bit of that. So I'm just dragging a bit of this white guash
around and through this scene to, um, indicate, you know, the snow
that's deposited around and you're leaving the you're letting the texture
of the paper kind of pick it up. That's
the important thing. Got to do it in a way
that just looks subtle, not too stuck on. Otherwise, you're going to
run into problems like that. We don't want
something like that. You know, I can't really prevent it anymore, but that's fine. Like this, you know, letting the brush sort
of float over the paper. It does help when you hold
the brush on its side. So just the side of the
brush sort of catches on here and there. There's a bit of snow
here, even on the rock, so you can just kind of just get that brush running
through on top here as well. You see there's
little bits of white. Again, just sort of letting the brush float over and
exposing the texture, the grain of the paper, which
is why it's so important to have textured paper for
this type of effect. If you try this on smooth
paper, it doesn't work. You know, the idea of this is to try to
complement everything else. I'm already thinking
it's too much. So I'm going to now put in
a bit of yellow into this, tiny bit of yellow
into this squash, and I want to put in, like, a few little strands of grass
here in the foreground, like these, see that little
bits of grass running up. There's also greens
that I can drop in, a little bit of green as
well with white guash, and just, again, try to
get in a few little marks. Where I find it makes
a big difference is when you add these marks
near to the water area, like for example, here, you'll see there's
a stronger contrast because of the darkness
there in the back. Keep it light, keep
the strands of grass moving in different
directions as well. If you use the same direction
the whole way through, it's going to look it's
not going to look good. It's going to look
very stuck on. It's not going to
really look like natural strand of grass. It's kind of, I'm just using a bit of green and a bit
of yellow mixed together. You know, I might even just
be yellow at some point. I don't mind. As long as I got a
bit of contrast here, and this to the viewer
is going to hopefully imply the sense of
the foreground, like, a bit of grassiness
in the foreground. Okay? Just one stroke, you know, just one by one, just adding in bits and pieces
like that and see how I'm making the grass look like it's moving maybe
to the right hand side. Maybe there's a strong, you know, breeze or
something coming through. It's just stroke. Each and I used to do
this with a fan brush, and fan brushes are great, but they save a lot of time. But when you want to really be intentional about this
effect and not overdo it, you just do it strand
by strand like this and cause you to
spend all day doing it, enough time that allows you to get in a bit
of that effect. Of course, you've
got some parts where the grass is quite light. So here it's pretty light. So you might want to put
in some darker strands, see, some darker
strands of grass. It's not just the light
strands of grass. You've got darker
bits running through. You know, it's depends on
how the light catches on. So I'm kind of alternating
between both of them, but, you know, it's still
just squash running through. In the front, sometimes you get these longer bits of strands of grass coming
through as well. But having both light
and dark strands really help together to make
it look more convincing. I'm kind of making it
go over the top of this snow that I had painted on before
as well, like that. Every now and then, I'm
sort of sticking my head back to see if it makes sense. Even here, you know, there's perhaps indication of
grass like kind of these little don't know tufts of grass or something
like extending upward, so I can just, you know,
imply some of that. Little detailing work.
Some people love this. If I'm in the mood,
I'm fine, I enjoy it. But it does take a
lot of time. Yeah. And as you can see, it helps. It helps bring out detail, sharpness in an
otherwise very sort of, abstract looking scene. So yeah, thinking where else can I
put some of this stuff? You can just go on
forever and do this. You know, maybe got a few something that just
comes out here, like a larger tuft
of grass as well, like a little tuft
of grass here. Balance it as well. You know, like a little
tuft of grass there. There's maybe something here. You know, Balance some of these more intentional
brush strokes with some darker and randomized brush strokes to create a
more natural looking effect. You know, and this is
what I'm saying, again, these bits of grass
here in the front, they will be longer because they're closer to
the front of the scene. Okay, and we're finished.
47. Day 19: Malarrif Lighthouse: Let's get started
with the drawing, and I am going to kind of decrease the length of this scene because it's quite
a long reference photo, but I do want to
get in, you know, good amount of the
water as well. So let's make the
left hand side of it, a little bit, you know,
a little bit shorter. Now, the bottom of the scene, it's really just a lot of black. But let's just go and put in this line with the distant
mountains in the background, and roughly the lighthouse
there touches the ground. So here we go. It's just a line going across the entire scene. And I'd say it's almost just a little bit
less than a third of the way from the top of
the page, like that. So there's enough sky. This is the area of
the beach, I guess, coming in here. Right? Sometimes you're gonna need to alter scenes a little
bit to make them, you know, make them
more interesting. Come in that comes out
maybe like here, there. And this is kind of
like I'm gonna get all this sort of granulating
detail maybe below. Here, I'm just gonna
make that come out, then a little bit of this
rocky outcrop, like that. Okay, to the left hand side, you've got a lot of this
sort of green grass there, and there's little bits of
it running through as well. Should probably emphasize
this better like that. Yep. It's not completely
straight, though. Something like this, yep. Then you've got more
green up the top. Really, all this stuff is just, you know, rocky outcrops. Um, And the lighthouse,
let's get this in. I might actually zoom into the reference photo
to make sure I'm, you know, I've got a
decent indication of it. Yeah, the base of it is kind
of a bit like a rocket ship. It's a little bit wider
at the base here, and then it just
sort of comes in a little and then runs up
to the top like that. Cap down. And the top of the lighthouse has
a bit of this, you know, structure there. Then you've got, like, a
rooftop of it like this, kind of cape, something
like that. There we go. That's a basic structure
of the lighthouse. And, you know, you've got to
remember that all this is pretty much going
to be in white. And just make that a
little less obvious, something like that. Good. Someone walking around here
in the grass, as well. And there's some houses
out in the back. You can see There's
something here like a little house.
Let's get this in. Little house here
or something there. There's another one here all
the way out in the distance a Okay. That little person there. Apart from that, I don't see really a need to
put in anything else. The people there
really help to add to the scale of the scenario. So let's go and get in the sky wash. And I've got just a bit of gray leftover on the palette
which I'll pick up. Let's just drop this
straight into the sky. It's kind of like
gray plus a bit of coolness on the right. But I'm going to go up to
the top, and you see here, I'm just going to add in a bit of darkness at the
top of the scene. And as I move down, I'm going to just add in a
little bit more water here. Smooth that wash out.
On the right hand side, I'm going to put in the blue. This is a bit of cerulean blue, tilting the page downwards
slightly as well. Here, let's get
this in, like that. It's quite a nice sort
of cerulean blue. And on the left,
I'm just going to continue on with
this grayish value, and important thing
to do here is to cut around this lighthouse. Alright, something like that. That's really important.
Left hand side as well, and using the tip of the
brush to cut around it. Okay. Here we have it. Oh, I've gone into it, a touch. It doesn't matter. Okay.
Sort of near the base. These houses also going
to cut around a little. Just the rooftops, like that. Bring this other wash
further down here. The blue and I think what
I'll also do is add in a touch of purple or something here for
this, cloud shape. The I don't know, I think it just needs a bit more darkness in the sky here. There we go. Might bring out the might bring out the lighthouse
better anyway. It's kind of like a
purplish gray here. I got very moody sort of day. There's also some
clouds that just sort of come over to the
right side here, so I'm just going to bring
over a bit of that shape. Because this is all wet, it
makes it a lot easier to sort of play around with
the sharpness, as well and not the sharpness, but the darkness here
in the sky without it creating too much sharp
too many sharp marks. Now, I will dry this off. Let's dry this off,
because we need to, we need to get in a bit of a bit of a sharpness
for the wash below. So these areas in the
background, well, we've got some little mountains
here in the background, which I will try to get in. And, firstly, what
I'll do is just spray this area a little
bit first with some water so that hopefully the mountain doesn't appear too sharp
in the background. So it's just a bit of purple
I'm using here, maybe, like, a bit of blue mixed in with
that purple, like this. Let's just get that in, like, a kind of a quick indication of some mountainy shape
there in the back, okay? Hopefully that's just sort of doesn't move around too much. You just clear that bit
up a little bit. Yeah. I want it to sort of blend into those clouds in the distance. And I'm going to grab some
kind of browny color, add that in kind of
bit of burn tumber. And we see here on the
left the same sort of impression of the mountains all in the way in
the back there. Okay. Good. Cut in front of that lighthouse, and it becomes a little
darker in front. Yeah. Like that. But again, cutting around that
little house there. Same sort of deal
like that here. Good. Great. Now, further
down the page, I'm going to put in
some light green. It's a bit of yellow
mixed with dark green. Or this part here to just blend this down
because I want this to just look like
really light grass. Okay, it goes all around to the right hand side
of the buildings and the mountains there, where it sort of stops off. Sort of stops off,
and then you got this grayish color further down. But let's just get this same wash anyway,
running through. Like this. Ing towards
the right hand side. Some of it down the
page here as well. You know? Good. Okay, fun bits coming
up, fun bits coming up. Let's just get this bit
out of the way first. Bit of gray here. These sort of rocky areas. These are sort of basalt rocks just run out a little
bit towards the sea. And again, like, the real dark areas I don't
need to worry about just yet. Some of this just
needs to kind of blend in with the green a touch first. Even here, some whiter
parts of lighter sort of grayish bits there on the
rocks, bits and pieces. In the water, let's
add some blue. Cerulean blue, but
that's too much. I'm going to add
some leftover color here to just dull it down, whatever is on the
left side of the page. This brush is too small for me. I've got to pick up a larger
one to do this, like that. And I'm also leaving in
a bit of that white of the paper where possible. But yeah, sort of goes all the
way up the back like this. Maybe make it a bit
darker out there as well. Just a little bit darker with some ultramarine
ultramarine with a bit of brown mixed into it. Divi got. That looks better. I want that area at the back to
really form a sharper edge. You further up like this.
Okay, that's better. Just continue this down
again and just leaving the previous wash not going
too far into those rocks, carrying it down, down here, maybe some purple
ish color here. Okay, good. That's, you know, that's
the water pretty much done. Now, moving on
down further here, I'm going to pick up some black. I've got some Lunar black. You can use some granulating
colors mixed together, or you don't even need to use granulating colors for this, but it's just more
of my preference. I'm going to drop this in.
And Lunar black or Mars black is fantastic for this
because when it dries, it actually looks
like like rocky, you know, claves,
you can see here. Look at that get some
really interesting effects. Sometimes, if you wet
the paper first as well, I just spray a little
bit down here. Look at that. It's doing some
very interesting things. And I've got a bit
of purple as well. I want to drop in a bit
of purple with this black because it's too stark. Let's drop this in.
Look, I'm holding the paper on an angle
going downwards, just so that I can
encourage the paint to flow down the page. Okay. Okay, let's continue this. But here, where the darker bits of
rock now hit the water, I'm going to need to create a lot of extra
contrast for that. You do see a little bit kind of run through the green as well. The smaller brush will
help with this so that it doesn't completely
obliterate all the green. So you can just see
these little darker bits of rock that just
run through here. This is going to be helpful. There's a bit here, too.
You can see just going out this into the
ocean like that. There's a bit here, okay, that sort of joins
on a bit here in the back like that, you know, even maybe a tiny bit sort of on the edges of the beach
little bits like this. Yeah. There is some type of building there in the back that
I've not gotten in. I think afterwards, we can put in use a bit of guash to just bring it
back a touch, okay? These are just some
more kind of outcrops, as well of this rock, um, running in from the left. But unfortunately, there's
not really much shadows on this day because it's a
very overcast sort of day. Some more darkness, more sort of black running
through here. I'm going to re wet
this whole area in a moment to encourage some of this stuff to
move and blend together. I especially want it to be
quite dark at the base. Maybe a bit of brown swell. But the purple was
just to add a bit of extra color, bit of coolness. Most of this should probably
fade out once we're done. You see these little
striations in the rock, which rocks that you can imply swell bit of water. I'm going to start off
with a bit of water. I'll just drop someone to
my hand and just maybe pour it in left side like this. Let's see how water the
paint reacts to this. Put a bit more in that. Just if I can get some
interesting marks running through the darkness. But just let it
run down the page. Maybe I'll get some, Oh, I didn't mind that stuff actually back there near
the White House, though. Let's just see what happens. While this is drying, I can
just put in a bit more of this black paint again to create some extra contrast
on some parts while the paper just starts to create some
granulation in areas. Yeah, I just want this area
near the water to really look a bit more defined. There's some more
darkness here near the base as well in parts. Let it dry for a little bit. I'm going to hold the paper just on a slight angle like this, 'cause I've dried
it off a little, I will just spray down this
area on the top corner. Yep. Just see what it does. This might form a little
path or some kind of interesting pattern
running through here. Let's see what happens. Another one. It's a book. Give me another bit
of water here. Here. And this only works because the previous wash has
sort of dried off. So reintroducing the water just shifts starts to shift this pain
around a little bit. But also leaves areas
that haven't been wet. So it creates a bit of
an interesting contrast. It sort of shows the path
of where the water goes. Okay. Let's shift this
downwards a little bit. So I might get
some downward kind of marks striations
running through Okay. And let's just again, shift the direction
of the water the opposite way. See what happens. Notice some of the
waters just running a little bit too far
up so stop it there. Okay. Leave that to dry. Okay, this is all dried off now, and some finishing touches gonna use a bit of leftover
darker paint, and we've put in some little
shadows for things in here. For example, this lighthouse, I just want to bring out
the base of it better. And there's also some in
the lighthouse itself, there's a little sort of shadows running through the
center, like here. You know, we can just
imply this stuff. It's a little brush like that. It's not much kind of bit of that shadow running
to the right like that. And it's actually a bit more coming through
up here as well. Underneath the top
of the lighthouse, there's a few little
bits and pieces, and then you've got, you know, these little bits here, plus the top of
it, there's well, just a bit of something
It a detail, really. But it's not a huge deal.
Just something up there. Of course, these
little houses as well could do with
some detailing, I put a bit of dark at
the base like this. I think just one stroke
there should be fine. There are some people
walking through this scene. I will pick up some dark paints and just indicate
a couple of them. One here maybe here,
sort of walking. Another one here, simple figure. Um, just shadow. It's pretty difficult
to put these in just a little bit of maybe
shadow running to the right. Like that. It's
quite tricky. Kay. I think maybe this lighthouse
could do with a bit of shadow running towards
the right side on the ground, as well, here? Something like that.
These houses, too. I know they don't
look like this in the reference, but, yeah, I think just a bit of
something would help make this look more convincing. Bring out the light
in the scene. Then some final
touches of guash, which I want to
use to bring back a little bit of light on the
lighthouse here to the left. This base of it generally
be sharper, like this. Same with the other
side, like that. It tricky to imply
this, but, uh, yeah, something like that
should definitely do this Maybe the top
of it here as well, some bit of squash hitting the top of the
roof of it like that. So simple, but, yeah, I think it's necessary. Maybe a bit here on
the people like that. Blend the base a bit more
with the shadow here, too. Yeah, it's more of
a squarish base. Alright, and we
are finished. But
48. Day 20: Snowy Cottage: Start with the drawing,
and I'm going to put in the bottom of the mountains
roughly about here. And it's just less than a third of the way through the scene. Bottom of the mountains
also ends around there. There is a larger
mountain that goes up to the right hand
side. Let's get that in. It's sort of coming
up like this. It doesn't have to be perfect, but just something
that resembles the reference,
something like that. Okay. And then we've got all
these other mountains to the left hand side, so I might just put in a few little dots
to indicate roughly where the peaks and troughs
are of the mountains. I'd always like to
do this first and then work on joining
up these little lines. This down like that. There this goes up like
that, comes down again. And runs down like this. This mountain
actually runs down a little bit further
to about here. And then in the back, we've got a whole bunch of these
other ones, which, again, I'm going to just put in some little dots
where the peaks and troughs are some
little quick lines. But at the end of
the day, it's not a huge deal if they're
not super accurate, just as long as they
approximate the reference. Okay, good. Here, this sort of just
runs down the side of the mountain and
disappears off to the back. Okay, fantastic. This house here is the next
part that we want to put in, so it's triangular sort
of section like that. Just put that in
sort of triangular. Then you've got the
side of the house. And there's this sort
of balcony area here that just sits off the left
side of the house like that. That sort of just runs
down there, there. Else, you've got a window there. My aim is not to get in, you know, super accurate
sort of scenario here. We just want to make sure that the darkness of this
house is visible. Like that. And actually runs out to the
edge of the scene there. You got a chimney here, and there's lots bits of dark on the roof which we'll be
able to get in afterwards. And a lot of it is actually
just sort of covered in snow. You know, underneath the house, it's like, you know, you've got a bit of
the side of it here, the board making
up of the house, but you've got just a lot of snow just
covering up the rest of and we've got
another window there. We've got a window here, and there's a door here, another window
here to the right. Okay, so it's pretty basic
sort of house. Okay. Alright, let's just have a
quick look at everything and check that it's all in place. Just
make up a door there. Okay. Fantastic. So let's go ahead and get started
with the painting. Now, for the sky, I'm going to pick up a little
bit of this color here. So for the sky, I'm
going to pick up this mop brush, and firstly, we're going to start
right at the top with some cerulean blue mixed in
with some ultramarine blue. Let's drop that into the sky. I want to make this
perhaps a little darker, slightly darker than
the reference photo. More ultramarine
maybe up the top. Okay. And as I come
down the page, I'm going to drop
in just some water. It's all it is, it's just water, and we'll move down
further again, more water and more water. And what this does is that
it lightens this wash so you get a nice smooth
kind of transition. But at the top of the scein, I will also drop
in a bit more blue and let it run down
a touch as well. So you've got more
of this gradient. We do it this way. And as I move down, as well, I'm going to pick
up a bit of red, a tiny bit of red here
and drop this in here so that it just warms this
section a bit up, okay? More red. I like a
pinkish color, okay? And I'm going to drag this
down like this, okay? Just warm up the sky a
little bit. That's all. Okay. And I'm cutting
around these mountains very loosely as well. But I want the sky
to be pretty much, you know, a nice
flat wash like that. Now, what I want to do is
pick up a bit of purple. I've got some purple
already on the palette, and let's drop some of
this into the sky, like, just a little bit there
for this, you know, this cloud there, and then maybe a bit
on the right there. Okay? This will just
blend in nicely, a bit up the top here,
a bit here to the left. Here. Maybe a little bit of something
down the base as well, with some pink mixed
in, like that. Some softer sort of marks there for maybe
some clouds lower down. I make this one a bit more darker and just stick out
better that one as well. Just a more obvious
looking shape. Great. Let's give this a
little dry off now. Okay, let's work on this
next part of the scene. And really, what
we want to do is get in the snow of this scene. And we have really
just a bluish value, like a bluish purplish
sort of value, which I'm going to mix up here. Okay, it's really just it's
really just a bit of purple, bit of ultramarine
blue mixed together. And let's just go straight in. Let's have a look at this. It's approximates
that value. Yep. That's too dark. So just add some water again. And, um, let's
move this through. We want this to be fairly light. So we want the sky
also here to be, you can see, just the
edge of this mountain. So we're gonna drop in a bit
more paint up the top here. There, let's bring
this down like that. Okay, there you can see
just going across now. I'm keeping this really loose. There coming up
next to it there. There's more okay. I kind of trying to strike a
balance between making sure the mountains come out in front, but then also a light enough so that when I apply
that second wash of black, it's going to show through. So something like this. Just kind of all in one. Just get this all
in the same time. Keep flicking paint
around. Don't want that. Good. Yeah, that goes up. Okay. And this stuff is all in the rooftop of this
building here in front. So let's get some of that in. I mean, it's really
over the entire scene. It's let's just get this done. Bring this wash down the page. More blue. And this rest of this sort
of snowy kind of color. Okay. Really, the whole
thing you can just go over as long as I keep
a bit of that light, so I need to see through
that pencil as well, so I know what I'm actually
painting afterwards. There we are still
kind of like a pale, bluish, cool sort of color. Great. There we have it. That's the sort of
snow wash. Now, I'm going to start working on some of this granulating
color in the mountains. So I've got some brown and
I've got some lunar black, which is basically Mars black.'s drop a bit in here.
Let's see what it does. Drop in some here, here, up the top here where
it kind of, you know, you've got parts of it that just stick out a bit more like that. Okay. This comes down here. This part of the mountain
is actually a lot darker. I need to get a
sharper edge here. It comes out in front of that
mountain behind like that. Runs down like this, finishes off, kind
of trails off there. But then in this
mountain behind, you've also got a little
bit of this color as well. I'm going to drop some
of that in maybe with some water in there to
just encourage it to bloom a little and granulate get a bit of inconsistent
drying like that. Some more here.
Let's have a look. Yep. So bits here, tiny little mottled
little dots of color. You know, there's
something here as well. I just want to paint
some of this stuff in. This mountain, there's,
like, some little bits of darker values in there. The same thing goes.
I just drop in a bit of a bit of water. And let that kind of move around a bit so
that it can imply, I guess, a bit of this
rock or whatever. Here in the background, I
think I'll mix in a bit of purple with the
black that I have some other types of color
running through in here. The It's not a big deal, 'cause it's quite far
off in the distance. That Great. Some stuff here in the
foreground, as well, you can see, these
like shrubs here. They need to be brought out. Just go to feather feather a bunch of these
around like this. There we are. Just
get that through. Some there. Up there, perhaps. Okay. Then we're getting
on to the house now, so it's kind of got to be a
bit more careful with this, but I'm going to go into
the rooftop, like here. And I've got a lot of paint
on the brush so that it just doesn't hopefully
spread too far. There's the front
part of the roof, that darker sort of
section of the roof. You've got a bit of light
showing through there, but then you can cut around, use that black and work on these lower
parts of the house. Didn't spend all too much
time drawing these in. But we can spend
more time right now, because this is
gonna obviously end up in the final
scene afterwards. So more black here. Great. Here we have it. Just leaving strategically
some areas that are a bit lighter on there. Yeah. This right hand side as well. This section should have
more darkness on the right. Like that. Again, leaving out
these windows, I might put in a
bit of a little bit of yellow or something in
there afterwards, let's see. Black again here on the
right hand side. Great. All looks pretty grainy at
the moment, which is fine. Um, I want it to still
look a little abstract. Yeah, you can see this little
balcony area especially. It's kind of joining on, so you can see underneath, it's actually a
little darker there. Yeah, but I just want
to preserve some of that light later on. I think what I'm going
to do as well is work on some little darker bits behind on this mountain to try to bring out the
rooftop of this building. Can you see there should
be a rooftop here. But it's not really
showing through. But by doing this, it helps to bring it
out of this Area. Should be more on
this angle, actually. Little chimney. Let's put the little
chimney in here like that. Good. And on the rooftop, you do notice there are some
little bits of darker color. There's little bits of black there that show
through sharper bits. Let's imply some of
this stuff here, where the snow hasn't
quite covered parts of it. You know, even here on the right hand side,
let's do that. Maybe a bit up here as well. Okay. We need some of this. Yeah, and that idea I had with the
mountains is important. Yeah, it's gonna bring
out the rooftop. Otherwise, it's going to be tricky to imply any
of that detail. Okay, here is the kind of
road or whatever that's just sort of leading up there. I'm going to give this spray
again to reactivate some of this so that we get some, uh, So more wet and wet work. So I can get some more wet
and wet work through here. Okay. Good. All right. The house still looks
pretty abstract, and we'll work on
that afterwards. Okay? I think I just
thought I might add in another layer of trees or
something here as well. Maybe some little just getting a little bit
closer to the house. I've also got this fan brush, which I'm going to play around
with a little bit as well, just with that same black and then flick up some
of this stuff here for the trees and little see these little
shrubs and things. I think that's going
to be important just showing through
very quickly. And if it looks
too sharp, again, just sort of spray down spray down the page
or touch like that. That it moves a little. Even back there,
there's potentially some little things as
well I can add in. Great. Some bits of black
running through, some darker bits of black. I need to really imply
this better in some parts. It's tricky when you're painting went to wet because
a lot of this stuff tends to separate out and run
off. If you're not careful. These ones even starting to
sort of lighten off a bit, same as the details
in the house, but with this stuff, I think afterwards, I can
put in more detail anyway. That's going to be fine.
Okay, so I want to put in some tree branches, some indication
of tree branches. I've got some purplish black, and I've just got the black
again mixed together. And you can see some branches coming over
from the left hand side. I'm going to indicate
some of this that. Okay. Is this some of these branches you
see going into the sky, there's not much wet and wet
effect going on there, okay? Because it's the sky is
pretty much dry, okay? So I like that. Just want to make sure
we've got some of that happening coming in
from the left of the scene I hope
to kind of frame the scene better than the
reference, kind of implied. So that. And I want to make
maybe like a tree, a tree shape come in from
the left like this. See? A tree shape. It's
another bit there. You know, that will
kind of help frame the house. Scene a little bit. And not only that, but
also on this side, some shape, some
little tree shapes, also, branches running up
through the scene like this that same color
that same sort of black. Okay. I just want to maybe feather
in a bit of this down below here for another layer of
these shrubs or something. I think that might
be a good idea. Most of it is just
painted all this, it's almost all
just wet into wet. T of darkness on this tree, as well. Yep. I think maybe another one
running up like that. As Yep, something like that. Just redoing this house, the rooftop of this house. It's tricky. The paint has
started to thin out. I'm having to go
over it just another time to emphasize this again.
49. Day 21 : Stockholm Night Drawing: Let's get started with
the drawing here, first thing I want to
do is just put in a bit of the area of the ground. Going to start drawing
a line like this. Leaving a slither of grounds there because we do have some people walking across
that kind of thing. Now, these buildings
are a little bit easier because they're
pretty much in the dark. And the way I took
this photograph was the path and the centers, pretty much, so you
can see all lit up. And then you kind
of got the side of the building that goes
all the way like this, and then you've got the
top of the building. And, of course, you know, there's different parts
of the building as well, but for the most part, it's just a large
silhouette, okay? You've got a bit of
the rooftop like this, and the rooftop does have little things, you
know, sticking out. Uh, chimneys, that sort
of thing coming across. Then it kind of goes off. There's a sort of section
like that almost. And then there's
a bit that drops down and then extends
to the right. So let's go and basically it's put in that sort of silhouette of the building. And you can also
kind of just put in little lines like this. They kind of just oops, perspective lines
of the building. Okay, that one
should be straight. Then you might have
some more like that. And also, it's good
to just put in a few little windows
here because these are going to be gonna try to preserve some
of those afterwards. Alright, so just preserve
some of those windows after. It's up to the top here,
there's maybe, like, another bit here, some
windows here as well. I'm not fussed exactly as to what what is up there, you know, as long as we have some light showing through, you
know, for the most part, all these buildings
are quite dark, so it's difficult really to
pinpoint what's going on. There is a lamp here, okay? But before we do that, let's get in this sort of
front part of the scene. Here, you can see there are some of these
little poles here. Then there's, like, some
railing here that just goes all the way into
the back like that, and here to the right, as well. This is an area actually of the where the river
runs underneath. So you've got a bit of this
railing, this handrail, I suppose, there, and
that sort of goes off into the distance
down there as well. Okay, pretty basic. Now, the good thing is that
we've got these nice sort of shadows running to the right and you've got people as well. But before we get
in those people, we want to get in these other
buildings and things here. Okay? So there's this larger
sort of building here in the back, you know, here. Not a huge deal,
something like that. Then you've got the
side of this building. It's almost as tall.
Look this sort of side part of that building
goes up like that there. A bit of detail here on top. Then you've got this
bit that sort of extends a little bit further up, as you can see, and there's a longer part
of the building there. Okay. Let's go. There's
some details here. There is kind of a
tower on top here. I'm just drawing in
a bit of this shape, I suppose, easy sort of
shape like that to the left. And then we've got some bits
and pieces here as well. What else do we have? You
know, we've got windows. You got a window here. This slide is actually
a little bit darker, so there's not much
to put in Alright. Let's kind of mimic that
left hand side as well. You've got a bit of path
coming up like that, and then you've got this path running there, and of course, you've got this kind of darkness here and the rails there, and you've got some
of these little you know, bits as well. It's part of the railing. To fussed about the
details of that. Now, let's put in some people.
I've got in a person here. Let's just drawing the head. Maybe there's a
person behind here. There's another person
in front here as well. There's another one, maybe
a little bit closer. Let's just put in
some of these people. Whoops, and a bit far
there, doesn't matter. Okay? This guy may look like sort of walking to the left or
something like that. There, you know, and in the
background, you've got, like, little figures just
in the distance, as you can see, just
walking in the distance. So just want to put in a
few of these little crowds, I guess, coming over this
elevated area, like that. I think it might
be good to maybe put in another figure here just to even it out a touch
so that we've got some, got maybe a couple of
figures here would be good. That. The, just sort of
going through the scene. I, I don't have anyone up on
this kind of bridge area. So let's just draw one
in, maybe a couple here, just looking over the, you know, maybe just looking
over the the edge. Sky's kind of
looking to the left. Maybe someone else here as
well, sort of looking over. Yeah, just the figures, I think, just make the scene look
a lot more interesting because there's going to be
a lot of darkness in here. Fantastic. And I also want to get
in a good amount of darkness here in the
ground, as well. So let's go ahead. Let's get started with
this painting now.
50. Day 21: Stockholm Night Painting: Okay, so first things first, I want to get in a
lot of this light. Also forgotten one
more thing here. These round parts should be indications of these
lamp posts, okay. We want some lamp posts in here. There's another
one here as well. So just kind of
pick out a couple of spots where you
want to do this. I should have done this before. But there's a few
more, as you can see, that sort of just
go into the back smaller and smaller as we go. Okay. Now, with the
light in this scene, I'm just going to
pick up some yellow, really bright, sort
of vibrant yellow. This is Indian yellow, and I'm just going to drop this into some parts like this. Alright. And I want that to be pretty
vibrant and stand out. We've also got these
sort of windows behind. Some of them are just, like, a little bit yellowish. Some of them have more
contrast and vibrance in them. So you just want to dab on a bit of paint
into those windows. You know, this is a very
loose style of painting, so I just want to make sure
I've got some light in here in the background
that we can imply, okay. And not only that, there's a ton of light
back here as well, kind of, you know, just from the buildings
and the you know, all the back area here as well. This should just be pretty warm. Now, I might use a
larger brush for this. Alright, around here, just
to make sure I've got some, I guess, a bit of warmer
color showing through. Me yellow perhaps at
the top there as well. Yeah. In the ground, I think a bit of yellow
would be nice or some kind of orangey
yellow as well, just mixed into the whole thing. Of course, I'm just going
to, like, doll down, cut around the figures a bit as well that so that there's
some color leftover. All right. Look at
that. Just going over the top of the figures. Okay, because getting in this
light is really important. Once we put in that second wash, once we put in that second wash, it's not really going
to look so bright, but to have some in there to begin with is very
important, I think. All right. I put some
orange in there as well. Bit of I've got some yellow
ocha in here as well. Just to make sure
we've got some of this warmth back here, too. Fantastic. Okay. It goes up
into the roof even like here. It's not a huge deal, just a nice back in color. Warm values to the right. I'm not worried about
painting the whole thing, but just give it some warmth is what
I'm trying to do here. Now, the sky wash, we're going to have to
get in quite sharply. But I think we should be okay actually because we'll
go over the buildings again once more. So I'm going to go
and just drop in in the sky a ton of blue. This is going to be, I guess, like a purplish blue
would be good for this starting off
at the top there. Kind of purple and
blue mixed together. Remember this is a
Nocturn sort of scene, so you're going to get you're
going to have to make this sufficiently dark at the top. Alright. Let's continue down the page. More blue and purple
mixed together. Drop this down. Some of this
might go into the building. Don't worry too much about it. The main thing is try to get in a nice even wash for the sky. Um, yep, purple works very well
against these warmer values. Alright, just kind of creates interesting bits and
pieces here where you get, you know, bit of the
light showing through. And look at how I'm just sort of cutting around as well.
You know, some parts. I'm cutting around.
So parts I kind of let join on like this. Let's drop this further down. Bit more blue in that mix here. Good. I mean, at this point, I'm just glancing at the reference
every now and then. I'm not by any means, like, obsessing over it. Oops. There we go. This will sort of mix
together in places. I like that top
bit. I just leave that and see what it does. This color downwards a bit. Encourage that to flow down. In the sky as well, I'm kind of tempt to just pop
in a bit more purple, like, to get some cloudy areas, some indications of some
darker clouds in here. So I'm just dropping in a bit of purple paint like thicker
purple paint in areas. Make these clouds a bit
smaller as we get down. Let's have a look maybe up here. Yeah, that's just I don't want to I don't want to
overdo this as well, because we still
want the sky wash to have a bit of
light in there, okay? So just a little a touch
of that's gonna be fine, okay? Touch of that. Alrighty. So the next step here, we're going to use some
darker values, okay? I'm gonna be using a bit of lunar black and also
some brown ochre. And this is to get in there kind of darker silhouette of
this building, okay? So I'm going to start
maybe off here, and I'll leave on as well, the a bit of light maybe on the right side of that chimney or what
have you there. Let's try to it's a chimney, sorry the tower, what
I'm saying there. Okay, there's a bit of
detail there as well. Okay, and you cut around again, just leaving these little
spaces and bits and pieces so that it's
not, you know, yeah. Completely just
obliterated. But, yeah, you do want some darker contrasts
in here for sure, okay? I think the trick is, too, um, just find ways to blend
together different elements. Like here, especially this, we got to cut around that
circular light there. Okay? Bring this down. Okay. And, look, this area would
have maybe a bit of light on the right side
of the building there. So I'm going to just
leave that out. And again, just
continue carrying the same wash down the page. I want that to sort of
hit the sky and have a sharper impact like that. If some areas are too light, I'll just drop in
a bit more color, a bit more of that black, okay? Cutting around again, just
remembering that there are some windows or
whatever that you might want to imply in here, okay? And some purple as well might help a little bit of purple
into this darker value. Okay. You got another
one here. Good. We got down here, I
can just drag this down and again just
create this archway, this indication of an archway, and then another one here to the left side as
well. Like that. Great. Let's move this down
all the way through. I'd like to also
make it a little bit darker down the
base here as well. Little bit darker down the base. Cut around this figure. More water and darkness down
here just to encourage, um, a bit of anchoring, I guess, for the building, that? Good. These buildings
have, like, a ton of, you know, detail and
windows and stuff in here, which I can just sort of imply. Um, that not much, but just a little something. And then maybe this section
there is a bit darker. Then we've got some little bits of line work as well
running through like that. The trick is just, you know, not obliterating
all of that color. You're kind of leaving
parts of it out. And that way, it
looks, you know, that light from the scene
from the, you know, lamps and things like
that is just reflected into the off some
of these buildings. But down in the
background there I thought this might actually
be better if it was slightly darker to make the figures
in the front come out. A touch. Good. And back there, you know, it's actually a lot lighter. Um, there's not much I can
really do about it now. I might be able to lift off some of that
paint afterwards, but I'm just putting in
a bit of yellow there, I think I'll have to lift off
some of that paint to make it lighter right in
the background later. Let's not worry about
that just yet, okay? So that building to the
left is looking quite okay. Now I'm going to start working
on this building here. Let's drop in some
darker color here. Okay? This is just a bit of Mars
black or lunar black. Yep, there we go. Again, cutting around some
of these, like, lamp areas. In fact, kind of forgotten to do it over
in this other area. That's no big deal. Yep, yep. I really love how the
yellow seems to form a nice kind of granulating
effect with the black, with the black sort of
coming forwards and the yellow kind of
as you can see, peeking through in parts. Okay? So that's sort
of an area there. This can be. Again,
I'm just leaving some light on the building. But, you know, the
tops of the buildings, you can see there are
little kind of details like this sharp sort of details that you might
want to indicate. I think it's a good idea anyway, chimneys and stuff to just show the tops
of these buildings. And I'm really just
simplifying this down as well. As you can see, I'm not really
going that dark in areas. Let's just go across
here, bring this down. Again, you know, you've got
areas that you can just cut around and just make
it a little darker. This window, see, cut
around that window, this one here, this
lamp post here, just cut around that light. Same deal here, cutting around, putting some darkness in there, but not fussing about too much. Sort of I try to
give things one pass and then continue on. Okay. This is just
a round brush, by the way, I'm
using a round brush so I can get in a
bit more detail. And again, I'm picking up some purple and putting in
a bit of purple because I feel this wash is too
too much at the moment. It's just too
light. Okay? So you can drop in some of this. This whole, you know, all these buildings in the back, they need to kind of look
like one big object. Okay, one big sort of
mass out in the distance. Coming down here, more
windows to the right. Let's cut around like this, here, here. Fantastic. Okay. Now, what I want
to do is perhaps wet some of this
ground area, okay? Because I want some
of these buildings, the shadows and things
of the buildings to actually blend
downwards a bit more. And yeah, just
look more organic. So I've got some sort
of spray bottle here. I'm going to give
this area a bit of a spray underneath like that. This is going to encourage some of this water to run down. But the main point of it is
for me to you just have, like, a wet surface so that I can pick up
some darker value. I'm gonna pick up some
purple and a bit of black. And let's see what we can do. So there's got to be
some darkness here, for example, and a bit of a shadow running to
the right here like that. Maybe for the person. There's these shadows
for these, like, little, what do you call them It's here. Let's have a look at this. I might get in a larger sort of shadow running
there, a bit here, but also member leave some
light peeking through so it's not just
complete just darkness throughout this whole area. This needs a bit of shadow too. This area there, this sort
of bit what do you call it. There's not really much
sharpness in here yet, so that's something I'm
going to do later on. I'm going to work
on a bit later. I just want this to kind
of blend and melt together a bit first. Okay. Okay, like that. What
else do we have? There's a bit of darkness
running through here as well, through the center of the scene. It's kind of like the figures
when they walk around, you also get a bit of
darkness on the ground. So that's like you have
to imply that, too. You know, it's all very
abstract at this point, but you can kind of make out
what's going on roughly. And you see I'm
just cutting around the heads of these figures
a little bit as well. Even here, you've
got a figure here. I'm just sort of dropping in
a bit of this dark paint in the background to really make sure that their
heads come out. And, you know, you'll
get a bit more darkness at the base of the building. If you just drop in a
bit of extra paint. Hopefully, this doesn't
spread all too much, okay? You know, of course,
there are also some darker windows in here that I think
could be indicated. There's a bits inside. You know, even some
of the windows, as you can see, there's frames. So you've got to also do stuff like this in
some of them so that they look more interesting. They don't look all
the exact same. I do like to save a lot of
this stuff afterwards, though. So kind of be sparing
with it at the moment. Yeah, I like to just
in the final wash, really exaggerate this more. Okay, good. Let's have a look how
this is appearing. Yep. Some more darkness at the base, maybe some purple again here
just to add some coolness, not just the same coolness, but here, more color as well
that needs to be darker. And here maybe, as well. Sharper sort of point
area and there, I guess, around
the figures. Okay. But strategically leaving out some areas of light as well. Okay. And what I'll do is
maybe just give it a few little britches
of water in places, maybe here through
that building. And this one here, maybe a bit here in the
foreground, as well. And I want to encourage a
bit of the water to run, work its way through and kind of mix a bit Okay, everything's dried off now, and I will put on some
finishing touches. And some of these
finishing touches will also just involve lifting off. Lifting off some paint, okay? But let's get some
darker paint first. And what we want
to do is, I guess, touch up on some areas
like I've noticed here, I've forgotten to put in
this section of the roof, a little bit up the top there. But there's things like,
for example, this, you know, a little bit of
detail up the top, okay? Kind of little almost
finishing touches, I suppose, just running
through some parts. And it's not to it's not to take away from
that previous wash. It's just to add on a bit of structure to what's
happening in here. You know, you might
have, for example, you know, I've picked out
maybe like a window here, like a dark window, the
shape of a dark window. You have, you know, a frame, a window frame
there, for example, or, you know, there's
something here, like, another window
in the background. And I like to sort
of put these on in a very sort of loose
manner and not worry about the getting in
all the edges of the lines. I mean, you sort of just let
it do its thing like that. And you might skip a part of the line or
you might just do, like, one or two sides of the
actual window frame itself. There's something
running across here. Like, you don't have to you only need to imply a little bit
of what's happening, because the moment you
start doing too much, it becomes you just
ruin it, really. So, yep, let's have a look here. You've got also, you know, these bits and pieces that
we'd lost out before. So some little details there. This is really just, I guess, some of the railing
that runs across, which we'd lost out before. So I'm just implying
a bit of this here running through
in that section, maybe a bit of this a
perspective line as well here, there, like a perspective
line just running through. I'm there. You know, some of these, like, again, these little pools
that we missed out before. We can connect some
of them up like this. This side, let's get
in a few quick ones. But here as well, you do get some of these again, fencing off fenced
off areas here, it gets smaller as you
go towards the back. It's just little
tiny little details. You know, kind of like
the previous detail I put on there with
some of these frames, so I'm just enhancing
it a touch. I'm putting on the remaining
part of some of them. Uh You can also sort of put on details
like the rooftops. And, you know, it's very hard to see exactly what
is happening in here, but you can put in a
few little, you know, see these little lines running across the
scene like that, running across the
buildings to separate out maybe the floors of
them in parts anyway. I don't want to overdo it, but it just adds a bit of extra perspective
without much effort. And you have all
that previous wash just sort of left
in as well. Okay? So here are the people I thought of getting legs for these, you know, couple of people here. Quick indication of
their legs, walking. And you got connects on
to the shadow there, and this one will need a
shadow, too, like that. That just needs to be
a bit better there. Yep. This one here person there, a bit of shadow, and I'll
get that one in as well. Uh, we go. Not that. This person could just be
wearing a lighter shirt, maybe can't see so well, but that looks okay. There's a person here. Very, very um, not too detailed. I thought a person here as well. Legs and the shadow
running to the right here. Like that Mm hmm little people walk around and you need this stuff
here because it just makes the scene
look more believable. You know, even in
the background, there's people walking
around and they are forming like a little, you know, crowd out
in the distance, and you have to imply some of this stuff
back there as well. I mean, it's not even much,
but something, right? This person here, I forgotten to sort of put
on the legs properly, but it should be running
to the right, as well. Same with these, like,
bits of the fence. There's like these
smaller fence, but like these three poles
that sort of stick out here. And whether you want to actually put these in
or not, it's up to you. But I think they just, I think they make the scene
look a bit more interesting, but you don't have to do this. Okay. Look at what else. I can't really
quite see what's on the top of this building,
but that's fine. Uh, you know, there's a whole
lot of things you can do, but I think that's okay for
the detailing kind of work. Now, I want to just get
rid of a bit of paint to bring back the
light on some areas. I'm gonna drop in
some clean water to some of these sort
of spots you see here, just this area where I've got, like this light you know, like this, um, part
of light, I suppose. You can bring that back.
What else? Maybe a bit here. You can try to bring
something back here, here. Okay? Just like I'm going
to need to connect this onto a, you know, hole. These main ones here
are the most important. In fact, I've kind of forgotten about this one. Where is it? That might have been
there. I forgot to let's see if I can just remove this paint and get
in some indication of. Alright. There we go. Maybe you get
in a bit of yellow here. How does that look a
bit white or something? All right. Let's get
in a few more sort of round lifting off areas. Again, these are
just for the lights that line the street. So it kind of looks
like there is a light source, I guess. I just goes to show, if
you go over something, it's not the end of the world, you can still, you know, recover some of this paint. I just blur off some of these windows a
little bit as well. They look a bit too
sharp in parts. You know, I can lift
off a bit of paint in other parts as well
if I feel like that's just I need a break
in this whole area, like a bit of yellow up there. Yep. It's just a way of putting in getting in
a little bit of light. And this whole area
at the back as well, I did mention that this
would be better if I just was to lift off
some of that paint. I think that's going
to sort of work. I won't be able to
get it in exactly, but it does look a little bit lighter there
in the background now. Touch lighter in some spots, you know, not hugely
fuss about that. And of course, some
of these figures, I do think it's getting a bit of a bit of light on
this figure there. This one here looks a
little bit too washed out. I want to just bring
out some details. Okay. Some of them just put the heads in
be easier like that. Brown maybe some hair. And finishing touch just
to get in the stems, these like stems but you know, the poles run down some of
these, like street lights. I got there, and of
course you might get a bit of shadow running
across the ground. Connect on with this
light up the top, but I just want to soften
off a bit as well, the edge of that. There we are. These two are probably the most important because they look like they're so close to
the front of the scene. It's all just a bit of a
little touch of water. Then just lifting off. You can recolor it a
little bit as well so you can see. Okay, good. But I'm not quite happy with this figure
here on that side. I think I might just
reduce him down to, like, a darker shape like this. That's better. I think,
looks more interesting. And we are finished.
51. Day 22: Bergen Scene: Alright, let's get started
with this drawing. And what I want to do
first is kind of put in a rough line here where the
bottom of the scene starts, and it's kind of where the
darkness is dark areas. Then moving further up, we've got this kind
of mound of rocks. There's a bunch of them sort of just sort of lying
on their sides, sort of jagged sort of
rocks sticking out, and you've got kind of moss
on those rocks, as well. So it's kind of, you know, just a pile of pile of
rocks, really, and sand. And you can see here even
just, you know, in the ground, there's this sort of
larger style rocks, and I'm just trying to
indicate them very, very loosely like this. And this is going
to be interesting. We're going to get some type
of effect here, I think. I'll try to get the water to run through this area when I re wet the paper to create a
incline sort of effect. Okay. But for the time being, we just want to put in a brief sort of indication of the
landscape like that, okay? And a lot of these rocks, we don't don't have
to really bother with huge amounts of detail, just an indication that
they are there to remind me later to cut around them,
maybe indicate them, scratch some bits
out here and there, trying to sort of also indicate the fact that there might
be a bit of a path, you know, laid and
through this area. So like that. Okay, so
yeah, over here as well, this is where sort of some
of the trees start and you can see they go all the way up. There's just so many of them, and I am wary to
not overdo this, but have a brief indication
of the two big ones, the two really tall ones, as you can see here,
really tall one. And I do like how do like how the branches just sort of go through this whole area, and this is going
to be interesting. I think I'll try
to indicate that through a bit of brushwork, plus, of course, some wet
and wet work as well. Okay, sort of move all
this detail through. There's another tree here
to the left as well. I think I'll leave
that one for now. I really like the
fact that there's a couple of people here, tiny little people here
in the background that just give a sense of this
enormous scale here, and I was walking
through this area. It was basically a
mother and a child. I think I put the child here on the right, perhaps, like this. I was walking next
to the mother here. Okay. Something like
that should be good. And, you know, there's
other trees here. You know, there's
another one there, like a trunk of another tree, another one there, another
one sort of here as well. These are pretty
dark looking trees. Here, there's sun coming
out from this area as well, which we'll do afterwards. But for a drawing, I think
it should be good to go. So the first thing
that I want to do is add in the lights. Now on the back of
the scene here, you can see there's lots of
really light sort of green. I'm just mixing up
a bit of dark green with some yellow, okay? And I'm popping that
through here at the back with the
yellow, as well. I'm trying to be a bit
more generous with this so that it just stays a bit brighter and it's very watery. I mean, there's only five to
10% paint in here, right? So just coming across here. There really sort of mossy, grassy sort of area. There, I'll cut around
that bit for a bit. And I also think some yellow
ochre will be good here, kind of like a dull down yellow. I'll mix a bit of gouache into it as well to hopefully try to create a more
milky sort of look. There we go. Just spread that throughout
the back like that. Again, it's just
really light paint. I'll probably look too light and weak at this stage, but
that's what you want. You don't want it to get too
dark and saturated just yet. Remember, this is the
light of the scene, so you really need to preserve
that as much as you can. All right. Good.
That's about enough. Now, the top of the scene, we've also got ourselves
a bit of blue. You can see just a
bit of the sky wash. I'm gonna pick up ultra not
ultra some cerulean blue, really light wash
of cerulan blue, and you can see just a little
touch like that. Okay? You can see some
of it sort of come through the tree like there, but apart from that, it's
just a bit up the top. Okay? What I'll do as well is wet
this bottom part a bit more. Okay, so that this
stuff tastes wet. I don't want that to disappear. Now moving up, I'm going
to put in some green. Now, this is just a
bit of undersea green, which is basically
a darker green, and I'll mix this in with a
few other colors as well. Alright? No fast exactly
what I use in here, but just a kind of
nice greenish value. Okay. Move this around. And
it's a little bit darker than this area
in the front, mind you. So when you're painting this in, make sure you make it darker. And I also like to drop in
perhaps a bit of purple into this mix so that you've
got some you know, a bit of variation in color. It's not just the
same, you know, green running through
the entire thing. And now everything, you
know, as you can see, everything is pretty wet. You can just drop the color in, and it just very nicely blends together where
you got the blue, as well. Can you see I'm just kind
of flicking that color in, leaving some of the
blue but again, these trees are going to
show through a little bit. I'm going to let them just indicate the base of
that tree you touch. Now, I need to make sure that the base here is a
little bit darker. So I'm going to just add in a bit more darker
paint at the base. But keeping in mind,
this yellowy stuff is going to trying to get some of the yellowy
stuff to go upwards. So if you just slant
the page upwards, you should get that effect. All right. This whole area is kind of
like the start of where the lighter area of the grass, lighter moss and stuff
like that begins. All right, so you want to make a bit extra contrast
in that section, okay? And then over here, you can
see it starts getting dark, right around about here. And I'm going to
mix in some brown. So I've got some
brown ochre here. And it's also
green. It's kind of like brown and green
together here. Bit of I think a bit of blue or some cooler paint
would be good, too. So purples even. Yeah, just to keep I don't know, just make it a little bit
more interesting in here, some coolness, I suppose. I'm going to drop in some black, some granulating black, as well. These two people here, I can see them and they just, you know, make them kind of
standing by the edge there. Okay, let's drop in some this kind of
granulating black color. Here, I got also some larger
round brush for this. Okay. And what I want to do is just, force this color to really Stay onto the page here and blend in
with everything else. All right. So we have some amazing kind of
granulation effect. But I also want to
make it pretty dark. Alright. I'm going to make it
pretty dark because I'm going to introduce some
water afterwards in this section and
that should cause it to spread out even more. More darkness here at
the base like that. Here, maybe mix it a bit with
some granulating purple. So it looks a bit
different in parts. Yeah. Of course, you've still got
those other colors as well. Um, I'm thinking
whether I want to put a bit up the
top here as well, a few brushstrokes perhaps
running through in spots. So the trees as well,
I'm going to get in with this granulating dark value, but before I do that, I
have to actually wait for all this stuff in the
background to dry off. So I can't get those sharper trees ingest
yet. I've got to wait. So, um, there we go. I'm just going to play
around with this stuff. And the center of the
path is kind of darker, as you see, this
sort of area here, so I might just indicate that. Going up here, it's also darker. Here, reworking
it a bit as well. Like that. If I can drop
in a few bits of water, maybe coming through the top. Like there, just
drop in a couple of little bits of water and just let it run through the page with some
other black paint. I'm just hoping this will create some interesting marks for the water kind of traveling down and create some
pathways, I suppose. Um, I got to be quiet, careful with this so
that I don't overdo it. This top section here is
kind of come down a bit, so I might just lift off
a little paint there. There you are.
Okay. So, kind of, I just want this
interesting effect there. I want to dry the top
off a little bit. So this top section of the
page has started to dry, while I've dried it
off pretty much, maybe a little damp, but, you know, 80, 90% dry. It's time to pick up
this darker paint again. I'm going to use a bit of this lunar black or mass
black with a bit of brown. And let's get in this
large sort of tree. You know, it sort of starts all the way down the base here, see if I can just join it
up with the rest of what's going on here, right? We know it sort of begins
roughly about here, right there, and then we're
going to bring this up. I also am mindful that
I don't want to spend too much time putting in all the little
details of this tree. You want it to be quick and kind of quick and matching with the rest of the
style of this scene. So that's the tree, you know, bit of brown in there as well, but it's mainly just
this darker black value. And I'm trying to
get it to blend and mix in with the
ground as well here. Okay. Oops, this probably just make this a bit
thicker here, maybe. Yep. Okay, let's go for the
one here to the left. It sort of starts
maybe there and go up. Let's get this in. Okay. The vertical. Really just a nice
little vertical. You know, you might
have another one here, like running through, holding the brush near to
the base as well so that it, so that I can get these lines in faster and at more
straighter, as well. I think this one should come forwards a bit more.
This one here. Yeah. That. Good. Okay, let's have a look.
What else do we have? Yeah, this tree sort
of goes through. We've also got some
smaller ones like here. You know, they sort of just
disappear upwards into this mass of leaves and things. So I'm just getting in a few vertical brushstrock
strokes here for this. I'm going to have to re
wet that area above again as well this area to get
in some more details. But let's get in this
vertical tree to the right. There's two of them, one here, and then one that sort of
runs up next to it like this. Alright. Good. I'm going to pick up a little rigger brush for this round brush
round rigor brush. A larger belly, but basically any sort of
rigor brush will work. And I'm going to
hold it at the end, and let's just try to
get in some of this this detail here of the branches running
across the scene, okay? Of course, you get some
of it just interweaves and things with the other
trees and stuff here. I mean, it's the
same with this one, perhaps. Let's just get this in. This is easier to do
when the paint is completely dried as well like that because you can
get sharper sort of marks. Um, but at the same time, I think I want also some darker maybe some darker
values here for, you know, some of
the background. So I'm going to just re
wet this hard again, anyway, and just create a bit
of darkness here and here. Alright? A bit of that sort of color
moving around a bit there. Okay.'s top there as
well, here, maybe. Anytime it sort of looks
maybe a bit too sharp, I like to just change
it around a bit. But keep in mind, we do need some sharper values and
marks in here anyway. So this is important
to put in Okay. But as you can see, it's all these tiny details that really come together and
make it look like something. The bottom of the trees here
as well, as you can see, they've got a bit
of a proper trunk and the root system established. So I'm trying to indicate a little more detail
at the base as well, maybe another one here, too, another one here that
just runs next to it. Yep. Yep. Some rocks and things here and just try
to get in a bit of water, maybe, um, to work its way up the little mountain mountain, but, um, It's a
little hill here. So introduce a bit
of water and let it flow through, actually, just to create a bit
of bit of interest, some granulation, up
the top here as well. I just want to do some
of that up the top. And help join up some of these areas of
the trees like this, you know, same deal. So there's just a lot
of darkness in here. But it's contrasting very
starkly with the light. So we have to we
have to imply that. And also, a lot of this darker stuff kind of
helps to frame the scene. So if you don't leave if you don't add some of this scene,
it's going to look funny. It's going to look
really out of place. Yep. Some more of these brush strokes. Running to the right there helps to join up
the scene a bit. See if I can if it's time, might be able to scratch
off some of this paint to create these little rocks, areas of rocks and things
that are in the scene. Kinda make them a
bit bigger down the front that helps swell I put in a few sharper
marks as well for grass or things like growing
here in the foreground. While I was drying
this, I was also picking up a bit of
paint and just adding it through this center
region again to, I guess, bring out this some of these branches
that sort of connect up the scene from
the left and right, because this has to
be done wet into dry. Yeah, it's just looking a
bit too abstract before. So Yep. I'm gonna put in these
figures, maybe here. One figure, another one here. You can't really see too
much what's going on, but just pretty basic. I might put in a bit of highlight
the figures afterwards, but you can see, like,
a couple of them there. Okay. There we have it. So more brushstrokes joining up. Let's give this a little dry
52. Day 23: Icelandic Mountains: Scene. It's pretty much
a black and white scene, and I'm going to do a little
bit of drawing up the top here just to put in the
edge of the mountains. Okay. I think this is
about all I'm going to do so that I can generally
get in that sky. There's a bit of
the background land around here where it ends. I've got the river
running through, and I'm going to just leave
this for a bit later. Okay, you can barely see this, but it's more just to separate
the sky from the Earth. Probably the fastest watercolor
drawing I've ever done. So let's go ahead and get in
some of this sky wash. Now, the sky wash is
something that's quite important because we
need it to be darker. Darker than the rest of the sin. Got a small, well, not a small, but I guess medium
sized mop brush. And I think what I'm going to do is use a bit of a grayish, purplish color left over
here on the palette. Right. Just a bit of this
grayish, purplish color. And I'll start off right
here, pop that in. Maybe a bit more kind of a
cooler color up the top. I'll slant the paper down
a little bit, as well. Maybe a bit of cerulean
at the same time. Okay. But mostly sort of
a grayish color. Alright. And as I
move down the page, I'm going to just drop in
a little water like that. I want the sky to be, you know, a nice kind of even color. And as we move
down, like I said, you're just sort
of cutting around this edge of the mountain. And there are parts where I'm
just leaving a little bit more lighter or more
jagged, I mean, Okay? Yep, just sort of following this down the page till
it gets to about here. And that's it. That's
the first wash. I'm going to give this
a really quick dry. Moving down the
page now, I'm going to get in some darker color. I've got some of this black. Now it's a granulating black. You can use any sort of black, but granulating, I
find works best. Especially for this
sort of scene. And I think I'll get in edge right about here coming down. This has to be it has
to be sort of wet on to dry in parts of this
because it's yeah, we've essentially got
some sharper sort of edges here for the snow. So I'm trying to get the brush
to sort of come through, make some marks on the paper, some little smaller
marks like that. You know, at the
top here, that's not you can't really tell there, but there's also some other
bits that are up there. Maybe a bit up here, you know, just to take the
darkness of some of this mountainous region. But a lot of it, if you
look at it, is just white. So you're just implying some little striations
in the mountains, and, you know, some parts
of the mountain like here. It's actually like sharper up the top and you've got
more darkness up there. So I'm just going to put that in for some parts like that. Maybe this little part here, I can put in something
there for that. Okay. And the trick it's
kind of just dry brush. You know, I've picked up a
little bit of that pigment, added in only a touch of water, and then just
continued on in order to get in this sort
of indication here. In the background there as well, there is a bit of
softer darkness like this make that a really Sharp, sharp line at the back. Okay, let's continue this down. It's just leaving
out as much of that white as you can to indicate some of those
mountainous regions. It doesn't have to be exactly how the reference looks as well. So, you know, I've just changed my mind
around a little bit. Okay. But one thing that is
common is that you can see, it's just all kind
of Dark below. So we've got to join this
all to a darker shape. Okay? Using more of this
darker paint, running through. Okay, like that. As we move down here. All right. More of this darker black
sort of paint as well, and do have also some purplish black paint here, which I'm
going to drop in. I just want a bit of
coolness in here. A little bit of
coolness in there, changing the the changing it around a little
bit does help. Okay. You see the bottom
of the mountains. I sort of got a bit of light, but then it starts
getting pretty dark right about here and
here, like that. These little ridges
that extend out. I can blend that
on with this air in the back that's meant to be a little bit lighter. Right. It's really dark now getting
down to the bottom here, like pretty dark, adding on more concentrated black in this whole area
just at the base. And I do find some of them
does tend to move around, anyway, so it does look a lot, but don't worry too much. Down here, we've got this river running
all the way through, which I'm going to
try to imply later on by just dropping
some water in. I'm going to grab a mop brush, a larger mop brush to do
this area more efficiently. Drop in some lighter color, lighter sort of black and
a bit of this purple, purplish black color as well. The idea is I want to get the water running
through here by spraying a bit of water
on the background. Background around there, letting the water come
through the scene. But, firstly, I just need to build this up first, this area. That's going to be
a bit of darkness. Another ridge coming
out like that. There there this ridge sort of becomes smaller
down the back here. Okay. Of course, you can always just spray spray a bit of water onto the page as well if you feel like
it hasn't really, you know, you haven't really got enough soft wet and
wet effects in areas. I think mine's looking okay, so I'm not too fussed
at the moment. Okay. But some of this stuff
here at the base, yeah, I want to just drop in
more paint and also some more maybe bluish purplish
color in some areas. Yeah. A little bit of
I got a tiny bit of green as well that I can just add in a little
bit of that, Cape. Okay. So I'm gonna now
just try to drop in some a little bit of
water at the top. I'll just leave this to dry for a second first
before I do this. The trick is to get
this area really dark first so that when
I put the water through, it's gonna carve
out a lighter path. Cake. So I'm going to spray a bit of water just up the top here. And let's see if I
can get a bit of this effect running
through like this. Okay, slanting the paper so that the water kind
of runs through, cuts a little path
through this scene. You got to do it while
everything is wet. Okay. You can sort of control it, but yeah, it's very tricky. You're kind of
working with what the water kind of wants
to do, as well. Okay. Maybe I'll start
doing a bit here as well. Just to bring in a bit of this water to run
through this section. Just on the left hand
side, spray a bit there. I think Okay. I reckon I'll start
also putting in a bit more color
around the sides of this river running
towards the back and just try to shape
it a little more. Okay. But for the most part, I'm
just kind of leaving how the I'm just trying to
leave it to do its thing. You can even drop in
a tiny bit of water here and watch as the paint sort of runs through the black of
the paint and form some more of this kind of effect
running downwards. But again, I do want to perhaps shape it up a
bit more around here. Go around the top. Sometimes you can do your best to try to control this effect, but it's very difficult. Gonna drop in a bit of
water up here as well to just encourage it to
move a little here. P You're kind of just relying on the
flow of that water. You're adding in paint
along the way, too. Just using a bit of
pain's gray here, which is it doesn't granulate
much, just a little. But I thought this might help form the ridge a
bit better as well. Mm hmm trying to also connect this
mass up here of this mountain so that it moves downwards a
little bit, hopefully. Got a little spray. There we go. We've got one bit coming down
through the center. Okay. I can scratch, try to
scratch something out, see what happens.
Yeah, there we go. That look a bit like a
path of a river here. Yep. This is just going to add a bit more
structure to this whole area. Maybe just indications. Okay. This river system. So parts of it already looks
like a river over here, but I just want to
make it appear more. Yeah, kind of look like
there's some main ones which haven't been carved out directly by the law
of the water itself, like I just did before. So it's just a bit of manual doing a bit
of manual work here. Okay. A little more color here, just a little bit of this
grayish black as well up the top to just
indicate this kind of shelf region, suppose there. Yep. Yep. So just rub out a
bit of paint where you want to bring
back some light. I just drop something
in there as well, just drop a bit of water, have that run through a little Let's give this a
dry. Should be done.
53. Day 24: Icelandic Shoreline: Let's get started
with the drawing, and it's going to be fairly
simple kind of drawing. You've got the foreground that comes in here and this water, kind of misty sort of water
there in the background. We've got this sort of rock in the foreground that starts all the way
out the back there. You can see there
is another a couple of shapes of these rocks. I'm not trying to
make them exact, but keep the general silhouette of them coming down like that. Okay. This is now around
midway of the scene. There's a rock that goes
out into the water here, hits the water underneath, and then you've got
some other sort of rocks beneath like this, you can see there's just a few
of them in the water here. There's another one here, here, just drawing them in. There's all the way in
the back here as well, you can see it's kind of
like a runs up and then forms a bit of a point
like that, then runs down. Okay? That's another one
there in the distance. I mean, apart from that,
the rest of them are just, you know, very sort of similar. Now, the water in the back sort of
finishes off about here. I'll draw a nice
straight line so I can get the sky in in the
background there. Okay. Maybe I'll make this
a bit higher like that. Okay. And what else
do we have here? I mean, it's just a lot of
this other detail here, there's another rock runs
into the foreground, but the water line is
roughly about there. Okay. And I can just make up
a few other bits and pieces, rocks, that kind of thing. Running across like that, and that should be good
enough for our drawing. Alrighty. So for the sky, I'm going to get in a light wash of ultramarine and
a bit of gray, starting off in the top. Okay. Ultramarine
and a bit of gray. Just go to make this it's
actually a little bit too dark. Let me dilute this
down a fair bit. Okay, I'll cut around
these rocks as well a bit. I like this sort of moody
looking sky. Let me across. Let's just add again, just more water as I
move down the page. Yeah, it's kind of like a
cooler gray color for the sky. Like that. Just move this right
hand side down more But Okay, fantastic. Now, in the sky, I want to drop in some
little indications of cloud. So we're getting a bit of
that same purplish color, purplish, black
sort of color here. I'm going to drop that in and just sort of feather in some of these like cloud shapes, make some of them maybe
a bit more bluish. This. Here on the horizon line, it's actually a little darker. There's some smaller
clouds there. The cause a bit
of darkness here. Here we have it. But you're also preserving the light
in the sky as well. So you're just kind of yeah, just dropping in some of
this paint here and there. Me these bits of these brush
tracks are more randomized, as well, so they're not
all to picture perfect. Okay? But mostly I'm
leaving in the sky, darker bits here and there, going to make it look
more interesting. Always make the clouds a bit
darker up the top, as well. Okay. Okay, I've got a
large round brush, and I'm picking up
a bit of this kind of purple purple
mixed with black. And I want to know
if that's too dark, but just sort of get in
the darkness in the water. And I'm also being
careful to create a sharp straight edge
here in the back. Goats where everything finishes
off is also a bit here. So just a little bit darker
off in the background there. Okay? And then it just
sort of comes down. I'm going to cut a little
bit around these rocks, just so I can preserve
their shape for a second. And as I move down
the page here, this is where I
just lighten off. So you can just add
water to this mix. That's how you can
get it to just lighten slowly as you move down. More water. You know, it's pretty much
all water at this stage. Yeah. Tastic. Now, I'm going to start putting in some of
these darker values now. So large mop brush for this. And I've got some
granulating black value, maybe with some brown. Here, let's just
drop this in here. I want all this stuff
here to be pretty dark. These bits up the
top here as well. Need to have a nice sharp
edge, too, like that. Dropping a bit of
water through there. Okay, this has to come
out of the sky a touch, so I really want to
get this darker, even at the top here, just some darker paint. But I've got the paper on a bit of a tilt. It helps to carry
this water down. And form some interesting
downward sort of patterns of the
water running. You can also drop in water
to encourage it to mix. Now, this whole area
is going to be a bit darker as well,
especially this part. I'm dropping in that paint. There, I'll have to darken
this rock a bit more, as well. I just don't want it to
go all the way through. So look this little detail here for the rock
in the distance. Alright, bit of that, bit of maybe purple
through there as well. Then you've got
these rocks below, which I'm going to really
make quite dark too. They're forming kind of slightly furry edges, which is fine. It's going to help to make it look like you've got
these rocks that are partially submerged and
this mist and things around. But at the same time, you've just got to be careful
because you can lose what you want to
imply through here. So, look, let's just
do what we can. When you're painting
wet into wet, at some point you just
have to accept that it's going to do
what it wants to do. Okay. Good. Dropping some more
painting up the top, maybe some extra dark
darkness as well here, a bit of granulating brown. I'm going to make that top part like a bit darker as well. Sort of dropping in
paint in places and letting the wash kind
of carry downwards. This bit sort of
carry down a bit too much, but that's fine. So here I'm really
going to start darkening up this whole area, get connected on with the water, the edge of the water
there in the background, and tilting the paper
downwards so that it does not mix upwards. It sort of just finishes
off and that's it. Bit of bluish paint,
purplish paint, and a bit of this
brown paint in there as well. Introducing water. If I can just tilt the
page this way as well, I'm going to hopefully
getting effects, interesting granulating
effects running across the page as well. But also being careful
not to have it go too far upwards to preserve
this whole area really make it pretty dark
in some spots as well. This is not reading as dark
as I would like it to. Like this whole spot should
be joined together as one. Like that. Drop in more, flick in
some more of this paint. Let it do its thing. Just a bit more on the tips. More details on the rocks. Just dark paint, really.
To help bring them out. Again, This is neutral
tint or pin's gray. They work quite sort of
in a similar sort of way. But it doesn't granulate as much and is really dark
because of that. So I'm just dropping in some
more little indications, you know, maybe up the
top there as well. Just need this to appear a
bit more like a silhouette. Like a kind of secondary layer, I guess, here, and the front. Um, I'm going to try to drop in a bit of paint
to the left here. The clean bit of water, drop in a bit of kind
of paint really in the water on the
edge of the painting to encourage some of this
to maybe run down the page. Okay. I want to create
some little marks and things going through. Flick some water on as well like that to encourage it to move. It will dry. And you can see it's creating some impressions of rocks
there on the left hand side, where the water has moved through and carved out a
little bit of something. I want to just do it more here, maybe, break this
one apart as well. You have to wait and be
kind of patient with it. That one up It's
just a little bit. I just wanted to break that
one up a bit more here. It's kind of implying a bit of light there,
which is good. It starts to look alright, I'm going to leave
it because this is so difficult to control, even if I get something like what we have here on the left. I want to preserve it. Some darker spots behind here
maybe. Break this area up. Touch darken some
of these rocks. What's more, Okay. So more darker
paint just running down here to further separate out the water
because I think this has gone a bit out of hand. Yep. That's better. This might just run down
the page a bit like that. All right. We'll leave it
to Troy and should be done.
54. Day 25: Iceland Mountains Drawing: Let's go ahead and
get started with the drawing and going to put a line in roughly just above
the middle part of the page. Right about here, just to give
enough room to, you know, get in that white house in the background as
well as leave a bit of room on the top of the scene for those distant mountains. The first thing I
really want to do is just get this house in it's just like smack bang in the center, a little
bit to the left. And I actually zoom into
the reference photo to make sure that I've got
enough detail in it. That's the sign, and then
you've got the roof, which is sort of like
this triangular sort of shape like this. And, yeah, it's quite
important to make sure this is more accurate, given that the rest of
the scene has a lot of softer and less detailed parts. This part of the rooftop
here has a chimney, so I'm going to just
pencil that in as well. Just a little indication of that chimney sticking
out the rooftop there. Okay, the back of that house. Now just sort of
coming down like that. Okay, it's really
just the front of the house that's
catching a bit of light, and then you've got the
right hand side, which has, you know, this sort
of area at the back. Let me just also, I just want to make that
line a bit straighter. I mean, apart from
that, the rest of it, I think we can put
in afterwards. I mean, there's a whole lot of detail for the
windows and stuff, but we don't need to worry
about that just yet. On the left hand
side, there is a car. You can barely see it, but it's just like a
truck or something here. I'll just put in a
little indication of that at the end of the day, I'm not fussed with
those small details. We've got these sort
of mounds of grass, hilly kind of areas, which I'm going to start
indicating there as well. But there is also a house here in the
corner of the scene. Let me just see if
I can why not just indicate a bit of this something there on the left side as well. Whether I include this later, we'll see, simplify
that down a bit. In the mountain here on
the left, it goes up. It's kind of a bit
jagged, as well. You've got the sort of
bits that stick up, and then you've got
this sort of bit here, top part of that mountain there, and then it comes down. A lot of this stuff, again, you can sort of alter
it a bit as you paint, so don't be too worried. I'll make this mountain go a
little bit behind the house, as well so that I can
create a bit more, you know, a bit more darkness. And there is also, like, some grassy area there, a bit of darkness, the
bottom of that mountain. Then here in the back,
we've got, like, another you know, grassy
sort of mountain, and then that runs
towards the back on the right, as you can see here, just a little
decation like that, then it just dips down
to the right, okay? Fantastic. There's grass and there looks like there's
something growing here, some bushes near the
side of the road. You know, this
mound here as well, that needs to be done
all in wet and wet. But I want to put in
this little edge here. Now, you can see where there's these cliffs on the
right hand side. And they kind of just run there and you've got,
like, green on top, and then this darkness
on the right hand side, and these rocky kind of areas which we really need
to imply, okay? And here as well, look, it's just sort of these sort
of jagged areas almost, where you've got this cliff edge here as well. Look at that. It comes really close to
the front of the scene, and it disappears
off like that, okay? And these are just like
these, like I said, these little cliff edges when
the grass is green grass, it sort of comes in front
of it a bit here and there. Okay? Again, it's a
very loose drawing. In here, as well, there's, of course, more
rocks, more darkness. There's another sort
of shape there, okay? And more rocks and things
here, a bit of darkness. A lot of this stuff we'll be able to get this in with
a lot of wet and wet work, a bit of darkness here, and then you've got this sort of bit of rock coming
out like that, and then a bit of
maybe darkness on the right hand side, okay? Remember, the shadows are
running to the right, so the light sources
to the left. Here there's a hill, and that's casting a shadow, as well, to the right. So we're going to have to imply
that that stuff in there. It's going to be a bit
of darkness in there. We'll be able to
get that through later, same with this grass. So no need to worry
too much about that. The reference photo actually has a bit more grass
at the bottom, but I'm not too fast about this. I think we should be
good to go for the, we should be good to
go for the painting.
55. Day 25: Iceland Mountains Painting: Alright, so first things first, I'm going to get in a bit of
cerulean blue for the sky. Really light wash
up cerulean blue, starting off right here. It's about maybe 5% paint. The rest of it is just water. All right. And I'll just add water
as we move down the page. Okay, you want to keep this
really light, you know, we can have some darker
bits up the top, but as we move down, I think it's best to
keep it a bit lighter, just so that those mountains
can really show through. I think that's going to be an important part of this scene. There's even a little bit of snow on some of those
distant mountains, the one in the center there, so might leave that one white. Let's move this wash down. Okay. Fantastic. And I might just drop in a bit more blue in some
areas like here. We've lost a touch of that
sky that was showing through. So I'm just adding a little
bit of darker cerulean there. Like, there, what
else can we do? Put a bit here, as well. Okay. But I'm leaving
most of it as is. Okay, let's have a
look how we've gone. Alright, let's give this a dry. Alright, let's work on the second part of
this painting now, and I'm going to be
picking up some green, some darker green,
maybe a bit of blue or purple mixed in here as well. Now, the left hand side
of this mountain here, needs to be needs to be green, but still lighter than
the right hand side. But this terrible habit of
just flicking paint around, so I've got this
tissue here just to mop up any stray spills now. I'm putting in a
little bit of yellow into this green to
the left hand side so that I've got a bit
of vibrancy and I guess, an indication of light
on some parts, okay? So here you can
see going around. I'll put in a bit a little bit of black as well in some areas. You can see that it's actually
quite dark. It goes up. Most of it is just,
like, a lighter, wouldn't say a lighter, but it's definitely lighter
than the right hand side. Okay? So just taking
my time here to get in those little details. Okay, need a bit
here that chuts out. And then when I get to the top, it's kind of darker here. That right, just trying to mimic the features
of this mountain. It's tricky. Okay. Let's continue down that left hand side of
the mountain again. I just pick up some more yellow and drop that
in some yellow ochre. Also here on the
left hand side to sort of mix in with that green. All right. Let's grab some black. I've got some leftover
black and a bit of purple, and I'm going to just drop some of this into the
right hand side, mixing, you know, also some
normal green into this area. Now, the right side of the
mountain must be darker. It's important. And I'm also putting in a bit of a
little bit of brown. Okay? This is, I guess, this volcanic sort of rock
that you see show through. And it needs to be
darker in some parts, and I'm just dropping in
that darkness wet into wet. I'll probably have
to go through again, once the whole painting
is dry to just add in a bit more detail that detail to it after
some sharper detail. But for the time being,
this is going to be fine for that first wash. But notice how I've kept
a lot of the greens. Still, you know,
on the left side, and even on the right hand side, it's not completely black. It's just it's like
a really dark green. You know, as we
move further down, as well, just over here, cutting around that
house down further down, you know, I'm just
adding more paint still, bit more green here. Sometimes you can
just add in a bit of purple or something, as well that will just make it look more interesting
near the base. And I'm going to add in a
bit of yellow to this mix, like a more vibrant sort
of Indian yellow here. Again, my hope is to just sort of lighten a bit
down at the base. So you get a bit of light maybe catching at the base here. And you've of course got this house there
in the distance, which I'm going to have
to cut around, again, just using this same paint, and it helps to have a nice
little point on the brush. You have to leave that part
of the house white, okay? Something there could
be a car, as well. So I'm just gonna
leave that too. Okay. Now let's have a look. What's
going on over this side? Well, it's starting to get lighter as you
go down the page. You know, this
sort of edge here, I've left wet for this reason, right, so that we can sort
of continue this down. But I also want
to make sure that we've got the right hand
side of this scene in. So I want to put in more green on the background
in the background here. I will actually probably
just make this all green, this mountain here
in the distance. I sort of thought of leaving
a bit of snow there, but it does look I think it
will just look better if I keep it more uniform. So cutting around again, J, this is the toughest part
where you're just being so careful to cut
around the house. And, um, this part of the mountains on the
right side are not as dark. So I've added more water
to dilute out that green. It's probably about ten or
20% paint at this stage. Still cutting around stuff. Okay, let's continue moving
to that right hand side, a bit more green, bit of darker green as well here as we
reach that right hand side. I put in a bit of
brown, as well. Why not in that section. I'm trying to just rewet some of this stuff
down here at the base. I don't want this to dry off until I'm ready
to go back into it. Maybe a bit of
yellow, a little bit of yellow here as
well, down the base. Okay, let's continue on. This should be at kind
of more mottled as well, like some more maybe a little
bit darker green in there, just let it move around. Okay. But I also don't want to
spend too much time on this. Let's just continue this on. Following that little drawing
that we had in there before helps to sort of keep it simple. When we move down the base, I'm just going to drop in
a bit of darker green. There's also some black, which I'll feather in as well. I do see some striations there you see just
sort of coming down, they're very, very subtle. You know, I'll pop
in a bit of brown. You know, see how
it just, you know, we're able to just imply some stuff there in the
background without overdoing it. I think that's
something you have to play around with. Like that. Just looking at
the reference and, I mean, rather than
even looking at it as a shape or anything, I'm just looking at the value, the color in there and whether it's light or dark
and just following through. So good. Let's bring this wash down. Now, over here, we've got
a lot of lighter colors. I'm mixing up a bit of
green with a bit of yellow. Vibrant sort of e
Let's drop this in. That's not light
enough. I'm going to have to put in more yellow. Really want this
to be lighter and just mix in more
water if you feel that it's not reading correctly. There we have it. Just
mix that through. I want there to be a
bit of a break so that it's noticeably lighter
down the page here. Alright. Connect that. We, what's that car sort of
left some bit of white there. It doesn't matter. Yep.
The bottom of this house, it kind of goes up, and
it's not really so even. It just pops through
like that. Good. But yeah, basically, this connects downwards,
and it's lighter. Alright? So we have to
be mindful of that. Alright, and just
use more water as you paint this part here. I always like to paint from
top to bottom like this. I find it a lot
easier, and that way, nothing dries inappropriately in terms of drying
too quickly, okay? So this is the edge
of these cliffs, and we've got this green here. All right? It's this yellow mixed with a bit of that
darker green I had. I'm just trying to find roughly
where those cliffs were. The drawing a lot of the
time gets lost in all this. So just look at the values. We've got some kind of green
here, some more green here. In fact, there's a bit of
water showing through there. I don't know if I can put in a bit of blue or something in that section just to imply maybe a bit of
water coming through, but it's not necessary really. And more of that
green there does turn actually a little bit browny as well on the right side
of some of these rocks. So you can see, so I'm just dropping
in some of that brown. But look, mostly what
you want to try to do is to make sure that you've got
this grass showing through. So it's just yellow and green
mixed together, like that. Here we have it. That's more of this green there coming through. That's part of the sort
of this chasm that you can see where a cliff
descends downwards, but the light is just
bouncing off all of this area, which is amazing. So we have to get in yeah, like a general wash over the
top of all this stuff first. Let's go to use a larger
mop brush to do this more. It's just quicker
to do this. Good. Uh, yeah, look, it's
just that same green, maybe a bit of yellow
still mixed in there. Yeah, I'll keep it light, keep it safe and have a lot of light running through that way. And then we get further down. I like to put in more darks. So a bit more darker
green here at the base. Okay, let it sort of feather in. So we've got a kind of slightly
darker area at the base. Look, a lot of the darks anyway, they're going to be going in. There's there's no avoiding it. We're gonna have to
drop those darks in pretty much straight away. But what I like to
do as well is to work on these kind of
brownie sort of bits. So I've got some you know, a bit of raw umber. I'm mixing that in with a
bit of got some panes gray, maybe a little bit of
white guash as well. Let me have a look. There we go. And I'm just going to
drop some of this into this area and tap on
to where the green is. Can you see just where that
sort of greenish part is? And actually, you've got some lighter parts
of rock as well. It's not just all, you
know, completely dark. So so a lot of this, you kind of have to use a bit of your imagination, as well, but, you know, that's just implying this
kind of chasm below. If there's some white in there, don't worry too much. We can leave some
of that white in. It doesn't have to
be all the same. Okay? So this is
kind of implying the lighter brown bits, yeah. Because the side of the cliffs got lighter brown bits in there, bit of guash, tiny bit of
this white guash as well. That adds a bit of milkiness
in there, like that. Okay. Really? The rest of all
this is pretty pretty dark. But of course, you do
have some in there, like some of this, you know, brownish value in there. Okay, I just put in a bit of this grayish brown value there, a bit of darker value
here, just a bit of black. Okay. Now, running through here, this is where it
gets interesting. I'm just going to
start putting in some darker color to
indicate this area. Whoops should have this cliff sort of running downwards
a bit more like that. But look, it's just dark values in here. Picking up some black. So this is a granulating
black, by the way, which was going
to hopefully form some interesting little
effects in here. Alright. We'll probably have to go back in this
again afterwards, but here we are. Connects on here. There.
There. Alright. And here, this part of the is just basically green
and black I'm using here. This part of the hill to the left has a soft
shadow running to the right, so I'm going to just drop
in some of this paint. Probably use a larger
mop brush for this. It's gonna be easier to do it. And the trick is also to leave out some of the
yellows in there. Don't make it all
the same color. Okay? The light has
to be left in there. Otherwise, it's
gonna look funny. It's not gonna look like that there's any light coming
through the scene. You know, there's something running there almost like a tree that's like I don't
know what it is, but to the right there. This needs to be darker.
Just some of this area near to the cliff
where it goes down, and you kind of just
continue working on this a bit, as well. Let's have a look out the back. You know, there's
more, you know, some more greens that I could potentially drop in
like here, you know, this near this sort of
area, that's darker, bit of darker greens there, here as well to the left. There's some shadow here or something there,
there, you know, near to this cliff, as well, you've got some more sort of undulations and
things like that. There, you know, I'm picking up really thick paint as well. So it's mostly just
darker paint in there. There's not much, you know, there's not much water
in there at all, just to create that extra
dark effect running through. I'm were of this stuff
starting to dry off soon, which is good
because I can add in an extra layer of detail of complexity through
there as well. For the time being,
just soft marks, you know, indicating, like, these shrubs and what have you, most welcome, you know, even darker marks
running through these shadows here the shadows are not the same color
all the way through. The same valley all the way
through there's, you know, it's actually a few
different colors and values, so it's tricky. I'm also trying to make
sure I preserve this bit of light that's running
across the top, right? You got some more shadows and things even here
underneath this house, there is a bit of this
darkness there from the house which we will leave in. All right. A bit of this diluted
black and maybe a bit of purple to just drop in
here for some again, darker values that can
hopefully show through, create a bit of an effect, a bit of a granulation
type effect. I'll bring in a bit more
here as well in the corner. I think just having
it a bit darker in the edges will help as well it's tricky because you're feathering
it in and you're trying not to overdo it as well. But at the same time, you know, if you when the
paint looks really, really dark, often,
that's, you know, it's going to dry a bit lighter, so you have to sort
of anticipate. And I put in a bit of purple
here because the purple, just I think sorely needs a bit of something else in there. You know, look at this
stuff here as well. This is all the
same kind of deal. And this rock may be a bit of, you know, brown to the
right side of that rock. Some of this stuff
I'm actually making up now because Yep. Kind of making up
some of this rock, actually. Doesn't matter. That can be like a sharper
one here in the front, then a darker brownish
rock there in the back, soften off some parts there. I'm waiting for this stuff to
dry so I can really get in some sharper bits
running through. But again, all this stuff
is still wet so I can, you know, feather in
some stuff, okay? So darker bits and pieces. Yep. What else? Here, there's a bit of darkness. As well, just this
section there, there's sort of you can see, just runs to the right
all the way to this, uh part that opens up. There. A lot of this is just, you know, implying what's in there. You don't want to start making it look too detailed
because otherwise, you're going to draw away from the rest of this
scene, you know, This black that I've got in
here now is perfect to just create contrast to show that there's this sort of dark
rock there in the back. So you can see, probably
I'm going to use some Payne's gray to really
emphasize this as well, there's the sort of more
rocks there to the right. Can you see that? Just
sharper sort of marks. Some of this stuff would have
started to dry off as well. And a neat little trick I like to do is to
scratch off some paint. Is it time? No,
you've got to go to wait for things to dry off
or touch before you do this. But it's sort of
working over here. Um, it's just areas like this
that are just almost dried. You can sort of start to see, just scratch off a bit
of paint here and there. Uh And this, of course, helps to indicate
some tufts of grass, a bit of detail
running through here. Not all of it will sort of
scratch off and look lighter. Some of it, you know, if the paint isn't
completely dry, it will just run back in and you'll be left with
almost a darker line. That's also not a big deal. You want some changes, some variations in there. You know,
56. Day 25: Iceland Mountains Finishing: I just want to drop
in some more bit of something here as well, while the paint is wet, a little bit of extra bush or something here in the front. Another thing I can do is if you've got a
little spray bottle, just to spray the section down a little bit again to
encourage the paint to kind of move around there. Good. I think what I'll
do is work a bit on this house, some small details. So the rooftop of the house, a little round brush
is going to be good. So with the small round brush, I will pick up some purple, maybe a bit of purple, like a cooler color. Is the background dry yet? Almost. Let's see. Okay? That rooftop is pretty dark, so we
need to get that in. And those mountains in
the back should be dried. So when I go in, make a Yep, there we go. Nice, sharp mark cut
around that chimney. What bring this rooftop down. It's got to be dark.
There we have it. That's the roof. Very simple
sort of roof like that. And of course, I've
forgotten the bottom bit, but we will put
that in afterwards. There's also, you know, these little windows
and stuff on the house, which, again, you need to imply, but I'll put in a bit of
this left side of the house. This there's a bit of darkness running to the left like
that as well, okay? And here goes nothing. You just got to be quick
with this and not overdo it. Okay, so that it looks
like it was just kind of painted on in a quick flurry almost like so that otherwise, if you start to mess around with these windows
and things too much, I find it it detracts
from the restless scene. So you do the best
that you can and then just simply simply
accept it like that. You know, the right hand
side, there's actually a couple of windows
or something there. This is the car which I
almost forgotten to put in. Like, I can just imply
that like something there, you know, here's
the thing as well. You've got a bit of this road that runs through the scene, which you can dry brush
a little bit of that on. Of course, this area
here indicates the road, as well, these, like, bits of shrubs or bushes just
running across like that. So I'm just implying
a bit of that. This is dry brush.
You're kind of adding on some little details. Now, this is the building here, and this needs to be another
building to the left, I mean, this needs to
just be darker, I think. I'll add in a bit
of h gray in there. I don't want it to
come through too much. Okay, drop that down a shade. And the rooftop, look
simplified, something like that. Let's have a look.
What else do we have? You know, it's
that same sort of, you know, bits of darkness. I'm using the side
of the brush to indicate some of this in there. Okay. It's a bit much. You can also just give the surface a spray
with this spray bottle. To help the paint dissipate
move through a little bit. Okay. This last, you know, thing that we're
doing really is just putting on the
finishing touches, the final finishing touches. And essentially in this scene, it's all the real dark parts. So more black here, maybe here. You're also doing a bit of
scratching out work, too. Now, I really like that mountain
there in the background. I'm I don't want to put too much paint over the
top because it just looks. I really like the look of it. So, kind of, like,
thinking what to do. I think I'll put in a little bit of a little bit of, like, dry brushing over the top for parts of it, but
at the same time, remembering to preserve that previous color
previous wash in there. Okay? This is just to get in an extra layer of
complexity with these, the darker side of the mountain, the right hand side
of the mountain. There's even some, you know, bits here as well, like
littlestrations on the rock. There, look, it's
just going to help emphasize the light on the left hand side
a little bit more. I think I think
it's a good move. But yeah, like I said, I don't want to get
rid of all this, detail here on the left
side of the mountain, so I'm just being
quite careful with it. Okay. So parts there. Got it, good. And I will soften this edge at the base
with a bit of water. Let's make this
mountain come forward. It's a little bit like this it hits the house, the
left side of the house. I a little bit of bluish color on the right
side of the house here. You just need a thin
wash of blue or something too
impolite, the shadow. Yeah, go too far out there. On the right hand side, maybe the chimney will have a
bit of it, too, like here. Like that. To look. Sometimes you get up bit, maybe bit under the
roof. Like that. Okay. Let me just flick a little bit of water
or drop in a little bit of water through some of
this stuff here to encourage maybe a bit of running bit of
running of the paint. Yeah. I don't want it to
move down too far, but just something there. Bring back a bit of
that granulation. You can do it sort of in some of these
other parts as well. Drop in a bit of water and
move it around a bit and see what happens. Right. So this scratching
out effect again, just using the little blade and I'm going to just
scratch out in some areas cross the scene and hope
that it just helps to mark out this parts
here in the foreground, you can also put in larger
little scratch marks like this to make it
look like there's some, you know, longer strands of grass in the foreground
coming through. Okay. Do we need a little bit of darkness underneath those
mountains there at the back, a touch of dry brush. Yeah, just a touch of
dry brush back there, I thought it would be good
cause there's actually a little darkness
there running as well. And of course, the shadow for the building just
gonna imply that. With this brush, you can
kind of already see it. Bit more darkness, way too dark. There we are. This house there to
the left is gonna have a bit of darkness running
to the right, as well. There's not all too much
really to imply in this house, other than maybe the
rooftop like that. A couple of windows
or something, you know, something
simple like that. I don't want to make that a
central part of the scene. But, yeah, I still want it to read like a
roof or something. So that's what I've done that
hopefully should be enough. Okay. Let's leave this
to dry a little bit. Dried it off a little bit, and I'm gonna continue
on to just scratch off some little bits and pieces
near to the cliff areas. A lot of it's kind of dried now, so there's not much I can do, but I thought some here on
the left side would be good. As well, break it up, break this area up a bit. Uh This area is
becoming a bit odd. It's run down the paints
run down slightly. We'll put this kind of bunch of shrubs or
whatever here back in to just make it
look like a Like, there's a much stronger
impression running through. It's the same with some of
this other stuff, you know, you might just get
really dark spots running through some areas, so the side of the brush
can help with that. Soften down if it's a
bit too obvious. Okay. At this stage, because
the paint is quite dry, a lot of the marks you add
in now can look too obvious. So you kind of soften down in parts Stride off again. I've got a little bit
of white wash here. And I'm going to be using a smaller round brush to add in a few little
highlights here and there. Now, the first thing I want
to do is probably this there's like a muck pole or
something next to the house. If I can just get that in, it runs downwards
from about here. All right. Something there. Okay? I'm not exactly
sure what that is, but it is there, there are a few little
white marks here as well. I don't know. They're
just sort of objects, I suppose there. Yep. You might have a bit of
highlight there on the roof, you know, from, you know, a little bit of something. The light to the left, just a little bit of that,
you know, it'd help. Don't want to overdo
it. Same with this one, maybe just a little Something
like that on the roof. Now, if I mix some yellow, a little bit of yellow
in with the white, now create maybe some
little bits of grass, like, some lighter
bits of grass, I suppose, just running
through in areas. Um, lick a bit of this
through, you know, especially in these
areas where there's kind of some white I
left on the paper, and I didn't mean to
leave that on there. But, um, you know, if I can just transform
some of this into some tufts of grass or
something like that, I think that will
look interesting. Um, in parts, I can even mix some green in and
just make it kind of, like, some lighter
green bits, okay? Um, I can put some in
here in the foreground, like a um, some little bits
of grass going upwards. These I kind of overdid that
bit, but it doesn't matter. Just keep it randomized. Just helps to kind of add on
a secondary layer of detail and also implies this kind of light source coming in
from the left, as well. Okay, it's not 100% necessary, but I think it's a nice little finishing
touch in some spots anyway. The trick is not to overdo it so that it takes precedence over all that previous lovely kind of brushwork and the granulation and the larger kind of
washers that you see. Fantastic. I think we will
call that one finished.
57. Day 26: Tallinn Drawing: Okay, let's get started with
the drawing for this one. Now, what I want to do is
just put in a basic line here for the the ground. And I've just positioned
that a little bit below, about an inch below
the center point of the page, like that. And I can see down on the
left hand side as well, you've got this kind
of market stall here. It runs down. And
there's a bunch of other roof areas like
underneath as well like that. You can see there's
some white cloth, which I can just quickly imply. I don't need to do too much. Inside the stalls,
you've got a lot of different bits and pieces
like on the ground, there's these little pots
and you've got flowers. Inside everywhere.
So don't need to really don't really need
to indicate that too much, but just a quick few
little lines there. I thought I just
might as well put in this person here while I'm in this section and you can see sort of legs running
towards the front like this, shoes, and lady just sort of standing looking
towards the camera. And kind of arm
down on the side. Okay. Now, the background area, you've got a whole bunch
of these buildings. Is a medieval town. So you've got this rooftop running like that for that sort of building in the background. There's also a large
tree here just a just obscuring a lot
of the left hand side. So I don't need to
do too much there, but look on the side
of this building. I've also got this bit
of brickwork there. There's some windows,
sort of stuff here, running towards the
center of the scene. Here, you've now
got more details. You've got this another
sort of rooftop here. Sort of just looking and
seeing how you can I guess, put in some of these
little details and simplify the buildings down. All I see when I draw these
things are just rectangles, you know, not trying
to get in any, you know, really detailed areas. Now, this, you know, tower is pretty important, so I just have to
get that in here, and it runs up like this. And, of course, you know, it doesn't have to be exact, but it does help a
bit of accuracy here. You know, the sides
of the towers, you can see there's like
a little few bits here. As well, okay, let's just
run that down like this. Okay. And in the
back here as well, there is a secondary tower
there just runs about here. Okay, leading the viewer through the center of this
whole scene, like that. This one's a little
bit taller actually runs about there and
then comes down. Let's try to get
this one in as well. Like this Good. Fantastic. Now let's move this down. It's like a pointed
little tower like that. That's kind of all you need to imply there are some
details up the top, as well, which I can
just quickly pencil in, but it doesn't need
much in there. There, you've got
these windows and I can just sort of quickly
indicate, like this. And you've got this
other building that sort of cuts in front
a little bit like that. The paper that I'm using
is a little bit wider, so I'm going to have to
maybe make some stuff up on the right hand side just to accommodate for all
this. Oh, here you go. There's, like, a little archway underneath there, like that. There's people just walking around everywhere
as well in front of lots of little people. And this is just good
to indicate here. In the back, there's
another building, and, you know, same
with these windows. There's like four windows there. In the back, and you've
got the rooftop. Interesting sort of
rooftop runs like this. And then it's,
like, a, you know, I could detail it more, but I'm not bothered indicate some little chimneys or
something like that. And on the right hand side, this is where you've
got a bit more detail, some more buildings
running down like that. There is this sort of triangular style
building here like that. I extend this a little
bit more so that it's going to look more detailed
and fill in more space. Okay? That's going
to have to run downwards here. No, I like this. There's this nice light
here. Look at that. Really golden
looking light that's just sticking out like this. You've got in front of
this building some kind of you can see this little
shade area like that. It's, you know, you got
the window of the shop. Here, just underneath, there's
a bit of darkness there. That's the bottom part.
And here you've got, like, a tree, so
it's not a big deal. But, you know, these
little windows, you see here, I'm just going
to pencil in a few windows, and I don't know if they're
actually there or not, but just a way to simplify it and make it look like
there's more detail in there. And I think with the
ground, as well, I will simplify this
down because I see there's more stone
there to the right, kind of more textured
stone, whereas here, it's a little bit more
smoother modernized. So I'm going to make
that all hopefully the same and some more people. Let's just pop in some
more people here. You know, you can see people
just sort of walking around, doing their thing off
in the background. Of course, you've got
some more buildings in the distance as well. So a little silhouette of
those buildings there. A lot of buildings
that just sort of overlap with each
other a lot as well. So, yep, I'm just trying to get an
indication of all this stuff. It's kind of the front
part of the building, front facing part
of the building. The rooftops kind
of darker here. You know, these other buildings
they just kind of get smaller and smaller
off in the distance, but at the same time, you've got some little roof areas like that that just
kind of stick out. You know, you're just kind of figuring out little
bits and pieces here. Like this. And they all just disappear a little bit off into
the background there. Of course, you might have some additional details off
in the background like that. You know, there's a tower here. So, for example, I
can just simplify this gonna get in some
kind of tower back there. I believe there's another
tower here I forgot to put in. So just kind of get that dome underneath and then
I'll put in some of this stuff here and the top of the tower
like that, like that. Okay, so let's have a
look. We're looking right. I will put in this
person as well, just here in the
foreground and just, like, walking into
the scene like that. You'd see one leg behind,
one leg in front. More people just
standing by and looking at this, these shops, I guess. And we can, of course, you know, put more people in here in the background and
legs, as well. In the center of the scene, I find this helps extra. Just just sort of get in a
kind of crowd of people, you know, just draw
them in like this. Oh, put this one up. These two up a
little bit too high. Um, that's okay. I might just reduce the height. To about here. It may look like there
may be a bit further in front of these
other people as well. Go. There we are. Good. Okay. I think that's
good for the drawing. Let's get started
with the painting.
58. Day 26: Tallinn Painting: Alright, so let's get
started and put in some very light
colors for the sky. And I'm just going to pick
up a bit of grayish value, maybe some purple in there. And let's just drop this in. It's kind of like, you know, slightly cooler colored
sky, I suppose, you could call it
just up the top here, but still kind of grayish. Okay. I'm going to go all the
way through, actually, through the top of
this section there, look and just touch the
edge of those buildings, but not bother too
much with them. Now, this has to be
really light, yes, so it has to be pretty much
pretty much like 5% paint, if anything, and the
rest of it is water. So the majority of
this is just water, and the buildings actually
darker than the sky. So we have to make
sure that we keep this nice and light. Lots of water. Okay. Going around
the edges like that. Okay. Fantastic. Now into the buildings, we're
going to start putting in some little bit of paint. Okay. I'm going to put in a little maybe
cloud shape up the top. Here's just a bit of darker
paint in some parts. Just up the top, maybe a
little bit of something. Okay. Like that. Okay, so let's go and
get in these buildings. So a bit of this color here, which is burnt sienna, a bit of burnt sienna, start off at the
top of this tower. I've got to be a little
careful with it, but I still want to make sure that I follow the
general style of this scene and not make
it too detail just yet. So there we go. You got
the top of both of these, and at the end of the day, they're just a little bit
warmer, if you notice. And we can move downwards now. Let's get in some yellow
Ocha bit of yellow ocha. Actually, we'll mix
this with some purple. There we go. That looks better. Like a yellow ochre and
purple mix right there, get that I'll cut around
this figure, as well. Here, let's use that same mix
with a bit of that yellow. Yellow and purple make a
very good combination, especially when you
mix them together, they kind of just
subdue each other and go to create this color I'm looking for here that's sort
of in the middle. When you get down the bottom, I like to just put in a
bit more purple sometimes to just change things up
a bit like that there. Now in the background,
we're going to follow the same sort of color, but I'm going to mix in other
kinds of yellows as well. It's all pretty subdued,
though, at the end of the day. I don't want too many really, uh, really dark and
vibrant values in here. So this is all kind of like
one big as you can see, one big shape that I'm trying
to imply in the background. And if they all come through looking kind of
similar to each other, I'm not fussed with that at all. Okay, as long as
they blend a little bit with each other,
I'll be happy with that. Okay? These are going to have a bit of purple
or something again. I just want to, you know, just change this
up a little bit. It almost looks
like some shadows, some soft shadows on the
buildings, which is good. In the rooftop here, I will put in some more of
this sort of purplish color for this rooftop area there, let that sort of seep
in and do its thing. This might go into
the tower a bit. I don't I got to be
careful with that. Not a big deal, but, yeah. Here, I gonna put in a bit of grayish value or whatever
for the rooftop areas there. Some of this might seep
through, seep downwards. No big deal. And, of course, this like a tower there
in the background. I'm gonna get that
in at the same time. Okay? Whoops, doesn't look
too much like the reference, but it's no big deal. Okay. Alright. Now we've got this darker
sort of building to the left. Let's get this darkness here. And this building
here to the right, which is a bit lighter
as well there, and then I'm going
to put in a bit of darkness in the center here. I really like to get things to mix and blend
with each other. And this tower here
in the background, I'm just going to get in
again with this brush, something there in the back
tower in the background, you know, something like that. Okay, remembering this down. It's kind of adding in a bit of this brownie value
here and also some of this yellowish value coming
down as well, like this. On the right hand side, I'm going to start putting
in some more of this lighter value
to the Yep, there. And the rooftop again, I'm just going to
darken that down a little with this grayish value. I've picked up from the
leftover paint on my palette. Okay. Good. Another rooftop area here or something like that. I'll bring this washed through. These buildings here
to the right start looking a bit more yellowish, so I'm going to add in
a bit of yellow ochre. Bit of yellow ochre here, and I'll doll that down
again with some purple. Parts. Moving down the page, some more of this
yellowish paint again. Trying to cut around
these figures, too. The. And there are some
little highlights, little bits of yellow,
like for this, like tiny area there
and underneath this little area that's like
bit of orangy yellow color. I'm going to drop that in. Okay. This little
shaded area here, get that in like that. The rest of it I can just put in with some of
this yellow ochre. And the purple does help
as well just in spots. Like I said, it's a great
way to balance. That. Okay, so it all
kind of comes down towards the ground here
anyway, like that. Okay? There it's up here, more of this rooftop
sort of stuff, which I can imply. There's also some trees
running through there, which, yeah, we don't have
to bother with too much. Okay, now, left hand side, I'm going to again just
get this all in in one quick swoop, like that. And I know there's some
reflections and stuff on top, but I don't want to actually put them all in because I think it's just going to
look a bit too stark. Okay? But here is this sort
of left hand side, and there's going to
be trees behind there, as well, so I will get them
in in just a moment. Okay. Once that dries a little. But, you know, here, you've got a whole ton
of different colors. You've got, like, yellows, and it's really just the colors of these flowers, if
you think about it. Yellows. You've got oranges, all kinds of stuff that you
might want to just drop in indicate some of this in there. Again, I'm not fuss with
all the little detail. I can get this in with
a few brushstrokes, it's going to be better and
imply something is there. Oops, I should probably
have left a bit more of space for those indication of what you call it little bits of
white, but that's okay. All right. So moving
on to the ground now, I'm going to have to put in
some details for the ground. I'm going to use this kind
of purplish, grayish color. Leftover. And I'm going to drop that straight
in like this. Okay? And also to try to
mimic the sky a little so that this light from
the sky comes down. Now, this stuff is a little
bit wet in the building, so some of this will
run. That's no big deal. Okay? But we want
to bring this sort of light wash down
the page, okay? And you got all
these flower pots and stuff to the
left. No big deal. I'm just gonna leave
something white, and I'll put in
details afterwards. But, uh, Yep. Bring this down the
page like this. And the trick really is to match the sky match the
sky. Very light wash. And basically just
start putting in some downward brush
strokes for the people. And I've just got
some darker paints, kind of like a purplish color. Again, drop this down. Do have smaller brushes that are going to help,
smaller round brushes. There's this guy here. You've got to do this all while
the paint is wet as well. You don't want to wait till it's too late because
it's gonna look very, very, yeah, too obvious. Okay. He's ones
here in the back. Look, now it's just nicely running down
the page like this. Okay. Probably should just lighten up some of
this other stuff here, or darken off some of this
other stuff here anyway. Like for the you see
just in the background, this tower is casting, like, quite a darker shadow there, reflection downwards like that. So let's just try to imply
some of that as well. Get these reflections and
things to run into each other. It's difficult because
these figures are so small, so far behind. Okay. But look, we
can get this effect in just dropping the paint
and letting it run downwards. Yeah, maybe a bit here as well. Let's just, you know, a little playground with that. Okay. We'll let that dry a little bit, and I'll go into this top
left hand corner now. And I'll just pick
up my mop brush, a bit of green and a
bit of darker purple. And I'm just going to
drop this in like that. Getting this indication of the tree and what
have you to the left, needs to be pretty
dark, as well. That. That should be fine. Bit more darkness in
there. Okay, good. A little dry off.
59. Day 26: Tallinn Finishing: Alright, time to add in some
details to this whole scene. And I think what I'm
going to do first is just pick up
some darker paint, some darker purplish paint. And I'll work on some
of this stuff here. So there's probably this rooftop that runs all the way here, all the way to the
back like that. You know, there's also
some of these, like, separation separators and what have you like that, as well. Okay. Areas in between the shops that are kind of
darker like that, you know, you've got some of these
pots that are just, like, sitting down like that on the side of the shops here, and they should
actually have a bit of a maybe downward trajectory
like that for just to indicate a bit of
that, um reflection. Okay. Now, I couldn't get all these reflections
in wet into wet, so we can still get
a few in wet on dry. Again, this is all very, very
indicative sort of work. So, you know, anything
in there that might help to bring out some contrast
is going to be fantastic. And, you know, there's even these little I don't
know what they are, but these little bits just sticking through
the side like that. That's dark. Yep. Yep. The top section, you know, here. Some verticals. Okay. Okay. Good. You
really just, like, making bringing out
details, little details. This is the roof of one of those buildings
there in the background. I just wanted to bring
that out a bit more. Now we've got these
little windows here on the areas of detail for the
rooftops that that we can, of course, bring out a bit. This helps to bring out the, the side of that
tower to the right. Notice, I'm just using
pretty much the same color. I'm not really bothering
with much detail here because a lot of a lot of that previous wash I
want to leave in there, that beautiful yellowy kind of color. I don't want
to get rid of that. So here's just the
windows just touch on. No windows, but you
know what I mean? These little portholes
and, you know, details of the tower that
you can just quickly, like, indicate like
this on the side of the the side of it. Now, here, again, a new
opportunity that I can use to create some contrast
on the tower like that. Here, there's a
little opportunity here with this darkened spot, another sort of rooftop
part here as well. Running to the right. Okay. These windows you
can see here in the back. These little windows just appear through these little
buildings in the background. So I'm going to just
put them in like that. It's just purple. Just a
little bit of purple paint. Okay, let's get some of
these more of them in. Okay. Barely tell what is in
there after a while. Maybe dropping a bit of
brown or some warmer value. In some spots like here, I just think a bit of
warmer value would be good. And this also is so that I can bring out the side
of that tower there. Like, if you make some little darker spots
around the tower, it brings them out like that. Hopefully it looks
better once it's dried. Yeah, there's a lot of this
stuff here in the background, a lot of these buildings
and what have you. So again, you don't
have to You know, you don't have to
drive these home, but just have enough detail to make it look like
you've got something going on back there,
some little details. Maybe we can fix
this tower up a bit. Okay, let's do this one bit of couple little
sushstrokes like that. Uh, there should be another one here underneath,
actually, like this. Building windows
here to the right, simplify these windows
down here in the distance. And some of this stuff on
the roof of the building. It's all just a bit of purple, purplish color, mind you, that I'm using for this. H. Windows again and this little archway
with some detailing. I just darkened down the left side a bit
here as well, again, to bring out that tower,
'cause it's lighter. I just want to bring it out. It's not lighter in the
reference, in fact, but it's just something I want to imply in my version
of this scene. What we got here, these other sort of buildings running
to the right, you know? So I'm going to try to
indicate this here. Then you've got maybe some
windows again to the right. There's a pole. This is, like, a little bit
of shade here. Bit of shade, and then I could deal with maybe some
darkening the top like that. And then underneath,
I'm going to grab some darker paint
that's dropped some of this purplish
colored paint in here. The window inside of the window. But Okay, now we've got
this tree to the right. We don't need to do
too much with it. Okay, so I'm going to start putting in some
details for the people now. It's really got to go
darker with this stuff. I'm using some purple, and I've also got some
neutral tint up the top, which I can pick out and put in for some of these
figures, okay? You can leave some of
them white, as well. I don't feel like you have to make them all
the same colour. Like this one here,
I could leave white. Here's legs, couple
of legs like this. Okay, maybe here,
leave that one white. Why not leave this one? Maybe white as well. Les colors sky and a bit darker. Great. This one here in the fronts like quite
detailed, actually, but um, here we go with
feet sort of crossing over a little legs
crossing over, I mean. He bit of lighter blue paint
for the shirt or something. Someone there
another person here. Maybe someone here that Well, there's a person here that I'd forgotten to put in
before, but like that, standing on a side someone back there, a couple of people in
the distance there. The legs are important. They just sort of make them
look more like people. If you've not got the legs in, they won't look like people. You know, even if you've
got some quick little legs, something like that, can put
another person here as well, you know it's quite a crowded day, so Okay, I think I can do with
a little bit more like, downward brush strokes
for these reflections. And I will just use
a mop brush maybe for this or a
larger round brush. Name color. And let's
just try to get in a few of this these running downwards. Now, we've got
already some wet and wet wet and wet kind
of reflections, but this is gonna just seal the deal and
make it look better. I think. Okay, great. Some little guiding
lines would be good. Just running into the scene
like this because actually, there's a lot of stuff
going on in here, and this is just gonna
help bring it out, bring out some of this detail. You've got lots of
these little bricks and things also running through, and I don't want
to um I don't want to make this too much
of a big deal, okay? But some Okay. Opposite running lines like this is going to sometimes make the scene look more interesting and
balance it out a bit. Okay? In all parts, but
just some parts. Because the ground is yeah, there's lots of little
details and things in here, so something like
that could be good. I don't want to
overdo it, though. Just a bit of extra color, I suppose, here in the
bottom of the scene. Okay. And I might just spray it a little. Encourage and
encourage the color to just run a little bit. I feel like it's, um, needs to have a bit more of
that downward trajectory. Yep. So that rainy days kind of look, which is important to imply to split up a bit so that
there's some darkness in here. Well, touch red for some of the heads of these
figures like here, here. You know, there in
the background. You can just drop in a bit
of color for the heads. Could be people in here as well. What? Okay. Quick
little dry off again. Okay. We're almost done here. I just wanted to touch up
some small bits and pieces. For example, this figure, maybe some dry brushing
for the legs again. Helped to bring some of
that little detail back. I really like the granulation of the ground and everything
else that's in here, so I don't want to overdo it. Okay. This figure as well, maybe a bit of the detailing
for the legs, Kate. Okay. Good. Now, let's have
a look back here. There is some type of a lamp here that just runs
down the page, maybe like there, so
I can just put that in quickly like that. Same with the other indications of some lamps or whatever on
the sides of the buildings. Okay. It's really just a
quick little touch up, little bit of detail. You can add in, you
finish off the scene. A simplifies legs
down a bit like this. Have this run down the page. Bit more there as well. Just want some extra darkness. Um, in some spots. Maybe here as well. Bit to the left. That way, it looks
like the towers are just creating a bit more of a reflection downwards to balance this a bit
as well so that there's some darkness
to the left. Okay, a little bit of hair
and stuff for these figures, maybe for this one, especially, just a bit of
something like that. Dark brown, then I'm picking up. So here for this
figure there as well. You just pick up a little bit
of that paint and see what you can do. Yeah. Just little touch ups. Sometimes just little bits of sharpness in here
will bring back, uh, the impression
of those people, the details that you lost. Um, I think a bit of blue or something in the
middle here would be good. Just a little bit of something for these person
here in the t shirt. A bit of brown for the hair or something like
that. Yep, there we go. So it looked like a
couple of people there. Legs bringing the legs
back a little bit. Okay. It can be tricky to
bring things back, especially when you've
got all this amazing sort of mistiness and
softness down below. You don't want to get rid
of all that softness, so this is the only
way to just do it just tiny little
tiny little bits of detail that might look like
something here and there. Okay. Great. And
we are finished.
60. Day 27: Gotland: Okay, let's start
with the drawing, and I'm going to
put a line right through the center of the
scene, roughly about here. And this is going to
be where this house is on the right hand side where
it's going to be sitting. And for the time being, I want to just get
in this little kind of road you can see
here that runs across. It's pathway, actually
just running across, and then you can see it sort
of cut downwards through the center of the scene around
about here, finishes off. And then you can
see the path just runs to that right hand side, and a little bit
here on the ground, looks like the grass is starting to wear
on the side there, but there we have it. We've got a general path, and this is going to
be good because it allows me to now place
roughly where the house is. So let's get that in. The house is just going to be this rectangular sort of shape or square shape
at the base like this. And then on the top, you've got this triangular like
rooftop like that, and I'll get in a bit of the side part of the
house there as well. And, you know, there's a little something here sticking out on the
left side of the house. Looks like a little
rooftop area like this. You can just put that in
there on the right hand side, you've got this other
part of the roof that's out running down
the side like this here. And at the base, there is basically a kind
of a wall that runs around, runs up, as you can see here, and then it comes down. Yeah, the piece of paper
that I'm using is a little bit longer than
the reference photos. So it's going to have a bit of space on the right hand side that I'll have to fill in. There's a gate here and there's
like door behind there, there is another
sort of window here, and you got another
window up the top there, so just penciling that in. There is some kind
of chimney here, I think, I'm just sort of
figuring out what that is. I think it's a chimney. Okay,
side of the house there. So that's the house done. Of course, we've got
some shrubs and stuff, but we've also got
some other kind of houses out in the
background there. There's, you know, you can
see a bit of a rooftop there. And that's kind of
like a dark rooftop, and then behind here, we've got some type of
I'm not sure what it is, but I think it could be some
kind of shed or who knows? And of course, there's some more details off into the right hand
side there like this. I'm just going to simplify
that down a touch. Okay. Just simplify that down. Like that. Okay, I just looks like a bunch of houses
or who knows out the back. There, good. You've got a lot of
these green sort of shrubs and stuff
running in front as well, so it's no biggie. Good, good. Um, right. So, that's most of the right
hand side, pretty much done. Now, what I want to do is start putting in some
details for these trees. Now, we've got a tree here
runs up and it just you know, I think I'll just simplify the simplify this down a
bit just put in the trunk. And then the rest of
this I'll do once we get the once we start
off in the watercolors. We've got another one here in the background as
well that's sort of just into weaves through
the tree like that. You know, there's even
another tree out the back here that's kind of like
a shorter looking tree, and it just turns into,
like, a much larger bushy or there's tons of sort of greenery
at the back there. Okay. Now we've got this
larger one here in the front. It's probably around here. It's going to go all the way up. Okay? And then you can
see the branch just runs across quite suddenly, okay? And then you've got
the left hand side, so let's get that in. And this is kind of like a part where it splits off
into two sections. There's another bit of the tree that runs to
the left like that, and this comes all
the way down here. Okay, so that's this tree here. And we've also got some, you know, shrubs, like a
larger sort of bush here. And, you know, there's a really interesting
pattern here of this grass that just goes up on this
really steep ankle. But behind all this
stuff in the background, you have got some, like, details of those background
buildings like this one here. I'm just going to pop that in sort of peeking out
from behind like that. I'm making it a little
bit larger as well, hopefully to emphasize
some of the details, okay, little triangular
bits, you know, running through underneath
like this, maybe. And in the background, you know, there's more than
kind of rectangular. There is this other sort of And those would be sort of
the facade of some of the buildings, okay, like that. Then in the
background, it's just kind of a water there
off in the distance. Okay. Good. More shrubs and things here
covering this area. Fantastic. Alright, let's get
started with the painting. Alright, the first thing
I want to do is just get in some light
into this scene. I'm going to put on a bit of warm yellowy color onto the
front of this building. Okay? I want to recreate this light a little
bit just to make it a touch more warm
than it actually is. Okay? Just a little, little bit of yellow value. Okay? I've diluted it down. I mean, it's probably 1%
paint or something like that. It's so minute that color. In there, then you've
got the rooftop, which is like this
orangy kind of color. So I'm going to pop
that in a little bit of that orange here. Okay. And a bit here as well
for that part of the roof, that left hand side. Okay, then I'll probably darken down that orange a bit more
to the left, like here, just so that it looks like
there's a bit of shadow or that kind of thing
running across it. Okay, but it's
going to be tricky to make sure it doesn't go into the into the
front of the house. But at this point,
really, I don't mind. As long as you've just got a nice little indication of warmth running
through this scene. Okay. There we go, the base. That's the house, the
bottom of the house there. And I'll just get in some
more warm value again. It's kind of yellow
ochre now just for this bit of the fence there, a bit here in the
background, too. I might actually put in a
touch of cooler color here, just make it a
little bit cooler. This is some purple
in the background, but it's just diluted
down so much Okay. Leave a bit of that
light on. Like that. Just go to leave a bit of light on some of these sections there. Okay. Good. Same thing here. Down below, I think I will just pick up
some really light paint. Just a bit of purple for
the rooftop, this building. And I have a bit
of black as well, or just some gray tuck
that in there as well. Lake that. Okay. Good. Do this all at once,
and then you've got this building here behind, which also has a bit of
darkness back there. That bit of orange, orange sort of values. Well, this rooftops and
things just running through. Even a little burnt
sienna will do the trick. Okay. As long as I've got something, some really light values
in the distance there, we can bring something
out of it afterwards. Good. Now, in the sky, I'm going to pick up
some cerulean blue, and I'm just going to drop
this straight in to the top. Now I can cut around
this tree a little bit. We don't have to paint
the entire tree in because we know that it's yeah, it's got a bit of
warmth in it as well. Same with these trees
here in the background, I'm just going to cut around
them and touch, okay? Like that. Okay. Let's just bring that across
to the right. Okay. Borrow some of that
paint on the left, and I just want to bring it
over to the right and create a nice kind of wash
that will blend. It's just go to blend a bit into the buildings
below as well there. I'll add in a bit of extra concentration down at the base, indicate that water
you at the back. It's not too obvious,
but Okay, good. Bit more concentration,
I think would be better. And again, just sort of
cutting around the house. This is tricky because
you want to make sure you're not going
too far into everything. Okay, just sort of leaving
the previous wash in there. Okay, let's do this
left side of the house. Now, that there we
go. There we have it. Good. Now, this path, I'm going to just
leave as is really. Unfortunately, some of the blue has already got into the path. It's not a big deal, but I'm going to
pick up some green, a little bit of this
undersea green. It's a really light green value, and I'm going to
bring that across maybe add in a touch
of yellow as well to make that green a
bit more vibrant. Okay, like that. You've even got some of
it just goes up here, kind of like this shrub or
whatever, runs up the wall. You know, you've got
some of it that runs up here as well into
the building itself. It's actually quite
dark this bit, so I can drop in a bit more concentration
in there like that. Other than that, I want
to keep the rest of it, pretty light for the time being. Okay. Let's continue on, like down below here. Okay? Just bring this across and, you know, notice how I'm just cutting around this
path a little bit, as well. I trying to leave trying to leave a good
amount of that path white. I can darken it afterwards, but if I go over it now, if I go over the whole
thing, it's going to be tricky to bring back
that previous wash. So I've got to be careful here, a bit of darkness on the
left and a bit of yellow mixed in with the green a
little greenish value here. I'm going to cut around
that little house. And as I move down
the page here, I'm going to start
adding in some purple, little bit of purple
or black or whatever, just to create a bit of extra
darkness in there, Kate. I'm just using the
same brush, mind you. This is just the same
mop brush shows you how much you can
really accomplish in a few brush strokes. And further down here, I'm going to add in some of
the kind of grassy texture. It's just a bit of
yellow mixed in with white to get this
milky sort of color. It's gonna look a bit green,
actually, unfortunately, because I've already used
a lot of green here, but it doesn't matter. As long as it's
lighter, I'll be happy. Of course, I can drop
in some more yellow in there as well, like that. Okay. Good. Back to that green, adding in some more green here. And a bit of purple
mixed with that green to create a darker green value, I suppose, running through. Underneath, you've
got extra dark values in there, too. Okay? There. Oops, we've gotten here. There's some more bits I can just sort of cut
around as well in there. Yep. Good. And let's bring some of this darker green to
the right, as well here. Bring that through. A
bit more yellowish color up the top portion here. Good. Yep, trying to bring more of that yellowy color throughout the back
behind that path. Okay. Some more
green down below. Green and, like, purplish value. Okay. And a lot of this
is gonna be great. This light that you
see running through. Okay. Now, this stuff is
starting to dry off. So this is kind of
my opportunity now to put in a bit of white here, just to subdue this
down a touch. Okay? I don't have to do
it in all places, but just in some spots 'cause I do want some of that white to show through anyway. Okay. Good. Now, with the trees, we need to put in some
lighter value as well. I'm going to just switch over to a smaller round brush for this. This is a bit of yellow ochre, which I'm going to drag all
the way through that tree. Okay. That's some of these trees in the background there as well. Maybe a bit of brown
up there as well. Good. A bit of brown. This is raw umber. Then I put in some darker
value of raw umber now to the right side here. Hopefully, this is
going to create a bit of a bit of softer shadows
running to the right side of this tree and preserve the preserve the light
on the left hand side. Okay. It's tricky, but especially because
that area of the sky is still not completely dry. Okay. But yeah, all this stuff anyway, I can put in a bit more
detail afterwards, you know, another layer
or what have you. But I can still kind of
get in, as you can see, just these branches, these indications of branches
running across to the left. And parts of that scene
have already dried. You can see to the left, here, parts of these areas of the skies this area here
that's not completely dried, so it's a bit more effort to get in some of
these small details. But, um it's just saving
a bit of time and also creating a nice loose
feeling here as well. The right side of
that tree just needs more something running through. Yeah. Some more trees out in the
back here and they just have this so you can see this upward trajectory
to the branches. So I'm going to imply some of these
branches in here like that. The shadow, obviously on the
right hand side of the tree. There is another tree back
here behind everything, and that also goes up. There's another one back there, which I'll put in as well, maybe an imaginary one here. All right. And also, let's start putting in some
little leaves, some green. And this is going to just spread amongst the sky a little, hopefully, because the page, the paper is still sort of wet. I can do this all
at the same time. It's a lot easier if
I do it this way. More yellow, maybe some orange mixed in there 'cause it's kind of like autumn
sort of time. But it's a bit much
actually to the left, but it doesn't matter. Cute. Gonna pick up some brown and
some black mixed together. And with the rigor brush, just put in some little
detailing work here, while the paper is still wet, can just go ahead
and do this and get in an impression of all the little details
and what have you. That the right hand side of that tree just needs to really be darkened down,
as you can see. Plus, you've got some real dark branches on
the left, as well. So that just go all
the way through. Okay. Plus, you've got all
this kind of, you know, if you see on the tree, the sort of the
pattern of the bark. I just sort of seems
to run through and permeate through
the entire tree. So just a little
something like that hopefully will help
imply extra details. Great. Fantastic. Now, this stuff is probably started to dry now, the
ground and everything. So I'm going to go pick myself
up a bit of purply paint. Okay. Just a kind of purplish, maybe with some blue
mixed in there as well. Ultramarine blue and purple. And I'm going to try to get in like a shadow here
on the ground. You can see it just
running through. There's also another big shadow just running through the
front of the scene like that. I'm just making it a bit darker than the actual
reference to just really exaggerate
this a ton, okay? Like there, you can
see they connect up. They'll go all the way into
the back of the scene here. This shadow needs to connect on better like that with the tree. Yep, maybe one here. You can see here, the same
sort of deal, like that. Um, I'm just trying to extend this tree
downwards a bit more so that this shadow makes
more sense there. You know, I mean, running through, you've
also got other, you know, bits of tree branches also here, you know, maybe something
here in the front, as well. Let's put some more
bluish value that Okay. Of course, back here,
you've got really a lot of darker value. Um gonna drop in extra paint. And also use this as an opportunity to maybe bring
out some of the tree to the left the tree,
this light pattern. Alright, yeah, really putting in this darker value
here to the left. Just purple and black mixed
together for this section. Um, B more darkness
back here, perhaps. You know, with the fan brush, I'm hoping to just
maybe flick in a few little little details like tufts of grass and things. You can see just running
through some parts here, like, just in a way disrupting
disrupting the flow of things, but also joining, joining parts of the scene
on to each other. A bit here as well. Helps to break it up a touch. Good. I'm going to continue bringing this a shadow perhaps
through the house a little. Like, maybe up running across the house like this.
Here we are, like that. It's like a purply
shadow, I suppose, off some hypothetical branches
running into the scene, and then maybe darken down
this right hand side there. Good. There's also some branches, tree branches and patterns we can put just running
through this fence. Not a fence, but the
wall here behind it. I'm just going a bit darker. Maybe more purple
behind, like this. And the same thing
just creating a bit of a shadow running across
this building in the back. Same shadow pattern, I
suppose that I'd seen before. I will darken off the
rest of it. Like that. Yep. A bit of purple also just running across this side
of the building, the right side of the roof. Okay, again, to I guess, indicate the shadow
that's running across. Really try to make it
a bit more organic. A bit of shadow on
the chimney there. Uh perhaps there's a bit
underneath even the roof, like here we can get this
part behind the roof there, just indications as well. Like that. Let's have a
look at these. There we go. You can just put on
a window like that, and then a window below, like that. Extra darkness. In the background,
I'm going to just start to put in
more details like this little house back
there that could do with some extra purplish value
around it to bring it out. You know, even behind these little triangular
parts of the houses, I can just put that in a bit of detail or something
underneath like that. An indication of, yeah, some of the rooftops, I guess, and architectural
details showing through. One thing I really like doing is to scratch out some paint. So this is a little uh
pocket knife that I use, little blade that I can
use to just scratch off some indications of grass
and get in a bit of light. And you've got to wait until
the paint is almost dry. So pretty much at
this point here, where I've just about finished all the other
details before you do this. And as you can see, it's quite effective
implying textures. Trying to make some larger
ones here in the front, you know, here, you know, where you can see the light
come through a little bit, a little bit more
scratching out works. It helps to create
some contrasts. Otherwise, it looks
kind of boring. Just the same old values
running all the way through, and it saves you from using some guash as well
for this. Yeah. There we go. Look at that. You can just really work into some areas a little
more than others. Okay? All right. Good. I think I could also do with just a few more
little rush strokes like that here in the foreground
for some tufts of grass. Okay, so this area here in
the back is almost done. I just want to add on a
few finishing touches to bring this all together, a bit of purple and a bit
of black mixed together. And we'll just go into some parts like for
example, the rooftop. I thought that might
could do with a bit of extra tiny little detailing
here to indicate the roof, bring the roof out a
bit more like that. You know, for example,
underneath here, that could do with a bit of
extra detailing, as well. This bit here behind the door, I suppose, there that needs
to be darkened off a bit. A look. It's really just a way to bring
some little details back. Yep, this is part. The building could do with a bit of re jigging, detailing. Okay. And we are finished.
61. Day 28: Tallinn Nocturne: Okay, let's get started
with the drawing. Now, this is a pretty
simple noc turn scene, if you ask me, because you've only got the
cars really to contend with and the details of the silhouette of the
buildings behind, along with some small details. So I'm going to just
draw a line just underneath probably about a third of the way
through the scene, maybe a little bit more than a third of the way
through the scene. This is to separate the
buildings from the ground. And we've got the car
here in the front, which I can just kind of
indicate the windscreen there, and you can see the
front of it sort of flares out a little
bit like that. And then you've got
the lights here, you know, sort of coming
in from the front. And, of course, that
that reflection on the ground that we really
need to to get in. So firstly, I just want to
put in the shape of the car. Now, the rest of this is
going to be a lot easier once we have the general
shape of the car in. Now, there is
another car behind. You know, I can just
sort of draw in the general shape of the
windscreen again as usual, and then the back
end of the car, here you've got another wheel and then you've
got a wheel here. It's kind of just the
front of the car, I guess, just moving along and
yeah, there we go. That's the car behind. You know, there is actually
another one behind as well. There's like this van of some sort there that's just
all the way in the back. You can't really see much of it, but that's a car there
in the background. You know, the rest of
them, you can see, they're just all the
same sort of shapes. You got this other car there. You've got another
one that seems to be facing towards us again, another couple of wheels there. You know, I'm just
trying to simplify this down as much as I can. You've also got a
couple of people here walking in the foreground. I'm going to just put
in some little details of those people
there in the side, you see the sidewalk, and there seems to
be some kind of tree here or what have you? Another building there. Okay? So I'm going to put in this other road that
sort of runs across inside, and then that sort of runs
off like there as well. So it's sort of like a like a three point
perspective, isn't it? Okay? So you've got this
silhouette of the buildings. Now, this is where you really want to make sure
you're not overdoing it. I'm starting off with this
one right in the front first. I kind of goes up. It's
got this triangular, like, rooftop comes
down like this. And there's all these
little details on it, which I'm not fussed
about at all. Here, you've got
some little details of these architectural details, I guess, you can call them
on the rooftops, like that. That let's just put in
some of these, you know, running through the sides of the buildings that runs down, and that's kind of like another front part
of the building. Okay. This building here
has some lights there. Other than that, you've
got these windows that are just coming
through the buildings, like a couple three windows here and little bits that
stick out the side here. Then let's get in this one. These are the buildings
here on the side and you've got and this triangular sort of building there and a bit of this stuff on the chimney there. You can see them all
start to come down, and then you've got
this really large building there
right at the back. But you can see it just
sort of pops up there and then like a silhouette all
the way in the distance. Like that. Okay. Now, this part
here is just simplified. I'm just going to make this a silhouette of some
buildings here to the left. Okay. And, of course, you've got this van that's sitting here and you've got a bit of the side
of the van as well, which is great because
you can sort of make this look like you've got a bit of light coming in
from the right hand side. Okay? So, of course, you've got some light
running downwards, as well. Here, you've got more cars that are just parked on
the side of the road. And, you know, look just
simplifying this down. You've got some that are
actually driving into the scene, Okay and some that
are further behind. So I'm just simplifying this down just simplifying
this down, yeah. There's also you
can see some people maybe walking on the
road here as well. Three people just sort of
walking into the scene. Maybe put a person here as well. I'm just thinking
just to make it look more All they need to make
this person a bit bigger. Just to add a bit of life
in the front of the scene. I want to make the
head up there, be kind of walking into
the scene like that. Okay. Good. Let's have a look at how
everything is appearing. I think that looks pretty good. We should get started
with the painting now. Some of these headlights and
the light in the scene now. Over here, you can
see there's a bit of yellow runs down
the page like that. I'm just going to drag the
brush running downwards like this to get a bit
of that yellow light. You got a bit on that van as
well running down like this. Alright. And not only that, you also get these, like, tail lights of the cars that run down
the scene as well. So this is just a bit of orange that I'm picking
up here as well, just a bit of orange
that's kind of indications of the tail lights of the cars. Okay. And you can see there, maybe there's you know, I can indicate a little bit like this as well for that one. Alright. Okay. And some yellow again
for this part here, just a bit of downward brushstrokes
for some of this yellow. Alright? I think the orange and the red tail lights would
be easier to get in afterwards if we've
missed out on anything. But Yep. This should be good. Now, I'm going to just
give it a spray to keep this bottom section
of the scene alive. Okay. Just make sure I've
got a lot of water on there. And what I'm going to do is start working a little
bit on the cars. So I want a bit of blue here, just a cooler color, really light, lighter
color than that. More cool, I guess, like this. And there we have it there. Okay. Just showing it run
through a little bit. And I can start working on this stuff
in the buildings now. I just want to have
kind of purplish color, but I also like to have some
yellows in the buildings. So I've got a bit of
this yellow ochre, and I like to mix this
with some purple. And it just subdues down
the yellow a little bit. Okay, like that. The buildings have a bit of
something going on in there. Really I normally like to
do this a bit earlier. But it's good to have
the sky in as well. Okay? I'm just going
to put in some blue, a little bit of blue up the top, maybe some darker purples in there as well blue
and dark purple. Yep, there we go.
That's going to be a nice sort of
color for the sky. Now, it's got to be, you know, it's got to be
reasonably dark as well. But it's not as dark
as the buildings. So this is just a
little bit of this. I'm cutting around the
buildings a touch, so that it doesn't go
directly into the buildings, like a little bit
of cutting around. This allows me to just work on the buildings as
well afterwards so that that color doesn't run
completely into everything. Okay? As you can see, it's just a
mop brush I'm using for this. Move some of this paint upwards, move some of it down
over that side. Okay. Maybe we'll move some
of it down here as well. Okay. Good. So continuing on with
these buildings. But I'll just give this again another spray at
the base so that it keeps that wash
alive down below. Let's have a look. G pick
up some yellow again, a little bit of
this yellow ochre. There. And more blue, maybe a bit
of neutral tint or black, just sort of mixed
in here as well. Okay? The big thing is just
trying to make sure I've got some significant contrast for
the buildings in the front. The buildings need
to be a little bit darker than the background
and the sky wash. Okay? So I'm just cutting around a bit in order to
try achieve this. I'll probably have to go back
in there again afterwards. Okay? It's just a bit, as you can see, a little bit of this
skywh come through. Leaving a little strip
of light on top, little bit of lighter
value on top so that it's able to separate
from the sky. Okay, a bit more yellow
as I move down the page. Okay? It's just a bit of yellow, maybe some orange
in there as well. Okay, main thing I
just want to do is add in some warmer values. So warmer sort of values, and then I'll feather in some
of this purple again, cape. Great. Now, we've
got, of course, all these cars and everything, so I'm just going to
cut around these cars. And, of course, this person
that's walking around here. All right. There's also this
car here in the foreground, this larger car, I'll
cut around a bit. Like this. There's
another car behind. Okay. Just trying to get
in this soft sort of really soft feel of color. Okay. I'll do the same for
this one to the left. Maybe some yellow up here first to get in a bit of light that
might be showing through. Then I'm going to go
in with the purple. Yep. And it is very dark out
in the back here as well. So same purple I'm
using darker purple. And just redo some of
these buildings a touch. It's a little bit tricky
because they're so far off. Let's cut around
this little van. I'll have to get in some
bluish paint maybe in the back like this to make it
look more There we go. Yep. More like a van,
the back of the van. It's not going to be so
obvious at the moment. We can put in more
details after. Okay. Now for the rest of this, I'm just going to drop
in some more color. But let's give it a little
spray down below first and what I want to do is pick up more of this
kind of orange values or, you know, warmer
colored, you know, got yellows and stuff like that, and I'm going to
drop that down here. I'm trying to keep
this area a little bit lighter so that I can indicate the whiteness of the
headlights here. Okay? That's not 100%
something like that. Okay, let's move some more
of this stuff downwards. Again, this has to melt in
with all of this other color. And the idea is for
it to just look like there are reflections
coming from above. Okay. Make that run
through a bit there. Bit here. Same
sort of deal here. Just verticals, essentially. This way, you've got
now indications of light and downwards sort
of strokes, I suppose. And you can always just drop
in a bit of paint as well, let it run downwards, and that creates these, like, little blooms of light
that just run through. Thank you. Okay, let's give it a quick dry. Final touches, we're
going to put on the details of the buildings and some of the darker spots. So I can see here there's specifically some buildings
out in the back that I mean, these are actually some trees darker kind of trees
out here than I can imply that just a bit of green and a bit
of darker blue. Okay? This is just gonna help me to indicate the
side of that building. As it goes in, and
then we can start putting in a bit of the
details of the building like this and
underneath, like that. This is just a bit
of darker paint, whatever I've got
on the palette, essentially, which is
purplish colored paint. Okay, here, you've got some little windows
and here as well, some more windows that
you got more here, a couple others there. You just looking at that
reference and finding some points that you
might want to bring out, indicate or otherwise, you got a window or something
on the top like that. Then you've got two more there. A couple more there. Running down. It's really just almost drawing with
the brush to create some final final bits
so that it makes sense. Another window there, another
window here, you know, at that just quick little
quick little indications. And I'm really just trying to be careful with this as well, so that I'm not
overdoing it, too. The rooftops are a
little bit darker, you can see on some
parts of them. So I've just gone and indicated a few more extra extra
bits and pieces. You also find that
maybe there's a bit of darkness that surrounds the bottom
part of the scene here. So I can just drop in a bit of darker paint around
the cars like that. Hopefully that will
help to bring out the the light below. Okay. I don't want to overdo it again. But, you know, here
in the background, some more windows like that. Okay? This should be darker, this top part of the
building like this. Then, of course,
you've got some of these trees here on
the right hand side. Okay, like that. And let's put in some
details for this car. So they got the grill
there in front. And plate. Then you've got the bottom
of the car, which is, like, pretty dark, like that. Here. And, of course, we've
got this car behind like right there in the
wheel as well, like that. Just go to put in
some details for the car and the windscreen
perhaps like that. Um good. Another car behind here. Um, another one here as well. Another one there. I got a person here and I'll
just put in some legs. There's a person there, maybe, like, crossing the street. Of course, there's
something here. I think that could
be another car that's just parked behind. Again, I'm just putting in
some details for those cars. Another one here. Another two people here as well. It looks like a couple
of people to the left. You've got this car
here, of course. And it does have a
bit of darkness on the left side,
just behind there. Okay. Good. Flat brush. Maybe a smaller flat brush. I want to blend
some of this stuff downwards like that into the shadows and
the lights there. So check this out just sort of quickly dropping
this in like that. Okay. It's just some purple. This figure as well, maybe a bit of reflection there. Me downward strokes. Like that. So more windows to the left here with these
buildings in front. Might also just darken some of these other buildings
here to the left. Okay, to hopefully bring out the central part of
the building and the center like that. Give it a bit of contrast. And yeah, just trying to
darken a bit more around this area to create
extra contrast, as well. Well this car Extra contrast
there to the right. Oh, I've forgotten, there's
a couple of figures here, too, where people be good to put in some details
inside the windscreen, these darker spots inside. Okay. It'll dry off. Okay, so finally some white guash that I can use
to bring out some of these details for the lights of the car
like that one here. Let's get that
through like this. There we go. That looks better. Really just feather
that in picking up a little bit of
bit of that guash, just bringing it downwards. Okay. It's difficult, actually, to get it to show through and look
kind of dazzling, as well. Um. There's some people as well. We can just drop in some
guash for the shoulders. You know, the top of
the car, you might put in a bit of
guash up there to just bring it back
a touch, okay? All right. And we are finished.
62. Day 29: Helsinki Snow Drawing: There's a lot going
on in this scene, and the first thing I think
that's important to put in is just some basic guidelines as to where the sky separates out and the bottom of the buildings and
the back starts out. So I'd say that's about maybe
a third of the way down. So I've got the pencil here. I'm just going to drag
the pencil across about a third of the way down
from the top of the page. It doesn't have to be perfect,
but something like that. Is going to be fine. You know, you've got all these
buildings back there. I mean, I can just maybe
pencil in some little details, and it actually there's
a lot of snow that you can see that's just
sort of piling up on top of the buildings. I think I'm going to
emphasize this a bit more than is necessary, actually, because I think that will make it look more
interesting. Okay? There's another building
here. Look at that. It's sort of like a building
off to the side like that. And we've got the train
station there to the left. Okay, this is in Helsinki. And what we will do
before that is, again, just sort of pencil in some of these buildings here
in the back and a bit of this lighter colored snow
on top of the building. It's really just the rooftops. If you think about it, it's
all so misty back there. You can barely see what
is going on at all, but a tiny little bit of scribble there is
going to be fine. Okay. Now, I'm going to carry this row down roads sort of start off
all the way in the back, and it runs down the page, and then it runs
out on the right. Okay, and the other parts of
the road just sort of run down and actually scoot all the way almost to the
center of the page here. So it's quite a yeah. A few little tracks
running through. Now, this is going
to This is going to be easy to do more
watercolors later, okay? Let's have a look now
on the left hand side, there's a bit of this road that runs in sort of to the left, and there's some
stuff on the road, that kind of thing, okay? And we've got this big
mass over here that we need to and we need
to sort of get in. Now, where does the building start? Where does it
touch the ground? We're only at the
center of the scene. If we look here just
around the center there. Okay. Then you've got to really try to
simplify this down, make it as easy as I can. So we've got, like, the
side of it like that. Kind of like a squarish shape, and then you've got this
arch like in there. Okay, underneath, you've
got this section like that and then a bit of darkness under like that.
Let's have a look. You got this spot
a side like that. Okay, there's a lot
of stuff going on in here, and like that. The rooftop, you know, lots of these little
rooftop sections that's pretty complicated. But when we look at
it later as a whole, it's all going to be
much more simple as we're just going
to leave it kind of like a little bit
lighter there on the top. Okay. D this runs all the
way to the back there. Like that. Let's have
a quick look, okay? Comes forward like that. Okay, that's so this piece of paper I'm using is a
little bit a little bit, um wider than the reference. So side of the building. And we've got the kind of this arch way that runs like that. Then you've got kind of this another entrance to the front
of the train station here. That has some of these
features running on top, as well, towards the back. Okay. And of course, you've got this clock tower that's running all the
way upwards like this. Really quite a stark
looking shape, and I have to make sure
this gets in here with, you know, some decent
amount of detail. Okay? Just to keep you know, keep it looking interesting and quite salient in this scene, 'cause it's quite
a you look at it, it's really quite
an obvious part of this entire scene, okay? There's a lot of stuff
going on in the rooftops. I mean, what's going on here? Let's see if I can just
rejig this a little bit. There's another roof
or something here as well, underneath. Okay? Okay. Some windows sides here. Okay. In this area, there is just this detail. If you look at it, it's just
they're just shapes here, I can see some kind
of rectangular shape, and it's like a structure
there of some sort. You know, here in front. I've also, you know, you can see this
other structure here. Okay, let's just
try to get that in. That's like a a little
station or something, like, a little
information center. Okay. Apart from that,
apart from that, I think we've almost got all, you know, the little details
that we need in here. But I think the cars are going to make a really
big difference now. Let's just put in some little
indications of the cars up from the distance to the top of the scene that
from the top of the scene, you can see they just
kind of look like little rectangular shapes, okay? So we need to imply some
little rectangular shapes. And here, you know, it gets a little bit
more complicated, but, you know, you can get the windscreen in
the back of the car, then you have the front that. Doesn't have to be
super accurate, but just some car there. There's a couple
more here as well. Another one in front maybe here. Okay. I'm just really
scribbling these in quickly. There's people all around this scene walking
around everywhere. We don't need to put them
in really at this point, a few to just remind myself. And you've got all these
kind of poles here, and these are important
because they, you know, a lot of
them have a bit of light coming out from them. And even the windows
here in this building, they have light coming out. So that's just to remind me to make sure I put in some
of that light afterwards. Let's put in some more of
these cars and as you can see, just these sort of boxes
that you can see from above. Then as you get a little
bit more into the distance, you see more the back of them a bit of the front
kind of thing there, they just line up. It looks like some kind of
traffic jam or something. They get smaller and smaller
as we get into the distance. They appear to be just sort of waiting at a crossing
or something like that. There maybe some people
accessing the road. Okay. Good, good, good. Just looking to see what else we can potentially put in here. More objects. There's
something here. I don't know what
that is. But yeah, you've got some small cars also coming in from the distance. You can see just little cars. All right, coming in, you know, you can just imply like that. What is this thing here? It's
other something or another, like public area, some spots. You know, at this point,
they're just shapes and areas of darkness. Okay, so I think that should
be good for our drawing.
63. Day 29: Helsinki Snow Painting: Going to put in some light. And I'm going to pick
up some yellow ochre, mixed with just
some normal yellow. Okay, a bit of white
guash in there as well. And I'm going to just
drop a touch of this. You know, let's
just put a touch of this into the windows, and into the ground, as well. All right? Just so that we've
got some light. Okay? A little bit of light running through
the scene. Okay? You know, you've got to be
careful not to overdo it. But you've got some here. You know, you've got
some over here, as well. It's kind of like, you know, the headlamp headlights just shining onto the cars in front. You know, got a bit
here maybe a bit here, the cars going into
the scene, you know, even the tail lights and
things like that of the cars. You know, a little
bit of that's going to really make a big difference. There, you know, even on top
of the clock tower here. You've got some light here on
the sides of the buildings, like like that, just a bit of a little bit of light there. Okay? Just a lot of something like a
warmer kind of light. And this is coming out spilling out a little bit from the building downwards as well. Not only that, you've got
some of these buildings in the background that also
have some light in them. You know, I wouldn't
bother too much with all this if you
can't get it in, you know, I just
like to quickly drop in a few little specks,
that kind of thing. And because afterwards,
we can actually get in some of this light
with some guash anyhow, it's gonna be difficult to leave all this to just the watercolor and cutting around
work, it's okay. Now, just underneath some
of these lamp posts, you can see there's a
lot of light as well. So just sort of trying to
get in a bit of this stuff. Okay. Now let's give it a quick spray with the
spray bottle. A little spray. Now, on top of the buildings, I want to get in some
kind of bluish color, and I think I'll use some
ultramarine blue for this. All right? Yeah, the snow is
like a kind of, you know, there's definitely
like a bluish value, but a very light
blue kind of value. So let's go in like
this over the top. Um, maybe less
saturated, like this. Yeah. Okay. It's kind of like a very light
blue color. All right. A lot of these buildings
are just going to have this light blue color that permeates through the
top, Okay, like that. Let's have a look
some more around the back section as well. I do think this is
going to need another. It's going to need another wash on top of this to
bring it all together. Up here in the sky, as well, I really want to. We'll just go over
this clock for a bit. But in this sky, we want to just make
it a bit darker. I've got some darker purple,
which I'm going to drop in. But yeah, as you can see, I'm just going over
the top of the scene. If it's a little bit
darker, it's no big deal. Okay. Actually, the
buildings are touch lighter, not lighter, but they
touch darker themselves. But we can still have areas. You know, we can
still have areas like the rooftops of the snow and stuff here that are
still lighter on the roof. Okay? So you want to
keep this sort of nice and wispy. Yeah. Good. Nice and wispy, maybe a bit of darker value as well in the top part of the
scene, just like this. Okay, so that it looks a
bit more darker on the top. Okay, like that. Maybe some mist or something running through. It's difficult to imply
this in watercolors, but a bit of this feathering inwork goes a long way to help imply that. Okay. Now, moving down the page, we're going to have to again feather in some
more of this color. And I've just got again, some blue, really light blue. Okay? And let's drop this in around all this
light that we have. That's already in there
previously. Okay. But maybe some Cerulean. A bit of cerulean. That's cutting around to the cars again. Yep. All the way down the
base, it's really light. I mean, this wash I'm using
is mostly just water. Me this Wash. Okay. Now, I'm going
to start putting in some little kind
of lines, I guess, of the road or just some areas that I
can see running through, and it's basically just really these little
guiding lines, okay. And not only that, you can see they kind of just go up as well into the actual
buildings themselves, like up here, for example, that gets pretty high there. And then in the background, you got the buildings all
the way in the distance. And again, this is just kind of wet and wet
work for the buildings. Not much in the way of
structure, but just enough. And this is just a little
bit of purplish paint mixed with black to kind of get in some of that stuff
there in the background. Some of those buildings
in the background anyway. They will just settle
in a bit back there. There's not much
I want to imply, but just as long as it's soft. There is indication
of them back there. I can probably tied
them up later, but I'm not fussed
about it right now. Okay. These little roads that go in to the back section
there as well. Um, let's have a look
at this building here. Gonna use some more black
here and just drop that in, and this can, you know, be the bottom part
of that building. A lot of this I want to try
to put in wet into wet, if possible, you know, some of these structures, I don't even know
exactly what they are, but, you know, it's going
to make it a lot easier. You know, the cars I don't
need to bother too much about. I can put in some sharper
shapes for the cars afterwards. But this stuff is
definitely going to make a difference to make it
look more subtle, I guess, like these this road or
whatever down the base, the bottom here, like that. It doesn't look too, stuck on. Let's see if we can go into this building here. All right. A bit of brown maybe
also mixed in. Okay. And again, sort of just trying to keep away
from the rooftop a bit, to leave some of that white on Well, it's kind of just leaving on that sense of that snowy
effect up the top. Okay, while still
trying to get in this bottom part and having
it all sort of wet and wet. Like that. This part's darker. And here, I'll sop over to
a smaller round brush for this big thing you want
to do is try to preserve the preserve the light on here, which is essentially just
the rooftops of things. All right. There, look, let's just get
some more in here. I kind of comes up a bit in
there, doesn't it? There. There's some other bits in here as well. Okay, good. Dark sort of values for this, because we're painting
wet into wet. We don't want to put too
much paint on the brush. Otherwise, it's going to
spread everywhere because the paint is actually still
wet underneath. Mm hmm. Okay. But it's really the only
way to make sure I get in some nice light effects
running through here. Just outline the bottom of
these buildings a bit more. They don't appear to be too obvious just yet, but
just something there. Yep. Okay. There is some darkness
behind here as well. Yep. That section is
a little bit darker. Soft enough this
part at the back. That looks a bit too harsh. Gonna mix some water in here. Good. Some more darker
bits in the ground, like, as you can see, just a little little kind
of indications of the Okay. Of things in the ground, darker spots in the ground. Okay, that's going to be pretty important
to imply, as well. It's almost minute
little details, which we can get in
afterwards as well. But, you know, you can only do this wet and wet stuff here
at this moment, really. So I do notice there's
actually a lot of like down the base extra color here should be extra bit
of darkness in some spots. Okay, in here, maybe. Actually, here in the front, I think, could do with a
bit of extra darkness. Even if to exaggerate a little even this
section could do with a bit of extra
details on the roads like Okay, let's give
this a little dry. I'm gonna go into the tower
here now and just get in a little indication of
it in this darker value. This will be pretty
pretty light, and I just want to
make it stand out from everything else in front. Okay? So just like that. Near the roof below, you can see I'm just
going to stop shy of that snow there. And there we have it. We've got a nice little
indication of it running above. Let's get in the
top of it as well. Like that maybe Yep. Difficult to quite
see into the details, but, um, that should be enough. Okay. And we can also start now implying some other
little details like here, for example, on
the sides of the, you know, station, there's little bits of
darkness in areas like here, sort of imply the where the roof separates from the bottom part of the
building, as well. Can just sort of
do that and put in some rough brush
strokes like this. Okay, here, let's put in some downward brushstrokes like this, as well. Great. Some more little
indications to the left. It's really just to outline some small details that
didn't show up before. So yeah, there you go. Just some downward
spots like that. Something going back in there. Of course, you've
now got this side of the station and the arch or
whatever you call it here. Inside, there's also a bit of
darkness here at the base. Something like this, a
bit of darkness here. Good. All right. Some more here, left hand side. Let's have a look in the
background of just gonna dry brush some small details on here in the back
because actually, there are some details
on the rooftop. You can see just
some tiny little, like, details, I guess
you could call them. And this section out the
back there, it's darker. It's difficult to imply, but yeah, just dry brush. Dry brush is the
way to go for this. So that it doesn't
completely remove that previous wash and
cover over the top of it. Can you just darken that
a bit more. This tower. A little bit more some parts. Good And just sharpen this section up again. Little parts of the buildings, you can just sharpen up adding in a few
little brush strokes. This Amar's another something bottom
of the building. Again, there's a lot
of detail in there, but these look like
stairs or something, and you've got some
architectural detail or some walkway here, runs around. This You know, I don't
know exactly what that is, but just some little
dry brush work, make it look like
there's something there. Okay, good. Okay, some of this car. Let's put in some of these cars. All right. This bottom part of the cars yet. I'm just going to color them in real basic sort of value in
these cars as well here, below, again, they are
for the sake of this, just little boxes, really. Okay. Lots of little lines and things running through. But Okay. I might put in some
of these poles. These light poles. Rigor brush. Okay. Just a few of them
running down the page. Maybe some running down
here, the streets. You know, some here as well. A more darker value to
indicate some of these again, these little
architectural details. I just didn't think they
were dark enough before, the rigor will help also add more detail so long
as I'm quick with it. Okay, good. Even the towel, there seems to be some bits and pieces in there
that I can emphasize. Better. It's B cast again, just detailing a bit extra all the way into the
background like that. And let's put in a
few little figures. Some black paint. There's a lot of them just sort
of walking around, you know, put them in quickly. Oh, over the place, really. Trying not to overdo it as well, 'cause in terms of the simplicity of the people
that we've got in here, just keep them very, very basic. Even just the bodies you can put in that worry
too much about the legs, especially the ones that are all the way out in the back here, They're just to
indicate some figure, a person, but not worrying too much about all
the little details of them. My you get smaller people
here out in the background, so I don't need to really
do too much like that, but it's the ones that you see closer up, you
know, like here. To just put them in quickly
and then move along, really. I have another one here, maybe Detail this car a little bit better? The wheels and underneath them. I go to get the tire tracks, tire marks on the
ground like that. Okay. And that is finished.
64. Day 30: Gustavsberg Drawing: Okay, let's get started
with the drawing. And what I'm going
to do is start off around the center
of the scene and put a lines running all the way through from the
center of the scene, kind of cutting this
page into half. Because that's
roughly where the sky meets the Earth, okay? The next thing I want to do is in the center of the scene, you can see a little path
here in the background. I'm going to just
indicate this path, okay? Sort of starts off a
little bit out the back, comes down a little bit. Then you've got this
sort of hill here and the path then starts again coming down to
the front like this. Here, moving out. Then you've got a much wider
sort of bit that comes out here like that down
towards the base. Then you've got the path
that sort of runs to the right hand side of the
scene, roughly about here. Okay. You've got
all these shadows that are running
across the scene, which are going to be quite
interesting to get in. Okay? There's all
these mounds of grass that you can see here just
growing in its autumn. So you've got really a lot of beautiful beautiful
golden colors in there as well as the greens. And of course, I'm going to need to put in roughly
where the water starts. I'd say it's right here. It's in the background.
And really, there's lots of shrubs and things growing around
there as well. But at the same time, you know, you've got this tree here. And a lot of this stuff, we're going to be able
to just get in actually with the watercolors afterwards. Okay. So don't worry
too much about the details of all the different branches
and that kind of thing. You know, I'll leave a lot
of this too afterwards, but this is just a start, right, just to get us going. You see some branches coming in from the far Far
right hand side, there's as well, shrubs here. Okay, there's more trees
in the background. There's some more that just
run upwards like that. There, there's some
more, you know, running all the way into the
background like that, okay? Plus, you've also got some kind of distant
mountains or whatever here, not mountains, but, you know, just elevated land
in the background. Okay. Over here, we've also
got a bit of elevated land. There's actually
a lot of housing and people living back there, but you can't see it
from our side just yet. I do like this tree that's
sitting right here. It just define this
path a bit better. There we are. Just defined
that path a little bit better. And the tree sort of coming
up from within here. And again, it's just similar
sort of upward patterns, and then you've
got these branches that sort of just split off
from the sides like this. Okay? It's important to It's important to get the
general structure of these trees in correctly, 'cause they do have a unique
look to them, do they? This one comes off on a
bit of a Y tangent there, Y, yep, sort of shape. Okay, good. Oh, right. Really, I'm just putting in
more smaller details here. So this should be kind of like another mound of
what have you here, like a little da mound. And there in the background, there are also some a
larger sort of mound there. But there's a house
here to the back, which I want to
put in triangular rooftop like this comes down. Comes down here. There we go. And, of course, the sides,
putting in the sides. There's just a
little chimney here, let's put that in just
a little indication of the chimney coming
there, running down. Now, we don't have
to get this in exactly as the reference, but as long as you've
got a, you know, house looking a shade looks a house back there,
you should be fine. I do like the I do
like that shadow, but I find that it's
maybe a bit too much. I'm going to reduce
that down a little bit, so it's just a slither
of a shadow there. And then the right hand side
can mostly be in shadow. And there's also like, some windows that we
can imply here as well. So let's just draw on a
bunch of these windows. You know, in the
background, there are a few bits and
pieces back there, but I'm going to emit
some of that stuff. There is this tree
as well coming in, forming some kind of
connective branches. Which you'll be
able to get in with the rigor brush afterwards, get in maybe a few of those golden looking leaves as well. Okay. But apart from that, we pretty much have
everything that we need. I mean, that's Yeah,
there are some more, of course, greens and smaller trees and stuff here
in the background as well, but we can get that
all in with one wash.
65. Day 30: Gustavsberg Painting: Okay, let's get started. And the first thing I want to do is put in a bit of
this golden sort of color in the bottom of the
scene for the the grass. Okay. So it's really
just a lot of this sort of yellowish value, and we'll just touch
that onto some areas. L to mix in a little
bit of green as well, sometimes so that we've got
some lighter greens in here. This needs to be really light, this green that
we're putting in. Okay? Really, it's the lightest
part of the scene. And I'm using a lot
of golden colors. This is like a Cronacrodon
yellow or Indian yellow, which does work very well. For this circumstance to create that golden light that shines through the pathway itself could do with a little bit
of yellow in there as well, but this is just subdued down. I've used a bit of yellow
mixed in with guash, with white guash to create
a kind of more grayish, more subdued down, yellow. I've just mixed in a bit of a little bit of this
other color as well, basically just a gray
leftover on the palette. Okay, so that's the path, the path just has something, you know, some kind of
value in there as well. Okay? There's the back section, I'm going to keep dropping in some greens and some yellows, just to continue this on. Okay. More yellow. Not afraid to use too many
yellows here because we've got a ton of light. Now, notice I'm
just dropping a bit of orange as well in some parts. This is going to be helpful
to indicate just a bit of that autumn feeling, you can see with some of
the shrubs and things, they have a bit of a more
orangy appearance to them. Even here in the grass, you've got some bits
of orange, as well. You know, they are just
leaves, essentially, okay? So moving that through, really being generous with with the warmer values,
here is some green. I can just put in
some of this green. We need to put the
green in as well, because I mean, it's really the predominant color if
you look at all the grass. But if you put in
the green first, I find that, you know, the oranges just disappear, so you've got to
be pretty pretty careful with this. Okay? Me orange, a little bit
more orange sections. Okay. More yellow maybe here
in the edge. Okay. Remember, the greens are
very easy to feather in afterwards, don't
worry too much. Bit of greenish value here
in the background as well. Maybe some more yellow
in there as well, just cutting around this house. But we need some lighter
values back there, too, lighter green values. This is all just like
the background mountains and what have you
in the distance. Need to get that in very
lightly, like that. Sort of cuts through the trees a little and behind
the house, as well. Bit more behind the
rooftop of this house. Just using that same
mop brush to do this. Maybe some more yellow and some more orange
in here as well, just to the left side. And some green. Well. Great. Now, time to get in
some of the skywh. I'm going to pick up ultra
not ultramarine blue, but a bit of cerulean blue. And we're going to
start right off the top here pretty strong. And as I move down the page, as I move down the page, I just tilt the page a little bit. I'm just going to
add more water. Okay? So just add more
water to the brush, move this wash down as you go. Okay? This is going to
create a nice kind of gradiation gradation
where the wash gets lighter and lighter
as you move down. Simple graded wash. And when it hits these mountains and bits of things down below, I'm not going to worry too
much if it runs, that's okay. Okay, as long as
I get it in with one go like that.
Okay, fantastic. So I've got a very basic wash, and it sort of looks
like it's dark, a little bit darker on the top
and lighter down the base. Okay, bit of blue, cerulean blue also
for the water here. I need to just drop that in. It needs to also be a bit darker than the sky wash, right? So dropping that in, hopefully not making sure
it doesn't spread too much, but if it does, it's
also not a big deal. Okay. Good. A bit
of water there. Fantastic. Gonna just feather
in a bit of green here now. Okay. Fantastic. So really the next step
here is we are going to be putting in some small
details for the grass. You know, for example,
I might want to drop in some oranges, some yellows or something just in place in
some areas where I, you know, create some
blooms or things like that. So I guess sharper sort
of effects, I suppose. We've also got this fan brush. I've got a fan brush that I use for these sort
of effects as well. Just to help feather
in a bit of green. I've picked up already. I needs more green
in some parts, like that kind of thing. You can also spray the
paper just a little bit to encourage the
paint to move around a little bit so that
you can continue going into this area. Okay, it's just a bit of green We haven't even gone in with the real
darker greens yet, but this is just some mid values that I think we need
to imply in here. Good. More yellows, more
oranges in some parts. Well, again, just trying to emphasize a bit
of that autumn feel. Especially maybe
out the back there, there could be some more orangy
looking trees and stuff. Okay. It's just the
paper is still wet. So you've got this
great opportunity here to continue dropping in color and create some
interesting effects while everything is still wet. It's these trees
behind here that I really want to imply and get in some details of some of those here as well, kind of growing near
the front of the scene. Okay. I'm gonna go in with flat brush and try to get some
nice looking shadows, sort of wet and wet
shadows running across. I've got some purplish color, which I'm going
to mix with blue, ultramarine blue and purple. And I water this down a little bit so that
it's not too much, but I just testing here. Yeah, that's okay. Maybe the mop brush might
be just a bit better for this section first so that you get
broader brush strokes. You always have to
choose your brush based on whatever you're painting. Here I've just got to take
a little bit more care. Here, you can see
there's a bit of darkness in there in this section of the
path, there maybe. Even back there, it's getting a little bit darker as well. The more blue, more green and blue mixed
together, maybe, like that. I find that blue and
purple works quite well as a shadow color. Back to the round brush. Going to connect
this on like that. And the purple, along with the yellows in the background really make for some
fascinating contrasts. Here, that needs to be
sort of left for a bit. Yeah, this has to be kind
of a bit sharper, I guess, this bit of shadow area. Um, Yep. Ideally, I want some
nice softer shadows and some really kind
of harsher shadows running through like that. You can only do these wet
and wet shadows once before they look way too
overworked and not natural. Yeah, this is, like, a pretty
big shadow, I suppose, coming in from out there, so just gonna get that in a bit. I'm thinking whether I should invent another one.
I think I will. I might invent one
coming through here. Yeah. There we go. Could be from an imaginary tree out in the back of the
scene or something. Okay. Got that nice bit of light preserved
there in the front. Hunk. Leave some of
this stuff here, you can see, it's kind of like the orange
that's shown through. And I will actually use another tool to scrub off
some paint in a moment. But I'm just kind
of looking around, seeing if there's
anything else that I that I think I
need to imply here. I mean, so far it's
looking pretty good. Maybe a small round brush
to indicate some darker, I don't know, not darker, but like some other greens in this mix here, would be good. It's at the moment, very orange. So just some more greens
running through this area would be nice to balance it up a bit. Um, more of these shadows. I'm trying to get them in
a little bit sharper and Yep. Yeah, look,
there's actually some see bits here
that sort of run up. You put some black
in there as well. The difficulty is
trying to leave the light on top of things as well so that
it doesn't look all, you know, washed out. So yeah, you've got to use
a bit of imagination here. Back in those spots, especially, you can see it's like you have some darkness and
bits in the back as well, softer areas of darkness. Okay. Good. And I think a bit of a bit of tree shapes
here would be good, too. Yeah, I'm exaggerating
this a bit, but again, just to create some extra
layer of trees here. I think I really
need to do this to help make that background look a bit more interesting,
more believable. Okay. But, you know, leaving a lot of that light, as you can see, as
well is so important. I'll probably have to
bring that path back and with some guash or
something later on. Well, you know, I could
probably, you know, could just leave leave
it as it is, too. Um, let's do the house. I'm going to get a darker
value for the rooftop, like just a grayish value. The rooftop needs
to be pretty dark. For this, yeah, let's get the right hand side of
the chimney, bring that down. Y. Some of it might mix. That's okay. No big deal. This shadow here, I
need to blend this in connect it onto to
the roof, like that. The bottom part of the house, I reckon just a
bit of light blue, really light sort
of color like this. Be good. So should sort of blend into each other. There good. That's that house. Pretty simple, but it's there. And Okay, it's dried
off a little bit. What I want to do now is,
use the spray bottle again. And let's see if I can scratch
off some of these leaves, these little autumn leaves. Let's try. Mm. Basically just scratching a
little bit of that paint off, maybe to indicate some
of these little leaves. I don't want to overdo
it, in some spots. I think it creates
a bit of texture, bit of interest in this scene, which I think is sorely required in sometimes in watercolors because it's so
difficult to create any, uh any light areas once you've gone back into the once you've gone back
into them again. So I can scratch them out. That's really the
next best thing. And as you can see, I'm using
that also to create a bit of bring back a bit
of that path as well. Um, you know, you
can scratch some of these little bits of
grass out, as well. So just, you know, as you
can see just little bits of grass, maybe here and there. You can see them actually
near the trees here, little bits of grassy
sections like that. Don't want to overdo it. But yeah, the main thing
here in the front was just try to bring back a
bit of the previous wash, a bit of that the orangy leaves or whatever here that might be sort of scattered
on the ground. Yeah, without actually
having to paint them in. You know. These ones
were done already. There on the side, they
were fine in the beginning. Okay, so I'm going
to put in the trees. Let's pat them in using
some darker value. Just any dark value
will do fine, preferably with a
touch of brown in it as well, it's warmer. We start with this one here. You can see it sort of comes up. I'm holding the brush very
close to the bottom, as well, so that I can get in these tiny little details that are difficult
to get in otherwise. Okay. Runs down the base there. It's just a bit of brown
really paint that I have. Looking at that reference
photo and trying to get this idea
of the branches, and I'll skip over the
page a little bit, as well, so that the lines
kind of skip over in parts, so it's not all, you know, completely defined
sort of lines. These will be kind of
the darkest sections of our painting, really, these little branches,
if you think about it. So we got to make
sure that, you know, they kind of identify they look like proper branches, okay? And there's no leaves on them, so there's not really much
you have to do, okay? But I do think you still have to put in
some decent effort to make sure that they come
through and look like branches as well. So really pay attention
to the reference, and you know, try to Okay. Try to observe, for
example, these branches, how they split off into
smaller bits and pieces. You know, I also have
a little rig of brush. And the rigor brush, probably let you do this with more
ease, as well, like this. Yeah, that will work fine and with more precision like that. I'm making this
tree a lot larger than actually than it
actually appears as well. So, um, there's this other
one here in the front, this other tree there, again, we're just drawing
with the brush. And this is why I
don't like to do too much of this stuff
in pencil first. I mean, we're going to go
back over and do it again, essentially, so
there's no point. There's also some
branches that just sort of go over and come over to the left sort of
thing here on the ground. So this is going
to be important. Some more here, maybe.
Some more trees. They just line line the path, and they get smaller
as you go on. I'm just going to change
some of these a little bit to make them slant a bit, maybe. Okay, so that they
look more interesting, look all exactly the same. Yep. The rig of brush is so helpful
for this kind of work. Notice how I'm
just skipping over parts of the paper and letting it just not continue
on any further. Sort of skips over
so you don't have continuous lines
all over the place. This is a great way
to imply light. You know, here's another
one here in the back. This tree here, this
is quite interesting. It's also similar, but there's so much detail. Look at it. You just could spend all
day painting this tree, but you don't want to
just put in the branches, and thankfully, you know, we're looking at, you know, autumn scene because if
this was a you know, a summer or a spring sort
of scene would have to contend with the leaves as well. But, thankfully, we only
need to do the branches. Okay. That's that tree there back in the distance.
What else do we have? I mean, there's
another one here. It just depends how many
you want to put in there, how detailed you want
to make this scene. And, you know,
there's another one. And again, there's just
quick little marks on the page to indicate
that the branches go up and some sort of sprout
off the side like that. But at the end of the day, they'll kind of join onto
each other, don't they? So here. It's another one that I just thought
I would imply. You know, there's a
really distant tree off in the distance
over here as well, so we can make those
marks lighter, appear a bit lighter there. Okay. So over here as well. Try to vary these
brattrokes so that they look more interesting. There's a larger branch
coming in here from the side. I've drawn this in before with the pencil and so here
we go just going over those lines with the rigor
brush and helping bring this across the scene to
create this continuity You know, there's also some of this orange color
for the leaves. I'm gonna drop some
in here and there. Try to imply this. Sometimes with a few
little brush strokes like this, that's all you need. Just an orangy color, maybe some yellow as well. I mean, it's really combination of orange and yellow
in some parts. So just imply some
of those leaves. Rustling through this
left side of the scene. It's more yellow
that I'm using now, actually, to do this. Um, and just sporadic little
things like that, um, Good. Let's put maybe a bit of detailing into
these houses house here now. Just underneath the roof,
I'm going to darken here. All right. And I've got to
do the windows as well. So there's one that's
another there. The other side that kind
of gets a bit complicated, but we just want to indicate
the windows like that. Um, what else do we have? I mean, these ones have a little it's like a little
frame around them, actually. Well, there's a lot of little bits and pieces
we can put in here. But, I like how there's
these little, uh, you know, wooden boards that you see running
across the house. So I'll just try to do
some of that in places. Okay. Do the window frame
a little bit as well here. Chimney. Fantastic. And I'll
call that one finished.
 Watercolour Mentor (Darren Yeo Artist), Art Classes, Mentoring & Inspiration!