Transcripts
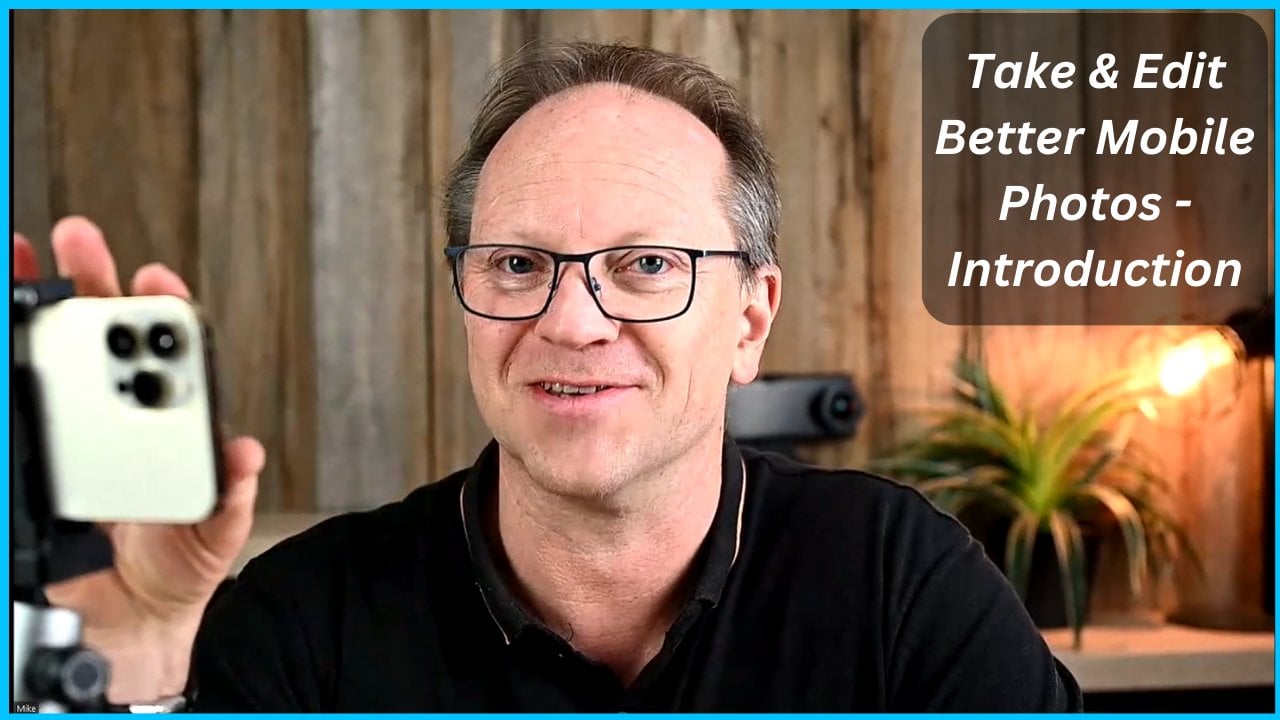
1. 30 Days of Lightroom Mobile - Introduction: Good day and welcome to 30
days of Lightroom eyeball. I'm excited to bring
you this on Skillshare. You can do this in 30 days
or you can binge-watch, get all done in awake AND
they bought sized video. Now this is one of
my premium courses I'm bringing to you
here on Skillshare. The video sections because we all learn differently
for some of us, video is enough and
that's fantastic. You get access to
everything here. If you prefer to learn
with other people, have a community and be
able to speak one-on-one with the course facilitator
or an instructor, then this is the link
below to do that, but otherwise,
everything is here. I'm excited to bring you this. This is where you
learn the why, when, and how of all the
tools in Lightroom from the capture tools
to the editing tools, stop being overwhelmed
by the tools. I'm going to break
it down and show you which ones work better than which ones and
when to use them. Kind of show you how to
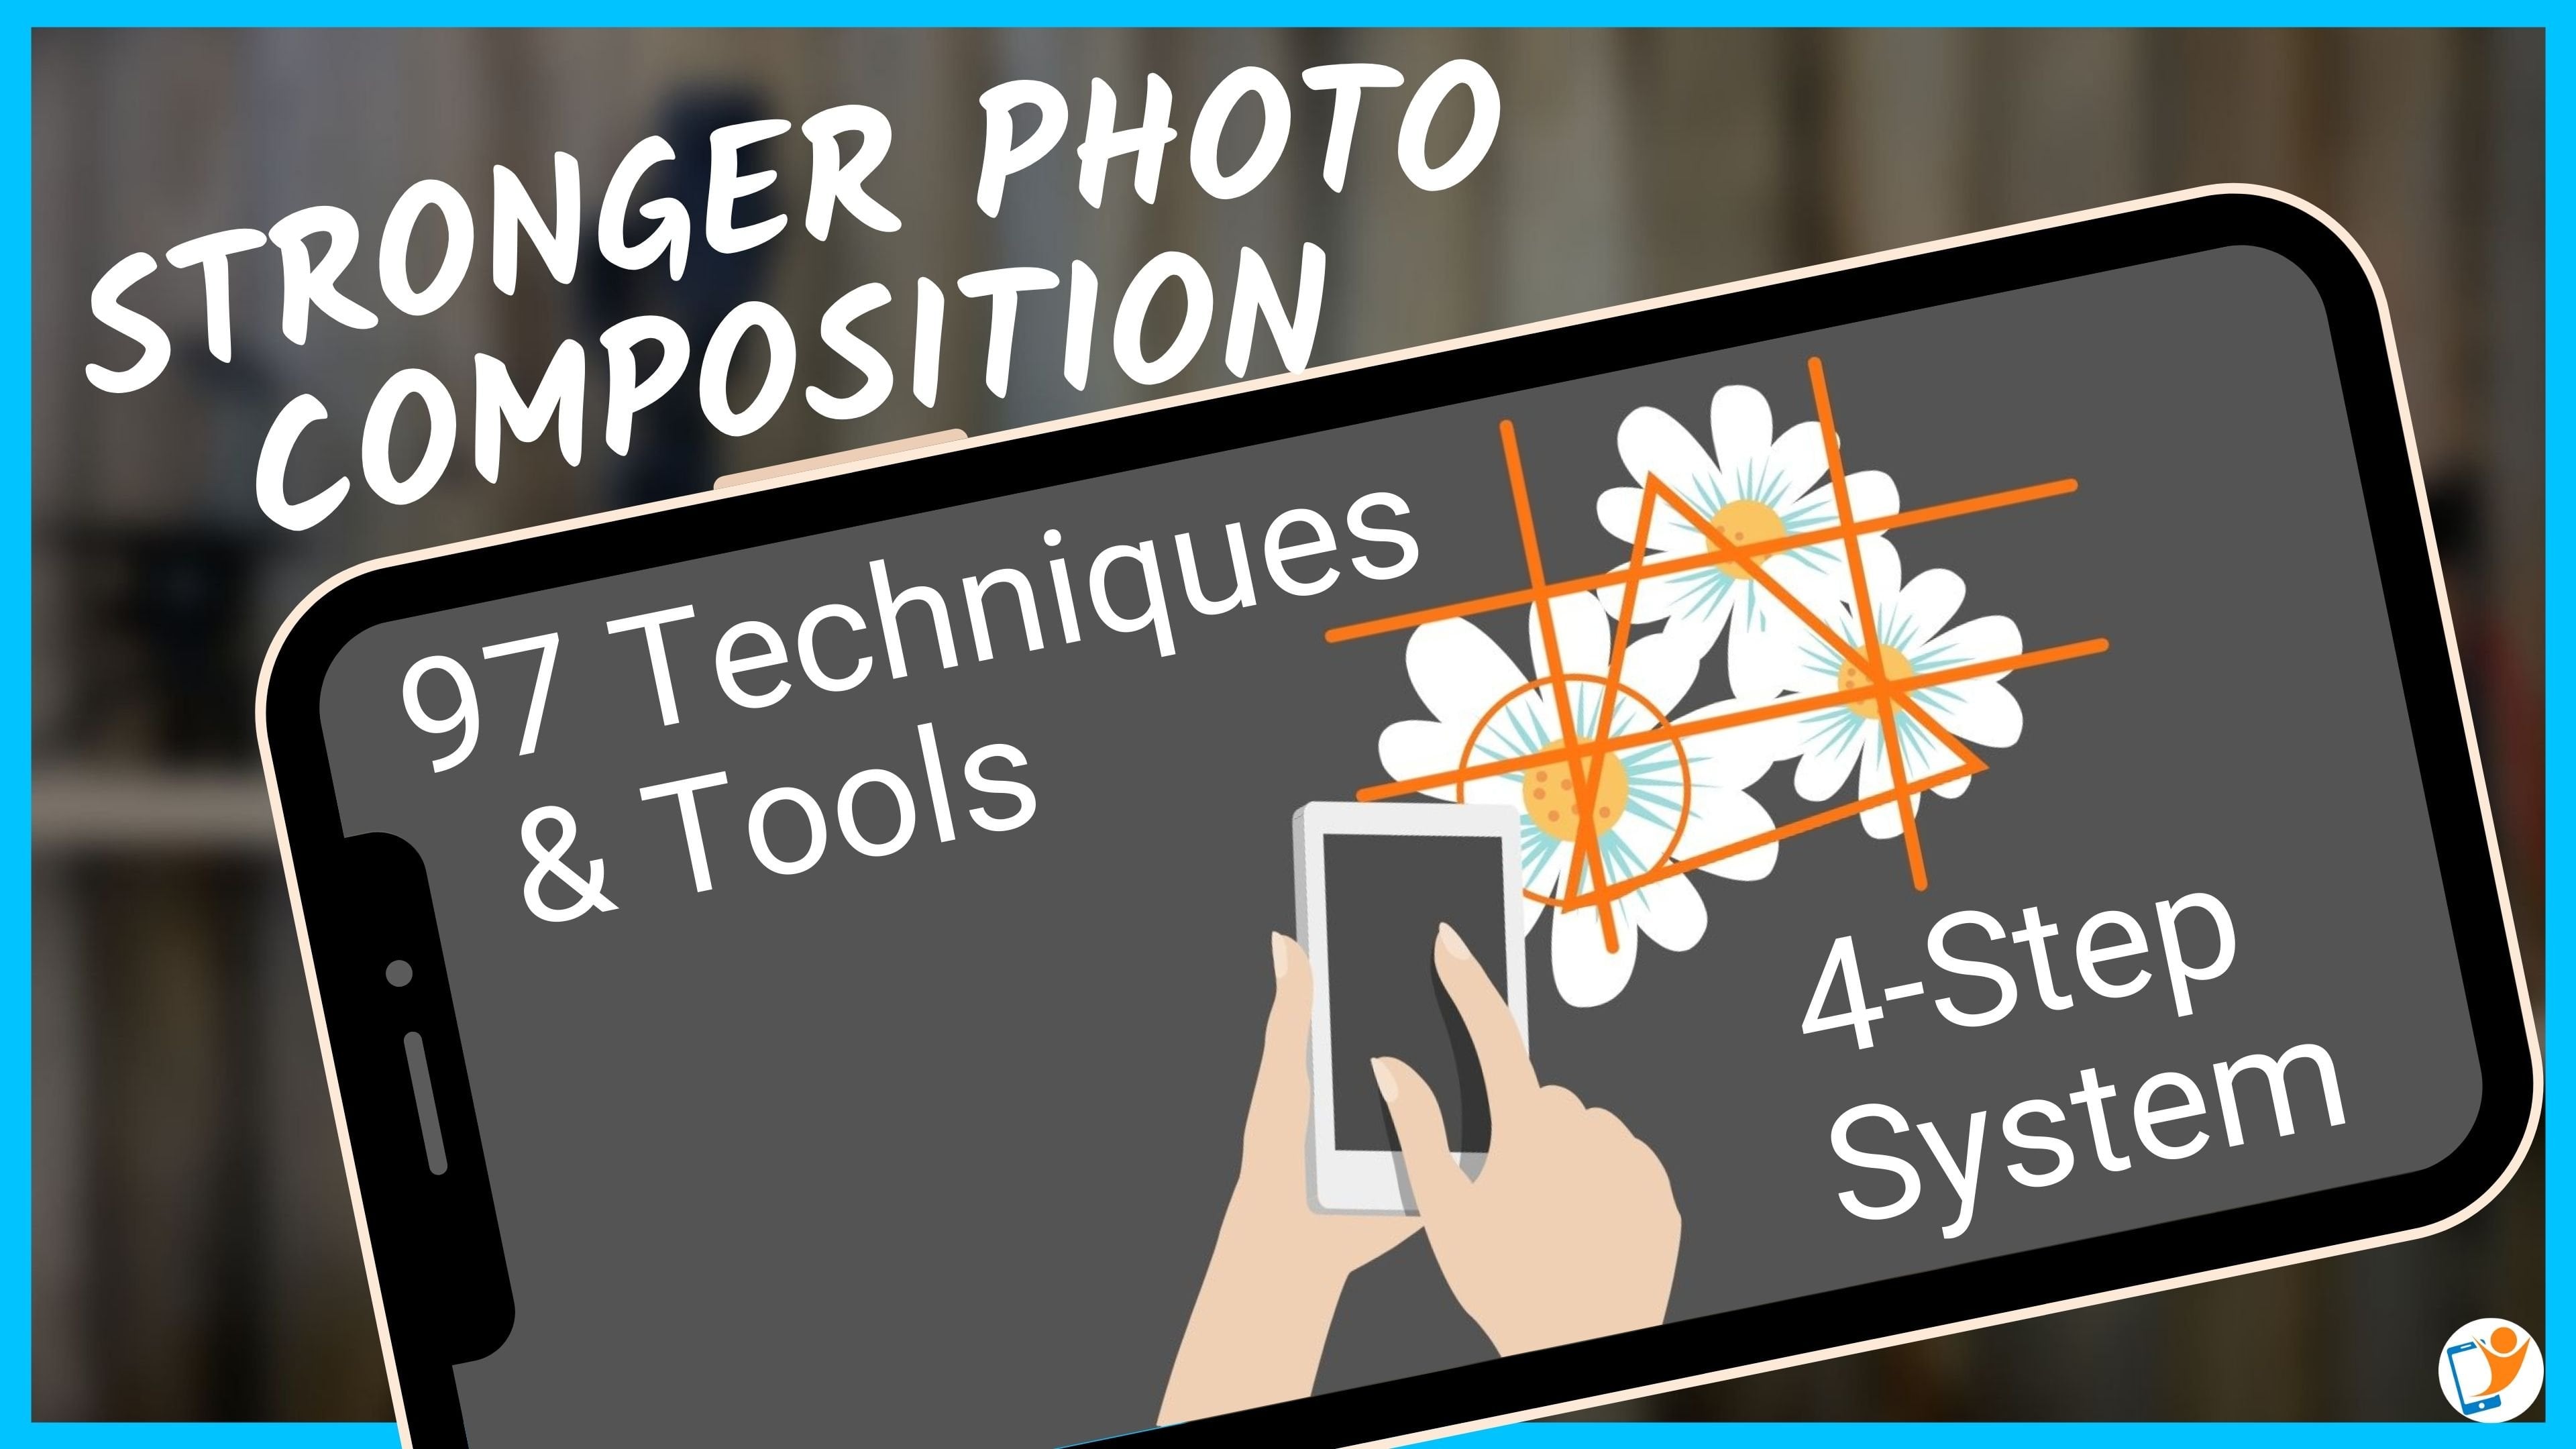
be most strategic guide to share some workflows. It's my four-step system. Basically it is composition,
tones, colours, and selective editing,
local editing, localized editing,
masking wherever you want to call
it with healing. It's all in there. So here, this is what
the 30 days are. Number one, gestures, shortcuts and tips,
21 different tips. There are shared cropping
geometry exposure with the tones black
and white point D Hayes Texture, Noise Reduction. What balance, vibrance
and saturation, the difference between
the two color, HSL hue saturation, luminance, target color grading black and white, the right
way of doing it. Vignetting, the better
way of doing it healing and cloning tool talking about the difference between the two. They're masking using sky
and subject using linear and radial color and luminance
profiles and presets. Talk about the learning
and discovery and how they are amazing,
really helpful. Review right, and
share your photos, how to organize your photos. Then we're gonna get
into the camera app. We're gonna talk about
auto versus pro mode, HDR, long exposure
and portrait mode. We're going to talk about
the depth, manual focus, white balance, ISO
and shutter speed, and also Lens Correction. Shutter speed is one of my
favorites because this is where I get to show you that
most people got it wrong, got through all that, and
explain all that to you. And I'm also excited
to bring you a couple of workflow
examples from other photography trend is not just listening to me
talk to you about it, OK, so they're further ado, there's the first video below. Let's get straight into it.
2. 20 Secret Tips & Hidden Features In Lightroom Mobile : Good. I welcome back. Tie number one of
30 days Lightroom. My balls that have a one
we're going to talk about. Actually, it's actually near 20 sacred tips and
hidden features. It's really familiar,
familiarization. It's an easy way to sizing it. Familiarization are
going to show you some shortcuts just to show cards finish nice
navigation themes. I'm going to show you some tips that unless somebody shows, you don't even realize you
can do inside there as well. So it's pretty exciting. Now. They will be if you haven't
opened Lightroom before, it's going to fill
out well-marked. This is local. It just hosing be waterholes, You just drawing
all these at me. You got moving around so fast. I've never opened
the camera before. That's the case. That's okay. You can
come back to this video. I just wanted to put
this at the start of the 30-day series just
to get you comfortable with where things are and a couple of things
to set up before you go exporting photos. Just to jump ahead. By default, it doesn't actually export a full resolution photos, so that's pretty important. So that's what we're
going to cover it is that sort of thing. Now, first thing you do when
you open up the photo E, or open up the app is that you
need to set up an account. It's free. Now I have a screen
capture here. This is what it looks like. You, if you have an existing account at Adobe
account is really simple. If not, you can use one of
your socials or your Google. If you have Dremel,
you can use that. And then you can set it up. Now you don't have to subscribe. That's the key thing
here that I wanted to explain to you as the
tide have to subscribe. I do now because
the masking tools, fantastic, That got
me over the line. Next thing you do. Now, I'm going to be
jumping around here between I found and general
speak if you'd like, because Lightroom, one
of the things I love about this app is that it is available on Android and iPhone. There are some little
differences between the two. Whether it is, you may
see what I'm showing you. You might go, Oh,
that looks totally different on my phone
and that's okay. But I will just show
you the principles and just get familiar. And if it's slightly different, and the app will update as well. This is one of the, one
of the apps that does regularly updated
with new features. So it will look a
little bit different. So this is what it looks like on the iPhone in the settings. There was a couple of things
in here in the settings and encourages you to set
this up at the top. But you can always go
back and change this. You can say he location. I just wanted to use location for geotagging
when I'm using it. This is the one that
I like is far out, so you can select which furrows will synchronize with Lightroom. You don't have to give access to all your photos. I think
that's really important. And then he notifications
and that sort of thing. Next one is the gallery. This is what it looks like
when you first open it up. So down the bottom
right corner you've got there to add a photo. And the other one
there is the cameras. You can open up the camera. On the left, you've got
your different folders on Android, this
looks different. You'll have extra awesome
Wednesday we'll at Google Photos and Dropbox and all these other
areas Online. Onedrive where you can download photos or access files in the
Cloud in other locations. What I wanted to show you here
is the gallery by default, it turns up with this sauce, but have a look at
these pinch and zoom. You can make them bigger. Move them around and
go, You know what? I want to have a look
at that in closer. But not all the way
out already selected. But you can change you can change the size
of your thumbnails. I mean, that's one that's not
in the instructions anyway, that's not one that Yannick
twist on that part. Discovering buyer. It's searching online or just playing around and
you can't break it, It's sort of joined. That's the first one.
Now the three dots up in the top right corner, you've
got three dots there. View Options. And you can show
information over life. If I go back up and
you'd say there, you've got a histogram, two fingers tap on the on the Federal,
you can get rid of it. So you can go toggle through
different information here. So here we've got
all the metadata. Tab again, histogram, tap
again, and remove it. Now, you don't have to turn that on and
off through there. You can actually also
go down to settings. Settings here, you'll see
there's some different things he and one that I
want to show you, there's gesture shortcuts. Just a shortcut. There it is. You can actually say
there it tells you, hey, just two-finger tap
so you don't need to set up in the menu
knowledge at any time. When you're, when
you're editing a photo, you can just tap two fingers. What else we got here
before and after. So you can hold down your finger and say it before and after. Now, I might just quickly
add preset there. Now, hopper finger, There's the before, there's the after. Pretty cool. Another thing you
can do here is double-tap. And you can zoom in. Then we wouldn't
finger just move around and east to pinch and
zoom, that sort of thing. But double-tap Xunzi,
double-tap again at a zoomed back out
again. Just a great way. Quick, simple, easy way of
just getting a nasa class, checking it going FDI, average shot do not
ever sharpen that or is that looking
a bit blotchy? Go back and get it if
you're copying it. So let's go to Crop
and we will go in here and we'll crop,
move that around. And you're not quite,
not quite right. You can just reset
it back to double tapping on the shaded
area on the outside, just double-tap and it goes
straight back out again. Double-tap. This ACT just to speed up
your workflow a little bit. Next one I wanted to show
you is an iOS specific one. Down the bottom, technology reviews and I'll cover
these later on when I talk about lung exposure
and that sort of thing. So here we go. Low
exposure and depth map, which is the portrait mode. All right, so that's,
that's how you turn out inside the settings. It's not there by default. Another thing I wanted to
show you heat is what's new. This has great way of keeping up-to-date with what's
going on inside the app. And this is how I actually
discovered masking. I didn't realize that
those brand new masking, those is playing around here. Omega, what is this? It's really handy a lot of people and you say
that new presets. So if you're subscribed, you get a more presets and continually update those and improve those and give
you more options. Next one I want to show you here is I wanted to
go into camera now, set now inside the camera, I'll switch it over today because I'm looking
at the wrong way. Inside here. You've got the three dots again. So we get three dots. Tap on the three dots. We have settings, the cogwheel, and here we have max
scrape brightness. Now I always put to
an add-on because I want to see the exposure
as it's happening. If you don't have it, it will just got
back to the default. But I like to have
an offset brought. I didn't capture the
virus and then come back to that photo was
brought over is really dark photo
into competition before we've had actually
training the screen brightness. And then when I saw them
posting posting it, it's like, oh, that's
not what I intended. Always mx squared brought
us, but it's up to you. It's up to you. It's a personal
preference, luck, luck. A lot of things. A couple of things here
I want to show you now is when we tap on different
parts of the photo, it will change the exposure. So if I tap on the
dock area there, you will see that
it's made the rest of the photo bright so that that dark area on the
case there will be nicely exposed to block the
balance of light and dark. I'll tap on a broad area. You can say there the
dark area becomes darker. What you can do once you find an area that you quite happy, don't worry about
anything that's happening when you tap
a changing the focus. At the moment, I just
want to focus or concentrate on the where
I'm exposing so far. Expose there. That's
a good balance. Top-right corner, personal that padlock and I've
now locked that. Now that I've locked that,
I can now go back and I can tap wherever I want
to set the focus. If I set the focus on the zip, the corner there, I can't now, this is really cool. If I long press that's now locked and I now have a
green overlay shortly. This is an iPhone. Android doesn't show
these green overlay, but it now has great overlay. I can zoom in and I can long press and zoom
out and it stays there. What I wanted to show
you here is, again, this is an iPhone, but there's a slight
difference with Android, and I'll explain
that in a moment. Broke out into the light panel. I want to adjust the whites, which is basically the areas
in the image that are pure. What can increase
the amount of areas surrounding towns that
become pure watt or could decrease itself is less
pure white pixels, dots of information
in there already. So we don't do that. You see here it's adjusting. But it's been hard to
say what it's doing. In sit on the computer. You can do an option with colds. You can do Alt or
Command and you can tap on that and then you
can see this cool overlay. It's a black mask and you can
see what's picking through. Now on, on the Android
when you do this, it'll just show a
before and an after, whereas on the iPhone, so what I'm doing is I'm swapping them. I'm controlling
the slider first. And then wallah, I've
still got my finger on. I put my thumb on the
actual photo. All right. So it's not too at the
same time and running in-person workshops where
I've tried to show people this can be confusing. So what do you need
to do is to put your finger on
this slider slide. Mr. you've still
got your finger. They put your thumb
on the photo. Then move the slider a kid. So it's not just slide, thumb on its slide,
them on slide. You could do the same
with the black tea slide, thumb on and sliding in. And you can say that these
areas become pure black. While I'm here having a look at the blacks, it's minus 100. If I tap on the
line, the slider, if I just go to Tech,
he said it's minus 95, minus 90, minus 95. Incrementally by
five steps stops. It will adjust automatically. Now if I want to reset
it with a circle, is I just double-tap on that? Double-tap back to 0. So cool, so easy. Nothing I want to
show you here is the question mark up the top. You can see there the
question mark at anytime. You can tap on that. And you can see tutorials, inbuilt tutorials
inside the app. Fantastic. So if you're not quite sure
what the blacks is doing, just tap on the blacks, showing me and it
will go through. Good. You can see exactly
what it's doing. Next, say the little
panels on the right side. We've got light color effects. Zeta is last ones I mentioned. It's got a dot. Now I just applied a preset. Preset is like a macro. It's a recorded steps. Recorded works like if someone's gone through and
gone through this, this, this, this, this, this, and
then they've recorded that as a preset. And then when you tap on
that price it and you selected it's gone
and recorded these. Now you can actually go in there and see
exactly what it did. So these preset is automatic. Adjustment is gone and affected
the watts and the blacks. Now you know that
it's affected those three because it's got a
little dot next to him, the little star icon, the little color, the effects squared, they've all got dots. So you can see that
this filter has affected those. Yeah, anyway. Now other plot that
now I want to go in and I want to use
one of the others. So now when I go in and do
a little bit of sharpening, shop in it and I'm just
gonna do it into crazy. Okay, So you see
there that was crazy. There's the before,
there's the after. You'll notice that these
before is before the preset. So this is before before. I can't really see
when it'd be nice. If we could have a look at
those adjustments and have it before the previous
this instead of that, because I want to see after
over plot that preset, I want to see what that
sharpening has done. This step, not the very start. So what you need
to do is I need to go down to this little clock. If it looks like a clock, we go with a rewind tap on there and we can
create a version. So I'm just gonna call
this one step one plot that now if I go
into sharpening, sharpen, it got crazy. Now I can go and call them, create another version
called that step two. Now I can go Step one, zooming. Step two, zooming
with happiness. We could see me. Anyway, but you can see that there's the business
that was step one. And then they step
to say now we can see and you can do this
through the workflow. And one of the things
I loved that you introduced this
earlier, the sheets, these aldoses Azure going, it will automatically
create versions. They like save points through your, through
your workflow. Really super cool. Next one I want to
cover is something that we all need to set up when
we first set up this app. That's the export options. Up the top right corner, you can see the little
Share icon tap on there. Most of us and I did
this for a long time before I realized we just export to camera roll because that's where I share
to social media. That's where I have
my album setup. Just unfamiliar with it,
uncomfortable with it. I like being able to
search for photos and it works works
from our workflow. So I'll just explain
it to camera. One of the problems
easy if you're shooting in DNG file format, the role file format. What will happen is it will, it will import and then what if you're on a
paid subscription, you can edit rule photos into Lightroom Mobile,
which is brilliant. If you're not, it'll, it'll edit page I pay. Now, you might edit
a DNG file format and then you go to
export to camera roll. And it'll export a JPEG, which is not ideal because
you might want to keep that, you want to retain that all
that information and continue editing in an lightest
ages different app. Now down the bottom here we have Export As a tip on Export As. And by default, it's not set at 100 per cent
image quality. You want to go in
there instead of 90. You want to make that 100%. If you're playing around
with the DNG file format, you can now go into
here and you can go, and I want to export
it as DNG and D and J. You don't need to adjust a
100% because it already is. It's like it's got all the
information retained in it. Makes sense. I hope it does. I think it's really cool. And you can edit
so you can create a shared online in the community and
I'll cover that later on in his 30 days. Open in so you can open it in another in another app already. That's done. Next one I want to show
you he is 0s albums. You got done their albums. So we can tap on the
plus and you can create a new album and folder. Now, I just having a play around with these
and I'll create an album. It was discovered that if
you create a folder and this is using the desktop
as well as the mobile. This is basically collections
and collections sets. Now album is collection folders, collection sets, so you contain the albums within the folders. Now the folder
stance synchronized automatically, detects top. So I'm just playing around
with albums at the moment. So all I'm doing this,
I just basically create an album and then he can, and then what
happens is then it's easier to find on
the left side there. So it's a great way of going through and quickly searching. Now the Search Inside
here he is fantastic, works really well,
especially with people. But yeah, so that's what
I want to show you. The last one I want to
show you is the discovery. Now cover this at length in later on where we're going to talk
about this topic alone. But I wanted to show
you really quickly, is you can see that
little icon up there, the avatar, I've just
got my business logo. And you can go in here and you can create your own profile. You can sit, you're about
talking about yourself. You can follow people, people can follow you. And it's like a silica, a photo-sharing social media
app, but it's friendly. Certainly. I've had a little bit of a play and I'm really enjoying it. So I just wanted to show
you that really quickly. Say, this isn't your settings inside your editor
or your camera. This is ego, the first, which is the community. And then you can tap on
there and you can set all that up and it's got
some really stringent, great community guidelines
in a fantastic. So just to recap, what did we cover are
covered quite a bit. They didn't like. I showed you how to
open up the hey, you can't what the gallery I showed how to access
gesture should mix, brought in a tap, black
editing tools black the question mark and getting in create a saved on
the right side. What's being an export as changing the albums,
discover it. That's a lot, isn't it? Let's 20 different tips are
hidden techniques there. So that's quite a lot
to go through there. And like I said, you might have found this a bit overwhelming. If this is the first time
you've seen the atom that you say may just gone, bang,
bang, bang, bang, bang. That's totally okay. This 30 days is designed for you to just
get more familiar with the tools and then he can come back
to this one again. All right, so with that, I
think I'll wrap it up there. And thanks for
joining me tomorrow. I'm going to talk about cropping and I think that's
critical step. First step in editing. And another call to
seeing you there.
3. How To Crop Your Photos Lightroom Mobile - Composition: Good, I welcome back die. Number two, we're talking about cropping in these
30 days of removal. Cropping. It's one of the most
powerful and important steps in your editing workflows. People places different,
different stages. For me, it's like number one in my process because
there's no point going and in hating different
parts of the photo that will end up being cropped, it
doesn't make sense, does it? I think it's a critical step in editing installed Lightroom, my ball, it is a fairly
straightforward process. It's the same as your
in-built editors. It has changed the aspect ratio. You can zoom in, you
can straighten it. So I'm gonna go a lot deeper today in cropping
and why your crop. And it's all about rape
composing the photo. So yes, you can zoom in. You can do Border Patrol. We go around the edges
and go, You know what? I just want to crop that
little bit at sets it. I'm going to go into a
lot more detail about composition and introduce you to my four-step
system and show you some of these that I'm
going to show you. That system that I have or has over a 100 different tools and techniques for composition,
which is crazy. A long time researching,
putting that together. What I'm going to show you is all the ones that
relate to copy. If you want to have
rule of thirds, then you need to
read crop it and bring the photo back inside
of that maintenance subject. That main visual anchor is on one of those one
of those lines. So here's a photo that are
captured in Melbourne. I just saw a group of people
and are just interesting people were interesting clothing,
interesting mannerisms. And so I've tried to
capture some of that. And this was just one
of those snapshots. And the reason why I just
chose this one as a group because for the
purpose of thesis or can break crop these to create different stories which is
really cool, pretty simple. Tap on the crop icon there, and then you present with
these different options. You've got your flip,
which is really cool, that can change some photos. I can just completely changed because we quite
often, majority of us, I should say, rate of photo, scanner photo the
same way we scan a page of text from
left to right. When you walk out the
front door of your home, you look down to where
you're stepping, your edit or whatever it is. You look down as you stepping and you look up any escaped. So quite often we
look from the bottom, lower half and scan across. Now we all have different cultures,
different backgrounds. We all might scan things
slightly different, but flipping it might
make a big difference. Some photos, believe it or not, flip it upside down. Especially if you want to
do a pattern interrupt. If you're on social media
every now and again, show a black and white photo or every now and
again showing up. So **** photo people
go, Oh, what's that? That's mark making stupid
again, it doesn't matter. At the end of course, you've got your rotate there, you've got your straightened. So that's really cool. That spirit level, it will go and try and automatically
straighten up for it, which is pretty handy. And lock and unlock. Unlock basically means that
now I have full control. I can put this exactly
where I want it. And I can create whatever
photo I want just by dragging those
corners In this slides up the top there next to the question mark is
our aspect ratios. Now we can change it, we
can get back to original, we can change it to
169. I've done 69. If you have a look up
at the top-left corner, you can change the orientation. So if you want to make
this Instagram story or some other social media that a year like
the sixth day nine, any native make it vertical
portrait orientation. Then it's just the top there. That's totally ages of
hot and start applying. Remember this? I
remember I'm a cropping, just a little shortcut
and we covered this on that first day he got
die one yesterday. It took them a couple
of shortcuts here, double-tap outside of where
we've, we've cropped. So if we cropped there and without like it or
you're gonna get back, just double-tap on
the grayed-out area. Because back to normal. Pretty cool. Few different options here. We can unlock this,
this guy here. I'm going to go to lock that. So I'm gonna full control. Not true taught, but I want to go and I have it
too tight around team. Then I want the context of where you use them when
you're taking the photo off. Now, if I drag this and
I include all of them, that brings into visual
tension, doesn't it? Because now he's caught
right on the edge. I don't know about you, but I want to know what
he's looking at. It's a great way to
introduce visual tension, but just playing
around with the crop. We've talked about aspect ratio. The other one is zooming in. So we can zoom in and we can zoom in right on
these people here. We can see what they're up to now I'm going
to bring some of that rock solid
wall and I've got a little bit of
symmetry, if your luck. Grand doesn't add anything. So then we get three
different photo is a photo. Within a photo, There's lots
of different options there. Now, my struggle photo
composition four-step system. Basically the system
is set up in position, the camera where you place the camera and one of
that is zooming in. Zooming, because we can do that when we crop the
photo, you can zoom in. What you want to do is. Getting nice and close.
Now, your distance to the subject will impact on
the distortion perspective. So that's why we,
why we do that. Number one, setup and position
yourself in the camera. Number two is positioned
the subject in the frame. Touched on rule of thirds. So that's why you want to
place that main subject off-center where you applies
to subject in the frame. Every photo, every intention,
these different sites. There's no hard and fast rules. Please don't get
bogged down with that. Number three is positioning
of the contextual elements. And then number four is
photo editing tools. I know it's a four-step
system, professor composition. But as you've seen here,
cropping is a major part of a, It's a really important
part of composition because you can go in after
the fact and you can change, completely changed
the composition. So I think it's really
important to put that bidding. Just suffer some examples. These are photos
that I've cropped. And I'll explain the
composition technique why I've cropped it that way. Now B1, symmetry. This is a vertical symmetry. You have different
types of symmetry. You can have
vertical, horizontal, and then you get into lots of
different mosaic symmetry. There's so many different
ones that are going into in the course to have this perfectly
symmetry, symmetrical. Basically you wanted to divide
it down the middle and you could fold it in half
and it looked sign. Next one is
asymmetrical balance. In this photo because
there were cropped it. I've got the visual
weight of the tree, the big tree on the
right side of the frame. And then on the left I've got the building blocks in space. Space is important to
create visual balance. And this just works. If I crop this in tighter and I dropped in half that
tree, then yes, it would isolate that
building a little bit more at that changes the
intention of the photos. Cropping changes the
balance of the photo. Next is Dutch angles.
A Dutch angle. This is a really, really
cool one in Lightroom. Swap around the bottom
there and you can change the strike and you
can change the angle. This is basically where we
intentionally and deliberately tilt the fighter for the tilt the camera or
you do these in editing. Basically, it adds energy, but it can change
the visual wife of everything in
the photo as well. Because when you tilt it, if you'd like to do
it the right way, it could look like
everyone's falling out of the photo or objects are
falling out of the photo. Objects that are up higher
on the horizon have more, all of a sudden have
more visual white. That's a really cool. Here's an example,
This boy walking along and some looks like he's walking out of the
frame is gonna fall out. Others, it looks longer
than a full app. We talked about. Demonstrate here also Spice. This one is off-center and
this is obviously a composite, and it just had a bit
of fun with this one. I've noticed something
in this photo. The annoys me a little bit. Noise strong strong term bugs me, I want
to go and fix it. And Border Patrol that
I talked about earlier, it's going around the
edges and looking for things that kind of
grab your attention. You can save all along the
left side of the frame. They always brought spots
that kind of half cut-off. That's why cropping
is really cool in handy because I can
go in there and I can just bring that edge
in and just crop that rule of thirds. You've heard of this, Everyone's
heard of rule of thirds. I mean, these grid lines are
built into your smartphone. A lot of people use it just to get the horizon straight,
which is fantastic. If you get the horizon on one
of those horizontal lines, That's where you start bringing the rule of thirds because 1 third of the photo
is the foreground. Two-thirds of the photo is the sky that tells
and communicates to the person hate this so
much more information here in this photo of the sky, the intention, and the
story of this photo. The reason why this
photographer took this photo is they want
me to look at this guy. And if you do it the other way, you have the horizon on the top of the two
horizontal lines, then this guy is
not as important because it takes up less
space in the photo. So you can say how
that changes it. And you can see putting the main visual
elements like here, it's the eye of the dark on one of those intersecting lines. We've placed that off-center both vertically
and horizontally, which is kind of
that's the sweet spot. Okay. This is another one. What's this one called?
1 third, two-thirds. So basically we're on one of those intersecting lines,
one of those lines. And the main visual element is occupying two-thirds
of the frame, as you can see here
with the mushroom. I didn't when I took this photo, I wasn't thinking about this because this four-step system, I want you to be in D2. That's the outcome
is you become more intuitive with this
sort of stuff, not bogged down with theory. Even though the eBook
there's like 146 pages. It's not about understanding
and learning all of it. It's about being able to go back to it and guide, you know what? That's off-center. I want a bit of
space around that. Now if I do this,
it'll be 1 third, the third principle
or guidelines. This one is centered. So again, it's symmetry. So symmetry is very
similar to center. This one is really cool. We've cropping is
positive and negative space and active spice a
positive spaces though, it's the space that the
main subject occupies. Negative space is
the space around it. Negative spaces away that
you can isolate something. Negative space can
create visual white, can also create
that juxtaposition, that contrast between
the background and the foreground that
figure the ground. I'm throwing all these different terminologies at Chanel and I. Active space. This is another
one as a cropping, you can see he both
these examples dramatically different
based on where we cropped it and
where we position is. So active space is space, a head of the main subject. So you can see there
that the runner, he looks like he's
running towards something on the
bottom right there. He looks like he's running away from something that creates a different energy to
the photo as well. This one here is
S-curve, is Zipf curve. Now, depending on where
your crop this in position, the entry point of the S-curve
can make a big difference because we made a point of fixation point where
you pick it up and go, okay, now from here
I'll follow it through. Otherwise, you could end
up picking it up halfway and you've missed out on the intention of the photographer. This one here is
just an example of visual weight and how your R goes to one thing,
then the next thing, the next foreground interests while your crop will again position their
full grand interests. Now I told you about
rating things from left to right, bottom to top. This is a classic example. Now that foreground interests
is not a strong one, but it is there and tick that
box. This is my favorite. One of my favorites
here is ruthless crop. Because these rules, guidelines, principles, if you like,
they're all there. But they don't really, I really matter that much because sometimes
a ruthless crop, which is basically
just going in and during breaking all the
rules going in there. And unexpected crop
and unexpected getting in there
and just changing cropping scenes off half, you can create some
visual tension, visual interests,
that sort of thing. So that's what,
that's all about. That tomorrow I'm gonna cover the geometry panel and I'm gonna go right
through all of that. So that's it. I think we'll wrap it up there. Thank you for joining
me again tomorrow. As I said, geometry,
I look forward to bringing that to
talk to you again. Bye.
4. Fix Distortion, Perspective & Lines In Lightroom Mobile: Good day, Welcome back. Today is Dynamics. Three. We're gonna
be talking about the geometry tool in
Lightroom Mobile. And this is number three of
30 days Lightroom Mobile. And this is still inside
the kind of step number one of my four-step photo
editing workflow, if you like, where I
work on composition, then I'll work on tones which we're going to
get into tomorrow. Carla, and then
local adjustments. Local adjustments. They already paid subscription
Tool SAI with today. This is a paid
subscription tool. If you use take full advantage of the free
version of Lightroom. For most of us,
that is fantastic for if you're not quite sure whether to
pay that little bit. And to be honest, I was on the fence for a long, long time. And the race and Wallace was
that things like geometry. The tools I'm going to
show you, some of them I could do inside snap
saved using perspective. That tool is amazing
and other one is screw, it is W T. And between those two apps could do most of the
things inside here. But there's a couple of tools in geometry which are,
which are fantastic. And I can't wait to
show you that as we have two different things, we have distortion and perspective distortion
side lens distortion, distance, the camera distortion, barrel distortion, pin
cushion distortion. They both with the lens that happens is barrel distortion is typically when you have a put a wide angle
lens attachment, if you get a cheap one, you
know that its impulse buys, you get it the,
the, the register. Even if, even if a
camera shop you'll get those little lens kits and if you get one of
those wide-angle lens, what happens is that you'll find is used to capturing
a certain field of view. And when you put a
lens attachment on it, all of a sudden that's
got all these extra data, all this extra
information pixels. And I'll try to squeeze it
all onto the same sensor. So when you when you
squeezing it on there, that's when you get
that distortion and up and up bows outwards. You'll also see that if you use a fisheye lens as
well as another nail, the other one is pin cushion, said this is where it
goes the other way. So I pose inward. And pin cushion is typically
when he put a zoom lens on. Not so much a two times, but once you go beyond the
two times, tele converter, something like this, I want you to stop
putting something locked on your, on your lens. Then you get that
the other distortion and it gets pretty
crazy pretty quickly. You can fix that inside. Snap, say Screw it. The others, a distance
and subjects. So if you have your
wide-angle lens and if you've got a third A1 Pro, you will the iPhone, you will say the ultra-wide. Some Samsung and enjoys have an ultra-wide as well with
all the multiple lenses. What that does if you get too close, especially with the face, what happens is the nose
center gets bigger and the outside cookies gets smaller and wrapper
and we'll fix that. The other A's
perspective distortion. You notice luck. He said the
beautiful sunset, sunrise. Want to capture it,
capture this moment, captured the beautiful colors. Lift up, defined. It's tiny, it looks so small and
that's normal at Sam. So that's the other one. Alright, are you ready to have
a located saw at the app? Will bring it up. So I have this photo here. This is local church and this is a great example
of an ethics is not extreme. I'll show you more extreme
one in sotto Tower of London, took another photo of a building and because I was so close, couldn't get further back at
end up having that issue. These two parts here. One is we go into optics, going to optics enable
lens correction. Now this corrects that. That's our barrel distortion
I was talking about. So turn it off. Turn on EKG, you say
what's happening is little bulging in the middle, so it's correcting and it's recognized, it
knows what the metadata. Notice. This is an iPhone and
it'll go in and knowing the typical lens distortion
with these typical scene, it'll go to bulge the middle
to make it a bit flatter. Working for the top damp. This is not your
typical workflow working from the top-down, but I just want to show
you here top-down. And I will show you here
distortion does the same thing. Exactly the same thing is what
that lens correction did. These tools enable
lens correction using distortion
does the same thing, but it's a bit more aggressive. And instead of
just concentrating on the center of the frame, it pulls in and distorts more of the
frame when it does it. That could be good. It can
be really handy. Here we go. This one's going
to be a challenge. The perspective distortion
is quite extreme. Not only that, there's
not much room in the top, so it's kind of crop. Alright, so we're going
to go to perspective. First thing you want to do is the vertical garden we're
gonna apply with that. It's cropping, it isn't it
as we're losing the top. So it's kind of the reality, we are going to
lose some of that. Now what I can do is
go here and I can go offset and I can
try and bring it back. Say that I can bring it
back, it's still there. But then I'm gonna
have to go and crop the psoas and
I've lost the bottom. So what I suggest is
first we gotta aspect. We try and squash it first. Then we go in here
and do this process. Why go all the way on. Welcome back just a little bit. We'll see how we did that. By using aspect first and
squashing the photo first, that has meant that we've
lost less. Makes sense. If I've got the top
hearing constraint crop, it'll crop where it
needs to do that before. These are often go into
the geometry tool again, and you'll see up the top here, and I'm gonna leave
constraint crop turned on, I forgot the top here. You've got this option, you've got auto guided, level vertical full now. And what I'm gonna do is
just go order first of all and tap the screen first. Get rid of the menu. Hold my finger and I can see
the before and the after. Quite a dramatic improvement, which is really
cool, really good. Now, what I can do
is I'm going to go off initially and I'm
going to go level. Now what level does is, it is basically striking the
photo, which is really cool. Now it talks about that earlier in cropping and
straightening where you can, you've got your
crop aspect and you need to swap left and right
and it will strike in it. This one he, it will
automatically go. I think it needs this. It picks up on visual
references in the photo, like I window frame or the roof line of
a building and go, this looks looks good. Level, vertical is where it's done heating now
it's done the same thing, but instead of prioritizing
what should be, strike it looked at those vertical sections here
and it's a really good job. There's the before,
there's the after. Now it's done all the compression,
compressing the photo, distorting the rest of it to make sure that prioritizes
those vertical lines, which is, which
is really clever. Now full is the same as auto. It's assignments order except it has prioritized instead of prioritizing distortion because
auto includes distortion. Full means that it's concentrating
on the vertical lines. It's concentrating on
the horizontal lines. And it's just doing that
and stop worrying about that whole bulging in the
middle and that sort of thing. You can see what's
happened here is it's all perfect and it's
going to move it. I'm going to undo that. Okay? I'm going to turn off
Constraint Crop and say whether there's a
difference here, full. And you can say
that this is why, because you'd say it's added
the white bits because it's distorted the photo that much and then it's
gone and cropped it. And that's why it's cropped
in. It's moved at all. Now, guided. This is fun, this is really fun. What we can do now is
we can actually tell it these are the vertical
lines I want you to focus on. This is the horizontal lines. Now they might be to you
or you can add up to four and a combination
of two of H, two vertical to horizontal. Or you could do two vertical, one, whatever you like. I'm going to tap
and add, and add. And there's one. And this is going to
turn out really, oops. This is going to turn
out really funky or no, because it's quite an
extreme far-right. There we go. That's too. Now I'm going to go
with a horizontal. And I'm just, I'm just
going to guess this because it will readjust each time I do it and I can tell you what, that
actually looks good. There we go. That's that's not net Done. Now I'm going to have to scale, bring that back so that
I can bring it back. And I'm going to have
to use some aspect. And it's already maxed at
aspect is maxed, maxed out. Is this one of the
sudden negative thing. One of the things about
Lightroom is that, I mean, that's all looking good, but it's not looking good. I want to squash that even more. But once you make sat
at a 100, That's it. Now you can, in some
apps like Snapseed, you can save it and then you
can re or export the photo. Bring the photo back in again and treated like a
brand new photo. And then he can
go and you can go minus 100 again with Lightroom. It does what we call non,
non, non-destructive editing. So if we save this,
bring it back. It saves all these edits
inside the photo and we got to open it up and it'll open up with the same edits. But you can see here
the buildings looking really good and nice and level. But now it's stretched and I can't bring it back any further. Yeah, anyway, that's, that's the really cool fun options
inside the geometry.
5. Adjust Exposure, Highlights, Shadows in Lightroom Mobile: Good day. Welcome back to day number four of 30 days of Lightroom Mobile. Today we're talking about the light panel inside
Lightroom Mobile. We're gonna talk
about the exposure and all the different
tools inside there. We're going to talk
about black point, what point highlights, shadows? I'm also going to throw in there and talk about the
histogram because the histogram is a
great way of visually seeing what's happening to the photo because we can see it. But it's kind of subjective
without interpretations. But the histogram is more objective because it shows you where the data
is inside the photo. And I'm not gonna,
I'm not gonna geek out because I made to be honest, the histogram into
Lightroom is very small. It's not very detail, but I think it's
really, really helpful. So we're going to
get into that one. So this is a photo
that we're going to play around with today. This is inside the
Louvre Museum in Paris. And what I loved
about this photo is all the different
horizontal lines and then the converging lines. And I just, I just really, really enjoyed this one. So this hasn't been edited. It's just a JPEG, it's not pro raw because this was
taken on a tennis max. This is gonna be a good example for us to play around with. And the reason why this is
a good photo is that most of this is actually mid tones. There's actually not
much variety there, so I will be able to see just
how much we comply with it. What I'm going to go into
here is the light panel. It looks like some easy to find. Now if you're holding
your phone vertical, you'll have the icon
as well as the night, which actually finding
myself more and more nowadays doing
my edits in vertical, which means the actual
photo is smaller because my photos mostly
landscape orientation, but I'm really enjoying just doing this slaughters
with my thumb. Personal preference.
I'll digress. All these tools are
all about brightness. Exposure. Brightens, indiscriminately
brightens everything. If we've got some
really bright areas like these lights up the top there where the
center of the lots might be kind of brought in, increasing the exposure will
make those even more broad. And that might clip and
blow out and just be pure water with no information
in their contrast. Contrast is the best
way of describing contrast in a sentence is that contrast is the
difference between two things. If you increase the contrast, then the difference
between those two things, if you're making it
even more different, if you are reducing
the contrast, you are making those two items, two different
colors, color tones, brightness values, you're
bringing those closer. Most of the time we
talk about contrasts, we talked about tonal range. So you go, Oh yeah, that's
a high contrast photo. So that means that there's
a lot of highlights, lots of shadows, and
I'll show you later, I'll show you a high contrast black and white, and
how we can do that. If it's a low contrast
in any kind of, everything comes
a bit more gray, a bit more of the same. And you could end up with a
bit of a milky washed out. It's very popular in total
social sharing sites. They're kind of washed out look. But for me personally,
my preference, my style is have asymptote contrast,
good, vibrant colors, that sort of thing highlights is the broadest part of the virus, which is the light,
the brightest parts. So if we increase those, we can increase the ISO,
we take place them. We're going to reduce
the brightness and actually bring out more details when you reduce the highlights,
things like skies. If you reduce the
Holocaust cassettes, that's always gonna
be the brighter, some of the brightest areas, you can actually bring back day tiles in clouds and
that sort of thing. So you can add bit more,
more trauma to the photo. It looks really good. Whites and blacks. These are a little
bit different. These are the ones that
you're not going to stay on your in-built photo
editor most of the time. Although the iPhone
you now see flexor, which I've been asked,
what does this do? Why's how's it
different to shadows? Shadows is a section
within the photo. I said you've got
your highlights, mid tones and shadows. So your brightest areas is darkest areas and
your in-betweens. Shadows is that tonal range. So it's the darker areas. Blacks is the area of the
photo that is a pure black. Pure black, you can increase or decrease the amount
of the photo that is pure black if you want to have really an
crush those blacks, this is a term you want to crush those flex you're gonna
have really dramatic, have those shadows where you
can't see anything in it, say reducing the shadows
and affecting everything. You can reduce the
blacks and you can test those areas that
are really dark. He can Tucker, I just
want to pure black and create those
elements in the photo. Makes sense. That's the theory. What I want to do first
is I want to show you if you double tap
with two fingers, we start bringing up
information so we can go, okay. This is the information
and there's the histogram. As I said, this photo is
relatively or mostly all. In the mid tones. And here's
the proof is the proof. So we can see here
on the left side of the histogram that is the
shadows, the darker areas. On the right side is the
highlights, the brightest areas. And you can see here, there's no big areas that
have dark shadows. There's no big areas that
are brought even the sky is not a mid tone. And the way we know
the skies and mid-tone is that we also have our colors. We have blue in our histogram and you
can see all that blue. They're pretty cool. Pretty cool, isn't it? So what I'm gonna
do is I'm gonna go into exposure whenever x first we always have
to do is go in here, brightness of my screen. Now that I'm looking at
it in its true form. Brightness and I can increase the brightness, decrease it. Sometimes you might want to
add a bit more atmosphere. And this is the thing
about photo editing. It always has to come back to the intention of the photo
and your personal taste. Like Why might that really
brought those lights in the art tries rod in
the back corner get lost. But if I reduce the
whole bright and see how that now comes back. And the highlights, I can increase the
highlights and I can make those lights kind of
stand out a little bit more. If I tap there and
then I'll go before, after, you can see that they're
standing out a bit more. That's the intention. The intention might
be the highlights. You don't want to actually
make those really dark. I don't want to make them
a lot on like them doc. And you can see that
there's changed it again. Exposure markets bring
that back a little bit, contrast or come
back to contrast. Contrast is one that I do afterwards because I like to adjust the whites
and blacks first. As soon as you can imagine, if you increase the amount
of areas that are white, increase the amount of
areas that are black. That's contrast, difference
between the two things. Photo contrast, that's
kind of effect, how I adjust that and it's
going to affect vice versa. What's now these
when your spirit, it really to the
extreme to see what's happening here near a
good visual reference. Here's down on the floor.
This specular highlight here on Parker.
What Look at that. They become pure white. I go the other way. You could come out
to be blotchy. If I do the same with the
blacks, we go increase. That way. Now, an iOS thing you can do, an iPhone thing you can do
is the two thumb methods. So she told me with
any figure I typically do is swap Lake my finger there, and then with my other finger, tap this image preview
and then swap again. And I can say as I swapped, you've got these black overlay and then these
colors come through. You can see here first of all, you get green and
then you get blue and red and you get different
intensities of white. And you can see what I let go. I'm going to go back here. That is the point where
it's starting to click, starting to blow out with
his normal day tasks. So that is a good point. Blacks again swipe
and go. That way. I've just starting to see the impact and
go the other way. This is where it's
becoming really dark. You can see dan in
here sculptures. That's the point where the
shadow is still have details. The blacks, if I
go the other way, you can see now, those blacks, I just pure black. I think about there
was pretty good. We've done the blacks first. Now I can go back
to contrast and go, I'm going to add a
little bit more contrast because this is the whole photo. Now that said, contrast really does affect
the mid tones more. It does. It, it covers because when
you adjust the shadows, it's our shadows and mid tones. When you do the whole lot, it does the highlights
and midtones. Mid tones gets thrown
around quite a bit when you're doing these
different adjustments. It concentrates on the mid
tones if that makes sense. So contrast. I think that's pretty good. One thing I skipped over here that I wanted
to show you is the histogram can have
a look what happens. The bottom very edges
of the histogram. So I'm going to
double-tap on those two. You can see there
the information doesn't go right to the
edge of the histogram. Now if I want to have full range 101 is I want data going right
to the very widest parts. I want that again routes
to the very dark parts because then you have
the full dynamic range. So if we look at the highlights
or the white's first, have a look what happens
to the histogram. See how the histogram
all moves across and then it goes crunch right up, it gets the side a
bit, the original. It doesn't even reach
the edge, the histogram. So I want to move
it, move it, move a, move it until it
starts to squash up. Okay. So I will just, I just want to make
sure that it hits it with the blacks were
pretty close already, but let's just
extend that range. There we go. This creates more depth
to the photo as well. So that was pretty close. What I want to do. So I now want to show
you how good auto is. I'm going to undo this. We go back to the original, apply that and I'm
going to hit Auto. Look at that. Auto. Pretty close. Did exactly what I did. You can see this is a
typical workflow you will see in most photos and
it doesn't matter. That's it. Samsung or a fan Samsung to be the internal processing of JPEG file format is actually
pretty close to this. But for iPhone and lots
of others smartphones, I'm sure the typical
workflow is reduced. The blacks, you Chris, the
whites increase the shadows, reduce the highlights, increase the exposure
a little bit. It's done that exactly here. It does that in
nearly every photo. It's a typical workflow. Reduce the blacks
in crystal whites, decrease the highlights, increase the exposure
a little bit, add a little bit of
contrast, just a little bit. And that's a typical
workflow for most photos. It's very rare. You'll hear me say that
because every photo is slightly different and your photo intention
is different. Now if you're a photo intention
is that you want to have a dramatic dark photo. We'll then the
shadows instead of increasing and getting some more details, edit the shadows. You might want to
reduce the shadows and create more depth and mood. And that's what I'll
do most of my photos. I actually go against the, against the popular way and I actually love shadows
in my photos. It just adds visual interest because people, it's
a bit of mystery. People go what's got on there? Like, Oh no, I can't
see the details. Later on when I'm getting
into the masking, I'll show you how you
can do that even more. So those local adjustments, so areas specific adjustments, It's a lot of fun. Something else I wanted
to talk briefly here about the highlights and shadows and playing
around with contrast is other things that
affected your color. Now, different hues, different colors have
different brightness values. You can compare. Blue or green. Have a dark brightness value. Yes, you can have a broad blue, you can have a bright green. But then when you look
at the color yellow, yellow naturally has a
higher brightness value. So if you compare the two, if you increase
the brightness of one, It's okay independently. If you increase the
brightness of the whole photo that has yellows and greens, the yellows is gonna
look blown out and more dramatically increased when we increase both of them. Does that makes sense? So
when you're gonna need to, when we want to show
you a color grading later on we stopped playing
around with color grading. You will see that
some of those colors, when you're playing around
with them in the mid tones, shadows, highlights where
you can actually throw a color cast in just those
areas of that tonal range. It starts affecting the brightness value of
the whole image. This is where my
four-step system of fixed in the composition. Tones, colours like
what adjustments sometimes when you
do the colors, when you play around with it, you might need to go back
and just tweak and fine tune the shadows and contrast and highlights because
you've increased the brightness of the
greens and you've thrown a green into the highlights
or whatever you've done. Yes, so sometimes that
can affect it tomorrow, dynamic five, we're gonna
talk about tonal curve. Sands a little bit
intimidating Lightroom has a very basic tonal curves, so we're going to
have a bit of a play with that and I'll
show you how that works and how you can
affect mid tones, shadows, all that sort of thing. So thank you for joining me. I know I went on a
few tangents there, but that's all foods
or part of it. And it's tomorrow. I'll send you again for the tunnel curve.
6. How to Use Tonal Curve In Lightroom Mobile: Good day. Welcome back. Today's day five of 30
days of Lightroom Mobile. Today we're gonna talk about the tone curve and
curves inside Lightroom. Be honest, I don't
use it that much. The reason why I don't
use it that much in Lightroom is that we have lots of different choices because there's two
things that it does. A few large or micro
adjustments of contrast and exposure or brightness from the darkest point right through to the lightest point,
which is fantastic. You can boost the mid
tones, you can decrease. The other thing you
can do is colors. You can do the same
thing with colors. Now, with Lightroom, we have
a whole colors section, and the whole color
section is brilliant. You have individual
color channels. You have the target icon, which I'll show you
later in another video. It's, it's brilliant. You
have so much fun control. So we don't actually, I don't actually use curves
all that often. You have contrast control
inside the light panel, which can effectively
give you an S curve. Now, it's kind of a fixed measurement that it does with the contrast
with the curves. You can make it more
images specific, which is really helpful.
For me personally. I'll use the S
curve or the curve into quite a lot inside
snap safe because it doesn't have
advanced color tools like we do with color grading. Color grading inside
Lightroom Mobile. Here we go. So this is a photo straight
out of the camera. You can see it's a
typical iPhone shot. It's lacking in contrast a
bit down, this is an old one. This is what is this one? Doesn't have the information back 2019, I took this photo. It's quite some time ago. Here's a histogram.
Now, histogram, as we talked about yesterday, that gives us lots of information and it's not something to be
intimidated about. You don't have to
understand it fully. What we know, what we can see is the visual representation of where the tones and the
brightness of different times. Now this, you can see
he old the white, He's all the color
channels altogether. And then you've got
individual blue, red, green, and you've got
yellow there as well. You can say he blew. It's
because this is a cool photo. Not, not as an awesome cool is. It's taken in the morning. They said they'd seen shade. You can see that it's
in shade with the blue. It says lots of blues
and the shadows, curves. Tap on the curves. And you can see here
we've got white, which is all of them. And then you've got those
individual ones and then you've got the
one on the far right, which is just a different way
of controlling the history. If we have more smooth, it's not as dramatic
and accurate. I say heavy-handed and accurate at the same time
because that's what it is, because you can put quite
a lot of dots along here. Now, this curve, this effort
IS curve what this is. I'm gonna go back, double-tap these to remove them. Pretty good. I'm gonna keep saying AS curve because that's what
I use these for us. You can go in there
and that is an S. S, but you can see what
I've done is I've fixed the highlights and I've
reduced the shadows because on the far left side, these little graph we can
see that's the shadows. And then on the
far right, that's the highlights are
the brightest areas. That's an S-curve. And you can see there,
hold that down. There's the before. There's the after. Dramatic contrast, isn't it? If I go into the light panel back into
there and slide the contrast, it will produce a
similar result, but I have more control
here that I can go. You know what, It's actually not too many highlights
in his I'm not gonna concentrate too
much on the highlights. I don't want to do that. I'll just want to
concentrate on the shadows. I want some nice deep shadows. The mid tones boosted. I actually want, I want
a curve like that. I don't want your
typical highlights increased and that
sort of thing. I want my highlights
to be critique race or my midterms up and
just experiment that for me, that
looks really good. I liked that. I've got rid of the haziness. I think that looks really nice. So there's before, there's
after the contrast. Slider doesn't do that
because it just has a fixed amount of contrast in
the fixed amount of areas. And it'll adjust those as far as the amount of intensity that
you increase or decrease. It's a fixed amount every time. It doesn't matter
what the photo is. This one here and kind of personalized this
contrast adjustments. So that's looking really nice. And then you have,
and this is where I don't play around with
these anymore. Oh, I do. When I have a going in steps. But here I don't play around because it's so heavy handed. I can't I can't
kind of separated. All right, so we're going to say this strategy,
boom, color costs. If you have a heavy color casts, then it can work really well. Greens, actually. There you can see the Instagram and other
photos sharing salts have a lot of these that
have kind of a style. People have a stall
to have a look to their photos and they
might just color grade their photos
and make them look similar because they
share similar subjects. That plot is similar. Color grading. Color grading tool in
here is sound so much. I think personally
it's so much better. You can fine tune it and you can make it
look a lot better. And the color grading,
you can still apply that to your and
save it as a preset. I do have one more thing
here I want to show when you play around with the colors, just going to bring this up. When you do play around with the college and
you're playing around with the red, green, and blue. When you increase that led, you can say the
diagonal line near when you drag that line upwards, you're increasing those,
but when you drag it down, you're actually
introducing another color. So if you want to
bring in some yellow, you will grab the blue line
and you'll drag it down. And the last one
over here I want to show you is this one here. It's similar to the
one on the far left, but you have more fluid control. You can see that instead
of putting the dots there, along there and then you can adjust and it's
more gentle curve. Now we talked about
yesterday black point briefly, in the black point, I talked about that
once you decrease the blacks and he
wanted to convert those blacks, crush
those blacks. When he gets a minus 100, kind of eat it as
far as you can go. But inside curves here, we have the black point
is down the bottom left, the white point is at the top. So we can adjust our
black point and we can go as far as we want. We can go crazy. We got as far as far as we want. Some of the what point
you can drag drag the one-point in and
you can bring that in. So that's another benefit of curves is over just
the exposure tools, is that you can really crunch. If you're doing a high contrast black and white,
then this is green. So we'll go back in here. I will go dun colors,
black and white. Now back into curves. And you'd see here I can
make a real high contrast. Pretty cool. One thing you can't do
with curves is you cannot. Let me just undo that to bring it back
to some form of color. That'll do. You can't go into mask and go Select Subject. These
picks up the leaf. Not great. What am I do is I'll go in there
and select Color Range, Color Range, the leaf, they're refine it
and make it more. There, there we go. Now we've made a selection. It's not a great one,
but that's okay. I've made a selection here. We cannot go into life. There's no curves. That would be handy
because we've closed because it's so heavy handed. You can go in there and
you can go, you know what? I'm just gonna do this guy or I'm just going
to do the subject. I want to create
more separation. I want to isolate
that subject from the background a little bit
more than he can go in there. And now I'm going to go
into curves and ongoing to dramatically add
a green color casts or yellow color costume. I can look summary
to be different, but we do have here contrast
that you can add. Contrast. All good. Fantastic. Discard Changes. We're all good there. I think we'll wrap it up. They're not short sweet one
today because like I said, I don't use this tool a lot, but I wanted to show you
what it does it explain. Hey, put the dots on there. You can remove the thoughts. Hey, you can work with
the histogram agan, just the different colors. Might wrap it up there and I'll talk to
you again tomorrow.
7. What Does The Dehaze Tool Do Inside Lightroom Mobile?: Good day and welcome back. Today we're going to talk
about the Dehaze tool. We're going to talk
about what it is, what it does, what
you can avoid, because it's a brilliant tool, does come with some
issues if you overuse it. And I'll show you how to basically replicate
it if you need to. Because similar to yesterday, we talked about
contrast and contrast. And then yesterday we
talked about tunnel curves. We talked all about
contrast. Last two dice. They kind of fixed, especially contrasting
saw the light panel. It's a fixed demand
of adjustments and you can just increase that fixed formula approach
if your luck increase, it will take Chris, it total
curve was great because then you could go and be
a little more selective. You could increase contrast
in just the shadows, the mid tones or the highlights. This one Dehaze again, this is a 1s, one slot,
does, does everything. And effectively what
it does is it works on the black point,
vibrance and saturation. It does three things. It's kind of the collective understanding of what it does. It's been a bit of black magic. It's a bit like Texture tool. It's just magic, it just works. So what is highest, the highest A's
basically highs haziness is an atmospheric conditions, so it is particles in the air. Typically we landscape where
you've got an MAT range in the background or
you got something in distance with a lot, kind of reflects off
the particles in the. Other things that
can work really well for this Dehaze tool is folk and gla, glare off the glass of water. Now, the polarizing filter
still Bates it hands down. But if you haven't used that, then it's a highest
tool is really good for bringing out
some of those details. Because basically what all of those things that
I've talked about, the highest, Let's
constraint on highest ate. It washes out the color
and reduces the data. So that's what the highest does is it brings back the color, brings back the data. You can imagine just
by that definition, you can imagine that if the
photo and it works globally, it works in the whole photo. The photo has things like
skin tones in there. You're bringing back and
adding saturating color. It's going to,
it's going to look pretty funky and
orange and skin tones. It's also going to dramatically. At shift colors. Blues is one blues it does. The polarizing filter does
the sign in the middle. Gallon dark blues. With that said, I
think it's best to show you what I'm
talking about here. So I've got to have
this fight I loaded up into light room already and
you'll be familiar with this. It's one applied with yesterday. I'm gonna show you
some other examples. So this is the original farther
into effects panel there. And you'll say the highs. You can say that the grain, the grain is server, etc. And you go the other way. You can say that it
is reducing colors, it's reducing
details, sharpness. You got the other way. You can say, it's
getting pretty funky. Remember, I talked about the histogram, the
histogram up here, so you can actually see the color shift happening
at the same time. So it's not just the white
area of the histogram. You can see all those individual
colors moving as well, saying the whole photo dark
and there it's all darkening. And if you look very
bottom left corner and you say with the white
part of the histogram, you can see the black point. I told you that this is
just the black point is hitting it and then
it's gonna go up. So that's not right, but a little bit of day highs. Let's just tap on and
to get rid of the menu, a little bit of a haze can
work absolute wonders. Now let's do a comparison
and let's go into contrast. Contrast does the same thing, but it hasn't affected the
colors as much as the height, which is looking at
one file right here. So we're gonna look at
a few factors to say how to fix different,
different products. Because you can see there's a lot of colors in this photo. There's a lot of mid tones. You can tell this load mid tones because we looked
at the histogram. Histogram, it's all bunched
up in the middle and it's kind of a bell,
curve bell shapes. That's quite an old mid tones. This virus are
fantastic because D. Hayes works mostly
in the mid tones. When you look at the
highlights or the shadows, it doesn't really bring out
details and adds color, but the mid tones and this
fire has a lot of mid tones and that's why it's dramatically
effecting this one. Let's contrast. The other is black point. So we're going to
reduce the black point. That's not a really
good job, hasn't it? For after black point, a little bit of contrast. Now let's go over and we'll
add a little bit of vibrance, will say they started adding this yellow
is just killing it. But we can see saturated the
whole photo desaturated. I'm going to talk about this
later in this 30-day series. You can say saturate
the whole photo and then it takes saturate and
then we can add the vibrance. Vibrance brings back
mid times as McCullers, the more muted
colors brings size back before. And our after. One I'll bring up,
I did actually create a collage of all of them, so it's a bit easier to
see them all together. There we go. The top left, that's
the original. This one here, let's
say our original. This one here is the Dehaze, say that the color shift, this one here is just contrast. This one here is
manual controls. Now the benefit of
manual controls, as much as I love the
highest and I'm going to, I think it's brilliant, I use
it nearly every workflow. The benefit of going through is now in making it
far as specific. So we've looked at the
husband gonna add a lot, but oh gosh, it's really
killing those colors. Understanding. And this is what
I'm trying to do is 30 days easy to show you
these different tools and go, it cannot replicate
that same look. I know a plexus on our
shadow is does MIT time. Hopefully you're starting
to grasp this and understand so that when
you look at this guy, oh, that tool is not working, you know why it's not working? What I'm gonna do
is subverted out into here and I got the
highs and lows, highs. It you can say that
it's dramatically affecting my skin tight is
kind of orange and be GKE, the background is getting muddy. It's highlighting
imperfections in the lens with this guy. Jpeg compression,
Chromatic Aberration, all that sort of thing
gets really emphasized and stands out when we stop playing
around with the dehaze, just do a little bit, but it's still affecting the skin tones. So what you do is you
go into masking tools. I'm going to reset that masking. I'm going to select
Subject. This is so cool. Now I go invert that selection. So now I've selected everything other than the person
in the full grant. Now we can go in here
and let's dehaze that. Now you can see that it's
still doing the sky, isn't it? But what we can do, we can now. Fair enough. I'll take that. But I can subtract the sky. Now this is becoming
a masking tutorial. That's not the intention,
but I'm just showing you how I'm using the Z height more and more because
before I would guide, you know what, it's going to
affect this and this, this. Whereas nail I can
say a cow just wanted to limit it
to just this area. Now, I can go into
something like texture. I can bring it into texture. Colors, I can desaturate
the mountains. Yeah, It's just brilliant. Brilliant. This is a nice one to play with. This. This is original straight out of the
camera. It's a JPEG. That's nothing. Huge details in there, but I just want to show you how this works with underwater. Cuts out the glare. Really good effects. This is piffy example of one
that does the color wheel, the color to the extreme. And I've heard several,
bring that back. And then what I'll do, I'll
just digress for a moment. I'm going to go into here
and I'm going to go Target. I'm going to pick
up and I'm going to reduce the saturation. Pick up a purple area
to reducing the purple. That's not as
dramatic. That's good. That's pretty cool. Before there's our after, so we are cutting
through that glyph. What am I do is I might do
again, this is what I love. I can go in here
and I'll just do a radial and I'm just going to constraint
on just this area. And then I can come in
here and I can get a bit more crazy, crazy, crazy. Clarity. Is that before these are often Haeckel's
that we want another one. I'll do another one. Be fun here, I have a
look at the histogram, say how there's not a
lot of color picking. So this is fairly flat. You say the
background. I'm going to go dehaze, see what it does. Look at that you can tell I took this photo from the bus
as we went past because that's the highest
is brought out The reflection of the
frame behind me here, the window frame behind
me. That's pretty funky. But if I lock what it's doing to the rest of it, remember, I can actually do a selection
and do a sky selection, which we'll just select all this guy and then I can invert it. So I will select everything
other than this guy. So I can apply this the highest at everything
in the foreground. So let's just ignore that
scar for them for now. Pretend that we did that. Clarity. Now I'll go down actually, I'll just bring that back a bit before it becomes an issue. Just a little bit. Just,
again, just ignore that. So blacks, which is the
blacks bit of contrast, is that before or after? You can see what I'm trying to demonstrate that you
can see there that a combination of the dehaze with black contrast, vibrance
and saturation. A combination of the
four far outperforms. Just the Dehaze. Dehaze is still an amazing, awesome tool for just
a quick one slaughter. See what the potential
is in the photo even. And then once you've done
that, then Danielle laughing, so we'll wrap it up there. Thanks for joining me and
I'll talk to again tomorrow.
8. Using Texture, Sharpening Or Clarity In Lightroom Mobile: Good day and welcome
back to day number seven of these 30 days
of Lightroom Mobile. Today we're going to talk about the difference between clarity, sharpening and texture tools. H of them are brilliant
through a fantastic job. Some of them lend themselves better to different
photos, different genres. To increase that
sharpness definition. Today we're going to
concentrate on just within Lightroom,
just these tools. First one is clarity. Clarity is similar to contrast. Contrast, as you might remember from what
we've talked about, is basically where you have dark and light pixels
tones within the photo. When you increase the tax, decrease the lats, you increase that
difference between the two. If you decrease the contrast, you're making those
to look similar set of becoming a black and
white becomes a grinder. Gray. Makes sense. That's what contrast
is a contrast. When you apply that
in your photo, it just increases the contrast in the whole photo
like indiscriminately. It doesn't matter what
the tone is in the frame. Clarity, on the other hand, works on just the mid tones. Which is where it gets
a bit more exciting because the mid tones, which is the different
the area between the brightest parts and
the dock is pots is that you're increasing
that contrast in the bits that
matter most with it. That gives you the depth, gives you that clarity. Makes your photos pop. Every photo can really
benefit from that. And you can go a
negative value as well. So you can actually
make the mid tones. You can smooth them out a bit. That works really well
for high contrast photos. You playing around
with Hong Kong, high-contrast black and white. If you do it the way I'm
gonna show you in a couple of days here we press the black and white
button inside Lightroom instead of reducing
the saturation, locate the colors there. And clarity is one that works really well in black and
white photos as well. Alright, so what I'm
going to show you now is just an example of it. I just want to talk about
just really briefly that, that perception of sharpness. Now you can say here, the black one gray because
there's not as much contrast. The lettering, I'm
gonna it looks sharp, which is, which is great. But then when you look
at the black on white, because there's so
much more contrast that takes these
exactly the same. It doesn't matter whether it's black or gray or
black and white. That is exactly the same texts, but because of that
higher contrast, let's increase that
perception of sharpness. All right, So I just wanted
to touch on that first because in this photo here, you can see that yes, the times of being changed, the background hasn't
been blurred anymore. We've got some color contrast. But if we have a look
in the center here, you can see there because of that sharp watch
against that black, because there's higher contrast has increased that
perception of sharpness. You can see in a
more practical sense that shopping is
really coming through. This is St. Paul's
Cathedral in London. This was this cool
little rooftop place to the head to take the, an elevated it to get up to and get this viewpoint which,
which I absolutely loved. I went back there
quite a few times to get a photo that
I was happy with. All right, So according here and already edit
this a little bit. There's the before,
there's the after. What I wanted to show
you here is clarity. I'm going to zoom in where
they're awesome details. He now this photo, as you can see from
the histogram, I do have a lot of details
in the mid tone ti, not too much in the
ducts or the broad. I want them all to
just really quickly. I'll just go into here and the blacks bring those
blacks a little bit. Because remember when
we have a lot of black and white with
extending that, That's dynamic range, that tonal range, because
I'm working with tons. I want to have the
full nine today, so that's why I'm
doing this now. What you can say that, that already has might increase that perception
of sharpness. Now, blacks and whites,
I'm not even playing around with
sharpening tools yet, but you can see that already
on shopping this photo. Clarity. Now, I'm just going to
take it to the extreme. Pretty grungy, pretty yucky. Don't want to accept that. I'm gonna kick to
get out of there. Alright, double-tap.
Let's go back. I'm going to zoom in and
just do a little bit. You can say that it is
starting to affect the, it doesn't affect the colors, which is fantastic, but it's getting into everywhere
in that tonal range. So this is a photo that would benefit from
just a little bit. So what I'll do is I'll
double-tap on this circle. And if I do a single
tap on the lawn, I'm gonna add it by 15. Okay. So that's pretty good. I'm happy with that. I can do. Remember
in die number one, I told you about how
we can long press. It'll go back to the original, original I forgot here
and create a version. I'm going to do now.
Credit version. Now I'll create my new. Before. Then we're gonna do this
editing playing around with the different types I
can go and compare the two. It makes sense. It
back into here. A little bit of clarity. The highest talked
about it yesterday. A little bit there.
That's looking good. All right. Next one I want to talk
about is shopping. Now sharpening, sharpens pixels, indiscriminately sharpens
the whole photo, which is not bad thing. But I'll show you how we can shop and just the
areas that we want. Now if we look up here,
I'll go into the sky. And I'm gonna go to
the extreme again. You can see the shopping
the pixels in the sky. A little bit of, little
bit of grain and noise and artifacts
and all that. It's not a big deal, really isn't a lot of effort. I switched heavy on F5 for us to leave those moments
in years to come. We are also we might be
posting them on social media. So a little bit of
extra sharpening in disguise and that sort of thing. When we look back to the
photos, they'll great founders, we don't look back and go, Oh, look at all that grind, look
at all those imperfections. We're not, we looked
at the storyteller. Don't get too hung up on it, but where we can change
it and improve it, That's what we're
trying to do here. Sharpening. Like I said, every single
pixel sharpens everything, which is good, especially if you've got
to print your photos. This is a great tool to
use because we can use, It's like Output Sharpening. You can go in there
and an overshot it because naturally when
you print your photos, it does lose a
little bit of Theta. And it'll go soft. Sharpening. I'm going to bring that
back. And you can see he's say where it starts to
go, read the slider. Really good indicator that
the red zone is the bedside. So don't go too far to the red. I typically like to
go about halfway. That 70 radius, radius is
when we look at these edges, I'm looking at these edges. Just going to undo that. Now, look at the edges. Can you say that high-low, that's around the edges? I have a sharpen it negative say the highlights
around the edges. This is because our phones
already processed sharpening, because it's a JPEG. It's already applied their own
proprietary way of editing the photo to present you with the final JPEG
photo unless you're shooting raw DNG file format. This is going to happen
in a lot of your photo, especially with these
strong lines and contrast, can even happen with trees, not necessarily just limited to architecture
that's highlighted. That's caused by the sharpening
going, you know what, that edge of the
building, and I'm gonna make that daka, daka. And then on the other
side of the dark pixel, I'm gonna make that brought up. And you can see there
the line that's, That's the cool thing
now, the radius. So the phone has already
applied sharpening, and it's a plot of radius
that many pixels either side. You can see there,
that's the radius, the highlight, that's the
radius that they've applied. If I go in he now and
I apply a radius, you'll see if I
increase the radius, I'm increasing that highlight how I know we don't want
to have a highlight. I'm just using this
as an example to show you when I apply my
inside a man of shopping. This is the highlighted
cell phone can't reduce. So you can see that's the radius half-hour away from the edge
that I want to apply that. You can say that on
your little screen. I'm going to bring that back. And I want to bring it
back to default. One. Let's just leave it at that. I want you to understand
what it does. They tiles. Now it's a tiles. This is way it looks for
those contrast those edges, those differences
between dark and light. The detail will go
from looking for large lines to find lines. So 0 is the larger lines. And then up to 100
is defined as data, as you can see here in the sky. This is pretty funky, isn't it? Say they're on scar
because this guy, there's really not
much difference between light and dark. And this got there is some existing name because of going extremely
the sharpening. So let me just bring that back. Okay. That's 70. Now details, it looks for all those
and it goes okay. Now it's just going to shop
in just those large areas. So you can see that it's not
applying that sharpening, Sorry, much in the sky. Which is really handy
to balance, isn't it? It's just shopping
those details. And if I go this way, you can see it's now applying
that sharpening everywhere, even when there is a slightest
little difference between pixels in the sky that we've actually introduced
with the sharpening. It's now going in there
and sharpening old eyes. I liked the default value, but because we're really, if this is a photo
where you really, really want to get as much
data out of it as you can, then you might want to increase their
shopping quite a lot. But you might say that I wanted to really bring
back the details here. But I don't want to affect
sky and things like that. You can reduce the details. Now if it's a really super
blurry photo radius, we want, once we increase that to two,
That's pretty extracting. It's increasing
those areas that he wants to bring into focus. If I got back, this is looking. Extremely sharp. Now, the highest resolution, remember this is
taken on a tennis. So we can say that I'm
going to bring that back 70 odd default, bring the effect of default. Because I want to show you
one more tool inside heat, and that is masking. Masking on the iOS. Iphone works differently
to the Android. On Android when you apply this little system,
I'm going to show you. It will show you a
before and after. Now it shows you a before and after inside this
tool what it's doing. Another before and
after the back to the original photo and after, it'll show you what shopping
is being applied here. Yeah. Okay. So let me just show you here's
her masking with my thumb. This way often it works
for me with my thumb. I'm going to move the slider. Leave my finger there
while it's there. Put my other thumb
on the screen. And you can say a
black and white mask, much as zooming out
a little bit here. Masking, put my finger on Bang. Look at this. This is really couldn't believe what has
been not discovered. This, this was amazing. I can select way what I want all the
shopping to simply apply. I don't want anybody in the sky. I want to apply all of it. All in the cathedral. You're not hold and
apply it just to those main larger dataset, not the final details
in the building. I want it to be
the large details. How cool is that? Now I've said Android, you can say before and after, say probably better to zoom in. And then when you put your
thumb, second thumb on it, it'll give you a before
and after so that you can compare visually
just what it's doing. Basking on. Typically, don't like to throw numbers at you. But this is kind of a bit
of a workflow for me. Iconic go for these details
on nearly every photo is around 70 to 90
sharpening radius and details are laid
on those default. But if I have a
super blurry photo, they don't come in and I'll play around with the radius amount. And then they tiles. That's where I'll start to
use those two because I can increase that
area that I want to sharpen and around the edges and targeted into
the larger details instead of the finer details. Good. And I actually have a
preset that I've set up for blurry photos. I'll just go bang and
it's like that TV show, CSI, if you're a member, CSR, really hit the enhanced
button and it'll just go like That's what this does when you
apply Rama's radius and data for a
super blurry photo, you can, this is pretty cool, pretty cool stuff
to bring that back. Let's set one sharpening. So what I'll do is I'll reset days because I wanted you to see what the next one does,
which is texture. So we've talked about
clarity sharpening. This one has texture. This one is also, also, this one was released
back in 20152015. And the Adobe team, when they designed this, they were actually trying to create a skin smoothing tool. And then I just discovered
that he felt stumbled upon this other way that you can use the tool selecting
high-end Rey touches. We're using these high-pass
sharpening and all of these pretty funky things inside Photoshop to try
and smooth skin. Whilst perfections, while still retaining the data as is the poor of the skin, because otherwise you would
just end up really smooth. And 5k looking, sir, designed is to smooth the
skin but keep the details. When I did that,
I realized that, hey, if we do this
the opposite way, we can increase the tiles in a fun way that
doesn't affect color. Saturation. It doesn't affect
color luminance, which is super cool
because a lot of contrast and even
the sharpening tool, it can affect color
cast in the photo. What I want to show
you here is texture. Hey, so I'm gonna go in here, just go crazy 100% and
have a look at this. It's applaud all
that sharpening. But it hasn't even
touched the sky. Which is really
cool. It's magic. It's magic. I wish
I could explain it, but it's kind of a
combination of clarity, sharpening and noise reduction
because it's in theory during increasing
clarity and shocking should introduce
some imperfections. Gi pay compression, looking, watching us and and
just overall, Yacc. But it seems to apply some
noise reduction as well. And we have a look
at noise reduction. It doesn't actually
apply it separately. It does it all within
the one slider, which is super cool. I use texture all the time because when it comes
to streamline workflow, when it comes to shopping,
I've already applied, I've already corrected color of, already worked with the tones. And I don't want to become backwards and forwards
with my workflow. I mean, you're
naturally still do. But when it gets
to that shopping, prefer tools where I can selectively shopping
exactly where I want. And now with masking,
it's even better. With masking. I'll just touch on that really quickly broke out into masking. And I'll go in here
and select sky. I'm telling this guy because you can actually see
it a bit better. What's happening? If I go into shopping? You can say that I cannot
really apply the sharpness. I can't play around with
the data radius or masking. It's just one thing. I can just add, sharpness. I'm not a real big fan of that. But with the mask, I can go into texture
and I can add texture. You say here we
can go a 100 plus. We can also go 100 minus. Have a look at that. Scott, the before and the after. I've selected this guy, got nice texture
and I've smoothed, got rid of if I've got in
there and shopping at all, there's already
existing sharpening. The JPEG has already applied
going there and reduce that. And it works really well as
noise reduction as well. And I'm gonna cover that
tomorrow, noise reduction. So I'll show you this tool
again. Let's super cool. I love it and just be
mindful when you apply around with a lot of these
sharpening tools that overall, if you increase the
sharpness overrule, you can increase the brightness. So you may need to go back and reduce the
products a little bit. That's because some colors have a higher brightness
value than others. So when he stopped playing
around with sharpness, then it's tones, but it does, sometimes it does affect. That's before, that's after. It's pretty cool, super sharp. I'm really, really
pleased with that. Let's spread. So tomorrow we're
gonna talk about noise reduction and
how we can do that. Super advanced features
inside Lightroom height. And they're pretty cool. So I'll see you there. Bye bye.
9. Advanced Noise Reduction: Good day. Welcome back to dynamic of the study days of
Adobe Lightroom. Today we're talking
about noise reduction. This, it really is a
tool that we need to do too often now if with
the modern smartphones, which is, which is brilliant. But I love playing with my old photos that are on my camera off from a
couple of years ago. The reason why it's our
modern smartphones do so well that really need to
worry about it is because of the algorithms, the software that image signal
processing basically they blend multiple photos and noise is random
in-between each photo. So when you're frame average way there's
a pixel of noise. Then if it's not in
all of the frames, then it's averaged
out and it's gone. That's pretty amazing. But that said, I want to show you what it does because
you might be shooting raw. And if you shoot in raw, and it depends on top of rule. I'll show you a photo here. Exactly what I mean. Here. It's very different photos to
first to catch it on Apple. First one is a JPEG, then a pro rule, which is a proprietary
kind of role. It is a DNG file format that work with Adobe
credit their own, as my understanding, and
then Lightroom or raw DNG, these were all
shot in auto mode. And you can see the difference, the noise and file size. Big difference in file size. But you can say with
the comparisons that rule files
quite often if you shoot through
Lightroom or the same in the other camera replacement apps out there that
should rule for you. Then you might need
to go in and do some noise reduction when
you go into Lightroom. If you have a JPEG and you
bring JPEG into Lightroom, it doesn't apply
any noise reduction because they kind of
know the visit JPEG, your camera, your phone
has already applied. All its processing is already
worked on the Colors, tones sharpening, and noise
reduction is already applied. Noise reduction, which
is really exciting and that makes it so
convenient for us. But a lot room
also knows that if you bring in a RAW photo, it will go and apply
noise reduction. And with some default settings, one thing to be
mindful of is when you bring in Apple Pro rule, it recognizes it as a DE and DJ. Apple have already processed noise reduction and then
you bring into Lightroom. It'll go, hey, this is a role we need to
apply the default. It gets kind of a
double treatments. So it's just something to
be mindful of because you may lose some details there. The reason I brought this in as an extreme example is
said that you can see, you can see what it's doing. So we go into the triangle, which is day tiles, which as you can see here, I haven't processed
any of this and you can tell if you remember, die number one are shuttled
a shortcut and navigation. As soon as the garden
applies to change something, you will see next to that
symbol there is adopt. When there is no dot, you can say that these
are the default settings. Now this photo is a dangerous. So it has applied these
defaults to bring up a photo that is a deepfake. He began to hear this one
hasn't been sharpened. You can see there,
there's no sharpening, there is no noise reduction. It hasn't uploaded anything
that noise reduction. There's two different types. It's got the noise reduction
or color noise reduction. Noise is signal noise. It's gain noise,
it's electronic. It's something that
happens when you boost and that's what
ISO is. You're boosting. A main set amount is 5100, whatever the camera is,
your smartphone ease and it amplifies itself. That amplifies signal
creates this noise. And that's what makes it random because every photo
responds differently. The other noise is Illinois. At Illinois, and
you'll recognize it. And again, it is over the
top, but that's okay. The one the one on the left, that's what your
recognizes normal noise. It's kind of it has salt and
pepper kind of look to it. Solenoids, extreme doesn't
really look like that, but just, just a skew an extreme example there
of what it looks like. Two different types
of Illinois is also known as Chrome and noise. And other noise
that we're talking about is also known
as luminance noise. We slide that, we
just slide that. And what happens is
it basically blurs all the fine details
and tries to grab all those bits of noise and
just go and smooth them out. Now what happens is it smooths the whole image, which
is what you don't want. That's why we have these
other slides underneath the day tile and
contrast day tile. What that does is that it brings back some
of the details. Now it brings back the day
tiles in all the pills. Like if we can imagine
yesterday I talked about sharpening and
compared sharpening and texture, that sort of thing. Sharpening effects every pixel. Well, that's what
this detail does. It works differently so that detail is not sound
as this data. This data inside
noise reduction. This is the shopping. It's basically it
affects every pixel. When we go into contrast, what that does is
that tries to bring back the edges that we've lost in that smoothing action of noise reduction when we play around with
contrast in here. Let me bring back the
definition around the edges. In my experience playing around. I prefer to actually go back
into the light panel in here and play around with
contrast there because it's global and I have
more, more control. I quite like that instead of, instead of using
the feature inside, inside, Here's
what I'll do here. I'll zoom right in. And I'm gonna go to
the extreme here. Now, the United States,
when I slide it, I slide it must stop. You can see the
before and after. Another way on an
Android of saying the before and after is
the two thumbs system. With my thumb, slide
it, leave my thumbnail, my other thumb, put that on the screen and it turns into
a black and white photo. This is iPhone only. If you do this on an Android
and it's just as before, let go, and it doesn't
after, before and after. But on the iPhone we had
these black and white, which makes it easier
to see without color. We can see definition. You can see here, say they were, I'm smoothing, smoothing,
Smoothing, let go. And if I want to bring
back some details, and I'm gonna just kinda
go to the extreme here. You can see that it brought
back some day tiles. Extremely contrast. It'll near the edges, not so much lines. When people think of
edges, we think of lines. These are not lines
that I'm talking about. These are groupings of dark
and light tones together. They created an edge, if you're lucky, they're
not lines such as edges. We've applied maximum
noise reduction, but then we brought
back maximum, so we bring it back
well as imperfection. So I'm gonna reduce that and get all about what is the
default 50s or 25. So I'm gonna go up
by 50, double it, bring these back, which
is going to double-tap, bring your eyes back
to the defaults. There's a lot of this
still a lot there. So I am going to increase
that a bit more. That's looking smooth. And you're always
zooming to have a look and make sure you
zoom back out again. It's really important to zoom back out because you want to see how it's impacting on
the rest of the photo. Next one here is color noise. I could say some
solenoids there. And we're going to
reduce that a bit. We're bringing back
detail and color. So color noise,
it's picking up on, on color and it's
against smoothing. The colors are blending
the colors together. Date how brings back the color? Because if you do too much
color, noise reduction, it will make it look a bit more desaturated and
I can look blotchy. Not fantastic. Smoothness
is where you have that modelling Noise networks. You've got big chunks of noise. That is one for
photo restoration. Old, old ferrites looks really bad at all, severely
underexposed. And you brought it
all USA's big squares and blend lots of color in it. Then you do this smoothness
and it will target those areas data Oswald is more than the
foreigner day task. Now, quick tip with color noise. If you've taken a photo where
it is a macro photo or it is all about the
intention is all about the sharpness and you
want the most sharpness, this sharpness in color. I've talked about this with perception of
sharpness yesterday. The edges of the contrast,
color contrast exists. It's real, It's not just tones, the chromatic contrast, two
colors next to each other. The difference between
those two cases increase the perception
of sharpness. So if we go and reduce some
of the details in that color, we lose that perception
of sharpness. So I'll actually go in there and reduce that and make that 0. Now you can see
this photo because this is such an
extreme bad photo. What am I get? 0, boom, you can see in the shadows, see all that color cast. That default setting. Actually got rid of it all. So you can see it's
quite, it's quite strong, it's quite big adjustment. Now some photos, this
is an extreme want to, like I said, it's not time or deliberately set this
up so that have noise. Have looked at your
flower photos. Daytime perfect lighting
conditions amount not be there. So you can move that back to 0. Now if you've taken a
JPEG, again, JPEG photo, your camera, your smartphone, it's already applied at, so you don't need to worry about this and this is all set to 0. So this is if you're shooting in raw or program on the iPhone. Another way of reducing
the noise is to just go and decrease the
shadows and make the shadow is dark and say
you can hide the noise. So when you start playing
around with noise reduction, it's a global edit and
affects everything. If you can just see evidence
of it in your Zoom meeting, then you might just want
to go, you know what, I'm just going to hide it a
little bit and the shadows, I'm going to make those darker or I will change the blacks. Kinds of blacks is
another great way of hiding noise without doing
all this sort of thing. Another quick tip is to go into your effects
panel and texture. You can smooth your textures, Textures, smoothing texture, going negative with
the texture will also work as a noise reduction. We talked about that yesterday. It's kind of a combination of clarity blacks and
noise reduction. So that can work
really well as well. Thanks very much for joining me and I'll talk to you
tomorrow. Bye bye.
10. White Balance Adjusts Color Casts: Welcome back to day number nine of the 30 days Adobe Lightroom. Today we're gonna
be talking about what balance from the
perspective of editing. Later in this series, I'm going to talk about what balancing the camera capture mode and had to get it right in camera. If your luck. Now today we're going
to talk about how to fix or hands or correct, introduce color casts
using white balance. That the tools into Lightroom
pretty straightforward. There's a couple of sliders, drop-down and an Eyedropper. It's not too many
not too many things there to be overwhelmed with. But I just want to explain
what white balance is, what causes it, and
what those tools do. Why do photos have
a color costs? What is some of them look just wrong that that look
like what our eyes see. And that is because a color cast is the light source,
essentially an environment. And it could be that it could be diffuse light through clouds, changing things in shade. And that can introduce a blue
color cast early mornings, afternoons, you can
have an orange hue. Light has an orange time
to it, indoor lights. So if different types of lights, so our brains
basically get tricked because we know what a plate or a white piece
of paper looks like. Brian knows that that's why. But our cameras don't
just looks at data, it just looks at the
information in front of it, processes it gives
you the image. And so it will
overcompensate because well, classic example is
the older fires, not so much the new ones
because they recognize a sunset and sunrise. But the older ones
will go, well, there's too much orange and I'll overcompensate and it'll
add blue to the color of the overall photo to try and minimize and bring back it
doesn't D saturate the orange, it adds blue, if
that makes sense. So different sources have
different temperatures and then they measured in
Kelvin warm light, ten hundred and forty five
hundred sunrise, sunset. We've touched on natural
light or neutral light. He's about 5 thousand midday, then we have cool light, which is the bluish
tinge and in shade that's 5,500 to 10
thousand already. Numbers doesn't
really mean anything, didn't really need
to know about it. That's all fine. This is inside the color panel, icon,
color temperature. I've got temp tint above that. We've got custom with a little down because I've already had a little
play with this. And then we've got
the Eyedropper. Okay, So temperature, basically
this is where we move it from a blue tinge
to a warm tinge. Color costs, if you like. So we can make it a
little late afternoon. It might look a
bit more evening. He'd say there it gets pretty
aggressive pretty quickly. I'll do the increments,
just tap on the slider. Even five steps is
to quite a lot. Double-tap on the
center to move back to 0, tint green magenta. This is to correct
those indoor lights that are really playing
heavy equity or farther. Then vibrance, I'm
just going to bring that back a bit satisfied. It doesn't look so
vibrant and intense. Customer would tap on that. You've got shot or order. Let's go with auto. It's not bad. There's a before there's thereafter. Did a
pretty good job. Quite often it does a great job. Okay. Next one, he is the eyedropper. Near the eyedropper,
tap on that. What we're looking for here is a neutral point, neutral color. We're not looking for
white, especially a cloud. It'll come up and say, cannot set the
white balance here, we need a darker, neutral because it's pure white. It needs a gray or a brown,
Something like that. I need something that a black. Even it needs something that has good combination
of the RGB values. Red, green, blue, gray is
perfect examples I could be. Here we have a great building. What's fantastic about this? When we move our finger ran, say the little circle
rent, it gives us a color. So we can say that it's great, but that guy has got
a bit of blue in it. So let's come up to this one. That one's a lot of gray.
That one's pretty good. Then we can say that instantly
temperature and tint, It's my adjustments, network personal taste and bring it back to our intention. We might go That's pretty close, but this was an afternoon shot, so we might want to add a
little bit more warmer tones, but a quick tip before
you go sliding all that, you actually have
to go and tap on the tick to accept
that eyedropper. Otherwise you go and touch it. It'll just undo that. I need to accept that. And now we can go in here
and we can change that. Look for grazers are always
the best 11 thing you can do if you're struggling
to find a gray area. What you could do
is you can go into, let's go here and
we'll go to whites. Whites, and reduce our whites. Because in the clouds, clouds, you can see there
we've brought in some gray in the clouds. This font, it looks
better when they, when they brought
bright and white because this is a bright
and colorful photos I've been enhanced the
whites there to kind of because it looks funny
having great clouds, colored buildings,
vibrant Building. So what you could do that is you can go there and now you can go to your Eyedropper,
move it across. And now we have a
great as dark enough that it's now going to
pick that up as a gray. It's not going to go hang on. This is too wide,
it's not gonna work. Bring it down a bit,
so began to tick. Once you've done that,
then we can go back into here and we can bring these whites back
to where we had it. Cool, bit of an
advanced tip there, that one's pretty, pretty handy. Other neutral areas
I talked about grays are the areas that you can use, is the whites. Because you can say
you can use the whites of people's eyes. You can use teeth is really good and get gray roads,
that sort of thing. Let me bring up another
couple of examples here. So let's go into here
and we'll go auto there. Before, after. You can see there, it's
made it a little bit cooler and it's edit a bit of a green tinge to it
and you can see it. I'm not sure if you can say
it, but I can say it and I'm really not very foreign tuned for this sort of
thing, for seeing colors. Like I can talk to other photographers and
look at the magenta in there and there's
little block here, I could say the green coming in, especially in the ground. In the papers. They bring that back a bit where I think it
looks better, nice. Yeah, that's pretty good. Vibrance. Let's just undo
that for a moment. And then we do the vibrance. This will really
bring the colors out in the mid
tones, the vibrance. I'm going to talk
about that tomorrow. But if you're not sure about what's happening
with the colors, just increase the
vibrance and saturation. And then you can really see those colors coming through it. And you can see now
that that's not looking to bring up another one. This one here I'm going
to bring up is a bad one. Also captured a great moment. But your histogram, but
you can say they hit the lights indoor was inside. So let's go to order. Let's have a little bit
more of a play around. There's only so much you
can do with some photos. But like I said, it's a perception thing
and we know what white looks like in two days time. We're going to show you
this tool, but I'm gonna show you now really quickly. If we go into here
and we tap on target, we're going to go to saturation. And they were their finger. We can tap on somewhere
and then we could slide down and it'll
reduce the saturation. Let's tap on this
white plight and let's reduce the saturation of that. And then it's picking up that color channel and it's reducing the saturation
of that color channel. And tap on there again, done. And then let's have a look before and after it's quite
significant, isn't it? It's not perfect. But you can see
there when we start playing around with
individual color channels. And then we can add a color grading in a
couple of days time. You can really bring this
out and it's pretty, pretty amazing what you can do shooting through glasses and other reason why you might have a green tint and you've
have spectacles. You might have bought the more
expensive lenses that have the green tint so that you can read and you don't have
them any issues at night. Sometimes buildings have that green tint
in there as well. Fantastic. Thanks for joining
me tomorrow we're going to talk about
the difference between Vibrance and Saturation and what each of them do and how I
go about balancing the two. And I will have
uniformly that one.
11. When To Use Vibrance Or Saturation: Welcome back to Dinah pertain
of 30 days of its I'd be Lightroom today I'm talking about vibrance and saturation. We're going to talk about
each of them, what Hs and do. And more importantly, the
difference between the two. Because I know I've, I've experienced this
myself that slide the vibrance or saturation
since do the same thing. Firstly, what is saturation? Saturation is the strength, the magnitude help strong. The colors are vibrant, vivid. Die. If you get a mention a flower, and you've got brought
purple flower, and then in the
background you've got some broad green leaves. Beyond that. You then have your
additive field way or paddock where, you know, you've got some yellows and browns and that
sort of thing. Those purple and
green are gonna be vibrant just because
of the color. They've got to be punchy.
They're gonna be in your face. Whereas the yellows and brands, because they're not as intense, they're not going to
be different colors have different saturation,
different brightness values. That's what it said. It was credit talked
about this yesterday. Tomorrow we're gonna go
into a lot more detail with that one, vibrance. Is it the vibrance tool? What it will do is
it will pick up, this is where it's really cool. What it does. It'll pick up those
less vibrant colors. Those colors in the scene lock the yellows and the brands
and the background. It'll guide, you
know what, we're gonna try and make those ones, bringing those ones up, then it will target the more
vibrant and intense colors. At first it will
bring these others up and then eventually it
will bring them all up. That's where a lot of
people get confused because they'll use
the slaughter and not going all the way to the maximum as we do to see what it does. Really sure it didn't get back. Because with vibrance, if you
go all the way to maximum is it is going to eventually
affect old colors. So that's why it's really
cool to it a little bit. Now I've got to have
a photo here that I want to share with you. This was a photo
captured on the weight gained with two of my kids. My wife just catches
the snapshot. One of the things with
vibrance is that it does that it brings up the less
saturated colors, but it preserves also
skin tones really well, because I'm a perfectionist,
you know, I am. I'm going to just
bring the scene. I'm going to make
this a bit more, a bit more of an intimate shot. Or you can say
it's out of focus. You can just gonna
move on, work on the colors flunked out into the color petal
of E2 saturation here. And I increase the saturation. You can say there
have gone up 30%. Look at, look at my skin tones. Look like that. That's
fairly intense. I mean, everybody,
my shirt looks good. The colors of the school, a bit of greens popping
in the background. Very orange. So I had to
go take that one back. Let's go with vibrance
now, Louis Barbara, I got to the same value, 30 and my skin tones
have been retained. It say the difference? Depends on the photo. See when their skin tones
bank or no straightaway. Barbara, don't even
touch saturation yet. You can, but just not yet. I'll show you how. That's really cool. There's the before, there's the after. It's subtle, It's not crazy. Let's go crazy. Now. You can say that as I said, it will eventually
just o colors, it'll just make more, more vibrant and that's no good. We don't want that. We want to go far. I've probably got to be more. 40 is the maximum
with this photo, and each photo is different. Now that I've done that, now, I can go and add some saturation
and then, you know what, I need to pull
that back a little bit fond that tweak that
and find that balance. So that's looking, looking
much better, isn't it? Next I'll go into here and I'll add just a little
bit of clarity. Clarity, if you remember, attacks the mid tones, not the bright area
is not dark areas, just works the tones in it. There's the before. It looks a bit flat and
washed out and bang. We've given it some
color, some depth. That's looking
really, really great. Okay, so this is
another photo that has some really punchy, vibrant, bright colors we can see here and I'm
presuming my fingers. I love it. I love the action, the moment in time
that the colors of what the story and the
intention was all about. They got to the original. The original that has
captured the camera. This smartphone has captured some really vibrant
colors there. Let's go to saturation, and you can see very
quickly skin tones again become more
orange, unnatural. You can see there are a few
different reference points there that's not
looking so good. Vibrance have looked at this. Have a look at this. I love it. It's so good. Now what I'm looking
at is I'm looking at the shop fronts in the background at the top
of this screen there. I'm looking at those yesterday. I mean, everything else is becoming more and more intense, but have a look at the
colors that are coming back. And what we can do. These all can reduce
the saturation. The whole thing. Some reducing the saturation
of the whole photo, boosting the saturation
in the lower areas. And now I'm creating
a bit more of a balanced to say he'd now outbreaks as vibrant
and in your face. But we've got some color coming back into the rest of the same. I liked that way. Barbara and on it's own little
bit of desaturation, that is my typical workflow. And playing around
with these, sometimes you get negative vibrance. Saturation. Other times you'll go plus
vibrance negative saturation. It depends on the photo, depends on lots
existing in the photo. It's great where this
is also great for landscapes is the greens
in the background. You can change the intensity
of some of those grains because vibrant colors
attract your eye. Going back to my stronger photo composition
four-step system, having a point of fixation way, then you've got their
attention and that can be something that's
vibrant, saturated. And then the hierarchy
of where the egg moves. So many different
techniques and tools ever 100 that I've got in
that, in that course. That then helps you
go Okay, this area. And now we can do the
masking selective, so you can go in there and
you can do that as well. Another way here,
Let's have a look. We have saturation, but
we don't have vibrant. Say that. That's a real shame. It's a real shame.
You can see there. So you can increase, decrease the saturation,
but we don't have vibrant, so just be mindful of that if you're doing
local adjustments. So what I do is I this is
why my four-step system for systems that are my
four-step system for photo editing is that the local adjustments
have done afterwards. So I would do the
masking and that's something lighter in
the, in the process. Tomorrow we're gonna go
deep dive into color. We're going to do color makes the target tool
and color grading. There's a lot to cover. And I'll see you there away.
12. Advanced Colour Mix, HSL & Grading: In today's day number 11, we're gonna be talking
about color mix here, HSL, which is hue saturation, luminance, and color grading. We're going to touch on that. We're not gonna go too
deep on color grading. The objective for
this 30 days is to help you become more familiar with,
with Lightroom Mobile. And the outcome of this is
that you will be able to use these tools confidently and get the results that you want. And basically what
I'm trying to do is introduce what other tools, how to use them, when to use them,
what not to use it, when not to use them. There's some tools for certain things are
better than others. And today as an example, what balance we talked about white balance and setting
the white balance. And sometimes you can
struggle with that. The white balance
is not quite right. Getting into the HSL and the target tools that I can't wait to show
you the target tool. More often than not do
actually do a better job. Let's get into this. Now it seems extreme
that it's blue. Believe me, this was
straight out of my camera. The tennis, this was
at the time because it was a combination of the US quite often
tricks our cameras, but it was in the shade as well, so it really caught
blue and the in auto white balance on the camera didn't
do a fantastic job, but it's super simple
and quick to fix. Now, we talked about
white balance already, so I can go in there and just
go auto white balance bank. It's not a great job.
Got rid of the blue. But we can see
here, have a look. Now, if you recall, to correct too much blue, it adds more warm tones. That adds more orange and
reds, that sort of thing. And you could see it, you
could say it in the post. He can say, that's good. They're very warm tones. There's the before,
there's the after. So I didn't do a great job. So you would be balancing
that in going into what? Bring it back. Now the trays have got more
natural looking colors, but I still have the blue. This is where I love this tool. I'm going to go
into the top-right corner there and
I've got the color, we'll have a look color mix. And you can see there next to the between color mix and done. You got a little target icon. I can tap on that. Now. I've got options. He hue, saturation
and luminance. Saturation is one-on-one
apply with heat because I want to reduce the blue
on a disaccharide, the blue and just the blue. So if I put my finger on
this now, can have a look. It actually detects
which values, which color channels.
This is e1. And then you can
swap between Dan, Dan, dan, you might
completely white. Or we can bring some of
those times back in, make it look a bit more natural. How good is that before? After? It's awesome? And then click on T. I've done, get back
to a color balance, white balance, and we
can go, you know what? I'm going to bring
that back temperature back even more because I'm comfortable and
confident that that is a really nice white
that I have there. That's super cool, isn't it? When I first discovered that
always blown away that tie. Because quite often and I mentioned this
yesterday quite often. I struggled to say
the colors that other people see,
the subtle colors. It's what whenever apply RAM we call the color
grading are always looks a bit over the top and
it's creative for tomorrow. Because I struggled to see the subtle, subtle these in it. And that might be why I'm
more of an educator than a photographer because
that's the can't do teach. I guess I want to
bring up another photo here that we can have a
bit of a play around with. Here we go. This was St. Paul's Cathedral. I'll share this one with you
earlier in these 30 days. This was from a rooftop. I just loved the
composition of this one. I went back he so many times
to try and get a nice shot. Here we go. So this one I've already edited, we had to go back
into the color wheel. Color mix. Now we can play
around with each of these channels now with
target tool, brilliant. Actually use that more often than in any other tool
inside the color. Because I don't have to guess. I can just go and change those. Hue. What is hue? Hue is the color
shift back into, I'm gonna go into color
grading for a moment. There's a color wheel account
gonna come back to this, don't worry. This
is the color wheel. If I move this right to the
edge, these are the colors. This is 360 degrees of colors. And it starts over
here in the red, and it goes all the way around. These are called hues colors. The color hues. We need to get a color value. Color value 142 degrees. That means that
I'm way over here. Alright, so that's
the color wheel, that's color hues is the
shift between colors. And moving around that
color wheel, saturation. We've covered that already. Saturation is the intensity, the magnitude, the
amount of strength. Of that color, luminance. I love it. I love this tool inside here because now if we
have a scene that has waterfalls are perfect
example waterfalls, it's the grains and not as lush because there's not
enough sunlight coming in. If you have sunlight coming in, it might then blow
out the water and you've been there
and you've seen that these colors are really vibrant, but on the day of
the year there, they're not vibrant or
just not much green niche. It's all fall originals. Little Brian has not much green. What you can do
is you can select the green channel and you can saturate those greens and you can broaden
those grains. It works and absolute trick. Next step, the more advanced, the most scary looking
color grading. I understand when you
look at it and go, Wow, there's three wheels there. And as soon as I touch it, it goes funky really quickly. Get it. I understand. But we've got to break this
down and simplify it for you. You have this used
to be called split toning and in October 2020, replace the split toning, which basically just each
shadows and highlights. And you could do a
combination of colors. What you can do now
is you can go into shadows, mid tones,
and highlights. Now, I've used this photo
here because there's actually not huge variation. This is mostly mid
tones, shadows. I'm going to go and
give it some blue, maybe not that intense. I will bring them back. If at anytime you're applying a random ago,
I just want to give up. Just double-tap on the center, not on the dot, double tapping on the dots,
not going to do it. They noticed he really loved this feature is that when
you move this around, say the little reverse, I drop out and all
that, That's cool. See how that gives you the color tells you
what you're doing. So I'm going to, I want
to give owner give it a shadow is a bit of a blue because this
is an overcast die. I don't want to go that crazy. I'm gonna come back and
that's tending to purple. I'm going to go about it
there. That looks nice. Now have a look
here at saturation. I can still it with my finger, try to get it precisely
in that line. I can go in here. You might be at better
off just going, you know what, I want
to bring in there. And then you can come back with the saturation and bring
it back to where you live. It depends on your workflow,
what's comfortable with that probably
works better for me. Garage to the edge
and then reduce the saturation luminance here. Shadows, I want to
bring the shadows down. The brightness of those
blues want to bring it down. Blending and balance.
I'll come back to that. If you tied, say this hue and saturation
little thing there and when you open it up, all you say is this
because depending on what you're holding your phone vertical
or horizontal and what looks
slightly different. You can see here the
little arrow tap on the arrow and that will drop down because quite
often that's hidden. You'll also see three dots here. And you can reset the shadows, reset everything if it's tending into a bit of
a dog's breakfast. Not quite sure
what he got error. I get here, then you
can just go on race it. All right, let's, let's go over to the mid tones and
then the mid tones. I wanted to have a bit of red to the mid time. So a bit more of a
pink, pink code pink. And they saturate that. That's looking nice. Okay, now when I go over to my swap across some
highlights and I'm a halide. Want to have my whole
lot, so I want to have an orange and I
bring it might get a lot more orange and then
D saturate about there. Alright, now, say that
I hold the screen. There's no before and after. What Obama, Hey, we can
do is we can get it done. Then we can do at
before and after. Now that's pretty aggressive. But I'm going to change this
and make it a little bit more balanced and blend it. Recognize those terms I'm using. Faculty. Now I go to blending
and balance. The reason why I'm
going to blending and balance last is because
this is a global. Speaking of global, I had
one more slide, he'll deny. Here we go. How lot globulin, you can add a bit of a global to everything, little bit of green
to everything. Now, go back across. On now have blending
and balance. Blending is blending colors would mixing all our colleges. 50, it's a false sitting there
is really nice because 50, it has a blends in nicely smooth out the transition
between the colors, but h color that we've adjusted
still have it has enough. What the Adobe call
independence in their room. That right, a fantastic
blog when they release these back
in October 2020. And smoothness of that
makes near-far go all the way to 100%. It's a mix of everything. The colors. So I did green,
orange, and blue. So it's blending green, orange and blue and
blending them altogether and applying them the
strength where I put it, but it's a blind as a blending. All the colors near-far
go this way and blend. Now I have complete
independence and separation. Can't quite see it. But if I've got balance, have a look at this icon that
balance between this is, this is a global thing. Remember, so now I'm
balancing guy, You know what? I want to prioritize the color grading did I did in the shadows
because I really want to get those shadows
or do you know what I really want those highlights? And that looks better for
me because the shadows, I want a strong blue
in the shadows, but I don't want it to be
what your eye goes to. I wanted these small,
I want this look. This is the look, I want balance
all and bring it back to there and aren't quite
happy with that already. Before or after. Color is amazing. I really encourage you to really study and get into
color the color theory. I had a great article on my
website about color theory, talking about the
mood, the ambiance, and how color can
affect your viewer. Sometimes colic and
even effective. Physiologically, we can
react to color because grid, energetic yellow is happy. It's, it's incredible. And once you get
into it and really study it and really
play around with it, it's a lot of fun and you
can photos like this one. We can create a totally
different file, right? So we've gone from an aesthetically
pleasing blue kind of photo to now this is very different and you
can say, it's amazing. Even though I've only
played with color. You can see the difference in details and clarity as well. It's quite
extraordinary, isn't it? Hopefully that has given you a bit more confidence to play around with it and know
that you can't mock it up. That's one of the things
we love about Lightroom, isn't it is non-destructive. You can go back and
play around with it. Tomorrow. We're gonna talk about
black and white. Now. You do black and white,
the Rottweiler that I'll show you the right way of
doing it, the wrong way. Most of us have been
doing it all this time. I'll show you the right way that only Lightroom can let you do. And we'll play around
a little bit more than calibrating and HSL and
all that sort of thing. And show you the
difference between the two inside a black and white photo,
which is pretty exciting. So thank you for
joining me and I'll look forward to touch him on
that one with you tomorrow. Bye.
13. Best Black & White Conversion: Good day. Welcome back to day number 11 of the 30 days of Adobe Lightroom. Today, we're going to talk about black and white photos
into Lightroom, we can talk about
briefly what makes a good black and white when you're trying to choose a photo. I've talked about a
couple of techniques to convert it to a
black and white. There's three different
ways in Lightroom. One of them is a bad
way. I'll show you by. And it's the way that most of us do it on our inbuilt editor. That is basically we
just go into the photo, go to the editor and
we go into saturation. You can increase the intensity, the magnitude, and
go the other way. And you can desaturate and
you can reduce, reduce, mute the colors In the colors, remove the colors so you
can get rid of all colors. So that turns it into
a black and white. I'll show you why that's not
a great way of doing it. So we can see the histogram. You can see where
the colors are too. You can see there's
drains in the highlights. There's hardly any
greens in the shadows. In the shadows, there's
little bit of blue. That's the blue color
cast you can see in the trade lining said
topic tree line, you can see repeated blue there. First way that I
mentioned is to go to this where inside
the color panel, Color panel saturation
and reduce it. Boom. It's a black
and white photo. It's okay. It's good. It's good because
then you can go into different things that you're familiar
with on your phone. You expose your contrast,
that sort of thing. So you can have a bit of
a play around with it. The other way is simply the black and
white button at the top. Thing that turns into a black and white name will be thinking and totally get it. Looking at this guy,
Mike, it looks the same. What do you want about? What do I show you? Is I've created this
little image where I've overlapped the
histogram of both of them. They can say to the eye, looking at the
photos, you go yep. It's pretty similar. The one on the far left is the desaturated where I've
used their first method, the center photo in this collage he collection is where
our tap the BMW, a black and white button,
one on the right. You can see I've overlapped
the two histograms. You can see that
if I just simply D saturate that histogram the bottom one of those two that
are on top of each other, bottom one is the T saturation. So negative minus
100 saturation. You can see that it's actually brought back the
highlights and it's reduced the highlights
and it's actually affected the tonal
range of the photo. Some photos, it's more
different than others. So this is one and another one. This one is almost identical. The reason why this
really stands out so much is because the difference is in the highlights.
Why is this important? Well, it's important
because when we go in there and start playing
around with the tones, which is the best part of
a black and white photo. The information is there to play around with all the
original stuff. Number two is when you
go into desaturation, you'll removing all the color, not just converting
into a black and white, you're actually stripping all that information
out of there. When I desaturate. I've done that. Now I go into the colors. I'm going to choose blue because I know there's
a lot of blue. And I'm going to try and change the luminance and the
brightness of the blue, not doing anything.
It's not saturating. The reason why it's
not working is because using that saturation going to minus 100 ways stripping all that information why I said it's not working. But if I go to the N W, Now we're going to
colors the blue. I believe this. I can
play around with it. I can increase or decrease the luminance going
into the target tool. And I can grab the trace there and I can make
the trees darker. You can say there it's affecting
all the greens in there. Actually, I've grabbed it. It's not quite all green, is it? It's got a bit of blue or blue that is totally
different colors. Their biggest see that? I can play around
with the colors. I'm going to tap on that. Done. Even though the white
balance, white balance works. Make it more cooler and it
might affect all the blues. I'm going to reduce
the blues and bringing more oranges
and that sort of thing. I know it sounds a bit,
we'd bit of an oxymoron, Not only making it a black and white and then you play
around with the colors. That's because it's
separate colors. We talked about this yesterday. Separate color channels
can affect individuals, certain localized
areas of the photo, and it works in absolute truth. Next method that I want to show you is one that
I've picked up on the Russell Preston Brown
the Russell Brown show. He's He's an employee
number two at Adobe. If you haven't subscribed to
his channel, it's fantastic. I don't have a look 0s
on Instagram regularly. And he brought this
one to my attention in history video is that you
can go into profiles. Profiles, and I've got
a black and white. And if you're not sure whether your photo has potential
for a black and white, this is a brilliant way
to go into the profiles. It's like a filter effectively. We've talked about
some photos lend themselves really well
to a black and white. And that can be photos that
have existing textures, lines, shadows,
different tonal range. Other reasons why
black and white can be fantastic as it can
hide imperfections. So if you're editing a photo and it's become pizza
low-resolution. Playing around with HDR, all the swelling is
starting to look a bit grungy and if we blotchy and just not
looking fantastic, but it really, you can't go and replicate this
moment that you've captured a black and white
conversion can be really good. These methods of Russell's where you go and just
got bank by bank trial, these different
profiles will go, Hey, look at that, That's swipe. And lastly is
recovering and not just recovering bad edits or edit editing workflow
that's turned a bit yucky. Federal recoveries
photos from years gone by where you can't
come back and you've tried sharpening it using the sharpening
techniques are used earlier about
increasing the radius. And a previous video,
black and white might be the way you might
be able to reduce the contrast and make
it a black and white. My complete more of a moody, aesthetically pleasing
kind of soft photo. Black and white just gives you
get out of jail free card. But it's a way that
you can just changed the whole look of
the photo and just make it look, look amazing. This is a great way
of doing it is to go into profiles, black and white. And you just tap on it. You can say little
previews there. Well that one looks funky. Look at some of these and go, Wow, that looks amazing. And I think that one there
is probably the best one. And then you got this loaded
down the bottom here. I'm going to slot it to there. Okay? And then once you're
done there, now, and this is the same as
the black and w button. It's retitled the colors. We can go in there and
change all the colors. We can also go in there
and change at the time. And so my typical process, go into the profiles, select one that is a really
good starting point. Then I'll go into
here and I go, okay, Looking at my histogram,
my black and whites, I've crushed some
of those black, so I'm going to
bring those blacks to bet their white point. I want to bring the
whites all the way to the end of the
histogram to about there. Now it's not just about
looking at the graph, it's about looking at
the photo as well. And guy, that's coming out too bright, That's
not what I wanted. I want to reduce the exposure because I've done black and
whites highlights. More often than not, I always
bring the highlights back, but you can see what's
happening in the histogram. There might be a bit
of a balancing act. That's blue now that's
just not working, is it? Bring the whites
back to the shadows. And I'm looking at the
histogram as well, but I'm looking at the
overall image because I want some definition
in those trees. I think the trees look
really good with that. Becoming a distraction. That's looking pretty nice. What's a much stamp bit
more of a play there. Yep, That's great. Love it. Then I'll go into clarity. Be too much. Really bringing out
the details there and a bit of structure
you can see there. That sound that's true is
becoming really crispy. And that's okay. I like that. That's, there is no
right and wrong. That's what I love about
photo editing already before. And these are after. So that's myoclonic
quick little workflow that I worked with,
black and white. You spend a lot more
time than doing some of the Selections and Masking and getting into
those local areas. And that for me is
where it really gets into the fun part of
photo editing already. Let me have a quick
look at my notes. Just to, just to recap, we've covered the saturation. Saturation minus 100. We covered just black
and white button inside the color panel. Then we covered the profiles. You can see the Bool every day. So thanks for joining me and
I'll see you again tomorrow.
14. Add a Vignette - Alternative Method: Good day. Welcome back to day number 13 of the 30 days of
Lightroom Mobile. Today we are talking
about vignette. We're going to talk
about the what is it, when do you use it,
and how do you do it? So basically, what
is a vignette? A vignette is the darkening of the edges around your
frame, around your photo. The reason why it works
is that a covered this in the early stages of my stronger photo composition
four-step system. I talk about visual literacy. I talked about what
attracts the eye, the point of fixation
where your eye goes to and then where
it goes after that, that hierarchy of other visual
elements that you move to. And if you've got something
in the edges that has brought vivid sharp, then your icon, I can go ping and head off in the
wrong direction. But when the age is a dock
and keeps you in the photo, if that makes sense,
it doesn't keep doesn't allow you
to get distracted. You stay in the
middle and you can contains your attention,
which is brilliant. Then on, then if it's soft and it's at a focus
or just not sharp, and the colors are muted around
the edges that come out. Even more stronger
impact in the fire. I mean the effects panel. And you can see
we've already talked about Texture Clarity, Dehaze, narrative
vignette, vignette. That's white rot is what? Lift is dock it
straightaway that I mean, how cool is that? Black. A black
background for a status makes your colors just pop
and more punchy and vibrant. If I go back, reset, double-tap, and then I'm going
to go all the way. Now this is not where
I'm going to leave it, but I want to go all the way
because I want to show you these other slide is in here and then come back
and bring it back. Because if you go just literally and I think that's a
nice vignette there. And then you can apply
with the other slaughters. It's actually hard
to understand or to recognize and see
on a little screen. It's difficult to see
what's happening. I'm gonna go all the way. Then I'm going to go midpoint. I'm going to play
around with that. First of all, feather. Feather. I'm going to go
all the way to 0. That looks pretty funky, doesn't
it? That's pretty funky. That we've gone and move that
fed all the way to live. But now I can see my
midpoint so I can see where the vignette is. I'm gonna go all the way
to their highlights. The highlights is
really interesting. This is one that you don't see. Nonane, non percent
of photo editors, these highlights are
basically what this means is you can
darken all the h's. The way. There's some
specular highlights or some nice bokeh or
something locked that you've actually liked, that burst of brightness and
color in the background. If we just do the vignette,
we could lose that. It could be part of
the storytelling, part of the narrative. And the intention of
the photo is loved. That background highlights. So we can bring the
highlights back. I'm going to go
all the way there. That's good. Now I'm going to go
back to feather, and I'm going to feather it. And then it'll come back to vignette and I'll
bring that back. That's my process. My process is vignette all
the way to the negative, feather, all the way
to the negative. So those two, I'll just
repeat back vignette. Although I negative feather
all the way negative, play around with my midpoint. Don't have to touch that again. Play around with my roundness. Don't have to touch that again. My highlights set that
back to my feather. Think back to my vignette. A little bit Good Dan, Dan, Dan, dan jumping around a
little bit and then back to feather and vignette. Pretty cool. It's
so easy to use. One of the things
you'll notice if I go back to there is that, that flower is my main subject. That's my hero. That's, that's my
point of fixation. That's where I want
people to really notice. But I can't move the
center of that circle or fraternity to rectangle or
whatever. I can't move it. It's always in the center. I love this tool, but I
have a better tool for you. And that is the selective tool. It's the radial, It's
a paid subscription. Let's go into selections. I'm going to select
radial gradient. Just like my flavor. Now, look at this. I can move it around. Now most people, what they'll do is they'll use this tool to
go and brought in areas. But what I want to
do is invert this. I run the left above the
rubbish bin, Invert. Now go up into my last panel. We've covered all this
already, haven't we? Exposure, I'm going to bring down the exposure
of everything. Drop-down. Have good SAT. Now what I want to do this, the edits that I'm doing
is not in the flowers. So just remember
the edits of doing error in the outside
of the flower. So I can use highlights
and looked at this. I can increase my highlights exactly the same as
you can in vignette. You might remember, I
mentioned to mute the colors. Last one here, applied around with these
federal a little bit. And here I want the highlights or the vignette to focus around
the building here. So let's go with vignette. You can see here, if I do that, that say they are missing
half the building. Okay. That's not that's not ideal
for vignette Again, no good. Then lock it. Doesn't like it. And I'm gonna do a
combination here. So I'm going to do one here. I'm going to go into texture. I'm going to smooth
that write-off. Happy with that.
Let's do another one. And they'll go into radial. And let's select
the building here. Happy with that selection. Invert some selecting all of it. Now I'm going to go into here, and you can see here I'm
playing around with white. If there's existing blue, which I haven't edited out
of it is 60 existing blue. That's going to make
it a dark blue. I'm a bit more
obvious, but anyway, I'm concentrating on just the vignette around
that building. I think we'll wrap it up there. Thanks for joining me tomorrow. We're going to talk about
cloning and healing. We get to talk about
that, talk about the differences between
the two inside Lightroom. So with that, thanks again and
I'll talk to you tomorrow. Bye.
15. Compare Healing & Cloning: Welcome back to die number 14 of the 30 days of Lightroom Mobile. Today we are talking about
healing and cloning tool inside Lightroom for some
photos when we play around, it can be actually a little bit confusing when you
use the tools and because you can't really
see what the difference is. And what we're going to talk about is what each of them does, what they do differently. We can talk about why,
why you use it well, that tools there and show you a couple of
little sacred tips and techniques and
little quick navigations around there and just to speed
up your workflow as well. When do I do? Why do
I use these tools? It's kind of one of those tools that it takes you to the
next level in your photos. I really does because you can reduce clutter
in your background. So you can remove
objects that are in there that it is
kind of distracting and pulling your attention
away as the viewer to the fixation and the
other focal points within the photo that you want your viewer to look around. If there's a broad
spot in the corner. Because remember die number two with the cropping
and we can crop out those bright spots or vivid kind of sharp
areas in the edges. If you can't crop
it, you want to keep that composition
that you've got. You can use this tool
healing and climbing, cooling it, this tool because
it's really the same thing. It's just a switch between
two things that it's doing. You can actually just go
in there and remove it so it's cleaning up the background, cleaning up blemishes
on people's faces. Now this is not I paid tool, which is pretty cool that you can get access to
these. It's not paid. It's really, really cool. This example here I've got
some textures of colors. So I thought this would
be really good one. So go into the band-aid, which is tap, just tap some way. We can see what we're doing. He is the circle on the left, that's called the sample area. So a sampling from that
era with copying it, but basically
copying from there, MR. going to replace the source area are
going to replace this area at the top. Zoom in a little bit so we can
see what we're doing here. You can see what it's doing. And you can switch between the band-aid and declining tool. And then underneath
that we have the size. Then we have filler, which once you're there, you just swap up and down. So you can see there were
feathering and we're doing just the center of the
circle heavy adjustment and then it is feathering out, pattering out and softening
towards the edges. There you can see
we've got a 0, it's just a bank to copy. And then underneath
that we have opacity, which will reduce the
transparency, which I love. I love opacity in any of these brush tools or
any of these effects. Because it gives you an
opportunity to really blended in and be
subtle about it. This is the cloning tool. So a cloning is an exact copy. The one above it is the
Band-Aid. Now the band died. It does the same thing, but it blends the colors and textures of the
surrounding areas. I trust them. I could look a bit more natural. This is where if somebody
has something on their face and you just
want to remove that, the healing is fantastic because it retains the
textures underneath. And I'll show you what I mean. There are two fingers.
You can just pinch and zoom and move around
you if you touch, you can't move around, you
just go and do the adjustment. If with two fingers, you can pinch and zoom and
weak drag your two fingers, you can drag around
the photo wall. This is active. Now if I bring this
down into here, now you can see this is
the band that you can say. All it's really doing
is it's copying the textures into
that yellow area. When you have a play around with a photo with his true colors to textures like this
have applied with it. It's really amazing. This is copying
just the textures. Go to the client. Boom, it's copying
everything. I liked. The band-aid. Don't quite like that. It's copying like that. So I'm going to reduce Capacity. And it's just a
way of bringing in textures from one part
of a fido to another. They probably
thinking, that's cool, I can say. Why
would you do that? When would you do that? I'm just going to take on that. First. You have to press the tick
every time you're done. If you know what I need to do more further on
your workplace, needs to do some more of that because that looked really good. I want to do more
down the band die. It'll select the
circle of the areas. But if you double-tap
somewhere on the screen, it'll get bang and I'll
bring up the source as well. So then you can strike
that and do some refining. Just a quick little tip day. We're going to go
over to the trees now because say how we
got that building there? We might not want that building. Let's do this. Let's go into and diversed capacity,
increase the opacity. Let's go all the way. A 100%. That's pretty cool. Once you press the tick, when
you do a client or a helix, press the tick, ie accepted. When you get back
in there again, you can actually apply and another healing over top of it. So if you want to blending textures from one
area of the photo, suffer example that that
federal just saw there. The trays blending the textures of the trace from one area. And then you go, You know what, that looks like a copy. It's obvious what
you can do gene and select another
part of the tree. Then you can blend it again so that it's different textures. So it doesn't look like
a direct copy because that is one of the
telltale signs that you've used
clouding and healing is guys know what that
looks exactly the same. That bit of grass has
got the same bits poking out of it there as it is there that
looks at natural. So you can go and
you can source it, sample it from one area
of pop it in there, and then you can save on other
areas and pop it over top. But you have to press the
tick in-between because we try in the same time. It'll just keep moving the different sample areas or tick in-between and
you can double up. We covered a fantastic already. I think hopefully
that explains it. I think it's one of those
things that you are better off sampling and
yourself for testing itself. Because depending
on the content, what's your intention will
change which you use. Thanks for joining me and
I'll see you tomorrow.
16. Sky & Subject Selection Masking: I add, Welcome back
to diet number 15 of the 30 days of
Lightroom Mobile. We're halfway already,
which is great and six IT. Today we're gonna talk
about an exciting, awesome, amazing tool,
selections, masking, whatever you want
to call it a What's selections. And that's
called masking. And it's brilliant edits
circle this tool alone. I was on the fence
for quite some time, whether to subscribe
to Adobe Lightroom. The reason for me
personally is that I'm not that interested
in synchronizing lightroom on my
computer with my phone. And that made that I'm not that interested in the
storage because I use iCloud or use OneDrive
google photos of a so many different areas where I'm storing things,
backing things up. The extra storage didn't
really appeal to me. It didn't didn't get
me out of the line. This tool, the
Selections and Masking. It is crazy good. And I'm gonna split this up over three days and said
I was going to talk about just the sky and hence and subject selection
tomorrow we're going to talk about linear and
radial selection. Then we're going to talk about
color and luminance range. Here's a photo actually
captured this inside the Lightroom Ball app,
long exposure photo. This is one that I want to show you how you select the sky. So basically up the top there,
we have the icon there. And then plus here
all your options, subjects, Sky, Brush, Linear, Radial color, orange,
luminance depths range. Depth range does not appear
because this was not captured as a depth capture. The app. Also, in addition to that, you need to have it's saving as a high TIC file format and
then depth range will come up. Digress, let's go to sky. Selected this guy. Standard amazing job. I mean, one of the
things that's good about this and huge advancement from what we previously had was previously you
could do the linear. Basically. You just select a
range from the top and blends until eventually
loses all opacity. And also worked around things. It looks around buildings,
works around trees. And it's amazing. You can say here on the
right side, look at that. It has gone through the trees, which is amazing you can see because there's nothing worse than when you're
ahead of the sky. You play around with
it. You make the colors more vibrant and all
this sort of thing. And then you can see gaps. You can see that it's
actually selected it through the glass,
which is pretty cool. It's mist down here, the speed here it's missed,
which is unfortunate. But here it's got the balconies. And then over this
side, some reflections. Reflections. They're going to pick up
the reflections as well. It's got the name Jquery, maybe in the original original amount of
a more reflective. That's why, but that's the same color tag.
That's what it's doing. Is it picking up the top
part of the far-right? This is just by guessing on Adobe engineer, just guessing. It's picking up that top range. That then is looking
at similar tones, colors in that range. But it's not looking for it
down the bottom of the frame. It's not making any
mistakes down the bottom. It's all off the
top and it's just working at how far
do we go there? Because they hadn't here. You can see in-between
these two gluings, it's going down
and then it's gone or should we keep going? I don't know. So
it's not perfect. But it's good. If you making
subtle adjustments, it doesn't really matter
either. Are in here. Now we have access to all our light color
effects. Data's all that. Most of them, not all of
them, they're not all there, but light that old, a brilliant here
where I'm missing. What are we missing here
with me seeing fabrics? Here we have clarity, texture, the highest three of my
favorite tools I still, he say you get access to these. In here. Sharpness and noise by six slot is not the advanced ones that
we covered earlier. So you don't get to control the radius and the day tiles and the amount around
H's the e-shop. And so it still
works really well. But it's a little bit of a limited range on
the three dots. Up at the top there. You can change the color, you can change it to
a green sky scenario. You could see what's there
if you take notified of flour and complimentary to the green colors
in the background. Crane leaves, green foliage. You use the green overlaid mask. I've electric. What's gonna happen is you see a green flower on top
of green foliage. That's not gonna work. So he can go in, you
can change it to red, you can change it to
blue, whatever works. On top of that, you can
change the background. You can do color on black
and white and have a look. Now that is full contrasts. You can say exactly,
this is amazing. You can say exactly
where these mask, and you can see
here when we move up here and BigQuery,
that's not great. Tomorrow I'm going to count
into a bit more detail. You can add to the mask
and subtract to the mask. You can refine it that way, but there is no eraser
to do the fine tuning. Let's go into Select Subject. That wasn't bad. Like that wasn't too bad because it's not
clear subject heat. And that's where this will
struggle a bit. This one. Let's have a subject. We can see that it's selected
part of the flower as well. You say it's selected
over there as well. So tomorrow I'll
show you how you could easily just subtract that. But it's subject to debate, which was, did a great job. Exposure, Let's just
go crazy and shy away. The reason why it works so well around those edges
and refine those edges. And I look, look at that. That is just unreal. The reason easiest
because these heads, such a juxtaposition, real contrasts
with the sharpness and the blur in the background. Get rid of that one.
Let's have a look. What else we got here. Let's
go with let's go with Sky. Say how guys see how it
works around the trees. Did a reasonable job,
reasonable job there. Hackers like that domain for me, I was just completely, completely blown away when I discovered these environment. We're gonna talk about
radial and linear gradient. And I look forward to sharing
that and exploring that, add and subtract to
that next level. Alignment. Saving.
17. How To Use Linear & Radial Masking: Good day. Welcome back to die
number 16 of 30 days of Adobe Lightroom Mobile.
It's very exciting. Yesterday I showed
you the masking tool inside the app where you can go in there and you
can select the sky, you can select the subject. Today I am going to
show you a couple more. I'm going to show you
radial and linear. But more importantly,
I'm gonna show you how to combine the two, which is where this
app just goes. Next level, soccer in here, plus I'm going to
do Select Subject. And you remember yesterday
into kind of struggled, struggled looking at it,
put a data, It's got red. So we can say, okay, it's, it's, it's got most of it. It's missed a little
bit on the front and it's on the sides there. What we can do a radial. I'm gonna go here. And you could stretch it,
you might get blown. You can change the angle. And basically I've
selected all of it. Yes, I've selected around it. But what I'm gonna show you, if you remember when a few videos ago I
showed you a vignette, always smack bang in the centre. With this tool, I can
invert my selection. So now I've selected
everything around it. Now the feathering, I can't
adjust the feathering, which is a little bit of a
little bit of a negative part. If it's not quite right, we wanted to it so we can drag these dots, zoom back out again. Now if you've gotten
my brightness, I could put a bit of a
spotlight on this little fella. By doing that. The other way is I can
use that selection. I'm not going to
broaden them up, but then it probably won't look very natural
because it's like unless I have a light
ray coming in or something that makes
it look like that. But this way, it is more subtle. It's the same with saturation. I can go in here and D saturate. Some of these background
to the extreme, can bring it back a bit
up, just desaturated. I can go into here texture, knocking, soften it too
much as well, isn't it? We can say, look,
I've just bank. It's also business
prior to sky selection and subject selection
and color and luminance range
radial and linear. This is what we've
had for, for so long. This is how it works. You
just drag your finger. Okay. Why this works is because with
skies, if you go outside, you'll notice that
up at the top is whereas most saturated colors, because it's the white lot, reflects, reflects
through moisture. On those scientists. I'm an observationalist. Basically you'll see the
colors more vibrant. And then as they go down
towards the horizon, they kind of fight a bit and this is more
natural looking. But one of the
problems we've always had is that these
buildings where these things intersect
with the horizon, they then get affected
the same way, which is not ideal, is it? This is where a lot of
people are getting in selecting Scott and I got cool.
I can play with this guy. Looking really, looking really unnatural and
funky unit slope doesn't look quite right. But what you could do is
we can combine them now. We have done the bottom
heat, add or subtract. Pretty cool. So I'm going
to subtract from this. I'm going to subtract
a linear gradient. So what I've got my selection, so now I know where I
want to edit is this guy. Now I'm going into what part
of the sky I wanted to edit. So now being this around
and they regarded so now you can see
that I now have this linear selected
with this guy. Does not affect the buildings. Apart from the
original scar where the original sky selection leading to the
buildings a little bit. But now I have a
look at this log. I can put in linear
right through there. Now I can go in here
and I can go exposure. And that is pretty good, isn't it? That's amazing. Now that we can combine them, It's just takes it to the
next level, doesn't it? Tomorrow, I'm going to
show you how you can combine a color or a luminous. And I look forward to doing so. Thanks for joining. I'll see you there.
18. Using Color & Luminance Masking: Welcome back to diagnose with 17 of 30 days of
Lightroom Mobile. Today we're going to talk about
color and Luminance Mask. This is one that I
use quite a lot, and I always use it in
conjunction with something else. I've talked about
the last two days. I've talked about masking. I'll use this mask, the color and luminance mask to select within a selection, what you're doing is
you are then getting, this is the area,
this is the sky. Now, what should go in there and select this part of the sky? And then that's where
I use color and luminance to select an area. We did a bigger area
that I first select. What I'll do is account into
selections, select the sky. Let's have a look at this. I'll change the overlay so
we can say it'd be better. Look at that. It
has gone in there. Let's let the
discard really well. But that selection has, has kind of merged
into the law here. So what we can do is
subtract from the mask. And we could subtract
the subject. Bank haircuts that this
guy does a great job. It's sometimes when these
things intersecting that skyline can
have a similar tone, similar luminance, low contrast. It can struggle. But we can also go in and he now we can subtract
from this selection. And we can go in here
and illuminance range. So now we can go in here
and we can refine this. And remember the bits
that are in green at the bits that we're keeping that we're
trying to be editing. So I'm not going to go in
here and now you know what, that was really overcast
day. Don't want the gray. I'll want to I want to
broaden that is uptight. Tripods all go into the
areas that weren't great. I don't want to
make those gray and create a more uniform flat. It's creativity. It doesn't matter. There's
no right and wrong. Yeah, in the bottom here we have the slaughter, this slide. First of all, you can, you can
tap with this target icon. You can tap what you want. You have a square which
can be really good. So you can go in there and
select a larger range. So not just bank that pixel, that broadness,
that luminance on debt bit thrust, touched. I wanted you to mask all that. You've got to square
the whole range to be included or excluded. Then the bottom here,
you have this slider. Now this four different VT. You got the pins a the side. Then we have the range in
the middle and you can drag these and you can tighten up that range and then move it to the product
parts of the photo, the dark parts coming in here
and do the darker parts. And then you can
refine it with these little handles it a
bit at the back here. Let's really
selecting all of it. So let's go and experiment
and we'll bring it back. Let's go to about there. And then we apply it. Now we can go into brightness. We can change the exposure
and we can change that. We can go into the saturation is at
before, there's our after. So you can see that we're
actually starting to select the brightness within this guy. Let's go in here and
we will add the sky. Now, this is a bit problematic. This father, and the reason is, is this guy doesn't
go beyond that. Like it's not going to go.
Or this scopic or height. This is a reflection
of the scar, the bottom of the frame. We need to select that as well. It doesn't work like that,
so that did not work. So what I'm going to
do here is I'm going to select the subject. This should work
reasonably well. Then we're going to invert that. Now that inverted the
subject worked really well. But what I want to do is
the shadow is here of the, the pia in the water. So I hold that down
and you can see that I don't want to I don't want to play
around with those. I just want the nice doll. Grays, grayish blue. I don't want to adjust
the shadows here. We can go in here and subtract. We're gonna subtract color,
luminance, illuminance. Now we're gonna go in
here and put my finger, drag my finger and
touch on the shadow. You can say that now
that has subtracted that the dark areas we didn't that selection now you can
say he looks great. Now we have all
the grayish areas in the background we
don't have to appear, will explain it in select Skype. You can see down the
bottom left corner he would kind of missed some stuff. This is where we
can use a slaughter here and we can refine it. I mean, how cool is that? You can drag that
and then refining. See the bottom left corner with silicon Mau Mau, Mau, Mau Mau. Now we are getting some
areas around the boat. You can see some of the boat. It's some of the pier and
the background there. Let's just select
that first and then we'll go in here
and we'll subtract, am I going to subtract a brush? We're just going to
we're just going to refine this and just
going to brush here, which is going to go in there
and select some of that. Take neon, it's going
to my brightness. And this is where I can go in there and have a bit
of applied around. So I want to reduce the
contrast because I want to make it a bit more foggy,
it a bit more moody. So I'll reduce that. Highlights. Want to bring that right down. Not too crazy path that exposure might bring the exposure backup because it's not
a dark and moody. It's just a moody or
maybe a bit more. It good. And maybe the blacks bring the
blacks down a bit. Too much, brings you
out a bit more color. I don't want too
much color there, so that's pretty good. I'm happy with that. Before and after It's subtle. Next step is now I wanted to play around
with it with the PO. I want to make the
p just kind of pop a little bit more and
just jump off the screen. I'd be more crunched
going, he knew mask. And I'm going to
select color range. I'm going to select the
pia, the color of the pea, because the whites on the p really need to bring those out. I just want to bring
out the textures and the colors in the PIE. So I'm going to zoom in
a bit when you zoom in. Zoom in on the dot because it'll funky, just zoom in on the rest. And then we have this refined
so we can go in here and refining, okay, too much. It's trying to bring in
higher range of colors. It's bringing in color from adjacent hues on
the color wheel. Try not to get too complicated. Sorry about that. Let's just refine this
and that's looking good. It's losing too
much of the piece. I'm going to get a day. But then I'm going to subtract. And I'm just going
to use a kind of use luminance because the
brightness values, the luminance of the pia and the shadow of the
P a very seamless, this is where I'm
going to have to use a brush and just go
in here and just use the brush and just
go wipe, wipe. And what a nice and
simple and easy. Now ago into that one,
That's what I want. Clarity. Add some clarity. That crazy textures, add some texture, zoom in a bit, make sure that it's
crunchy and crispy, so I won't leave that. There we go. I'm happy with that. That's really popping
now that's the before, that's the after. So just to recap, the
luminance and color masking. In my workflow, I
find that we're expected to help refine a mask. So when you select the
mask, whether it's Scott, subject, color orange,
whatever it is, even, even, even if you go
in there and you do a gradient of a sky and it might be something in the sky, it's not quite working. You see the first one
there with the Lighthouse. I subtracted the subject and
it slipped the lighthouse. Sometimes that doesn't work. So you might want to do the sky, looked at the intersecting
areas and going on the horizon is a dark building
or doc mountain range. I'm just going to remove and subtract the
luminance range, which is the darker range
of those mountains. And then you'll
get a much better refined selection of the sky. Makes sense. Pretty cool. I love it. I think it's a real massive
improvement in Lightroom. And I hope you enjoy that. Tomorrow I will see
you again. Bye bye.
19. Quick Editing Using Presets & Profile: Welcome back to die number 1830, days of Lightroom Mobile. Today we are going to be talking about presets and profiles. Inside Lightroom. The fantastic, they're amazing. And we're gonna talk about the difference between the two. The strengths and weaknesses. Reasons why you would you
choose one over the other, and how I incorporate
it into my workflow. And when you use h presets, they're fantastic.
I do four things. One, they speed
up your workflow. So if you find yourself
doing the same edits sent using this
slide is the same way. You can save that as a preset and then you can
apply it as a preset. It's a recorded, it'll just go bang and reply those
recorded slide. It says applause, that snapshot of what he
edited on one photo. The next one is seconds
save your time. The other thing you can
do is again, help you. When you use someone
else's preset. You can go in there. You can go into the sliders and
got that look really cool. But what did this person who created these preset?
What did they do? You can go in and you can see the adjustments,
which is really cool. It's educational because
you can go in there and go. I would never have
thought to do that. Everyone tells me shadows, boost the shadows,
increase the shadows. But this preset actually
did the other way and it came out much more
dramatic and moody. So that's a reason why
you would do that. The other is creating a style. So it's creating a bit
of a stylist if you take photos of flowers the
same time every day, similar lighting, similar
lens, similar composition. Then you're editing. You go in there and put
your own preset in there. Then you can create a bit of a stall that's really press it. So what are profiles now? Sub profiles, they
kind of like filters. If you are familiar
with Instagram, where before you
post your photo, you can go in there and
you put a filter on it. Exactly the sign. It's one that photographer or
someone has put together, designed it, saying
that they might, I wouldn't bother making them. If you're interested in how they created met click
tasklist Karski, he has a fantastic
YouTube video where he talks about the process
of how he does it in Photoshop or another
one called 3D blocks to create a.com
is where he died. And when he shows you
that it's like, wow, wow, the two technical
wherever my head. And that's how they do it. To install profiles you
need, as my understanding, you need Photoshop putting into Photoshop greener the
folders and it'll synchronize across the Lightroom and synchronize across
to Lightroom Mobile. I tell you what,
if you subscribe, upgrade your Adobe account, you get lots more profiles. And when I when I subscribed,
it was a real bonus. I didn't realize it
was like, wow, wow. Look at all these profiles. Where did they originate from? They came out in April 2018. And basically they're there to replicate film
stock. Originally. They'd be kind of
expanded and become the new future of presets
and new way of doing things. But originally, they
came out to replicate. They'll film days
where you could choose a different film. This film, this brand creates a more contrast in the colors. This one has more saturation. So it does that. In your cameras, they
have camera modes. So nikon has picture control. Sony has creative styles. Canon has pictures stalls,
they camera profiles. When you upload a pro rule that you catch it
on your iPhone, it's a real happy surprise. You go in there
and you go, well, it's actually come
up with its own. For your phone will recognize that what you've used and it'll apply it because every photo, every rule photo has
to have a profile, a camera profile attached to it. Makes sense. Makes more sense if I shy. So I'll bring up
my, my photo here. If I go into profiles and you'll see at the top there it
says Apple Pro raw 100. You've got all these others.
You can go in there and you can change the strength, the appearance of that
or the strength of it, the magnitude wherever,
where do you want to use? You can change all
that. All right, now let's go into camera
settings and go to Import. You will see here in
the bottom row default, you can change it and
you can change it. An actual preset, not a profile, but you can change
it to a preset, which is, which is pretty cool. If you've created your own, you can go in and
create your own preset. Fantastic. I'm gonna show you price it now. Let's go back into it by photos. Okay, so this is a
photo that I did I just captured and I realize
I'm covering half of it. So first of all, I'm
going to flip it. There we go. Now you can
see the flower that helps, doesn't it? Alright,
sorry, presets. Let's go into that icon there and you'll see here it's come up with some
users of the system, some free ones that I've downloaded and
played around with. To be honest, presets is not something that
are used a lot. I use profiles a lot at the end, presets out that used
too much because A font called Thomas
scroll through and go 90 and then antenna.
It's quicker for me. And you most likely to just go in there and he's got a book. Yep, cool, Sweet. Let's move on to the next thing. Because presets
predominantly used for your light panel
and adjusting shadows, highlights or that
sort of thing. Texture, sharpness, vignette. You could use all
that profiles is more color grading
and more current. Because when you
watch that video, I've met close Karski
and he goes in there, shows you inside there. It's all colors
or color grading. It's all blend modes and luminance of
different color channels. It's quite technical, but
it's all culture-based. So that's, that's why
I use it at the end. You can see he, let's go, let's go create
even have a look. Took was oh, let's not. None of these are
working. That's no good. Let's get portrait. This portrait is not necessarily
just linked to people. You can use portrait
for anything. Let's go, let's just
go with that one. What you can see if you
remember in video number one, white back then, on the right side here we've got all the different panels
where there's a dot. It shows us hi, going in and have a look
because you can see that it's increased the
whites increase the blacks. It has actually putting some dehaze and it's
adjusted the color. Cool, fantastic. Now I'm gonna go in
here and just have it, just move some things
are really crazy. And I'm gonna show you how we
can create our own preset. That's all good. Tap on Presets. And then up in the top corner
you'll see the three dots. A tap on the three dots. How goods that we can create a preset or you can manage preset. So you can go in there and
you can delete presets, you can go and rename them. We're gonna create
a preset here, and we'll just call this flower quite
original, their flower. You can save it under group. So this is user presets, which of my own presets? And haven't looked at this.
You can go in there and you can select things like masking. So if you, if you apply, if you created a bit of using radial and got real creative in credit sun flare and
that sort of thing. You can go in here now and you can select antique on
mastering guy. Yep. Include that masking,
include that in there. Normally recommend that because where you put a
sunflower or masking, localized selective
editing in one photo. When you use that phrase
it for another photo, it's gonna be totally different. So that's why by default
that's left off, but you can put that in. You can put that in there. And then you press
Tick and you're old, you're old done presets. When you purchase presets, a great place to start is
actually Adobe itself. Adobe.com website is way too
long for me to read out. It's a great place to go and get some free trial ones from
different photographers. Like I said, profiles, you can install on the phone
preset, you can basically, you will receive photos, you will receive some
PNG file format photos. And then you can go in there and you went you open up that photo. All those different recorded
sliding will all be there. Well, I slide is all
those adjustments. They all there already with that file that you upload
or you add to your phone. Then you can go in there
and do the same thing. Create a crescent you with your receiving his actual photos with the preset already applied. And then on your phone you
have to create a preset. Presets. There are ones that limit the limit to
a certain panel. And you'll say this
inside Lightroom itself. Let's have a look. I forgot back here and
I'll go to defaults. Here we go, guys. So you can say he green curve, they just apply the preset
to that panel if you large. So they are the
presets that I prefer. Got to download. Some, have some like that way. It is limited to that one area
because if you go in there and you start playing
around with it and you've got the look, you won't meet your tones. You've sharpened it, you've
done all those things and then Egon put a preset
on it and it's like, Oh God, I would take
all that and it doesn't because he can
do multiple presets. And it'll just override the sliders that
you've already done. So you're kind of
wasting your time. And that's where, that's where a lot of people
get frustrated, such as just be mindful of that. Saving preset could be
easier in the browser. So you can look at your
photos in your browser. I haven't mentioned this yet because this is
purely Adobe mobile. But you'll see he
lightroom.adobe.com. You can log in and you can
have a look at your photos. And when you're in here,
you say this photo here. It's applaud the profile
because this was a pro roar. It's applaud that profile,
profile immediately. And then you've got
your presets here. You've got all your selections, all your different,
all your user ones. So if you create
one on your phone, it'll synchronize the
here and then you can go across the plus and
you can save your own. Now you'll notice here in tools, if you do do the
localized selections and you create one
on your phone, it will save all of
them. Sky selection. Subject radial luminance,
it does the whole lot. Whereas here, if you create a preset on your
on your computer, you just limited to
those two sides. Not not a great way, sir. I tried this when I downloaded
some a thoroughgoing. He didn't actually move
everything across, which is not ideal, is it? I've talked about the process of using presets at the start, using profiles at the end, there is one exception, and that is black
and white profiles because black and white profiles phenomenal via fantastic
profiles and black and white. And have a look at this. You've got all these
different profiles. It's just have a temper round. Okay. Yep, yep. Yep. I thought this would actually
work quite well as a black and white because
there's lots of textures. But because of the color
range, it's not ideal. Have a look at this slide. Let's go in there. And then let's go
into the colors. Target. I'm gonna change the luminance and look at
that. How cool is that? And we talked about this
previously when we were experimenting and playing
around with color channels. And I talked about
black and white. And the best way to convert
to a black and white. One was the saturate, which is what we do on
all the inbuilt editors. And the other is to use the black and white inside
the color panel. This does the same. So profiles when you select
the black and white profile, underlying colors is
still, it's still there. So we can go in here
like I just did then. You can adjust the
luminance saturation. You can even change
the hue position on the color wheel of those
colors that you just selected. So I've gone in there and dark and that
background because I knew that that
background was green. That works really well. And then I can go in and I
can change the highlights. I can reduce the highlights. Can go in here and now I can add some more texture, dehaze. Which way works for this, the photo clarity and have
goods that it's amazing. So the black and white
profiles are a great one. Stop your black and white photo if you think this is gonna look good as
a black and white, because those profiles are fantastic and you don't want to, you don't want to
convert to a black and white Goya sliders and all that sort of
thing and then put a profile on top of it. You can. But I think you're
missing a big opportunity. I think we've covered it all. Look a little bit technical. Hopefully that
wasn't too technical and you, and you stayed with me. The key takeaways here
are presets are fantastic for just applying immediate adjustments
to all the sliders. It even has color grading
all That's one thing depending on how it was
created and recorded. It's a great time-saver. You can identify what works, you can learn what they used. You can develop your install, but creating your
own preset profiles, apart from black and white, the rest of them are
used at the end. Just for a little
bit of tweaking, just to add that seasoning, a little bit of salt to your, to your your cooking that you're doing,
cooking your photos. They'll have a cookie.
Cookie photos. Fantastic, with that sidebar and I'll see you
again tomorrow. Bye.
20. Tutorials & Community In Lightroom Discovery: Welcome back to die number 19 of 30 days of
Lightroom Mobile. Today we're talking about the discovery and learn
option within this app. Amazing. The loan option you have, the Adobe team have uploaded some tutorials that said other
people in the community, you and I, if we're on
a paid subscription, we can actually
share our edits and create phase as
well as brilliant. What I love about it is
that you could go through the different
categories and you can see that looks amazing. How did I do that?
Step-by-step process? Follow along. You
have u equal to this sliders and then in-between
when they change panels, a lot of them will
actually come up with a loop the board and say, Hey, this is why we're
doing this and I explain it, which is fantastic. On the other side where
you've got the discovery, we can share photos
that we've edited. And if we want to, we can actually share
it as a preset, all those edits,
all those sliders, and talked about this yesterday, when you make all
your adjustments as slaughters color grading, you can also add on the mobile, you can also add your masking is selection's not ideal because it's going to appeal
to older photos. But also if you add a little bit of profile that we
talked about as well, then you can share that and other people can download
that and make use of it. So scrape you can follow
people, people could pull it. You can save. It's that he
can look back at them later. It's just fantastic. Help out, help APA jumping and show
you what I'm talking about. We've got the app open here
and I'm just in my gallery. And up the top here, you can see the Learn. Here it is. So good. You can go browse, you can
browse and go, you know, what, what do I really struggled
with or what I want to be inspired with? Just
need some help. Let's go. Let's go with color grading. Because that's one that
would be complicated away to a lot of detail
explaining the tools, but it would be good to
actually go in here. It has somebody has
uploaded in their workflow. Alright, so we've
got through here, just have a quick look. I liked the look of
that one from Tyler. Bring this one up. You'll say
at the top there it's got these profiles so we can tap on the profile and learn a
little bit about taller. He's from common dial USA and you see others
that he shared. The following three who inspires him or
educates, informs him. You can see how many people have viewed this writing because at the end
of the tutorial, you can give it a writing
whether it was small, you are sad Pfizer, which is pretty cool, and that's got a bit
of a description. We will start tutorial. And this is what it looks like. I'm not gonna go
through all of them, but I just want to show
you a couple of steps. Here we go. Little snapshot tells
you what we're doing. Continue and you have
to follow these. And you can see here I have a slotted down the bottom
and the slaughter. When I move, when I get to the very end where it actually, since this is where
the slider too, you can feel a little bit of
haptic feedback in there, which is really, really cool. Color grading, fantastic. We're
getting straight into it. Slowed that across. I can feel it. I can't see where I'm like, Let me go across feel I can't see under my
fingers so I'm kind of just feeling around until
I can fill that up or bump. It. Got it. Luminance, little bit negative of that color tone. So you can see what's
going on there. So you can see each step
you can go through, which is fantastic and just get out of that
little tick at the bottom. Skip the feedback because I
didn't finish it. All right. Let's have another quick
look at another one. This one is the towel, so I just want to have a look at this one because this has really produced a lot of
contrast and day tiling a. So let's have a look. Mountain. This one is star lost at the beginning level,
six-minute long. I didn't know what percent
of people loved it. Fantastic. Start the tutorial
and then you can get back. It's trying to do
it. They take it, say that this is
brilliant, I love it. I think it's testing.
It's one of the best ones that therefore, like I said, in-app education, you get to all this on your phone or
you can do this on your, on your computer as well. On the Adobe account, putting it all on your
phone where you gonna be using your edits when
you're taking photos. Just makes it amazing. First thing he does. So this is more a traditional
workflow and answer. We're going to edit the
whole photo and is 19 steps this I'm not gonna
go through 19 steps. There. Will now show you what it looks like inside discoveries
about the topic. You now have the little
world icon here. This is way you go to be inspired and this
is where you go to discover other photographers, discover other workflows. Just, just take out. You can actually have
a look and you can see the metadata of the
cameras that I use. So this is not just my ball, this is all cameras in here. You can discover other
people, you follow them, you can have a look at
photos that they've shared. Like I said, if you have
your own paid subscription, you can set up your own profile. And this is what it
looks like when you go in through the discovery
of the top deck, this is where you can
put in your profile. Now I haven't completed
it yet. I need to go in. Shiism is put
together in about you can see here I'm already
starting to follow some people. And you can say how many edits Epcot and
you can go in there and your locker photo and
I'll show you how to do that. You will say, alright, sorry, let's go. Let's go. Close-ups. Close-ups. Which one do we
want to play with? As each thing? I was in here
probably 15 minutes ago, and there's already half
a dozen added since then. So this is chronological order. Let's go with this one. This
one is from Brett Cooper for it to load up because it
doesn't a little slideshow, it does a little step-by-step. You can see the progress
bar and you can see if the original photo
and then as you can see, as he's making these adjustments
and he gets tap on Edit. And here we go. You can
see exactly all the steps. And as you scroll the little
preview, we will change. So you can see exposure
contrast highlights. You can move alone. And
then you get to the bottom. You can cite this as a preset. Let's just do that. Save the process presets. You can see that that's created if it's the
first time or it's added to a folder inside your presets, important
from discovery. They can go in here, you can hot this, you can look at this. You can see the little eye icon. You can see what camera. It's fantastic. You can share this
with someone else. So if you discover something, go, hi, This is really cool. I've got a knight who's running two close-up macro
flower photography, who wanted to learn how to edit this way so
you can share it. It's so good. It's brilliant. It's not like your traditional
photo-sharing social app. You can't comment and
express your gratitude and appreciation for their work and talk to them and
get some feedback. But you can just write weizza going to be
inspired to be educated. And really, if you, if you find yourself in a bit of
a creative slump, give his struggling,
then this is a great way to
just get in there. I've got the Florida indict
photo creativity challenge, which executes your app
with project worker shooting something in your
backyard nine different ways. That's getting out. And I bet if you
prefer to just do it, you've got five minutes
and you just want some, instead of scrolling
through social networks, I would encourage you to jump in here and have a look in here. And it's so much more
fun and they actually learned as Thanks
for joining me. I'll see you again tomorrow.
21. Sort, Review & Rate Photos: Welcome back to the
die number 20 of the 30 days of Lightroom Mobile. Today is the last day of the mobile editing
component of this 30 days. Tomorrow, I'm gonna show you
what the camera looks like. And then from then
on we are going to break down
different parts of it. We're going to talk
about ISO shutter, manual focus or the cool
stuff that you have, full manual control
or the cameras. So that's what we're
gonna get into today. It's all about the
sharing or insulting, reviewing your photos and management of your
photos on your phone. But it will also show you how you can do it on your computer. Yes. I know this is 30
days of Lightroom Mobile. But if you subscribe
to the account, Adobe candidates describe it, synchronizes your account any
actually without having to download Lightroom and Photoshop,
all that sort of thing. Inside your browser,
you can login to Adobe, and it is lightroom.adobe.com. You can login. And this is what it looks
like when you get inside. There we go. That's
what it looks like. You can see there. You can see your photos
and you have access to your learn discovery
or your albums, which I'm going
to cover as well. You can review, flag
all your photos, which is really exciting. So that's what we're
going to get into. Now. What I'll do is I'll
share my phone screen. Go down to, let's
do albums first. You see down the bottom
here on the left side, you can press the plus
state and you can create a new album or a folder. Folder is great if you've got multiple albums within
a topic plug for me, I've set one up
here, composition, and then within that, I've
added some sub-folders. So composition examples. And then I have one here, passion fruit composition
where I've looked at all the different
compositional techniques within this one photo,
somebody got back. I'll go to base. Another
thing I love within here is the top-right quantity, but the three little
dots have a look at this 2's best photo. So if you take for me, we're not going to trace the
buzzer and the backyard. I'll take 55 hours minimum. Hard to work out
what the best ones or you can put them
all into a folder. And then you can let the
app based on contrast, sharpness, faeces, whatever it will work out
what the best photos are. And then have a look at this. It's come up with ten results. On the right there. You can go at high values, so
you can go, you know what? I really want the current with the gravel or
concurred that way, I can't just give me
more options in it. Selected out of all those, him and he was there there was fifty six fifty nine sixty
nine different photos. It's given me the
top ons and you'd say not a bad selection. That's not a big headed. I put that there. Why did
they give me that one? That one is terrible. That was a good one and I
have ranked it yet, so I'm gonna get
that one, 5-star. Now on that with your stars. Back, step. Bring up a photo that
he could say here. That across the
bottom you've got a film strip so you
can swap across. You can swap with the fingers, swap across like this. And you can also
with two thumbs. And when you can tap
your screen Tampa, you might prefer to do
give it a ranking there. If you don't want to go
to ranking, you can just tap on that fall began
to get rid of it. You can flag it saying
flag as a capa, like a flag that has a
reject. The other way. If you're a screen swapping
rows with two thumbs, you can go in here with your two thumbs and you can swap on the right
side of the screen. You can swap up, down, reject. That's a capa. And then a left side is great. You could swap up or down and
then swipe across. Again. This one is a capa. What that needs a
bit more editing. You will develop your own him
for for reviewing writing. From a five-star is one that I've edited and I'm
really happy with. Three is one that has potential that I
need to go and edit. One is come back to it or for is one that I've edited that
just needs to be more. First of all, I'll go
through and flag them, guy, you're not reject,
reject, reject. Whatsapp got all the regex. I can just delete
them all in one guy. Makes it nice and
easy to do that. Now, that was kind of a random
at y that we got there. But if you go to
all photos and we'd just carrying here,
select the photo. Now. Top-left it. This is what you're familiar
with is the edit panel. Panel. This is the
one we've kept using. So if we go to the drop-down,
right, and review, that's where you can
see that kind of went in there random
at why? Initially. So that's the other way. In here. You can see the info, so you can see the metadata and you can swipe
left and right. But that's the one
where in review, you can share your
photos and organized. You've got lots of
different options here. If you're inside an
album, you can add. If you insert your old photos or this edit, whatever it is, however you got here, you can edit these photos to an album. I got back back to the main home screen that
we're familiar with. You've got the little
funnel off the topic, and this is where you can go and all those re-check photos. It can go in there
and tap on regex. And now we can go, okay, there's all my rejects. Now I'm going to select
all these and then I can just delete them in one go and then it'll
delete them all. Black hole. Thanks for joining me and I'll
talk to you, gets marked.
22. Camera Navigation & Familiarisation: Good day. Welcome back
to diagnose at 21 of these 30 days of
Lightroom Mobile. Today it is the first day of the rest of the
series where we're going to talk about
the camera app inside Lightroom mobile app. Today I'm going to show you what that looks like,
how to get into it. We're going to get it
through the navigation. Become familiar with all
the different tools. And there's a couple
of words in a, we're gonna cover some
of that terminology. So we're just gonna go
right back to the basics here. Just set this up. Don't judge me for my setup of what I've set up a
half, set it up here. It's not about composition, it's not just the
camera familiarization. Let's start at the top-left. So the top-left corner, we have the selfie camera. With the selfie camera? I don't know. I have never used the
selfie camera using Lauren. I just don't see the need. To be honest. I use the built-in camera app
probably 95% of the time. The unintentional
go in here and use these camera replacement
epi is because it has full manual
control and we're gonna go into a bit
more detail about that tomorrow and explain why I use
promote and when I use it. But I didn't really use auto
mode in here that often. Things like reversing it and his selfie came from when
we go to that trouble. I'm just going to use the
19th camera just to be honest with you and tell
you how it is for me, a case that selfie camera. Now with the selfie camera,
you can't get access to. I'll just pop over
here for a moment. If you have auto
professional, HDR, long exposure in depth captures, DEP capture is portrait
mode and live focus. That kind of blurred, artificially blurring
the background. Selfie might do that. Next, we have done he
JPEG and we can switch between JPEG and
PNG file format. Dng file format is
a raw file format. What that does, we've
talked about this already. What that does is the DNG RAW, it will cut out the processing that
automatically happens in HIP. It doesn't matter
which brands you have, whether it's an
Olympus, Sony, Nikon, nikon, Canon, Samsung,
Huawei, Nokia. Doesn't matter what you have every camera that records
a JPEG file format, we'll apply some
processing to it. And we talked about this
the other day with profiles and has a profile and it has a way of processing the photos occurs
through systematic, automatic process and then
instantly it displays. I look to that photo and
it can shopping the photo. Crisis saturation. It can boost a little bit, Barbara, it has a unique look. Every camera shooting
the same scene for a JPEG will come out
looking slightly different. That's it. Rolls will come out
slightly different as well, but different technology, but more so with
the JPEG PNG way, you want to capture as
much data apology can. And the full dynamic
range from light to dark. The real benefit they East that you have a lot
more data to do your editing and
things like JPEG, we will compress that
information so it'll take full pixels and a mock trunk compress it into one
pixel and a blend. That's that information whereas they roar will retain all that. That's why a rule is a
larger file sizes as well. I'm going to leave it
as a JPEG for now. Next we have the flesh. I never use a flush left, just I never really
have success. I would rather use
an off-camera phone, torch or a little light chart, or you, Lindsey have so
many different options. We've lots that you can change the color and the temperature, brightness and the
temperature of the launch. Next we have the X, the X button basically
closest to the camera. So you go back to your camera. Reset. Reset is if you start
playing around with all these options here and you start to market
America, You know what? I just want to go back
to full automatic. That's what that
does. So the next one underneath I just touched
on that's manual focus. And we're dedicating a day to manual focus because
really cool. It's basically you just have your sliders and you
can change the depth. You'll focal range,
you can change that. And I want the front of
this in-focus behind it. In fact, you can do that slightly different
with an Android. You don't get that green overlay with all these sliders, but
all the way to the bottom. And it tends to order, which is really handy, white balance to cover
that separately. And then we have our ISO, shutter speed,
exposure compensation. A lot of smartphones now. And it's brilliant. Guy will have exposure
compensation that you can lock. You can set it up so
that every one of your photos can preserve those that settings
that you've said in every photo you
take from then on, we will be deliberately
underexposed. And I'll show you why surely
why that he's really handy. So we'll just erase
it for everything. Turns back to Auto
up the top right. Then we have filters. It can select a
different filter. Lovesfilter. I mentioned you can, you can
shoot a black and white. You can shoot in lots of
different modes there. The lock, exposure lock. Let's just get rid
of those filters. Especially look,
that's really handy. I'll show you why. Tap on different parts
of the photo and it will change based on the
brightness of those areas. It will change the
overall exposure. Tap on the dock area. It'll boost and brought
in the whole photo. So that dark area, you can see all the details
that are just today. Template a broad area
like the clouds. What that'll do is it will
darken the rest of the Friday because the camera has a
limited dynamic range. That's way HDR, high dynamic range capture mode
works really well. We'll talk about
that another day. You can see he tapped
the changing it. So what you can do is you
can go, you know what, I like that now I'm
going to look at it. And now that you've
looked at him, we can then go and
separately tap way. We want these to
focus. Pretty cool. We'll leave that the
one underneath that. If you have multiple
lenses on your phone, you can switch between them. Ultra-wide, wide telephoto, macro view or an Android
with Android, the capture. And then down here
we touched on these. Automatic, removes all
those manual controls, ISO shutter, white
balance, focus. But you still have a lot. You still have access to
all these ones over here. At the top-left, the three dots, settings, Mac screen brightness. We've talked about that. I'd say much point in setting up the exposure when you screen
these half brightness, half full brightness and
going, Oh, that looks nice. Nicely exposed is
nice and bright. Go back. Edit the photo. Oh, wow, that was
really severely underexposed. Overexposed. So I'll like to have that nice and consistent underneath there. Highlight clipping
now attached on he. Why you would while you would deliberately
underexpose the photo. So if you take a photo of landscape, disclose
really brought, you don't have one of those graduated neutral
density filters where it will go and dock
and shoot through glass. This doc and at the
top to kind of reduce the brightness of the sky
and then blend it through. Then came the HDR mode.
You haven't used that. Sometimes you will have some bright spots and
I'll recreate that here. These torch, either the same, it's really brought spots there. Now, I got to show
highlight clipping. Have a look what's
happening here. They say that we have
these zipper crossing. Basically it's because
that is a supervised area, so I'll tap on there because
that's super bright. And then the rest of this
Friday has now balanced that broad area
and the broad side of the screen has become dot. So let's hop on the dock area. These zebra things
will come back again. The next one underneath there is all your different grids. We can turn onto
the rule of thirds. But one that I really like
here is this one here, which is the Spirit Level. I can move this around and
get it perfectly level. Near that yellow line tells us, it tells us that the
level underneath there, we have a timer so we can
count down and set it up, set up the Tama aspect ratio so you can switch between all these different aspect ratios. I went on editing all my photos. I like to have it as a 689 so that I can display
it on the screen, but I don't shoot in 69,
I should infiltrate. The reason for that is
that I want to capture as much information
as I can because I could shoot in 69 aspect ratio. And then when I get home, you know what rule of thirds I wish I had of going back further
or catch it and forth. Very subtle. I
could actually crop this and make that
horizon go onto one of those horizontal lines and actually create a rule
of 30 my composition, capturing the full
three Kettering as much detail as you can, issue more options to
recompose the photo. That's it. That's the navigation. We'll leave it there tomorrow, going to go into
comparing not only the results of auto
versus full manual, but I'll show you in
going into some of those more details on
each of those things, and I look forward to
bringing that to you then. Bye.
23. Lightroom Camera Vs Native Camera: Good day. Welcome back. Today's dying of a 22 of add 30 days of
Lightroom Mobile. Today, I'm gonna
be talking about the native app versus the
Lightroom mobile app. We're going to explore also, why are these people say I want a full manual
control in their phone because it's one thing
to want it and desire. And we did for so long. And then when we went on
our members and authors discovered manual control
in camera placement app. So I was like, Oh, fantastic. Now I think I'll
do this, do that. But then it comes back to what is it that you actually
want out of it? Do you want it to
produce better results? Or do you want manual
controls would be more creative because we don't
have aperture control, we just have shutter
and ISO so we can squeeze more in theory, squeeze more out of it and
we'll do some experiments. He just literally experiment
is nothing fancy. But for me, it's
about the results and creativity for me comes from composition
and storytelling. I think that Beats
technology Haynes down. I'm going to
demonstrate two things. One is a static object, which is just my little
awful Itala here. Put together a
couple of shots and a little one-minute video
that I've compiled yesterday, I add in the garden, try seem synthase just
to compare the two. Moving across to
a lot room here, we've got the different modes, so we have automatic and
tap on the screen to focus, set the exposure or that sort
of thing. Take the photo. And then we go over to
professional mode and pro mode. Here we have access
to manual focus, ISO shutter white balance, assessing, exposure
compensation. Now, I'm going to have in the
next few days break these down a little bit
more and get more into those more into HDL. And for the iOS, the depth
mapping and long exposure. So I'm going to break
all those down a little bit more as we go, but I just want to compare
here we go, pro mode. And we took an
automatic say here. That was the looking at
our little details once 35400135400 did exactly
the same whether I shot in order in auto mode or whether there are
short order in promotes. We can see that on there.
And then that one there. I just wanted to
demonstrate they're basically that if
you're in pro mode and you shoot with automatic
settings inside PRO Mode is absolutely
identical to shooting Hadamard. Let me just try and
tell this fine. Hey, I'm horizontal,
shoot horizontal. You fool. Bit, hash
coma camera full. Alright, next thing
I want to do is I want to shoot in JPEG and also in D and J and compare
them to DNG is a raw file. So in theory, it will
be different because JPEG has putting
different compressions, different processing, that sort of things
will shoot huge. I pick first and everything's in order just
to keep it synchronized. Then I'll move across to
D and G. There we go. Same again. The
first one is a JPEG. The second one is the rule. Now the rule, and we can see the histogram has moved across the mid tones or the
midtones are brought up. Because when the JPEG is
processed, it, it's gone, hey, this is all too bright, even though he shot everything older, the JPEG has processes. This image quality-wise hasn't
applied noise reduction. Then the JPEG bank, massive differences in it. I will send that. It's my camera off. And
then I'll take a photo with pro rule and it will
be able to compare the two. There we go. And I have selected this, this is Pro and Pro Max and tap the capture does not histograms here
because I've just looking in the photos app. So what I'm looking
at here is this is the Lightroom version JPEG. And then we're looking at price. I don't know about
you, but that is a massive improvement. Go back. It's just the details
on looking at, there's so much more
details in the Pro Max. Personally, I did not expect
this of this blown me away. Pro is a DNG sets of rule, but at process, everything just luggage I paid to produce. This is a large file, it's a massive false,
it is a lot bigger, so we have to consider
that as well. I wanted to show you this little video and then
talk you through it as a shot. This was captured in my
backyard chasing some base. So first of all, I am using the Lightroom
Mobile, showed it in JPEG. First thing I'll do
is shut, set it to a faster shutter space because they've lost
on us and fast. I had to select ultra
wide lens because with the wide lens or couldn't get close enough
to get into the space. And you can see that was
the shot that I captured. A couple more photos
and it's hitting miss. Like I took 50 photos here. Compare iPhone Pro raw, didn't have to sit
in and everything was just getting nice and close. It was switch between
the white and the ultra-wide tack shop. Got in there nice and close. And I was blown away.
I couldn't believe it. The difference was
quite remarkable. Then lastly, I took some
DNG file formats with the Lightroom and then see
which one you think is which. The difference is quite minimal. It's like I said, it just blew me away.
I couldn't believe it. The one on the left is actually the Lightroom
and the one on the right is the native camera. Now, it's hard to compare like we just did
here with this little, this little Eiffel Tower
attached to compare apples with apples when you're
out shooting bees because same camera, same modes. This is why we take 50 photos because you just
got to keep going because not every
photo is going to turn out tech shop
like baselines, you have heating miss,
you're going to have some loop, a sharp, some that just ignore white
balance is thrown off. But the thing that
really works is having a fast shutter
speed in full manual. What I love about penalty to talk about this in
a couple of days, what I love is that you can set the shutter
speed and it will automatically adjust the ISO depending on if
you're shooting into a dark part of the bush, turned around and all of a
sudden need for backlighting. It changes everything. Same with the native app
if you use it in order, changes at all, so you don't have to worry about
that so much. Focus more on composition. For me. I guess the
takeaway for me was that I the convenience
was the big one. Now I know when I
when I was using the tennis tennis Max phone because it's a few years
old Lightroom dominated it, absolutely smashed it and
there was no comparison. But now I'm finding is just, this is just anecdotally just from what I've experimented. The convenience of not
having to worry about switching lenses
because Lightroom, you can only get so
close with white before we then have to switch
out of the water wipe. And then when you switch
over to ultra-wide at resets the manual focus. So you've got to go
in there and, and refocus it again and re adjusted other settings
like ISO shutter, switch lanes, it's Thursday,
which is really good, but I just found it
really cumbersome, having to switch between the
two and keep changing it. I love thee. On the iPhone, the manual focus, and it has the green
overlay so I can do that rocking motion between the base and I couldn't work at and anticipate
getting there and go, okay, it's gonna come
out of that flower and it's going to turn around
and face me when it does. I know it's gonna be in
focus, which is fantastic. That's one really big positive
with the Lightroom app. To get that tack sharp, it's probably more
consistent with that. That said, with the
auto mode using Pro was getting some pretty
consistent fires as well. What manual control of your camera to produce
a better result. But if Convenience wise, he's still producing
maybe not as many. Great photo spread. I don't know for me, I just
cited all the distraction. And this is coming from
somebody who's fair 25 years working in very
technical field photography way. I Stef this squeeze
as much detail as accrued out of
every single photo, make it an accurate
representation of what's in front of you too. Now I'm advocating just
go Aldo and just go with the flow and concentrate more on composition and
that sort of thing. I would never flavour would
be saying that sort of thing. But that's up to you. It's a personal
choice that we're not talking to the camera clubs from now on I'm gonna be saying, hey, what were they looking
for an environment, someone says manual control. I'm going to challenge
them and I'm going to say, Why is he weren't
full manual control? If it's about producing
better results, go out there and do an
experiment like RDD won't be completely blown away
by the comparison. And if it's that you want
to be more creative, then again, have a
play around with it. I've found manually
controlling eyes shut up. I found the difference
is quite minimal. When you put all
this together with this last 21 days where
I talk about editing. When you start editing
the photo, again, when you should indeed
Junior have some noise. Use that noise reduction. And using those tools we've
talked about vibrancy, clarity or that sort of thing. As you can see in
this comparison, you can get two totally
different photos pretty close to each other. Apple Pro raw profile, you can actually reduce
that and bring it back and reduce some of that saturation that's
going in there, sir. Thanks for joining me and
I'll see you again tomorrow. Bye bye.
24. Discover HDR Capture Mode: Good eye and welcome
back to day number 23 of the 30 days of
Lightroom Mobile. Today we're talking
about HDR mode inside your camera,
inside Lightroom, Mobile. As we've talked
about, how auto mode, pro mode, where you can go
and eat, can change things. You have other options. Hdr is another one came
out in March 2017. Basically, HDR,
high dynamic range. All cameras, even
modern mirrorless. A lot of those now
have software in there that can do what we're
doing with their files. But of course, sometimes
this was an area that phones just dominated because
you've got that processing, the image signal processing. The more modern your
findings and the premium, the better that is an ability
to be able to capture Ms. what Lightroom
does is it captures three DNG RAW photos. Socolow scans the Seine and chooses the exposures
for the highlights, the broad areas which
is typically the sky. It exposes for the shadows. And then one in-between, which probably the
ideal blend of the two. Or if you tap on
this green and side, this is where I want you to
expose for the final result. It'll take one for
that and then it'll blend the best of all of them. It actually Texas three photos at aligns them so there's no
movement In-between them. So you can do these handheld emerges them first day ghosting, which is where it looks for any movement
and then goes and tries to remove the
movement that makes sense. And tone mappings
or tone mapping is where it will look at
all the dynamic range, all the pixels and go, oh, that one's funky and it tries to create a more
natural looking farther. Hdr first became popular. It was the grungy, over toned look to it. You have HDI or bad rap
for quite some time. But now HDR in our phones, a lot of our phones, you
can actually turn it off. It just does it
automatically through frame averaging and produces
that high dynamic range, which makes it look
the same, look more. What are ISAs, which
is pretty cool. This is what it looks like when we turn it on our HDR mode. In Lightroom, we still have options there to
switch between lenses. We can tap to focus,
exposure, exposure lock, manual focus, white balance, and you see their
exposure compensation. Now that was really
good because it, yes, it's capturing a high range, but you can actually use
the exposure compensation. Say, I want my end result to be underexposed or parietal
and be overexposed. So you can actually still determine what the end
result will look like. This is an example here of
what ghosting looks like. Now, this is actually an
app that I paid $8 for. And you can see there my son Kai and pass
in the square root because he has moved
in-between frames. It's kind of just
half captured in one. Next, I want to show you
a visual representation. This is not actually the
photos There's capturing, but I'll just put
this together to show you the three different images. You'll see the
exposed normal photo, a bright photo and a dark photo. And they monetize is
the three photos. Blends them altogether to
create a final product. Doing my own playing
around with the iPhone, I was really surprised I
compared the GIF to pro, expecting the pro R4 to capture a higher dynamic range
because it's doing more frame averaging
and using raw photos. Really surprised
to find that here. If we zoom in, you still
got the data and the HCI IF and good
dynamic range there. And when you're looking
at HDR Results, I look in the sky
because that is where they do most
of the work didn't actually do that match in the shadows like you expect HDR outcome and
boost the shadows. It doesn't seem to do
that as much prior. Same thing, same
amount of details. And then the sky is the same exposure which was, which was really interesting. I wasn't expecting that. Have a look at HDR MOE, compare it with your phone. You might go, you
know what? Hdr into Lightroom performs
better than mine. Or you might look at your, your phone and go,
you know what? The default camera
does an amazing job, which it does on the iPhone Pro. It doesn't amazing job. I didn't really say the Nate
for me personally is go into here and I'll show you that
here I have another example. So this is the HDR. Hdr. So you can actually set it up inside Lightroom
that it will save the normal photo so you can see they're normally that's
what it looks like. And then the convergence of the three photos,
That's what it looks like. So it's a pretty, pretty cool
results, pretty amazing. One of the main reasons
why we do HDI is to reduce this guy because
typically scars will clip that. We've blown out all
the highlights, the bright areas
the camera will go. As a person in this scene, this photographer really
good chance they want this person to be nicely exposed and then it will
prioritize that. And then you end up
with a plan out sky. Now this was a filter
that are put on. And it doesn't align very good. I mean, it's really
disappointing because it has a graduated lens and this
is what it looks like. This in front of you here. I put in front of the
light, move that around. You can see that at
the top is darkened. And then it has a lawn
that's further than softly transitions to clear. So you would position this over the lens and you would learn that with the sky and it
should work really well. But unfortunately, this clamp
does not work very well. One that I have found that works really well, that
I've just picked up. This one here. It's
a pro physiology. So PROMs, zed, zed, i o in. It's fantastic. And you have this little
bit on the end here. When it connects to the phone, connects nice and square. Whereas this one, because
it's lucky, like a wedge, it goes on and it doesn't doesn't line up
nice and flat on, it ends up lock that and
that's what gives us, unfortunately that result,
no matter what I do. So I'm really looking
forward to picking up. I've just got to
stop filter on it. And I can't wait to get a neutral density
filter on there. And having a bit more
of a player around. We don't always have outlines attachments with us living Miho, we're taking him
from two photos. And I just wanted
to show you here. I won't go through and do
all the editing with you. We've already done editing. You can see here the
photo on the left, that is not an HDR because you can say they're
disguised really light. Now, we have covered
the light panel, this one down here,
the light panel. And we've talked about
highlights, shadows, basically, by reducing the highlights
and increasing the shadows you are creating I
high dynamic range. And you can see
there in the result that is a high HDL look. It's natural, it's not grungy. It, it looks really nice. So that is what
we have done now, the one on the middle there, this one here, you
can see there. I've taken it to the
next level and I've gone into the color panel. Now I've selected the blue
because it's a blue sky. Then I have reduced
the luminance creates that darker sky. So similar to what you
will see with a polarizer, which was really cool. Another option that
might work depending on the photo is going into masking
and this is a PIE tool. You can go in there and
do the linear gradient. And with the linear
gradient you can drag from the top to the bottom. And I've talked about, I've
showed you how you can then intersect it and you can take out beats in the
horizon, all that. So they really cool, fun stuff. The linear gradient is
great because you can go and dock and the
top of this guy then have a transition to clear
this just a few options there that if you don't use HDR mode or you're happy
with the default camera. And the result, because 95% of my photos I do
it by default camera, I'm showing you a lot
room does because sometimes it does a better job. Remember to use Lightroom or I end that with just the farther
you go. You know what? I wish that Scar was darker. I wish I could
boost the shadows. Well, already showed
you how to do that. And a couple of
other tools there as well with the luminance, different colors, and
also the linear gradient. So brilliant, I think
we'll wrap it up there. Thank you for joining me and
I'll see you again tomorrow. Bye.
25. How to Control Manual Focus: Good day. Welcome
back to tighten up at 25 of 30 days of law. Remember this one here, manual focus on the IFR is really good when
I sat on the iPhone. Because what I love is the focus peaking where you have the green overlay
showing you what's in focus. And I'll show you why. I'll show you a
quick little video. You can see here chasing
phasor Randy, my backyard. And when you have
the green overlay, you can see exactly
what's in focus there. So as I'm in the exam
rocking back and forth and not adjusting
the manual focus. But the green overlay shows me exactly where that they ease. Pretty cool, isn't it? It makes it so much easier
because then you have especially when there's so much clutter and so much going on. You're looking at a tiny
little screen and that's how, that's how I get tech shop far as an entity
editing, obviously, the editing is where you really take your sharpness
to the next level. Here we go. This is
what it looks like. So now I mean pro mode. If I just double-tap or
hit the Reset at the top, it goes back to normal. So I've set this up. Now, when we remember that number one, introduce you to
a few shortcuts. Tap the screen, will focus it, lock it, brighten it up a
bit of luck the exposure. Now I can tap where
I want to focus. Pinch zoom. Could focus on
the back here, focus on that. And then the tail
goes out of focus. Tap on there again. Now another thing
you can do is I can long press and look what
happens when a long press. The green overlay comes
out and displays, bringing them to be
closer than Louis further away. Long Chris. And you can see the
difference when alone, prostate, boom, that becomes
so much more in focus. That's one way of doing
it. To undo that, we just double-tap on
this great elsewhere. It took me I just worked
at AT and that's why I love really getting there and look for little shortcuts
and things like that. They either won't
find on YouTube. Things that I've found myself becoming a
little bit stuck. I looked at the annual. I say that I can get it is
to reset the whole thing. If I have I have done that. You see what happened. They want to erase it. I reset my exposure to
which is not good. So I wanted to get
that exposure back. Lock that in. Now the other way, tap on the focus and you can
see here a slider, really good slot, although i bottom tends you
to order go up. 0 is the closest
focal length lens. So the closest focal
distance should say. And as we go up to a 100 within that further and
further and further away. So we can get right
back to where the edge of that notebook is. Then it comes in
closer until it gets there and it actually
moves to the front day. Now, really good one to note is that the
close you are to 0, the closer you are to the lens, the more narrow the
depth of field is. Modflow not throwing jargon
out there this whole series. But depth of field is
basically what is in blue. So you have out of color in Blur and then
add a blur again. And that's what most
cameras work that way. And having a narrow
depth of field, the real benefit of
that is that you get real background blur, unlike yesterday
with portrait mode, where it's artificial. Algorithms, very
smart, very clever. This is real background blur, so the optics creates this. And that depth of
field is what does a lot of people that I think you can do that
with a smartphone, but this is how you do it
again, nice and close, and choosing the right
lens works as well. Now, you will notice
that if I long press, it does auto exposure, autofocus lock, and
then I can swap up sameness sense before
we've talked about, okay, I can zoom in and go, You know what, That's
not quite sharp. That's exactly where
I want it to be. And then we can zoom
back out again. Lot of Android's,
when you zoom in, lock the focus, zoom back at it, touching, touching the screen, intellectually deactivate
it with the Wi-Fi, need to double-tap What's
hap elsewhere to unlock it. The biggest that's unlocked. Pretty happy with that. Every tap on the back there and it will change
focus to there. Another thing with
here is that with you, I found that I really like is that if we're getting
really close here, lock that change bars. If I tap on the three
times lens magnifies. Now, you've no doubt already to realize with multi lens cameras, the ultra-wide getting
wrote on top of it, the wide you can
getting 78 centimeters. The telephoto two times 2.53 times that minimum focal
distance is why off again, it's weighing the distance. So if you're using
Lightroom Mobile and you applying rare with manual
focus and you want to, you're getting closer to that be any changed the lens to
the what, all of a sudden, you can't get in a close
enough and you need to switch back to a Y
with the author. Not sure what you're using
and how yours works, but just having a bit of an
experiment with the author. And if you're really close to that bait and switch
to a three times, it doesn't change that minimum. It just recognizing, oh
**** out of that lens, this isn't going to
work and it will just magnify, it zooms in. And that's where we get
this sort of result. So this is the scenario
where I would use the offer, but as you saw, they're
chasing the base around the backyard with the green
overlay on an iPhone. Android doesn't. Obviously. That's when I would start using using the Lightroom Mobile. So hopefully that explains when I would use lot
roadmap ball went over, just go to the iPhone. Thank you again and I'll
see you tomorrow. Bye bye.
26. Adjust White Balance At Capture: Welcome back to 30 days
of Lightroom my ball. Today we're talking
about getting what balanced rot at captured.
Why is that important? Well, you've probably
experienced like I have, where you've gone into
a cafe or restaurant, some sort of a new
indoor applies, mostly indoor place
where they've got really funky lighting and it's causing you all
sorts of issues. And you end up with
a photo that looks IX and politely the wrong color. Last week we talked about how to correct that using Lightroom, using white balancing, use the
color tool is heaps tools. They can be aggressive,
you can be subtle. The thing is, if your
photo is completely wrong, then that's the information
you've got to work with. To give you an example. Let me just bring this
camera over here. Have a look at this. This is the camera that I'm using now. This is warm time. And then there's the blue tone. I have mine here around 4500 Kelvin because as we
talked about in the previous, imagining Colbert
and then I have tint so I can change
from a green tinge to a purple magenta tinge and bring that
back a little bit. That gets rid of the economy. If you've got radish complexion, it can help just kind of reduce
those reds a little bit. So it's not just adding
colors, it's the other way. It reduces some over here, I've got this, the
cameras I'm using. I've got a ten x over
here and then over to the side here I'm
using a what are you? You are an ICT and I found it. As I've always said, I'm
a mobile purist everyday 0 my ball finds that I'm
using, as well as this one. Here we go. This is what
Lightroom looks like. So that's what it looks
like when you have those color adjustments
in the power, we have just set up this
really random bowl of fruit. Please don't judge my specular
highlights in my shadows. It's not about that, it's
about the color I already. This is what it looks like
when you are in heat, what balanced by default, it's an older white balance
which is brilliant. And we also have some presets. And this will correct different types of colors
that you have here. And how cool is that on the
left side, as we tap it, it says Tungsten fluorescent, which is if I turn my studio lights off and I have
my overhead light on, that will create a
bit of an issue. Clarity using the presets. Clarity is really the
only one sided die, the only one that
would come up with, and that is an overcast day. And I'm shooting
under a tree or I'm doing a macro under
a trade of a cost, there's a blue tinge and it's a noticeable blue
tinge antidote if it's noticeable because
I tell you what, the auto white balance
on our smartphones. It's just incredible what? Let's go back to here. This bowl of fruit. Last one. Here is we sit your own, and this is where you take
it to the next level. So you set your own, similar to what I mentioned last week
with the white balance, you need to find a neutral color in the scene and it has to be in the same, in the same lighting conditions. So it has to you have
to put something in there that is where
the subject is. Now. The experience I've had with this sort of thing has
been workshops with cafes, restaurants, hotels
where they're taking photos of food, the restaurant. And when you're out there
on location to those areas, you can you don't want
to have a gray card. You don't want to make
it it difficult for people because a gray card, technical, it's iodine percent gray and it works really well. But you can also use just a white piece of
I4 reflex copy pi bar. It's only an eight because
it's not a pure white, but it's a neutral,
It's neutral white. So what we do is
we put that in a, another that's in there. Now I'll go in here and
I will get to that. I'll lock that with the tick. Remove that. That's
our end product. That's quite good
because that ball is not actually a pure. What? If I erase it that have a look
for the lookout for them, a little bit of a blue
tinge to it already. You can see it more here. You can see them all there. Now, this will also
adjust brightness a little bit because
different colors have different
brightness values. This is why this is important to do before you do your exposures. Because if you add a bit
of an orange to the tint, or blue to the tint, or a bit of green, they all have different
brightness values. Now again, don't judge the
shadows diffuse in there. It doesn't matter. There we go. We've changed
the colors because I haven't a bit of a
warm globe in here. I'm going to do I'm gonna pop that on their white balance. I'm going to put use
my eyedropper and it mostly want to fill up
that scene. There we go. Remove it. Pretty
good, pretty good. If you want to introduce color, which you might want to
do, you might work in a, in a bar where you have some really cool
lights and you're shooting your photos in the day, you want to replicate
those lights. Well, there's an RGBA lot. Hear from you lazy the VL 49. This thing is, this
thing is brilliant. It's so good. You can change from a cool
What to a warm light. And you can also change through the entire RGB colors
so you can get some really funky
colors happening types. So we can see here we can change these colors quite dramatically. You can see I'm
scrolling through the colors of their
Rothbard of blue. Things is really handy if you're having white
balance issues. This is brilliant
because as I said, you can change it
from RGB values. You can change from a warm light right there and I'm gonna
hold my finger down. It will change the temperatures
of the raw button. And you'll watch, watch these
light as it goes through. And look at that. Haeckel's that. And then when you
put that on here, you can just change everything. That's probably any
Lindsay product is affordable quality. And css, to summarize, go through the
different presets. If you're having color issues,
go through the presets. If you don't want to muck around with all
these sort of thing, you taking photos of clothing, fashion, people,
natural lighting, outside is always the best but sometimes overcast days
location where you've got them, you can get a bit of a blue
tinge or that sort of thing. All right. We'll wrap it up there. Thanks for joining me. I'll
see you again tomorrow.
27. Manual Control Of ISO & Shutter Sec: Welcome back to tighten up at 27 of 30 days of
Adobe Lightroom. Today we're going to talk
about ISO and shutter speed. Now this is really exciting
because 90% of people, probably 50% of
professional photographers, get this wrong with
ISO, what it is. Most people think
it's an acronym for the International Standards
Organization. It is not. Let me read it to I'll bring
this up on the screen. This is on my, on my blog. This is direct out of
their website because International Organization
for Standardization would have different acronyms
in different languages, iOS in English, in French for organized Haitian
international denormalization, our founders decided to
give it a short for ISO. Iso is derived from the Greek, meaning equal, wherever country, wherever language,
we're always ISO. That's pretty cool. That means equal. That's not an acronym. In case that's the first one. And it's standardization, it's equal where this came from. Is back in film.
Photography dies. He's typing up the camera, put your role of filming, load it up, close the lead, and then take your photos. Now, different films had different sensitivity
to light and it can imagine putting up a
bit of perspective or pipe. Thin paper, thick paper up
to lot thin lets more light through thick blocks at AP
because it's different brains. Fuji Kodak, lots of different brands.
They're all different. So they needed to have a
standardization so that people could write them
and be able to know. Okay, I want to take low-light photography
on a 1600s film. If I want normal stuff, I'll go 400 film. It's a standardization
with cameras. Modern cameras,
when we move across the digital photography cameras, whether they're a
smartphone, SLR, mirrorless, whatever
you're using has a fixed control and has a fixed demand sites
like 30 to 50. When you increase, that IS actually amplifying the signal. Now, what do I mean by signal? Let me, let me write
Dima blogging. As we take a photo, light enters the lens in every pixel measures the intensity of
light by counting the number of photons
reaching the pixel. Now cameras, some cameras
have a dual pixel, one for focusing and one
for capturing light. The charge of the photons changes the voltage
in each pixel. The voltage values are
recorded by the camera. The raw data sits in jail. Raw stuff will say Jesus would fall top at the raw
data in the collection, records voltage values
from all those pixels. Okay? Alright, so when we
amplify that signal, so it turning up our
eyesight with my amplifying, the signal went
amplifying that process. So should we call gain not,
not increasing sensitivity. We are increasing the gain. Makes sense. We think you still
with me. Alright? So that's what that is. When you, when you have, your camera might have lowest
sensitivity of number 32. But let's just go with 100. Just to keep it simple. When you, when you
adjust your ISO to 200, you're doubling that gain. And that's when
noise comes from, because this is all
electronics and similar to operating a radio and switching between radios and you'll
get that white noise. That's similar
concept day. Alright. That's ISO. Shutter speed is a
little bit different. Shutter speed on all
cameras and even, even the new Nicol and this came out and that no longer
has a physical shut up, but a physical
shadow used to be. It would open the curtain,
LED light come in, hit the sensor, and
then you shut it and let me open for a long time. Let's lots of lighting and look pool of light and a
brightens everything. But if you open a
shot it really fast. That's a little bit
of lighting, and that's the capture
speech as well. So if you're taking a
photo, your fascia, a slow blurred photo, then you'll have it open longer. And it's really exciting. It's really exciting on the smartphones and has what
we call a rolling shutter. So instead of just capturing
the whole thing in one go, it reads those
photons is from top left and scrolls
down, starts again. And on the outlet room, depending on what
phone you have. This one, he is 13 Pro Max. It has physical
opening of 1 second. So depending on what found you're using with
Lightroom, that might alter. If I use the 19th camera, I can get up to ten seconds. All algorithms, algorithms
is processing this actually nothing physically opening up and staying open
for ten seconds. Makes sense. That's the exciting world
that we live in now it's smartphone photography is that the algorithms just give
us a much more capability. And we've gone beyond the physical limitations of what's happening
inside the hardware. I can't get by. I think it's really cool. Alright, let's have a look. So here we are inside Lightroom. Tap on any of these soft just basically
rates at rates it, this are we starting from,
starting from 0 here. Okay, Let's go to ISO
and you can adjust it. Let's put it on the lowest 40. Now you'll see they were not. Did that automatically the
shutter speed underneath it, seconds SEC, came
up with a value. Now it's looking at
this thing I okay, because my dad, I saw
the lowest demand. You want the best quality. You want vivid details,
nice color renditions. If I increase that ISO, making a higher and
higher, higher, then the amplification
of the gain will introduce that digital
noise that speckled stuff, that real funky
looking things in it. So I want to try and keep
it as low as possible. When I do keep it
as low as possible, you'll see that the seconds
has gone 130th of a second. Now there is a
fractions of a second. So if you break up
1 second and you break it up into 30
pieces, that fast enough. 30 paces. 130th is like that's it. Now. That's actually at
sands really fast, but that is actually really
slight 150th of a second. Okay, so if I'm looking
at this photo here, bang of my debt, as low as I can, get the
best quality photo I can. And then shutter speed 130th. Now if I was to hand-held
this and take the photo, you could end up
with some simpler, in their opinion scenario, you would have an arthropod and then you don't have to
worry 150th of a second. Now if I'm outside and
I'm starting to struggle, I can increase that a
little bit, go up to a 100. And you'll see that when
I get up to 125th of a sacred or wherever
a hundredths of a second, then everything freezes. It's people walking past,
all that sort of thing. You want to have
an issue anymore. But I digress. Let's just stick
to that for now. Leave. But it's just reset, put
everything back to order. That is the reason why you have that set to the lowest amount. When we do that,
automatically adjust, we're going to make
that the minimum 40. And you'll say there the seconds automatically adjust
the shutter speed. It gives it a value,
measures it gives it a value because it's trying to make these nicely balanced. Lot and Doc. Now if I put something dark
in front of the camera, you'll say they're slow down the shutter
and it's changing. The shutter is
trying to almost get a full second of staying open. Because now it wants to try and bring the brightness of
the stock object backup, something that's lost in
the statically pleasing, moving out of the way it'll
go and readjusted everything. Give it a second. It's coming. It's coming. All right. Foot put something dark
in the background. You'll see it automatically just from a practical
point of view, you thinking, what would
you want to do that? Well, let's switch this
around and all my ISO border. And then the seconds
I'll play around with if you're chasing bees around the
backyard like I do. You want to have a nice
fast shutter space that you've freeze that actions. For me the best shot
is when I can get them in-between flowers flying and you're gonna get
their legs dangling. It looks super cool. You
want to fast shutter. So when you do that,
you want to increase the shutter speed and you
want to have it nice and phosphate one thousandths of a second or something like that. When it does that,
you'll say that the ISO, it has adjusted that. And when you chasing
a random bush, we got a broad area, dark
area, broad area, dark area. I don't want to muck around
with all those numbers. I know we're balancing all that. It does it for me, which
is really super cool. So you can see here
these passion fruit flower photo on the left is all auto photo number two of adjusted so that the shutter
priority and studied nice, too fast shutter speed day. Photo number three, I adjusted, manually adjusted
everything to achieve the same measurement
on the same exposure. So you'll see the adjusted the seconds that shutter speed. But to adjust one, you
need to adjust the other. You might be
thinking, fantastic. I want to have the
ISO sit at 40. Nice and low, good-quality
shutter speed. I want to have that about
170 thousand sharp and fast. I'll just do that. But the problem is that you'll
end up with a result of an exposure or a
brightness that's either too bright or too dark. And to bring it back
to something that you can actually see the photo
and make it look nice. Again, that is where
you need to go into your, your controls. Adjust one of them to bring it back so that say
the broader or doc, you have to adjust
one of those in the shutter for the ISO.
28. Using a Lens Attachment With Lightroom: Good day and welcome
back to day number 28 of these 30 days of Adobe
Lightroom Mobile. Today we're gonna talk about
lens attachments now and it's something you don't normally associate
with Lightroom, mobile editing or camera. But it's fantastic. And the reason why I use Lightroom with the
lenses is because I can force the camera to select
the lines and stick on that. I find in particular that
have that LIDAR sensor. That sensor. It's brilliant for
what Lightroom does. It will go and it
will detect whether it's something you've moved too close or you've
moved further back. And it will tell
the camera, hey, you can switch to
the wide lens now, or you can switch to,
you've got to close. We didn't get 78 centimeters. Never gonna have to switch
to that ultra-wide. And this ladder will then go
broke and it will change. And you'll see it, you'll
see it and I'll show you a changes between lenses. It's great if you don't have a lens attachment because it
means you can get in closer. And then when you're in
really close and you hit that three times,
the leader will say, Hey, don't switch lenses, just magnification.
And it's awesome. Turn that off. I found a really sneaky white, which I'm really excited
about because for so long I thought I can't use
these lenses anymore. But what I discovered was
on the front of the camera. You can actually
see the lighter. This case, the streaming case, has the actual hole
cut out for it, which in theory is really good. Then when you
discover that, hey, this actually switches it lenses and causes
all sorts of grief. We actually want
to cover that up. So what do I cover that up with my where I put a bit of type
on there and cover that out. All of a sudden that gets
rid of that control. And now we can actually
go through and select lenses and it won't
try and override us. Which is really good when
you've got a lens on front deck for some of these lenses and just talk
about them really briefly. This is a 48 times. This one here. It has
a ring on the front, does require a tripod. This bazooka is a 21 times. It needs to be on a tripod. But the result is that you will have chromatic aberration. And I'll show you that, that you need to go in and
edit out and get rid of. It also has vignette and softening around the
edges really, therefore, when you really,
really need to get in superclass Soviet
tank feathers of birds. And the 14 times
it's not enough. The 21 times we'll
get to the further. But you just have to realize
that you're going to have to cropping past that vignette, cropping past that blur. And then you're going
to definitely have to go in there and
shop and an editor. And you can get some photos
that you just can't get on the phone by itself
would just blow your why what you can't do that
It's a lot of work, cinematic range this wide, I will put on the
wide lens and that gives you an ultra wide field. The, you're probably asking, what would, what would
you do that Marco and I've got an ultra wide. The aperture on the ultra-wide doesn't let in
as much light as this one. This one has a bigger aperture, bigger hole at the back, so it will actually
let in more light. So if you're doing low-light Astro photography,
something like that, then you would use the wide lens on the wide lens and
that'll give you the ultra-wide with a
bigger aperture. This is near the portrait lens. And the portrait lens, what
would you do with this one? Well, the portrait lens, which is a two times, you
put that on the telephoto. And it's amazing. You can actually get four times or now
actually with this one, it will be six
times optical zoom. The quality coming out of
this one is phenomenal. Lastly, a couple
of macro lenses. Now I have a just a
fixed macro lens, which gives you a very, very shallow depth of field. So you're getting
their new capture just the sliver of the beam. Running a random jumping
into your flowers. You'll get the eye and
maybe a little bit of the hair on the back and then the rest of
it will be just, just transitioned to being
soft and out of focus. Very creative, a lot of fun. If you want something that
with a bit more control, then you have this
cinematic macro lens which has a focus ring, which is incredible,
I mean, unheard of. And they worked amazing. You can get in if
you put this on your wide lens on your phone, not sure ultra-wide
because you'll end up with just a black fight over the tiny little circle in the middle of it
you can see through. So it's no good. This has to go on the wide lens. Then you can change the focus
ring so you can actually get rod on top millimeters away, just like the
inbuilt ultra-wide, getting millimeters away. And you can move
back a little bit. So it actually gives you
a lot of flexibility. So you can change, as
you move further back, you can change the focus
so that your debts, the field can be similar
to the little tiny one who taught me that
little sliver in here. Or you can change your focus. Focus distances, you move
back and then your depth of field increases so you can
get that whole be in focus. I'm going to use
the Lightroom app. I'll pop it onto
wide if you're not sure which lens, which. One of the things
that's great about the Lightroom app
is that you can see here so we can switch
between the lenses. I've gone to watch. And now I know when I stick my finger in front of the
lenses night, it's not it. That's the one. I know which one is the right lines demanded
need to put this on. Just screws on. Like I said, you could
focus further away. Are you bringing
in, if you want to say where you're
actually focusing, remember, on the iPhone, you've got these green overlay. So let's change this
to up to a 100. And then we can see as we are
changing this focus ring, have a look at that, that goes there. I
can getting closer. Bringing that focus
ring right there. Fantastic. Now I'm going to turn, I'm just going to erase it
and get rid of that. And you can see
there, that's where we are getting closer. Getting closer. So I'll bring their focus to a minimum
previous one to a minimum. Let's see just how close I can get this little coffee
bean. Here we go. That's pretty cool and
that is all pure optical. No magnification. He says all optical. Let's take that photo. And that's what it looks like. Pretty cool, very close. I love it. You can
do so much with this lens because you
can get inside flowers, you can get a really
close or you can change the focus distance on the
iPhone using manual focus. And then you can change the
focus distance on this. And you can get up to about
ten centimeters away. Then what I love
about these lanes is that then you get
these beautiful bokeh. If you've got a
background that you don't want people to see in the photo. It will just turn it
into a big blur and have a look at that
blur so you can see there the green,
what's in focus. And then have a look. The background blurred
that background is. It's brilliant. Now, I'll show you the iPhone. Se, how little the LIDAR
detection is gone. Hang on. Hang on. You. I'm not close enough
and forget closer than that. I'm touching it now
it's still won't. See. This is why. This is why the
choosing the lens on the actual Lightroom app, forcing the lens makes all the difference because
that just didn't work. Now if you haven't seen
this lettering pro in work, let me show you zoom-in. What I'm gonna do is zoom in. We go lock my focus. Now we'll do this three times. That's incredible
details, isn't it? You can say why. I've been thinking a lot. I love macro, but Zoom and their ability to
get in and easy in sign. So if you're doing
macro just for the point of getting
really extreme close-ups. This is the way to
go if you want to do macro where you can
have really beautiful, soft, real uptick,
blurred background. This is the lens that often
using with Lightroom and tap, the results are pretty amazing. Now I did say that I
was going to show you and share with you the
chromatic aberration. Here's an example. This pelican just can't get it, just, it just won't do it. Now, I did everything right. I changed the ISO God
and that sort of thing. But you can see there
it just didn't work. Throw on the lens. And this is what you get is the 14 times lens
that are used here. Just coming here
and going to edit. You can see here amazing. But we do have, you'll
see at the top there, along the top there we do have
the chromatic aberration, fringing, whatever
you want to call it. That's the with Lightroom. We can go into optics, then remove chromatic
aberration. Didn't get rid of all of
it, but have a look before, after it did do it a little bit. What we can do weekend, we can go in and I will
go out of that one. Masking. Going to add a
mask, to add a brush. I'm going to brush over this area where there's chromatic aberration
is happening. I think that's a
little bit there. Then I'll go into color
and I will desaturate. See how we've got
rid of all that blue, but they saturate. The benefit is that this is all the pelicans or
black and white. So it doesn't matter that I'm reducing it because
it's either going to reduce the saturation to
either black or white. There we've been able
to Electric etc.. And it's just going into those
areas where I've mastered. That is a quick tip. Had to have this on a
really sturdy tripod that it didn't move
because it's slide is brief and it will throw
it all out of whack. So this was a very
still afternoon when I took this photo already. Next one. Next example of fringing
is this one here. You can see here people on the bridge on the
left can't see them. Because you notice like he wanted to take a photo
of a beautiful sunset. Pick up your phone and go,
oh my gosh, it's tiny. This is sort of lens
attachment that gets that zoom will flatten and the photo
and compress the background, bringing the background
closer to what you can see. Here. We have more
chromatic aberration. Chromatic aberration
can be quite severe with these lenses because it's all
about the optics. So again, we can go
in here and we can actually do a color range. And we can go, you
know what, double-tap, not quite there, go in
here and go that blue, whereas the blue there it is. Because you can see the
outside, you see the blue. We can refine and
go, You know what, we want to make it
just that area. Apply. Same thing going in and just reduce the
collar and get rid of that blue in the sky
on the other side. So anybody who would go and
subtract from the mask, subtract all that
if we wanted to, but have a look, We've
got rid of all that blue. You can do it. You can't edit is
workable, but just takes, takes a little bit of work,
a little bit of patients and enter and
desire to have fun. It's fun. It lends attachments of fun
because they expand your, your capability that gives
you more versatility. You could do so much more. The phones or our amazing. Now with all these
different lenses built-in, ultra-wide,
wide telephoto, telephoto nails three times the same sound, ultra credible x2, that is the future I think the most will be following and
getting more and more Zoom. So yeah, there we
go. To wrap that up. What I do personally, most of them are macro
photos I just use, use the built-in camera app. It just use the native camera. Because I loved pro
rule, what it does. If I wanted to get
beautiful Bucher. And I've got that
scenario would have got flowers and I can see sun coming through in spots in the background is like
where is my macro lens? I need it. Go grab it and use
Lightroom to achieve them. So I'll see you tomorrow.
29. Live Filters Inside Lightroom Mobile: Good eye and welcome
back to day number 29 of these 30 days of
Lightroom Mobile to die, we're talking about
live filters. Should through Filters,
camera effects, whatever you wanna call
it, different names. But basically it's a lot of filter by these works
is similar to presets. We talked about
presets the other day, which is basically a preset is a snapshot of different sliders that have been operating in the edit module of
Lightroom eyeball. That's what this is. You are taking your
photo and it's a live preview of what that snapshot of sliders
is gonna look like. And you can say here, That's the icon at the top of the top. Tap on that and then
scrolling through any could see immediately, you get that immediate feedback as to what this is
going to look like. It does flash on the left
side while it's cold. I wish it would be
nice if you could actually see it like once you've selected a
densed idea and said, hi, this is flat
black and white. This is not high contrast, this is not wherever would be nice if we could
actually say that. This is the bird bath,
little bit of a reflection, little bit of murky,
yucky brown water. It's been sitting there
stagnant for a little bit. You can change these in
the presets. There we go. You can have a look. So this will look like
as a black and white. And I think Black and
White works really well. I mean the brand, the
tendons in the water. Yes, it does add
to the story which you have to consider
and adds to the story. It's real as real life. It's what, what's actual
there, it's factual. But you want to
be creative then. How about we just
do it as a black and white and you can
get rid of the brand. Now, wherever I really
want to show you, this is the exciting bit
is you might be thinking, fantastic Mike, I'll love that. I love being able to see it. But is this a permanent
thing and it's not. And that's what's so
exciting about this, is that basically
you just go into your photo inside
the edit module. You say here, inside edit. And then you can just go down two versions and you
can go to the original. There we go. Current edits. So that's as it captured, or you can get an
original stuff you should as a black and white,
it's still a color. Everything is still this. This is one of the things
that's just amazing about Lightroom is that
nothing is permanent. Now, just like preset, you can see on the right-hand side he
said a lot panel has got a dot in there and I can
say exactly what it did. Let's kind of curves. You can see here
the curves look at that S-curve and then look
down here at the black point, the bottom, we've
covered this previously to have the bottom left
corner of the black point. Say, instead of black
point being there, they've lifted it up to give it that low contrast kind of matte looking
finish as S-curves. So if brought in the highlights,
reduced the shadows. You can see the before
and after that effect. Before all the effects
of all adjustments to lift up, tap on it. And we can say everything else. There's lifts, so there's
really not much there, it's just high contrast is all
that was done to that one. Let's go. This one is a black and white. Now what I want to
have a look at, if we've got a colors and black and white,
you can see there. It's black and white is what
they've gone through four, they haven't gone forward
saturation minus a 100%. Simply in this preset
tapped on black and white. That's a real key feature there. I wanted to touch on
curves to look again a stronger S-curve and the black is brought
up if you like, black and your life
really crunchy, crunch the blacks like
I do to create shadows. But these presets done it that way to educational, informative, to why unkindly know what, instead of doing the
way I always do it, what does this preset live? Filter do? The very basic presets. But that's why I want, you
just want to say in real-time live what's going on before
you press the shutter. And I think it's really
insightful for me for quite some time. To
be completely honest. I struggled with the concept. Seeing the light. Photographers talk about chasing the light and seeing the light. I didn't quite get it, but well, I understood the concept. Basically, you're looking
for beautiful light. You're looking for the
way light hits, reflects, falls off and shapes
different objects, creates that three-dimensional
credits that depth. I get the concepts, but
for so long I struggled to actually see it because
we're looking at color. There's so many
distractions, but, but using the light
filter and you can do the same with a lot
of smartphones. With the inbuilt camera
is you can go into the live presets and you can actually choose
a black and white. Now, one on the offline
is called silver tone. It's brilliant,
it's my favorite. I love the wire, processes, the black and white, but
it removes all the color. And that allows you to focus
and observe and identify the areas where you can say that light just
gradually fall off something or really
high contrast. Black and white where you
got the real deep shadows. Middle of the day
is perfect time because you get a
rural big shadows, deep, complete separation and juxtaposition of shadow
and bright areas. And then they start
looking for shapes and the anticipation of people walking out of
shadows into the light. And you can see them lit up with the shadows
and the background. Super cool light filters. That's the Y2. For me. It kind of expedient it and that learning and that experience
of chasing the lights. Thank you very much.
Then number 30, going to be a recap of everything going to go
through from day one, raw throat of day 29, and Gouraud through them all. It's going to be basically, if you're not interested
in looking at all of them, he just wanted a quick succinct. Everything all in one go
tomorrow is going to be the day because it will cover
everything briefly. Go through it and Awesome. Thanks for joining me
and I'll see you then. Bye bye.
30. Workflow Example - Selective Color: Can I welcome back. I just wanted to show
you a really quick way or two ways of doing selective
color where you make everything black and
white grayscale, and then you just break some
college re-appear in pop. So the first way is to
go into the color panel. So let's go into
they're going to each individual channel here
and reduce the saturation, getting rid of all the
college in every panel. And you'll see someday
that don't have anything and that's okay. But we'll still go in
there and merges them all. Then we select the color
that we want to bring back. So bring back the red
and have a look at that. And we can actually really
make it pop and saturate. Pretty cool, isn't it? And we won't bring
back some of the other pizza, the trough will, and we can do that and we can bring back sunblock the green, and we can bring it
back so that it's a little bit of color there. But we making the ALA colors
really pop and punch. That's one way. That's
my favorite way. The other way is the
color range selection. So let's go to selections
and we'll go here to color. We're going to select an area. So let's go down to the red. There we go. And you can say we have
to refine it to bring those reds day invert. So we've got apply first, then we invert it. Now we've got a color
saturation and we can reduce the saturation of
everything except the red. Not as good, but it is another way and an
optional way of doing it.
31. Workflow Example - Passionfruit: Welcome back. Today we're going to go through the four-step photo
editing system. And I'm going to
go from this photo here, that photo there. The colors just jumped
so much more vibrant. And it's a wildfire. As you know, four-step system is first of all, compositions, we look after cropping, perspective or that
sort of thing. Number two is where we get into tones,
exposures, sharpness. Number three is the colors, color grading, white balance. Number four is the
icing on the cake, which is the local adjustments. Guys, we're back to
our original here. First thing I do is I go
into the lens correction, tap on both of those
tiny subtle, but do it. Next we're going to crop. Now, you know, I
love a 69 photo, but I'm gonna make
this a one-by-one because I can get
in three elements, heat ray flowers, the one on the right there's
the flower bud. Juxtaposition and I've
got depth with that. Forgot out-of-focus, blurred flower hitting
the background. So I'm quite liking that crop. The next account, step
number two, which is order, and then I'll get into
the light panel and look after the tones, exposure, contrast and leave
this alone highlights, I'm going to reduce those
highlights enough that the leaves don't
start to go funky. Say the leaves on
the flower heads, how it's tied to change color. I think about there
is nice shadows. It's not going to
affect the flowers, just going to affect
the background. So I'm gonna go all
the way back there. What, what am I sure
that I don't lose details in the
whites, the blacks. Let's have a look at
the photo itself. I think about there. It looks good effects. Now we're going to get
into the sharpening. Now this is global adjustments, so I'm going to
blur a little bit the background and everything
because the main flower, I'm gonna go in there and, and really bring out
the details there. Clarity. Let's have a look what
it does to the colors of the flower I think about
there, it looks nice. The highest attempt think
that's going to look good. No, that's right.
The highs vignette all outdo a different vignette using the radial
lighter on next, I'll go into step number three, which is the colors,
white balance. I think that looks
nice. Let's go order. Yeah, and I don't like that. Let's go back to that shot
temperature and tint. Let's have a look. Going to add a little
bit the saturation, it's kind of that first,
have a look at the grains. Whenever they are already
saturated colors in it, greens and yellows are the
very typical that I've just become too much
really quickly. Vibrance, as you know, will adjust the vibrance
of the more muted colors. So it'll bring up
the titles there. So I think that is
looking really nice. Now already we're ITO are
local laws adjustments. So the first one is going to be a radial gradient
and I'm going to select a random flower. I'm not expand that
selection a little bit. Reduce the feathering. It's a bit more localized
on the fly with a let's go into the light panel. Reduce the highlights. Highlights, bring
those right back. That's looking good and contrast just to really
make it pop and crunch. That's looking nice. Speaking
of copper and punch, Let's go into texture. Go crazy and overboard with
the texture and clarity, little bit of clarity. And that's looking a
little bit over the top, but that's okay because
when we zoom back out, That's exactly what we want, isn't that we want it to jump off this green a little bit. Tick, happy with that. Next I'm going to
do the vignette. I'm going to do
another radial and I'm going to swap across, change the shape, turn it
around, expanded, spend. There we go. Lock panel and exposure. I wanted oops, I've
got the inverted. There we go. Invert. I want the outside of that mask. There we go, exposure. Let's go crazy with that. And then texture. I also want to blur
that background so I could say the top left
corner with that leaf, you can see that
you've got the leaves. Let's blow that out because
it's not part of the story. We want to get rid of that. Next. I want to go in there and
just get rid of those things like the leaf that during
the Border Patrol, I'm going to go
into there brush. And I'm just going to
brush, brush these areas. Ten, negative exposure. There we go. And now say that it's
gonna take two swaps. Get rid of those bits,
get rid of that bit. And if you go over, so
you go over the leaf, we just go in there and a
rise out and we can just erase that and bring
it back. Here we go. Is that before and
there's after. I think that looks amazing. Thanks for joining me and
I'll talk to you again soon. Bye.
32. Workflow Example - Black & White - Dragan Effect: Good, I am welcome back. In this video, I'm
going to show you the dragon effects,
kind of an editing, the grungy black and white, cool it install and effect
using Lightroom Mobile. The app. I didn't have a video, another video that
are used, snip seat, which is really cool. I checked that one,
add the link above. And this time I'm gonna
show you how to do remote ball just to show you the difference between
the two apps to credit, very similar kind of look. I'll show you that before
photo here in the after. Here's the before and the after. You can see the
dramatic difference in the artistic kind of look, don't go for a room is the, one of the many apps that I
show on this YouTube channel. This is the one we were
playing with today. And I've got this really cool other little lower thirds
that as I'm going, I'm gonna show you these and
the tools that I'm using. So without further ado, let's get into it and I'll
open this up into Lightroom. So this photo, the first
thing I want to do is those local selective
adjustments. So now this is only on the paid subscription model that you could access to these. It's why I've got the
other video there on snap safe, which
is fantastic. But this one he paid
subscription, it's pretty cheap. Just do it through the app. It's easy to do. First thing I'll do is
I got to the tab icon. What I wanted to hear, what
I'm doing is I want to try and see how what lift one side
of his face is a bit dark. I want to try and
level that and try and reduce those highlights
on this side as well. We'll go into the
gradient and I'm going to first of all add a gradient. I'll drag it over to here. And that's pretty good. Guys. My lot panel, bring the exposure down, bring the highlights down, and you can see that
some that's doing it, just being mindful
balancing between exposure and and holidays knows they had that real
halo effect there. I realized I went too
far around the hairline, so I'm bringing that back so
that I've dealt that off. So that's the first
thing I want to do. Next thing we wanna do is another gradient
on the background. So we'll do another gradient
and ran the wrong way. They swing that around. About this time I want to broaden this side of his
face on broadening that up a bit because it's kind of lost a little bit
of saturation as well. So I'm going to go
into the color, add a little bit of
saturation there. It's really lucky about the selective tools in so
a lot of room eyeballs, you can do a few of them. You can say there that yes, it's gone in and it's
affecting that background, the one that I darken down, lightning it and kind
of messing it up. I'm going to mask that out and just It's my finger
finger paint. And just choose ij areas
that are masking out. Press the tick,
that's pretty good. Next I want to do
is have a look. Now, because of why this is captured in the
way that I've just broadened and doctrine
and mucked it randomly. Say the odds are off now, so once darker than the other. So as soon as I turn this into a convert this
into a black and white, that's going to look really odd. So I'm gonna go in there
and do another selective and I'm just going to do
the radial this time. And go in there and just
draw that off a bit. There we go. Contrast and a bit of contrast That's
looking a bit better. Maybe a little bit too much. There we go. That's looking better
now. All right, cool. We'll move on. That's excellent. The next thing I wanted to
do is the Effects panel. So let's say a cool is
that the law fits down. They're both pointing that
way, pointing that way. Get there. So texture is what I
want to apply with. So let's go into that
affects panel texture. I wanted to reduce the texture. Now, now this chance
counterintuitive guy who runs, you want details. But textures, so
good texture will go in there and smooth
off some of those, the font or points
that because what I really want to
encourage people to look at is the real deep kind of farm frown and details there. So that's what I want to do. Next. I want to go in and do clarity owner
increase the clarity. I want to increase the haze. Yes, it's looking
pretty grungy now, but we're actually
creating a kind of a HDR look at that
real grungy look. So hold my finger
on the **** finger. You can say the
before. The after. Yeah, that's pretty cool. I'm pretty happy with that. The next thing I will move on
to now is the color panel. See if I've got a little
thing here that we got color panel I
want to want to do and he is then turned
into a black and white. So you can say that the
NW up the top there, black and white,
zooming out a bit. Is that before and
our after forgetting, I've got these new system here. I've got a dam below
there that before. So you can see it as I'm doing
it, which is really cool. All right, so I've done that. It's really not much else
I want to play around with here other than
just converting it. So the next thing I
wanted to do is go into, back into that effects panel. And what I'm gonna do in here. Is add a vignette. I'm going to add a
real dark vignette. Regardless whether are adding a real dark vignette or not, I actually go all the way negative 100 so I
can actually see it. So apply rule with
the other bits. I can say that this is what I can actually see
exactly what I'm doing. What I'm gonna do is midpoint, reduced that feather, feather, it got that way. Round this, round that lock that and now go
back to the vignette. And that's pretty good. Now you can see there, I'm
gonna show you something. Yeah, that's if you
weren't afraid, plan, this is the way to do it. You say that that's quite good. But one of the things
that's kind of what it's done is because he's kind
of slightly off center. The vignette is in the center, which means they're on the
rod side of air frame there. It's a little bit broader. I want to actually want to
get rid of that vignette, get rid of that double-tap near it, and it goes back to 0. And I wanted to
get back to local. Will do a radial like that. Keep getting bring them
on notifications panel. It's not a ham helpful. Let's try that
again. There we go. Okay, that's pretty good. Now what I wanted to invert it. So now I've inverted it back to the light panel and I'll go
in there and just reduce. And I can just move that around. Haeckel's that. So now my vignette is
slightly off-center matching where he's faeces. And what I could also
do is go into texture, reduce the texture is a 100%. And that is just soften that background as well
as any sort of noise. Brian grittiness
in the background of actually smooth that
off a little bit as well. So that's pretty cool,
pretty happy with that. Press the tick. Couple of little things
I want to do now is just a little bit of
little bit of brushing. Now that needs to, but I wanted to go in
there and just go. I wanted to go and
do plus brush. And I want to, oops,
don't want to do that. Plus brush. But going noss enclosed, I want to brush around. He's all hear that
broader, broader. Zoom out. Make sure
it's not real Funky. Go back in here and
add a bit more here. Broader. And eraser and his pupil,
they, I don't want to, I want to bring these
people back side of what his people
would be black. I don't want to broaden that. Okay. Going they brought in it. And what I wanted to do is
just go back and just check, make sure that they level
theory even it doesn't look too crazy and I think
that looks really cool, That's happy with that. Because that's what I
want. I want you to pay attention to go to his eyes. I want you to see
all the wrinkles. And they go down and say, check out the texture
in any Beta ISA. That's still left
enough definition in the clothes and all
that sort of thing. Yeah. I think we'll wrap it up there. Thanks.
33. Greg McMillan - Guest Workflow Example : Hi everyone. Greg McMillan here from
the iconography podcasts. Like James is invited me to make a contribution to the 30
days of Lightroom Mobile. I'm going to show you to
do a quick photo at it. From this one to this version. Let's get right into it. Here's the image that
we're working with. And the first thing
I'm going to do is zoom in on the
trunk of the tree. As you can see, it looks very dark and there's not
much detail there. But in the light panel, I'm going to take the blacks and go to the plus side and
settled in and around 70. Now you can see that some of
that detail has come out of the shadow areas and other adjustments will
darker than back down again, but this will prevent
them from losing detail later in that process. If I press and hold that, you can see the difference. It's quite a, quite
a big difference in bringing it that
detail in the shadow. The next thing I'm going
to do is go to contrast. And I'm going to
decrease that as well. Right to vote there. And it's bringing
even more detail out of the darker
areas of the image. I'll zoom back out. Next we go into
the effects panel. The first thing I'm going
to do here is I'm going to adjust the clarity and
I'm going to bring it up. And while I do that, watch the histogram at
the top of the image. As I slide that up, the histogram shows that we're actually increasing
the dynamic range. And I'll settle out at around 5051, around there somewhere. Now press and hold and
see the difference. Then the next thing I'm
going to do is add texture. This adds definition
to the image. I'm going to take that
too, but 30 definition. It adds texture or definition to the
image which is similar to the photos app, the
native Photos app. The editing suite. In the iPhone, it has a definition slider and it
basically does the same thing. It just gives it a little more, more texture to the contrast
areas of the image. Next, I'm gonna go
to the color panel. The first thing I'm
going to do is increase the saturation and
then the vibrance. And there's a couple of
things to watch here. One is to watch the snow in the background on the
other side of the river. And you'll notice
that it's going to show more blue is going
to turn to a blue hue. In the histogram, you see the
blue channel there is close to the middle of the history
and it's actually going to increase in width or size, which is going to give
it more dynamic range. And it's also going to show that the blue is
getting brighter. And some parts of the image. I'll start off with
the saturation. I'll take it up to
around 40 or so. Then the vibrance, take
it up to about 25. Now I'm doing these
adjustments for the sake of the leaves to try and get
them to show a little better. Now to deal with that blue, I'm going to scroll
back down and up in the corner here
of the color panel, you'll see a mixed button. This is the color mix. So the first thing I'm gonna do is blue, it's already selected. I'm going to increase
the luminance. And it's going to toned down the blueness of that
snow in the background. I'll take this up probably
to about 30 or so. And it's going to not only help with the snow
in the background, but the pine needles
won't look as blue. If I was to take that down, you can't really see it too
much in the pine needles. But the purpose of this was really to deal with that
blue color in the snow, in the background
to make it look a little more natural again. Now I want to bring out
the greens in the tree. So I'll go to the green channel. I'm going to make some
pretty extreme moves here. Won't have a profound effect
on the rest of the image, but just the pine
needles, that's, that's that's what I
wanted to adjust here. I'm going to zoom in
on these branches. And then we'll see
what happens with these green pine
needles. The saturation. I'm going to take it
right up to vote AT. You can see there's a
subtle change there. I'm also going to take the
luminance up to 80 as well. The green areas that
are lit by the sun, they'll actually be brighter. In the end of the
end of the process, they will look a little better than they did at the beginning. That's all the
adjustments I'm going to make in the color mix panel. So I'll hit Done. And then I'll go back to
the light panel again. Because we took so much contrast
out of the image before. Although we added a
little bit back in with the definition or
the Texture slider. By adding definition
to the image, I'm going to take this contrast slider and I'm
just going to it back to 0. And the quickest way to do
that is just double-tap it. It jumps right back to 0. We can get away with
this now because with the prior adjustments
made to clarity and texture, they help retain the details of the darker areas
of the photo. Why not do this adjustment
before we did the color? Well, with the
contrast backed off, we can actually see more color detail because the darker parts of the
image weren't too dark. We were able to see how
the color adjustments affect the shadow areas
of the pine needles. And now with the contrast back in the sunlit areas of the tree, you have more pop to them. That was the goal
of this whole edit to begin with really is to make that part of the image pop. So now we'll go over
the detail panel. This is where all the
sharpening is done. There's four different parts
to sharpening the image. This is always the
last thing I do just before I finish the
image with a slight vignette. And I don't put a
vignette in every image, but in this one we're going to, and we'll get to
that shortly here. The sharpening slider, it enhances the detail
throughout the whole image. You want to be careful with this that you don't go too far. Since the focus of this photo was set to the
branches in the sunlight. If you look down by the trunk, There's a twig sticking onto the snow and that happened
to be in the book, the same focal plane. We're going to use that as
a gauge for our sharpening. I'll zoom in on the
twig and there it is. And I'll show you what
happens if I take the sharpening slider and remember this sharpens
everything in the image. And I'll take it right
up to the top just so you can see what
happens to it. So the twigs, the twig looks
a little over sharpened. And you can even see
that the artifacts and that's probably
noise in the snow. It really gets enhanced
by this as well. We're going to back
this back down. We're going to probably
stop it around 70 or so. Right around there. It's just very
subtle sharpening. And I keep it
subtle just because that's a small part of a
bigger frame, a bigger image. You don't really need to over sharpen because if
you over sharpen, then you're in trouble with the image and you get
artifacts and everything else. The radius slider controls how wide the edges where the
sharpening is applied. Since sharpening has done
to the edges of a photo. Lower radius values
offer finer edges, which is better for
more detailed areas. Back in on the twig here again, I'll adjust this radius. If I go way, way up high, you can see that it starts to give what I call a haloing
effect around the, around the edge of the twig. I'll take this back
down and I'm just gonna set it at one. We don't. Again, when you zoom back out, you can see that it really, it's not as noticeable
as you might think, but it just helps with how much sharpening
has done to the edges. Like whether it's
a wider edge that gets sharpened or
a narrower Edge. And how it looks. The Detail slider
affects the amount of sharpening in the
areas of finer detail. The higher you go
with the slider, the more the smaller
details get sharpened. I'll show you what happens when I take the Detail slider
and they go all the way up. Again, we're getting into
what we had there earlier with all the fine a little weed details
getting sharpened, which is pretty much everything, even the texture and the snow. We're going to back
this back down. We're even going to
go as low as ten. Because we just don't
want this thing to be over sharpened. By keeping the Detail slider up, way too many of the finer details get over
sharpen, in my opinion. Now, masking determines
the elements of the image that are sharpened. When it's at 0, the whole
image gets sharpened. As you go up the scale, the areas with stronger
detail we'll get sharpened while the areas
of less detailed won't. If you slide it too
far up the scale, the image will start to look
soft and maybe even blotchy. If I was to do that, say, well, let's go
back to the twig. And if I took the
masking all the way up, you can see how it softens it. So it's actually
counter-intuitive. It doesn't really do
any sharpening at all. Taking this back down. I think I like where it is when it's right at 0,
so I'll leave it at 0. Now I'm going to go back to
the Effects panel again. I often finish and edit by adding a vignette for a
little artistic flare. You don't want to go too
far with a vignette. You don't want a border,
you just want to add a little mood of
the photo to draw the viewer to the focal
point of the image. In this case, it's the part of the tree that's lit by the sun. Scroll down to where
it says vignette and I will take that down to about 24. The feather. Going to increase
the feathering. To make it a little more subtle, that it just expands out to
the corners a little more. Take that to around 80 or so. Now, before there's the
image as it was taken. And then after with all the
adjustments done to it, including the vignette, I think it just adds
a little bit of, like I said, an artistic
flair to the photo. And it makes you focus more on the branches where
it's lit by the sun. Whereas if it's not, if you don't have these edits done and you take a look at it, your eyes are going
all over the photo. But when you put that vignette on there with these
edits that I've done, it, your eyes just get drawn to those branches and that's
the whole point of it. Now I think I'm
finished with that. I will just export it. Export the camera roll. That's it. That's my edit of a photo for the 30 days of Lightroom Mobile. I want to say thanks again. I'm like James for
inviting me to make this video and
contributing to the cause. And the purpose of the
edit was to take what I considered to be a kind of a normal photo of a tree
and lit by the sun. And I wanted to enhance
the color, the detail, the contrast, make
it more saturated. But while watching it for
other elements of the frame, like the blues, blue cast in the snow and
the other side of the river. And I wanted to just add a little vignette
for artistic flare. But also the point
the viewer's eye to the centerpiece of the photo, which was the pine
needles lit by the sun. Again, my name is Greg McMillan. I'm a host of the
iconography podcasts, and it's the iconography
Podcasts Network on YouTube. And you can find more of
my photos on Instagram. My name is Macmillan
photo on there. And thanks for
watching. Take care.
34. Shayne Mostyn - Workflow Example : Good, I got a shiny
most in here on my YouTube content creator
and educator over there. Youtube is shining most of the mobile photography and
what I do over there, we create photos like this. There was no sort of photos. What we're really
doing every day or is pushing the centers
on these cameras. Really, really hard
when you go into shoot generally enroll pro role when it comes to Apple products. With all of those RAW files, you're going to have to
edit them. And more. Goto is Adobe Lightroom for
editing all these photos. So what we'll do today, I'll have a look at
one of these photos. This one hears from
the iPhone 13 Pro Max, very dark photo, very nighttime
sort of thought and lots of stars in the sky. I'll show you how I do it. This is the photo that
we're going to edit. This is a photo of an
old truck underneath the starry skies when the iPhone 13 Pro Max was first released. Now went on doing
this sort of photo. I'll look at two
parts of things or what I like to call to two different distinct areas of the photo and two different
sorts of adjustments. One is a global adjustment, that is things that I'm going to adjust them the whole photo. And then there are things
that are locked to refer to as local adjustment. And that's why we're using
masks and things like that. With this photo here, the first
thing that I looked at in every front of them look at is the composition of the photo. For me, it's not quite right. And to be honest, at nighttime, it's
quite hard to do that. It's usually a little bit of adjustment here after the fact. So what I'm going to
do is go into crop. I'm going to bring it in slightly because it's
not quite centered. They're going to move the truck
so it easy in the center. I'll just keep it on
those two lights, the headlights there to
make sure that it'll roughly lining up with those
third rules that we have, the list third guidelines. That's pretty good right there. So I'll hit the tick
there. Next thing I'm gonna do is look at the sky. So when we look at
nighttime photos, I'm always looking at the sky, every single adjustment
that I'm like, he's always looking at the
sky and if I do something in the foreground and it affects the sky, I'm
not going to do it. Luckily, Adobe has released the masking tool for the
sky and the subject, and we'll use that
in this photo. But first of all, with
this a lot to look at the whole photo guy
that looks really cold, the white balance and
this just isn't good. I'm going to go
into not presets, so I'm going to get into color. And across the top they exceed the white balance is
white and longer. And to increase that slowly, I'm just watching the scar here. As it gets higher. The 3146, I'm happy with that. They'll hit that. It'll leave it right. There was some funders are a
little bit of magenta to it. A little bit of magenta tint. And that's pretty
cool right there. What I'm gonna do
now is basically say the sky is what
I wanted to adjust. So I'm going to
go all the way to the left, going to masking, hit the Plus and say Select Sky, It's going to go
through the photo now, fire in the sky and it does it. 99.9% of the atomic
doesn't incredibly well. What we're going to
do, he now he's go-to light and I'm going to add some contrast into
that night sky. That doesn't pretty well. I'm going to reduce the blacks. So I darkens the night
sky and go to effects because iPhones generally will add a lot of haze to the photo. There's a little
bit too much here, so I'm going to decrease that haze quite a lot that it's added a
little bit of blue. You can see that as I've
adjusted dose things, I'm going to get back to
the color and increase that temperature a little
bit. Just like that. I'm happy with that. And we're gonna hit
the tick right there. And then next thing I'm
going to look at with this photo is the truck itself. And we're going to do it in the same way that
we've just done that. Hit masking hit plus. This time we're going to tell it select subject and
it doesn't really, really well that
you can see that the subject is lit up perfectly. So everything that
we adjust now, just like before, it's going to be in that pink area in there. So what I'm gonna do first
is increase the blacks just a little bit and it's going
to bring the truck out just that little bit to
decrease the shadows. That's also going to add
a little bit of contrast. The bumper bar, and
this is quite bright. I'll see you back in,
decrease that just a little. It's quite cool. Now I want to add some
sharpness to this, but one of the tricks that are fine with this sort of fellow is adding clarity rather
than contrast. They're not the same thing, but you'll see what I
mean in just a second. If I go to the Effects tab
and it'll add the clarity up a little bit and keeping
only touching on the trachea. I really like how that
photo it looks as a whole. So I'll hit the tick on that. If I don't know what this
is going to look like, all I need to do now
is pushing hold. Here's the before,
here's the after, and I'm really happy
with that edit. That's how the vast majority
of my nighttime fires. There's a lot more
that we can do this and spend a lot more time. You can use healing
tools and get rid of planes and mediums and
that sort of stuff. We can bring in some shadows and the full gram with
different sort of fires. Every photo is little
bit different. But once you learn
how to use this tool, it's a very, very powerful tool. That's it for me to go last. Thanks very much for watching. I'll catch you later.
 Mike J., Professional Smartphone Photographer