Transcripts
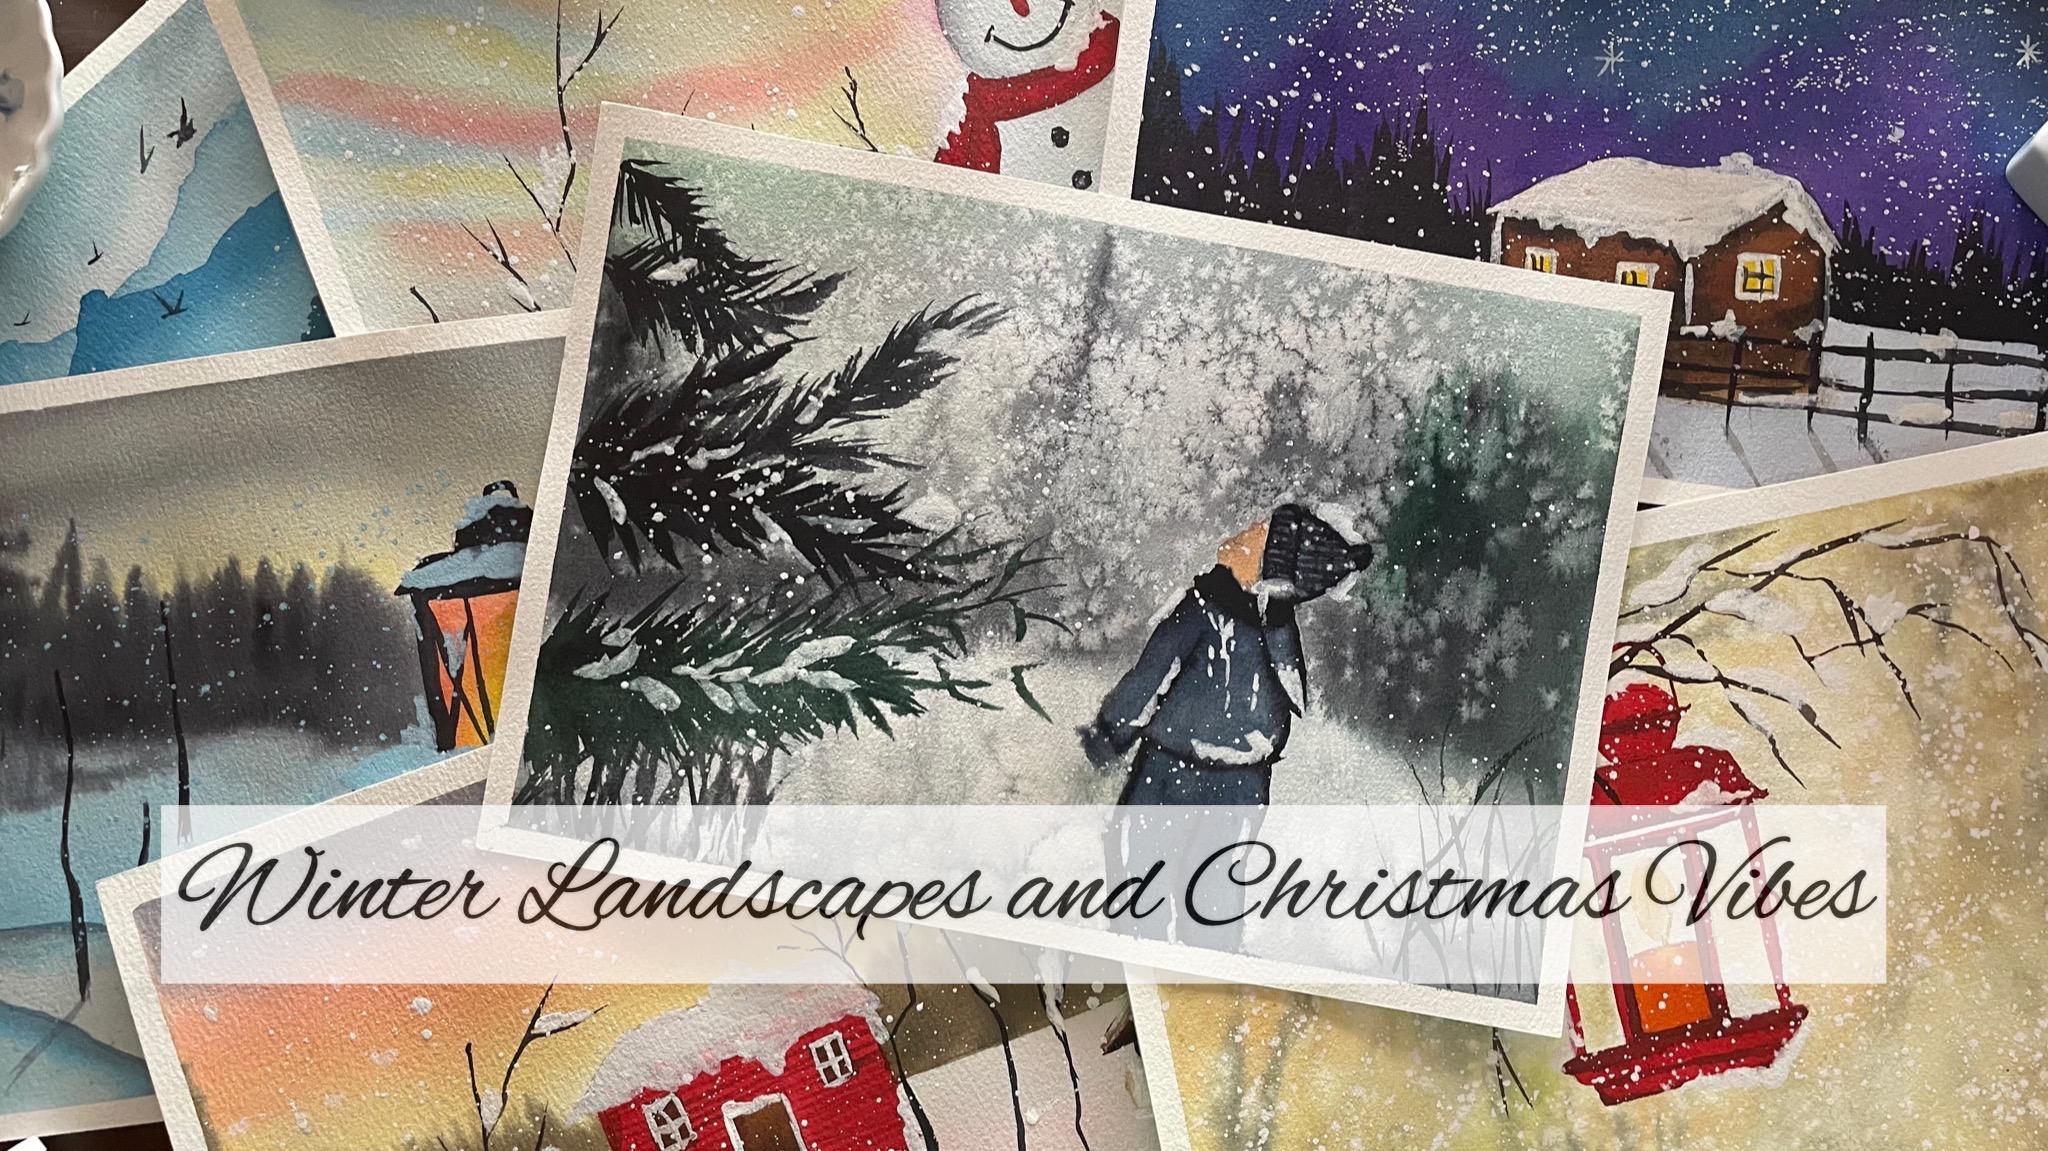
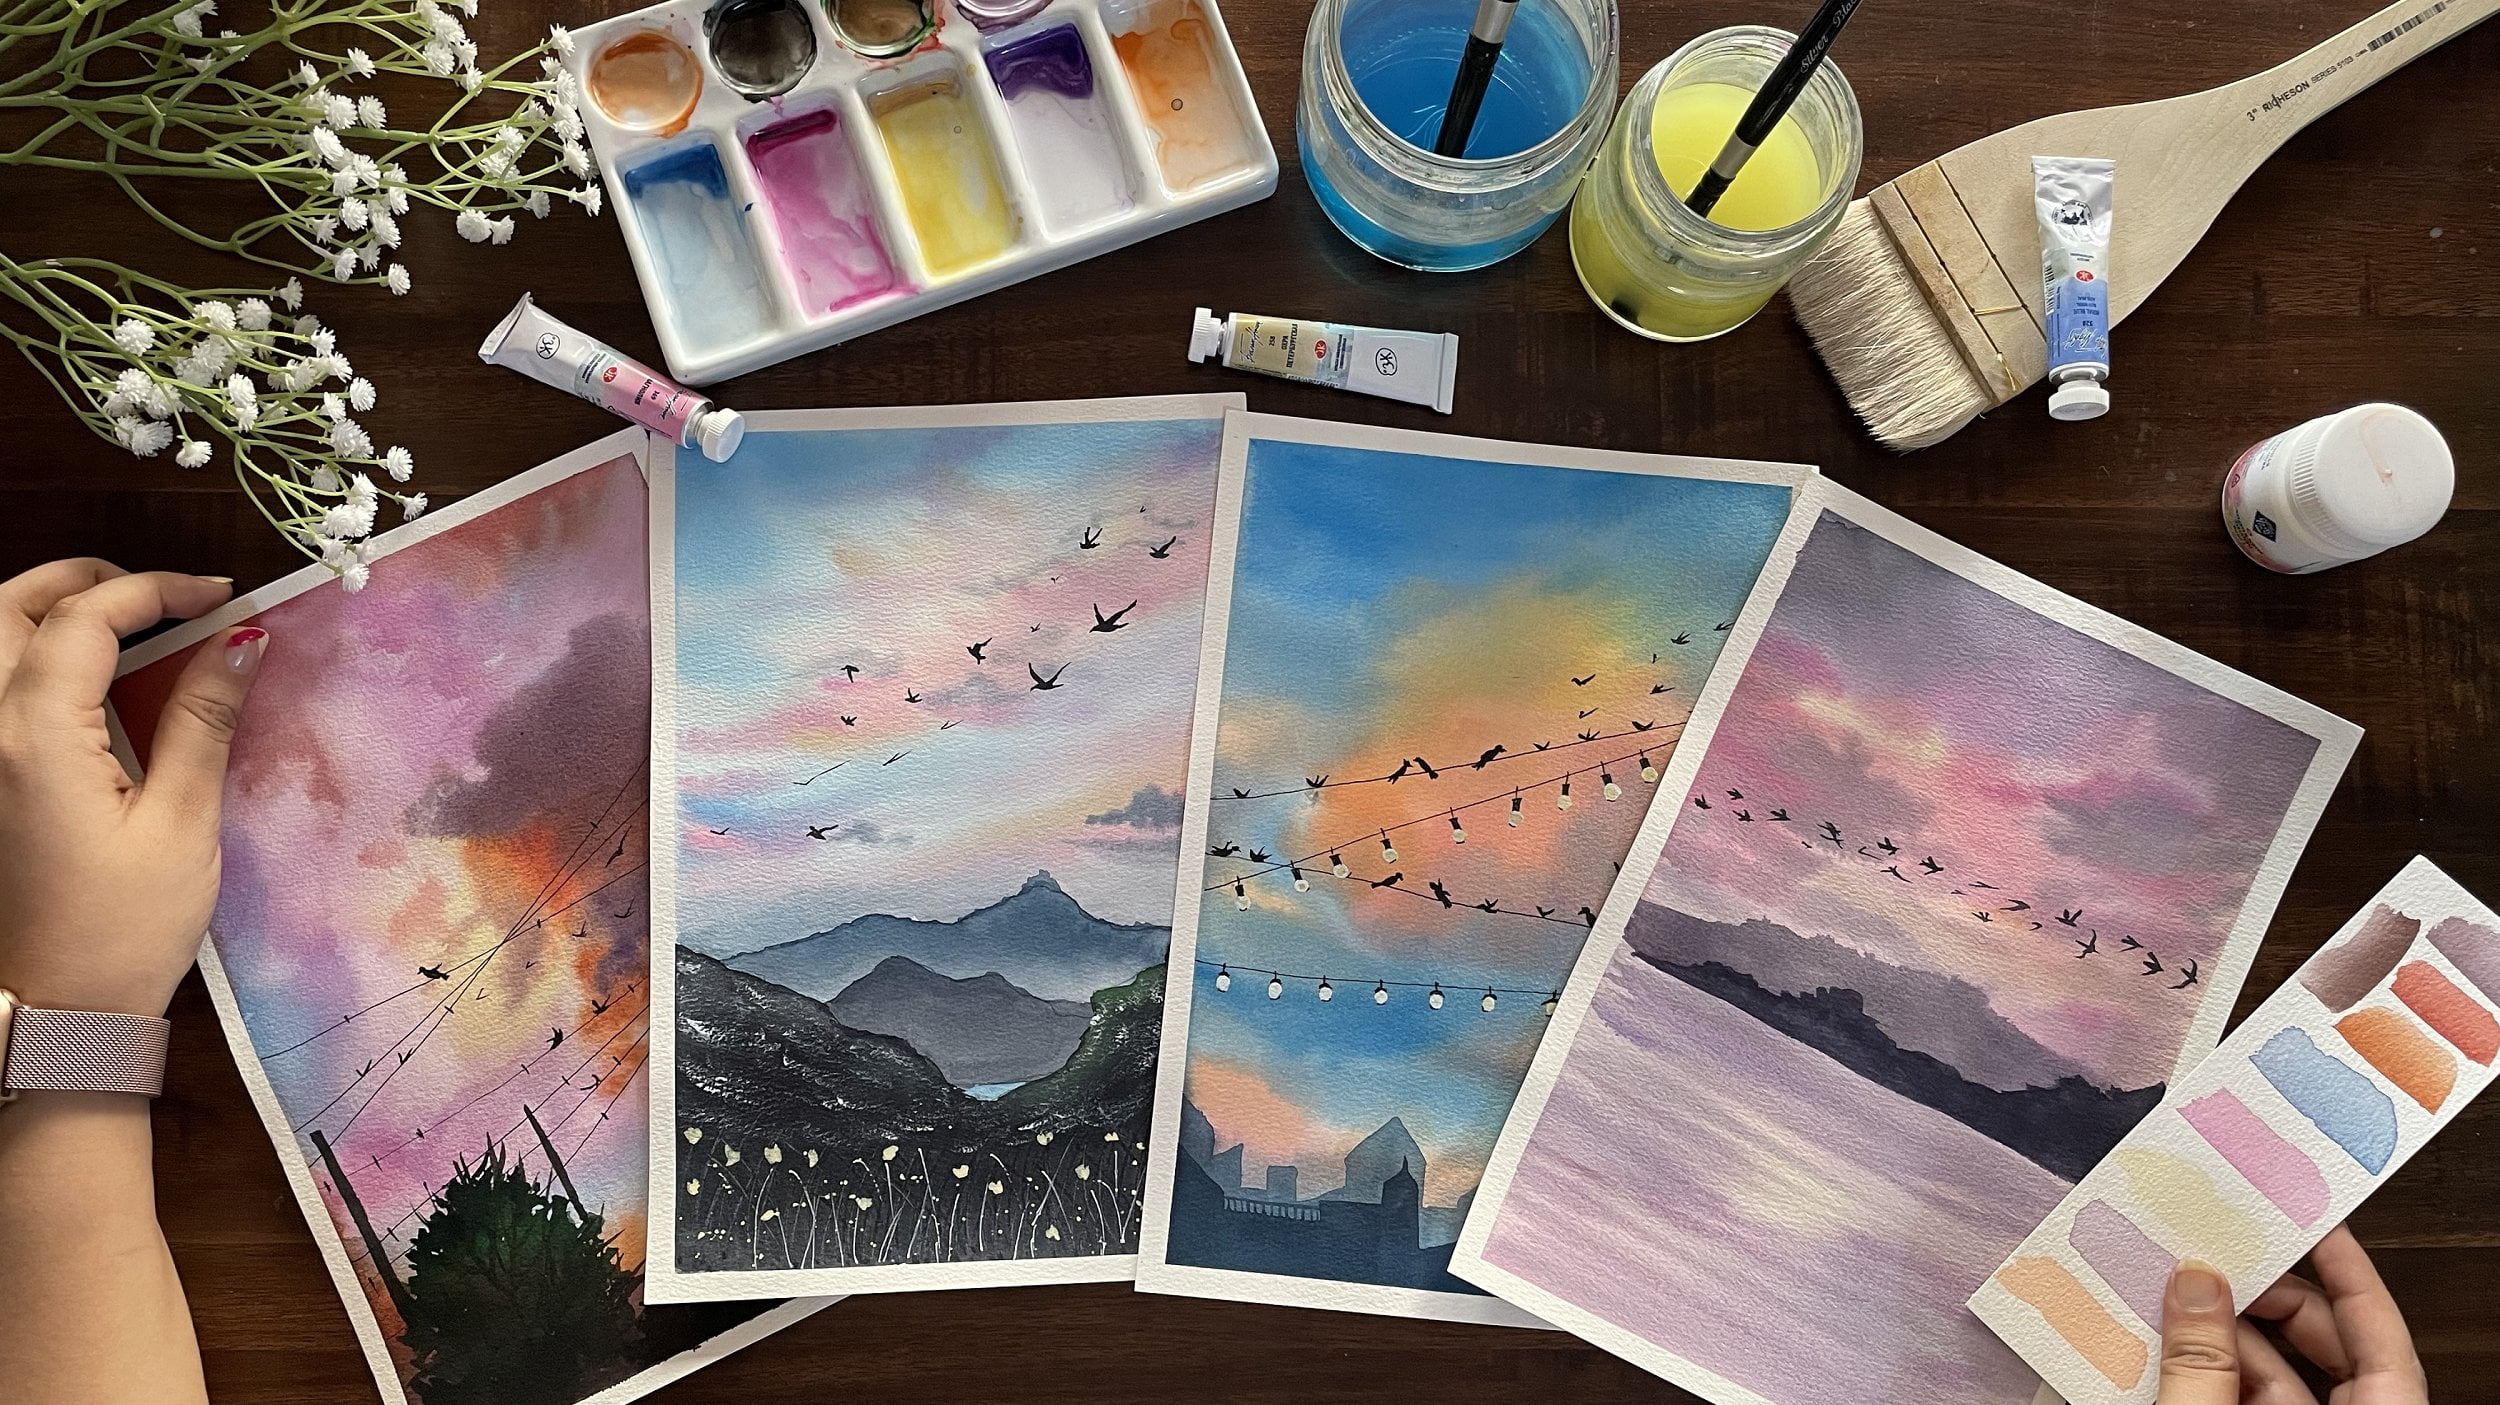
1. Hello and Welcome Back: Vento is the doctest and often the coldest of the seasons. But the width, chin and the possible snowfall comes the holiday season and ample movements for Posey retrieved and hibernation. Who doesn't love calling up with a winter cocktail by a fire, please, snuggling up with a blanket and indulging Verbit. Window is magic. Oh, I'm a machine, an artist, and an art instructor. You can find me on Instagram, YouTube, and Pinterest as creating from the heart. Heart is like a therapy to me and I love sharing this therapy with each one of you out. You're welcome to another Skillshare class with me on painting beautiful winter landscapes with the Christmas wipes on either one of those people who say, I can't read for winter. Then when it gets your my fingers and toes, I hold my nose is running and I'm ready for summer again. If you're feeling anything like IN then maybe these window paintings with all the Christmas lights, then help you appreciate the season of bit more. Even if you are a big note, you can still join us because I will first be guiding you through all the basics that will be helpful to you for painting each of the class projects, easy me, and just like a pro, we will be learning how to create beautiful textures and do a painting using different materials. And I will guide you through each office and even initially discussed each of it with you so that you know what we are going to be getting into the coming days. I would even be sharing the entire material list that I will be using for the class projects in the coming days. And I would even keep telling you about the colors that we are using through each class, project. Through each class, I will be guiding you through all the steps in real time to how we're adding what details and at what point, how you as opposed to using the palace and the best alternative colors that you can use it. We will be learning to create these misty, beautiful, blurry background and paint beautiful landscapes in just realtime with each other. Doesn't is beautiful snowfall paintings Rouse your inner child to dream and play once more. We are all like the snowflake, all different in our own beautiful being. So come and join me into this Watercolor Challenge class, where we will be painting these beautiful window landscapes, which brings the Christmas wipes on. Window, is not the season. It's a celebration. Winter comes with the happiness and joy of Christmas wives. So I would like to see you all join me into this class. And these beautiful winter landscapes with me through the bombing, CATI is creating such beautiful Christmas wipes around. You can even use these paintings as the obvious Misko Scott and send it to your loved ones. So without further ado, let's get up into wipes on with these beautiful paintings.
2. Materials You will Need: So let's have a look at the materials that you would be needing in this class. You would be needing what other people? I'm going to be using this 300 GSM, 100 percent cotton. Then by two inch into seven inch watercolor paper from the brand, go home. It's academy level watercolor people fat. So this is a block of people I will post and then the sheet off from the top edge and remove it after bending. You can see this people has a texture and that will be very helpful in adding textures using the dry brush stroke. So this is the paper that I will be using in each of the class for the coming term, TVs. Coming next, you would be needing a pallet to mix down your colors. You can go ahead and use any palate which is available at your end. It may not be the same as my. Next, you will be needing a masking tape to tape down your paper onto all the four edges for all the coming days. Next, you would be needing of your brushes. You would be needing a flat brush or medium-size round brush, a smaller sized round brush, and vd lA brush. So you can go ahead and use whichever brushes are available at your end. Next year we'll be needing a pencil and an eraser for doing some pencil markings. Next, you would be needing this free water for evading the surfaces at cases and for adding texture. And you would be needing right field as well to add the texture. So for the white, I'm going to be using this white dwarf separately for splattering the small stars and providing some pictures as well in the wet on wet background to create some snow effect into the background as well. Next, you would be needing two jars of clean water for Egypt, the class project. One job you would be needing to apply clean coat of water and the other one to keep cleaning your brushes from time to time. Next, you would be needing in water follows. So I will, using in this Magellan mission set apart from this, I will be using a few sheets from the white knight set. So this is Naples yellow paint, indigo. So these three to four fellows that I would be using it from the other set. So you can go ahead and use any watercolor set that is available at your end. It may not be the same as mine. Next, you will be needing a lot of tissues. You will be needing issues for or, you know, adding perfect reflections. And in case if you want to spread the fisher around by just plugging this task so as to avoid the pleas from getting the right spots, then you would need a lot of tissue, so keep them handy and ready. Next you are going to be needing in soil, we are going to be using in salt for adding textures into a view of the background. So this is just normal, regular cooking salt that I have used in your patron data. I'm going to keep a reflow to also had liquidly for dabbing off excess water or paint. I would also be using in our hair dryer too quickly speed up my drying process in between. So I would not be recording this part, but you can also use a hairdryer to make your paper dry out quickly and so as to speed up your process for feeding. So these are all the materials that you would be needing in for the coming for TVs. You can grab all of them and we can begin painting our first class project for today after discussing some basic techniques in the next lessons.
3. Technique 1 - Basic Wash: So before beginning with today's class project, Let's discuss some basic techniques which will be helpful for you if you are a big note with watercolors. So the first one is going to be wet-on-wet and the wet-on-dry technique. We will discuss both of these techniques and then move ahead and discuss further, are there techniques that will be helpful in creating beautiful backgrounds? So as the name suggests for the first one, it's wet on wet. That is we have a wet background and undo that. We're going to add in vet beam search smallest piece on which I applied at the input of photo. Now I'm just going to pick up any random color, and I'm just going to wet this color. I'm going to apply to a Buddhist Webpack though. So this is called wet on wet technique. It's useful when you want to pin surfaces and you'll do not want any harsh edges in between. Now as the second technique, wet on dry technique. So that is your background is dry and you'll begin with wet paint onto it directly. This is helpful when you just need to be smallest offices or adding in DBS. And all you know, it will be very difficult to paint larger surfaces or the technique wet on dry because you would begin to get sharp edges in between. So you can see, you can use both the techniques depending on the size of the people or size of the area that you are willing to paint in. Even be using both the techniques in each of our class projects. Next is a gradient wash. That is, you'll get different values of fun color, either from bottom to top or top to bottom. So I will quickly just apply water onto the surface first and then show you how to get the gradient for getting the bleeding. We are using the wet on wet technique here. So now I have the red undo that I just applied, a layer of color at the top. And now with a damping trash, I'm just pulling that color from the top to the bottom. So you can see at the top I have got the darker bones and as we move down, what's the bones have? Don't light up. So this is called a gradient wash. Now I will show you the same gradient wash from warping. Who thought the first one we did was taught to water. So for bottom to top, we will apply the color at the bottom space and then just use a clean damp brush and pulled up close to the top speeds and get ingredient. See, you can get video with two colors, three colors depending on the project that you're working on. So this is how you can achieve gradients. We are going and using this gradient technique for building mountains and skies in the coming D's class project. Even for today's class project, that is going to be the Class Project 1, where we will be painting the misty landscape we are going to be using in this technique to being these beautiful mountains. We are going to be using this technique into these class project itself. I hope you could understand all the three techniques that we discussed in the first file. That is the wet on wet, wet on dry, and the gradient washes. In the next lesson, we will further discuss how to get water control when you're working wet on wet with different colors.
4. Technique 2 - Water Control for Blurry and Misty Backgrounds: Now that we've understood the wet on wet technique, Let's begin to understand the water control in wet on wet technique. That is when you already added in the fourth year of color. And then while that calendar your best in red, and you wish to go ahead and add another layer of color, then how you need to control the water to achieve the effect. We are going to be using this technique a lot in many class projects to create a blurry, misty background, and also for creating some beautiful pine trees into the backbone. So I've just mentioned it here. It's the water control for wet on wet. So I haven't heard of photo and unfold that. I am foster playing in the first layer of color. You can see the first year of color does not make a lot of problem. But even in the First New York control the weapons, you do not want a lot of light effects, okay, Now this background is big and you can see in this painting these created the background using this technique itself, that is the wet on wet technique. Even in the other class projects, you can see the blurry effect that we have achieved. So now I can just pick up some things Greek adequately and buying this background is in bed. I will begin applying earlier of beans green column. For first I'm picking up the beans be in a very liquidy consistency with a lot of water. And you will see that the pins are spreading a lot and they will not be creating a perfect look as you need, and even just fled and create a batch of the palette instead of maintaining the look that you're trying to add in. So you are, you can see the background was still a lot of it and you added extra bad thing. So it just created another square off the Payne's gray color. Now I can just make another block here quickly and show you how the need to go the right way. That was the wrong way that we discussed. Forced templates are planning or clean the water. Now I've just added in the layer of color quickly and you can see we've got the perfect color. Now at the bottom, that is a lot of water. So I'm just going to pick up little of the water and dab it off. Now or before beginning to applying the second year of follow, I will just read for a few seconds for this neo to just soak in a bit and dry in just a little bit. And this time I'm going to pick up the beans, be also the cholesterol photo. I will quickly be dabbing my brush on do a reflow to audit issue before beginning to add in your so that if there is any excess water by any chance, it will be the moves and absorbed by the tissue so quickly dabbed it. Now after a few seconds, I am beginning to add in. And you can see now the pins are not spreading much as the first one. Also, you are able to achieve the sheep that you are adding them in. And it's creating the perfect glory mistake that you'll want them to your paintings. So this is how you need to add these details in the right to be. You need to control the water and you also need to wait for about say, OF US against for the fourth layer to set an in before beginning into add the second meal. Now you can see on this I aggregated darker details and even their standing out but having the software and the blurry edge. So you are the key concept again, I repeat, is that you'll need to control the water nag you are adding in the Talia, that is the neural find genes that I added right now. And you need to wait for a few seconds for the fourth layer to just set the name. We are going to be using this technique to create these beautiful background. She's which are bloody. And also creating this beautiful background by injuries you're in a blurry view. So this technique we are going to be using a lot in the other buildings as well. And it will be very helpful if you practice this technique of few times on a rough paper before beginning to add these into your class projects into the coming days. So I hope you get to control or what is water control technique? And I will see you guys into the next lesson where we discuss some textures that we will be hi.
5. Texture 1 - Using Water and Paint Splatters: So now that we've understood the basic techniques of wet on wet, wet on dry, the gradient washes, and the water control. Let's begin to create some textures which we will be using in the coming days. The first lecture that we will be looking into is creating textures using waters plateaus and using the spray bottle and the white beans plateaus. So I'm forced just feeding a small patch and onto this, I'm going to quickly go ahead and add the indigo color this time, you can add any color for practice purposes. It may not be the same sheet. You can go ahead with a initiate of your choice. First, I'm just going to add a layer of the color completely. Now first I will show you this flag, those using a spray bottle. So the three important that we discussed in the material section, I'm just going to pick up that's pretty Bowden. So a drop of water from the cap just spend down so I can quickly just adapt this EDA and keeping the surface before showing you the right technique. So you need to be careful about this thing that, you know, not excess water should fall in, otherwise it will create a big blue. So I will just quickly leaping the surface. And now I'm going to use this play button and I'm just going to spray some water droplets from a distance. So approximately 15 to 20 centimeters, five from the people. Okay. So it's from this far off the paper that you just need to splatter some water using this play button. And you can see that it showed that it is pleading by just reacting with the beans on the paper. It gives the smaller blooms. And you can use this technique when you want a very fine snow effect or no effect in the low galaxies. Okay, So this is the technique that we are going to be using it for readings flappers at times. I'm going to use the second technique that is creating these rules using it, the brush technique. So first being the surface also with the indigo color. Now this time I'm going to pick up a brush which has a little water into it. And I'm just going to splatter some water droplets from fire on to this area. You can see you get larger blooms as compared to the blooms that you get by plugging using the spray bottle. You can notice that what do you get in the spray bottle? You'll get VD smaller moons because it's very small droplets. And then you use the brush, you get these big rooms, okay, so you can add as many as you want. Also, I'm going to use right? So just picking up the right thing just as you picked up the water on your brush and Ivan splattered mature and show it to you. So you can see the difference when use black and white things, you get clear white fetches. And when you use a water balloon technique, you get them lighter bone off that be creating a lightest no effect or no effect of stars in the galaxy may be. So this is how you're going to be using this technique for creating the blurriness, no backgrounds at the background. Oh, you don't. It will be really helpful for creating beautiful textures into your painting. Wet on wet. So we did all of this wet on wet, that is the paint was backed by nice black and the white beans or using the spray bottle also. So this technique is going to be quite useful to you, are creating in the snow effect into the paintings. And also you can use this technique for creating some grass effects, antimony effects as well. It works really great and gives you really good pictures into your pin thing. Second one, Let's pick a more water and see how a GX, my background is still wet. I'm just picking up a brush but knitting what? I'm dabbing some water. You can see how you definitely again, it's creating a blue and the snow effect. You just need to be careful about one thing, that you should not have excess water on your brush. Otherwise, as in the beginning, I dropped a big glob of water. It will create rules. Okay, so this is the first test shot. In the next lesson, we will further discuss more textures.
6. Texture 2 - Using Salt: So now let's begin with the next step. I'm going to apply a clean coat of water first. This time I'm going to apply it on black because surface we are going to be creating textures using the salt that we discussed we will be needing in the material section. So impulse going the head, adding in the Euro photo. Now on to this item quickly added the indigo color again, this time. Again, you can go ahead with any color for all you know, learning this technique has very, it's completely your choice. I'm just picking up the Pamela's very candidly so quickly using my round brush, I will just add the integral follow onto this entire surface. So I'm done adding the indigo color. Now, I will pick up soiled and I will begin splashing the soil onto this wet surface. So at the top space I'm going to splatter the stars VD randomly far away from each other and from a distance. And after block them, I will be adding salt in patches and tribal show you the dividend results. Most of it will be giving me. So now you can see at the bottom, I'm adding a lot of salt into factions together. So we even see both the effects that we get and at the top against matching those salt from the distance. Now using this technique, we are going to be creating beautiful snow effect like this into our paintings as well. So you can see the effect that we have is using the salt tech shop. So now let's wait for this to dry completely. Do not use a hair dryer for drying this because if you will use a hairdryer for joining this, it will not give you the same effect. So let this dry very naturally on its own. So I can wait for this to dry first. So now beyond my texture is completely dried and I have written stopped the soil and you can see the beautiful texture it. So you get this noise effect using this plateaus and you know the white fiend as well. But with this also you can get snow effect innovating different texture like this into your findings. So both of the techniques create very different look and what are the techniques we will be using for creating different textures into offending. And at the bottom you can see the patches that are creating by adding soil as a batch. So you need to be careful what kind of pattern you want. Whether you want to open your Python like the bulb or patches at the water and according to splatter the stars. So this was all about the salts technique.
7. Texture 3 - Using Brush : Now the next technique that we're going to look into is creating some grasp patterns into the weight back on using the back-office brush. So I'm quickly going to need a yard of color. I'm going ahead with a wet on dry technique. Your because the paint is going to stay for a little time and I don't want the whole lot bedtime. Now just using the tip of the brush, holding the brush perpendicular, I'm just going to pull out some grass drops very randomly moving in different shapes and angles. And you can see the beautiful effect that this is creating. This automatically creates the effect of the same fallow and chose as into the palette there. Now, this has to be done when your background as well. So you can see on the left side, I'm uneven to achieve the glass effect vent because it began to dry quickly. And on the right side I have been even will achieve the glass effect. Perfect, neat because it was still wet and it is still back for me to keep adding a few more grass tops. Now, this, this will be very helpful for you for creating grass strokes while painting widows and even by adding smaller the beans. And it gives very beautiful look when you want the grass of the cell stone into a vacuum. And that also easily just using the tip of your brush. So the risk that you need to hold your brush perfect if you know by pulling up these glass door and use a pointed tip. And you can see the right side is terabit and hence I'm even able to pull out his troops even now. Now under this, let me show you one more thing. I'm just going to pick up the indigo color and just going to add a very light tone of the indigo color onto this. Now you can see it's kind of a glazing technique that we are using in your. Now again, using the tip of the brush, I haven't followed the Facebooks while this is still back. So this time you can see we are getting the gospels with the indigo color, the orange color of the US troops underneath are also stand there. And we can see both the brush stroke and it creates so much valence and build up the index. So this technique will also be a lot helpful for adding in the glazing technique or grass effect as well. So this was about adding the grass roots wet on wet, using the tip of your brush and add in some textures into your fiendish. Now next we will discuss about adding some stars and define Gs and the dry brush strokes.
8. Texture 4 - Adding Snow , Snowflakes and Stars: So for discussing the folder techniques, I have already created a patch of the blue color and I have let it dry completely. Now using the Payne's gray color adequately add a mountain range onto the left side and we have to wait for it to dry completely before adding the dry brush strokes onto it. And also under this top itself, I will just add a few pine trees and then show you how even be adding in those details onto the find genes. That is this no badges on to define g. So now you can see I'm going to be painting the pine G is very randomly and nothing much in media. I'm going to be using the simplifying g, the deal that we are building right now. And some of them, I'm just going to add the least cost that is not with much foliage onto them. So you can notice I'm using the very basic binary and this is how I'm going to be adding in the pyogenes. Now let's be for this to dry and then let's see how we are going to be splashing the snow. So first pledging does nor we are going to be using invite washed and using a round brush. We are just going to dab our fingers onto the tip of the brush and then you can see you get these flatted off. Notice. Now when you're weightless, plateaued at this V is going to create a mess around. So for that purpose, I'm going to eat officials around so that I don't have to clean my people again and again. If you want and find stuff, you can lose a pour-flush and splatter this task, this will give you verifying status. You can see it creates Verifying stuff and all you want, you can add both the techniques to create a balance into your snow effect. So with both the techniques that will be a lot of whites flappers on the site. So I'm going to use the shoe paper and spread it all around and keep my painting onto that and then splatter the snow so that I do not have to keep cleaning my surface again and again. Okay. And it's going to create a little mess on your hands has been. Now next, let me discuss with you how we will be adding of your snowflakes and do a few of the buildings as well. So now using a smaller sized round brush, which has a pointed tip, I'm just going to begin adding in the snowflakes. So first we are going to be adding in a plus sign, then a small cross in between this, which is going to be smaller than the plus sign. And then just add these little details onto these are lines that you have added to feed the snowflake blue. We are going to be using this to adding it into your pin things to make. You can see that we've added in this class project, this video, we're going to be adding in snowflakes in different sizes. Now next we are going to be creating some Chinese task. So for that first I'm going to pick up the white color and create a very small round. And I'm going to create it in under dim light tone, as you can see. I'm trying to blend this silicon with a backbone and it has a very light tone to it. And then we will wait for this to dry and then add the shining look to these tasks. We'll be adding into your graphene things. Then the other kind of styles that we will be adding in these small shining stars and some shooting stars as well like this. Okay, So these are the different things that we will be using it for adding in the stars and the details and who are fainting. Now these patches have died in for this time. I'm just going to mix in a little yellow with my gosh, I'm just going to add the shining look to these tasks using a yellow color. And you can see it stands out so differently. So for these, the bees DO has to be blended with the bag down so that it creates a light bloody shining effect for the backbone. Now, my opined genes have dried and we will begin adding in the snow patches on Buddhist. So for that I'm just going to be using in the white quash and using the tip of my round brush, I'm just going to add some small, small batches like this as you can see. So now you can see the fine G automatically gets a lot of detail because of this no effect. You need to wait for your binding to dry completely before adding in the snow. Otherwise, as you can see in the center, feet up I love begins to spread in. Now in the next lesson, we will discuss about the dry brush stroke and the deflections.
9. Texture 5 - Dry Brush and Reflections : Now next let's begin to learn to add some reflections. So we are going to be adding a lot of GDP is I'm just smaller branches into a bin things. So like this, see we've added a few branches and now to this we will need to add the deflections. So for adding that reflection, I'm going to keep our tissue handy with me every time. And I'm going to use the same themed color in a very light consistency. And depending on the movement and the angle of the sun, I'm going to add the reflection and quickly dab it with a clean edge of the visual. So right now I'm showing that the sunlight is falling towards the right side, and hence these deflections are moving towards the right side. You can see I add the reflection with a very light and watery tone and quickly dab it with a tissue of give it much lighter tone. Now, see this side, the reflection is moving towards the left side, so I will add that flexion towards the left. So that is the sunlight is moving towards the left side and hence the tree reflection of these genes is on the left side. Now the key here is that you need to use a clean side of your tissue and not use the DOD side. Otherwise it will create a bad image onto the reflection. So this is how we are going to be adding reflections and do API index. I hope you could understand this and make sure to use a clean side of the tissue. And also, you need to quickly debate by the distance and positive flexion. As you can see, we've been using the beans in a very watery consistency with just a little touch of the pigment. So that is how we will be adding all the deflections into the painting. Now the last thing, let's begin to understand how we are going to be adding in the dry brush strokes into a painting. So my mountain is completely dried. I have picked up some bike wash that off the excess paint issue and just using the tip of my brush, you can see I'm pulling out this triplets tube onto the people. Since the fire has a little texture, it's making my job a little easier for adding the texture. Now I'm going to pick up some fresh by cosh without adding any water to it. I'm just going to add some darker highlights. And you can see you get so much DB by just using the fellow without adding any water. So make sure when adding in the dry brush you do not add a lot of photo. We will be using this dry brush technique with different colors to add some snow-capped mountains and other details in our being done. So this is all about the techniques that I wanted to discuss with you all, which will be helpful for you all in the coming Curtius class project. I hope. And I would recommend all of you to practice all of these onto rap sheets. And let's begin painting after these class project for the one which is going to be this beautiful misty landscape for today. So let's begin painting this in the next lesson.
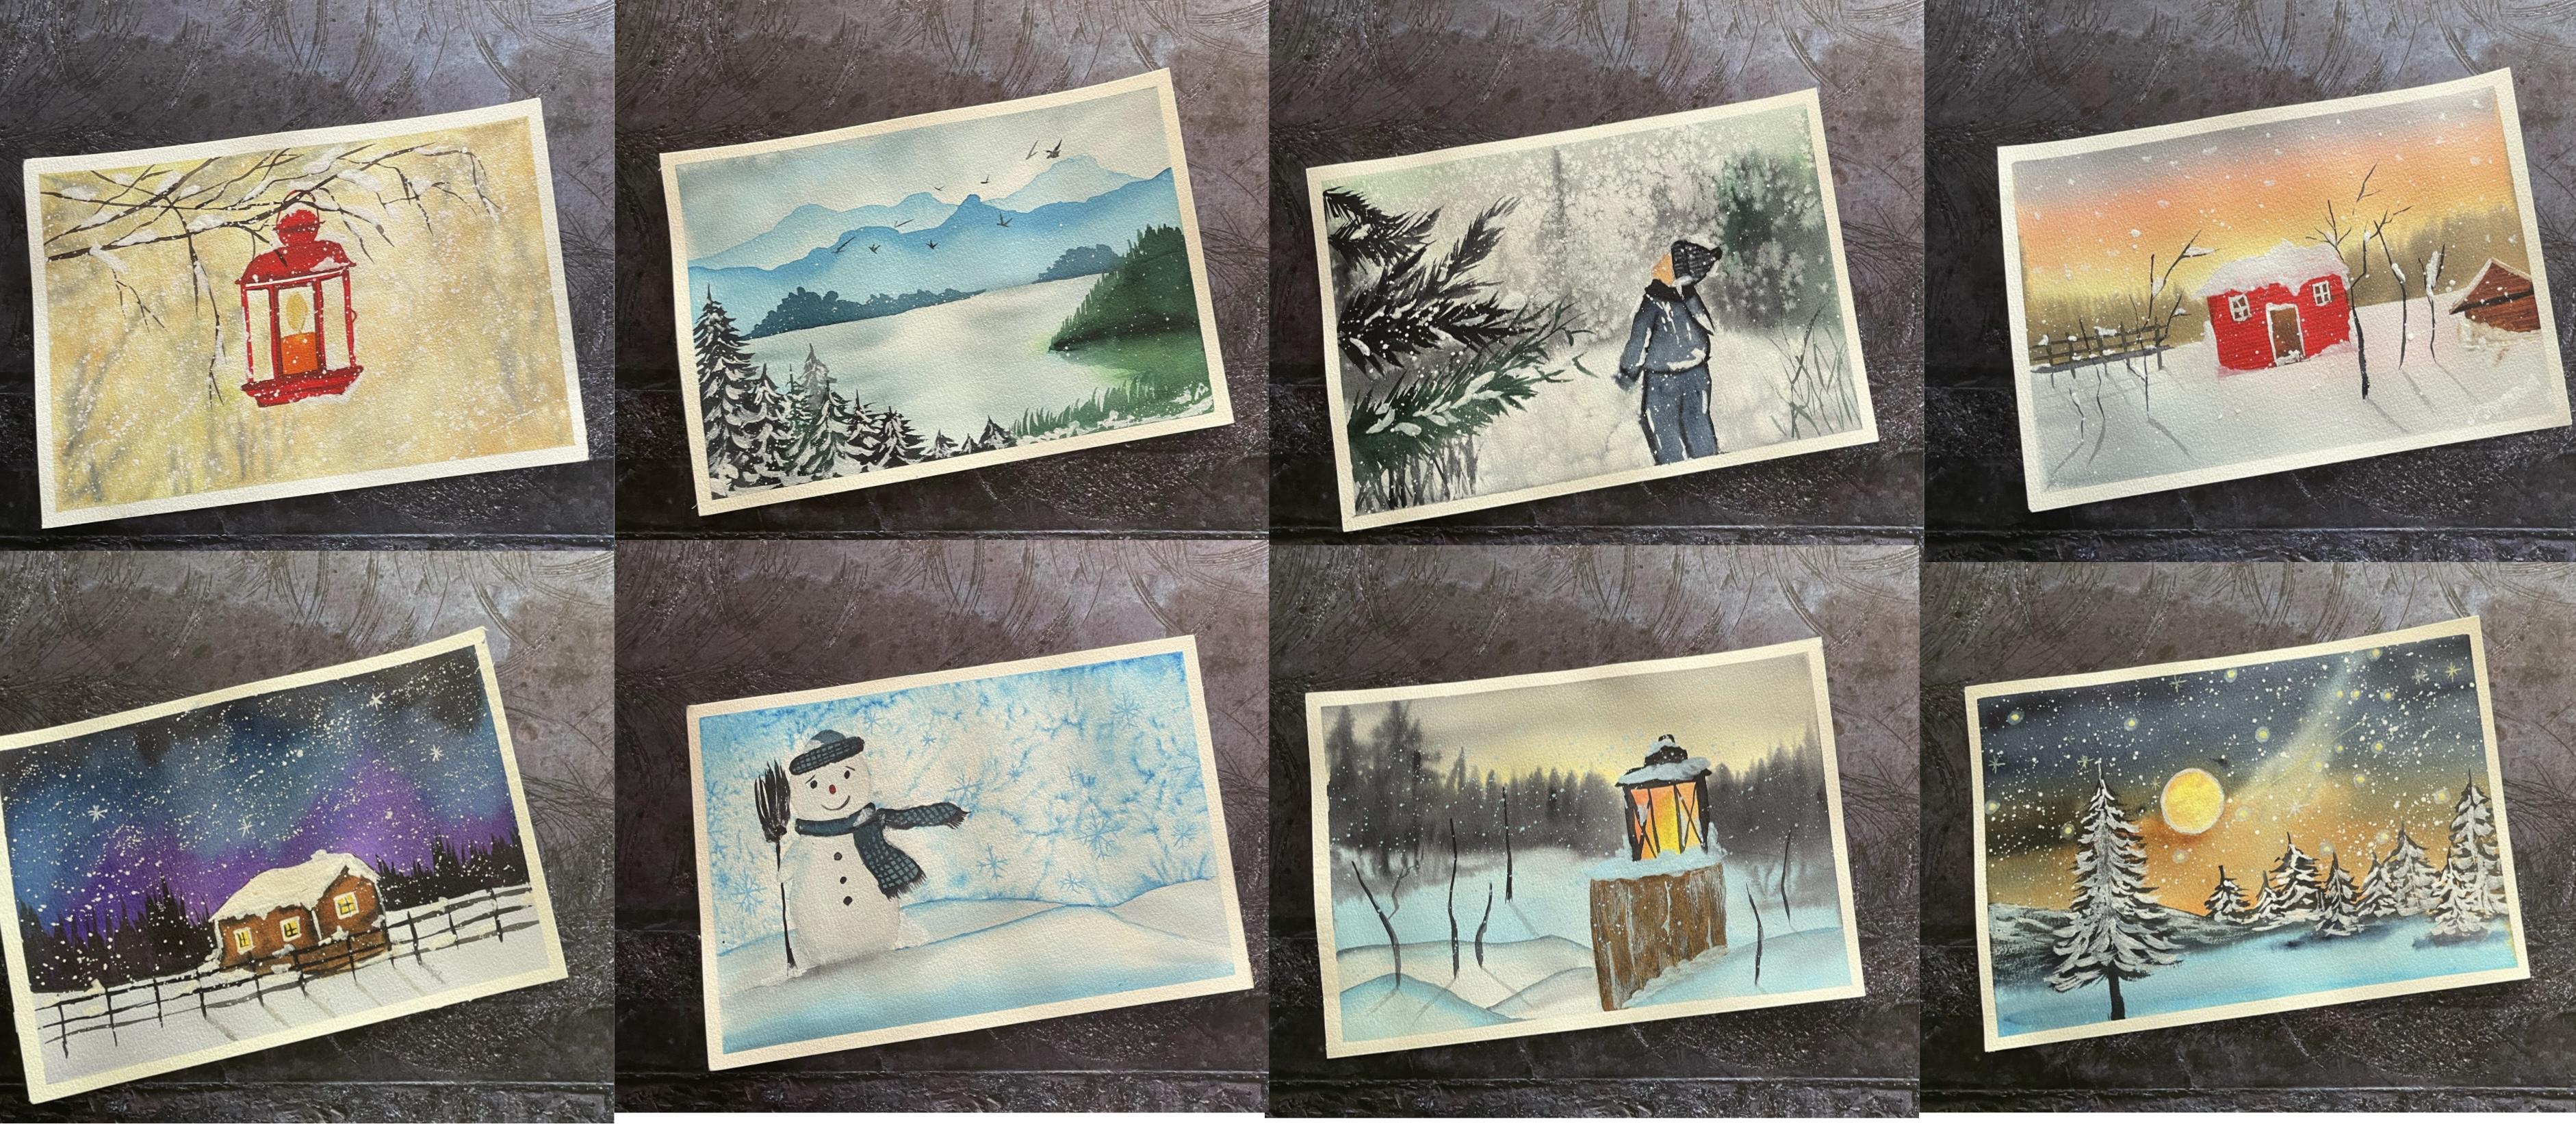
10. Day 1 - Misty Landscape: So before beginning with today's class project, Let's discuss some basic techniques which will be helpful for you if you are a big note with watercolors. So the first one is going to be wet-on-wet and the wet-on-dry technique. We will discuss both of these techniques and then move ahead and discuss further, are there techniques that will be helpful in creating beautiful backgrounds? So as the name suggests for the first one, it's wet on wet. That is we have a wet background and undo that. We're going to add in vet beam search smallest piece on which I applied at the input of photo. Now I'm just going to pick up any random color, and I'm just going to wet this color. I'm going to apply to a Buddhist Webpack though. So this is called wet on wet technique. It's useful when you want to pin surfaces and you'll do not want any harsh edges in between. Now as the second technique, wet on dry technique. So that is your background is dry and you'll begin with wet paint onto it directly. This is helpful when you just need to be smallest offices or adding in DBS. And all you know, it will be very difficult to paint larger surfaces or the technique wet on dry because you would begin to get sharp edges in between. So you can see, you can use both the techniques depending on the size of the people or size of the area that you are willing to paint in. Even be using both the techniques in each of our class projects. Next is a gradient wash. That is, you'll get different values of fun color, either from bottom to top or top to bottom. So I will quickly just apply water onto the surface first and then show you how to get the gradient for getting the bleeding. We are using the wet on wet technique here. So now I have the red undo that I just applied, a layer of color at the top. And now with a damping trash, I'm just pulling that color from the top to the bottom. So you can see at the top I have got the darker bones and as we move down, what's the bones have? Don't light up. So this is called a gradient wash. Now I will show you the same gradient wash from warping. Who thought the first one we did was taught to water. So for bottom to top, we will apply the color at the bottom space and then just use a clean damp brush and pulled up close to the top speeds and get ingredient. See, you can get video with two colors, three colors depending on the project that you're working on. So this is how you can achieve gradients. We are going and using this gradient technique for building mountains and skies in the coming D's class project. Even for today's class project, that is going to be the Class Project 1, where we will be painting the misty landscape we are going to be using in this technique to being these beautiful mountains. We are going to be using this technique into these class project itself. I hope you could understand all the three techniques that we discussed in the first file. That is the wet on wet, wet on dry, and the gradient washes. In the next lesson, we will further discuss how to get water control when you're working wet on wet with different colors.
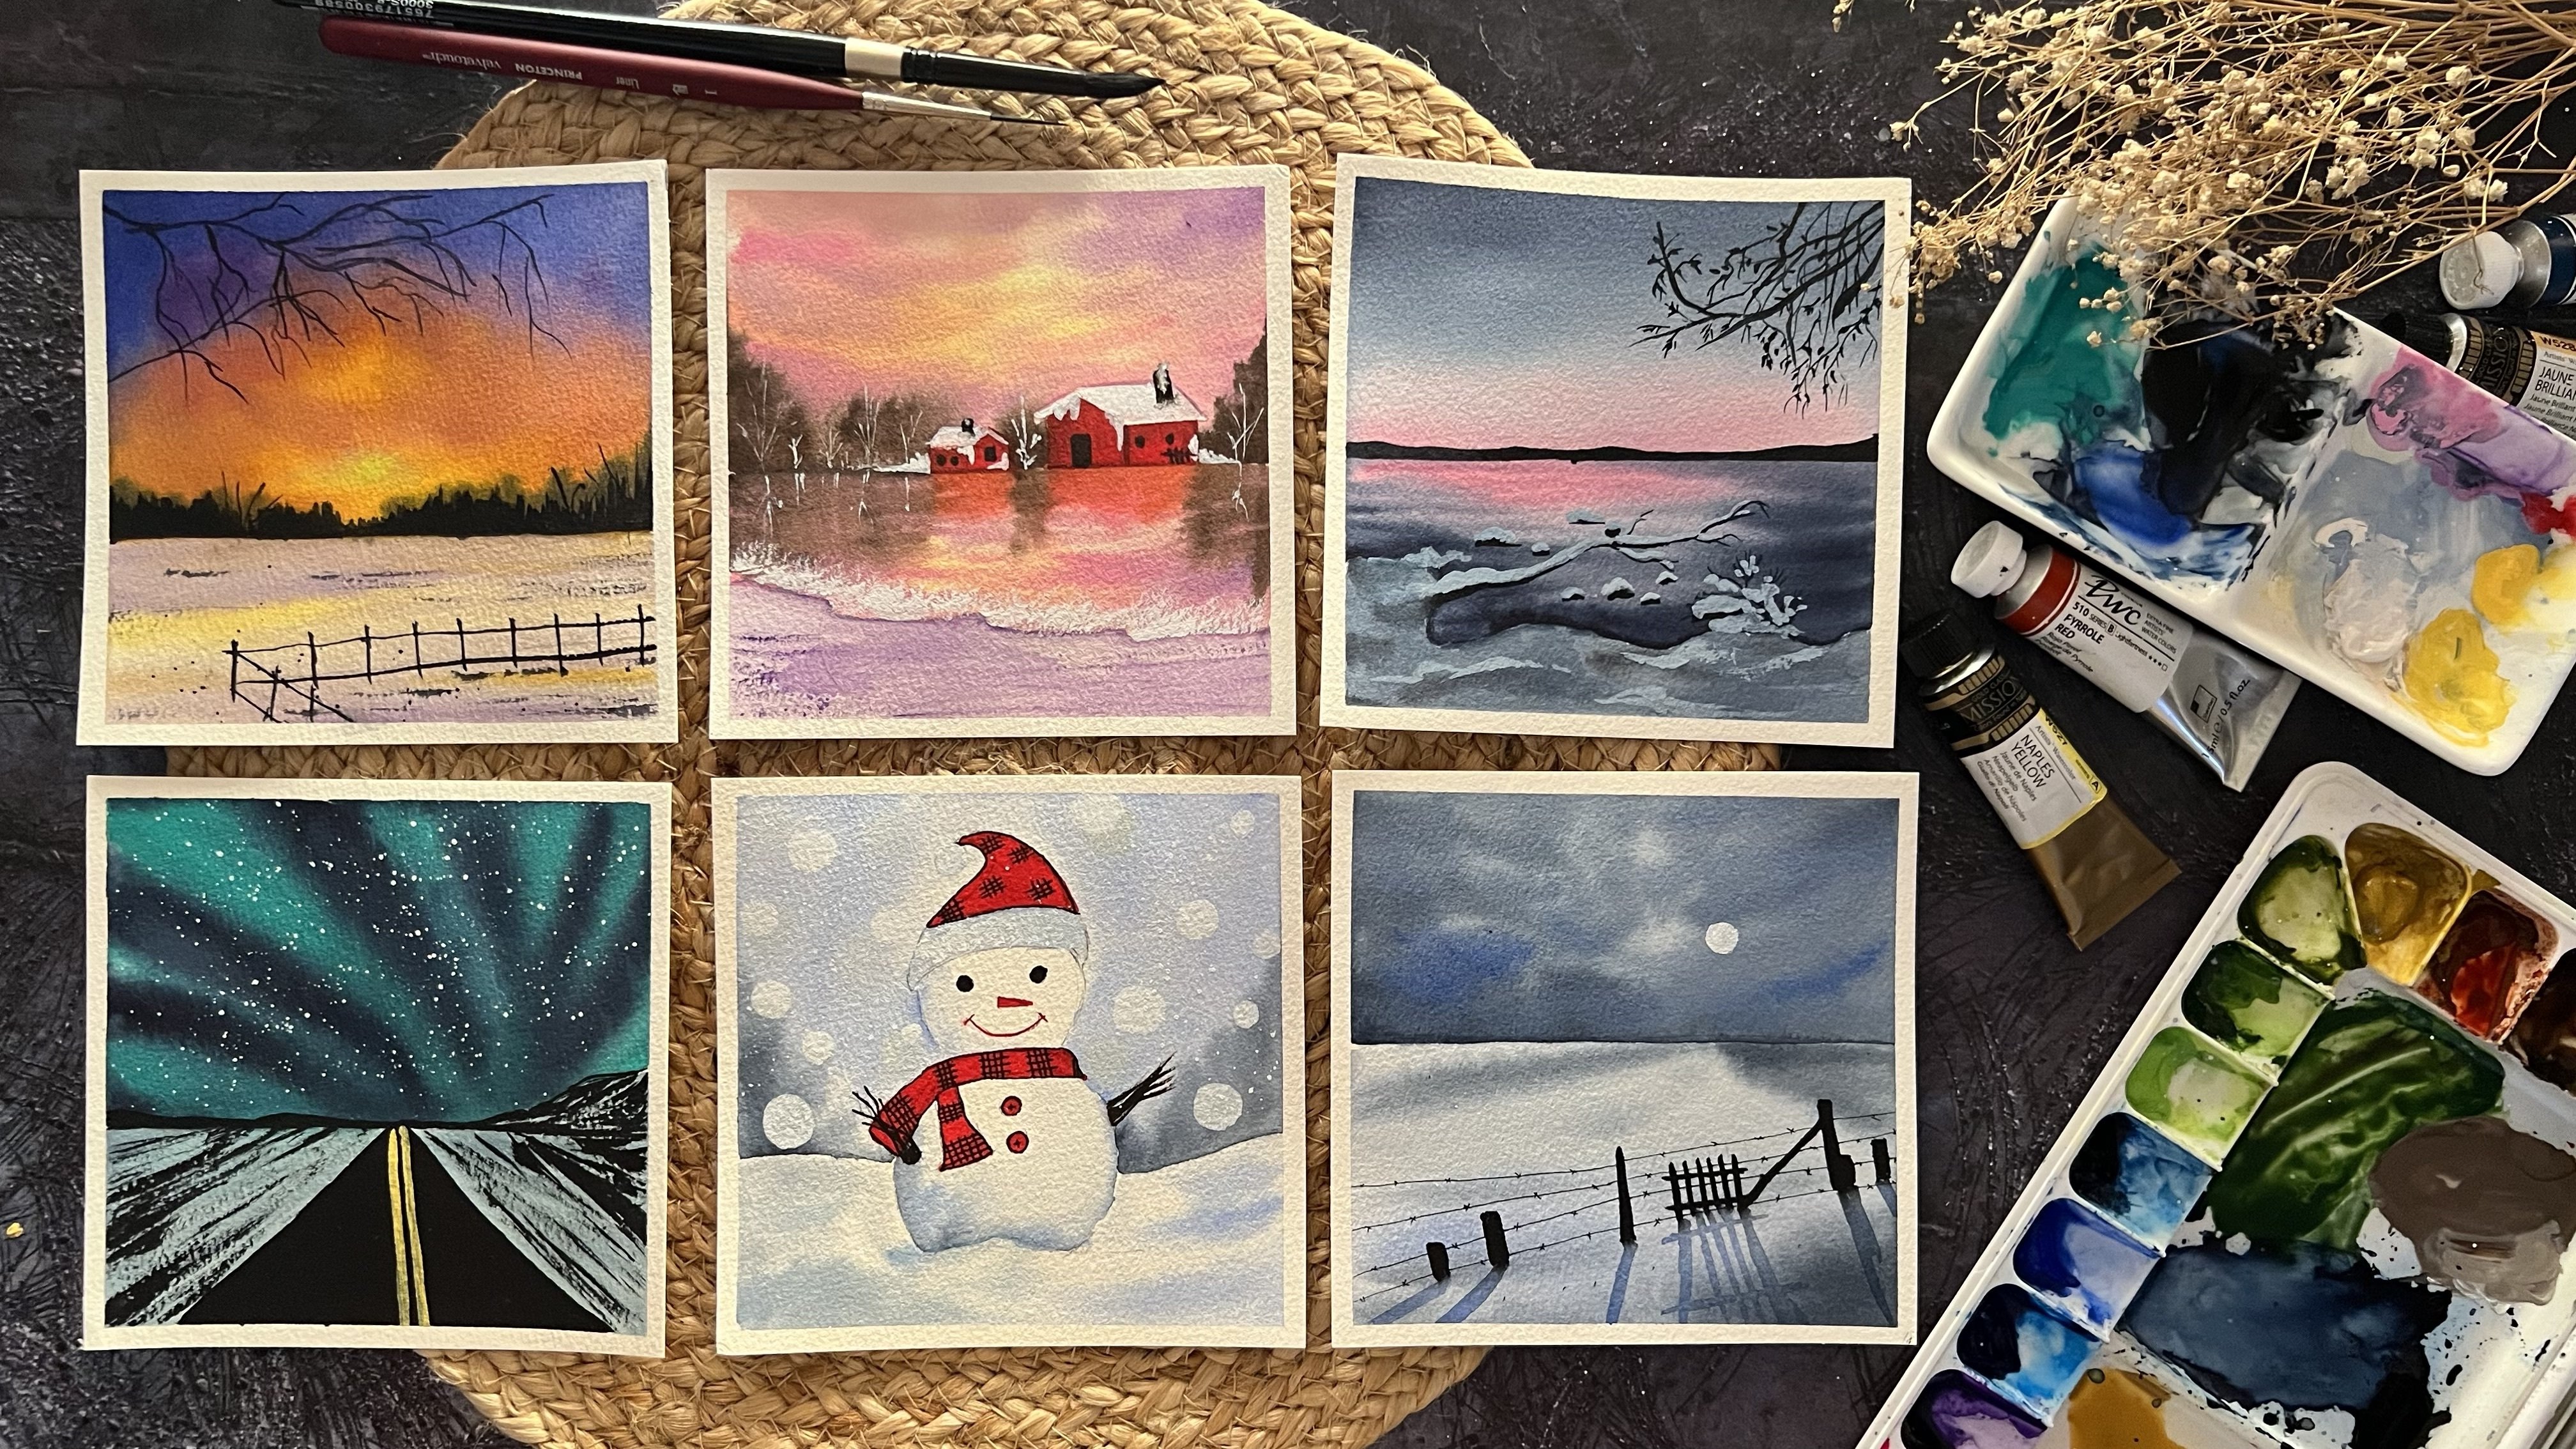
11. Day 2 - Winter Sunset: Hello everyone and welcome back to D to E to D even be painting this beautiful countryside kind of words. Do we view the panelists that you need for today's class project? This beans green, Naples, yellow, black, white goulash. And you would also be needing a little thing to offer orange color as well. So today, we will first be using the technique that we learned for water control and creating the misty sky, and then add in the rest of the detail in the foreground space. So now I have my people now onto all the four edges and we will begin painting. I will first begin with a very rough pencil sketch. I will mark the distinction between the horizon line, that is the skies fees, and the rest of the foreground space. And by marking the horizon line. And then on the right side, as you saw in the beginning, we are going to be having offense space. So I will quickly roughly mark out the fence space. Then I'm going to be adding in now onto these. I'm going to be adding in fence. So the backlog, things are going to be quite small and as you reach glues or defense is going to be taller in height. So now you can see as we're moving closer, we are increasing the height of this fins. And the one-step is that the backspace Neopets summarized in life is going to be quite smaller than Hive. And we've tried to give this a little circular movement as well. Okay. I can quickly just mark very rough rest of the fence as well. Now, I'm just increasing the height, which are much more closer to us. You can see, if you want, you can directly add this widow beans instead of adding it forced with the pencil mark. Because if you remove an electron from this pencil map, the background charcoal months we've been visible as the background is going to feel quite lighter tones. Father being the mean this fence, although they are going to be having interconnections resist giving him some light pencil sketch for that as well. So that is it for the pencil sketch. Okay. I just start with a very light pencil sketch of the T as vent that we'd be adding later on with the themes directory. So I just want to apply UCLA important for both or neither my horizon line and forth to even begin painting in the sky. So now I will just keep in this masking tape under my board and keeping people tilted downwards so that the flow downwards. Okay, So I will post beginning with the shade of Naples yellow. I'm going to use my round brush and thickly applied. So before that I will just set up our luxury out on my palate. Now you need to be careful about one thing that there is no excess water. Then if you can notice on my horizon line, I have gotten a little excess water because identify people. So all the water has gathered near to double rise in length. So using a clean edge of the tissue, I'm quickly going to pick up that excess water. Now I'm just getting the thelodonts ready. A little touch of orange and more of the Naples yellow and the Payne's gray color samples for him to begin with the Naples yellow near to the horizon, right in the center of the sky space. Now just onto the top of the Naples yellow adenine, very little of the orange color. And you can see, because I have kept my default denotative, all the things are flowing downwards and blended each other in the downward direction. Now just for you to pick up things Greek or low, I'm just going to add it about the orange color. Now if you see I have when using all the follows, Inability limestone and not too dark. Now new to the horizon line, I will just pick up the excess water and dab it onto a tissue because then we are going to be adding in the grass effect into the background space. So if you remember, when we learned in the water control, we learned adamant that by dawn blurry trees and uploaded details. So that is the technique that we will be using in your, I just added a little bit more of the orange near to the beans dried. And now I'm just going to add a little more of the yellow again as well. Because remember watercolor dries adorned by token what they seem into the paper at the moment. Now just adding a little tinge of the bond CMR color as well at the top space. If you want, you can skip this step. But all of this is wet on wet that I'm adding in. Now I'm just going to pick up until after bone sienna color, I'm mixing Payne's gray. You can even mix in orange and Payne's gray color if you do not want to use the bone CNR callow. Now I'm just going to mix watercolors and almost an equal consistency. I'm going to get a medium consistency of these things. And using a smaller sized round brush, I can begin adding in the details. So as you remember in the technique also, I had told you you need to wait for a few seconds for your sheep to just settling into the space that you want to add these details and then begin adding these details. So then that way these details one spread even much and even still have that soft and blurry effect. Okay, So I just quickly dab some excess water we do is still flowing from the top side. Now using my round brush, I adequately begin adding the details here. You need to make sure that there is no excess water. So I quickly remove the excess water from my brush. And also by adding the details at the top space. I'm just going to use the tip of my brush as you can see. So you could see how in a controlled way I was able to add these details and they've got a soft edge because my paper was still wet. Now, another important thing, your voice that we get the masking tape underneath our people to keep up a tilted so that automatically the pins won't flow towards the top side and they would only give flowing towards the bottom side. So I would recommend you to keep your paper tilted as well. Now just picking up a little darker tone of what the previous two on that I have picked up. I'm just adding some darker highlights because again, as I told you what the calories will dry upload like dot. So that is it. I'm done editing the complete skies piece and this laudatory effect, if you can notice, I have added these two reasons actually that the background, yellow, orange beans read round. All the colors are still visible of the sky. You can see the yellow color being perfectly visible just near to this G life. Ok. So you got to be a little careful and make sure all the deals are visible. Now let's wait for this to dry completely. So now you can see my sky spaces completely dried and I've got the perfect effect to the piece that I wanted to add it in, the blurry effect. Now I'm going to pick up, pick up some freshwater and apply water into the rest of the bottom space to begin painting the foreground. For the foreground, we're just going to be adding very little of the eyes effect using the same colors that we used in the sky to reflect this tight space. Your then adding little dry brush with the Payne's gray color and adding the fence detail and a few tree and then the small effect. So that is all what we are left to be adding in the foreground now. So first, I'm just giving a very light wash of the Naples yellow that we used in the sky. You can see the pattern is so light and it's even lighter than the sky color. We just need a very little touch of these colors as a reflection on Buddha ISPs because of the sunset view that we have. Now in the same vein, I have just picked up a very little touch of Payne's gray and the brown color on it and just adding it from the edges, you can I have picked up the fallow in such a light consistency without any water on my brush, hence just evil to add it onto the edges and get that gradient. So in the center space trying to maintain the yellow light and from the edges just pulled out this light tone of the color and make sure that the palace have very light even compared to the skies piece. Now I'm going to quickly add in the transplant does your AUC, so as to add little more depth to this price-based that we are adding it. So with the Payne's gray and the brown color mix, just adding splatters wet on wet. So this is the paper is still wet AND gate goes into the palace plugging technique. I had taught you this technique using white color, but we can do that with any color neo to these fans speeds onto just adding little patches already wet on wet, so as to add little more debt when we add in those or, you know, thanks details needed on. So you can see how lightly I'm adding this ground column make innovative night consistency. Again, your since we are adding all of this wet on wet, you need to have the what the console against clutching a little converge at the bottom, please. And Europeans believed it feels so much depth into this. Isps that we are creating your, the reason that I'm using these colors for ICR is to reflect the sunlight onto the ice. So basically the color of the sky effects the color of the eyes as well. Okay, now, I'm just going to mix in a little more of themes three and going to add the tree that I have added in the same dose. Now, I just started a few branches with the pencil sketch. So I will pause, try and cover that up. And then I will add the rest of depth of we cleave very randomly. Now make sure that your bottom species dry so you can see, since there wasn't a duvet at the warping space, the paint is beginning to spread. So I will quickly pick up a clean brush and oh, you know, docker logs from there so that it does not spread a lot. So now ready to randomly just quickly add the branches to this G. Make sure to add the not the God Apollo branches and tribal VD the branches throughout so that it looks like an actual tree. So since my brush has appointed, you can see me, but we'll add all these details just using this one brush in this, if your brush does not have a pointer at the Big-O of branches with all of the Co, brush and then shift to a detailer brush for adding in the smaller branches. So now you can imagine the smaller branches also just using this brush and in-between, I'm just darkening these branches. So I'm done adding that gene, the center. Now I'm going to pick up this color and begin adding the fence. So I'm going to use the Scholar in a very medium consistency force. And I'm going to keep our tissue handy so that I can that and light in the background fence. It's quite a blurry background that I want to add them. So you can see I'm quickly adding boot revenge and just dabbing it quickly with a visual, just as I have shown you into the reflection technique section, how we're going to be adding the reflection thing. You ought to meet the back daunting a little glory and a little out of the side view. I'm quickly adding in these and dabbing it with the help of the tissue. Now, as I've been begin to move more towards our close up view, I'm going to darken the fence area as well. So now, while adding these fans your near to the t, I have darken the color that is amusing the ballerina little multicore consistency. And you can see you are getting one tone darker than the ones that you were using at the back end. And now as slowly as I move towards the more foreground species, that is this piece that is more closer to our view. I even begin adding this width of any dark bone of the beans Greek follower. And I won't be diving these off with that issue anymore. So I'm almost done adding all of the fences, Just last two of them are left. And then we will act of all horizontal lines as well into this fan speeds that we had added using the pencil mark. Now at the backside I'm going to add the water is on the line also in a very light tone and quickly dab it with the tissue and add the foreground space that is more inclusive. You, I'm going to add them with the darker tone just as we added the vertical lines with the Dakpo door. So for the background, you can use a more diluted form, the technique you would not want to dab it with the tissue. And for those of you that is closer to you, you can use the pons and darker consistency. So automatically it will balance the view that we are trying to add it. Now, I'm just going to pick up a little of this beans green mix. I'm just going to splatter a little of this Carlo very than the mean Neo-Orthodoxy, things that we have added in. So make sure that you add these black dots in a very controlled manner. In this, if you feel that just like Bozeman spread towards this guy's beast and make sure I propose this guy EDI vetoes off before so that these plateaus do not move towards the sky. Now I'm just adding a little of these plateaus, even into the center of the fan speeds medially near the fence. As you can see, I'm adding a fairly close to the fence and hence I'm able to control the splatter limit in peace, if you will, or use a bigger size brush, it will move towards the sky as well. So you really need to control this plateau as you begin to add them. Now just going to add very little newer to the backspace. And you can see a little bit moving into this guy's face. So I haven't. And I will just cover this piece now and quickly add this plaque does to the bottom of this spins as well. Now I'm just going to keep the tissue onto the other side and splatter and Digital of this node towards the left side as well. Make sure that even by adding the shadows, you control the water. Now I'm just going to add little of the dry brush strokes as well. So and I'm adding the dry brush strokes. You can see I'm dabbing off excess water onto the tissue before adding it onto the people. And you're just going to add very little dry brush and then just going to add small batches and do the areas. So you can see just a little up the batch in between the speed and just on a gel onto the left side that we added in. So that is it for the dry brush stroke with this color. Now I'm going to quickly shift to the whitewash and begin adding in patches of snow into this E. Okay, so we try and push all that already. It's a completely ISPs filled at the bottom. But now we're going to add some snow badging as well, trying to show some smoke elected at thesis forming some rough mountains of snow. So I'm just going to begin adding the snore baby than the mid Meiji onto the left side and very little on the right side onto the. Make sure that you pick up the white portion of editing consistency so that you'll get the A-B-C blue. And in using by decree, Let's make sure to not add any water. Otherwise, it will be very difficult to achieve the look of the acrylic beans vital for watercolors will not be able to do this grid justice to you and give you this A-B-C Look because it's going to act like watercolors and it will be transmitted making the bottom background still visible. Hence, I would recommend you all to either use by quashed, by post Apollo's all white acrylics. Now just flattening the middle of this nor make sure that you can lay down the shoes onto the edges and then please the people so that do not have to keep cleaning your table again and again. And this time I'm quickly just flushing the snore and you can see I'm splashing it so I'm a little distance. So I'm getting these plateaus of different though sheets and different sizes. Now at the bottom space, your, I'm quickly going to add a little more of the small batch, okay, and I'm just going to cover this extra dots, these here with the white color. So in these wind up being things, you can easily cover up any space with these snow patches and correct your arrows because whitewash is going to act as an opaque one onto these light watercolors. Now quickly, I'm just going to add, let's lock this nope election onto these pens very random. So in between the connection of these fancy, you can just add little patches of this white piece to deprotect know being collected onto these connection points. And that is it we are done with our painting for the two, Let's remove the masking tape and see our final painting. Make sure that you remove the masking tape at an angle from your people and be careful if the white foreigner, white elks feeds is still wet, otherwise it will begin to spread onto the edges and the fellows may get lifted onto the edges as well. So beyond this and calculate by taking off the masking tape or read for the beam thing to dry completely. So you always have been doing for the dual. I hope you guys enjoyed painting this beautiful sunset view with me today. It was a very simple one. And yet outcome. I will see you guys into the D3 tomorrow.
12. Day 3 - Red Snow house: Hello everyone and welcome back to the d3 of this RDD watercolor challenge, the candlestick. The need for today's class project is a shade of yellow, red, orange, one CNO themes green, black. And by wash. You can go ahead with the best alternative followers if you do not have these exact same sheets, we are going to be painting this beautiful snorted in house today. And we will first begin by painting the sky and then add the rest of the details into the painting one by one. So let's begin painting to these class project. So I have MCI put the double bond to all the four edges, and we'll begin with the pencil sketch first. So the pencil sketch that we are going to be adding is phosphine mark the horizon line to distinguish this guy and just no species. Then in the center space, we are going to be adding in the big red house that we will be being. So you can see the houses going half into this guy's face and have it this into this little space. So just a very simple house that I'm adding in. The top of the house is going to be covered in with snow. And the rest of the house will be painting in with the red. Now on to the left or right side here I'm just adding another very small house in which we want to be adding much of the leader. And onto the left side you're just adding a very small fence, and that is it for the pencil sketch. Rest of the details we would add with the veins directly. So now let's begin painting to these class project and post when to begin with oblique portal for dog only on to this guy species. Now when I will apply the screen CTO photo Eigen, make sure that I do not add the water into the house. You can add the water include offense space that will be completely hokey. But Jaya whiting to add the water and the beams off the sky into the house. That isn't the center portion because the top of the sky, we are going to be having a completely filled up with snow. So try to maintain the light handed out there as much as possible. Make sure to apply an even border of water throughout so that your paper doesn't dry quickly and you do not have any rough patches in between. And also make sure that our no bottles of water anywhere. Otherwise the beans may flow because of the water that is excess onto your paper. Now impose going to begin in with a sheet of Naples yellow. So now to the horizon line and pause beginning with the sheet of Naples yellow and almost till the half of the sky I'm going to take in this column. Now next I'm taking the shade of yellow, orange. You can just mix in a little touch of your orange to this yellow and make a yellow orange color. And I'm going to just apply it next to the idea load actually applied. I'm going to blend both of them then. Now to this, I'm just going to quickly mix in a little bit of the red color to get an orange tone and apply it at the rest of these guys. So you can see that follows attending well into each other. And I'm trying to get the perfect radiation from the yellow, the orange haze. I use the little yellow orange in between. Now at the top space, I'm just going to add a little bit of the Payne's gray color. If you do not have the Payne's gray color, you can just mix in a little bit of indigo and black to get a Payne's gray color and engaged. Even if you do not have an indigo color, you can simply use your black color in a very nice consistency to achieve the Payne's gray color. Now just trying to get the perfect blend into the sky space and you can see we have a perfect transition. Now, I'm going to keep this masking tape underneath my people so as to give my more tilted downwards and now add memorizing, drying, I'm going to be adding in the blurry, gee, look with the mics off bond, CNOT and beans, great Gallo. And to create almost shaped like a bond on book, I love my mixing these two fellows. So if you want, you can directly use the bond amber color. Now, I have already waited for a few seconds for the force Neil colors of the sky to set the link. And now beginning with this color, I'm beginning to add in the background blurry find Gs are the background blurry effect that I want just knew that the house gene make sure to not cover the entire yellow color of the sky. You can see my beings are not spreading much because of the two things that I have discussed with you in the technique section, right? Adding in these blurry effects what you need for a few seconds for the fourth layer follows to settle in. And second, when you begin to pick up the second column for adding the blurry effect, you need to make sure you do not add excess water. Despite if you want light-dark bones, you need to control the water by adding these effects. Because if you're going to pick up excess water dough, all of the beans will begin to spread and you will not be able to achieve the sheep that you're wanting to add it in the bloating manner. So you are, if you can see I am able to achieve those by TH2, these blurry because I am controlling the water that I'm adding in. Now I have just darkened the door by adding in a little tinge of the beans green color and adding another layer onto these trees. And at the top and you can see I'm getting the appointed edge to these genes just as I needed them. And the pains are also not spreading much despite being the red background because I am adding them after the base steel beams out in the dead center. Now let's wait for this to dry completely. So now my sky spaces completely dry it. And you can see I've got the perfect look to those floating jeez. Now I'm going to apply arrow four dot-dot-dot ISPs at the bottom area. I can make sure I did not add this water into the house is that we have in the center and the right side and into the rest of the space quickly just going to add a clean Leo Porto. The eyes, is going to be a sort of an affliction off the sunset sky just above the house. So we are going to be using the same sheets but in a very diluted consistency and unoriginal of the Payne's gray palette to add eyes effect. So first, I have just picked up a little of the beans green, mix it with a little touch of blue. If you want, you can skip adding in the blue. Man, I'm just adding a little bit into the bottom space to give more of the eyes unfit. I have picked up the yellow orange That wasn't my palate. And you can see it's quite dark, ventilated down onto the paper. So I'm going to quickly use a damp brush and blend it into the rest of this piece. And now you can see I have been even bla achieved the light color loop. So you need to make sure that, you know in the ISPs, the polos that you are using from the sky, they just need to be like 5 percent and 95 percent needs to be the workup. And then I'm just adding in a little more off the blue effect into the eye space. But onto the right side you can see I have maintained the yellow and the orange look as well in the center. So make sure to maintain that little yellow Read effect. Now, I'm just going to pick up a little of these tones again, I'm going to add a little more of this color. Now you can see when I'm adding this, I'm dabbing off all the excess paint. And I'm going to quickly blend this into the rest of the EDR. And if ever you drop in darker, you can quickly use a damp brush, lift up the Apollo or light DNA by spreading it with water. So you can see, despite me dropping in the darker tones, I could lighten it quickly because my background was vague. Hence, I would recommend you to use a flat brush by adding in this detail. Now just going to add little darker highlights onto the edges of this new area. Now, this dries, let me show you the details that we are going to be adding into the house. So I will just do a rough pencil sketch off the windows and the door that we are going to be adding into this house in the US and does the house on the right will not be having any ideas. It's just going to be a simple, plain ground house that we are going to be building in. Now let's meet for the complete snow area to dry quickly and then we can add all the details into this beam thing together. So now raise no spaces, also completely dried and you'll get Steve, you've got such a beautiful, It's no effect with the Palace of this fire odds that afflicting it. Now I'm going to pick up the permanent leg drawn from my palate. You can go ahead and lose any similar bright red dawn. And I'm going to fill the Santa house completely with this bright color for me. I'm going to leave the windows and the doors of this house without discolored door. Because that we will be adding the details needed along with the yellow Kahlo and giving some effects to the doors and the windows as well. For now, just being the rest of the House makes sure that you add this detail volunteer sky and this lowest fees is completely dry. Otherwise the red column and begin to spread and you will not be given to all control the spreading because of the weight also faces around. Now you can see my brush has appointed dip pens. I'm able to get those crisp edges with my brush by just using the tip of the brush. Hence, I always recommend to keep up brush, which has a pointed tip so that you can quickly add in these details also together, along with thinking in these big goals offices. Now onto the roof I'm going to add a very diluted bone of the color. You can see the entire loop is going to be covered in with the small afterwards using the whitewash, but just really be leaving some of the places blank without the white wash paint is i1 the underlying get drawn into that group space. Hence, I gave in that light that bowl to the house in the right side. I'm just going to lose the bond sienna color. Mix them with a little touch of Payne's gray and 12 being the complete. How's that this scholar retreats. So I'm done painting Buddha houses. They dry. I can quickly add in the other videos. So I'm just going to pick up some Payne's gray color. I'm going to add a few branches into the ISPs, moving to the half of this guy space as well. Now you can see I'm adding these branches vary randomly and invitation draft. You're going to be adding in deflection to these nature dot. If you remember, we had learned how to add these reflections in the technique section. So make sure you have a tissue paper handy to add the reflections in the lightest and the best ones. So now I'm picking up the light tone of the gray color. And you can see, I'm quickly dabbing it off and the deflection is so light and looks perfect. Now to the ones on the left side to add reflection moving towards the right side only this type. And you can see I'm using the faintly fallow in a very diluted consistency. It's almost 098% water and just do percent of the pigment. Now, I'm going to begin adding in the rest of the detail into the center house which is dry. So I'm just going to pick up the bond sienna color. I'm going to add the door with this bond C and our Carlo. Now in through the windows, although I'm going to be using in this bone cnf Gallo mix. All right, I'm going to add rest of the details with white brush. Now next I'm just mixing in a little bit of my bond CNOT and the red color and getting the reddish brown dogs. And using disadvantage from dawn and a very fine liner brush, I'm going to add lines in to the house area in the sample space. So just to add some detail to the house, I'm going to use this mic's off the red and brown and add some thin lines completely. And this is just going to add little wooden details to this house. So if you want, you can directly use one of the red color or bone sienna color if you do not want to add it with a mix of David M zone. But the reason of mixing the red and the brown is to get a sudden stone so as to blend both the details of the door and the house together. Now you can see I'm quickly getting in so much of more of the details. Do not divide up the fellows that has all beeped out of the house space. You can follow that up simply with whitewash. Then we add in the small details. Hence, I'm not worried much about those little edges that is coming out by adding in these lines. So I'm going to quickly add them into the rest of the house phase as well. So I am then adding the details in the housing space. Now in this house on the right side, I'm going to use the Payne's gray color. I'm going to add some darker edges to this Payne's gray color into this brown house. Just added the Payne's gray color on the edge and I'm just trying to blend it with the brown color using a little RED brush. And now onto this house as well, I'm just going to add fuel is cheap nines using the beans green and the brown column-based, you can see just very Magendie dance not much onto this site. And enter, enter can easily be covered up with snow and do this no landscape painting. Now using the same Payne's gray color, I'm going to quickly add in the fence you're on to the left side. Now I'm going to quickly add in the reflection to this fence also, just as we added Google's branches, very small ones, as you can see, nothing much in detail. Now just going to add lead to autism deadlines as well to reflect the fence perfectly. And you've been adding the deflections makes the painting look more natural and more real. So I just felt like adding one more branch shop, just me or to the house with smaller branches popping out. So I'm going to quickly add this and then we'll just be left to add the snow deviance and do the painting. You can see I'm using a size four brush. Even then I'm even to add these smaller and finer details of branches using this brush because it's the pointed tip that this brush has in peace of your brush does not have a pointed tip. Your smallest brush to add these GPS. Now just adding in that reflection to this new branch that we added in your. Now let's pick up some whitewash and begin adding the details into this house. So I'm going to quickly be adding in a lot of snow into the roof of this house. And you can see I'm adding it ready randomly so as to show that the snow is being connected, innovating random shape. And hence, I'm pulling a little of this noise effect into the house area as well. And I'm going to cover the rest of the entire rules with this snow quickly. Now just going to add a little snow your at the bottom space as bed and on the roof also, you can see I cover the roof of the house with this north in such a very random manner and created a little mountain lake look of snow on the roof as well. And now onto the edges of the house, I've added mode off this note. Now to the US House on the right side, I'm going to add the snow and I just have to love the brown color picked up on by my hand. So I covered that also with the white quash bakery. Now on to this roof as well. I'm just going to add in the snow, bought them site again. I'm just going to add in a small batch collected Nieto this house as well. Now I'm going to quickly add some slower on UDL connections off this spans and an added onto the branches that we have added in so quickly. Now on through these branches going to add in a dense snow collected in between these branches. Now using the brown color, I'm just adding little details on the roof as valley as you can see. And now it's the best thing to do with that is Plaza this nose and let us do. Okay, so now I'm just going to pick up the whitewash in a medium consistency and I'm going to just dab my brush and let us know all fall onto the entire painting. Now, you need to be sure that the table around this all paper is going to get legitimacy. So you can spread some visual pay both odd or health people around. So that does, no, does not spoil your paper and you'll do not mean it again and again. So I'm going to quickly just dive little snow into this painting and make sure that you'll use the whitewashing a little tick consistency so that you get the opaque look to this node. You're, if you're going to be using it in a watery consistency, you want get the opaque look. Let's remove the masking tape and see our final painting. I have quickly cleaned up my day, but also I just added the white quash effect onto the doors and windows of the center house. As you can see, I missed to add that thing here, so you can just add those details into your painting as well. So your is up beautiful painting for D3. I hope you guys enjoyed painting this beautiful snow house with me today. I would be seeing you guys into the default class project tomorrow. Thank you so much to each one of you for joining me do this totally Watercolor Challenge class.
13. Day 4 - Snowman : Hello everyone and welcome back to the for today, we are going to be painting this pretty looking snowman into the sunset view. The colors that you'll need for today's class project is Naples yellow, red, orange, civilian blue, brown, green, black. And by gosh, we're first going to be creating this beautiful lights sky and then be adding the details of snow and the snow man. For painting the sky, we are going to use the colors in a very diluted consistency by controlling the water and adding these strokes, pulling out from the edges and create this beautiful sky and then add the snow man. So let's begin painting. So I have my people, they've doubled to all the four edges. And I will quickly begin with the pencil sketch for the snowman. So I'm first going to place the snowman towards the right side. You can show the change the placement of the snowman according to your choice. It may not be the same as mine. Also, according to your paper size and the size of your snowman may be. And make sure that you add the pencil sketch of the snow man with a very light hand and the light sheet. Because as you would have seen in the thickening, thus no man is going to be off the eye's color only and it's going to be very light. So in order to avoid those charcoal marks after you pin the entire thing, it's very important that you add the charcoal marks very lightly. Now in-between the fees and the body, I have quickly added in a scarf and now just added a few buttons at the bottom space, I'm going to add a hat and then the details into the face area. So just a pretty looking symbols no man that we are doing. Okay, and nothing much in detail. We will paint all of this part by part. Once we paint a beautiful sunset sky. Now I'm just going to add those branch hands to the snowman as well. And then just going to mark out the horizon line. That is the distinction between the ISPs and the sky area that we're going to paint it. Quite small at the bottom as you can see, and it's a little slant as you can notice. Now, at the top I will begin applying of Lean Court of water. And I even tried to avoid adding the water into the snowman speeds because we will be painting the sky with the sunset colors. And The Snowman is going to be of a very light iStore. So in order to make sure that no Carlos go into the snowman, do not apply any water in Buddhist no, ma'am. Area. Now water can run into the headspace because their hat is going to be over black color. Any color underneath will be hidden. So you can see I'm applying the water just around us know man being careful of not taking it into the snowman face and the body. Makes sure to run your brush multiple times so that your paper stays wet for enough time. Because we are going to be using a lot of colors into the sky and create a routine looking sunset sky. So in order to achieve the perfect blend, you need to make sure that your paper will stay wet enough for a longer time. So first I'm going to begin with the synonym blue color. You can see I'm adding so much water and very less of pigment. And I'm just going to pull this color out from the edges. Now you can see in the center, I'm letting the gap b, right? Because we will be pulling the other colors from there. And even in between the blue and leaving little gaps. And I'm using a very light tone of blue as you can see, make sure you do not use the data kalos otherwise, it will be very difficult to achieve in that 3D looking like sunset view. And in this inverse base you can see I have maintained the white color look completely. Now next I'm going to pick up the Naples yellow column. You can use any light yellow which is available in your ballot. And even the yellow color I'm going to be using in a medium consistency. And I will just begin adding this color into the centers piece. Now when you begin to add the other colors, make sure you control the water. And you'll know when the blue and the yellow and react, it will form a greenish tone. So around the blue color, apply the yellow color with a very light hand so that it does not form adapalene or don't because of the blending of the nose and the yellow. So now from the edges and pulling the local law in between the blue strokes that we added. And you can see now you have two strokes coming back from the edges. That is the blue and the yellow color. Now next I'm just going to pick up a little octo orange color. And I have mixed in the orange and the yellow to get. And I'm just adding little darker highlight. And I can quickly lighten them by spreading through the rest of the yellow strokes that we have added in. Now next I'm picking up the shade of red color. I'm going to add very light highlights with the red color in-between the yellows and the blues. You can see I'm adding these strokes very randomly. But the key is, you should not pick up any excess water while picking these bins up. And you need to make sure that you pick up these things in a very nice consistency. And despite being in a light consistency, you can see there is no water on my brush. Hence, the beans are not spreading much and they are redeeming the shape in which I am pulling them out. So this is a polar body, sunset sky, just pulling the color stops between each other very carefully. Now, for this guy to dry first and then the rest of the details for the spindle. So now my sky is completely dried and you can see we've got such a pretty looking blend of the followers and the colors are so light. And so now I'm going to apply a layer of water onto the rest of the bottom space. Now this time if you run into this moment body, it is okay because we are going to be in the snow area as well in the open space. So the palette, I'm just going to be light so fast I'm adding a very light tone or light wash of the blue color. You can see at the top near to the horizon line, It's much more like dof, and at the bottom it has little daffodils. Now I'm going to quickly pick up little of the beam three fallow And just going to add some darker highlights into the snow space. Suppose near to the snowman body to add some shadow to the snowman, going to offend some Payne's gray color and blend it with the blue color that you have added in. Now from the edges just going to pull the Payne's gray color out and you can see how the father is forming another look to the eyes and giving it so much death because of the shadow looks at this darker tone, is giving it. So again, just from the edges and pulling the Palo undescended of the ISP's is light with that blue tone itself. Now just underneath the snowman, I'm going to add some darker shadows further ahead with the darker tone of Payne's gray color. And you can see my background is still wet and I'm blending the shadow into the background. Make sure that your snowman EDA is dried. Otherwise this column is spread into your snowman as well. And this domain is going to be awful light tone, then it will be very difficult to hide this darker. So you can see I'm quickly lifting up the fallow which is spreading into the snowman using a damp brush so that I do not have any darker tones there. Now next, I'm just mixing in a tinge of brown Carlo with the Payne's gray color. I'm using this docker dawn, I will begin painting the head of the snowman. We will address of the details on the horizon line. Once does no area is completely dry. Then then we will quickly begin adding little details into the snowman than that bottom space. So using this darker tone of brown, I'm just going to add the entire in-between the heart. You can see we have a very thin line. That line we will be painting in with the red color later on. So make sure to leave that line right and add the red color to it, leave it at all. So once both the top and the bottom space of the head dress, then we will add in the red color there. Now I'm just going to be these branches that is, I think as the hand to the snowman. And you can see this time, I also, I have added in a very crooked manner and not just a straight line. We'll give it a pulpit branch look. Now I'm just going to use a very diluted bone of the city in low follow and Pindar and bios, No man body. I'm just going to let us know Mandy, with this light tone of blue color in between if you want, you can just add a little pinch off the beam sleep Allah, or mix a little pinch off the Payne's gray palette to your blue colors. So first I will add it only to the lower part of the body because are the top be careful that you had EDA is still there. And if you add the color palette from the Hackman, begin to spread into the area. So you need to be careful about multiple things because with watercolors, the pandas will begin to spread and move into each other. Now just using some darker tint of the Payne's gray color, I'm adding it onto the edges triangle reflect and create some new no shadow blue, this snowman that is standing Your, I'm going to quickly blend this pins gray color into the body space using a damp brush. Now using this brown and pains click Allow mixed, I'm just going to add very different Bush on Buddha horizon light. So pasta, I'm going to add bush with a lighter tone of brown as you can see. And then this I will just add a little darker paint at the bottom space. Now you can see in-between my snow idea was a little wet. So at that place, this knitr ground Gallo has spreading. Know. When I will be adding the darker tone, I will try to cover up this mess that has happened because of the snow idea being wet. So make sure that you have no ADS completely dry to avoid this beam from spreading. Now the half of the snowman has dried and I'm quickly became the face of this domain with the same color, that is the blue and the Payne's gray mix. And once they dry, we will add the details of the eyes, nose, and the Smiley onto this nomad and even the buttons at the bottom speeds. And then we would even being discussed with a red color. You are also on the edges. I'm just lightly adding in a little of Payne's gray dots. You can see this will just act as the shadow effect because of the sunlight. Now you're at the top and between the hat adding in the red line for which we had left that space MD. So let's stop it also going to be of this same that I'm using in the Permanent red color from my palate. Your, you can go ahead and use any red tone, which is an abundant know ballet. And if we do not have any date, you can simply use the scarlet color. Now I'm going to pin the scarf also quickly, make sure that variable you are adding the paints, all the areas around those are completely dry. Otherwise the beams may begin to spread and slow into each other. So I'm done adding in the red color to the scarf. Now while this is still wet, I'm just going to pick up a little of the bond C and Apollo. I'm going to quickly add it onto the edges of the staff to create some shadow effect for this top area as well. So you can see just on the red, red color and quickly dropping in little of the Payne's gray only onto the edges. Make sure that when you add this Bhante enter, you do not add a lot of water. I use the mainland spread a lot and admin cover the entire space and you've been lost or red color. Look. Now next I'm going to pick up a little more of the Payne's gray and I'm quickly begin adding the DB in Buddhist no man. Now the nodes of this, no matter, I'm going to be painting it with the red color. The same that we used in for the scarf. And rest of the details I have added in with the Payne's gray color. You can use a black color in case if you do not have a Payne's gray color. Now I'm mixing Payne's gray and brown. I'm going to add the second layer of the bushier. So this time it's more of beams three and very less outlawed. And it's going to be smaller than the forest area. And you can see it's automatically creating the Doppler effects. And in between you can just pull out little of the classes as well like this. Cmb, even you're on the right side. I'm going to quickly add the darker shadow for the bushes as well. Now I'm going to pick up a tissue and this is still very quickly dab of tissue on the second layer, the bush and some lighter and darker effects automatically mean end of the tissue and dab it in between. So now you can see it looks like this, no eating. Also in-between, you just have little of the darker ones and then the rest of Beta stone by dope, I just dabbing a tissue and do it quickly. So you need to do this. Why is the area is still wet? Now going to pick up some Payne's gray palette. I'm going to add a few branches. You are into this most famous moving in the sky. So you can see I'm adding random branches. Now since my brush has a pointed tip, I'm able to add all the details together just using one brush and even add the pointed edges and thinner branches to this using this brush itself. Now using this brush, I'll quickly adding the shadow to these branches. Okay? And in case if your shadow dawn staff, you can quickly dab it with a tissue. Now since I'm using a very diluted don't I don't need to use a tissue to dab at this time. Hence, I'm directly adding it without dabbing it off. Now the last thing, let's pick and white quash and begin adding some snow patches onto the branches and onto the snowman HIV as well. So just have that connection point of the branches. I'm adding some snow patches, even under the snowman, just going to add little onto the scarf, EDR top space or literal onto the hat and Lipton onto the hands of the snowman. Now just adding very little snow effect at the bottom of the bush as well, but not much. Now it's the time those plateaus, I'm snow. So I'm going to quickly pick up some whitewash into my cap of the white Bush quantity. I'm going pick it up in under two medium consistency so that I can easily splattered it in case if you're using whitewater color will not give you that A-B-C Look. You can either do was y equals two, colors are right, declare legs if you do not have a bush. Now if you do not want the RMS on the table, then you can quickly lay down some tissues around it so that you do not have to clean your table. Now, for I forgot to add little of this no effect on the headspace, so just adding that a bit. And then again I will begin splattering a little more of the stars. Sorry, thus no effect, not that starts actually. So you can see this time I'm slouching a lot of the small effect in between. I'm even getting some bigger blobs off the snow and it's looking also pretty together. Just that might be even it out mess. And that is it BID with our painting for the four, Let's quickly remove the masking tape and see our final painting with those clean edges. Make sure that the edges are completely dry before you begin to remove the masking tape. And remove the masking tape from an angle so that if there is any watercolor paint on the masking tape, it won't run back into your painting. So your ability snowman for D4, I hope you guys enjoyed being pretty snowmen and getting the Christmas lights on. I would see you guys tomorrow into D5.
14. Day 5 - By the Lake: Hello everyone and welcome back to the face. Today we will be painting this beautiful lake side view. And the calories that you need for this class project is Naples, yellow, orange, brown pins three black and by Porsche even phosphate creating a beautiful sunset sky with the orange sheet, then painting a reflection of the sky into the leaky area. And then we are adding the snow and the rest of the details and do the same thing. So let's begin painting. And let's begin by painting the sky first. So I have my paper taped down onto all the four edges. And there is not much of a pencil sketch for this one. The only pencil sketch that we will be having been quickly mark out the horizon line. The horizon line is almost in the center of the paper. And at the bottom species and quickly marking out the league, EDR and the rest of the area is going to be the IZ. So just very light pencil sketch as you can see, nothing much in detail. Now you're at the horizon line will be painting some blurry Bush effect of very small, right? Like this. So just a rough pencil sketch to let you know. Yeah. Now let's begin with a beam coat of water onto the entire sky area. And even phosphine does die before that to dry and then paint the leaf area and I apply an even Nero for DOT or do the entire sky space, make sure that you apply an even layer of water throughout and that there is no foothold of water left anywhere. Otherwise, the water may seep into your painting and Miss point the edges of your painting or wherever the porthole of water seeps in groups. Sam, first keeping some orange colored ready because after the ad in the yellow color, I will quickly be picking up the orange color. So I'm going to pick up the yellow color first. I'm going to begin at a fly into the center of this guy's BCE. Now next flows to the yellow. I'm just adding in the orange color. And you can see, I'm just trying to blend both the followers and maintain the yellow color in the center species B, the CLV adding darker orange sheets there, but even cyclopentadiene, a little yellow color just near to the sun space, as you can see. Now at the top space, I'm just going to add in a little bit of burnt sienna to this orange color and attitudes have the dot. So you can see I have got an orange brown sheet and now remaining top speed, I'm going to just mix in a little bit of my write it with beans green. I forgot to mention the violet color in the pallet list. Also in case of your remark after violet panel, you can just mix in a little bit of your Pin Lu and the Payne's gray Palo and get this so, you know, while it is Show grid like this, and this will imply that at the top space. And again, you can see because of the orange column, you get a muddied on there. But since you already have underlying brown, it creates a perfect blend with each other. Now I'm quickly going to overlay the same fallows in the order so as to give some darker strokes because I want quite bold colors once the beans dry. So I gave another neuron of the brown and orange mix now and under the hood of the orange color. And then I'll again add in a little bit of the yellow color as well. Because watercolors dry or don't lie, don't. Hence, since I want volcanoes after they dry in, I'm giving you a bold color look right now as Ben and near to the horizon line. So you can see, I'm just trying to give in the darker orange towards and just near to the sun I have managed to maintain in the yellow column. Now I will pick up this orange and brown color mix and begin adding some darker strokes at the lower level floor near to the horizon line. But the strokes are going to be quite less in such a way that the orange palette is also visible. And you'll get duotones your at the Balkans fees. Now just going to pick up a little bit of this violet and the beans green mix. I'm going to add little strokes at the bottom layer as well. But make sure that you've not pick up any excess water. By adding in this CEO, you need to remove all the water just to add a little cloud effect. I'm using this color tool. And if you will add a lot of forethought, the beans will spread a lot. Also you will still pains in a very light consistency, not too dark as you can see. And near to the sun, I have still been able to maintain the yellow and around it, I'm adding a little of the cloud effect with this violet color. Now despite knowing that the violet and the orange mixed together, they form the radical. You can see, since we made it with a very nighttime, we have been able to achieve the violet, fell in love and not lose it to all muddy color tool. So you need for an attention did on your hands. Now I'm mixing in the same violet and the beans green color. And I'm going to add a little effect on, you know, near to the horizon line of the glory details. So far, I'm going to keep a masking tape under my people. And this time I will just keep it your at the top space. I'm going to tilt my board so that the paints do not flow upwards again into the sky space. Now. Now make sure that you wait for a few seconds before beginning to add this. Otherwise, if the iga is true, well, then the beans will spread a lot. I have a different a few seconds. And now I'm going to pick up this mix of violet and Payne's gray color. Make sure that when you pick this up or you do not have excess water on your brush, as you mentioned me should only be having in the Figma. And, you know, always keep a habit of dabbing it onto a lot of people or a tissue before picking it up and adding it onto the paper. So quickly I'm going to add these small Bush effect onto the entire horizon line. Make sure near to the sun, you add them quite small and try to maintain the horizon line and give or definite medial to the horizon line by adding in this bush detail. So if you'll notice I have been adding these D1 indifferent heights throughout. I am not adding them in one single right? And kneel to the sun. I have added them quite small. And now again, moving towards the right, I'm just going to take them off the height at the left side. Now. I'm just adding some darker details by picking up the Palaeolithic of consistency and opening on for the first layer. And you can see we are getting the darker details. My beans are not flowing much and I have been able to maintain the blurry look and yet not spread the bead. Now let's wait for this to dry. So my idea is completely dry it and even begin painting the CDR. Now that is the nape area. That area is going to be an exact reflection of the sky species. So fast I will begin with the import of water. I will not be adding water to the ISPs. Now, PDL been dies phase once the needs phase is completely dry. Now in the leaks piece, just read the sun is in the sky area just at the same place your interleave, we are going to be adding the yellow color to reflect the sky. Oh sorry, the sound reflection into the leaky area. So you can see just a small patch of the yellow palette. And now I'm going to use the orange color and lay down the first layer of orange color into the entire leaks piece. After this, we will be adding the darker edges using the mix of the bond sienna and the brown color. So now I'm just going to mix up on CNN the orange and undo the edges either begin adding the Docker push and pull out a little of the effects in blue, this nape area. So in the center try to maintain the yellow color. And on the edges you can begin to add this orange and brown mix and just pull it to the center. And you can see getting late reflection of the lake B simply by just beginning to add in the Dakota. Now at the top we are going to be painting some fine T. So why is this is where we will add the reflection to that bind G is now only in the leg area. So I'm going to be using in the pins gray color. And again, you're also, you need to wait for a few seconds for the Leaky idea to set. And then just as we added the bushes same behavior going to be adding this reflection into the lake area. We will be adding the F9 key is just about this. So I'm just adding a very rough reflection to define g is that we are going to be adding above. You can see very simple reflection, but this is wet on wet. And said You need to control the false. We'll need to set an in a bit. And secondly, when you're adding these things three column, make sure you do not introduce any new water. You only ask pigment which will automatically give you the blurry effect. And also I'll give you the shape effect of the videos that you want to add it. I'm just going to add little at the horizon line and a metal onto the right side as well. Now whenever you want to please the pine trees, you can add the reflection there. So your placement of the findings can be different than mine. These findings are going to be just at the edge of the nail. That is why we are adding the deflection into the space. Now just giving another layer of tobacco details to the deflection just as we are difficult, Bush's about CMV. All of this is wet on wet. We are still going to be adding a little deeper into the leaf. So I'm just mixing in a little more of the brown to the orange color and onto the edges, I'm going to drop this darker shade to create some reflection and some shadow details. Now you can see just by adding this darker tone on the Edge, be automatically get so much more depth to the leaks. Bce suggest mixing in a little bit and more of the buoyancy and ethical orange and adding mature and adding a lifting VIV effect. But you can see I'm still able to maintain the yellow color in the center for the SCN species. Now just going to darken the brown of bit by adding in the beans green. I'm going to add another edge at the bottom speeds and pull out a little more strokes. So you can directly use abundant book a lot. But I usually prefer mixing in the fellows on my palate if they are already there so that I do not have to waste in the fellows. So I just mixed in a little bit of beams lead to the orange and brown mix and got this darker tone of brown. Now let's wait for this to dry completely and then add the rest of the details. So now I'm just going to add a little detail to the sun. So I'm just going to pick up the yellow color. I'm going to pin the sun completely with this yellow color. And then I'm going to pick up a little of the orange color and just blend it around the sun species. Now in these, if you're not sure about blending it, and if you feel that you missed points on the beam, then I would recommend you to just add this on with the yellow Palo and skip the rest of the Bible's blending it with the orange fallow into the skies piece. Because, you know, The using a damp brush and quickly blending in the Skype bot and you must did not having the sharp edges. But in these, if you really want to level up your game, I would recommend you to try this first under FIFO and then tried to new or fainting. So now I just added the orange color. And now using a damp brush, you can see I'm pulling up the sunrise trees and just trying to blend it into the background. And now I'm just again going to pick a damn brush and blending into the background and even avoid the sharp edges as you can see. Now let's add this new space. The albedo of the sky is of the dark Red Bull. We are going to be adding in the snow also with a Dakota board. So I'm just using this mix of the violet and beans three in a very watery consistency. I'm going to add the complete story idea with this scholar force. Then we will be adding a little patches with the white quash. You not to give in a little more bright snow effect d1. That is, we will try to show that not all of the ego of the snow is reflecting the sky of Fallows. Okay. Now your, what I'm using is 95 percent water and only 5% of the pigment me. Make sure I use it in a very nice consistency, almost equal to water. So same day, even on the right side you can see I'm quickly adding it does nor with this scholar force we are literal, careful neoplatonic. Make sure that you are making idea was completely dried before you begin to add this. Now just adding the two reflection with the orange, yellow, and blue, the snow ADR so as to reflect the orange effect of the sunlight as well. But you can see I added the orange very little almost equal to just do three strokes. Now I'm going to pick up whitewash and just going to begin adding little details. The whitewashed. So we cannot add the fine trees until the snow area is dry. So I think we had this no effect in blue, the lake area. So I'm just going to add some snow patches into the next piece, trying to show that awesome Small has been collected and getting formed into the next piece as well. So just white badges. I'm just going to even splat to the lifting of this noise effect into the late speed. So you can see just an against black dot on into the lake area. You need to be careful that the snow does not get splattered anywhere else. Now I'm just going black little of this nor the DIN. You're new to the bush area as well. But it's going to be quite limited and not much. Now in case of building that goes flat, dose may spread into the rest of this piece and you cannot control it by its fledgling. Then I would recommend you want to cover the rest of the space with official ordered of plot and, you know, begin to add this plaque does only at the bottom side of the leaf where we're trying to show the ice patches being formed. Now Neonatal, the bush line you can see I'm just trying to show some ice collected near to the bottom of the bush area. So just knit Denon the world, the edges that we added is now very slow speeds is completely dry and I can begin adding the fine jeez, flexion, which we already added into the CAD. So just above those pieces we are going to be adding some simple pine trees. Click once and nothing much in detail. But just need to be careful about one thing that you need to meet him being the height according to the reflection that you added in. Now you can see I'm pulling out define g a lithium into this Leaky idea. And I will try to blend the reflection later on into this pine tree that we are going to be adding it. So first I added knitted of the brass effect as when analytical branch effect. Now next to it I'm going to add in the pine tree. So you can add a mix of both or just one audio police and just add some simple branches if you wish to, if you do not want to add find genes for this one, it's completely your choice. Just typo main theme that affliction size at the top species as well. Now I'm going to keep adding these binaries to the place that I have added that reflection. And you can see I am decreasing the height according to good reflection. And I have just added in a directed graph effect again. Now just using a damp brush, I'm just like me or the barber media of this triangle blended with the reflection. And now you can see it looks more real than blended. So again, this site of them going to do the same thing I haven't picked here and define G and an a to love the branch effect. And then just use a damp brush and lighten the bottom space and try to blend it with the reflection area. Branco make it look more real. And this side you can see I'm adding more of the bush details rather than the fine Ji De Beers. So as I told you, you can keep adding different kinds of t is called the deflection because we've added a very generic reflection. Now seeing that I just use a damp brush and try to blend the reflection and about trees and the push details that we added. Now I'm just going to add a little of the branches as well into the rest of the eyes face. Now we're going to add little branches. You're onto the left side as well. I'm going to add little more branches nature on the entrepreneur side as well. But I will make sure that I do not run into the science piece. Again, I'm using a pointed tip brush pens. I'm able to add all the smaller and bigger details altogether just using this one brush and even the point of V gains, I'm, you know, you can see I'm adding the pointed tip and then adding a little pick-up or open space. It is all because my brush has a pointed tip and I'm able to control my brush movement. There I need justice movements and bed. I need to press the venue of the brush. I told you just adding little more branches near to the sun. So between the branches, the sun will be peaking out. Now I'm going to quickly add a little reflection to these branches that we added in. So just very light reflections as you can see. And this time I'm going to use a tissue and get very light reflection. So as I have discussed within the technique section, keep a tissue handy for each class project. You may never know in which class project you will need an issue for adding different things like in previous class project. Thus no man project that we've been dead, we added in the second Bush layer and be quickly that does Docker reflect Docker or bush efficient lighting that using a tissue. Now in them. Just adding a little reflection to this song branches that we added and just dab it with the tissue to lighten the reflection. Now, we are going to pick up five squash and add a little snow detail onto the branches. This time, we won't be splattering this nor even just be adding patches of this node. So even around the leaky area, you can add little patches of the white snow. So basically, we are trying to show that the rest of the store is having a reflection of the sky. But some bad debt is white snow, which is still visible. So just in between the connection point of the branches you can see I'm adding in this modern day, okay? And I'm just going to give middle of the dry brush at the bottom left space as well. So as to reflect that and lifted off the white snow is visible at places very randomly. So even do the bushes of near to the lake Ada, we added little ice collection and now on the left side and the right side just added lifting dry brush to reflect some white snow. And that is it. Now just going to add little snow your near to the horizon line where the leak and the horizon line is meeting. So as to map a little distinction, you're okay and that is it we are done with our painting for today. And just some final touches your into the space which do audits. It's perfectly okay to leave it there. So now let's remove the masking tape and CFI and then painting with those clean edges. I hope you guys enjoyed painting this beautiful lakeside view with me today. And learn how to add the reflections in uploading Mano into the league for the BBS, that would be just did on the Lee. And I hope you guys enjoyed painting this beautiful project with me today. So your final painting with those clean edges. I hope you loved painting this beautiful bold sunset today. I will see you guys tomorrow into the basics class project where we paint some beautiful mountain ranges with some snow cave look to see you guys tomorrow into the basics of this copd watercolor challenge. Thank you so much to each one of you for joining me.
15. Day 6 - Snow Capped Mountains: Hello everyone and welcome back to D6. We're going to be painting this beautiful snow-capped mountain ranges to be the colors that you need for this class project is Naples, yellow, brown, beans green, black, and white. Gosh, these are the minimum colors that you need for this class project. We will begin painting this beautiful light looking sky first and then move to the C and the mountain ranges and then add the snow cap below. The mean technique that we will be using your is going to be a lot of the dry brush strokes. So let's begin painting together now. So I have my people, they belong to all the four edges. And I will begin with the pencil sketch. So the pencil sketch, as you would have seen in the reference image that you have been doing, is going to be the horizon line and the mountain ranges. So I will add the mountain range almost just in the center space and older the top of this, I'm going to be adding in all the mountain ranges just about over rising light. Now you can see I'm going to be marking off the mountain ranges vary randomly. So you can go here to the very differently also the mountains, if you wish do. And I will add the distinction between the mountains while adding the pencil sketch so that we know that we need to add the darker highlights so as to define the mountain ranges separated each other. Now, I'm going to add another mountain range in a low-lying effect. And it will add all these mountain ranges in such a way that the distinction between each of them is visible. Now in-between these mountains also, I'm going to add some darker areas and lighter areas. And for that I'm adding these center lines so that we know major even left side of the mountain, you're going to be adding in the light oranges and the right side of these mountains, we will be adding in the darker tone. So that is the Docker dry brush effect. At the bottom space, whatever we will be painting, even directly be adding it with the beans and won't be having any pencil sketch. Put it. I haven't quickly begin with a thin coat of water only onto my sky space, but make sure to not add the warping to the mountain range because the mountain range is majorly going to be only with the dry brush strokes and not adding anything today. Hence, you need to be a little careful while adding this layer of photos so that you would not run into the mountains fees. Because if you add any color on the mountain space, it will be very difficult for you to cover it up with the proper dry brush tool. So be patient while adding the water and the beans in the sky species. So I'm done adding in the Queen CTO photo. Now I'm going to quickly pick up the Naples yellow color force and I will begin to blend the Naples yellow color just near to the mountain range into the skies piece. And I'm going to be using a very light consistency of this column. You can see, and if you had seen the image of this building in the beginning, you know the sky is of a very light tone, adding little yellow effect to show some sunset effect into the skies. And now we will just be picking up the Payne's gray color. I'm going to be adding effects with the B3 follow into the sky area in between the yellow strokes also that we added in. Now, even that means three colors. You can see I'm picking it up in such a light consistency and then I will begin adding some darker strokes. Now do not add the darkest dropped altogether. Add them Leo by Neil so that you have different color tones into your Skype. Now when I'm adding this neo to the yellow color, you can see I'm adding it in such a way that the yellow color is still visible and near to the mountain ranges. And very, very appealing that the color has dropped up on a tobacco. Make sure to quickly use a damp brush and pick up the excess color. As you saw, I just picked up the color. Now on the edges, as you can see, I'm adding the darker highlights and near to the mountain range and making sure that the yellow highlights is visible. Now again, I'm going to pick up a little yellow color in a medium consistency. I'm just going to add it little by little knee up to the mountain range, but very slowly while painting the sky so that you do not overdo any of the colors and you maintain a light tone as well. And also my lighting the colors. Just be careful that you do not add it into the mountain range. Otherwise, as I told you in the beginning, it will be difficult to add the dry brush uncovered the fallow strokes. Now next, I have mixed in the beans green and a brown color. And I'm going to add the darker highlights at the top space with the brown and Payne's gray mix, I have added in the bond sienna color. You can go ahead with any brown bone that you want, but just on a dark brown tone to add a little more sunset effect. Now to this mix only I'm just adding a little bit more of the industry and creating further darker tone. I'm going to add little more darker highlights onto the brown and the pins, three highlights that we add it. Now, you can see my sky is having so many calories despite using just minimal colors. We have needle off the ground look yellow and the Payne's gray blue. And we've tried to create a perfect evening light sky. Okay, So this is a photo sky speaks not done. This guy's been strike even quickly being done the water ADR, because we cannot pin the mountains until the sky is completely dry. So I can quickly begin with a green border photo onto my entire CSPs. Now for this guy, I'm going to be using in the sheet of the blue color. So I'm going to use the city and Luke are like, Oh, I'm going to add a very nightly or into the entire CSPs major. It will be in the ascender space. You can add in it along the edges as well. But I'm not concerned much about the edges because on the edges we are going to be adding in the mountain ranges. But in order because we do not know, oh, you know, what mountain range you would be taking. Hence, I would always recommend you to add in the blue color onto the entire space as the mountain ranges are going to be off the darker color and getting an antenna yet easily covered up by the blue color as well. Now I've just picked up a little of Payne's gray color. I'm going to add little ripple effect into the CSPs, wet on wet. So I'm adding this while my paper is still wet. But when I'm picking up the beans green color, I'm making sure I'm not picking up any excess water and just going on with a very nighttime to add in a misty effect into the CSPs as bed. So that is eight. Now let's wait for this to dry and then we will begin adding in the dry brush into the mountain ranges one by one. So now my sky and the water is completely dried and I can begin adding the details into the mountain ranges. Stand for speaking up a little of the Naples yellow and the themes vehicle onto my palate, I have been defiled, Apollo's in a light consistency and onto the right side of the mountain ranges, I will begin adding in this lightly or of kalos. I'm going to add them. They don't dry because it's just a very small space and nothing much detail to add wet on wet. Hence I'm directly adding in the fellows. So at the top to give a little up the sunset effect, I added a little yellow effect and then little of the beans grab the bottom. I'm just blending both of them. So as I told you in the beginning, the right side of the mountains are going to be darker in tone and the left side of the mountains will be lighter, tends to create the Doppler effects onto the right side, I'm adding in this portfolio CMB, even to the second mountain range going with the same palette mix and adding the darker shadow effects, because we didn't have to wait for this before even adding the dry brush onto these ideas. Now as I'm moving towards the right side, I'm just going to be using in more of beans three onto the entire right side mountain speeds because you can see as we're moving towards the right side, even the sky is having more of pins three and very less of the yellow effect so as to reflect the same things onto the mountain range, we are going to go ahead and leave it the leader of Payne's gray onto the right side mountain scapes. Now onto the left side of this mountain scapes, I'm just going to be adding very little effect with a very light tone of the Payne's gray color, just very little medium, you have the bottom species and you can see already getting these patches, botanical dry brush strokes because of the paper texture and because of the water contained by picking up the color. So already this will begin to act as the false Neo4j dry brush of a light layer. And then on to this we will add for the deviance of the dry brush with darker tones of pink and black. Now in the first year of these mountain ranges dry, we cannot add the dry brush stroke. So even begin painting the mountain ranges at the bottom space in the sea. So I'm going to be mixing in my bond sienna and a Payne's gray color and begin adding into mountain ranges at the bottom space. In the z-space area, you can directly use a darker tone of brown order cpr Kahlo, I perform it in Palo so that I can, you know, in-between lose the individual callosum is better to give little more detail effect. Now, I'm just going to begin adding very rough shape of the mountain ranges indices. And in-between. I'm going to be using in only darker Payne's gray color that give some DACA effects as well. Now, if you want, you can pause, read, and watch heat I'm adding at one end and then on the other end. Or you can go ahead and paint continuously and simultaneously with me as well. So I can begin adding the mountain ranges one by one. Now you need to be sure that when you are adding these mountain ranges or overlapping onto the top mountain range, the dark bounded range for SNR is dried. Otherwise, this beam we begin to predict there and it will be very difficult to control the spreading out there because of the red background. So you just need to be a little careful by adding these details. Now I have just picked up some Payne's gray color without adding bow. And at the bottom, dangers of this mountain, see I'm just dropping the Payne's gray color. So the brown color is still wet. Hence the Payne's gray is automatically spreading and blending with the brown dog and creating another effect into the mountain ranges. Now I can begin adding the bottom ranges mountain and just underneath this connected to each other. So I'm just going to make them Lipton smaller than the previous one. Okay, Ivan first just define a very rough outline, do this and then add the D1 color into all dispatch completely. So you can see, I'm pulling out this e ya indifferent Lands Act places. So at the top we added a mountain and at the bottom the giant book epic justice model, feet of space. And you can notice we're just adding different lens. I'm pulling up this piece based, seeing right now on to the right side, onto the left side, I'm going to pull out an equivalent, the opium space. I'm just going to make them up different lens. Now just as added on the right side, I'm going to quickly be using an only the Payne's gray color in a very dark consistency and adding similar field effect onto the left side as well. Now you can see I'm pulling it your also independent lens. So make sure to call them out smaller Chicago logo and in-between leave some space for the CSP is also to be visible. Then onto the edges of this v that we're using invite wash needed on and adding a little of this no effect collected onto the edges of this field space. If you want, you can add this field ADR of it differentiates of green and brown as well. If you want to add a little more of a green field effect. So I'm just finding this top mountain range and lithium light, so I will just quickly darken it with a little darker. Now let's begin adding in the dry brush onto the mountain ranges one by one. So I'm fostering, breaking up the mix of the brown and the Payne's gray color in a very light consistency and beginning to add the dry brush only under the left side. Now you can see every time that I pick up the paint that I am dabbing it on. Rough cloth diapers just kept beside it so that I do not have any excess water. I'm defining the edges and I have pulled the drivers walk from the top and the bottom space meeting till the center line. And the Centaurs are unwritten light, as you can see. Now, onto the right side, Eigen quickly begin adding in a little darker effect for so I will add some darker lines so as to make a distinction between the left and the right side. So the line that we added in the sample space, I'm adding them with the Docker loads and justifying the shape of the mountain range first. Now you're at the bottom space and post adding some darker patches onto this, we will be adding in the dark or digraphs drop once this dries. So your first time adding more of patches and less of dry brush onto the right side. So this is just the second level of adding the details into the mountain space. After this, we will be adding the darker tones for the dry brush and get more detailed look through these mountain ranges. Now just in this scene, I'm going to be adding it onto all of the right side of the mountains and the left side of the mountains, using darker dawns on the right side, lighter bones on the left side. And on the next slide, I haven't tried to add more after I brush instead of patches. And in the same deadlines I will just try to add in a distinctive lines and define the mountains onto the right side and onto the left side you can see I'm moderating major tobacco lines or mountain lions. So as I told you, onto the right side of each of the mountain and quickly adding in more darker effects and leaving some light does spaces as well on some of the mountain ranges. As you can see. All of this, we just started a lot of details. Now since I want these right side begins to dry hands. I added them all on the right side force. And now I can begin adding the details onto the left side because on the left side we have to add the dry brush now did equity. But on the right side we need to wait for the second batch also to dry before adding in the dry brush. And on the left side you can see we are automatically getting in the light to reflect because of the light OB scholars and directly adding in the dry brush strokes but onto the left side, sorry, under the right side, since we are adding so many color patches post, it's automatically having the decoy effect trying to show in the sky effect onto the right side of the mountain ranges. Now I have just picked up a little darker tone of the Payne's gray color and adding into second patch onto the left side. And now beginning to live in the dry brush even onto the right side of the mountain. Now if you know disband, I'm adding the dry brush back then onto the left side of the mountain. I'm majoring me. I didn't get moving towards the left side and then I'm adding the drivers packed and on the right side off the mountain, I'm imagining I didn't move it moving towards the right side. So that will automatically create the effect into your mountain ranges as well. Now with the darker tones also, you can see I'm adding more patches and trying to add little diluted badges just as I did on the first mountain range, and also defining in the center lines. Now under the left side, I'm just going blind in the tobacco dry brush. I will quickly paint the rest of the three mountain ranges first and then even only be left for adding in the whitewash effect of snow near to the bottom mountain range in the sea area. Now again, you are, you can see on the right side I'm using such a darker, adding more darker badges and more darker dry brush effect and covering major of this mountain danger bit darker because in between I just want data a few off the mountain, that's very less, no effect. So majorly bought off the black part depicts more of the mountain being visible and more of the white bar debits more of this no being collected on the mountain. And since I wanted to add in the shadow effect of this dye onto the mountain ranges. Hence, I have been did all the right sides of the mountain with the darker tones. I get so many Nios added, so many color patches to make it look darker than the left side of the mountain deal. If you want alternatively, you can create that left side as the darker tones and the right side as the lighter tones depending on the placement of your son Carlos. So since I asked based painted more of the yellow effect of the sun onto the left. I have given more of the shadow effect onto the right side. So if you want to add more of the shadow onto the left side, I would recommend you all to place more of the yellow polos onto the right side of the sky rather than the left side of this guy. Now again, I will pick up more of beans, lean in much darker consistency, and begin adding little more details onto the bottom veins of the mountain. So I'm going to add some thicker line of Payne's gray. I'm going to add some rough edges and she'd defining these mountain ranges a little more. So you can see, I'm pulling out little thin budgets from the mountain ranges as well. Now again, on the right side, you can see I'm adding more often dry brush strokes as well. Now I have picked up the white quash and I'm going to pick up the whitewash and take consistently without adding much of photo. And I'm going to major in it, picked up color on the tip of my brush. I'm going to add this effect onto these bottom mountain ranges. So I'm just going to add little lines off the whitewash. I'm going to pull out little dry brush effect moving into the sea space. So you can see I'm just adding a border with the whitewash and then just pulling out a little dry brush effect with this brush to create some snow effect elected into the sea area as well. So just a very fine line using the tip of the brush and then the dry brush with does seem palate itself. So the important thing you're again is movie not add any water to your whitewash. Otherwise you will not get this dry brush stroke. And even if you will pick up a lot of whitewash to get out, it will be very difficult to achieve the dry brush look as well. Now I can quickly add the dry brush effect with the light color even under the left side. And you can see just by simply pulling out the color is giving so much of the small details near to the mountain gene. Now your, I'm using the whitewash. You can see I haven't added even a dipole of water to this, and hence I am able to achieve the dry brush easily. And I'm picking up very little paint on my brushes because I know if I even pick up lot of b, I can only get white patches and mark the dry brush effect. We will even be adding a little dry brush effect on both the top mountain ranges that we have added in. Now I will quickly pick up a little more of the Payne's gray color and add little effect onto this last mountain range. Your some Doppler effects onto the right side because the EDA was didn't not dry it completely. Now that is it. Now I'm going to be adding a little more darker effects onto the left side variable. The need is, since this mountain range was a little bit on your, I did not add them previously. Now when they use the whitewash and begin adding in some snow effect, you're at the bottom space that we added three to the fifth area near to the mountain range. Just there. I'm going to be adding in little off don't snow effect. Now using the same by quash, I'm just going to keep adding leptin dry brush effect onto these mountain ranges. And you can see I'm adding them very gently and I'm able to achieve the GI brass draw because I have not fixed effects as being one. And secondly, I have just used off my brush for adding in this dry brush very lightly. Make sure to be a little gentle on your hands. Do not pick up excess paint. Wait for the brown needs to be dried completely and add this NEO bit of a region then hand. If you feel that you have picked up excess paint, dab it onto a tissue AutoDock lot before running it onto a people. And in case if you're not confident about adding these dry brush technique, all of these tested on a rough paper before adding it onto your mean painting. And that will help you a lot to understand whether your brushes having an excess paint or no. So we are almost done with our painting. Just some final darker strokes onto the top mountain range to give more definition. And B, there's very little strokes and defining the mountain dangers on the edges you can see. So in-between the lines that I had at justifying those darker lines and some darker strokes as you can see. And then we'll be done with up ending for the D, another beautiful mountain deal with dust. Nokia's low. This exercise will help you a lot to master the dry brush stroke and we'll get the darker shadow and reflection effects and also help you in creating these beautiful mountain ranges with beautiful views and tribal give it a little more natural effect as you can see here. So now let's remove the masking tape and see if I'm painting with those mean edges, make sure that your edges are completely dried before you begin to remove the masking tape. Or masking tape may begin to meet back and do your people. So your is our final painting. With Dublin edges. The painting automatically look so much more beautiful, doesn't it? So I will see you guys tomorrow into the D7 class project. Thank you so much for joining me.
16. Day 7 - Galaxy Sky: Hello everyone and welcome back to class project seven. Unknowns that you need for today's class project is Naples yellow, violet, indigo, blue, round beans, green, black and white wash. We will be painting this beautiful galaxy to D, and then the painting in this house under the snow. So let's begin thinking. We will first begin by adding in vocalic CSPs and then after the stock the details into the building one-by-one. So I have my people being done on to all fours. And I'm going to take the beginning with the fentanyl sketch side the first begin by marking the horizon line and the house in the center space. So I will just mark the house and then accordingly Iwill marking the horizon line. So you can go ahead with the different silicate for the house. It may not be exactly like mine. So you can change the sheep or the details of the house as you want. And as you can notice, the house is medially at the bottom space and not much in the same space this time. Now in front of this house, I'm going to be adding an offense space. So we will be having three horizontal lines and then some vertical lines to mark the fins. Although if you read this, the houses and live in a diagonal angle this time and Nautilus cheat you that we have added. So the pencil sketch towards the left side of the house is little smaller as compared to the right side, adding in the diagonal view to the house. Okay, so this is a product pencil sketch now in-between if you want just mark in the horizon line and Jill value will be having in the sky area and from value what they are in the snow and the house area suggest about the fence space. I'm going to be having that length. So now let's begin with opinion coat of water onto the entire sky species. I want the adding the water in Buddhist law and the house space at the present. We will be adding these details later on to make sure that you do not add water or the galaxy Carlos, into the snow and the house. If a little of the fellows go onto the roof of the house, it will be okay because we are going to be adding in the snow effect with the white growth there. So the PAN-OS onto the roof will easily get covered up and corrected, but as much as possible, try avoiding to add in the colors. This time, we are going to be painting in the galaxy with the blue and the wireless domains. So in case if you do, while I'm doing, you can mix in your blue and red to get a violet tone. Now I will first begin with the bright clear violet, which is I've eliminated my palette directly. This is the sheet that I'm using from the Magellan mission set. And to this I'm just mixing in a little bit of the pink color as well to just lighten the color. If you want, you can directly use the violet color. I haven't even be using the direct violet color for adding in the highlights as Ben now forced nearer to the horizon line, beginning in with this color. And around the house you can see I'm just using the tip of my brush to add the kalos. So almost half of the sky, I will be covering it up with this violet color. Now to this, why lead to Jeff, I'm mixing in the ocean no color and with a mix of distribution, blue and violet, I'm going to begin adding the color just about the violet color. I'm trying to blend both of these colors. The reason of mixing bowl this so that you have a good transition from the violet to the blue color. Now this time I'm placing the masking tape at the bottom space, making the colors flow towards the top space because I do not want the colors to 0, slow down what's near to the ISPs. I want them to blend at the top space. Hence, I have kept it did at the top space. Now you can see in the blue and the y let us mixing, you get a little mixture of the bluish violet tone in the center automatically because of the blue and violet that you are mixing onto the valid. Now I'm picking up more of the violet color directly without mixing anything and just have the bottom space I'm adding in the second bill so that I get much better blends with the blue. All of this is bet on red, so your people has to stay wet for a long enough time for you to be in the galaxy and get the blends in-between the galaxy. At the top speeds, we're just going to be adding in the darker tone of blue by using the indigo color. Or if you want you ingest mixing Payne's gray to your solution law to get an indigo color. And that is how I'm going to form my indigo color. I'm mixing Payne's gray to my blue color to get a dark indigo color. Now at the top space, I'm going to quickly add this darker color first. Now I'm just picking up the Prussian blue color again, and I'm just going to begin blending in the darker shade of pollution low near to the Payne's gray color that I have added in. So basically just kneel to the darker tones, I want a darker highlights and as we move downwards, I want to lighten the bones. Now you can see variable I'm placing the gallows. I'm trying to blend them with each other, moving my brush those colors again and again. So that is how you will get the perfect blend into your galaxy. Now I'm adding more of the bushing blue-collar in the pollution loose base and trying to blend the pollution Lu with the top dark tone of the indigo color and the bottom color of the violet tone. So that is how you can achieve the blend. Now I'm just going to be using a little of Payne's gray color directly and just give some darker highlights at the top, squeeze and pull it out. Do the little blue color. Again, pick up a little bit of the blue and try to blend it, the doctrines that you added in. And at the bottom, I'm even going to have DACA highlights of the violet color again. Now, make sure of that watercolors always dry or bone lighter. So make sure to add these fellows in a very bold consistency so that when they dry you get that ball looking galaxy. Hence, I'm going with so many layers of colors so that when my galaxy drives I have the ball layer of colors. Now in the blue space, again, you can see I'm adding in the darker layer of blue so as to get the perfect blend again, because I added more of violet and the Payne's gray color. Now while they for this galaxy to dry completely and then even begin adding in the folded into the painting. So now my galaxy is completely dried and either begin adding the details into the screen. First, I will quickly remove the masking tape at the bottom space that I added. And now into the house base I will just add the little details of the windows that I'm going to be adding in it. For the windows we are going to be adding in the yellow color so that OB half the light for popping out from the house face. So I will begin by adding in the yellow color into these windows because we need to wait for the yellow color as well to dry before adding the other details into the house. Timed innately using in the Naples yellow column. And you can use any bright yellow color that is available in your and just fill the complete ring goes with this color for now and vehicle it to dry completely before adding in the other details into the house. Now next, using a flat brush, I'm just going to use the blue color that's in my palette and mix them with a little bit of Payne's gray. And I'm going to use it in a very liquidy consistency as you can see, and I'm going to add it into the complete ISPs. The reason why I'm using such a dark color for the eyes this time is to reflect the effect of the above galaxy, even undo the ISPs, even still be adding a little darker highlights into these. As Ben. Now just going to pick up a little of the violet color, adding little violet highlights from the sky space as well into the snow area. And you can see I'm just using the same colors that's just on my palate, but in a very light consistency to add the snow space. Now using a very light consistency of the bond sienna color, I will just tap this layer onto the roof space. The reason being that offers going to be covered with snow completely. But to give a little underlying effect, I'm adding in this layer OH, bond sienna follow so as to or leave some species brown. And if give the effect of the underlying move or just under the ISPs. Now I'm picking up the bond sienna color in a very thick and dark consistency. And I'm going to add it into the rest of the entire house that we have added in. Now you need to be sure that the yellow Palo is completely dry. And neonatal windows we are going to be adding in little yellow Dodge again because also as to reflect lifted off the night effect on the house phase as well. I guess if you want, you can even skip that step and directly add in the bronchi and Apollo into the rest of the house. Do not worry about the bond sienna color. The roof space, as I told you, the major of space is going to be covered up with white stone. Now, even now to the eyes you're at the bottom. We are going to be having a lot of eyes, hands, and motivated about the leptin colors spreading into the ISPs because it will all get covered up with the eyes that we will be adding in using the whitewash. But in case if your eyes EVA is to read than wait for it to dry completely. Otherwise, if the brown color will spread a lot, then you will not be able to even hide it with the eyes did. And also you need to be a little careful about debt, that it shouldn't even spread excess hour that goes out of control for you to corrected using the white flush. Now writing the house faces still very real quickly pick up the famous Greek Hello and act on DACA highlights into the house base. So I'm just going to mix a little of Payne's gray with the bone. I'm going to add these darker highlights onto the edges of the house, as you can see. Now when you are adding these highlights, you need to make sure that you do not add any access to adore. Otherwise the paint will spread a lot and you will not be able to maintain the Docker highlights. Instead, the entire surface will become of this darker color. So majorly on the edges and just little darker patches at places I have added into the house. So you can see the bond sienna color is still visible and not completely covered with the darker highlights. So you need to be sure that you do not add too much water, otherwise the beans will spread a lot. Now at the top space, we're just going to be adding lot of the old grass effect onto the horizon line. So while the house based dries really quickly add this onto the horizon line. Now in these, if you want, you can add in the Glut4 detail by engaging your own. If you'd not want to add this simple looking GI effect. But I felt like going ahead with the simple looking GI effect for this one. So I'm just going to add some spiky looking details. You're indifferent typed weld on both the left and the right sides. Now in the same way, I'm just going to quickly add the effect onto the left side as well. And I haven't tried to be the height to Ottawa, but I will make sure OK. Covered either of those color completely. Now I've just tilted the board so that it's easier and I do not lay my hand onto the wet ground space. So that is the best thing. If you tape down your paper onto a movable surface, you can just change and shift the anger. Doom, also, your hand movements easily. Now you can see this side, I'm even adding some bigger strokes your butt. I'm making sure that not all of the violet color gets covered up because we need to let the wild-type color in the galaxy also be visible. Now let's begin adding in the dispense D1. So using the Payne's gray color, I'm going to add very crooked line. Now if your house species still bed, do not add dolphins area, then you can report it to dry. They'll then you can add the fence space into the rest of the space just as I'm adding it because my house piece is still a little red. To just adapt the ADI, I will add a page on one's. My house is completely dry. After diving in defense D1, the only deviance we will be left to agonists or adding the stars in the galaxy, or it could even be called as the snow effect this time and adding the snow effect into the house and the fence face. So now even the vertical lines of defense, I will be adding very frugally. Now my brown color is dry, so I'm just going to connect these lines of defense in case if you want, you can read for the House to dry completely and then only add defense. Now these vertical lines also you can see I'm adding them very crooked and very randomly. So adequately our disk throughout just to the center vertical lines I'm going to add in the shadow effect because of the light popping out from the house bees and feeding the reflection on the nullspace of these lines. I'm going to be quickly using in a tissue and dabbing and making the reflections very light. And I'm just going to be adding this shadow only into the center for 25 vertical lines quickly. So that is it for the shadow. Now rest of the phases that I need to understand the effects are completely dry. We begin by picking up some white wash and I'm not going to be adding much of the water to my right wash because I need the right Bush in a good thick consistency. So quickly going to pick up some white gouache onto my palette. I'm just going to add very little water to get it into the perfect consistency. And I can begin adding the snow onto the roof of the house. Baby being did the light tone of brown color. I'm going to be adding in good big patch of the snow onto the roof. And I haven't even be adding patches in such a way such that it looks at our new. So I haven't even the adding little of this nor falling from the roof to the bottom of the houses and even onto the windows of the houses. I will be adding in the snow get into lifted. So just using the tip of my brush, I'm adding in the snow effect onto all the four edges of the windows as you can see, and even on the roof as you can see, I added this little baby randomly and showed them calling at the bottom space with those rough edges. Now on do the fence space, I'm just going to add little of the smoke. Now you can see the bottom space where the brown color was bleeding is completely hidden because of the fence and the snow effect. So that is the thing that I believe when adding the brown color, that if it's spreading a little because of the width ISPs, You can easily cover up with the deviance that we are going to be adding it. But in case if it would have been spending a lot, it would have been difficult to even cover that up. Now and do some of the fence connections. I'm quickly adding in some snow collected very randomly urine there. And then we are going to be adding some splatter of the snow falling from the galaxy. So under the complete space, we will just begin adding in some small effect now. So I can quickly lead some issue at the top space so that I do not have to clean my David. And now I will begin splattering the start all this dual effect into the galaxy. Make sure that your mics have a mix of the different sizes of the star or the snow effect. And you can see I'm using a brush and my fingers to dive in so that I have the minute details in case if you would be using in another brush to dive onto this brush, you may get because Brad does. So it's onto you. What kind of splatters do you want? I'm going to be scratching the snow onto the entire species, even at the bottom species trying to show it as the snowfall and not as the star effect this time. Now also keep this brush after distance when it's pledging so that all of these black dots do not be of bigger sizes, plateaus. Now just going to add some shooting and shining stars. We had discussed these different styles when we had discussed them in the technique section. So just going to add very little of these tasks as well to add more effect into the galaxies guy. So that is it for today's class project. Let's remove the masking tape and see your final painting for D7. Make sure to remove the masking tape at an angle from your paper and make sure that your edges are completely dry before you begin to remove the masking deep orange the paint and the water from the masking be, may begin to see back into your printing. So your is defined as being due. So I just missed to add some detail onto the windows. I'm just going to quickly pick up a little of that. Hello and act the gratitude of window with the beans green color and give a little more detail view to the window has been just kneel to the white fellow that you have added him very little effect with the beans Greek. Hello. Okay, so that is if we are ready with topping thing for these seven, just adding little blue highlights at the bottom spaces When I hope you guys enjoyed painting this beautiful galaxy and wouldn't Gavin, today, I will see you guys into the DH class project to model. Thank you so much for joining me.
17. Day 8 - Snow Lamp: Hello everyone and welcome back. Today. Today we are going to be painting this beautiful lamp hanging from the branches. The covenants that you need for today's class project is Naples yellow, orange, red. Beans, black and white wash. We will first be creating the mystery bag, don't. We will be using this flushing technique that we have seen in the technique section and create temporary and this noise effect into the Pacto. We will be using this flushing technique with water and white voice. And then we are adding in the main focus details. Let's begin being linked list class project for today. So I have my B for the dome, uneven picking with a pencil sketch. So this into the center space I'm going to be having in the land, Simon quickly have a rough sketch for the lambdas time. It is if you want, you can go ahead with a very different delegate for the map as well. This is going to be going ahead with a very simple lamps so that it's easier for everyone to follow along easily. So I'm just going to quickly add the pencil sketch for the lamb in this, if you want, you can read and see the entire pencil sketch and then added or keep adding it along with me. As you can see, I'm adding it major into the sender's piece of the entire of April. So accordingly, if you want, you can even paste a lamp onto the left or the right plane if you do not want to make it in the Santos bees. Now at the top, I'm going to show it kinda hanging from the branches. So I'm just going to add little deep data and then just going to add a hand into it, which is, uh, when do they think that the handle is deemed wrong onto the branch? And it can be from that branch. Now in the means and does piece, I'm just adding some details by giving you some borders which will be filled in with red color. Because this time we are going to be adding the details into the lamb, trying to show that the lamp is a transparent one. So in this endless base, we are going to be having in the glass effect to which the background is going to be visible. And these fine lines that we are creating are going to be colored with today. So the medial pick species in the same space Your will be covered with the background colors that we will be adding in. And then even just be using in there to give these borders and detail to the lab and show it as a blast land. Now in the center, we're going to be having a vandalized well too, I'm just going to add in the candle pencil sketch as bent. And that does it for the pencil sketch, the rest of the branches and all the details. If I am directly added with the p.ball, I do not want to add them first and then, you know, let any charcoal marks be visible. So I'm going to begin with the clean water for two onto the entire surface, even including the lamps piece. The bathroom is going to be of very light yellow Fellows and the brown colors only. And the land is going to be offered thick red color, which will cover all the yellow color that we will be adding in the backdrop. And as I told you previously, in the namespaces bend in the central area, we're trying to show in the glass effect, that is the background has to be visible in the centers based. So it's better to add the color onto the entire paper. And then we can define the land with the darker red tones. Make sure Latin even near a photo, because we're going to be playing around with the wet-on-wet technique a lot. So I'm forced picking up the shade of yellow column. You can pick up any local law that's available in your pilot. I am picking up the sheet off. Right yellow. There wasn't a trough to Payne's gray on my brush which has been added to this yellow, but it's obedience. I want to use the yellow in a very light comes to z. I did not add the dot invasion. Now I'm just going to lay down this yellow color over the entire surface we did on the moon, leaving some white spaces for adding in the other species. Even in this piece out your, I'm going to just add it. They look hollow at the top and the bottom speeds either giant widened to add the yellow color. Because then we are going to be having in the red color if an adult or logos in there, it's okay, you need not worry, but as much as possible, try avoiding it so that you will not have to worry about how the red will cover it. Now to this yellow itself, I have mixed in a little bit of the bond CLF Fellow, and I'm going to add details with the bronchi and the color just in-between the yellow colors. I'm going to fill the rest of the white gaps with this buoyancy and their fellow. Even in this glass effect space, make sure to add the buoyancy effect as well. So basically these three pins are the glass beads from behind rich, the background has to be visible. It has to be seen as the rest of the background to give it an extra effect. Now to this mix itself, I'm just going to add little of the bone gumbo candidates. Ben, I'm going to add some highlights with the bond amber color. You can see I'm placing these colors vary randomly and just making them very randomly urine there onto the basic colors that we added in the fourth and the second layer. So just add these colors randomly. The major effectual is going to be with us fledgling D1 fact we're going to be adding in for that the need for the fourth year colors to be dead so as to give the effect of the scratching technique. Now I'm going to begin this flushing technique. Picked up what onto my brush and just very gently dabbing it from a little distinct so that I do not have bigger blobs of water falling onto my paper. Now you can see we are getting no difference, no effect because of these fledgling technique. In the beginning, a little bit of this black belts mesure effect and then again March into the background. So you need to wait for a few seconds and then again begins pledging more. So you can see, I have been reading in between my next platters and you can see automatically I have to begin to get this such beautiful splatters. Now I'm going to pick up a little of the beans green, add some blurry branch effect while the system back. So make sure when you pick up the beans green, you do not add a lot of water, dab off all the excess. What DO otherwise, it will be very difficult to control from the famous treatise credit. So I'm just going to add in some loading branch dD by the species to embed. Hence, I told you in the beginning they are going to be working a lot with the wet on wet technique here. So you need to make sure that your paper stays wet for good enough. So very randomly, I'm just going to add a few of the bloating branches into the battle with the beans green. You can add these branches moving in whichever direction you want them food. You can see I'm adding them varied unlimited crisscross to each other and moving invaded randomly. And even adding the smaller branches popping out from these bigger branches that you are adding it. After adding in these branches, we are again going to do this factoring technique to get these branches also the slowest step. And then we will even be splattering the snow effect with the white wash. So I've always done adding in these branches. You can see I have added a lot of them because half of them will again get covered up. Because if this flushing technique that we are again going to be adding onto this paper on with banknote. So you need to just read for a few seconds for the colors to set the limb before you begin this splattering technique. Say the different approximately 15 to 20 seconds. And now I'm just going to begin flexing the water again. Again, I'm splashing the water using my size 8 brush, and I'm watching from a distance of almost 15 to 20 centimeter. Hence, I'm able to achieve those smallest no effect into the backbone. Make sure to add it from a distance. Otherwise, get bigger bought tools of Four book which will create big open rooms and will not give you that natural flow effect that you'll need off the smaller group. So just make sure you do not even overdue. Otherwise you will have lot of white patches into your being. We're still going to be adding snow effect with the whitewash. And then later on we will even be adding once everything is dry, we will even readings flappers of whitewash. So for now, while this is still wet, okay, I'm now just going to pick up whitewashed with an atom's flat dose with the white quash. I have discussed this technique, has been with you in the technique section of adding these rooms using white paint itself. You can see with the white paint you get more wide moons with the water, you get lighter blues of the underlying cut off. That wasn't the yellow color. You will getting lighter species of yellow dawns. But with whitewash, you get white blooms and more of snow effect into the painting. Now let's meet for this to dry completely. So now my background is completely. And you can see the effect the water and the white color boost has created a variable that was whitewashed. Moons behalf much whitespace and variable what they was all the water move. It hasn't a delight shown in yellow color underlying into those rooms it has created. Now I'm going to pick up some brighter color from my palate. It's the Permanent Red Dawn from the Magellan mission step. You can go ahead with any thought of red color, which is bright and stands out very wide into the lamps piece. And I even begin adding the details into the lamp speeds one-by-one. Major me, all of the namespace is just going to be covered with district follow. But in between two acts on distinctions between the lamp I'm going to be using in the MSN Apollo. So you're also now at the tops of good. That is a fine liner pencil sketch, as you can see. And that gas, I'm going to leave it blank once this bottom and top speeds dry, either use about codon and add the detail there and the rest top and the bottom species I will quickly been deeply in debt with the red candle. Now just going to fill this top space on to completely with Devitt Kahlo popping the lamp, I'm going to hit It's a technique of wet-on-dry because that is not much detail to add radon bet your though we will be adding some darker brown highlights wet on wet, but that can be easily done with this possibly heard of David color being beg, you do not need underlying all liter of water again to keep it red for much longer dying. Now in between the means peace of the lamp also there are lines that we're going to keep MD. Before that, I'm going to quickly pick up the bond sienna color and now just add some highlights onto the edges of this piece that we have added. So I'm just using the tip of my brush upon sienna color and adding in some darker highlights, just using the tip. Now in the sand does base your I have added the buoyancy in NACADA, wet on wet only, and then I will define it later on once it is even completely dry. Now I have shifted to a smaller size brush. And using this model size brush, I'm going to add these details all in the sender's bees, which are ready. So these are very small, fine grid lines which adjust the edges of the lamp, the maintain those pieces on glass. So we let need to let the background be visible. Now make sure that you're using those monocytes brush for adding in these details so that you do not run out of the portion in between. We are even going to be using the brown colored doors so as to give little more highlights to the connection and distinction points there. Then let's add these fine lines quickly with the head Carnot. So you're onto the right side. Does Locke also, I'm going to be blending in with the red color. I'm just using the tip of my brush but adding in the detail and store in the center part of this plan and all, make sure that your brush has appointed. Did audio shift to a very small detail brush? I am repeating this again because I do not want you to lose onto these beautiful details just because of using a wrong size brush, It's very important to control these minute strokes using the smallest size brush and defining the details. Ready, ready. So that you will not lose the main focus of the beam, which is this lamp in the centers base. Now in this endogamy or to the candle, if you see you still have one more module. Neither be adding back with a darker tone of brown. So for now, just add this Jake dawn onto the ages and wait for it to dry before adding in the blank on there because we want to make them standing out very separate. E. And now at the bottom lines also weakly added the red color directly. And on the edges you are looking just give it a little wet on wet with the brown color, just as we did in the top species. Now just picking up the bond sienna color, I'm going to add in the detail into the center line as I had told you previously. So my red color is almost dry, it tends, I'm adding in the bone CNN line now, make sure that you have red color is completely dry before you begin to add in this detail, if the board new species not dry. Okay. Because I'm going to make the ground at the bottom. I'm going to blend it with the red color. Now again, you're also, you can see I'm just using the tip of my brush, but I mean the follow-up, hence, I'm able to achieve so much of the position DB is on this jagged lines because of that pointed tip. Now on to the left and the right side as well, just giving the little highlights with the brown color to add more DD even at the top species, as I told you, I'm going to be adding some darker highlights and creating some darker effects just so as to give a little of the shadow details into the lamp as well. Now justifying few lines at the bottom spaces bed using in the brown color itself. So the bottom red color is just a little vector. So automatically the ground and it is having a soft edge, you need to wait for the red color to dry like almost 70 percent when you are adding the bottom rungs be. So automatically it will have a soft edge, yet have a certain look of the brown color into the lamps. I have the top, although I have added in the brown D, D. Now just going to add that hanging from where it's hanging into the branches. And then we will be painting the candidate once the lamp is completely dry, then, then B will begin adding in the branches using the Payne's gray color. So I'm just going to pick up some things Greek fellow, in the thick consistency, make sure that you do not add much of water. I'm just mixing it with a little bit of the brown and the red dots on my palette so as to create an underlying tone. All you know, which adds much Well all to this painting. Now I'm going to be adding in these branches very down the middle. And I'm going to add them very crooked as you can see. So the main branch passing through this handle of the lab, okay. Now make sure that you add the ground just moving in different directions of different heights and shapes. Act simple, straight lines, otherwise it will not add to the beauty of these branches. I'm going to be adding in the smaller branches as well, popping out from the bigger branches. And as I told you previously, since my brush already has a pointed tip, I'm able to add all the fine and the bigger DBS just using this one brush on the ball. So I would always recommend you to invest into good flushes with time so that you do not have to keep shifting between brushes, but adding in the bigger and smaller dd. You know, when you're adding and justify them the deals into the painting. So benefit I want to add vertical branch. I just pressed the value of my brush and get that because Bs, and As soon as I want to make it again, I just lift up the Bennie and begin using the tip of the brush. Now you can see I'm adding these few branches hanging out from the top space as well as I told you to add the branches moving in from undefended agenda and of different sizes and different angles. Just going, add a few more branches moving out from these bigger branches and then a smaller branches popping dot. So that is it for the branches that we have added it. Now I'm just going to pick up orange color. I'm going to be the candle. My dead space is completely dry hands. I'm adding in the candle speeds now. So the tangent is just going to be off the orange color and of our light, I'm going to add it with the yellow color and a little yellow, orange touch to it, but not much major me, the light effect is going to be off the yellow color and the candidate is going to be off this orange color. I'm using the orange color. A very thick and wool consistency. Hence, I'm getting such a boy looked to my orange color as well. Now I will pick up yellow color and add flim to this scandal. I'm going to be using in the bright yellow Paulo, I'm just going to add it in a very thick consistency. And then using a damp brush, I will just try to soften the edges of this fleet to create a little flame. If Beck and Dr. mature of blurry flame effect through the glass view. So I've just picked up a damp brush. I dip my brush into what DO and just clean depth o on the shoot for that. I don't have excess water and just trying to soften the edges and lighten the color a bit so as to show the blurry flame effect. You can see just a little bloody at the edges. Now I'm going to pick up some fresh whitewash. I'm going to add in this node deviance onto the branches. Make sure that you pick up the white quash in a good thick consistency. I'm just going to add a little three or four. Don't do this. Make sure that you use clean water by mixing in the whitewashed. Because if you went to pick up water from the jobs that already have Kahlo's into the whitewash may get the effect of those colors. And you may not get this clear crystal violet blue. Now first I'm going to add in reduced no collective onto these branches. Then a little snow I'm going to add on to the lamps be collected onto the connections of the lack and onto the edges of the lab. And then you're going to be splashing some small as bed, even at the bottom space. I'm going to add little of this node trying to show this no collected onto the edges of the lamb, the bottom and the top species. I'm not going to add much onto the lamps button that did make sure that you do not cover them diagram for this node because those lamb is the main focus of the painting this time. So you can see I'm adding very little snow and different connecting points of the land, but I'm letting the main focus of the lamp be visible. Now quickly. I'm just going to add this no, forced onto the branches. Someone was done adding it onto the fungus. Now I will quickly some tissue specific. So now I have this, these covered with tissues and draft cloth on all the four sides. I'm going to be using in the right brush. I'm going to splatter some snow into the rest of the painting. This time. I'm not going to dispatching a lot, but just to make sure that we split the from literal distance to that you get fined study did. And you need to use the white wash in a medium consistency so as to get the four-fifths plateaus. Let's remove the masking tape and see our final painting with those theme edges. Make sure that there is no brown color active onto the masking tape. Otherwise, it will seep back onto those edges and you may lose the mean effect. So your final painting for this beautiful lamp hanging from the branches just in the flames. These you can see there is a lifting charcoal effect with Bill, which I'm not liking, but I can't do much to try it out. Hence, I always recommend to most very light pencil sketch. I just tried to poverty but a LinkedIn using the white quash angular yellow effect. But I know it cannot be hidden much because I need an eye defect to the flame as bad. So, you know, it's a less than load to use very light pencil sketch. So that is it. I will see you guys into the DNA in-class project tomorrow. Thank you so much. Do you try to feel for joining me?
18. Day 9 - Ice Man: Hello everyone and welcome back to D9. We've been thinking another snowman to D. The colors that you need for this domain is sitting in blue, indigo, Payne's gray, black, and white quash. The last moment that we had created was written sunset view. Today, we are going to be creating texture using salt and creating that complete snowfall look into the background. And then we're adding in the snowflakes as well. So let's begin painting this beautiful snowman for today. So I have my k, but they've done onto all the four edges. We'll begin with the pencil sketch for this one. So I think first begin marking out the snow areas at the bottom. So this time we are going to be having in the snow ADR in different batches and different layers. So I'm just adding in these different layers. You can change the placement of these old Leo's as better if you wish to change. Now next towards the left side this time I'm going to be adding in this moment silhouette. So this time does no man is going to be a little in an oval shape and nodded and shear. The top body is going to be off around sheet. And then in the center you're going to be having in the snowman muffler. And this sign is normal, is going to be handling of gloom and do its left-hand as well. So I will quickly all the pencil sketch before we begin to be injured. So for the blue, I have added a rough pencil sketch as we're just going to be adding very random lines with a dark tone there. So if you want, you can skip adding in those details into the room right now. And let me address with the colors on the top. I have added that small half and now the details into the face on the bodies could be. So this is it for the pencil sketch we are going to be creating in a lot of effect with salt this time. So I'm going to be using in the regular cooking salt that we have. That's the normal salt. As you can see, we are going to be using this soil to undo a web backoff which we create. So within the white background. And then we will be adding the salt to get the texture of snow this time. So let's begin applying in order for toe onto the entire sky space. If possible, a wide adding the water in Buddhist Norman area. If you will have been in Buddhist no man space right now and assault false there, you will get the texture effect on the snowman as well. And then it will be very difficult to cover the texture with the bead. So I would recommend you to leave the snowman space without adding water and the beat. And we will begin this nomenclature on ones are sky is dry. So let's quickly add in a layer of four to foster and do the entire sky space and begin creating in the magical snow effective using the salt texture. So I'm almost done adding in the clean layer of photo. You can see I've got my brush multiple times, so that might be both these bad for enough time. I'm done. I have to add all the layers of pins and the textures. I'm running my brush multiple times. We will make our people stay wet for a little longer time than usual because the potent pause, absorb a little water and that is still layer of 4 dot on the top as well. Now for this nose piece, I'm just going to be using in one color of blue, That's the city and blue color. And using this color, I'm just going to add in this Scala forced into the sky species and then vile, this color will be still wet. We will be adding salts to get the tech shop. So let's quickly identify all medium layer color of this blue color. So you can see now to the snowman region, I am applying the color value gets me. So astronauts run into the snowman space because there's no man is going to be off quite a light color. Now into the rest of this, B is just adding in a medium layer of the city in blue color. Now I'm going to pick up a little of the city then glucagon of inadequate consistency and begin pulling it out from the edges like this. So this endoscopies will be the deigned to a lighter tone. And from the edges you would have some darker bone's popping out. So that is it for the color for the sky. Now I'm going to quickly pick up the salt and going to begin adding in the soil. Now, I will be adding the soil phi from each other, and I won't be adding in any bigger blocks of salt, as I have discussed with you in the technique section, if you drop this all ready done the mean, you will get a better shot instead of adding a lot of salt. Act one, please. We, you can still add on a dilemma at certain places together to create bigger blooms. But only they do not much, just latter the salt from a distance for that you get the smaller balloon DDS. At the moment, you may not be able to see any of the blooms because the blooms will only come into effect once the ADL is completely dry it unequivocally if the nitrogen snow effect so quickly, just going to add the salt and now I'm just adding little patches of salt that certain places. And on for this if you want, for the more tech shop, you can just pick up a little of a dark blue and drop it into this patches of solid that we are adding right now. So I will just add a lifted Alcala, do these patches quickly. So I have picked up the same setting in a very dark consistency. And you can see just using the tip, I'm dropping her panda into these patches of soil that we have added edge will create a little darker batch effect that as well. Okay, So this is just adding a little more things that you can do to get some beautiful textures as well. Now wait for this to dry completely. Then we begin adding the snowman and the rest of the DD. Make sure that you do not make this dry to a hair dryer. Let it dry naturally. So I will wait for this to dry completely now. So now my sky spaces completely. Try it and look and see the effects all has created and created such a natural snowfall effect. Make sure to remove all the salt I haven't mentioned up to solid, steady or at the top space. I will quickly rinse it off and make sure that you only remove the soil when your paint is completely dry, otherwise you may lose the texture effect of the salt. Now using the same city didn't look along, I will begin adding in the eyes at the bottom species you're one by one. I'm going to add them in levels reading for one LEO to dry using the sediment blue-collar in a very light liquidy consistency at the bottom. And then at the top I'm just using in water and trying to spread that color. Now using Payne's gray while this is still wet, I'm just going to add little detailing at the top space so as to distinguish it from this guy and get it a clear line of the snow you're seeing, then I'm going to be doing it for each of the snow patches that we have in three levels. I will be adding each of these patches once the false Leo drives and near to the snowman also, I'm just adding some darker shadow highlights already with the beans green, while the blue color is still wet. Same way, I'm going to add it, your words that I love the snow line as well quickly. Make sure that your blue and Payne's gray blend well with each other. At the top space you can see I have got a very light space created and I will just use a damp brush and try to get the blend full-fat. Now, I haven't just add this to the right more space here. The bottom big space, I need to wait for the top layer to dry so that I get a distinguished near look for your CMV. You are again, I added the city and in blue color, blending it at the top, just using a damp brush, I'm going to pick up little Payne's gray and add edges of it, the darker highlighted tones. Now make sure when you're adding all of this new pick up the dawns in a very light consistency and not too dark because this is the ice that we are trying to deflect in your and also we are adding this wet on dry because these are small batches and we just want them to dry in quickly. Not much details to add on each of these. Now till these snow patches dry, I haven't quickly paint the face of the snowman. Okay, So for the phase also, I'm going to use in very little light color of the signal in blue color and a little of the Payne's gray color onto the edges. And now majorly using in the water, I'm just going to spread this color. Do not worry if the color runs into the hat and the muffler species, we can easily cover it with the darker tones that we will be using. Even in the body of the snowman, I'm using the same color. And while this is still going to be red, I'm just going to be using Payne's Gray and giving and defining the edges of the snowman using the Docker. Good. So fast now I'm just using water and spreading this and just lightning it throughout. Now just going to pick up the paints gray color and add it very lightly on the edges. And using a damp brush quickly, I'm going to blend it with the rest of the blue color. Make sure that you add all of these details wet on wet and quickly blended with the color of the snowman so that you do not have any adult color or a distinctive color being visible. Now I will begin painting bottom big ISPs I'm going to be using in the seams and you didn't look along the same pattern. So at the bottom, I have added in the city then blue-collar. And now I'm just going to use what I'm going to call this color up and get a gradient to this color. At the top speeds it's going to be quite light and at the bottom it's going to be darker. And then I'm just going to be using in the Payne's gray color to getting into, you know, distinctive look to this altered defining its edges as well. Now next, I'm just going to pick up a little bit of the Payne's gray color. I'm going to add it just below the snowman so as to give little of dark shadow effect to the snowman onto the ISPs as bed. Now this is a little darker tones. I will quickly die new then spread this color so that it does not stay a lot darker. Now I have some, say even blue color picked up onto the tip of my brush. I'm just going to define the edges of this species so as to that, each batch has a different snow mountain. So just going to quickly added your undress blended into the, our list of the snow space quickly using the brush. Just repeating the same thing for the rest of this no spaces as well so as to define the edges of each of the smoke. So just adding in a very fine citizen blue line and then blending in. Now my snowman species is completely dried and I can begin adding the details into this normal. That is the muffler under hat details. For that I'm going to be using the indigo color in case if you do not have the indigo color, you can mix it with a little bit of the Payne's gray column to get the push or indigo color. And if you do not have been three color, you can just add in a little bit of the black color. Now I'm going to add this more flow with the darker tone and then our little texture to this as very good for the darker tones. Make sure that you do not rest your hand onto the back ISPs at the boardroom. Otherwise it may create a little patch out there. Now, even the hot, I'm going to be painting with this indigo color only and then be adding little textures with the darker tones once this dries so quickly, I didn't had also that this indigo color. Now I'm going to pick up the Payne's gray color and using the Payne's gray choline of anything consistency, I will add the rest of the details into this normal. So just picking up the beans, Greek alla, adding in the eye and the other details to this normal black color if you do not have a beans green color. So I'm using a brush which has appointed, this is a size four round brush, and hence I'm evil to add these details just using my brush. Now I'm just picking up the red color That's onto my palette and just went to add in the little nodes to this new man. If you want a little more variant, what you can do as you could add this nose into a carrot shape this time with the red color itself. But I've just added in as inputs nodes with the red color. But you could go ahead with the variation if you wish do. Now next, picking up the Payne's gray color, I will begin adding in the room as the sky spaces completely dry. So I'm just going to add a very crooked room and even the presence of the room, I'm going to add them very crooked and very randomly. Now the snowman giants compete. Let's begin adding in the snowflakes. This time, I have discussed with you in the technique section about adding the snowflakes as well. So I'm going to pick up light wash and do this. I'm just going to add a little tinge of the city and to get a bluish tone and that doing a very opaque consistency. And then we will begin adding in the snowflake with this blue color. This time. You can see I just added a very little tinge of the blue color and got this blue color. The reason why I'm adding the snowflake with the blue color this time is to maintain the entire harmony of the painting as we have added all the snow patches also with the blue color and white color, wouldn't stand out that when onto this entire surface. Now, I'm just going to add some different sized snowflakes. So some are going to be taught all big in size, some are going to be quite shorter. So discussing the technique again, your foster dad, then a plus sign, then a smaller cross to this plus. And now I'm just going to add little arrow effects to this. Okay? So this way we are going to be adding in lot of snowflakes into the sky space quickly. So yo you can see, I've added a smallest snowflake this tight. You can keep beating the height of the snowflake and the placement. And you can see because of the blue color that we added to divide quash, we have a little different effect this time too, does know a deviance that we are adding in. If you want, you can try adding these details with the right nc. They won't stand out this opaque and discrete because you already have a little by texture or because of the salt effect. I can quickly show you Snowflake again, you're onto a rough one if you have missed it in the technique section. So just the plus then across and then these little details to make it look like a snowflake. Now I'd have quickly continue to add more of the snowflakes into the rest of this tiny space. You can see I'm adding them vary randomly and distant from each other and of different sizes. And as I told you. You can also try experimenting and adding this with the white color and see for yourself that it will not give you this bright note what the blue color is giving you. Hence, I would recommend you or to make them a little tinge of the blue color to your whitewash to get this pasted blue color and address conflict with this color instead of adding it directly with the white color. Because the white color will not stand out because of the white textures that you have got wet the soil technique into the background. So I'm almost done adding in this snowflake texture. Now it's time to add the details and Buddha muffler and the hat for that I'm going to be using in the Payne's gray color. And then we are going to be I didn't let us know batches, many Autodesk No. And on the muffler and a half. So I'm going to pick up the paints gray color in a medium consistency. I'm just going to add little borders. So my muffler is still a little wet and you can see this is giving me soft lines and that is exactly what I want. If you want, you can have a rough line under rough edges and if you want, you can add it a little wet on wet and get this soft lines. Now in between your I'm just going to add little check details by adding in some street horizontal and vertical lines like this and creating texture onto the muffler as well. Now, same deal, just going to add the details you are as well. And at the bottom also you can see I'm trying to pull in some volunteer effects. Now into this altar. I'm going to quickly add in a little check effect and then a little off the Payne's gray detail onto the HIV space as well. Adding the detail onto the headspace as well using the Payne's gray color. Now, I am using my smallest size brush, which has a pointed tip pens. I'm able to add all of these details just using one brush quickly. And I don't have to keep shifting between brushes. Now I'm going to pick up some fresh white gouache without adding any water. I'm going to add some snow collected onto the hat and muffler of this no man. So very naturally just going to add, let us know by just randomly at places to show some snow being connected onto these glut pieces of the snowman and nettle at the bottom space near to the broom as well. So just to add a little of the snow details with the white quash, Nieto does no man. So as to give a little more depth to this no space here. So just very little details you can see. And that is it for our painting for today. Let's remove the masking tape and see if I'm painting with those clean edges, make sure that your edges are completely dried and there is no water onto your masking tape, which may see back into your painting and ruin goes clean edges. So your final painting for D19. I hope you guys enjoyed painting this beautiful snowman today. So I'm just dabbing the white gouache with the tissue and they do so as to give this no Olympians that didn't look into the background so quickly just using a tissue, I adapt a whitewash and gotten lighter tone to it. So we are a digital painting for Day 9. I hope you guys enjoyed painting this beautiful one with me today. I will see you guys tomorrow into the deep end class project. Thank you so much to each one of you for joining me.
19. Day 10 - Cabin House: Hello everyone and welcome back to detail. Today we will be painting this beautiful very simple cabin house with this sunset view. The calories that you need for this class for shape is sitting in blue, indigo, yellow, orange, brown, black and white wash even phosphate creating the beautiful sunset kind of overview. Then be adding in the house and then adding in those background mounted with those dry brush technique and creating this beautiful yet simple painting for today. So let's begin being taped to this class project. So I have my paper down onto all the four edges and I think the key beginning with the pencil sketch. So the major pencil sketches just going to be the mountain ranges and the house that we are going to be adding at the bottom speeds suggests wearing too a very rough shape to the mounded the details in the mountains. I just wanted to be with a dry brush as we went to show that these are against snow-capped mountains. So I'm just trying to show you the different paintings that you can do with these simple wouldn't have been houses. And Ah-ha, You can have different backgrounds. So what we did was the Red House. Secondly, being dead one with a galaxy view and not toward one with these background snow-capped mountain. Look. Now this time, the house, we're not going to add the bottom D days because then we're just going to be adding in the snow patches with the white quash Datadog. So let's begin by painting the sky first. I'm going to begin in with amenable to photo onto the entire sky is make sure that you added evenly throughout the sky and also make sure that you do not have any potholes or otherwise it Missy back into your building, creating all your different badges onto the edges of your being dead. Now near to the mountain, to be a little careful because as you know, the mountains are just going to be the Smoky Mountains. So the details in the mountain is just going to be using the dry brush stroke and the rest is going to be the right speed of the beam. But it said, so I've run my brush multiple times. So that might be both these vet for enough time. Now I can begin adding the fellows into this beautiful sunset that we are going to be added. So the first color that I'm going to begin with is the shade of yellow. You can pick up any yellow that's available in your valid, but good for the lighter tone of yellow. And near to the mountain. I'm just going to add in a yellow color first. Now, after this, I'm going to pick up the city didn't know palo, I'm going to add this and even rubella from the top and between the yellow and the blue. I'm going to let under DSPs be right for these colors to blend in naturally because of the water. So now I'm just picking up the city and Luke are very, very consistency. The edges you can see I'm leaving a lot light so as to our little nitrogen right cloud effect. So if I'm not running this blue color onto the edges either, very little effect lead to run onto the edges. For now, I'm not going to add much out there. Now next, I just added in a little bit of Payne's gray to my blue color and adding some darker deaths from the top speed. You can directly use an indigo color if you want. I'm going to place this mask indeed bounded. So that means no downwards and the blend into each other. So I've shifted the masking tape at the bottom speeds because I do not want the blue color to run into the yellow. In fact, I want the yellow to run into the blue. Now better we know that because of the whitespace the paper is drying quickly. Again, just use a damp brush and divert the surface and blend it with the blue fallows quickly. Now using this color, you can see I'm beginning to add the edges at the bottom space as I'm picking up very little Palo and moving my heart very gently and quickly. I'm not getting the green tones in between. Now. I'm just picking up a little of the orange color. I'm going to add little orange highlights into the yellow species. Now when you are going to add this orange highlights, make sure that you do not have excess of B. Otherwise it will spread a lot. Just some simple strokes of the orange color into the sunset sky. Again, if US yet see at the top species I have those whitespaces maintain trying to form some national white cloud effect. There. Now and do this whitespace, I've just added very little of the orange effect. I'll quickly dab it and heated light. And now just using a damp brush and a little of the blue color, I will just try to blend it and create another line defect there. But you can see majorly, I have been able to maintain it right now. I have father mixed in little more of the Payne's gray color and giving some more darker highlights at the top speed because watercolors dry, own lighter. So I know the top speeds will still be trying, adorned by dot. So I'm just darkening the top speeds so as to get the data highlight and GI Bill Joy it as a pull factor of, you know, boiled sunset. These fellows will still be drying the bone vibrator now again onto the edges, but I have the whitespace. It's beginning to dry. So I'm quickly using a damp brush and just wetting it and blending the Palo source of lead that I still have the whitespace also maintain. Sharp edges are also no longer visible. So that is it for this guy is not there. This guy drives. I haven't been this little house, you're in the center. And then we would add the details into the mountain and the rest of the small space. So bottom, because I'm going to be using in our mix up the bonds are more underpins Greek Hello, you can detect me was any darker tone of brown if you wish to. And now using this color, I'm going to add it into the complete house. Okay? I'm just using o, this bigger size brush only. And at the bottom I'm going to add very rough edge to the house because as I told you, we will be adding the details at the bottom with dust know, all using the white quash color. So just going to quickly add in the details and in under the roof, I'm just going to be adding in the fallow very randomly. So you can see even in the rules, I have left a lot of bypass because there as it is, we are going to be adding in snow with the white floor so you will all get covered up. And even at the bottom space you can see I've got a very rough edge because of this mode median SAT we will be adding. Now let's make all of this to dry completely and then add the snow and the mountain deviance into the spin day. Now, all of this is completely dried and we can begin anything that the deans and do the rest of the painting supposed to have and begin taking off a little door of the civilian blue color in a very nice consistency. And I just know details into the entire bottom species including the mountain region. It's going to be quite light. The time just went black Newton color. And then just wondering was in water and spread this being completely via, listen carefully to the house so that you do not run into the house. Okay. Now just you can pick up a little bit of Payne's gray to add a little more depth to this new space as well. But again, the paints we're always going to be in a very light consistency. Do not add it in a very dark consistency. Wherever you feel that the veins are going darker indoors, quickly dab it with a tissue or pick up some water and blend it into the rest of the space. So you can see under the mountain ranges, even when the adenine, this ISD, it's looking solar light. And when this village I agree to almost equal to a very light provide palette on only. Now you're at the right side, just adding a little ISD did with the yellow color to reflect the sunlight effect as well. So very little yellow color that I added and quickly blending it with water into the rest of the blue spaces. So you can see we have added this entire species with the debate on dry technique. But still we haven't got any sharp edges because using water quickly to blend in the colors. Now we need to add the dry brush technique on to the mountain ranges that you have added in. We are going to be adding a very simple dry brush this time, I'm this one to be using in the beans green color, idle quickly pick up the paint, Recolor, dab it on to the tissue so you can see there was so much excess of water. And not just using the tip of my brush, I'm going to begin adding in this driver's door, make sure that your first layer of ice is completely dried before you begin to add in this dry brush. Otherwise, if it's going to be red, Then this dry brush will not stay. And you may just get badges of the veins Greek follow. So since my left side is completely dry, I'm able to add in this dry brush. I just started in a dry brush at the top and a little dry brush and pulling from the bottom space towards the top side, we're not going to be distinguishing the mountain and the small space a lot. We're just going to add little details with this dry brush onto the mountain range. And that's it for the mountain range, how we are going to define it. So now you can see my right side mountain was thin vet and and and trying to add in the dry brush technique onto the right side mountain, it's just giving me patches of the beam speak I love instead of the driver's door. So we will wait for that to dry completely and then we will add the other details. So I'm just going to be adding in a little more Dakpo DDL of this dry brush on Buddha other two mountain space. Okay, so I will just begin adding those. And then once the right-side mountain dry, I will add the detail onto the right side mountain digital. So this time you would see I added the dry brush with quite a thick consistency of the beans need hands got some tacos tool. Now just going to add very little dry brush and the bottom spaces as well onto the ISPs to give little more depth to the ice. Very little. Not much. Okay. Make sure that this piece is at them epi dried before you begin to add this dry brush stroke. Now this right side mountain is also dry. So I went with me at the digression mode as well. Now you can see we have added the dry brush in blue color doors forced me picked up a medium consistency of the beams B, and I let that dry brush stroke and for the next meal, I picked up the paint leaf are not in quite a thick consistency and added some darker dry brush stroke. Make sure to add the dry brush into do NAOH so that you get much more depth into the mountain and you'll get the albedo still give look into the mountain ranges. Now before beginning to add in this no DDS, let's quickly add the light effect into the windows of this house. For that I'm going to be using in the yellow Palo and added the into the house windows. You can use in any shade of yellow that's available in your palette. Just make sure that you add it very gently and do not ruin the edges or anger not activate the brown color, otherwise, you may lose the light effect of the windows. Now I have some whitewash, the deaf in a separate palette. I'm going to quickly just add some freshwater. Yeah. So now I'm going to add the snow patches onto the roof. And you can see, I'm adding this no bad enough any random shape. And just trying to show that this noise being dropping into the house piece as well. Even at the bottom space, I'm going to add meters mobile, just trying to show a lot of NO being collected. Your and that is the reason I told you I'm painting the edges off the bottom has very roughly because I want to define the end of this house. But this mode, this time, we will be adding a little detail with the darker Payne's gray and given little brick details need to join under there. Just are these small batches buried underneath being collected on to the windows as well. For the windows, you can wait for it to dry completely and then. This small patch. Now I'm just going to pick up a little of Payne's gray color. I'm just going to add little brick detail. It's going to be quite little. And just on DACA highlights to define this house base more focus on just when do I have this video randomly and not in much detail. And just using the tip of my brush for adding in these details quickly. So you can see how simply just adding some darker highlights with the beans Mikolov, you put so much more detail into the house. And it looks so beautiful with these random darker details despite not being in a perfect shape. Now the last thing left into this painting is flashing the snow effect into their diabetes. For that Eigen forced Whitney Lea around the tissue so that I do not have to mean and create my table, a messy one with the whites plateaus. So I have some tissue paper later on onto the entire species. And now quickly using the whitewash in a medium consistency, I'll begin splashing this law effects into the entire painting. I'm going to be using my size 8 brush. I'm going to dab it with my fingers. I'm splashing the snow effect from a little distance so that I get little smallest node is and not Vigo patches of the white. So make sure that US flag at the speed from a little distance to get a little smaller batches of this, no. So that is for the snow splatters as well. You can see we've got an even they are ofs naughts Florida and do the entire backdrop. Let's remove the masking tape and z are fine and painting with those clean edges, make sure that you remove the masking tape. 12 ranges are completely dry. So you are as a final thing for details on how this beautiful vendor landscape and you can see the cloud effect that we have brought on the top species by leaving goes right gaps. I hope you've enjoyed painting district me, write it, see you guys tomorrow and do the d 11 class pressure.
20. Day 11 - Lamp on a Wooden Log: Hello everyone and welcome back to the TD Walter Cannon, challenge. The colors that you need for today's class is Naples, yellow, orange, brown, said even Bu, beans green, black and white flesh. Today we will be painting this beautiful lamp on Google didn't know. We would first be painting in the blurry background and then adding in the foreground and feeding the main focus of the bark and the lamp. So let's begin by first creating the pencil sketch and then beginning to add the details one by one. So I have my people the belt, and we'll begin with a sketch and defendant stitches going to be the wooden box and the lamp onto the bat. So let's begin adding that one by one. Now under this law, I'm adding in the lab. So it's going to be quite as in Finland, the details in the lab I will be adding invaded by BBN. We would just be adding a very dark pencil sketch so that you move what rough shape of the lamp is going to be about. And as you would have seen in the beginning, the outside of the lamp is going to be able to adapt or Carlos, and in the inside you're going to be having in the light effect that the yellow and the orange sheet. And then we'll do that. We're going to be adding in patches of snow. Now on the inside I'm just marking very fine lines so as to depict the borders of the land which are going to be in the black or being three columns. So in the center, I have just marked and V3 even rupees. So we are going to be showing again that it is a glass slab. So it's a C2 lab, so the entire yellow light inside would be visited. So I have again remove the pencil, sketch or post-lab because that was just for your reference to walk because Eigen be adding them directly with the Palo to avoid any charcoal months. Now I'm going to map out this high-speed and the rest of the ISPs. So you can see I'm adding into the duodenum. So the bottom is going to be all eyes and the top is going to be the Skype. But even in the ISPs, we are going to be adding in half of the ISPs in applauding manner that can be blended with the sky. Once we begin to paint the sky, and then once all of the sky and the glory details dry, we would add the details into the lamp and the wooden block, which is going to be the main focus, I would just add another layer of ice. You're at the bottom. These bottom leaves of i's are also going to be in main focus with the log and the lab. And the rest of the top ISPs is going to be blurry one. Let's begin adding a thin layer of water. Now make sure you try to avoid adding the water into the mean lamps piece. If you add the water on the top lamp CSPs, it would be okay because the top is going to be covered with the black color. But in the center of the lab, we're going to be having the orange and the yellow light. So make sure you do not add the sky follow details there. So first we will paint the sky and buying that will still be read. We will be just the fourth layer of ice. And first begin with the Naples yellow follow, and I will just begin to apply this color into the center of this face. So you can pick up any yellow if you do not have the same Naples, yellow, just make sure that you do not add the yellow color into the center of the lamps and just add a yellow color layer into the rest of the top sky space. You can even added at the bottom space because they be willing to be adding in some pine trees into the flurry effect using the famous gray color. Now next I'm going to pick up the paints gray color. I'm going to begin adding it from the top and blended, but they look a little at the top speed. And now using a damp brush, I will just blend both the colors, make sure that the little yellow is still visible at the bottom speeds and at the top you have a blend of the yellow underpins. Public are not trying to create a beautiful sunset. You. Now I'm going to pick up the things Greek alla in a medium consistency. Now at the horizon line, I'm just going to add some loading TV deals with this theme three Kahlo. So foster the bottom. I have to get to the light. And now from this I'm just going to use the tip of my brush and quickly pull out these all blurry GI effect into the backdrop. Make sure that when you're adding this, you do not cover the entire yellow color of the sky. Otherwise, the spy would give you a flat look of the Payne's gray color. Now I'm just going to pick up a little of Payne's gray Palo in a little darker consistency. I'm going to add a little blurry by mushy your left side. And you can see it's a very random one that I have added. So just two to three of these in front of the TV deals that you added. All of this is also in the blurry. You can see, but once this dries, it will give a beautiful look and just adding some darker strokes into these trees as well to give it more depth. Now, even think this book for sphere of the eyes. So as I told you, once within the sky, the area is going to be red. Then I'm just going to pick up this blue color theory didn't look legitimate. And I'm just applying this formula into this post fear of ice. Now you can see when I'm adding it near to the themes lately, it's automatically blending with each other and creating the blurry effect for the eyes as well. So that is the reason why your side EDI still and you need to add in this color, make sure that you do not run the Pala into the land and the wooden block species. So be a little careful if you want, you can use a smaller size brush. Now see being you are on the right side. You can see my Payne's gray color has dried on legit. So I'm just going to try and blend both of these together. So I will first applying the blue color and then using a damp brush, I will try to blend it Neo-Orthodoxy, Payne's gray color. So I'm just picking up a damn brush. I will pick up a little of Payne's gray color and add a little defect there and create a blurry or, you know, managing point for both of them. So you can see automatically you've got the most between them. The entire sky and the first derivative of Phi is, is giving you the blurry effect at the moment. Now you're in the eyes. I'm just going to add a few more pine trees. So you can just add a few branches if you want, if you do not want to add the fine teeth. So all this is also going to be wet on wet creating in the blurry background. It's just going to add little details without vet, You're okay. So when all of this dry, it will automatically give you a blurry background effect, seeing that you're onto the right side as well using the Payne's gray color. So that is now we need to wait for the diode absorbs the background to dry completely, and then even begin adding the details into the bottom layer of the eyes and the wooden box and the lamb details. So now my sky spaces completely dried and we will begin painting in the details into the lamp and the wooden loss. Suppose we will begin with a wooden law. So the photo wouldn't know, I'm going to be using in the von sienna color. I'm just going to pick up the bones TNF-alpha, and beginning with the wet-on-dry technique here, I'm going to add this burnt sienna color forced onto the entire wooden loss if you want. And you can go ahead with any tone of brown that is available in your ballot if you'd not have the same onesie and Apollo, now be a little careful so that you do not run out of the sheet and then do the ISPs. So you can see onto the edges, I'm using the tip of my brush. Now at the bottom of the warden know also you need to remember that on the right side you have a big ice bath, which is hiding the bottom of the wooden log as well. So make sure to give this shape to the wooden log and not add a simple wooden block till the bottom of the page. So now will be for this wouldn't love to jive. Who are the details your, till then let's add the details into the lamps piece. So we will first begin adding the details into the center of the lab. For that, I'm going to pick up the yellow color. You can go ahead with any bright yellow. I'm going to add a bright yellow into the center. And then around it, I'm going to be adding in the orange tones. And you know, if you need a little of the data such as bed. So just going to add the yellow color forced onto them bios and does, do not worry if you move into the edges also because the edges is going to be off the darker palette of things green. So automatically all of it will get eaten up. At the bottom that is in-between the land and the wooden log, you'll see a little white space that is going to be covered up with the isolated odd. Now I just picked up a little bit of the orange color, added it around the yellow color. And now I'm just going to pick up a little bit of the red color. I'm going to add it near to the orange color. You can go ahead and just create a blend off the yellow and the orange color if you do not want to pull with the code. But I just felt like the adding a little extra warmth to this enzyme used in the electrode. So in that bottom space you can see you've got the yellow color and around that we've created or want to offer the orange and the red color. Now we need to wait for that to dry. Then we will begin adding the ICOs one by one. So first the bottom layer onto the left side, I'm just going to add this and even blue palo am then going to use a damp brush and create a gradient to this into the ice patch. So you can see just at the top I added in the Europe the color and then using a damp brush IDs or gradient to that color. And then at the top, I'm just going to use the tip of my brush and add a little Payne's gray. I like to create a little shadow effect here. Now next I'm painting in this ice patch your onto the right side because to pain the other batches of eyes onto the left side, we need to wait for the first patch to dry because we need to make ensure all the ice patches distinctive from each other. Just as we did the layer on the left, I'm painting this neuron the right. Now didn't the layer of the eye is dry. Let's begin adding the VDS into the wooden law. Make sure that you wouldn't log is completely dry before you begin to add in this DD. So I'm going to pick up a little of the Payne's gray color in a medium consistency do not add much of water because we are going to be adding in just little wooden need this, keep a tissue paper handy to dab off all the excess water. And then we will be adding some few lines like this and a little dry brush effect. So in-between, we will be adding lines like these just using the tip of my brush. And now I'm going to dab off all excess water. Then I'm just going to add little dry brush into the entire wooden law. So what you can do is first I didn't know Dr. Rush down to the entire wooden block and then add a few lines. You're in there with the darker tone of Payne's gray to create more of the wooden effect. Then we are adding little ISD did, once we add all the ISD didn't do the painting. This will not be the final look yet by the others is just one layer of the details onto the wooden lot. Make sure you do not have any excess water by adding this. Otherwise you will not get the dry brush effect and ultimately need to be sure that your brown color layer is completely dry before you begin to add this. Now using the Payne's gray, I will begin to live the details into the laptop space here. Make sure that you do not touch the yellow and the orange color if it is still wet. And also in case if your price does not have appointed day, I would recommend you to shift to a smaller size brush to add these details so that you'll get a little more detailed view of all of this. Now since my brush has a pointed tip, I'm even to add all of these details just with one brush. If you notice, whenever I want to have more control over my brush, I hold it from a very close point near to the brushes and venom. I want to let us lose. I hold it from afar please, so that it's easier to get into lose details. So whenever you want to add in details more precisely, had older brush from all closer to the presets and you will automatically have much more better control away your brush. Now, adding a second notifies you are on the left side. Make sure that your first layer onto the left is j. And this one Do we are adding in eyes in the same way just as we added the first two layers on the left and the right. So just added a layer of blue, diluted it, quoted the idea. And now at the top on the dinner at night with the Payne's gray color. Now to add the last neural price, we need to wait for the bottom layer to dry completely. So till then, we will quickly add the further details into the lamps piece. Lamps piece is completely dry so I can begin adding the details onto the edges of the lamp and create the lamp structure now. So I'm going to be using in the Payne's gray color and just using the tip of my brush, I'm going to fill in those fine lines with the black color. Now again, you can see I'm holding the brush from quite a closer point of view. So automatically I'm able to have much more control onto my brush. Now going to add these molecules with me in case of your brush does not have a pointed tip, I recommend again shift to a smaller size detailer brush for adding in these details into the lamp species so that you get much detail view to your wall. Now I think the center lines with the famously follow, I have shifted to a smaller size brush now because I want much more fine lines and I don't want to go out of proportion anywhere. Now on to the left and the right of glass bars, we are going to be adding little more details with the Payne's gray color in the center. We're just going to let the flame effect be dead. Now at the bottom of the land, you can see it has a very unfinished look at the vitamins. You will be adding the snow effect there. It will all get covered up and give a better view. Now. This last factor phi is your, well, make sure that your first few layers are completely dry before you begin to add this. Otherwise you will lose the distinctive look off the ice patches. So that we are done adding all the DBS. The only the Didn't left is to add the VDS with this no, this time. This time they are going to be adding in snow with a very eyes blue color. So for that, I'm going to pick up some whitewash and we'll dad, I'm just going to add a little touch of the cell in blue color. So I already had some whitewash. And to that, I just added a little touch of the city didn't do callow and you can see the eyes no color that you have bought it. The reason why I'm using this color is because you can see we've created all of the i's but this color. So I wanted to go ahead and add even the ice patches with this color so as to create a perfect evening view. So first I'm adding a rough ice patch in-between the wooden log and the land. And now just going to add little highlight, no, undo this wouldn't make sure that you do not have excess paint on your brush because we are going to be adding in little dry brush effect. You're trying to show some small deposits onto this log space. So be very gender, do not add a lot of pressure. Just add this dry brush very lightly. So you can see automatically you are getting so much more detail in Buddhist wooden logs piece, make sure that you will not cover all of the dry brush with paints gray color that you had either to make sure that both the Nios are visible and in-between. You can just add a few lines like this as well. Trying to show some eyes nines collected on Moody's wouldn't logs as well. Now just adding little ice patches, you are near to the wooden log as well. Now automatically you can see then you add the two eyes in between the lamp and the wooden log. The lamp has got a completely they look and it looks so much beautiful now, we need to add some ice patches onto the top of the lamps pieces bed, but you need to make sure that your black color is completely dry. Then then I'm just going to add a few branches, you're into the ISPs. So I'm using the Payne's gray column. We will be adding in the shadow effect to these as well. So I'm just adding a few branches first, and then we will be adding the shadow and let us know Effect bundle these branches as bed. So you can see I've added these branches with a very dark tone of Payne's. Make sure that you do not add them a lot light into because you need to add reflections with the lighter ball. Now for the reflection, I'm going to use a very diluted tone of Payne's gray. I'm going to quickly pull out the reflection. If you feel that the reflection is a little too that quickly dab it with official so as to get a lighter blue to the reflection as well. So just the last reflection your, and then we will begin adding in more details into the rest of the painting. Now just going to add little ISD detail your onto the laptop as well. So just make sure that you are black color or the beans recall, is completely dry before you begin to add this ISD, didn't your? So you can see when you've just added a little touch of the blue color to add in the eyes. It automatically blends and settled with the rest of the painting and creates a much better view. If you want, you can add it with white color and see for yourself if you wish, you can let it be with white or you can completely overlay the white with this eyes, blue eyes. Now one last thing, I will just splatter some snow effect I'm going to be using in this blue color mix only. And I will just flatten some snow into the painting to create a smoke ball view. Okay. If you want, you can just add a little dent of the blue color again, if the colors don't do like, I would go ahead and get this ice blue color tone or lipase fledgling the sprinklers as well for the snow effect. So that is it for all the details into this. For today, let's remove the masking tape and see our final painting with those clean edges. Make sure to remove the masking tape once your painting is completely dry it on to the edges and always remove the masking tape at an angle from your feedback. So your final painting for D 11. I hope you guys enjoyed painting this beautiful land with me today. I will see you guys tomorrow into the D2L class project time for so much for joining me and you.
21. Day 12 - Brown Galaxy: Hello everyone and welcome back to the 30-day watercolor challenge, VR on D2L. The colors that you need for today's class project is yellow, orange, and the goal, setting in blue, Payne's gray, black, and white quash. We would first be painting this beautiful galaxy kind of guy, and then painting in the mountain and define trees and then adding in this naughty deals to each of them. And then adding those little final details into the sky, EDA. So let's begin painting this beautiful class project for today. So I have made before they don't, they don't have much of pencil sketch. We just have a little pencil sketch. Suppose we'll just mark out the moon Your onto the New Left Center. So that is it for the pencil sketch for this one, we even not mock out the horizon line right now, we will directly adjusted by being big. So let's begin with a green quarter photo onto the entire paper, leaving the moon space right? Now when we will be adding the beans given make sure that we do not add the beans into the bottom part of the beat so that we can maintain the ISPs there without having any lines of the pencil sketch By far applying the water, we'll apply them to then diabetes so that we do not have to be careful about not running it into a particular species except for the moon space. Make sure you have an evenly order for DOE. Make sure you run your brush multiple times so that people will stay wet for a longer time automatically. Now, I've enforced beginning with the shade of von sienna and near to the moon, I will begin with the shade of fun sienna. I'm going to use it in a medium consistency, not do that, not to like. Now to be a little careful that you do not run into the moon and the moon shape. So almost in half of this guy, I'm going to be adding in this sheet of one sienna. Now in case if your brush does not have appointed day, then around the moon uses monocytes brush for adding in the bean force. And then use a bigger brush for adding in the binned into the rest of the space. Now next I'm picking up the indigo color and I will begin adding in the indigo color at the top of this buoyancy and SBS. And then later on we will be using in the white color and creating a whitespace into the sky, onto the right side near to the moon speeds. I didn't keep a masking tape underneath my boss, so that may be in flow downwards automatically for us adding a layer of this indigo color. In case if you do not have an indigo color, you can just mix in a little bit of your Blackberry occlusion law and get a darker blue dot. So this is just a forest near you can see at the bottom space you can see I have automatically not added the beat. So you will automatically have the bottom space light for this no EDR with a light blue color. Now I'm just adding in the darker tones of the indigo color at the top space majorly. And as I'm moving downwards, I'm just trying to get a gradient or not adding much of the beans are the bottom space. Same base. Now I am picking up the bond sienna color. I'm going to begin adding in the second nail with the buoyancy and Apollo to get in more depth into this galaxy that we are trying to be ended. Now again with the indigo color, I'm just going to give it some dot py and yet lens between the indigo and the brown color. And I can begin adding the indigo highlights even underground, but just on the edges. Now to the moon space, I'm going to maintain in the light brown lot because we are going to be adding in the yellow around the moon. You can see still at the bottom we have approximately two inch space, right? Which we will be using it as the slope. Being day. Now I'm just going to pick up some white gouache in a little liquidy consistency. I'm just going to begin adding in some white patches to create some glow into this galaxy sky. So just going to pick up with the tip of my brush and going to begin adding in the right things like this. Okay, now here we are trying to create in a white glowing space into the sky area. Hence, I'm adding a lot of the white color here. And now I'm going to quickly try to just create a white space around the moon. And moving towards the top space, I'm going to add it. Now. Every time that you add the white paint or you lift up the color, make sure you begin to clean your brush and then going for the next row. Otherwise, you will be applying the color that is lifted onto your brush and you will just mess up all the fellows at all. So it's very important that after every node of color that you pick up your clean your brush before beginning to pick up the next video. So you are, you can see there was indigo color on my brush which got applied onto the brown species. Okay. So we're just creating a light right back you are using in the whitewash onto the left side near to the moon, sorry, under the right side near to the moon space. Now whenever you even add in white collar, you can see after one year, you need to clean your brush and pick up fresh whitewash. Otherwise, while adding the whitewash onto the fourth layer, NACADA that is underneath a fit and that gets added to your white color. So you can see now your I have created in this white space moving at the top. So we add the water you have to guard. And as you're moving towards the top, It's like dot in between. I'm even lifting up the color. So using the lifting technique as well. Now let's wait for this to dry completely before adding in the folder. And this guy is completely dried and I'm just going to dab in some stars. I just need the tissue around so that I might even does not get messy and I do not have to clean it in between. You can also spread some tissues are rough newspapers or rough peoples around so that your table does not get messy with the splatter of stars. And after adding these datas, we would be adding the VDS into the full realm and then adding in the rest of the details. Now let's begin adding in the pine trees at the bottom space. So I'm going to be using in the Payne's gray color. I'm going to be adding very simplifying trees, as you would have seen in the beginning. We are going to be adding in this no effect on Buddhist binaries. So the buyer would get much more sheaf annual agonist know batches onto these. So for now, just going to add in the basic buying cheese. Now I'm adding this just at the brown line, where the brown line ended. Because at the bottom we are going to be using it that the snow speeds. So make sure that you do not add these bind Jesus much at the boardroom side because we want that space for the snow area. One apple binary, we will be trying to show him coming out from this null space as well, just like this one that I'm adding in case if you want to wait for your white course, Blockbuster giant quickly and then add this. Otherwise, a lot of the white column we get lifted and blend into this Payne's gray colored trees that you are adding it. So I'm going to quickly add a few of these findings onto the right side. And then on the left side we're just going to be adding in a mountain and then a big pine tree once the mountain is completely dry. And then I'll do all of these. We will be adding in this noise effect. And at the bottom as well, we will be adding in the snow. Now you can see I have added the buying Gs and different heights and different ranges and reading them throughout so that you would break the monotony and you do not have them in just one single shape or size. Now for the mountain, I'm mixing in a little bit of my brown and indigo color. So the brown panel was already on my palette and I just lifted a little of the indigo color. And now I'm going to mix both of these. I'm going to be using in this color to act a boundary to, onto the left side. I can add a mountain range moving towards the right like this. And I haven't just make it meets to the phosphine G that we have onto the right side here. Now just on top of the mountain, I'm going to add a field by increase so as to show the perfect movement. Often find Jesus vet and get a profit green of the pine trees coming out behind from the mountain ranges like this. Now let's be the ISPs at the bottom. So for that I'm just going to add a little of the city then blue-collar. And now using a damp brush, I will just dilute the color and spread it evenly. So at the top either be having a little lighter tone and at the bottom I have the docket boat. This time, you can see for the eyes also vive uses videos. A little dock door because we have a good dark sky. So I wanted to reflect a little darkness of this guy on to the ISPs as well. Hence, I have used in a little darker tone for ice this time and not a very light tone as we have been using N2O5. Now I'm just trying to get the perfect tone and unequal tone throughout and trying to get rid of that sharp line of the beam of the blue color. Now just adding little darker highlights with the Payne's gray color. And now using the Payne's gray color, I'm just going to create little shadow effect to the pine trees that are popping out from the ISPs. So via the ISPs, it's still bad. Just pick up a little of the indigo or the pins gray color and add a little margin point so that these bind Gs will look as if standing out from the ISPs and blended into the eyes perfectly. Now there's a pine tree and mountain drying, let's add in the morning. So for the moon, I'm phosphine to add an allele of the white quash so that it's much easier to cover up all the edges which I've, you know, been ruined by the color of the galaxy. In GitHub, if you want, you can even use a masking fluid to protect your moon completely and avoid any or all color bleeding into the moon space. Then you need not use in this white gouache to cover the mistakes that have happened. Otherwise, you can simply correct your mistakes using the white quash like this as the force Leo, as we want to let it be still moon itself. Now onto this going to just I didn't yellow and undo the edges. I'm going to maintain little white highlight trying to show the blue of the moon. And now I'm just going to pick up a little of the orange color and just add little orange highlights around to the yellow as well. So when you begin to live the orange cannot be a little careful. Do not add much. Just use the tip of your brush for adding in the orange highlights into the moon and blended van. But they look a lot to get the perfect blending. And you can see I'm just adding the orange medially onto the edges and just getting it blended. And in the center we've maintained a yellow highlight. Now using the white gouache, we're going to be adding in some shining stars and some bright stars into the sky space. So I'm going to add for some shining stars trying to show them as the sparkling ones. And then we are going to be adding in some bright stars. So for that we are going to be adding in white patches like this and try to blend them with a damp brush into the background. Then once these dry, we are going to be adding a bright white color onto these patches. So first I'm just adding small round patches with the white quash and blending it with the background and getting the bottom Leo Palo lifted and blended with this white color. So you can see these white spots are not too bright white. They are blending with the background and having a white-collar law. And then these ones, they drive either the adding in the white bright color, start look. Now my mountain ranges completely dried and I can use white gouache and add little dry brush onto the mountain range. So for that, make sure you use the white portion of validity consistency. Do not add much of order and keep a tissue ordered. A flood handy to dab off all the excess paint as well. And very gently just that little dry brush strokes onto the mountain range quickly. Now just adding some more bright highlights with the white color, you can see the false Leo was a little Done. So now with the second nucleating more highlights onto the mountain, trying to show love snow deposited onto these mountain range. Now, onto the left side, we are going to be adding in a big fine G with the Payne's gray color. So after a white layer on the mountain has dried, begin adding in this buying G. Now, we're just going to be adding in the simplifying g, not, not going to add much of the BDS because this is also going to be us know, keep the o find G. So when we add in the snow patches onto the F9 key, automatically the pine tree will get a lot didn't look. So for now, just adding the bind G very simply. And then we will be adding in the white patches of snow into all of it. So you can see I'm adding a very simple biology. And at the top it's a little thinner. And as we are moving downwards, I'm just increasing the length of the leaves your, I'm trying to show it into a triangular shape at the end. And this time at the bottom we are going to be led the little stamp of the bind G also be visible. So it understand kind of a thing little visible. And just add a little of strokes clearly. Now using the tip of my brush, I just added a little white quash around the moon again so as to define the mood much better and to hide those brown color biota were up. Now I'm going to add in the BDNF into these bright shining so-called styles that we added in. So I'm just going to mix in a little yellow to my whitewash. And I'm going to using in the yellow column this time to add in the stars and give them a little shining and dry blue, white colored stars we already have into the rest of the galaxy. So adding the yellow been given a pop of colors to your galaxy and blend much better because of the moon effect onto these tasks that we're trying to add it. So just that very small dots into these bigger dots that we added previously. Make sure that the bigger dots are completely dried before you begin to add in these yellow dots. And you can see the yellow color dots pop out much better and brighter than the white stuff. We all do these all shining look that we wanted to add it. So I feel like I can, you know, few more styles of these yellow colors. So for stampeding and these white patches and blending it into the background, then once they try Ivan, Ivan the yellow effect to these stars as well. Then I'm going to quickly, it was then white quash. I'm going to add in the snow patches onto the pine tree. Now for adding the SLO badges I'm going to be using in the white quash, the consistency. And you can see very quickly just going blind, little snow deposited onto the leaves. Make sure that you do not hide the entire pins gray color. You need to let both up a lot be visible, that is the Payne's gray and the white quash. So going to quickly add it. And at the bottom spaces of the buying jazz-band going to show a lot of snow deposited at the connecting point. So I'm just going to add in this no effect onto each of the buying cheese quickly. And you can see my black color or the Payne's gray colors still visit been undefined. G is look both at least no good. So you need to add them in such a way that the black color is still visible. So be a little careful. Try using just the tip of your brush majorly. Same baby are going to be adding in the snow effect even under this huge find G on the left side. And we will make sure that the bind G has the black fight also visible even onto them. Site. I'm just adding little more detail onto the background mountain range because the white color, the background mountain range seems to be a little dull. Okay. Now I'm just going to add the stars for us because my find g is not yet completely dried on the left. So till then I will just finish adding in the rest of the new styles that we added in quickly. Now in-between using the same yellow color, I'm going to add in a shooting star. You're at the whitespace that we have created. You can see the whitespace aggregated and do the galaxy pizza, look into the galaxy and gets it done. Other patch of light because of the light portion of fight that Vicki a day. You can use two methods as I showed you, adding enlightened by quash for added brightness. And the color listing method that we did by picking up the indigo color. Now this pine tree on the left is also dry and Eigen quickly adding this no badges to this. And then we'll be done with this painting for today. Now your, you can see a major using just the tip of my brush for adding in the snow effect. So be a little careful, go a little slower, do not overlap this, no, otherwise define g will not be visible. So I'm almost done adding in the snow onto the pine tree. And that is, we are done with the painting for D2L, another easy edge, beautiful winter landscape, which you can also paint and easily. Now let's remove the masking tape and see our final painting. I just dived off a little after whitewash onto that big pine tree because I felt it too bright and too much. So you see, you can easily dab in the white paint as well again and get the perfect look. So yard is I find a theme for deep 12 of this 30-day watercolor challenge. I hope you guys enjoyed painting this today. I will see you guys tomorrow into the betadine class project. Thank you so much for joining me.
22. Day 13 - Kid in Snow: Hello and welcome back everyone to data Dean of this cut D-day watercolor challenge. Today we are going to be painting this beautiful kid staring onto this Christmas tree in snow. So let's have a look at the colors that you need for today's class project. You need a shade of indigo, flesh, sap, green, beans, green, black and white goulash. Do not worry if you do not have the flesh tint color, we will be creating one for the building itself. So let's begin painting this beautiful snow painting for today using the salt texture technique. I have my paper taped down and even beginning with a pencil sketch effect little kid onto the right side. It's going to be a very rough pencil sketch. We're not going to be adding in the face details much just going in with the simple technique and the simple layout. So just going to make the face looking upwards. So a very simple pencil sketch. If you want, you can go ahead with any other salivate, a URL if you wish to. So foss creating the body. And as you would have seen in the beginning, the body is also very simple. We are not adding in much details or shape to the body as well. So you can see the fees is more tilted towards the top side and that is just a little of the mouth and the nose. D1 that be added in the eyes is hidden because of the faces that upwards. And then on the top you have that little cap under the head of this little caveat. So we're just going to be adding in these details. We won't even be adding much of the face features by him being done. It's just going to be with the simple fleshed and color. And even into the bottom space you can see it's majorly the outfit that is visible. We are not adding in the body shape details on so much because we're adding in these women outfit details. Just this small hoodie you're connected to the sweater that the participating. And that is it we are ready with our pencil sketch suggests already easy pencil sketch, as you can see, it's mentioned in towards the right side as the kid is looking towards the G, which is going to be on the left. The G on the left is also going to be just half visible to our view right now, the details that we are going to be adding in is all going to be the bloody one. And we are going to be using in salt and creating in the background and then adding in the main focus tree on the left side. So let's begin painting. We even beginning with Dublin CTO photo onto the entire people leaving this little kid blank. So I'm going to be adding in the water to the entire paper, including the kid area as well. Because the kids dress is going to be off the dark indigo color. Just adding in soiled either make sure that I do not add any salt onto the good space so that automatically you will not have in the soil texture. And just near to the face, you got to be a little careful that you do not have the darker dawns because then we're just going to be having in the flesh, flesh tint color. Okay, So that is f just going to add in this green layer of water quickly onto the entire surface, make sure there are no bottles of water left anywhere. Now I will keep some Payne's gray color grading onto the band. Your first week we'll be beginning in with the sap green color, adenine, very little effect with the sap green into the background. And as you would have seen, the background is a large bloody one. And we are going to be creating in this snowfall effect using the salt technique this time. So make sure you have some solid handy RGD. Now false using in a very light tone of the Vendee green and sap green mix. I'm just going to add it onto the edges very lightly. You can see it's such a diluted turn off the green color that I'm using in your. Now this nine that I have marked is our imaginary horizon line, which we are going to be concentrating for adding in the details into the sky. Now on top of this line at the background, just going to add a little blurry effect with the green colors again, just trying to show some gene branches very randomly. Now next I'm going to shift into the Payne's gray color. I'm going to add in details with the Payne's gray color. So in the center space that we left white, we are going to be adding in the Payne's gray color. And remember. All imaginary horizon line we created. So they're not drawn below that. Now just creating this guy and nail to do a little good to innovate. You can see I have not the added in the Payne's gray column either the green Palo moving into the good. Despite that is what onto the get the colors won't spread much because I'm controlling the water content, right? Adding in the gallows. So it's easier to believe in lay the water layer and it's even easier to control the pains from going in there. Now into the background while this is still wet, we're just going to be adding in some bloody Gs using the Payne's gray color. So you can see I'm using the beans green, gray, medium consistency, just adding very refined. You can see it's such a technique then bind to that I'm adding it. It's all going to be in the minority effects. So you need notch body about the effects that will becoming in your, because under this Mr going to be adding in this node Dyke Show creating some details of snow every vendor and out. Now around the silhouette, just be a little careful that you do not run this color into the face because the face is going to be off the light flesh tint color if the payload runs a little into the body space, that is the volume enclosed space. That's okay because it's going to be of a darker tone. So be a little careful there. And also if you can see I'm adding these buying Gs in a very blurry manner and just going to add it quickly till the right side completely. Now on the right side I'm just adding some very bloated GD does not even adding the median bind G. And on the right side itself I'm going to add a little green dot jazz. Well again, so just going to pick up a little green and add it near to the top space of the Payne's gray. So you can see we use springs, leaner, medium consistency. Hence, the beam is also still visible because I needed that codecs onto the right side and lighter depth under the left side. Now whatever I do I love is flowing into the phase, separate and quickly lifting it up using a damp brush. And you can see we are even doing deem the light effect of the face again. Now just going to pick up veins, green color. I'm going to add some darker didn't even onto the left side. Now write all of this is still wet. I'm just going to pick up a little of Payne's gray color in a very light consistency. I'm going to create this new act, the bottom space. So you can see quickly running in your brush by in the top space system and blend the top find g of bottom space and the bottom or ISPs quickly to each other. We are adding all of these wet on wet now a little touch of the city and in blue color into the ice base. If you want, you can skip that all. You can even add a little touch with the indigo color. It was very little as you can see. Now I am going to begins fledgling in the salt into the top space majorly. So you can see I'm splashing in this task five from each other, not creating patches, just adding them very randomly. So we're going to add a lot of them to create the snowfall effect into that back down. Make sure to begin adding the salt very slowly, little by little. Do not add a lot of them altogether. Even at the bottom space we are going to be creating in a little of the snow effect using the salt effect. And majorly at the top space we are going to be having more of it. You can see I'm adding the salt very slowly little by little. And that is now I will wait for this to dry completely. Do not use a hairdryer for letting this dry. Let it dry nitrogen, and then we will see its effect. So my painting is completely dry. I just remove the salt from the paper and you can see the texture. So I'll cast created and giving us that beautiful snow effect. Now let's begin adding in the detail to this little kid out here. So I'm going to be using in a little of Payne's gray and indigo color mix. And I'm going to begin adding in more detail first. So make sure that your species completely dried and 0. Otherwise, all the bins will begin to spread into the bifan and you will not have to clear distinctive features of this little kid out here. Now you can see I'm using the tip of my brush ready gets me to define the details. And we will be building these details one by one. So I first added in then biospace with the indigo color. And now either you can use in a very dark tone of indigo or you can use in veins green color to define the edges of this and give it a little detail, wet on wet. It says defining the features of the outfit as well. So even the bottom outfit, I'm just diving into Indigo Leo color. And now I'm going to shift into the Payne's gray color and begin defining the details into this bet on where you just need to read for a few seconds for this to dry in unlimited so that the beans kcal love and not spread much. I'm using my smallest size brush as you can see, and I'm just going to use the tip of my brush for adding in the Payne's gray color. Make sure that when you begin adding in the Payne's gray column, you do not lift up a lot of photo and just uses smallest size brush. You can see I'm adding all of these wet on wet so we automatically have the soft edges to the details of the outfit and still not outfit distinctions are now visible. So I'm done adding the details to the bottom outfit. Now we need to read for this to dry. The DP is into the pit at the top space. Let's begin adding in oh, fine GBD onto the left side, which we are going to create the as a Christmas looking CI on which the good is standing on two samples going to add any of you off. These are buying genies using the Payne's gray color. And then in between, you're going to be adding in fuel using in the sap green are the vendor green color. Go ahead with our darker green tone for adding in the leaves in between. We are going to be adding in half of the bind J Luke. So basically half of the bind G is not visible to all of you, which is on the extreme left. And half of the bind G, which is on the side, is visible to us, which we are adding in right now into a painting. I'm going to be adding in very simple binary log. So you can see it's basically more kind of the palm leaves that I'm adding in and just pulling out these tropes also vary randomly. Do not worry about much details. You are automatically, you will be adding in a little snow with the white quash and do these as well. So if you want, you can even create literary effect onto these trees using in the snow later on. Now from these you can see adding and bigger branches and pulling out these small Indies, again, giving it a little more dementia. It may not be filled completely onto the left side. You can leave little gaps as I'm leaving in-between. Because this is just half of the tree that is visible. That is the extreme right side is visible, the extreme left and the T is not visible to us. So you can consider the major DPS all affine, each pod onto the left side, which is not visible to us. Now I'm just going to pick up a little of the dark green color and I'm going to begin adding in little foil HER with the dark-field Kahlo first. So I'm just going to be adding in the similar leaves just with the green color quickly at the bottom space now. So if you notice how random yeah, I'm adding in the foil edge and I'm just trying to overlap it a little uneven, adding some very rough branches popping out from these bigger leaves. So all of this will give a lot of natural effect to your Christmas tree that you're trying to create in your, make sure that you do not run completely in that little kids. Leave a little space between the kid and the bottom for an HD ds. Just adding little darker details at the top, wherever I'm feeling that the details are a little light. So you can see, imagine you've just added like four to five of the bigger leaves and just then little smaller details popping out from there. And now newer on the bottom, I'm just putting out gonna do jazz di did moving into these stock GI doc needs that you have added it. You can see very simple dy dx, but yet, when all of it put together, It's such a beautiful composition. The blurry background, simple leaves popping out from the left and that little kid onto the right side. Now on to the left as well. Just going to add it didn't affect your width. Little branches, very Latina onto the right side here. Now my kids bottom outfit is completely dried and I'm going to begin picking up the indigo color. And phos going to begin in painting the cap of this little kid out yet. So we'll see just as we added the detail onto the bottom outfit and fostering dividing an indigo Leo. Wait for a few seconds for it to dry a little, and then pick up a little of the Payne's gray color and begin define the edges of this outfit as well, just as we did at the bottom. So you can see you've got the edges of the bottom outfit, but the edges are such software blender that they do not look completely distinctive and have a soft look to itself. Now let's feed for all of these to dry completely before adding in the folder.
23. Day 14 - Winter Cup of Coffee: Hello everyone and welcome back to d 14 of this 30-day watercolor challenge. The colors that you need for this class project is going sienna, red, brown, beans green, black and white wash. We will first 58 ticket a misty background and then be adding the details in the foreground with that, agreed, and the cup onto that. So let's begin painting This being the input D 14 today. So I have my paper taped down. We will begin with a pencil sketch. We will mark the EDR forced using the pencil sketch marketing for them and onto that vividly, that small cup. So quickly I'm going to add the grill area. So it's going to be a little diagonal as you can see. If you want to, you can even being this in 0 for x, you do not want to go into landscape V for this one. So first the adding the dark gray and then I'm just going to be adding its molecules in between. So I'm almost done adding the green. And then the only pencil sketches going to be a prop form to the right side on the top of this grid, the sky is going to be all glory and misty one, the main focus is just going to be the green and the cup onto the grid. Okay? And so rest of the details we are going to be painting all bet on red and teasing that blurry mystique behind. So that is it for the pencil sketch. Let's begin being done now. I'm going to begin with a theme photo, photo. I'm going to apply water onto the entire people for us because, you know, we have to be a domestic backbone in between the grills area as well. So in between the grid, there is the background sky that is still visible. And it would be very difficult to add those details. They're very small details again and again. So rather, let's be the entire sky foss as it is, the real is going to be awful, very ductile. So the lighter tones of the background will easily be covered up. Just New York or Tokopedia. Be a little careful that you do not act a clean palette for the pine trees there. So the first color that I'm going to pick up is going to be the beans green color. So I'm just going to pick up the paints gray color in a very diluted consistency by adding in a lot of photons, make sure that you do not pick up the color in the dark consistent and we need very light misty beans into the backbone. So far is just going to add a very light layer of this beans. Click on it. You can see, if you do not have been clear, you can just use in our little mix of your blue and black Palo and use it in a very light consistency. Or you can even directly using the indigo color if you want. So just a light wash of this color force into the entire background sky to feed the misty look for those Kai, Neo-Orthodoxy up you can see, be a little careful, just add the lighter tones there. Do not add the green color in the cup species when we add the green buying GI. Now next I'm going to pick up the pins gray color in a logistic consistency with very less of water. I'm going to add some bloody trees into the backbone in the center piece. On the left and the right side, we're just going to be having into a little detail but yet blurry G. So on the left side will be having a pain sludgy and on the right side we are going to be having a venous valve. And into the rest of the background, just adding little of this mystery kind of a look though, the inventory misty background. Now next I'm going to pick up the bond sienna color and begin adding the tree onto the right side first. You need to be a little careful. Do not add excess water in these pins that you pick up now to create a misty look and V it for a few seconds for the biofilm color to set the link before you begin to add this. So didn't then you can see I'm just preparing it by green and the buoyancy. And Apollo, once all my people, Dr. Fauci, around five to 10 seconds, then I will begin adding in this brown color now. So it's almost that might be by, as you know, settled in for a few seconds now. Now I'm going to pick up the buoyancy and Apollo forest and Stem of the g. Now when you add this, make sure that you are not adding excess water. Otherwise the beans will spread a lot. So you can see I just added a little badge of the beans clears. And I made sure that I do not have excess water while adding in this bead. Now next I'm going to pick up the sap green panel. I'm just going to add the foliage to this tree, trying to show it uploaded Christmas time of a gene to the background space. So the phosphate you can see I'm adding it in a very light tone. And again, if you notice my beans as not spending much despite being o Vietnam vet onto the bag. So that is a key Yo, you need to be careful by lighting in this, if you will add an excess water, you will not get that shape of defining G once it dries, it will just be a simple Street batch of the green color. So in order to retain the shape of the pine G, looking space out your IT, even despite having the soft pages, you need to make sure by adding in the green color and the brown color. You do not have to pick up any excess water. Now when when for the first year of the V01 to settle in a bit till then, I will be o G Your onto the left side. So on the left side, which is going to be half of the bind G, and half of the bind G is not visible to our view. All of this is also radon bet. So you need to walk a little quick. If your paper is the one that dries quickly. Or what you can do is we put a false background misty video to try to prevent them dieting and then add these Leo's now into the rest of the space. Just adding little bit of a bush effect into the background. Blurry wet on wet again your as well. Now under this green pine tree, I'm adding in the second node of green. This time it's the darker tone than the force Leo, you can see. And this time I have even less water. So automatically you can see the pins are not spreading much. Yeah, triangle reading the shape of the pine tree into the vagal, giving it uploaded yet a beautiful view. Thin film onto the G at the left side, I'm going to add in the Dakota. So you all can notice that after every Leo IV for a few seconds before beginning to add the second layer onto a specific place so that the falsely asset building, the paper also dries a little. And then when you begin wet on wet automatically, you get the soft edges and you also get that definite bloody shape of the peas that you want to add in instead of just getting in a symbol patch of colors into the background. Now and do the adding the third layer of the beam column to give more Docker depth. Again, you can see this time and I'm adding and it's much more or less of water and Neo-Orthodoxy up. I'm being very careful to not add the kalos and do DACA. So at the background you can see you've got a light, light green color of blue in the background of this gene. And in the front you have the good foliage effect, CMV onto the G at the left as well. If you want, you can add more depth, but I won't be adding photo because I'm satisfied. Now I'll just read for all of this to dry completely and then act of order details into the spindle. So now my background is completely dry it and you can see the misty effect that you've got to the trees that you added in. Now I'm picking up the bond sienna color in a very dark consistency and I will begin painting the grill. We have added up the bottom speech. Now all of this is going to be the main focus of the painting rest all of it was a blurred effect of the beam. So I'm going to first begin adding in these outstanding grades of cure. So simply false, I'm just going to add in this burnt sienna color and the wet on wet, you can even add a darker depth onto the edges if your paper dries quickly than I would recommend you to paint one at a time at the decoy effects while it is bad. But since my paper doesn't dry quickly, I will add three to focus first and then shift to the darker color and add the darker color just onto the edges of this grid. And automatically it will blend in with the brown color. So my paper is still wet and hence all you know, I'm adding in all the real force and all the layers that I, I didn't do the green previously are still red too. I can add the darker depth in Giza venule feel green is dry and then I would recommend you up or false damped the dark obedience to that one. And then begin adding it to the second Glynn. Hence, I always recommend you to use a 100 percent cotton paper towels so that the drying process is a little slow for you to add in the details. Now I'm going to shift to the Payne's gray color. I'm just going to begin adding it onto the edges like this. So I'm just using the tip of my brush and dropping in a medium bone beans green region you under the edges and a little bit into the Sendai few neat. So automatically you can see the green is beginning to get into so much depth and space piece is still wet. As you can see, the bins Leica lens automatically blending with the audience and having a soft edge and does not have a sharp edge. So you can see even my photo stream that I been to distill way. All of this though we added wet on dry technique that people remain read in GitHub if you want, you can first add a layer of photo, then the front color, and then the Scala media people stay wet for a little longer time. Now one that dark green, I'm adding in a very light layer of the color forced because on the top we are going to be adding in the snow patch so that you don't need the docket bone. At the bottom grid, we are going to be adding in the darker tone. The reason why I'm adding in the brown color, because all we are going to show us Orton Park without this noise well, on Buddha's good space. So hence, It's always better to post. I've been doing dialogue because with whitewash, all of it will get covered up very well. You want to add this note. Now Neo-Orthodoxy up space. I'm adding in the Docker bone of the bone sienna again, so as to add a little shadow debt to the cup space as well. So just using the tip of my brush, I dropped in a little bit of the darker tone of brown by mixing in a little beams three to it and meet me on the right side, Nike did the DACA species. So on the left we are going to be adding a lot of snow onto this glass beads. Now let's wait for this to dry. And after that, we will be adding the rest of the day, the pinna and the snow effect into the day. So now my first news of brown are completely dry. I will begin painting in with a very dark brown color this time, if you do not have a dark brown color, you can simply mix in a little bit of black to the browser. Now, I'm going to be this bottom layer of the grid forced with the docket boat at the dock, since we are going to be having in the snow effect, I'm not adding in the docket boom there. We already added the darker tone on the right side at the top space that we will be having less of those no effect. Ok, Now at the bottom space, I'm just going to quickly add this darker tone of now on to the edges of this gorillas. But I'm going to drop in the backward dawn just as we did at the bottom grid to create a, a little more depth to this wooden space. So now using the Payne's gray color, I'm just going to drop it onto the edges while this is still wet. So you can see automatically the Payne's gray color spread and blends with the brown and gives it a perfect blend and the darker space edges. Now I'm going to use this Bowman and drag dawn and paint the entire cup force including the handle. Then once it will dry, we will add in the depth to it with the white and the black color. So pause just being then diacritic with whichever color you want. But, uh, since to give it a little Christmas feet, I'm going to paint it with the red color. So that is it. Now, do I add the final details into the painting? We need to read for all of this to dry before beginning to add in this noise effect. So let's meet for this all to dry. So now my painting is completely dry and we can begin adding in the snow effect. So I'm just going to pick up some whitewash quickly. Make sure to pick up some fresh bright brush with a clean brush and all while adding water to the wash. Make sure you pick up freshwater and do not pick up the colored water. Otherwise you will not get the flesh right. Look. Now first I'm going to add a lot of snow of batch kind of thing onto the top pins based be a little careful if you are a bottom layer of Grill is still wet. So I'm just going to add a big snow patch on the green onto the left side first. Now as I'm coming near to the cup, I'm just going to take it into a smaller height and just let it end there. And then on the right side, I'm just glad it very little onto the edge. So on the right side, a little of the dark bone, bone is going to be visible because we added previously. Because we know it's going to be visible in there to detect new onto the right-most side. I'm just going to add little snowball HDD. Now I'm just going to pick up some Payne's gray color. I'm going to add little dry brush detail onto the bottom grills. So just going to pick up the theme 3, follow if you want, you can even pick up a darker tone of clouds are very dark tone of brown. And add the dry brush technique makes sure that by adding the dry brush technique, you always dab off the excess paint and water from your brush before you begin to add it. And then you will get the dry brush very easily. So I'm just going to add very simple dry brush onto all of these vertical drains that you added it, and then even just that little snore details on to them as well. So you can see how easily the dry brush technique, the key is that you need to pick up the bean in Arctic consistency, but still you need to dab off the excess paint as well. Because if you will have a lot of beamed, it will begin to give you batches instead of the dry brush technique. And also a need to be careful to not add excess water and always dab off the excess water before you begin to add it. So if you notice I always dab my brush before I begin to add the dry brush tool. So this is how you can get the driver's stroke easily and also the texture of the paper adds to adding up these dry brush strokes easily. Since my people is, has a metal draft, it automatically aids in and adding in these dry brush strokes easily. Now I'm going to quickly given a little off this dry brush effect even on Buddhist stop. And just some little details automatic need that get added because of these dry brush stroke. Now to the cup also, we need to add little details to give it a little more effect and some natural look. So I'm going to begin adding the details onto the subspace now. So first I'm picking up the beans week alone in a very nice consistency and just using the tip of my brush, I'm just going to begin adding it onto the edges. I'm going to blend it with the red color. It is not blending easily. Use a damp brush and title. Just deactivate the red color native and automatically you can see it blends. Do not add this value. Red color is too wet, otherwise the beans click on Login, spread a lot and it will cover up your entire rates based you just needed on the edges and highlights the anger, define the shape of the gut. Now I'm just going to pick up a little of the beans, Greek alla. I'm going to add it underneath the cup to add as a shadow onto the space. And I'm going to blend it with the brown easily. Now let's pick up some white gouache and begin adding in this knowing do a painting finally. So I'm just going to force platform little of this no effect vary randomly. And we're not going to add lot of these plateaus because since we already have a misty background and it's almost a white background with a very heightened of the beans green color. A lot of this, no one be visible. So major lineage is going to be adding a lot of it onto the beans, green, green, and the brown color effect. So far it's just going to dab little of this. And then I will still be adding little effect of the brush also. Now using the blast just going to add small strokes. I'm some snow deposited onto the grid spaces as well. So very random strokes you can see on video random shapes that I'm adding input epic data's being collected onto this gives base. Now once your cough is also completely dry, I'm just going to add a very small white highlights onto Dakar, just using the tip of my brush or kidney out, but it didn't highlight to give a little more depth to the cup as well. And that is if we are happy ending for day 14 today. Now, and remove the masking tape and see our final painting with those beautiful clean edges. I hope you'll agree that with those clean edges, the painting looks more beautiful than what it looks with the deep on and on. Removing this deep is always a satisfying feeling that you get. So let's remove the masking tape. So you are as a final painting for the 4D, we're almost halfway through this 30-day watercolor journey. I hope you guys are enjoying painting all the window fees. I would see how best to model into the class project.
24. Day 15 - Northern Lights: Hello everyone and welcome back to day 15 of the 30-day watercolor challenge, VR, halfway through this journey today. So let's have a look at the colors that you need for today's class project. You need a shade of indigo. Payne's gray, black, and white wash. Do not. But if you do not have the cobalt theme, hello, you can simply knows in any medium tone of or you could mix in your video with a little touch of yellow too wet, or any donor of green with a little lighter. And for indigo, you can just mixing a darker blue tone with a black color to get this indigo color and begin painting. So let's begin with a pencil sketch first and then begin painting the head. So we're just going to be having a very simple pencil sketch. We are going to be marking the horizon line and then the lake area at the bottom space. So almost at the center of the page, I'm giving you a very rough horizon line. And in the center bottom space, I'm going to add in the lake area where we are going to be having in the reflection of the northern lights. The rest of this basis on the left and the right side is going to be the AI space. And at the dark they are going to be painting the northern sky, giving it up into loop. So I'm going to be using in this Coval chain for, from Magellan mission. So it's the cobalt green hue. I'm going to quickly pick out this color onto my palette and login. You just need very little of the beans because this is what the colors and automatically or when you add quarter, the quantity doubles up. Next you would be needing indigo palette, which I already have the D and in abandoned at me. And I haven't detected begin painting the sky forced. So I'm going to be adding in a layer of water first before adding in the BB. So fast, we're just going to be adding in the layer of water into the sky space. And then we would be adding it into the rest of the details one by one. For this guy, make sure that you add an even more affordable. Because for painting in the northern lights, if you will be having an excess water, the beans will spread a lot and you will not be able to maintain or control the flow of the colors to achieve those streaks into the northern lights space. So make sure that you haven't even neuro floor don't know excess water upwards of water anywhere. Now I'm first going to beginning with the cobol chain color using my round brush. I'm just going to add some half C kinds of strokes into the sky, moving diagonally in between them. I'm going to leave in gaps for the indigo color to come in later on. Now in the green, I'm just going to add in very little of the yellow green tone as Ben very knitted, it will immediately get all covered up, but it will leave a little light, highlight the ones at the end when you reach there. Now I'm going to begin the cobalt green color again. I'm going to begin adding in the strokes into the rest of the spaces as well. In between. I'm leaving gaps. Also, if you notice I'm not adding excess of water to the Coval gene palette because I do not want the paint to spread it. So automatically if you will not be adding lots of water, the paint will not spread and you will get these two o'clock. But in case if you will add a lot of water, the beans will spread and it will be very difficult to achieve the stroke loop and wait for it to not spread until you add the indigo color. Even for the indigo color, I will make sure I do not add excess water. Now next I'm going to begin picking up the indigo color. I will make sure I do not add excess water to the indigo color. And by adding the indigo color, make sure that you do not pick up any excess water. Otherwise, it will begin to spread and cover up the green space. So I'm glad the indigo color from the left side. And by the time I begin to move to the right side, make sure that your paper has dried. It needs to be added by this is still wet so that both the colors blend well into each other. Now we're going to be adding in the Indigo for line 2, the spaces which we have left blank in between the green strokes that you added it. Now be a little patient by doing this. Otherwise you may add the value of a lot and cover the green space. So you need to go a little patiently. You can see I have not picked up any excess water. First, I'm just laying down the legal calendar white gaps. Then again, I'm going to be picking up a little of the beam Calla and added to the Indigo strokes to get that blend between both the follows. If you want, you can even use a damp brush if you do not want to pick up the green color again. Now I just need the first layer of the indigo color. And now I'm adding the darkest layer, highlights of the indigo color. In the places where I added the indigo color previously. Now your eye has picked up a little of the green color again and adding the green color from the bottom posts because I feel that the space is beginning to dry in a little so as to keep it wet. I just added the leader of the green color and now I'm adding the darker highlights of the indigo color again. And let both of these quickly together. Just added the darker highlights of the indigo, even on the right side. I will just keep adding a little more of the indigo and the pink color and get blends between both of them. So very well, you'll see that the colors are not blending well or whether we need a different color again. So just as at the right side, I needed more of the V01 force. Now I'm going to pick up the indigo again. I'm going to add in the darker strokes and create the blend. Every time that you lift up a colorblind, make sure that you clean your brush. So I have this tissue of plot at the bottom. And every time that I pick up the indigo color and iodine it did, I'm cleaning my brush before beginning the next 20. Otherwise the neon from the forest, you will begin to come on to the second layer as well. Now, we are going to be painting in the league space. Also. I'll just begin with a clean CTO photo onto the neck area. So at the horizon line we are going to be having a little pine Chief Beck. So that is the reason you can simply being done the next piece now, even though the sky is still bad, because the palace won't flow much into each other. Now the lake is just going to be a reflection of this guy's face. So I'm just going to be adding in combines gene Palo falls in the center of the leaf. And then we'll do the edges. I'm just going to be adding in the indigo panel. I'm just going to add an indigo streets into the beans peas has better. I'm going to blend both of these colors, blend with each other. If you want to. You can even create the stroke effect in do your legs piece as well and add more depth. But I wonder go ahead with a simple reflection. Hands I've just added little Dean effectiveness and dark and rest filled it with the indigo color. Now just going to add some indigo highlight your at the bottom space and a little stroke effect with the indigo onto the green color. Many we'll feel that the blending is not happening easily. Pick up either of the color using a damp brush and just try to blend it and always try picking up the light dock on the four blending. So your since I have the lighter tone of green, I'm good. I'm picking up the green color whenever I need to blend it with the indigo color. Now on the edges of the lake as well, I'm just going to drop in this darker indigo color. And then we wait for all of this to dry before adding in the folder window for this northern night sky and the league area. So I am just a little bit unsatisfied with the blending your. So again, I picked up a little bit of the green color and just quickly added it near to the Indigo. And now using a damp brush, I'm just going to try and blend both of these. You need to make the blending effect while it is still wet, because once it will dry, you will not be able to blend them again. So you can only blend them by the ideas are still wet. Now let's wait for all of this to dry and then add the for the dy dx. So now bye. It's completely dried at this level. Now I'm going to begin adding in the DTS. So first I'm going to add in the snow EDA on the left and the right style. For that, I'm just going to be picking up a little bit of the beam, speak Allah, in a very watery consistency. So I'm just going to mix in a little of this with the indigo color that's already on my palette. And I'm going to be using it in a very watery consistency. I'm going to be adding it onto the left and the right side to create this no effect. So in the same V, I'm just going to add in this no effect onto the left side as well. The reason why I'm adding this no effect with this light tone of Payne's gray and indigo mix is to deflect the sky deflection onto the ISPs does well. So I'm adding in this small space this time, we don't, I don't off this beans Greek fellow. Now next I'm going to pick up the indigo color in a little thicker consistency and the darker consistency. And I'm going to add it onto the edges of the need to give some shadow depth to that. So just going to use the tip of my brush, I'm going to blend it with our own, you know, snow area that you haven't. So you could either do it by BIPOC wet on wet. So by you right side was done bet you could detect me add in these darker edges. Now I didn't place as my right side does begin to dry. So I'm going to quickly use a damp brush. I'm going to blend it again and revisit the surface like this so that I get the perfect blend with the darker highlights as well. So just to undo the edges, I'm going to be adding the darker highlights to add the shadow details. Now using the Payne's gray coloring, a little darker consistency, I'll begin adding in the pine trees onto the horizon line. They're going to be quite short, do not cover the entire Northeast. I looked and I'm going to add very simple ones because I'm going to be adding in some snow deposits onto these binaries that we are adding it. So just wanted to quickly, I didn't very simple ones, not much DB and ones. But I just made sure that I add them in different heights to up and not in just one single height. In the ascender space. I'm going to be adding them in a very small height, as you can see, because I do not want to add much of them in the Sandoz piece. I just wanted to give more of the fine JD deems onto the edges. So on this end does base, you can see I'm even adding in very simple, cheap vet, all by just adding those simple straight vertical lines out there in different heights to create awesome distance GI effect onto the sender's base. Now as I move towards the left side again, I'm going to begin adding in these fine Gs in the above because eyes and a little detail in MOOC than what I was adding in the sender's base. But again, they are not much detail once just the simple ones, but only in different heights. And I'm quickly add that. And then we'll just be left to add the star detail into this beautiful northern lights and the snow D1 and do this thing. Although if you do not want to add in the F9 key, you can simply add in simple vertical lines throughout at different heights to give it some different distance. D, g look effect. If you do not want to add in the J loop, but the width, the Northern Lights, the bind G gives him a little more beautiful look cans I prefer going ahead with the pine tree and InDesign, but just very simple. All you know, batch effect of the GI. Now in do the ISPs your, I'm just going to be adding in simple branches and little reflection to them as well. So just very simple implicate branches, make sure you do not add them simply stayed one's a little tilted urine then that will add more, much more effect into your being the same. They even onto the left side, just going to add a few quickly. Now I'm going to be adding in that reflection to these, so I'm going to keep it there. My handy so that I can dab off the reflection wherever it happens to look a little darker. I'm going to be using in the Payne's gray color in a very light consistency. And if you'll feel that the distant darker you can quickly, we're just going to be having in very light reflection, make sure that you adapt with a clean edge of a tissue. Otherwise, if there is any kind of on the tissue because of the wet surface, it may get lifted onto the people. So I'm just going to add a few more branches here onto the left side as well, amplitude reflection to them as you can see, just so simple branches and reflection add so much more details to the bean thing and such a beautiful effect into the simple ISPs as well. Now I just need some visual at the bottom lakes piece and I'm just going to splatter some stars at the top sky species. Make sure you have the dot-dot-dot effect into this lake, lake space as we are not adding in the snowball effect this time, just to start effect in Buddha northern sky. So just going to add little splattered first and then going to be adding in some shining stars creating that shiny white I don't love. So just a little more of this lattice. You can see just adding the stars automatically gives a bright look to this northern sky and give so much more depth. Now I'm going to quickly add in little snow patches onto the pyogenes that we have added it. So going to use in the whitewash in a little thick consistency without adding much of water and just going to begin adding in some snow onto the bind G branches. So if you notice just by adding in the snow, even define g begins to get in a lot more detailed look and automatically, even though we just added in simple find g of adult much detail. But with the white and the black color automatically that G begins to get in so much more detail. So quickly going to add in this flow onto the left side, find these as bad. Hello. So I'm done adding this neuron to the entire horizon line trees. Now, we are going to quickly add in the stars and the shooting and the shining stars into the night sky. Suppose diverges start in some shining stars. And then I'm just going to be adding in those pride start by creating in those white patches and then adding the bright star look on to that. So now foster using whitewash, I'm just laying down this model so I'll put a blending it with the backbone and giving it the download. And once these dry, I've been given the bright shining stars look to these, giving it with a bright color. Make sure you do not add a lot of these styles all together. Add them a little spaced out from each other and make sure you are them the turbine, the dinner not altogether. Otherwise, it will be very difficult to control if you add a lot of them. Now I'm just mixing in a little tinge of yellow to my whitewash. You was this bright yellow color to adding the side effect onto these small divide gaps that we created. Okay, So babies modeling and add-on that you want to be having the data by acting as the shining look behind from these tasks. So I didn't quickly added onto all of the styles that we added in. Is it now, but they are no gallery itself. I will just add some start looking stars as well as in the shining star look. These are, you know, adopt crisscross ones. So just a little of that with a yellow color. And then we are done with this painting for today. Lastly, just some snow onto these are branches that we added here at the bottom species very little, not much. Okay, Just going to add little off the snow with the white wash. So now let's remove the masking tape and see our final painting for the FFT. I hope you guys enjoyed painting this beautiful Benton or the nights with me today. And your reserve final painting with those beautiful clean edges. So we're halfway through this challenge today. I will see you guys into the other half from tomorrow, hope to see you all join me in the data D. Thank you so much to each one of you.
25. Day 16 - Country Side: Hello everyone and welcome back to the type dd for the color challenge. Today, we will be painting yet an adult with Misty window landscape. The colors that you need for today's class project is indigo, yellow ocher, sitting in lieu. Round sap, green, beans, green, black, whitewash. You would also be needing a little touch of the yellow and the red colors for adding in those flowers at the bottom is face. So let's begin today's class project. So I have my feet but deep down. And let's begin pencil sketch for this fun, we are going to first begin marketing the mountain ranges on the both left and the right side. In this handout, we will be having the mountains close to each other, but leaving a little gap for the CBO do still be there at the border. Want to you can see I'm marking a very rough edge to the mountain range, CMB. Now you're onto the right side. I would add them out and reach. Now at the bottom space I will mark out the field space. So I'm going to have to fill areas Markov, one on the left side and the smaller one on the right side. Now from in-between the mountains just going to rock in the horizon line. And at the bottom space your, I'm just going to have a very small house into this field area. If you want, you can skip adding in the house, but adding it would give it a little more detail to this vendor landscape that we're adding in. For the sky, we are going to be having enough any misty sky as you would have seen in the beginning. Then we would be building the mountains with the dark orange and giving this no effect on the mountains later on. Then we would be building the field areas and then the C, giving in the misty look to the sea as giving the perfect reflection of this guy in blue, the Z space. So first let's begin with a thin coat of water only do your sky area. Do not worry if you run a little into the mountain vein just because the mountain range is going to be off a very dark color. And the style is going to be offer misty night blue and indigo tones so you can easily cover up the colors that need and do your mountain range so you can be a little careful out there, but near the descender horizon might be a little careful so that you do not run into this. So for this guy first, I'm going to begin with the city, then blue-collar, innovative, light consistency. Now make sure when you arriving in this column, you do not add it or not do dark consistency. I'm going to pick up the Kalina very nice consistency. And in the center of this guy I will try maintaining or light-speed, that is the whitespace automatically for some lighting effects to create the misty look. Now next time picking up the same local over this liturgical consistency so as to begin adding the darker strokes into the sky. Now when I will be adding this darker strokes, I would make sure that I do not add much of photo because I don't want buy beans to flow a lot and on but the edges I will just give little strokes and in the center space I will create a cloud loop. Again. You can see I have tried to maintain the little white light near the horizon line. So make sure that you let little white gaps in between the visible to create the misty background both physically and do not add all of the neon's to get up quickly in just one Neo began a few, we'll keep adding them all Leo by Leo from lighter to darker dawns, it will give more depth to your painting instead of adding All the darker tones together. Now I'm just mixing a little of the beans Greek alla to the flu. Jab is already on my palette and I've gotten indigo color looking good. If you have an indigo color, you can directly use them, they go follow. But since I had a little of the law on my palate, I brought up mixing in the beams Greek island forming the indigo color instead of wasting the blue color. Now, I'm just going to give it the data highlights, but then they go follow. You can see I've added it in such a way that I have all the three colors visible in the lighter blue balls, the second layer and the top layer. Now right away you'll feel that the color isn't flowing smoothly. You can just use a damp brush and soften the edges and you look at the perfect blend. Now I'm just going to add little more highlights quickly in the boardroom space. You can still see I have tried to maintain in the light effect into the sky space at places where I have quoted the white spaces left. Now that is it for this guy. Now we'll begin painting in this model field area at the bottom for us. So first I'm picking up the yellow ocher, yellow and I'll apply it onto the top space. You are, we are going in with the technique wet on dry because it's a very small. And we do not have much DPS to add in wet on wet your. Now next I pick up the sap green color and I have added it to the rest of this base. Now I will blend the scholar venue bit about yellow Ochre sheet that we added. And at the bottom, just adding little touch of the bone sienna color to give depth to the field. Now just using the tip of my brush, I'm adding little of the beans, click on onto the edges to define more of the edges and give it a perfect look on the right side, I will make sure that the yellow ocher color is still visible using the same beam sleek allow adding more darker highlights at the bottom space. So that is, now I will begin painting in the same way. The field onto the left side as Ben. I will not add the PAN-OS into the house. So near the house I will just be a little careful. Now you're onto I'm going ahead with the technique wet on dry because it's again, a very small fees and I don't have much easiest to add in. So I can quickly blend in the palace the debate on dry technique itself. So floss the yellow ocher onto the top side, then I will blend it with the VIN color. So automatic because of the yellow ocher color at the top speeds, you will have a little of a light to being done after you blend in with the Carlos. Again at the bottom space, I would add in the brown and the Payne's gray highlights needed on. We cannot be in the mountain and deceiving until the sky is dry it otherwise, the colors will begin to bleed and blend into each other. Hence, we have been doing this bottom field area for us. And then once the sky is dry, we'll add the top deviance as well. Also in the bottom space, we are going to be quickly pulling out some grass strokes using the back-off or brush. So by in this field area will be like 50 percent dry. We will begin adding the strokes using the back of the brush. All right, side field is about to dry. I would recommend you befores pull out the grass dropped and then pin the left side area. So I'm done blending the colors you can see because of the NO codon, I have that little light highlights of the yellowish color on the top space. Now see, we're just adding little of the beans gray highlight onto the edges of this beam as vent. And now after this, and I can quickly shift into a smaller size brush so that I have a backside pointed brush. And using that I will begin pulling out the grass tool. So for doing this, your paper has to be read. Otherwise you will not get these strokes. Once these dry, you will automatically get the brass draw popping out and it will give you different look to your field area. So instead of, you know, adding in the grass strokes after all the neon strike, you can use this method to get the sense of self imprinted kind of the glass tube into the area. Might you need to do this wet on wet that is by your people and being distilled. That is not dying when you need to pull out these grass strokes. So now you can see automatically as the grass strokes are beginning to dry, if they're coming to life and I'm just pulling out last few strokes while this is still wet so that I get a lot of the grass look just at the bottom space. You can see I've only coiled up then the half of the field space and not completely. Now I will wait for the entire painting to dry, then begin adding the further details into this painting. So now we compete painting is dry it and you can see the grass effect that we have got. Now I can begin mountains one-by-one. So far the mountains I'm directly going to go ahead with the wet-on-dry technique. I can just pick out some Payne's gray Kahlo because we are going to be painting the mountains in a very dark color consistency. We are going to be using three colors for the mountain. That's the beans green, a little of the dark nor the indigo color, and a little of the green color to add some highlights onto the mountain ranges bed. So first I'll begin with the Payne's gray color onto the edge and venue begin to add the Payne's gray Carlo. Make sure you begin to define the edge of the mountain and give it a very rough kind of an edge look. Now next to the Payne's gray color, I'm just adding a little of the blue color and I'm going to blend it with the Payne's gray color. And it is going to don't automatically into an indigo looking color. Now, below the blue color, I'm just going to add a little of the Payne's gray palette again. And then I will add in the sap green color. I'm even going to pick up the sap green in a good dark consistency. Make sure with each color that you keep adding. You'll keep blending mode the colors because since we are going ahead with the wet-on-dry technique or you don't. And it may so happen that some of the edges will begin to dry. So in-between, keep blending them so that this David, now I just added the dark green color. And I will again blend the blue and the green velvet each other. And then at the bottom, you can either add little of the right to clean effect or you can just simply adding the Payne's gray color there. So I've just darken the blue color a little more so as to give it more of a blue. The dark effect to the mountain ditch me creating get more of the misty look. So that is it. We are done adding the mountain range on the right side. Now. I'm going to paint a mountain range on the left side quickly. Now in the same V after the beams Greek our law, I will pick up the blue collar in a dark consistency and begin adding it in case if you want, you can even use the turquoise blue palo. I am mixing in a little bit of that. Hello to my blue color to get a little dark eyes look this time. So if you can directly use either the city in glucose or later dot consistency, audio could add in any darker blue, Don need not be turquoise blue, compelled savvy. Now, just again, picked up a little bit of the Payne's gray color and blending it with the blue, giving it a little darker effect. Now last thing I just added the sap green color and I'm blending it with the blue. And you can see in this time, even at the bottom of the mountain range, we've tried to give him little different effect to the edge of the mountain range. Now I will just pick up little being piccolo and give more darker edges to this mountain on the left side. Now I've been thinking painting despite house that we have undefeated space because we cannot being this EDI Under the mountains are dried, otherwise the balance may begin to each other. So for the House Ada, I'm just going to first use in the bond cnf Gallo and fill in the bottom space completely. Now for adding in the rest of the details, even into the house, We need to wait for all of this to dry. So let's be for all of this to dry, then add the final details into the painting. So now my painting is completely dry. My mountain ranges have dried completely. Now before adding the final details into the house, I did first begin painting the CTO. So for the CAD, I'm just going to lay down of any rough layer of Waldo. I haven't made sure near to the edges of the mountain and the fields, Eigen not be adding in the water so as to avoid the balance from leading. Ivan did actually be adding in the palace day using the tip of my brush in the rest of the major species that is possible to add in this model euro for DOE, we are going to be painting the CEO, although in a very misty kind of a local, we won't be adding much details. It's going to be quite simple. Just as this guy in the center, we will keep in the light space and give Danko edges at the left and the right side and the legend at the bottom range of the mountain space, so forth using in the city in blue color, I'm just adding in a very light layer of the blue color. And in the center, I will keep this knee are also ready night and on the edges, keep it in a little darker tone. You can see around the edges of the mountain and the field space. I'm running my brush very carefully so that I do not run into those fees and reactivate those colors. So be a little careful near to the field and the mountain ranges so that the colors don't bleed into each other and do not true in your painting. So this is a photophosphorylation. You can see in the center, you're also in the light effect. Now I have picked up the darker consistency of the same blue palo and I will first added onto the horizon line. And I will just blend it into the bottom space and, you know, create a very light kind of an effect. Now using the docker dot and eigenvector, adding it just at the bottom of the mountain ranges to add the shadow effect to the mountain. You can see I'm just using the tip of my brush and adding it just underneath the mountain range. Even still be adding in the Docker depth. They're using the Payne's gray color. Now from the left and the right edges, I've been just pull out some darker VFS. Now in the same V, I'm just going to pick up a little of the beam Spain Carlo and begin adding the depth of it, the Payne's gray Kahlo. Now when you pick up the paints gray color, make sure you do not add much afforded. It needs to be very less what G, because otherwise it will spread a lot. We just need the Latin little shadow highlights to the mountain. So just an addiction. I go to the mountains and do that. So you can see just using the tip of my brush, I'm adding it underneath the mountain ranges and it's automatically blending with the bottom space. In case if it does not, then you can just use a damp brush and blend it like this into the bottom CDR. Now, you need to add all of these details wet on wet, so you need to walk a little weak so that you do not have any sharp edges. Otherwise you can make frontispiece to dry completely and then prevent the surface and add these details one by one. So I'm just adding little more d1 to the bottom side of the mountain ranges. Now I can pick up another darker blue and just add some more darker highlight veins popping out from the left and the right side. And then we'll be done with this EDA as well. So just a few CVs into the Sandusky says Ben, you can see the regionally maintain the light effect in the center, just a field or benefit that we have added now. So that does it for the z space as well. You can see we've got such a mystery looking CDS when giving you the perfect window and look and in the eyes effect forming on to the CDI as red. Now lastly, I'm just picking up very top bone of blue and just adding it using the tip of my brush at the bottom of the mountain. And you can see it still having a soft edge because by what our ADA is thin red and automatically creating the perfect shadow to these mountains into the sea space. Now using the right Gosh, I will begin adding the details into the painting. We have to add the dry brush stroke onto the mountain ranges. So first I will pick up divide Guassian a good thick consistency. And I can just begin adding very simple dry brush strokes on the board the mountains. Now make sure after picking up the white paint, you dab off all the excess paint onto a tissue out a rough plot, and then just using the tip of your brush, begin adding dry brush. Leo's onto the mountain range. By adding this, make sure you do not add a lot of pressure. Otherwise, the bottom DO fellows will get activated and may modulate the white color. I will not give you the A-B-C Look of the white color that you want to add in as the snow onto these mountain ranges. So you can see I'm using my hand very gently. I'm not adding a lot of pressure. Hence, I'm able to achieve the dry brush effect of the white color forming this boy effect onto the mountain range. So far the right mountain range, I'm pulling up the stroke, moving towards the left side majorly showing Internet them diagonal one, same for the left side mountain. I'm going to visualize it and showing it more in depth towards the right side. So I can quickly added onto the entire amount and G. You can see an additive in such a way that the bottom they are fellows are still visible. So they're not completely hide them. Dyamand endangerment just to write batch, you need to add it in our drivers format so that the bottom, the Apollo's are also visible. Now in the same manner I've been added to the mountain on the left side as well. You can see the right side mountain has created such a beautiful It's no effect on doing just by adding into dry brush using the squash. Now quickly going to add it in the same vein on the left side. So I'm almost done adding the dry brush even onto the left side boundary just in the Jennifer does left out the warping space. Then they just use the tip of my brush and add some white stroke to underwater mountains, giving little more opaque knock off the snow, undo these mountain ranges. So that is it for the mountain ranges. Now let's begin painting the roof of the house. For that, I'm just going to mix in my onesie and I'm the Payne's gray color and form it into a dark brown tone and added onto the roof of the house completely. Now using this dark brown colored only, I'm just defining the edges of the house and I'm just going to give it a little bit detail at the bottom space of the house, just using this dark brown tone, I'm just using the tip of my brush to add in this detail. If you want, you can use a black pen to add in the details if you are comfortable by adding it with abandon. Now in the bottom field space, even just be adding little advice lava look. So for that I'm going to mix in my white gouache paint a little bit of the yellow and the red color. And I'm going to add some flowers with the Hanoi and the red color. So fast I'm extend that a little bit of the white gouache with a yellow color. I'm just going to add it at the bottom space. Very simple. All you know, flower looking, birds kind of D-Day, many medulla fit. Now just going to even splat a little of the yellow color. By news plateau, you need to be sure that it does not run into the water space. So be a little careful. You can either cover up the space with a tissue or a rough paper so that you do not go out of proportion anyway. Now I would just add some smaller dots and some smaller flowers. And then on the right side I'm going to be mixing in whitewash with the permanent red color. I'm going to form a piece of looking pink door and add some flowers with that piece of being thought on the right side. So now on the right side I'm adding in the same kind of flowers just with the red color pastry mix that I formed by mixing in the white goulash. Same, we're just adding smaller dots at the bottom, please, to fill in the space. Now on the left side, I'm just adding a little of the pink flowers to give it a little bit. Oh, you don't lend it to the flowers as bed. Now using the whitewash, I will just add a little detail to the house and then we are done with this painting for today. Another beautiful misty looking landscape giving him the perfect window wipes. So let's remove the masking tape. Make sure that your edges are completely dry. Before you begin to remove the masking tape orders human data off the edges, or even though being done that you've created. So you always, I find that being day four, day 16 of this 30-day watercolor challenge, in the coming days, we are going to repainting more of Christmas wipes and Christmas landscapes. So I would love to see you guys join me to the end of this class. Thank you so much for joining me.
26. Day 17 - Winter Wonderland: Hello everyone, and then come back to the time PD wanted to pilot challenge VR1, D7, D to D and B are going to be painting this beautiful Gavin house without the Christmas pipes that banners that you need for today's class project is indeed equal covariance G, yellow, brown, beans green to black and white bush. So these are entrepreneurs that even be needing for the D's class project. We would create that galaxy looking sky, then adding the V dip into the rest of the painting. So let's take into defensive sketch first, we mark off this note and then the packing house onto the top of this null area. So I'm adding that having holes just on the snow line. I'm just going to be making a baby's infant onto the benzene sketch is not going to have much of this. We would be adding the victim here to the cabinets directly after dragging the philosophy of the house, we won't be having any pencil sketch all fit. So just have a rough cabin house sketch study. Now this time, you can see I have given it a little different edge at the top, defining more devious. And now even on the roof I'm going to add some smaller. The, theist first is going to be the commune, the right, and at the top site you're at the left one. I'm going to be adding top view factors are likely to flip sign of your coming out from this cabin house. At the below spaces, I'm going to add in quickly, somebody knows enzyme those odd suggests DOC benzene sketch, I start the BBS, I would be giving any big the beans did agree. So that gives it to the left and the right of the house we are going to be having in a lot of fine bumping up the EBIT from behind the house that we have added in. So let's begin painting the sky for us. So for this guy, I'm going to first begin by adding in a lot of water quickly. I didn't not be adding the water into the house space. So be a little careful in New York for the house. And you can either use the smallest size brush on there to lay down the water around the house. Or if you're using a flat brush, be a little careful by your kidney out to the edges of the house. Make sure you apply an even layer of water. Do not leave any excess water pools of water anywhere to be good since we are going to be, think of any night sky kind of a look all with the all kalos of covariance Gina indigo. We need to make sure that is not accessible. I'll go. Otherwise that follows me feed. And it would be very difficult to achieve the right look of the fallows. It's going to be sort of a steady simpler not the night sky that we are going to be adding it. So I'm making sure I haven't even their aquatic growth. So I'm done adding the layer of photo I'm fostering to be using in the provide clean fellow. I already have a little on my palate. I will just pick out very little again. Make sure you remove very little fellows because since they're walk, if I must've tend to increase in quantity just as soon as you add in a little while to do it. Now at the bottom side, force to either begin with improvise Jean Carlo. You can see. I have not added much of the water to the feet. I have kept the derivative of a consistency only giving iterative based and look as well. Now near the house, I'm going to run very carefully just using the tip of my brush and a little slowly. But in case if your paper dries into a green, you'll need to walk a little bit faster so that the rest of your speech does not dry out quickly. In this, if you do not have to provide Jean Carlo, you can mix into a voice blue with a little touch of white and get an agent fees to finish, don't like this, and use that color into the bottom layer. So you can see I'm almost filling the top of the sky, just leaving very little space for the indigo to flow in and blend with the Coval Jean Calas. And even on the right side, I even started the global theme running very carefully me onto the edges of the house to pick up the indigo color. You can see I'm picking up the indigo color also without adding much water directly from my bank. Now for the indigo color, I'm just going to be pulling up the indigo color from the top tilde up our greens peas. And I didn't just be blending in both the colors. Even from the left and the right side. I'm going to be pulling out the indigo valid later on. Now you can see I'm just using damp brush and pulling multiple and bending. Now again, pick up little of the team follow to create the perfect lens. To get clean blends, you will have to keep moving the fallows again and again. Do you know a perfect blend between the fallows and also get a great look to the fellows. So I again add a little of the Lean Colombia to the indigo. Now again, I can pick up indigo color and blend it with the greens. So at this point you can see how messy this is loci, right? We need to get perfect blend between both the fellows to get the perfect look. So I'm just going to use my brush. And now using a damp brush, I'm just running in between where the two colors are meeting it. And you can see automatically the blend is beginning to look a little soft. Now again, just using a damp brush, pulling the palace from the top than the bottom, getting appropriate length of the transition between the fellows. Now I have the top speed, I'm going to add with the indigo follow. Now again, using a damp brush either drive to blend the colors, if you will try and get the common mistake just in one bowl, Google not be able to achieve I print loop and the Baltic lending and transition between the colors you need to keep working in Laos wet on wet to get the perfect transition between the colors as you can see. Now, we are done with this guy. I can begin adding the light effect into the windows of the house because we cannot be in the house and the snow ADR until the night sky species, right? So picking up things and look how low I can just fill all the windows of the house, but they had no follows to show some light effect popping out from the house. In the night sky. You can still see, I have got a good five things look. All these human lot bowl with Leo's, once watercolors will dry, they will dry up all night. Oh, so you won't get that beautiful night sky look that we're trying to achieve. And then the snow effect will also look into this being day. So make sure you run the greens and the blues in multiple Leodes. Try getting the blends, adding in multiple layers, losing damp brush in between and then are in the darker highlights at the top as bed. Now I can wait for all of this to dry completely before arriving in the four DVDs into this being day. So now my sky is completely dry and you can see once it is dry, it has got the perfect lens between the blues and the trees. And I've got the darker highlights at the top space as bed. Now I didn't post begin painting the house species. So for that I'm going to be using in the MSN Apollo, you can go ahead and use any brown that you want. And I would be adding this color into the entire bottom. How space. Now the window either just be adding in a little fatter of either the yellow or the orange follow all you can mix them walkability. And I would just be adding little attach onto the edges so as to create some light effect. Falling onto the walls of the house has been suggested with the onesie and not adding Lipton off the yellow, orange mix to get the light effect. Rest of the house, you can see him just simply fitting in with the one CNF fellow who need to run very slowly. If you went hot, you may enter into the door space or into the sky species. So it's very important that you'll give clean edges to the house. See, even do the Vindolanda, right? I'm only adding into yellow color onto the edges. And now I move quickly, begin the bone sienna color and blend it into the rest of the house. So you can see the perfect load that is being created that on the window because if they didn't know that we used it now at the top speeds near to the root, that window that we added it, I can feel that space also with the onesie and that follow. Now this dries next, I have to be built into the bottoms host-based. So in this most bees onto this time we are going to be showing you the effect of the yellow light directly have in the house. So I do first begin with a clean Miro photo via the Duke I put near to this guys, please. And near to the walking off the house, you can see, I haven't been good the bottom of the house because I would be adding that last week so that I do not have to wait for painting in this ISPs again. Now Foster, I'm using a very light tone of yellow. I've just added benefits in yellow and now we're averages per edit and do the rest of the space and theater very light one defect with the yellow follow, do not pick up the fellows in a very dark consistency. Now next, just going to pick invading into an indigo color. I'm going to add it onto the edges and blend in with the yellow follow. So I'm using my flat brush this time so that it's easier to blend in and move quickly into that big O pays off the eyes area. So again, you can see how onto the edge and I'm just adding the darker highlights with the Payne's gray color using my round brush, just me to number the edges that I'm getting, the darker strokes. Make sure in that saying good, just below the house base you let the yellow right out showing the effect of the house light on Buddhist no space as bed. Now with a very nighttime, I'm just going to run a very light layer of the beams, Greek follow onto the yellow follow. This technique is called the glazing technique. So with already nighttime, you can see now I did just died a very nipped in the highlight of the Payne's gray onto the yellow color in such a way that the Yanomami loads will still be visible, creating light effect onto this most piece. Now I will post the door of the house. You need to reassure that the brown color of the house is completely dried. So I guess my edges water little vector you can see the paint is spreading and relative. So what I've been doing is I've been forced direct Apollo and quickly start to color on the edges so that it does not need into the house face. So you can see just using the tip of my brush, I lifted up the bellows type of blending into the house, please. And be that those green budget. So I would recommend you to make sure that your brown spaces completely dry. Now under their edges I will just add some darker, right? Let's using the Payne's gray color. Now again from the edges I will just affect the colors that is bleeding into the house face. Now we invade for all of this to dry completely before beginning to adding the final details into the painting. So now everything is completely dry. Need to begin adding the final details one by 1. First I'm mixing in a little bit of Payne's gray. And at the bottom space you are, I'm going to create this lab with the Payne's gray color, innovating medium consistency, not too dark and not too light. Next, onto the roof of the house, I'm going the name of your offer of mics off the ground and the Payne's gray Palo, but innovating, watery consistency, it's more of Payne's gray and very little of the route. We're just going to create this blue effect onto the roof like this. Then we would just be adding little details, no effect with the white quash needed on at the end. So just a very light layer. You can see it's almost a transparent layer of the pins gray color that I'm using it. Now to give a little up the nodded night effect onto the roof. I'm just adding in a little touch of the indigo color onto the roof area. But again, even the indigo ballets in a very watery consistency as you can see. Now using the Payne's gray color, I didn't pick me begin adding in the bind onto the left and the right side of the house and even unwritten top view onto the roof. Make sure that your edges are dry before you begin to add this, we are going to be adding in very simple finds these again because we will be adding in snow patches or do these findings as bed, creating a 3D look to define G is needed or so right there with the beans green color, you can just go ahead. Facilitates of the pine trees and added throughout onto the entire snow light. Though, when you are adding this, you need to ensure that pick up for ballet look good graph consistency because we need them in an opaque look. Also, just make sure about one thing that you'll VD the right of the binary throughout, do not have them in simple same height, two out, some vector or less on virtual Adobe and give it the perfect view into this landscape. Now I've been with me, I did the rest of defined Gs onto the right side. And then we will move to the left side, and then we will add the F9 key, popping out from behind the house. Make sure you do not add those buying jeans from behind the house until the roof is completely dried. Otherwise, the black color will begin to see been in Butoh, a roof space. So I just speed up the process. You're an amplifying these quickly. Now you can see on the rightmost side I've added such a huge find G because a new UGA house, we need to add smaller ones so as to maintain the balance and let the house be in focus. Now I'm beginning with identifying genes on the left side. So foster managing vinyl to half looking fine G, so half of that bind G is hidden behind the house, just aren't the top space. I've given it a complete you will see I'm just adding the bindings Brady down to me. I'm not adding an EdD and look just at the top. I like a little after coalition of BD. And at the bottom, I just finished complete new. Now my roof has completely dried it. So at the top of the roof, I haven't just died with modifying triangle. So then peeking out from behind site. Also, you at the top also make sure you add them at Reading Rights and mark off all the same heights. Now I will quickly add in the rest of the F9 key on the left side. Again, on the left side angle to make sure that you read the height of the pine trees and not our demo cleansing in height. After this, we will only be let into adding the ISD did and the big detail into the house. And v would be the deal with haven't dove underline find overview. Now using the Payne's gray color now, I can quickly add the margins to the doors and the windows that we added in the house. Make sure you use a smaller size brush or just the tip of your brush for adding in these details. So do the windows, I'm even adding in the vicinity. Beans click on it. It says later on, we'll just be giving a little D-Day look with the eyes by landing in ice with a white brush. Now next I'm going to be shifting in a very small flat brush. It's kind of a spotter brush. It's from many brush set. So this is the brush that I'm going to be using. Now using this brush and the backbone bone, I'm just going to add the big details into the house. So just going to leave small, small rectangles, leaving little gaps in between. Now if you do not have this brush, you can use your smallest sized round brush. And I'm the slack details to give him the big detail to the host. Now in the next slide, I'm going to add the break in-between the top rubrics. So automatically creating in the big D, D in between, you can see at places because of the, you know, going and adding the bricks continuous need some breaks. You may get off the light of Allah and that's perfectly okay. It wouldn't be a much more detailed view. So do not buy the end, keep lifting the palette for each of the three. Had a few bricks together. Let off. You often come in the lighter blue. So I haven't quickly added the oblique detail into the rest of the house quickly. Now using this model size brush is making my task quite easier to add in this quickly. If you're going to be using a round brush, it may take you a little time bladder, but make sure you add them dignity really did, so that you're not lose the look of the house that you have created. You can use of any smallest size flat brush for adding in this detail. Now the last thing left to add is all of this no detail into our painting. So I'm going to pick up some fresh BY clause onto a valid typically, make sure you use it. The English were picking out the whitewash. I'm just going to add a little water to it so that I do not know, lose the opaque look of the squash. Now first I'm going to add a small moon onto the top right side of any small moon. So first I will blend it with tobacco, create a very blurry light effect for the behind. And once this dries, I will add the moon effect onto this widow peak lookup, the whitewash. So this is a closely over the moon which I have blended into the background. Now using the white gouache, I will begin adding the detail of snow onto this house area. So I'm going to act small patches of snow on the roof and you know, little onto the house part has very near to the connecting points. Make sure you do not add all of them at one piece together at them little by little. You can always add more of it later on after thing, look up, adding little details. Now add the connecting point of the roof and the bottom household. So you can see I'm adding in the batch. Now New York to the boardroom species and onto the connection of the doors and windows. I will quickly, I didn't little of this node. Now at the bottom has value. I'm just going to add admittance more detail and Dr. Snow, but showing in your quickly, I would just add a little more details of this node and then I would be adding this Modi didn't onto the pine G. And then even finding these flagellin some snow to complete a painting for today. Now even between the windows you can see I'm adding little snot onto the grid of the windows as well. Now on the roof you can see how I'm adding this more detail by just showing some small falling out from the roof like this, giving it the ball fixed no effect. Now we are going to add a little of this no effect using the tip of my brush onto the F9 key. Make sure you add the snow effect in such a way that you do not cover the Find g is completely with all neither white snow. We need to make sure that the black parts of the pyogenes also be visible in between. Now onto all of the binding that you've added in the middle of this no effect. And then we, they just flatten middle of the snow. Finally look for this painting today. So I'm almost done writing on the wall of the pipe. Now I didn't begin my biggest brush that is a size eight round brush, and I will quickly lead some tissues around. Now using a bigger size, don't rush. I did quickly begins pledging in the snow effect into the entire sky. You can still see the effect that we have because of the blending of the blues and greens in the sky. Also, I forgot to tell you one thing while adding define g. I hope you had been a little careful of not adding the findings in such a way that the entire green color up the night sky gets covered up. So make sure that the green also has to be visible in the sky. Otherwise it would just be a plain indigo sky. So you can see we've made money. I did this no effect on, but that is the skies. And now I will quickly I'm in the mood effect as well. Just in the US ended up creating a white patch, putting us in such a way that it looks OB and around that you can see the light of eye defects getting the right effect of the moon. Now let's remove the masking tape and see if I'm painting with those clean edges. Make sure that your edges are completely dry before you begin to remove this. And also be a little careful that you do not have any fellows on your fingers, otherwise it may get lifted onto the paper. So your final painting, or D7. D. I hope you've enjoyed painting this beautiful winter wonderland with me today.
27. Day 18 - Misty Mountains: Hello everyone and
welcome back to the 30-day watercolor challenge. And today we will be painting this misty mountain range in the color combination
of blue and the y. Let's look alongside you
will be needing inserted. This class per ship is indigo, green rows by lead. You shouldn't lose. Famously,
black and white goulash. So these are all the
philosophy would be needed. We will be cleaved in the
mountain layers one by 11 mountain at the time and
then waiting for it to dry. So let's begin The indeed
today's class project. So I have met before, though, before beginning
to paint them, we will be marking
out the mountain ranges that we are
going to be having in. So I'm going to be having a very rough and very light
handed mountain sketch. Make sure that you give OVD uneven shifted the mountain
and not just simple ones. Now, also make sure that at
certain places you can let them around an overlay and cut out of mountain in between. So in this way, I'm
going to be adding approximately five to
six mountain ranges and our desktop space, you can see we have this
guy Space Needle lived out. Now we are looking, see I've got the mountain range into
a release more in one. And now at the forefront we are going to be having the smallest, rounded on the right
side, bottom, please. We are going to be having in
the pine trees coming in. So this is it We have
approximately by mountain ranges, the bottom, the
binaries to be added. Now this guy also
we are going to be painting in the
color combination of the pink and the flow speed in a beautiful galaxy
kind of a view. We will begin with the
green photo photo. I would be running the sky, EDF and the second
mountain range and agent, so as to I have an underlying pink color layer
onto the mountain ranges. If you want, you can
avoid adding it in the mountain ranges and direct me write the index,
the mountain, you can induce the
pink color into each mountain range that
you can see very roughly. I've taken it to the
Cordelier top edges, but I would recommend
you do only they get to the second video if it is
difficult for you to blend or, or, you know, director
colors again, mango, very clean
and even the Euro 4, make sure you run only do the second layer of the mountain for the pink color and have a definite x so that
it's easier for you by blending in the
mountains as well. So first I will begin with the Windows Carlo and the
second mountain range. I'm going to be filling it with the Windows color do
not run in to the third and the lower
mountain ranges because for you it may be
difficult to blend in. I'm going to be using
the indigo color. I'm going to blend it
with the pink color, creating an ultraviolet Poland. Between first, I'm laying down the indigo color in a written medium consistency
as you can see, as we move downwards, I would just, I knew
the color for Domo. So basically at
the top of the sky I'm going to have
the Docker indigo. And as it moves towards
the pink color, I'm going to have a
light absorbed by just moving my brush from
the top to the bottom. In-between the
indigo and the pin, you can see a small
bite line still there. Let that GloVe there because
we are still going to repeat again more and more
using the white color. So I now I will just join
a damn brush in between both of these to get a clean
transition between both, Unless you can see
using a damp brush, both the colors
are automatically blending into each other. Now I will just darken little pink color at
the bottom space. And as I move towards
the top space, I will make sure that
the pink color is light. So basically in
December meeting point, but the colors are
in light tones. And at the top the
indigo is a doctor. And at the bottom, the pink
color is at the Docker tool. Now again, I just
picked up little indigo and now I'm going to run
it till the pink palate, feeding in the violet
tones and victory. Automatically when the
Indigo and pink is reacting, you're getting light by
electrons coming into like. Now, I'm going to be using invite what the
color this time to create a glowing effect into the sky, almost
endless endospores. So I'm going to use white
watercolor and not white quash service quickly that I using my right watercolor first. Now just using the
tip of my brush, I'm adding liquid
whitewater color into the centers, please. Moving the ones that talk right side feeding
or glow effect. Now, every time that you
pick up fresh might be, make sure you clean
your brush and then pick up quite pinned
or blend Apollo's. Otherwise, you may
expect the colloids. And again, we will not be
just able to achieve in the whitespace that we
want into the sky area. So if you notice every time, whenever I want
to blend in also, I'm cleaning my brush. Now in between for blending, you need to pick up any of
the Pelosi, indigo or pink. You can pick them up login
and Brendan, Well, now again, picking up the white
color and I'm going to lighten the edges
and blend them well. So you can see the
white growing species into the sky SPs coming to life. You need to go very patient. Be in there. You'll
just find trash and drop all the
white color together. You need to go little by little, blending the edges
again and again. And doing all of this
while this is still wet, so you need to do it
too wet on wet again, you can see how
carefully I'm cleaning my brush every time before
picking up the paints again. So you can see the glow
that the way things are getting into this guy's beats having the blue edges as well. So it's very important that in-between you'll
keep picking up the cameras went to create the plan and the perfect
glowing species. Now let's read from all
of this to dry before beginning doping the
mountain ranges one by one. So Republic Nieto painting, Let's begin flat links I'm
styles into this high speed. Now you can see the glow that the white beans are
needed after giant, that is exactly what we needed. But if you wouldn't
have kept using the indigo palette for
blending the edges, you wouldn't have got such
a clean looking white space and the glowing effect
having the closer. Now using whitewash,
I'm just going to splatter some stars
into this piece. Later on, we will be adding
some shining stars as well. For now, let's just plug into some very small stars
into the sky space. Now I will, we can use a tissue and dab off all
the styles that I've fallen into the mountain range as I do not want them
in the mountain. Though, they would
have not been up there by adding in
the palace there. But soon to be careful, I will quickly dab it off, find it is still wet. Now, let's begin painting the mountain ranges
been by one so far, the first mountain
range I'm going to be using in the
peacock blue palo, or you can even use turquoise
know RCV in blue-collar. So one mean the
first mountain range at the dap POS tag and
add the blue color. Then I can pick
up the pink color again and blended
with the blue collar or false mountain means pleading the pink highlight at the
bottom of the mountain range. Now I will pick up the
same quin rose color and add it into the rest
of the mountain range, of the forest mountain range. Make sure that you add these
fellows quickly so that you have a perfect blend between the blue and the pink that
you're adding in. Otherwise, you may have sharp edges in between
the blue and the pink. So for these mountain ranges, you need to be a little
quick so that you do not have the sharp
edges in-between venerable you feel that
the top species dying quickly than the color
data as well so that it stays in there. We will be adding all the
mountain ranges one-by-one, moving from this lighter
tone of pink and blue to that our codon
of violet and indigo, creating the perfect misty look into each of the
mountain ranges. So you can see the
underlying thing tone that we added on the
mountain when painting the sky is creating the pulsing effect into the sky after adding
in the blue layer. So that is the reason
why I told you to take the thing
color of the sky till the second mountain
range. Because. Effect of the theme color. And then the second
mountain range bleeding the perfect effect of the sky
onto the mountain ranges. Now, the first mountain range. Let's begin adding in
the forest near for the shining stars that we
need and do this guys. So using the white quash, I'm just adding
simple backgrounds. That is simple
small white color, blending it into the background. And then once this dries, we would add the shining
stars into these. First, I'm just going
to add a few of them and then see if
I need to add more. You can see on the
edges I'm using a damp brush and creating
a soft edge to D, so good and blending it
into the background. So I haven't quickly
be adding in just to Bulls opens your
on the left side and then we will be
it for all of this to dry before I begin
the father details. So now let's do part a first
year of the mountain and the stars to dry
before adding in the further details
into this painting. So now we're falsely and if the mountain is completely dry, I didn't and I can begin
adding in the second year of the mountain for
the second year also, I'm going to be going in with the same palette combination
of the blue and the pink. Just that this time
I have taken up the blue pallor in a
little darker consistency then the previously. Because for the second
layer of the mountain, we needed mitten Dukkha, then the force Neo, as we even fought to
be moving down what we would be darkening
the palate bones. Now in between, I am even adding in little of the
violet patches onto this mountain range
when he met him not much and adjust and
adopt site post. I'm going to be
adding the blue and the white mix and
then picking up the pink color at
the bottom layer of this mountain village and blend both the kalos Bell together. You need to run a
little quicker so that the top blue and
violet color tools do not dry out quickly. So I'm going to quickly pick up the wind rose color
and blend it well. Sam, false just,
you know, again, give anything the blue and
the violet colors that I added in because it seemed
to be Giant out quickly. So this time I'm adding in our legislative
watery consistency so that it does not dry. Now I can pick up the
Queen Rose Scala, and quickly added into the rest of the second
mountain range space. Now this time you can see even the wind rose color
that I have picked up is in a little
darker consistency then what I have picked
up for the forcefully. So in the C V C, even if your blue and
violet color seems to be drying before you begin
to add in the pink column, you can quickly use
a damp brush with little bit of the color
tone, Angie event though, and DIA blue and the purple
range before beginning go adding the pink color to
blend in both of these. Now you can see the
second mountain range is quite DACA as compared to
the first round AND gate. Now as we move further downward, we would be darkening
the dawns even further. So this is how you're going
to get the abbreviations into the mountain to create
the perfect misty look. Make sure that in between the mountain you have
the perfect blend. And at the top you define the perfect sheets
of the mountain, giving them an uneven look. Also, paint a mountain
ranges one-by-one, only after the first layer
of mountain range tries it, you can begin with
the second one. Otherwise you will not
have the definite edges to the mountain as they may
all blend into each other. Now, I would begin
adding in this task until my second year of
mountain range dries in. So I'm going to be picking up nature of the paint palette. And I have a little blue wash mixed in your though
with the blue. I'm just going to mix them
very much love to paint. You can mix in just a
little of your pink than white quash and
get this pinkish tone. I'm using this, I have enforced that little touch to this task. So I'm going to be
adding these things, task or legal this task
that I'm in the blue space. Because if you will be
adding these things task to this task
into the Ping space, they won't be visible. You can see I'm just adding
one and showing it to you. It does not even stand out. So on the thing space
we are going to be adding in this time
with the blue color. You can just mix
in a little bit. Obviously, he didn't love with the white quash and add
the blue stars like these. Now with the light pink tone, I'm just going to be adding in little after shooting
stars as well. Now quickly, I will just add some sparkling
stars as well. You can detect near this
with the white quash. I'm using a pink outline, a very nice consistency almost equal to the white
board since it's all video onto my brush and just going blind a few of these
shining stars quickly. Now and do this guy,
I'm just going to lay down something stars
onto the top blue sky, creating the perfect blend
with the shooting and the shining stars that we
added with the pink colors. Now just as I told you
for the shining stars, if you're going to
be adding the thing starts at the bottom
thing colors piece, they won't even be visible. So I'm adding these sparkling
stars with whitewash and do that space and you can
see the standout perfectly. Now let's be it for the second mountain range to be guiding completely before returning to add in the code mountain range. So now my second mountain range is completely dried and I can begin adding the details into the code mountains
ensure on the left side. So for this, I'm picking up
the Prussian blue color. So it's quite a dark blue
color as you can see. And this time you're not going to be adding in
much of the paint that it's going to be more of the violet and
the pink color. You can go ahead and pick up any darker tone of blue that's
available in your palette. Now in this mountain range, you can see these got that
pink color line because of this Skyping color that we had added in the mountain ranges. Hence, I had told you cannot run the pink color to the
pod mountain range. I can easily blend
this by adding in the blue color and
it will be visible. But if your paper
will not supported, it may even be visible. So make sure that
you have not run the pink color in case you have, then you need to add
the blue color in a very dark consistency so that the pink color gets
hidden completely. Now on the top of
this mountain reach, I'm just going to add a very
dark colors of the blue and just going to be leaving this mountain simply
with this blue color. Now let's meet for the Cloud
mountain range to drying as well before beginning to act
the fourth mountain range. So now rethought
mountain ranges, Jayden, I'll begin adding in the fourth mountain range onto
the right side. For that, I'm going to
be using in the middle of the indigo mixed in
with the blue color, creating an indigo color. You can do that mean you will say in a medium consistency. But since I have a little
of the blue on my palette, I even begin adding an O, you know, Payne's
gray and creating the indigo color with the blue that's already on my palette. Now I haven't run completely
into this mountain range, but I haven't make
sure that it's in a medium consistency because the bottom most mountain range, we are going to be
running that into a very dark consistency. And on this mountain range at the bottom area we are going to be having in the pine trees. Now again, this
mountain range also you can see that pink
color that is there. So I haven't make
sure, you know, get rid off those edges
of the pink color so that they won't be
visible on the right. Oh, sorry. On the left. You can see under that we can still see a very little
line on that pink color. But I can't do much
about it right now. So hence, I told you to be careful and added only
till the second mountain. Now I haven't just made on this new Europe
indigo color quickly. Make sure that the
idea doesn't dry, I'm done, you are adding it
into the complete space. Otherwise you may have
sharp edges in between. And make sure you use the indigo Paulina
medium consistency and not too dark for this NEO. Now I've just picked up little more of Payne's gray
and less of blue. And I'm just dropping
in this darker tone on the top edge of
the mountain range. He think that darker
color despite there at the top species
and as we move down, what's having the lighter bones? So just use the tip
of your brush for adding in the darker
tones at the top space. And you can see we've got such a perfect transition from the darker to
the lighter tones. Now let's try it. Let's wait. I'm doing then. I'm just going to
add little more of this side effect into
the sky is faced with the white gouache because
the blue stars that we added on the pink audience
standing out that bright. So I'm going to pick
up some whitewash and add some highlights
to them as Ben. So I'm Bill all of this task. I'm adding in the
bright white effect so that they stand out
because I feel the blue and the pink stars
were looking down and we're not giving
that glowing effects. So I wanted the
profit growing set, hence adding in
that white Dutch. Now let's wait for the
fourth layer to dry before beginning the
last year of mountain. So my fourth year of
mountain is also dry. And father, I'm beginning with a very dark color
of indigo did agree. You can see it's much
darker and tone. If you do not have
the indigo color, you can mix in either black and blue or pink, green and blue. Now for this fourth layer, or 50 or also I'm going
to be adding it in opponent radiation mountain you are going to be having
in the docket book. So you can see I'm getting
the perfect radiation for this mountain has been at the top speeds,
the darker tones. And as I moved on what I'm
just blending that color downwards with a little bit of water heating the perfect tone. Now, we can begin adding in the pine trees onto
the right side. As we do not have the pine
trees onto the left side, so we do not have to wait for that mountain range to GI in, but we just need to be a
little careful that you do not need your hand onto the
left side mountain bike. So we are going to be adding in approximately four
to five fine teas and we may be even adding in
little branches in between. This time, I'm adding define keys in a little detail manner, going slowly step-by-step
and not rushing with it. Because I need to create the perfect pint look
fine, key luckier, because all we will
not be adding in snow effect onto these
pine trees this time. We're just going
to be adding it. Does misty mountain reached the technique without
any snow effect? Okay, So now I'm going to add another little taller
than the previous one. You can see I'm using the very smallest size brush going and very carefully each branch
and not rushing the day. So make sure this
time we will take a little time and atropine
Gs with little details. Now next you want to, I'm
going to be adding them. They're buying G,
which is going to be a little scars one. So I go much of the foil
HD deal with this one. I'm going to be adding very
little detail to this one. So you can see how
I'm leaving gaps in between the finde ich da
eating as class looping, buying G. So in-between just to acknowledge
and radiation, that is the reason I'm adding in this buying G that
very less for each. Now as I move towards the right, I'm just going to be adding few branches popping up
from the bottom space. And then I would just add in one more bigger bind G
onto the right-most side. But first just some
branches popping out the opening onto each other. Now on the right side you are, I'm going to add
this big pine g del the top edge of the
fourth mountain reach. And do this by going to be
adding in the regular files. But again, it's
analytical detail manner instead of just adding
in the simple d11. But as I move down, what I would just add in more
of the point h and Betty, less of the detail. Look. I know adding the pine trees, a manager detailed manner, me taking a little time, but you know, few
paintings to get that perfect look
to the painting, you'll need to take in
a little time and add these details in case
if you feel tired, you can show me a complete
and add these needed on once you are all
completely refresh. So now as you can see, as I'm moving towards
the bottom side, I'm just adding them quickly and creating more of the foil, the defect close to each other. Now last thing, I will just
add a few more branches popping out from in-between
these buying jeans quickly. So you can see how just little branches
popping out some between the pine create such a beautiful and a filled up
look to that problem space. That is it with me, ready with our painting for D D. Let's remove the masking tape
and see FIN and painting. Make sure that your water
most mountain ranges giant before you begin to
remove the masking tape. Otherwise, the palace may
bleed onto your edges. So your eyes are fine and
painting for d dt of this type, db watercolor challenge, we are just Wendy's a V from
ending up this challenge. And in the coming days we are going to be having in a lot of prisoners paintings coming
to dive into this class. Thank you so much to each
one of you for joining me.
28. Day 19 - Northern Lights Camp: Hello everyone and
welcome back to the TBI, the
watercolor challenge. Today we are going
to be painting this beautiful Northern
Light camping site to you. The balance that you need for today's class project is indigo, cobalt, yellow,
orange, burnt sienna. Things be black and white quash. We would first be creating in the northern sky and then we are adding in the
details into the tent. We didn't that file look and then add in the
rest of the ISD d. So let's begin painting this beautiful modern
night view for today. So I have my people deep
down. Let's begin with. So we're just going to be
marking down below horizon line and the blue tents
that we are going to be adding into this guy. So one onto the left side
and then obese model one onto the right side and do the thing that I'm
do twin bookmark, very rough lines so as
to lead to low value going to be having
in the darker lines to define the Penn shell. So we are going to be
taking in that then nine. So the tops be stranglehold that the standard is standing
on Google is rotten, which is, oh, you know, and it did above the height
of that then. Now I'm going to mark
in the horizon line Adelaide and lower level this time just under two
below this end up. And now on the right
side I'm going to add another small pen tool. So that is it for
the pencil sketch. Now let's begin with
painting the northern sky. I will first begin with
a pin photo photo. Make sure you do not run
into the tent space. Otherwise, it will be
very difficult to get in the lighter tones there as the northern sky
is going to be off, the darker tones of covariance clean and
the indigo color. So neon to the camp site
just drawn a little slowly. So I'm done adding the
clean layer of photo. I have run my brush quite carefully newer to the
camp site so that I do not run in Buddha because we are going to be adding in
the warm tones there. So for the northern sky, I'm going to be using in the cobalt green color
and the indigo color. I'm going to be adding in the Coval Jean Coulomb
force creating and stroke off the green color. Make sure when you're adding
in the cobalt green color, you would not add
a lot of water, otherwise the fellows
will spread a lot. Control the flow of things because we need
those strokes into the northern night sky and be a little careful near to
the cam space as well. Otherwise, just as Iran, the color data, you
may also add in there. So quickly pick up the father if you drop into the camp site. Now for us to start it in the strokes with the
cobalt green color. So you are on the left side. You can see I've
added more towards the bottom side
at the top speeds we are going to be having
in the indigo color. And on the right side
you can see I didn't talk about the envelop
till the edge of the page. Now I'm just adding another
layer so as to darken the kalos because I wanted them in a quite right
animal peak look. Now I will ship to the
indigo color and begin adding the indigo color in Buddha whitespaces that we have. Even for the indigo panel, you can see I'm not adding
much of what I just picked up a wet brush and
insignificant of the beans. I'm going to add it into
all the whitespaces. So postmen, I'm adding it
into the right species. I'm making sure that
I just made the following through the entire
whitespace, laid it on. I've been again because
Palo and blend mode. So as to get the
perfect blend and transition between
the followers. Again, Neil BU, that
then species be able to do carefully with the
indigo palette as well. On the left side,
you can see I'm just pulling the indigo
palette from the top, filled up a Valjean follow. Now you'll see that the blend between the
Apollo's is not that smooth. So I'm again going to be picking up all both the PAN-OS and layer them and get the blends
between both alkalosis. So fast I would pick up the
cobalt green color again. And now, and you begin I
begin the panel again, make sure you do not have
any excess water, otherwise, the beams may flow a lot and Mickey and only a
pageant of the Palo, and you may not get
the perfect blend. So very gently just near to
the edge of the indigo color, I'm adding in the
COVID-19 column. And you can see the blends
beginning to happen between the indigo and the
Coval gene fallow CMB, I will again be picking up the darker tones have indigo
color and link them over the indigo color so as
to get a perfect blend and the darker tone to
the indigo color as well. Now I'm doing the same
thing that the indigo color you can see I'm not adding
any new walked off. You need to be sure if you will add new water while adding in. The second video is I'm
trying to blend in. Now PAN-OS will
spread a lot and you will not be able to
achieve the stroke. Look into the northern sky. Also gun very patiently
so that you do not do any of the pallor or lose any of the
palace through. And also by a blended make
sure that the palate is in a medium consistency so
that they blend easily. And using the tip of the brush, try to blend in these colors. Also make sure by not
adding the northern sky you added in Leo's just have added them strokes
by strokes again. Do not add the darker color
all together at one time. Otherwise, it will be
very difficult for you to achieve the plans in between
and get it onto Leo's. Now let's wait for this to dry completely before moving ahead. So now my sky is completely dry and before beginning ahead, I've been forced begins pledging
the stars into the sky. So I'm going to be
using, in my right, I'm going to use the white
quash intermedium consistency, and begin splashing this task. Make sure when you begin
to pick up the whitewash, you pick up a fresh
brush on a clean brush. Otherwise, if there is
any color on your brush, it may get transferred
into the white color. And it will be
very difficult for you to achieve the right stars. Then I'm going to splatter some stars into
the sky space now. So I'm done. I've been
in this ties into the sky and you
can see we've got such a good splatter
of stars and very small ones
because of dabbing the brush with the fingers. Now I would begin adding
in different species. So the first camp
that I'm going to pick is the one
on the left side. For that I'm going to be using
in the yellow color first, you can go ahead and
use any bright yellow. So almost in the ascender space, I added the yellow polo. And now on the
edges I'm adding in the orange color
forest land very carefully onto the edges so that you have an arginine
and do this guys, these are the ways you may
not have the clean edges. We are still going
to be defining the edges of this PAM
site using the Docker. So you do not have
to worry if religion is bleeding from this guy
into the event space. So you can see I've got the perfect one defect
into this camp, ADR. Now I'm going to
begin picking up the brown color. For that. I'm shifting my
smallest size brush because now we need
the line details in a very small way
so that I do not lose the effect
of the camp site. So now with the brown color, I'm just beginning to
add it at the board and post you can
see modern life. When you begin to add
this brown color, make sure you do not
pick up excess of water. By the way, we are adding
all of these wet on wet, that is the yellow and
the orange is still back when you're adding
in these brown dB. So you need to walk
a little quick, move your paper
dries in quickly. Now I'm going to define those
five lengths that we have. I didn't do the camp site
showing the wooden logs that are hanging on which
the PAM site is hanging. So again, just using the tip
of my brush for adding in this ground lines
and you need to make sure you do not
have excess water. Because if you have
an add excess water, the brown color will spread
a lot and it will be very difficult to give the definite
shape to it later on. We are adding,
don't wreck because we need the soft
look boy does bend. Hence we are adding
in wet on wet. But if you will add
a lot of water, you will know, oh,
definite milk. And, you know, you would only have a backup, the brown color. Now just picked up on it
tidbit of the MSN Apollo. And I'm adding very much
me over those lines. You can see again with a
onesie and abandoned also, I'm running very slowly. I'm making sure I
do not override. My brush, does not have
excess water as well. It's creating the
perfect fire by enough effect coming out
from this camp site. So you need to run
very carefully. I'm Graham. Embryos do not add all the colors
together at one time. If you will walk with Leo's, it will give you a
much better effect. Maybe we feel that they ignore the orange color is
beginning to dry. You can just use a
damp brush and he read this office weekly
and blending the browns. Now in the C V, I've
been quickly being this month I'm site on
the night side as well. So going with the
same gynaecology, then the audio and
then the browns File adding the brows,
be a little careful. You need to control the water, otherwise you will not
get the shape that you're trying to get into
this camp site view. So on my right side one, I feel that the Brown has painted a lot five
and quickly lift up the brown color using my brush and then maybe some
yellow color again. So you can see, even
if you do a mistake, you can quickly lift up and get the light
of dawn data again. So that does it. Now,
I even begin adding in the liturgy effect onto the horizon line using the
Payne's gray color directly. So for that, I'm
just going to use the Payne's gray color in a
medium thick consistency. I'll make sure you do not add a lot of what we are going to be adding simple GI effect onto
the entire horizon line. We cannot be in this new area under the tent
species, dried it. So we will quickly I
didn't this GI effect and make sure that you do not rest your hand on to the PAM site, which is still bad otherwise or dopa loss may get
lifted from there. So you can see I'm quickly adding very simple Bush
kind of an effect. You are onto the horizon line using the Payne's gray color. The only thing that I would
make sure is that I do not add them in the same
height. I will try. And really the height of
this bush effect throughout by adding them in smaller
than shorter height. But also be careful that
you do not add them to a boil ones because we need
to let the main focus of. Be the PAM site and the
northern lights and also make sure that at
any particular please, you do not cover entire green or the indigo
palette with these. So accordingly run into
different heights. And you can see, I'm
just trying them in very small heights but still
reading them throughout. Now near to the edge of the
can be a little careful if a distance where you can
add it later on so quickly, just going to read it and give
it a darker depth as well. Make sure you're using
the Payne's gray or the black color in a
good dark consistency. Now in the same way throughout
onto the horizon line, I will quickly add
this bush effect. Just being careful that I do not rest my hand on
to the camp site. We just didn't vet. And hence, you know, having people take on a
movable surface makes it quite easy to add in the DB as when
a particular area as well. Otherwise, you need to
read for, you know, every detail to dry
it with the fear of lending your hand onto
any of the wet surfaces. So you can see even in
this end, does these, I was a little careful that I
do not add these trees come completely covering now cobol gene color lines that we
have on the right side. So you need to
design carefully in such a way that you do not
hide a particular color of the northern sky because we need to let the northern
sky also be visible. Now I'm in quickly
the rest of the trees onto the right-most side
of the horizon line. So I'm done adding the cheese onto the entire horizon line. And you can see
tried to maintain the height but still
VD them throughout. Now let's begin
painting the ISPs. So this time I'm
going to be painting the eyes wet on wet. So first we are going to be
having in a liter of water. But by adding the Neo4j, you need to run a little
carefully near to the horizon line and as
near to the camp site. So you can see I'm running
my brush very carefully. This time, we are going
to be painting in the Isaiah with a
very dark tone to reflect the decoy effect of the night sky into
the ISPs as well. So before beginning to
add in the eyes effect, I'm going to quickly pick up little of the yellow
Palo and just going to add it underneath the campsites that we added in. So this is to show
the light effect from the tank on to the
Isaiah as bed. We would blend this yellow
color with the indigo and the Payne's gray color
that we are going to be using it for adding the ISPs. Just added a limited
audience such as CMV or even to
the right side. I'm just going to add
in very legit and blended with the water
into the warping space. Later on using the indigo and the Payne's gray car lobby
would blend it with. Now using the indigo color, I'm going to quickly pick out the indigo color from the edges. So you can see using
the flat brush, I'm picking up the
indigo color in a medium consistency and many Gen V just pulling it out from the edges the amniote
of the camp site, we are going to
maintain a little after night effect and even into
the Sandoz base of the ice, we are going to maintain
the night effect. So just pull out the indigo
color from the edges, losing smallest
size, flat brush, make sure and be careful you do not run so forcefully
that you run into the camp site area and near to the
horizon line as well, be a little careful and
give it a perfect shape. So this was the first to unify. You can see thus NDA and
Nieto depends pieces, we maintain the right effect. And just on the edges I
added very lightly or off the indigo Palo time effect
of the northern lights. Now I'm going to beat. Using the Payne's gray color, giving some darker effects. But when I begin to add in
with the Payne's gray color, I will just make sure about
one thing that I do not cover the entire indigo
color. So pause. I'm adding another layer
with the indigo color, giving in some darker data
again onto the edges. But this time it was quite
less than the post crania. Now using the smallest
sized round brush, I will quickly blend
the yellow color with the indigo color that we have
added at the bottom space. Make sure you use a clean brush and not pick up
much of the color, just simply using
very little water and blend in with the colors. Now I've just picked
up a little of the indigo and the
Payne's gray mix. I'm going to add very
little Doppler effects onto the left site, rest of the Payne's gray, I would give him with the
dry brush technique rather than adding the Payne's
gray color your as well. So now let's read through all
of this to dry completely before I didn't get the final
details into this painting. So my painting is completely dry and you can see
the record such a beautiful night effect
because if they get no color underneath
into the ISPs, now I'm going to pick
up the paints gray color and I'm going
to begin adding it the darker highlights with the Payne's gray color
onto the ice area. So I'm going to use a
smaller size brush. First I will begin adding the details and do
the same species. So using just a very fine brush, I'm going to add in those five
lines defining the center. Again. I'm going to take
these into this time species, those logs that we added by
adding the pencil sketch. Now you can see all of
it coming the sheet. Now for the center line, I just mixed in a little bit of Payne's gray with brown
so as to get it into the theme of the
colors that we have all the Buddha campsite area. So now you can see just by
defining these wooden blocks, so much life is coming
into the painting already. Make sure to take
these wooden logs into the top speed in divine into each other trying
to show hanging off the detail of the camp site. So if you notice
when I'm adding in this column near
the center line, I'm using it in a light
tone and I'm even lightning it using a damp
brush so as to show them, I'll fire effect on do these wooden logs as well on
which this camp is hanging. So I'm going to add this detail to the right
side, small campus. Hello. You're also make sure that you add the details quite fine. And do not add some take lines go with of any
smaller tip brush. Otherwise the ALU
may lose the effect of the fire that we
haven't do these places. Now I'm going to pick up
the paints gray color. I'm going to just
begin adding in the dry brush technique and
do the I is going to be, I think very little dry
brush for adding in the dry brush makes
sure that you use a smaller size brush one. Secondly, make sure that when you begin to pick up
the Payne's gray column, you do not have
any excess water. Also, make sure that you do
not have access to otherwise, even then you may
begin just beginning, I think the dry brush just
using the tip of your brush and every time that you pick up fresh being for the dry brush, make sure other Babbitt
either onboard afloat the audit issue so
that any excess water or beans get removed
off and you do not have them just dropping as
patches on the European day. So fast. On the right side you can see I'm adding
some lines with a dry brush stroke and I didn't didn't patch at the bottom side. Now from the bottom speeds I'm simply pulling out
little dry brush effect. You can see I'm adding
them little diagnose. Kneel to the campsite
does we're going to pull up nigel of the
dry brush strokes. Now from the left edge as well, I'm just trying to pull out
these dry brush strokes. You can see in very little, I'm not overriding these drivers drove the add to
one please a lot. Make sure you add them very little on each of
the pleases first and then see how
much you need to add more at any particular list. So majorly from the left
and the right, I just, I have pulled up these dry
brush strokes and neoliberal, the camp site that
I have pulled out little of the dry brush now, very little dry brush into
the same space as well. And then adding the dry brush, you can see I've added
such that denied everywhere and creating
the perfect snow effect. Now I'm going to shift to my squash and I've
been figuring, adding some bright stars
into my northern sky. So first I'm going to lead
on smallest circles of the white color and blend
it into the background sky. And then once that dries, I would add in the bright star with the white quash again. So first before the stats, I would just create
this model space for the moon as well, this type. So first I'm adding this you
absorb going to furthermore, now I can blend the edges and create this off the edge
and blended into the bag. Or even I'm going to add the
moon in the second video, creating the perfect white
defected on the MOOC. Now for the bright stars, I'm going to quickly add
some bigger stars using the brush and just
going to create the grounds then the
ones that we plateau. And then just going to add
some shooting stars this time. I'm not creating a blurry
background for this style this time because we are having the moon in the blurry
background this time. So after this, I have
removed the masking tape. But in case if you haven't yet, you can post adding of your
branches into the ISPs, which I have added
after removing the masking P. So by the end of it you can see me adding those branches and creating
the reflection to them. So I haven't added them after
removing the masking tape as a completely forgot about adding them before
removing them. Now just in the
center of the moon, adding the white badge. And you can see, we've got such a great buy it glow around the moon because of
the force field of white quash that we
blended into the skies. And just adding in
a few biggest tasks creates such a perfect balance
into the northern sky. And that was it we had
ID with up ending. Let's remove the
masking tape and see our final painting with
those clean edges. Make sure that you are
dry brush strokes and the ISP's is completely dry before
you begin to remove this. So I completely forgot
about one thing about adding a few
branches into the ISPs. So I'm going to quickly use
the Payne's gray color. I'm going to add a few branches. Since we are not adding
them onto the edges, we can easily add them even
after removing the masking. So you can see I'm adding very fine ones and I
will quickly be of, you know, adding two small
reflection. Do these as well. You can see I'm adding
them in a little crooked and also adding them
five from each ago, saying we're just going to add a few onto the left side as well. Now I'm going to quickly
add a reflection to them using a very diluted dawn
of the Payne's gray color. If you pick up the
calendar, dark consistency, make sure you quickly
dab it with a tissue and pleiotropy light reflection of these branches. And that is it. We are ready with
our painting for D9. I hope you guys enjoyed painting this beautiful Northern Light
camping site with me today. I will see you guys
tomorrow and do the day 20 class project. Thank you so much to each
one of you for joining me.
29. Day 20 - Christmas Tree: Hello everyone and welcome back to the 30-day
watercolor challenge. We are indeed 20 today. Let's have a look at
the colors that you need for today's class project. You'll need a shade
of dark green, yellow, red, sap green, beans, green, black, and by gosh, so these are all the
colors that you will be needing for today's
class project. We are going to be creating the misty background first
and then be painting the Christmas tree in focus with those beautiful bright
Christmas ornaments. So let's begin painting this beautiful class
project for today. So I have my paper
taped down and let's begin with a very
light pencil sketch. So I will first mark
the horizon line. It's going to be a little below the center and approximate
here little near to the right sender side we
are going to be having in the Christmas tree and rest
onto the entire horizon line. We are going to be having in domestic binaries
in the background. So I will first begin with
a clean quart of water. Only do the top sky space
just above the horizon line. And then they would be painting the bottom space leeches on after adding in the first layer for the Christmas tree as well. So first into the
entire sky space, just add in a green
layer of photo. Make sure you do not have any portrayal of water anywhere. So I'm done adding in
the thin layer of photo. Now I'm going to begin in with
the Payne's gray color in a very medium consistency and added forced into the
entire top space. And then with a
little, you know, smallest size brush,
I'm using the Payne's gray,
medium consistency. I would act a misty
pine trees wet on wet. So fast when you are adding
in the Payne's gray color, added in a very
light tone and do the entire sky space
creating the misty look. You can see I'm using the color in such light consistency. I'm just using
very little color. I'm just spreading that
with the help of Bordeaux. Now I've taught in places I will just add some darker
highlights of the beams. Greek alla, make sure
they're not too down, just a little dark. Then the fourth layer to
add little highlight to dismiss the sky that we
are trying to create. Now just for a few seconds. And then we are going to be picking up the beans
green color in a medium consistency and begin adding in the background
wet pine trees, which are going to be
in the blurry effect. Make sure that when
you're picking up the Payne's gray color now, you do not pick it up and not too dark consistency or do not even add a lot of photo. Make sure to not have any
excess water on your brush, otherwise the paint
will spread a lot. We want to have in our soft
edge and a soft look to it, but still reading the sheep. So do in order to achieve that soft lock and the sheep
and the color look as well, you need to make sure
that you pick up the paint in a
medium consistency. And also do not pick up
with excess of water, dab off all the excess water every time that you
pick up the pace. Now you can see many
randomly I'm beginning to add in the binary
sheep wet on wet and it's already beginning
to get the soft edge because of the wet
on wet technique that we're using in engage your people is the one
that rising quickly. Then I would recommend you to first week for your
entire sky to dry in. Then rewrite the entire surface and begin adding these
mystifying cheese. You can add misty pine trees onto the entire horizon line. Even if you do not need the space for the
Christmas tree for now, it will be perfectly okay
because we will be able to create of the
Christmas tree effect using the Docker V01 tones. Now in the same way, I'm going to keep adding in these misty pine trees onto
the entire horizon line, just where I have marked the
space for the Christmas G, I will leave it a little
gap. If you want. You can even add the bygone
trees there as well, but they would be hidden
in any which way. So it's completely your choice
to leave that space or no. The reason why I
would not recommend you to add because
even then if you The placement of the
Christmas tree or later, it will not be
initial because N, O horizon line will be
covered with these binaries. Now I'm going to
add these and you can see majorly this time I'm adding all the mystifying
trees in a little long height, only not adding the
shorter ones in-between, but still in the long item, meaning the height by
very little distances. Now you can see between
the color was a lot too. I quickly picked it up
with the brush again and spreading it into the
rest of the species. You can notice I'm adding all of these details wet on wet. My background is
still back hands. I'm getting the soft
look and still able to maintain and reading
the shape of these fine. Because I'm using the
medium consistency without much of Florida. Hence the beans. I'm not
spreading much but still having the softness because
of the red background. Now, one last one, which I will just add half of it to visible to our Buchanan. And then we'll be
done with adding all the pine trees
into the background. Now writing the top
space is still back. We will begin painting
the bottom eyes for that and for supplying
of clean layer of photo. Do not worry if little of the dark colors
will be bleeding, but be a little careful near to the horizon line if
you can control it, even if they bleed
into each other, it will still create
the perfect view. Now for the ISPs we are going to be using
in a little bit of the indigo color as well to create little more eyes effect. In this afebrile not
have the indigo color. You can simply go ahead and
just use the beans hey Kayla, and neutral after sitting in. Now this time using a
small-sized flat brush first, I have picked up the
Payne's gray color. And I'm going to very
gently pull it out only from the edges
in the center leg. The space be white
because they're going to be adding
little yellow highlight. Now along with the Payne's
gray in-between and picking up the indigo color and giving
little indigo highlights. Now, even under
the horizon line, you can see I'm creating
the perfect line and blending such that
it has a soft edge, but still the colors
are not leading. Now again, from the
right edges, Ben, I'm just filling out
the indigo color and the Payne's gray
color in the center. You can see I've maintained
the light effect. Then we are going
to be adding in a little yellow highlight. Now using the Naples
yellow color in the center space which
we have kept in light. Then I'm just going
to blend in or very little touch of
the yellow color and create light effect because of the Christmas tree lights that we are going
to be adding it. So just blend that
with the indigo and the pains Greek
along the edges. Make sure you use a damp brush and keep
cleaning your brush in between because
the police may get lifted and spread onto
the other's faces. Now again, from the
edges I will just add a little bit more of the
Payne's gray highlights because make sure these
beans will dry or dawn light also do get the
perfect effect on the snow. You have the buffet
color laying out there. Now, even from the bottom edges, I'm going to pull out a little
off the dock with strokes off the indigo and the
Payne's gray color mix. So I think that both my brush, so you can see I'm
getting the highlight of both the dawns
and diagonally, I have just pointed
out some strokes of these colors from the edges only done then a
dense and thus based. So that is it. Now let's
wait for all of this to dry completely and then we will
be in the Christmas tree. So my background has
dried completely. And you can see we've
got such a perfect soft looking back down
with those pine trees. So Father Christmas tree, I'm first going to
begin by laying out some red and
yellow highlights for the ornaments are
the lights that we are going to be adding onto
the Christmas tree. So I'm using the Naples yellow
and permanent red color. I will. Adding some small assault guns
and giving them soft edge, you just using a damp brush. So I'm going to be
adding a few with the red and the field
with the yellow color. Make sure you type them in being the shape of
the Christmas tree. Do not add these,
so it goes out of proportion and make sure to add a blend of both the Apollos and have them almost in
the equipment on bus. So far with the red ones, I'm just adding the
so-called in-between. I've left a gap because
then we would be adding the highlighted
light effect. Once we add them die
a Christmas tree. So now just using a damp brush, you can see I'm
softening the edges. I have created these circuits by leaving that white
space in between you. If you want, you can
completely fill this opens with the red and
the yellow colors because we are going to be, as it is adding in the highlighted
night effect once we have the entire Christmas
tree completely. So for now, just to make the process easier
and deciding that the random circuits
and giving them soft edges by blending it with
the help of a damp brush. The reason of adding
these silicon's right now is just to create and make us know that we have to
leave these pieces without the green colors for now when we begin to add the
Christmas tree effect, do not worry if a little of the colors go inside this
via still going to be creating in the
perfect light effect after adding in direct
Christmas tree. So now let's begin adding into green color to this
Christmas tree here. So false, I'm going to add one NEO with the
sap green color. I'm going using this app
in color, innovative, medium consistency, not too
dark and not too light. So beginning from
a little top side, I'm going to begin adding
in this sap green color. So first I'm going to add kind of patches with the
sap green color, just leaving the areas around
the red under oh, yeah, no. So goods that we added. So if you have little
of the whitespace, it would be perfectly okay because we're still going to be adding in this low budgets
so we can cover it all up. Now my red and yellow still, but still I'm adding
in the green color because I know later on we're
going to be collecting it. And plus around I saw
because I'm leaving the little white space and not
adding in the green color. Now make sure when you begin
to add in the green column, you will begin to create
a triangle shape of the G lock so that we have the perfect Christmas
tree look your so you can see a little of the yellow and the red colors are also spreading into the green
color and do not worry, they would create the perfect
light effect when we begin to add the light didn't
do these lights later on. So these Carlos we
just added to create the unlit knowledge for us as to where we need to
have the night effect. And accordingly, you
already have the yellow and the red
pieces dead lady blended little bit
after creating the perfect defect that we
are going to be having it. So now after this phosphate, I'm going to pick up the
same sap green color, but this time and
then DACA consistency without adding much affordable. And by the fourth layer
of 3 minus 10 vet, either begin to add in the highlights with
the second Jacobian. So basically I'm just going to drop this darker green color, the little urine day in such a way that the lighter
green tones are also visible, do not, but instead we
are going to be adding in one more layer of green later
on to add more highlights. These are just the
base layer for the Christmas tree
that we are creating. So that we know better. We need to have the GI effect on the financial effect and vaguely need to have in
the light effect. So now this date you can see I'm pulling out some rough
edges from the ends and creating some leaf
fat didn't angles are sharp ends to make them look
as the leaves popping up. Now at the bottom space here, I'm just using a damp brush and blending that green color, very light beam to
the background and creating a soft edge
to the bottom space. Now I've just picked up very little of the
Payne's gray color. I'm just adding some
darker highlights into the Christmas tree. Very little you can see, make sure you do not hide the complete green effects
with the darker tone. Again, at the bottom space
has been just adding a little blend of
the darker tone that I just started with
the beans Creek allo, if you want, you can add the darker tone
with the Van Dyke green or dark green color if you did not want to use
a Payne's gray color. But since I have already
used in a darker tone, I thought of adding it with the Payne's gray
color this time. And all of this was wet on wet. So my t was done
back in that time, I was adding the
Payne's gray color. Now let's wait for this
to dry completely. So now Reggie is completely dry. Faster, mixed in a little bit of the white quash with
a yellow color. And I will begin adding again no ornaments and
create the highlight. So I'm just going to add small circles with the yellow
and the white column mix. And then I'm just going to give them a soft edge as bad by just using a damp brush and blending them into
the background. So make sure you do the
white and the yellow mix. You have a little more
of the yellow color. Do not use a very light
tone of white-collar. Oh, you know, ADH,
grim calendar. Make sure you have a bright yellow dots with the white quash mixed in certain places
in the background. Again, no Pala who owns
may have got hit enough. So you can randomly add now the yellow color light
at certain places wherever you wish
to add and keep the perfect light effect
into the Christmas tree. Make sure I didn't
leave space for the red ones that we
are yet to add it. Now see, I have mixed in the
red and the white goulash. And wherever I had the red circles laid
down in the center, I'm just adding
this light color. And you can see on the edges
we've got the dark blue. And then under certain
places I'm even adding in the red and the white quash look whenever I feel necessary. Now I'm going to be using the darker tones without
adding in the white quash. I'm going to add it
onto the borders, creating more darker highlights. So now just by adding
in the DACA highlights, you can see we are getting into forfeit glow effect coming into light often I defect seeing
me for the yen no panoramas, but I'm just going to add a little darker
highlights on the edges, creating the soft look to the
center lights that we have. Now using the right gosh, I'm going to begin adding in
this no effect on Buddhist. So waiting randomly,
I'm just going to add little snow patches on the TI
you are in day after that, I will still be adding one more layer of the
darker green highlight, creating more depth into
this Christmas tree. So we have added all three meals into
the Christmas geology. The first one with a very light tone of
the sap green color, seconds with a medium tone
of the sap green color card with a little touch
off the pins gray color giving in some
darker highlights. And now after adding
the white goulash, we will be adding little
off a very dark greens too. Now you can see I'm adding the white gouache, very limited. Make sure I do not cover
the entire green color and green color and the light
effects also be visible. So I'm almost done adding in the white quash and getting the floor effect onto the tree. Now it's the time to
add the highlights, but the dark is
screened on possible. So I'm going to be using
in the Venn diagram without adding much
of the water too. So automatically being
a very dark tone, if you do not have a
very dark green tones, you can add in a little
touch either of the black or the Payne's gray color and
get a darker green tone. And now very carefully leaving
the white quash species, I'm going to add some
darker highlights with the green color and
on the edges as well, going to create the leaf effect. You can see automatically
just by adding in these darker strokes that D is getting so much more depth. Now on the edges, I'm just pulling out some of the leaf effect just using
the tip of my brush, defining mode shape of
the Christmas gene. You're pulling out the
leaf effect very randomly. So you can see just on the edges very carefully leaving
those light effect. I'm pulling out these strokes defining the Christmas tree. Make sure you do not cover the light effect with
the darker green door. Otherwise, it would not make any sense of adding in
those layers of light. And also be a little careful
near to the snow space because we need the effect
onto the tree area as well. Now lastly, using the whitewash, I'm just going to
splatter some snow. This time it's going
to be quite little, not much because we already
have a very light background. So just reading it is no
effect on the entire space. So that is it via a digital
painting for today, let's remove the masking
tape one by one. Make sure to remove
the masking tape very carefully and add a little
angle from your people. So your final painting
for d two and d are beautiful Christmas
window vibe landscape. I hope you guys enjoyed
painting this with me today. I will see you
guys tomorrow into the big rain event class VJ. Thank you so much to each
one of you for joining me.
30. Day 21 - Pink Galaxy: Hello everyone and
welcome back to the 30-day watercolor challenge, the argon deep 21 today. And we are going to be painting this beautiful sunset galaxy. So let's have a
look at the colors that you need for
this class project. You need a shade of green, goes red, violet, violet, yellow, orange, faint green, black and white wash. We are going to be
painting the galaxy into two layers using the
riveting technique. So let's begin painting this
beautiful window galaxy. So I have my people deep down. And this time for the Galaxy, I'm going to be
picking the colors to the API out from my du. So for the yellow color, I'm going to be using in
the permanent yellow deep. And then I will be using in the red violet and the
queen rose color as well. So I'm going to quickly remove these colors out on my palette. And also a little bit
of violet color in DC. If you do not have
the eyelid column, you can just make some blue and the pink palate to
get to know Violet. Also, if you do not have
the red-violet colors, look in just mixing
of win-loss column, but a little bit of
the violet color. I'm also going to pick
up a little bit of the Payne's gray color
separately onto my palette. I will also be keeping some whitewashed ID onto another separate palette
because we will be needing in the white
quash for creating on the low into the galaxy. So keep all the velocity v. The reason for using the
colors from the field directly this time is because I want a very warm galaxy but with very bright and vibrant follows. Hence, I'm using the colors
directly from the tube so that I do not have to add a lot of water to wet the beans. I didn't use them in a
good vibrant consistency. So we are not going to be having any Bentham sketch
for this exercise. We are directly going to add
the mountains need to run. First, let's begin painting
in the sky to father sky. I'm going to wet the
entire sky first and then we'll begin adding in
the fallows into the galaxy. Make sure you have an
even no-no for DOE. Keep up because I is flat brush ready because
we are going to be using in the riveting technique to add depth into our galaxy. This type samples beginning with a very green yellow photon, making sure that I haven't even neuropore but throughout
without any tools. So I'm forced beginning with the permanent yellow deep color. You can see I'm not adding
much of water to the paint. I'm using the polos in
a medium consistency. Also, if you do not
have this color, you can just mix in a
little touch of orange to yellow to get this
yellowish orange tone. So I've applied a
yellowish orange color at the bottom speeds leaving little white gaps in
between as better. Next time we're
going to be picking up the red-violet door. If you do not have the right
by the door, as I told you, you can mix in
helping shape with a little touch of
the violet color. Just adding in, in-between
the yellow as well at the top side
and the top side. Now, I'm going to be adding
in this red violet tone. Now at the bottom speeds, we've just done the red
violet color blending it went but they do not worry. We're still going to blend
the colors later on. I'm going to add more depth and make the galaxy
look more vibrant. Now, at the top speed, I'm going to be adding
in the violet color. So now at the top speed, I'm adding in the
bright violet Cleo. And at the top I'm going
to add a little bit of the Payne's gray color
to the violet to get the darker dawns
at the top sky. You can see my paper
is still wet. Now. I'm going to delete
the people on the day so that the colors
bleed into each other. So I will keep moving
them in all the angles. Now make sure to pick
up the balance with very less water when you begin
adding in the second Leo, I'm just giving it more
depth to the polos. So first added the same
yellow color at leases. And automatically you can
see now the blending between the ghetto under I find it don't is happening much better. Now in between, keep rotating your people in the
two directions so that the planes are clear on
all the sides, on the edges. If that is excess of water not being that has come
onto the masking tape, make sure to wipe it off
with the help of a tissue. Otherwise they may see
back into the painting creating very rough edges
into the entire painting. Now very gently, just keep rotating this into
all the deductions. So make sure that
you did Governor people onDraw movable
surface so that you've been revealed in
all directions to get the blends in between the
colors match journey. So this is it for
the fourth layer. Now let's meet for this
to dry completely before beginning to do the
re-weighting technique on to the galaxy. So my first year of the
galaxy has dried completely. And you can see we've
got such perfect lens in between the colors because of moving the paper
in all direction. Now using AI, because
AI is a crash, Ivan quickly event
the entire people. Add more depth to the Galaxy. Make sure you use a
bigger size brush. Do the liberating technique with a very gender and height
one stroke at a time. And you feel that the
color is being lifted up. Make sure to clean
your brush and then pick up freshwater
for the next year. Now first using it
the violet color, I will begin adding more
debt exactly where we added the previous near of the red-violet
philosophy, please. I'm adding the
red-violet bone again. Now I've been picking a
yellow color and beginner, I think that debt
now this time, Ben, I'm beginning to add
in the second viewers, I'm not worried about
much of the layers at the bottom side because then we are going to be
having in the mountains. So you can simply leave the
bottom side blank like that and that will get covered up and you begin adding
in the mountain ranges. Now at the top speed, I'm going to add
the violet color, legend of the
Payne's gray color, creating the Docker effects. This time, pulling a little of the violet onto the
queen rose onto the right side you can see creating that depth
onto the edges. Now, make sure that your
white quash is read into a little medium
consistency because we are going adding in a lot of, you know, the glowing effect with the help of the whitewash. Now again, going to pick up little of the
yellow color to add the highlights near
to the ghetto to get the blends between the
yellow end of things. Make sure you keep repeating your paper in direction so
that the beans flow naturally, Bill each other and
create the soft blend. You can see, since we are adding so many meals automatically, the paints, I've gone into a
little liquidy consistency. And as soon as you've done, the body automatically
flow into each other, creating the perfect
and the soft blend. So you can see, even by adding in the Laozi
with one hand, I'm trying to keep
tilting this so that I have perfect
blend between them. Always keep additional
handy by painting galaxies so that from the edges you can keep
lifting up the colors. Now I have the top
space just adding in the dark or highlight
with the three colors, blending it with
the violet color. Now why is this? Second notice that I'm going to
begin picking up the whitewashing a little
liquidy consistency and begin adding in
the white highlights. Make sure you have a little of the Queen Rose, sorry, red, violet and the white color grading because we
will be needing them a bit as well to create the
perfect No out your first job. The department brush holding
my brush perpendicular, I'm adding provide
details into the galaxy. Make sure every time you
pick up the right column, your brushes clean and there
is no bylaw being picked up onto the white, onto the galaxy. So you can see how rough line created with the
white liquidy color. Now, the entire magic is about
letting this color flow. So very slowly, tilting your
board in all directions. You can see I'm not denting it completely our
detection and quickly repeating it in all
directions so that the beans flow into
each of the fellows leading a perfect
ride flows bees in the central area with
those color edges. Now I'm going to
pick up a little of the red violet color again. I'm going to add a
little highlight of the red violet color in the white space that
we have created. So going to pick the color, I'm going to add in the
center of the whitespace. And again, we are going to abort so that
these colors blend. We will still be creating
more highlights and creating the perfect
No into the galaxy. Now again, very gently
keep rotating your board. But to lead in such a way that the colors do not flow
just at one place. You need to make
sure that the flow is equal to into
all these phases. Now, any fuel female paper
is beginning her GI. Make sure that you
have a little fallow. Need that again so
that it does not dry. Otherwise you may have different badges on
do your Galaxy sky. Now again, we're going to
pick up the right color. I'm going to add the
whitespace effect. Now your eye field
that is excess water. So I just quickly
picked up a little of the water with the
help of the tissue. I'm going to lay down right
things again and just again going to make the beans
flow in all directions. Now again, make sure whenever you are laying
down the white paper, you do not have any
other fellows lifted. Otherwise, keep cleaning
your brush for picking up fresh might be using
the Windows color. I'm just going to blend
the white in the center with the background to create
the perfect glowing effect. Now just adding another biota
of the yellow highlights, the perfect blend with the white colors and
the yellow tone as Ben. Now just adding very
little highlight of the violet color just underneath the whitespace
that we created. I'm going to blend it
with the yellow color using a little bit of the
white wash. And that is, then we would wait for this
galaxy two giant completely. So you can see how
using the layers of white gouache and
the colors in between, we've created that white glowing
species into the center, creating the perfect night
popping out from the galaxy. Now let's wait for
this to dry completely and then after for the
details in the galaxy. So now my galaxy is
completely dry and you can see at the bottom speeds we have the rough edge
for the mountains. So for that I'm going to pick
up a little of the Queen Rose callow and keep the
color red in my palette. So I'm going to
mixing in a little of the windows and
the violet color. And I'm going to be
using this color in a little watery consistency. So I will eat this color red because first
we are going to splatter the stars in the galaxy before
adding in the mountain. Now you can see we've got the forfeit night
glowing effect, center of the galaxy
with the white and the pink tones
that we get using it. Now for splattering stars, I'm going to be using
invite wash. Now you can see there is
a lot of liquidity of the whitewash that I
have to make sure we do not use the whitewashing
such a liquid consistency. Otherwise you will not get
the opaque style look. You need to keep losing
the right question. A medium consistency. If we will pick up the color in such a liquid consistency, it will become dull after giant. So to maintain our
weekend, right, Look, you need to make sure
that you pick it up in a login
medium consistency. Now you can see I
picked up so much that I got such big
splatter of stars. So I didn't think that both
these big stars that have formed because of for extra
paint onto the brush. So make sure you do not
have even access b. Nobody's all of this
would get covered up and misclassify smallest stars and attend bright stars
need to learn. So for now again, I'm going to pick up the wide brush this time I'm going to make sure I do not pick up
much of the beans. Hence, I always tell you
from dab off your brush onto our last block or ordered
to shoot so that you do not have excess paint or water
when scratching the stars. Now this time I'm
going to be using in a toothbrush to splatter
some very fine stars. So I'm going to pick
up the white quash, make sure you pick up
the right question of medium consistency
for this as well. And keeping it at a distance, I will begins
plugging this task. You can see we
talked with brush, you get quite fine stars as
compared to what you get with a normal brush by
dabbing it with another brush, all your fingers. So you know, to get those
minute stars and do the galaxy, It's always best to use an open trash to get
this final study deals. So we are done
splattering stars now I can begin adding in
the mountain ranges. So I've been forced begin with
the first mountain range. So I already have the color of the violet and the Queen
Rose mixed in your ready. I haven't directly without
any pencil sketch, just add in a very rough
edged mountain sheep. So it's going to be at
the low length space where we did not act the
second mirror of the galaxy. Because of the
underlying yellow Palo, you will automatically. Hi, I'm Brian defect to the
top galaxy and giving it the perfect light glow off the galaxy on Buddha mountains. So cost you can see I'm defining
the shape or bad enough. She now at the bottom I'm
going to quickly fill this in. So I'm done adding the
first year of the mountain. You can see in the
center space we have the yellow highlight underneath because of the galaxy
that we added. Hence, I always
recommend you to pin the entire bocce post so that we can get the blow into the
mountains automatically. Now picking up a little
touch of Payne's gray color, I'm just going to begin adding it only on the top
edge of the mountain, creating the darker
edges and also defining the shape of the
mountain while doing this. Now while this post
Fontan range dries in, I even heard in
the shining stars. So we are going to be adding in the fourth layer with
the white quash, creating a blurry background
with the white dwarf. And then once that dries, we would add it or, you know, opaque look with
the white quash. So I'm going to begin picking up a smaller size brush and
pick up the white quash. I'm smart, so goes into the sky and blended
into the background. In-between, I'm going to be even adding a few of the
shining stars like D. So I've been trying to
keep a balance between both the bright stars
and the shining stars, make sure you do not. Or what I'd runoff
this task to allot. So keep adding both of
them simultaneously. And also make sure that
you add these does all this so that you know you're not
overdoing that a particular, I'm also adding 10 to
shooting stars in between. Now I will begin adding in
the bright stars so forth, added a big bite. So good. Now going to use a damp
brush and going to blend it into the background and
created, I'll look for it. And once this dries, I even added the whole peak whitewashed look
on Rudolf of it. Now you can see those
bigger white spots that had fallen accidently previously are no longer visible because of the
white glove, the galaxy. And because of this task that we added in so very quickly. And 25, 26 of
these, you can see, I've not overdone any of the kind of styles
and do my galaxy. So make sure to try to
strike a balance between all the kind of PBS that
you wish to add it. Now before adding any further
details into the painting, we need to wait for the
fourth layer of this task, as well as the posterior
of the mountain Dew GI. In. After that, we will add in another layer of the mountain at the bottoms fees with a darker door and the right
look to the stars as well. So let's wait for it
to dry completely. So now I bought the mountain
range is completely dry. I will quickly be
adding a little of the Payne's gray
color to my violet and the Queen Rose mix to get a darker tone of the wider
than the windows color. Because the second
mountain range is going to be awful quiet, dark codon as compared
to the first one. So I'm going to add
very rough random shape of the second mountain
range as well. I'm going to fill it completely
with this darker tone. Can see for the second
mountain range in between, I took it about the
false mountain range and now going to fill it
completely with this darker. You can also see the
color difference between the first
layer under secondly, make sure that the second
layer is darker one, I'm not a lighter one, so as to get the
perfect radiations for the mountain has been. Now just adding
that an island with the Payne's gray color
to make it more darker. Now my stars are
also completely dry. I'm going to pick up
some whitewashing, a thick consistency, and going to be adding in very small bugs in between
the so-called SAT. We add it. So automatically
around it you have the glowing effect
because of the dam layer. And these shots does stand out differently
into the galaxy. Now I've mixed in a little bit of whitewash to my yellow color. And I'm going to add little city light effect on
the first mountain range at the left side and small
dots randomly and you can add your with the orange value makes them
Let's find cautious bed. So you can see very
randomly and laying down these dots creating
a DIY light effect into this painting. Now do the same mix, just adding in a little patch of orange color to get some
darker city light effect. I'm going to add a few dots in-between the yellow
lights that we added, creating a little of the orange, the delayed effect as well. Now lastly, using the p3 color, I will pick the little pine
trees onto the right side. So make sure you use
the smallest size brush and you either use the pins
here on the black color. I'm going to quickly
add a little of the detail looking pine
trees onto the right side. So you can see just by adding the pine G
in a little detail, look at the top, gives it so much detail look to
the painting itself. Now at the bottom,
I'm quickly going to add in a lot of
coinage together. Now just going to be adding another one or two
smaller pine trees around this. They go find G. And that is, then
we would be done in this painting called
The 21 as well. Now adding another buying G, you are a little bigger than the center one that we added, but it's a little smaller
than the first one itself. So now let's remove
the masking deep and see your final
painting for deep 21. Make sure your edges and the stars are completely
dry so that you do not lay your hand onto the edges or this
task is winning them. Make sure to remove the
masking tape at an angle from the paper so that you
do not get off the edges. So your refined and fainting. Or D 20, another beautiful
vendors chi galaxy. I hope you guys enjoyed
painting this with me today. I will see you
guys tomorrow into the day 22 class project.
31. Day 22 - Red Barn : Hello everyone and
welcome back to the contribute
watercolor challenge, VR on D 22. And today we will be painting this beautiful red band
house in the night view. Now connotes that you need for this class project
is red, yellow, sap green, brown paint, black and white brush. So you would first be painting
the sky and then we are adding the details into the
house and the snow area. So let's begin painting this beautiful
paintings, but the deep. Let's begin with the pencil
sketch for this fun, we would be doing a
pencil sketch for the red band that we are
going to be been thinking. This time, I'm going to be
using a scale to mark out the proper dimensions of the house that we are
going to be adding it. So we are going to be
having the red house in the sentence piece of big one that you had seen
in the beginning. So first begin by creating
a simple house sheet with the roof and then add those Baldi DNS into the house. Now to the right
side of the house, I'm going to give a bit small
extension to the houses where it can be small space that you can
consider near to the house. Now at the top, adding
in the chimney, and then we would be
adding the doors and the windows into
the house space. So this center line that we map was just for the
reference purpose. Now we are done with
the measurement and getting the perfect
shape to the house. Now this time we are
going to be having in the door love towards
the left side. So towards the left side, just feeding as much
At the bottom side. Now I'm giving these thin lines because these thin
lines are going to be mounted with the white color to depict the DD
is into the house, giving it a perfect loop. So if you want, you could also Markov model in line
with the scale did acne, it's hardly three MM
line that I'm adding in. These lines, we will be
painting with white quash standing upright even
around the complete house. We are going to be adding
in the white line. But that I will
be adding in with the white quash using
a smaller size brush. So on the right side, I added a small Christmas red are hanging out now underneath. I'm going to be adding
in a small window and I'm going to be adding in into the top
space of the house. Now, even though this model
space you are and giving it that thin line for adding
the whitewash needed on. And we are going to be
having a small green kind of luck with the white color that we will be adding
the two naught. Now at the top space, I'm going to add
in this model we know that I was talking about. So just as I gave the dealing in the bottom windows,
in the same way, I'm giving the VDB our
top window as bench, marking out the
thinner lines for the white quash outlines that we are willing
to be adding in. Now inside the door
space as well. I'm adding small window and I'm going to add the same
details to the window, adding in those fine borders and creating the center
grid view as bad. Now just a little about the line I'm going
to be marking in a horizon line marking
the distinction between the sky and
the snow species. This is F4, the pencil sketch. It was a little pencil
sketch, this type. Now this guy is going to
be black color this time. So make sure you do not send
the water into the house. Bees added neural photo only. Do this guy speeds to create
the perfect black sky. So run very carefully
near the house, because the house is going
to be of a bright red color. So you can see, I'm running
very carefully near the house and adding the year
or quarter very carefully. So then I do not have any water running
into the house piece. Otherwise, it will
be very difficult to control the black color from
flowing inside the house. So make sure you
apply the newer of quarter very carefully
around the house. If you want, you can use
a smaller size brush to add the details
around the house first. So I'm done adding in
a layer of fascia. Now using my round brush, I haven't simply pick up the
black color directly from my palette and begin adding in the black column to
the complete sky. You don't have to
have any mediations or any details of
body about anything. Simply pick up the black color and sees a complete house with the black color directly in a medium consistency so that
you'll have a good vibrancy, could have black color. Now just around the house piece, you can see I'm running
very carefully and very slowly so that I do not need the black color
into the house. Because as I told you previous, neither house is going to
be off a bright red color. So you need to make sure
that the black color does not seep into
the house area. You're not confident about
adding the black fellow around the house using it
does seem size brush, make sure around
the house you add the black color force with
a smaller size brush. But since my brush
has a pointed tip, I know I didn't bottom
incidentally adding the black color very carefully to the
house piece as well. So major cost and do
the biggest pieces, I'm adding the black color
very loosely and quickly. But when I move
around the house, did is I just used the department rush for
defining the shape of the house and getting the
perfect shape so that I do not running through
the house even by mistake. So go slowly, but
make sure you have a good vibrant black color
before the paper dries it. Because otherwise you may
have patches onto the people of different black colored bones because of the paper drying it. So just need to know
around the house IDA lifting your and then just
add the top right side, you can see the black color
is looking in a little light. So I would just add in
the black color there again so that it
also is an adult. I'll just add that along. So I'm done painting the sky. Now we cannot think
the house and the smallest piece under
the sky is completely dry. So what we will do is we
will first ambulating, then leading into the
center of the house, that is the windows and
the Christmas read. So for that I'm shifting
my smallest size brush. First, I'm going to pick up a little of the one sienna color. And I will begin
from the top window. So I'm going to add
the bone sienna color, leaving the white margins
even if it needs there. And it will be okay
because we are going to be using in whitewash to give the perfect edges and the median looked to the
house completely. But as far as possible, try avoiding proven into those smaller
margins that we have left onto the doors
and the windows. Now at the bottom, I'm just blending it with
the black color, giving it the darker death. So at the top you have
a little up the bones, the analogue, and at the
bottom the black color. Now in the C, V, I'm going to be painting the other two
windows on the bottom side. But in the other two windows, in the top layer of the window, I'm going to be adding in
the black colors directly. And at the bottom I will be
adding the yellow color. Before that, I'm just picking up the sap green color and
adding simple read VD. We are going to be
adding in Java. You can see just
in a rounded I'm cheap and just quickly
dabbing the department rash, giving you some
rough, nice, nice, nice like edges creating
the perfect red look. So in the center of the red, you can see that
is by experience which will be filled
up with red color. I'm just giving some
sharp edge to them diabetic inside and outside. And that is the symbol
for smear of red. Now using the black color, I will just being the
top windows of this. I know you're at the
bottom left side. We DO underneath
the breath as well. Now in all the three
bottom windows I'm going to be using
in the yellow panel. So I'm just going to lay down the law and around that
I'm going to be adding in very little of the
orange highlight to create the perfect
one flight reflex. Coming out from these windows, make sure that you do not run in blue those otherwise
the black column and begin to seep in your. So I'm using the
bone sienna color now and just adding
it onto the edges. You can see I have just used the department rash finding
in the MSN, Apollo, and I think that the
color very less So automatically it's not flowing
a lot including Anaconda, but just blending
with the Yan'an and creating the perfect
won't advent. Now even at the top speeds
near to the chimney, I'm going to be adding in
the yellow and the bonds. Hello, beating the
one defect that has been just as we added
into the bottom windows. So you can see very GNP, the follow-up nosy, just lifted up using the
tip of your brush. So automatically you will
get the one perfect. Now, in the bottom left side
of the door of the house, I'm going to begin adding the red color there
very carefully, leaving those white margins. So automatically the
black color will not need into the sky space. I'm just going to be using
in the Permanent red color. You can go ahead and use any criteria that is
available in your palette. And I'm going to use
the red color and aggregate autocomplete
species leaving the margins of the
windows and the house. I'm going to be using in a
smallest size brush for this. And you're also, I'm going
with that technique wet on dry because it's
a smaller piece that we have been doing in. Now you can see I'm leaving those smaller margins
that I have less. So automatically the black color of the sky, despite being wet, it will not lead into the house area and even
the window bylaws, but not least because we know
how to have a white budget. So run very carefully so that you do not run
out of proportion, bleed into the margins
that we have added it. So after adding this d, d, Now we need to wait
for all of this to dry because we did
not add any folder. And then all of
these details dry. So now sky and the details of the house
is completely dry. I will quickly pick up a pencil. Just add little more detail. That is, I didn't
mark the margin of the house that I
forgot to add NPVs, leaving space for the
whitewash margins that we are going
to be adding in. If you want, you can
add the red color and then add in the
white wash or whatever, because white Bartlett
still stand out OB. But just so as to be more or, you know, getting the
margins much clear, I prefer adding the margins
and leaving them via and then adding the bright white quash effect
there as well. So now using the
bright red color Eigen needs those margins. At the bright red color and
do the rest of the house. Just run your brush
very carefully near to the windows and the red
that you have added it. Do not worry, you will be
having little white gaps. New York would've read all of it will look as it's
covered with snow at those places as
we are going to be splashing this no
effect later on, but just be a little careful and add the red color as
much as possible. Now before this
red color when dry in Vf to add in little
highlights with the darker tones into the house area near to
the edges of the roof. So make sure that you run the red color quickly so
that until it is wet, you can simply add in the
darker tones as well. Now New York Buddha fret, you can see I'm just
using the tip of my brush and adding the red
color as much as possible. Do not worry if it
overlaps the red. We will still be adding in a dark on neo color to the red. And then the red
color would again be covered up and you would
get the perfect shape. Even in the center, you can see just using the tip of my brush, I've added the red
color randomly. Now why in the house
base is still wet. Let's quickly uses smallest
size brush and pick up the Payne's gray color and begin adding it only on to the edges. So automatically, since the
red color is still wet, that means Michelob and begin to blend in with the red color, creating a soft and a dark edge. So make sure that
no use just the tip of your brush size brush, knife, the colostrum
odd, land on their own. Just use as little damp brush and blend it quickly
by you apply it. So you can see I'm adding
in the Palo and then quickly blending it with the
recreating the soft edge, just a darker shadow
effect that we needed. Your so you can see I've done it till
the right side as well, creating the darker
shadows on the edges. Now I'm just going to use
very little of the beams, green color or the
brown color and going a little darker highlights into
the house very randomly. Why the red color is still wet. So you need and walk on, let me quickly with the
red color and adding the Nios in case if you want it to stay wet
for a longer time, you can first identify
roughly out of water underneath very carefully. Now this money around the house painting it also
completely with the red color. To this also, we will be
adding in the black margins, giving in the Docker
Desktop to the edges. And this time to this little
space we are going to be adding in a lot of Docker
data on the right side. So half of this
piece is going to be covered up with the
darker color of Payne's gray blended with the recreating the perfect transition between the red and the beans vehicles. So now we need to wait for the house deviance
to dry in there. Then let's begin adding the VPNs into this
bottom snows piece. So far this goes Bs, I've been forced begin
with a clean CTO photo. We are going to be adding
in this no details, only moving from the edges
in this endoscopies, we are going to be maintaining the light effects so that we have to blow off the house
coming inside though. Oh, Snow space has been only on the edges we would be giving in Ducati deals with
the black color, creating the effect of the black sky onto
the slowest piece. And violet is still wet. We would just add Nitin
plus D Deeds wet on wet, creating a soft look to
the grasses as well. So I'm going to use
the black color, but didn't have any
medium consistency. And very nice. I'm
using a flat brush. I can just begin pulling it out from the edges
due diligence. And does piece make sure
are in the same though you have almost diluted
donor plaque equal to y, so that you have the
light-speed mean theme and the white loop in creating the
perfect mate effect there. So you can see how
carefully I pulled out the color from the edges
and from the bottom edges, I pointed out a little diagram, moving the house bees, but just under the house I have maintained
the night effect. Could even get by with just
wanted effect out there. And on the edges added
the darker dawns but not too dark as you
can see, you again. And that bone with the sky. The sky is black and at the bottom you have a very light tone
of black color, creating the effect off this
guy on the storage space, just on the edges
giving DACA debt. And in the same domain
deeming the light effect. Now, right? No spaces bad. I didn't quickly pick up
little black color and using a smaller size brush on the bottom left and the
right edges, I can quickly, just to add in little of the
grass effect suggests you simply going to add some straight lines
enzymes leaving lines. Hello, Let's grass strokes
while this is wet. So you can see
automatically it has a soft MOOC and blended
into the background. So in the same way,
just adding the middle at the bottom left,
right side as well. You can see it's creating such a beautiful view
into this red background. And when this went GI up and
have a full-frame soft edge, creating the main
focus on new under the house that we have
been in this industry. Now let's meet for
all of this to dry, to add the final details into
this beautiful painting. So now my painting is completely dry it and you can
see the soft lookup, the grasses that we have got
on the board, the edges. Now I'm going to begin by adding the whitewashed that I have. Make sure you use a clean brush for picking up the
white quash and also make sure you
do not pick up the whitewash in
extra, all consistent. Otherwise it may
begin to give you because stars all
this noise effect, just as the previous exercise. First, I'm going to pick up a little bit of the red color. And I even begin, I didn't
beat it into the bands piece. So just, I have mixed in a
little patch of the Payne's gray to induce getting
a darker tone of there. So into the entire house
leaving equal gaps. I'm just going to add
these darker strokes, adding more deeply
into the house. You can see I'm using a
very smallest size brush. This is a size two round brush from the Princeton
velvet dutch series. Since this has appointed, if I'm even to achieve this
GIF nines very carefully. And since I'm holding the brush from neon to the prison space, so I'm getting more precision
and honed over to my brush. So I have less than litter
nor on the left side, I would add these
lines in space needed after adding all
the lines and do the big space of
the house first. In this video, I'm going
to be adding in the lines, but you are going to
be adding the lines in the sanding direction into
the rest of the house. We had added it into
a sleeping detection. So say leaving equidistance
added in blue, then Diodorus space that
we have created here. Now let's begin adding the VDS into the house using
the white brush. So I can begin using the seam smallest size
two brush and using just the tip of the
brush Eigen thinking adding those finances
that we left and right. So now you can see at present the white gaps were not
equal or when looking at a, you know, some
vetting symmetrical. So now using
whitewash Eigen make all this width into
unequal speeds by gaps. So you can see just by
beginning to adding the white is getting
so much more detail. And you add the
water was adding in a white light to create the whole fake look of the
house on to this no space. So onto all the
edges of the house that we have left
in the white gaps, we will begin adding in
the white quash effect, even though the doors and the
windows that we have left those white edges now we would
be adding the white quash. I'm defining having a clear
space between them as bed. Right now if you see the
black and the yellow do not have equal distance
into both the windows. So now using the whitewash, you can connect all
of this and get D1 view to the entire house. You can see how slowly
I'm going around adding the details do not rush way lighting in this
whitewash detail. Otherwise you may not
get this Buffett detail. Look. It may be some better
because I'm Betty know, you need to go
quite slowly so as to get the perfect
detail look and get each of these lines
almost an equal sign onto all the edges. So on the roof space
you can see I've pulled out a little white
stroke outside as well, giving more detail
view to this house. Now I forgot to paint
the top chimney, our species with the red color. So fast I haven't just given the wide body you are and
being the red column H naught, since I wanted to do under
the white color, I know. Now very carefully, I would
add the red color as well, only in the top space. If you want, you can
even add a little of the darker details using the
black color on the edges, creating more detail look. Now using the whitewash, adding the detail gender to the black windows
that we added in. So just simple straight lines to give a little more detail. Make sure you either use a detailer brush
order pointed tip of the brush for
adding in this di did. Now on the right. So
this little space adding the greenhouse
effect that we had added with the pencils sketch. Now, even on the left side, we will later on be adding a little fence detail
with the whitewash. Now on the precipice
red adding litters, know badges, creating
little of this no effect. We will be having more
of this no effect by just scratching the whitewash. So first adding the fence
do Didn't you are on the left side leaving a little
gap near to the margin. So you can see just as
modern sense D then with the white goulash near to the
house gets in so much depth and Buddha painting and less of the empty spaces and creating the perfect view to
this beautiful house creating in the Bolsa Christmas
vibes to be setting in. Now we're going to begin
splashing this node. And then we would
be adding some of the bright star effect
into the sky as better. So first let's begin
by getting the whitewashing the
perfect consistency, and begin by its fledgling,
the white quash. Make sure you do not have
access of the paint and water. Otherwise, you'll
begin to get them because pots of the white feet, you can splatter the snow effect even under the house area. You do not have
to stop anywhere. We are going to be showing it as a small phone view and
not this task view. So keeps plugging this no
effect onto the entire paper. Just in case if you do not want the rest of the
table to be messy, you can either spread
enough paper or some tissue so that you do not have to clean
it up later on. Now let's begin creating in the small tokens for the bright stars that we
are going to be adding in. Suppose using the whitewashing
of very light consistency, going to add swans ochres and blended into the background, creating a very bloody and
done effect of the whitewash. Now using a damp brush, I'm just blending
the edges of this, creating a soft edge to them. You can see just by
blending, do that back down. It has such a soft,
soft download. Now when these dry, we
would be adding many. Take my brush creating the
boffin bright side effect. Now using the whitewashing,
not the consistency. I didn't just using the
tip of my brush and add Start effect into these bypasses
that we added right now, just in the center of these, just added by quash creating the buffering right looking
starts out you're now in the rest of this piece. I'm just going to be adding in some bigger white spots creating more balance
into the sky. And this effect has
been so very randomly, some because whites, Okay, Then the ones that nice
mattered and uneaten smaller ones that we added
with those blurry background. You can see just by adding
and these because of spots, we are getting so much more
depth into this pie as Ben. So that is if we have any
with up ending for D 22, let's remove the masking tape and see yeah, fine and painting. Make sure edges
that completely dry before you begin to
remove the masking tape. So you are is our
final painting for D 22 or beautiful red
bond in the night view. I hope you guys enjoyed painting this and put the
rest of the EDs, we would be building more
of the Christmas wipes. I hope you enjoy all of them
as well in the coming days.
32. Day 23 - Santa's Bag: Hello everyone and
welcome back to the TDD watercolor challenge. We are on day 23 to d, and we would be
building this Santa's back to D. The
colors that you need for today's class project
is red, yellow, Sap Green. Said even Wu Liang, beams be black and white. Brush to these are
all the colors that you would be needing
for this class project. We will post fit the aiding
the misty background and then begin adding the details
into the rest of the BBS. So I have maybe but the boat. And let's begin the dependent
sketch from the right side, I'm going to be adding in the sand dance band and
onto now I'm just going to be laying out some gift
boxes and around it as well. On the left side,
I'm going to be adding in a few gift boxes. We're first going to be painting
a snowy background with the blue color and then adding
it to evoke effect to it. And then we would be adding
into details to this handles back and the gifts that we are adding the rounded
and on top of it. So we're going to add toolbox is trying to show them as
a gift from this foundry, not on the sand as fat. So you can go ahead
and, you know, lead the gifts independent
don't angles if you wish to. And Walton believed in
agony print sheets. And I think of your walls
in between us bedtime to some of the Christmas
ornaments popping out. So do a few gift boxes, just read having
defensive sketch itself. I'm adding in a little
more detail as well. The rest of them, you
can directly add it by adding in with
the beam itself. We are going to be
being in this very simple me, the gift box. We're just going to be
off simply follows. And then you can go ahead and
add any designs onto data. You want time to show some
gift-wrapped designs onto it. So on the left side you are, I'm just showing some
Christmas ornaments around this gift as well. And run know your last
around the bag itself. And that is if now we will begin painting the media
is one by one. So I will first begin with a clean photo folder
onto the entire surface. I wouldn't be leaving in the Sanders bank
also, MD begins. This guy is going to be of a very light blue collar trying to show in
the snow effect. If you will go on
leaving the space, it will be very difficult to
achieve the media so as to get to that around
those gift boxes and around the bank itself. So you know, to make it simple, first we are going to be
adding in a layer of water and be independent tire by
mom with the blue palo. So do you want on the bag
down the Gibbs phase as well? We will try to avoid
adding in Bordeaux next. Oh, sorry, we will try to
avoid adding in the field and they're not automatically will not have any
underlined blue color. And in the rest of the
space we are going to be adding in a very light tone
of the city and Nepantla, it's going to be a very diluted. Now, picking up the Sydney
Lynn do panel, I did. I'm just going to lead
into the entire species. Well, why did adding
it into the space understand as bad as
much as possible? Even if you run a little
of these light colors, it will be perfectly okay. You can see I just picked up very little Carlo and onto
the entire background, I'm linking this scholar trying
to design this no effect. Now run this paint is still wet. I'm going to lose enough
smallest size brush, and I will begin painting some various spots
onto this backdrop, like the shoulder effect. So this is going to be the posterior for the bokeh effect. After this, we are going to be adding in the MOOC effect using invite quash and yellow
mixed in with white, broadly shorter, more detail
into the vocal effect. To, for the first
year of the MOOC, you can see I'm just using a damp brush and just running
it in and out motion, keeping the brush perpendicular, trying to lift up the fellows. So you can see, although the palmy again these
blending a little, you will have to run
it one or two times at the seams for to us to lift
up the color completely. So just be a small
white spots into the background trying to show in the first layer for
the book a vet. Now do I folded it into
this I'm going to be using in other droplets are
fundamental to feed some moves. So I'm going to pick up any damp brush with
very little water. And I'm going to begin talking very small photo to get
nums and do the painting. So you can see automatically
when the water is spreading, it's creating the
white Lomborg effect. But make sure you need to add very small droplets or folder. If you will increase
the size of the drug, then automatically the
pins when Saudi though, what do they spread a lot
and it will create a bigger, to be really careful
about this and make sure those are very small
droplets of water. You can see I have added so small droplets that automatically it's
getting smaller rooms, getting to the MOOC
effect for the post Neo. And all of this will create a perfect looking snow effect into the background as well. So that is it for
the first year. Now let's wait for this
to dry completely. And then you can begin adding into for the viewers and begin adding the details design does FAC and the gift boxes as Ben. So now my first layer has dried completely and you can see that moves the water droplets have PAD giving you the
perfect bokeh effect. Now 45, you begin
painting and descenders, forgotten taking up the
permanent red color. I'm going to lay down this color falls onto the entire backspace. So this is going to
be the false name. And then we'll do this while the system rep averages
lifetime darker highlights by mixing and showing some fees on the device near to the four
lines of the back. And also near to this
fees or where we have the forbidden or the data that
we will be showing of our, even under that, even
showing some darker shadows. Now if you feel
that you know, of, of expats and in-between, we begin to try giving
you sharp edges. So you can even go
here with the wet on wet technique by
laying a layer of water on the defenders and
then hiding in the red color. But make sure to use the red color in a
bright for consistency. Do not dilute it a
lot with four dot. You can see how vibrant, whether it is
looking out to you. Now, good This leg, I'm just
mixing in a little bit of buoyancy enough lost and
getting attuned upon. I'm going to begin adding
onto all the edges. Then I will folded up
in stone by adding in more of brown and giving
him more depth to it. Now in between,
this is still bad, just using NACADA off
without excess of water. I'm going to add in
some darker lines into the match time to show in the
Please lines into the bat. So for that, I've just added a little more onesie Anaconda, and now I can begin
adding the peas length. All of this is based on vector. You need to make sure
that your red color does not dry by the time that you're adding in these
crease lines and the darker details into
the sand does bad. Now for the adding a
darker tone of brown, but making sure that the
nitrogen is also still visible. So you need to add the
darkest brown very less as compared to the second dawn of Ramachandran that we added in. So imagine you can
see on the edges and in the center I've
added the freeze line, but I made sure that the red cupboard in the
back is still visible. Wherever you feel that the
blending is not happening, you can use a damp brush
and blend them has been. Now I've been begin painting
the gift boxes one by one. So first time picking up the red color and I
haven't been this box, you are at the bottom side. Now using this index
law and we'll begin painting the boxes more at
the top species as well. So I'll go ahead with one or two red boxes and then I will shift to the yellow color and blue color to add
in some other view, I would leave one of the
boxes right itself has been trying to show in
the different colors into the gift boxes. Now, I'm leaving
the most pieces MD. Adding the darker tones
their lead to draw. If you want, you can show to go ahead and change the
valid options for these gift boxes
and warhead with very different color
combinations of your toys, they need not be the same. Just as I told you,
you can go ahead, been definitively
out of the boxes. You can go here to the different
palette options as well. But just make sure when you
are adding in the follows. If you are adding the gift
boxes next to each other, read for them to dry, and then begin
painting the next one. Otherwise, Apollo's may
bleed into each other. So you can see when
I'm being demon making job that variable
and painting there is pieces in between
left so that the colors are not going to
meet and reach our goal. So basically the false
books and I've been good and lift Lydia, MD, CMV. Now I'm painting the one in the rightmost bonus
automatically, there's nothing that the
colors begin to meet it. Now using a darker blue door, I will begin adding in these
little Christmas ornaments. So very simply just
going to fill in this so-called DO
with the blue color. Now at the bottom
speeds you are as very, I'll begin adding
in the ornaments, make sure that your land
box is completely dried. It I guess my box handwriting, but it's inherent
little moisture in it so you can see a movie
spreading in a legit. I haven't predicted by
lightning in the module. So you need to be
careful and say I told you when you're beginning
to add in the details, you need to make sure
that when you're adding in the beans
near to each other, the beans has dried
completely orange. They will begin to
spread a lot and you will not be able
to control them. Now adding 10 to Christmas ornaments with
the dark green color out. Now just going through being
done the robot this back. So first I'm adding the
red color door itself. Once this dries either this
time it's a mediation, do it using the right along. Now this red box at the bottom
space is completely dried. So I will just pick
up the bean color in the dark consistency and
ask the board to this gift. Now you can again, as
I told you before, this altar boy had with different value combinations
as you want it to be, not be the same like mine. Just made sure that if
your brush does not have a pointedly who use a DVD, adding these details
so that you do not run out of proportion
anywhere or ruin things, legos, pieces that have
to be. Now why not? I'm just adding a little
different shape to this salt moire effect
that I added in and clicking on it and
flower shape for our TO now to one of the gift box, not the top space. I'm just going to add very
little polka dot effect with the red color instead of
filling it though completely. So the one just
about the ornament, I'm this one provide very
simple Polka dot effect. And I told her I would
leave this piece. Why dialing in the
polka dot the vector. So the gift grappled of
your design onto it. Now using the yellow color, I'm beginning to add in the
details out you're supposed adding in the lip
of this farm that I mean did the false now again, wait for all the posts around
it to dry and complete. And again, oh, you're also you can go ahead with
different combinations. If not, it need not be
the same like mine. So feel free to, you know, go ahead with whichever
color you like and with whichever color
you would like to see your brazen
coming in activity. Now I'm going to pick up
the beans green color. I'm going to add in the lid to this gift box at the top space. So now for this rightmost one
as I'm adding in the body. And then the details using in the same vein, streetcar lot. Now this gift out you are
in the center which is left that I'm going to add
it into the yellow panel. And then once this dries, I would add in the body
veins to this as bent. You make sure that
the nonpolar and the software lead gift, it completely dried before
you begin to add in this yellow and a little off, it may spread even
if we run around the red color mode if water
gets printed out there. So now let's wait
for this to dry. Then. I will begin adding in the other details
into the painting. So I'm picking up the phone
panel and I will just add little edges gift box and try to define this
gift boxes a little more. So you've been added
to all the shadow according to the balance
that you have used it. So I completely forgot that by adding the brown
palette again, Local was still wet and I should have waited
for it to dry, but since I forgot, so I'm just blending in the
brown as well to the yellow. So you can see now it does not seem as a problem any longer. Now I can begin
adding in the book is best because I
need to wait for the rest of deals to
dry before adding the father the beans
into these gift boxes. So pause, I'm going
to be using in the white quash mixed in
with a very little yellow. So it's a very neutral tint. You can see just, you know, 5% yellow and 95 percent
right then that I'm using. And I can begin adding
smallest locally at leaving gaps in between feeding in the second mill for
the bokeh effect. After this, we are going to
be using in the floor right quash color and adding in the coordinator for
the bokeh effect, needing more of the
snowball effect on tour. So I'm almost done adding
in the second note off the woke effect using the
yellow and the white wash mix. You'll be then from each
other and some media or well, in the first year
bokeh effect that we feed it using
the plume effect. And that is how exactly
this to be added. You need not added completely separately from
the force beyond. You need to add some
of them overlapping, the 1.5th one and some
very overlapping full, complete, depending
on the placements. Now when we did it
begin writing in the wash effect of all with the white fellow
for the Vulgate. So that time we are going to be opening on the
photosphere has been. Now before that, we need
to wait for it to dry. So first I'm picking up
the indigo color and just using a very light
touch of the indigo color, I'm going to paint in the
stops fees off the Sanders, but with a very edge
of the indigo follow. Now by default am the middle slide effect and even imagined
partisan effect. Then we will be using whitewash and adding little
more medial to this. So you can see very night bone of the indigo color that I used. I have an indigo color
you can just use in a very slight bulge of the
black and the blue mix. And I think it was a
very diluted burnt almost what DO but just a
little thing of the Palo. Now this last little ornament
at the bottom species, I've added it with
the yellow color. Now using in the
whitewash without adding any color to it
in its purest form, I will begin adding in the portfolio for
the bokeh effect. So the third layer
is going to be overlaying the first and
the second near what? So now you will see, I'm going to add it in
such a way that little of the second
year book effect will also be hidden. So do not worry about that. That will be given
to affect MOOC. In fact, to just feel and keep adding in the third
year of the MOOC effect. Somebody you can see I'm adding it not overlapping
the second video, but overlapping the
fourth year at thesis. So you need to get a balance
into the building by adding a denial thoughts so as to get a perfect balance of
the bokeh effect. If you want to go in with a
more detailed bokeh effect, you can add very small
bookkeeping details and keep adding them a lot and read more detailed look
into the feeding. But I wanted to keep it simple
so that it's easier for everyone to follow along and
easy to paint it quickly. Now I'm going to
use a black pen. I'm going to define
the gift boxes adding in the final video. I'm going to add little
photos as well to the Sanders by defining it
a little more this site. So I'm using a size 0.3 Ben, you can go ahead and use
any waterproof black pen. Make sure to use
a waterproof pen. Otherwise, if you'd all any water when fall
onto this audit, you need to correct anything. It would be very
difficult because though pen ink may
begin spreading. Now just defining the little
of this and does bag is bad. Now using in their red color, I will just mean this bore
out your father yellow box. Then after this I will
just be left to pick up my white gel pen and add a little of effects
to the bottom. Gift wants to, I mean, a little d, d1 and a
bridge to that gift box. So now just before
removing the masking tape, let me quickly add little flinch to this
little GIF both up. So this gift box lips
that like kind of a strongly to me now after
adding in the white. So now even to the top one yard and
we hear little detail. So you open this line, I'm adding a little of a cheque detail rather than the
normal so-called bins. So you can see how
I have defined all the gift boxes
separately and different prints with
from each other. Now let's remove
the masking tape and see our final painting. We are going to be
painting for the most. I'm painting in the
coming seventies. I hope you guys are enjoying this 30-day watercolor
challenge with me. We're almost near to the
end of this challenge, and we are ready with the
happy ending for D2 and D3. So I hope you guys enjoyed painting this gift
back with me today. And I hope you all
received lots of gifts, Christmas and have
a happy Christmas. I will see you
guys tomorrow into the day 24 class project.
33. Day 24 - Christmas Ornaments: Hello everyone, Welcome back to the turkey day
watercolor challenge. We are on D2L for two D, and we will be painting this beautiful
Christmas ornaments into this little space. So the colors that you need for today's class project,
this red, yellow, brown, blue, indigo, Themes, clean, black and white quash. These are all the colors
that you would be needing to be in
today's class project. So we would first be
creating the background and the sky species and then be adding in the
elements one by one. So let's begin with the
pencil sketch first. So I will quickly mock
out the horizon line. And then the bottom snow
speeds and the ornaments. We are going to be having
it due to treat out on Mintel and do
star-shaped ornament. Then we begin to paint on mints will have to be in
them one by one, so that beam need to be sure that the colors do
not bleed into each. Now if you want, you can use any tool or something to mark
out the so-called audio, can just draw it roughly as
I'm doing it directly with depends on without
using any bull CMV. Now you're under the right tail. I'm going to be adding in
a star-shaped ornament and around cheap ornamental
close to it as well. So basically you can see the bottom part of
the ornaments are not visible because I'm vanco show them that the
actor bottom space, we have a big snow batch, end of which half of dawn on
him and shapes are hidden. That is the reason I've marked that little mountain
shape kind of a thing at the bottom of the page because that they
are going to be shown, showing as a different
snowball on, you know, build up already. And under which these
ornaments I had didn't have the last star-shaped ornament that I'm adding
here on the left. And then we'll be done
with the pencil sketch. So first we will be
painting in the sky. So let's begin the Dublin quota for the only into the sky space. For this guy we are
going to be using in the dunes of red and brown. I'm going to be using in the permanent red and the
bone sienna color to add a little bit of the Payne's gray column to give some darker effects
into the cloud. Make sure you do not run into the ISPs or the small
space because we are going to having
this nose piece with a very light
color later on. So first are the horizon line. I'm beginning in with the
burnt sienna color mix to limit a little
touch of red color. Then at the top, I'm just
going to be adding in with the red color up
your live without mixing in any brown forest. So now at the top I'm using in the Permanent
red color without mixing in any brown and just blending it relevant
the bottom layer color, you can see we've got such a perfect transition
and such vibrant colors. Hence, I'm using a flat brush so that it's easier to
blend in and tense. You know, it's going
to be simple blending. Now I'm going to pick up
the darker tone of brown and when to begin adding
it from the top space. So you can either mix
in a little touch of black colored pins liquor
lobby to a brown color. Or you can directly use
any darker brown bone. So I'm going to pick
up a little bit of the Payne's gray color. I'm going to add it at the
top and blended downwards. So in-between you will
see bright red tone which will be left again
at the horizon language, the brown and blending
the Payne's gray color, blending it in the top space. In this NDA, try to maintain
a little light space at the top and the bottom near the horizon line tried
to get the darker tones. So you need to go step-by-step
with the blending. Now we're going to create the texture using in
the water droplets. So begin splashing
the water droplets. Make sure you do not
pick up excess water and keep the brush at
a little distance so that you can add these as plateaus easily and you'll
get this multiply dose. We are going to create some
texture effect of the snow in today's sky space using
this texture technique. So you can see, I'm splashing these plateaus very slowly
and very little now. And even if you feel
because of this platform or the beans that excess
water is being collected, pick it up with the help of a damn brush, dab it on board. They showed bid for a few
seconds for the beans to set the lymph and then
begin splattering again. So you know, you need to
splatter also when your paper is approximately 20 percent dry, Only then you would begin
getting into effect. Now you are you
can see there was excess water that is being collected to using
a round brush I'm lifting in because when
needed access model, you can see the effect of splattering technique
is not coming to life. So I lifted the excess
water and now again I'm splattering ones might be points approximately 20 percent dry. So only when the paper
will be a little moist, it will give you the perfect effect of the
texture using these blooms. So if your people
will have access, what other pins will only spread and give you
a flat look again. So it's very important
to understand the action of DAPI put autumn, I shut off the paper when you
do this pledging technique. So again, now when
I'm splattering, you can see the
effect is coming in. Now, delighted for the
sky to dry a little far, the most plateaus I
will be picking up the indigo color
and begin adding in this novel space
at the bottom media. So I just added a very small
touch of the indigo color. And now I'm just going to
spread it using Word doc into the entire bottom space and
then just add the top line. I will give some DACA highlights
using the indigo color. So that is it. We
are ready to retire. Firstly, we need to
wait for this to dry. If you feel the
need, you can add a little more splatter depending on how
your sky is looking. So might be placed completely dried and you can see
that bloom effects. I've gotten to the sky space. I did splatter little more after my people was 50
percent dry hands, I've got the perfect
bloom effect. So as I told you, you need to make sure and see how much bloom
effect you want. Now beginning to paint
the rest of the ISPs. So I just added a
little layer of water. And now using the indigo
color, I'm just, you know, adding a very lightly off the indigo color onto the
entire want them I spaced. So just reading the dosage of the indigo using and
watercolor spread. At the bottom, I even I
didn't do read highlight to reflect this guy effect
on Buddhist no, ADR. Now just using the indigo color, I will give little
darker highlights onto the horizon line while this is still wet so as to give some darker shadow effect. Now on the left and
the right edges, I will pull out very little of the dark indigo
blue color to add some darker effect
into this nullspace. So you can see it's very
little and very light. Make sure to use the color
in a light consistency. Now, my entire painting
is dry it and I will begin adding in effect
onto the horizon line. So for that I'm using in the darker tone
of beans piccolo. And just going to add
very simple trees. You can see I'm just dabbing
the tip of my brush in different size DTC and just
going to add it very slowly. Now you need to
be sure that your ISP's is completely dry, otherwise these column
may begin to spread it. So you can see isaiah
had a literary my show. So this pinned automatically spread into the ISPs as well. So you can quickly use a damp brush and lift up
the color from there. Or if you want, you can let that little or dispersion
also be there. So you can see on
the horizon line I'm adding very small
tree is because in the top speeds we are
going to be adding in little bokeh effect and
let us know flicks. Hence, I'm just starting
very small keys and not going to add it on to
the entire horizon line. Just going to be
at certain places. So now you can see in-between, I am adding in big O. I created
little bush effects cost. And now in the rest of this piece is just
adding in buddies. So maybe go some mid shot
dosa, mythic, some bacteria. So just trying to get
different variation on for the entire horizon line. Now under the left side, I've just added a
very big pine tree. You can see it's not
much of a detail one, just a very simple one. And around I'm just going to add little of
the bush effect. And then data's, it will be done with the trees
on the horizon line. As I told you, I won't
be adding it onto the complete horizon
line at places I've left little gaps so as to do a little variation to
the t line as well. Now let's begin painting
the armament one-by-one. So first going to paint
this biggest one. So for that I'm using in the Permanent red color
and laying it down. You can go ahead
with any bright tone of red that is available
in your palette. But just make sure to
go and very slowly around the edges and
define the ornament well. Because this is the
layer wherein you can get the shape of the
ornament on to the edges of the ornament I'm
going to be using in the bone sienna color and adding little darker highlights
and shadow effect. Just undo the edges
and blend it with the red color will be giving you and the lighter
tone effect later on. And you need to add the darker tone of
brown while the system, otherwise the blending,
what happened? So now just using
the tip of my brush, I'm dropping in the
bonds sienna color and I'll blend
well with the red. At places you can see I'm even adding some darker
strokes to create more of a shadow effect
as I was telling you. Now, picking up a father
darker tone of brown, just going to add very
little on the edges. So basically now lament is
going to have the three color no time to showing more of the
details into the ornament. So majorly foster red color
was into the entire space. Then the light from callow into little of this b such that
the rate is still visible. And now this darker
dawn in such a way that the force to Leo's
still be visible. Now seeing v, I
will begin painting in the different ornaments
has been before that, just creating little
light effect to that. So just lift up little color
if you feel the need to. Now using ultramarine
blue color, I will begin adding it
into the ornaments. You're onto the left side. Even though Anna meant
you're on the right, I'm painting it with
the same blue color. Then we need to wait
for both of these to dry before painting
in this task. Otherwise, the colors
may bleed into each other till they even begin adding in the details into the sky because the
sky is completely dry. So in this guy, I'm going
to be adding in little of the snowflake and
the bokeh effect before that even do
these blue ornaments, I just picked up a little touch of Payne's gray color and added darker highlights on the edges and blending it too well
with the blue color. Now using smallest size
brush and the white quash, I'll begin adding some
snowflakes into the top space. We had discussed are
adding the snowflakes or while we have
discussed the techniques and the details about adding in the details and do
though when difference, no effect, one of which
was the snowflake, how we will be painting in. So the very simple layout of the snowflakes that I'm
using in your just that I'm going to be adding
these snowflakes into different sizes and at
different places. Now. At them in such a way that
you do not have a lot of cluster of the same
at one single place. So keep adding them
at a little distance, going by adding very
little by little. I do not add a lot of them
altogether because we're still going to be having in the MOOC
effect into the sky area. So you need to go very little, have a perfect
combination of the smaller than the bigger
ones and also spread them evenly across everywhere
so that you do not have access of it anywhere at
just one particular place. So you'll see on my snowflakes
are of different sizes. And then I'm just diving buddies and Bedouins has been now just going to add it onto
the left side as well. The reason why I didn't
did the people was because my bottom
Ottomans us didn't bet. I did not want to lay
my hands on them. You have to be a little careful. Otherwise the cosmic
and lifted onto your hand and you may lead
them into the ice base. So be a little careful about it. Now, I'll begin creating
in the bokeh effect. So for the first layer, I'm using white gouache. I'm just going to add
10 bits or goods at random places and do the sky
space again for this also, do not overdo any of
the color altogether. Add little by little. If you feel the
need for MOOC alos, after adding in all
the bouquet effect, you can go ahead and
add the colors again. But if you add a lot of them
already in the first goal, it will be very difficult to
remove them and connected. Now Father, next
layer of the book, I just mix in a little touch of permanent red color
to the white color. I'm just going to
add a few circles with this light pinkish
kind of a door. So you can see it's a little
different than right. So even though Arlington caulobacter to instead
make a defense, so now I'm going to add a
few circles with this color. Some, it will be closer to the white ones are
very far away. You can see I'm adding the sizes of this
one quite different. So try to have variations with this modern and the
bigger circles as well. Now let's begin
with the Todd Lee also for the third layer, I'm mixing in more of the red color getting
in the top bowl. So this is the dot-dot-dot. Now some of it's going to be overlapping the falls
to Leo's just as this I can nail was
overlapping the first one and some of it's going to
be separately all alone. So again, you need
to strike a balance. You can still see my sky has such more empty spaces left in. So you need to go
in very slowly. Decide whether you need to
add more off which color. Do not overdo or add any
of the color in Toledo, in the forest near itself. See if you added a lot of fight, then it will be
very difficult to achieve a sense of balance
and do this bokeh effect. Now I'm just going to add a little more on the
left side as well. Again, since my
bottom is still wet, I'm being careful about laying my hands onto the Ottoman space. So again, I would
recommend you be careful about lean your
hand onto the red beans. And the y's. All you Leah, what those back beans
onto the ISP's. It will be difficult to
cover them up again. Now after adding
the darker bone, I feel like adding a little
more with the second tone. So again, I created the second
tone and just going to add some of the bouquet effect with the second bone
color that we used, which was almost like
a baby pink color. Then onto this I will just be using in little
of the pure white again to add the final New
York of the bokeh effect. Now lastly, for the final
layer into the bokeh effect, I'm just going to be using in the far right column B dot
mixing in any way to it. So this time I'm going to be adding in very
little compared to the first three folios
because now it's just a fine and highlights better very feed and more often, right of the white doll
color bokeh effect. Okay, So you can imagine the ADA or two layers of
pink colors that I'm adding half overlapping onto those creating the bokeh
effect altogether. So I'm almost done with
this bokeh effect. You can see now the
white color onto the top of the two Leos effect
with such pride, look to the bokeh effect. Now, let's begin painting
the bottom ornaments. If you are, all your
assignments are dried in. So my ornaments are completely
dry and I will begin painting the rest of
the two ornaments and add the highlights
to these ornaments then. So first the start, you're onto the right side. I'm painting this
also completely with the red color and
just as we added the darker highlights
with the brown tones into the so-called ornament. Bce. Same VBR going to be adding in the DACA highlights
to this as well. Now by painting this time, I'm leaving that little
gap because then I will add a very light tone
of the red color. Later on, I will be adding in the highlights with the white
gouache onto the ornaments, creating a little of the light
effect onto the Ottomans. Now picking up the brown color, I'm just going to drop it onto the edges and blend it well with the red color just as we did
for the ornaments space. So now I'm do this task space. You can see just by using a damp brush and
lifting up the color, I created, that little
light ISPs into the ADR. Now just on the edge
having the brown color. And in the rest of this base, I'm the top side of that star. I even let the light
look be there. Now this last ornament,
your Raspberry, just going to paint it with the red and again the
Brown highlights. So we used a very
simple procedures to be in this ornaments. We would be adding
in the highlights with the white quash later on. And the media time that took was creating in
the bokeh effect. And you need to go very slowly
there so that you'll get a perfect loop and do not
have an overdue off anything. Now just adding little after Brown highlights as
well onto this one. Now good, The top of the
ornaments I'm going to be using in my
technical pen and just adding in those details in the top space after
each of the ornaments. Now into two of the angles
of these ornaments I'm just going to be using in a little bit of
the yellow color. I'm just going to fill it completely with
the yellow color. So uses smallest size brush if your brush does not
have a pointed tip. And I'm using the yellow
Kalina thick consistency and very carefully I'm just going to add it into
the top species so the black borders are
visible and that's okay. That's exactly how you
want it to look like. Now using the white gouache, I will just create
a highlight and the light effect onto
these ornaments. So just adding in very small
white patch, you can see, select this, I'm going to add it into each of the agreement, deviating in the light
effect into these ornaments. Now using the white gel pen, I'm just adding a few lines and creating more highlights
and do these ornaments. So you can see very light
lines that I've created. Now in case if you do not
have a white gel pen, you can add these as well
using in the white gouache. But you just need to make sure that you use the
white goulash in quite thick consistency
with a very fine brush. Now one last thing, going to pick up
the indigo color and just going to add in little darker shadow effect
into this bottom store space. Time to show the ploughing
bulge into this new area. So just at the top I'm
adding in the line of the indigo color and I'm going to blend it
till the bottom. And that is, then we would be ready with this beam
being four day 24. So just a little more of the indigo touch at
the bottom as well, creating more darker
depth into this no space. But you just need to be
sure you do not pick up the indigo colon quite
a dark consistency for the entire space. You need to get a
perfect blend and you can see very,
very thin necessary. I am even lifting up
the indigo color so as to get the perfect
law. And that is it. We are ready with it. Now let's remove
the masking tape. And C, final painting
for date 2004. Make sure to remove the masking
tape very slowly and at an angle from your people so that you do not
take off the edges. And if you bought them
snow species still wet, just be a little careful. So you are is our
final painting for D 24, the Christmas ornaments. I hope you guys enjoyed painting this beautiful view
with me today. I will see you
guys tomorrow into the day 25 class project. Thank you so much
for joining me.
34. Day 25 - Christmas Ornaments 2: Hello everybody and welcome
back to the data in five of the 30 days
watercolor challenge. Today, we would be
being deemed as beautiful and yet simple
Christmas ornaments. The candles that you need
for today's class project is red, yellow, violet, brown, fat, vended key beans, three, black and white
goulash do not body. If you do not have a
few of these alloys, we will surely be going on with the alternative
arrows as Ben, why we begin painting. So let's begin being deemed
today's class project. So I have met before deep
down onto all the four edges and Louisville beginning with
the Christmas arguments, you can go ahead and use Outlook for mocking out the
circles for the augment, the odd, even you could add in the automates veto by
enough rounded sketch. So we're going to
be having a few of the business branches from which these Ottoman's
would be hanging up. So we are going to be
having in three arguments. So I added the first
run, left side, right side, and now the second
one in the center space, you can see the outer little tilted and inner diagonal manner because we are
going to be having the highest mode
from that branch. So the center is quite a big one as compared to the one that
we added on the right side. Now on the left side, I'm going to be adding in the smallest element
of all the three. And it's going to be tilted
towards the left side more. So the total ornament is a little hidden behind
the center one. You can see I've added a little just behind
the center one, giving it tended to shape. Now to the centroid
of these ornaments. Just adding in little
details for adding in Eden patent onto these are
little Christmas ornaments. So PMAC fill this with a very light handed
pencil sketch so that it's easier for us to heightened shackled
months when we begin painting in now rest we are going to be
having in the business G's are hanging out in
between from these, which we will detect maybe adding in with the beans itself. I wouldn't adding much of
the pencil sketch for this. So this time false, I'm going to begin painting the Christmas
ornaments one by one, and then we'll be
adding in the back row. So for the first one
on the right side, I'm going to be using
in the violet color. You can mix in your blue and red if you do not have a violet. Did agree, does NBA little speeds that we have marked
out with the pencil on the automated even
leave that blank while adding in the popular
color for adenine, the violet color, I'm
going ahead with the wet-on-dry technique because
it's emitting smog species. Lastly, I don't have much
to add except for that. You're not adding in
the DACA highlights on the edges right,
of distilled bit. So that I will add in a few
seconds nato, so close, just defining the thought and the block and sheep
with a violet color. Now I've been just pick up
a little bit of the beans, be an adult to my violet color, and begin adding it
onto the edges of this autonomic so as to give the DACA highlights
onto the edges. So you can see I'm just using the FIB and adding
it onto the head. Use analytics to watch that
I CMV at the bottom spaces, but I would just add lips
enough the highlights. Now next I will begin painting the ultimate
in the center, while also for the
sender ornament I'm going to be using in
the dominant jet color. I already have this color in my palette from the
previous exercises. So they just begin
adding this color into the top and the bottom
space of this argument. We would leave the
sender's piece of this ornamental to empty
at the moment. And then once we
are done adding in all the details on to the
top and the bottom side. After they dry, you
would add the US entered the field and
to these arguments. Now, when I'm adding
the red colors, when I'm going to head into technique wet on
dry again because. The smallest piece, just
that we are going to be adding in some darker
highlights with the brown color. Now to add the
darker highlights, I'm going to be picking up the brown color
and mixing it with a little tint of red and begin
adding it onto the edges. Make sure you use
a smaller brush for adding in the
darker highlights so that you do not drop a lot of color is supposed to add. These are related by the
Ottoman distilled way. So just adding little
highlights this time and giving little sheets as well
into this Ottoman space. Now whether we feel
that the blending is not happening on the
palate is Doug use a damp brush and
blend it quickly so you can see just using
a damp brush off with me, I'm able to even blend them. Now this time you can see the darker shadows
in a little odd, defined manner, giving you
little shapes to the ornament. So again, remember these
browns that are made, I'm laying in a darker LEO which is smaller than the
force may also, you can see how faecalis
visible in this Automate first ejecta
allosteric and medium brown. And the third layer of
the dock is from dawn. So that is how we are adding in the layers now into
the right one as well, onto the edge, I will just
add a little more darker. So my species still
backends and even do add these details
even now in these, if your pop an ornament
has already dried, then do not our DC didn't. Otherwise you may
just get in batches. Now in the Bhopal one, since this is still wet, I will create the light
dilates by just lifting up a little of the Palo from
the bottom lift space. Now in these, if your
paper has dried, you can give it the
surface and try to do the lifting technique. So just an added
shadow effect onto the bottom space of the Popolo on and on the top space as well. By doing in the panelists, I did not do the column listing just often in the
balance because I wanted to Carlos to set
an analytical so as to get a little
state onto the paper. Hello. Now I can begin adding in
the last ornament, but when you begin
painting the last Ottoman, be a little careful as it is attached to the red ornament. So when I moved me out
to the red ornament, Eigen leave a little space might and I would
fill that later on. For now, I'm just picking
up the yellow color. I'm going to either to do
the rest of the argument. If you want to be a
little extra careful, what you can do is wait
for the red ornamental dry completely and then being the
yellow ornament completely. I'm going to leave a little
space between both Winsor, yellow one as bad and
good one as well. We are going to be adding in the highlights with
the brown color. So you can see how a fine line or fight I
have left in between both the yellow and the
red ornament key thing in that little space so that the colors don't bleed
into each other. Later on, I would even cover
that up and define it. So now just going to add in a little highlight to
the yellow ornament. So before beginning to add in the highlight to
the yellow, orange, I will begin painting
the Santos be softer red and violet ornament. So I'm just laying a very
light layer of the loop allo, and I'm just going to blend in and create a very light
tone of yellow color. Now, hello, ornamented,
still a little wet. I'm waiting for it to settle in. And after that, I even begin arriving in the Brown
highlights onto that. Till then, my red
and violet elements are completely dried. So in the sentence piece, adding in the yellow lines, you need to go very carefully, uses smallest size brush
and run very carefully. If you want, you
can directly mixing a lighter tone of
the yellow color on your palate and then apply it rather than
for supplying the Palo and then diluting it with
water just as I did it. Now I have an even blend
this little speech that I have because my dad is
completely dried it. So I will just leave it there. Yeah, Luca low as I feel it is a little dry for me to
add in the highlights. So you can see for
adding the highlights, you can even revert this office and begin creating
in the highlight just near to do a
point where the red and the yellow
ornament is meeting. Be a little careful. Now picking up the brown
paint onto the bottom side, I'm just going to add
in little effect. I'm going to blend it using a damp brush and
little of the yellow Carlo. So you can see how using
a damp brush, I just, I knew that the bound banner at the bottom species and blending it when we take a look Hello. Now we need to wait
for all of this to dry before beginning
to paint the hair. So now my ornaments
are completely dried and I will begin
painting the background. So for the background, I'm going to have the
debate on dry technique using the green color in a
very liquidy consistency. So I'm using sap green color, your innovative night
diluted consistency. And I'm going to be and
do the entire background. So you can see I'm picking up very little pigment and then just using water to dilute this color onto the
entire species. Now neonatal ornaments
just be a little careful. So what I'm doing is other
because pieces that I have, I'm forced been doing it
with a bigger size brush. And then once I'm
done with that, I will shift to a smaller size. Brush around the ornaments
beads and blended perfectly. Now you can see how easily the palate is being
blended because I'm using this bigger size brush and also am again and
again over water onto the previous layer so
that it does not dry and I do not have any
sharp edges in between. If you want, you can go ahead with the wet-on-dry
technique here. You can force needed money
onto the entire species, leaving the Ottoman
space are perfectly dry and then you can go ahead
and add the green color. But I prefer going ahead with
the wet-on-dry technique. You're so as to show you that how using the wet-on-dry
technique for largest pieces you can
keep the peoples didn't bet van carefully around
the edges and also, you know, but just by running your brush over and
over again the species, you can get the people back
and a Y, two sharp edges. Now shifting away smallest
sized round brush, I will begin adding in the beam Paolo onto the edges
of the Ottomans. So now near the edges
of the ornament, I'm going to be adding
into clean palette with a little darker
so as to show a little of the shadow off this green color as well
because of the Ottomans. Gets smaller size
brush so that you get the ball rolling into these ideas around
the Ottoman space. Now under this green, I'm going to be adding in some darker highlights using
an adapter being taught. So I'm using in the Van
Dyke green color you are you can go ahead with
any document though, either a dark green color,
glucose green, viridian, Jean Valjean, any darker green of your
choice that you want? And just add some darker
highlights onto the edges. All of this is again wet on wet, you can see automatically, I'm going to be having in
blue tones of green at places creating the perfect
or Christmas wives coming it onto this, we're still going
to be adding in the business news
with the darkest tone and they would still be visible onto this dark green NewRez bed. So now ornament speeds
you can see it's more of the light color
creating in the noise effect. And around it we have
the Docker calumny down. Now while the green color dries, I will begin adding the
details into the ornaments. So first using the red color, just adding a little
pattern onto the center of these ornaments where we have
been at the yellow color. Make sure that the yellow
color is completely dry. I'm just adding a little
spiral effect. Also. Make sure that you do
not rest your hand onto these green color that you have been there because
they are still bad. So you need to run it.
It'll definitely by adding these details
into the arguments. Now let's read for
the green layer to dry completely so that we can begin adding in the
Christmas leaves effect. So now my green V0 results
are completely dried and I can begin adding into effect
with the Christmas list. So first I'm going
to be picking up this brown color which is
already on my palette, mixing in with a
little thin dark red, which is already
onto my palette. And I can begin adding
in the branches first, make sure that you're being
videoed is completely dry. Otherwise this
column, you begin to spread and have a
little smudgy effect. So in order to make sure, make sure that you have the green layer completely
dry in-between. You can see I'm picking up
more of the red tape for adding in these of
branches first. So you can see very randomly, I've added a few branches, some because I'm shorter
branches popping up from that one main branch
and then from the shorter branches as well as some smaller
branches popping up. Now from below the
ornaments as well, I'm popping up a few
branches trying to show the leaves from behind
the ornaments as well. Now, adding the
leaves I'm going to be using in the sap
green color first. So I'm going to be using in the sap green color in
a dark pencil syncing, mixing in with a little
bit of a darker green. So this is going to be like the first layer for the leaves. Then we would even be adding
some darker highlights. So just simple leaves that
we have been using in for the previous Christmas
Eve effect as well. Just pulling out the strokes are creating simple bomb
leave effect as well. You can call them.
So just going to add them with dog medium
green bone first. Now you can see
this green is less diluted with water hands
and standing out so vibrant even on the green layer that you have already added with these same sheets because all the false Niels Bohr
in a diluted consistency. Hence they are in
the lighter tone. Now when you're adding
intervene leaves it with a darker tone off the same palette with
adding less or photo. So quickly going to add
in a few of the leaves fall onto the bottom and
the top side as well. Hi. So in between you can see I'm pulling out some of the
leaves very randomly from the pieces that
are even have an added in the branches at
certain places, just adding of your
stroke effect randomly onto the branch without
creating an elif sheet. So this is already
randomly that I'm adding in creating
the plasmas branch. So it can go very random
naturally anywhere as you want. We're even going to be
adding in a few often leaves from in-between
the Ottomans as well. So quickly the false
they are asked to this, we are going to be adding
in the highlights as well. Now I will just take my board so that it's easier for
me to add this on, get the perfect shape. Otherwise it would be
difficult as we would have to. And onto the green color, which is still red at
the bottom leaves space. So that is why I would always
recommend all you know, that you can then,
then easily to get the perfect angles as bad. So I'm almost done adding
in a lot of branches. Still a lot to be added
onto the left side can quickly add them and then we'll shift into
the darker tone. Now in between the
on-demand you are as well. You can see I'm adding in symbol stroke effect trying to show some leaves
popping out very randomly in-between filling
in the space between the red and the yellow automate. We know they had ornament
as very quickly adding it. So you can see how quickly
I have added these needs. And you know, very simple one not running much about
the detail, nope, pulling out ways and builds towards at least as you can see, I even have a little
dry brush look beneath. All of this will make the
painting look more natural. So do not worry for perfection. Just go ahead with
Duflo and keep adding these needs vary randomly into the
entire painting. Now at the top space
where I feel there is a little empty space just going to add some of the
leaves as well. So now, using in a little more darker tones
mixed in with browns, I've just mixed in a little
of my green with the brown. So you can see such adopted. Now with this dartboard, I'm going to begin
adding a few highlights onto the previously added
gain needs as well. So you can see I'm overlapping
them and now I'm even making these Neil's move on to the Christmas
ornaments as well. Now again, at the bottom right, you can see a little
of the business needs with a dark color
overlapping the previously. And moving from behind
the Christmas ornament. Now you are in between the red and the yellow
ornament as well, just adding a few
highlights with this darker colonies moving very randomly
overlapping each other, triangle fill in the space
and show more of the leaves next to each other near to
the again ornament as well. Just adding in a line
and triangles or half of the leaf from behind this
ornament popping out. So you can see just
as we begin to add in the darker highlights,
body's needs automatically, all of it begins to get so
much more of the shape and ODE didn't look creating more
depth into the painting. Now the final thing, Let's
begin adding in this no details onto these ornaments and then splat to the snow. So first I'm going to be adding a little snow badges onto
the top of the ornaments. I'm going to even adding little highlights with the white quash onto these ornaments. And then just restructuring a little snore using
in the right brush. And I'll take consistency. Now just beginning to add a little highlight
with the white quash on to these ornaments, you can see very little details to create some highlights. Lastly, onto this
yellow one as well, just at the bottom space you can see very
small highlights that I've created to show the right effect onto
these ornaments. Now, just going to quickly use a little bigger size brush and
splatter some snow effect. And then even going
to be adding in little snow patches on
Buddha leaves as well. Make sure that your
leaves are completely dry before you begin
to add the patches. Otherwise, they may begin
to be activated and widen the mix together and give you a
little greeny batch. So first flattering in the snow. So I don't feel like adding in the snow patches onto the leaf. So I will leave
it to you because I'm happy with this plateaus. So let's remove the masking tape and see our final
painting for D 25. Another beautiful Christmas
themed ornament painting. I hope you guys are
enjoying painting all the Christmas illustrations
with me into this class. So you are, is our
final painting for D 25 of the 30 days
watercolor challenge. We are just five days away
from closing this challenge. I hope you guys are
enjoying it and I will see you guys to join me in to the rest of the
five days as well. Thank you so much
for joining me.
35. Day 26 - Christmas Gloves: Hello everyone, Welcome back to the 30-day watercolor challenge. Me. I wouldn't D 26
today and we will be painting this beautiful
Christmas gloves from today. The colors that you need for this class project
is red, yellow, brown, sap green van, the green beans, green, black and white quash. We would first be
creating the misty back down and goes also of
Cleves wet on wet. And then moving ahead
after the dry ice and add the details of the leaves
and the glass one by one. So let's begin painting
to these class project. So I have made
before they've done. So we'll just begin with a very small pencil
sketch off the gloves. You're on the right side. So that labs are going to be hanging in from
the branch of the Christmas G. So I'm just
going to add rage our feet. Oh, Christmas branches. The details we will directly
be adding in by being done. Now just going to add all four loop from which these cotton gloves
will be hanging it. And from this I'm going to be showing in the
prisoner's gloves. So VFB into a pair of gloves. So basically it does again, is hidden behind the first one. So just going to make a
little of that being visible from behind the soft first
lab that we have added it. Now in the rest of this base, we are just going to
be having in a lot of Christmas branches
coming up too. I'm just roughly mocking a
few of the branches rest of depth now we'll directly begin while adding in the dy dx. So I didn't begin
with a clean coat of water onto the NIOS office, just leaving the gloves
area as much as possible. Even if you run a little into the glove areas, do not worry. We can easily cover
up those mistakes out there because we are
going to be using in a dark red color out there. But as much as possible, try avoiding to run into the glove species and improve
the rest of the area. I'm going to go ahead but
top-line photo photo. So I'm done adding in the
clean layer of photo. Now I will begin painting
the background first. For the background I'm going
to be using in the Naples yellow and the brown color
in a very light consistency. I'm just creating a very
misty kind of a backdrop. So first time beginning in with the Naples yellow
color directly. And I will just begin
adding simple lines onto the left side with
the Naples yellow Palo. Now I have the bottom space. I'm picking up a little bit
of the Payne's gray color. I'm just going to blend it
with the yellow column. Just trying to create a blend between the beans
green and the yellow. And even on the,
you know, I have, I did a little badge of the Payne's gray color to
create the mistake banknote. Now I do know this median. Now out of these colors, we're only adding it
onto the left side, because on the right side, we're going to be adding in
the blurry background with the green Palo so as to give it more depth to the business
needs that we'll be adding in. So why Hanoi and beans
green on these still wet? Just begin adding a layer of very light green phone onto
the right side completely. Just to not add this
green Palo into the gloves space because we do not want any underlying
color into the glove area. Now in-between you can
see I'm even adding some rough big leaves or
creating some soft backbones. So basically this
all is going to act as the force
they are after this. We're going to
still be adding it. We also want this to
get in more depth to the Christmas leaves that we
are going to be adding. It. Now next, I'm just going
to pick up a little of the brown color and act
of water right side, I'm going to add a little
depth with the brown color. You can see all of
this instead of radon, math might be placed in backend
time even for achieving the soft details and
Buddhist painting is dry, it you will not be able
to achieve the soft back down V deals
onto the right side, even at the top speeds, just giving a little of the
Brown highlights again. Now using a medium green door, vinyl background is still wet. Just add a few of the
Christmas leaves wet on wet so as to have them as
the soft background VDS. So you can see I'm adding
in the background leaves, I'm adding it very big
and very randomly. I'm not worried much about the details out
you're now seeing, even on the top side, I'm going to add in a few
of these leaves major, using the tip of my brush, I'm adding in these VFD did this is just as I can nail
for the Leaf Back Rome, after this oven,
everything dries it be, would it be adding
in further detail leaves on top of this? So you can see at the top side
we've taken these leaves, Stendhal almost left end. Now just going to add
a few more leaves wet on wet at the bottom
side here as well. You can see I'm moving
reading, I mean, different detections
for adding in these leaves by Don might be posted in bed for me to live in all of these
needs and the DBS. Now around the globe, I'm creating the
darker green effect so as to add in the shadow
effect for the gloves. So philosopher named
Violet is still bad. I'm adding a darker green
depth around the glass area. Now one last detail. While this is still
valid, I'm going to pick up some
dark bone fallow. I'm just going to add a
few branches wet on wet. Also asked to have
the soft edges for the branches as well, very randomly just dropping
of your branches wet on wet. Now let's meet for
all of this to dry. Then we will begin adding the
further details one by one. So now my painting is
completely dry it and I will begin fading
the gloves one by one. Suppose I'm going to pick
up a very dark tone of the red color and begin painting the gloves at the
backside first. And then I'll do the
edges of this glove. I will give it for the
darker dawns so as to make a distinguished from
the front layer of the gloves that we
will be adding it. So automatically the
background layer of the blood is going to have
some shadow effect into it. So fast I added a layer
of the red color. I'm using the
smallest size brush. I'm using the permanent
red color without adding much of water in
a Word doc consistency. Now into the edges of
this background gloves, I'm going to add a little of the brown color dodge so as to give him the
Docker depths. So you can see using the bond sienna color and just
using the tip of my brush, I'm defining the
edges and giving DACA decks to this
background block. So Astro van V been
the front love automatically even have
a distinguished look. Now we need to wait for the first glove type VFB
interrupt the backside to dry in only then we can paint a glove on the
front side there. Then let's begin
adding in a few of the Christmas leaves
in the background. Now this time I'm
going to be using in the sap green Palo in
a dark consistency. And I'm going to begin
adding the Christmas leaves. A few of them. Now
onto the left side. Now when we're adding this fine, uh, Leon of the Christmas Eve, you can see I'm I
think it didn't have much detail. I'm using. My brush and adding in the nice effect so as
to give it more depth. Now the next one you are, I'm going to paint
it near to the lab. So just be a little careful. You can see the red color from the glands seep
into the VIN color. I will correct it later on. But in case of your
rectangle is to read, just be a little careful
that you'll know you'll do not let the green color
go into the red color. The red color coming into the green space is
perfectly okay, but the green colors should
not go into the vector space. Now do this as well, just
swapping out the leaf effect. Now in between you can see I'm adding some of the beam needs with much Dhaka index so far that I've just mixed
in and they don't. And Jeff Brown to my green. So automatically I get
another darker tone green. So you get little
variations and do this. I think some fit that
backward lean bonus bed. Now you can see I'm moving
it on Wednesday down to me by adding in this
Toyota attorneys, we have student debt
to add a few more leaves your onto the right side, so I can quickly begin
adding them one by one. Now as I'm moving towards
the bottom right side, you can see I'm
adding these needs in quite a big odd size rather than what we were adding
previously at the bottom, I'm going to be adding
in one of the needs with the brown color itself
because in the background, just as we added in the bloody
brown color at the bottom, I'm going to add one of the neat effect with
the brown color. Now just a few more
leaves in between your and then even be
painting in that love. And that mean just be left
to give the full effect. Buildup labs and then
splatter some snow and given us know badges to these leaves that
we have added it. Now you can see my knees are
moving in random directions, also asked to give it the more natural look
as much as possible. So just pulling out a little
of the last leaf effect, your InDesign does
BCE where there is little gap left and that is it. Now what I will do is I will begin painting in the
second glove now. So my first plot is
completely dried, and now I'm going to use the permanent red color
without mixing in any brown. So you can see automatically
that background glove is now offer darker tone and
the front glove is awful. I dot dot because of the colors that we used in the
background law. So automatically the brown color there has given
it a darker tone, adding the shadow effect of different glob onto
the backlog as bad. So now I'm just going to quickly add in your be very careful. Uses smaller size brush. Now do the background
glove as well. I'm just giving a
little highlight again with the lighter tone so as to make it in proportion with the front clock
that I have added in. But you can see
automatically it will be our own docket and
the front glove, and exactly That's what
you'll need so as to make the distinction
between both the glass. Now using white gouache, I will begin adding in the BDS. Speeds of the gloves. So first I'll begin
painting this handed from which the globe
is hanging on the brush. So I'm just going to give it
a little flow of 40 effect. So I'm just dabbing the tip of my brush and leading and
written for like look, I'm going to paint the
entire loop from which this is how an EQ on to
the Christmas branch. Now at the top space also I have added in the league
and white quash. And even for the bag glove, I have added the
whitewashed Riyadh. Now I'm just going to pull out little effect into
the glass area. Make sure that your expats
off the glove is completely dry before you begin to
polit this little body fat. So just using the tip
of my brush you can see I pulled out that effect
leading the profit, oh sorry, effect on the
dogfight space of these gloves. So on all the edges I
pulled out that 40 effect. Now just using the green color, I'm going to begin adding in another layer of the knees
your onto the right side. So now this time the green is of a much darker Columbia
going to begin adding it much bigger
leaves this time. Because your IV that
the two leaves are kind of a little messy
so as to cover them up, I'm adding in this
bigger leaf so as to get little more better
view to the spin day. So you can see
just one dark leaf can add so much more
depth into the painting. Now I'm just defining the edges. Then after this, we just need to wait for the entire
painting to dry in and then we can begin fracturing does no effect
in blue this painting. So let's wait for
this to dry now. So now my painting is
completely dried and I can begin adding in this noise
effect into the branches. And then I will just black
and some snow and even BID with our class project
for the 26 as well. So I'm using medium-size brush and eigenfaces begins
flattering this note, make sure bioprinting is trying to otherwise
the fellows may begin to blend with
the white and may not leave you with the
white snow effect. You can see just medium
small effect that I'm getting splattered it
from a little distance. So automatically you
will get to or you know, the smallest no effect if you
want because no effect on, because no badges Flajolet from New York and applause of you and pick up more of the pink in
much liquidy consistency. Now just going to add some patches onto the leaves
that we have added in. For that I'm using a
smaller size brush. And just to undo the
center of the leaves, I'm going to begin adding
little small batches. These leaves, very thin line, you can see automatically
then this is adding a lot more detail
and do the entire painting. So you can see that snow patches are quite
thin and not much. So make sure not to add
to take off the patches. So just undo all of the
Christmas leaves that we added. I added in the middle
of the snow patches. So that is it. Now let's
remove the masking D and C final painting
with those clean edges. Make sure that you remove
the masking tape at an angle from your people so that you have those clean edges. Main theme. So you order is
a finite being dig for D 26. I hope you guys enjoyed being this beautiful
Christmas gloves, simple and yet so much
fun to paint the law. I will see you guys into the
D 27 class project tomorrow. Thank you so much to each
one of you for joining me.
36. Day 27 - Wreath: Hello everyone,
Welcome back to day 27 of the top DD
watercolor challenge. Today we are going
to be painting this beautiful Christmas
spread by the door. So the colors that you need for today's class project is red, yellow, brown, green, blue, violet, indigo, sap green, van, the green beans, green, black and white goulash. We would first picky thing, this guy and the
background space. And then we will
begin adding into details into that modern species and the granite and the red stack we are
going to be painting. So let's begin painting
today's class project. So for this class project, we are going to be having in quite lot of a pencil sketch. So first I will begin
with the pencil sketch out your onto
the right side. So on the right
here we are forced marking of who didn't
walk onto which we are going to be giving in little detail and we are going to be adding in this no effect at
the top space of this area. And onto the entire left side
we are going to be having integrated kind of a good look on to which we are
having a Christmas. My timing in even onto this
saw wooden wall that we're adding in your we are
trying to show in a lamp in front of
this wall space. So just giving you
that the sketch for all of these details
into all of this, we even did actually be
adding in using the beans. Now leaving equal distance, I'm beginning to add in this
grid or detail to this time, the doors of the
grill that we're going to add in the
metal grill, the debt. So now I've just begun ID into further details
to this grid. And then on top of this we would add in the Christmas red. And then it is the
extra lines that we will be having because
of the green area. So this huge object
on the left side. Now whenever the lines of the graylag going
into the red area, just get rid of those
pens at night so that even by mistake from
beneath the Kahlo's, these lines don't be visible in the center of the gray
line that you have. Let that be because that space is going to be the
background space on me. Now at the top of the red, adding in more detail this time. Now, let's begin to add in the father details
into the prison door. So just type the dot post ID
part is on dynein needed. Then again, I'm going to add another horizontal line
at the bottom side. And then in-between what these horizontal night, I even begin, I begin the inverted U-shaped to add in
more detail to this. Now last year at the border in-between the main grid lines, just adding another line
to add more detail. And that is all via an ID
with our pencil sketch, just one more line, that eigenvector
distinction between the sky and the landscape. So in-between the grand space, I'm going to back out the line that will act as
our horizon line. So now this bottom
space is going to be kind of design space that we are going to be showing
from behind the door. So I'm going to begin
with the import of Bordeaux Eigen only apply the
water into the sky space. Now, uh, you need to
make sure that you do not run into the wooden wall on the right side
and that you'll be not even done and do
the fist misread space. Rest of the species if you
run also, we can cover up, but in these two spaces do
not run the water. I know. I'm just going to
apply the layer of water below the
horizon line forced, the grid is going to be
off the black color. So any color running into
these grids will be perfectly or as we will be easily
able to cover them up. Now floss time beginning in
with the queen rose color. And I'm just going
to apply a layer of this when nose color into
the top space of this guy. Then I'm going to begin using in the violet color and
begin from the top space. I'm going to blend it
with the pink color. Later on, I'm going
to be adding in the DACA Carlo with the
indigo color into the sky. It more darker deck. For now I'm just blending the violet and the
windows color. Then the horizon
line I've inflows died in the year of
the violet color. You can see I'm using the violet Kalina medium
consistency for the false now because we will be
adding the darker depth using the indigo and the
Payne's gray color later on. Now make sure in-between
the vector space, this guy is running Dwight
in the sky details there, and then otherwise it may
look out of proportion. So now I have a next big and
picking up the Docker dawn of divided color and add another layer
with a darker tone. Now. Now I have picked up windows color, inner darker consistency, and this time blending it
with the violet color completely creating
more pink space in the center of this guy. Now, either begin picking up the indigo color and I will begin adding it for at the top and the bottom line type is at the topmost piece and at the bottom near to
the horizon line. And in-between, I haven't
tried to the blend off the vine it and the
pink color itself. So very lightly you
can see I'm running the indigo follow on. Do they send us b such that the pink species
didn't maintain? So this is called the
glazing technique. You need to go with a
very light time such that the bottom layer color is
still visible underneath. Now been this guy dries, I can begin painting this one. You are on the right side. So first, beginning with the
shades of yellow, orange, and one Sienna plus to add the namespace I'm adding
in the yellow column. And then we'll begin adding
the audience on today, just creating the effect
of the light falling on to the area has been and I'm
running with the technique, wet on dry because it's the smallest piece and I have only three colors to add in. So just make sure to keep
the blending effect, also an eigenvector bond cnf aligned to the
rest of the space. I will make sure that I do
not blend it with the sky. So I've already divided
line out there. I would add in later
on when we add in the details to the 180. Now you can see very
carefully I'm running near to the sky because
my sky is still wet. I have left a little bit
Brightspace, if you can see. Now, I didn't blame the orange brown and the yellow
bell and create a one defect on
the rightmost side because of the light that we
are going to be adding it. So I've been run the same colors again, that's the yellow, orange and the bond sienna, and get a perfect blend
between all of them. So when you want
the blend run from the Knidos color to
the darker color. So automatically the light of love and not being a didn't. Also you can see you need to run your brush multiple times to get the perfect one defect and the blending
between all of them. So every time that I
pick up some fallow, I clean my brush before
running it again. Otherwise, the darker
colors may get laid onto the lighter tones and
then it will be very difficult to achieve
the dawns again. Now writing the brown
color is still wet. I'm just picking up a little of the Payne's gray color
blended onto the edges, giving in the Docker
debt onto the edges. So you can see just using a damp brush and blending
it onto the edges. I just use the tip of
my brush and I did very and beans we
only on to the edges. Now just to add
the bottom space, adding some darker
neckties benefit very light tone of the
Payne's gray color. You can directly use a darker
brown bone if you want, if you're not blended with
the Payne's gray color, just near to the sky species where the sky on the
wall is meeting. Just be a little careful. Otherwise the balance may
bleed into each other. Now let's meet for
all of this to dry completely before moving ahead. So now everything is
completely dry and I can begin adding in the next
details into this being paid. So the next thing that I'm
going to be painting is the bottom layer for that I'm going to be using
in the brown color, mixing with a little
touch of wire to give the little violet effect into the bottom land area as well. So fostering, writing
a clean layer 4 dot, and then I will begin adding
the kalos one by one. So first I have picked up
the Avante and Apollo, make sure near to the
skies base will be a little careful and even
around the breath, be a little careful. In the center of
the retina again, we will be adding
in the same color. So first adding in the MSN
Apollo onto the entire space, then I even begin
picking up a little of the violet and the
indigo color and get darker next to reflect this high-speed into the
bottom media as bed. Make sure that your
whitespace and the sky is completely dried so that
when you begin to add this, the colors do not
seep into each other. Now picking up the violet color, I'm adding in the
DACA highlights. So you can see how carefully I'm adding in the violet color and I am and even overlaying
it on to the brown color, giving in the glazing effect of the sky onto the land area. So just blended in
such a way that the brown underneath
also be visible. Now I'm going to pick up
the darker indigo color and begin adding it on today edges
and blend it veil again. But make sure that you aren't the indigo color such a way that the violet color and the
brown color still be visible. So you can see I add a
very light layer over to the brown color such that the ground is also
still visible. Now in the center of the
neck variables again, the namespace I'm going to be painting in with
the same method. Your I'm going ahead
with the technique wet on dry because it's
quite a small space. And I will quickly
add in the brown, violet and the indigo
color. Now not body. If you run into the grid space, it's perfectly okay
as we are going to be having it with the
black color later on. So it's okay if you
add the color there, just be careful of
not to run into the red and the booth space
as much as possible. Now just adding the violet and the indigo color into
this space as well, and getting the perfect
blend and effect of the sky. So Victor, darker
tone of indigo, ribbon detail and around the neck I'm giving it the
Docker effect already. So especial, the shadow of the red and the bot
that we have added. So just on the edges add the
darker tones and lighter, darker dawns be more
prominent onto the edges. So I automatically, after
you've been in the red, this will begin to act as
the shadow to the red. Now let's begin adding the details into the
wall one-by-one. So fast at the top of
the one I'm using in the bond on Bokeh, innovative
medium consistency. And I can paint
this little block out here. At the top block. I'm just going to showing
the eyes effect directly with a very light layer
of the indigo color. So to this also just adding little more depth with the
indigo color so as to show more darker data and
more of the snow and the wall if sky effect
on the wall as well. Now using the
Payne's gray color, I will just begin defining the outlines of this lamb
that we have added in. I'm going to use the
Payne's gray color in the thickest consistency
that isn't a datastore. So as to get a good look
to this lamp that we are having in your so I'm just
going to add the budgets. The center light that we
already have is going to be the only light noble IPBES that we will be adding
more defining in your. Now at the bottom of this line, just adding little
details to the land. Now using a mix of the Payne's
gray and the brown color, I'm just beginning to live little more detail to this one. So you can see I'm adding very
crooked lines in-between. I'm lighting this
brown color and I have the light effect from there
and picking up little of the brown color so as to
show the light effect onto this block area that
we're trying to create. Make sure to add
these lines quite crooked as you can
see, very randomly. And I'm trying to lift my
brush in-between places. I'm giving tenor lines and I
places some thicker lines. Now around the light area, I will just lighten little of these lines so as to show
the light effect onto the wall just
readily than lifting the Palo Alto brush and dabbing it off before
picking it up again. Now see that I can begin
adding in the brig details, creating a break on to this one. So first I'm giving it
an edge so as to define a distinguished Lee from the green area that we are
going to be having it. I'm just using a damp
brush and blending it with the whitespace so
that you do not have a very prominent
kind of edge. Now this using the same color, a little darker
consistently and beginning to add in the big
D then one by one. So basically, in
the first layer, you add two blocks forced off your knowledge and
five from each other that in the next slide and
begin adding in this line in-between the two blocks automatically creating
in the brick detail. Now again from your older, if you want to show
the light effect, you can lift up a little of the PAN-OS and given
the light effect. So now though some
of the bricks, I'm just adding in
little layer of the color again to give
more depth to the one. So just darken some of
the next two given B. Then, now I will begin
painting the top of this one. I'm just going to leave very
little obtain Deco color. And now I will just
denote it with water and show it as a layer of snow
onto this entire top speed. So just a very light
diluted bone of indigo dark is what we are
adding in your laptop space. At the bottom side, I'm just going to add little
of the darker shadows of this indigo color
to debit the ISPs. Now let's wait for all of
this to diet only then even begin painting the final details and
put up being day. So now everything is
completely dry it and I will begin adding in the further details into the painting. So I didn't begin creating that space for the ornaments
into the red force. So I'm going to add in some
yellow and red spots so as to mark them as this piece is for the
Ottomans and do the painting. So very little and small dots, five from each other. I'm going to add
them, some of them, you can add it onto the
edges of the Veritas bed. Make sure to not add any token, not too much right now
because you still have to add an image loved to
read ornaments as bad. So I've just marked
out this piece is for the ornaments nothin these dry. I will begin adding in the grill D1 using the black color. So I'm just going to pick up
the black calendar tick is consistency and I will begin adding the details one by one. So I'm just delighted by boat so that I do not leave my hand, or what do those ornaments
that I've added in? Now, I will just draw
the border little and begin adding it so
that dependent sketches clearly visible to me the now very carefully just using
the tip of your brush floss, defining the edges of this grid, then being done completely
with the black color. Now in case if you're not confident about
adding it directly, you can even mocked out lines
using a black marker for us and then begin adding
the details one by one. So now reading carefully, I will quickly fill
in all the graphs using this black color itself, just a building that is closest. While data, I'm going to create a knitting
lighter space using the brown color reflected light effect onto the
ground space as well. So now onto this grid near to the one I added middle
of the year no Palo. And now I will fill it
with a blank calendar, rest of the species. So on the right
side of the screen, I will automatically create
a little lighter species. Now in the C V, I will even be adding the horizontal grids
with the black color. Again, just be
careful that you use the tip of your brush
and go very slowly. Also, make sure that, you know you're using
a smaller size brush. Now when you are adding
the horizontal grid, make sure that you do
not lay your hands or what do those are
vague vertical grids. Otherwise, you may begin to pick up the black color and lead risk that the places now
at dawn is on Belgrade, begin defining the edges
of the red as well. Like I define the
edges of the bowl as well. Now you can see. I have my paper but
deep down onto a movie, but it's all face it
so easy for me to justify paper and
begin adding in db ds. Now in the same vein using
the same black color, but just with a
smaller size brush, I will begin adding the rest of the details into
the grid as well. Now, even the inverted U, I'm adding it using the
black color itself. You can see automatically
this drill daughter is beginning to get in so
much more of the details. Now if you remember,
in-between the red space, we have forgotten to add
in the grand detail. I will add it after adding in this top detail out
your because we need to connect those all grid as bad because the red is visible
in the sample space. So we need to add
a good day dental, make it look perfect. Otherwise it's looking
incomplete right now. So now before painting
that I will just add the fourth video
for the red so that this can also dry thing that we can add in the
black color later on. So first I'm using sap green
color and I will just need and do them die of reds piece adding in as the
falsely of other vec. Now make sure to
leave the yellow and the red species of which
we added previously. If you have little bite marks on because of the spaces
that we're leaving, it's perfectly okay
because as it is, we are going to be adding in
more detail onto the red. After this layer dries, we will add in the detail
to the vet by adding in a darkened and giving
the effect of CVS. Now till the first
layer is drying, I'll be in this green
with the black color. So automatically I'm saving a little of the time
so that, you know, some of the layers
can die in same day, even onto the right side. Now you can see
all the little of the black color that has
seeped into the green color. So I will quickly just lifted
up using a damp brush. No problem if you have
little darker depths into the red area because
we are going to be adding in the
darker tones now. Now, even this horizontal line just connecting it
there between the red. So now you can see
automatically by just adding the grill
detail and between the red, the bending as begin to
look so much more detail. Now I have picked up the
same sap green color in a darker consistency
and I've just begin to add in
the dark adapted. Now in the light and
the darker color, I'm adding some spiky notes onto the edges to give it a look
off the precipice red. So just make sure to leave
the red and the green, again, auspices of father ornaments to be visible in the
rest of this basis. Now you can begin adding in the dark codec using
this dark green fallow. And at places of the
light of invisible, It's okay onto the edges
begin given adding in this spiky look to create a Christmas leaves
effect onto the red. Now Father toward me
or on the breath, I'm going to pick up a
father darker tone of green. So I'm using the Van
Dyke green yard, which is the dark is still
enough green and I would just add father more
darker patches into the center of the neck
and even given it and more leaf effect on the edges creating more often
leave effect. Now if you do not have
a Van Dyke green color, you can simply add a
little of the beans, your black color to
yellow sap green color and create a darker green tone. Now, let's begin painting
the board space. So far the ball, I'm going
to lay down a layer of red color onto the entire
board space after this dries. And I even add in a little
detail to this using whitewash creating the fall and the light effect into
this board space. So for now, fill in
the complete boy area with a red color. Now Father lastly on the breath, I'm Father adding in a
darker layer of the green this time I've added a little of the Payne's gray as well, given very little darker effects on Buddha edges and the
Arduino board space. Let's do it for all of
this to dry completely and then add the final details
into this painting. So now my painting is
completely dry it and I will begin adding in the snow
effect into the painting. So first using the white
quash in a medium consistency I'm beginning does plateaus does no effect into
their diets piece. Later on, we will just
be adding a few branches onto the top left
side of the sky. So we will add that after
adding in this naughty disk. Now, using the
white color itself, we will be adding
in the Libyans and the snow patches in
between the green space, onto the red and even
onto the wall and the lamp space does
flattering this norm. Even begin adding in
the patches one by one. Now using the white quash, I'm beginning to add it. Let us know affect your
onto the whitespace. So just a big window. Use the tip of my brush
and beginning to add in the snow dripping
down this wall. So you can see I'm creating this no droplets at
the bottom space. Now, even at the top of this one where we added
the indigo palette, just going to add in
that moire effect, even under the lamp, just begin adding little
of this no badges detail. Now even on Buddha's
grew that we have added at the bottom
I'm adding ghettos, no effect and even
adopt species. You can see just using the
tip of my brush, I'm dying, don't show does know
being collected even at the top of the snow patches. So as to show in the FX noise, either end do this Christmas. Now using the whitewash, I will just begin adding
the details and do the revision of this
red tag we added in. So to that ball onto
all the six more, the effect that
we have added in, I will just begin
adding very light lines in-between nucleate
and mock distinction between each of the boy effect. So automatically
between the Beauford, you can see the details coming in because of these white lines. Now onto the top side you are, I'm going to be adding
in a moon this time a big white onto
the top right side. Now lastly, just
going to quickly add a few branches onto
the left side. So using the black color, I'm just going to add a few
branches popping out and then some smaller than just popping out from these bigger branches. And then above this as valid, we're going to be adding in little up the snow effect being deposited onto these branches. So first weekly out of luck of branches you are
together and then using the whitewash is
laid down little up the snow patches onto
these branches as well. Now quickly using the whitewash, I just need a little of the snow patches onto
these branches creating this no effect and does not deposited onto these
branches as bad. So now just some
finance nor the data onto the wall of
this though effect. And then that is it we are
ready with up ending for D 27. So you can see on the
one just add in the dense naughty didn't
and the breaks. And that is, we are
ready with the pin day. We are just three days
away from closing this RTD watercolor challenge of window landscapes
and Christmas wipes. I hope you guys enjoyed painting all the Christmas
paintings, these Ds, and we are left with three
more Christmas being things coming up for the next three
days into this challenge. I hope you've enjoyed
them as well. So let's remove the
masking tape and see our final painting with
those clean edges. So you are, is the final
painting for the 27. I guys enjoyed painting this beautiful Christmas
landscape with me today. I will see you guys into the day 28 class
project to model.
37. Day 28 - Cardinal Bird: Hello everyone,
Welcome back to day 20 of the capillary
watercolor challenge. Today, we will be painting this beautiful red
cardinal bird. The colors that you need for today's class project
is red, brown. Payne's gray, black,
and white brush. We will first be creating the Lafley background
and then begin to add in the golden details
and the board and the top branches and
then the final snotty, the hands into the pin thing. So let's begin painting
today's class project. What they've done onto
all the four edges. And before beginning to paint, then I will begin with the
pencil sketch for this one. So at the bottom side, I'm just going to begin
adding in wooden logs. As I move towards
the right side, I'm going to begin reducing the size of the wooden
logs gradually. Now undo that little
center right side. I'm going to be adding in the
cardinal board sitting in. So it's going to be very simple. We won't have much details to add an end to
the board as well. We are going to be showing
you this board sitting on do this wooden log and defend those just touched behind wooden look. Even in the face of the wall, we are not going to be adding
in much of the details. It's going to be a
very simple board that we are going to be
adding in and painting. It also is going to be
quite a simple one. The branches at the top I will direct me I did with
the Payne's day today. So let's begin painting
the sky first. I'm going to begin with
a thin layer of water. Do not worry about running into the wooden log space because the wooden logs are going
to be off the darker color. So you can move freely and
begin to paint in the sky, even if you run into
the board space, it's okay because the board is also going to be
offered a darker tone. So I'm going ahead
with a polynomial of order onto my entire paper. The first time,
beginning in with a very little of the
brownish green color. So you can mix in a little
bit of your brown and green. Or if you want, you can directly
use in your brown color. Now next I'm adding
in the red color at the bottom of the green
color that we added in. I forgot to mention the green color in their
lives because, uh, you know, it's more of the brown
bone that I'm going to be using now are very random. I'm going to run in
between the pins, gray, brown and red color. I'm going to create a very
light soft background into the sky speeds. Then on this we are going to be giving in the texture effect. Now on this, I'm just
when to begin adding a little more of the darker
highlights using the red color. So major, it's going to be
in such a way that I bought, bought the lighter and the darker highlights
into my sky space. Now I will just be foresee
about half a minute or a minute photo paper to dry
on later, not completely. And then I will begins
platooning in the water on Buddhist people creating in the blue for the
texture effects. So now after say half a
minute I started splattering. These are what are the effects. And automatically
you can see that blooms that has
been created and do the sky species
giving in detection of snow into the sky area. So if you were to have
splattered entwined, your paper was too wet, then you would have not got
this effect because the water would have just
begin to spread and because of the two wet paper. So just wait for say about a piece against our van minute, depending on the paper
that you are using it, fire people to drive, say around 50 percent. And then when you're
wasting 50% web, begin those fluttering in the blooms and New
York skies piece. So now you can see I've carved medium blooms and some
big problems as well, creating the perfect snow
effect into the sky space. Go very slowly step-by-step. If you feel that you're adding
in too much, just hold on. Now let's wait for this to dry and then we'll begin
painting ahead. So now my sky is completely
dry it and you can see the effect of the blues that we have gotten into this guy space, creating the four fixed
noise sky effect. Now let's begin adding in the details into the
wooden log one by one. So I'm going to begin using
in the onesie and Alcala, and I will begin adding in the
force they are into all of the wooden logs using
in the MSN alcohol. For these wooden logs, I'm going to hurt but the
technique wet on dry, that is I'm not adding
in a layer of water. I'm directly beginning
in with the beans. You can see at the top
of the wooden log, I'm giving you a
very rough edge to give it more often
actual wooden log d, d. So now I will
just paint all of these completely with the
bone sienna color first. Then by this is still
going to be wet. Either begin adding in
the DACA highlights and the darker details into
these logs one-by-one, and defining and distinguishing them from each other a little. So I'm almost done
filling up all of these blocks using in
the bond sienna color. Now ready randomly
using in a little of the Dakota end of
the onesie anaconda, I will just begin dropping in this darker pink
into this piece, creating DACA highlights
into the wooden log area. So I'm going to be dropping
this baby randomly and not wanting much
about, you know, how this is looking at the
moment we would be defining each of the logs need to run using and father darker dawns. For now just begin adding in the darker tones onto the edges. Now using the Payne's gray
Kalina medium consistency, I'm going to begin defining the edges of this wooden logs. So now, while this is still wet, I will just begin to
add a little darker, trying to distinguish each of the wooden logs from each other. To undo the top and the
side edges just ready likely going to be adding
in this darker Galileo. Now ready join me using
in the brown color, I'm trying to blend the
edges into the wooden space, trying to show what
the perfect blend in between the
darker tones and not have to shop darker
dawns trying to distinguish it to all your
not much prominent VIP. Now using the same brown color, I will just begin adding in the branches at the top space. So just going to be adding in a blend of all the branches. That's going to be some penalty caused by low, shorter branches. So I'm using the same
brown color and you can see I'm using the tip of
my brush for adding it. Nothing, no branches. And then then I want
a thicker edges. I just bend the bending of my brush to get those
thicker branches. For indices v, I'm
going to quickly be adding in a few
more branches. Just make sure that
you do not lay your hand or what do the
red wooden logs pieces. Otherwise, as we begin
to get lifted up. So you just need to be careful because that media is still wet. Now you can see everywhere
I'm dangled data blend off the ticker and the
thinner branches DD. Now in the next video, I'm just using a darker
tone of brown color and beginning to add in the
folder branches philosophy, I, I did all log of branches
bit then I dot dot. Now just picking up a little darker tone
of the brown color and beginning to live
in some DACA branches. If you want, you can just out in the middle of
the Payne's gray to the same bond sienna color and
get the darker brown tone. So now I will quickly add a few more branches using
in this darker tone. So you can see I've tried to add in the smaller branches has been popping up from these big O branches that I've added in, unfolded more smaller branches popping out from these
medium branches as well. So you need to strike a
balance in between all of the sides of the branches that
you are trying to add it. Now again, all willing
the smaller branches you can see I'm trying to add
in some takeover branches. So you need to go
step-by-step and try to show it a perfect
Branches Collection out. You're at the top right side. So I'm almost done adding
in the branches here. Now after this Eigen begin adding in the detail
into the board. So father bought I'm
going to be using in the Permanent red color.
So I've been false. Begin with the permanent
red color for the board, and then I will begin adding in the DACA highlights using
the Payne's gray color. So first let's begin adding into details using this
permanent check. Your all-time going ahead with
the wet-on-dry technique, I have not really done
any new era for that. I will directly be defining in the details using in
the Euro Freda Kahlo. Around the bottom edges, make sure to run quite carefully using the
tip of your brush, defining the shape of the board. So now even at the top space, you can see I'm adding in that egg border in-between
our left hand written by kapo using in the Payne's gray color for
adding in the Dakota EBS. Now using a medium consistency
of the Payne's gray color, I will just begin adding
the darker details at the federal and neoplasia phase, I will be defining
it very carefully. Now you can see when
the Payne's gray and the red is mixing
into each other, it's automatically giving you or darker tone of the red
color being formed. So you need to get a perfect
transition between that. Now even at the bottom edges, just starting in little
darker highlights, beginning though given
details one by one. Now when you add the
pain clinic Allah, your near to the Phase D, then you need to make
sure that the beak is of the red color Just on it. They loved the
Payne's gray color. And then again, you have to
use indirect color there. Now when you use the Payne's
gray car lender fees ADR, be careful that you do not have access or
Florida otherwise, it may cava then
diabetes as bad. So you can see how simply added just the
Payne's gray color, very lightly linear
but the B2C space. So that is it for the bar, you can see a very simple board
using in just two colors. I'm just defining
the details slowly. Now my wooden log is
completely dry it and I will begin adding in the
dry brush effect on Buddhism or didn't look. So I'm using the
Payne's gray color and using the
Payne's gray color, I'm just going to
be adding in very simple drive large detail onto this entire
wooden log space that we have it
going very slowly. Make sure you do not have
access of the otherwise, you may begin to
get in patches of the Payne's gray color instead of getting the driver's door. Certain places, if you get it in batches, It's perfectly okay. But you cannot get
a lot of them, so be a little careful. Now I can quickly add in these dry brush pattern on
both all of the wooden lats. And then we would
just be left to add in the small detail
into this paint day. So you can see I've got extra patch onto
one of the blocks. Ivan just covered it up later
on using the snore details. So that is why you have
to be very careful plus you need to be careful that you do not
have access pinned. Otherwise, you may begin
to just get badges. Instead of the dry brush to do important things by adding in the dry brush
is that you should not have excess paint
and always dab off the excess paint and water before running it
onto the paper. Now further using
the darker tone of Payne's gray and
the brown color mix. I'm just trying to predefine more details into this
wooden log space. So I'm just trying to
add a little detail into these wooden logs
using in the darker color, you can see this within
this DACA camera is not same thickness
throughout the warden law. It's indifferent
level thickness on different wooden lats and even on Baldwin would
then log itself. It's not of the same thickness, so that will give Davide
to its natural look. So go ahead and add these darker details
onto the wooden log. So I just define the beaker little more with that
bright red color. Now using the white quash, I will begin adding in
the snow patches onto the modern spaces and
the branches, so forth. Let's begin with the branch
since they are dry it and then the dry brush off
the wooden logs mail to dry. So just going to
add let us know by just onto the branches quickly. So it's not necessarily
that you'll need to add them to all
of the branches. You can add it to a
few of them and leave a few of them without
these two batches also, that is perfectly okay. Now let's begin adding
in the detail of the snow onto these are
wooden logs as well. So Foster, I'm going to add little dry brush and along with the dry brush I'm going to be adding in the
patches are as well. So we are going to be
creating small patches of snow being collected
onto these wooden logs. And then at the end
we are going to be having in this platter
off the snow as well. So maybe roughly randomly
wherever you want, just that little
patches of the snot, even at the bottom space
of the wooden log, we are going to show
in some snow being collected around
the wooden blocks. So I'm done adding
in the patches. Now using a medium consistency
of this whitewash, I will just begin splashing
in the snow effect into them, tie up in the even in the sky space and the
wooden log space. So just quickly
splatter some snow. And then we would be done with this painting from D to E. We are just two days
away from closing this 30-day
watercolor challenge. I'm loving to see all
of your class projects, so keep them coming. So that is f. Now let's
remove the masking tape and see our final painting
with those clean edges. Make sure to remove your
masking tape against the paper and after your
edges are completely dry. So your final class
project for D two and D, If I hope you guys
enjoyed painting this, I would see guys and do the
last two class projects.
38. Day 29 - Christmas Car: Hello everyone, Welcome back to the TDD watercolor
challenge, Vietnam D 29. The second last meaning
of this challenge. Today we will be painting this
beautiful Christmas scar. So the colors that you need
for today's class project, this red brown, sap green, Van Dyke brown, yellow
blended green beans, green, black and white goulash. We would first be creating
in a misty back down and then begin to add in
the details into the car, the Christmas tree, and the other details
into the painting. So let's begin painting
today's class project. So let's begin with the
pencil sketch first. So first we're going to mark out the van out you're
onto the right side. So I'm just beginning
to give him little details to the van. It's going to be
albino of Fichte. The right side is not
completely into aside. So we're just having like say, almost three-fourths of the
car that is visible to us. So just adding in a very
simple one at the bottom, we are going to be having
an a Christmas red. And from behind, we are going to show in the Christmas tree picking up which this band
is cutting into its Gadiesh. Now your InDesign does piece, I'm going to add enough that. So I didn't master VNET
and then I put it eased the pencil lines that
I am the center of it. Now to this red just
giving in the body as, as you can see automatically, all of it is beginning
to take shape. Now on the left side, we are going to be having in some gift boxes being laid
into this null space. So fascia is going
to add in this. Now into the standing, we are going to be adding in a little detail from
the window of the car. So just little
understanding the deal and little effect on the
window panes as well. And the last thing of the pencil sketch out the gift boxes out. Yeah. So just going
to add in boo gift boxes nine and do
this most base at all. So let's begin In bit
of info for the fall. So I will begin
with a P in order for dot into the entire
background for us. And then I will add the
details one by one later on. So for now I'm
adding in a new era for Uber and do the entire paper because the background is white light color and we are
creating a light misty view. So we can simply add in a
layer of photo onto them, die a background at the moment. So first to create
the mystery bag on, I'm using the
Payne's gray colors. I'm using the Payne's gray color in quite an equity consistency. You can see you have to give in a very light tone analyte layer
of this beans gray color. If you do not have the beam, click on OK. You can just use a very diluted dawn
of the black color. Now as I'm adding in this, I'm triangle wide running into those spaces and the
gift boxes basis. No matter water out then visit beans misbranded automatically,
and that's okay. But as much as possible
if you can avoid running into those pieces I'm giving in the phosphine are out there. Now next I'm going to
pick up the same things get hollow but with
little less of water. And I will begin adding little
adapt into the snow space. So creating more
Docker depth around the gift boxes and
even around the car speeds even Naoko the
wheels of the guy I'm going to be adding in
the Docker depth more ahead. Now into the window
area as well. I'm just going to add it. Of this Payne's
gray color because I'm going to show what that
from behind the window. Thus guy is visible in that I'm going to add a little
green color as bad, so as to show a little effect of the Christmas
tree behind us, Ben. Now write all of
this system red. I will begin picking up
the Payne's gray color and a little touch of the
green color bought mixed together in a little
liquidy consistency and begin adding in some misty pine trees into the background. It's going to be ready enough cheese with
not much of detail. Just onto the horizon line, adding more detail to
the misty background. The main focus of this painting is going to be the car and the gift boxes only restaurant if it is going to be
blurry background. Now on to this, the audit
file, this is terabyte. I'm going to add in
the second layer in which that is more
of Payne's gray. And I'm going to add
it in such a way that the background color is
also still visibly uneven. This neon is visible a bit, just adding in Dhaka depth
onto the horizon line. Now next I'm going to pick up a diluted version
of the gene color. And I'm just going to create a blurry background
for the Christmas tree that we are going
to be adding in into the backside of the car. So for that I'm just creating
a blurry background. And once this dries, we would be adding in a DD, looking Christmas
g, much elasto, give it a little more off
the perfect view I'm adding in this blurry background so that even if you
miss little spaces, a green palette will
automatically create the balance. Now let's wait for all of
this to dry completely and then we will begin adding
in the videos one by one. So now my entire
painting is completely dry and I'm going to begin painting the
Christmas red force. So I have picked up
this app pink color forced and I'm adding in of any lightly on of
the sap green color into the entire red species. So basically this
is just a falsely, then we will be picking up the darker dawns on
adding the strokes of the Christmas needs onto
this red, adding more debt. I'm leaving the more space
because we are going to be painting in the bowl with
the red color later on. Now next, using the red color, I will begin painting
in the gift box. You are at the leftmost side. I will fill it completely opened the red canon now and
given the DNS name, once this is completely dry then now with the same red color. And I think that the
beans into the car. So you need to go very carefully and begin defining in the CAUTI, using in the pointed
brush. In GitHub. If your brush does not have
a pointed tip shift to a smaller size brush so that you can begin to add in the dance. We are going to let
the window with the base layer pins gray
color that we have added in. We are just going
to be defining in the edges at the top
space of the car. Now at the bottom you are, I'm going to fill it
completely with the red color, just that I'm going to be a little lighter species you are to show enlightened
light effect. So at least this I'm just
going to be using in the tailwater and just creating
indigent light effect. So first I'm adding in the
column on the left side. Now one the left side of this, I'm just going to lift up the Palo and Little
Night defect in-between. And I'm going to blend in the light tones and the
darker dawns way so as to show the buffet
line defect falling onto the red color of the car. Do not worry if the little Palo has even do your red space. When we begin to add
the final strokes into the wrath of all of
this will get covered up. In the same vacating the delay dilates your onto the
right side as bad. Now even the bottoms base of the pile leaving the red space, I'm going to fill it completely with the red color quickly. So you can see around the days are gone and quite slowly and a half typo maintain
the shape of the deviance that we are
going to be adding in. Next, I'm painting it completely
with the black color. Now, then our left, this dries, we cannot add the father, the DNS into Dakar. So I'm going to begin adding the Christmas G at
the top of the car, which has been had you not taken into the car
from the backside. I'm just going to delete
my B bar and the Christmas GM going to add it in
a litigated manner, trying to show it gets into
the carriage of the car. Now this time I'm going to add the Christmas gene and
little details panel. So I'm going to give
in the Prisma strategy or strokes in a little detail. So first I'm adding in a few
branches and then do this, I will begin adding
in more foiled age. I'm using a smaller size brush. So make sure you use a
little smaller size brush and add these details and
a little detailed manner. So in between our monitoring between the dark
and the light upon us so that I can add
even more depth. Now just make sure to keep
adding them closer to each other so that you'll get more of the point edge effect, but that please leave
a little gap as well so as to give it an
attorney didn't look. So you can see from
my main branch, I'm popping out for the
smaller branches as well. So as much mediations as you
can get to these leaves, the more produce this
Christmas tree will look. So you can go ahead and add
the branches as you want. And father asked for LeBron just popping out from the
bigger ones as well. Now I've been beat this
Christmas tree for islet completely
to the right side, trying to show it's a
quite big Christmas tree that has been carried out. So I'm done adding in
the Christmas tree and my boss base is
completely dried now, so I will begin picking
up with the black color. And using the black color, I will just begin adding
the details at the bottom of the current that is
near to the bonded area. So now I'm just
going to add a view onto neat line your
with the black color. And I've been met
every alternate Nine in-between be right
only later on, we will add for the details to this defining mode of this base. Now even the lines between the red space in
the center area, I'm going to be painting them alternative with
the black color. You can see we still
have the line staff. Just be OK, F1 dot
you do not run in today of a given
species as well. Now next I add the
bottom of the rest that line that we
have in this online, although I'm going to
fill it completely with the other I know to turn
off the beans Greek alla, I will try to show a
little metal effect out your later on. Now I will pick up
the darker tone off the beans green color and I will begin adding it onto the edges, trying to create more
depth on to the edges. And in the center, I will let
it be off the lighter tone. Now do these dry either being
done this I can give talks. You also bought this
I can give box. I'm using Indian yellow color. And then one of those Christmas
ornaments me would be after this yellow fifth
boxes onto completely dry. Now mixing it the
famous Greek island, the red color, I will
begin adding more. Do the first piece, I'm going to add in
more shadows and depth. So using this docker, don't mix up the red and
the beans cake Allah, I will begin adding it onto
the edges and blended well at places and define
the complete car speeds much better
using this docker. Don't. Now you're new to this headlight space. I'm going to blend this
using a little damp brush. So just using a
damp brush and I'm blending DR. Dawna with
the lighter color. Let's create a little of the smooth blend
between both of them. Now using the
Payne's gray color, I've just flipped into
this headlight space. So by mistake, I made it into the area where there was
war ended but activated. So you need to be
a little careful. I've just added the edge
and now using a damp brush, I will just create a lighter
load in the center space. So automatically
the edges you have the darker tone and in the center you've got
the lighter tone. Now using the
Payne's gray color, I will just begin defining more details into this
stating space has been using the same beans vehicle. I'm just beginning to add in more details from this
window view of the car. So just really
simple details that I'm trying to show is
just trying to add in little of the backseat
effect using in the black color to artist
creating smaller lines. Now after a false
set of lines is dry, just use a very diluted dawn of the Payne's gray color
and fill it in blue, the rest of the alternate lines which you have still
left and right. So automatically you can see a blue color variation
has been created. Later on, we will add in more details using
in the snow for now, this much is enough. Now my yellow gift boxes try
on using the blue polite and just being that one ornament in between the yellow
and the red box. Now using the
Payne's gray color, I will just begin by finding the details onto the gift box on Eigen little body days out your using the Payne's
gray color itself. Now next, shifting into
that Calla and Ivy, the boy into the vet
space that we have. So I'm going to be
ending then dial bore with the red color itself. Later on using in the
DACA beam Paolo even just be adding little
details into the vet space, giving digit of the
business leaves effect using the
darker tone of green. Now using the black color, I'm just going to add
a small nameplate out your onto which we will be adding in the deviance later on. Bonds it is completely dry. So I'm going to be writing
in the Santa Claus, you're trying to show that it's the Santa Claus scar
that is coming in. You can go ahead and name the
name plate as you wish to. Now next, I will
begin picking up the dark green color
and begin adding in the detail into the space. Now using the pointed brush, I will just begin adding in simple strokes to
create the vet, the DNS onto the edges. Now you can see I'm giving in this spiky edges onto the edges. I'm trying to show in the
Prisma onto this red. So you can also go ahead and use the darker green
color in-between middle of the night to
being born when we visible. And that is perfectly organic, exactly how we need it. So that is the
only reason we had added the forced labor in
such a light skin tone, allowing the Boss
Base just be a little careful if your area is 10 bed. After this major event, just be left to add in the snotty didn't do
the entire painting. That is the snow
patches under snowfall. And then we would be done with
this painting for day 29. So I'll mostly under then diode. I'm done adding in there. So you can see automatically
with the light and the darker tone to
your fuck such detail. Now I'm just defining
the little often give walks out your nosing in the
darker Payne's gray color. Now let's pick up white quash. Make sure to use fresh whitewash
without any color mix. And using this whitewash, I will begin adding
the snow patches post, so forced onto the paths
piece at the top area, I'm going to be
adding in patches of snow being collected
onto the car. Then even under the Christmas
tree that we have identity, we'll be adding in
this noise effect, even under the window panes and the top space of the
Christmas read me would be adding the details of small budgets later on in
the rest of this basis, we are just going to
be adding in the snow splatters using in the
white quash itself. So you can see a one-by-one, I've been creating the
snow patches and B, they're giving it
more detailed look and creating the
perfect snowing. Now even under these
Christmas trees, I'm just adding in effect
off the snow out there. Now lastly, at the bottom
speeds up the gift boxes. I'm just adding in
small batches trying to showing that the gift
boxes out and lift him, he didn't in below the snow. So automatically, very roughly. You see, I've added in, now I'm to the red one. I'm just adding little
details using in their whitewashed creating little
pattern onto the box. Now my breath is
completely dried, so just adding a little
snowballs detail at the top speeds of the
red, make sure you are. This one's your green
strokes are completely dry. Otherwise the parliament
begin to spread it. Now using the black color, I'm just going to
add in a small vein, real MEN lookout your reach. I forgot to identify landing
in the pencil sketch. Ready symbol rate will matter. And that is it. Now on to this
altar, I will add in little small batch
at the dark ones, it is completely dried. And lastly, we will just flatten
little off the snow now. So now using the white gouache, you can see I've just
plugged in the snow effect creating the ball fixed
knowing Christmas day. So just Flajolet, make sure
to use the whitewashing, that thick consistency
so that you'll get the opaque look of the snow. Now lastly onto this name fleet, I will quickly write the letters and amp create the
word Santa Claus. So I'm using my white gel
pen for adding in this, you can use whitewash if you do not have
your white gel pen. So that is it. Let's remove
the masking tape and see our final painting
with those clean edges. Make sure to remove the
masking tape at an angle from your people so that you do
not take off the edges. So your is our final
painting for day 29. I hope you guys
enjoyed painting this. I would see you
guys tomorrow and do the last class project.
39. Day 30 - Merry Christmas and Thank you: Hello everyone. Welcome back to the 30th day of the TPD watercolor challenge. Today we will be building
this final trespass. The columns that you need for today's class project is red, burnt sienna, raw umber, sap, green van, the green, yellow pins, green,
black, and white quash. These are all the colors
that you would be needing for today's
class project. We would first be creating
the soft background of the wall and then adding
rest of the details pending. So before moving ahead, let's begin with
the pencil sketch for this class project. We will go ahead with the
pencil sketch off the door out. You're onto the right side. I'm going to show the door or little open so we will be adding the darker shadows lead to draw after we been
the entire do. So for now, I'm even adding
the goal in such a way that the right end
of the door is not in our view at the moment. So the inside outline
is going to be the main goal part
which is slightly open. And the next outline is the space that we
are going to show that is visible from behind
the door that is open. So we are going to be
adding that dark black tone only trying to show in the
DR site inside the door. Now are around the door onto the left side we are
going to be having in a Christmas tree before that, just giving it a little more of the Waldensians
near to the door. And then on the left
side of this wall, we are going to be having in a Christmas tree and
do a partly down. Now on the left side
you're just going to add in the Christmas
tree and do this part. So I'm mocking the
pot a little in front of the whole
space of the door. And we are going to be having in a huge Christmas tree out T0, which we would directly be
adding in with the beans. So this is fundamental sketch, just one motif we
are going to be having in a vector
onto the door as well. So I can quickly, I didn't
very rough pencil sketch. So now let's begin painting. I would begin with the clean
border for dot onto them die a wild species
we would first be creating in the wild species, if you would have seen
in the beginning, the one has the time effect
also in a very bloody toll. So we are going to be adding in the entire wall space and
that bloody don't itself. Now make sure when you're adding in the water for the wall area, do not add it into their doors piece and
the shadows face. Because then we are
going to be having in the red and the
black color effect. So make sure you do not let the yellow color go
into the door speeds, and the brown colors as well. Now let's begin the default
period of the colors. So I will begin with a
layer of yellow ocher color into the entire species that I have added the water layer on. So you can see the yellow
ocher color that I've added is quite good
and quite light. Now on this, I'm going to add in a layer of the
bone sienna color. Again, the bonds, the
Anaconda results are going to be off of any
diluted consistency. And I'm just going to add it
very roughly in such a way that an internal thing Live
is visible in urine there. You can see how light upon sienna bi-linear also
that I'm adding in. All of this is wet on wet. Now on the other,
the Christmas tree, to show a little of
the light effect, I'm just adding in little
of the yellow color onto this innovative
thick consistency. So automatically you've got a little yellow
effect out there. Now write all of
this is still wet. We are going to be
adding in the tidy then wet on wet giving
him a soft edge because we want the mean
focus to B or neither door and the plasmas tree that we
would be adding in. So for I'm going to be using in
my half inch flat brush. And using this half
inch flat brush, I will begin adding
in the dial or the brick detail into
the entire world space. I'm going to be using an, a mix of the bond
on book. I love it. A little bit of the
bond sienna color and getting innovating
new dawn of the brown. I'm using it in a very
light consistency. I will begin adding in
great detail, wet on wet. So leaving little space, I'm just adding small
rectangular boxes to debit as the
bricks onto the wall. Now this BreakLine your
that is close to the wall, then I will be adding in the big detail in
a different angle. So for now I'm going to
leave that space MD. And just on the left side of the one I'm going to be
adding in this brief detail. So you can see between
the two lines, I'm leaving little space. And in the next line
I'm adding in the break between the break
off the fast tool, a phospholipid break
in-between the center of them. So I'm almost done
in the big detail. You can see the different
colors of brown, sad, I've been coming
into the brain. That's perfectly okay because
I just tried to mix in the palace that
are on my palette and get little variations. Now, break out your near
to the door speeds. I'm going to be adding in the
blood D1 little diagonally. So as to market distinguished
from the rest of the ones be strangle show as
the border to the door area. So you can see how diagnose
I've added the same. We break details into the
daughter's face area. Now using a little darker
tip of the brown color, I will just beginning with a very tough second video on do these brick details
giving in Dhaka. So I'm seeing bricks, I'm laying very roughly
the darker dawns. All of this is also again
bet on where that is. My big details are
still wet and gaze of your paper has dried and then
do not go on with this NEO, you will have to leave
at your entire paper. And then given that alpha
VDS after the venting. Now, even though
the diagonal with details that we
added in Benioff me, I will be adding in some
darker depth to this as well. Now let's pay for all
of this to dry it, then even act upon the details
and do this being done. So now and completely dried and I will begin painting
in the door for us. So father, daughter, I
am going to be using in the Permanent red color
in the right consistency. And paint the entire dough
with this red color first, and then adding in
details with the brown color giving you the
depth onto the edges. So I'm leaving the red area, MT because there will be
adding in the green commonly drawn and then giving in
detail darker green color. Now in case effect any
place your red color is beginning to dry in
like mine on the edges, run your brush again
so that you do not have sharp edges on
Buddha dog space. Or if you want, you can go ahead with a wet
on dry technique. You are having an allele for us so that
everything remains. Wait for an extra long time. Now next I will paint the
bar area first value, the Christmas tree is
going to be standing. So I'm going to be using in the bunt sienna color
and using a bond sienna. I didn't just pain then
die apart completely. Now using the sap green follow, I will begin adding
in the Christmas tree LTR onto the board space. So I'm going to be adding in a very simple Christmas gene with very less the
data and not much because we are
going to be adding an ornamental and lights later on to this to
add in more detail. And then they're adding in
this node the daylights bed. Now you need to be careful
that you're not Leo. Hand over to the vet door
as a distilled Beck, I'm even the base so you can either build your
paper or you can simply wait for everything to dry and then begin adding
in this Christmas tree. You can see my Christmas tree is completely done the top space. So I'm just going
to begin adding in the final issue that divided it onto the entire
Christmas tree. Now, now as I'm moving downwards, I've just increase the
total value of the palate. Didn't do a darker tone of
green as I'm moving downwards, you can see I'm adding in
very rough shape often leaves that enough for snail much if it does
not even visible. Because the most of the
details will be visible once we begin to add in the details
into this Christmas tree. For now I'm just adding
a layer of clean panel, having spiky edges, et cetera. So I'm done adding the Christmas leaves onto the face mystery. I'm just pulling
out an interlock them onto the park space. Bonaparte was little dry. The green color has
not split in much. Now using the brown color, I will begin adding
highlights to the wall and using a damp brush, I will blended into the
background quickly. So false near to
the door space y, which I wanted to show a little separate from the
rest of the wall. I'm just adding small brown
line and using a damp brush, I will just blended
into the background. I'll see you on as well. I'm just going to
use a damp brush and blended into the background. So that way you will not have
any sharp edges and have the Docker highlights
as my blending, you need to make sure you do not have excess water
onto your brush. Otherwise, it may
begin to spread a lot. Now and do this space between
the door and the wall, I'm going to be adding in
black color completely trying to show that space
from behind this door, which is not completely
visible to us. So just adding in black color to show as the room
speeds in sight. Now make sure brown space
was completely dry, otherwise, the black
column and begin to spread into the brown color. So you can see a little of the black color spread
into the brown space, but very little, nobody's back. We'll get corrected when I add in the snow effect out there. Now using the green color, I will just to begin adding in the fourth video for the red. Before you begin to add this, make sure that you are all red currant of the
door is completely right otherwise the clean may spread and also the Born Buddha read, leave that space empty for adding in the red
ball out there. Now next, using in the
bond sienna color, I will begin adding the
details onto the door. So I am going to be using the bone sienna color
in a thick consistency. And I've adjusted by people
so that I can easily are these lines onto
the door giving him the texture detail
to the doors piece. So just simple shapes
and lines onto the door nosing in the darker brown
tone of the bonds sienna. So you can see I'm
leaving equals piece and adding these lines
around the red space. You can see under
developed the white spaces left by do not divide. I'm going to be adding
in this noise by 10 for the MongoDB is in red, that is the time and all of
it will get covered up pens. I'm not robotic much
about that right now. Now next I'm going
to bring the ball completely with the
red color quickly. Make sure that your green
color was completely dried before you begin
to add this red color. Now let's me for all of this
to dry and then we will begin adding in the final
details into this painting. So now my painting is
completely dry it and I've been forced begin adding in more
detail into the red space. So I'm going to be using in a darker green tone
and I'm going to begin adding into
Christmas leaves. Do this spread space polynomial
strokes onto the edges, giving the red are
more defined shape. So you can see I'm just adding some belief strokes to define the edges and then
filling it with the dark green color in-between. If you would have little of
the light or gaps that will be perfectly fine and that will add more beauty to it
around the Boss Base just drawn a little carefully
so that you're not drawn into the red color. So you can see how I just
define the edges and in the Sendai just filled in that darker dawns because
median of this, when you get into view
when we begin to adding in the body the
enzyme do doping day. Now using my technical pen, I'm just adding in a string light effect to which I will be adding in the light using in the white and the yellow color. So now I'm just mixing
in white quash and my yellow color together
based on the yellow color. And you'll see a nofollow. I will begin adding in
the light effect to this strings that we
added in using the pen. Make sure whenever
you lay your hands, the space is not wet otherwise the bylaws may begin
to get lifted. So undo all the strings. I'm going to add
in a few lights, leaving a little
space so as to add little red lights
out there as well. Now next I am going to mix in a little bit of the red
and the white goulash. And using this all based
on mix up the right color, I will add further lightened between the yellow
lights that I have added in giving more detail
to the Christmas tree. So you can see I've simply
added the red light in-between the two yellow lights
and automatically the Christmas tree
is beginning to get in more detail look. Now even under the
christmas red, I'm just adding little details
with the basal ganglia, no red color that we
added on the Christmas G. We are almost done with this beam being
just little details. And plugging up the snow
line, adding in this node, but just to get the
perfect Christmas feels. Now after this using
the white gouache, I will begin reading in the
details into the painting, adding in the snow effect
and the snow patches. So foster around the door, read where I had the
black color being spread a little into the brown because of
the whitespaces. I haven't covered it with us. No badge out there, very
roughly drying the shoulders now being deposited at the
top of the door space. So the black color on this side, then the right side of
the door has to be all he didn't completely
using the whitewash. Nightline was actually
not supposed to be added. I added it by mistake out there. It was actually supposed to
be red coloured out there. So because of that mistake, I have covered it up
completely with this no comma as I had by mistaking it
the black color there. Now this fall die,
adding in more detail onto the exact then I will
move to the Christmas tree, add little detail to
the court as well, and then snotty dealing as well. Now you're into the parts-based, just going to add
very little d, d, just going to give
it little design onto the part using
simple lines. Now I will just be adding in little small batches on to
the Christmas tree as well. And then even just be
splattering this no INV would be ready with a final painting for the 30 days
watercolor challenge. So now finally, let's
begin plugging in the small companies being done. And now under the
Christmas tree, I'm just going to be adding in little patches of this node to add liberals not give me the positive in-between
these leaves as well. And that is it via Daddy
with topping thing for the party of this 30-day
watercolor challenge. I hope you guys
enjoyed this topic, a watercolor
challenge and all the 30 winter and Christmas
Eve wipes being dean. So here is our final
painting for the DEA. I hope you guys enjoyed
painting this with me today and all the
other tacky paintings. I would see you soon into my
next class in the New York. Also, thank you so much to each one of you for joining
me in this class. Do dropping and review if
you liked this class and upload your class project
if you painted along. Thank you so much
for joining me.
 Umashree Taparia, Artist, Art Instructor, Entrepreneur