Transcripts
1. Class Introduction: Hello everyone. My name is
Ivan fluorine Tino Ramirez. I'm a fine artist, graphic designer and painter as someone who's had
experience in life studies, Fine Art, painting, graphic
design, and even animation. I decided to start this course in order to learn
through fandom, which means pop culture, we're gonna get rid of
all the boring things out of the way with any kind of basic drawing and learn through
the world of celebrities. With my experience having graduated from California
State University, Fullerton, a lot of
classes that I have taken, whether it was beginning,
intermediate or advanced, I felt like everything
was by the books and sometimes can be
boring and rigid. So I decided to make
things a lot more FUN and just go for it. Because I know that at some
point in our, our journey, we've all tried to
draw things from memory or just
directly onto paper. And with this course, I truly believed that
learning through freehand drawing will help us with our
observational skills. So in this course we're
going to draw what we love and we're going
to have been doing it. Whether it's drawing
a celebrity, a video game character,
a superhero, and anything from the world
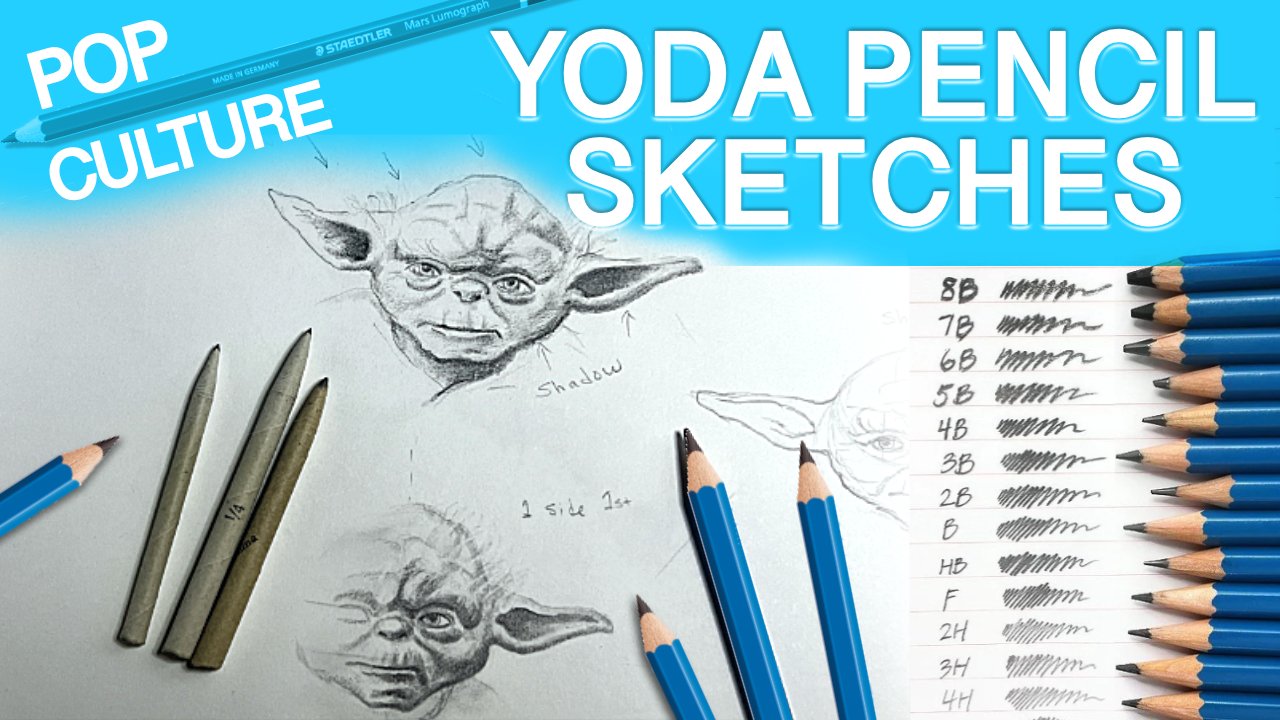
of pop culture like I did with my first Skillshare
class where we drew Yoda. And it's all centered Through the fundamentals of
freehand drawing. In this course, we're going
to learn how to draw Rihanna. Yes, the single Rihanna. And my approach is we're
going to learn how to draw her face and her head
in the three-fourths. I'll be doing it
in Graphite pencil and trying to do it in realism. I created a
step-by-step course on how to draw in the
three-fourths angle, using her face will be drunk
small exercises to get us Emilio with the
way that her face looks and also where
the eye placement, nose and lips will go for that everything
looks symmetrical. I'll be going through
the materials needed in order to
create this Drawing. One of the reasons
I decided to do a three-fourths angle is because compared
to a profile phase and a front-facing face, if you're able to draw at
three-fourths of an angle, the other two will become
a lot easier and familiar. And this will overall improve
your observational skills. And I'll have an easy to
Download high resolution photo, which is another important
component to this course because everything has done for us when it comes to lighting. So I wanted to challenge
you guys to break away from the norm and
learn through fandom. And I know that it may
sound a little difficult, but this is actually for anyone with any Art
skill at any level. You guys can do this. So I'm ready to start
drawing. Let's get to it.
2. Class Project: So for today's project, we are drawing Rihanna. We will be Drawing Rihanna at
three-fourths of an angle, and we are using
graphite pencil. If you don't already
know who this is, she's an international
singer from Barbados. She's an R&B and pop singer. So one of the reasons
I decided to create this project was work
within pop culture. Instead of drawing a boring model or just something that's uninteresting and
anything that's by the books which a lot
of classic courses do. I decided to use a famous icon like Rihanna and create an
entire course around that. So one of the reasons is
that a lot of artists do have trouble
drawing the eyes, the nose and mouth, and just the entire
face at this angle. Sometimes things can
be off when it comes to the symmetry of the
face and the proportions, which is the most
important thing when drawing a portrait or a Face. So if you haven't already
done so this class also follows in the
footsteps of my class, course number one, which is Drawing Yoda through
freehand drawing. And this class, we'll be
using freehand drawing, meaning we're going to just
draw on the paper directly. We're going to try and create
likeness as much as we can. This is the way we're going
to understand perspective. So one of the first steps
are going to do is create some small thumbnail
sketches in order for us to get familiar with
what we're doing and how we're going to draw our
three-fourths of an angle Face. So we'll be drawing
small thumbnails, get familiar with our materials. For example, all of our
Graphite Pencils, our Erasers, and also for the end and how to blend everything
together in order for us to create a 3D look
and go for realism. And I truly believe that any
artists can Draw Realistic. I know it looks really
tough. It is not. As long as we
follow These Steps, we go back-and-forth with
our reference photo. We can create anything
that we want. Well there How To Draw
the eyebrows and kinda touched on a little bit of
how eyebrow hair works. We're going to focus our
main attention to her eyes, which is one of the
most important things to a human face, and also will learn how
the eyelashes work. We will be drawing
the nose and lips, and at the very end, try and smooth
everything together and create something special. So are you ready to get started? See you in the next lesson?
3. Materials Needed: So here's the materials
needed for this lesson. Some various Erasers,
some pencil sharpeners, soft bristle Paint
Brushes for Blending. Some papers, Stumps for
Blending in various sizes. Different types of pencils. Some of them are optional, but these are the
main ones we need to create our drawings. So I have a collection of Staedtler pencils varying from a lightest to be all the way up to eight feet being our darkest. One of the main
important ones that we always need for
any Drawing is the number two pencil that
we then a number two is the most important in any drawing
or sketch that we create. It's because we can create
tones from neither light to dark depending
on the pressure that we applied to the paper. However, this one is optional. But if you do have a pencil that's lighter
than the Tooby, I recommend a drafting pencil. And this one's a to H, which is fairly, fairly light, and it doesn't matter how
much pressure we apply, it's always going to
remain fairly light. And the reason I
like using a traffic pencil just when I need to begin the initial drawing is because if we do make any mistakes, lines are easy to erase. Having an optional
mechanical pencil like this, any type of lead pencil comes in handy when it comes
to making hair, very thin hair and anything
like eyelashes and eyebrows. Expert of the Erasers.
I have several. I have an Art Gum Eraser, Staedtler, Mars Plastic Eraser, and a kneaded eraser. Any brand that you have is fine, but you do need at
least one hard eraser for general all-around erasing, but you do need a Needed. The most important
reason is because it's able to be
manipulated like clay. You are able to
mold it and shape it into any size that you want. And you're able to lift
any type of lead and the type of Graphite that
we're using, any pencil marks. And it's easy to shape it into various sizes
that we may need. These following are optional, but I do recommend
at least having one of these because this one, you're able to go into
the Fine corners of any type of crevice when it comes to a Face that we're
going to be drawing. And this one, there's an
electronic pencil eraser. This one can remove
almost any type of dark, dark marks and just reveal the pure white
paper underneath. And if you don't have any
electronic pencil eraser, picking up various pencil
Erasers like this is also fine. You're just going to have to put a little bit more elbow grease just to erase any
of those marks, but these will do
just fine for all the detailed erasing we'll need. For the pencil sharpeners, make sure they're very sharp. And if you don't
have any on hand, you can also use
an exacto knife or a very sharp box cutter
to get the job done. Now for our soft blending
where our skin tones, we're going to need soft
bristle Paint Brushes. Any that you have are fine. Any type of acrylic
or oil paint brushes, as long as they're
in various sizes, these are going to help us do the soft blending and the overall rendering
of the drawing. These here are called Art Stumps or blending sticks
that are made out of paper, or also called torta lens. And these are one of the most
recommended blending types of tools to have
in your arsenal. Because these you can get
into corners inside the Lips, inside the ears, eyes, and for hair, and
also for wrinkles. And this one's going
to help push and pull all the type of Graphite and
lead into different areas. And they usually come
with these strips of sandpaper that are used to
clean and sharpen them. Spare paper, make sure
you haven't drawing paper that's thick
enough to withstand a lot of the lead pencil
that we're going to use and also the erasing that
we might also do. So this one, I had a huge Strathmore drawing pad that I just cut down into sizes. And you can do this in
whatever size that you'd like. Finally, if you have just
regular paper or also I recommend is tracing paper
to put underneath your hand. So when you're drawing, you're not pushing or
smudging the pencil and Graphite all over and making
mistakes onto your Drawing. And don't worry, we will be going into more detail as we get on into the drawing with other materials
that I just listed.
4. Photo Reference: So for this step, we're gonna be looking
at the reference photo. So one of the most important
things when drawing a photo, realistic, drawing, any kind of portrait is to have a high resolution
reference photo, and it is available
to Download and the resources section
of this course. One of the easiest things
to do is to have it downloaded onto your
iPad or on your phone, even on your laptop. And this way you're easily
able to zoom in and out and go right into the selected area that
you wish to begin with. This makes it very easy
to stay focused in one area and really go
into detail when needed. And also just to make sure
everything like proportions, lighting, and contrast is
as accurate as possible. Now because this course
will be done in freehand, the most important reason that I love using reference photos is because all the information
is already done for us. For example, the
lighting is done for us. It's not going to move. And therefore we know where the highlights are
in the middle tones, the shadows and
everything in-between. You don't have to worry about
setting our own lighting and having things
change for us this way, we focused on the proportions and just getting straight
into the drawing. And would this course we
will be learning how to draw out a three-fourths
of an angle. And I chose this specifically because at some point
in our Art journey, we have tried drawing
faces in different angles. And this one I feel like once we get proportions
down at this angle, drawing basis on the
side, front-facing, and everywhere in-between, everything will
become easier to do. And just by having our reference
photo right next to us, we can move back and
forth as we please. Alongside the reference photo, I will have other
examples to help us nail the head
proportions and be as accurate as possible
so that we can eventually turn in this
realistic portrait. Because this is a realistic
drawing that we will create. A will be touching on
how to draw the eyes at three-fourths of an angle
with a focus on the pupils, the eyelashes, and
also the eyebrows. We will be touching on the
nose and lips as well. And to make things complete
as the final details, we will learn how
to blend everything together using Stumps and Brushes with a reference
photo handy and ready. Let's move on to the next step.
5. Thumbnail Sketches: Alright, so for the tools, we'll need our Kneaded Eraser and our Plastic Mars Eraser, and even a pencil eraser,
our drafting pencil. And I have a number
two pencil here on this pencil holder because
it is kinda short. And I want to use it
all the way up to, and I can't use it anymore. Our Blending Stumps, two
sizes and our blending brush. Now you can use any size
sketch books that you have. I have several here. Or you can just draw on
regular sized paper. And remember these
are just exercises, so any size will do. So to begin, get your reference photo ready and place it wherever you like. And we're gonna begin by drawing the basic Head and get to know
our shape of the anatomy. And one tip I want to
stress out through this entire lesson is that in the real-world there are
no such thing as lines, light and shadow
create the shapes. We're just going to
be revealing it. We are not drawing cartoons
were going for realism. So for this sketch, we're going to be drawing
some thumbnail sketches. And if you don't know what
a thumbnail sketch is, is usually the size of a
thumbnail or just any type of small sketch that you can sketch out and get familiar
with what we're drawing. But I'm going to do
something a little bit bigger and you can choose
whatever size you like. I'm gonna do one that's
around 3 " on each side. Like I said, any sizable do
and this is just for us to get a feel of what our head
is going to look like. For example, we are drinking
three-fourths angle of the head and we're going to
learn how to use our tools, get familiar with them, Use our Brushes are pencils and blend
everything together. And this is just something that I always enjoyed doing so that we know what we're
working with before we get into our final drawing, which is gonna be a lot bigger. So it's easier in this
step to make mistakes and get familiar with all of our vocabulary before we begin. So let's start off
drawing a circle. We're gonna draw an
imaginary line right in the center and
divide it into thirds. And this is where
our eyeline will go, our nose and our mouth. These imaginary
lines will help us divide the face so that we can easily know where our planes are so that we can
eventually add our eyes, eyebrows, nose, and lips. And because we are doing
things in freehand, this will help our
observational skills by just eyeballing
things as we draw. Here's a helpful diagram
of the front-facing, the reports view and a
profile view of a head. So now let's focus on the
three-fourths of view. And as we look at
our reference photo, I'm pointing left and right. Let's go back-and-forth
and just attend to lay those eyes
focusing on one side, which I started on the right. And slowly move our
way to the left. And feel free to start adding some details like the
eyelashes, pupils, eyebrows, nostrils,
and get familiar with not only realism but
freehand and also perspective. Because like I said before, when we learn symmetry
in three-fourths view, everything else will
become a lot easier to do. Especially in our own drawings. We will observe things in
the real-world and just apply to them and we will execute them effortlessly
in the future. Here's another helpful diagram
when it comes to the Nose. Here we can see the contour, the hard lines of the bridge where the highlights might go. The under shadow, just a shadow and then just the
lower sections of Nose. And we can also divide
those into shapes like this diagram right here
were the two balls, parts of the Nose where
the nostrils are, and the middle section
where the cartilage is. It's just another helpful
way to break things down and make things a lot easier and simplify the
way we approach it. For example, here, we
can imagine The Lips as ovals divided into thirds and then divide it horizontally. Then start laying our
shadows middle tones, and leave the white paper
as is for highlights. And now with a kneaded eraser, I'm erasing our guides
because I don't need them, but you can keep them
on as long as you like. It is also a time to get
familiar with your Erasers. And as you can see,
the Kneaded Eraser is perfect to remove any type of stuffs and also lift up any
Graphite that you don't need. But now I'm deciding to go in and add all the dark shadows, cast shadows, all of the medium tones in
the reference photo. So for example,
underneath the Nose, the bottom lip, nostrils, right underneath the eyebrows, and also towards the
right of the cheeks, the forehead, and adding
layers and layers of graphite. So that when we do go into
our blending process, which I'll do right now with
my paper Stumps and towards Berlin's and also
our blending brush. We can learn what Shading
and Blending is all about. For example, you'll
notice right here that by adding all
of that Graphite, we can push and pull and
create a soft airbrush look. When we want to create realism,
when drawing portraits, we do need to really define three-dimension and this is going to help us do so. You can make things look
soft, hard, rounded. I go back in with my Graphite and more
and more as I like. And again, we will
be working with form user towards Berlin's to round out the areas around the eyes and nose
and the nostrils. And we're using a
just like a pencil. Trust me, with this exercise, you'll get familiar with
how things feel and work. So this is your first
time ever even trying these tools don't get
discouraged and don't be afraid. They are easier than
what it looks like. When I tell you you'll
be able to create your first realistic
drawing using this course. You'll be so happy you did. Now, for an even softer look, our brush also helps with
pushing and pulling, but in a subtle and
more softer way. Because remember, light plays
around with shadow a lot, especially in our skin tones. And because this is a
grayscale version of it, we need a variety
to keep things from looking flat and boring. But most importantly, we
are creating the illusion of depth and
three-dimensionality. In this final step, you can see that I'm trying out my five KB and
you can even try your six B pencil to really intensify the dark
and look at them. Big difference compared to
when I use my Tooby pencil. There's a striking
difference with adding harsher, darker Graphite. And not only will this
help things stand out, it's easier to push and pull those darker colors into
the skin tones as well. And this is the perfect time
to practice drawing hair, especially the
eyelashes and eyebrows, and added those little
details that at the end will definitely give it
the Human Female touch, especially for this portrait drawing where you can tell that she's wearing makeup and
mascara and it's very defined. And this is another skill to
find nuances in portraits. And I know this is the longest
video of my entire course. I decided to put all of this together because I feel
like everything just fits perfectly well and
it's easier to just dive into this and learn
all of our tools, what we're drawing, the vocabulary so that when
we start our final drawing, there won't be any
surprises and you're familiar with it
from the get-go. So let's move on
to step number one
6. Light Face Drawing: Now for step number one, I used a drafting pencil
to create a very, very light pencil sketch. And because I'm using
a reference photo that just focuses on her eyes, nose and mouth,
and her eyebrows. This makes it very easy to
just focus on those features. And this is what this
drawing is all about. Starting off with an HB pencil and the drafting
pencil will help create a light outline which is easy to
erase and control. Keep this in mind through
this entire class. Lines are a graphical
representation of value to form. We are creating a soft gradient from light, medium to dark. Make sure you're referring to your reference photo as often
as possible and start with one side before moving on to
the other when it comes to extreme detail so that there is less erasing in between drawing. And also this helps with making sure the eyes are aligned
and they're symmetrical. Using a very, very
thin mechanical pencil will also help fill in
small, micro details. And otherwise, sharp, regular pencil wouldn't
normally work. This one is very, very helpful in this case. And as you can see, I'm using tracing paper right underneath my arm and my palms just
to prevent any smudging. Because knowing me
you didn't want not want to be erasing
and smudging all over the areas that you didn't want to do any kind of blending. And yet, this happens
all the time. So this helps so much. And just as a reminder, I'm just using the HB and
to be Pencils Right now, we're still in the initial
light drawing stage where you don't want to go into so much detail just
yet so that we're able to erase any
mistakes if we need to. Because the most important
thing of any type of Face Drawing is getting
the proportions down. Now one of the ways
to help align Eyes is using a ruler and
this helps you align both the bottom and top
of the eyes and also even using a pencil
later cross just to kinda help you make sure
the lines are straight enough to make sure that
everything is symmetric. And you're going to see
me using the ruler often. Because what seems
to happen with a lot of drawings
and just people in general is that sometimes
proportions can be off because we are
doing freehand. Sometimes we can
have, for example, one eye larger than the other. And this tip with
a ruler will help us align the bottom
part of the eye, the folds, what are
the pupils might be, and the eyebrows, and it just helps everything stay aligned. So as you're following along, you're noticing that
I'm staying fairly detailed on just one
section of the Face, which is towards the right. So we have the
eyebrow on the right, the iris, the pupil, and some of the eyelashes
and the phones. While ignoring the
left, I just burnout. So as we draw the
iris, the pupil, the eyelid, and all the
folds on the top and bottom, and also the eyebrows
that using small strokes, pushing your pencil up with not so much pressure just yet, we are creating our
first side of the eye. And we will get into detail in our next step where we
focus just on the Eyes. And we go heavy into some practice drawings and revert back to our
thumbnail sketches, which were very important
to get familiar with this perspective on the
three-fourths angle as well. I know that sometimes
it can be hard to work on different areas of the face at once and go
into detail all over. But just hanging there. Just be patient
work on one side. And that way if
there's any mistakes, you don't have to be erasing. On both sides. We are using our
observational skills to make sure that everything is
accurate as possible. So now, let's move on
to the next lesson.
7. Eye Detail: So in this step, we're focusing on the eyes
and the alignment. So let's take a look at
our reference photo. And just make sure
that the eyelids, the irises, and the eyebrows, for the most part,
are accurately aligned with one another and
nothing looks off or wonky. And when you know that,
everything looks right. And when you know that
you can eyeball it, which is what freehand
drawing will help you do. Let's move on to the left
eye and add some detail. Now having done that
with the ruler and also not going in so
dark on the right, I am competent enough
to start the left eye. And now we can start going into more detail and eventually using darker tone pencils and start layering or a difference
in contrast and light. For these following
steps, you're going to notice that I'm going
to be filling in shapes using an HB pencil and also it to be Pencils
still fairly light, but making sure that
things are now a lot more dense and filled in. For example, the eyebrows
are going to be filled in using the site of
my pencil as well. We make sure that it's easy
to cover larger areas. I'm also gonna go underneath
where all the shadows are. For example, underneath
the folds of the eyelids, eyelashes, the iris isn't
even under the nose as well. So another resource to
Download If you would like, and it's very helpful, is the eye anatomy chart. And this is a very
basic breakdown, a front-facing eye
anatomy illustration, or we can easily see the
names of what we're drawing. For example, here's
the eyelid pupil, the iris, the sclera, the tear duct, and the lacrimal. Carnival will be going into
detail as we get to them. So as I'm moving into
the eye on the left, we can start adding
some more detail like the contact shadow right underneath
the fold where it meets the iris and pupil. A little bit more
of the eyelashes. And again, we're moving in an upward motion and it's
curved and not a straight line. And this will also give
it some three-dimension. And we're also working
on the eyebrow as well. So I know this may seem
like it's challenging, but when we learn through
freehand drawing, we're approaching
things as we see them. And this is where our
observational skills come in hand, are trying to represent
exactly what we see. And we're just going for it. And it's okay to make mistakes. We will have our Erasers here, especially our Kneaded
Eraser comes in handy. Again, we're still
drawing fairly light. And as I zoom in here, so you can easily see
how the eyelashes look. They look like they bend
upwards in a curved angle. So just push your
pencil up without doing any straight lines and this will give it
a nice curvature. And I saw the ones on the
bottom part of the lid, stark, dark and go
light as you go down. And this will give it a
width and it makes it look realistic when it
comes to thin hairs. Same thing with the eyebrows. Doing a quick upward
and downward motions. And make sure you have a
variety of thick to medium to heavy lines to make
sure the eyebrows and any type of eyelashes could keep them from
looking unnatural. You're going to be noticing
me rotating my drawing. This helps make sure that your hand is not cramped and
not in awkward positions and then just helps you go into areas without you twisting
your whole arm and body. Most importantly, in order for us to make sure we have a
three-dimensional drawing, we are following the
natural curves of the face and your Drawing
specifically you. That's why you do need to
check your reference photo. And then this case, because
we are drawing a human face, naturally, we won't be
using straight lines. Instead, we're going to
be using curved lines. And this is going to
help us in the end, make sure that we have a
three-dimensional look and render of a racial Drawing. Now as we're rendering
this drawing, we're going to finally move into four B5 and even six
be dark tone pencils. And this is going
to help us really distinguish between
different medium tones, light tones and darker tones, and have a clear
separation so that we have a nice variety and contrast. In this drawing, you'll notice a striking darkness to the iris on the right compared
to the one on the left. And that's what we're going
for for the overall drawing.
8. Let's Draw the Nose: None. This section we're
going to be focusing on the Nose and checking our reference photo
does look like the light source is coming
from the top and the left, and that is creating
a cast shadow right underneath her nostrils
and the tip over Nose. And this creates a shadow
and dark cast shadow. So you're going to notice
that I'm going to use any 3D pencil on this
one because this is where light does not
enter and is going to create a very nice contrast
between light and dark. So as we take a look at our reference photo
for Rihanna is Nose, is an African American
woman who has a wider nose and nostrils. And in comparison to this
chart that you see them noses, Let's focus on the
three-fourths view. And notice that in order
to create some dimension, we do add a little bit of
door Nostra to the right, and this will give
it a dimension. And you'll notice how the
middle of the Nose who refer it to a
ball-shaped that also helps us draw that as well. Same thing with our
nostrils. You can draw in a ball-shaped
and it'll all be curved and just follow your pencil the same way
we did with the eyes. Draw the forum, and this
will help the Nose. I'm looking flat by just using
curved lines and going in with a freebie and
even not for being pencil right
underneath the Nose, that's where our
darkest shadows are. So as we break down the
Nose and how it looks, we can break it
down into planes. And here's another example on how to simplify it
a little bit more. Because we're drawing
at three-fourths of an angle or shortening
will happen. So this is why it's a lot
different than Drawing from the side or profile view
and any front-facing knows. So if we focus on the
nostrils which look like a comma and the tip of the Nose, we can see that there's
a lot of curves. And although a lot of noses
have different shapes, sometimes it can be
a little bit bigger, a little bit more Squared. Her nostrils and Nose
and symptoms seem to be very curved with
very soft features. And again, if you're having trouble with
aligning everything, use a ruler right
underneath where the tip of the Nose meats and what are the folds of the
nostrils are as well. You will also notice
that Rihanna lacks a bridge or a prominent bridge
that most people would have, especially European
centric features. She lacks this prominent bridge, and as you can see right here, where I'm pointing my red arrow. So this actually makes it
a lot easier for us to just focus on the
prominent septum, which is right in the middle, right in-between her lips and another name for her
nostrils would be the wings. As you can see,
the tip or ball of her nose has some cartilage, just like everyone
has cartilage in their nose and this is why it
pops out a little bit more. This is an easy
breakdown of the Nose. So continue with your pencil. Continue curving using
your eraser if needed. Because in our next step
will focus on the Lips and eventually will be
blending everything together
9. Let's Draw The Lips: So for this step, we are drawing the Lips. And although we won't be
taking so much time on this, I do have a chart here
where we break down to human lip anatomy and try and simplify it as much
as possible into shapes. As you can see these
names right here, we are focusing on
the cupid's bow, the bottom and top lip, which is a vermillion
border and the oral comma s4 will keep it simple as calling it the upper
and lower lip. And the reason we can
focus on the cupid's bow is that that's actually something that
Rihanna is known for. That is very prominent and
very aesthetic looking. And here's a picture of her front-facing view just
to see how prominent it is. And one that we can easily
point to with an arrow. And one of the things
that we can do, just like we did with
our nose and eyes, is to darken all of
our shadow areas. This will help us determine
where we can leave things, as is when it comes to the highlights and started
working on our middle tones. But you can see in
the middle part of her lips where it's the darkest. You can use a three
before B or even a five be to really
intensify that black. Go right underneath the
Lips wherever they touch. And this is where the
light isn't hitting. So that'll be our middle tone. And I'm working my way up into curved lines and working
on the outer outline, never Lips as well. And as you can see
on the cupid's bow, I'm adding a little bit
of darkness as well. And if you look to
your lab where I have my iPad and the reference photo, you can see all
the details there. What you'll notice is that
Lips have a lot of wrinkles. There's a lot of blinds, and this is where a lot
of things can happen with the way light bounces and it captures light and
it reflects light. So you'll see a lot of highlights
in some areas that are pure white specks and a
lot of dark areas as well. So you'll see at the bottom part of the lip RAM darkening it. This is where there's
a cast shadow. And again, if we take
a look at this chart, this is an easy breakdown
on how we can shape it, and it looks like an oval. We can cut it in half,
horizontal lines, vertical wise, and
then cut it in half. You can easily see how it divides if you need
help with that. So just continue adding curved
lines or those wrinkles. And for this you do not have
to draw every single line. It is not necessary. This might age her a lot so
we can do it as we see fit. This is an artistic
choice that you can do. So do as much as you would like, and you'll notice that
it looks right or wrong. So continue adding a
pencil layer on the Lips. Because with our
next step we are finally going to be adding an entire base layer of pencil before we begin our blending
and shading process.
10. Blending and Shading: Now for this portion
of the tutorial, you're going to notice that
I can finally start moving everywhere back-and-forth
in the drawing and her entire face. And this is where we can
start checking as a whole her skin tone variation
and also to make sure that all our darks are
medium tones and likes matched throughout
the entire drawing, because this is a huge
step before we get into an actual blending
with our Stumps. Because this is
where we can start building a base layer
that's going to be light enough for us to start blending in and have a very, very even soft tone. So remember all that practice we did with our thumbnail sketch? Well, this is a
time to really go in and add our really dark
shadows with either a 567 or even an API
pencil so that we can really notice
the contrast and start defining our values. So now that we have a fairly rough the base
of Graphite laid onto this drawing and
finally move into using a soft bristle
Paint Brushes. And these are just ordinary
soft brushes that you can find anywhere that you can
use for acrylic painting, oil painting or watercolor. And this is perfect for
us to help have a very, very smooth blended look. And also again, we're also following the natural
curve of the face. And this is also going to
help us with that 3D look that we're going to eventually
achieve. This step. We're going to continue adding darker and darker Graphite. And this case I added a seven V, and this really
intensified the irises and also the eyelashes
and eyebrows, and also any dark, dark contact shadows
that we can see. And also, for example, the nostrils and also the
middle of the Lips as well. Now besides our brushes, we're going to be using some
Art Stumps and porcelains. And these sticks of
rolled-up paper are perfect for getting into very,
very tight areas. And they're perfect
for picking up Graphite and moving
them into other areas. Got actually laying more
Graphite onto the paper. And it creates a very soft, delicate look as well. It's great for overall
blending as well. As we're getting
closer to completion, we are going to be
using a kneaded eraser. And if you haven't
used them before, they are very pliable and molded and stretch it into
various shapes and sizes. And it's perfect for lifting
light to medium marks. It might not be able to
completely erase dark marks, but this is perfect for
getting into tight corners and removing and lifting Graphite
into small, small details. And it's perfect compared
to normal sized erasers. Now as we're getting closer
to finishing up as drawing, we're going to repeat all of the steps from the beginning of this video until we get the desired look
that we're looking for. We're looking for a contrast in light to medium
and dark tones. Adding more detail where
it's Kneaded, going back. And fine tuning areas that
really do need more detail. And we're going to be looking
back-and-forth between our reference photo until
we have that 3D look. So we're going to
continue to add shadows, continue to blend, and
continued to round out any soft areas to
create that 3D look. In this part of the time-lapse
video. Look at them. A huge difference between the upper lip and
the bottom lip. And notice where
I've purposely leave the paper, pure white. This is where our
highlights are going to go. There's gonna be a
striking look when I'm adding the dark
right next to it, it'll stand out and those highlights will
really pop at the end. Those are the small details
that really make for glossy Lips, sparkling eyes. And naturally the eye will
be drawn to anything that's a striking jump from a dark section to a very
pure white section. We're almost at the finish line. And one other last, last step that I wanted to
show you guys are the secret Eraser tips that
I know a lot of people have, might not have heard of, but I really wanted to
share with those. Let's get to it
11. Eraser Secrets: Okay, everyone, we made
it to the final step, which is some of
the eraser Secrets that I learned over the years. And depending on
which one you're using, the results can vary. But as long as you have
a Plastic Mars Eraser, which is actually
one of the best one. Kneaded Eraser and
he pencil eraser. You can have many options
at your disposal. If you need to go
into tight areas and create some
small highlights, some small cores go
into the eyelashes, the irises, and
things like that. A thin pencil eraser
will do the job. One of the most versatile
and important ones to always have a your
disposal when Drawing is a kneaded eraser
because they're able to squash and stretch
just like clay. It's almost like Gum as well. You can make it
into thin points. You can make it as thin
or stickers you want. And what it does is that it lifts Graphite
right off the page. And this is how you can create some imperfections
into the skin. You can create
highlights like I'm doing right here on the Nose. And just create some cool and interesting things
like lightening areas that might seem too dark and reveal a middle
tone underneath. So these are the secrets that
I've came up with and that I've learned over the
years with these Erasers. So this Kneaded Eraser
is one of the best. And don't forget to have
some kind of brush to remove other debris from
the eraser marks because there's
going to be a lot. You can use your fingers
like I am sparingly, but just remember all
the oils in your hands can also make smudges. So try and use a brush. And for the most part
you'll remove it without making any
type of mistakes. And to create small wrinkles
and lines in the Lips. This small eraser pencil
is perfect for that. I can go in between all
of the little cracks and crevices and create that
desire looked at we want. There's also perfect
for eyelashes and right underneath all
those folds in the eyes. So it's a great idea to
have a different array of sizes because you're now you always have options
at your disposal. If you've made it as
far into the video. Thank you for watching. And one of my favorite
things to add at the very end is
adding highlights. And this, I like using a battery operated eraser
and this is perfect because it vibrates so fast that it removes very dark
Graphite pencil. And it just reveals
pure white areas that otherwise would be pretty
hard to do just by hand. And this is very perfect for adding highlights in the irises, the Eyes in the skin to lift up pencil marks at small strokes of white highlighted hair and just complete the look when
it's next to dark areas. And that creates a
realistic drawing. So now that you
learn the secrets to Erasers and how it plays into revealing the white
underneath the page, revealing the negative and positive space
from the Graphite. Here's a, we created our final finished
realistic drawing of Rihanna at
three-fourths of an angle. So as we finish up here, this move onto my
final Thoughts. Jamie
12. Final Thoughts: So how did your
project turned out? Did you have FUN Drawing Riana? I know I did. Did you
have been creating the Exercises and
everything we went through. And remember, you can do
this with your own artwork. Choose a celebrity, a
video game character, a superhero, anything
that you like. This was such a FUN
learning experience for me because this is one
of the first times that I've done a drawing like this in a long time that
I took my time with. And it actually
helped me improve my drawing skills in anything
that I've done before. So don't forget to upload your projects so we can take
a look at your creation. So I hope you learned a
lot from this course and you took all your
skills and apply it to your daily artwork that
you guys so much for watching and see you
in the next lesson.
 IVAN RAMIREZ, Artist, Painter & Youtuber