Transcripts
1. Intro: Let's celebrate spring with this fun and fruity
pattern design tutorial, where we'll create
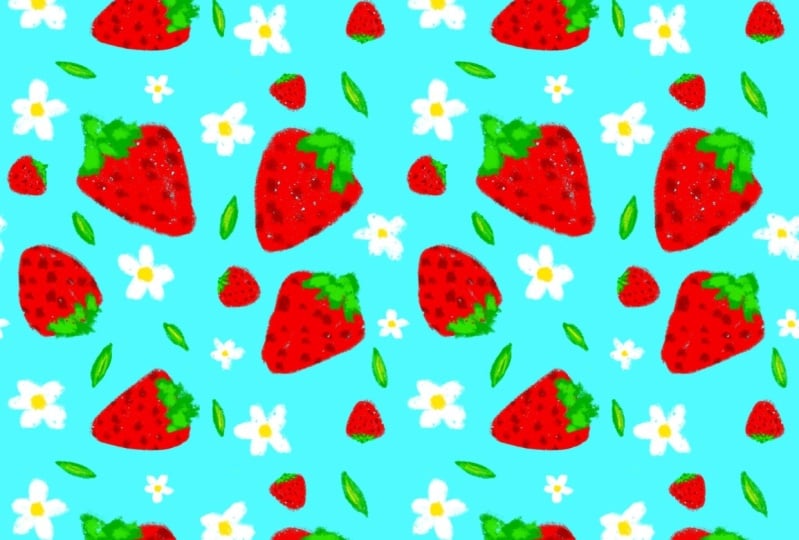
a cute strawberry and daisy pattern in Procreate. Hi, I'm Julie from
Julliard and Designs. For over a decade, I've been creating designs
for products like fabric, home decor, and stationery. And since getting an iPad, I've really been loving creating seamless patterns in Procreate. This is a quick and easy
creative project for intermediate
Procreate users that you can create in
under 15 minutes. This class, we'll
go over how to draw the strawberry and
daisy motifs and then tie them into a
seamless pattern using the snapping and magnetics
tools in Procreate. I'm also including a
free color palette for you to download
and use in this class. So get your iPads ready, and let's get started.
See you in the class.
2. Creating the Strawberry Pattern: So jumping right
into this class, we're going to
start by opening up the Procreate app and then
hitting the plus sign and creating a new canvas that
is 3,500 by 3,500 pixels. And then press Create. Now we're going to
grab our Apple pencil and select our color palette, which I've provided in the projects and resources
section below the class. So make sure you go
ahead and download that. And I'm going to start by using this bright red color and then
selecting a brush to use. And now this is
totally up to you. I'm just going to use
a basic monoline brush and then just increasing
the size a little bit. So now I'm just going to
go ahead and start drawing some shapes that look
vaguely like strawberries. And then filling them in by
dragging the color over from the top right and dropping
it inside of this shape. And I'm going to do about
four or five of these shapes. And then I'm going
to go ahead and add a new layer and select my dark green color
and then start adding some leafy tops
to my strawberry shapes. So I'm just giving
it kind of like an organic feel and doing this for all five of my
strawberry shapes. And now going back into layers, I'm going to select
the strawberry layer and turn on Alpha lock. And then I'm selecting my darker red color here and just making my brush
a little bit smaller. And then I'm just going to draw some little dashes on
those barry shapes, and these are going to
represent the seeds. So I'm just going to go ahead and do this with all of them. And I'm going to go back
to layers and select that greenery layer and again, turn on Alpha lock. And then with my lighter
green color selected, I'm going to start adding
some lighter leaves on top of the dark ones to
sort of add some depth. So once I've done that
for all of these, I'm going to go ahead and
group these two layers together by swiping right on them and then
selecting group. And now with the group selected, I'm tapping on my
selection tool, and with it on free hand, I'm just selecting that strawberry and moving
it around a little bit, rotating it, and then using the free form selection to just change the
shape a little bit. And now I'm going to
do the same thing with this strawberry and
just kind of try to lay them out evenly and edit
them to look more natural. So once I'm all done with that, I'm going to add a
new layer above. And first, actually,
I'm going to click on the background and select
this light blue color just so we can see our
shapes a little bit nicer. And then click Done. And then go back into our color palettes and
select this white color. And now we're going to
use the same brush, or you can use a different
brush if you'd like. And then on our new layer, I'm going to start drawing
some little daisy flowers. So just super simple shape, fill it in so that it's white, and I'm just going to
draw a few of these. And now we're going to add
another layer on top of that. And using this
darker yellow color, I'm going to make some
little yellow dots in the middle of each flower. So now we're going to go
back into layers and drag the flower layer down into the same group as all
the other layers. And then I'm going
to swipe left on the group and duplicate
the whole group. And then we're going
to keep a copy of our original illustration and then tap on the group that we duplicated
and select flatten. So now we have all of
our motifs on one layer. So now I'm going
to take my brush and using the same yellow color, also make sure to turn off
Alpha lock on this layer. Now I'm going to fill in all
four corners of this layer, just like so, and
it doesn't have to be perfect because
we'll be erasing this. And then back to
our layers panel, we're going to swipe left and then duplicate this layer once. And then using the
selection tool, make sure it's on uniform. And then turn on
the snapping and magnetics and our other settings
all the way to the Max. Now we're just going
to drag our pen to the left until it
snaps to the middle. Just like that. And make sure
you see the orange lines, make sure they're not blue. Sometimes it actually
helps to turn off all the other
layers if you can't get it to snap properly. And this part is very important. Otherwise, you might
get a white line in your pattern, and
we don't want that. So make sure you're
getting the orange lines. And now we're going
to do the same with the other layer, but
drag it to the right. So turning off the other layer, I'm going to go ahead and
drag it right until it snaps and we see those
orange lines just like that. So now we can turn
on the other layer and pinch them together
so that we have them all on one layer and then go in and erase those
yellow triangle shapes. So now we're going
to go ahead and fill in this middle section. So I'm actually just going
to use the selection tool and select one of these
strawberries I've already drawn, and then swipe down
with three fingers and select copy and then swipe down with three fingers
again and select paste. So now I've got a copy
of my strawberry, and I can turn off the
snapping and then flip this and just rotate it
and play around with it a little bit to
make it look more unique. And once I'm happy with that, I'm going to just
move things around a little bit to make
it look more balanced. And now I'm going to select one of these flowers and again, swipe down with three
fingers and select copy and swipe down again
with three fingers and select paste to
duplicate the flour. And then we're going to move
it to this empty space here. And again, I'm going to
edit it a little bit, like I did with the strawberry, flip it rotating, scaling,
all that sort of stuff. And then I'm going back into the layers panel and I'm pinching all the
layers together. And now I'm just going
to do that same process one more time with
this other flour. So now we're going to pinch all the layers together again, and then we're going to swipe left and duplicate the layer, and then turn off that first
layer and save it as a copy. And now I'm going to use
the brush tool again, to add those four corners back
in again with the yellow. So marking those corners and be careful not to touch
your motifs at all. And now we can go back
into layers and duplicate this layer and then turn
off our first layer. And we're going to turn
on snapping again. And then just like
we did before, but we're gonna drag the layer down this time until we see those orange lines and then do the same thing
with the other layer, but drag up instead of down. And finally, pinching
those layers together and erasing the yellow markings. So now we're going to
fill in this empty area similarly to how we
did before by copying our existing motifs
and editing them and just moving things around
until they look balanced. So I'll just start
by moving around my existing motifs a little bit and turning off the
snapping again. And then I'm going
to basically do the same thing again
of coping and pasting this strawberry and a
few flowers to fill in the empty space and just balance
everything out nicely. And pinching everything
onto one layer. And now you can
see we still have a little bit of empty
space on the sides here. And now, since we
have our motifs covering all four corners, we can go ahead and
duplicate this layer, turn off the bottom layer, turning on our snapping
and magnetics. We can just drag
it to the right. And drag the other
layer to the left. And one last time,
pinch them together, and then we can fill in this
empty space in the middle. So again, I will copy and paste my strawberry motif and move
it into the center here, turning off the snapping and then transforming it to fit into this
empty space nicely. And then just shift
around some of these other elements until
it looks nicely balanced. So now we basically have our finished repeat
pattern tile, and the final step is
going to be to test it out and make sure that everything
is lining up properly. And so to do that, I'm going to go back
out to my gallery and then click on select
select our pattern, and then hit Duplicate. And then click the
X to exit out. And now we're going to go
into our duplicate file, and we're just going to
make it all one layer. And now I'm just going
to hold down with one finger to select
the background color. And then I'm adding a new
layer and dragging it below, and then filling it with that blue color and then
merging both layers together. And now I'm going to duplicate
this layer three times, so we have a total
of four copies. And then with our selection
tool and the snapping and magnetics on and
uniform selected, as well, I'm going to drag
down from the corner this time and snap it so that it's in one quarter
of the canvas. So again, make sure you
see those orange lines, not the blue and do the same
thing with all four layers. So now you can zoom in and just check that your pattern
has tiled correctly, and there are no gaps or
white lines showing up. And this looks pretty good. So if you do have any
white line showing, you may have to go back and just do some of these
steps over again. So please make sure that you
upload the pattern that you created today to the project
section of this class. And if you have any questions, you can ask them in the
discussion section below, and I'll be happy to help you. Also make sure you
follow me here on Skillshare so you don't
miss my next class, and we'll see you there. Cheers.
 Julie Erin Designs, Artist and Entrepreneur