Transcripts
1. Introduction: Gain confidence using a fine
liner ink pens and learn to master this incredibly versatile
and challenging medium. Hi, my name is Patty Lenton, and I'm a digital artist and illustrator
based in England. I've been working
professionally in art for several years now. And one of my absolute favorite
media to draw with is nx. Within inks, my favorite pen to use is the fine
liner ink pen. I've worked over the years
using many different media, including fine
liners, marker pens, colored inks and more. I was even commissioned,
wants to draw a huge abstract mural
in the lobby of an apartment building using paint pens and really
fat ink markers. I love drawing with fine
liners and ink so much. And whilst I've worked
over a range of different commissions
and illustrations, my absolute favorite
and specialists areas working is abstract
pattern making. The exercises that I'm
gonna be showing you today, I've used myself to gain confidence when using
ink fine liners. And I'm hoping that they
do the same for you. Over the course of this class, we're going to be looking at
12 different exercises and activities to help you gain confidence when using
ink fine liners. We're going to be looking
at techniques such as mark-making, shapes
and patterns. And shading will also be
freeing our creativity using exercises like drawing
with your non-dominant hand, doodling, focusing
on tiny details and drawing in one line. I'm also going to
be sharing some of my own personal tips and tricks, as well as recommendations for paper pens and other media. As we go through this class. By the end of this class, I want you to be able to
draw something using your new found confidence
in ink, fine liner pens. Whether that's sharing one of the activities or exercises
that we did in this class, or uploading something
completely brand new that you have
now been able to draw thanks to your
new confidence. I can't wait to see
what you create.
2. The Class Project: In this class we're going to be covering 12 activities and exercises to help you gain confidence using
ink fine liners. Each exercise class provides you with an opportunity to
add to your sketchbook. I recommend dedicating
at least one page per activity based on the
size of your sketch book. Don't worry, I'm going to
be recommending brands and styles and types and
sizes of sketchbook. In the next lesson, what you need to get started. By the end of this class, you will have a
sketchbook filled with new techniques and you'll be
brimming with confidence. At the end of this class,
I'm gonna be inviting you to share your favorite
activity or exercise from this class or something
that you've been able to draw with your
new-found confidence using ink fine liners. Don't forget to post your
project to the project gallery.
3. What You Need to Get Started: Let's go over some
of the materials that you might need to get started in following along with the activities in this class. A pack of fine
liner pens is best. You could follow
along with a biro or ballpoint pen if you wanted. But to get the most out of
some of these activities, you're going to want a pack of fine liners with a
range of nip sizes. Avoid using pencil as the
point of this class is to get out of our comfort
zone and embrace the ink. If you're just starting out, I would recommend
getting a fine liner set with a wide range of nib sizes. Ideally from size
is 0.05 to 1.0, but aim to have at
least four or five different nip sizes
in your arsenal. My favorite fine
liners at the moment are microns secure.
A fine liners. I find they're incredibly
smooth to draw with, and I just love the feeling
of them on the paper. They're great quality ink and I love using them
in my drawings. If you want to play with color, you could get a pack
of color fine liners, full points, or by rows
for color fine liners. My favorite sets, they
always have been, and I imagined they
always will be our Staedtler try
plus fine liners. There's really
nothing specifically special about these fine liners, But I love the wide range of
colors that they come in. And you can find these in
most stationery shops. When choosing paper, standard art paper or even
print paper will suffice. Recommend for this
particular class, starting a sketch
book to gather all of your ideas and exercises. We want to have by the
end of this class is a reference sketch book
that is just full of ideas and mark making and shapes and patterns and
everything that you can refer back to when you're creating your inky
illustrations. There are several brands
of sketchbook that I would recommend if you're
just starting out. See why it's make great
quality sketchbooks. And I love their paper. Personally. I also love using Casals
own range of art papers. Start small with your
sketch book so you don't get overwhelmed with the
fear of the blank page. I have a wide range of
different size sketchbooks, all the way from A6 going up
to a foreign, even a three. If you start around the A5 size, I think that's a perfect
size to start starting out. Particularly with these
exercises using a six, the page can actually
be quite small and overcrowded and A4 and bigger, you might end up feeling
overwhelmed with having to fill the
page each time around. So I would recommend with an A5 sketchbook to get started.
4. A Note on Confidence: Finally, before we dive
into our first exercise, I just wanted to take
a minute to talk to you about confidence in general. There's no right or wrong
way to take this class. I'll be guiding you with my
own techniques and tips. But this is an opportunity
for you to find your own inky voice and style. There are infinite possibilities
and ink out there. This is just a guide to help you along your artistic journey. As we progress through
these activities, each one will get progressively
more challenging. Please take your time, follow along at your own pace. And if a technique
isn't speaking to you, just adapt it or move
along to the next one. There are more challenging
activities and exercises that might really hit the note perfectly for you. And simpler ones
that just aren't ticking the boxes. That's okay. The important thing
is that you're happy, you're enjoying
this class and that you're building your
confidence as you grow. Confidence comes from within. I can't literally teach
you how to be confident, but I can equip you with
all the tools, tips, and techniques you
need to launch yourself up and get you
drawing competently. Now with all that in mind, let's pick up our pens and
let's get started drawing with inks confidently with
our first activity.
5. Activity 1: Lines: For this first activity, we're going to be drawing
with straight lines. No rules allowed. Lines are the foundation
of any drawing. And as basic as it sounds, to draw a straight
line as one of the greatest skills I've
practiced and developed. That might sound strange, but a lot of my work
involves straight lines and drawings would just look
odd if I used a ruler. There's this scene from
this movie. Good night Mr. Tom. And Tom asks this young boy how he was able to draw this line so straight
without a ruler. And I don't know what it was. I was eight at the time when
I first saw this movie, it completely stuck with me. And I thought it was
so incredible that one could draw that
accurately without a ruler. Now, I can, for the first activity and the
first page in your sketchbook, I just want you to
draw straight lines. Do not use a ruler. Start with shorter ones and progressively get
longer and longer. If you've got big
enough piece of paper like a four or a three, see if you can get
all the way from the longest edge to the
other longest edge, then same across
the other way as well without using
a ruler and see how straight you can make
those lines as you draw them. This act of just drawing
lines on the page. This is called mark-making. And this is the very
first step and getting confident using ink fine liners.
6. Activity 2: Lines and Pressures: For our second activity, we're going to be building
on our first one of drawing straight lines by increasing and decreasing the nib sizes, by increasing and decreasing pressure to create
different effects on the page using different
pens from your set, see the differences
in nib sizes. Pens I have here. You can see my nib sizes go
from 0.05 mm up to 1.5 mm. One of my top tips for this activity is to actually create a
reference page within your sketch book showing each of your different pens what the thicknesses and what they
look like on the page. This can actually be
really helpful later when you're trying to create
something specific. And you want to refer back to which pen was it that made
that really cool effect? And you've actually
got a reference page and you can look at it and say, Oh yeah, it was the
one-point nodes. I personally find
this tip really helpful and I use
it all the time. As you're drawing in
your sketch book, I want you to create
different lines with different thicknesses and see how they interact with each other and how you're
creating those marks. Increase or decrease
the speed at which you're moving the
pen across the page. Draw straight lines,
curvy lines, loopy lines, layer them on top of each other, mix the thicknesses of the pens and the
speeds of the pens, really get to know your pens. One of the best tips that I can give you about working with ink is that you need to
know your pens inside out. I can't tell you if I if
if one of my pens breaks, if one of them stopped working, it dries up out of ink
and I have to go get a new one and I can't
get that specific pen. It sounds, it sounds
really bizarre, but it's actually
so important to me. I have to have that brand
of pen in a nought 0.3 because that's how I make that particular
mark on the page. Once you know your
pens inside-out and exactly how they're
making marks on the page. That's how you're gonna be
really confident saying, I know exactly how to draw that and I know the
pen, I need to do it.
7. Activity 3: Straight Edge Shapes: For our third activity, we're graduating from
straight lines to straight line shapes using the
exact same idea in theory. Again, using a brand new page
within your sketch book, I want you to start drawing out straight-line shapes again, without using a ruler. Try drawing squares, rectangles. Rhombus is pentagons, octagons, stars, any shape you can think of that has
straight lines at the core. You can make them increase
and decrease in size. Layer them up, makes the
thicknesses think about the speed and the pressure and how you're applying
the pen to the page again, my shattered pieces start by me drawing a border
around the page. And then every straight-line
shape and size, which I then fill with
an abstract ink pattern. Every straight line on these pieces has been drawn
completely free hand, no ruler, no pencil
to show the way. Now we're gonna be trying
the exact same exercise using rounded shapes.
8. Activity 4: Rounded Shapes: At this point, you should
already be feeling more confident using your
ink fine liners. And you can start to see the
person hair, excuse the pun. But we're now going to
be moving on to round shapes and getting a little
more fluid with our drawings. Again, on a new page
of your sketchbook, I want you to practice
drawing circles, ovals, teardrops,
hearts, and swells. Any shape you can think of, which has a rounded edge. In the same spirit as drawing the straight line
without the ruler. One fun challenge
is to try and draw a circle perfectly
without a compass. It takes a lot of practice
to be able to draw that beautiful,
perfect even circle. And I'll admit it's still something that I
struggle with today. As you draw your shapes
in your sketchbook, mix them up exactly as you did with your straight line shapes. Think about increasing
them in size and pressure. Changing the nib sizes, maybe changing halfway
through shape. Change the speed at
which you draw them, make them tiny,
make them massive. You can layer them on
top of each other, makes the thicknesses,
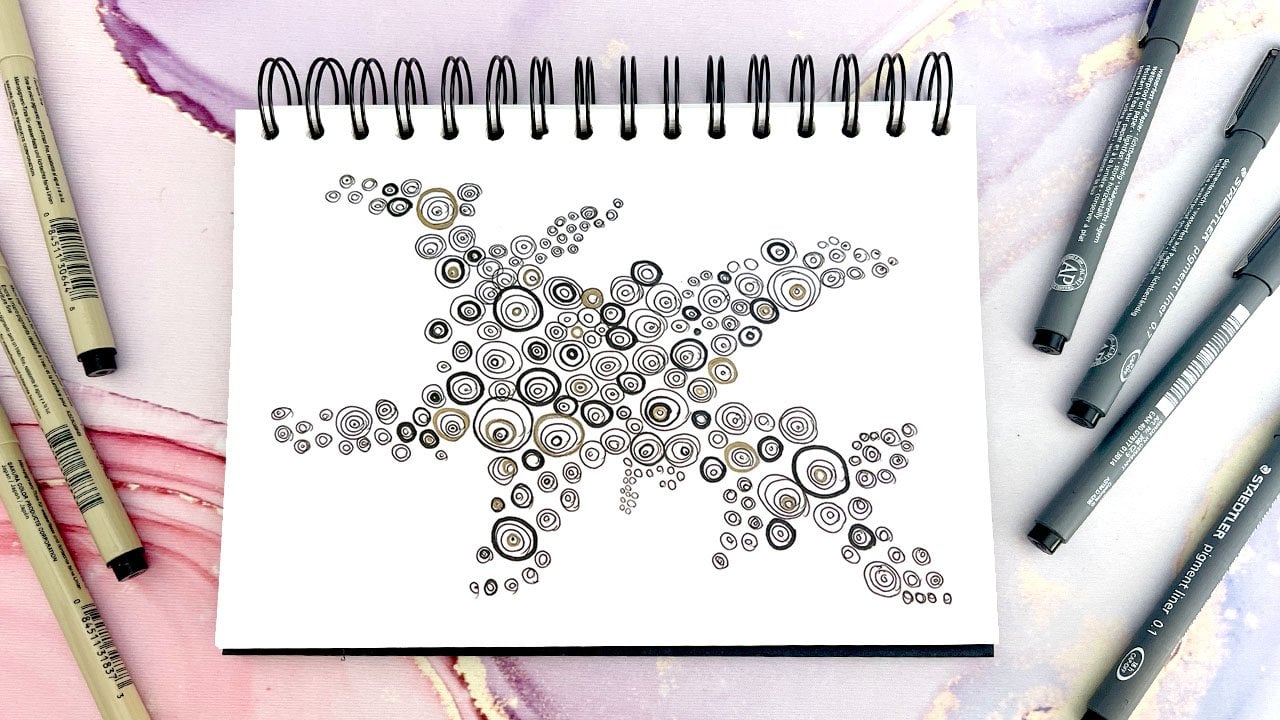
and make them concentric. Here's a piece that I drew
imaginatively named circles, made entirely of circles
in different pen sizes. These last four activities
have really looked at the importance of mark making and getting
the pen on the page. Hopefully by now
you're feeling a lot more confident in this area. And now we're going
to be moving on to our next stage of exercises, where we'll be looking
at gradients and depth.
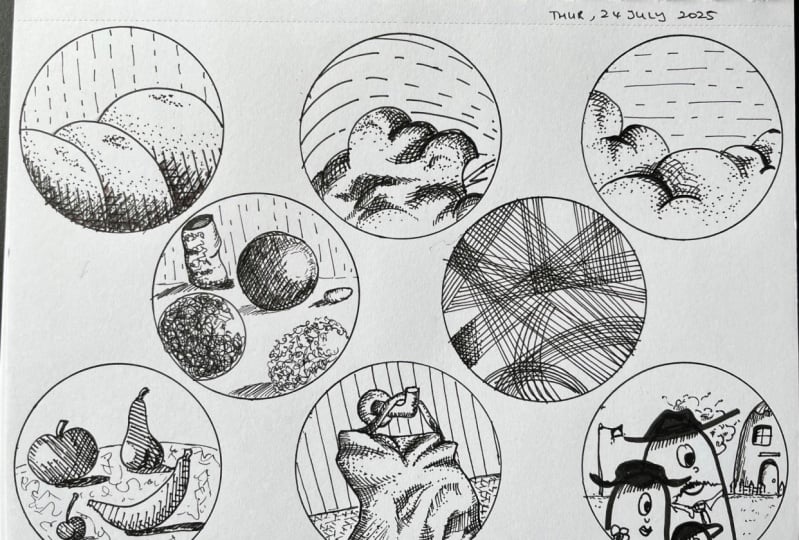
9. Activity 5: Gradients in Ink: One thing that people
have told me scares them when it comes
to working with ink and particularly
ink fine liners is that the drawings
have no depth. This is something that I
completely disagree with. And in this activity I'm
going to show you why. There are many techniques
for creating depth, tone, light, and
shade using ink. First up, one that we've
already covered in our previous exercises
is pressure. Again without pressing on your pen so hard that
you break the NAB. Think about how light touches with the ink on the
page and heavier, heavier touches using the
exact same pen can create different depths and lightness and darkness within your ink. Pressure can be used very, very well within
ink illustrations. And this is something
that's definitely worth practicing within
your sketchbook. Stippling. This is the process of adding dots closer together
or further apart to create depth and shade
within your drawing is very similar to
pointillism in painting, where artists like Sierra would paint using
only very tiny dots. These dots would then
create a pattern and color and shape and shade
within paintings, even though they're just
working using dots. Hatching is the process
where you are drawing using straight lines
to create shade. So you can draw the
lines very close together or very
far apart to create the impression that the
shade is lighter or darker. Cross hatching is
just like hatching except instead of lines just
going in one direction, you're literally crossing
them over each other. So if you think back to
our activity where we were practicing layering lines
on top of each other. That was crosshatching. You've already had
a go at that cross hatching again,
same as hatching. If you cross hatch the
lines very close together, you're going to create
a much darker effect. And if you cross hatch
them further apart, you're going to make a
much lighter effect. Scribbling. This is exactly what it sounds. You are literally
scribbling on the page, scribbling in different
intensities, very, very tight scribbles
together and very, very far apart scribbles, you're going to be able to
create a lot of light and depth and darkness
in your drawings. It's also, in my opinion, a more fun way to draw depth
and light with a drawing, hatching and crosshatching
can be quite rigid and stippling can take
an awful amount of time. But scribbling is
actually super fun. And the idea of drawing something and then
scribbling all over it to create that depth is actually a really fun way to draw. One activity that works really well is on a page
of your sketchbook, draw a long thin rectangle, and then make a gradient using
each of these techniques. So pick one end of the rectangle and make that your
dark as possible. And then slowly, slowly all
the way out to the other end, make it as light as possible, or vice versa, started the light end of the
rectangle and then make your way across
getting darker and darker and darker
using these techniques. Mastering ink gradients, enlightened depth
using these techniques is a great way to add more
intensity to your artworks.
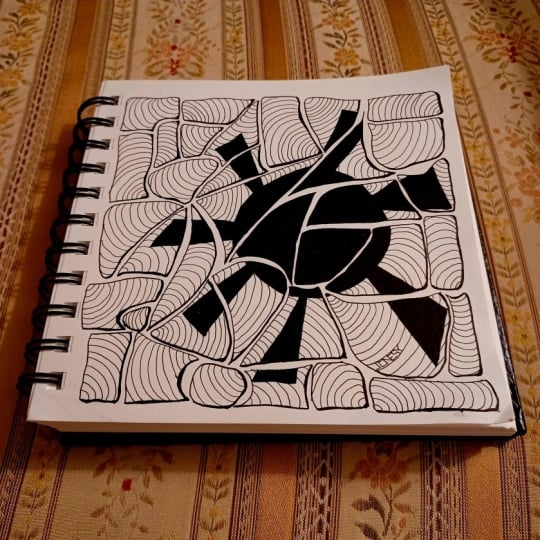
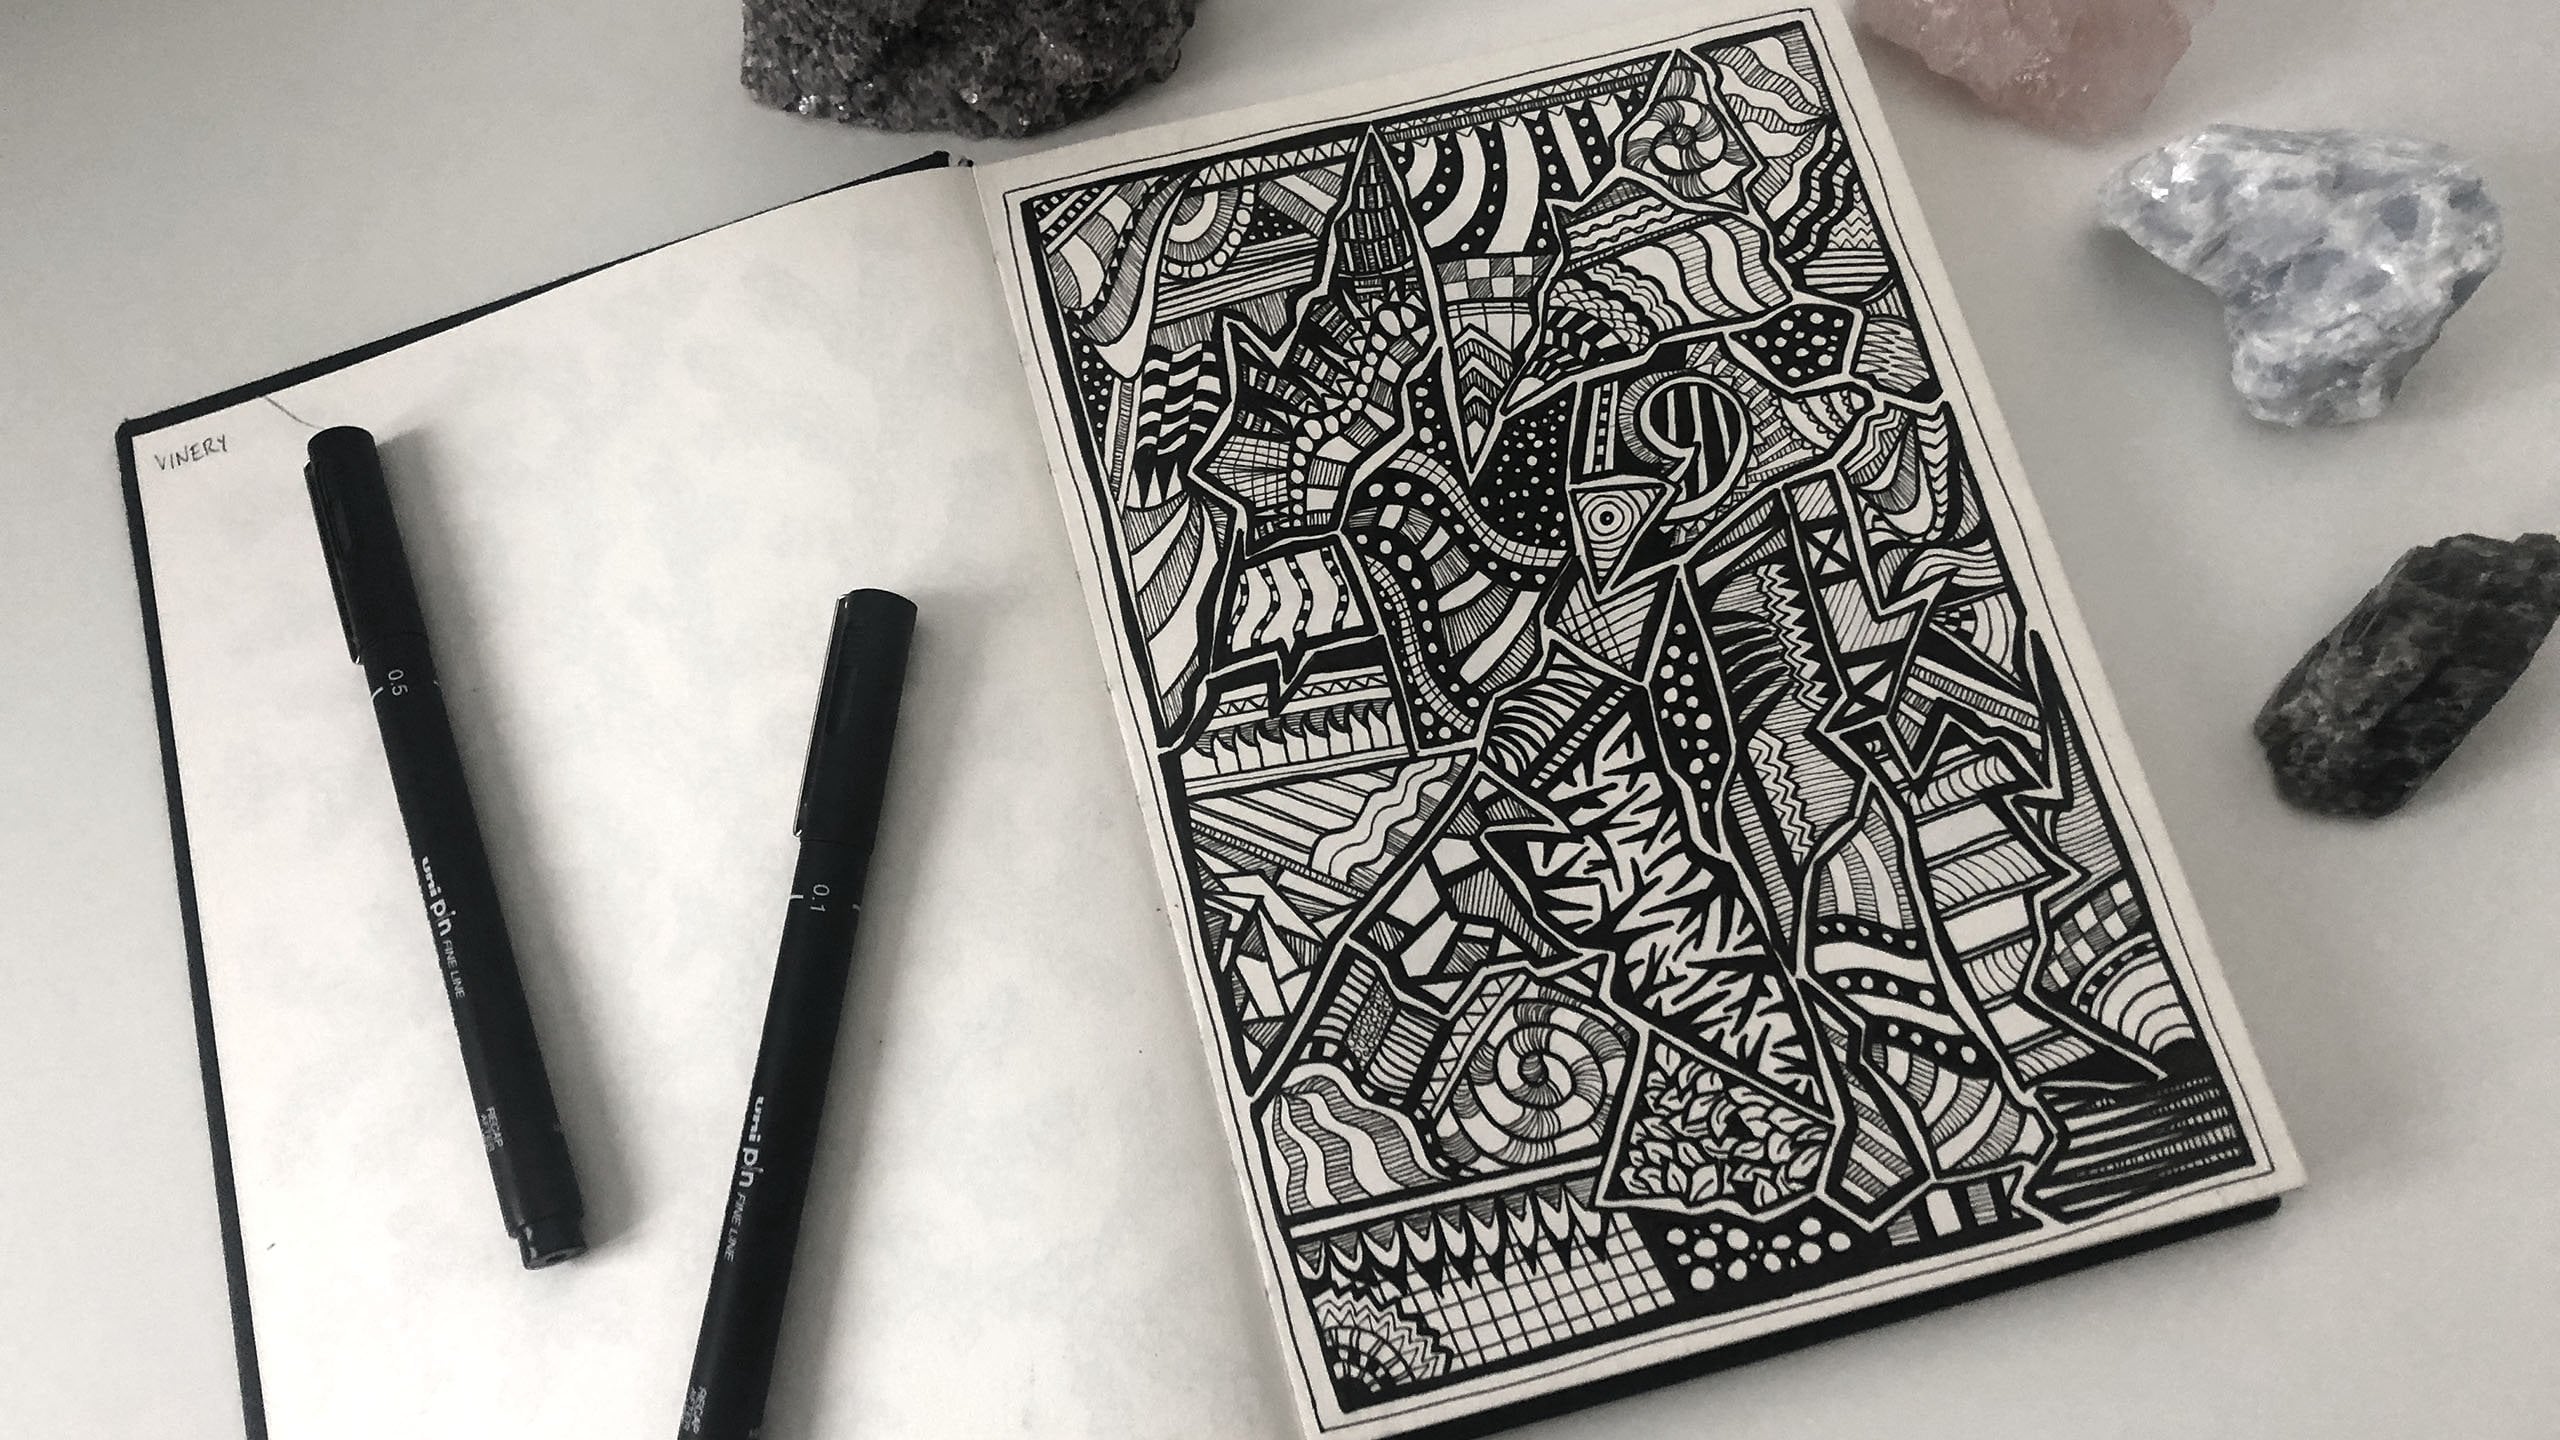
10. Activity 6: Making Patterns: Now that you've mastered
lines and shapes, you're gonna be able to
put them together to create patterns on the page. Abstract patterns is one of the core aspects
of my art style, whether I'm working with ink or creating digital
illustrations. I want you to start
with two shapes. Find an interesting way
to make them interact, and then repeat that across. That, that's a person. You've made your first person. How about a passive lines? What would that look like? Look back through
your sketchbook for inspiration on how
you've created marks on the page and how you might turn that into a pattern. You could draw sets of lines
to fill with a pattern. They can be straight
or wavy or a mixture. One great way to practice
passing making in your sketch book is draw a grid and fill each square with a different pattern using
a different technique, different mix of shapes
and sizes and nib sizes, pressures, everything
that you've learned about mark making up until now. Keep practicing creating
these patterns. And not only will
your confidence grow, but you will have a sketchbook filled with different
patterns to reference back to later
at the drop of a hat.
11. Activity 7: Doodles: I am a big doodler. You should see my notebooks. It's not just in sketchbooks
where I do my notebooks, my work notes, meeting notes, recipe books that all full of little doodles and squiggles
and shapes and lines. I can't stop doodling. To get started with doodling, pick a point on the page
and just start from there. Try and add to the page
without leaving a gap and keep going until the
page is completely full. You'll do those can be
figurative, such as flowers, moons and stars, rainbows and
sunshine, leaves or vines. Or they could be abstract shapes leading from one to the other, like circles and squares,
lines and triangles. As you practice your doodling, think back on your activities so far and your mark-making. Flip back through
that sketch book and find examples of
things that you could then use to doodle in the same way that you did
with your pattern-making.
12. Activity 8: Using Your Other Hand: This next activity is a really fun and challenging
way to get out of your creative comfort zone and boost your confidence
at the same time. For eighth activity,
we're going to be drawing with our
non-dominant hand. The purpose of this activity isn't to become as
good at drawing with your left hand is as
you normally are with your right or vice versa. It's more about unlocking the other side of
your brain to make drawing with your dominant hand easier and therefore
giving you confidence. E.g. if you were
to draw something really simple that
you're familiar with, say a flower or hot, with your non-dominant
hand first. And then try and draw it now
with your dominant hand. And see how much easier and
more confident you feel drawing with your dominant hand. One trick is to set yourself a short timer and then give yourself the same amount of
time with your other hand. You're bound to see
how much easier is now drawing the same item. Another trick is mimicking. Try drawing with your
non-dominant hand and see what kind of marks you're
making on the page. Drawing straight lines or even very basic
shapes can create different effects
because you're not using your main hand. Looking at a shave which has
now got some wiggles in it, or different effects
with the ink trying to replicate that
with your dominant hand. The important thing
to remember about this activity is that
it's not about becoming ambidextrous and being able to draw perfectly with
your non-dominant hand. If you already are ambidextrous, you've clearly got a
leg up on the rest of us and you can probably
just jump straight ahead to the next
challenge because this isn't going to be
challenging for you at all. But the idea is that instead of perfecting your
non-dominant hand, you're actually trying to
free up your creativity and open up new possibilities
in mark-making on the page.
13. Activity 9: All in the Details: So far in this class, I've shown you a lot of
different ways to do general mark-making and specifically abstract
patterns on the page. Now so excited to show you this activity because
it's actually one of my personal
favorite ways to draw. When drawing figuratively. I want you to take an item, anything at all,
something detailed. I'd recommend avoiding
anything made of glass or highly reflective. As we want to be looking at something that has
a lot of details, it's very easy to draw. I want you to start
by thinking about the details of the item
that you're looking at. Say we are drawing a vars, focus on the rim of the
vase and then the lip, and then maybe a little
bit of the neck. And then slowly
you're starting to build out the shape of the vase. Instead of that immediate, I'm going to draw a vars and
then fill in the details. You can go even further by really zooming in
on the detail of your item and thinking about there's a tiny
bit of shading there, there's a little crack here. So you're really focusing on
the details of that drawing. For me, this is a great way about getting confident
using the very, very thin pens in your arsenal. I'm always tempted to go for really thick pens
and make big marks. That's what a lot
of my drawings are. But being confident in creating those really
tiny details with this really tiny nib pens
is hugely beneficial. One tip for making this
challenge a little easier for you is look at the item
head-on and not on an angle. If you're looking at
the item straight on, you're going to be creating
the shape very flat. And that's going to make
it a lot easier for you, making the marks on the page, anything on an angle. You're then also taking
perspective into account, which is great if you're already feeling confident and
you want to do that, go for it, That's going
to be brilliant to see. But if you find that
you are struggling, imagine like the vars
that it's flat and you're looking at it very square rather than on the angle. And you're having to figure out all the perspective as well. It's very tempting
to try and draw any item as an outline first and then filling
in the details. But personally and I
hope you found to doing this exercise that is
actually great fun, starting at a single point and almost discovering the
item as you draw it, going out from that single point to create the whole drawing.
14. Activity 10: Single Line Drawings: For our tenth activity, we're actually going to be
looking at drawing using one long, continuous,
single line. Single line drawings
have become very popular in media and
style at the moment. People have them done as tattoos and very minimalist
illustrations. And I find that it's
a great way to get super confident
using fine liners. Pick an item, start
with something basic. Examiners want you to attempt to draw it in one
long continuous line. You can go back over your lines you've already drawn
if you need to. Try to not take your
pen off the paper. If the thing that you're
drawing has a big gap, such as a face and you need to get across the skin
to draw the eye. Just go for it. Think about where
a line might make the most sense artistically
within your drawing. And if you're not sure, just do this anyway. This is definitely one of the more challenging activities. If you're feeling overwhelmed, don't worry, just start small. Think about something
little that you can draw that you're
familiar with as a shape. And then slowly build up into more complicated
illustrations.
15. Activity 11: Drawing Letters: This one might seem a bit odd, but I've always loved drawing letters and punctuation marks. It's something I've done
since I was a small child and it's something
that I've continued to do in my adult life. As an illustrator. You'll be tempted to pencil the shape of the
letter out first, but don't write the letter or a punctuation mark first if you're struggling
to visualize it. And then use that as a
guide in your sketch book. You can draw it as a
straight line shape and then add
embellishments to it. Or you could draw it
as a block letter. Then add patterns and lines to make his
more unique piece. As always, as we have done
throughout this class, remember to reference your
sketchbook for mark making patterns and shape ideas as you fill out your letters
and punctuation marks. Another fun challenge is to
combine letters together. You can match downstrokes, such as putting H and
L together or j and k, even V and B, you can make one
larger than the other, such as E and T, or T and X, or C and H. You could put one
inside the other, such as 0 and x. As we move on to
our final activity, I'm hoping you're
feeling full of confidence and your sketch
book is full of practices.
16. Activity 12: Embracing the Mistakes: Here we are at the
final activity, embracing the mistakes. One of the biggest
fears people have about ink is how permanent is. Am I completely understand? I felt the exact way
when I was starting out. There's definitely
comfort and safety working in pencil as
you can erase it. Even media like acrylics, you can build up the
paint and you can cover mistakes you
make. With ink. It's so much more final because once you've made
that mark on the page, you can't exactly go over it without creating something else. And I believe that's
where a lot of people feel the fair
when drawing with ink, fine liners with ink. If you slip or smudge or feeling something you weren't
meant to within a pattern, it can feel like
your work is ruined. And I just want to give
you the confidence, same as I have in the past, that your work isn't
wherein there are ways to embrace this and transform it
into something new that you maybe hadn't
planned for before. I want you to take
your drawing and deliberately add
something incorrect, such as a line or a smudge. Now I want you to think
outside of the box, your art is a living thing and it's now in a state
of evolution. It was going to be x. Now we've done something else. It's not going to be x anymore. We're going to need to keep
going and turn it into y. To quote the wonderful Bob Ross, there are no mistakes, just happy little accidents. I won't lie. Even being super confident
in ink fine liners and pens Doesn't take the annoyance
out of making mistake. There's nothing I know to do
to stop them being annoying, but at least you won't be
afraid of making them anymore.
17. Your Project: Well done. You've made it through
12th activities designed to challenge
your thinking, builds up your confidence and your creativity using
ink fine liners. By this point, you should
be feeling really great. A sketchbook filled with
ideas and inspiration, patterns, mark-making, and more. For your final project, I would love to
see which activity you connected with most, which one will be
the most confidence, which one had the most
surprising outcome for you, whether it was
general mark-making, drawing with a single line, creating patterns
using your other hand or any of the other
activities in this class. I would love to see it. So please snap a picture of which one spoke to you the most, or something that you've drawn
with your new found ink, confidence and post it
in the projects gallery.
18. Final Thoughts: Congratulations and thank you so much for taking my class. It really means the world to me. During this class, we have been exploring ways to
gain confidence using fine liners in a
wide range of techniques, including mark-making, shapes
and patterns and shading. We've also been freeing
our creativity using exercises like drawing with
your non-dominant hand. Doodling, focusing on details, and drawing in one
long continuous line, reaching the end of this class, you should now have a sketch
for brimming with examples and exercises and a
newfound confidence. I can't wait to see what you draw with this new conference. So please don't forget to post your project to the
project gallery.
 Hattie Linton, Digital Artist and Ink Illustrator