Transcripts
1. Introduction: Limitations in art can set the stage for
creativity to thrive. With just a few supplies and just a little bit
of time to create, art journaling is a great
way to push through artist's block and rediscover
the joy of creating art. Hi, I'm Ashton Womack. I'm an artist and
surface designer. I'm lucky enough to
have my dream job as the artist behind
Virgo and Paper, where I get to
create artwork for stationary and
lifestyle products. Art journaling has
been a hobby of mine for over a decade. Journaling has helped me
to practice flexibility, come up with new ideas, and unlock my creativity in
both my business and my life. But I know that it can
be really hard to find the time for another
creative project. So I've been thinking about
how I can keep up with my journaling even when
life and work gets busy. The answer is making it
easy and achievable by working on it in small pockets
of time throughout my day. In this class I'll
demonstrate how to set up your own daily
journaling practice, what supplies to use, and we'll go through a seven-day journaling
challenge together. Working with a
time constraint of just 10 minutes will
help you to complete this challenge even if you
have a busy schedule and a time limitation on
your work will help you to make creative decisions
without overthinking. This class is about
surrendering perfectionism and creating quickly
to generate new ideas. By the end of the class, your journal will become a small but mighty library of materials and subjects that
you've experimented with. This practice of journaling has inspired creativity in all areas of my life and I'm so excited to share it with you.
Let's get started.
2. Class Project: Your class project
is to journal along with me for the
seven-day challenge. At the end of the seven days, take a photo of your
favorite journal page and upload it to the
project gallery. You can edit your
project later to add new photos as you
continue journaling. I can't wait to see what you create over the next seven days. To prepare for the challenge, go to the next lesson where we will assemble our
creative toolkit.
3. Tools and Materials: Art Journaling Supply Kit: Let's talk about the tools and materials that we'll
be using in class. I found that the
key to keeping up with a daily
challenge like this, is to pick out my
supplies ahead of time. That way when I have
time to create, I don't have to waste
time picking out art supplies or deciding
what materials to use. Those decisions are
already made for me and I can just jump
in and get to work. Let's first talk
about the journal. You can use any journal or sketchbook that you
like and have on hand. For this challenge, I'm using a small pocket size three
by five sketchbook. The brand is talons
art creation. This book has 94 pound paper. It is an off-white color. There are lots of
pages in this book. I've found that this paper
holds up pretty well to a variety of materials
like paint, markers, pens, and so I can layer lots of different materials
on a page and my paper doesn't
seem to warp at all. I really like that. Another pocket-size journal
that I've used that I really enjoy is a crescent
renderer sketchbook. Now this paper is really unique because it can hold
materials like alcohol markers or even spray paint without bleeding
through the page. Again, these are great
for layering lots of different materials and just playing around and combining
different techniques. But you can do this with any existing sketch book
that you already started. Don't feel like you need to start a new sketch
book for this project. I'm going to be
jumping in and just continuing to use
my pocket notebook. Now for a daily challenge, I like to use some container
to hold my supplies. I'm using a pencil pouch
to hold my supplies. I like to have a limitation on the number of
supplies that I can use to reduce any overwhelm about figuring out
what supplies to use. For this challenge,
I suggest using a pencil pouch or
a small basket, some container that will limit the number of
things you can include. As far as materials, you can include anything that you have and you'd
like to work with. These are the supplies that I like to include in
my pencil pouch. I like to use my
favorite pencils and markers and just choose
a couple of colors of each so that I have
a lot of variety of colors and materials
in this small kit. I've included three
Prismacolor colored pencils. I have a graphite pencil here, just a to-be pencil
and an eraser. I also have a little
paperclip and sometimes I like to use this to hold the pages in
my journal open, especially once my journal
starts to get full, this can come in handy. Some of my favorite
colorful markers to use are these Tombow
dual brush pens. I've included a few colors here. Then I have a few Faber
Castell Pitt pens. I chose a black one, a red, a sage green and then
a large yellow one. I also have a Pigma
Micron pen in 0.5. I'm also including a brush pen
that is a new find for me. This is a Pentel pigment ink
brush pen in a medium tip. This has quickly become one of my favorites for
drawing and lettering. It has a really Inky style and I always love the
results when I use this pen. Also just included a fun Mr. Sketch marker. They're really fun
scented markers. I just included this one
because I liked the color. A really fun supply that is also a new find for me is
Posca paint pens. They're just a lot
of fun to journal with because you can really easily draw right on top of
glossy photos with these, so I've included a couple of colors [BACKGROUND]
Then finally, I like to use some
paint in my journaling. I like to use these
little craft paints. There are a lot of fun for journaling because they come in so many different colors and
they're very affordable. You don't have to worry
about mixing paint colors because they come in so
many different varieties, so I have a blush pink. I've also included a
little sample size Liquitex Basics Acrylic
paint in black. Then I also have an
acrylic gouache paint. I've just included this because I really liked the
dark green color. Then for my paint, one of my favorite techniques is instead of using
a paintbrush, I like to use a
little plastic card. This is just an old hotel key. I like to use this
to apply my paint. Takes some of the overthinking
out of the process and lets you get paint down
on the page really quickly. You'll see me do that
throughout the class. Now in my journaling,
I also like to include a lot of different
collage elements. I have found this nice little plastic pouch that allows me to just keep a few on hand
and keeps it portable. Some of the things that I like
to collect include photos, pieces of pattern paper or
colorful construction paper. I'll also include little
pieces of art like this, like sketches or things that just really don't have
a place anywhere else, but I like them and I think that I could use them
for some collage. You can include found
items like a paint chip or a sticker or a receipt,
really anything. I like to just collect these
elements over time and keep anything that I really like the look of or the
texture or the color. I've also recently enjoyed
typing up a variety of words on my typewriter in order to cut them apart and
create some word art. I've actually included in the class resources
for this class, a PDF that includes
some of these words. You can print those
out and cut them apart to use in your journaling. If I'm wanting to do some
collage in my journal, then I'm also going
to include in my supply kit a glue
stick and some scissors. The scissors are
really optional, a lot of times I
like to just tear my pages apart because I like the texture of the ripped paper, but that's up to you. Now that our supplies
are ready to go, join me in the next lesson
where we'll discuss some tips for keeping up with a daily journaling practice.
4. Creating a Daily Journaling Practice: It can be difficult to
establish a new creative habit, but I have a few tips to help you complete
this challenge. First, I'd encourage
you to think about when in your day you'll be
able to work on the challenge. I think it's a great idea
to wedge this new habit in with a habit that you
already have established. Think about a time
when you're normally sitting down for a few
minutes during your day. For example, I like
to journal with my morning coffee because drinking coffee every morning is a habit that I already have long established so it's easy to just wedge a little bit
of journaling time in while I'm enjoying my coffee. You could fit journaling into your lunch break or in the
evening while watching TV. I also suggest to set the
bar low and that's why this challenge focuses on creating in less than
10 minutes a day. On days when you have more time, you can go back and continue working and add more
detail to your pages. Remember that every
page doesn't have to be an artistic masterpiece. Journaling is about
self-expression and recording your memories and I found that that looks different every day. Some days you might feel really creative and you want
to draw or paint. But on other days maybe you
only have time to glue in a receipt or a photo that you found during your
day and that's okay. Each small creative
act will build on the one before
so just keep going. My last tip is to refer to a prompt list for
journaling ideas. I'll be providing daily prompts throughout the
class and I'm also including a list of further prompts in the
class resource PDF, which you can download
in the Projects and Resources section
of the class. Now we have our journal and our supplies ready
and we've identified some times during the day when we can work
on our journaling. When you're ready to start
the seven-day challenge, head to the next
lesson for Day 1.
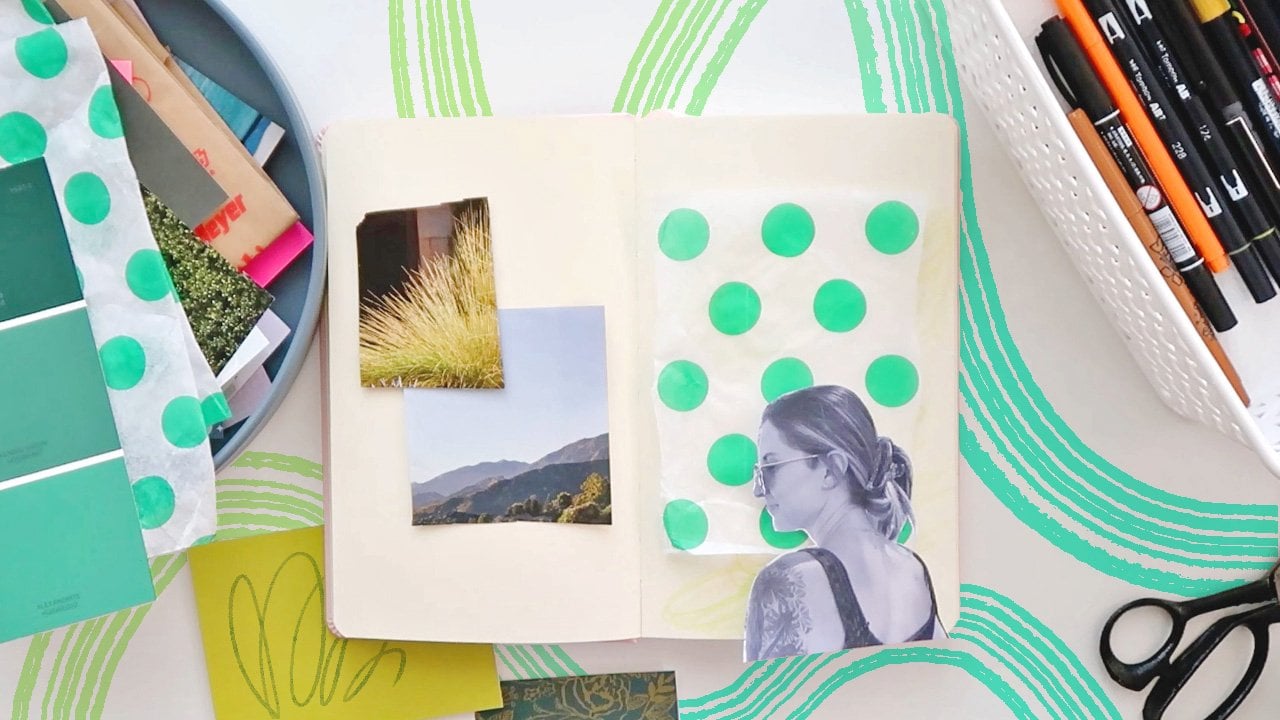
5. Day One: Color Collage: Welcome to Day one of our
journaling challenge. So each day of this challenge, I'm going to provide a
prompt to inspire our pages. We will work together
so you can see how I'm going to journal and you can follow along exactly with my creative process or feel free to interpret the
prompt any way you like. So today's prompt
is color collage. We're going to pick
one color and use a variety of materials
to create a collage. You can start with one of
your materials or one of your collage elements and
I think in this case, I'm going to take a look at the things I've
collected here for some inspiration
about what color I might want to use for this page, so I'm just going
to take a look at the elements that
I've collected and see if I can group them
into different colors. So I'm noticing right
away I have a lot of green and blue items. I also have a lot
of purple elements. You might notice this with your supplies that
you've collected. You might notice one or
two predominant colors. If you're like me
you tend to just gravitate to certain
colors over and over. So it's pretty
obvious to me that I need to choose the color blue because I have lots of
different shades of blue, photos that contain blue. So I'm gathering the items that have blue as the
predominant color, and then while I'm here,
I'm also going to take a look at my supplies
and see what I have. I have a blue marker here. I have a blue paint pen as well. So I've picked out
my blue materials. If you have just a couple of materials that go with
your color theme, that is totally fine. Less materials means
more creativity and less decisions
that you have to make, so that's perfectly fine. Now because I'm working
with some collage elements, I'm going to pull my
scissors and glue here and I'm being conscious
of my time constraint. I want to stick to
10 minutes a day, so I took about a
minute to collect my materials and I want to jump right in and
start collaging. As far as the color
blue I really love the ocean in this photo, and I also really like this
floral drawing that I had, as well as this piece
of blue glitter paper. I'm going to start
playing and see how I can include these elements together. I'm noticing that on this piece of art I have like a
bright blue color. I also have some bright
blue paper here and envelope in a piece of colored
paper and I think this, it's really more of a blue-green
but I love the color of this envelope and it
matches this other piece, so I think I'm going
to include this. I think I'm going to
use this envelope as sort background, and I'm just going to cut
out a large piece here. Now, this piece is too large
to fit on my page as well, so I think what I'm going
to do is I'm actually going to cut out some
of these elements. So I chose the color collage as our first exercise because we're really just
focusing on colors. So if you're thinking
at this point like, wait, what am I making? What am I exactly putting together here and what is my
page is going to look like? You might have questions like that when you're
starting out and I think if we just focus on color
alone and just seeing how our different
colored elements who play off of each other, that will inform
the decisions that we're making along with
that time constraint. We really just have to focus on getting things
down on the page, that takes away some
of the pressure to figure out answers to
all of those questions. So I've just ripped my
paper and I love to rip my collage elements
especially if I don't have a pair
of scissors with me. So I'm just going to spend a couple minutes playing
with different layouts to see how my elements might fit together and what
looks good to me. I'm going to start gluing
pieces down even though I'm not 100% sure about
my decisions, just so that I can get
the page done quickly. So I think this photo, once I glued it
down it didn't land exactly where I wanted it on
the page, but that's okay. I'm just going to embrace
it and keep moving. I'm actually going
to let part of this piece hang over the page and then I'll just
trim that when I'm done. So by cutting the blue
piece of paper in half and then cutting this
drawing in half, I'm able to create
some repetition on the left and the
right side of the page, and then my favorite
element that I pulled is probably this piece of glittered paper just
for a fun texture. I'm just going to
cut a little piece here and try to figure out where exactly I
would like to place that. I'm almost going to
make it look like it's a little piece of
tape on the page. Slide it into place when
my glue is still wet. Again, to repeat that
element on the other side, I'm just going to glue
another piece, that paper. So I think I have all my
collage elements down, my page is feeling pretty full. Now, in order to use
some of my markers here, I'm going to think about
how I could maybe pull some elements from
the collage items that are already on the page. So for example,
maybe I could pull another leaf shape or
a flower shape here, or even these repetitive lines. Or I could even take
inspiration from the sky, the clouds and the
waves in my photo. I think I'm going to start with these little dashes just
because that's going to be the easiest and I know I can just replicate those
marks here on my page, and that's just a
quick decision I can make and just keep going. I feel like a really good rule in art is to use odd numbers, and so I like to repeat elements
on my page three times. I do that pretty often. So I've already have
these dashes here, so if I add them two more times, it really just creates
a sense of balance so that your eye can swing around the page
and it feels more complete and then again, I actually had used this blue paint pen on this
piece of collage here, so I'm going to use it somewhere else on my page as
well and I think I'm actually just going to go
with the flow here and create some dots and I love
these paint markers because you can actually draw
right on top of a photo, no problem, and again I think
I'm going to repeat that element three times. All right, so I just trimmed that piece of paper that was hanging off the edge
of my sketchbook and I'm going to
call the page done. You might be wondering, how do I know if my page is finished? I think the longer that
you work on a journal, you'll come to just have an intuitive sense of when
the page is full or complete, but to start out I'd like
to use the time limit. So that's the great thing about this challenge is we're just going to set that
10-minute timeframe and when that window is over, that's how you know you're done. All right, that's it for Day 1. I will see you on Day
2 in the next lesson.
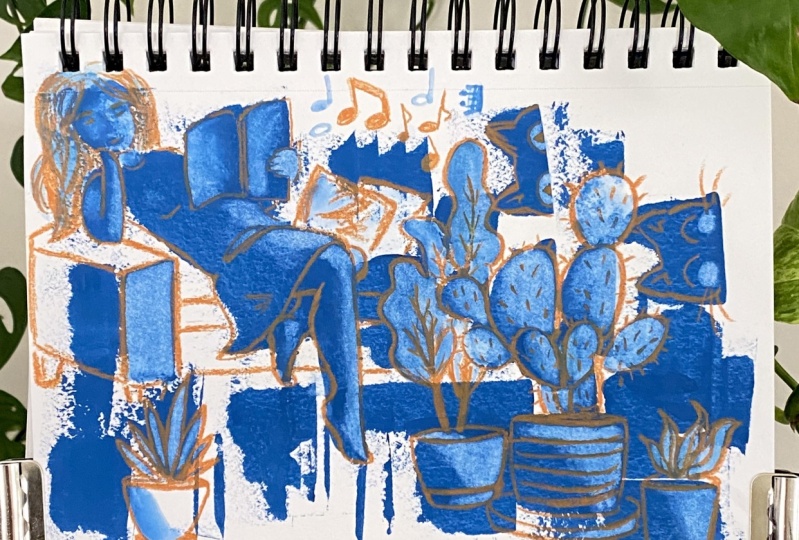
6. Day Two: Paint and Respond: Welcome to Day 2 of our
journaling challenge. Today's prompt is
paint and respond. I'm going to start by flipping
open to a blank page. For this prompt, you might
have guessed we're going to start with some paint. Now I think the best paint to use for this
exercise is going to be acrylic paint because
it is very fast drying, so that'll help us keep
within our time limit. I'm just going to use
some Liquitex Basics, acrylic paint, any acrylic
craft paint is fine as well. Any dark color is going
to be your friend, because the darker
the color the more variation and values that
you're going to get. For my art journaling I love to, instead of using a paintbrush, use a plastic card, so this happens to
be an old hotel key, but any plastic card will work. I like to do that because again, it prevents any overthinking
that you might have if you're using a
paintbrush or trying to apply the paint perfectly, because applying it
with a card definitely is going to lead to some
unexpected results. For this exercise, that's
going to be a good thing. You can either put your paint onto your page first
or onto your card. I think I'll try and do
a little bit of both. [NOISE] Sometimes I like to just start with
a dot on my page, [NOISE] and then smear it out. I'm going to zoom
in a little bit. You'll pick up the paint
as you start to do this, and then you can neatly smear, but notice how that
created a difference in applications so it just
created some natural streaks. Just apply this in really
any haphazard manner. You can try to be a little
more precious about it, or just experiment with
using a little bit of a different pressure in different angles and
see what happens. For over here, I think I'm
going to try and apply this right on my card to start and sometimes I'll try to do a thin line across
the edge of the card. We'll see what
happens. [LAUGHTER] I love just the difference in streaks and it's hard to
get this result with a brush. I just love the
result of the card. Then you can scratch
back into areas of thick paint with the card as well to create
a little texture. Texture is definitely
your friend here. [NOISE] I'm just going
to let this page completely dry
before we move on to the next step and with acrylic paint that should
only take a few minutes. If you have a heat gun
or even a hairdryer, you can also use that to
heat up your page and dry your paint to save
a little bit of time. Now that my page
is completely dry, I'm ready to move on to
responding to my paint. I'm already starting to notice
some shapes and patterns and designs within the texture of the paint that I really like. I really like these
arches created here, as well as some of that texture
scratching that we did. It almost looks to me
like there's a face here- there's like two
eyeballs up at the top, a nose, and then a mouth. The more you look at your page, it's almost like looking at clouds and trying to
spot different shapes. You can start to see different things emerge
that maybe you want to outline or trace or bring
a little bit of emphasis to. I think I'm going to
start by actually working in some of the margins around my paints by copying
the designs that I see here. I have these arches as well
as this textured scratching. I think I want to use a black
marker and recreate some of those shapes in the margins of my page and just echoing
what's already there. One way to respond
to this would be to focus in on those things that
you're seeing on the page. Maybe you start to see objects like a face or an animal that you could actually draw and create some subjective artwork. Or you could do like I'm doing and take a more patterned
approach to it. Start to pull out
and notice themes and play on those to
create an overall pattern. I really love exploring
pattern in my journals. Any chance that I get to do
that, I definitely will. Now I'm finding these
textures really interesting in the
areas where there's a whitespace or a gap
between areas of paint and I feel like I want to try
and fill those in somehow. I think I'm going
to start by just doing some lines that echo those blobs of paint and connect some spaces
that are open. I'm discovering I really
like these shapes here. It almost feels like I drew some stitching like
as if the paint is a fabric and
then the spaces in between have been pulled apart. You can see spaces
through the stitching. I think I'm going to
continue that theme over on the side. I like this exercise
because this is one that you can do
pretty easily on the go. Maybe when you're at home, you can prepare a
couple of pages by putting down some paint in
backgrounds and let those dry. Then when you're out and about, you can bring your journal
with just one or two pens. When you have a couple
of pockets of time, you can use those to fill in and respond to the paint
that you already have. This process is
really meditative and these are the
types of pages that I like to work on when I'm just
needing a creative break maybe or feeling tired and not really feeling like
I have a lot of ideas. I just want to work
with my materials and exploring patterns is always
really meditative for me. Just drawing the same
thing over and over in slightly different
configurations can be really fun and it doesn't take
a lot of brainpower, but also as you're working you just become
completely focused on what you're drawing
and trying to create this visual pattern
that I find all of my thoughts just float
right out of my mind. That can be a really good
thing, very meditative. I'm pretty happy with
what I have on the page right now and I feel like I've continued this theme quite a bit throughout the page. I just have one more thing I think I want to
add to this page. I mentioned that this
looks like a face to me [LAUGHTER] and I
really can't unsee it. I think I'm going
to emphasize that using my Posca paint pen. I think rather than completely
drawing my eyes and face, what I really feel this
needs is just some eyelids, [LAUGHTER] maybe some eyelashes. I just really could not get this idea out of my head
so I'm going with it. It looks neat and it ties in
with my other semicircle, wave shapes throughout the page. I think those eyelids
make a nice focal point. Without drawing the whole face, maybe that will lead people to see the face and find it in
the page, so that's fine. That will complete
this page for me. I hope you enjoyed
this exercise and I will see you in the
next video for Day 3.
7. Day Three: On Repeat: Welcome to Day 3
of our challenge. Today's prompt is on repeat. We are going to use this prompt to choose one item and then represent that item in many as different ways
as we can on our page. Now I know that with that
prompt I could easily get swept away with a lot of different options
and take a lot of time, so for today's prompt
I'm going to sure and set a 10 minutes
timer on my phone in just a moment so that
I am sure to work quickly and get my idea on
the pages as first as I can. Now you can choose any object
like for this challenge and I am going to choose
a moth, so animals. I think are great for
this and I'm actually going to be working from
this reference photo. This is a moth specimen from the Smithson House at the national museum of
History in Washington DC. This Smithson website actually
provides photos of all of these moths specimens that
are free for public use, so. I will include this photo in the project and
resources section of the class if you would like to download it
yourself and I will include the link
to the Smithsonian where you can see all of the various photo
references that they have. I'm going to go ahead and set my 10 minutes timer right now, and I'm going to cut out
this image really quick, and I'm going to cut just
around the moth so that I can use this as a collage
element directly on my page. I like this resource of the specimen photo because
you can actually zoom in and see all of the details of the moth and I don't know
anybody you but I find it hard to actually capture bugs and birds and
things because they move so quickly
that they don't give you much of an opportunity
to study them, so I have this resource. I'm going to end up gluing down my moth as
one of my images. But I think I'm going to
start with my materials and I would say just pull out as many different
materials as you have so you could use
your collage elements, you could use your marker, your color pencils, your paints, whatever it is you have
in your supply kit. I'm going to pull
a couple of pens and I will just use the colors of this moths
as our starting point, so I'm going to pull some
green and yellow and black and I'm going to try and just do a version of this moth in all of my
different materials. I'm going to quickly do a color pencil sketch and in
order to move quickly I'm just going to use basic shapes and then I'm going to do the
same thing with a marker. I'm moving quickly at this stage and then once I
get my ideas down, if I have more time left on
my timer I'll go back and add more details but at
this stage I just want to get down as many
moths as I can. I think it would be fun to use my piece of paper as
one of my moth shapes. This is going to be
a fun challenge. But I'm going to try to cut
out the shape of the moth almost using my scissors
as a method of sketching. This is definitely a fun
different challenge. If you don't get it right don't worry
because you could always add some more details with
your other materials. You can tell that this is
definitely not perfect. But I'm going to go
ahead and glue it down. You might notice I have some glue on my
page that's okay, we're just going to roll with the imperfections and
I'm going to grab a brush marker for my next moth. At this point, I'm
realizing that with each drawing I'm picking up on different details as
I keep referring to this moth and I
think it might be fun to represent these spots on the wings moving
really quickly. But just to get the idea down and then for my
next moth I would like to take a little bit
of creative liberty here and make the wings a
little bit more closed. I'm challenging myself to see how many different
techniques can I use to represent this moth. I think I'm going to
challenge myself here and actually create one
with some paints. I'm going to grab my card here that I
like to use on the go to work with my paint instead of a brush and going to very
carefully scrape my paint on, just to try to represent those wings and then the
body down the middle. This definitely a creative
challenge for sure. It would have been easy
with a paintbrush. But like it's fun to see
what happens if I don't use the right tools for the job and just jump in and try something. I think if I glue the
photo down here I might have a spot for one
more moth over here. I'm going to draw
that more really quickly because I'm
running out of time here. I want to glue this moth down and part of this wings is going
to hang out the page, that's okay we'll trim that. I have three minutes
left on my timer, so I can go back and add some details and the first
area I think I need to do that with this collage moth because to me right
now he doesn't really look like a moth and so I think I'm going to
add some details, color in this body
a little bit and maybe we're coloring second
wing bottom wing there and then let's use
a pen to outline that top wing and again
some quick spots. I think I want to
color in some of these details just to add a little bit of
depth to the page. Just under two minutes
left on my timer. I'm loving these areas but
they all started to overlap. That wasn't definitely the
plan but I really enjoy those fun accidents
that happen when you just have to make
quick decisions. With about a minute
left on my timer, I realized that this
point blob moth is just dying for
some more details, I'm going to give
it some antennae, trace out the body and the wings a little
bit just make it look like I meant for it
to end up there. I think this moth is hard to see so I'm going to darken
it a little bit, 30 seconds left on my timer. That's our timer. You might have been not quite finished but I challenge
you to just drop your supplies and we
can always pick up on this page and do another 10 minutes tomorrow
if you would like. I'm just going to trim off this little piece
that was hanging over the edge of my
page and I'm just going to allow the page dry
and call it done. I hope you enjoyed this
challenge and I will see you in the next video for Day 4.
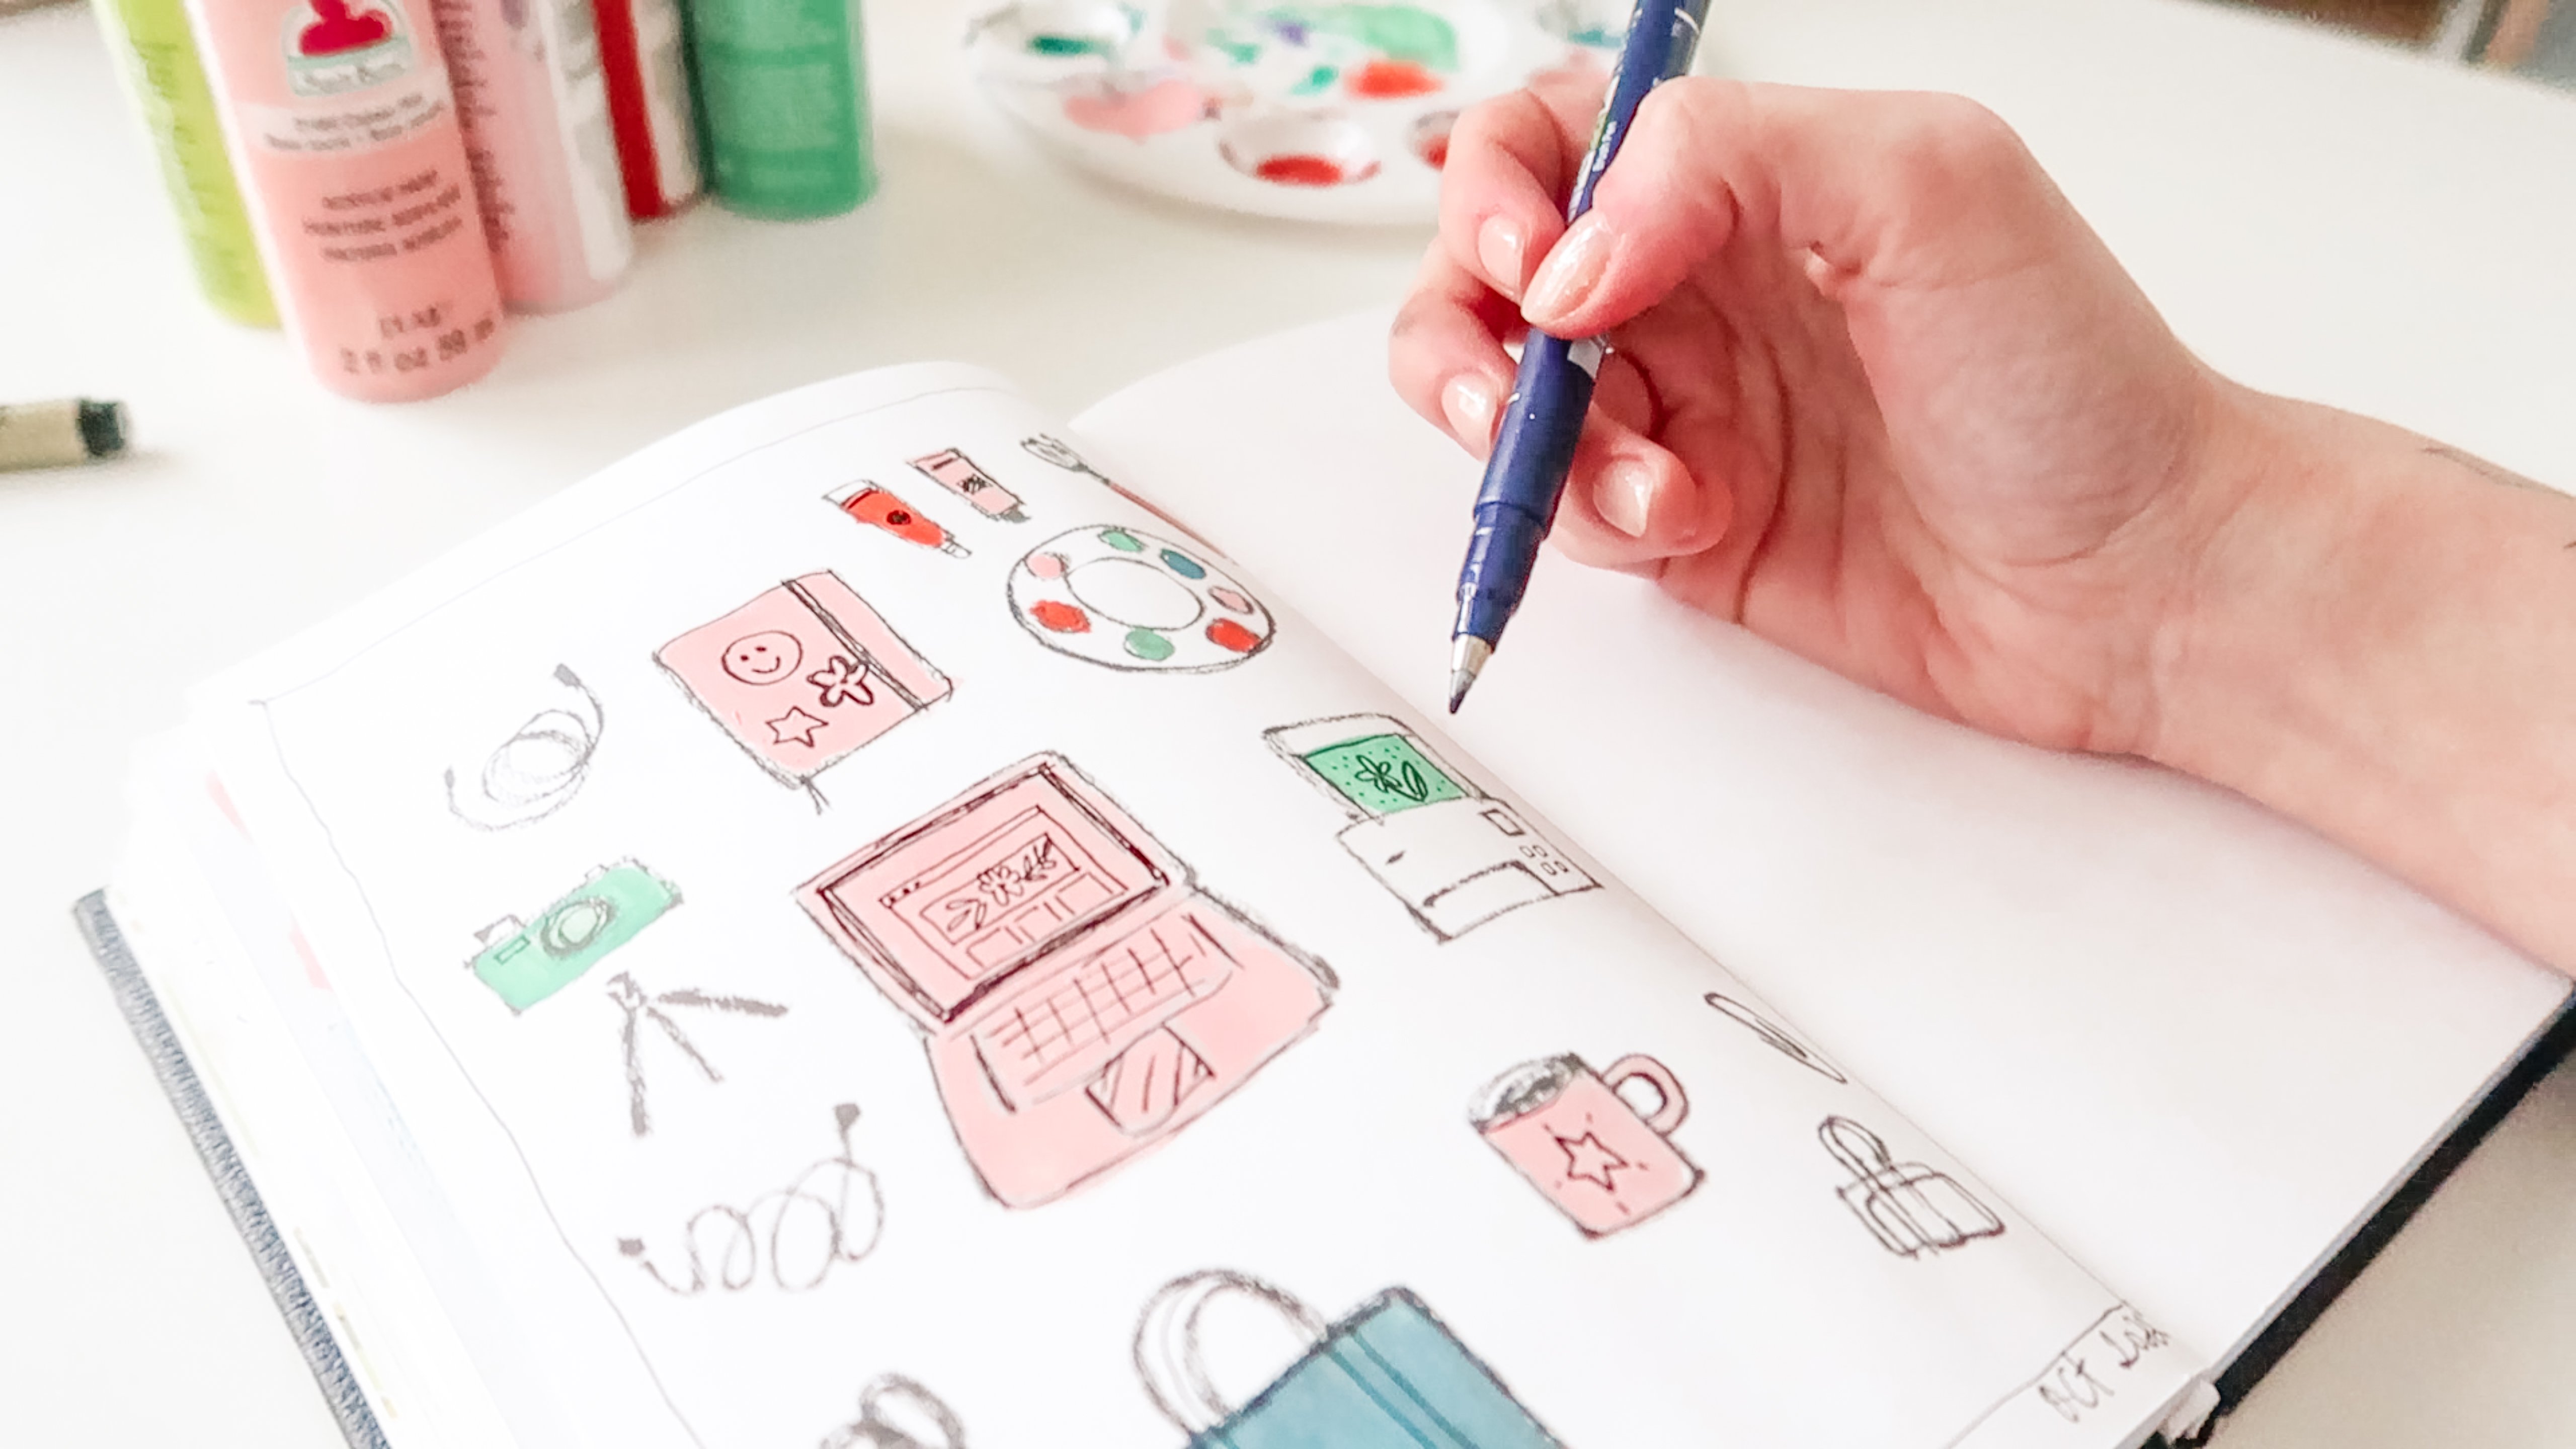
8. Day Four: Coloring Book: Welcome back to Day
4 of our challenge. Today's prompt is
going to be a fun one. It is coloring book. I thought for today's prompt, we could take some inspiration
from coloring books. I don't know about you, but I loved coloring books
as a kid and we're all familiar with what those
illustrations look like. Usually they are a very
bold line drawing in black. Sometimes you'll see
really detailed, really thin line work, and lots of tiny small shapes, and other times the
illustrations will be more simplistic for younger
children with larger shapes. I think we can
interpret this prompt in either of those ways
or somewhere in between. But what we're going to do
is we're going to start by creating a coloring
book like illustration, and then we can apply some
color as we have time. I recommend just choosing some
black pen or black marker. Anything that you
really like is fine. I think I'm going to start with my Faber-Castell Pitt pen
just because it's in-between, and I feel like for
this size of page, this is a pretty
good line weight. Now, you can jump into drawing
directly with your pen, which I think is what
I'm going to do. If you feel a little bit cautious about just
jumping in with marker, another option would
be to just draw your outlines first in pencil and then you can
trace over it with pen. Either way is fine and I think for the sake
of this video, I'll go ahead and
work directly in pen so that you can
see what I'm drawing. But feel free to use
pencil if you like. For my page, I'm
going to work with a subject matter that I could think of a lot of
different ideas from memory. I'm going to work
with a dessert theme. Think cupcakes, cakes,
pies, ice cream, milkshakes, candy, any
dessert that you like. I think I'm just going to
jump in and start because we're definitely cutting into our 10 minute time
frame already. I'm going to start
with a cupcake, and with the coloring
book illustration, I want to think about having open spaces that I
can easily color in. I'm actually going to draw the little paper cut
for my cupcake first, and then the cherry on top, and then I'm going
to draw some icing, and then some cake. You just want to think about
like having big open spaces and sometimes that
means you want to draw the items that are going
to be more on top. First, I think I'm going to do a little
series of cupcakes. Well, I think of what my next
desserts are going to be. You can either place
your items into a scene or you can just have
them free floating. I think either one makes for
a good coloring book page. I'm going to have another
cup cake in the back here. Maybe I want this icing to drip down the cupcake
a little bit more. Maybe I'll just give this
one a little candle. Our time limitation
definitely comes into play in an exercise like this
because if you're like me, you can definitely spend a
lot of time trying to figure out what to draw instead
of just drawing, and so I'm just making
decisions really quickly. I don't really know how the whole piece is
going to come together, and I don't really know how is this cake going
to the cupcakes. Are they just floating? But I love the time constraint because we don't really have
time to think about it. We just have to make a
decision and keep going. I'm going to put my
cake on a plate, and how about we give. I created a plate there and now this cupcake feels like it doesn't really
have enough space. I'm going to just give it like, maybe it's on a
paper napkin behind the plates. Let me think. Maybe this is like a
bakery's cabinet that I'm drawing here and I'm going to
give myself some ice cream. Maybe this is a little
piece of a waffle cone. Sometimes when you go
to an ice cream shop, they'll give you a little
piece of ice cream cone. Couple of scoops of ice cream, and then I'm going
to give it a bowl. I'm going to just drew
right over my other plate. That's totally fine. I'm going to give it
some sprinkles just to make it clear that
this is ice cream. Maybe we need, you know sometimes at an
ice cream counter they have little scoops that you could use to test out
a sample of ice cream. I'm just going to put some
of those in a cup back here. We have cake, but one
thing that is missing from this picture for me
is definitely a pie, so I'm going to draw it pretty similarly to the way
I did my cake slice. Pie is probably one of
my favorite desserts. I'm going to give it some of those lines that you see
on top of a pie crust. We'll give it a little
bit of a side view here, and maybe I'm going to draw like a pie
crust outline there, and maybe it's
like a cherry pie. I'm going to draw some
cherries down here. I'm definitely getting
short on time, so I got to just think quickly. How about back here? We just say, we've
got some bowls, maybe like a stack of
bowls for the ice cream. Because we have spoons, so why not include
some supplies? Maybe we have some
pints of ice cream for sale back here are just
stacked on top of each other. I don't know if
I've seen a bakery that is going to have
all of these things. But we're working from
imagination here. I'm going to give them a
little simple design there, and maybe we should give
that like a plane to sit on. Maybe that's a different table. I'm going to go
ahead and throw in a couple more
cupcakes back here. Maybe we have another piece
of pie over here or a cake that's going off frame
a little bit cherry. I'm going to extend
this plane that I drew all the way across. Maybe back here we just have a big window
in the background. Maybe some rolling hills, and maybe another bowl, just to fill in the spaces. I'm going to give myself a little patterned
napkin over here, and maybe just this
is looking more like a table now than
like a bakery setup. It's getting very random. I'm going to give myself
a little fork over here, and maybe another napkin
just to fill in some of these extra spaces that
I wasn't sure about. Once you have the basis of
your illustration set up, you could go back
and continue to add more details into any empty
spaces that you have, or you can jump in
with some color. I think in my case, I'm just going to jump in
with some coloring and I'm not going to color the full illustration, I don't think. But I'm just going to
choose a couple of accent colors to be repeated
throughout the piece. One that I want to do
is red because I have some cherries
throughout my picture. I'm going to fill those in, and then maybe I decide to make a couple other
items red as well. Maybe I can use
the coloring part to actually add some
more detail too. Then I think I'm going to choose one other color just to
create some accents, and I think I'm going to go with a light blue.
Now, you know what? I'm going to go with the
yellow because I have a lot of cake in this illustration, so I think it just makes sense. You can see with my yellow, I'm using an oversized
marker here and I'm definitely not being
careful at all. But it's up to you how
detailed you'd like to be. I actually love that style when the coloring just goes past
the line work a little bit. You know what? I
decided I'm going to throw in some blue as well just because I already have
red and yellow and blue is the other primary
color that I'm missing. I just think it
would be so fun to just have all three primary
colors represented here. I think this would be
a really fun method to do for travel journaling. While you're at a destination, just have your black
marker or pen and create a coloring book
style illustration of the place that
you're visiting, and then back at home
when you have more time, you can then go back and add
color from your memories. I feel I like the amount of color that I have on the page. I want to leave a lot of whitespace for
this illustration. I just the look of it. You can definitely
keep going and fully coloring your
page if you like. But I think I'm going to
call my page complete. I hope you enjoyed
this exercise and I will see you in the
next lesson for Day 5.
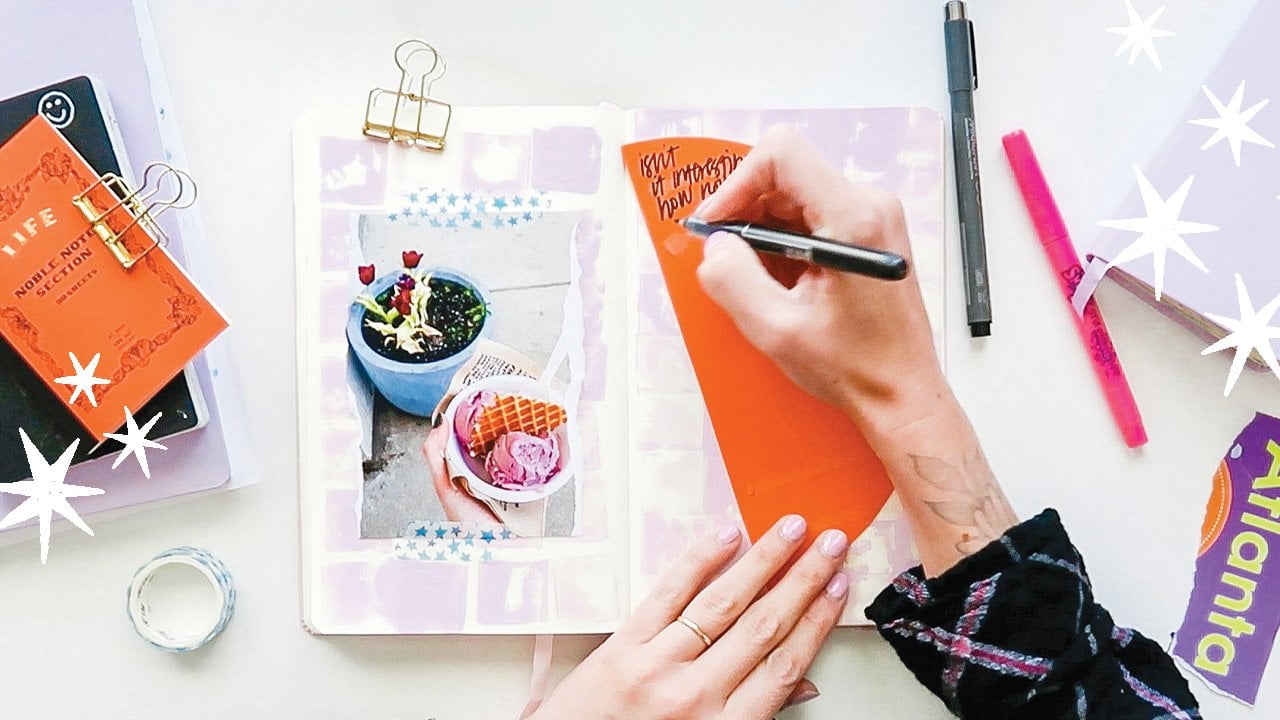
9. Day Five: Hidden Message: Welcome back to our
challenge for day five. Today's prompt is
hidden message, and we're going to
start today's page with some written journaling
so you can choose any pen or pencil that you
like to do your writing. I'm going to be using
a pigma micron pen. This is a great time to just spend a moment and
write out your thoughts and feelings about the day or whatever may be on your mind, doesn't really have to
make sense necessarily. It could be a list of
things you did today, it could be anything
that you're working on, any current worries or fears we're going to be hiding
this journaling in our page, so feel free to write
whatever you like. I'm just going to take a
moment and start writing. You can see that my handwriting
is pretty messy and I typically will just write
all the way across the page, but feel free to write on
one side of the page or the other if it's more comfortable and don't worry
about your handwriting. Not looking neat, doesn't necessarily need to be
legible by any means. That's usually my process, I'll just continue scribbling until I've filled up the page. I feel like this
pocket-size journal is usually enough space
for me to just get out a few sentences and get my thoughts out of
my head and onto paper. Now I want to start
the process of covering up the majority
of my journaling, so it's not actually legible
on my finished page, and usually what happens
is I'll notice that maybe I don't want to share the
full written journaling, but there are certain
words or sentences or phrases that pop
out that I'm like, oh, that can make for
an interesting page. If maybe those one or two
words was peeking through, so I'll keep that
in mind as I go. I generally like to use
either some paint or some collage items to
cover up my writing. On my page, I happen to
write about how in art, I tend to make
things a little more complicated than
they need to be, and usually I find that
my ideas and my work, it doesn't take as much
time as I think it will. I like build projects up in my head to be so complicated
when in reality, if you just get started, I find that I'm
typically amazed at how little time things actually do take once you just
start working on them. I'm using a collage to apply
a little bit of paint, and you can see that starting to obscure some of my writing, I think I'm going to
mix another color and because I chose
this light pink, that is pretty light. I'm going to add in
some of my green paint. This is actually an
acrylic gouache, but that shouldn't be a problem. It should mix with this
acrylic paint pretty easily. I'm just going to put
some more onto my card. Now, I'm going to mix them
like just a little bit. I don't want to mix them
too much just because these colors might
create a little bit of mud so I'm just being
careful about mixing and see I'm obscuring just enough of the writing that you really can't read
what this says, and then I'll go in and add a little bit
of collage as well. Next, I'm looking through the
collage elements that I've collected to figure out what I might want
to use on the page, and thinking about using the colors that are
already on the page, maybe some green or pink. At this stage with the collage, if you still have words
that are peeking through your paint and maybe areas
that you'd like to cover up, you can think about
how to use collage to cover up the remainder
of those areas. Another way to think
of what to choose for your collage elements is think about what you
wrote on the page, and if you're like me, maybe you wrote down something
that is negative or a thought that you'd
like to change and maybe think about a
little more positively. You could use an element with
words or add some writing to create a new more
positive message on top of the old one. I think in this case,
this is perfect. I had just written down one
thing a day on some paper, and I think that's going to
be perfect and it happens to coordinate with the green
paint that I already have. I also like this sunshine shape, it radiates positivity for me, and perhaps I'll use another green element just
to make things coordinate. That's always a
trick that I use, just stick to one or two colors, and then no matter what
elements you have on the page, it all seems to work together
when the colors coordinate. I'm going to quickly figure
out where I would like these items to be placed. I think I do actually
want to allow some of these words
over here to shine through and then maybe cover up my wording on this
side of the page. I think I need to just
trim down this piece of paper a little bit just so
that it fits on the page. I'm going to go ahead
and glue that down. Playing around with different
elements and I'm not loving anything on
this side of the page, so I think what I'm going to do is I'm just going
to switch gears and grab a pen and just
draw something over here. Flowers are of like
my go-to doodle. This is one time where I think the time limit comes
in handy because I definitely would
overthink exactly what to draw on this page, but in this case, just staying within
my time limit, I'm just going to quickly get
something down on the page and not overthink it because I don't have
the time [LAUGHTER]. I like how this word
creativity is shining through, so I'm going to make sure
not to cover that up, but I will just draw right over some
of the other elements, not worried about some of these other things
being covered up. At every stage of the process, you can just choose
what you'd like to keep and what you'd
like to maybe edit, and the more layers you add, the more flexibility
you have with what you allow to shine through and then what the message is
going to be hidden. The word creative
ended up up here too. I can see that as
well. That's fun. Then I think for just
one more layer and just a way to put play
with my drawings. I think I'm going to
take a colored marker. This is another
shade of green and I'm just going to
color around some of these leaves just
to make them pop out. I loved that layering like this because you just get all
kinds of fun effects. Like in this case, you see
some of these leaves are covered with the pink paint
that's shining through, and then we have
the green paint. I just love continually adding more layers and
this is something that is really easy
to work on in pieces, so if you have a
little bit of time, you can draw something and then if you have a
little more time, you can go back and
color in around it or add another element of
collage, and again, making sure not to cover up
that one word that I liked, but then selectively color over the words that I don't
really care to save [NOISE]. I'm going to call
this page done, just due to the time
that I've spent on it, and I think this is really fun. You can see how the
hidden message ends up on this page where if you were to try to read the
journaling in full, I don't think you'd be able to, but you get bits and
pieces shining through, which is really fun. This is one of those pages
that you can just keep coming back to in small
pockets of time, keep adding more layers and collage and drawings
and whatever you like, but I'm going to call
it done for now. I hope you enjoyed today's
prompt and I will see you in our next
lesson, for day six.
10. Day Six: Altered Photo: Welcome back to our journaling
challenge for Day 6. Today's prompt is altered photo. Today we're going to take
inspiration from a photo and see how we can alter the image
to create a journal page. I'm going to be using this
photograph that I took a few years ago
in New York City, and I'm going to include
this photo for you in the class resource PDF, so you can download that if you'd like to
use the same image, or you can just use an
image of your choosing, either one that you
took or something from a magazine or a newspaper
or something like that. There are a few
different methods we can use to alter the photo. We could paint over it. We could collage over top of it. We can cut it apart
with scissors. One of my favorites is actually drawing on top of a
photo with a paint pen. I like to use these
posca paint markers to draw right on
top of the photo. Another material that
works pretty well if you don't have these paint pens is any kind of permanent
marker like a sharpie will be great for
drawing on top of a photo. Those are a couple of
the methods that you can think about using for
your journal page. In my case, I'm going to
respond to the photo, and what I'm noticing
is that there's a really clear line around
the water in this photo. Over here on the shoreline and then also along these buildings, and it occurred to me that
it'd be pretty easy to cut those out with scissors. I'm going to just cut along those lines and take the
water out of my photo. I'm going to move quickly.
So I'm not going to worry too much about
it being perfect. We have the top piece here, and then I'm going to cut
along these buildings. I often find myself taking photos of
landscapes like this, especially when I'm traveling. To me, they're not the
most interesting photos. They often won't make it into a photo album or
something like that. But I do like to use
them in my journaling, because I think there's
just something really universal about looking
out at a landscape. Even if it's a place that
you have not been to, I feel like it's something
that a lot of people can relate to and just
get inspired by. We have the two pieces of
land here and then the water, and I'm actually
going to get rid of the water and not
use that in my page. The other thing I'm
going to do is I'm going to cut my photo
down the middle, just because I don't want
to glue this down as is, just because it'll
cause a little bit of trouble with closing my book. I'm going to just cut it
right down the middle. I'm going to do that by
lining these pieces up. Now I could have
done that before I cut apart my photo,
but that's okay. I'm just going to cut them
at about the same place. It doesn't have to be perfect. Actually, it's fun seeing
these two pieces overlaid on top of each other to
create a new landscape. That's one option
that you could do is collaging different parts
of the photo over itself. I'm going to see what it
looks like if I actually just separate these pieces. I like that a lot. I think I'm going to
glue them all the way as far apart as we can
go here on the page. I'm actually altering
this image and making the water appear a lot
bigger than it really is. I wonder what else I could use. You know what? Maybe, why don't we try this? Maybe I can use some paint in the background prior to
gluing down my photo. Just a little bit just
to add some color, and then we'll glue
the image on top. I'm just going to use a really
thin layer of paint here, so just scraping off as much of these blobs of
paint as I can. Just because I want my paint to dry a little more
quickly for this, so I can just move
on to the next step. Then I'll glue down all
four pieces of my photo. You might notice I tend
to work quickly and I usually have glue
all over my table, and I'm okay with that because it just lets me keep creating. I think if you have a
space where you can leave some supplies so that
you can jump right back in, that will really
help with being able to do this habit in a short
amount of time every day. It doesn't have to be
a whole table or desk. It can be a really small area. But just a little
workspace enough to leave some supplies
out if you can do so. I find one trick that
works is just to leave my journal open to like a blank page or the page
that I was last working on. Even if I don't have all of my other supplies
ready to go, just something
about walking past my table and seeing
my journal open, makes me feel like it's
really easy to just jump in and keep creating. I have all my photo glued down. Now as I've been working,
I've been seeing this piece staring at me. I wonder if I can use this
as almost like a sunrise. Coming up over these buildings. I cut out the sun shape here. This glue is pretty forgiving. I'm going to just
peel up the edge of these buildings
here and then tuck this piece behind the photo. It's coming up over
the buildings there. I had in my little
sunshine shape drawing, some rays of sunshine and I'm going to just add those back, but with a marker here. I'm getting conscious
that I don't have too much time left. I think what I'm going to do
is add some words in here. Using some of these
typewriter words that I've included also
in the class resource, I'm going to just cut these out. I'm going to pick a couple of words that I
just like and then see if I can make some
phrase out of these. I like the word beyond. I also like the word limits, and then looking at the
words I have available here, I think I can write
beyond the limits. When I say beyond the limits, I'm thinking of how we physically stretched this
photo beyond the limits. We also have the word vision. That's a great word. I had
this paper element over here. I think I'm going to repeat the paper element on this
side by just keeping my text on the left side of
the page, beyond the limits. I think I want to write a
vision beyond the limits. Another little time-saving
hack is that I actually printed these words out
onto sticker paper. I don't have to worry
about trying to glue down my tiny little words, but I can actually
just peel the backing. If you have any sticker paper, this is a great way
to collage really quickly and you
don't have to worry whether or not you have
a glue stick with you. Sticking down my last word here. I think my page is complete. This turned out to
be a fun one for me. I had no idea where this was going when I started the page, and I'm pretty happy
with how it turned out. I hope you enjoyed
today's prompt, and I will see you in the
next video for Day 7.
11. Day Seven: One-Minute Page: Welcome back to Day
7 of our challenge. I have saved a fun prompt for the last day
of our challenge. Today's prompt is
the one-minute page. We've been focusing
on journaling in 10 minutes or less
throughout this challenge. For today, I want to
show you how much you can actually get done in your
journal in just one minute. The key to this
challenge is going to be preparing
ahead of time and then using exactly one minute to actually assemble
the page together. I've just gathered a
few things that I like and I think that the colors
work pretty well together. Making some of those color
decisions ahead of time will help you when you actually
go to work on the page. Looking at these items here, I think I'm actually going
to not include this piece. I'm just going to
try and narrow it down to a few favorites. I like that this
has a word on it and then I like that
this is a photo element, so I'm going to use those. I love the colors in this little floral drawing as
well as this pattern paper, just repeating that
floral element, as well as the color purple. I like those. Then I think these
leaves are just fun, but I don't really want to
spend time cutting these out so maybe I'll
exclude this piece. I'm going to include
this little piece of a paper toilet just for fun. I think it helps to collect
those items in advance as well as choosing a couple
of materials in advance. I'm going to go with just
some tried and true items. I really like this brush marker and I'm always happy with
how it looks on the page, so I'm definitely
going to include that. It is a black marker so I
think I'm also going to include some colorful
element here. The color that I don't have
but that I think would look nice with this
purple is green. Maybe I'll include a light
green colored pencil. I'll give myself a purple
marker because I actually think this is the same
marker that I had used to color in these flowers. Maybe we can use that as well. Then maybe we can use a
white Posca pen, we'll see. In addition, I
think I might need a glue stick to put
these items together. Then I'm going to have
my glue stick as well as a pair of my scissors off to the side
here just in case. But I'm going to try not to use this scissors because I
think for one minute, this might slow me down. Trying to actually cut something
out might slow me down. I'm going to try
not to use those, but I will have them
on hand just in case. Once you have your
materials ready, we're ready to set the timer for one minute and just see
how much we can get done. Maybe as you're gathering your materials some
ideas started to flow into your mind as to how you can put these
pieces together. Maybe not. Either way, that
is totally fine. We're just going to set a
one-minute timer and jump in and start the process. You can start with any of
the supplies that you have. Just jump in and start putting something
down on the page. I'm going to go ahead and
set my timer right now. Ready, set, go. My timer is on. I am going to quickly lay down some background color
without really thinking. Then I am going to
quickly decide and lay out a couple of items
without giving it much thought at all because I
don't really have the time. I love this challenge because you don't have the time
to overthink at all. I'm going to glue. We have about 17 seconds
left on the clock, 7, 6, 5, 4, 3, 2. We're out of time. That
truly was one minute. I don't know if this
is what I would call a completed page. Here's where, if you're like me and you feel like you need just a little
bit extra time, go ahead and take that time
to finish up the page. I'm going to say let's
set one more minute to call it perfectly
completed and finished. You've got to think
critically here because you just
have one minute. But probably during
the first minute you identified something
that you feel like you did wrong or something that you want to add
or improve upon. We're going to set that
timer one more time. Ready, set, go. We have about 43, 42
seconds left on the clock. I'm just making doodles at
this point with no plan. But I feel like it just needed some more
pattern elements. I'm repeating some of the elements that are already on my page
that we're already in, elements that I chose. That just takes some
decisions off my plate, 12, 11 seconds left, and we're out of time. If
you are willing to do so, I would love to see how your one-minute or
two-minute page turned out. If you want to post that
in the project gallery, I am just so amazed by how
much you really can do in literally one minute.
It's your journal. If you want to come
back and spend a full 10 minutes
polishing up this page, you can definitely go for it. But I think it's
fun to challenge yourself and see what you
can do in just one minute. Post those pages in the project gallery if
you would like. I definitely want to see what you were able
to do in one minute. I hope you enjoyed this
challenge and I will see you in the next video
for some final thoughts.
12. Bonus Lesson: Completed Journal Tour (More Journaling Ideas!): This lesson will be a fun
one because I'm filming this quite a while after the original class
videos were filmed. My little pocket journal
is all filled up, so I wanted to come back and
show you my finished pages and talk a little bit more about some of the
techniques that I've used. Hopefully, this will provide
you with some more ideas and inspiration after the seven
day challenge is over. Now, this book actually took
me quite a while to fill up. And that's just because I
like to jump around and work in different journals and work on different projects
at the same time. I believe I mentioned in some of the other lessons
that I don't work chronologically
through my journals from front to back. So actually, this first page was the last page
that I completed. I have a habit of
leaving the first page of my sketchbooks
and journals blank. To kind of skip over
that blank page anxiety, I'll just start on page two, and this book is no exception. So I did come back later
and fill in the first page. As we're flipping
through the journal, I just wanted to share a few of the tips and
tricks that have helped me continue my daily journaling
practice for the long term. Of course, the biggest
tip is the one that we talk about most
in this class, which is working in
small pockets of time. And I continue to do
that to this day. I also like to break down my
pages into different stages. So I don't always just sit
down and complete one page. A lot of times I will go through and create
a few backgrounds. And then I will go through maybe with a certain
pen or marker, and I'll do different
drawings or doodle. And then when I'm feeling
in a collage mood, I'll kind of skip through
and see if there's anywhere I want to
paste different elements that I've collected. So often I'm kind of building up a few
different pages at a time. And for me, that's something
that's really helpful in just keeping myself
interested and engaged. And I don't feel
like it's a chore at all to work in my journal, because I can just
kind of follow my passion and follow
my creativity. Another tip that I have is to keep a folder of
inspirational photos. This page is one
that's really simple, but it came from my
inspiration folder. I was on a trip to Boston
several years ago, and I took a picture
of this cathedral, and I just thought it
was really beautiful, so I saved it to my
inspiration folder. And when I was looking for something to draw, there it was. And so I just did this
quick little line drawing and added some color
in a really loose way. And I find that folder
of inspiration photos to be really helpful when I just don't really know
where to start. They also make great things to print out and paste
into your journal. You can probably tell
that pattern is something that I explore a
ton in my journal. I am a surface pattern designer, so pattern is obviously something that I think about
a lot and I work on a lot. And I often find myself using patterns and repeated
elements in my journal, and I think it's a great
way to fill a page. And that leads me
to my next tip, which is to follow
your interests. So you'll notice I have quite
a few pages where I have drawn some sort of knot
or rope or string, and it's just a little interest that I've had for many years, is just drawing knots and ropes. And I really appreciate art that includes those
types of things. And it's something that really doesn't have a huge place
in my other work right now, but it's just a little
passion of mine. So it's something that I
just find myself drawn to. And even in my linework on
this page, for example, you can see that
there's this sort of woven line that has the quality
of a fiber or a thread. I think that probably comes from my love for pattern, as well. But it just becomes something that I'm
naturally drawn to flowers and foliage is obviously another one of those that just pops
up in my work all the time. It's kind of just my go to. And I would say, don't be afraid to follow your interests because you never really know where
that's going to lead you. Oftentimes, I have found that when I come
to my art journal, it really is just the
place to express myself, and that is always
where I start. But I have also
found that later on, when I'm kind of
searching for inspiration in other aspects of
my life and work, this little book has become
a place where I will go to actually look for
inspiration from my past self. And so I think it's really great to just follow those interests, follow those little
subjects that grab your attention and just have your journal as a
place where you can explore that and where
you can document that, even if it's just gluing
in a photo or just noting down a color or a type of font that you like or a type of linework
that you like, give yourself permission
to play with that, because those little marks
and those little pieces, they may not mean much at first, but over time, they
all work together on the page and create
something really beautiful that I find
to be really inspiring. Ah, this is a good page to
talk about my next tip, which is, don't
be afraid of what is on the page. I
wrote on this page. It's okay to make a mess, and I really stand by that. But I'd also add, don't be afraid of what
lands on the page. Don't be afraid of your pages maybe being too full and being too busy or your pages being too blank and having too
much negative space. Your art journal is a place where you don't have
to be self critical. You can kind of put
that critical voice to the side and let yourself
just explore and play. Now, I know I'm sharing my
journal online with you, but you don't have to share
your journal with anyone. You can if you want, but it
can just be a place that is for you and you only if
you would like to share, we would love to
see your work in the project gallery,
but that is optional. That's totally up to you and what you feel
comfortable sharing. I think this practice is most beneficial when you can
fully allow yourself to explore different things and be afraid of how
the pages end up because I think we all
have that critical voice in our heads when it comes to creative
work and visual arts. A lot of times the
voice in my head is telling me that I don't
have enough words on the page or that I have too many words on
the page or that my art journal doesn't look like the art journals of
other artists that I've seen. And so maybe it's not
really an art journal. Maybe I shouldn't
be calling it that. And I think it's so easy
to just get carried away parison and
critiquing yourselves. I have found that if I can allow myself the time
and the space to just play and just let the
journal build up over time, in the end, I'm really
happy with the result. Not every page is my favorite, and not every page is a
beautiful work of art. Some pages I'm really proud
of and really excited about, and others, they just feel a
little unfinished or messy. But when I look at the
journal as a whole, I'm really happy with what this represents
because for me, it's just a place
to play and explore my interests and
document my interests, and your journal can absolutely be whatever you need it to be. So allow yourself that space and give yourself permission
to just have fun. As we approach the end
of this flip through, I hope you enjoyed and I hope that you will continue with your own
journaling practice. Again, if you would
like to share, I would love to see your
work in the project gallery, and I'll be sure to take a
look and leave you a comment.
13. Final Thoughts: Congratulations, you've
completed the class. I hope you've enjoyed
journaling along with me over the
past seven days. If you enjoyed the class, please leave a review and let me know what your
biggest takeaway was. A review will help
other students to find the class and I
really appreciate it. If you're up for it, I challenge you to
continue journaling for an entire month using
what we learned in class. I've created a list of 30
journaling prompts you can find under the projects and resources section of the class. On days when you don't feel
particularly inspired, you can refer to that list for some ideas to
get you started. If you'd like to share
your journal pages or your journaling
process on Instagram, you can use the hashtag, art journal daily habit class, to connect with other students. You can also tag me at Virgo and Paper so that I
can see your work. Thank you for watching
the class and I hope you'll use what you learned
to continue journaling.
 Ashton Womack, Artist & Surface Pattern Designer